 Sam Smith
-
1Building the Biochar Reactor
![]()
The current version of the Metabolizer uses a stainless steel whiskey still from AliExpress as it's Biochar Reactor. This whiskey still is more expensive than the kegs that I originally used, but it is A LOT easier to build, and requires no metal fabrication, cutting, or welding to build. In fact, the whole thing can be assembled with basic hand tools in a couple hours.
You can find the most up-to-date Parts List Here. All told, the parts costs around $1500-2000 shipped. The Latest Stable Release used 2" Tri-Clamp fittings for the condenser, but now I'm testing out a new version that uses 1.5" fittings because they're considerably lighter, cheaper, and smaller, and still seem to work as well. You can find the parts list for that experimental configuration Here.
The full build documentation is still a work in progress, but is available here. Be sure to read the precautions section and understand the risks of operating a system like this before you build it. Working with heat, electricity, and flammable gas carries inherent risks, and if you choose to build this reactor, you must understand those risks so you can take proper precautions.
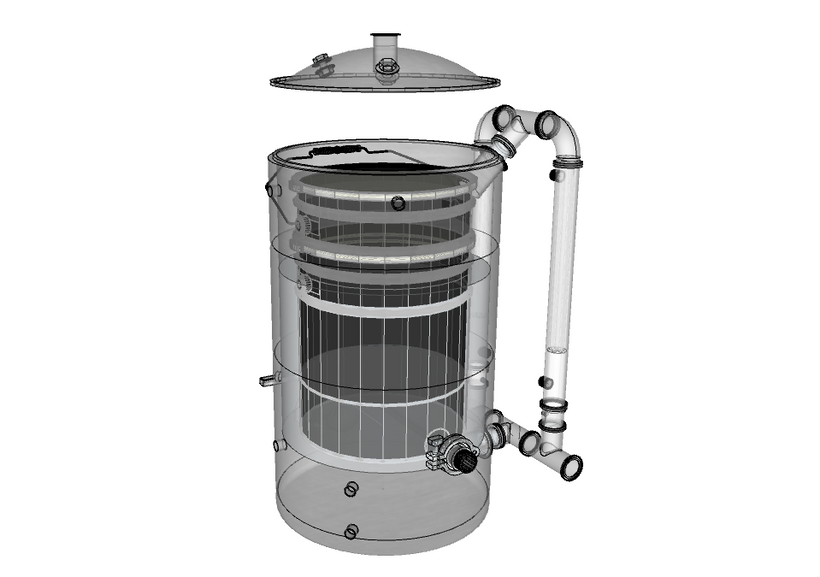
The reactor has 3 main parts: The Reactor, the Condenser, and the Gas Storage Bag.
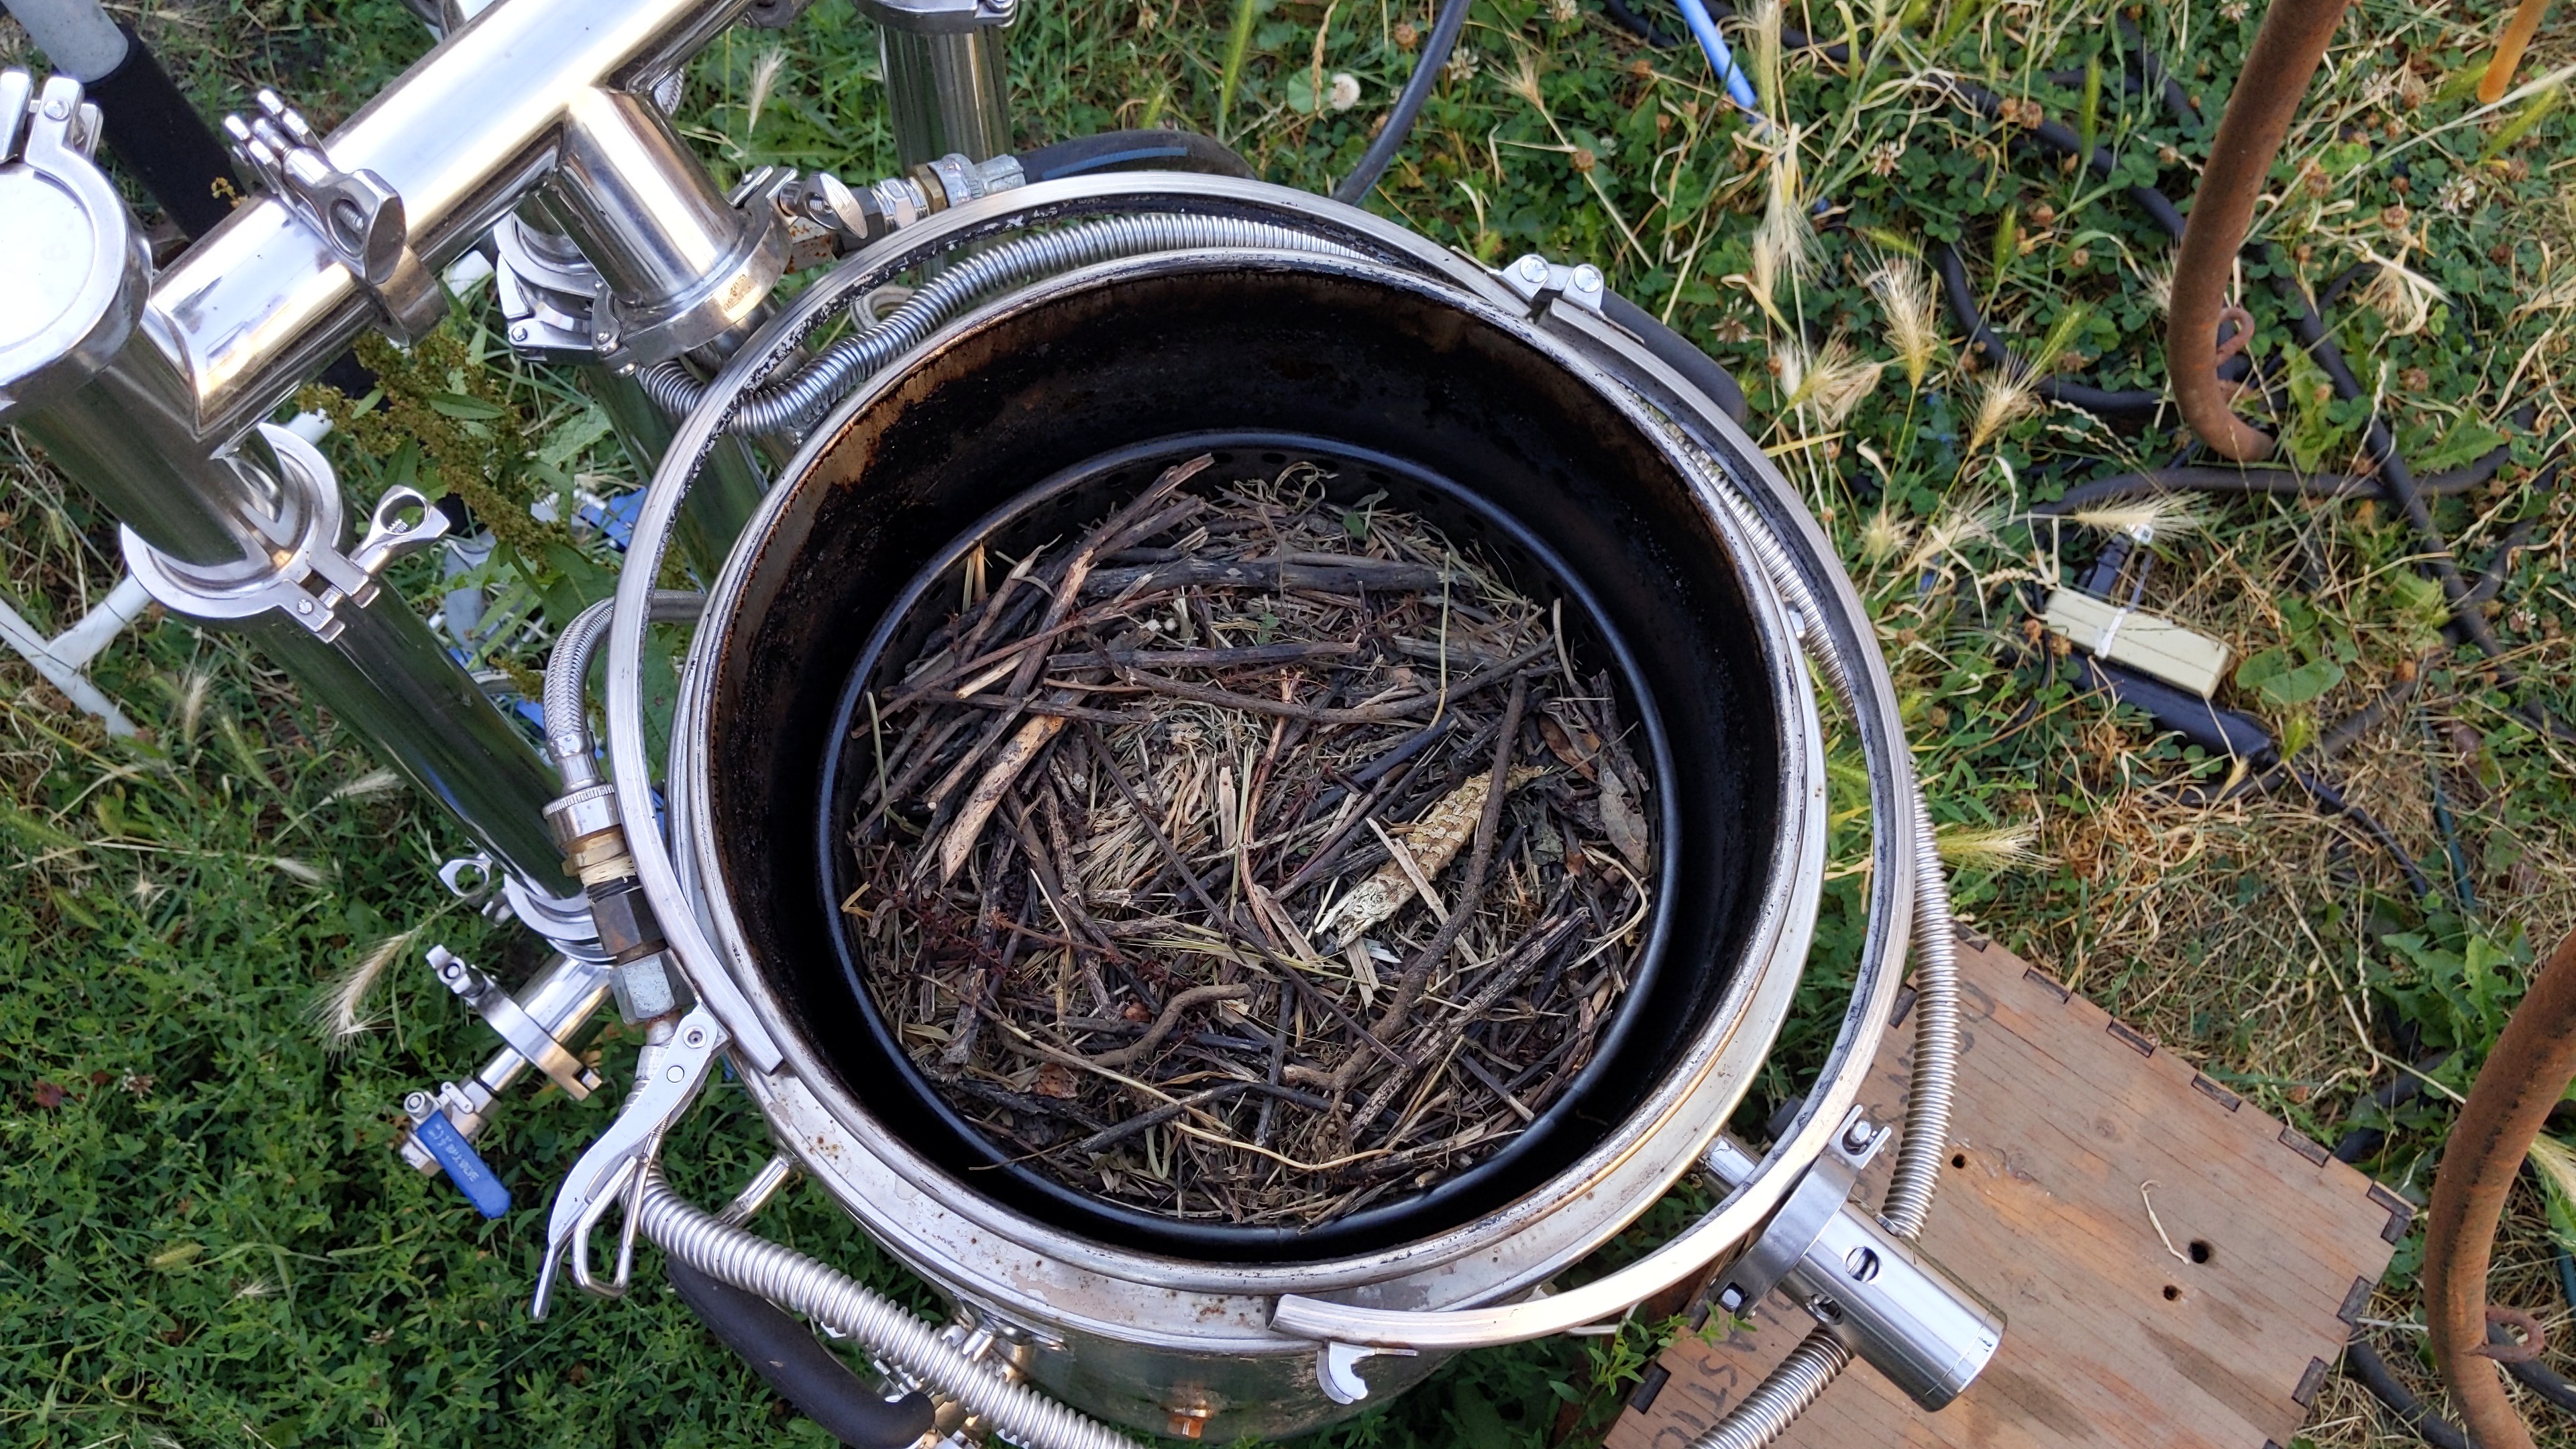
The Reactor
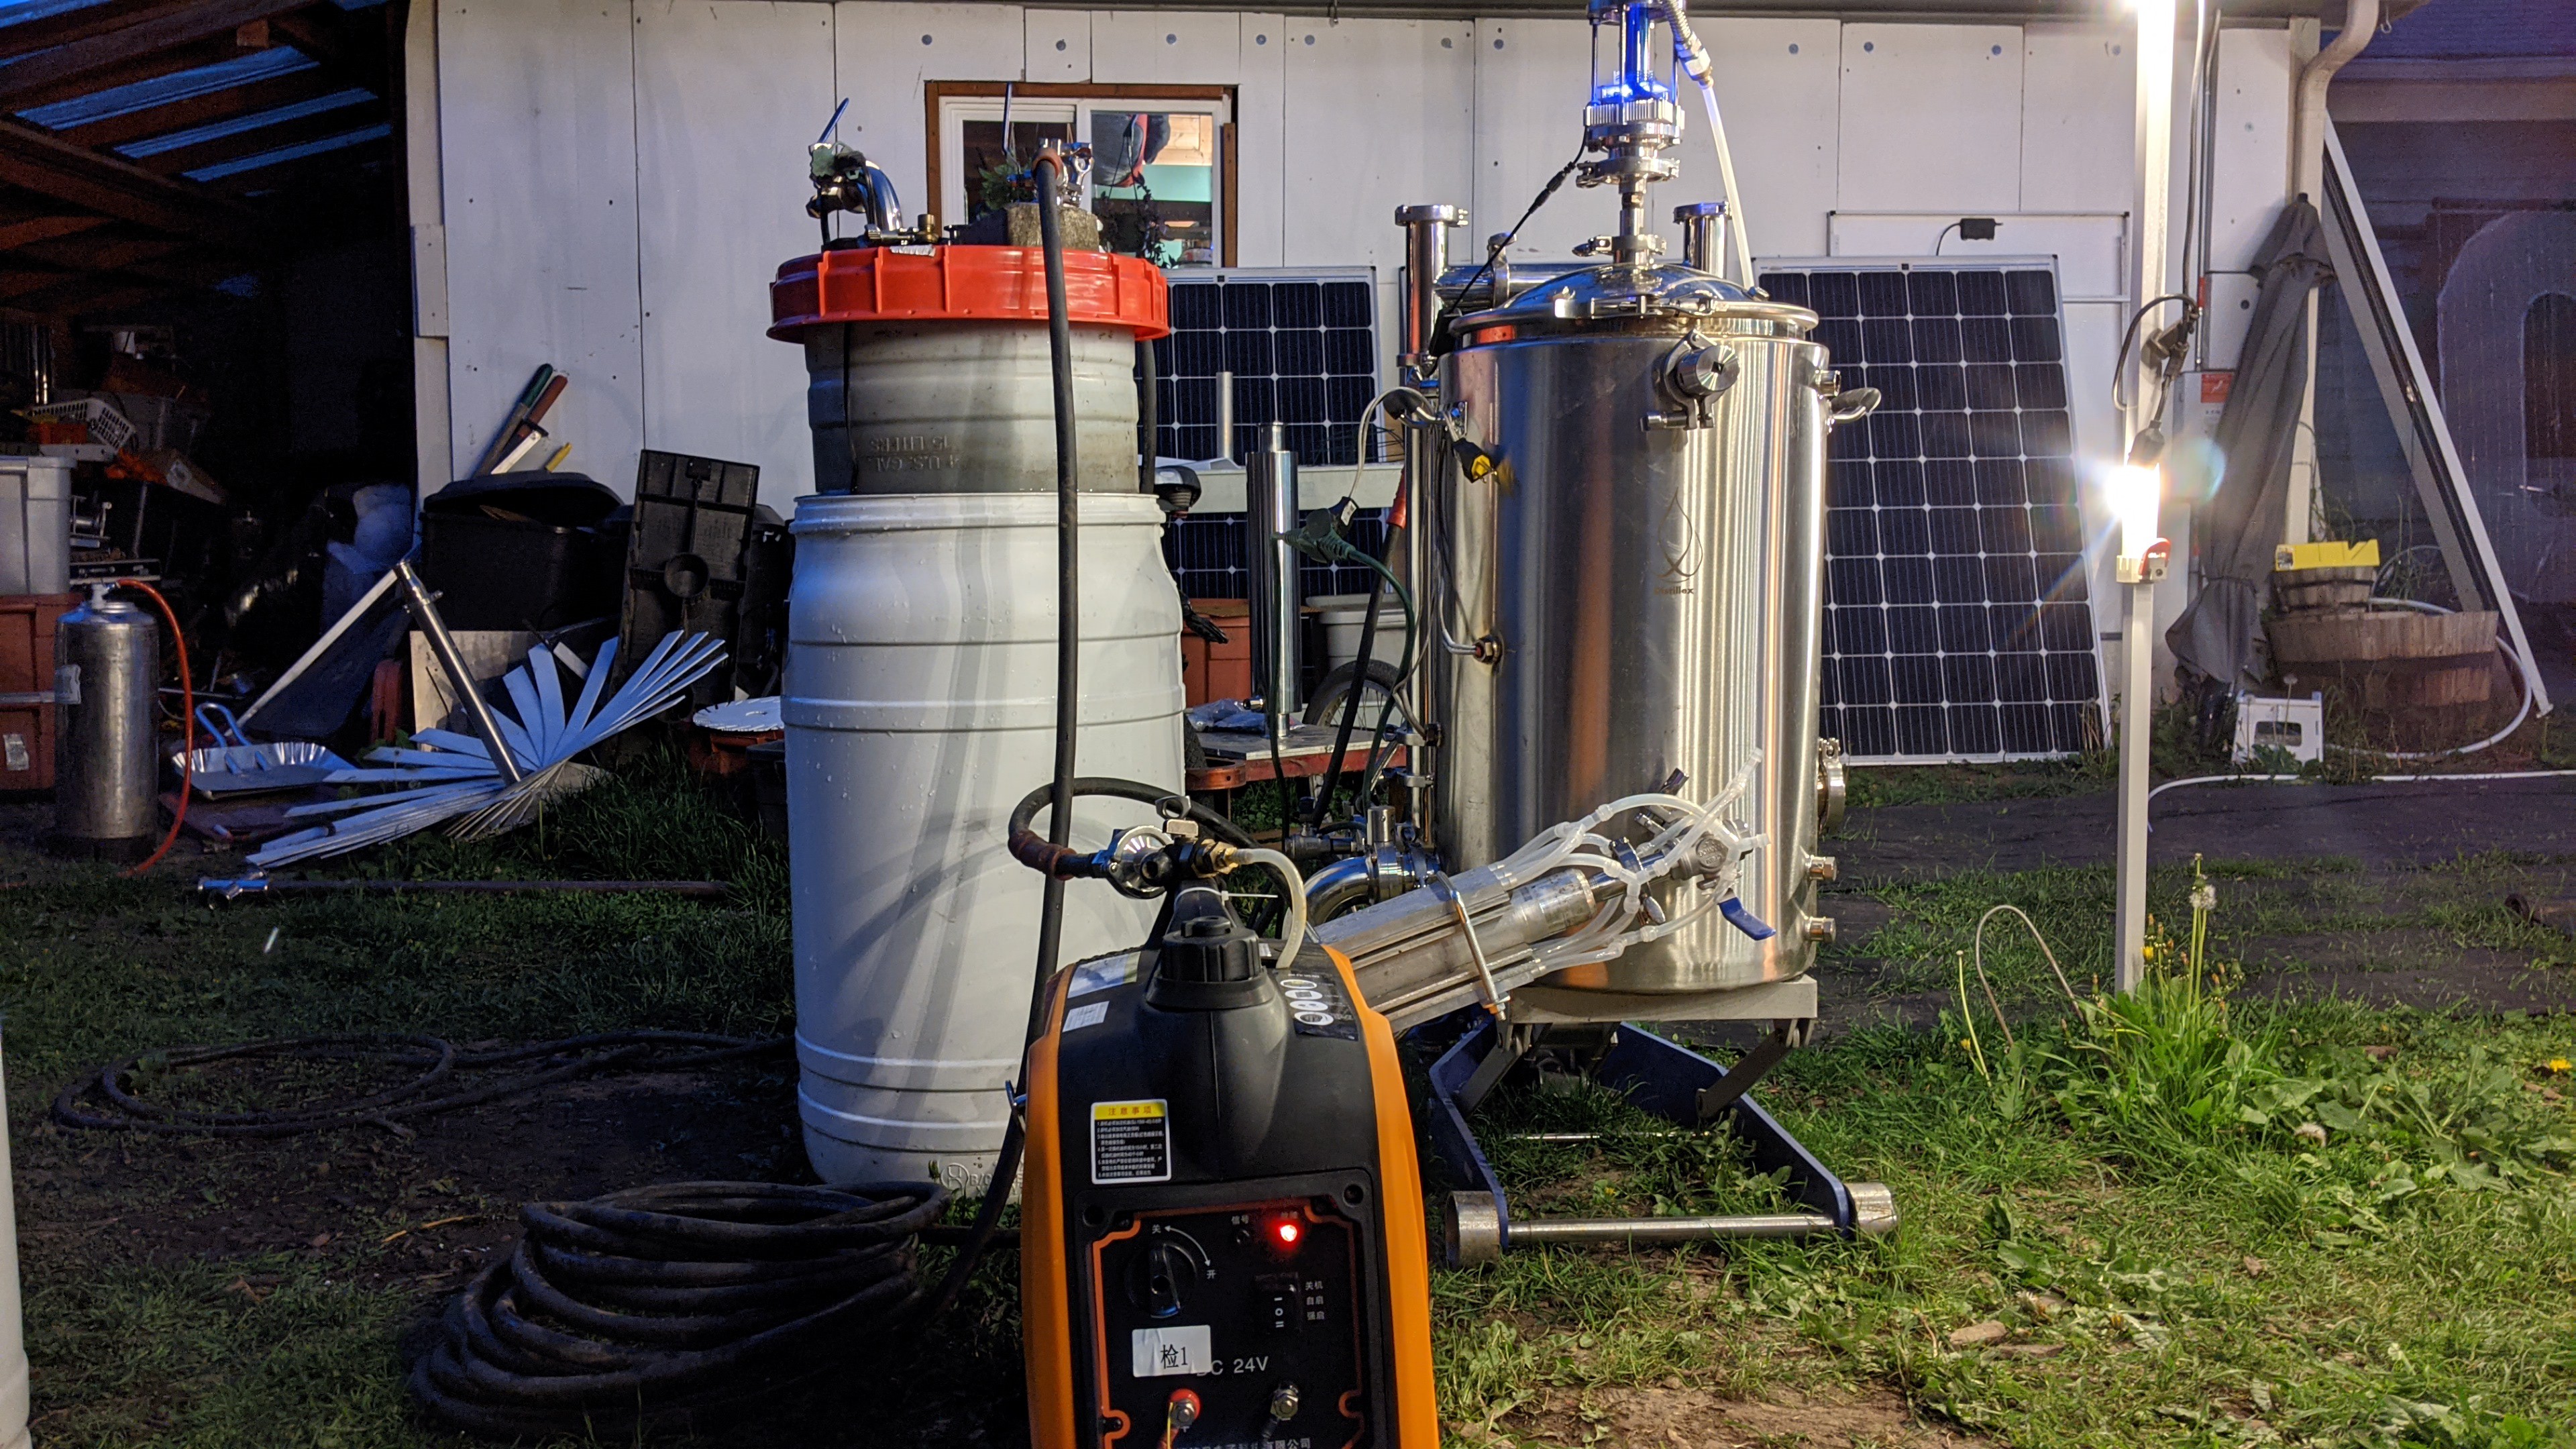
The reactor is a steam-jacketed whiskey still from AliExpress, made by a company called Distillex. I chose it because it's something people can just buy, and not have to fabricate stainless steel, which is a high bar. The still has all the ports and fittings I need to add temp sensors and condensers, and the double-wall steam jacket helps insulate the reaction, and allows me to recirculate hot exhaust from the generator to help add heat. A non-steam jacketed version would be a lot cheaper, but I haven't tried it yet. The reactor should cost under $1000 shipped.
![]()
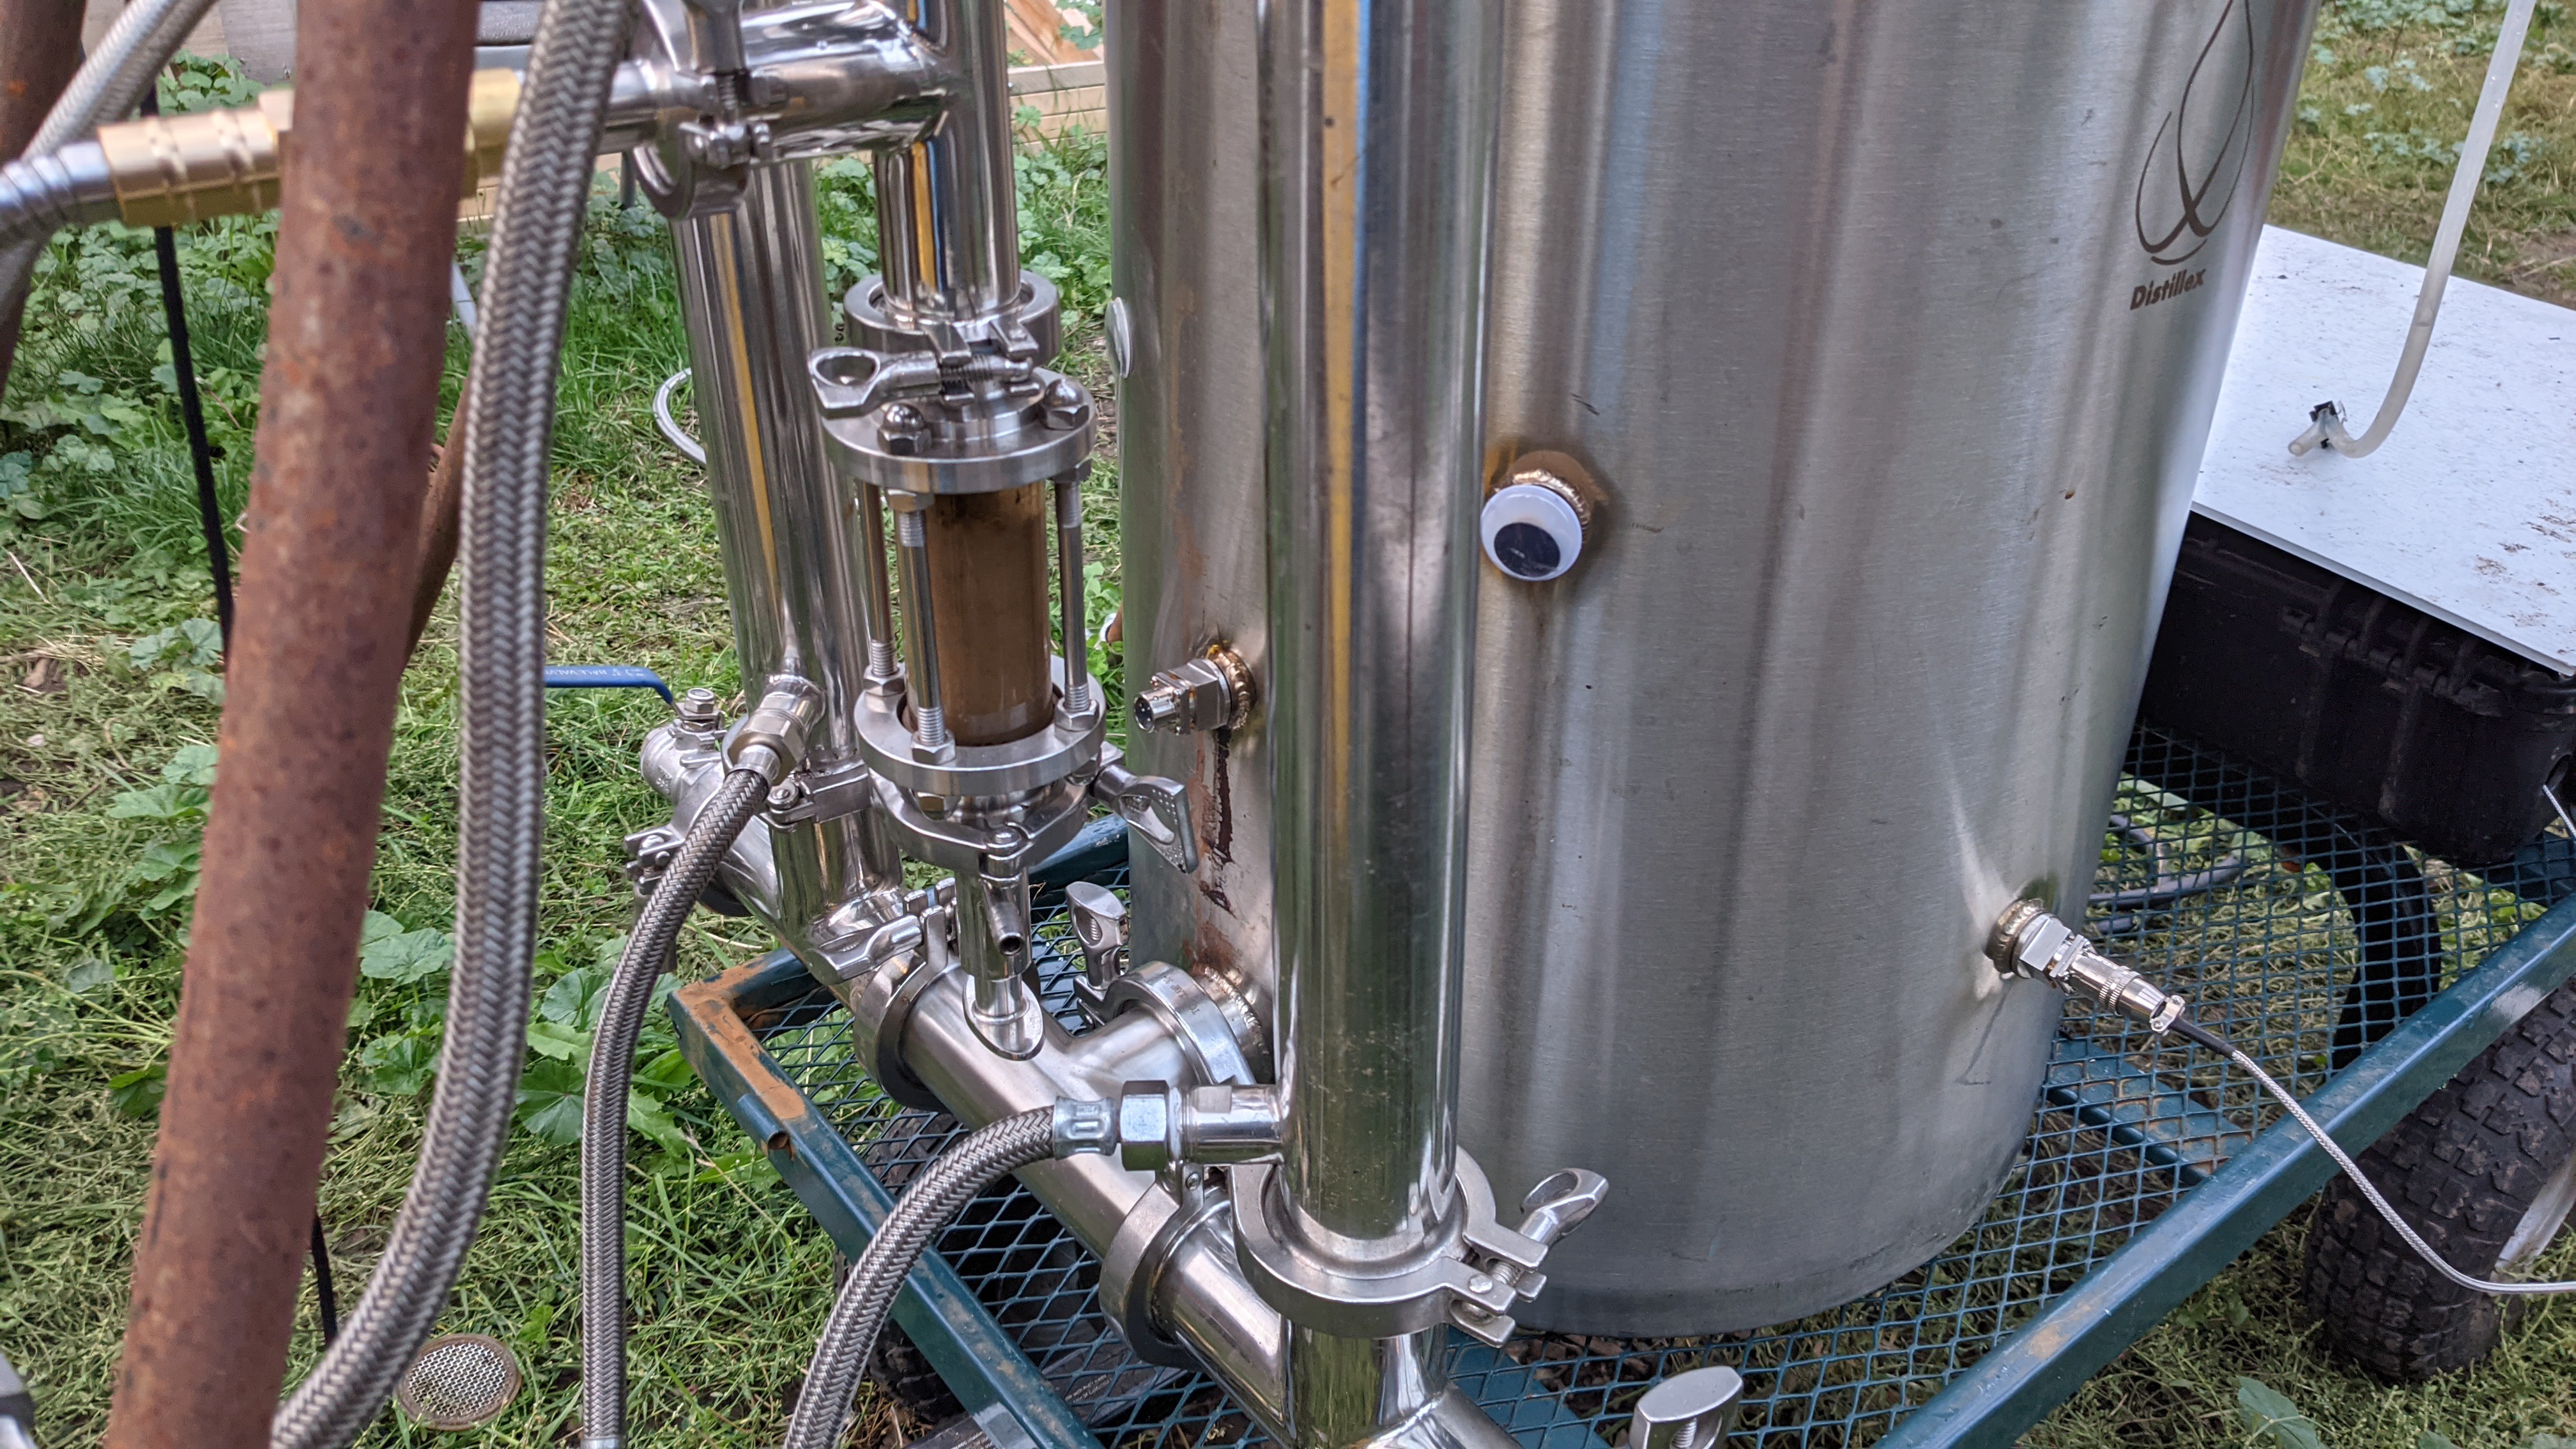
The Condenser:
Connected to the Reactor is a water-cooled condenser, made of Tri-Clamp fittings. These fittings are like legos, and you can configure them together in infinite ways. All the condenser does is cool the smoke that comes out of the reactor, and collects the liquids that condense out of the gas in the process. Cooling the gas selects for the lightest hydrocarbons, and refines it into a clean flammable gas, producing hot water as a by-product.
![]()
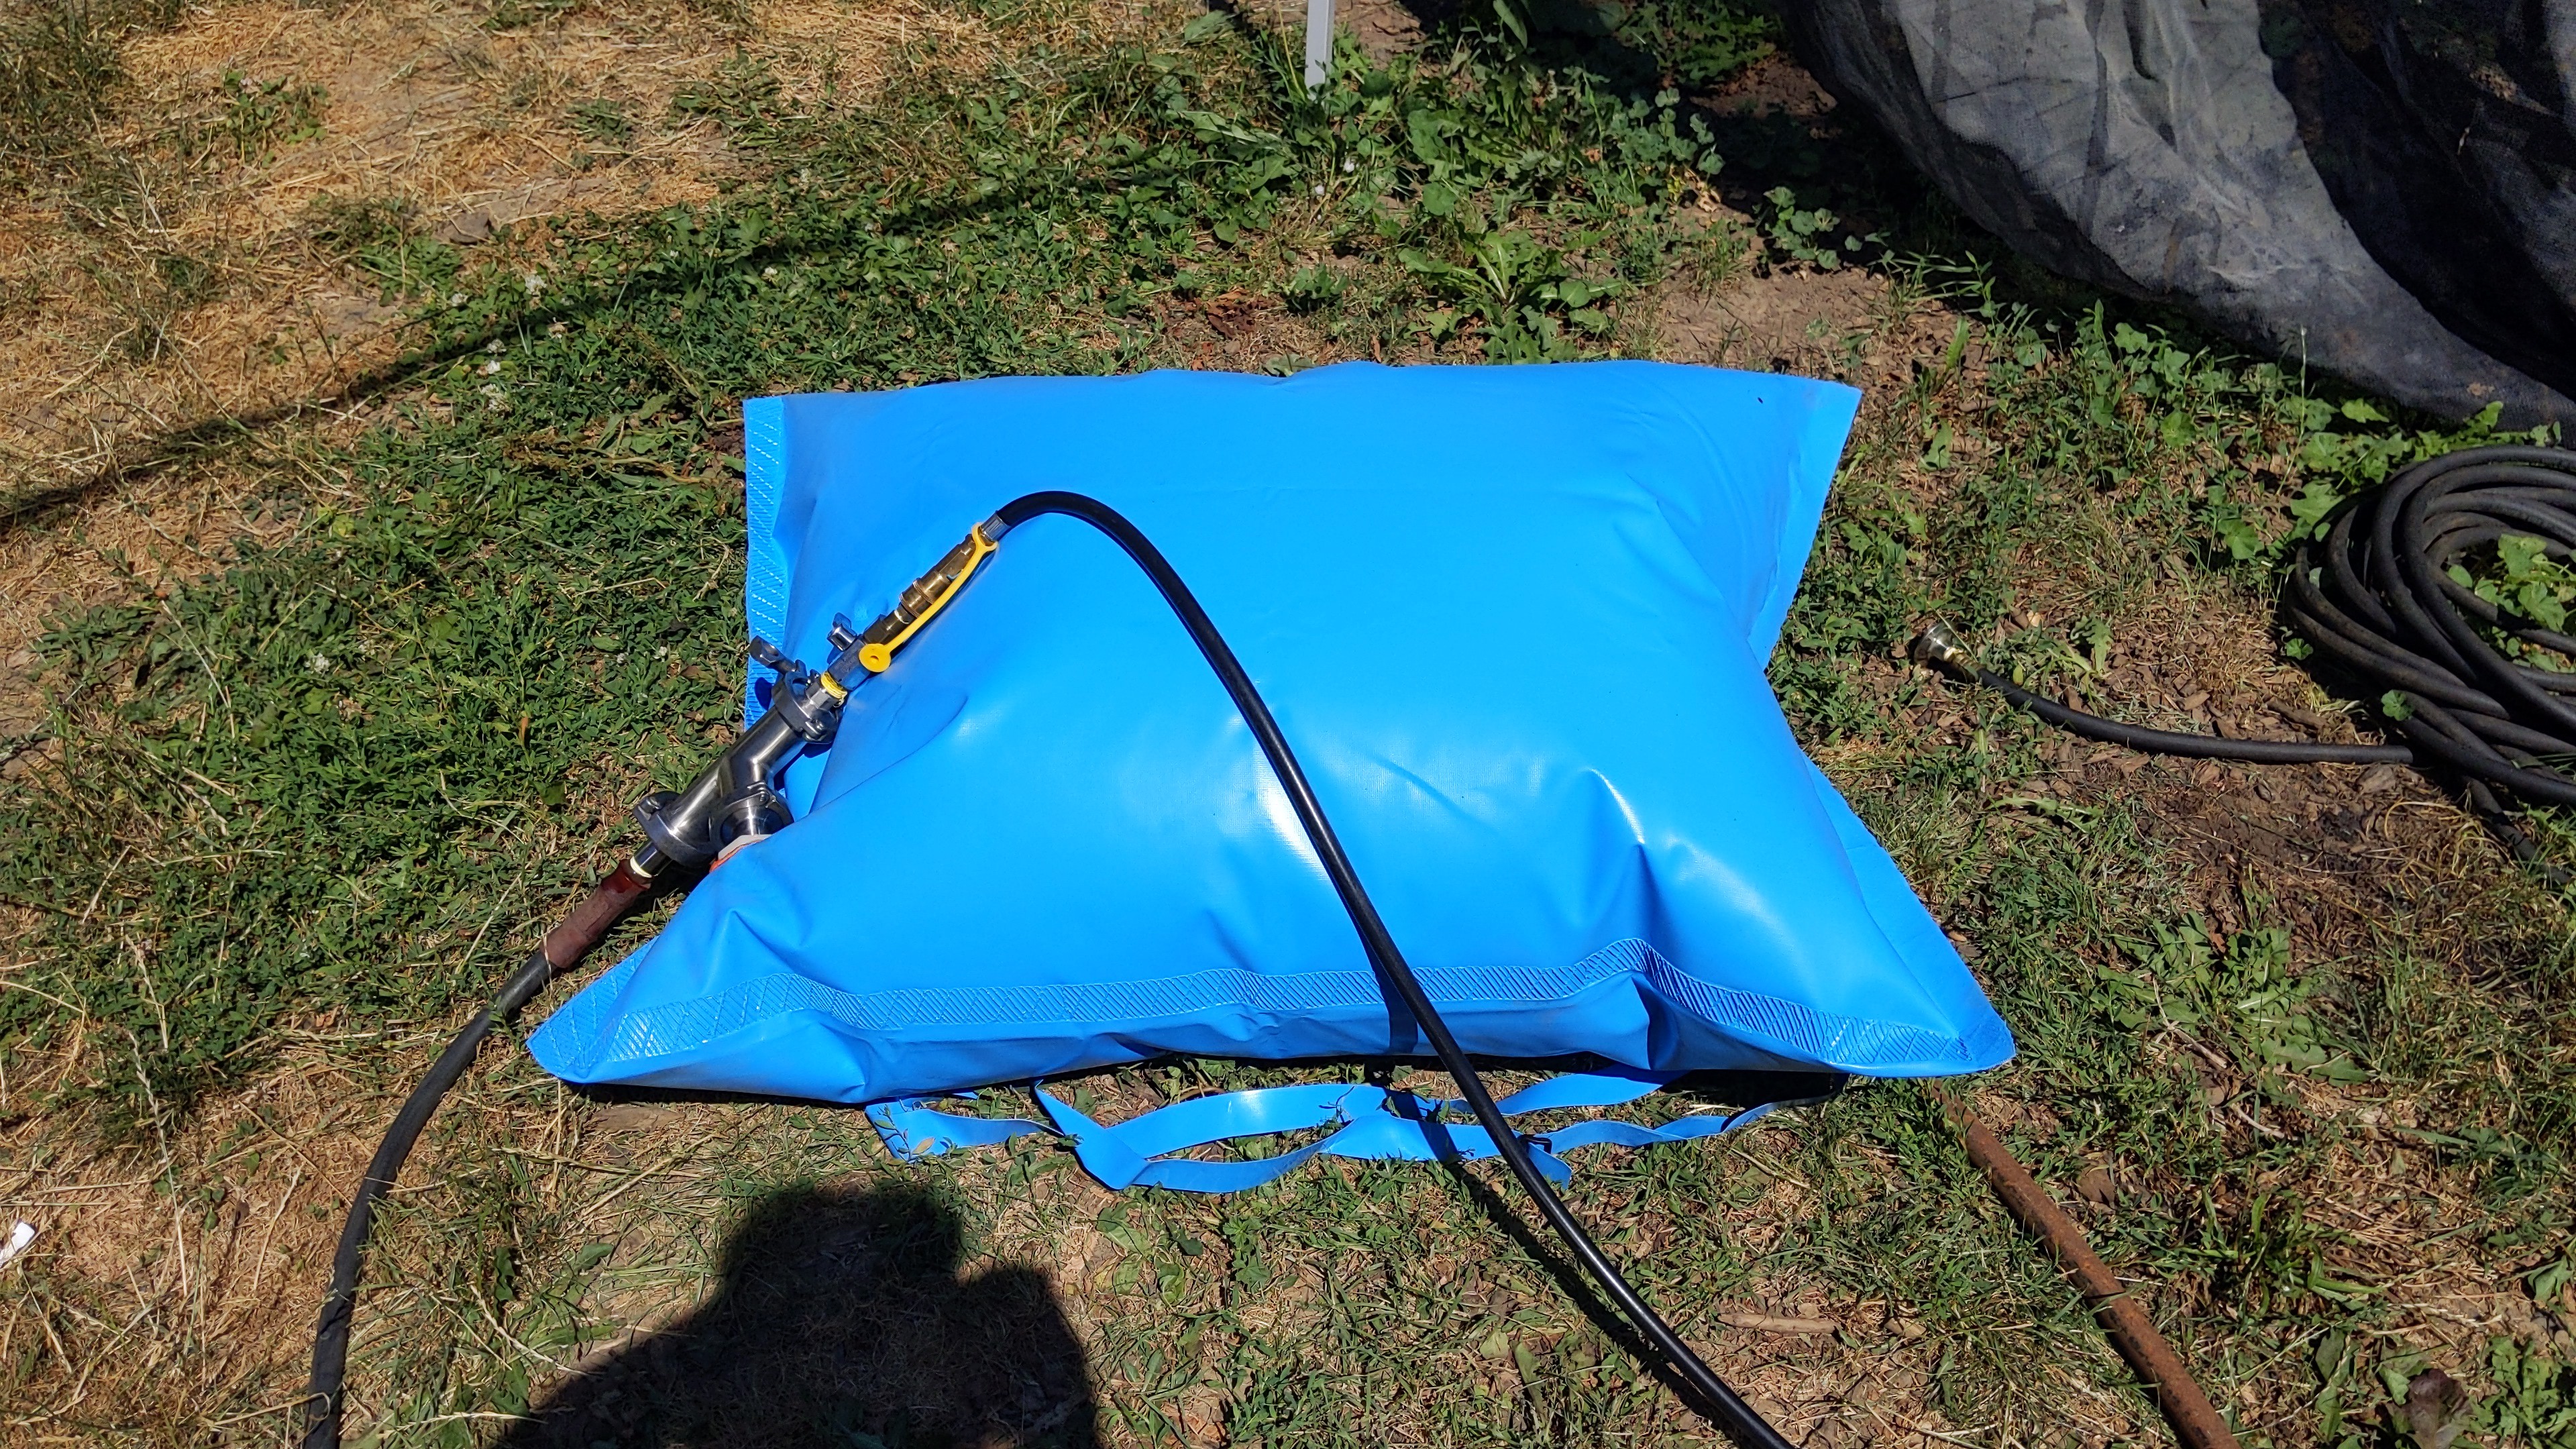
The Gas Bag
In my first tests, I used a "gasometer" to store the gas. A gasometer is simply a barrel floating upside down in another barrel full of water. The inner barrel rises as it fills with gas, providing both storage and pressure. Gasometers are fascinating devices that have been used for hundreds of years. But they are also somewhat tricky to build, VERY heavy, and can only store a limited amount of gas - in my case about 40L, which can only run the generator for a few minutes.
![]()
I'm now using a gas storage bag designed for storing Biogas, and these are much cheaper, lighter, easier to work with, and can store a lot more gas. I'm currently using a 300L bag and a 500L bag. A full 500L (1/2m3) bag will run the generator for over half an hour. In the future, I would like to have as much a 5000L (5m3). In my experience, a full batch of biochar will generate between 1-4 m3 of gas, depending on the energy and moisture content of the biomass feedstock.
![]()
-
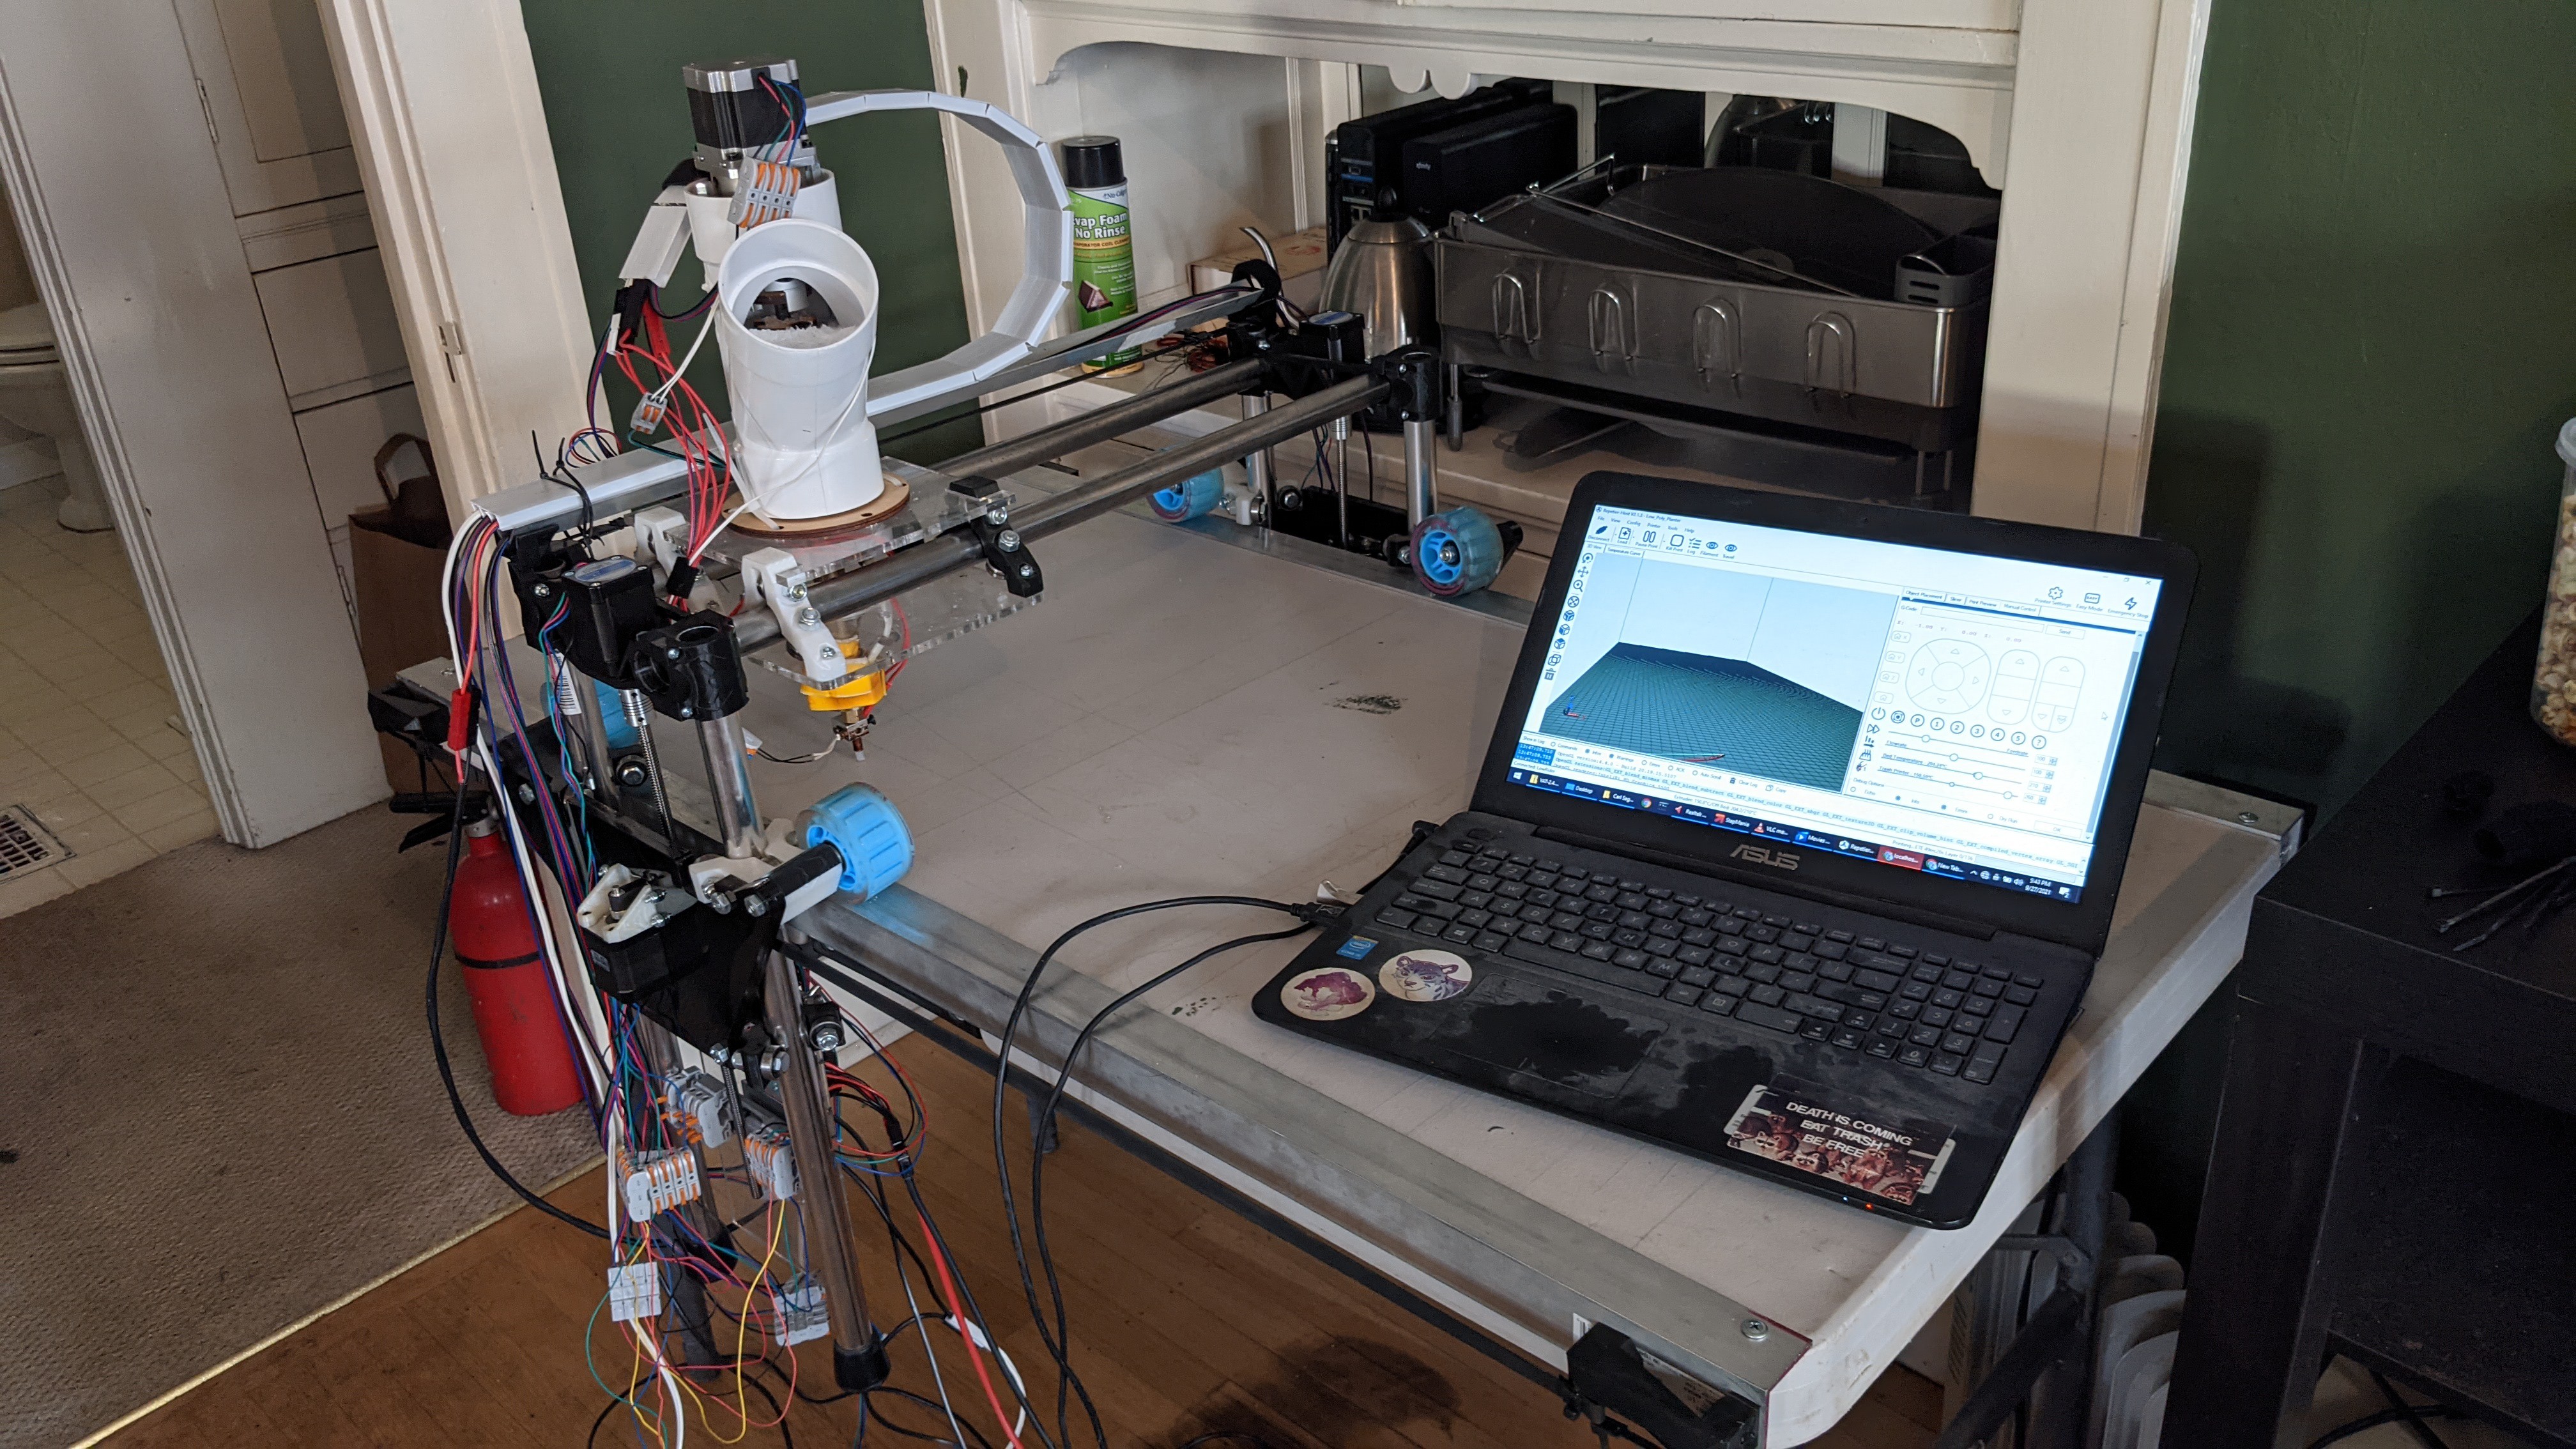
2Building the Trash Printer
![]()
The Trash Printer has two primary parts - the flake extruding print head, and the gantry that moves it around.
The Extruder
The flake extruding print head is fairly easy to build, and costs roughly $150 in parts. You can find the full parts list here, and you can watch this tutorial on how to put it all together:
The Gantry
So far, I've tried the MPCNC gantry, and the LowRider2 gantry, both from V1Engineering.com. Both work about the same, but the LowRider2 can do larger parts and is easier to transport. These gantries are both easy to build, and I chose them because they use primarily 3D printed parts, can commonly available hardware. You can find the full documentation on how to build these machines here. Typical cost to build is $500 or less.
To control the gantry, I'm using a RAMBO 1.4 control board, running Marlin firmware. You will need to flash Marlin on your board, using the Arduino IDE. Instructions for how to do that can be found here.
The Software
To control the Trash Printer, I am using Repetier-Host, running on a Windows 8 laptop. Repetier-Host I am still experimenting and dialing the settings, but I have found that a tip and barrel temp of 250C seems to work well.
Hacking it all together
There are just a few minor hacks I had to make to get everything working together.
The barrel heater on the extruder is designed for 120VAC, but the Rambo Board runs at 24V DC. To bridge this gap, I added a Solid State Relay, that is triggered when the DC "heated bed" output is on. This in turn switches 120VAC on and off, and turns the band heater and and off as needed. Since having an actual heated bed would be impractical for a printer this larger, I've "tricked" the printer into treating the band heater as the "heated bed". This lets me control the tip temperature and bulk barrel temp independently.
-
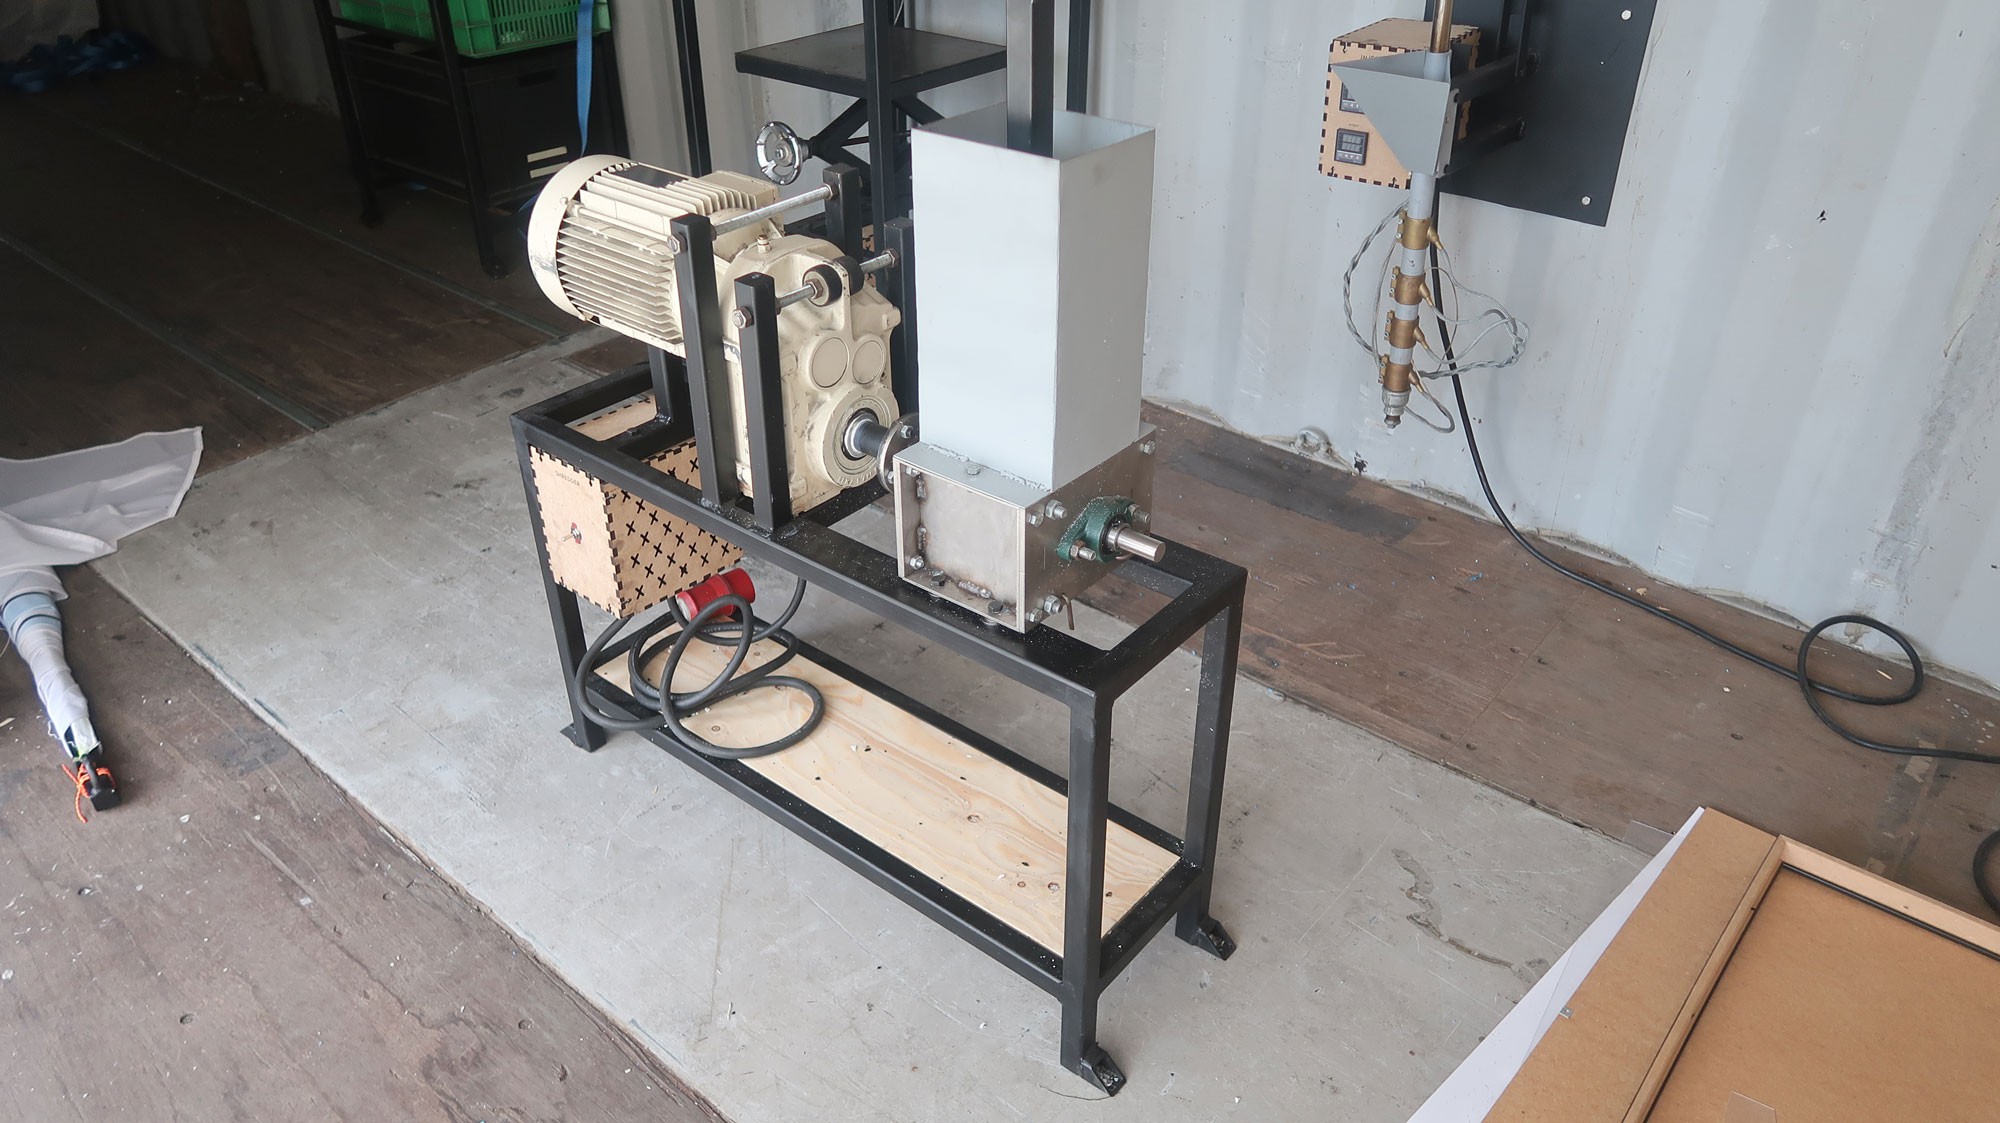
3Building the Waste Shredder
![]()
The shredder I'm using is a "Precious Plastic" open-source shredder. If you're not aware of the Precious Plastic movement, you should be! It's an open-source effort to develop low-cost, community-scale plastic recycling machines. It's deeply inspring and it's what started me off on this journey.
I'm using the original shredder box design, which has it's flaws but absolutely works. Precious Plastic has since released an updated heavy duty shredder, which is extremely powerful but more expensive and difficult to build.
The shredder box cost me about $400 to get the parts cut in stainless steel, and it took a few days to assemble. Overall, the shredder is the most technically difficult component to build, and requires access to a metal shop, ideally with a lathe, MIG welder, and grinder.
Alternatively, you could just buy a plastic shredder from aliexpress for not much more money.
The electric motor and gear reducer was the hardest part for me to source, and cost me another $300. You don't have to use a PP shredder, but they're the best open source option I know of. An industrial shredder might work a bit better if you can find one, but the scale of the Precious Plastic design is ideal for backyard processing.
Find full plans at PreciousPlastic.com, or in the files section of this page. I highly recommend reading the Precious Plastic forums before building- you'll find a lot of improvements and hacks there.
-
4The Powerplant
The powerplant is the system that stores, captures, and distributes the electrical energy the powers the whole system. It's the most expensive part of the system. The powerplant is made up of 5 basic sub-components:
Solar Panels - To capture solar energy and provide the base power to start the system.
A Charge Controller - To safely charge the battery bank with solar energy
A battery bank - To store the energy for later use and act as an energy buffer
An Inverter - To convert DC power into pure sinewave 120V AC power
A generator - To convert the gas produced by the reactor into electrical energy.
Here is how I am currently doing it:
The Battery Bank
In the current release, I am using two "all-in-one" power stations, a 2.0kWh "Aspen" Power Center, and 1.8kWh EB180 Power Station, for a total of 3.8kWh of storage. These all-in-one power centers are plug and play, portable, and very easy to work compared to building a system from scratch. These units combine the charge controller, battery, and inverter into one box.
![]()
The main drawback is that their maximum solar charging rate and overall storage capacity are still lower than I would like them to be, which reduces the overall runtime potential of the system. The longest I've been able to run a system so far is roughly 4 and half hours, and the main limiting factor was battery storage. In the future, I would like to try powering the system with two of these new 5.1kWh units from Bluetti, but I don't currently have the budget for that.
Did I mention I have a Patreon? If you like this project and want to help me keep hacking at it and figuring out what works and what doesn't, consider tossing me a few bucks every month, it helps me afford to try stuff like that.
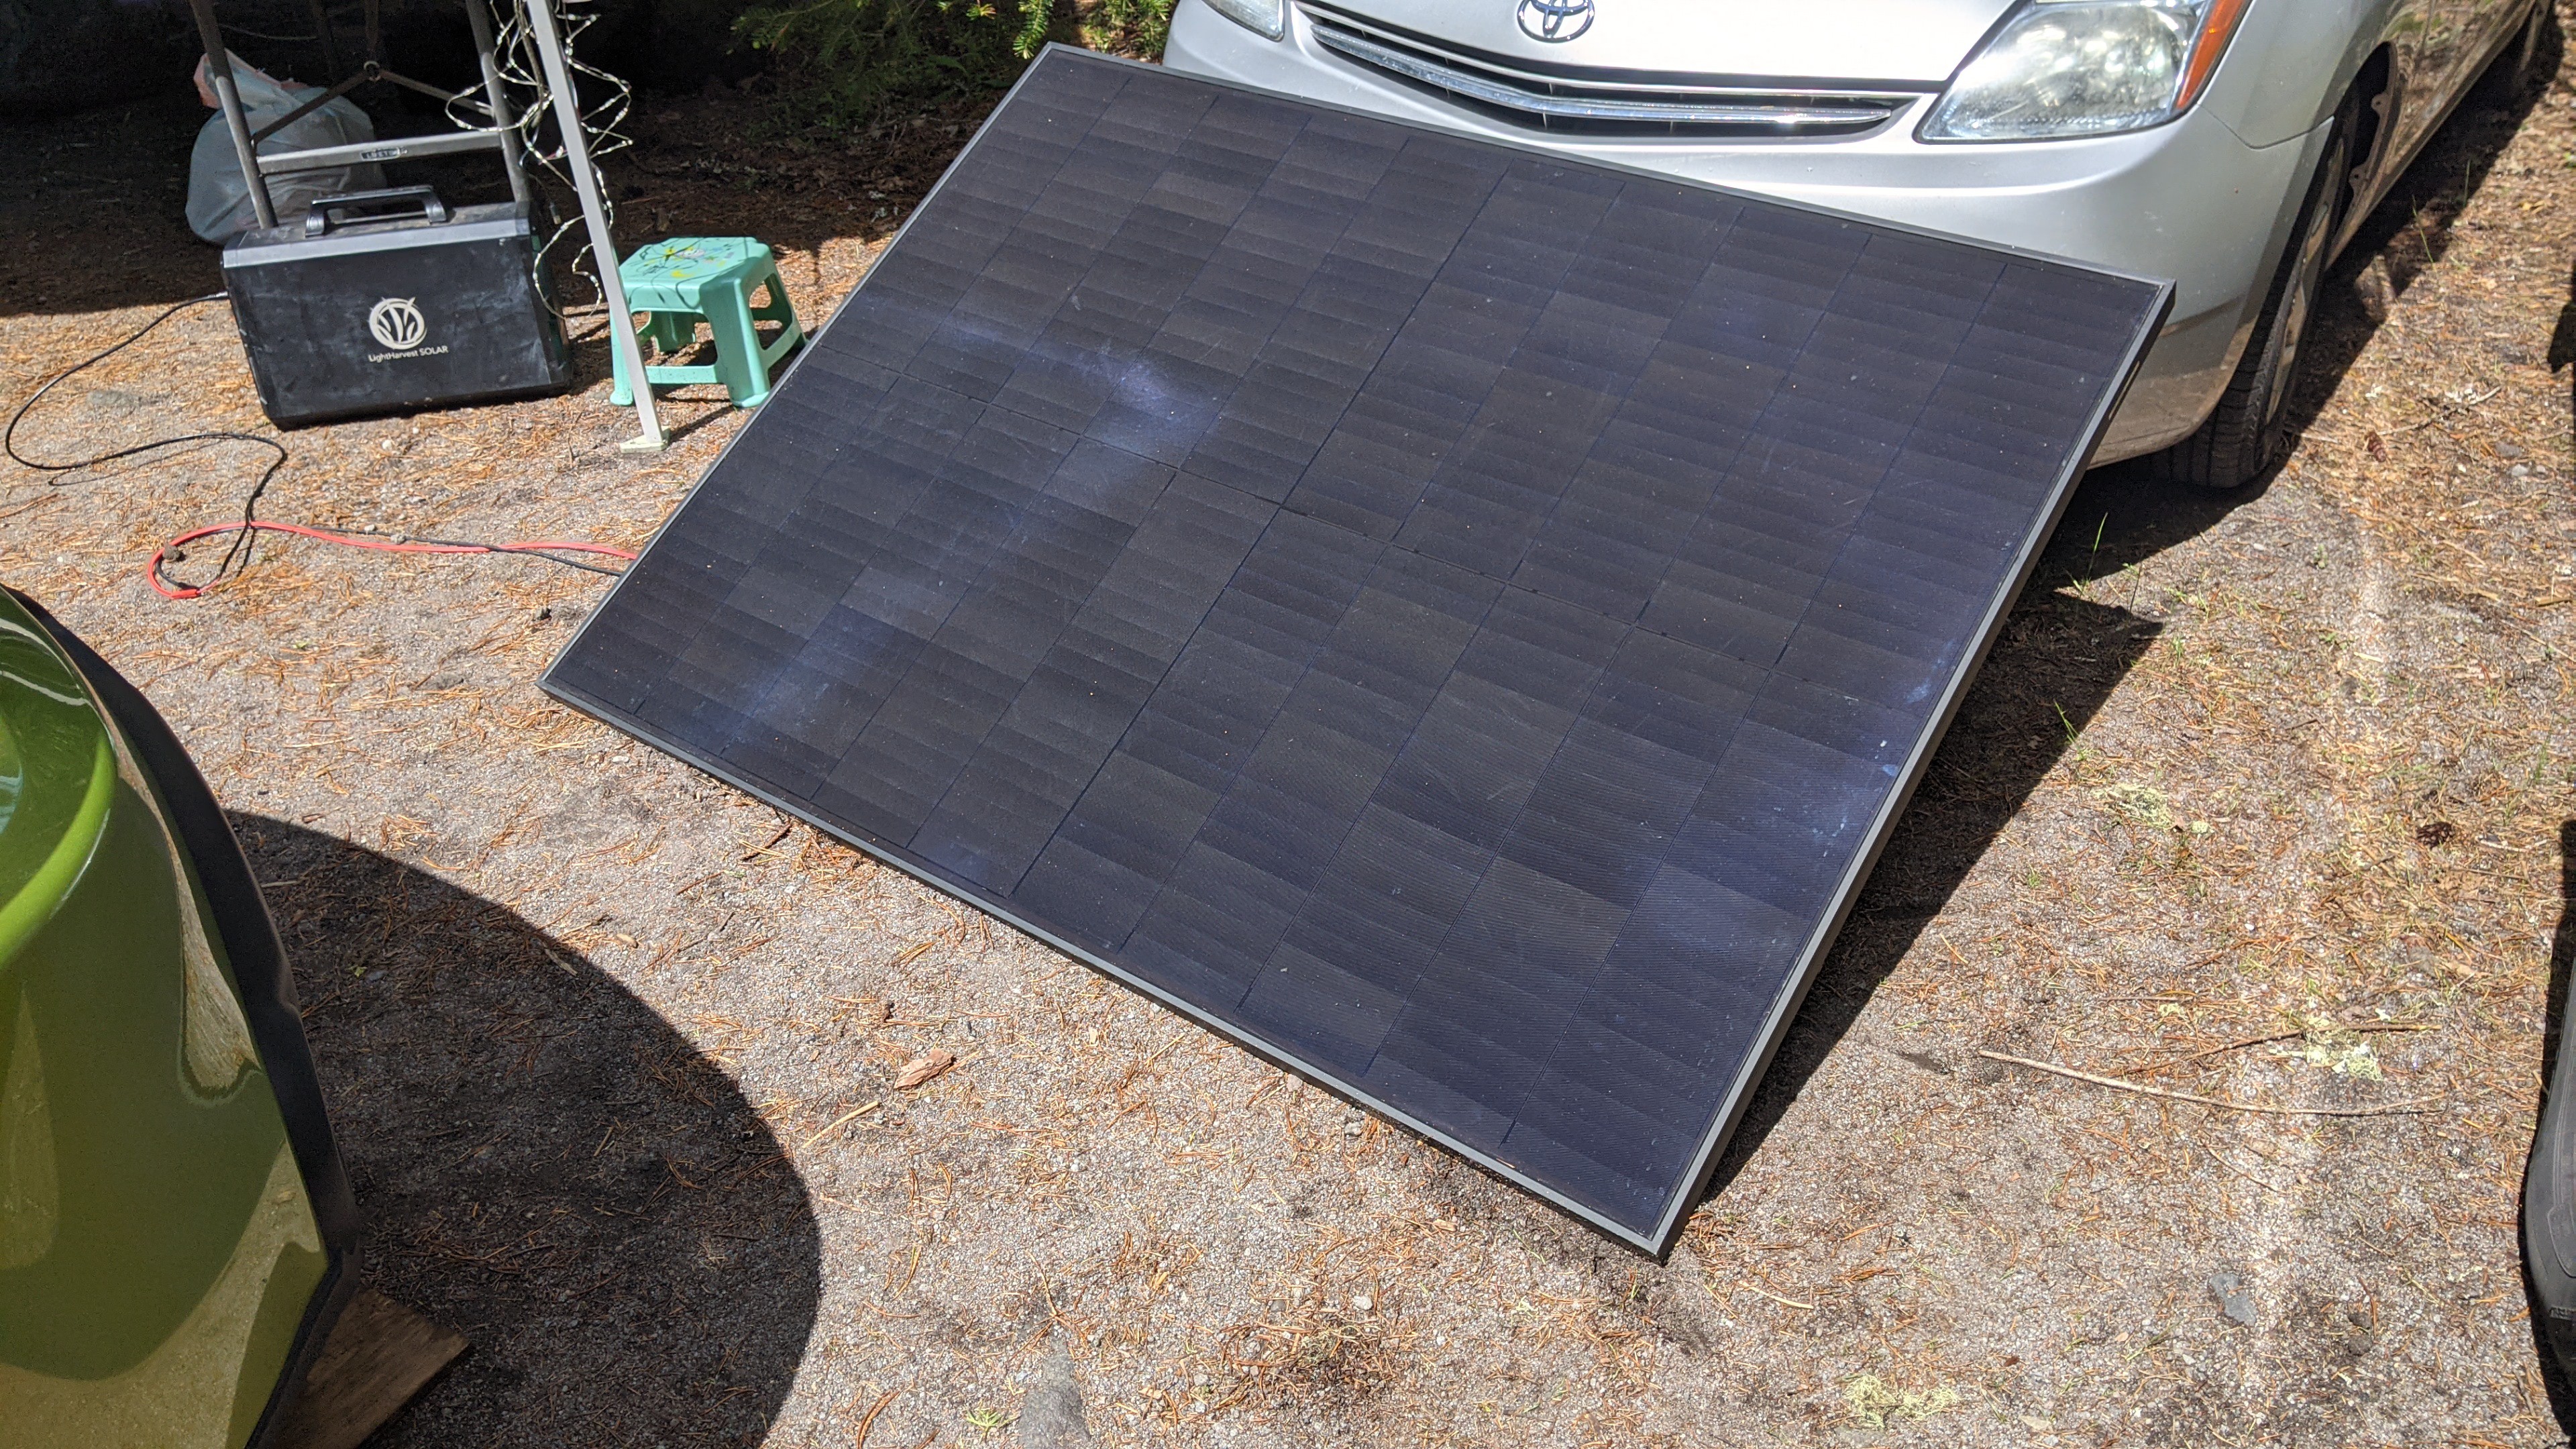
The Solar Panels
![]()
I am currently using two Solar World 300W solar panels, connected in series to charge the Aspen Power Center, and one SolariaXT 400W panel to charge the EB180. The Reactor can run on as little as 700W and still produce gas, but it works better with 1000W or more, so at least that much solar power is desirable for long-term operation of the system.
Over the course of a sunny summer day I can capture up to 4kWh from just those three panels, which is enough to generate enough gas to cook with, but not enough to fire a whole batch of charcoal, which takes more like 8-10kWh.
The Generator
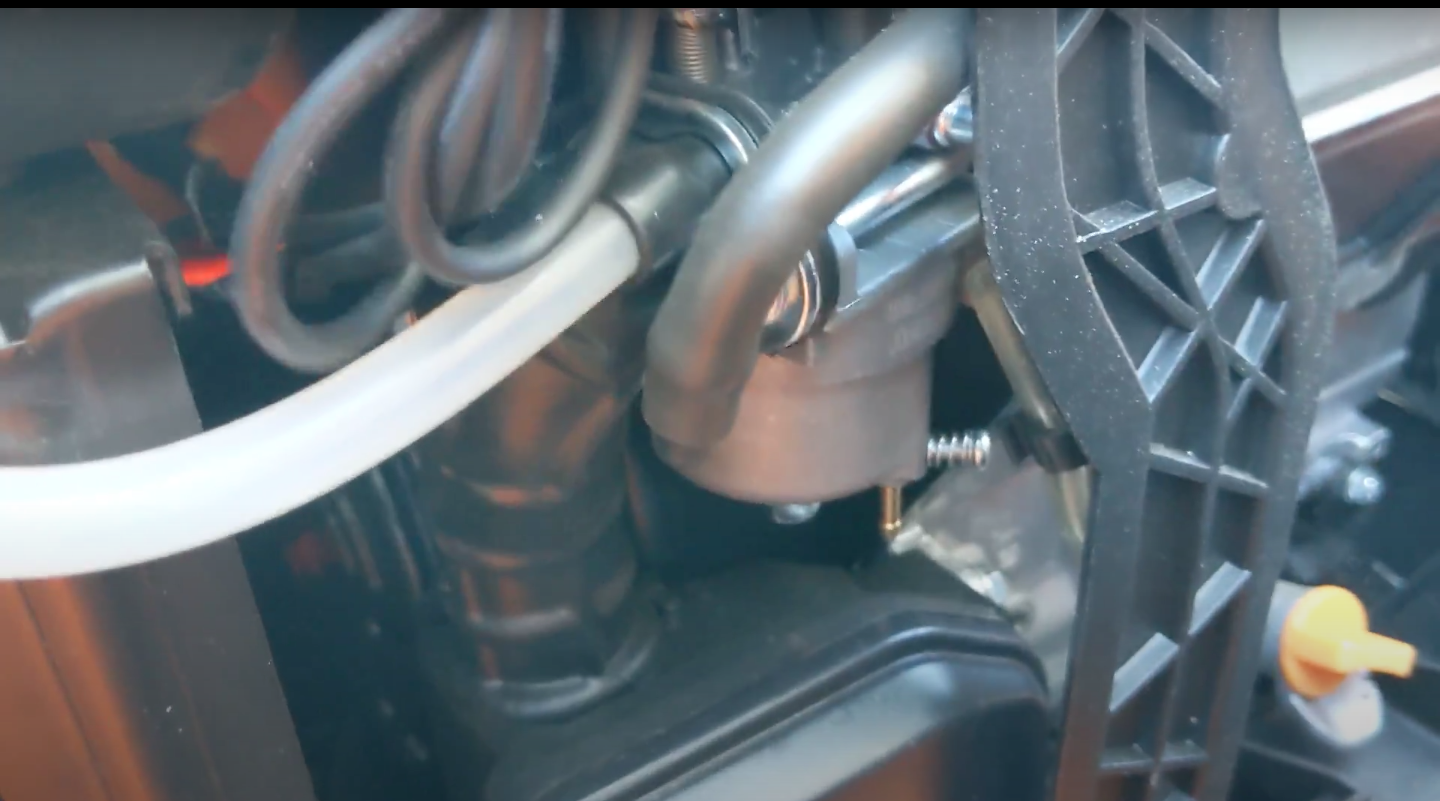
I have tried many different ways of generating reliable, useable, storable electrical power from biomass-gas, and the best way that I have found so far is by using one of these direct DC "range extender" generators from AliExpress. Getting gasoline engines to run on the gas is actually extremely easy, I literally just stuck a 1/4" ID silicone tube into the air intake manifold of this one.
![]()
The hard part is getting consistent, clean power that can safely charge a battery bank. Woodgas is less calorific than gasoline is, which causes most generators to run considerably slower than they would on gasoline, which causes problems in generators that need to run at exactly 3600RPM to produce 120V 60hz power.
"Inverter style generators" that is, any generator that has an "eco-throtttle" feature, work a little differently, and will actually put out clean, 120V 60hz power no matter how fast the engine is running. But the net power output varies with speed, and typically they only produce 300W-800W. That causes problems when you try an power a battery charger that's designed to pull 1100W. Not to mention the inherent inefficiency of converting DC to AC and back to DC again.
![]()
The best solution I've found so far is to use these special DC generators with fixed ouput DC voltage and variable current based on the engine speed, which makes their power output much more like that of a solar panel does, which makes them integrate easily into an existing off-grid energy system. They also have a neat feature, which is that they can remotely auto-start themselves using their Brushless DC generator as BLDC motor.
Generators like these are available for $500-1000, come in voltages ranging from 24-96VDC, and are very easy to modify to run on wood-gas. Mine is 24V nominal, puts out up to 27.5V, is rated at 2000W on gasoline, and I have generated up to 1000W running it on woodgas. At idle, it generates 250-400W, similar to the output of a single full-size solar panel in direct sun.
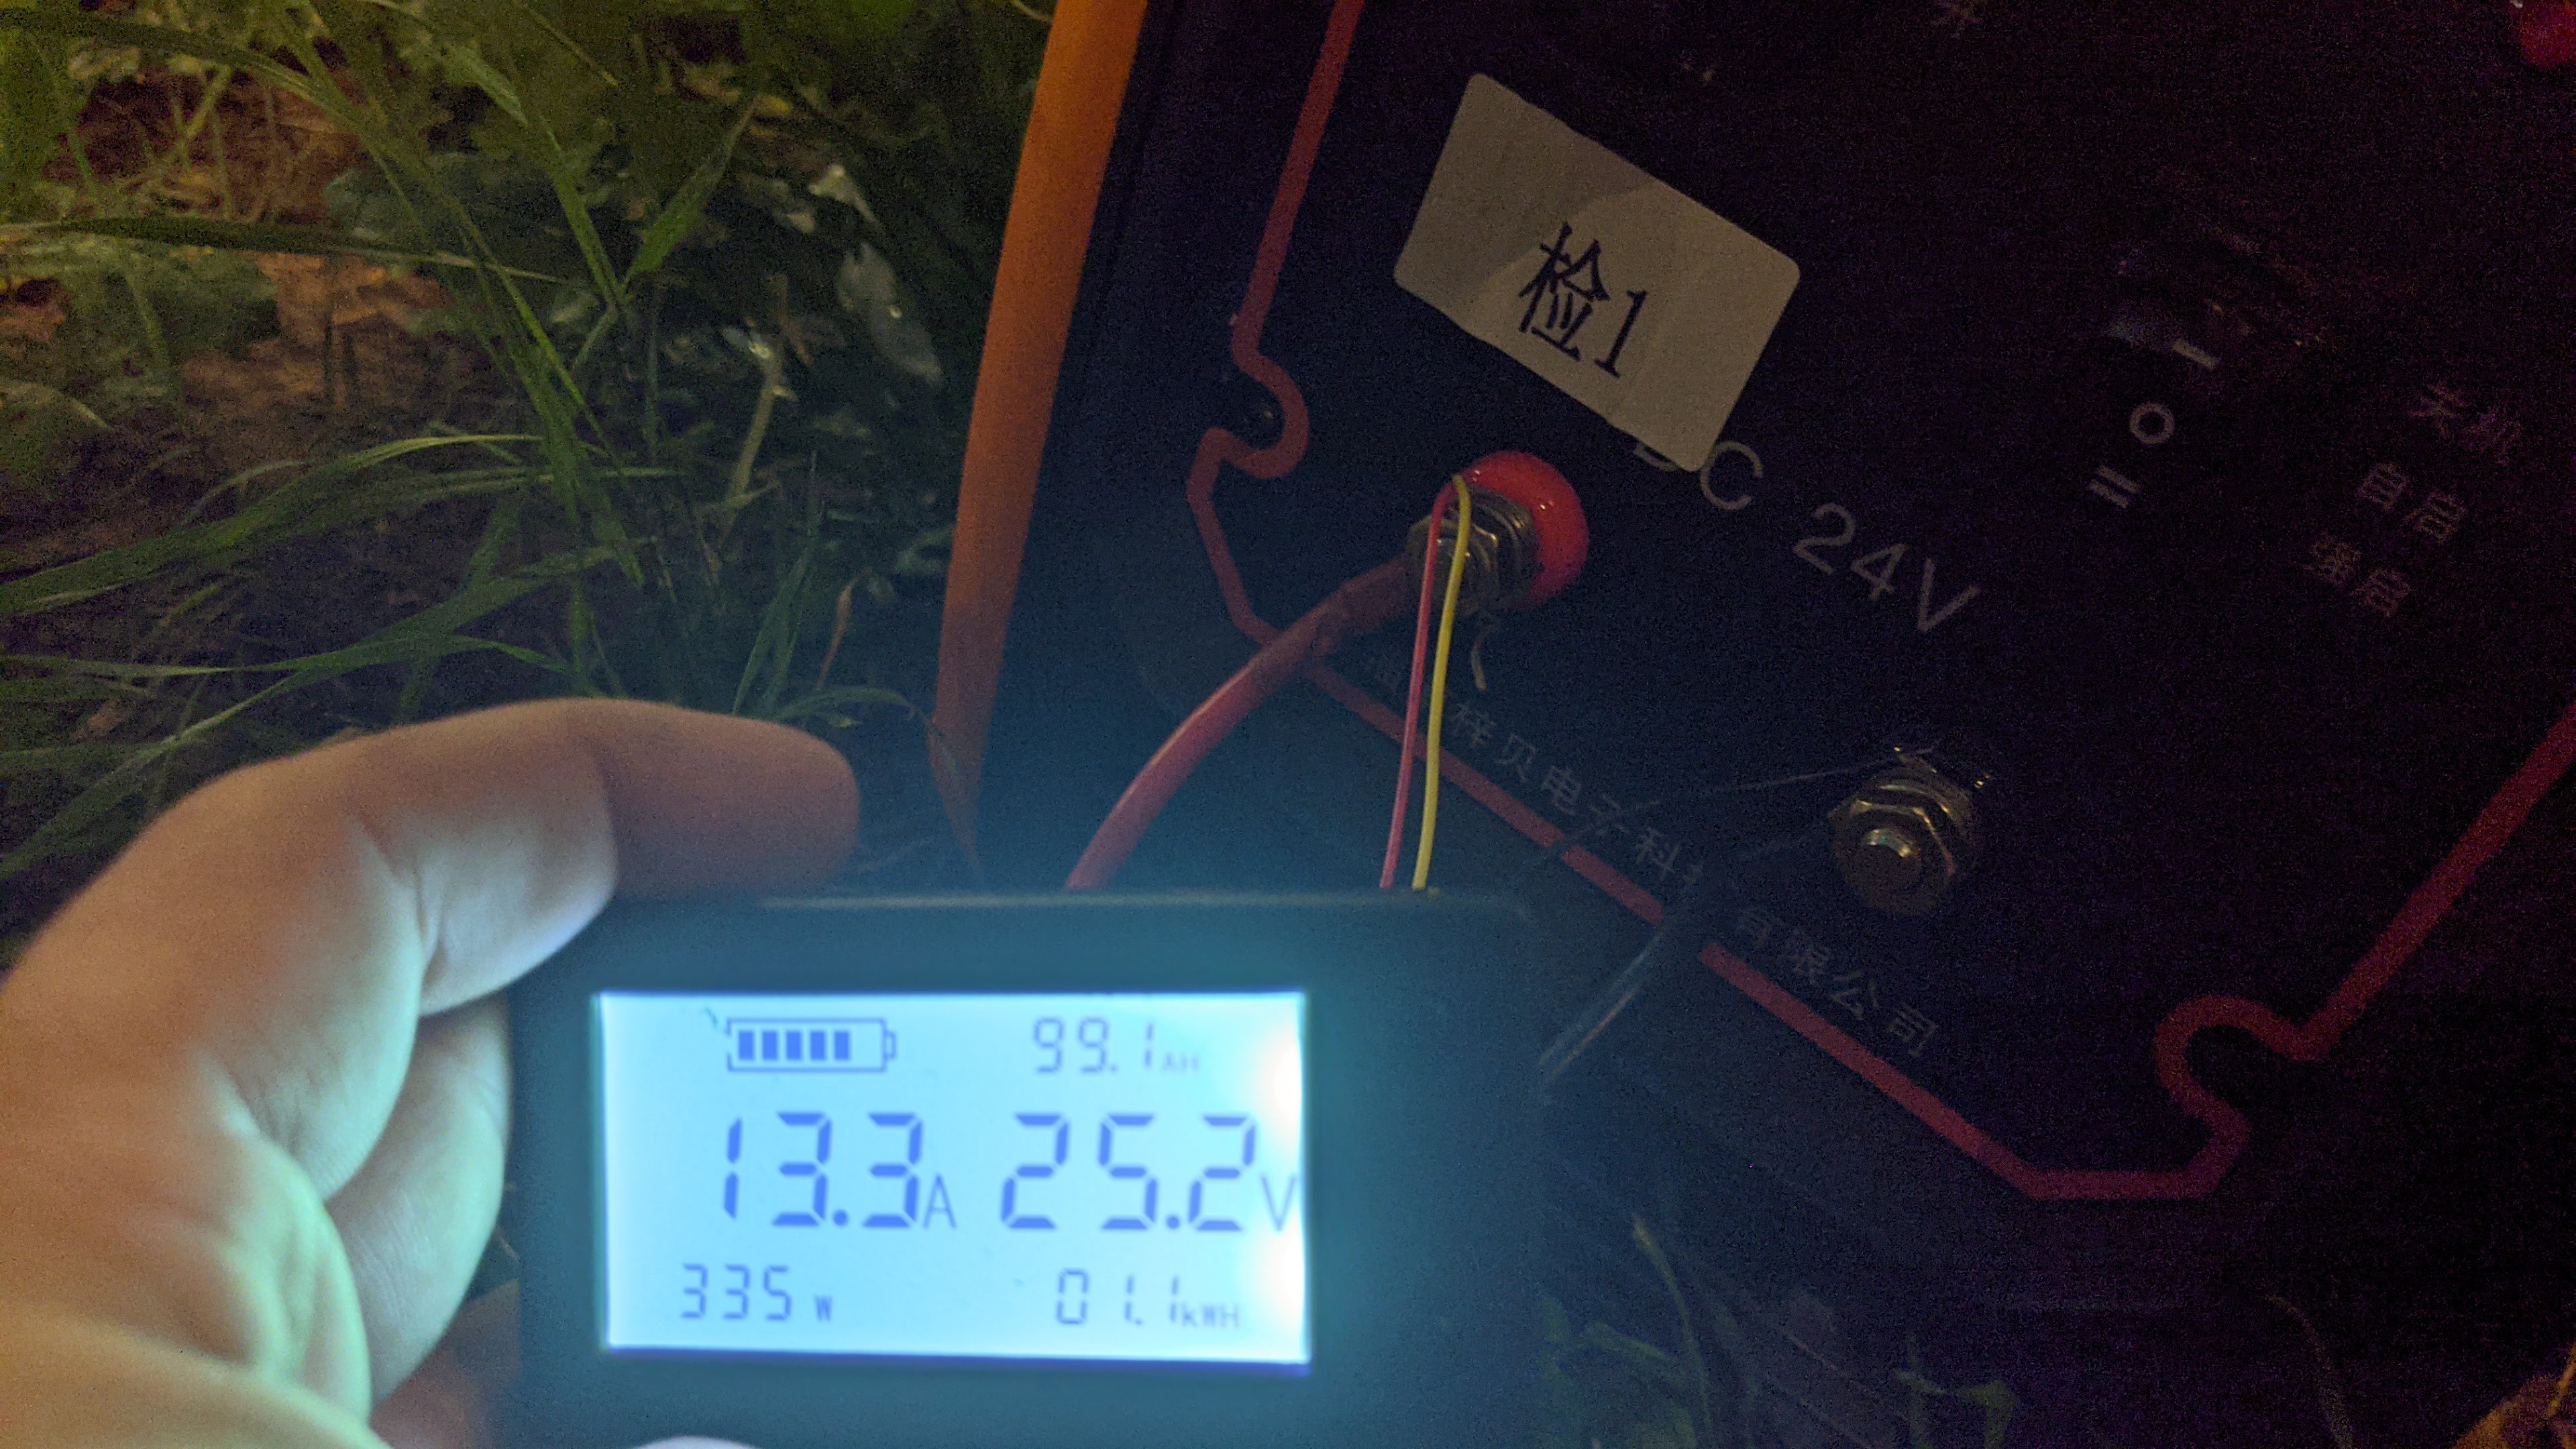
![]() 24V Buffer/Starter Battery
24V Buffer/Starter BatteryIn my current setup, the DC generator needs to be connected to a 24V battery bank in order to start itself. In addition, it's important to have a battery bank connected to act as a buffer for the power generated by the engine. I'm currently just using two 12V AGM Telecom batteries in Series. This bank doesn't need to be high capacity or high quality, and old lead acid batteries are fine, they just need to be able to start the engine (350W cranking) and be able to absorb up 30A of current. Once the generator is started and charging the buffer bank, I feed power into the All-in-one units by using a 24-48VDC 960W Boost Converter. The All-in-ones read the 48VDC from the converter as a solar panel input and charge at up to 9A (450W) on the EB180 and 12A (500-600W) on the Aspen.
You can also feed the 24VDC from the buffer battery into a standard MPPT solar charge controller as if it were a solar panel, and use it to charge a 12V battery bank. In the future I would like to streamline this system and increase it's capacity to 10+kWh, but for now, this how I'm doing things.
The Metabolizer
A living recycling center that eats trash and sunshine and poops recycled plastic objects


 24V Buffer/Starter Battery
Discussions
Become a Hackaday.io Member
Create an account to leave a comment. Already have an account? Log In.