Close
0%
0%

IMcoders

IMU-based encoders. IMcoders provides odometry data to robots with a minimal integration effort, easing prototyping on almost any system.

Similar projects worth following
The IMcoders project is meant to offer to the robotic community an easy to mount, cheap and reliable device capable of substitute the wheel encoders in an already existing system, or to produce accurate odometry data for wheeled robots without previous odometry support.

HACKADAY PRIZE 2018

INTRODUCTION

Autonomous navigation is a trending topic, one of the main problems to solve in this field is the location and tracking of the robot in its environment.

The robot should know where it is to decide where to move, this tracking of the movements of the robot is called odometry. <- This is what the IMcoders provide

Our main focus is to design a device able to provide odometry data with a minimal integration effort, easing prototyping on almost any system without hardware modifications.

Thanks to the combination of sensors in an IMcoder, each module can provide much more information than a traditional encoder. Now we are able to detect drifting of the wheels, robot kidnapping issues and a basic auto-validation of the output data.

GOALS

The goals of the project are clear, the sensors will have the following features:

  • Easy to use and integrate in a system
    • No hardware modifications of the target system needed. Attachment always external to the device.
    • Libraries and integration with ROS (Robot Operating System).
  • Extend the functionalities of traditional encoders with detection of
    • Wheels drifting while
      • Accelerating
      • Braking
    • Robot kidnapping
    • Basic self-verification of the data

HOW DOES IT WORK?

IMU -> Encoders = IMcoders

The main component of an IMcoder device is an IMU (Inertial Measurement System), a device equipped with three sensors: Accelerometer, Gyroscope and Compass.

The traditional use of IMUs as source of odometry data has been deeply studied and it has been proved not to be the best option as odometry data source in the long run (with a double integration of the acceleration to obtain position the acummulated error grows really fast). All the measurements are relative to the robot’s previous position and they are not absolute to the environment where the robot is moving. The error of each measurement of the sensor is accumulated in the next measure and, at some point in time, it makes the output of the system not reliable anymore. This effect has always been the restricting factor to use this devices as an standalone odometry source.

Our approach is not to use the bare output of the IMU as the input data to generate an odometry output but to use this IMU data to infer the spatial orientation of the wheel the sensor is attached to. Then, analyzing the spatial orientation of the wheel over time we can mimic the behaviour of the traditional encoders + some extra interesting features.

This approach has several advantages:

As the measurements of the IMU are relative to the object where it is attached, the physical constraints about where to mount the system are minimal. 

The IMcoders sensors can be easily attached to any exposed part of a wheel, as the sensor works rotating WITH the wheel.

The IMcoder sensor has an internal battery and includes a bluetooth module to wirelessly communicate with the host processing the data. This wireless communication approach removes the problematic of wires and simplifies even more the attachment of the sensor to the robot.

As the IMcoders directly measures acceleration, angular velocity and magnetic field on the wheel, we can infer much more information from this data source than just the orientation, as we proceed to explain:

Drifting Detection - Acceleration:

Imagine that in a static state (robot is standing still) the IMcoder sensor measures a high value on angular speed (the wheel is spinning) but there is almost no change in the magnitude of the measured acceleration (there is no change in velocity from the static position). Then, it is highly probable that the device...

Read more »

BOM_IMcoders.ods

Bill of materials for one sensor. If you want to make more than one IMcoder you can buy the boards in bulk and save some money!

spreadsheet - 12.80 kB - 10/21/2018 at 23:51

Download

3D_Files_Solidworks.zip

3D files of the IMcoders enclosure in SOLIDWORKS format (.sldprt) in case you want to make some modifications to any part.

Zip Archive - 385.28 kB - 10/21/2018 at 21:30

Download

3D_Files_STL.zip

3D files of the IMcoders enclosure in STL format ready to be printed.

Zip Archive - 147.21 kB - 10/21/2018 at 21:30

Download

PCB_prj_Wheel_Rev01.zip

Kicad files, modify them as you please!

x-zip-compressed - 639.92 kB - 06/20/2018 at 20:40

Download

IMcoders GERBERS.zip

Do you want to build you own IMcoder? Here are the gerbers for the PCB!

Zip Archive - 22.97 kB - 06/03/2018 at 08:08

Download

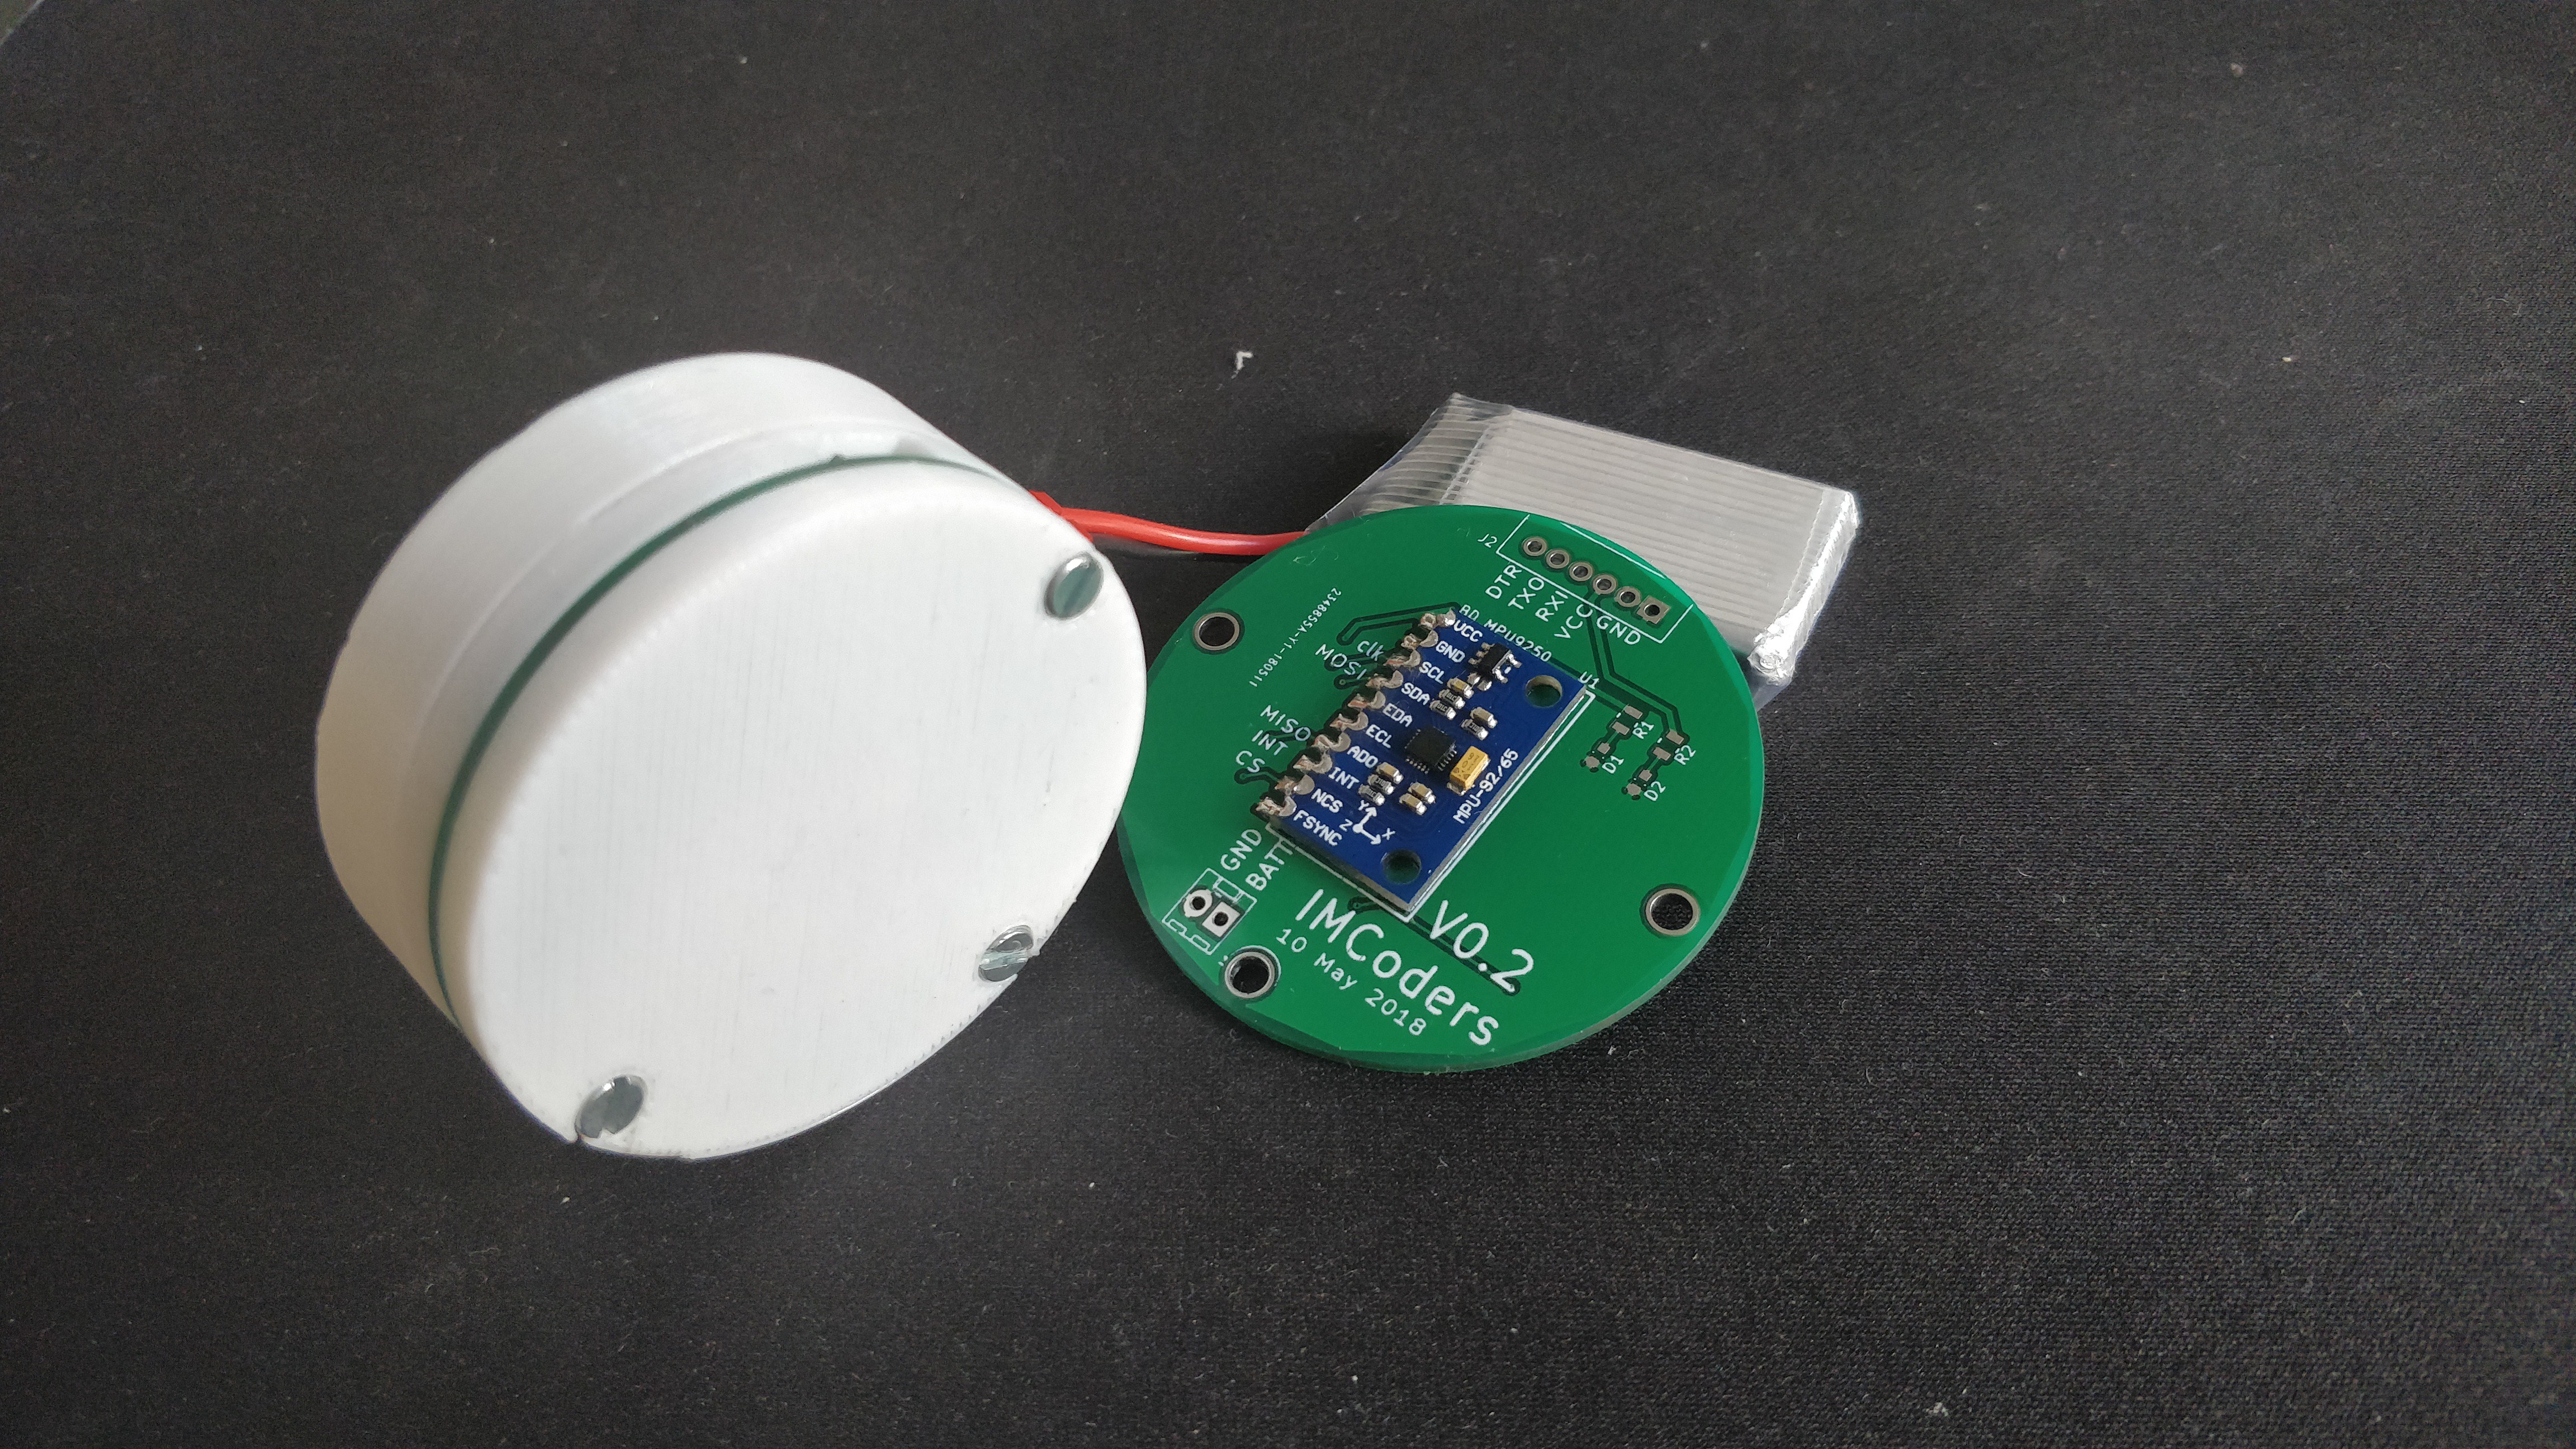
  • 1 × IMcoder PCB Self-developed PCB to integrate the 3 main components of the system together.
  • 1 × Arduino Pro Mini Brain of the sensor, it will read the data from the IMU and send the values to the host computer
  • 1 × MPU9250 Core sensor of the IMcoder. IMU module with integrated Accelerometer, Gyro and Compass
  • 1 × HC-05 Bluetooth Module Wireless link with the host computer. It creates the connection between the Arduino module and the software stack.
  • 1 × LiPo Battery It is not a must, but somehow we should power the device, don't we?

View all 8 components

  • ENCLOSURES REDESIGN

    Alfonso Troya10/20/2018 at 08:25 0 comments

    The submission date for the HackadayPrize2018 is really near and we need to prepare, gather and edit some videos. We decided was time to add some personal touch to the sensors enclosure and a small modification on the 3D files were done.

    Now they have a proper name and the axis are clearly present on the outside of the box. The size of the nuts and screws are standard measurements and they fit perfectly :)

    Read more »

  • SENSORS EXTRA FEATURES

    Alfonso Troya10/20/2018 at 08:24 0 comments

    The IMcoders are working as expected, we still need to work on the stability of our Bluetooth link, but the results look promising.

    Now it's time to test some extra functionalities. We will try to analyze the output of the sensors to detect if the chair is drifting or blocked. 

    This tests will show us if the sensors could be used to expand the functionalities of a traditional encoder or if even having three different sensors inside an IMcoders these measurements are out of the capabilities of the system, let's see!

    Read more »

  • WHEELCHAIR INTEGRATION

    Alfonso Troya10/20/2018 at 08:23 0 comments

    We are back on track!

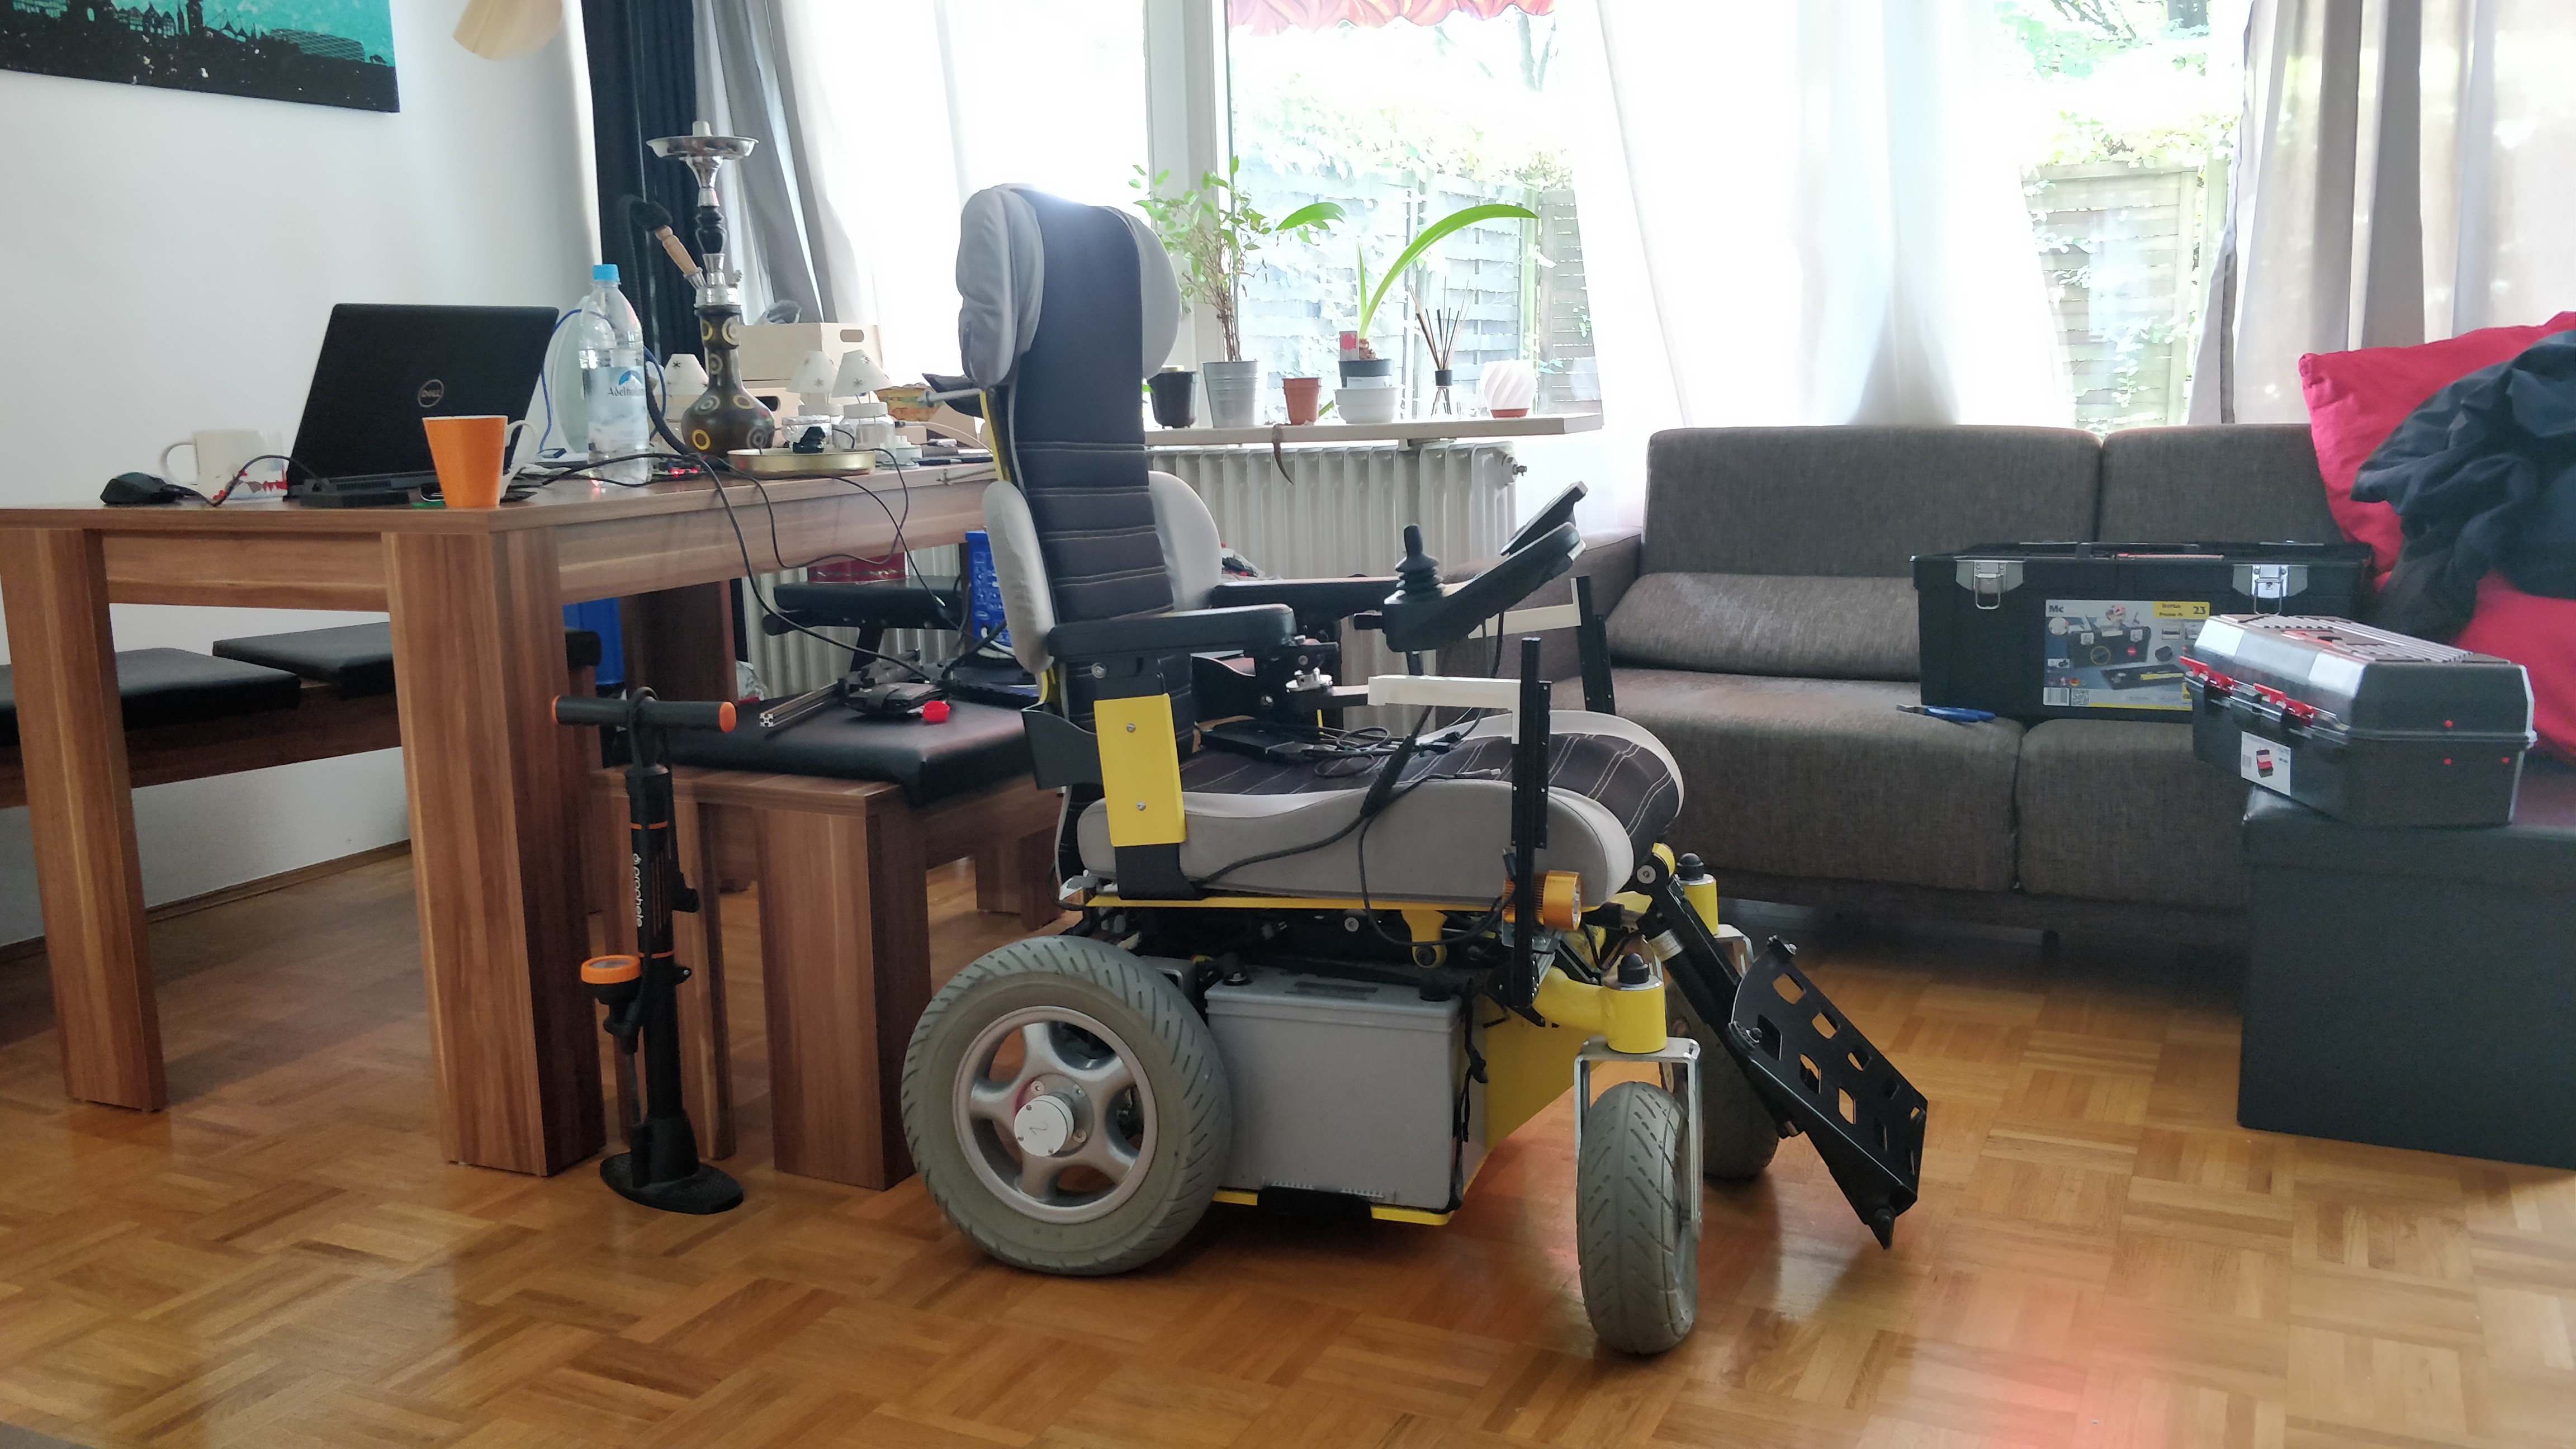
    Simulations and tests in small robots are fine, but now it is time go bigger and target our final device: an electrical wheelchair!

    The chair was bigger than expected and it took the whole living room to set it up. To control the chair we needed some extra electronics, as the manual joystick normally used to control the device must be bypassed to directly control the chair with our software in ROS.

    Read more »

  • ROS COMMUNITY

    Alfonso Troya10/20/2018 at 08:22 0 comments

    ROS Discourse

    Days are going through and the project is moving forward. 

    Even after the success of our initial tests, it was clear that more development was needed to be done in the algorithmic part. To get some help, there is no better way than asking for it directly to the experts in the robotic field, so we made a post in ROS Discourse.

    https://discourse.ros.org/t/imcoders-easy-to-install-and-cheap-odometry-sensors/5543

    ROS Discourse is a platform were the ROS developers/robot makers discuss about the new trends in the robotic world as well as people expose their projects and ideas to get feedback and help from the community. And that is exactly what we needed :)

    We received several ideas how to test our system. We would like to thank again all the people who contributed to the post with great ideas and constructive feedback!

    ROSCon2018

    After such a positive experience in ROS Discourse we decided to go bigger and move forward. Knowing this year the annual ROS conference (ROSCon) was in Madrid, it was the perfect opportunity not only to learn more about robotics and meet the community in person but also to pitch our project. 

    With our goals clear we decided to flight there and show our project! And here are the results :)

    If you are interested in the slides of the presentation you can download them from here:

    https://roscon.ros.org/2018/presentations/ROSCon2018_Lightning2_2.pdf

    See you soon!

  • REAL ROBOT ODOMETRY

    Alfonso Troya10/20/2018 at 08:22 0 comments

    Now that the sensors are mounted on a real robot we can get some measurements and check if the data is useful.

    Thanks to the previous software work and the integration in ROS testing the sensors with a real robot is pretty straightforward. Changing the wheel_radius and wheel_separation parameters in the file to launch the differential odometry computation software is all we need.  Adapt the system to different platforms is fast and easy :)

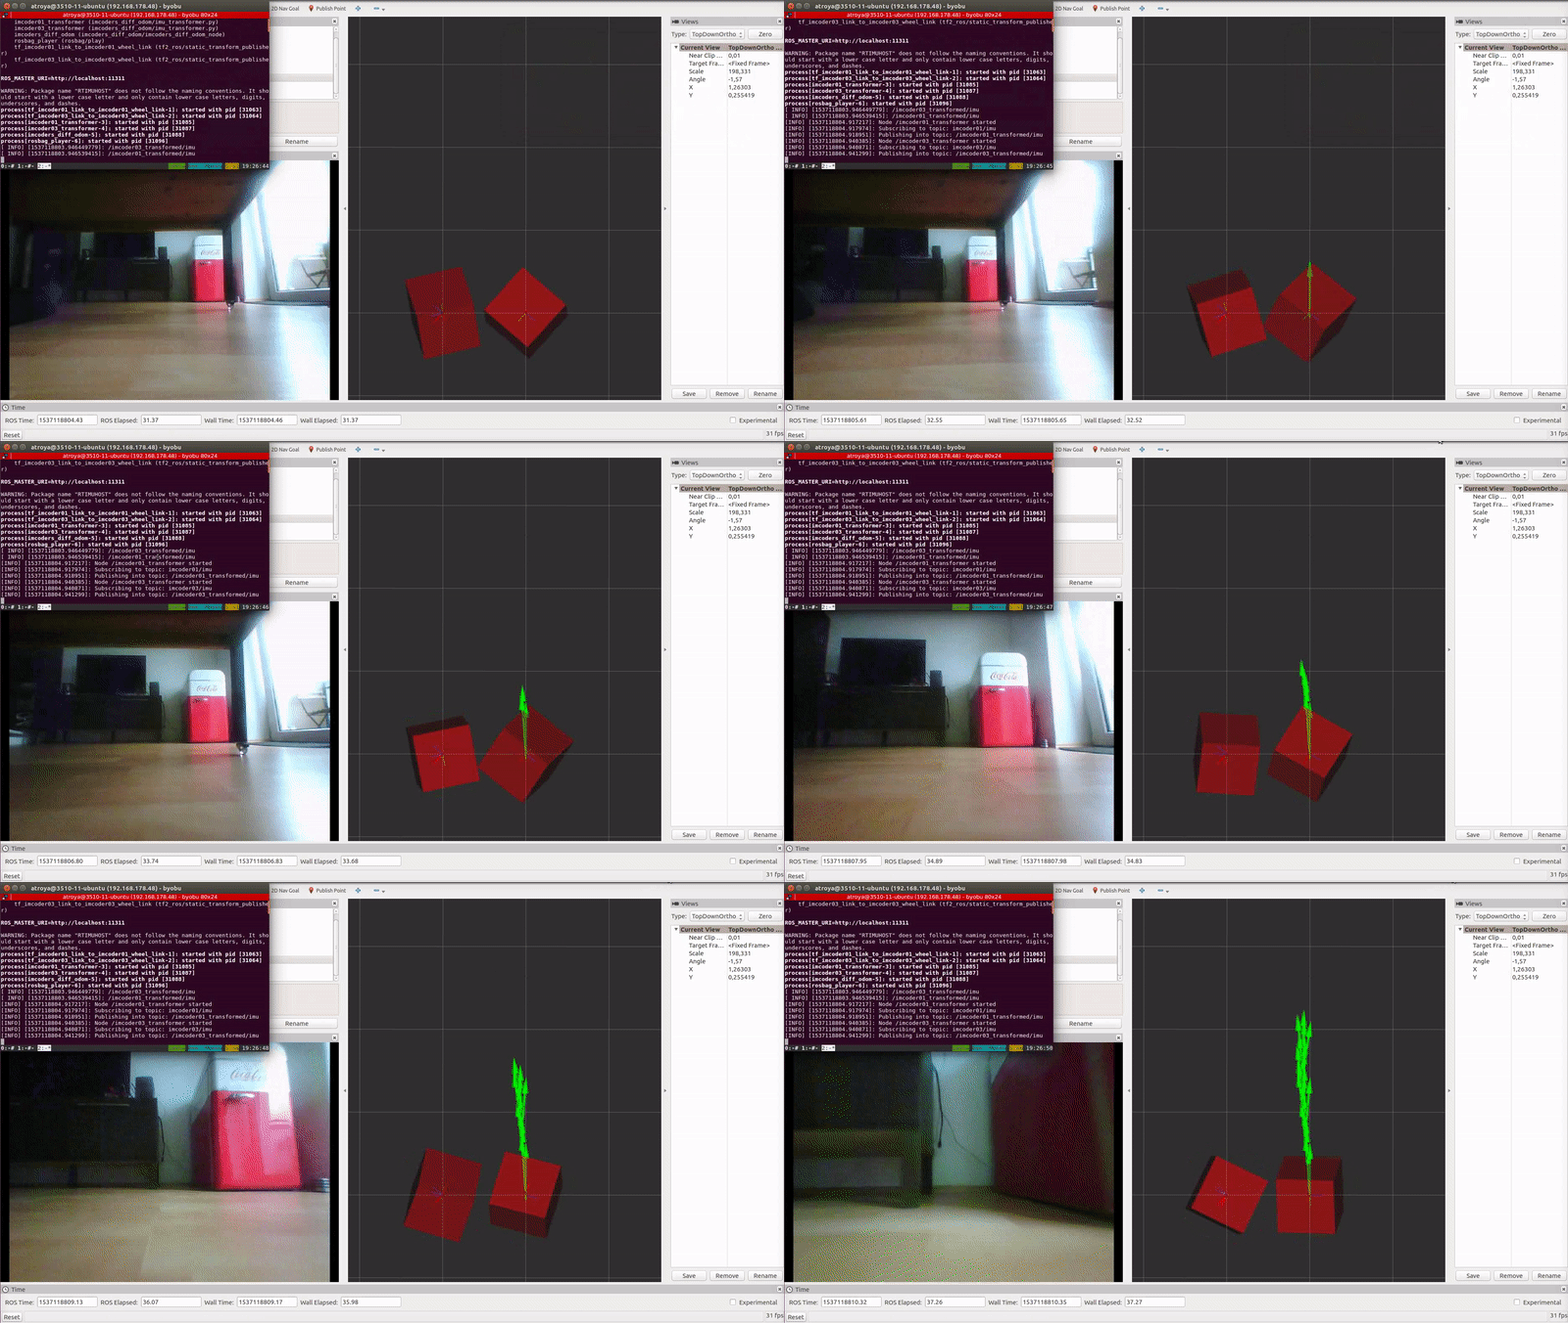
    After checking that everything was up and running we were ready to record some datasets to work with the data offline. We made some tests and here you can see the result. 

    Linear trajectory

    As it can be seen in the left side of the upper animation, the displayed image is the recorded video with the robot camera, the red boxes are the output of the IMcoders (one per wheel) and the green arrows are the computed odometry from the algorithm we developed (btw, thanks to Victor and Stefan for the help with it!).

    Here it is the same dataset but this time displaying just the computed path followed by the robot (red line):

    Left turn trajectory

    Complex trajectory

    In this video you can see an additional yellow line which is also displaying the path followed by the robot but with a different filter processing the output of the IMcoders. Probably you noticed that the trajectories are slightly different. This is because several algorithms can be used to compute the pose of the robot wheel. 

    Due to the time constraints we had no time to prepare a proper verification environment so we cannot ensure which one is better. 

    Conclusions

    Finally, we can conclude that much more time shall be invested in the research of algorithms for computing the estimated orientation of the wheel due to the important role that they play when computing an odometry out of it. 

  • REAL ROBOT INTEGRATION

    Alfonso Troya10/20/2018 at 08:20 0 comments

    Now that we have demonstrated in the simulation that it is possible to compute an odometry using the simulated version of the IMcoders, it is time to make some tests with a real robot.

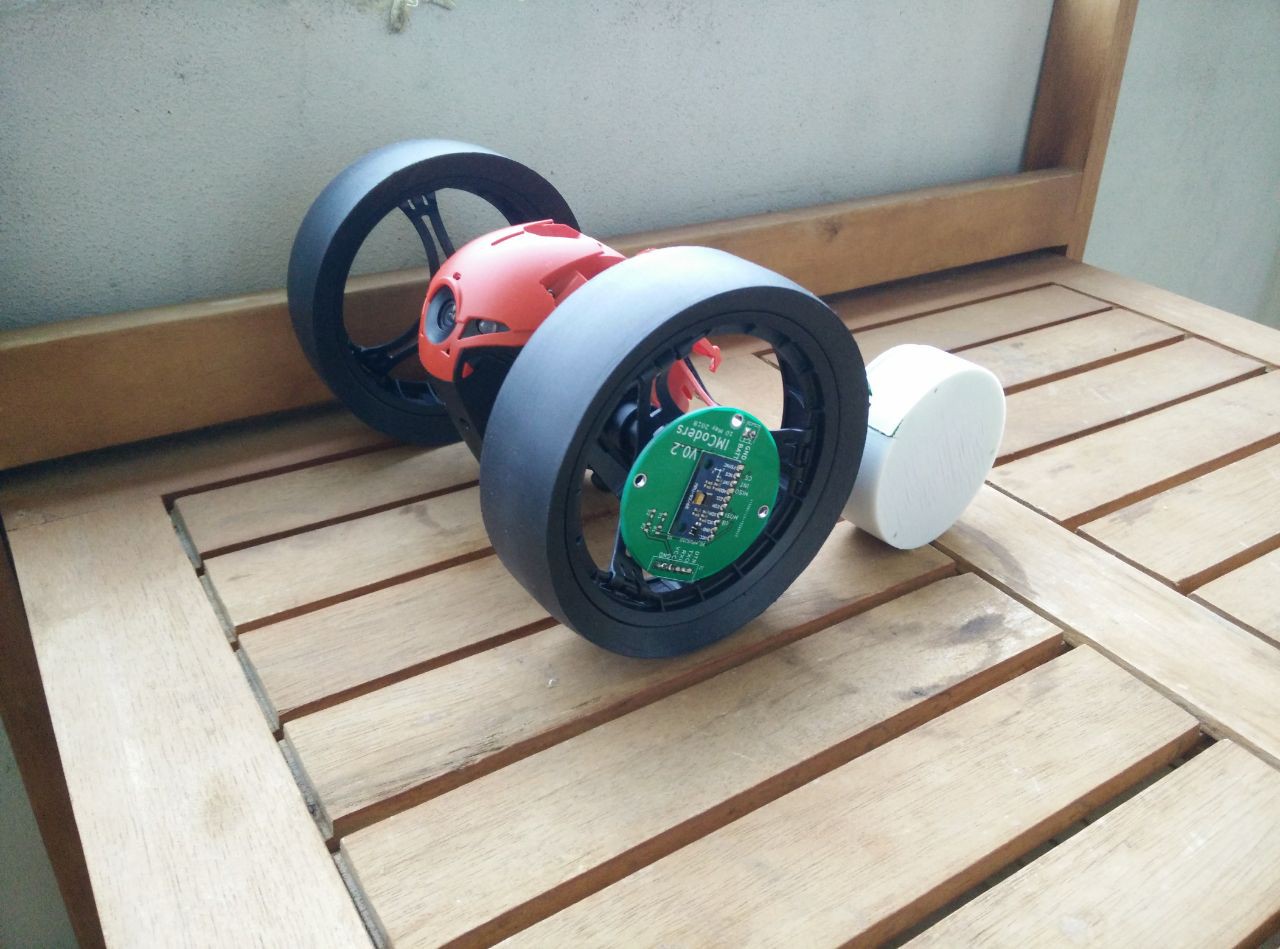
    In order to do that we need a robot. After looking some of them, we finally decided to use a commercial one, the Jumping Race MAX from Parrot. It has an open API , this API will ease the testing and algorithm verification as we don't have to modify the hardware to control it.

    Here it is next to the IMcoders:

    We thought it had metal rims so we could attach the sensors with magnets. Unfortunately, they are made of plastic. No worries, a 3D printer is making our lives easier. 

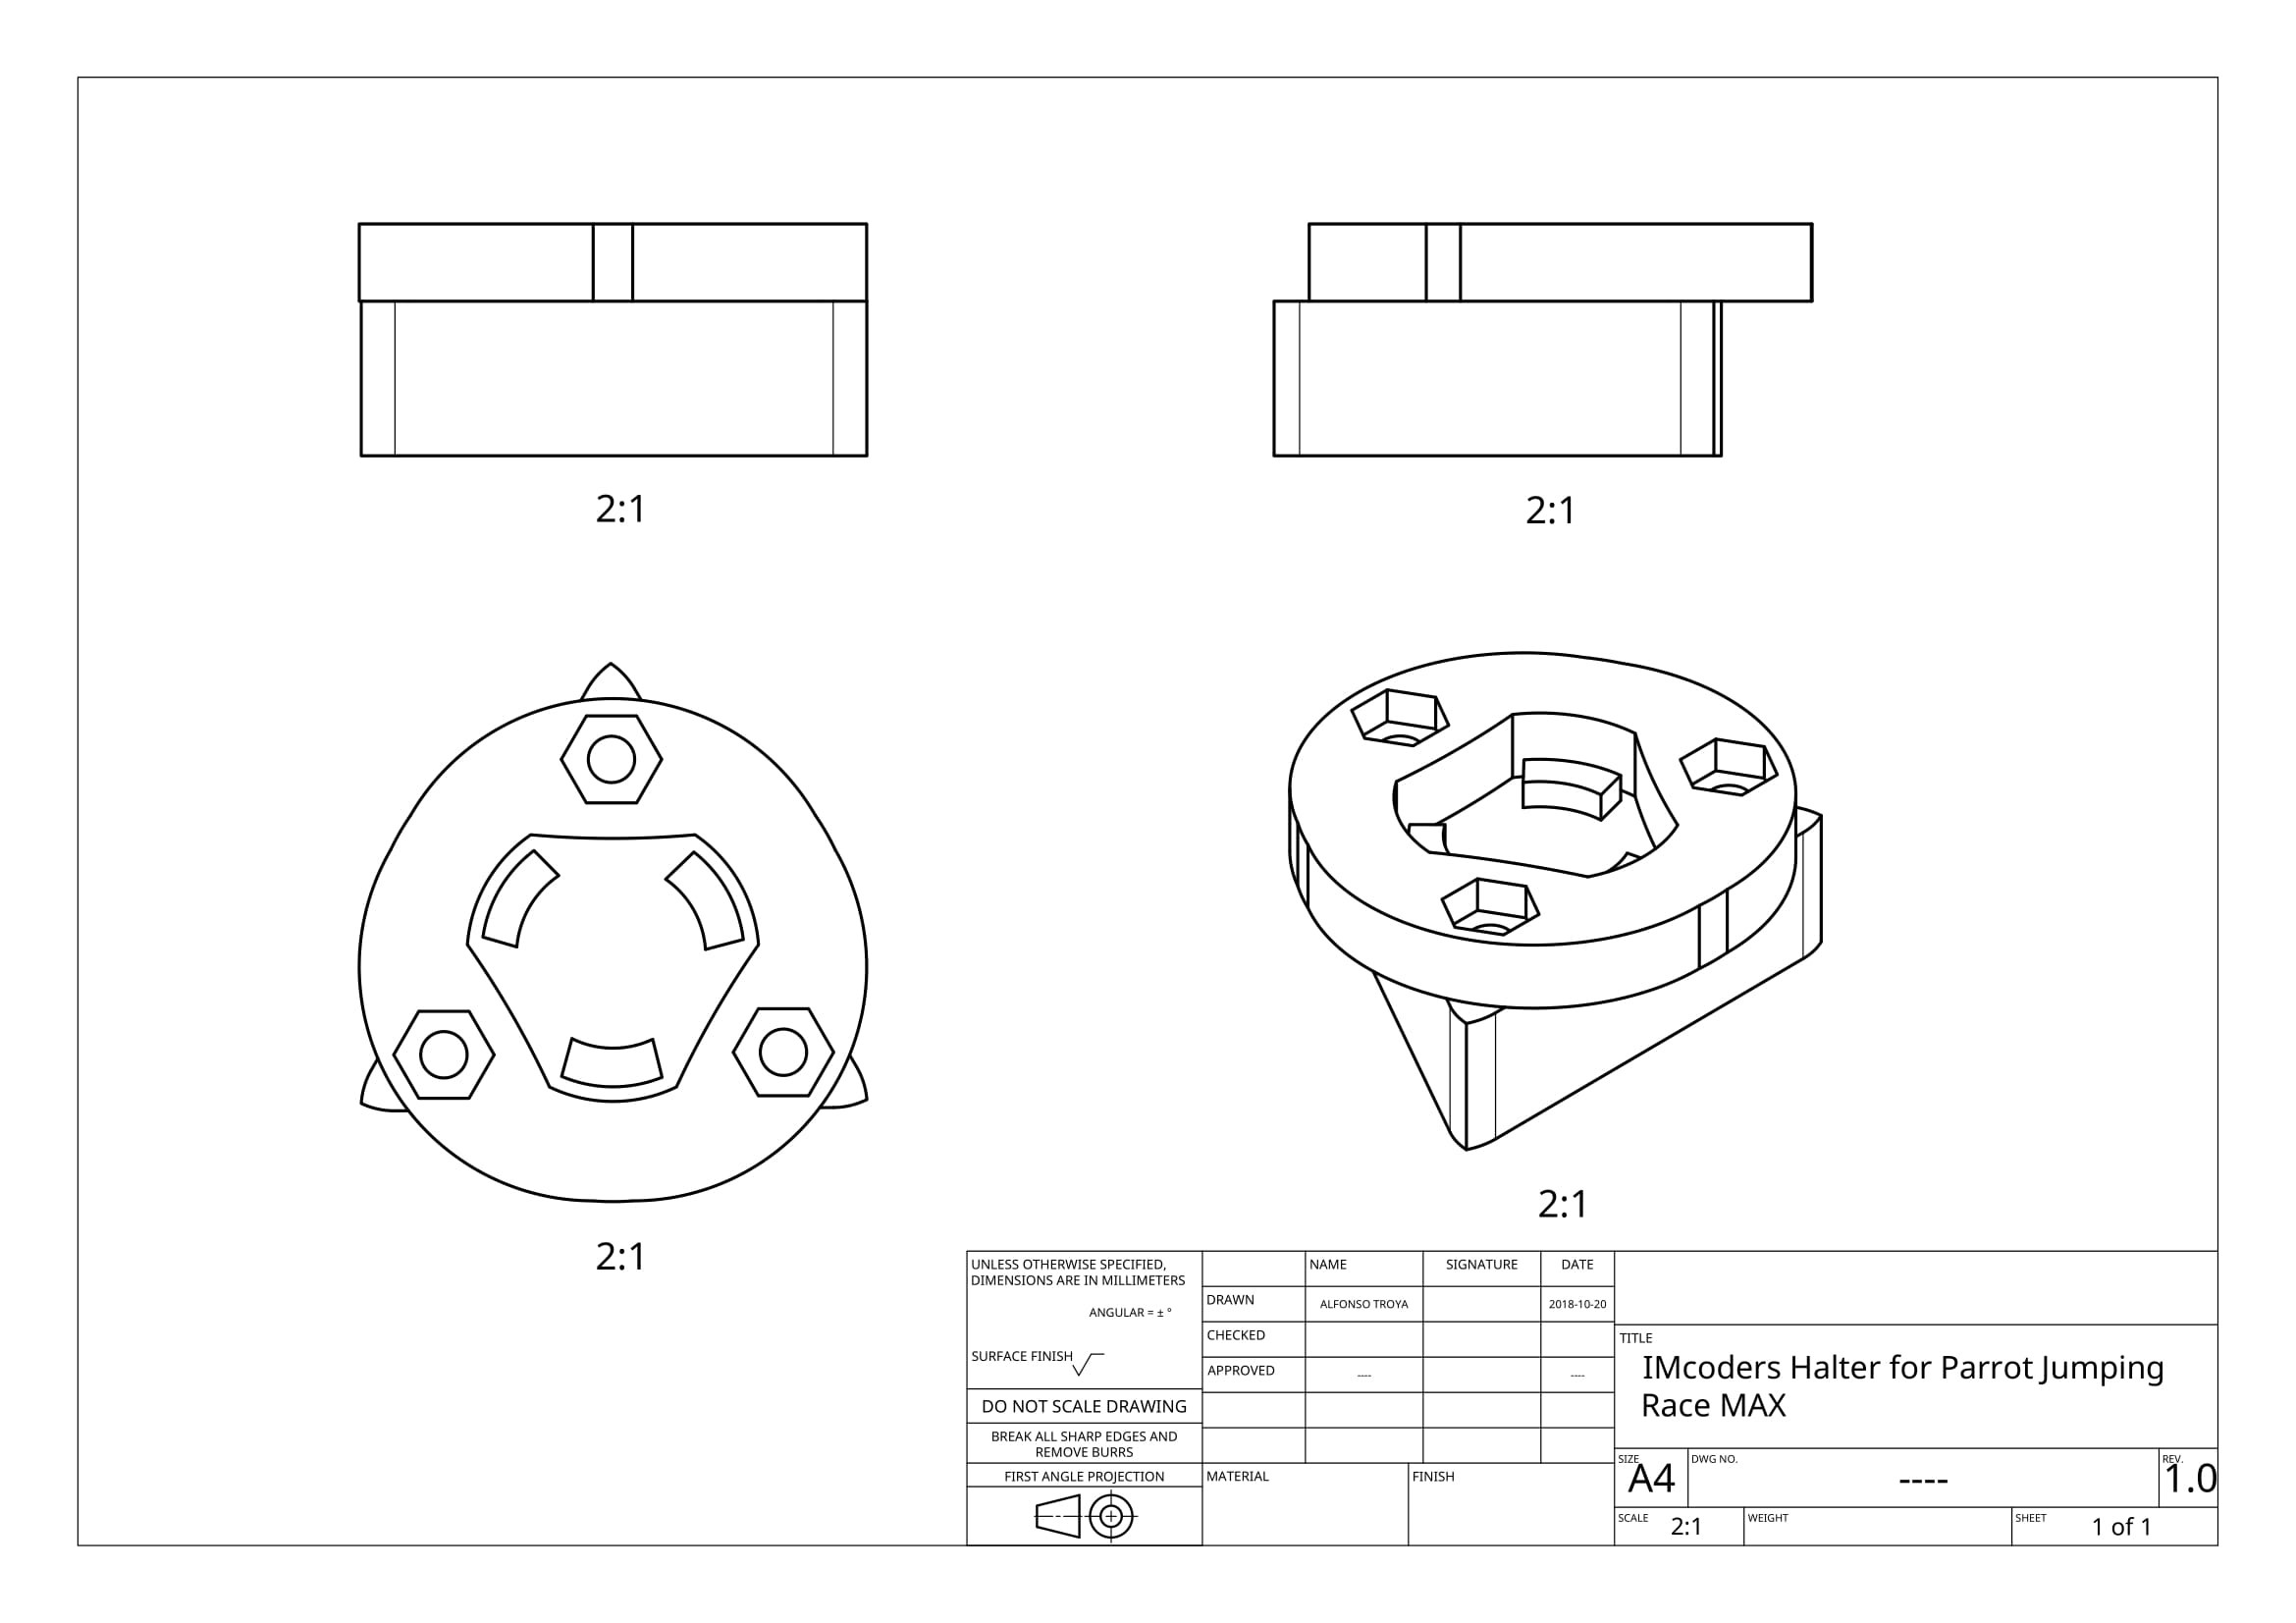
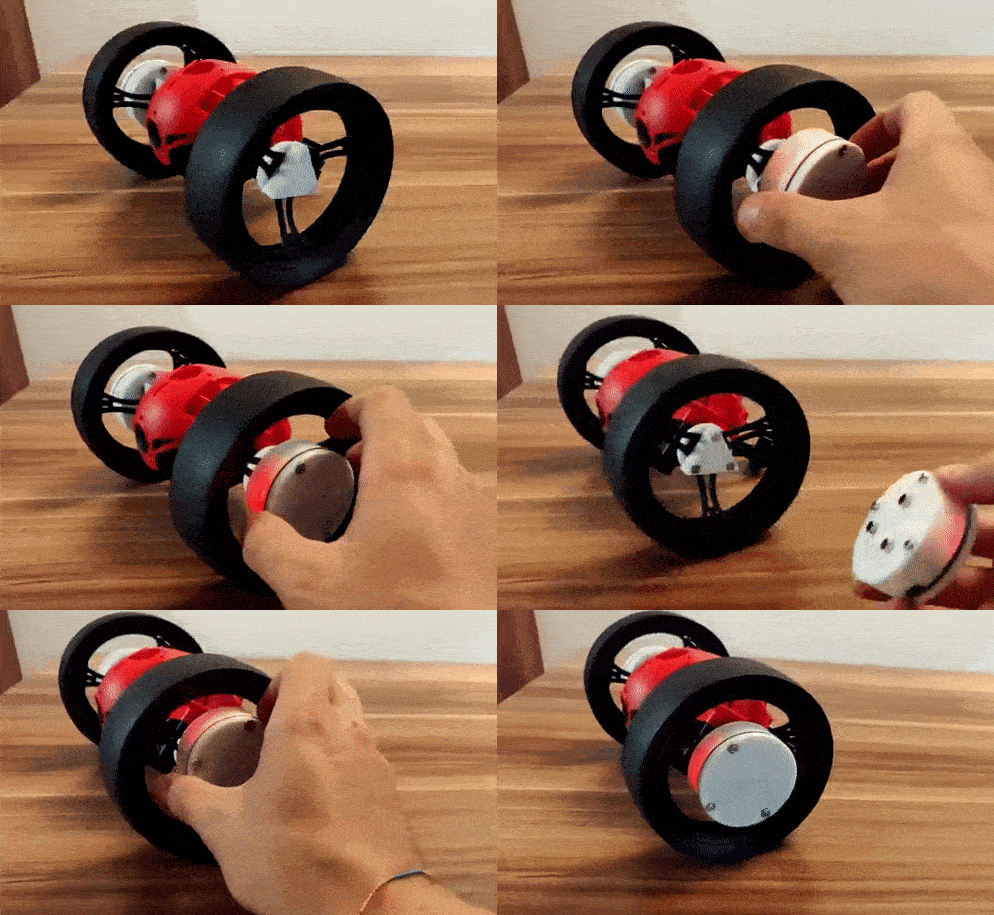
    After a couple of hours for designing and printing, we have our attaching system which allows us to attach an detach the IMcoders really easy.

    Some hours later, after waiting for the 3D printer finish, we have holders for our sensors!.

    Here you can see the result:

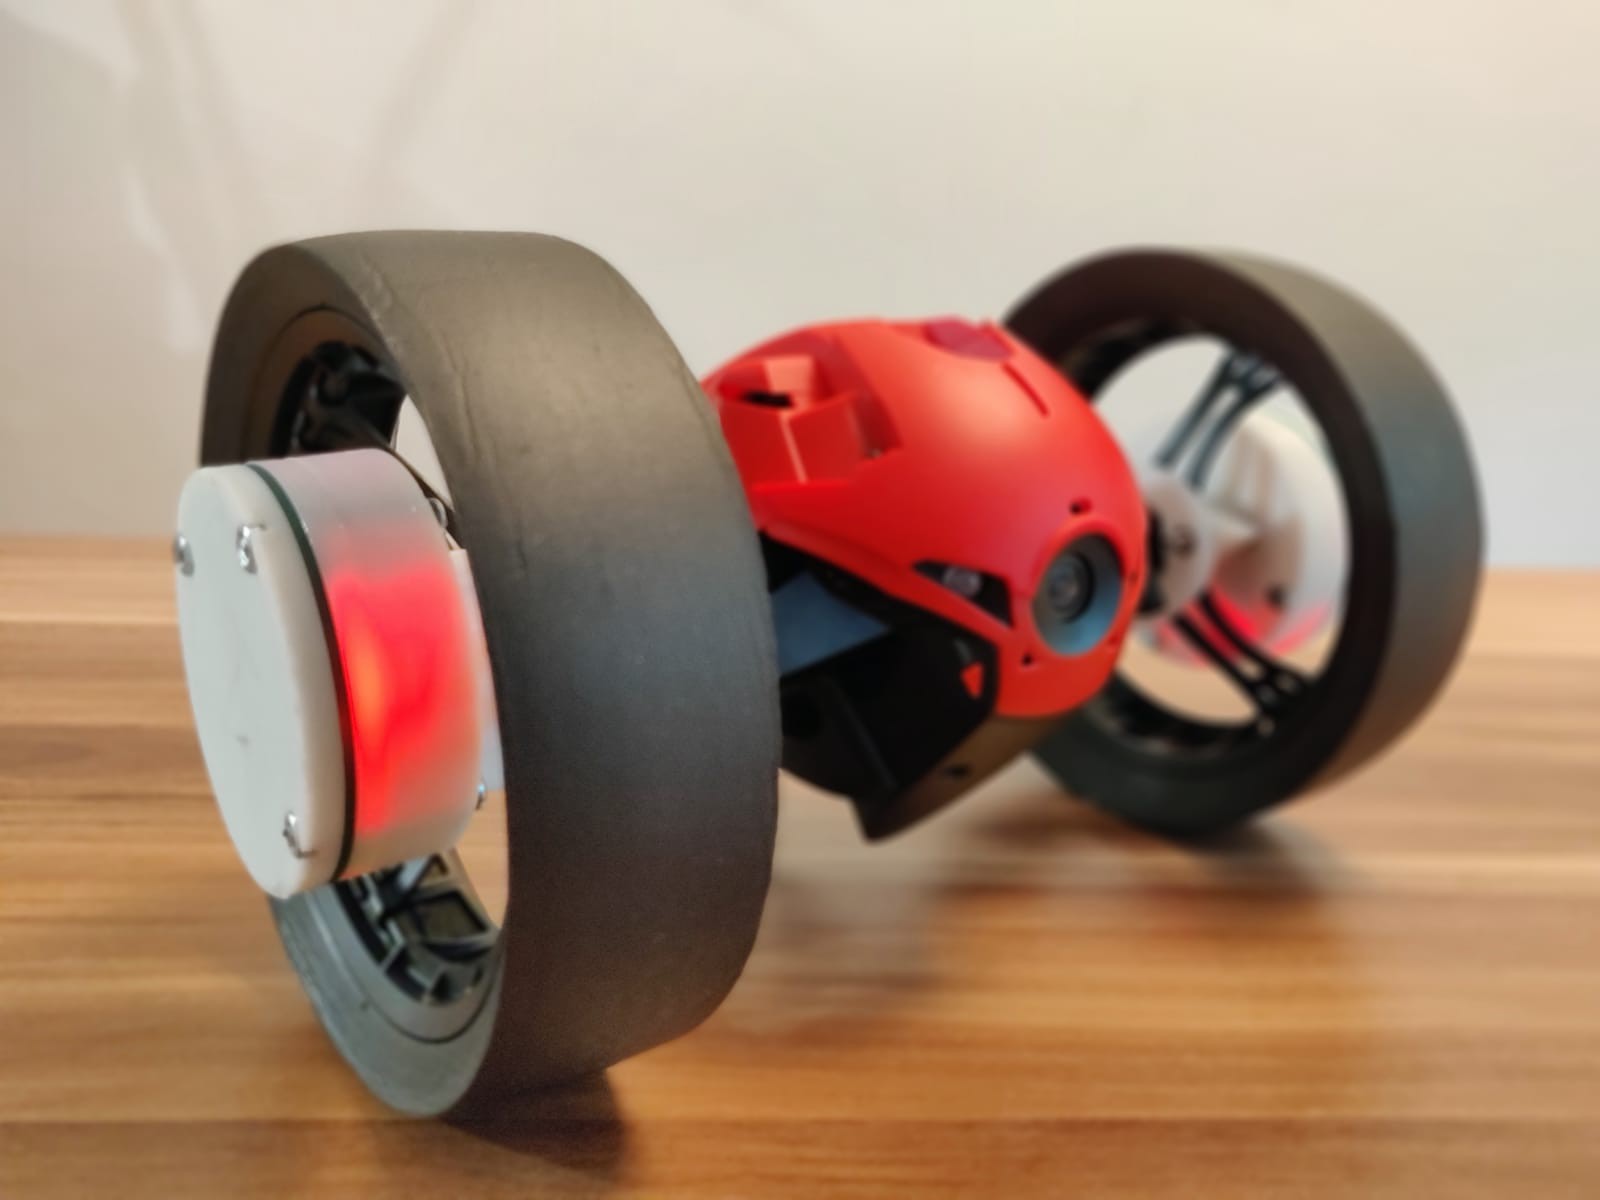
    Not bad, eh? As you can see, the mechanism to attach and detach the module is working pretty good. This is the final looking of the robot with IMcoders:

    The robot has a differential steering and so has the simulated robot we developed the algorithm for. We just have to modify some parameters in our simulation model to match the real robot and our sensors will be ready to provide odometry.

  • ROBOT ODOMETRY

    Alfonso Troya05/31/2018 at 00:24 0 comments

    Hi again!

    We have some very good news, our Robot is moving!

    The simulation environment is up and running. The calculations for the odometry and hardware integrations are done! There is still a lot to be developed, tested and integrated but we can say the first development milestone is complete and the Alfa version of the IMcoders closed.

    Read more »

  • REAL TESTS WITH SENSORS

    Alfonso Troya05/30/2018 at 23:24 0 comments

    In the previous log we checked that we are able to simulate the IMcoders for getting an ideal output (we will need it for making the algorithm development much easier and for verifying the output of the hardware).

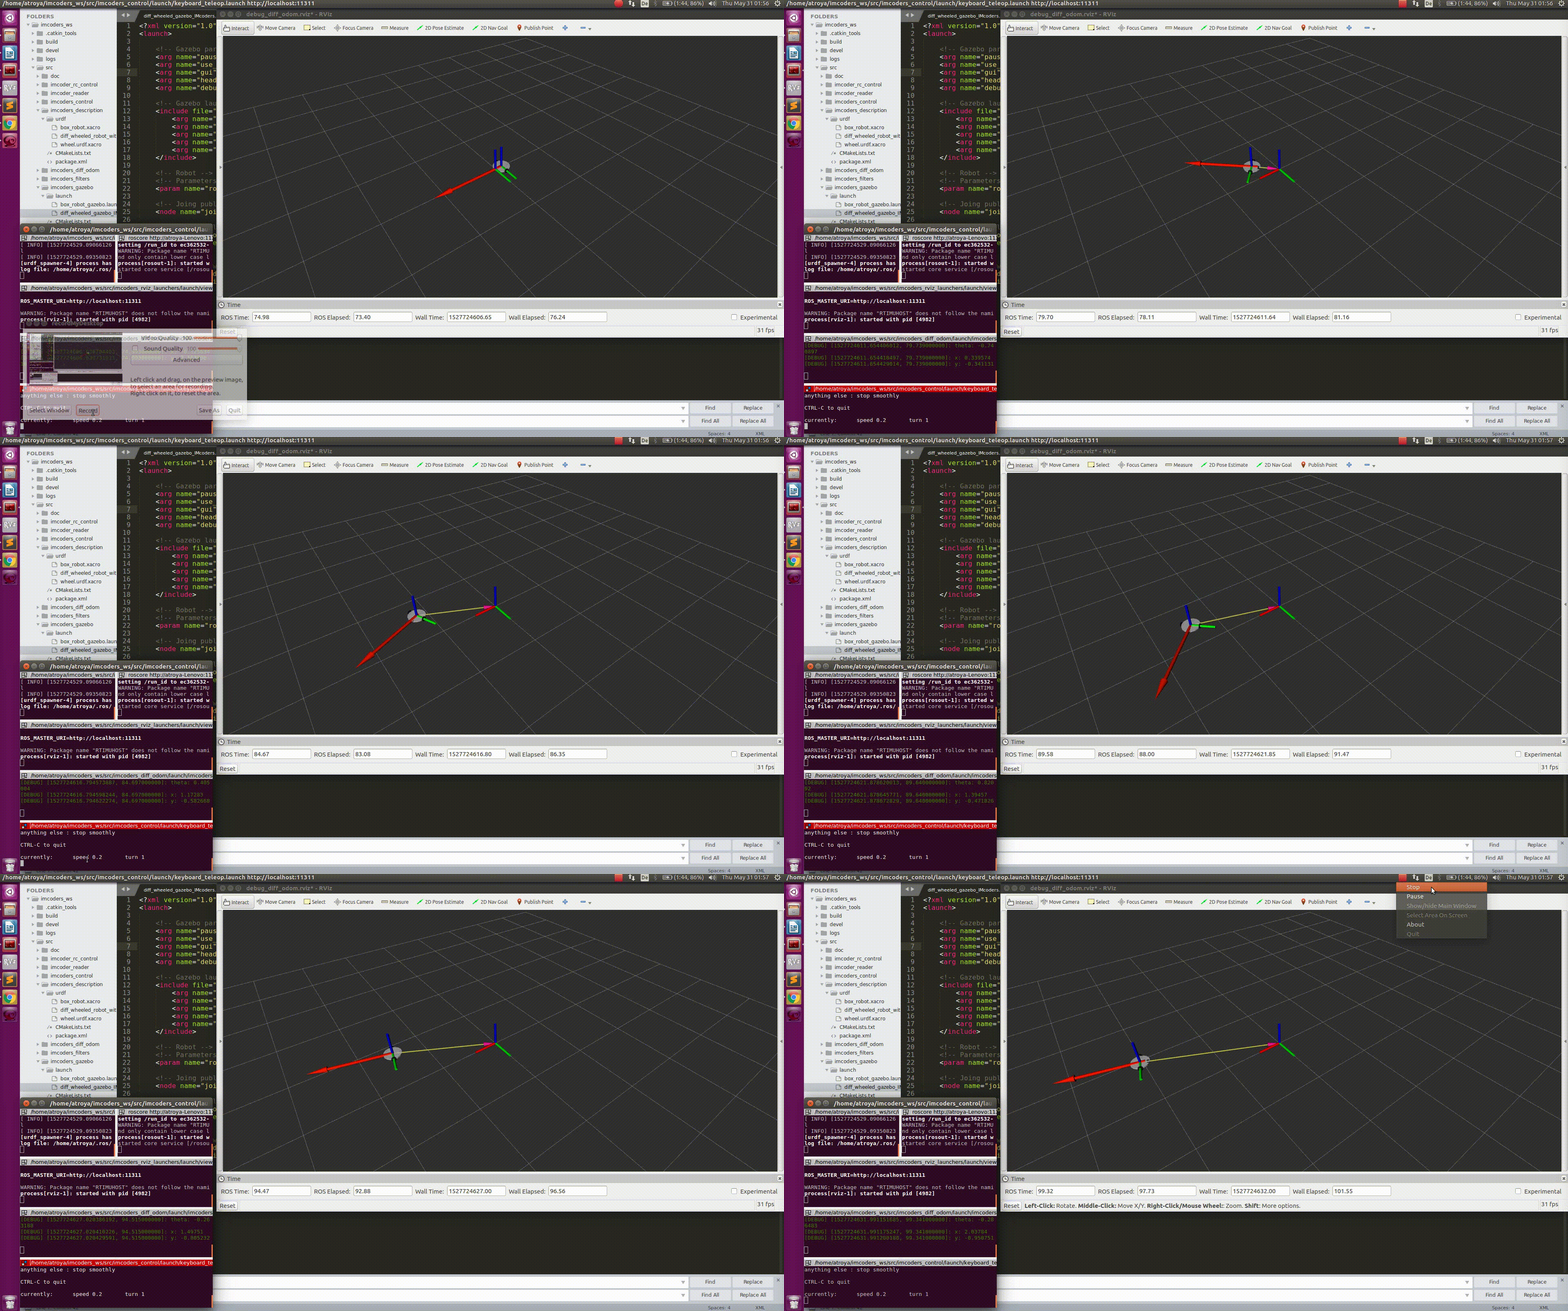
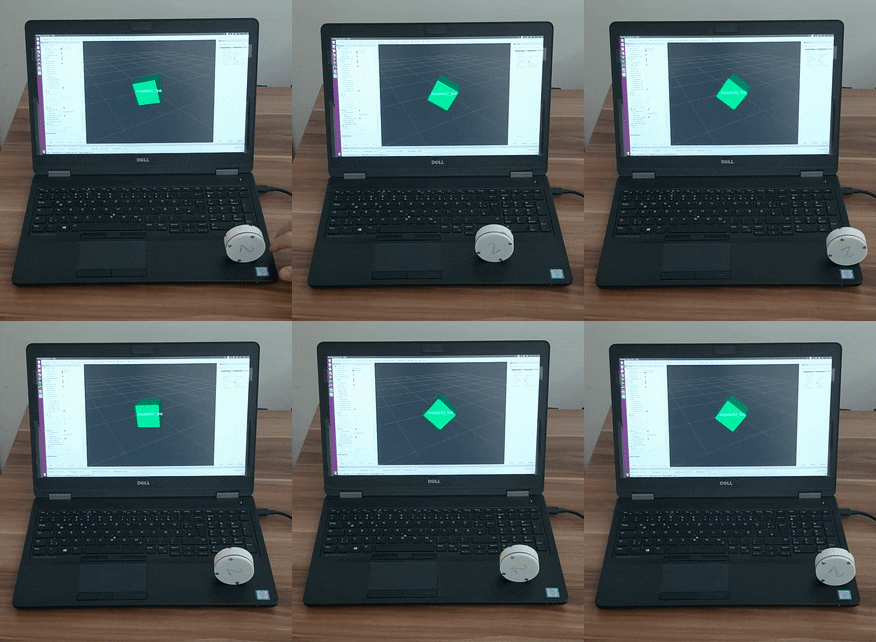
    Let's check in Rviz (ROS visualizer) that the movement of our sensors corresponds with the data they output. The procedure is quite easy (pssst! It is also described in the github repo in case you already have one IMcoder). 

    Then, we activate the link with the computer, start reading the sensor output, opening the visualizer and...

    Voilà! The visualization looks great. Now we are ready to check the sensor in a real wheel. Let's start with that broken bike there...

    Read more »

  • SIMULATION IS IMPORTANT TOO

    Alfonso Troya05/30/2018 at 22:52 0 comments

    Ok, so now the hardware is working and we have a lot to do, but in order to have a reference for comparing the output of the real sensors, we want to simulate them for getting the ideal output.  In order to ease the use of the sensors and making the rest of the people to use it, we created a github repository where you can find all the instructions for running the simulation with the sensors (and with the real hardware too!). As we want to integrate them in ROS, it makes sense to also use for integrating all the simulation. Probably most of you already now it if you already worked with robots, but for those who don't here you can find an introduction to it. So let's begin!

    Our first approximation: a simple cube

    As our sensors are providing an absolute orientation, the easiest way to see the rotation, is using a simple cube. Inside of it, one of ours sensors is inside, so we are able to move the cube in the simulated world and see the output of our sensor:

    Let's tell the cube to move and let's see what happens...

    Read more »

  • 3D CASE DESIGN

    Pablo Leyva05/26/2018 at 16:18 0 comments

    BETTER WITH ENCLOSURE

    The days pass quickly and the project is moving forward. Before the development on the algorithmic part is finished we are working on an enclosure we can attach to our tests platforms. 

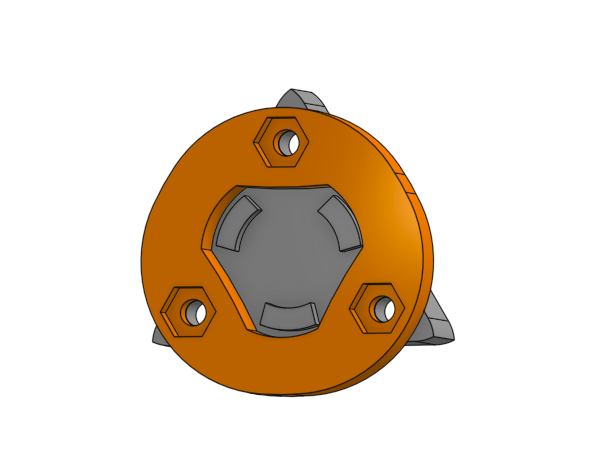
    A case is not only an attachment help for the final device, it will also help us to use the sensor without fear of shorting something out or breaking a connector. The design is extremely simple, two plastic covers with the PCB in the middle. An extra piece will hold the battery in place.

    The design was done on Onshape and is already available. We are planning to improve the case and get rid off the screws, but will work on that once everything is up and running. Right now we have other priorities to focus on. 

    Read more »

View all 13 project logs

  • 1
    Build the IMcoder Hardware

    With the available gerbers for the PCB and the components list, you can easily solder your own IMcoder module. You just need a soldering iron and some time to put all the components together.

  • 2
    Program the IMcoder Firmware

    With the Arduino IDE and the code in our GIT you just need to program the sketch RTArduLinkIMU.ino. 

    By default it is configure to use MPU-9250 IMU with SPI, so you are ready to go :)

    To establish a connection with the host PC, the HC-05 Bluetooth module should be configured with a baud-rate of 115200.

  • 3
    Visualizing the data with RTIMULib2

    If you want to test the connection with the PC opening a serial console with the COM port binded to the bluetooth module should be enough. You should see characters being printed to the console.

    If you want to see the orientation of the sensor and something a little bit more graphic you can follow the instructions in our GIT to compile the visualization software.

    Thanks again to richardstechnotes as he did the heavy lifting with his RTIMULib infrastructure.

View all 5 instructions

Enjoy this project?

Share

Discussions

erick wrote 11/25/2019 at 14:33 point

hello, this project that you raise very interesting because it is an alternative to traditional encoders (incremental or absolute), help with this, how do you load the calibration file (RTIMULib.ini) in the ROS node?

  Are you sure? yes | no

John wrote 10/23/2018 at 20:09 point

So, is it one encoder per wheel ?

if so, how do you maintain 4 BT channels all going at the same time ?

I have small 4WD robot I am building and a normal photo-optic encoder isn't easy to work  with on it.


  Are you sure? yes | no

Pablo Leyva wrote 10/27/2018 at 17:39 point

Hi, sorry for the late reply.

Yes, it is one IMcoder per wheel. As we are currently using differential driven robots we just need to track two wheels.

We are facing some stability problems with the two Bluetooth links, we know we are missing packets but as we are using the cheapest Bluetooth module we are not sure if it is a problem with the link itself, transmitter or receiver... even though they work pretty well if you are near the sensor to ensure a good reception.

We have always tested with the integrated Bluetooth antenna of our laptops, maybe with an external one, we can increase significantly the range and stability.

  Are you sure? yes | no

John wrote 10/27/2018 at 23:02 point

Just wondering why you wouldn't just have the bluetooth transmitter on the IMcoders and then have the bluetooth receiver on the control CPU on the robot ?

Do you think that might help ? I ask because that is my plan on how to use them.

  Are you sure? yes | no

Alfonso Troya wrote 10/30/2018 at 17:47 point

Hi, sorry again for answering that late. We are not receiving any notification of the messages published here.

Regarding your question: for sure it will help. The closer to the modules, the stronger the received signal it is supposed to be. The only reason that forced us not to do the same as you propose is that the robot we used were smaller than the laptop we used for connecting the IMcoders, so we could not attach it. 

Nevertheless, if you take a look to the integration with the wheelchair, that's what we did: the laptop is placed on the seat of the wheelchair.

  Are you sure? yes | no

rasyoung wrote 06/20/2018 at 11:20 point

Great Project!

Wondering if KiCad design files are available? I would like to add some additional connectors, and blinky bling.

  Are you sure? yes | no

Pablo Leyva wrote 06/20/2018 at 20:47 point

Sure! They are now available under "Files".  

I highly recommend a pull-down in the trace from EN (HC-05) and Arduino, The bluetooth module interfere with the UART while new software is being downloaded and without it, you cant turn it off... I realized that too late.

  Are you sure? yes | no

Mesbah Uddin Mohammed Arif wrote 06/20/2018 at 08:23 point

hello, 
does the module need to rotate to get the odometry data ... can it provide odometry info whenit is in a stationary position on top of the robot platform but the robot is moving ?

  Are you sure? yes | no

Pablo Leyva wrote 06/20/2018 at 20:53 point

Yes, and No. the module just sends the values of the sensor (accelerometer, gyro, and compass) to the computer. In our case, a ROS node reads the data and perform the sensor fusion under the assumption that is attached to a wheel. Knowing the radius of the wheel we send the odometry data.

You can use the module on top of the robot, but the fusion of the sensor data to generate the odometry is going to be different.

  Are you sure? yes | no

Similar Projects

Does this project spark your interest?

Become a member to follow this project and never miss any updates