 Hamza Khalid
ILLUSTRATION OF THE PROJECT:
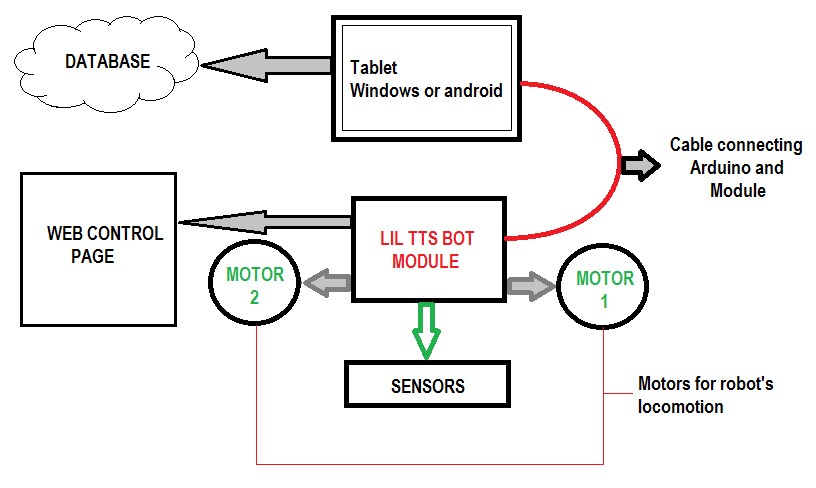
This illustration shows the usage of LIL TTS BOT module to make a small bot that receives a signal to move from a control page, reaches the targeted location with the help of different sensors and motors, sends the signal to a python application (installed in tablet pc) after reaching the targeted location and the python application then receives text from the database, converts it to speech and the robot says it.
ROBO HAZEL MADE USING LIL TTS BOT MODULE:
Hazel is a little robot which is made using LIL TTS BOT module. This robot is a school worker makes important announcements classrooms by following a black line path using IR sensors. Hazel uses LIL TTS module's control page. Teachers can have an access to hazel's control page by typing its IP address on a web browser. On the robot's web page teachers can type a text to be announced. The text is then stored in Hazel's database. Robot then receives a signal to move through WiFi whenever 'Turn On' button is clicked on her control page. Hazel starts moving, reaches classroom and makes an announcement by converting the text to speech that has been stored in the database earlier, and then she comes back by following line. Hazel can understand python (Program in tablet) and C++ (Program in module). On server side php, SQL, bootstrap, HTML and CSS are used (Code of control page). Hazel is the future of announcements.
STEP 1: Type the text on the control page and click TURN ON button.
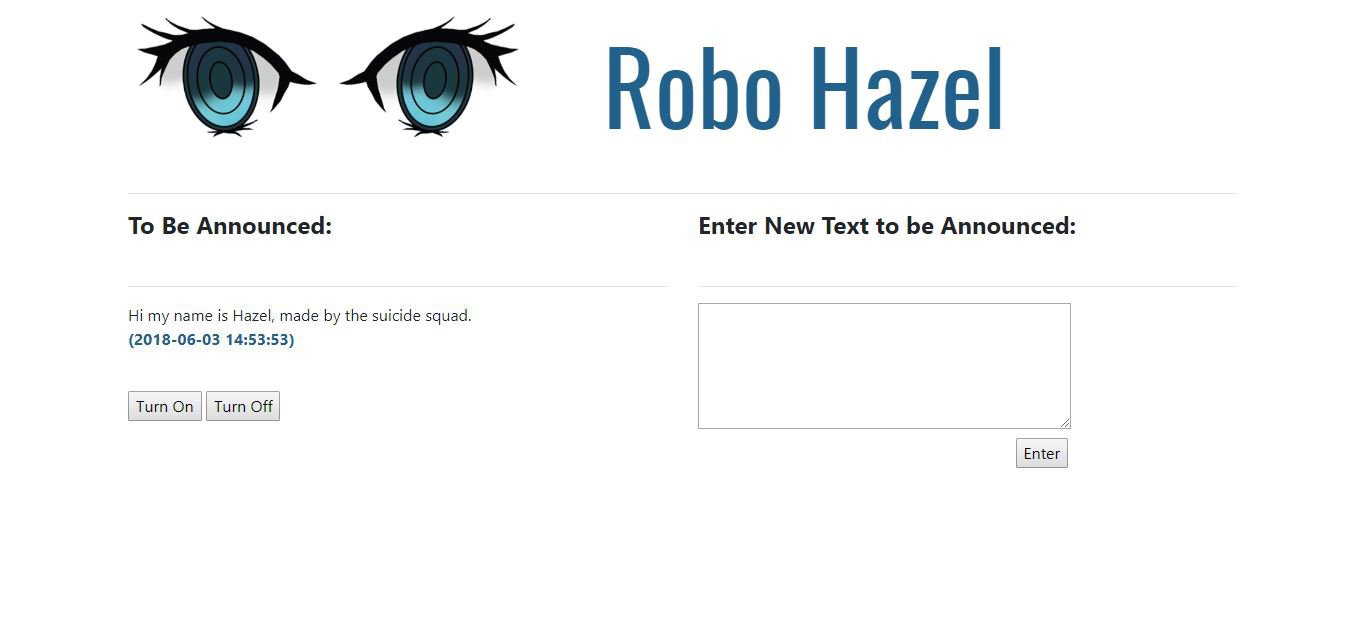
STEP 2: The Robo will start moving and speak the text.
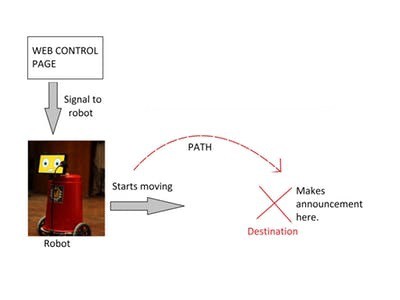
ILLUSTRATION OF ROBO HAZEL'S WORKING:
SCHEMATIC OF LIL TTS BOT MODULE:
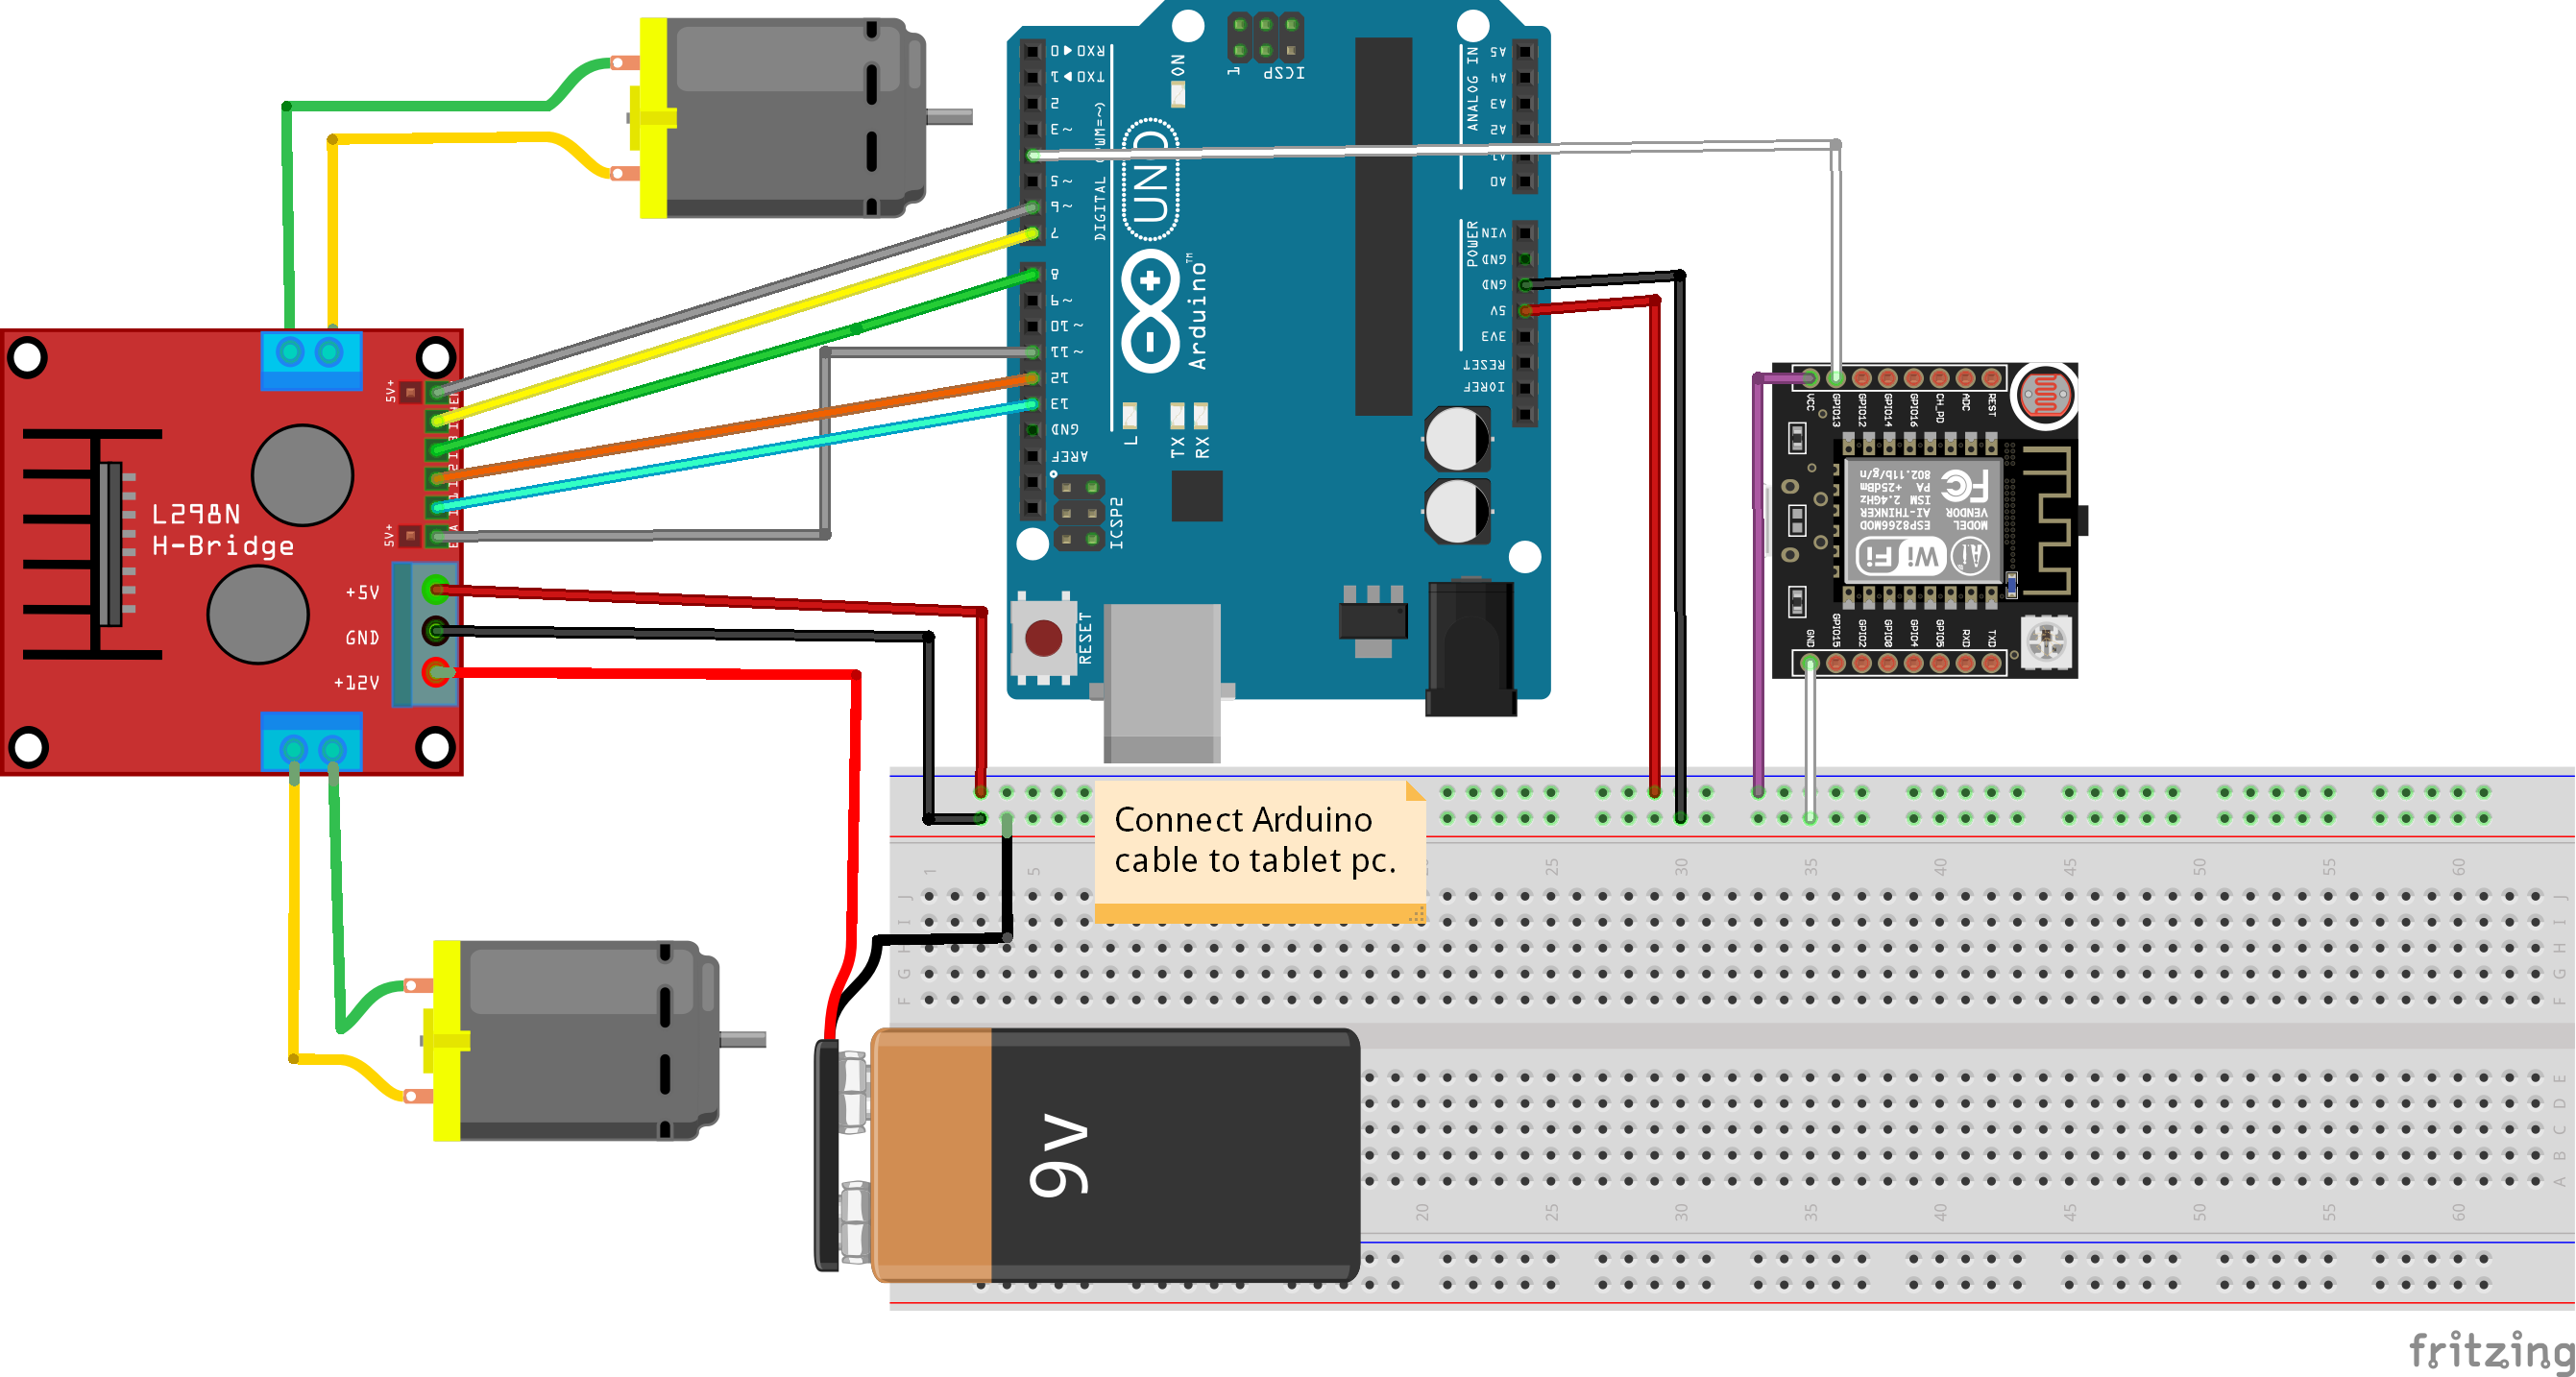
The Arduino used in the module is pre-programmed to follow a black line using three IR sensors that can be attached on pin 2,3 and 4 of Arduino. If a user wants to add more sensors he or she has to edit the open-source program of LIL TTS BOT module. All the analog pins of Arduino are empty and can be used to attach sensors like ultrasonic sensor.
The open source programs are available on:
https://github.com/hamzakhalidhk/LIL-TTS-BOT
NodeMcu is used to receive a signal to move from the control page of robot and send it to Arduino.
CHALLENGES AND THEIR SOLUTION:
The greatest challenge while designing the module was the selection of its parts (hardware) as the project is designed to be used by students who are beginners in the field of robotics so it was necessary to use simple parts or components that can be easily understood and modified by them.
Keeping that in mind, I used Arduino and ESP8266 that are widely used across the world. L298N is used that is also a very simple motor driver. Arduino and ESP8266 are preprogrammed in the module. Python software is also made with the module that can be installed on any tablet pc which works as the robot's brain (No need of ROS). A simple web control page is also made with the module to control robot's motion and typing text.


 Victor Joo
 Limenitis Reducta
 igorfonseca83
 Kartik Tiwari