Close
0%
0%

Flip-Dot Display & DIY Controller

Messing around with Annax Flip-Dot displays.

Similar projects worth following
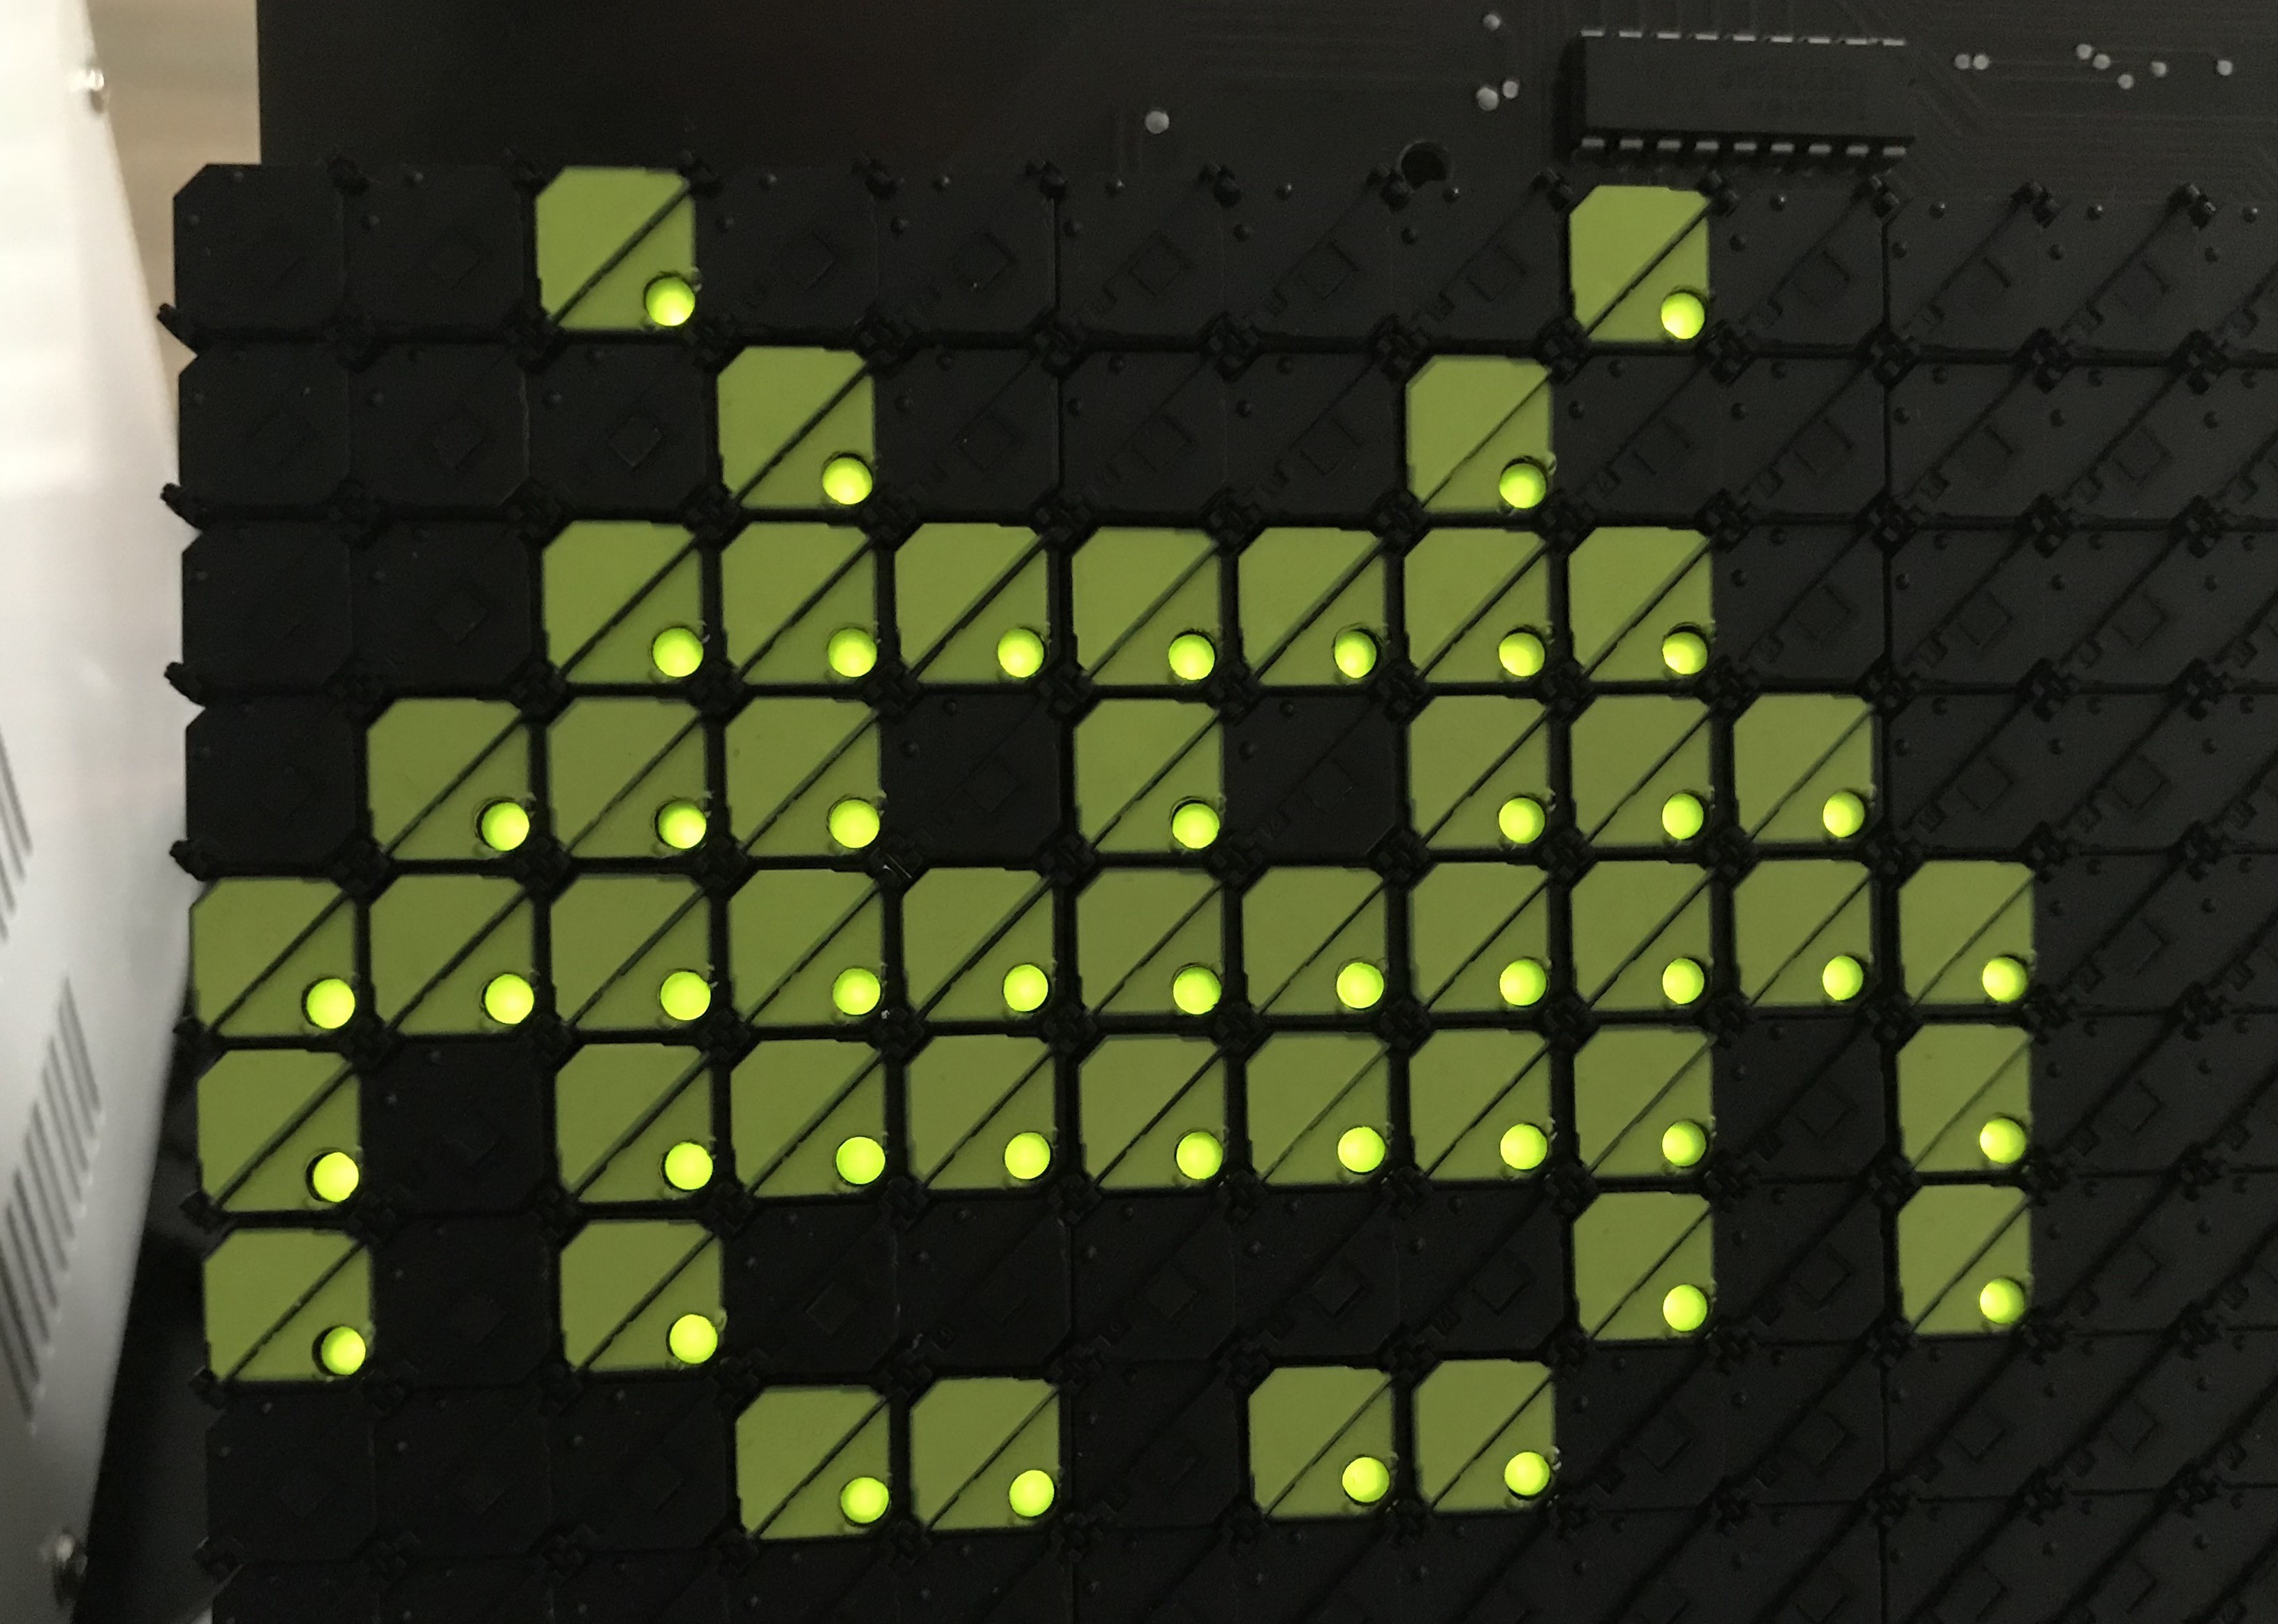
Just impulse-bought a couple of ANNAX ZM16C30 Flip-Dot displays out of eBay. Let's see if I can make them work and try to make something interesting out of it.

I'll try to summarise all the steps I'm taking to build a usable flipdot display, including :

  • Understanding how it works
  • Making a prototype controller
  • Tweaking the controller to improve results, refresh rate, efficiency...
  • Designing a PCB for the final controller
  • Code a useful firmware to display stuff
  • Pack the whole thing in a nice enclosure
  • Enjoy watching dots flipping all day long

It's a long ongoing journey, stay tuned !

Flipdot-Controller-Prototype-v1.pdf

Controller schematic.

Adobe Portable Document Format - 186.57 kB - 08/03/2018 at 10:47

Preview

  • 2 × ANNAX ZM16C30 16x30 Flip dot matrix

  • Two steps forward, one step back...

    Frederic L05/01/2021 at 16:08 1 comment

    I have been working on this project again with hopes to finish it soon enough so that I can proudly display it at home in some kind of enclosure.

    The problem is that I always get new ideas for functionalities that require re-writing some code, adding new feature, or starting over again in a different programming language.


    What started initially like a good way to display only the date and time, for which an Arduino is perfectly good enough became much more complex :

    I later thought it would fun to have games on it playable through a web browser, so I went on and redid everything for an ESP32 running a local webserver and displaying the weather, date, time, pixel drawing game and such. Worked perfectly fine but....

    Finally I thought the best would be to have old games (pong, bricks, snake, flappy-bird like games...) playable on the display with a remote console gamepad... This added a whole new level of complexity having to pair bluetooth devices with the ESP32 (failed to do it), and ultimately switching to a Raspberry Pi, dropping the Arduino Framework for Pyhton and C code.


    I now have the following result :

    Getting closer to a final product, but Raspberry Pis are much worse than Arduino and ESP32 at dealing with fast GPIO switching and I lost quite a bit of frame rate in the process. In the video, with only one pixel updating it's perfect, but with more dots to flip I get 1 to 2 fps, much too low for enjoying some games.

    I should next try to combine the best of both worlds, The Raspberry Pi running the games and web stuff, and an Arduino or other uController dedicated to refreshing the display...

    Stay tuned.

  • Daisy chained !

    Frederic L09/08/2018 at 22:39 0 comments

    Finally managed to daisy chain my two displays for a total area of 60x16 dots, and as a bonus I wrote a library to make the display compatible with the Adafruit GFX library ! When I figure how GitHub works I'll post my code there as well.

    Hope you enjoyed the teaser !

  • Prototyping finished.

    Frederic L09/06/2018 at 20:50 0 comments

    This concludes the hardware prototyping part. I'm genuinely surprised that the entire circuit works without any further modification, and that it could actually have been my final PCB.

    All of the target functionalities were implemented and have been proven to work in previous logs :

      • Have a controller that fits on the mounting holes of the ANNAX display
      • Interface with the display using built-in dual IDC 40-pin connectors without modifications
      • Flip and unflip dots at a pretty fast rate
      • Illuminate the LED of the flipped dots
      • Chain several displays and controllers together to expand fun area.

    Minor modifications on the PCB would be to change the screw-terminal for the +24V input/output into a wire-to-board connector (maybe Molex ?), as it's currently quite a pain to connect/disconnect the cable when needed. And that's it ! The rest works.

    A lot remains to be done though :

    • Software : I need to write some kind of library for basic display functions (dot, line, rectangle, circle, text, icons, etc.) which would make my life easier when coding the final usage I want to do with the display, and make the webpage to control the display from any phone/tablet, making the whole thing IoT.
    • Hardware : And in parallel, I need to revert to using the ESP32, and design a board for the ESP, some buttons and encoder, the level shifting required, and voltage/current regulation to complete the project

    So it's far from being finished, but great steady progress were made over the past two months and I hope to keep it going this way.

  • It glows B-)

    Frederic L09/01/2018 at 15:45 0 comments

    Finally, I made some steps forward following the little setback of previous log. After the smoke, comes the glow :)

    After a couple of weeks unsuccessfully trying to chain the displays together, I thought I'd try something different : attempt to drive the LEDs of the dots. It took me the whole day, but it does work pretty nicely !

    As described previously when taking a close look at the ANNAX display, all 16 rows of LED anodes are connected to two 8ch source driver controlled by two 8 bits shift registers. Those 4 chips are integrated onto the display.

    The LED cathodes are linked per columns and connected to the flipdots column sink drivers (on my controller).

    So in order to drive the LED we need to go through each columns one by one, load the 16 bits representing each 16 dots state for that column, illuminate the LEDs, move onto the next column, and repeat. If done fast enough, we don't see the blinking and the illumination feels quite natural. The flickering on the video is from the camera and isn't visible to the naked eye.

    Now the code is a bit more complex as I used my updated code and functions that I'm continuously tweaking and improving for broader usage.

    Basically there are two important variables : current_display[] and new_display[].

    Both are array of bits (30x16) representing the current and requested state of the display.

    Any modification to the display is done on the new_display[] array, then the code compares the current state and requested state of the display, and only the necessary dots are being flipped and unflipped.

    The rest is commented, but feel free to ask if you have questions.

    #include <Arduino.h>
    #include <SPI.h>
    
    // SPI pins for sending data into shift registers
    #define SPI_SPEED 1000000  // 1 Mhz
    #define PIN_CS_ROW 10 //22
    #define PIN_CS_COL 9 //21
    #define PIN_RST_ROW 8 //2
    #define PIN_RST_COL 7 //0
    
    // Pins used for flipping dots
    #define PIN_SET_RESET 6 //4
    #define PIN_PULSE 5 //15
    
    // Pins for LED control
    #define PIN_LED_OE 3 // PWM PIN
    #define PIN_LED_STR 2
    
    // Fixed parameters
    #define PULSE_LENGTH_US 200  // May be adjusted according to voltage used
    #define SET 1  // HIGH
    #define RESET 0  // LOW
    
    // Display params
    #define DISPLAY_WIDTH 30  // Only 1 display connected for now
    #define DISPLAY_HEIGHT 16
    
    uint16_t current_display[DISPLAY_WIDTH];
    uint16_t new_display[DISPLAY_WIDTH];
    
    // 8bit Space Invader
    const unsigned char monster8x11[] = {
      0b01110000,
      0b00011000,
      0b01111101,
      0b10111110,
      0b10110100,
      0b00111100,
      0b10110100,
      0b10111110,
      0b01111101,
      0b00011000,
      0b01110000
    };


    void clear_registers(){
      // Clear Shift Registers
      // I have doubt if this is working as datasheet is confusing
      
      digitalWrite(PIN_RST_ROW, LOW);
      digitalWrite(PIN_RST_COL, LOW);
      delayMicroseconds(1);
      digitalWrite(PIN_RST_ROW, HIGH);
      digitalWrite(PIN_RST_COL, HIGH);
    }
    
    
    void load_single_dot(uint8_t x, uint8_t y){
      // This method safely pre-loads all SR with zeros and only 1 bit set at the
      // requested x and y position.
    
      // Currently this method is implemented for
      // 2 horizontally daisy chained 30x16 displays (2x1)
      //  ______________________________    ______________________________
      // |                              |->|                              |
      // |         DISPLAY 1            |->|         DISPLAY 2            |
      // |         (30 x 16)            |->|         (30 x 16)            |
      // |                              |->|                              |
      // |______________________________|->|______________________________|
      //
      // Any other arrangements "3x1" displays or "2x2" or "1x2" are possible,
      // but modifications have to be made in the order of bytes of data
      // sent to the registers and number of bytes sent to accomodate for each
      // individual setup and how shift registers are connected
      // (vertically vs horizontally). 25 dots width displays can be used as well.
    
      // Clear shift register data, but if it doesn't work it's not a problem
      // as we send bytes to all SR of the two controllers.
      clear_registers();
    
      // Insert 2 dummy bits for unused output 31 and 32...
    Read more »

  • Smoke test failed :(

    Frederic L08/20/2018 at 22:13 4 comments

    Yep, you heard me. Plugged in the supply, 5 seconds later heard a sizzling sound and a nice blue smoke came out from behind the display. Just before that, a couple of random columns went from black to yellow (the whole column, at once).

    I haven’t had the pleasure to experience this acrid smell in quite a long time, so it brought back some memories. Unplugged the supply straight away and got ready to throw all out in case it caught fire, but it decided it was enough of a warning, and settled down slowly.

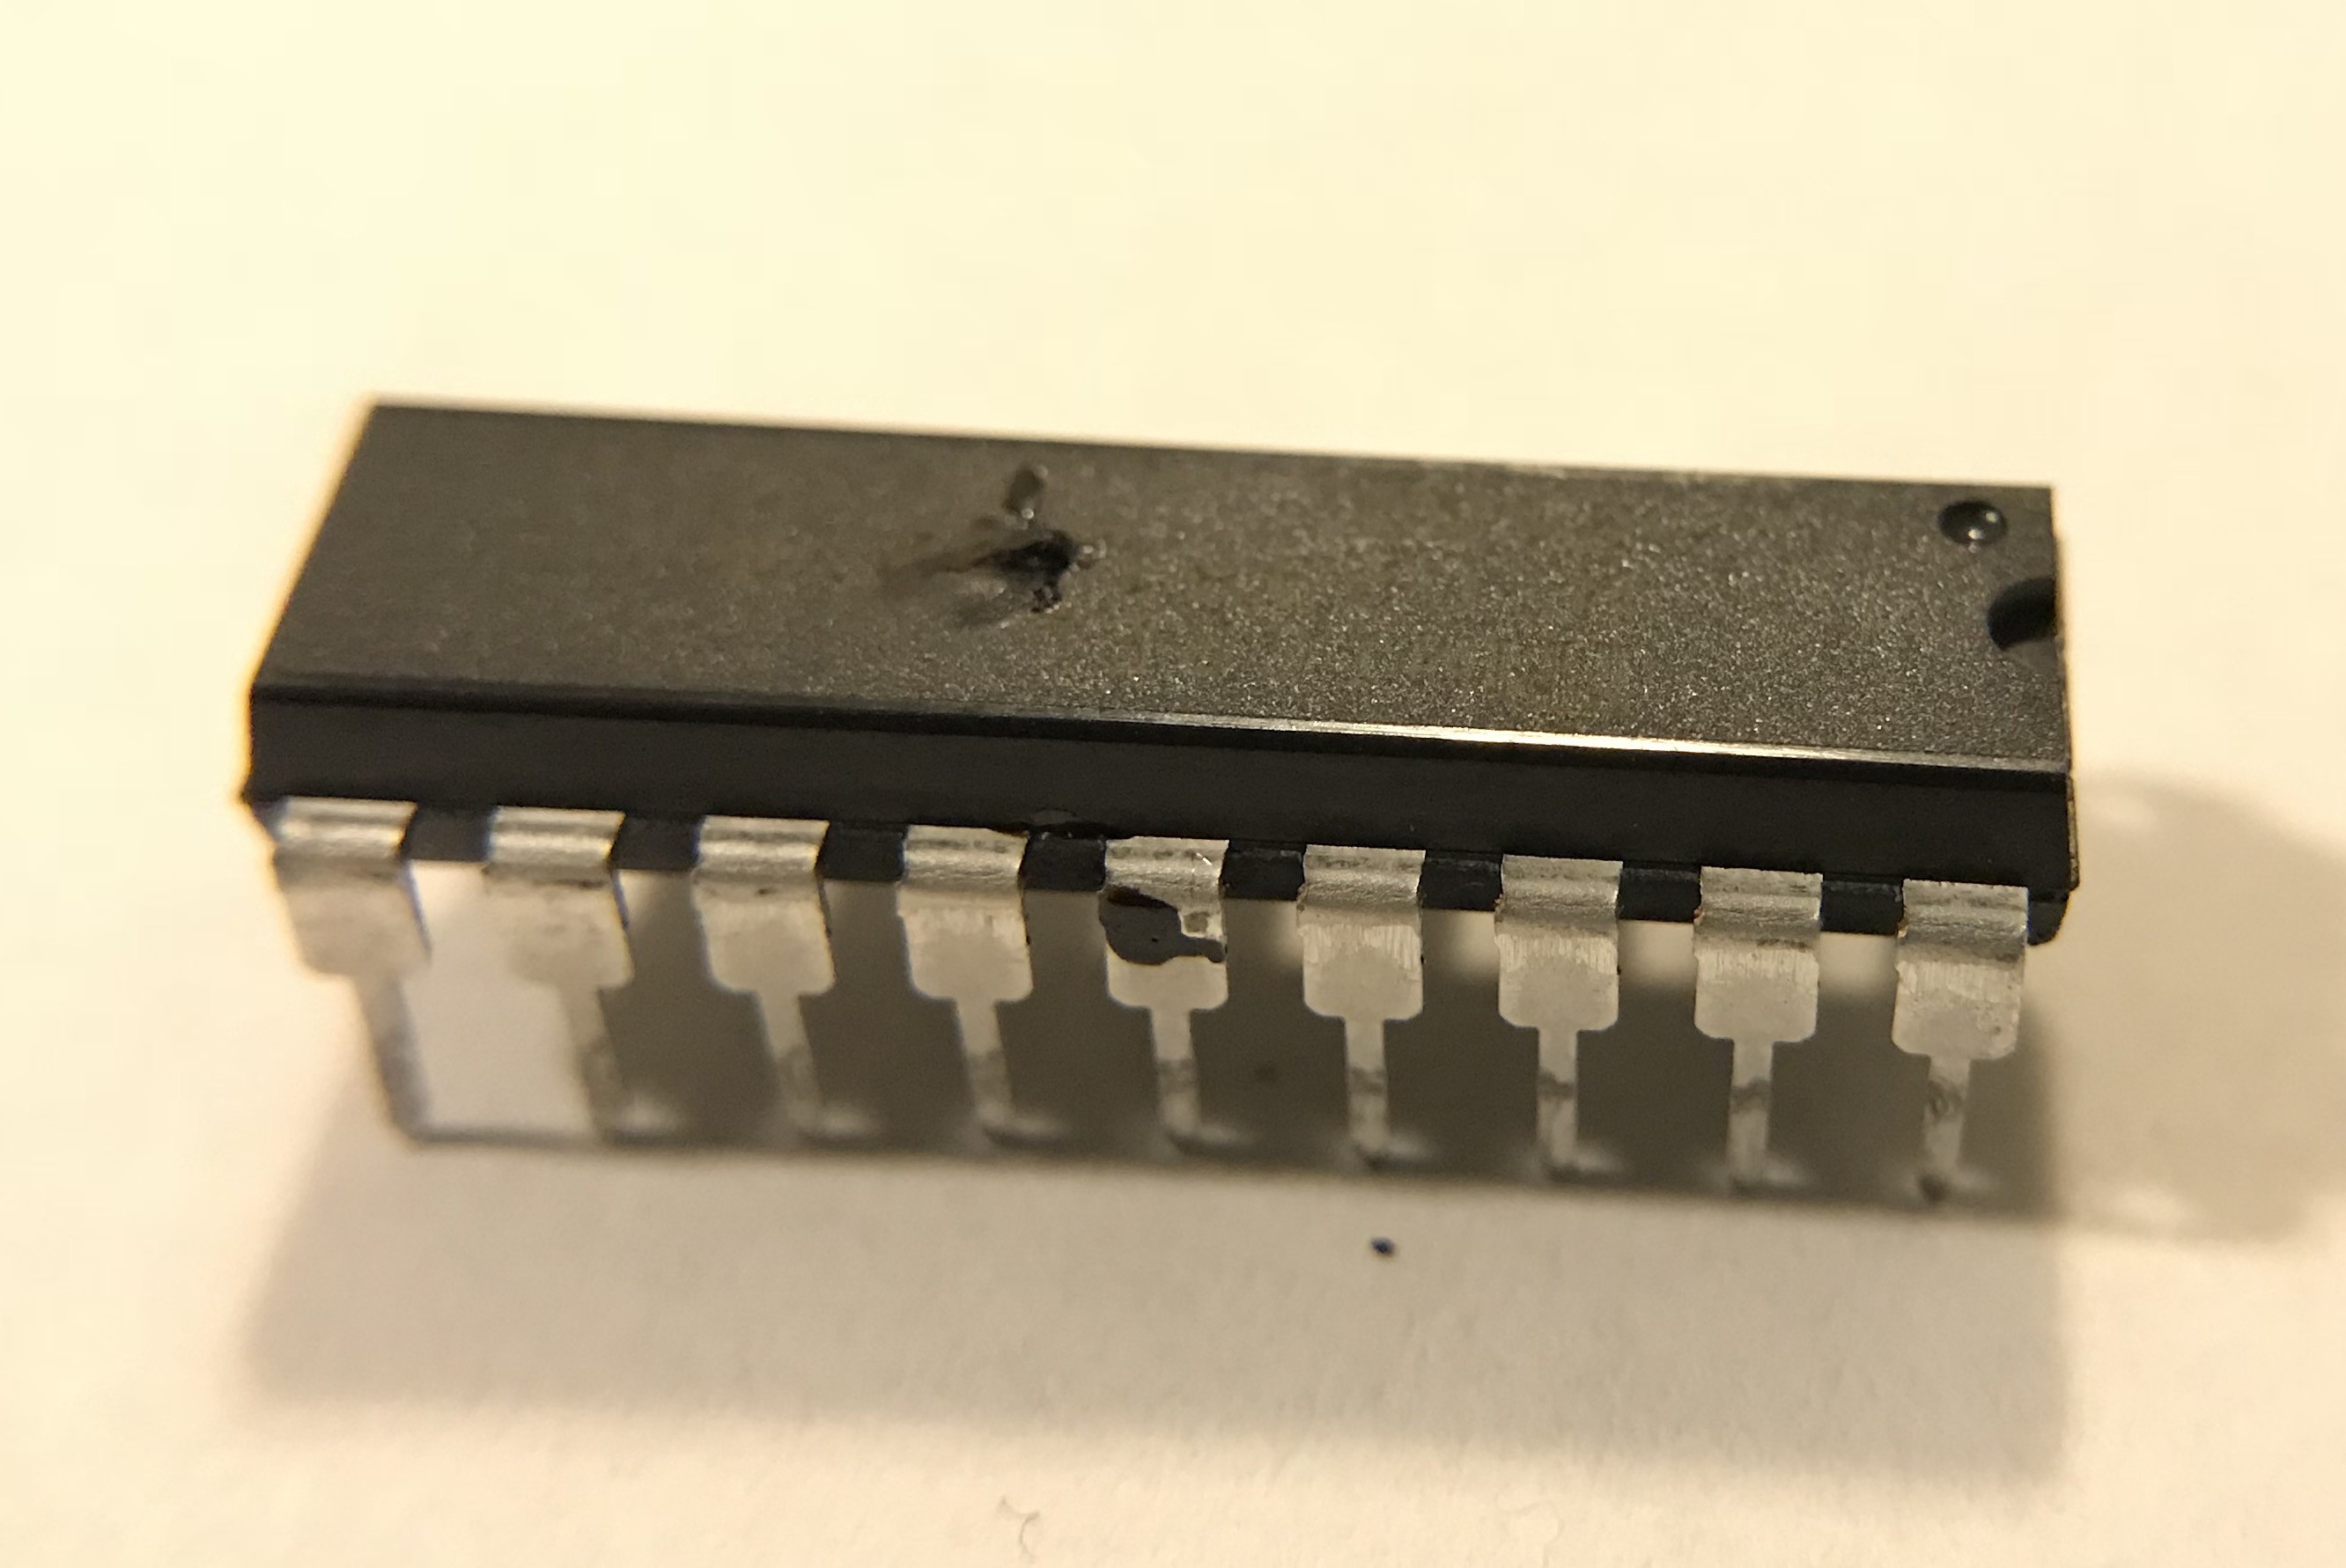
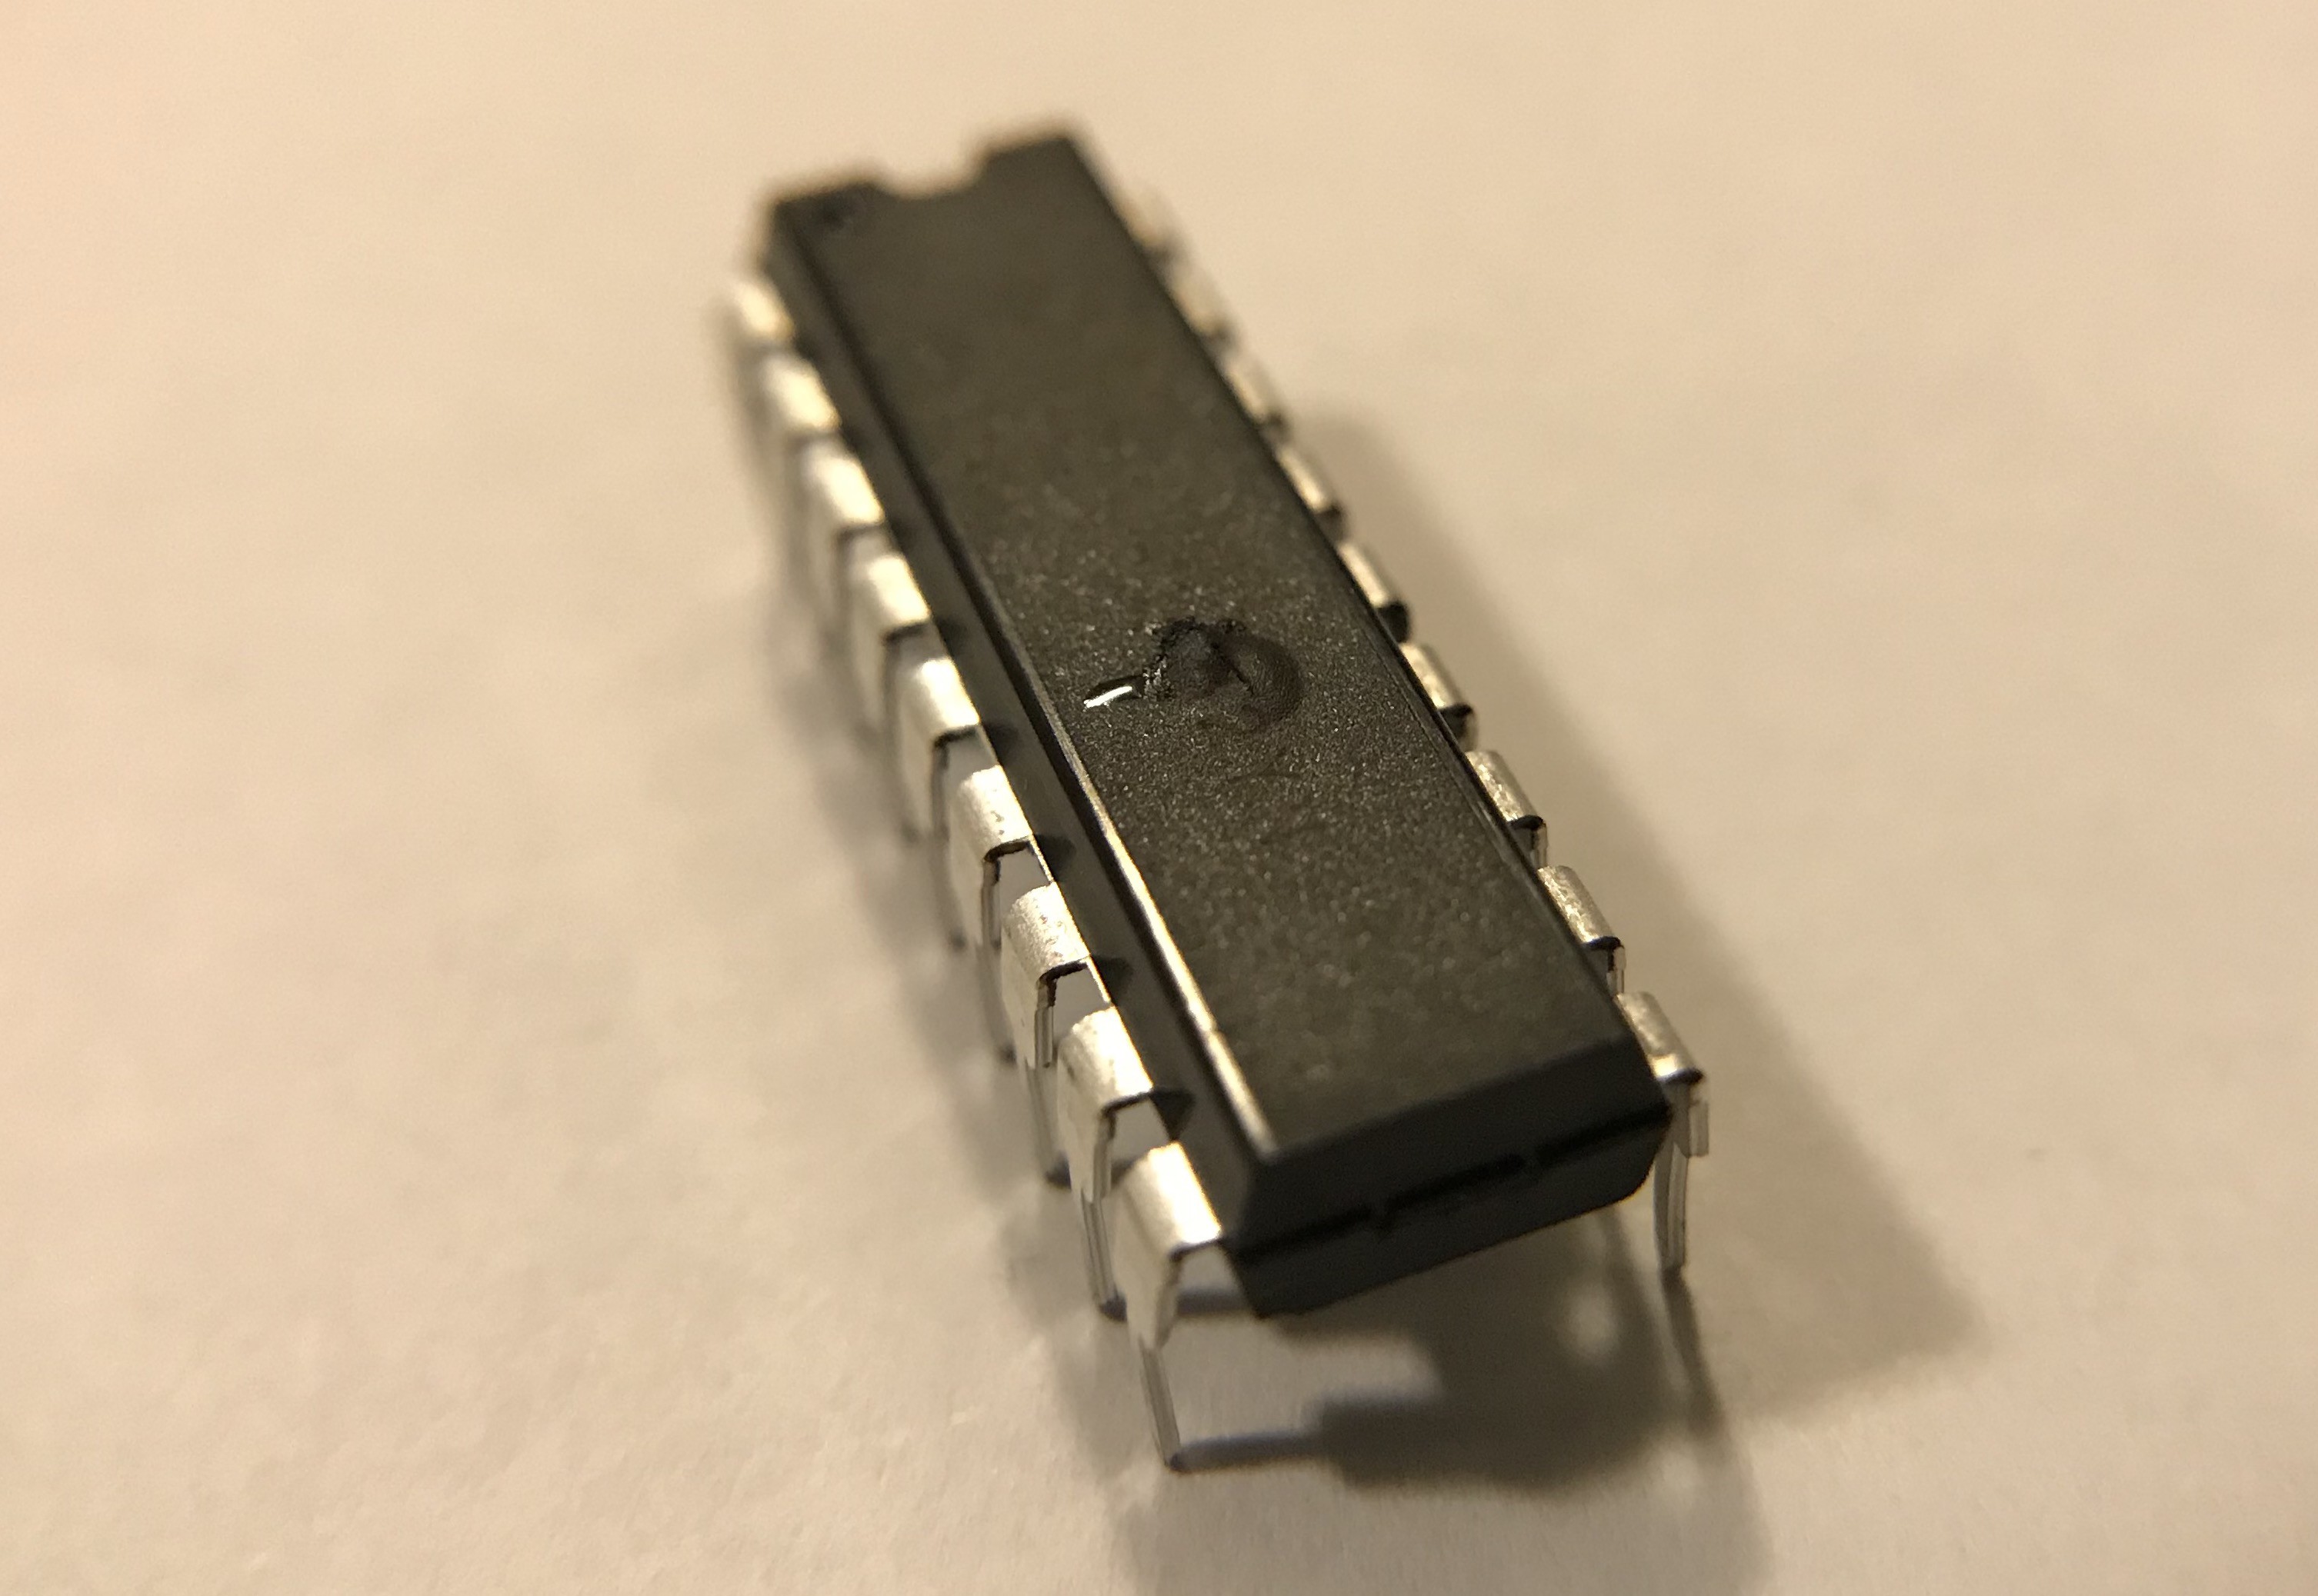
    After I thought it was safe enough, I approached the beast to assess whatever damages I did to the poor thing. Luckily it seems it remained contained. One MIC2981 source driver is certainly out of service and was definitely the source of the smoke.


    There might be some other damages but they are well hidden, as all other chips and PCB look fine to the naked eye. Nevertheless I was happy to have planned ahead and put the drivers on DIP sockets to facilitate replacement (as if I knew I would burn a few...).

    What happened ? I’m not really sure, and it’s very annoying, as now I have this feeling it’ll burn again every time I plug in the supply. So far I think either one of the ground cable got disconnected and the ESP32 had a different ground reference than the control board, making its behaviour erratic, or the ESP32 had some power problem as it wouldn’t run the code properly when checking the outputs with the oscilloscope at a later stage.

    The code itself wasn’t faulty as I wasn’t trying anything crazy or demanding as I have been in the previous log when blinking the whole display at max rate. The ESP32 wasn’t running the code for some reason, maybe was booting or re-boooting, during which the outputs went awol and may have loaded the shift registers with corrupted data, and at the same time sent a continuous pulse. This would explain the two columns flipping simultaneously, followed by the burning chip that couldn’t handle the current of that many simultaneous dots flipping (source and sink drivers are rated to 500mA per channel).

    Legs up, as in... DEAD.


    Having replaced the burnt chip, it seems I still have some troubleshooting to do as I cannot unflip dots. It’s a time consuming task and quite a setback as things were going so smoothly so far. I truly hope I haven’t damaged any of the coils or other parts of the display, but having been able to flip all remaining dots to yellow side seems reassuring.

    I just finished soldering a second control board for my second display as I was about to try daisy chaining both displays, so I will probably use it to help isolate the remaining problems. Also, I may temporarily swap the ESP32 for an Arduino for more stability during the testing phase.


    EDIT 26th August 2018 : The display is fine and doesn't have any damages. My control board has some burnt drivers, and 9 out of 12 shift registers have erratic behaviour. Those not being on DIP sockets, I'll have to re-solder a complete new board to go onto the next step of prototyping, ie. daisy-chaining, and making the LEDs work. It'll take a bit longer as I need to re-stock some components, but come back soon for updates !

  • IT FLIPS !!!

    Frederic L08/19/2018 at 07:10 2 comments

    Today I earned the dot flipper badge, and a milestone in this project has been reached. Those few weeks of hard work, figuring all out, selecting components, designing a PCB and coding a simple firmware finally paid off !

    Below is my very first dot flipped, and you cannot imagine how excited I was when I heard the clicking sound after plugging in the power supply. More tests shown below.


    I kept the code as simple as possible :

    • Define the outputs (setup)
    • Load coordinates of the dot to flip into the rows and columns shift registers (load_single_dot function)
    • Send the pulse (flip function)
    • Toggle modes between SET and RESET
    • Repeat every 2 seconds
    #include <Arduino.h>
    #include <SPI.h>  // Using SPI is faster than bit-banging in that case
    
    // SPI pins for sending data into shift registers
    #define SPI_SPEED 8000000  // 8 Mhz
    #define PIN_CS_ROW 22
    #define PIN_CS_COL 21
    #define PIN_RST_ROW 2
    #define PIN_RST_COL 0
    
    // Pins used for flipping dots
    #define PIN_SET_RESET 4
    #define PIN_PULSE 15
    
    // Fixed parameters
    #define PULSE_LENGTH_US 200  // May be adjusted according to voltage used
    #define SET 1  // HIGH
    #define RESET 0  // LOW
    
    
    void clear_registers() {
      // Resets shift registers
      digitalWrite(PIN_RST_ROW, LOW);
      digitalWrite(PIN_RST_COL, LOW);
      delayMicroseconds(1);
      digitalWrite(PIN_RST_ROW, HIGH);
      digitalWrite(PIN_RST_COL, HIGH);
    }
    
    
    void load_single_dot(uint8_t x, uint8_t y){
    
        // Clear shift register data
        clear_registers();
    
        // Initialise SPI communication
        SPI.beginTransaction(SPISettings(SPI_SPEED, MSBFIRST, SPI_MODE0));
    
        // Transmit coordinate x and y coordinates to shift registers :
    
        // Slave Select Columns shift registers
        digitalWrite (PIN_CS_COL, LOW);
        SPI.transfer(1 << (x%8));
        for(int i=0; i<(x/8); i++){
          // Insert 8 blank bits 'spacers' if x>=8
          SPI.transfer(0x00);
        }
        digitalWrite (PIN_CS_COL, HIGH);
    
        // Slave Select Rows shift registers
        digitalWrite (PIN_CS_ROW, LOW);
        // 16 rows, so let's send all 16 bits at once, it's overall faster.
        SPI.transfer16(1 << y);
        digitalWrite (PIN_CS_ROW, HIGH);
    
        // End SPI
        SPI.endTransaction();
    
    }
    
    void flip(bool dir) {
      // SET or RESET mode
      digitalWrite(PIN_SET_RESET, dir);
      delayMicroseconds(1);
    
      // Send pulse
      digitalWrite(PIN_PULSE, HIGH);
      delayMicroseconds(PULSE_LENGTH_US);
      digitalWrite(PIN_PULSE, LOW);
    }
    
    
    void setup() {
    
      // Defining outputs
      pinMode(PIN_CS_ROW, OUTPUT);
      pinMode(PIN_CS_COL, OUTPUT);
      pinMode(PIN_RST_ROW, OUTPUT);
      pinMode(PIN_RST_COL, OUTPUT);
      pinMode(PIN_SET_RESET, OUTPUT);
      pinMode(PIN_PULSE, OUTPUT);
    
      // Initial outputs state
      digitalWrite(PIN_SET_RESET, LOW);
      digitalWrite(PIN_PULSE, LOW);
    
      // Clear Shift Registers
      clear_registers();
    
      SPI.begin();
    
    }
    
    
    void loop() {
    
      // Load (x,y) coordinates of dot to flip
      load_single_dot(0, 0);
    
      flip(SET);  // YELLOW
      delay(2000);
      flip(RESET);  // BLACK
      delay(2000);
    
    }

    I eyeballed the pulse length to 200us for a start, thinking I would have to increase it to a higher value, but it seems to work perfectly and I might even be able to reduce it a touch. It would increase the overall frame rate, as waiting for the pulses to complete is the most time consuming task of the process (loading the shift registers takes on average 20us per dot).

    Anyway, here is what I got flipping each dot every 200ms, and finally at full speed without any delay.

    I’m quite impressed, knowing this is only the very first tests and a lot of optimisation is possible ! Stay tuned, while I hypnotise myself looking at it. 


    BONUS VIDEOS :

  • Controller assembled and ready for tests.

    Frederic L08/18/2018 at 10:20 0 comments

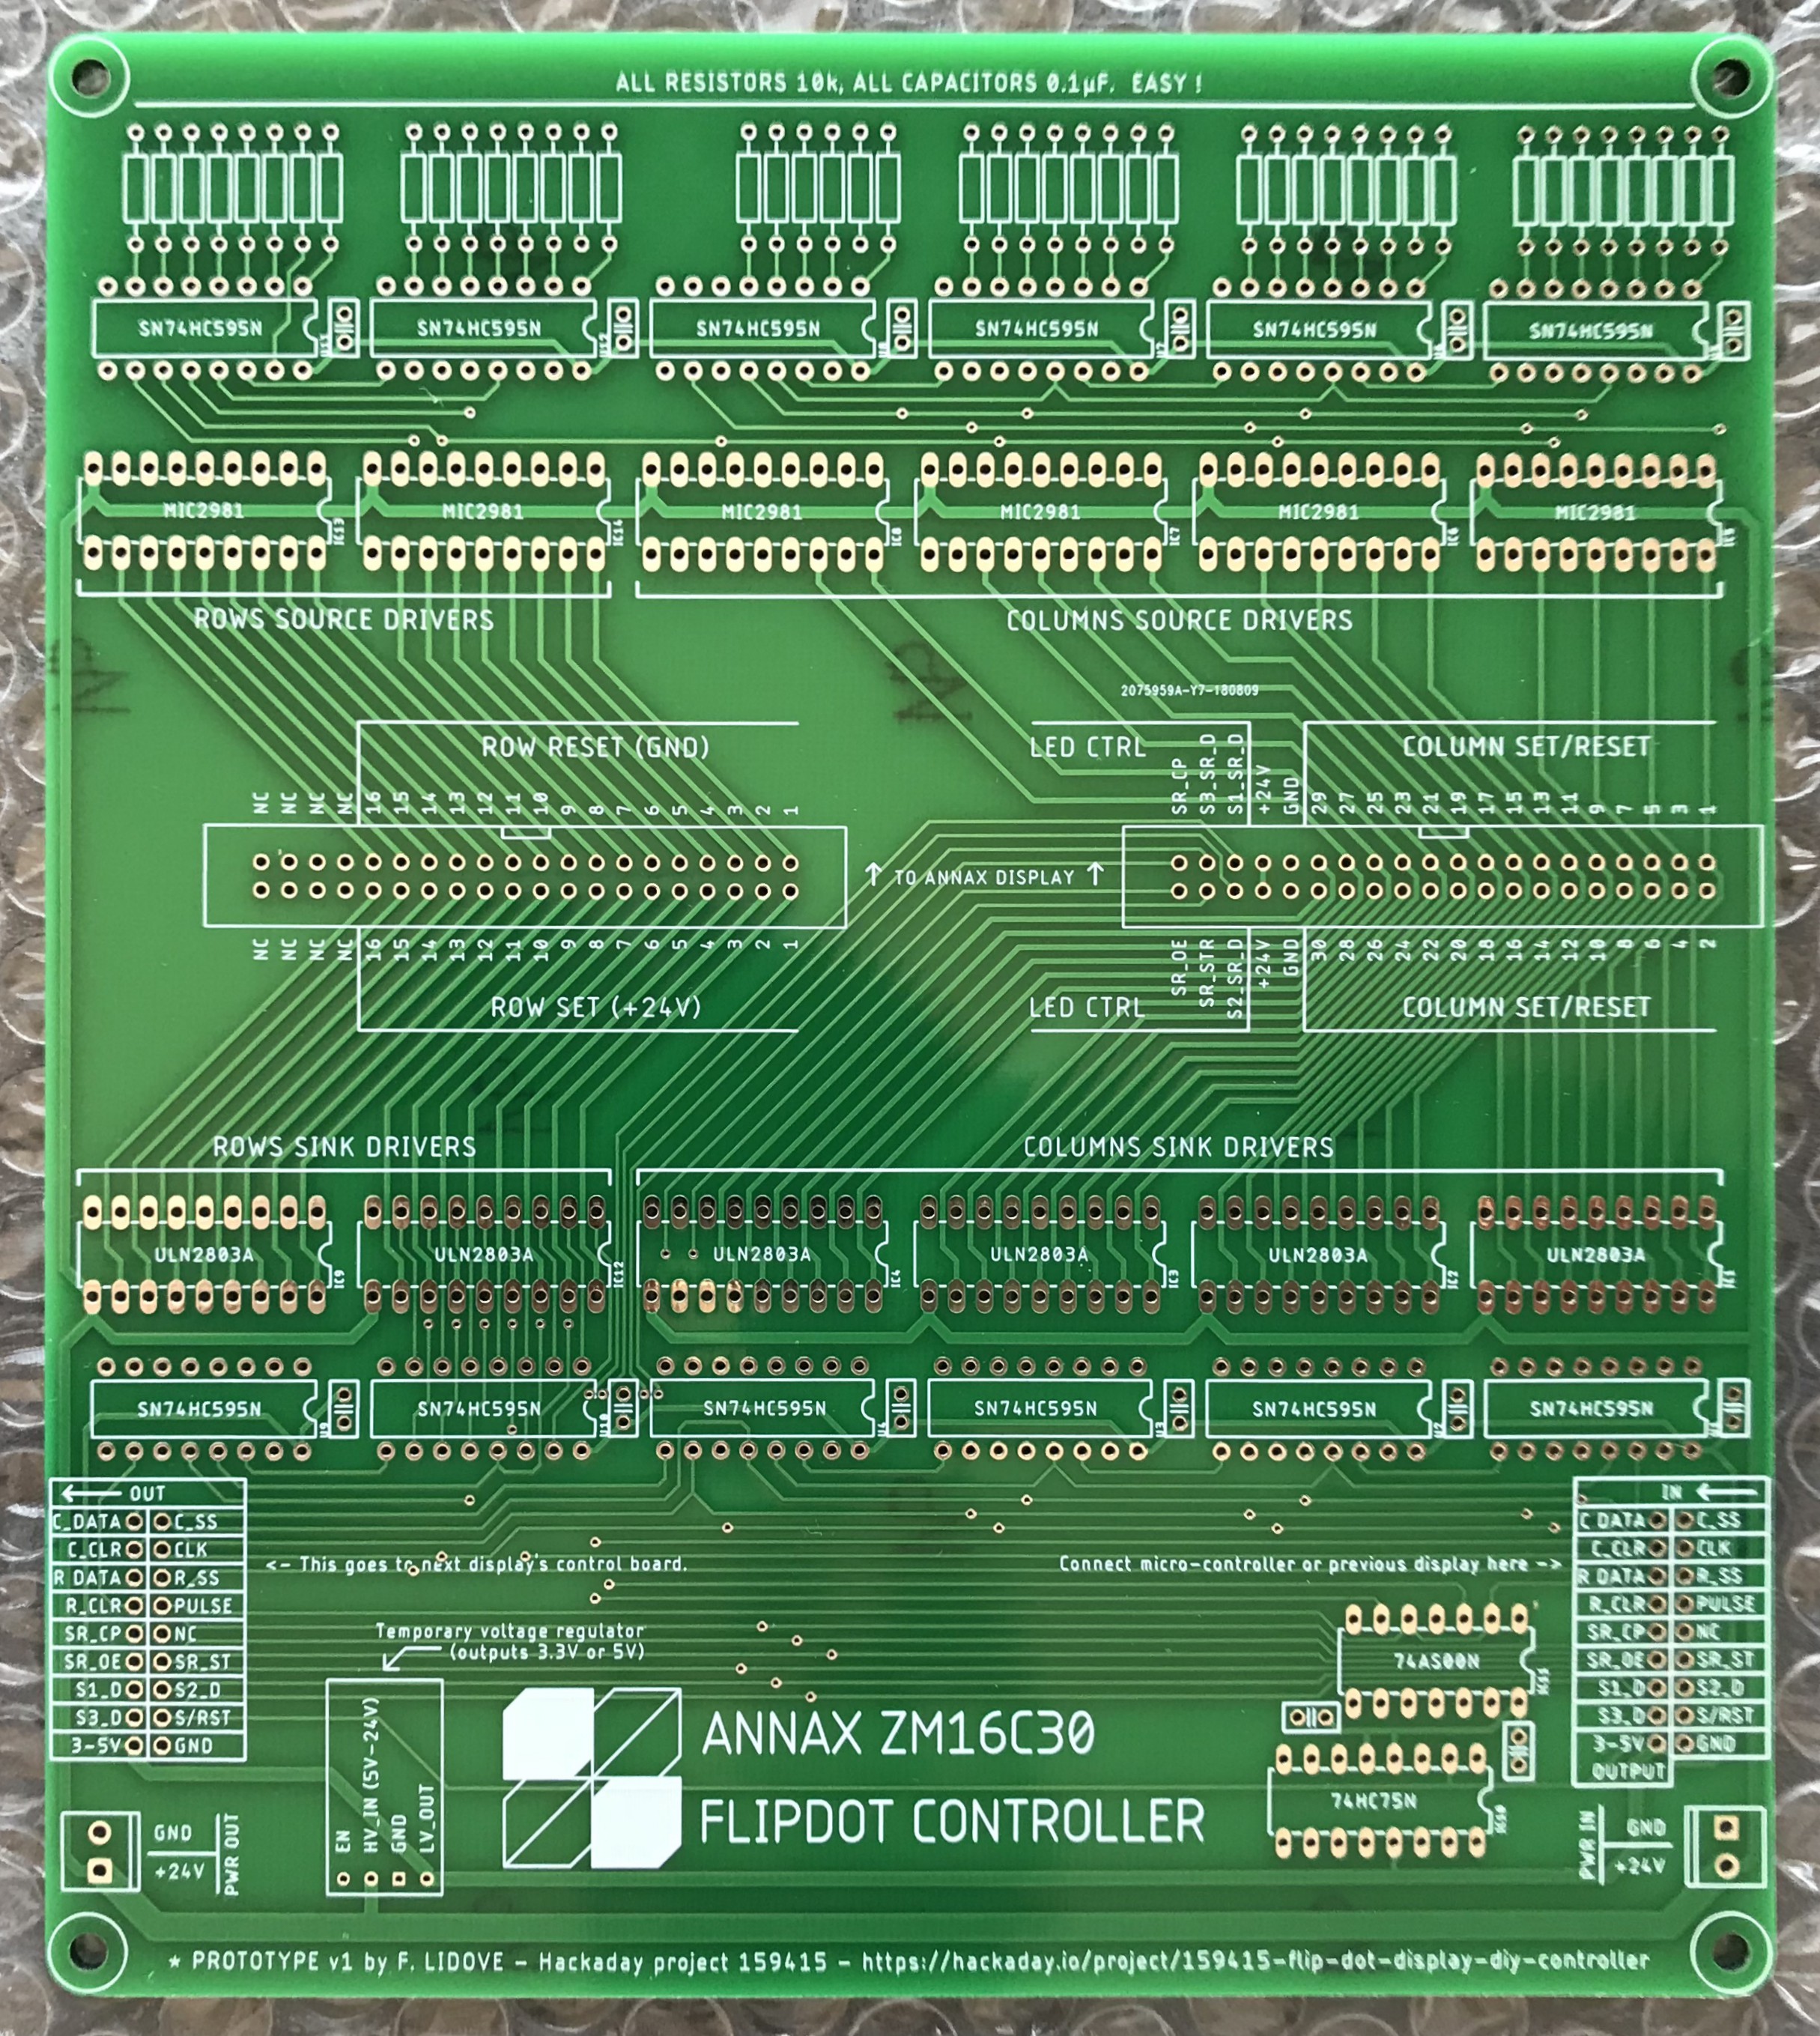
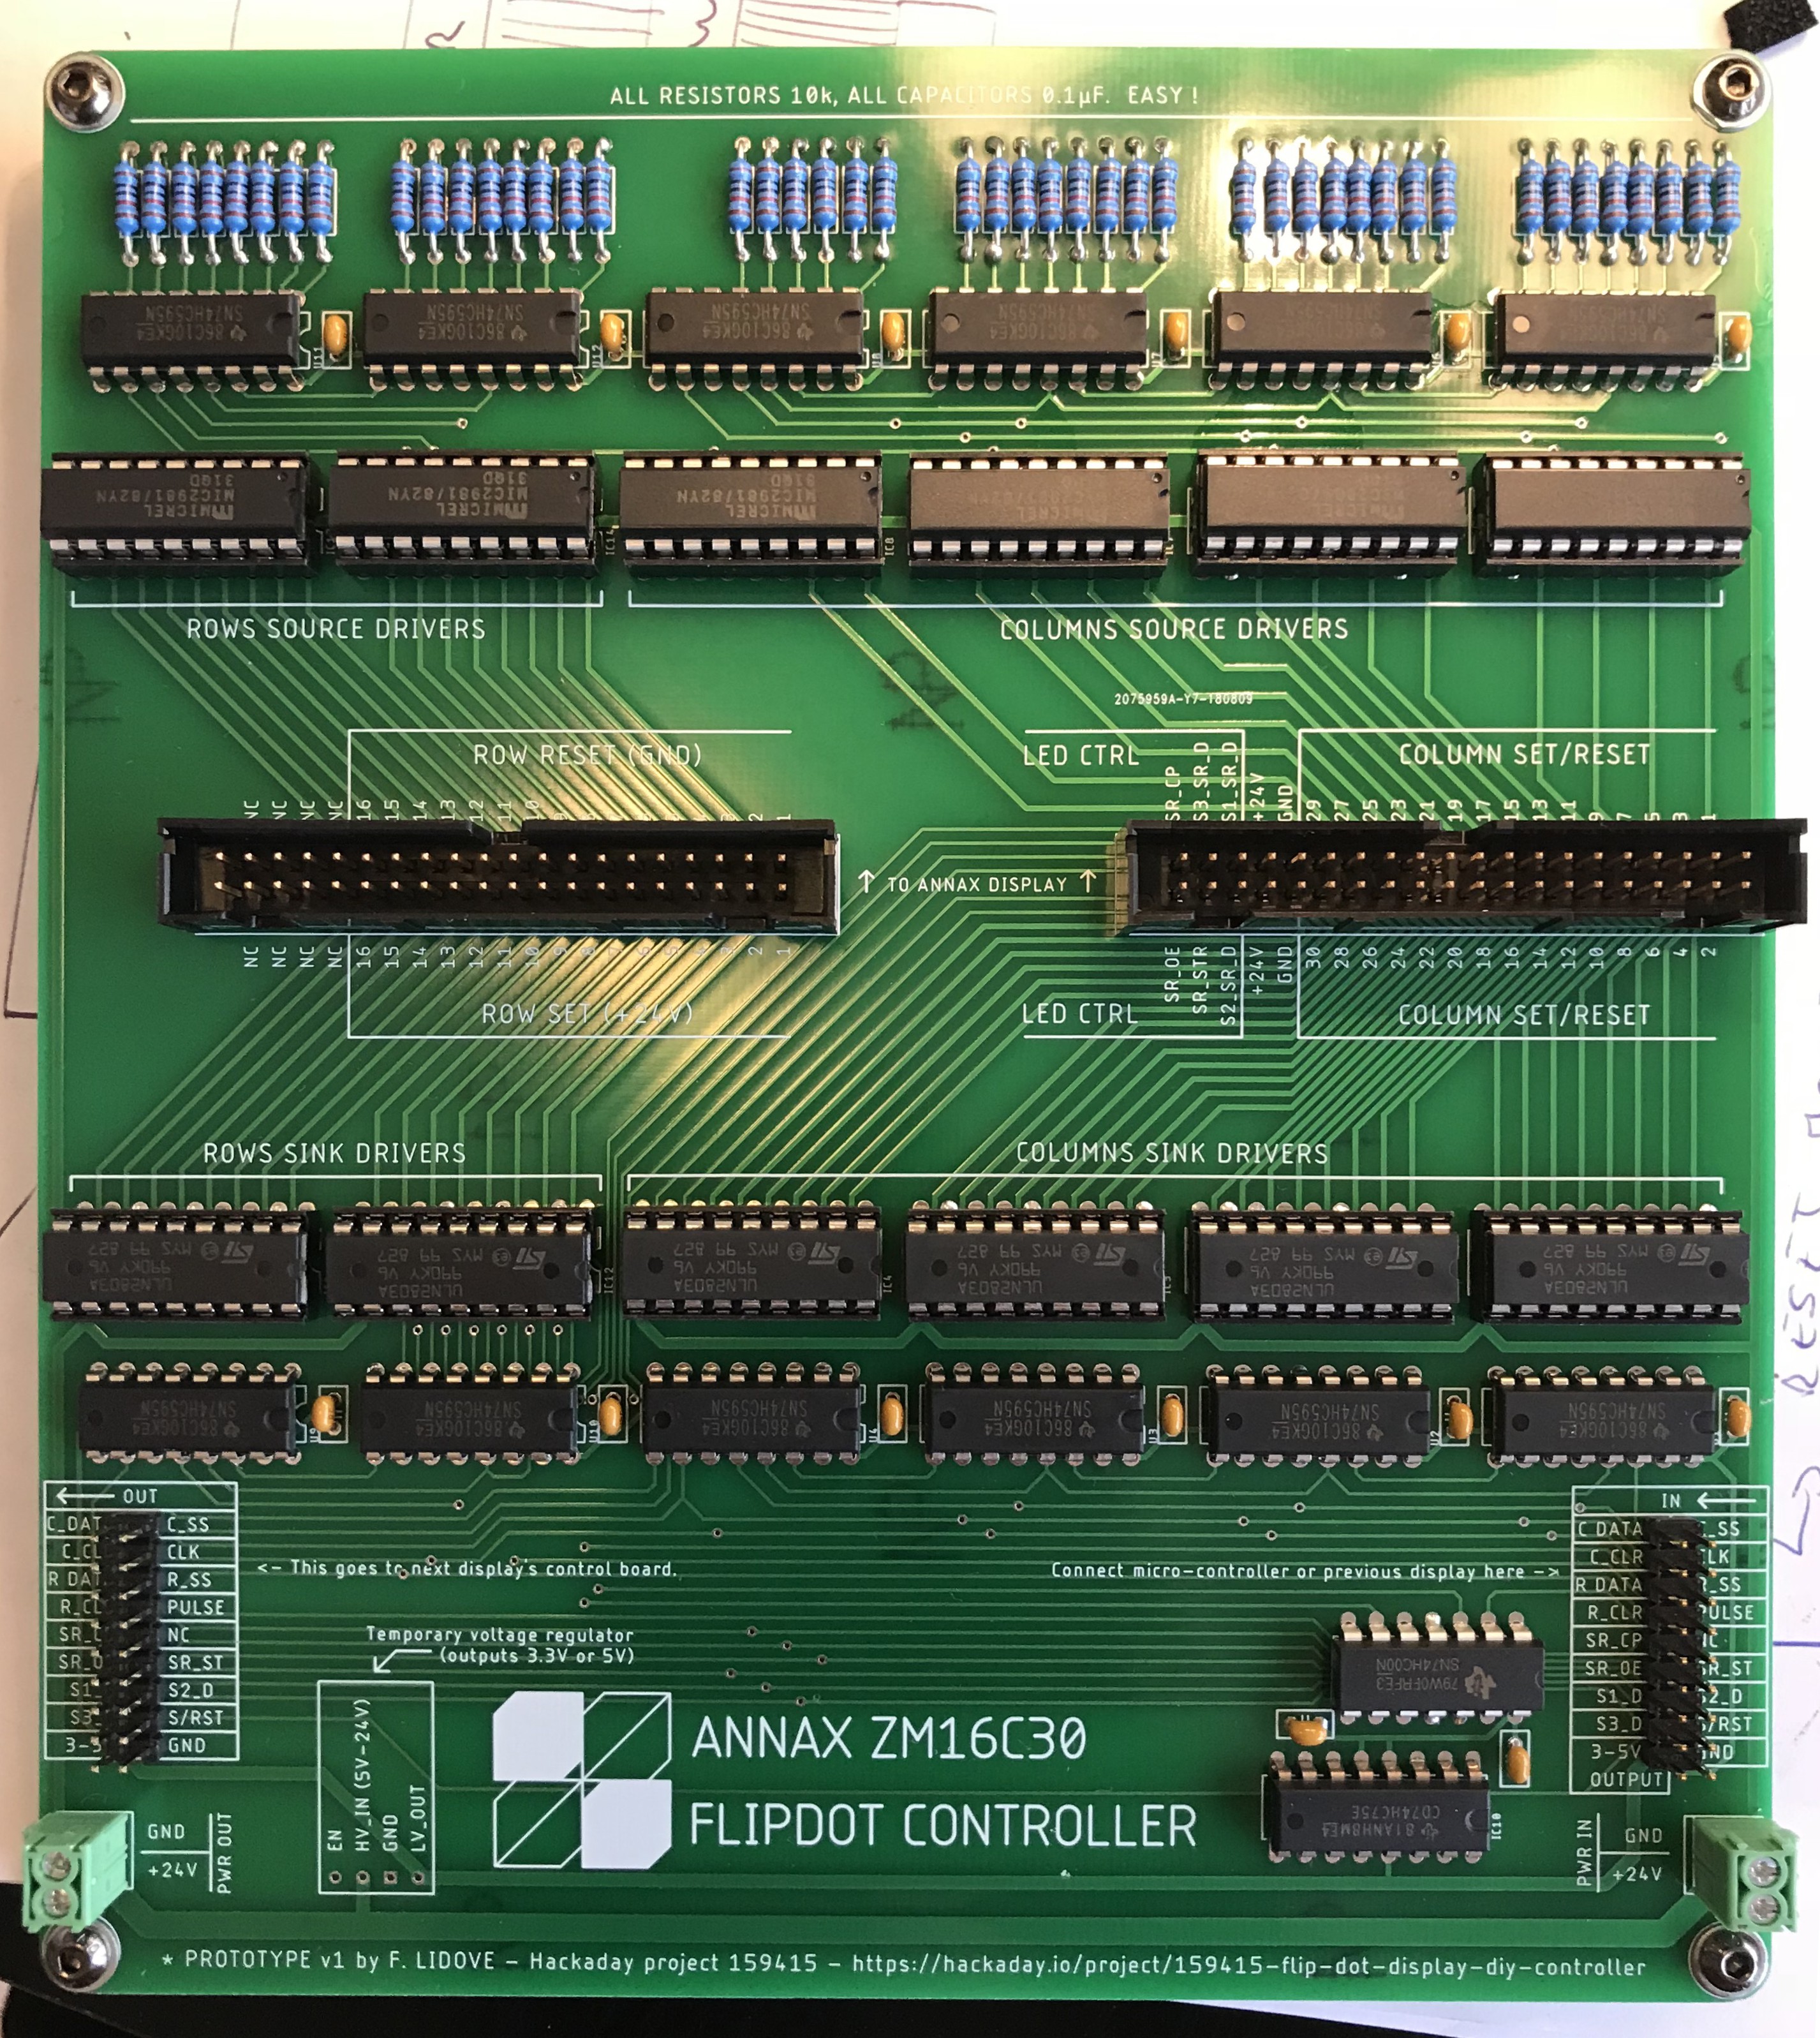
    Got the parts yesterday and started putting it all together. Here is the board as I received it from JLCPCB, and the final result with all the components soldered (not my best soldering job but got much better at it towards the end).


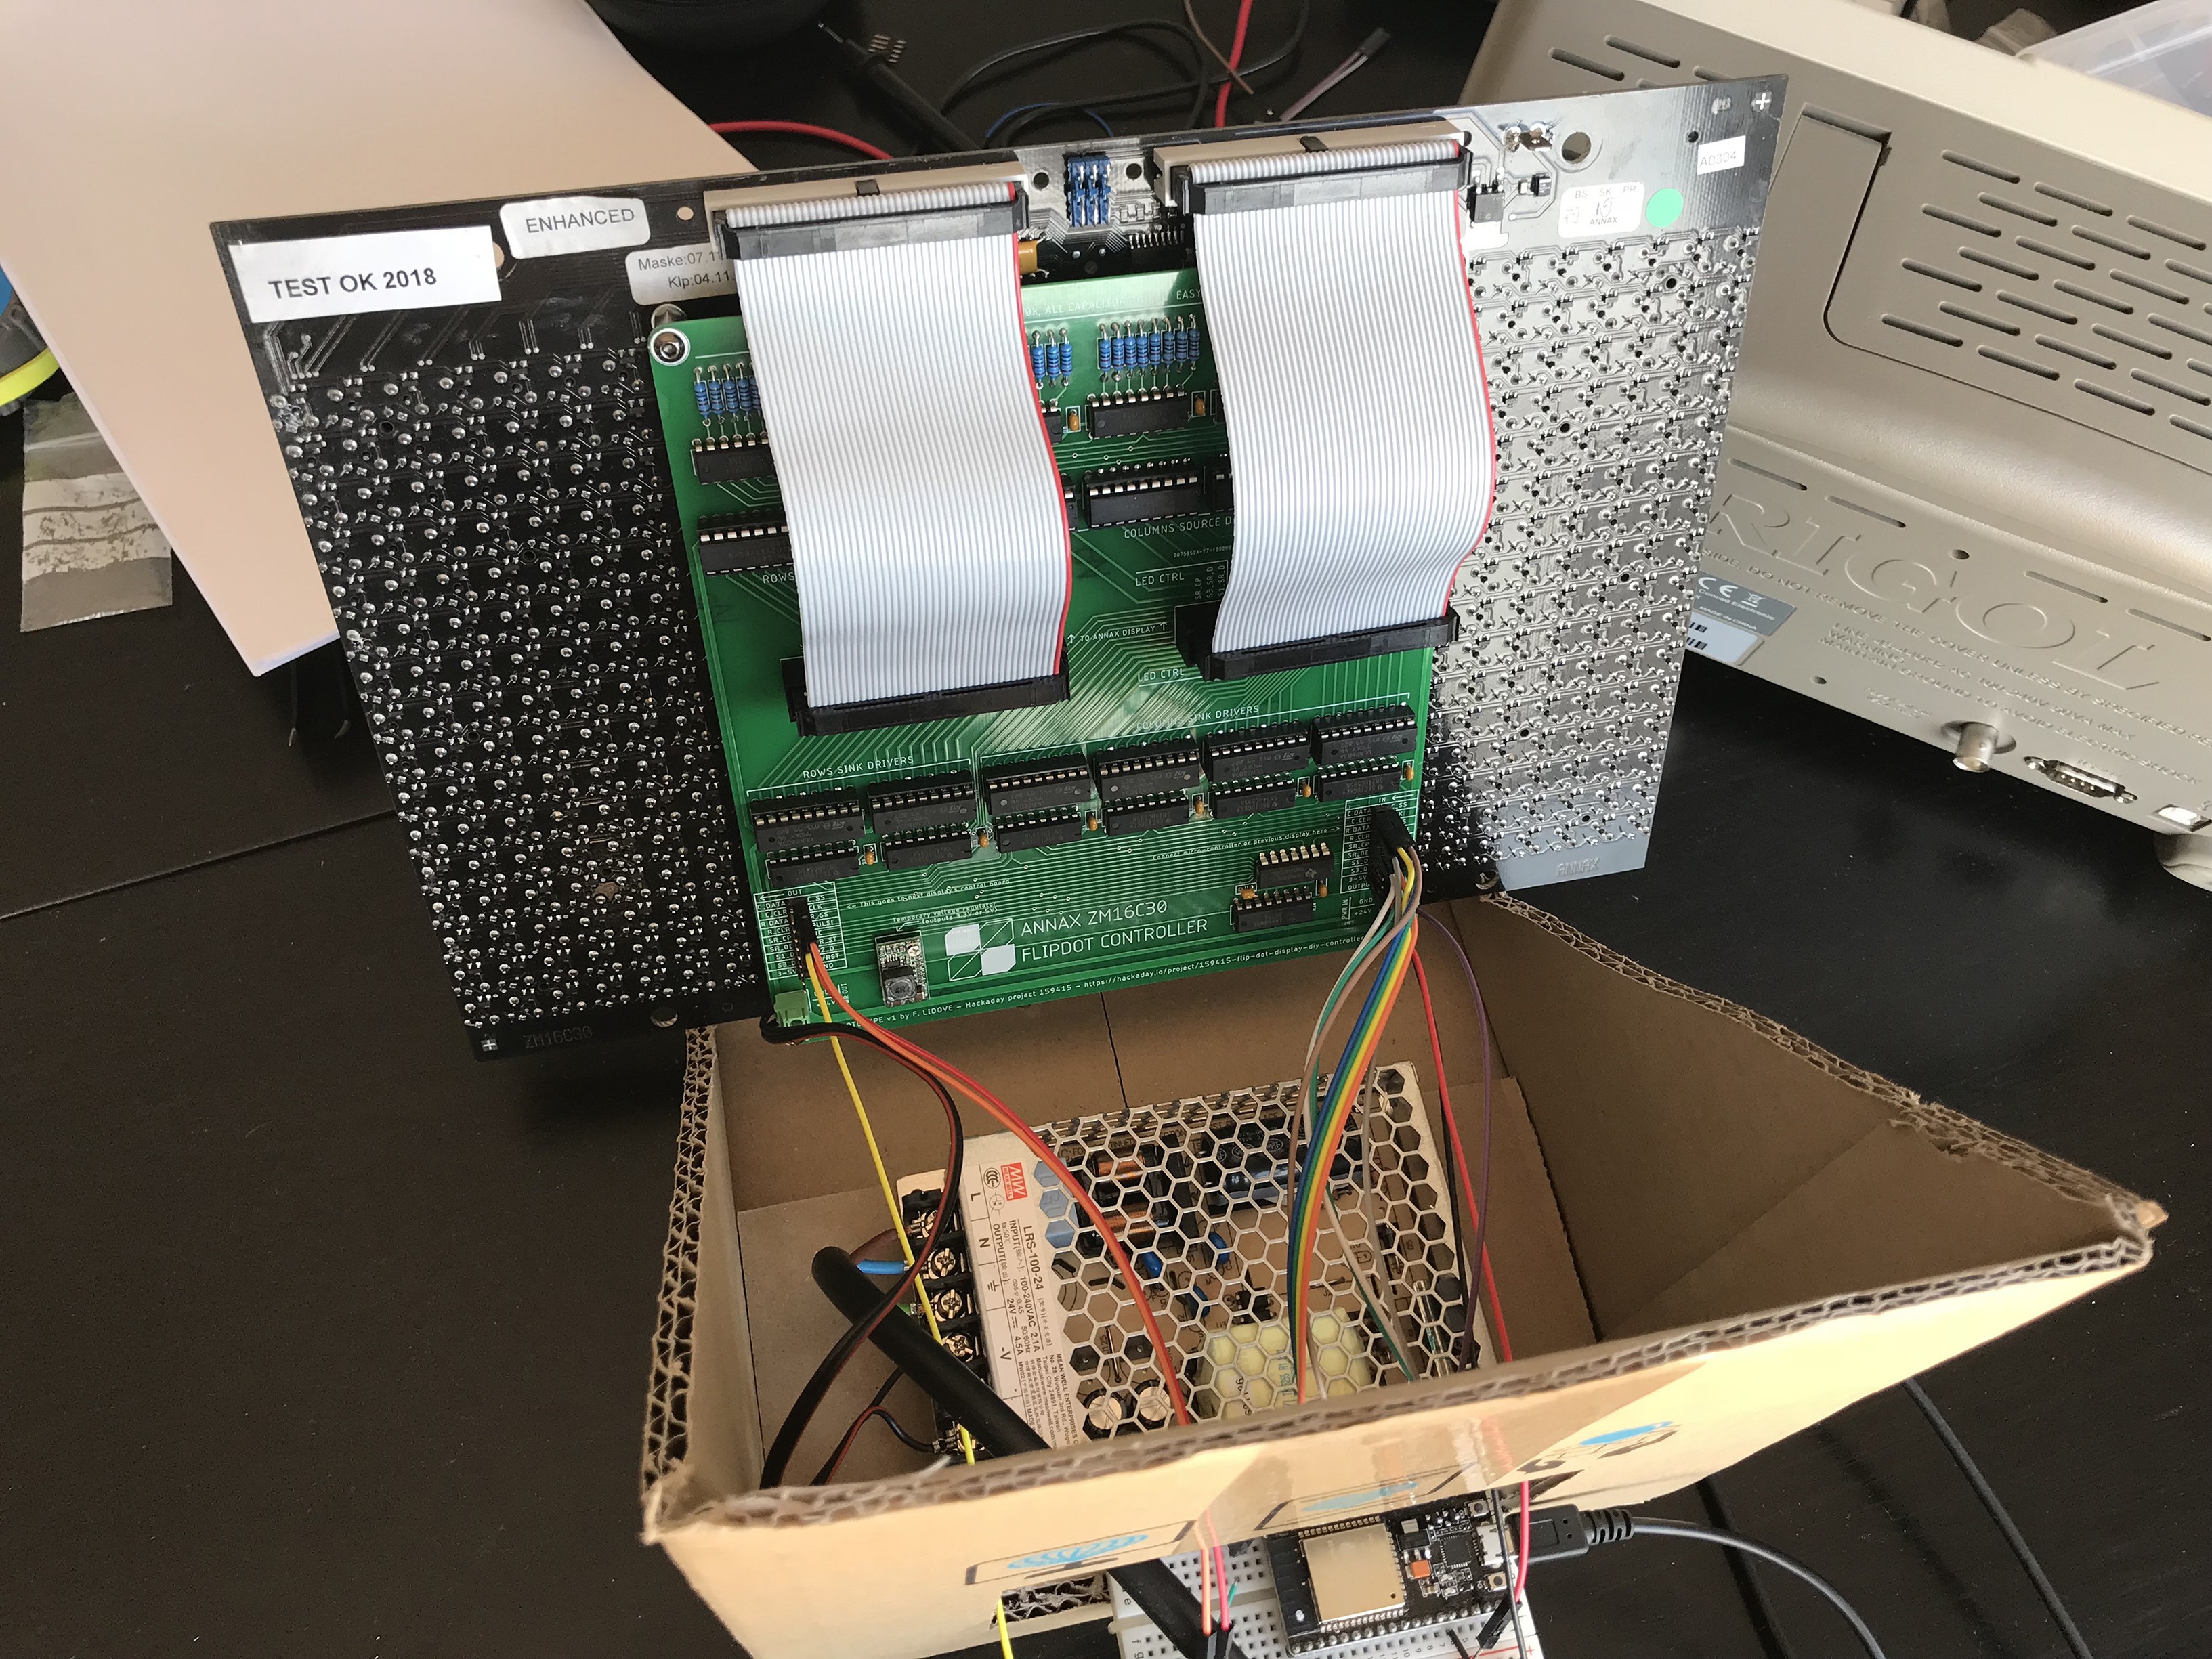
    The board fits nicely on the back of the display with 10mm spacers. The 40pins connectors are aligned with the ones from the display and all seems to fit as I was hoping. You can see the power supply here as well in the temporary cardboard support.

    I could only find a couple of small mistakes so far :

    • The pads holes for the voltage regulator module are too small, so instead of using standard PIN headers I had to solder stripped wires
    • The silkscreen should read ROW SET (+24) above connector 1 and ROW RESET (GND) below it, instead of the opposite

    I’ll make sure I’ll correct those before posting the board and schematic on GitHub.

    Off to some coding and hopefully dots will flip soon ! 

  • Flipdot prototype BOM

    Frederic L08/11/2018 at 07:18 0 comments

    With the PCB on their way and expected to arrive next week, it was time to order the components required for the assembly. Here is a table with the references used, quantity and unit price (for ONE display).


    DescriptionReferenceQuan-tityUnit PriceTotal Price
    Shift RegisterSN74HC595N120,374 €4,488 €
    Source DriverMIC2981/82YN61,74 €10,44 €
    Sink DriverULN2803A60,867 €5,202 €
    10k ResistorsMFR-25FBF52-10K480,017 €0,816 €
    0.1uF CapacitorK104K15X7RF53L2140,039 €0,546 €
    IC Sockets for Drivers1-2199298-5120,179 €2,148 €
    40 pos. flat cable (1 ft)3365/40-CUT-LENGTH11,39 €1,39 €
    40 pos. Board Connector5103308-821,99 €3,98 €
    40 pos. Cable Header1658621-941,30 €5,2 €
    40 pos. Header Strain Relief499252-140,241 €0,964 €
    18 pos. Cable Header (for daisy chaining)71600-318LF21,41 €2,82 €
    NAND GateSN74HC00N10,408 €0,408 €
    Bistable LatchCD74HC75E10,757 €0,757 €
    9x2 Pin Strip (for daisy chaining)67997-218HLF20,587 €1,174 €
    24V Power SupplyLRS-100-24115,91 €15,91 €
    TOTAL56,25€

    A total of 40 € of components (excluding the power supply), for 1 display, so 80€ in my case as I want to try daisy chaining both displays together. A bit pricey for a prototype but some components will be re-usable, such as the drivers (mounted on sockets), and cable assemblies.

  • Prototype PCB design

    Frederic L08/08/2018 at 16:04 0 comments

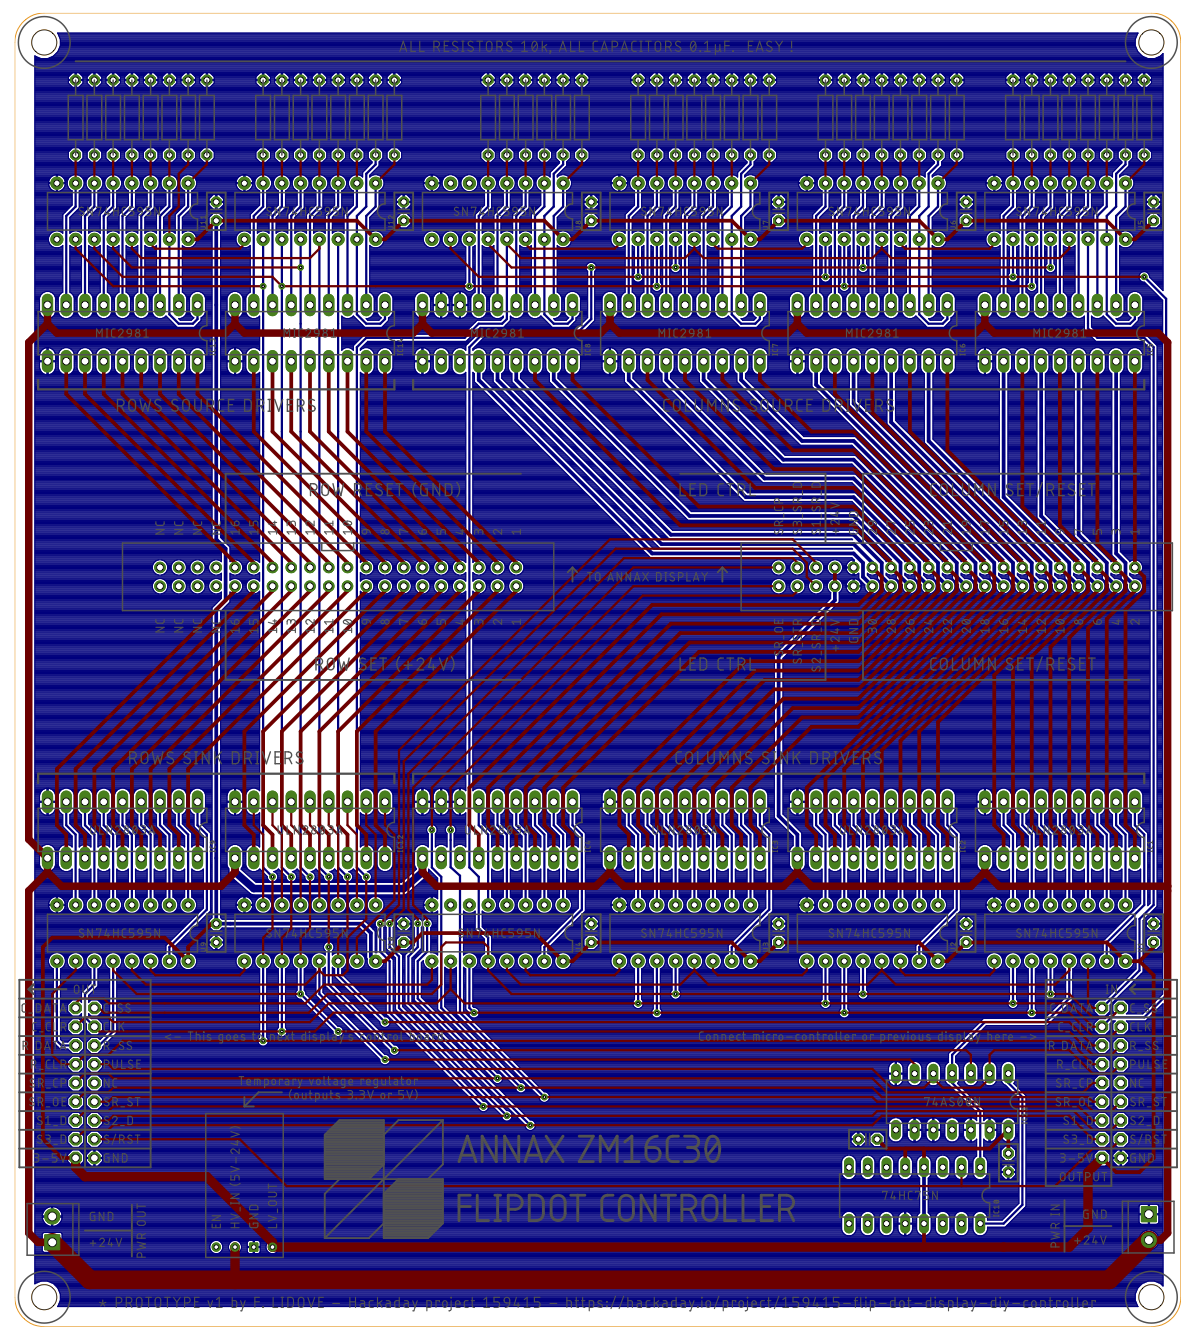
    It turns out the schematic from previous log contains around 200 wires, that is, for one display. I have neither the patience to cut to length and strip 400 wires nor do I have enough breadboards to accommodate for all the ICs in order to run my two displays.

    So, for the price of extra breadboards and wires, I can have a PCB manufactured, which not only will eliminate (or at least reduce) the risks of mis-wiring, but also will keep the “lab” (read: my living room) tidy. The only downside is that I loose the flexibility of changing the circuit on the go, but I worked hard on the schematic (even harder on the PCB layout) and I believe it should work.

    The PCB size is based on the available ANNAX mounting holes and should fit nicely on its back with a few spacers. I chose only through holes components for ease of soldering as well as for ease of changing burnt ICs (plan for the worse, hope for the best). The ones most susceptible to get grilled are the source and sink drivers, so I’ll mount those on sockets.

    Having through-hole components all over the board, and trying to keep them all on the same side (reducing overall thickness) was a real challenge as it restricts the available space for routing, but I managed to make it work, hopefully without breaking too many laws of good PCB design (eg. the GND plane on the back has more signal lines cutting through it than I would have liked).

    The PCBs have been ordered from JLCPCB. I have used a few time past and I was pleased with the results. Five boards for 16€, one week delivery for 24€, for a total cost of 40€ (standard delivery was 12€ only but I'm in a rush to get started).

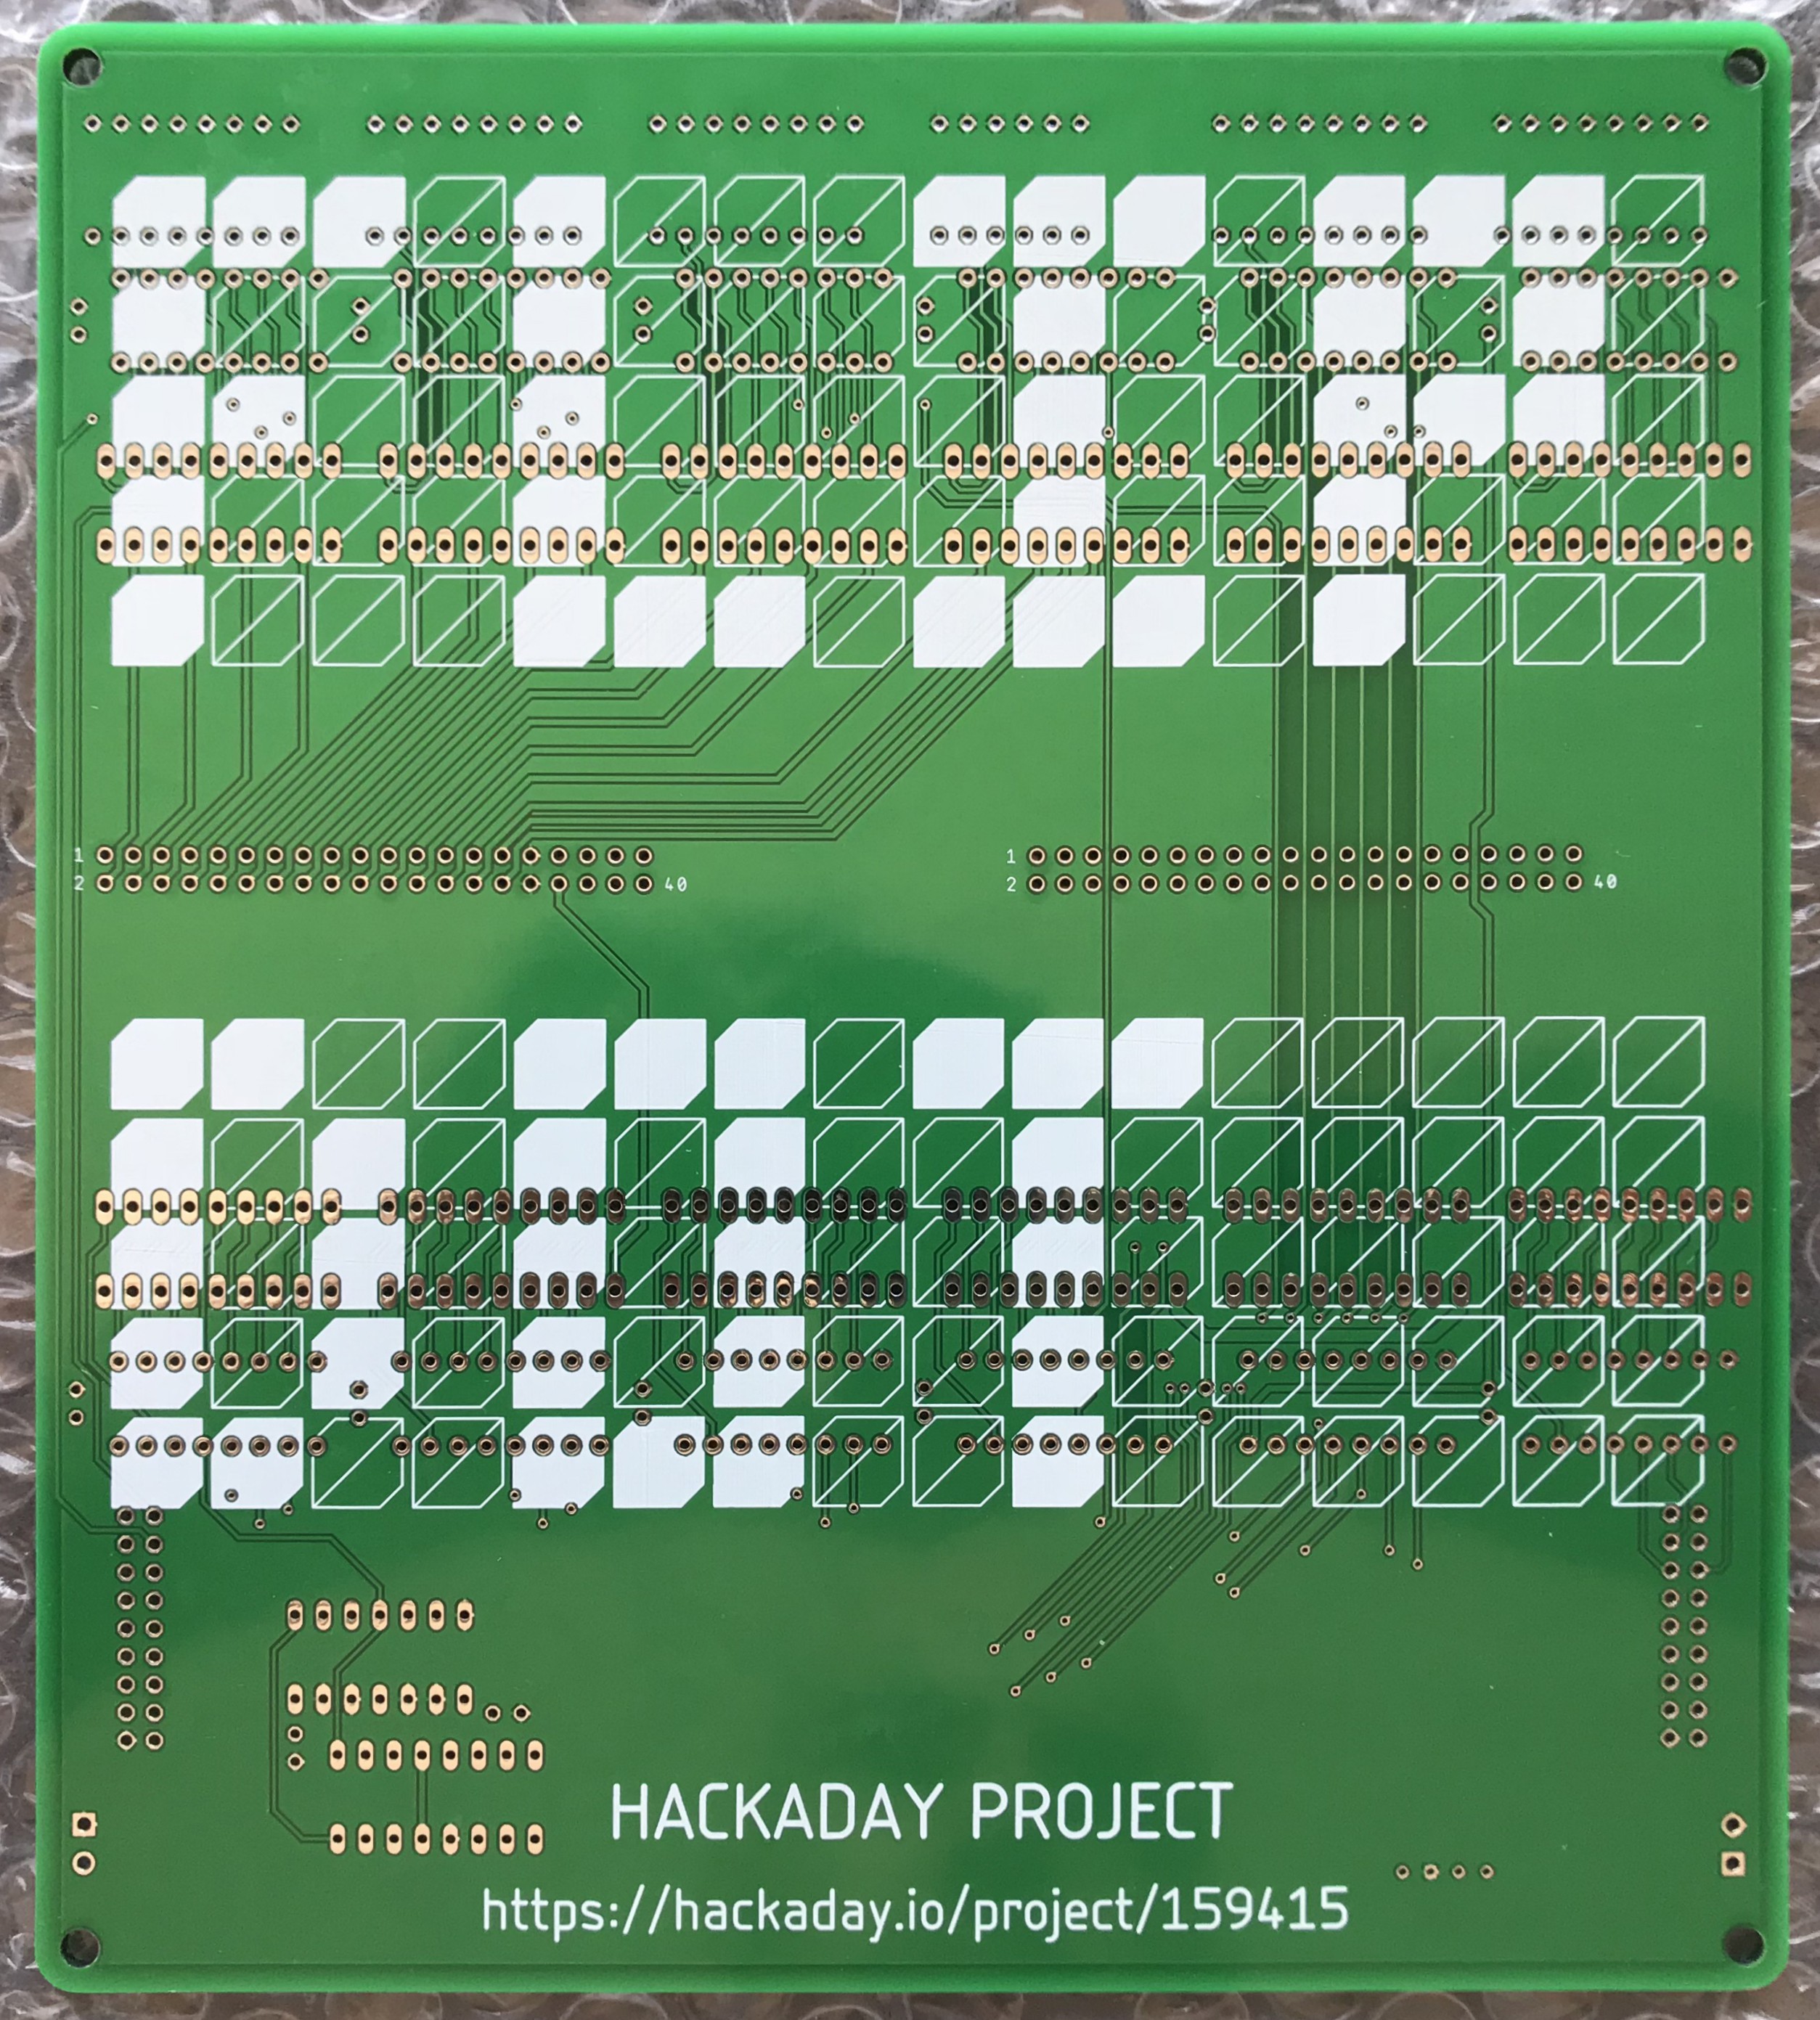
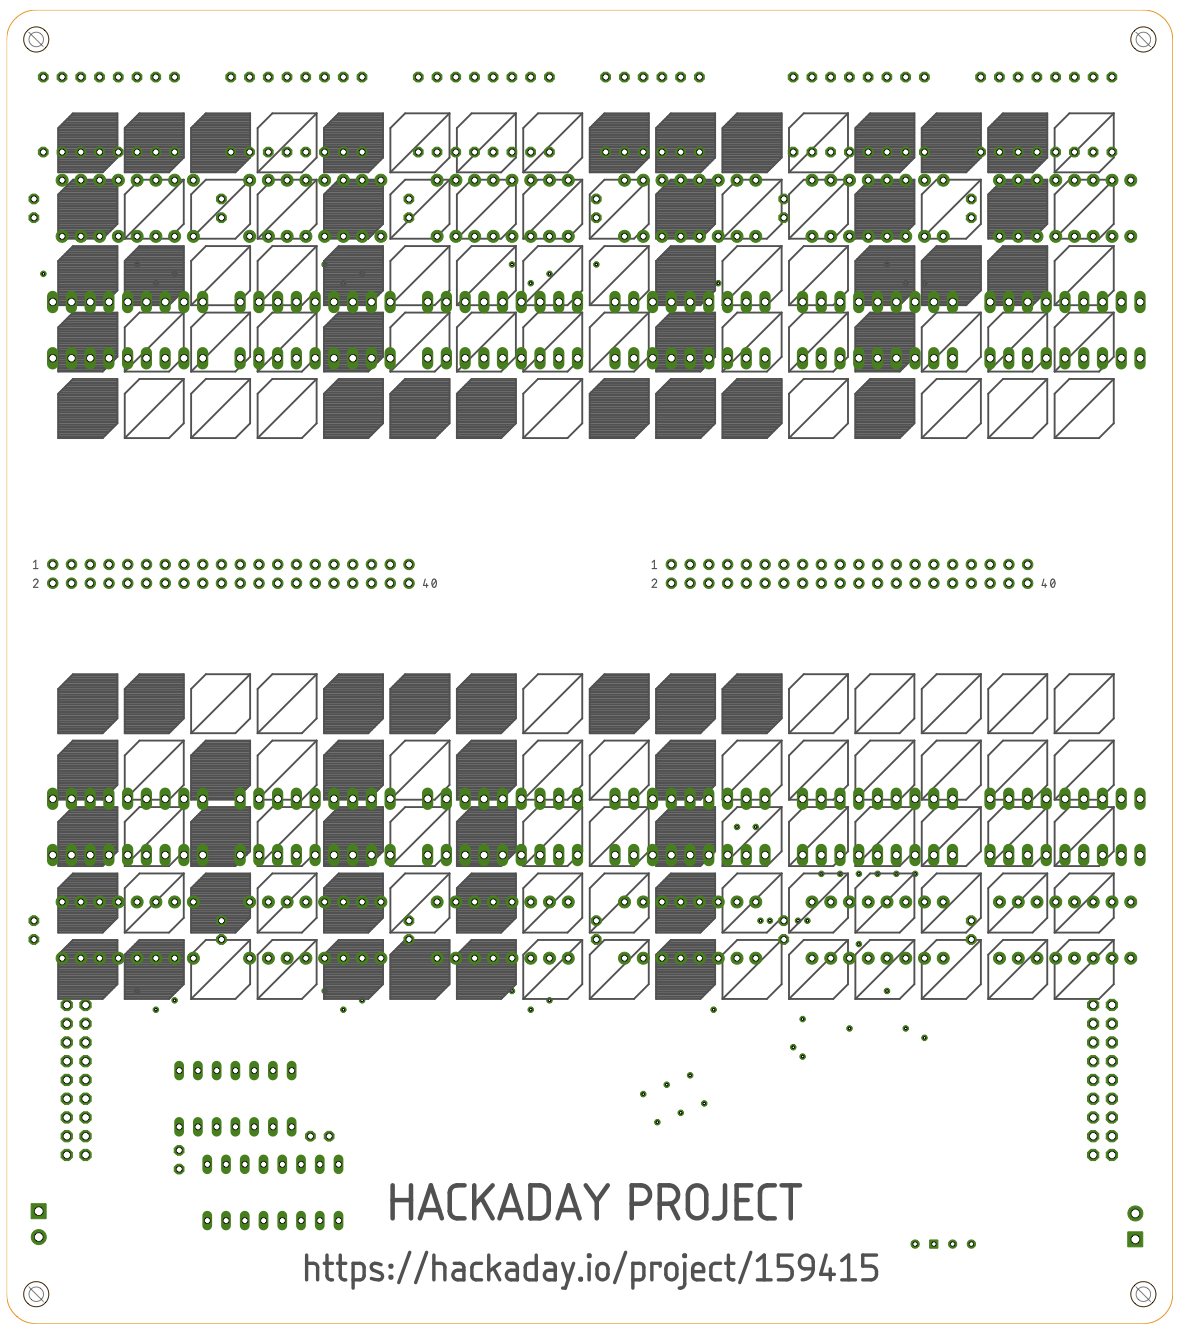
    Here are some screenshots of the layout, I took the liberty to make some silkscreen “art” on the back but the result might not be as expected as there are vias and through-hole pads literally everywhere.

    Layout output from Eagle
    Improvised "PCB art" on the back

    On the final board, at a later stage, I’ll probably use SMD components to have more space to integrate an appropriate voltage regulator, some level shifting chips, and the ESP32. Maybe a nice soldermask color, and higher quality surface finish, would make for a cleaner, all in one final product, ready to be framed ! 

  • Schematic, ICs, and logic description

    Frederic L08/03/2018 at 10:24 0 comments

    As seen previously each dot is connected to three lines :

    • Column SET / RESET is either sourcing current from +24V or sinking current to GND
    • Row SET is sourcing current from +24V
    • Row RESET is sinking current to GND

    So we need to be able to Source Current from the +24V power supply, as well Sink Current to ground, both on the same line in the case of the column trace.

    • Source Current with MIC2981 driver

    This chip is a 8-channel source driver, it is connected to the power source, it has 8 logic inputs that control 8 high voltage outputs. When an input is HIGH, its corresponding output is sourcing power.

    This is pretty much the same as the MIC2981, except when an input is high, it connects the output to ground and sinks current through it.

    • Controlling the drivers with shift registers (SN74HC595)

    Several solutions available here, one could use a multiplexer with a binary counter to switch from one row to the next, and from one column to the next, but for more flexibility I chose to control the drivers with shift registers. These will give me a complete control over which columns and row I’m selecting, and in any order, through fast SPI communication. If required I could also flip several dots at the same time, but power will be limited to 500mA for sourcing and sinking from the drivers.

    • Quad latch for SET or RESET selection (CD74HC75)

    One thing I want to avoid is to shortcut +24V to GND, which could be easily done with a simple mistake in the code such as having both the SET output and RESET output of the micro controller HIGH or LOW at the same time. To avoid this, and reduce the outputs required from the micro controller, I chose to use only one output which would be either HIGH for SET and LOW for RESET. This quad latch splits an input in two opposite signals which will restrict the system to be only in SET mode or only in RESET mode.

    • NAND gate for enabling shift registers through pulse control (SN74AS00)

    With this setup, the only way to control the pulse of current that goes through the dots is by shortly enabling the output of the shift registers. As we need to select which shift registers we want to switch on (either the ones for SET, or the ones for RESET), we can combine the SET AND PULSE or RESET AND PULSE. OE being active low, a NAND gate instead of AND is appropriate.

    • Power sources

    For the power supply, I will start with a MeanWell LRS 150-24, an open frame PSU probably overkill with 150W of power. I’ll select a final PSU when I’ll have figured how much power I need to run the display.

    For the low voltage power, I found a small cheap adjustable switching PSU circuit on eBay, which offers variable output including 3.3V for the ESP or 5V. All ICs mentioned above are compatible with 3.3V or 5V inputs.

    • Logic subtlety and controller available modes

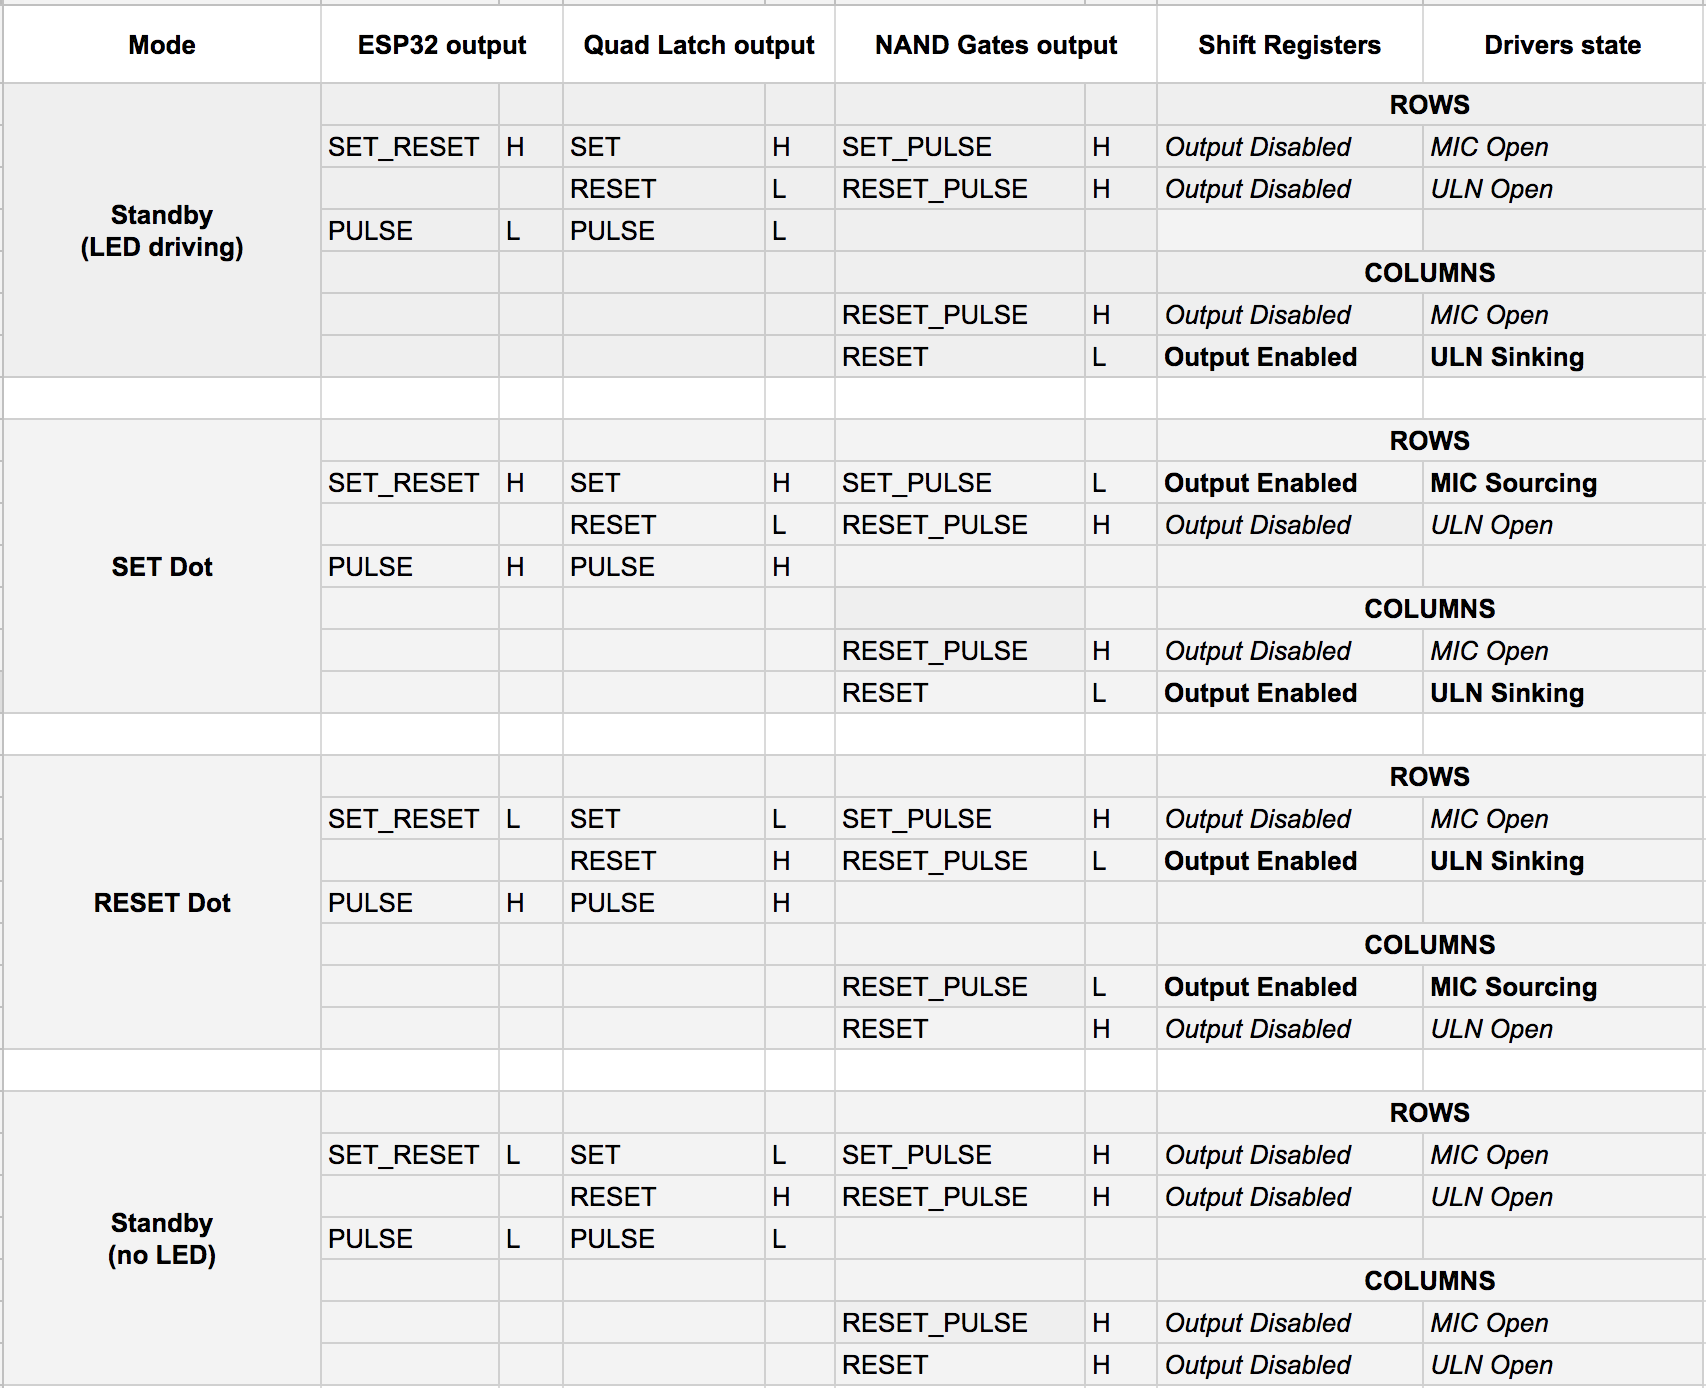
    If you look closely at the schematic, you'll notice that the columns sink drivers associated shift registers (bottom left) are not enabled through the SET_PULSE line as we could expect, but instead directly from the RESET line, bypassing the NAND gate. This is due to the design of the LEDs on the ANNAX display.

    The LEDs have their anode connected to the shift registers on the display itself (controlled independently), and their cathodes are connected to the columns SINK lines. Therefore, when I'm not flipping dots (PULSE line LOW), I still need to enable the columns sink lines to control the LEDs, independently of the PULSE input.

    Here is a table with the 4 different modes the controller can be according to the state of the SET_RESET and PULSE output lines of the micro controller :

View all 17 project logs

Enjoy this project?

Share

Discussions

ClancyThePanda wrote 11/11/2023 at 23:55 point

Hi Frederic, 

how far are you to post public release of pcb design and code? I asking because i want build it with four Annax ZM16C30 panels.

Best regards from Poland
Konrad

  Are you sure? yes | no

Sebastius wrote 01/01/2020 at 23:19 point

Hi Frederic, do you have any updates on hardware and software? I am redesigning my own flipdot driverboard based on your work as i like the protection in the logic with the set/reset lines. Mine had i2c 16bit LED drivers to get everything connected and while it worked, it is way too slow (and i burnt a few chips myself). 

Any hint why you use IC10 to split set_reset into set and reset, instead of just using a gate on the 7400 to invert Set into Reset?

Also U1-U4 are 'enabled' using Reset, not using a 'pulse' signal, might be the cause of some fried chips. 

Are you willing to share your code? I wonder how yours got so incredibly fast compared to my stuff. 

Also, i have a theory why some chips burn faster. The most issues i have is when i burn column one chip, it also destroys the row chip, which then takes out more column chips. But i also think it has to do with chip quality. AliExpress chips caused heaps more issues than the Farnell ones i had. 

I have 8 panels of 16x32 flipdots currently, so my plan at some point is to make one massive 1m^2 display with 64x64 pixels. Or perhaps 4 smaller displays for multiplayer games. My first attempt with a 32x32 display plays snake and tetris. 

  Are you sure? yes | no

Frederic L wrote 05/01/2021 at 15:54 point

Hi, quite late... but I'm back working on that project since a couple of weeks or so.

Have you solved your problems ?

No explanations as to why I used IC10 for splitting the set/reset when I had gates available on the 7400. You could probably get away with only using the 7400 gates and obtain the same result.

Fried chips happened on my side by errors in my code (flipping too many dots at once exceeding the sink/source drivers output capacity), or having a pulse length too long (150us to 200us only required with 24V). I bought my chips from Mouser, so they may be of better quality than the aliexpress ones.

An Arduino or ESP32 are perfectly fine at running the display at high refresh rates. I have recently tried using a Raspberry Pi for ease of programming games and such in Python, but to the expense of a fast refresh rate. Raspberry Pi's are not good at dealing with GPIOs with precise timing (pulses where between 500us to 1500us when my code only asked for 200us).

I will probably try to have a Raspberry Pi running games and web connections, and having a microcontroller like the Pi Pico or an Arduino dedicated to refreshing the display and running the LEDs.

I hope that helps.

  Are you sure? yes | no

Modzer0 wrote 07/23/2018 at 14:33 point

Cool, but you could have a an easier time with control if you did some reading on core memory and how things were designed. The hysteresis of the dot core is the same thing, just using the polarity to flip a dot rather than store data and requiring a bit more power. You could store data in those as well if you add a read line.

  Are you sure? yes | no

Frederic L wrote 07/29/2018 at 07:09 point

That's very valuable thank you, it seems it's pretty much the same thing ! I guess I have a bit of reading to do now ^^

  Are you sure? yes | no

toby wrote 02/26/2020 at 23:10 point

Any specific references you found useful? I'm also considering something based on your design.

  Are you sure? yes | no

atltvhead wrote 07/16/2018 at 14:55 point

Heck yeah! 

  Are you sure? yes | no

Mike Szczys wrote 07/03/2018 at 15:43 point

I would also like to know where you picked these up. Flip-dot displays have been on my project list forever but I'm perpetually unable to source panes without breaking the bank.

  Are you sure? yes | no

Frederic L wrote 07/12/2018 at 10:07 point

Hi, new log with my research. Let me know if you find better sources !

https://hackaday.io/project/159415/log/149181-a-bit-about-pricing-and-sourcing

  Are you sure? yes | no

Mike Szczys wrote 07/12/2018 at 18:55 point

That's awesome, thanks!

Regarding controllers. I know @Elliot Williams built a controller for a flip dot display but I don't think he's posted details yet. I'll try to bug him to get something up.

  Are you sure? yes | no

Sophi Kravitz wrote 03/01/2019 at 19:23 point

helpful log, thanks!

  Are you sure? yes | no

Yann Guidon / YGDES wrote 07/17/2018 at 02:41 point

Mike : eBay is a semi-decent source.
more examples at #Dot flippers too :-)
And https://hannio.org/produkt/flipdot-modul-16x24/ is interesting

  Are you sure? yes | no

Mike Szczys wrote 07/17/2018 at 15:13 point

Hey, that's a pretty good price (0.11 € per pixel!). Too bad they're out of stock but I'll key my eye on this. Thanks!

  Are you sure? yes | no

Yann Guidon / YGDES wrote 07/01/2018 at 21:46 point

Where did you buy it ? :-) Please share your information :-)
and request to participate in the Dot Flippers project !

  Are you sure? yes | no

Frederic L wrote 07/12/2018 at 10:08 point

Hi, I just published a log with my research: https://hackaday.io/project/159415/log/149181-a-bit-about-pricing-and-sourcing

Ciao !

  Are you sure? yes | no

Similar Projects

Does this project spark your interest?

Become a member to follow this project and never miss any updates