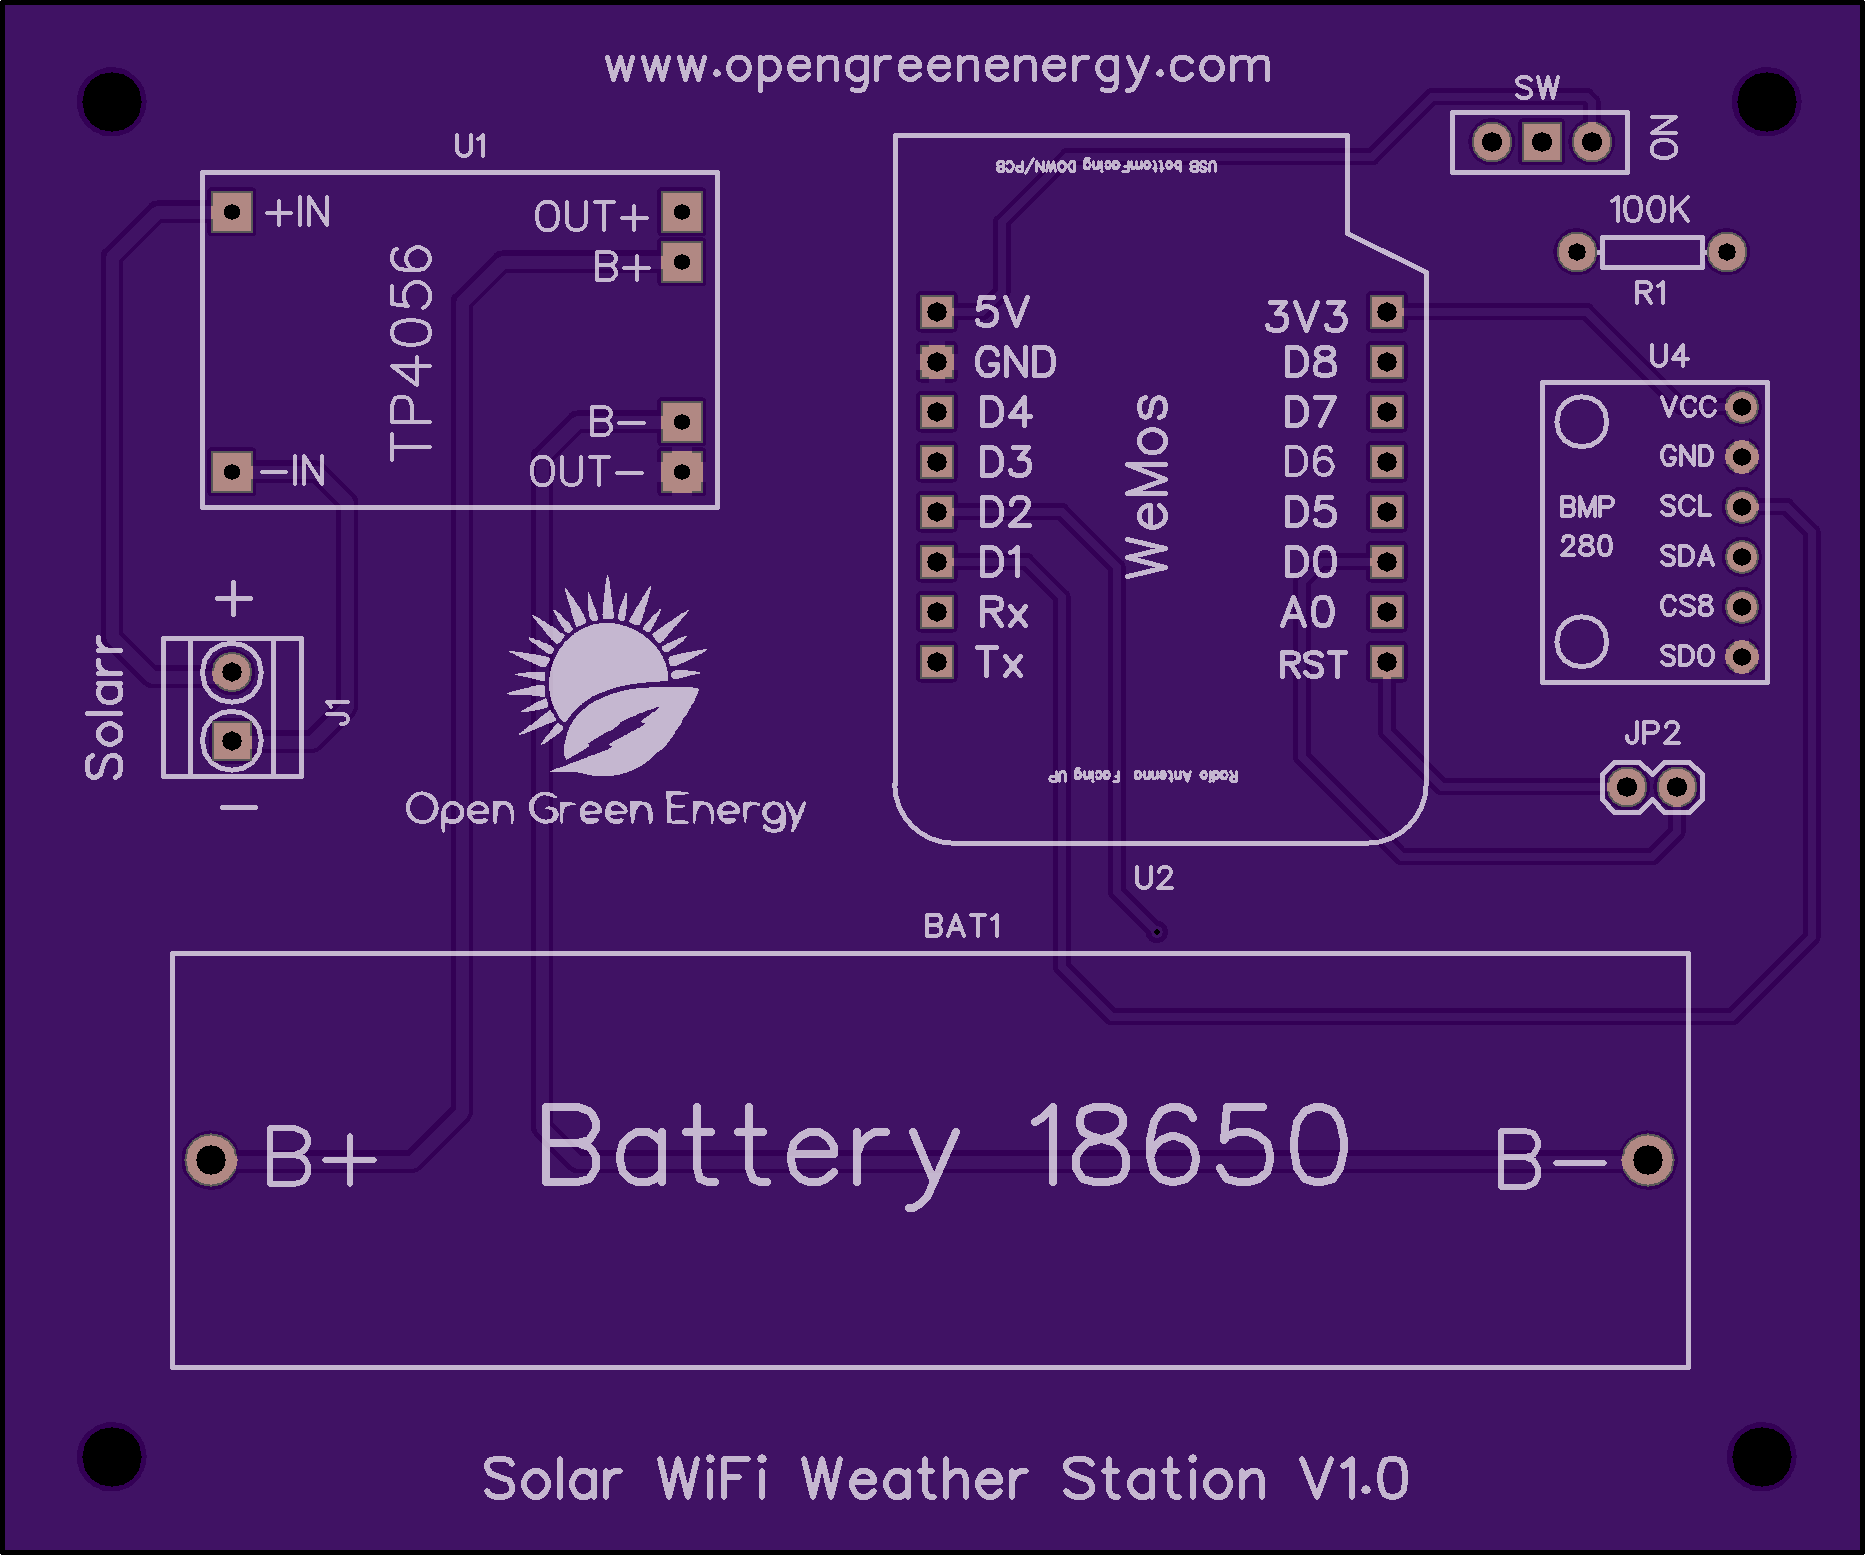
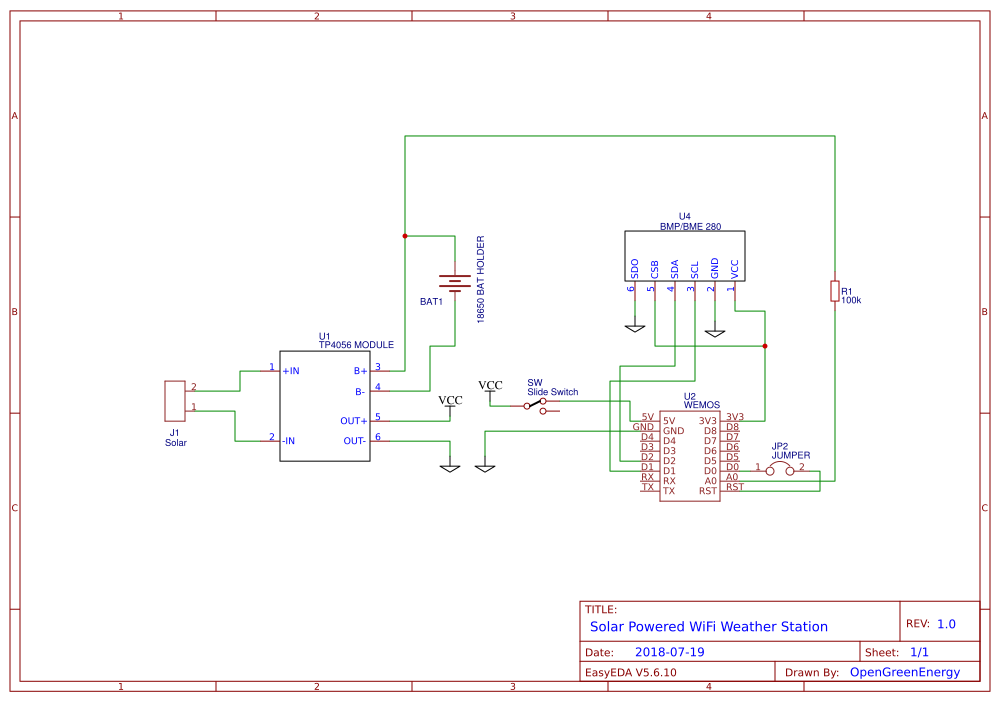
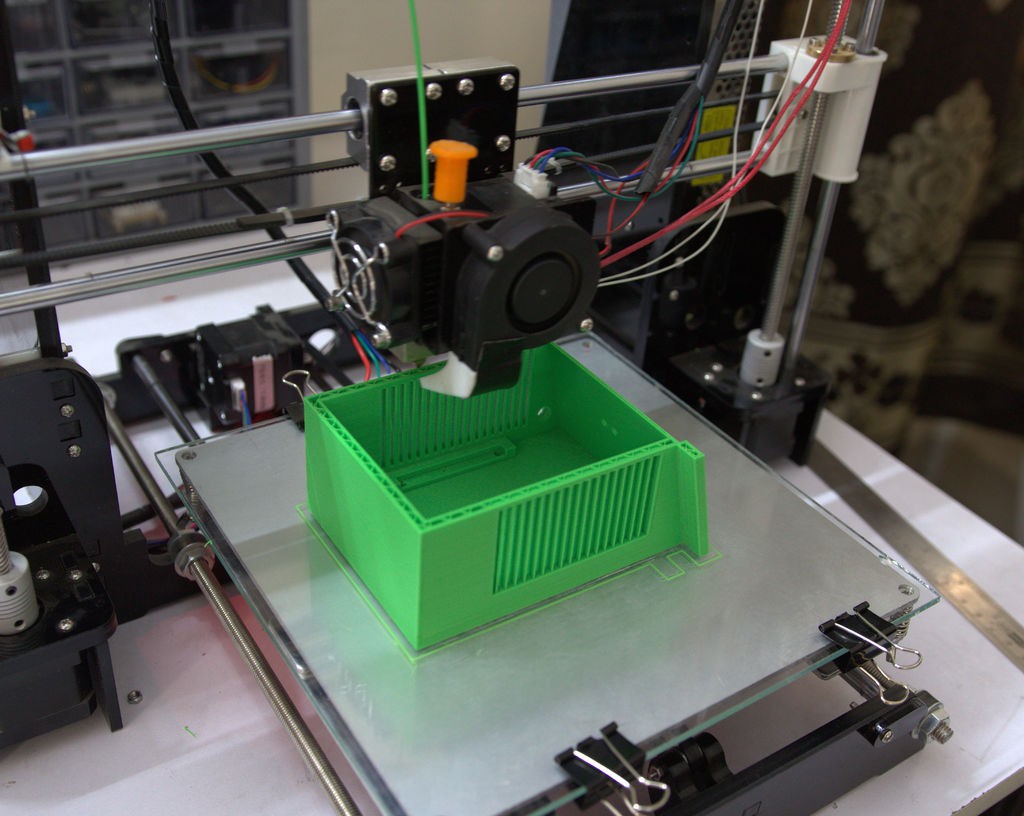
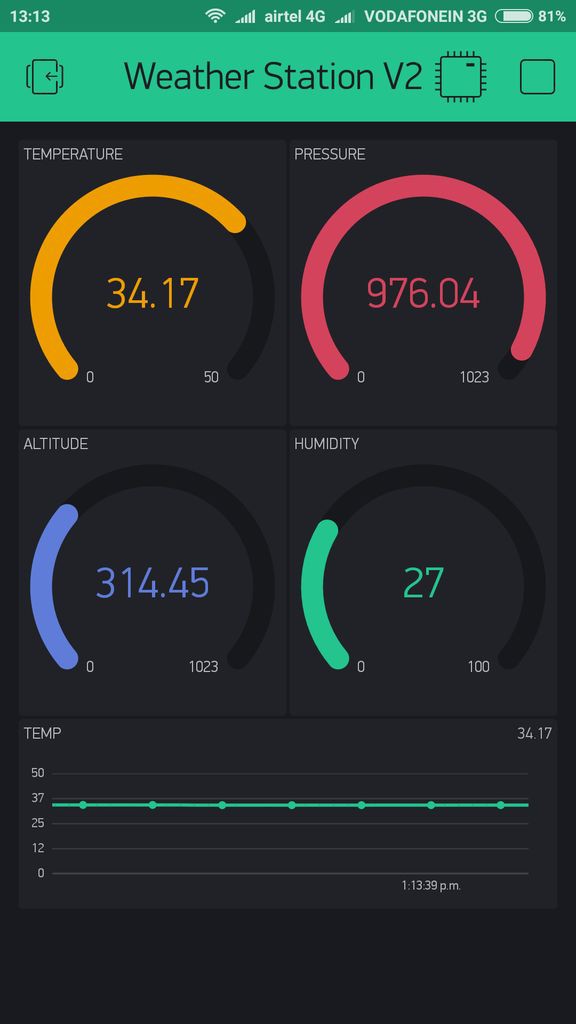
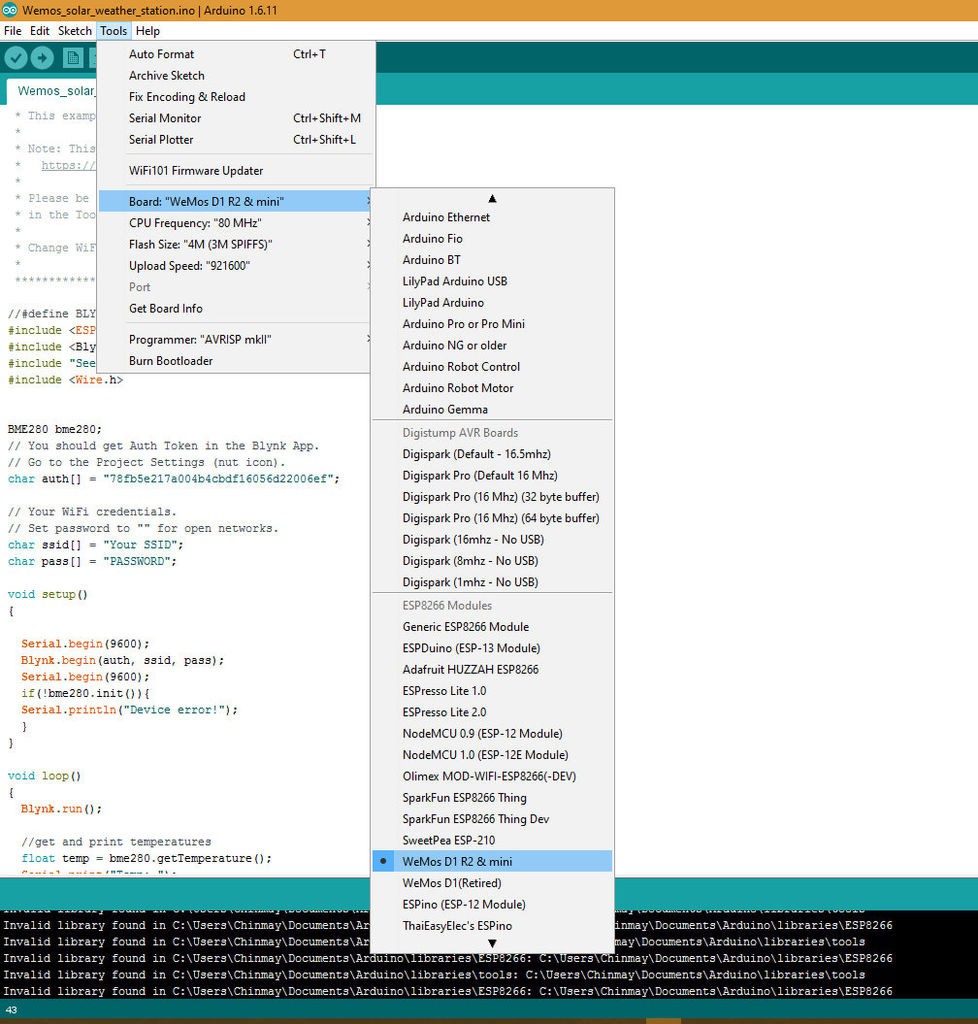
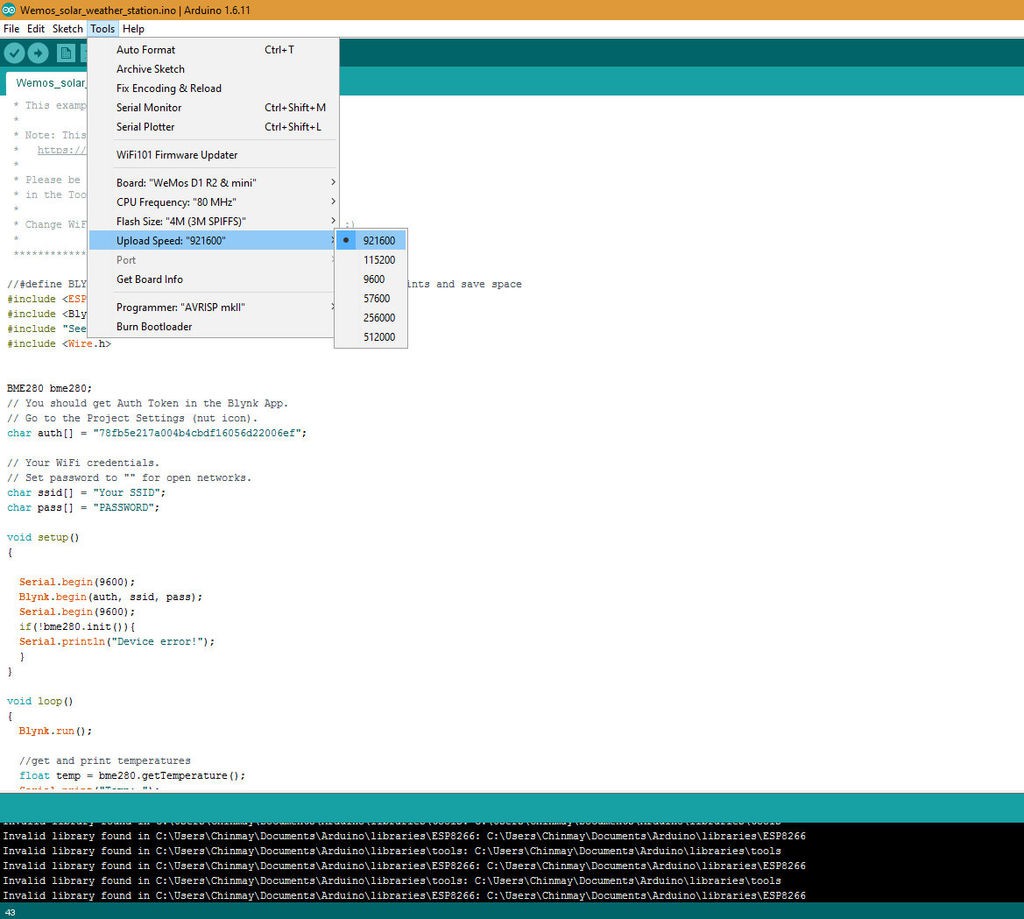
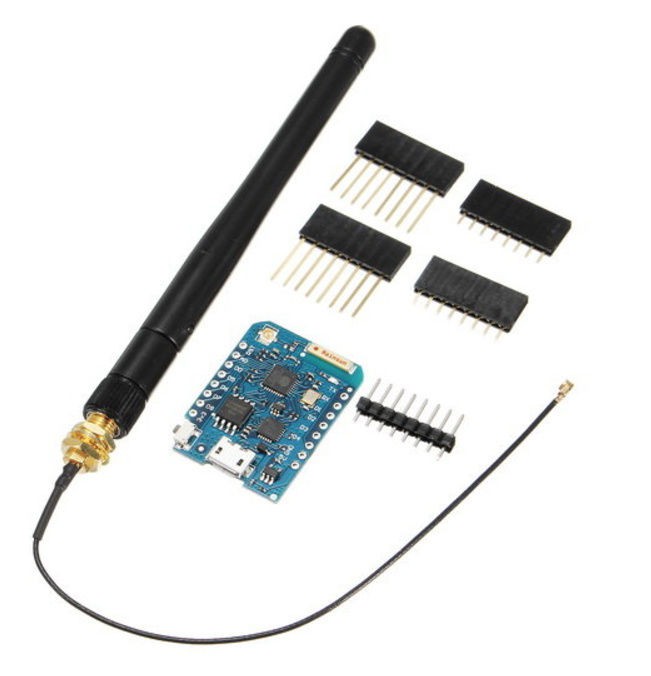
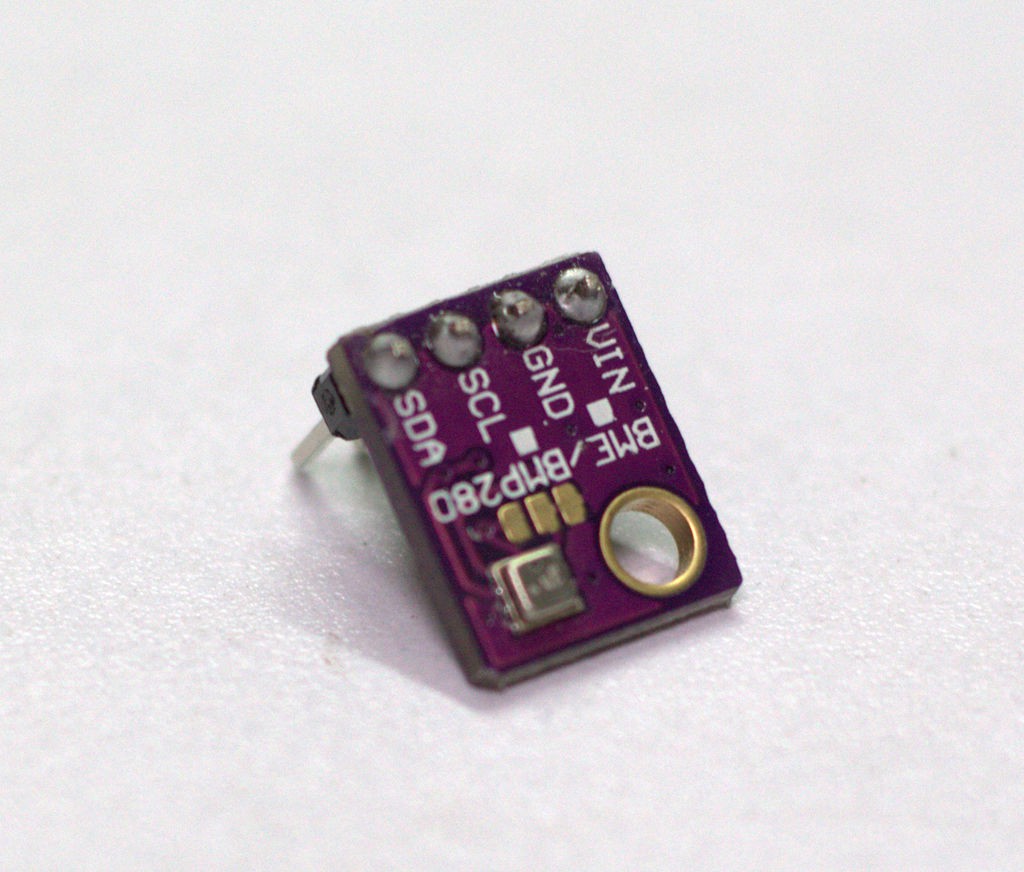
ESP8266 based Solar Powered wireless Weather Station
To make the experience fit your profile, pick a username and tell us what interests you.
We found and based on your interests.
Arduino Code_Weather Station.rarArduino CodeRAR Archive - 2.91 kB - 07/09/2018 at 17:48 |
|
|
3D printed Enclosure .zip.STL files for 3D printed Enclosurex-zip-compressed - 367.12 kB - 07/09/2018 at 17:46 |
|
Recently I designed the PCB for my weather station with new feature to monitor the battery voltage.
Another change is replacement of 14450 by 18650 Li Ion Battery.The battery foot print is in the PCB itself.
The PCB is still not tested, waiting for its arrival.
1. Adding a Voltage divider network to measure the battery voltage and monitoring the data on Smartphone.
2. Power Consumption optimization.
3. Separating the Solar Panel from the main enclosure to get more accurate weather readings
4. Making a custom PCB for the circuit.
5. Over The Air ( OTA ) sensor calibration
6. Option to add more weather sensors like wind, rain and light sensors.
First create an account on ThingSpeak.
Then create a new Channel on your ThingSpeak account. Find How to Create a New Channel
Fill Field 1 as Temperature ,Field 2 as Humidity and Field 3 as pressure.
In your ThingSpeak account select “Channel” and then “My Channel”.
Click on your channel name.
Click on “API Keys” tab and copy the “Write API Key”
Open the Solar_Weather_Station_ThingSpeak code .Then write your SSID and Password.
Replace the “WRITE API ”with the copied “Write API Key”.
Required Library : BME280
Credit : This code is not written by me .I got it from the link given in a YouTube video by plukas
Designing the Enclosure :
This was the most time consuming step for me.I have spent around 4 hours to design the enclosure. I used Autodesk Fusion 360 to design it. The enclosure have two parts : Main Body and Front Cover
The main body is basically designed to fit all the components. It can accommodate the following components
1. 50x70mm circuit board
2. AA battery holder
3. 85.5 x 58.5 x 3 mm Solar Panel
4. 3dBi external antenna
Download the .stl files from Thingiverse
3D Printing the Enclosure :
After completion of design, it is time to 3D print the enclosure.In Fusion 360 you can click on make and slice the model by using a slicer software.I have used cura to slice the model.
I used an Anet A8 3D printer and 1.75 mm green PLA to print out all the body parts. It took me about 11 hours to print the main body and around 4 hours to print the front cover.
I will highly recommend to use another printer for you that is Creality CR - 10. Now a mini version of the CR-10 is also available.The Creality printers are one of my favorite 3D Printer.
As I am new to 3D designing, my design was not optimistic.But I am sure, this enclosure can made by using lesser material ( less print time ). I will try to improve the design later.
My settings are:
Print Speed : 40 mm/s
Layer Height : 0.2
Fill Density : 15%
Extruder Temperature : 195 degC
Bed Temp : 55 degC
Blynk is an app that allows full control over Arduino, Rasberry, ESP8266 and many more hardware.It is compatible for both Android and IPhone. Right now the Blynk app is available with free of cost.
Follow the below steps :
Step-1: Download the Blynk app
1. For Android
2. For iPhone
Step-2: Get the Auth Token
In order to connect Blynk App and your hardware, you need an Auth Token.
1. Create a new account in Blynk App.
2. After the project was created, we will send you Auth Token over email.
3. Check your email inbox and find the Auth Token.
Step-3: Preparing Arduino IDE for Wemos Board
To upload the Arduino code to Wemos board, you have to follow this Instructables
Step-4: Install the Libraries
Then you have to import the library on to your Arduino IDE
Download the Blynk Library
Step-5: Arduino Sketch
After installing the above libraries, paste the Arduino code given in files section of this project.
Enter the auth code from step-1, ssid and password of your router.
Then upload the code.
To upload the code, following settings are preferable :
PU Frequency: 80MHz 160MHz
Flash Size: 4M (3M SPIFFS) – 3M File system size 4M (1M SPIFFS) – 1M File system size
Upload Speed: 921600 bps
Implementing Power Saving Mode :
The ESP8266 is a pretty power hungry device. If you want your project to run off a battery for more than a few hours, you have two options:
1. Get a huge battery
2.Cleverly put the Thing to sleep.
The best choice is the second option.Before using the deepsleep feature, Wemos D0 pin must be connected to the Reset pin.
Credit : This was suggested by one of the Instructables user " tim Rowledge ".
More Power Saving Option :
The Wemos D1 Mini has a small LED that lights when the board is powered. It consume lot of power. So, just pull that LED off the board with a pair of pliers. It will drastically drop the sleep current down .
Now the device can run for long time with a single Li Ion battery.
The Wemos D1 mini Pro board have a inbuilt ceramic antenna along with provision for connecting an external antenna to improve the range.Before using the external antenna, you have to reroute the antenna signal from the built-in ceramic antenna, to the external socket.This can be done by rotating the small surface mount (0603) Zero Ohm resistor (sometimes called a link).
You can watch this video made by Alex Eamesto rotate the zero ohm resistor.
Then snap the antenna SMA connector in to the Wemos Pro mini antenna slot.
In the earlier days weather parameters like ambient temperature,humidity and barometric pressure were measured with separate analog instruments: thermometer, hygrometer and barometer.But today the market is flooded with cheap and efficient digital sensors that can be used to measure a variety of environmental parameters.The best examples are sensors like DHT11, DHT 22, BMP180, BMP280 etc.
In this project we will use a BMP 280 sensor.
BMP 280 :
BMP280 is a sophisticated sensor that very accurately measures barometric pressure and temperature with reasonable accuracy. The BME280 is the next-generation of sensors from Bosch, and is the upgrade to the BMP085/BMP180/BMP183 - with a low altitude noise of 0.25m and the same fast conversion time.
The advantage of this sensor is that it can use either I2C or SPI for communication with microcontroller. For simple easy wiring, I will suggest to by I2C version board.
The Power harvesting circuit is made of TP4056 charging IC and DW01 li Ion battery protection IC.
About the TP4056 :
The TP4056 IC is a complete constant current/constant-voltage linear charger for single cell lithium-ion/Lithium Polymer (LiIon/LiPo) batteries. Its SOP-8 package and low external component count make the TP4056 ideally suited for portable applications.
Other features include :
1. Current monitoring
2. Under voltage lockout
3. Automatic recharge
4. Two status LED to indicate full charge and the presence of an input voltage.
To know more about TP4056, you can read the Data Sheet.
About the DW01 :
The DW01 battery protection IC is designed to protect lithium-ion/polymer battery from damage or degrading the lifetime due to overcharge, overdischarge, and/or overcurrent for one-cell lithium-ion/polymer battery powered systems.
To know more about DW01 , you can read the Data Sheet
I used a ready made module which include both TP4056 and DW01 ICs. This module will offer 1000 mA charge current then cut off when charging is finished. Furthermore when the battery voltage drops below 2.4V the protection IC will cut off the load to protect the cell from under voltage. It also protects against over voltage and reverse polarity connection.
For this project,
1. Solder the two male headers to the Wemos D1 pro mini board.
2. Solder a 4 pin male header to the BMP 280 module.
After soldering the headers the module will look as shown in the above picture.
Next step is soldering the headers to the perforated board.
1. First place the Wemos board over the perforated board and mark the foot print.Then solder the two row of female headers over the marked position.
2. Then solder a 4 pin female headers as shown in the picture.
3. Solder a screw terminals for battery connection.
Stick a small piece of double sided tap on the back side of the charging module and then paste it on the perforated board as shown in the picture.During mounting care should be taken to align the board in such a way that the soldering holes will match with the perforated board holes.
Adding terminal for Solar Panel
Solder a screw terminal just near the micro USB port of the charging board.
You can solder this terminal in the earlier step also.
Create an account to leave a comment. Already have an account? Log In.
Awesome project! I have a pond that i want to monitor so i'll probably incorporate this design to include sensors for water temp, level and maybe ph level
Become a member to follow this project and never miss any updates
I need Fahrenheit for my Temperature readings.
Do you see any issues with changing this line of code:
From:
measured_temp = measured_temp + TEMP_CORR;
And Changing To:
measured_temp = measured_temp *1.8+32;
It seems to be working. Let me know if you know of a better way to use Fahrenheit.
Thanks.