It was a dark and stormy night (not really) in winter 2013 and I was in the produce section staring at some particularly bad lettuce. Wilted would have been a kind description. "There's got to be a better way!" I thought. I had always been interested hydroponics, growing plants in water without soil, and figured I could easily grow lettuce better than THAT.
Researching existing hydroponic systems, I found they were bulky and expensive. Being a typical engineer, I figured I could make something better/faster/cheaper. How hard could it be? I determined that the most advanced systems use aeroponics, which sprays the roots with a fine mist. Wanting to be at the forefront indoor agriculture, I began designing my own aeroponics system.
The picture below should give you an idea how the system works. Looking through a plant port in the side of a tower pod, it shows the roots after the lettuce has been growing for about 6 weeks. The round object at the top of the frame is a mist sprayer. The black square in the middle is one of the foam plant holders coming through the side of the pod. The water drains through the stacked pods from top to bottom, and anything not absorbed by the roots ends up back in the bucket.
Plant roots thrive in an oxygen rich environment but must remain moist. The computer controls the pumps and valves to run a 10 second spray cycle every 5 minutes. The computer, pods, foam, and sprayers combine to give the roots an optimal growing environment.
In the following entries, I'll describe the various parts that make up The Little Green Tower (LGT) and the design decisions made as the system evolved over the last five years. The goal is to design a computer controlled, modular, compact, and low cost aeroponic system that is easy to replicate. I encourage everyone to ask questions, since it can get boring just talking to myself.
2
How it Stacks Up
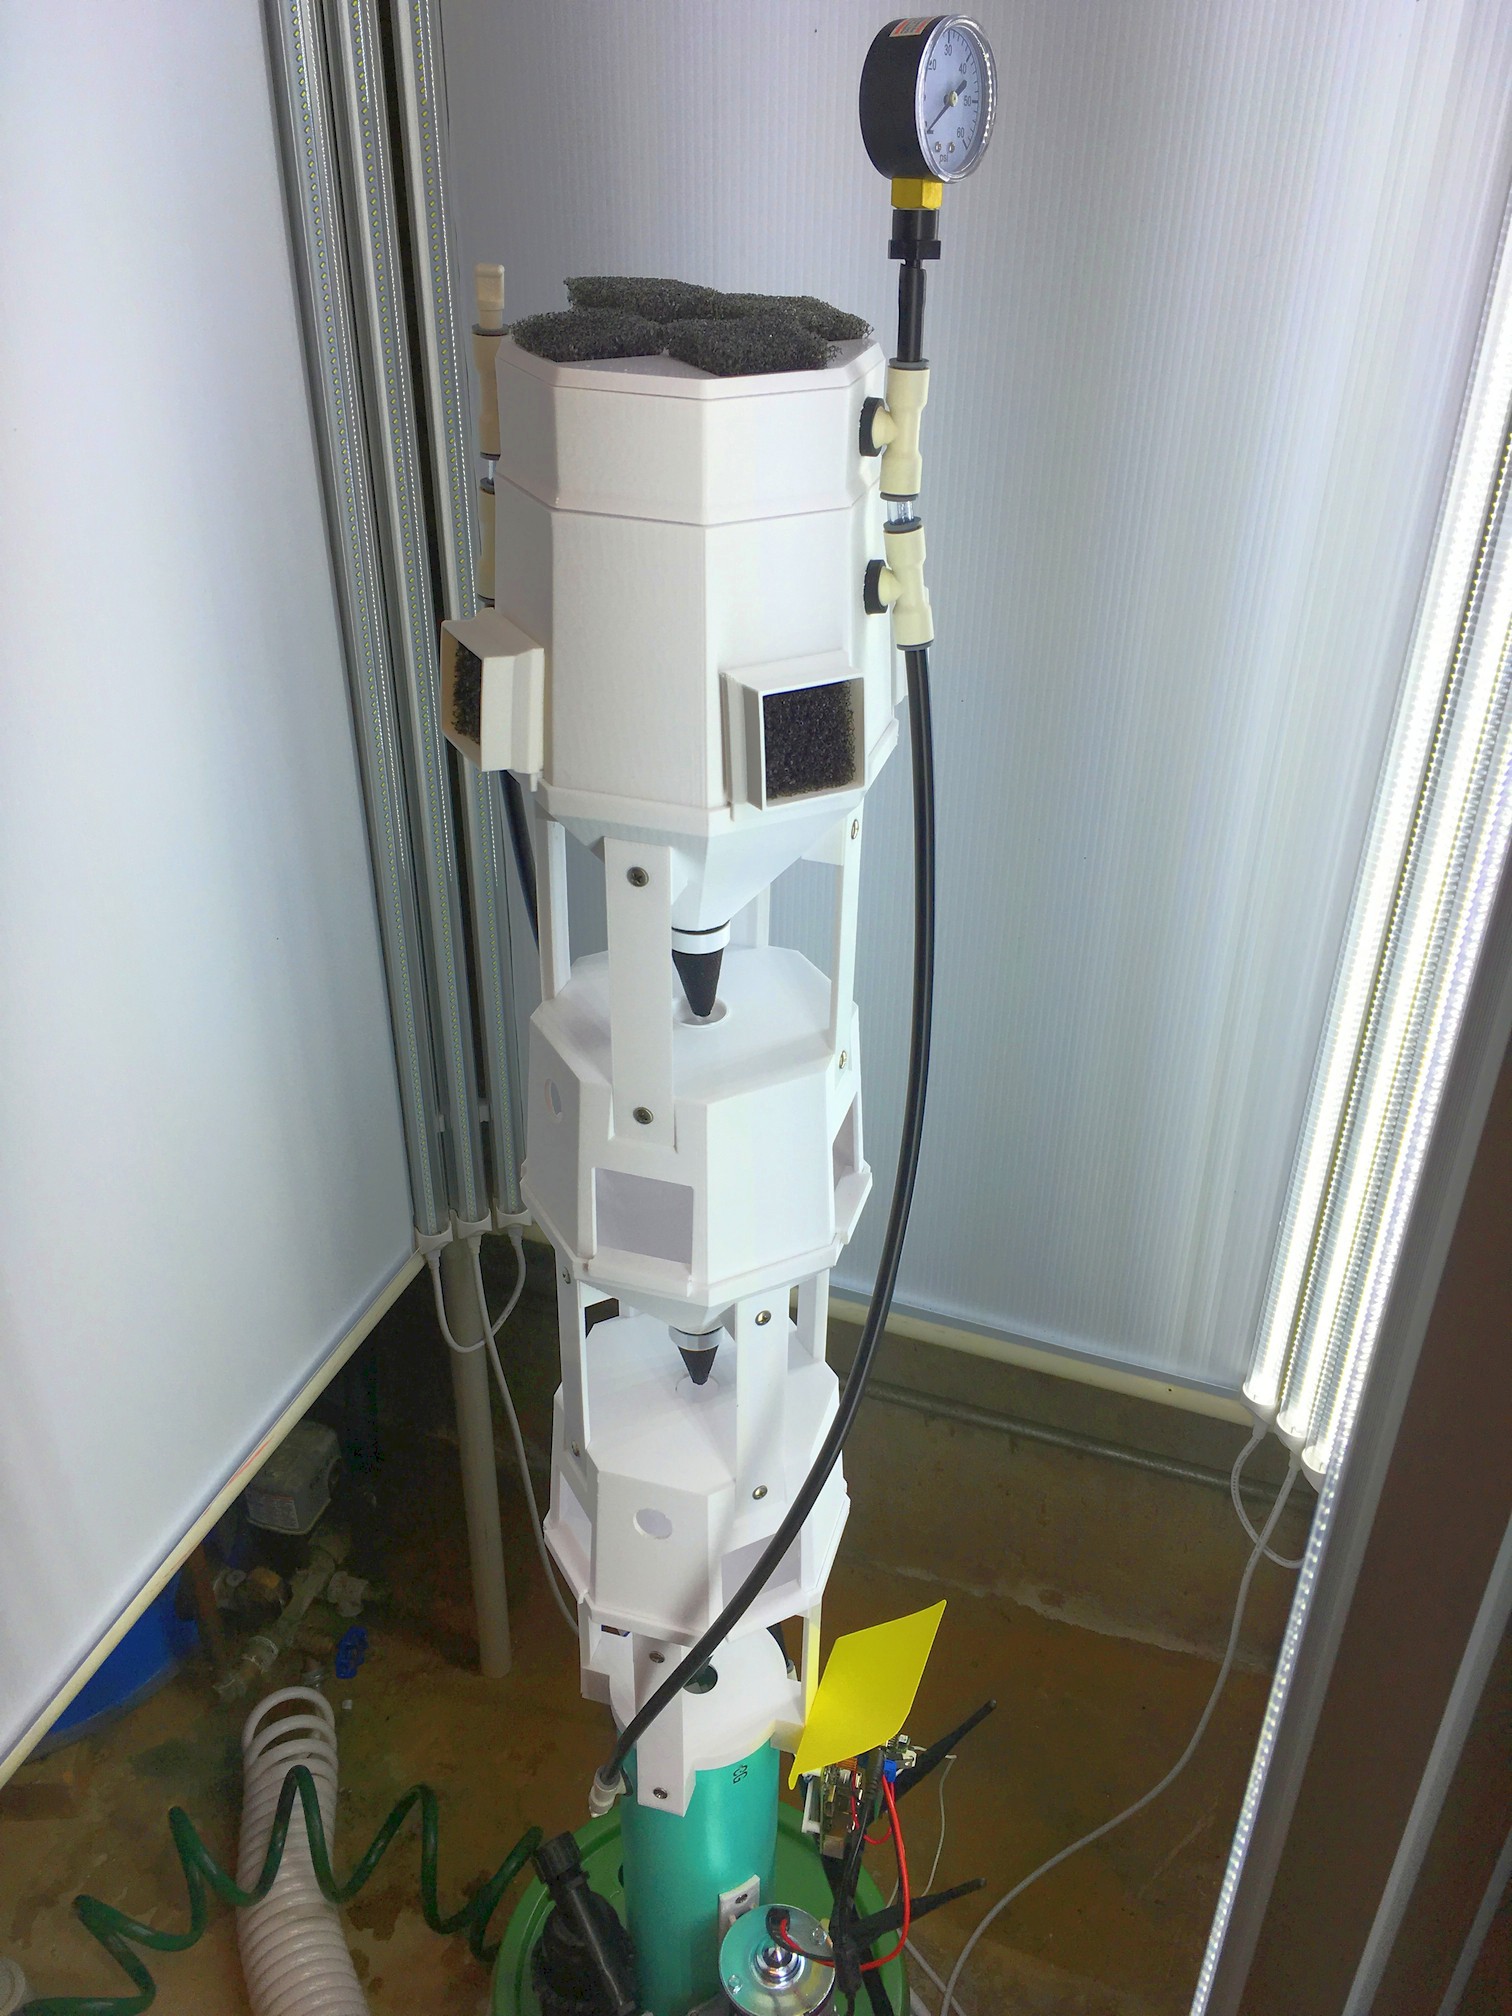
The picture below shows the main portion of a three pod test system. The pods are separated from eachother and from the base with four vertical links. These minimize the amount of plastic and thus 3D printing time/cost to get the desired vertical spacing. From top to bottom the tower has the following:
Pressure Gauge
Plant Starter Area
Plant Pod A
Plant Pod B
Plant Pod C
PVC Pipe Mounting Adapter
PVC Pipe Base with Computer and Pump
200 Mesh Stainless Steel Water Filter
Water Reservoir
Pipe Base Aligner (inside the bucket)
The tower has two valves, one in the plant starter area and one at the top of the PVC pipe base. The top valve is normally open and automatically closes when the the system is pressurized. The base valve is also normally open and closes to pressurize the system.
Only a tiny amount of water flows through the sprayers when the system is pressurized. In order to make sure that the water is well mixed, the computer runs the pump for about 10 seconds at the beginning of a spray cycle with the top and bottom valves open. This circulates water through the tubing and out the valve at the top. The water cascades through the system and back into the bucket producing a "waterfall effect" that puts lots of oxygen into the water. The computer then closes the bottom valve for 10 seconds to pressurize the system and run the sprayers. At the end of the cycle the computer opens the bottom valve and the water in the tubing tubing drains back into the bucket.
One of the key features of the system is that the entire column can be lifted out of one bucket and placed into a second bucket. This makes changing the water very easy. The buckets even have convenient handles! The old nutrient mix is great fertilizer for lawns or shrubbery. I'm still experimenting with the best water changing schedule, but it will probably be about once a month.
3
Keep Your Plants On
Plants need something to support them while they grow. Many hydroponic systems use foam since it can expand as the plant grows. The LGT uses reticulated foam, which is a special type of open cell foam. Open cell foam has open walls between all of the bubbles that make up the foam. It is much more breathable than closed cell foam.
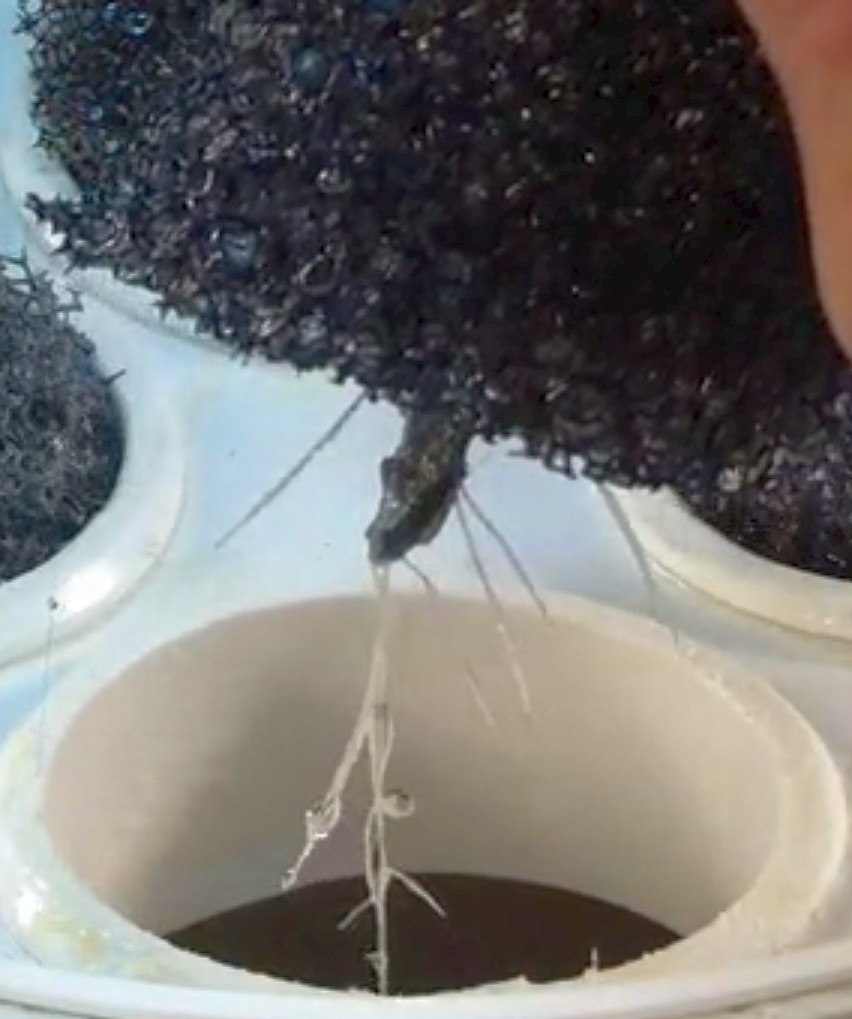
In the first PVC pipe based version of the system, the foam was cut using the die in the picture below. It produces a 2" cylinder with an "X" and hole in the center. The hole is filled with carbonized bamboo fiber that extends beyond the foam, as shown in the second picture. The fiber wicks moisture from inside the pod to the seeds when they are first planted. Once I decided that the system could be 3D printed, I changed to square holes in order to avoid foam waste after cutting. In this case, the same die is used with pre-cut square blocks, but only the "X" and hole portion in the center is cut.
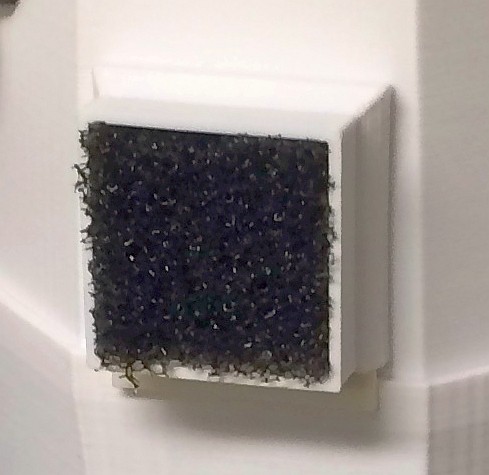
The foam is held in place by a 3D printed square collar as shown below. A child-size silicone wrist bracelet provides a gasket between the plastic holder and the pod. The picture in section 1 above shows an interior view of the plant holder where you can see the gasket.
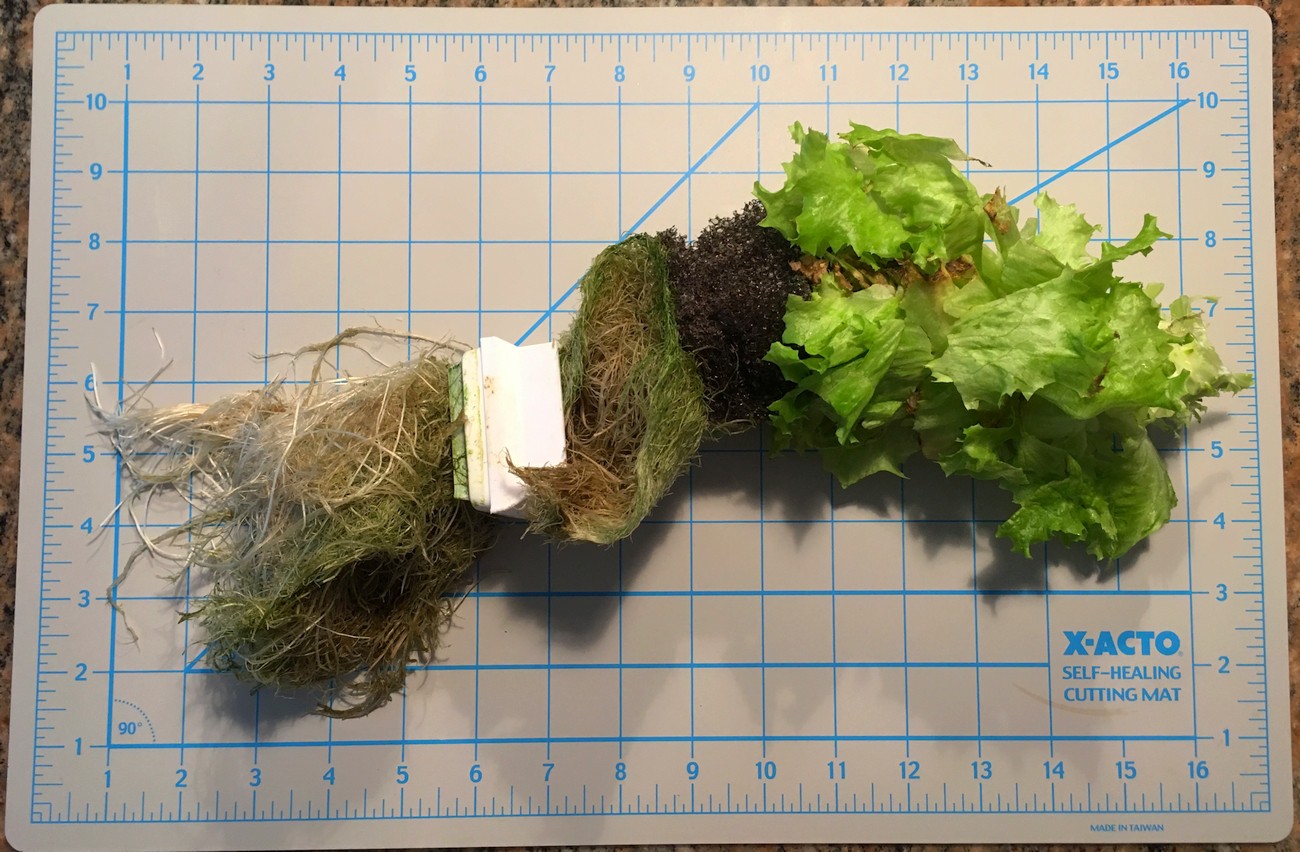
The picture below shows a plant that was removed after about 60 days. As the lettuce grows, the largest leaves are picked. The remaining leaves grow more quickly, since a larger root system is supporting a smaller number of leaves. For the green leaf lettuce below, leaves can be picked starting about five weeks after the initial seeds are planted. Small leaves can be picked at about 4 weeks.
4
Baby Steps
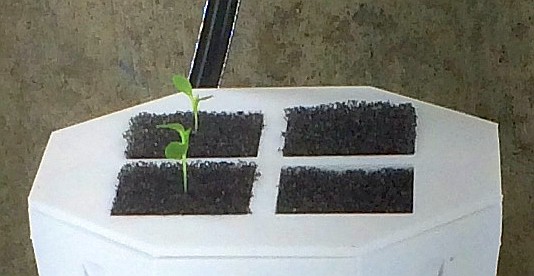
Above the top pod sits a platform with four spots for foam plant holders. This is where seeds are initially planted and sprout. The sprayers in the top pod keep the plant starters moist. The best practice is to plant two or three seeds in the wick at the center of each block. After the seeds sprout, the smaller plants are culled, leaving one plant per block. Once the roots start popping out the bottom (a week or so for green leaf lettuce), the entire block is moved to a free spot in one of the plant pods below. This avoids disturbing the roots of the fragile seedlings. The time lapse video in the files section shows a plant sprouting and the roots after about a week.
I had conceived of the plant starter area initially to get more growing area in the same height. However, plant roots have the amazing ability to sense gravity, so starting the plants on "flat ground" is actually a requirement. As an experiment, I tried to start lettuce seeds in the side ports on the tower and the roots just grew down into the side of the plant holder, never reaching the inside of the pod.
5
Getting all Misty
To twist a phrase, into every aeroponics system a little mist must fall. Below is a picture of the spray nozzles used in the LGT. One of the best things about them is that they are compatible with the 3/8" push-lock Tee fittings that connect to the pump. If a nozzle ever gets clogged, you just pull out the old and push in the new. Each pod has spray nozzles on the opposite side of the pod from two plant ports. Since the spray cone angle is 80 degrees, the edges of the cones are well aligned to the plant ports. The exact alignment is not that critical since the nozzles fill the entire pod with mist.
The nozzle specs are shown below. The system runs at about 50 PSI, so the typical flow rate is about 1 gallon per hour. Note that this is a REALLY slow rate. Even running continuously with four pods, it would take about 20 minutes to fully recirculate the water in the reservoir. In reality, the spray portion of the cycle runs about 15 seconds every 5 minutes, so it would take over six hours to recirculate the water. In order to assure that the water is well mixed, the pump circulates water before closing the valve that activates the spray cycle.
Some aeroponics systems use nozzles that produce more of a stream than mist. Others use expensive nozzles that require high pressure and produce a very fine mist. The 30PFAF008-80 nozzles are a good compromise in price, performance, availability, and ease of replacement.
6
Go with the Flow
To RV or not RV, that is the question. Actually, it really was not that much of a question. After trying lots of cheap, noisy pumps, I decided the best solution was a standard 12V RV water pump. RV water pumps are durable, widely available, and there are even repair kits for when the diaphragms wear out. The pump is one of the most expensive components in the system, but it is also one of the most important. It does not pay to cheap out on a pump and have your system fail unexpectedly.
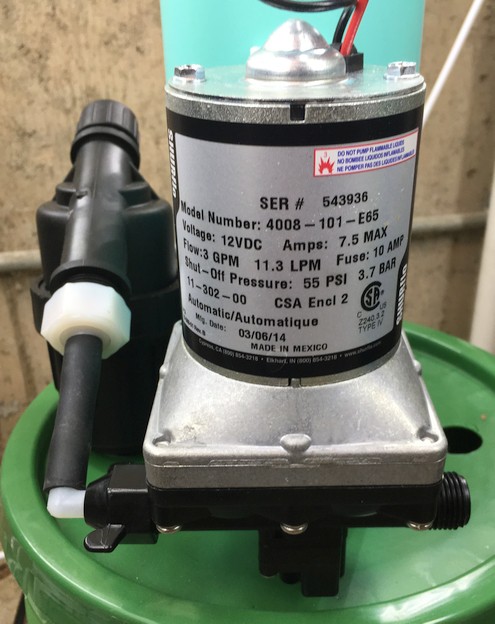
The picture below shows the LGT pump, a SHURFLO 4008-101-E65 . The pump comes from the factory with a rubber shock mount, but that is removed and the shock mount screws are used to hang the pump from the column on a 3D printed bracket. This allows the pump to be lifted out of the bucket at the same time as the rest of the column when the column is moved to a second bucket to change the water.
A possible additional benefit of hanging the pump on the column is that it vibrates the column when it runs. Some studies have shown that vibrating the root system of plants enhances growth.
7
The Bucket List
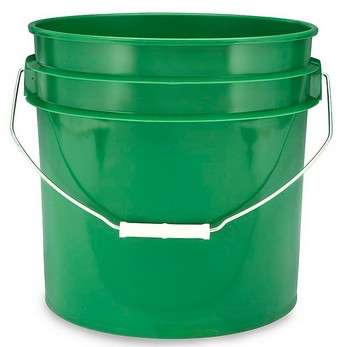
In order to minimize cost and maximize ease of use, the system uses standard FDA food contact approved 3.5 gallon buckets. These are filled with about 10L of nutrient solution, leaving enough space at the top so that the bucket can be carried without spilling. The built in handle makes them relatively easy to move, especially when full of water.
The green color is used to minimize the amount of light seen by the nutrient solution in order to minimize algae growth. While black would have been best in this respect, I was worried that it might absorb too much light and warm up the nutrient solution. Plus, green matches the plants :-) . White would have been best to minimize absorption, but it is lets too much light through.
One nice thing about buckets is that they are stackable. When shipping a system, two buckets don't take up much more space than one. Having two buckets makes changing the water very easy. Just mix up a new bucket of nutrients, pull the column from the existing bucket, place it temporarily on a column stand so that it doesn't fall over, replace the old bucket with the new bucket, and place the column in the new bucket. I actually haven't designed a stand yet, I just balance the column very carefully. Eventually there will be a stand.
Other tower systems have huge immobile water reservoirs. I'm not sure what their water changing procedure is. For the LGT, it's relatively easy to move the approximate 25 lbs/12Kg of bucket and water. I actually haven't weighed the column, but it feels like it's in the same weight range. After swapping the buckets, the old nutrient solution can be user to fertilize outdoor plants or grass.
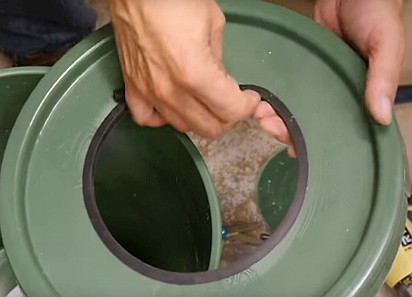
In order to minimize light intrusion and evaporation, the top of the bucket needs to be cut for a very close fit to the column. A 6-3/8" ceiling light hole saw is a good fit and provides just enough space for a rubber gasket around the inside rim.
Additional holes must be drilled for the water filter, the conductivity probe, and the PH probe. The exact dimensions of these holes has not been finalized.
8
Column Advice
This section will describe how a piece of standard 4" PVC pipe is used for the base of the tower
9
Mod Pods
This section will describe the plant pods
10
Outer Tubes
This section will describe the simple push-lock fittings used to bring the water from the pump to the sprayers
 Chris Johnson
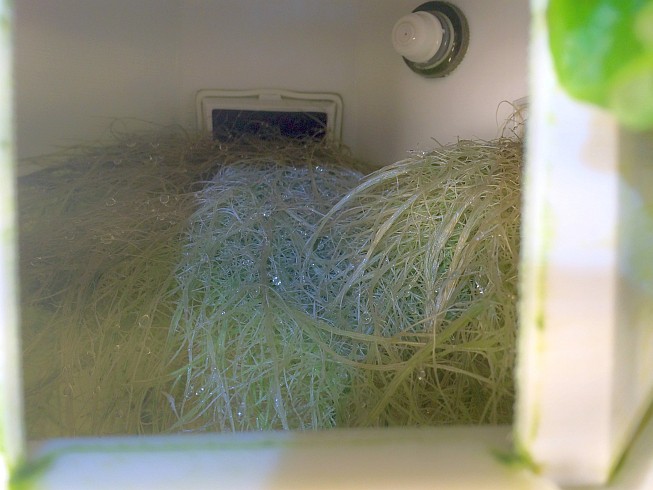
 The tower has two valves, one in the plant starter area and one at the top of the PVC pipe base. The top valve is normally open and automatically closes when the the system is pressurized. The base valve is also normally open and closes to pressurize the system.
 Each pod has spray nozzles on the opposite side of the pod from two plant ports. Since the spray cone angle is 80 degrees, the edges of the cones are well aligned to the plant ports. The exact alignment is not that critical since the nozzles fill the entire pod with mist.
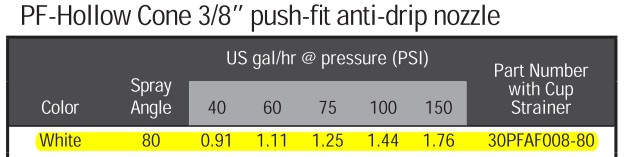
Discussions
Become a Hackaday.io Member
Create an account to leave a comment. Already have an account? Log In.
Thanks, I prefer a bit of cheese with my salad :-)
Are you sure? yes | no
Nice titles ;)
Are you sure? yes | no