-
my optimization code for the amg8833 will finally be made to work arm cpu
09/10/2019 at 00:58 • 0 commentshello all, i've been busy working on getting the mlx90640 sensor working better. and it does. it works faster on arm devices, and it works reasonably well on arduino. the code from the ground up has modifications that are designed to work on multiple processors. when i did the amg8833 optimizations i only gave consideration to the atmega and the nano and uno.
i'm going to start to modify the library within the next week or so to ensure it is compatible with arm processors. i will also take what i have learned in optimizations from the i2c and also include a terminal output graphics mode in the amg8833 code and ability to output 8x8 -128x128 data on terminal both in graphics mode and in deg c. so some exciting stuff coming up soon.
-
mlx90640 sensor output at 64x48, calibrated on a 328p nano, using 1k of ram!
09/03/2019 at 23:03 • 0 commentshttps://hackaday.io/project/161499-mlx90640-sensor-works-w-800-bytes
I have recently verified and tested, and made changes to the MLX90640 code and it works on arduino uno, and nano currently outputting data to terminal. this will change and data output to lcd will be possible soon. anyway the code currently uses about 1k with resolution doubled, without it uses ~750 bytes. this is during compile. but there are no heavy pointer uses in the functions, and the stack never is saturated as memory arrays have been reduced. the biggest array so far is the 256 byte buffer for the DoubleResolution function with its main purpose to reduce i2c reads from mlx90640 sensor memory, and reduce complex calculations of To calc Deg C to only once per mem cell per capture.
i have been working with the amg8833 sensor for a while, and while it is good and i have it upsampled only the luminescence information really increases. finer detail is missing. this is where the MLX90640 sensor shines. also it has better fidelity, or resolution detail.
My goal for both of these sensors is to have them working at better resolutions and working on the uno. this requires rethinking how each sensor works and operates. in some aspects the code for the amg8833, works faster than the arm version. unfortunately the code for the most part also only was designed to work on uno. this will be a different story for the mlx90640 code.
This is something that i had in the back of my mind for the mlx90640. it will maintain compatibility across processors in the Arduino family with minimal code modification.
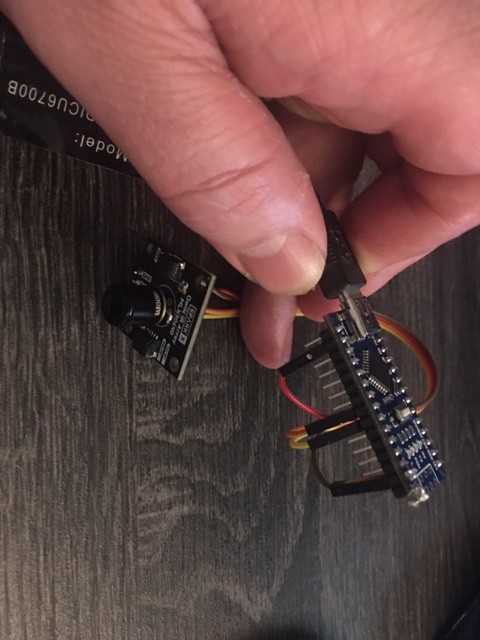
here is an image of the nano hooked up to the sensor (btw i switched to using a 35x70deg field of view)
![]()
here is an ascii graphics art output of the sensor to terminal. it has a 2ooms second delay per frame just to show image on screen for a little bit
this is output in image mode (not as accurate) upsampled and sending data to terminal as ascii graphics art output on atmega 8bit processor. (same as uno for processing power, and uses about 1k of mem)
now on uno, i thought it would be better to show raw value outputs. i am doing a karate chop about 6 inches in front of sensor for this video below
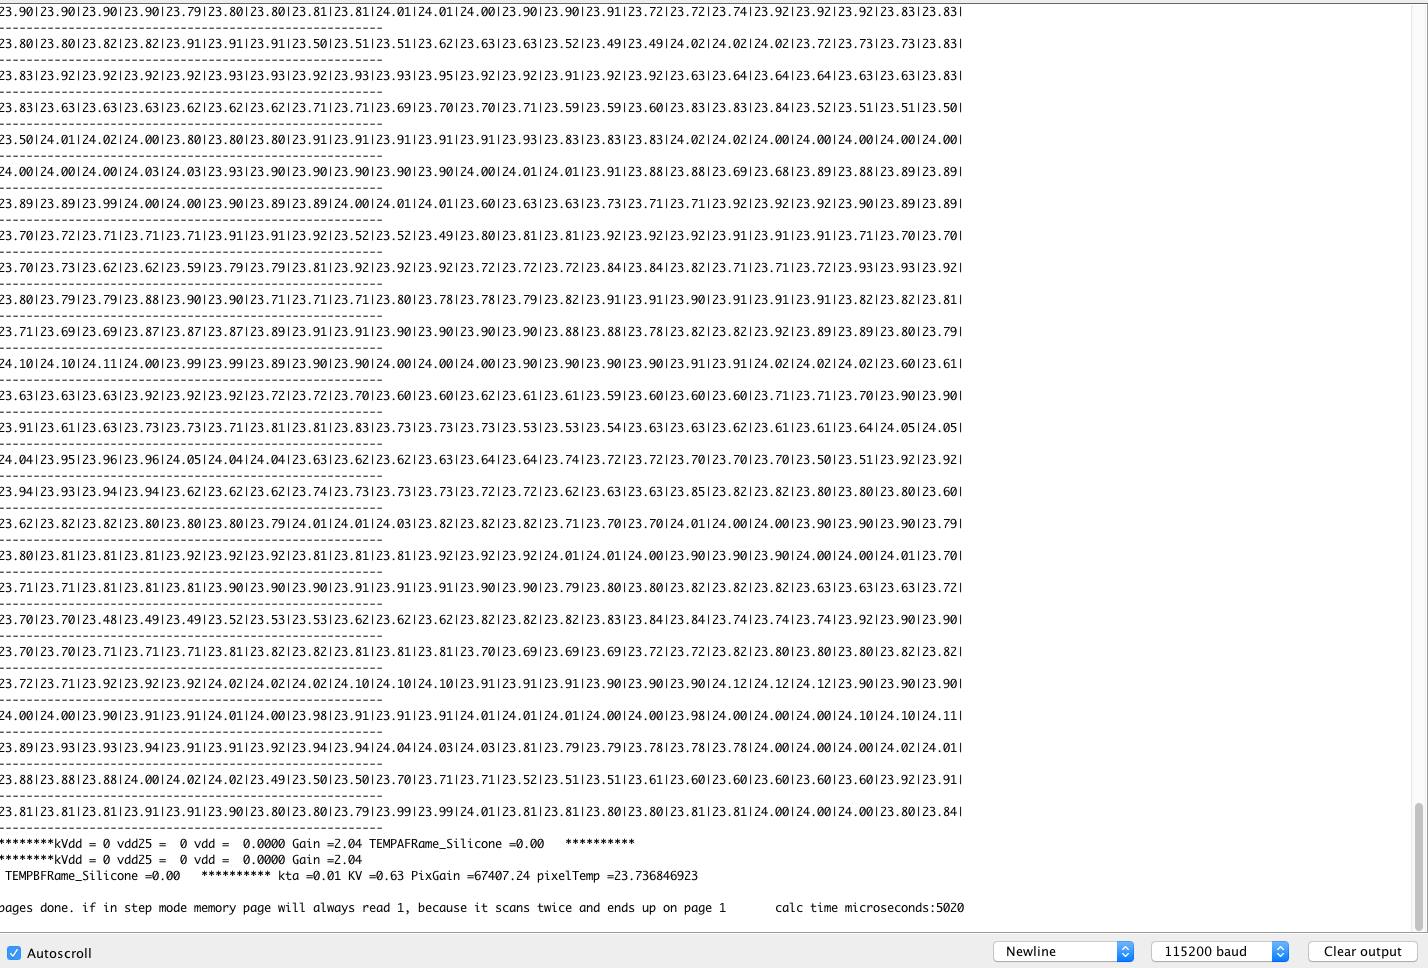
video above is using the same code as previous video, just output mode is switched to show deg c, and its output detail is from To Calc the accurate output of cell with all the calibration information.
below is information from compile
![]()
so the mlx90640 sensor i have had working on arudino for some time, but i have not had it working calibrated. now it works calibrated, and it works at a similar speed as the arm version with some debatable shortcomings.
the arm processor uses heavy ram storage and thrashing to reduce i2c requirements. but it also just waits there 98% of the time doing nothing so it can meet the timings of the ram refresh before the data is overwritten.
the arduino 8bit version utilizes the storage of data on the internal mlx90640, while requests for calibration settings are already stored and copied into its flash from a table. it reads 1 cell at a time, and has a resolution doubler. it does not wait as long as the arm version does. both arm and arduino versions are limited by i2c bus and math calculations. i have reduced the i2c requirements on the arduino thru caching of data that is to be read more than once for resolution doubling.
Both arm and arduino versions can currently output 3840 cell samples at best resolution per second.
we will only need about 5 of these samples for lcd mode, and the rest can be of faster image mode processing that is about 2-4 times faster than To deg c calc mode.
Anyway further caching improvements are in the works, and better math shortcuts for more performance are on the way.
this makes the mlx90640 project cheaper for those just starting out, and it allows more memory freedom for those with projects. for example the teensy-lc compiles to just under 3k of ram, leaving room for other processes to be added. the teensy3.1/3.2 compiles to about 5k, about 15k less than the original code. and every 8bit to 32bit processor can take advantage of the resolution doubler to 64x48
the code is still experimental and has a lot of settings and features that make it easy to verify it works similar to the old way, many of these are not needed so a cleaned up version of code will be worked on at some point in time.
MY goal for the mlx90640 sensor is to have it working on arduino 8bit uno processor and have it also outputting data to an lcd display, similar to the way the amg8833 project has done for some time.
-
whats next.. increase display speed 3X more, get 128x128 subsample on ili9341
12/16/2018 at 09:09 • 0 commentsi've been spending time getting the mlx90640 ready to work on the thermal cam code, however my main priorities are to change the sub sample code so it runs in any project. my goal for this is to have an input resolution buffer, and all you do is fill the input buffer, and then request what data would be at output resolution line. with caching of math performed, most calls to reference addresses will return data instantly.
since the sub sample math is non float, it solves rather quickly compared to the display writes.
once i separate out the drivers and have references to display location and buffering be able to write any pixel at a time (right now it needs to be an entire square block), i can reduce the commands settings for display to 1 time per entire line. this will speed up writes considerably, because most of the write time is still the command overhead, and after this change, i will set a window to 1x240, or 1x320, and write all the pixels in the line, this should allow update refresh rates of about 30-50 FPS, or 60-100 FPS interlaced mode.
also i need to get ili9341 display upsampling to 128x128 for amg8833.
i'm not sure what order this will happen but the 128x128 is easier as i already have the st77xx able to do this.
-
added ability to show where high and low temp is on display.
12/16/2018 at 08:52 • 0 commentsshould be simple, low temp square is white, high temp square is a yellowish orange. keep in mind that this is working using an arduino uno, it is upsampling a amg8833 to 64x64 square blocks in a 320x240 display real time!
-
i have the mlx90640 sensor reading full array of calibrated values in deg c
12/09/2018 at 19:35 • 0 commentshttps://hackaday.io/project/161499-mlx90640-sensor-works-w-800-bytes
i think i've got the mlx90640 sensor working to read deg c outputs after running a buttload of calculations. i will know for sure when i convert the code to output colors on lcd display.
code runs a lot of calculations and outputs degrees in C. sensor is capable of resolution to 0.00065 deg c! however noise is far higher than that and some work on speed of calculations and noise reduction is in the works.
I will begin to convert the code into a drop in replacement coding for the amg8833 sensor code and make it work with the thermal cam.
![]()
-
added ability to calibrate temp easy
11/30/2018 at 22:03 • 0 commentsmore of a fine tune offset
just change the setting tempOffsetFloat 2.0 to a lower or higher number then upload sketch.
tempOffsetFloat is in deg C.
-
added a details sheet to code that shows what settings do
11/28/2018 at 17:03 • 0 commentsadded a details sheet to code that shows what settings do, and some settings that will be removed soon.
https://github.com/jamesdanielv/thermalcam/blob/updates-(possibly-unstable)/featureList.pdf
//thermal cam setting choices and settings
lcd pins
TFT_CS. //fewer issues if leave pins the same. might need to change some pin settings in
TFT_RST//st77xx.cpp or ADAFRUIT_SPITFT_ili9341.cpp
TFT_DC
interlaced - true or false. this changes updates to cells either left to right or every other cell block. it prevents the rolling effect if display update rate drops.
blocKinessRemovalFilter 0-10. zero is disabled. this blends the colors of pixels a little. it helps with blockiness effect. works better at higher resolutions and is only enabled if above 16x16
autorange- true or false. if set true this changes. min and max temp to ram values and it moves entire color range within the values in the sensors. autorange adjusts depending on what looked at and allows higher sensativity generally.
optics_correction-true or false. this is a trick to compensate on the different angles or slight different positions of the sensors in array. if this is turned off especially at lower resolutions you will notice artifacting. sensors are not perfectly placed.
threshold- 0 -100. this ignores values below it and treats them as zero. this is to reduce noise. this is also before the autorange which changed values to a temp range.
enhancedDetail- true or false. this looks for changes within a sensor that would normally just average out. it increase detail resolution to about 16x16 in some situations. it takes advantage that light intensity is predictable, and if it does not follow predictable pattern a shadow exists in between.
SubtractColor- 0-500. if zero it is disabled. this is a post processing step that says after temp range is calculated and spread across 1024 intensity levels, we want to reject the amount. this allows low changing areas to be filtered out for a cleaner image.
optimize- 0-3. this changes the methods of optimizations to reduce screen writes, such as buffering, bandwith control to only update most changed as small change is usullly noise, and special write patterns that optimize pixel writes to display. higher is better
interpolatemode 0-3, maybe 4 or more. this is the level of detail of sub sample. 0=8x8 pixel blocks, 1=16x16 pixel blocks, 2=32x32 pixel blocks, 3=64x64 blocks……
noisefilter- 0-200. this is only enabled if optimize is 2 or higher. this looks at temp data of a single sensor and only updates it if greater than this value. it reduces noise to display, but too high and detail will be lost. if set too low there will be a lot of snow on screen,
show_temp_readout- true or false. if true this allows temp infomation to show in center of display and it averages center 4 temp sensors together to get value. depending on sensor used this can be +/- 4 degrees.
temp_Fahrenheit- true or false. if true temp is in F, if false it is in C
showcolorbar-true or false. if true this shows a color bar map and lowest temp and approx highest temp on screen
colorMode 0 and up. these are color map profiles. you can make your own using colorgenerator.html file
spi_optimized_st77xx- true or false. at lower resolutions this takes advantage of spi bursting doubling speed
spi_optimized_st77xx-true or false. this uses slower pushcolor and setaddresswindow commands that should be universal but some drivers do not support it. it allows other displays to work for testing purposes, but does not include the spi optimizations
subpixelcoloroptimized- -1,0,1 this command is going away soon. -1 allows commands without lcd overhead for timing and testing, 0 writes 1 pixel at a time, and 1, writes 4 pixels at a time. this currently only works to 16x16 resolution.
spi_buffer_local- true or false. this command will be going away soon. it was to allow buffering of spi data so it could be pushed thru when it was read to load another byte and effectivily run 14-16 commands in between. the overhead is so small with the new methods that this method will no longer save time. perhaps at higher r resolutions.
spi_safety_checks this command is going away soon. it just allows for spi to do checks for complete transfer rather than just timing. it works better for slower spi speeds
buffersizex
buffersizey - these commands are to help scale buffering features for larger temp arrays in future. not yet in use
AdvancedColorVisualSeperation - 0-100. this is a very powerful setting it allows color seperation of colors within a cell block area. rather than just a autotemp that tightens entire display range of colors to within a few degrees, this setting allows colors that are just 1 or two intensity levels to get pushed further out from eachother to make easier to see, such as fingers details. too high can cause color clipping.
lowerColorvalues -500 to 500 . this moves the color scale to the left or to the right. this is after all other filters, so emoving colors such as from SubtractColor, and then using visual seperation may push colors out of normal range. this allows map to be more centered. this may have different effects depending on color map used.
-
doubled ili9341 performance in 64x64 subsample mode
11/28/2018 at 08:58 • 0 commentsthis version has several enhancements, such as doubling text writes to display which were slow and improving the draw performance of the color bar, and significant performance boost of the graphics showing of the upsample amg8833 thermal sensor output.
i also now turned off debug serial for display block time updates. this should speed things up more. sending a capitol 'C' to Arduino serial will send a copy of 8x8 sensor output.
here is it in action.
-
fixed display bar for different display resolutions
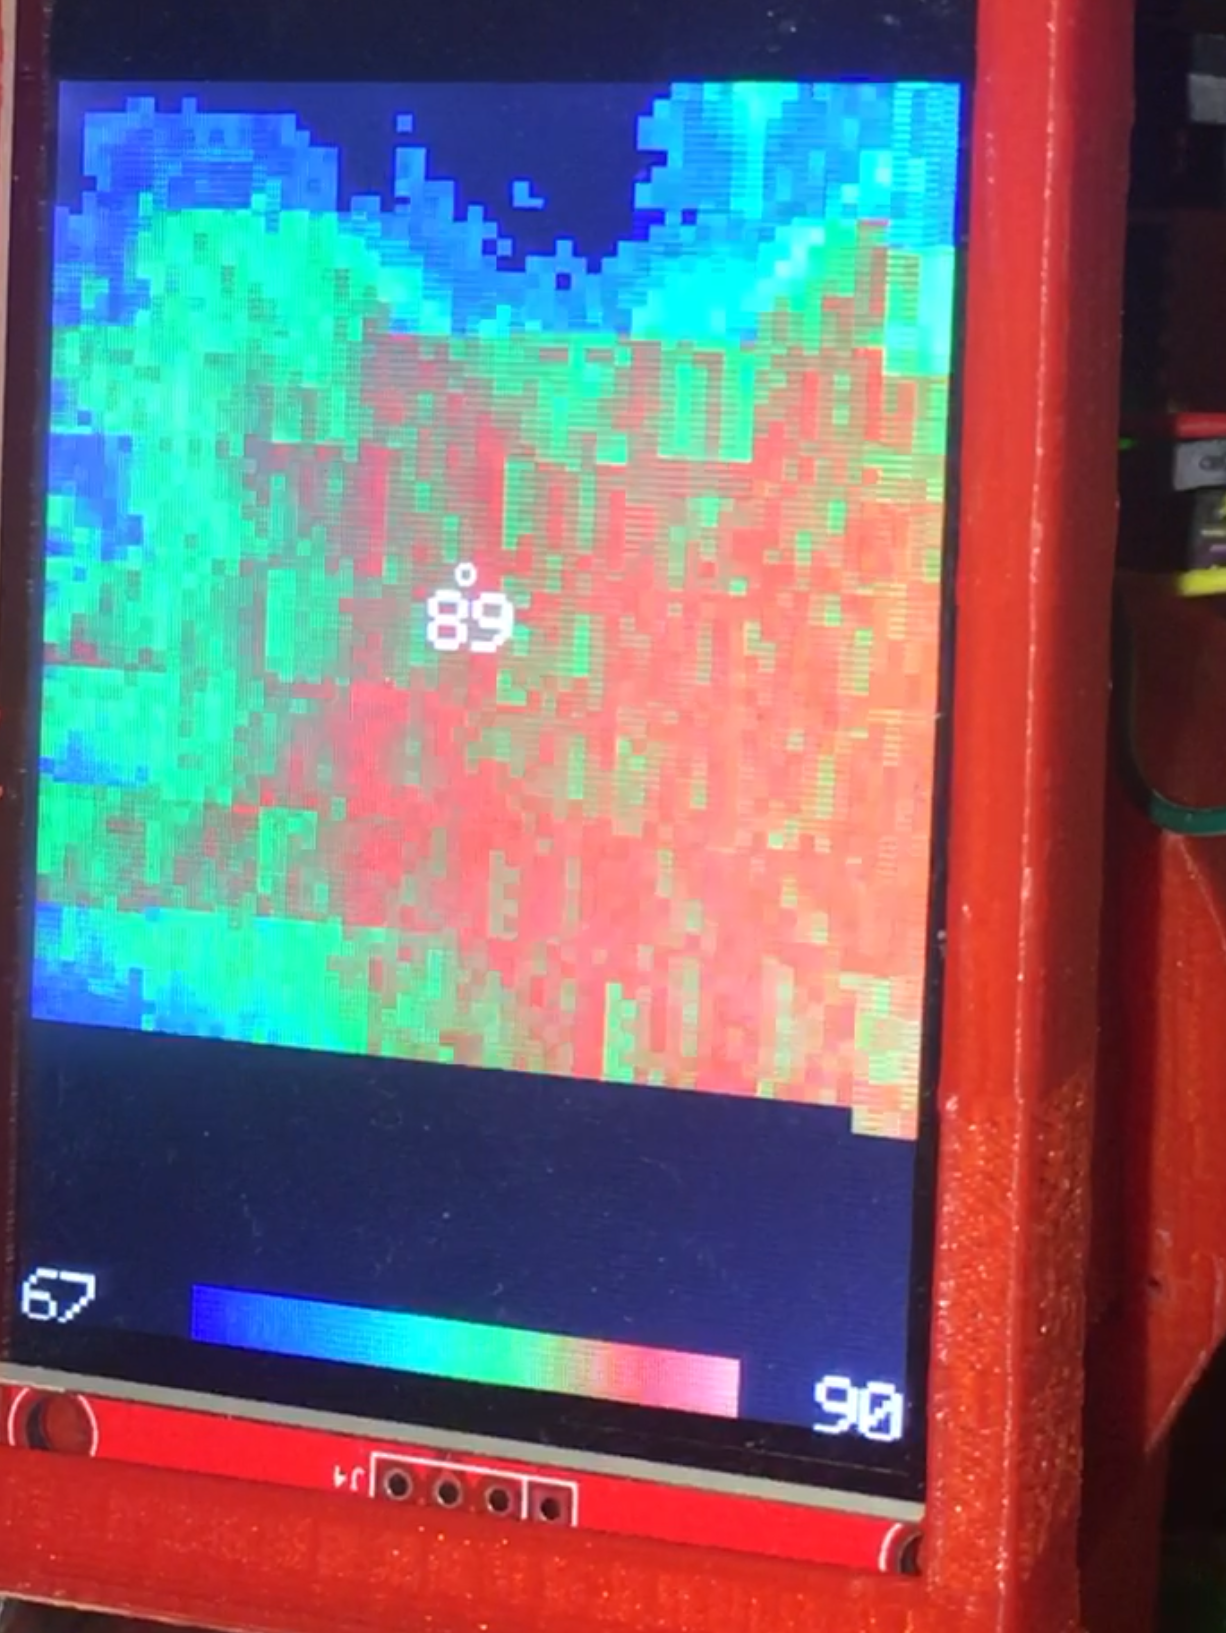
11/25/2018 at 09:00 • 0 commentsthis image is of my hand, on a ili9341 display that upsamples a amg8833 sensor
64x64 with display temps showing centered and color bar, now it calcs positions based on display size rather than fixed positions. also tuning the color visual separation that makes things such as fingers easier to see. keep in mind the amg8833 is only a 8x8 sensor. getting this much detail out of it. it works on Arduino uno or equivalent. still needs 64x64 optimized.
![]()
-
ili9341 has amg8833 to 64x64 resolution. will optimize soon
11/25/2018 at 05:27 • 0 commentsili9341 display now has 64x64 upsample. the drivers are not optimized yet, and soon will be.
one of the most basic changes was the first color in the table 21 is black. i will update web color generator with the option to put 1st color in table to black. this allows low noise and rejected color to go to black.
I also have included changes to AdvancedColorVisualSeperation, that allow detection of slight temperature difference, and enhances changes. this is good for smaller details such as fingers together now can be seen as separate items.
by default if AdvancedColorVisualSeperation is on, lowerColorvalues ofsets the color intensity to be in a more centered range. i could make this all automatic, but i set it so it could be experimented with.
also i turned up SubtractColor to 280, it prevents the lower intensitys from being calculated, more so because of noise.
anyway the ili9341 display updates about 6fps currently (12fps interlaced) i will update drivers soon that will double performance. currently setting optimize 2 or optimize 3 does nothing because the code is not there to distinguish the difference for 64x64 mode. will work on it soon.
I'm also in the middle of centering the display information and temp map color bar. if you want it disabled currently set this:
show_temp_readout false
Also you may start seeing more code relating to the mlx90460. it will be working soon, and ill have a guide to the changes and meanings for the settings.
spi write up to 64 colors at a time on Arduino!
amg8833 equivilent sensor thermal cam is a perfect example of how to write faster with spi lcd displays. 128x128 sample fast on Arduino.