-
1Soldering timelapse
Soldering all components, except for the ATMega328P
-
2Soldering the leds
For soldering the led, I first printed an arc of led footprints (see files) on a transparency sheet. I then flipped the sheet. Using superglue, I (temporarily) glued the leds, upside down, on top of the footprints. This made it that the leds were evenly spaced and in a gentle arc.
Next I took 5 strands of 0.1mm magnet wire, and twisted them together using a drill.
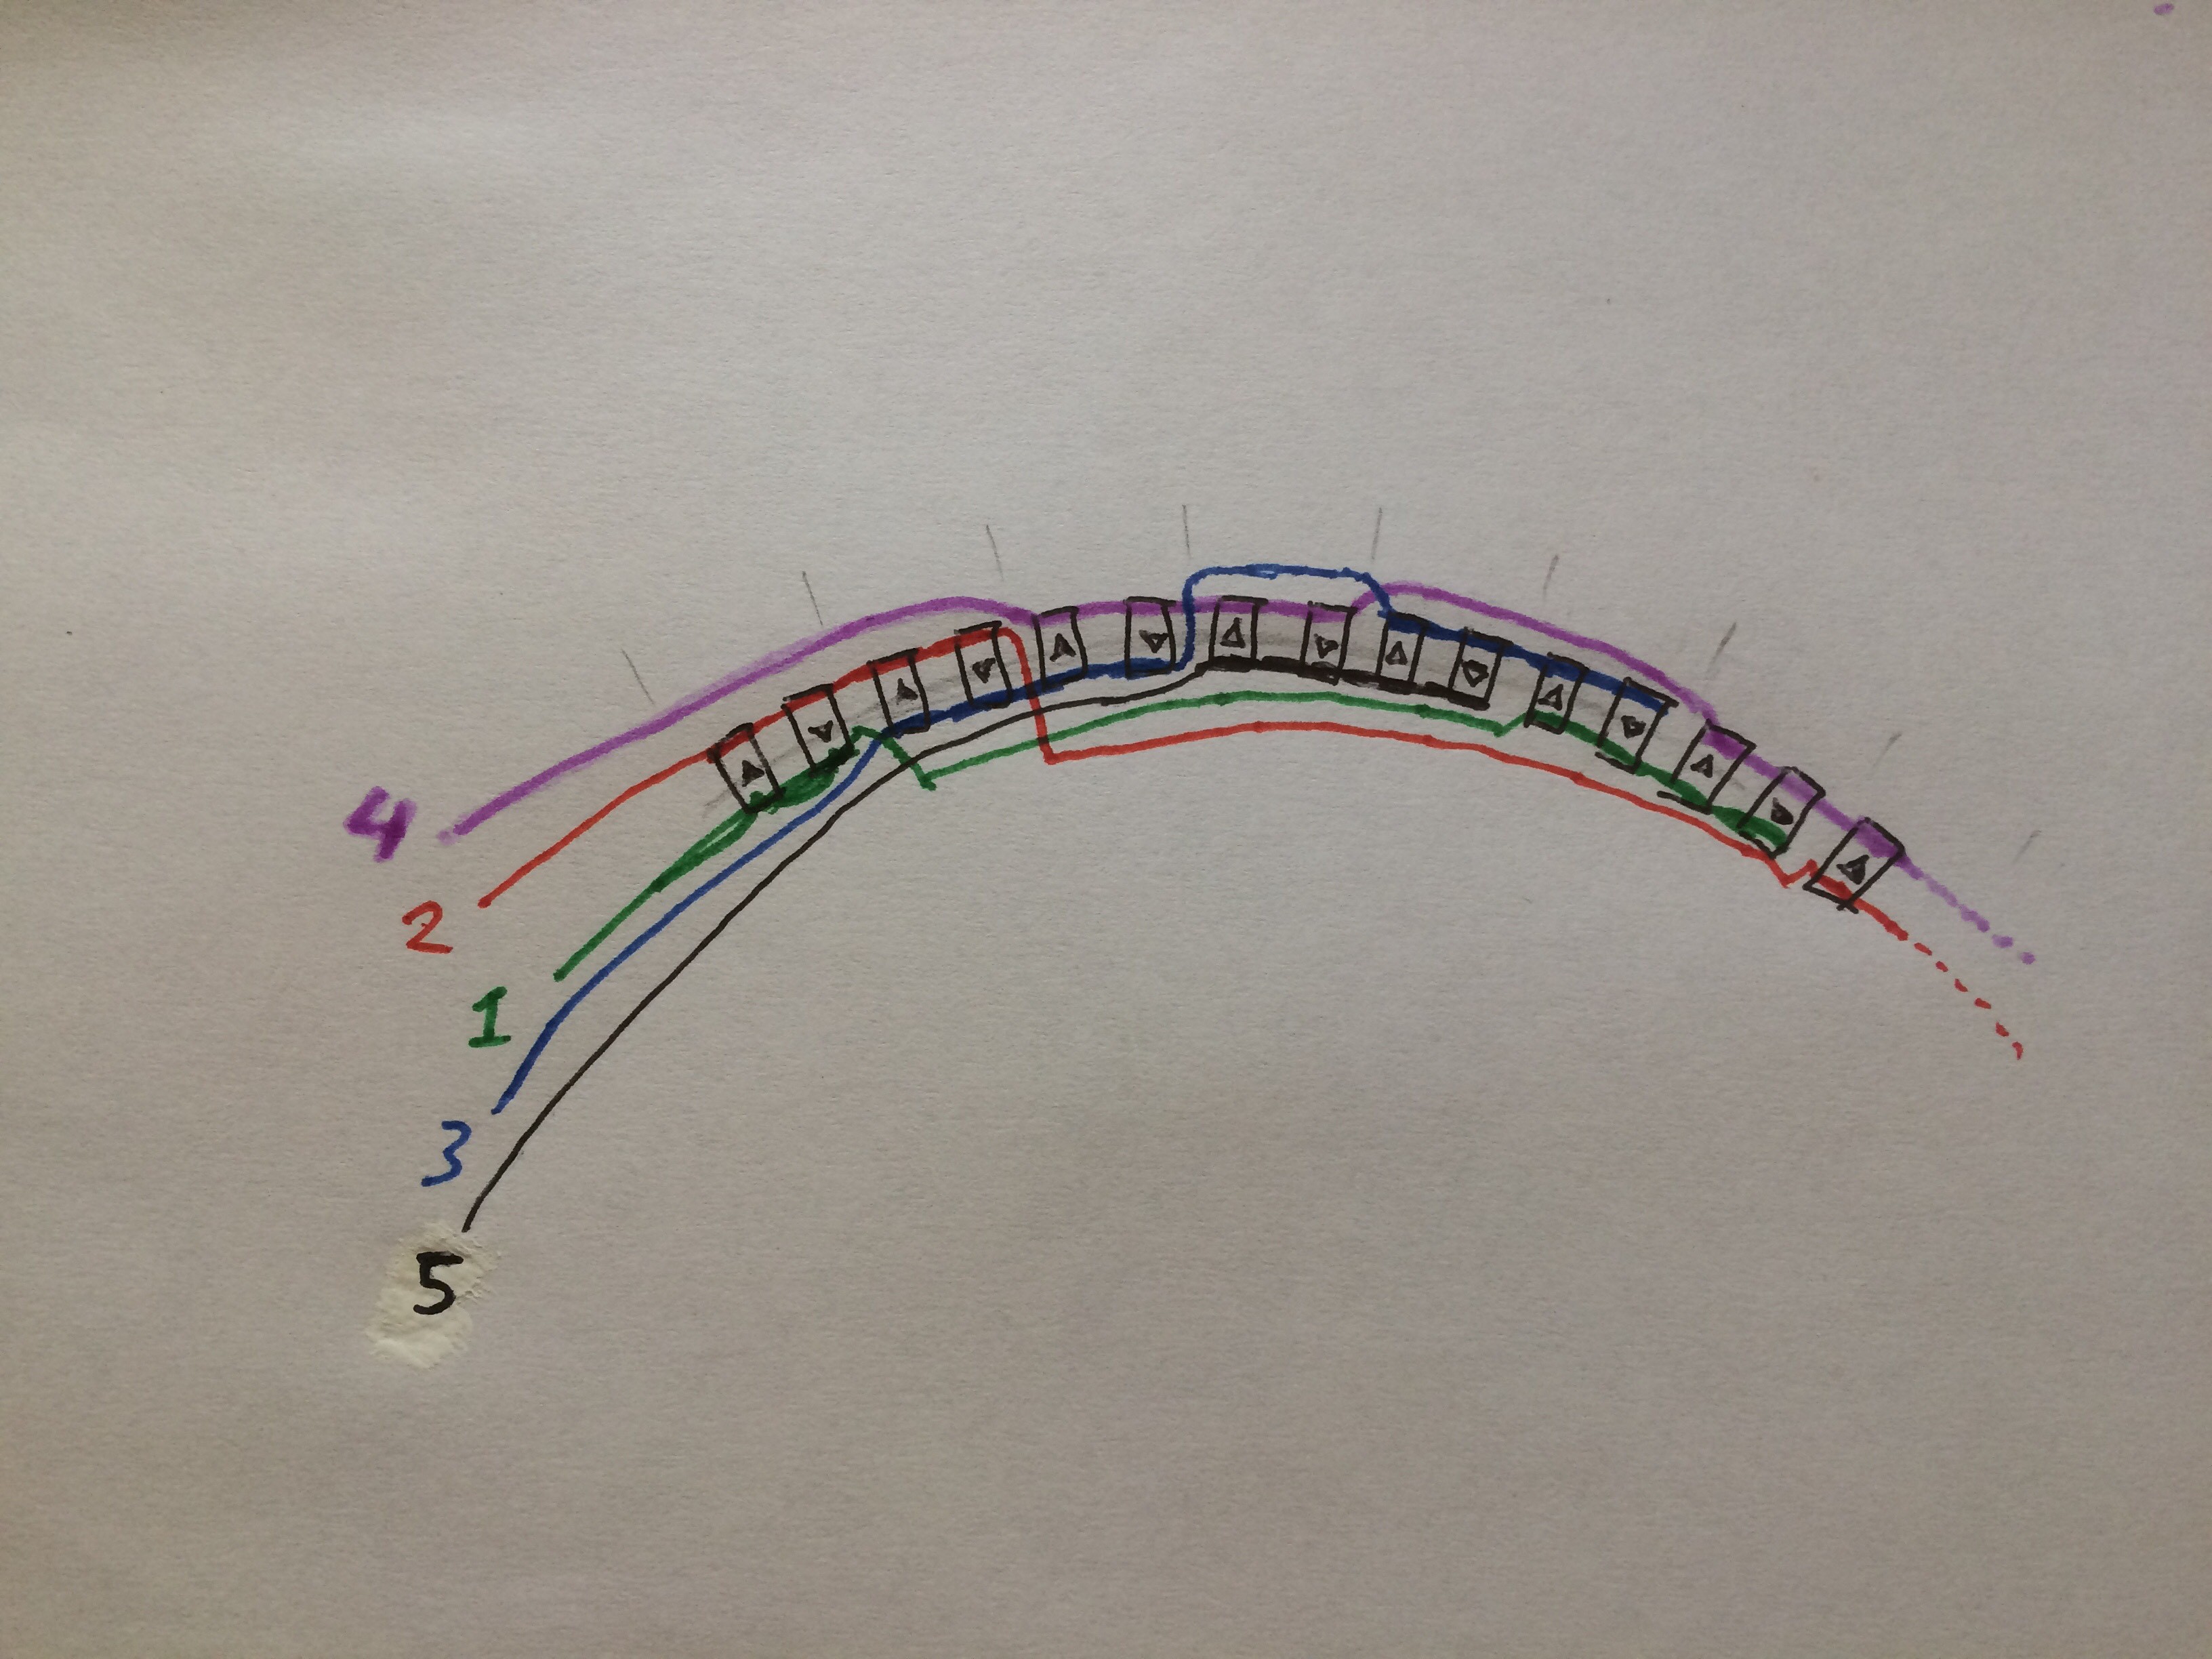
I untwisted the last few centimeters, that were going to be soldered to the leds. I pre-tinned the pads on the underside of the leds. I then going left to right started attaching the correct wire, to the correct pad, using the diagram below. Taking care to only remove the enamel from the wire, where a connection was needed
![]()
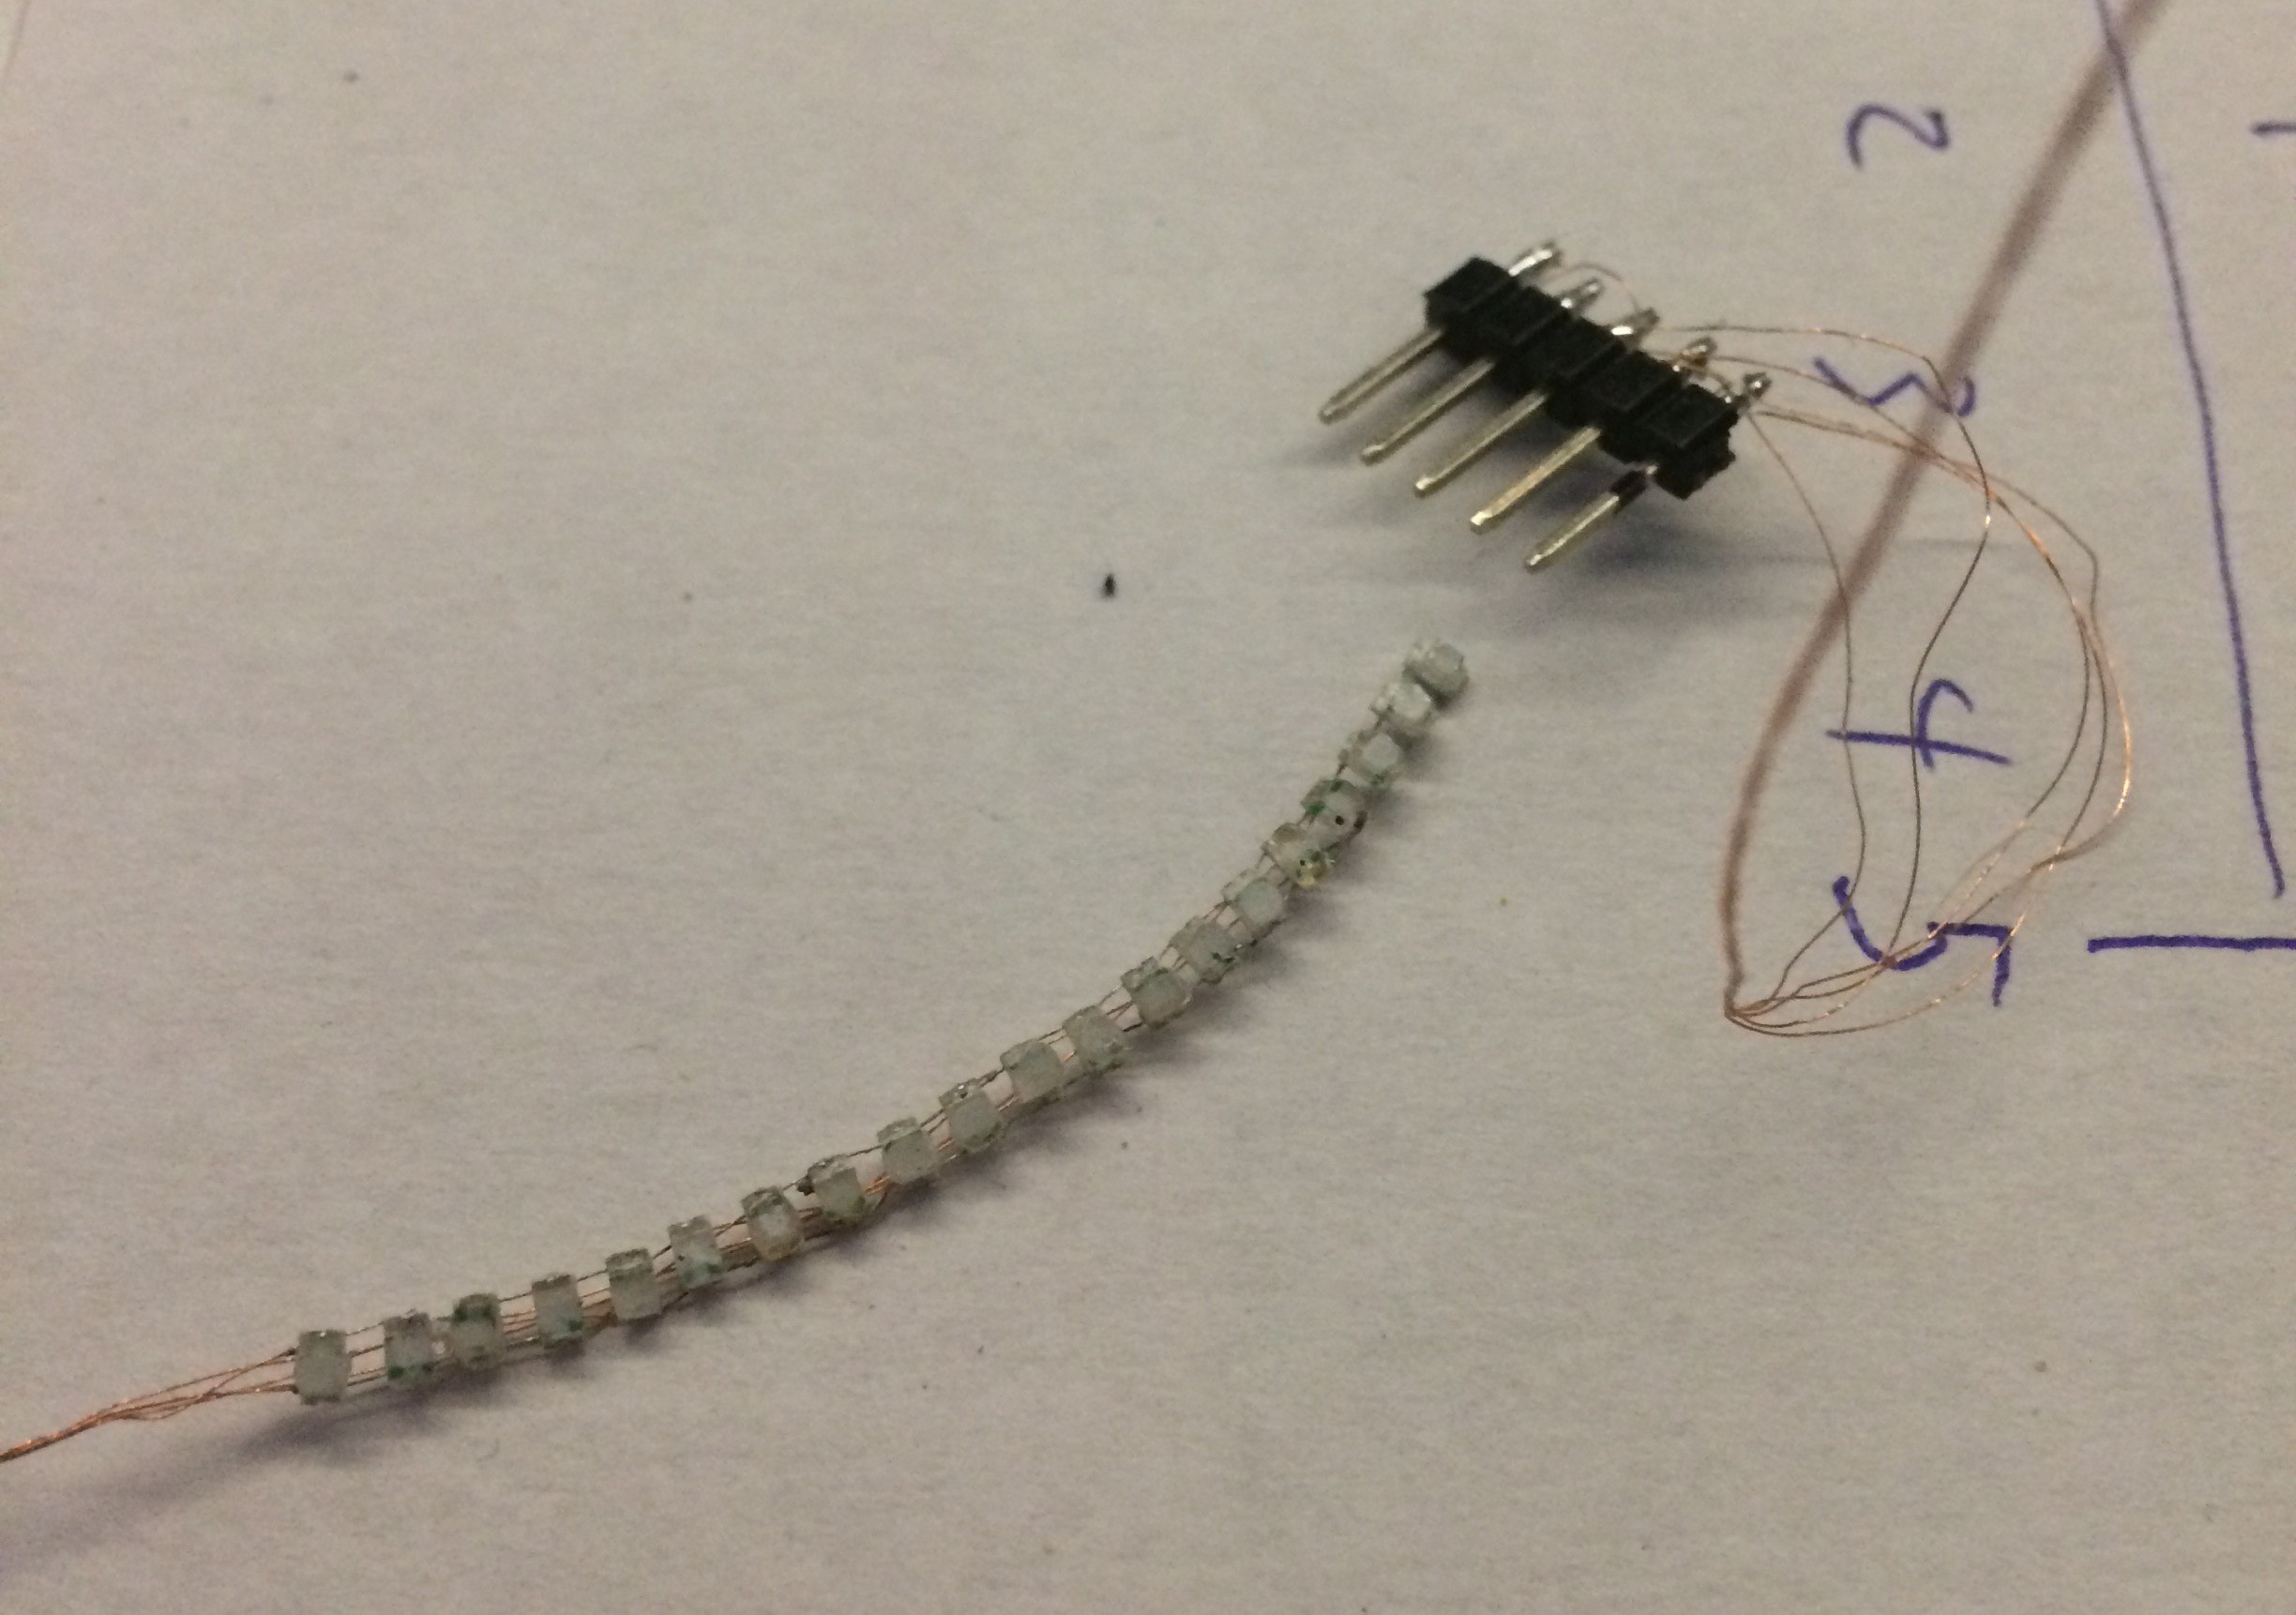
After that I removed the leds from the transparency sheet by soaking everything in acetone, and gently prying them off. After that I bathed the led in acetone to remove the remaining glue- and flux residue. I applied thin coat of nail-polish to the solder connections (to prevent shorts), and at the point where the wires go from twisted to spread-out (to prevent them from untwisting). After that I ended up with this:
I temporarily added some male headers, so I could test them out in a breadboard. Also note that I used 20 leds here. The last 5 were cut of later, when I knew how long the fake lashes were, that they needed to be attached to.
I removed the sheeting from some solid core wire, and slipped that over the end of the five twisted wires, to prevent damage, and make it possible to keep them in place using some hair-clips, if needed.
Lastly, I glued the string of leds to some fake eyelashes using white-glue. I soldered to other end of the wires directly to the PCB, and added some glue for strain-relieve.
 Gerben

Discussions
Become a Hackaday.io Member
Create an account to leave a comment. Already have an account? Log In.