 Lex Kravitz
-
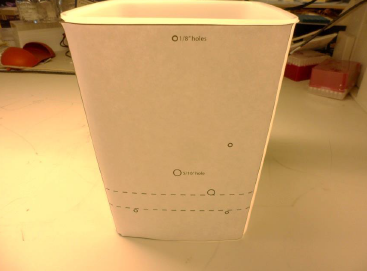
1Drill mounting holes in the bucket (get these from the PDF in the files area).
1. Print out the Adobe Illustrator files for the front and side panel on plain paper or removable labels (8½” x 11”).
2. Place the templates on the bucket, with the side panel to the right of the front panel.
3. Drill seven 1/8” holes and two 5/16” holes where shown on the templates.
-
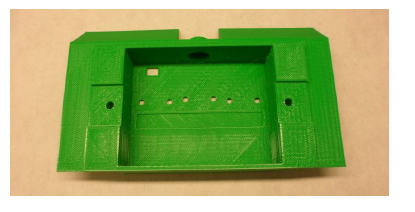
2Print out the 3D housing
-
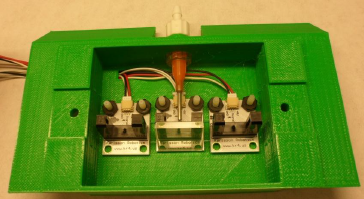
3Plug three JST SH jumper 3-wire assemblies into three photo interrupter boards.
Label the signal wire for each “L” (for left), “C” (for center), and “R” (for right).
NOTE: You can use any photo-interrupter you want, but you may have to modify the mounting holes in the 3D housing.
-
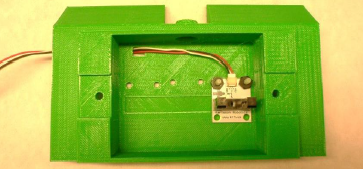
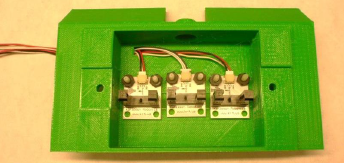
4Secure Photointerrupter boards into housing
Use the nylon screws and hex nuts to secure the photo interrupter boards to the inside of the 3D printed cover and bring the wires to the outside of the cover using the hole in the top left of the housing.
-
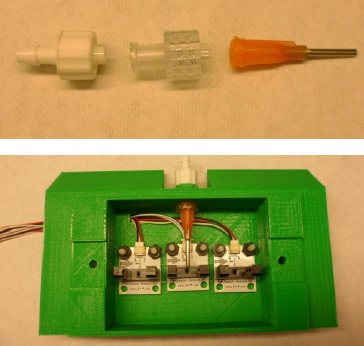
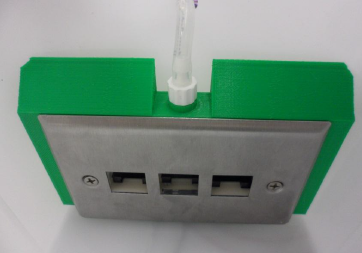
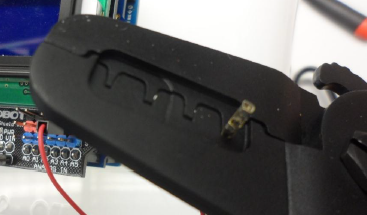
5Assemble dispensing needle
Assemble the blunt needle with the two luer lock pieces, and screw together securely in the top hole in the housing.
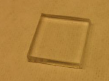
Place the ½” piece of plastic under the center poke.
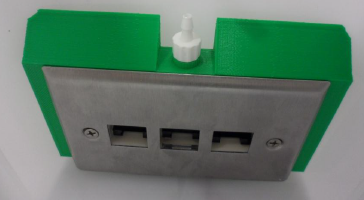
Place the faceplate over the housing, such that the plastic piece is clamped in place, and everything is secure.
This piece is done!
-
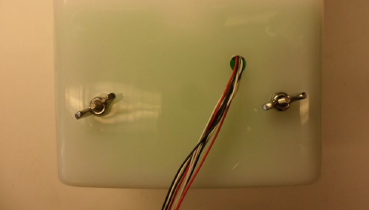
6Secure the nosepoke panel into the bucket
Use two 1.5” 6-32 screws and wing nuts to secure the entire apparatus to the inside of the bucket.
-
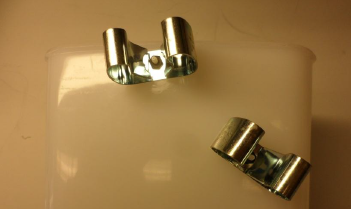
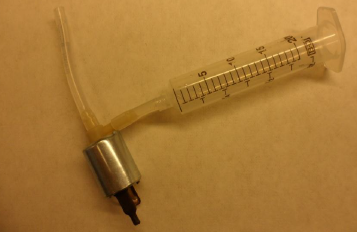
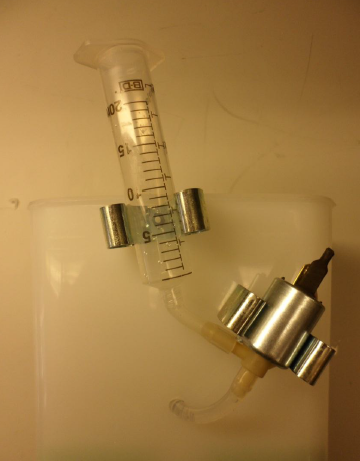
7Mount the solenoid valve
1. Using nylon screws and hex nuts, attach the two broom clips to the two 5/16” holes on the side of the bucket.
2. Attach the syringe to the solenoid valve with a piece of tubing that is approximately 1.5”. Leave a piece of tubing (approximately 3”) hanging off the output of the solenoid.
3. Mount the syringe and solenoid in the broom clips, and attach the tubing to the hose barb on top of the nose poke apparatus.
-
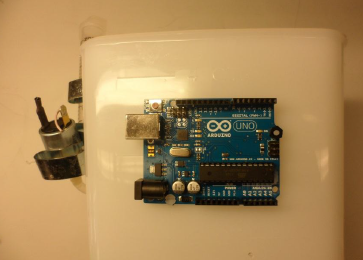
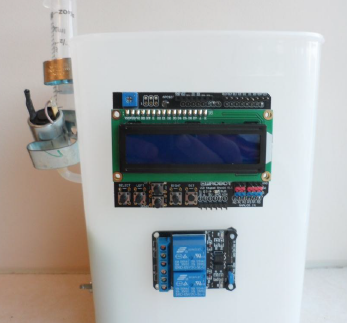
8Assemble the electronics
1. Place the Arduino Uno so that the top right and bottom left mounting holes align with the top two holes in the side panel. Secure the Arduino board in place using the nylon screws and hex nuts. Place an additional hex nut between the bucket and the board at each mounting point, to allow for a small space between the Arduino and the bucket.
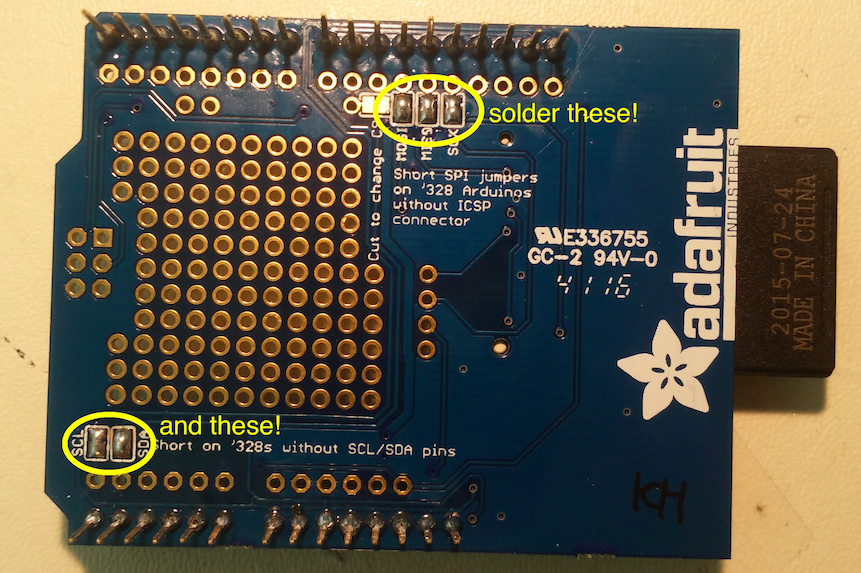
2. NOTE: This step is for V2 of the Adafruit SD shield (how can you tell which one you have?) Add stacking headers to the SD shield, and jumper the following 5 solder pads on the back.
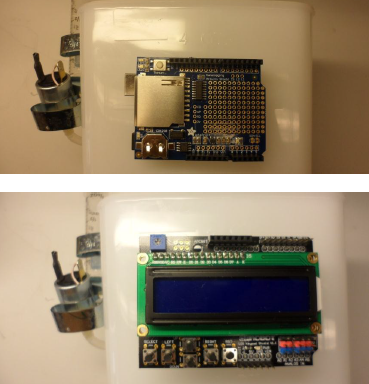
Fit the SD shield (with stacking headers soldered on) on top of the Arduino and the LCD shield on top of the SD shield.
-
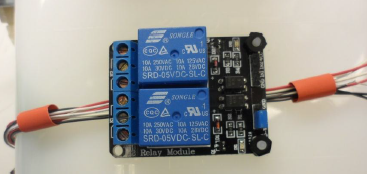
9Secure the relay module to the ROBucket
Secure the relay module to the bottom two holes in similar fashion. Orient the relay so that the male pins are on the right side.
Now everything just needs to be connected up!
-
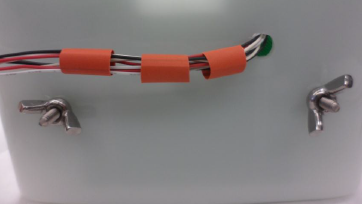
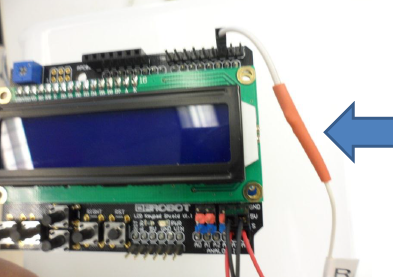
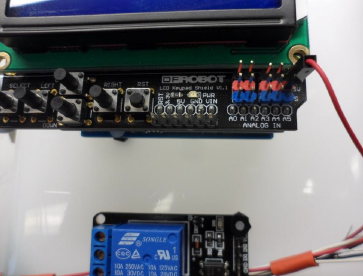
10Attach the nosepoke wires to the LCD shield.
1. Place three short pieces of heat shrink tubing around the bundle of 9 wires coming from the nose poke apparatus. Do not heat shrink these yet.
2. Route this bundle of wires underneath the relay module (you may want to unscrew it to do this).
3. If these wires are long enough to reach the LCD keypad shield, place a crimp connector on the end of each.
4. If any wires are not long enough, solder a header wire with a crimp connector on it to increase the length so it can reach.
Plug the power and ground wires from the three nose pokes (6 wires total) into the power distributor on the LCD shield, such that each one has its own power and ground.
6. Plug the remaining 3 wires from the nose poke enclosure into the input/output pins at the top of the LCD shield, in the following order (NOTE: these are different from in the ROBucket paper! We moved them so the wires no longer need to pass over the screen):
- Left photo-interrupter to A5 (last pin on the right)
- Middle one to A4
- Right one to A3
- Relay shield input to A2.
7. Use three F/F jumper wires to connect the relay module to the GND and 5V pins on the LCD shield, and attach IN1 on the relay module to Pin 3 on the LCD shield.


Discussions
Become a Hackaday.io Member
Create an account to leave a comment. Already have an account? Log In.