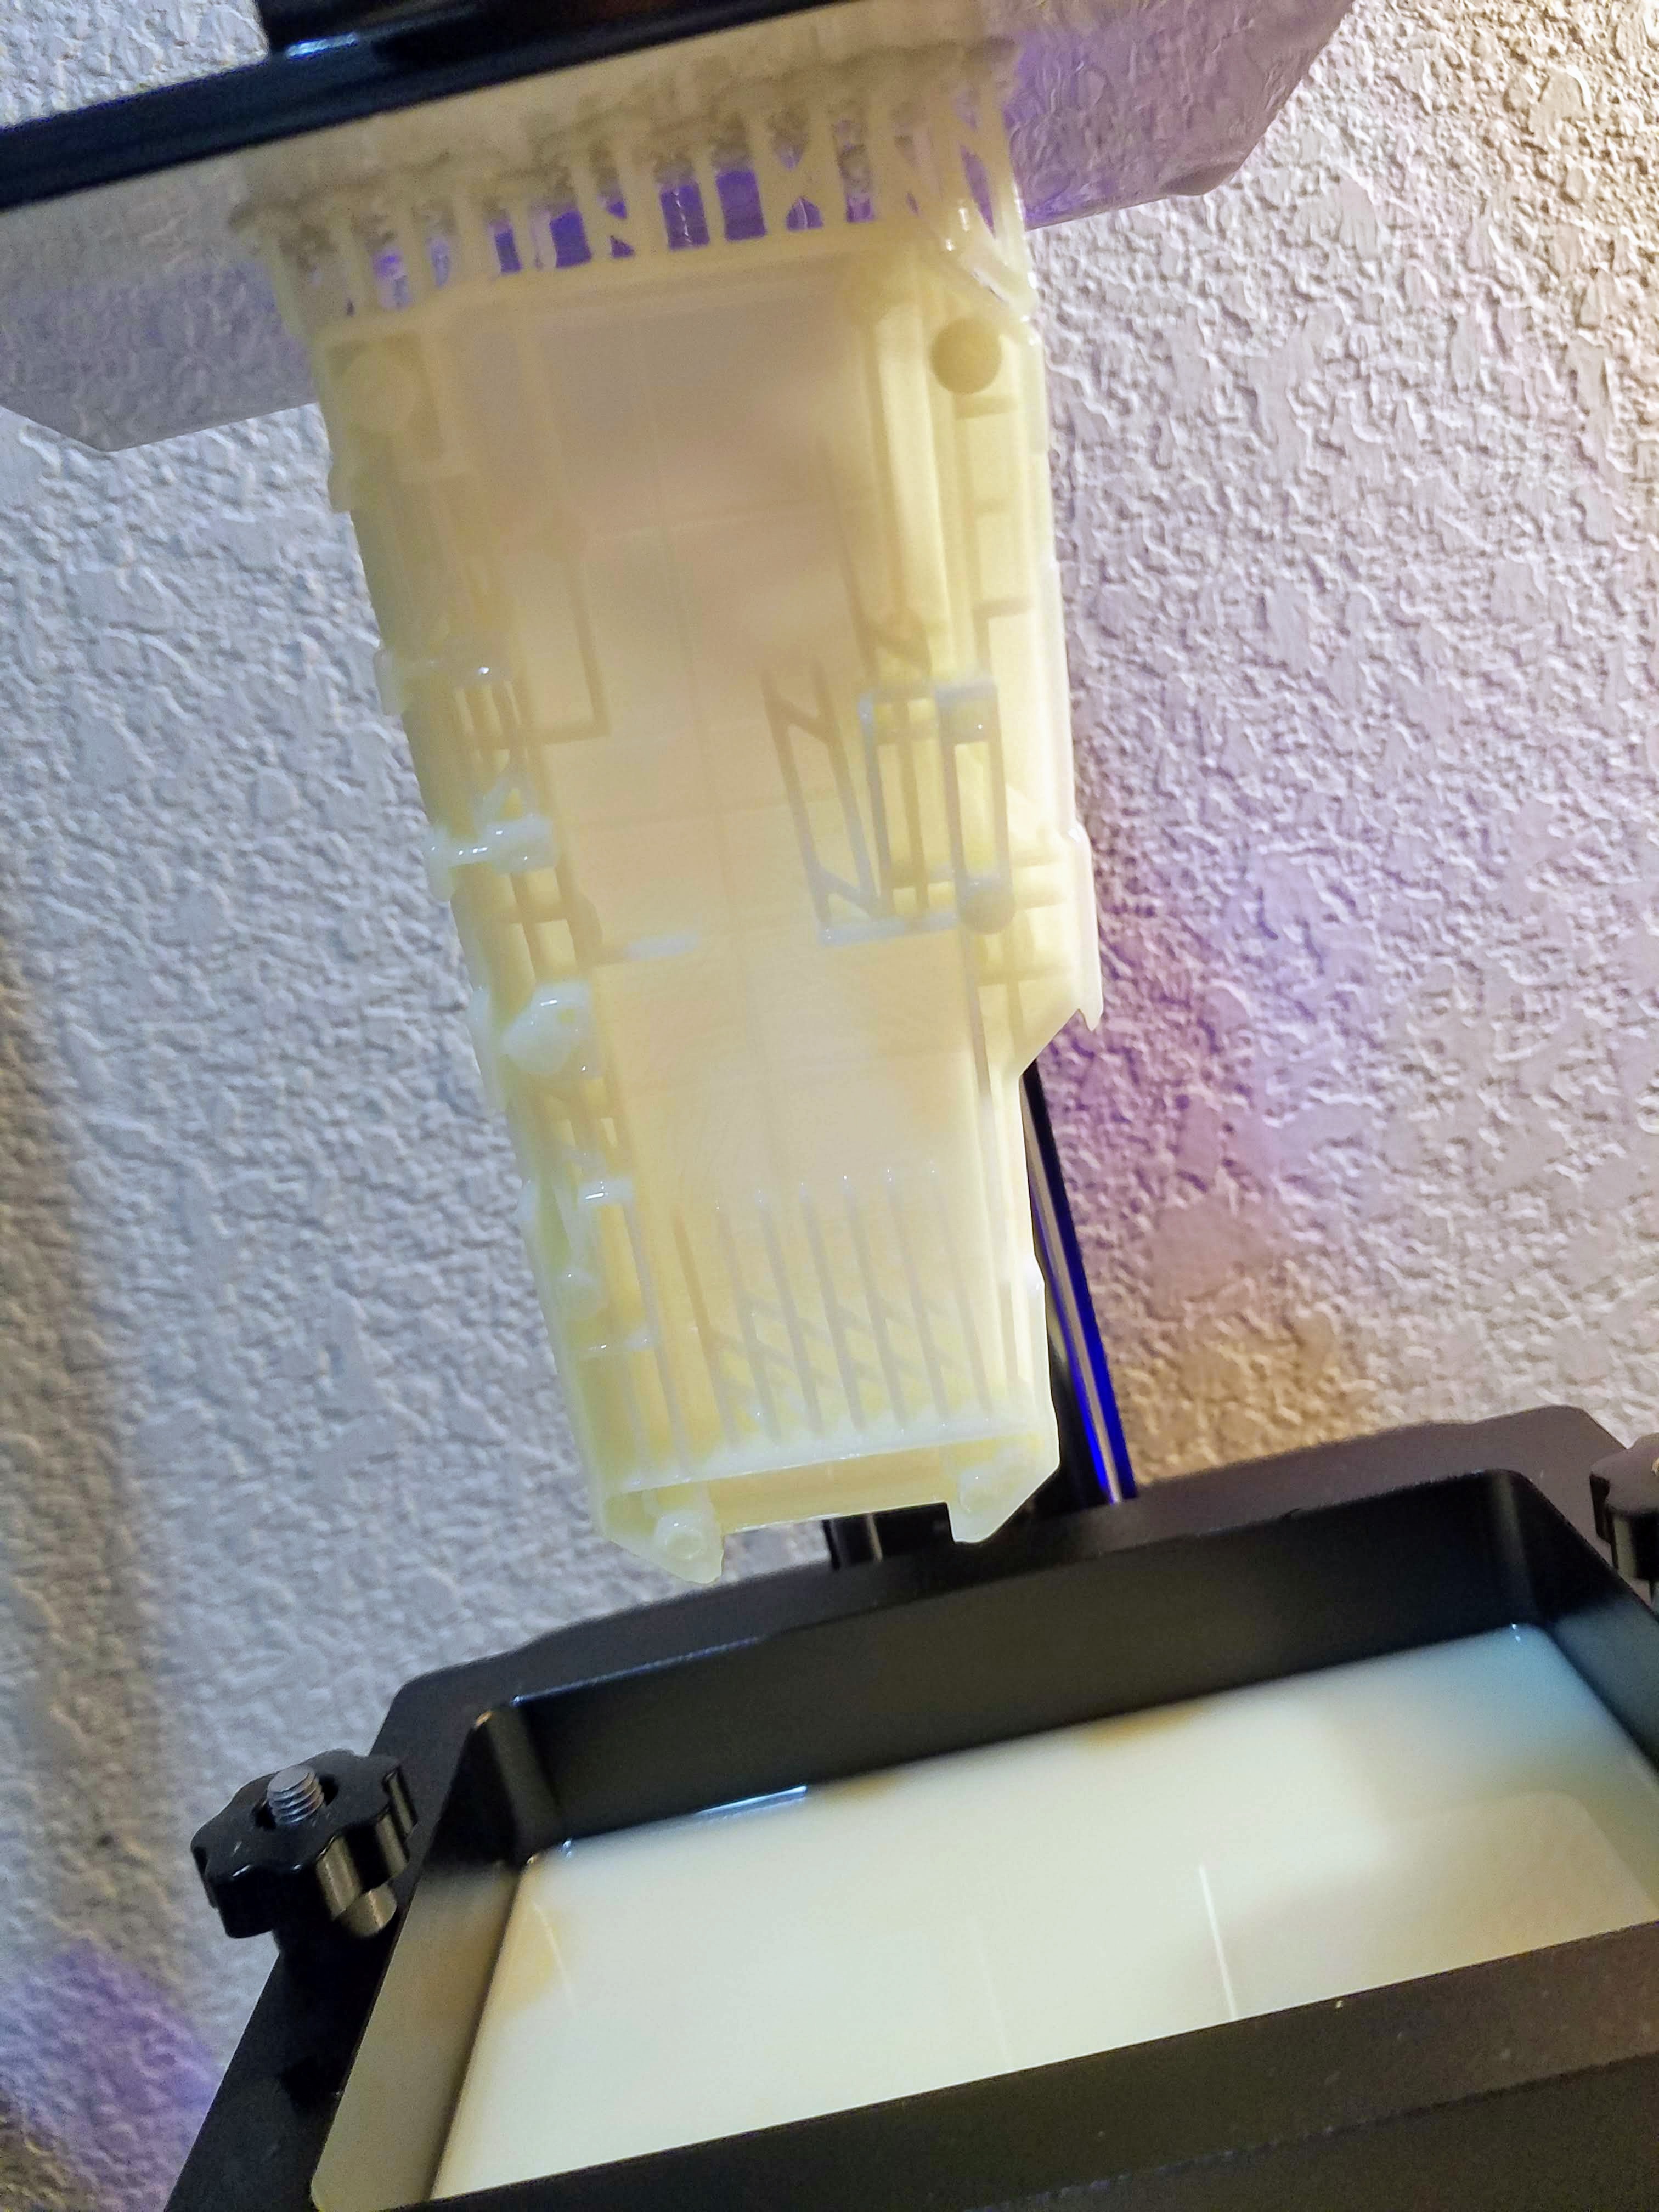
After a bit of fiddling around with my Wanhao D7 resin printer, I've finally settled on some enclosure prints that I'm happy with. Printing with resin has its own set of challenges that can be tricky to work through, especially with larger parts. There's a good bit of post-processing involved once the parts come off the machine (removing supports, UV curing, sanding, drilling) and it can be a pain.
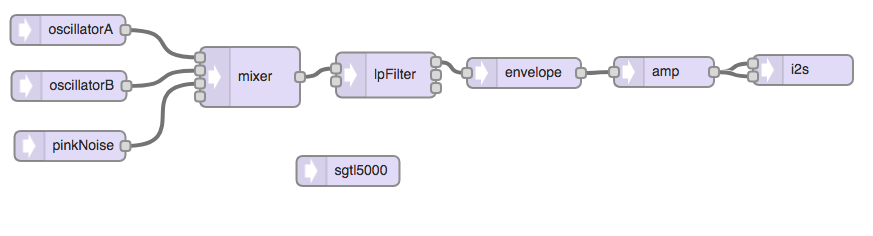
In the meantime I've also been working pretty hard on writing code for the Teensy. It's been pretty interesting playing with the audio shield and I'm happy with the results so far. The basic synth I've designed has 2 main oscillators, a filter and an envelope (these are configurable via code, so I can easily change it up later on if I want to). I've mapped the IR sensor to the oscillators' frequency and also added functionality for octave shifting and a low-pass filter that can be adjusted with the linear pot trigger. I've also been manually drawing out frame-by-frame dynamic animations for the 8x8 dot matrix display, and they're looking pretty cool so far!
I'll be traveling for the next couple of days for a wedding so I'm trying to get as much as possible done before that. Hopefully when I get home my PCB's will be waiting for me in the mailbox!
I've been trying to finish up the housing over the past 2 days. I think I'm pretty close to being done. Currently printing out a couple quick prototypes on my FDM machine to test fit everything and if everything looks good I'll send it to the resin printer.
I've started laying out the Arduino code and have been playing with a couple of the audio shield's features. I'm not entirely set on what I want each button to do, but hopefully after a bit of messing around it'll start to become a little more obvious.
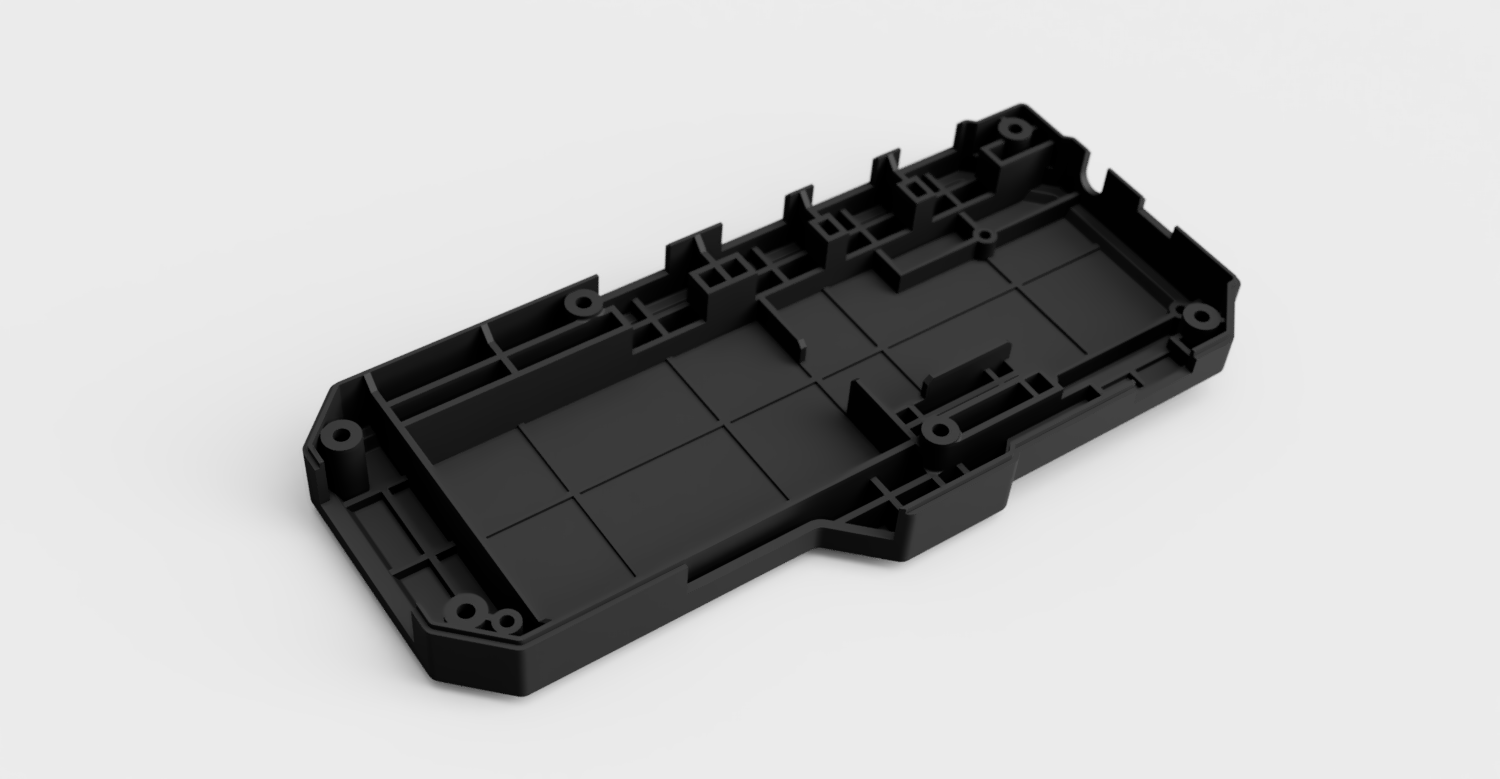
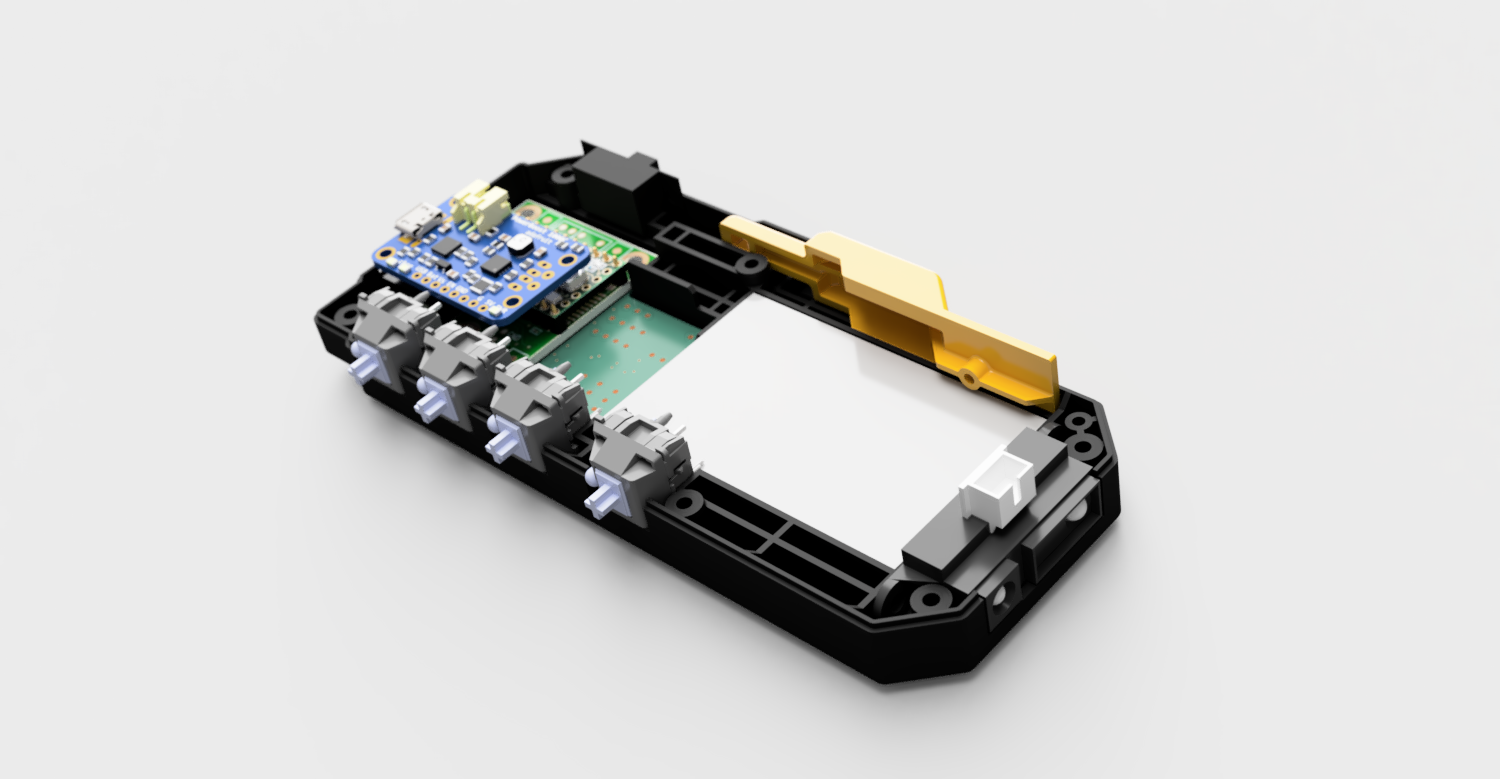
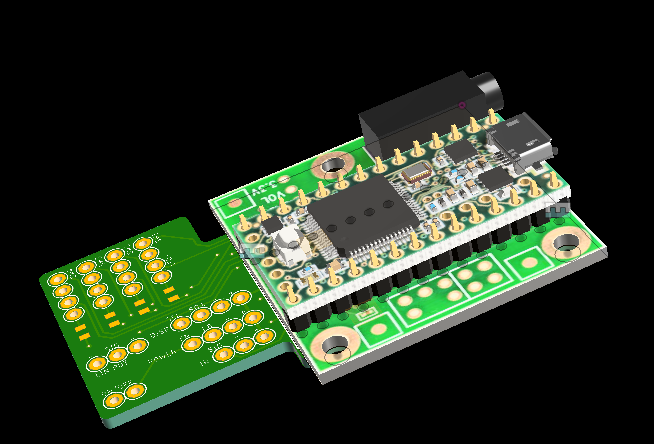
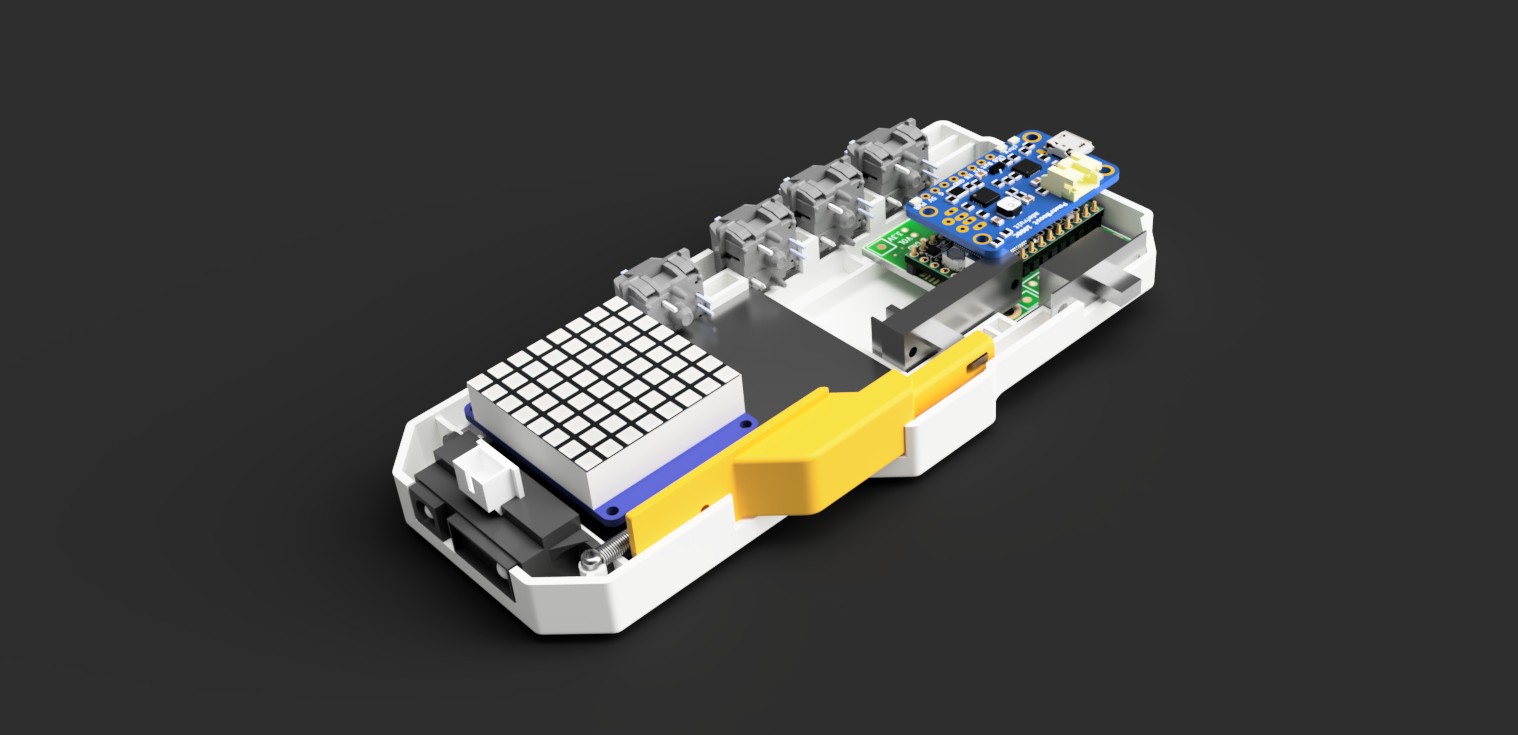
In the meantime, check out some renderings I did of the enclosure:
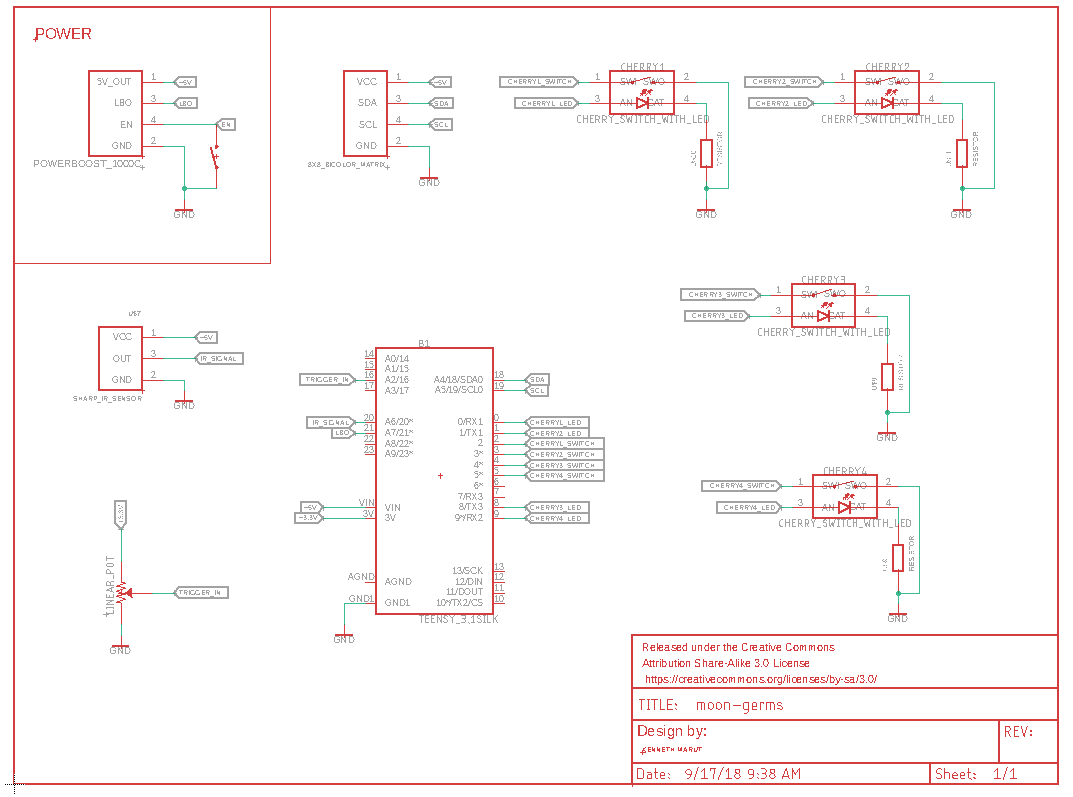
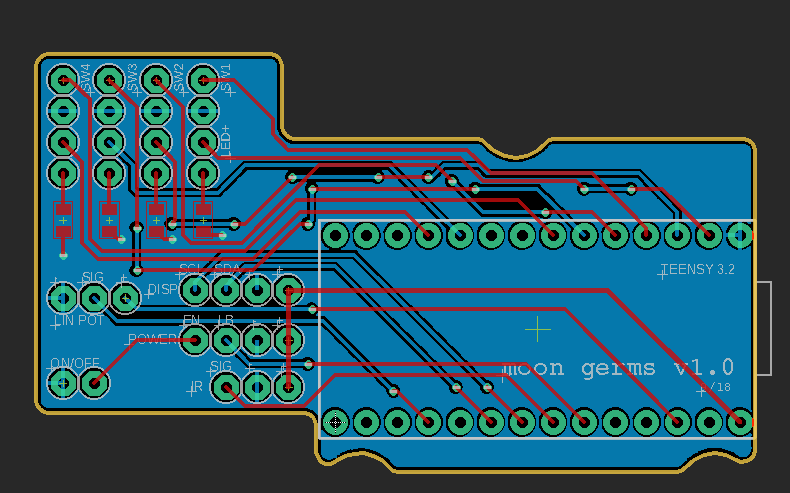
I was able to knock out the schematic and layout for the PCB last night and this morning. I used the Fusion 360 + Eagle integration to generate a pretty cool board outline and was able to seamlessly work between the two CAD programs. Routing the board was a little tricky, but ultimately not that bad. I sent off the Gerber files to Seeed for manufacturing (I had a $1 coupon for 3 PCBs, making the total cost $18 including shipping, incredibly cheap!). Let's see how fast they can turn this around.
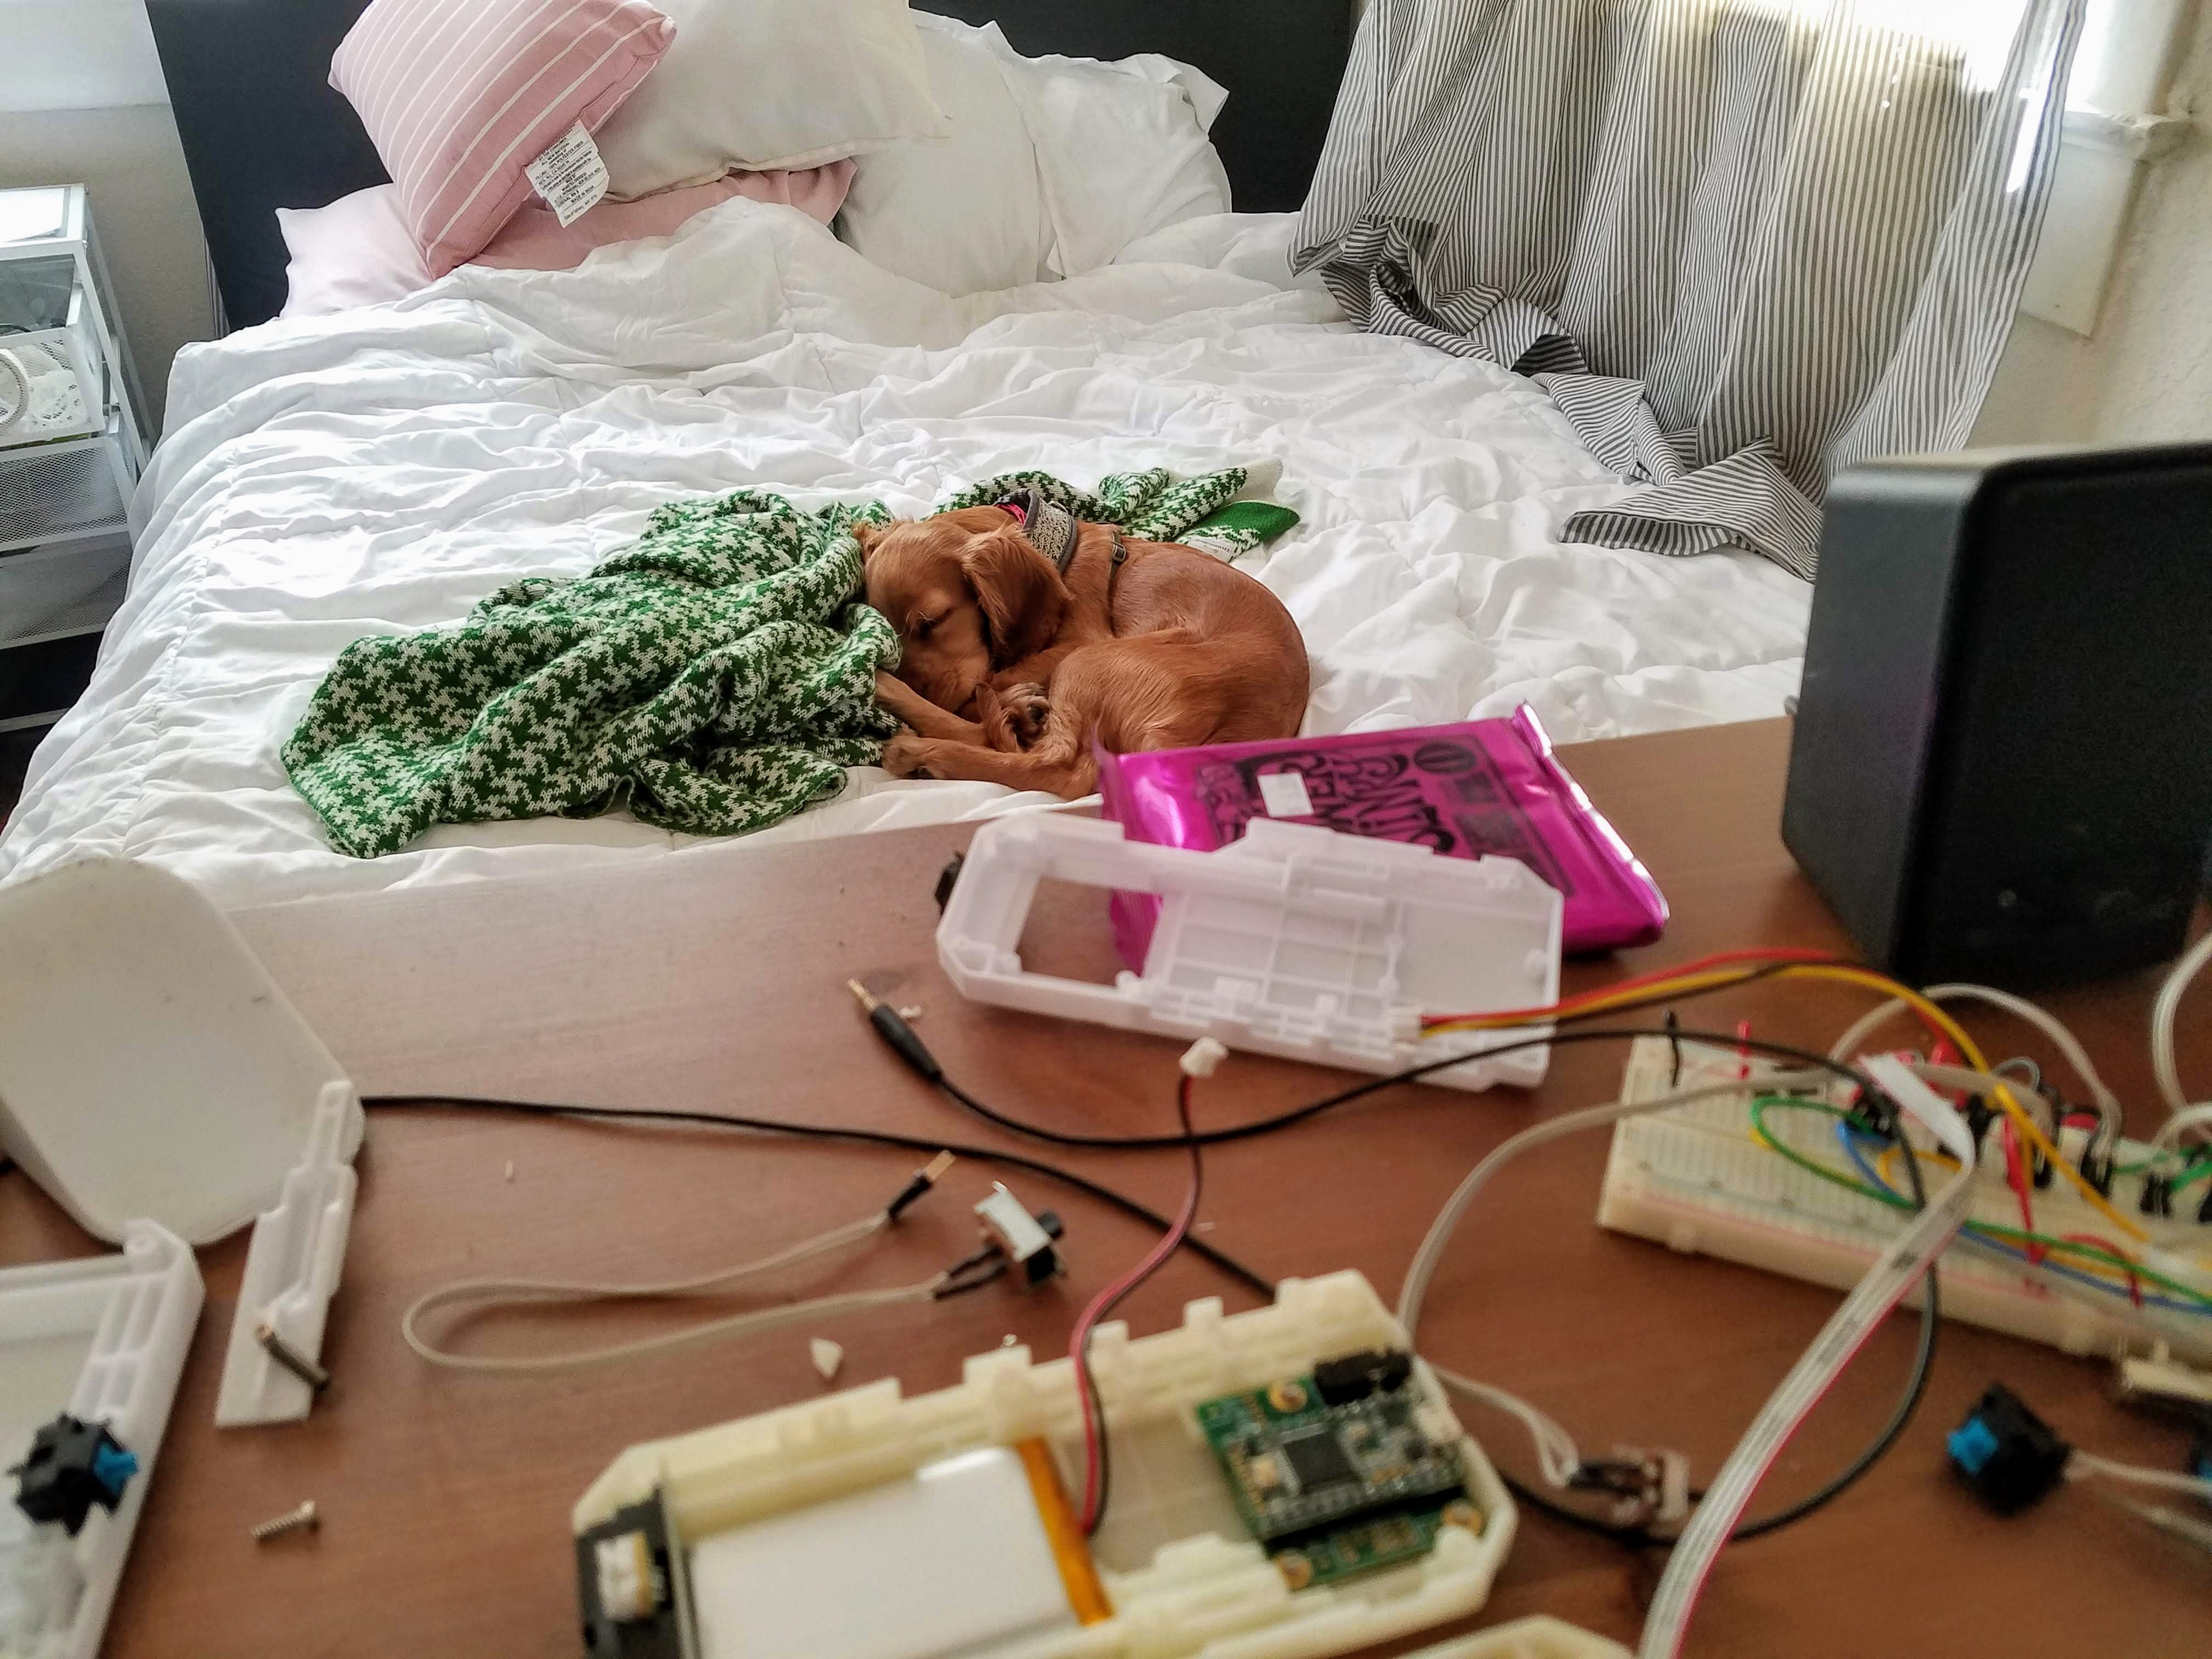
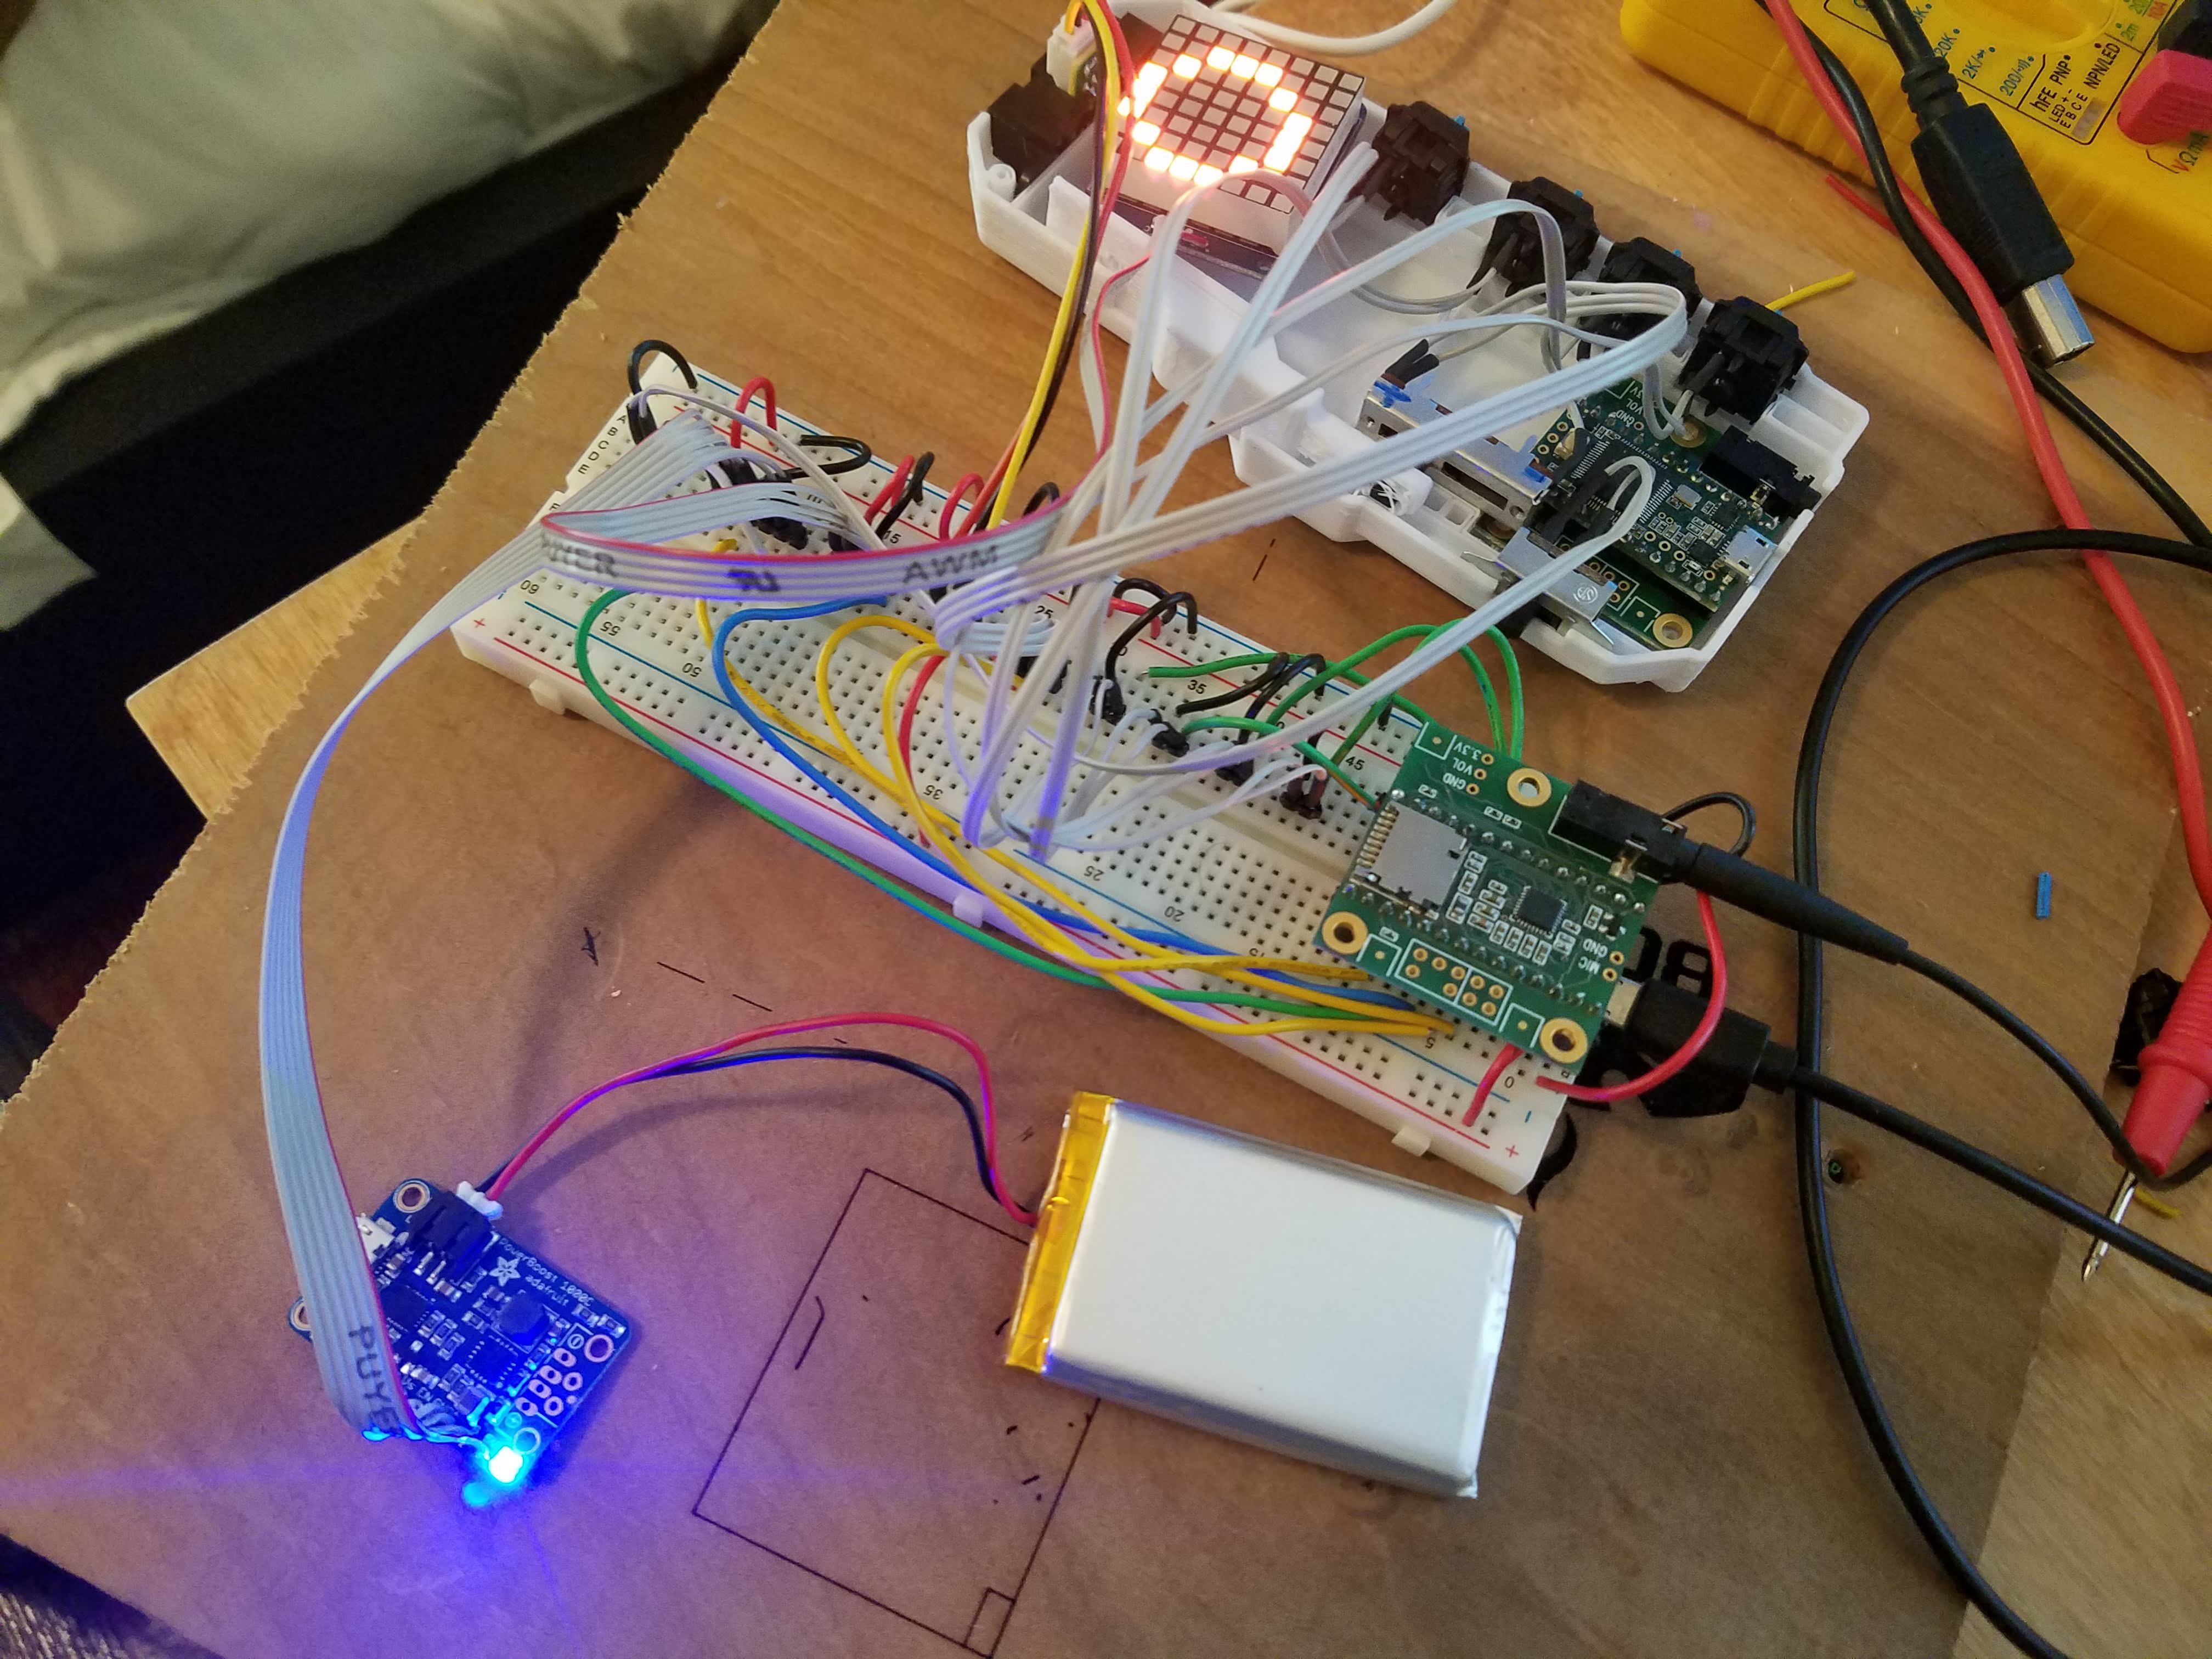
Hooked up everything to a breadboard and ran some preliminary tests using the Arduino IDE to check connections and functionality. So far so good! The 8x8 matrix and teensy Audio shield share the same I2C bus and everything seems to work fine. I was able to get the device to generate some audio waveforms while also displaying some simple images on the matrix (what a relief).
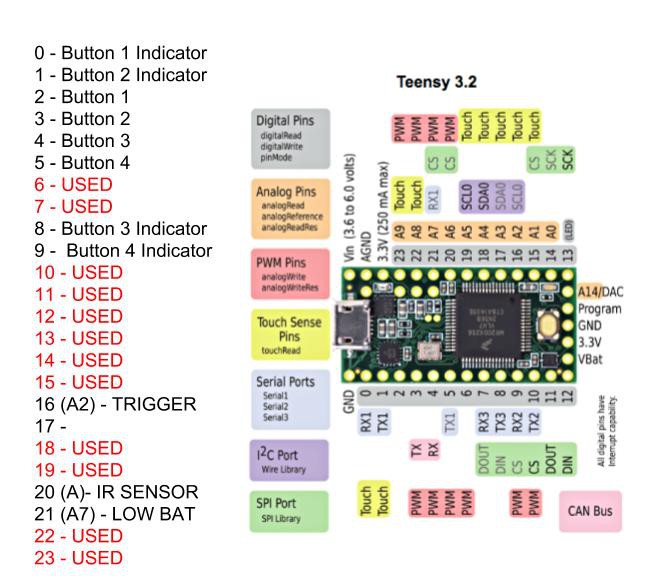
I've also decided that I'm going to go ahead and try to crank out a PCB breakout for all these components before the submission deadline. It should be pretty straightforward, but I'm a little bit concerned about the lead time. If I can get this thing sent out by the end of the day tomorrow, I think I'll feel pretty good. I've marked out all the pins I'll be using and started creating my EAGLE library. Between the pins being used by the Audio shield and the pins I'll be using for my additional components, I have a single free pin left (17), pretty lucky!
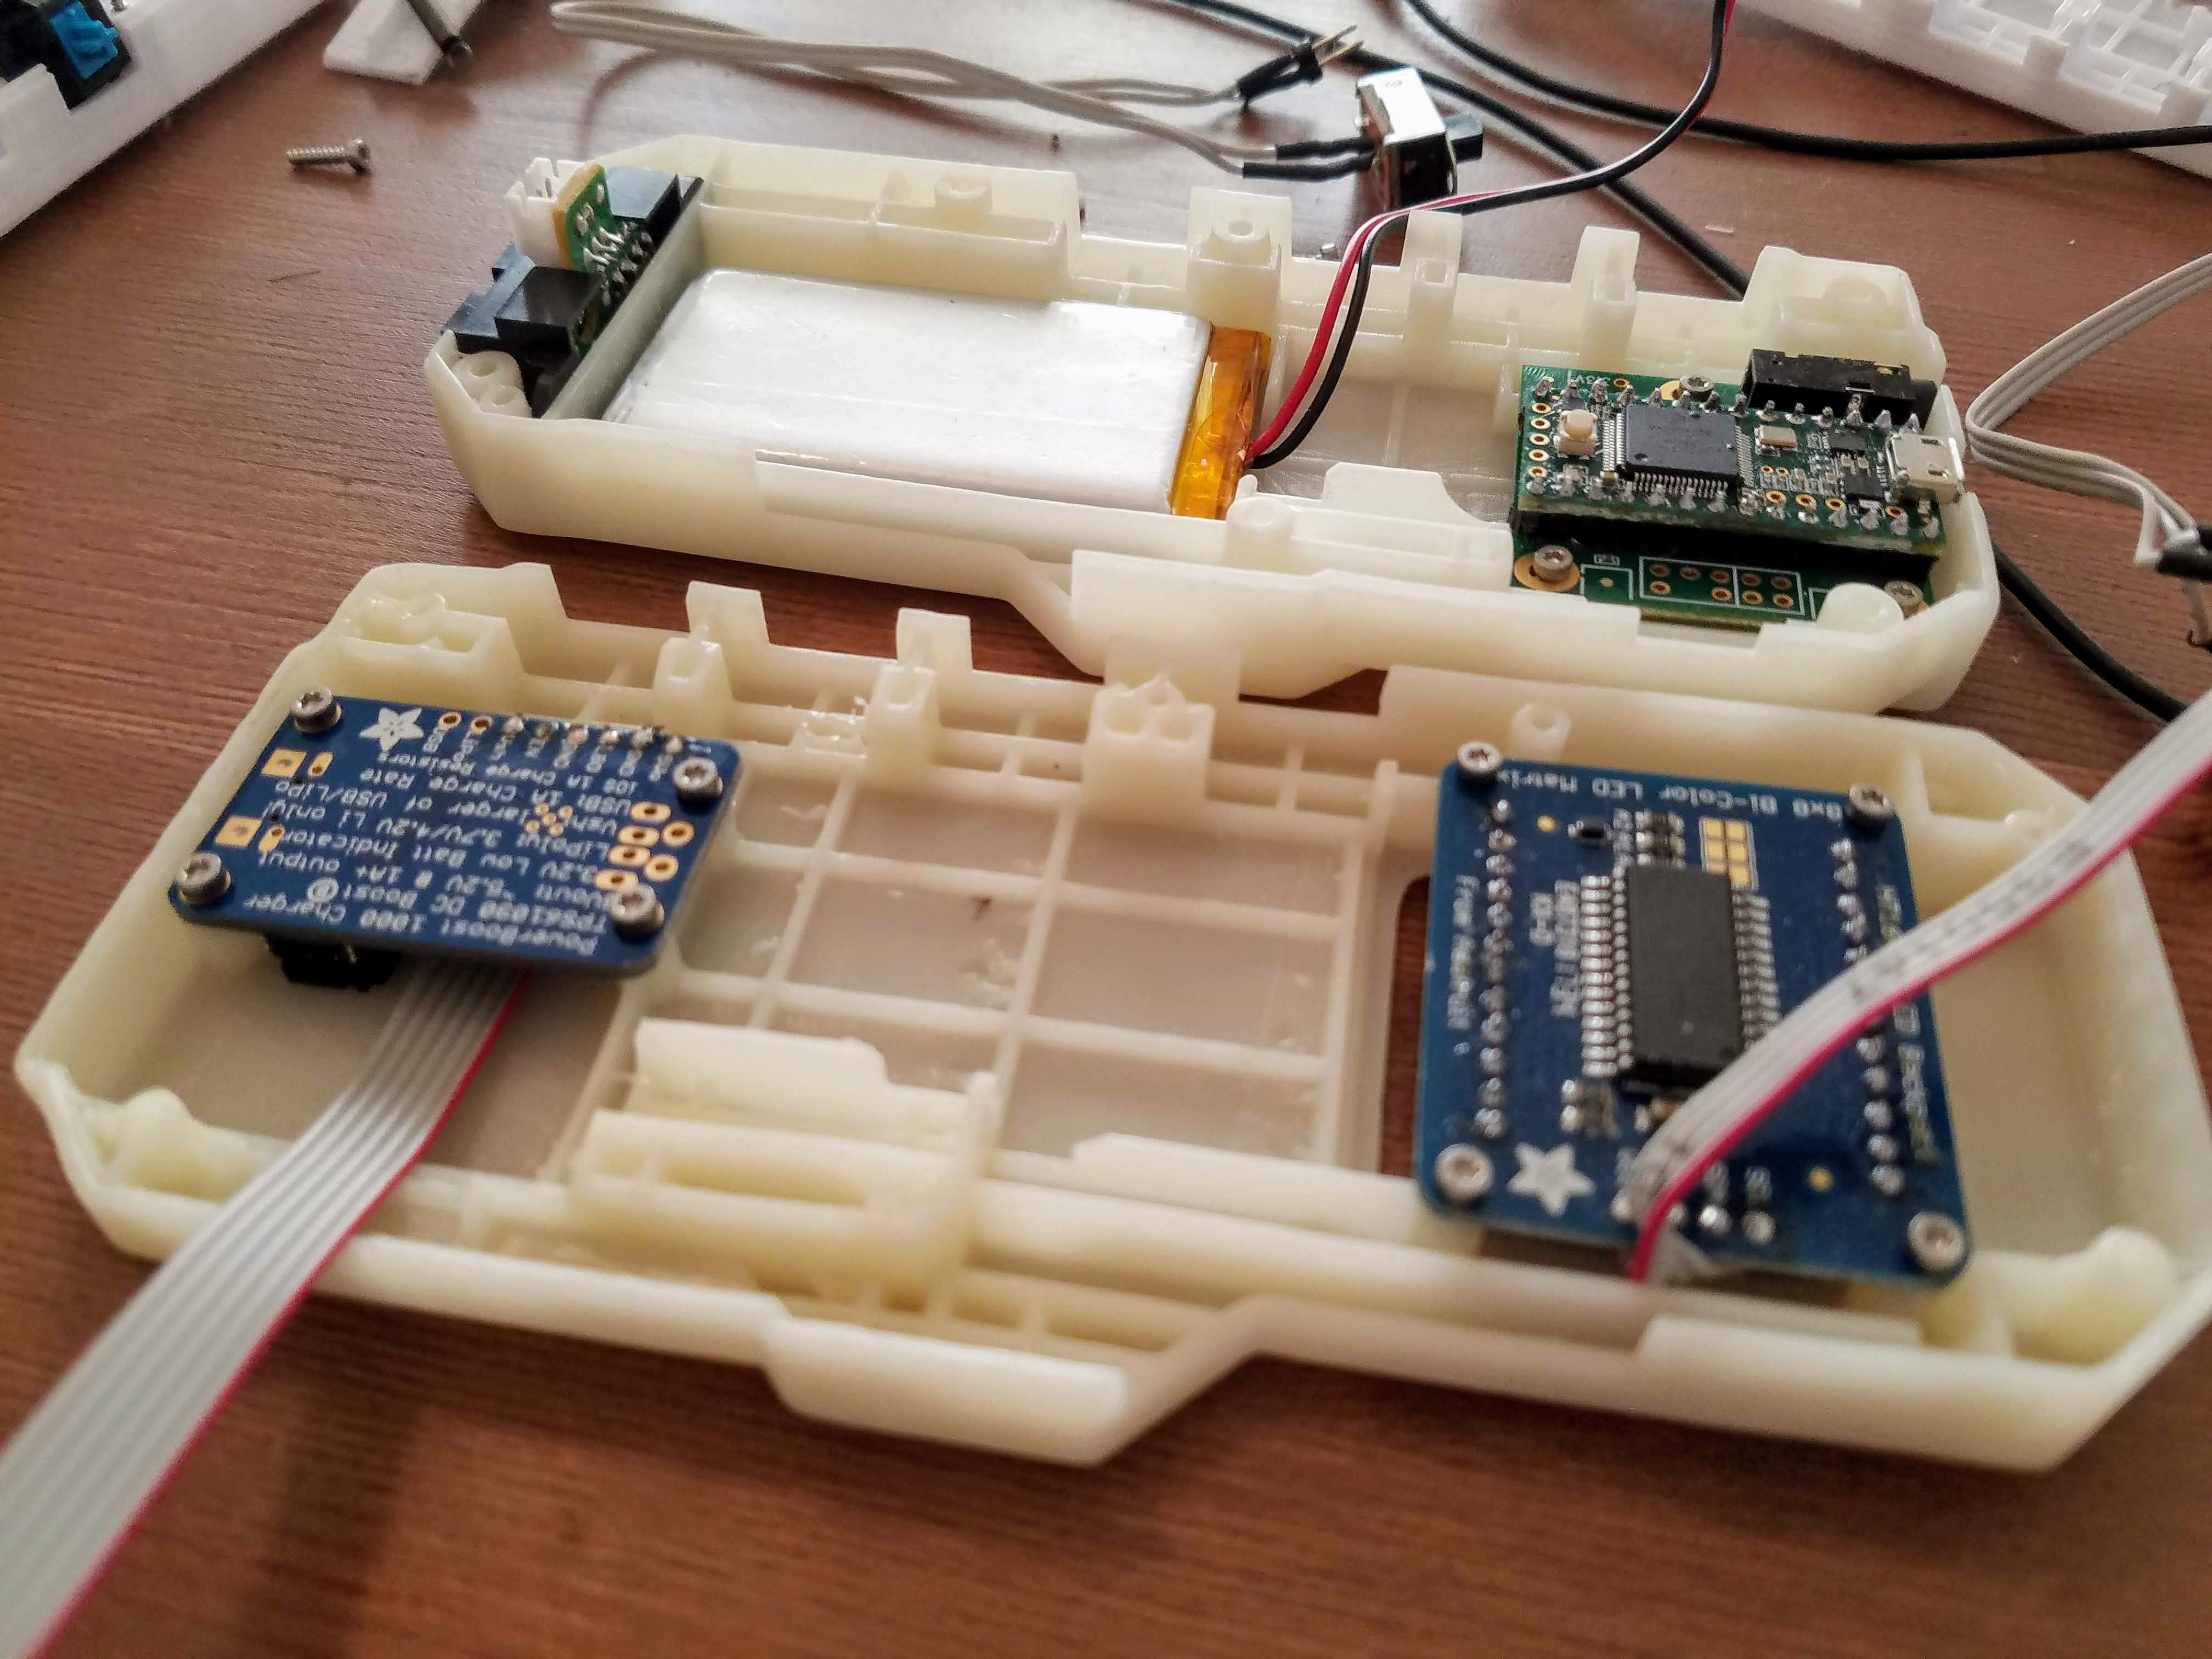
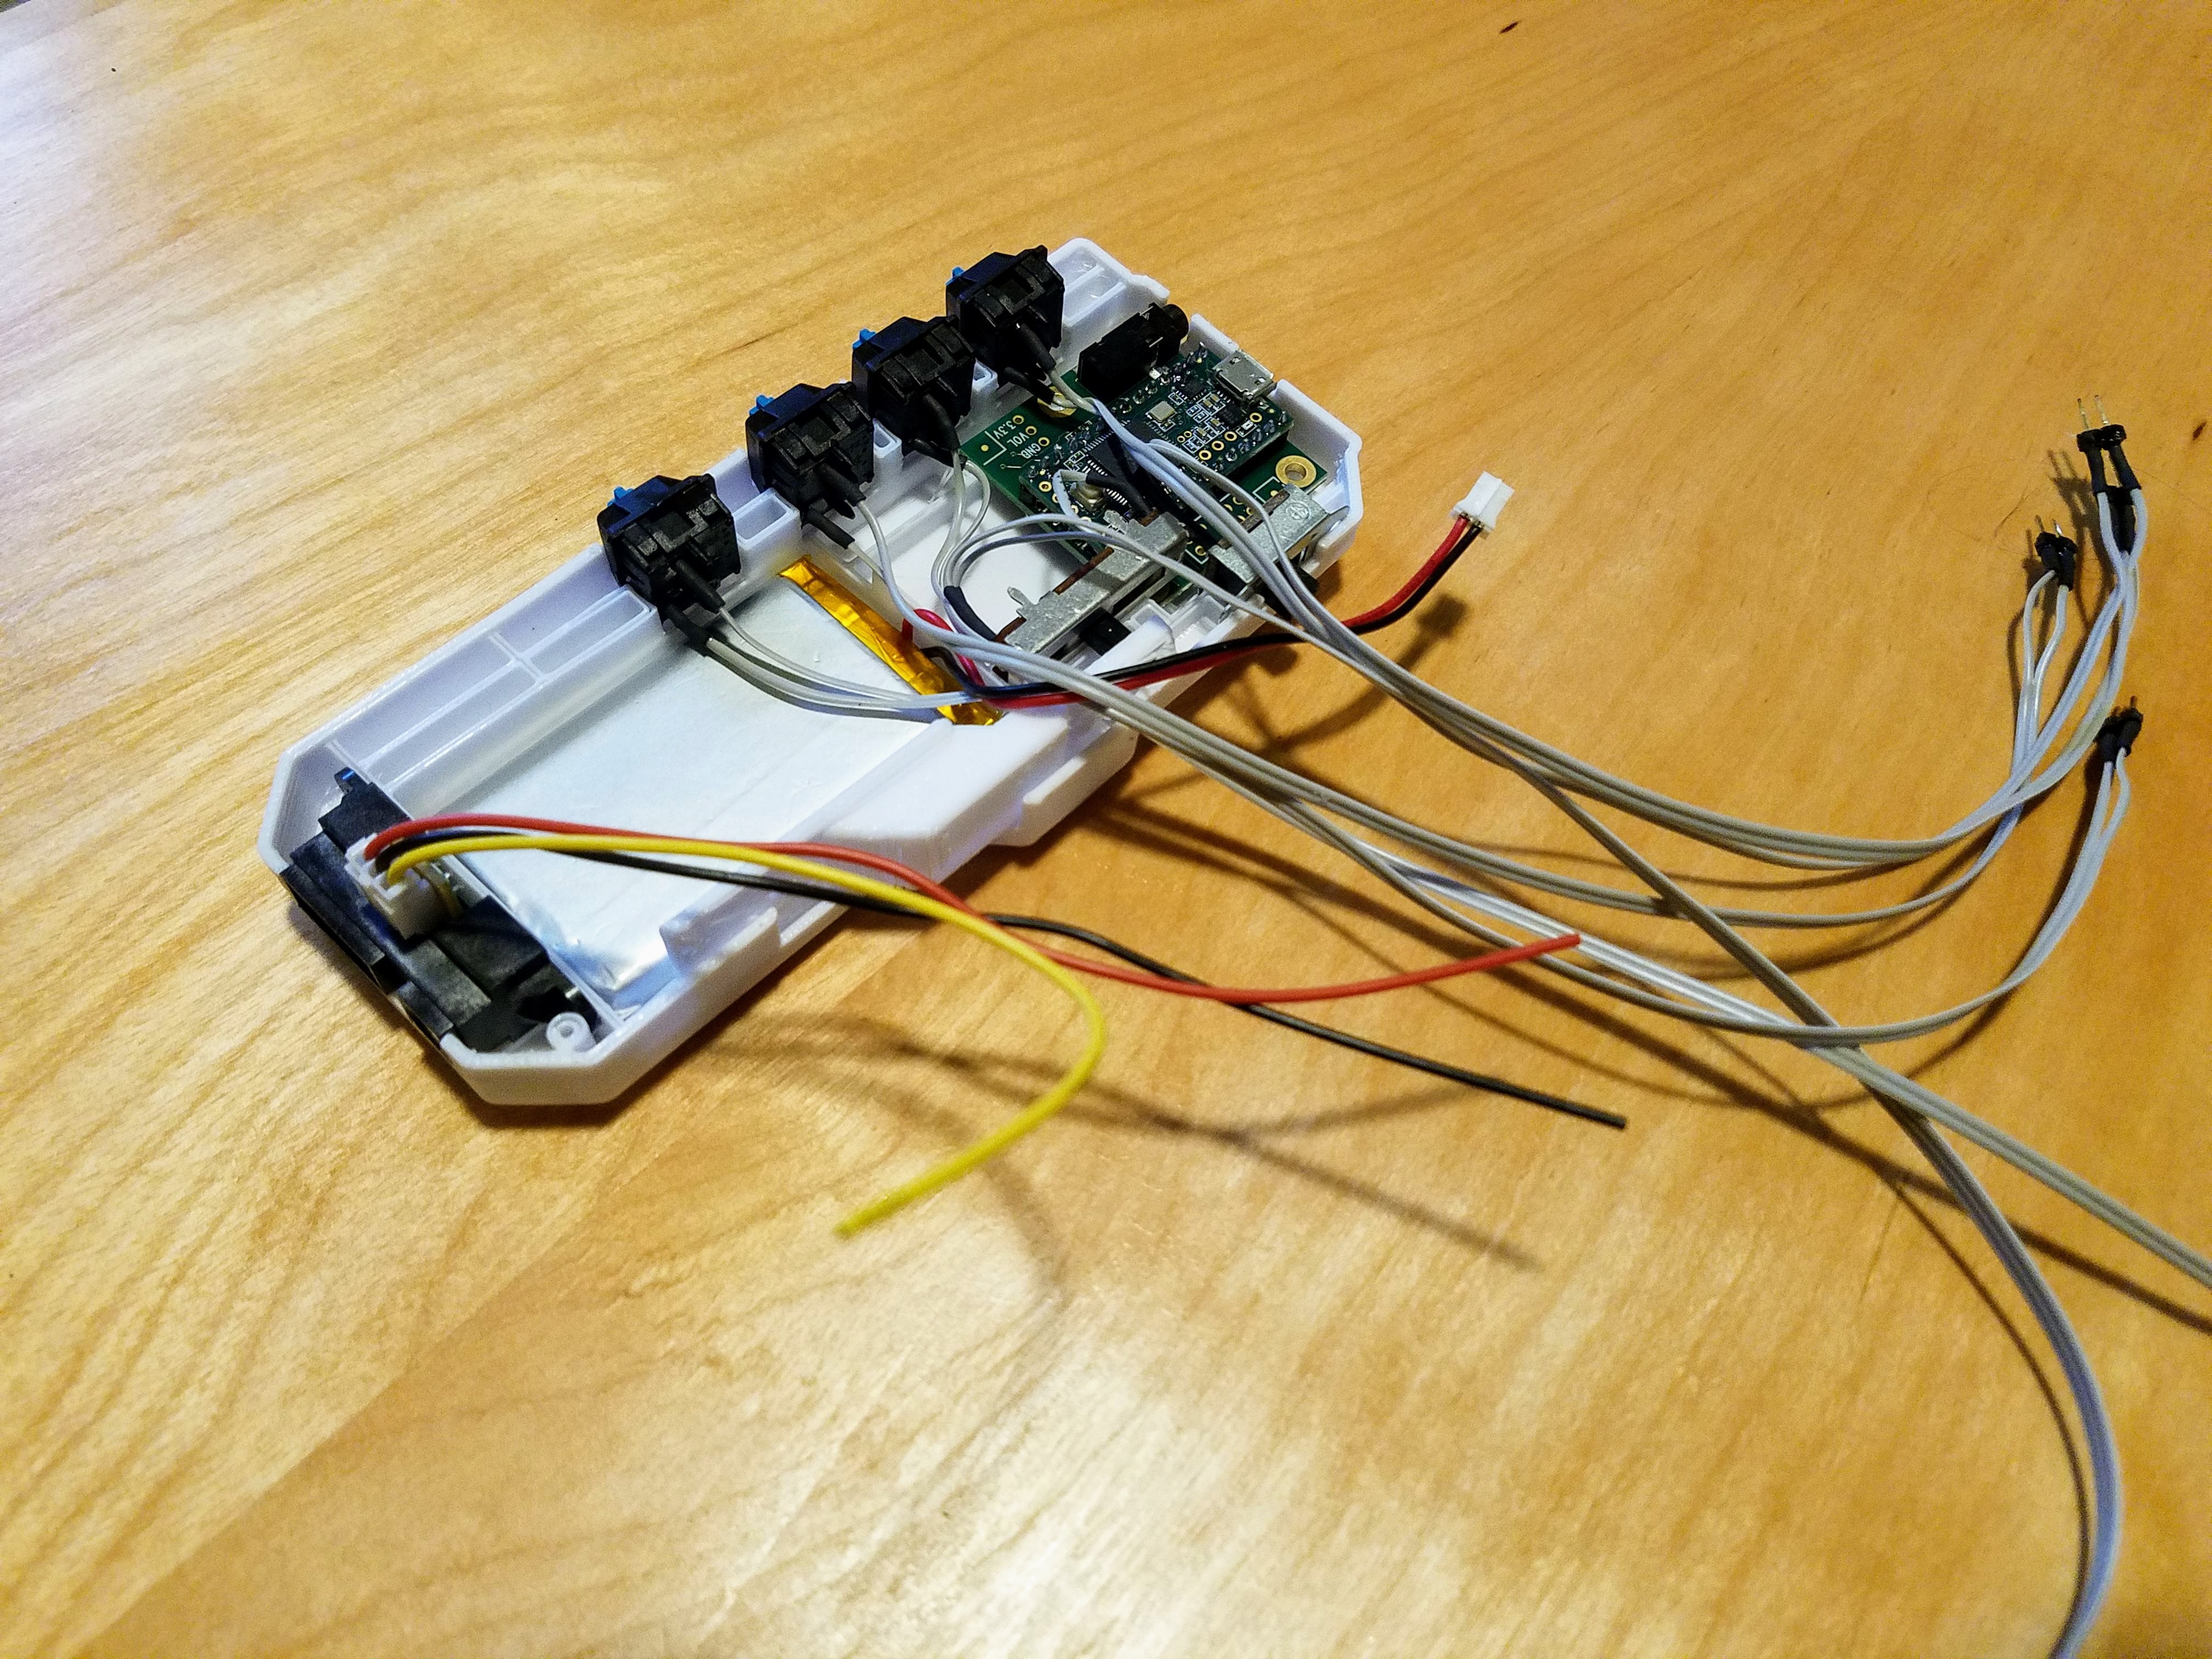
Just spent the afternoon soldering wires to all my components and terminating them with some 0.1" headers for easy breadboarding. The enclosure prototype just came off the machine and things are starting to fit pretty nicely!
It's been a very productive day, now time for a beer or 3.
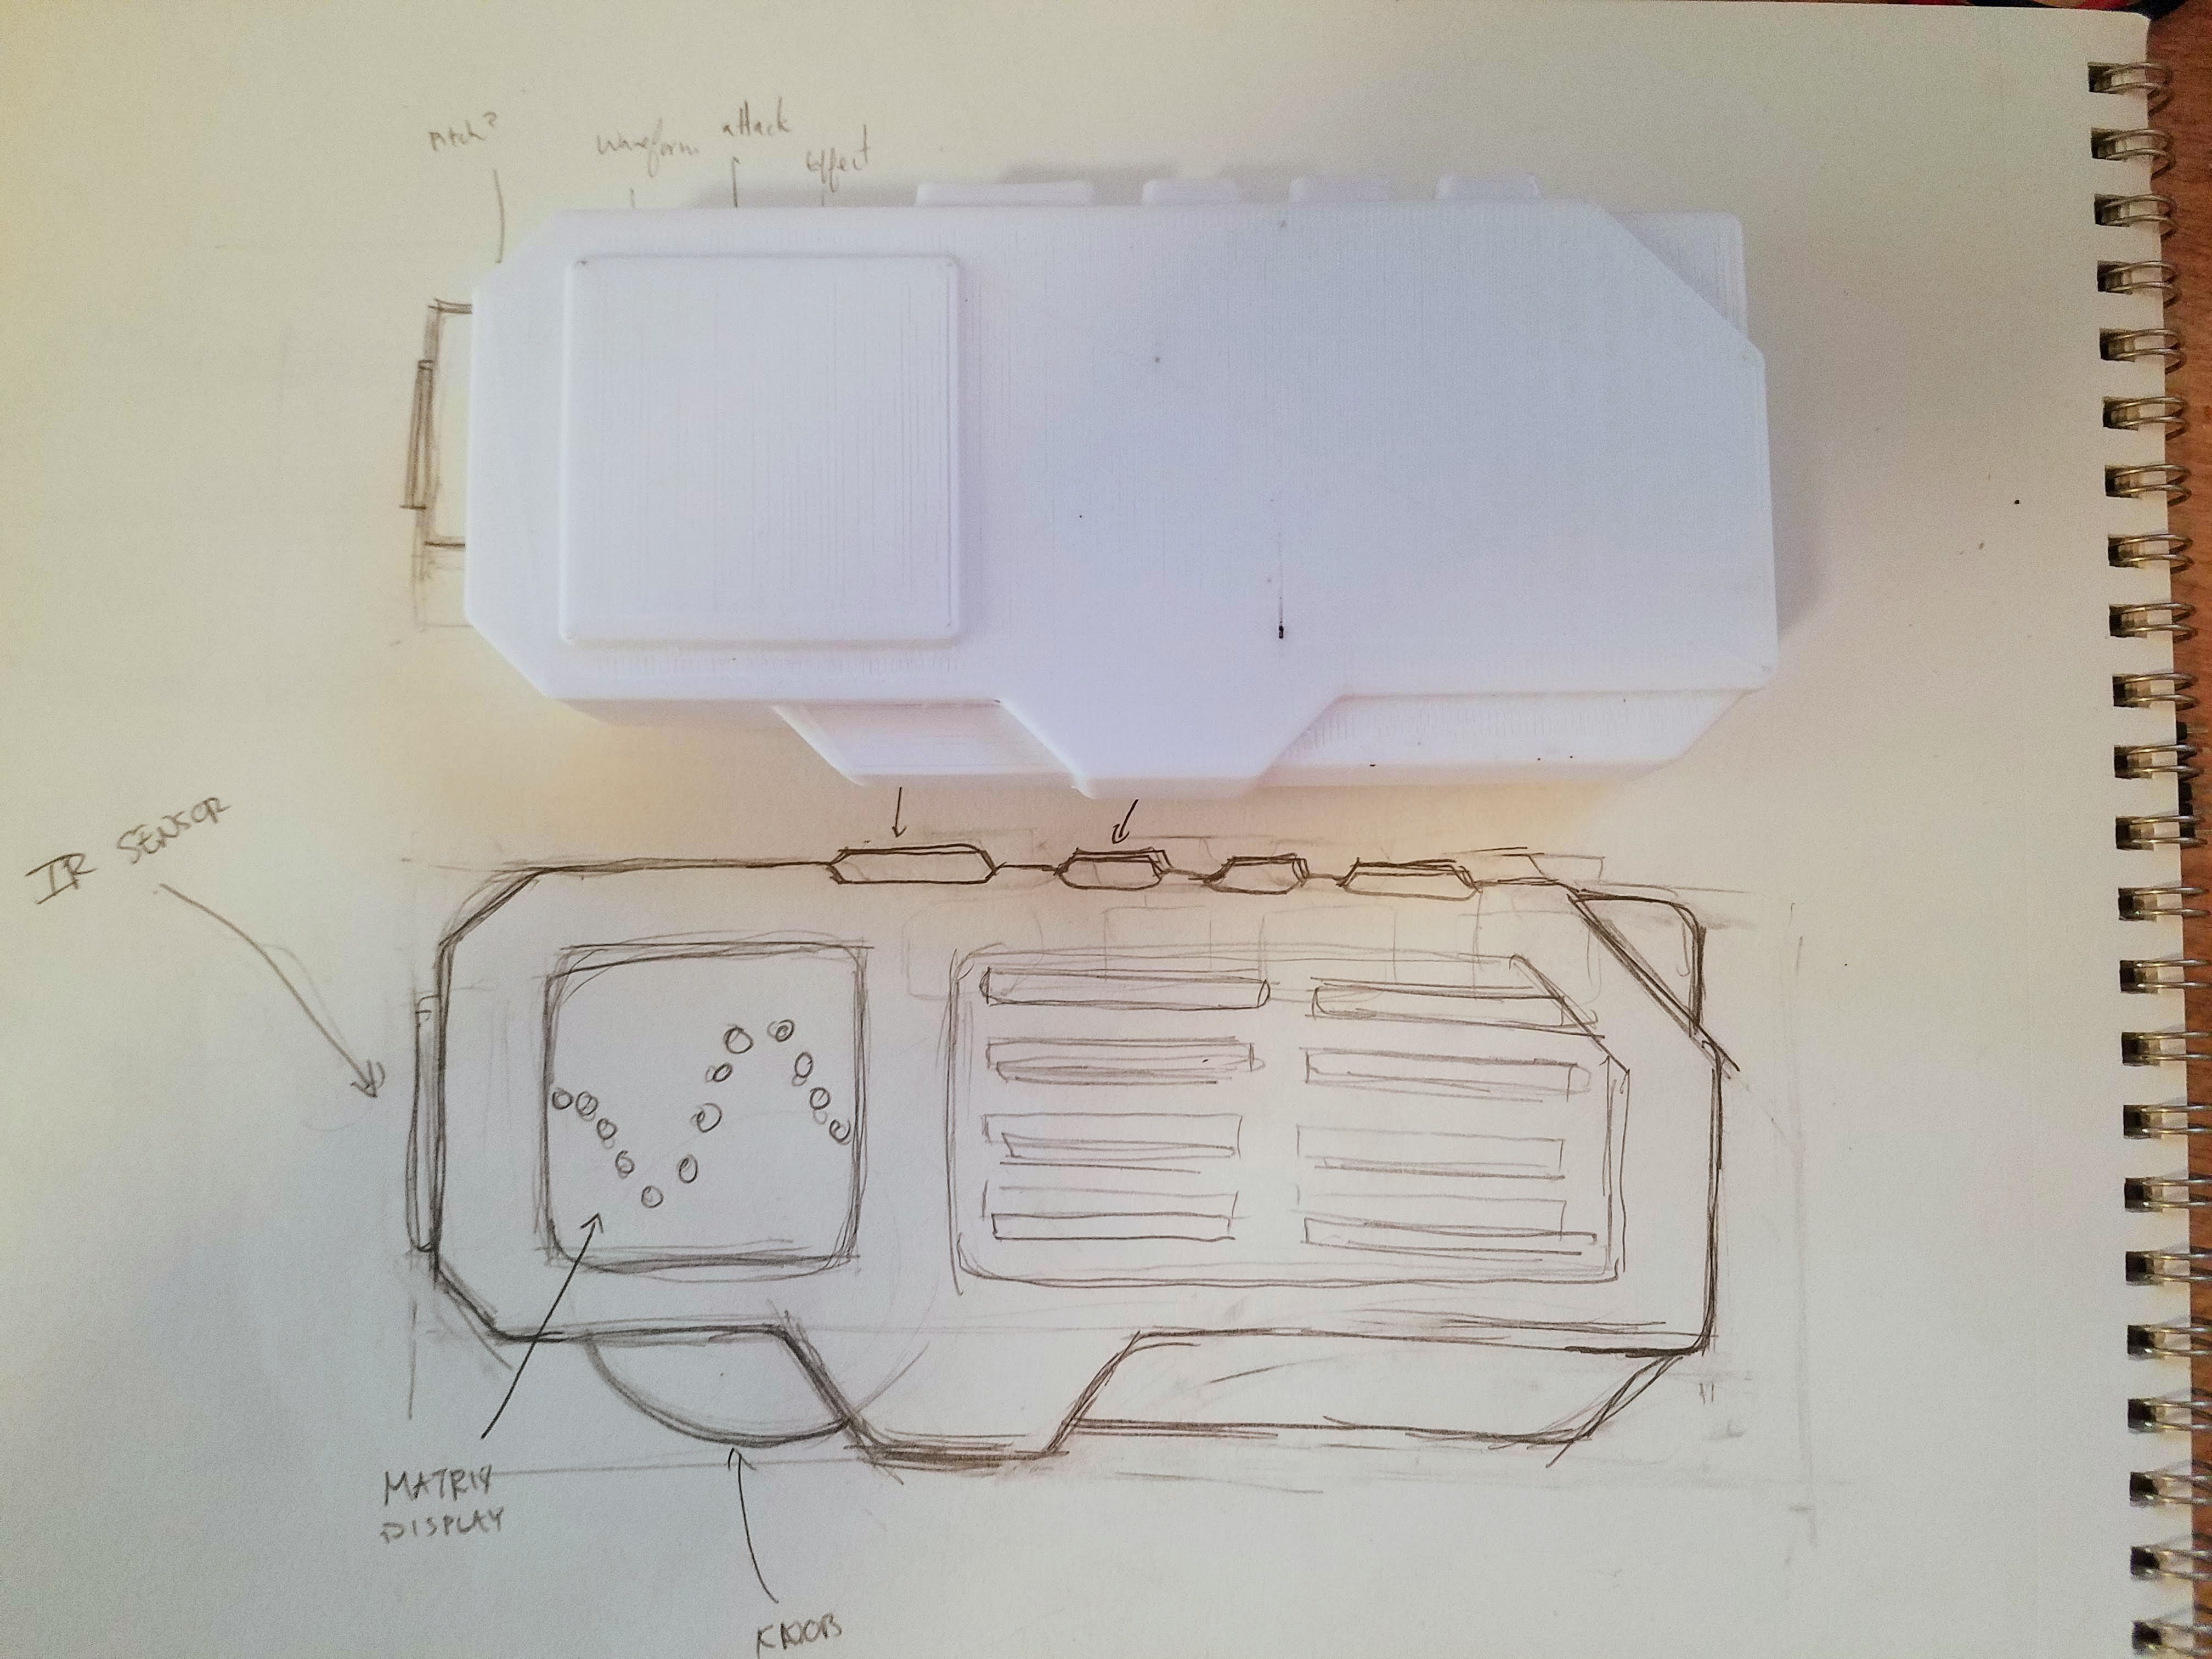
Trying to move quickly here! I've laid out my internal component structure and started shelling out the 2-part enclosure and adding mechanical mounting features. For the final design, I'm planning to 3D print the enclosure using my Wanhao Resin printer, so I thought it was best to design the enclosure as if it were to be injection molded (ribs, bosses , etc). Going about it this way will allow me to save on resin and also prevent warping during the print process.
Some cool mechanical features that I've incorporated into the design:
Mechanical "Cherry" keyboard switches as inputs
A springloaded linear pot with trigger. Sot sure exactly what I'll be controlling with this, but it should be a pretty fun input
I'm currently printing a prototype of the enclosure's lower half to test fit my components. If everything looks good I'll move on to the upper half (this is where I'll be housing the 8x8 LED display and LiPo charger.
In the meantime, I've started breadboarding my circuit. Once I get a proof-of-concept, I'll probably transfer everything to a perf-board. Ideally, I would like to make a custom breakout PCB, but I don't know if I can afford a 10-day lead time on manufacturing!
Still a lot to do!
Check out a quick rendering I did in Fusion 360 below:
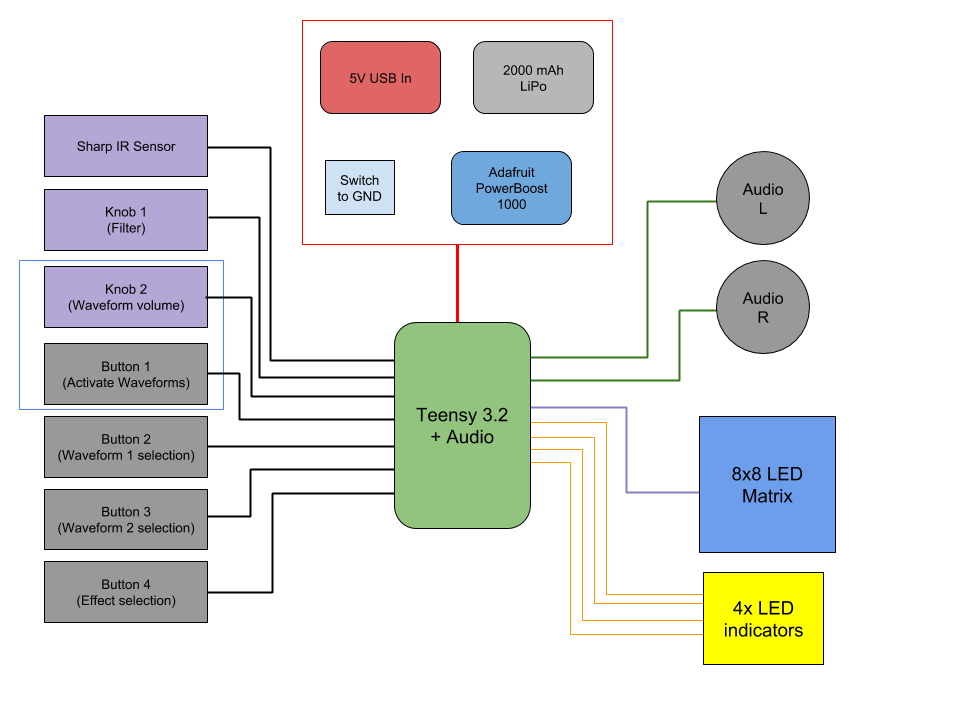
I came across Hackaday's musical instrument challenge the other week and thought I'd give it a shot. Over the past couple of days I've come up with the basic concept for the synthesizer (which I'm calling the "Moon Germs" synth) and done some preliminary industrial design work as well as electronics architecture. Put in my first order for some parts (it quickly added up to about 150 bucks, hopefully I don't have to spend much more).
I'm also very excited to mess around with the Teensy Audio shield. It seems like it's more than capable of making cool noises. Really hoping I can knock this thing out before the submission deadline. It will be a challenge for sure! Up next is the internal component layout and preliminary CAD.
Been listening to the Blade Runner sound track as inspiration :)
 Kenneth Marut