ARISTIDES Alexandre
-
Electronic V2
10/07/2018 at 19:01 • 0 commentsAfter some math the ESP32 can not do the audio treatement for this project.
The analog way didn't work and I now miss time to fix it.
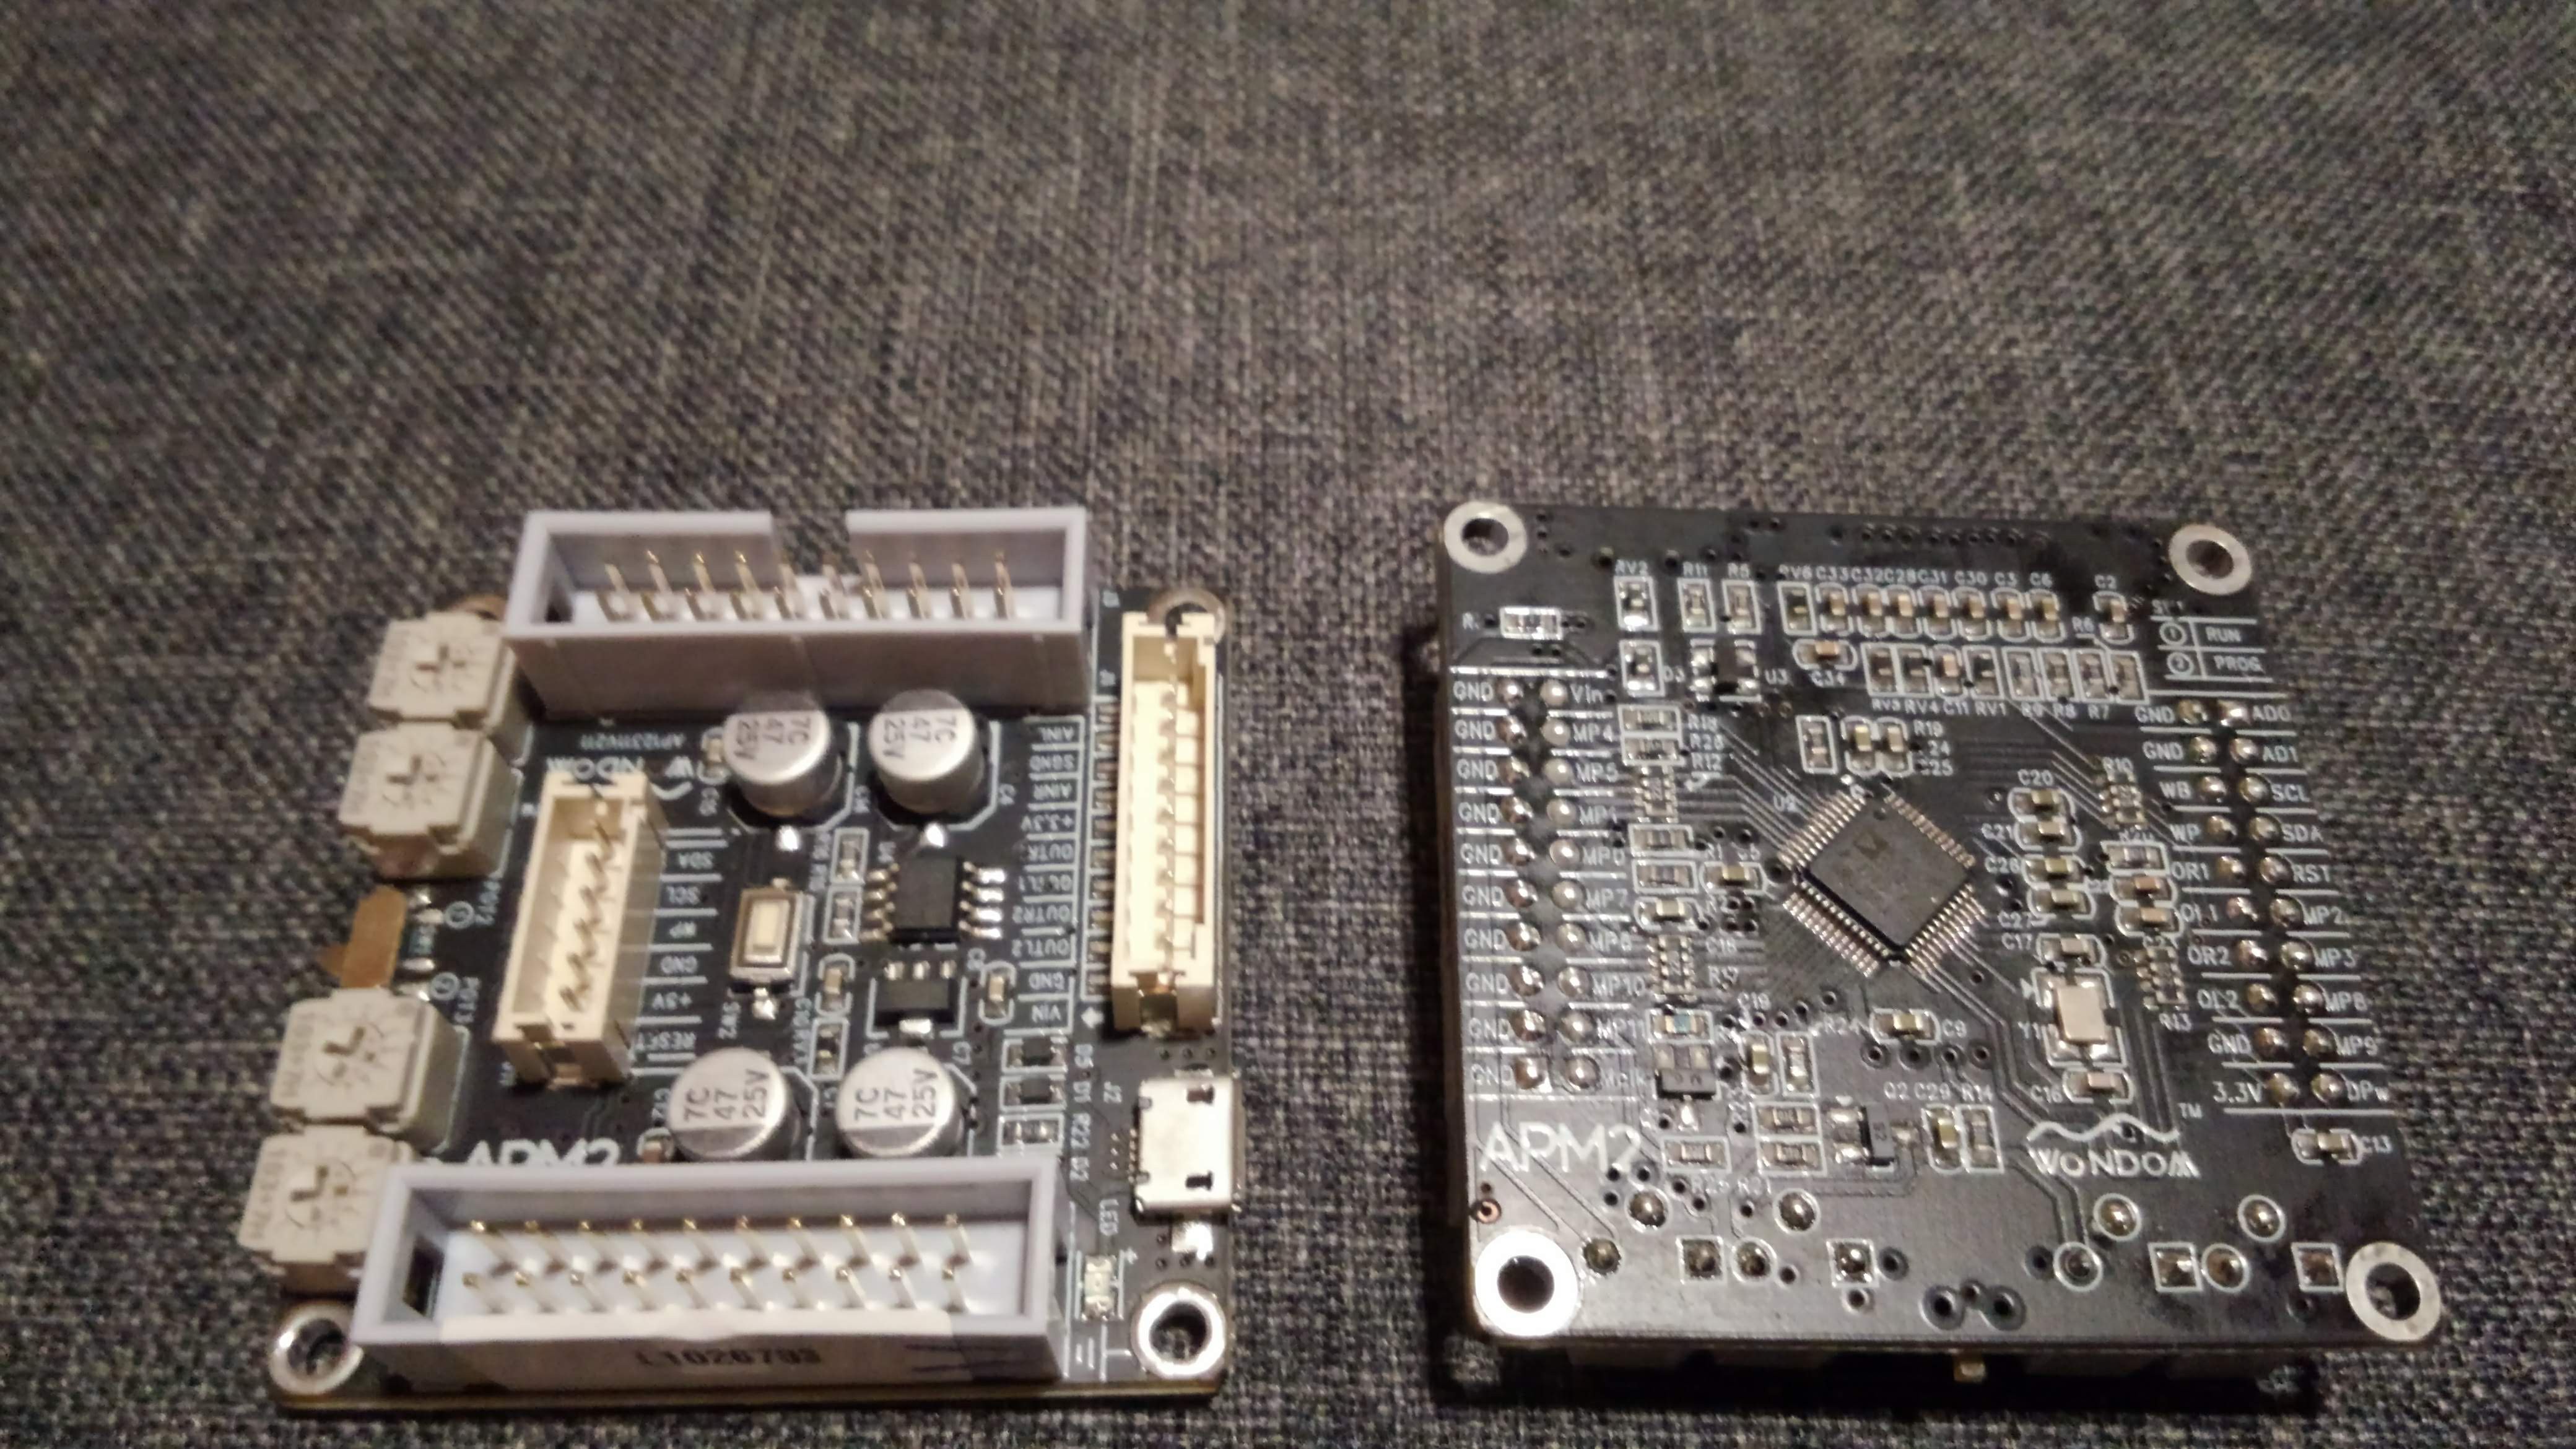
So I take 2xADAU1701 devboard, this is a DSP from ANALOG DEVICE which can works stand alone equiped with 2xADC and 4xDAC and easy use graphical programation.
![]()
This kind of DSP, I hope, can also do the midi convertion if it still enought memory.
But the consumtion of this DSP is litte high (50mA each) with the 80mA for the IR leds it's the battery life time start to be short (bellow 2h)
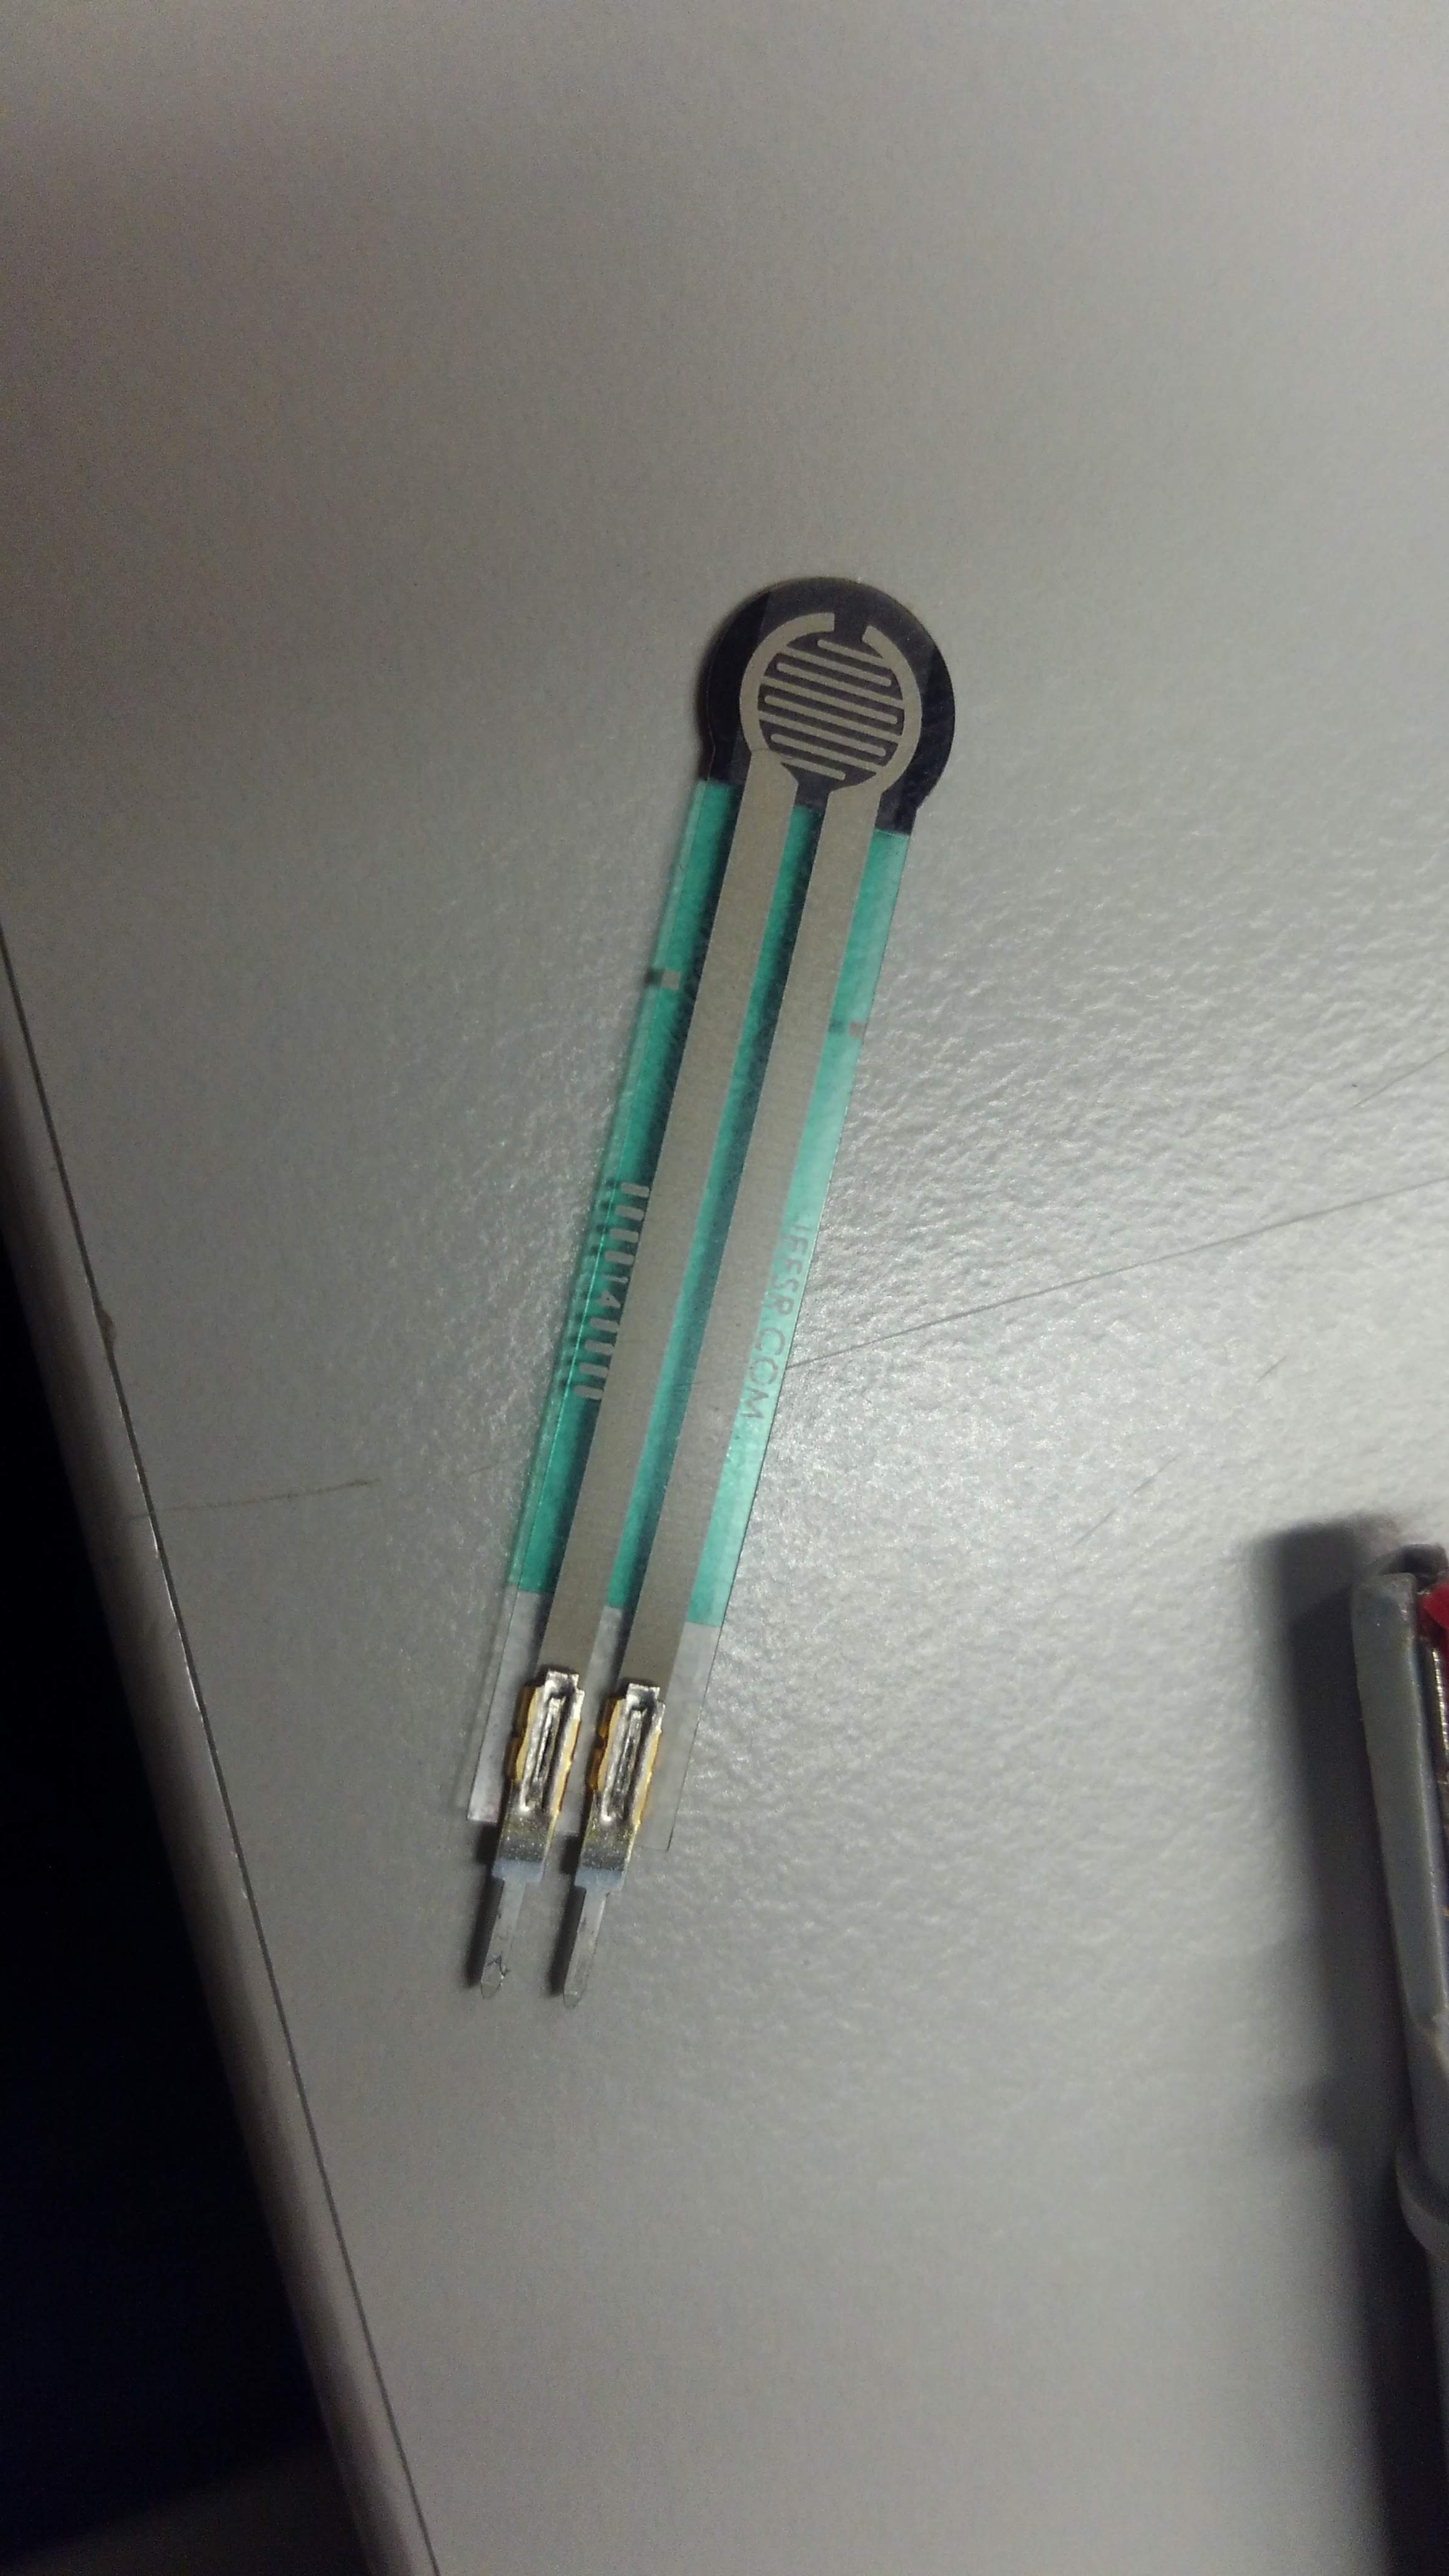
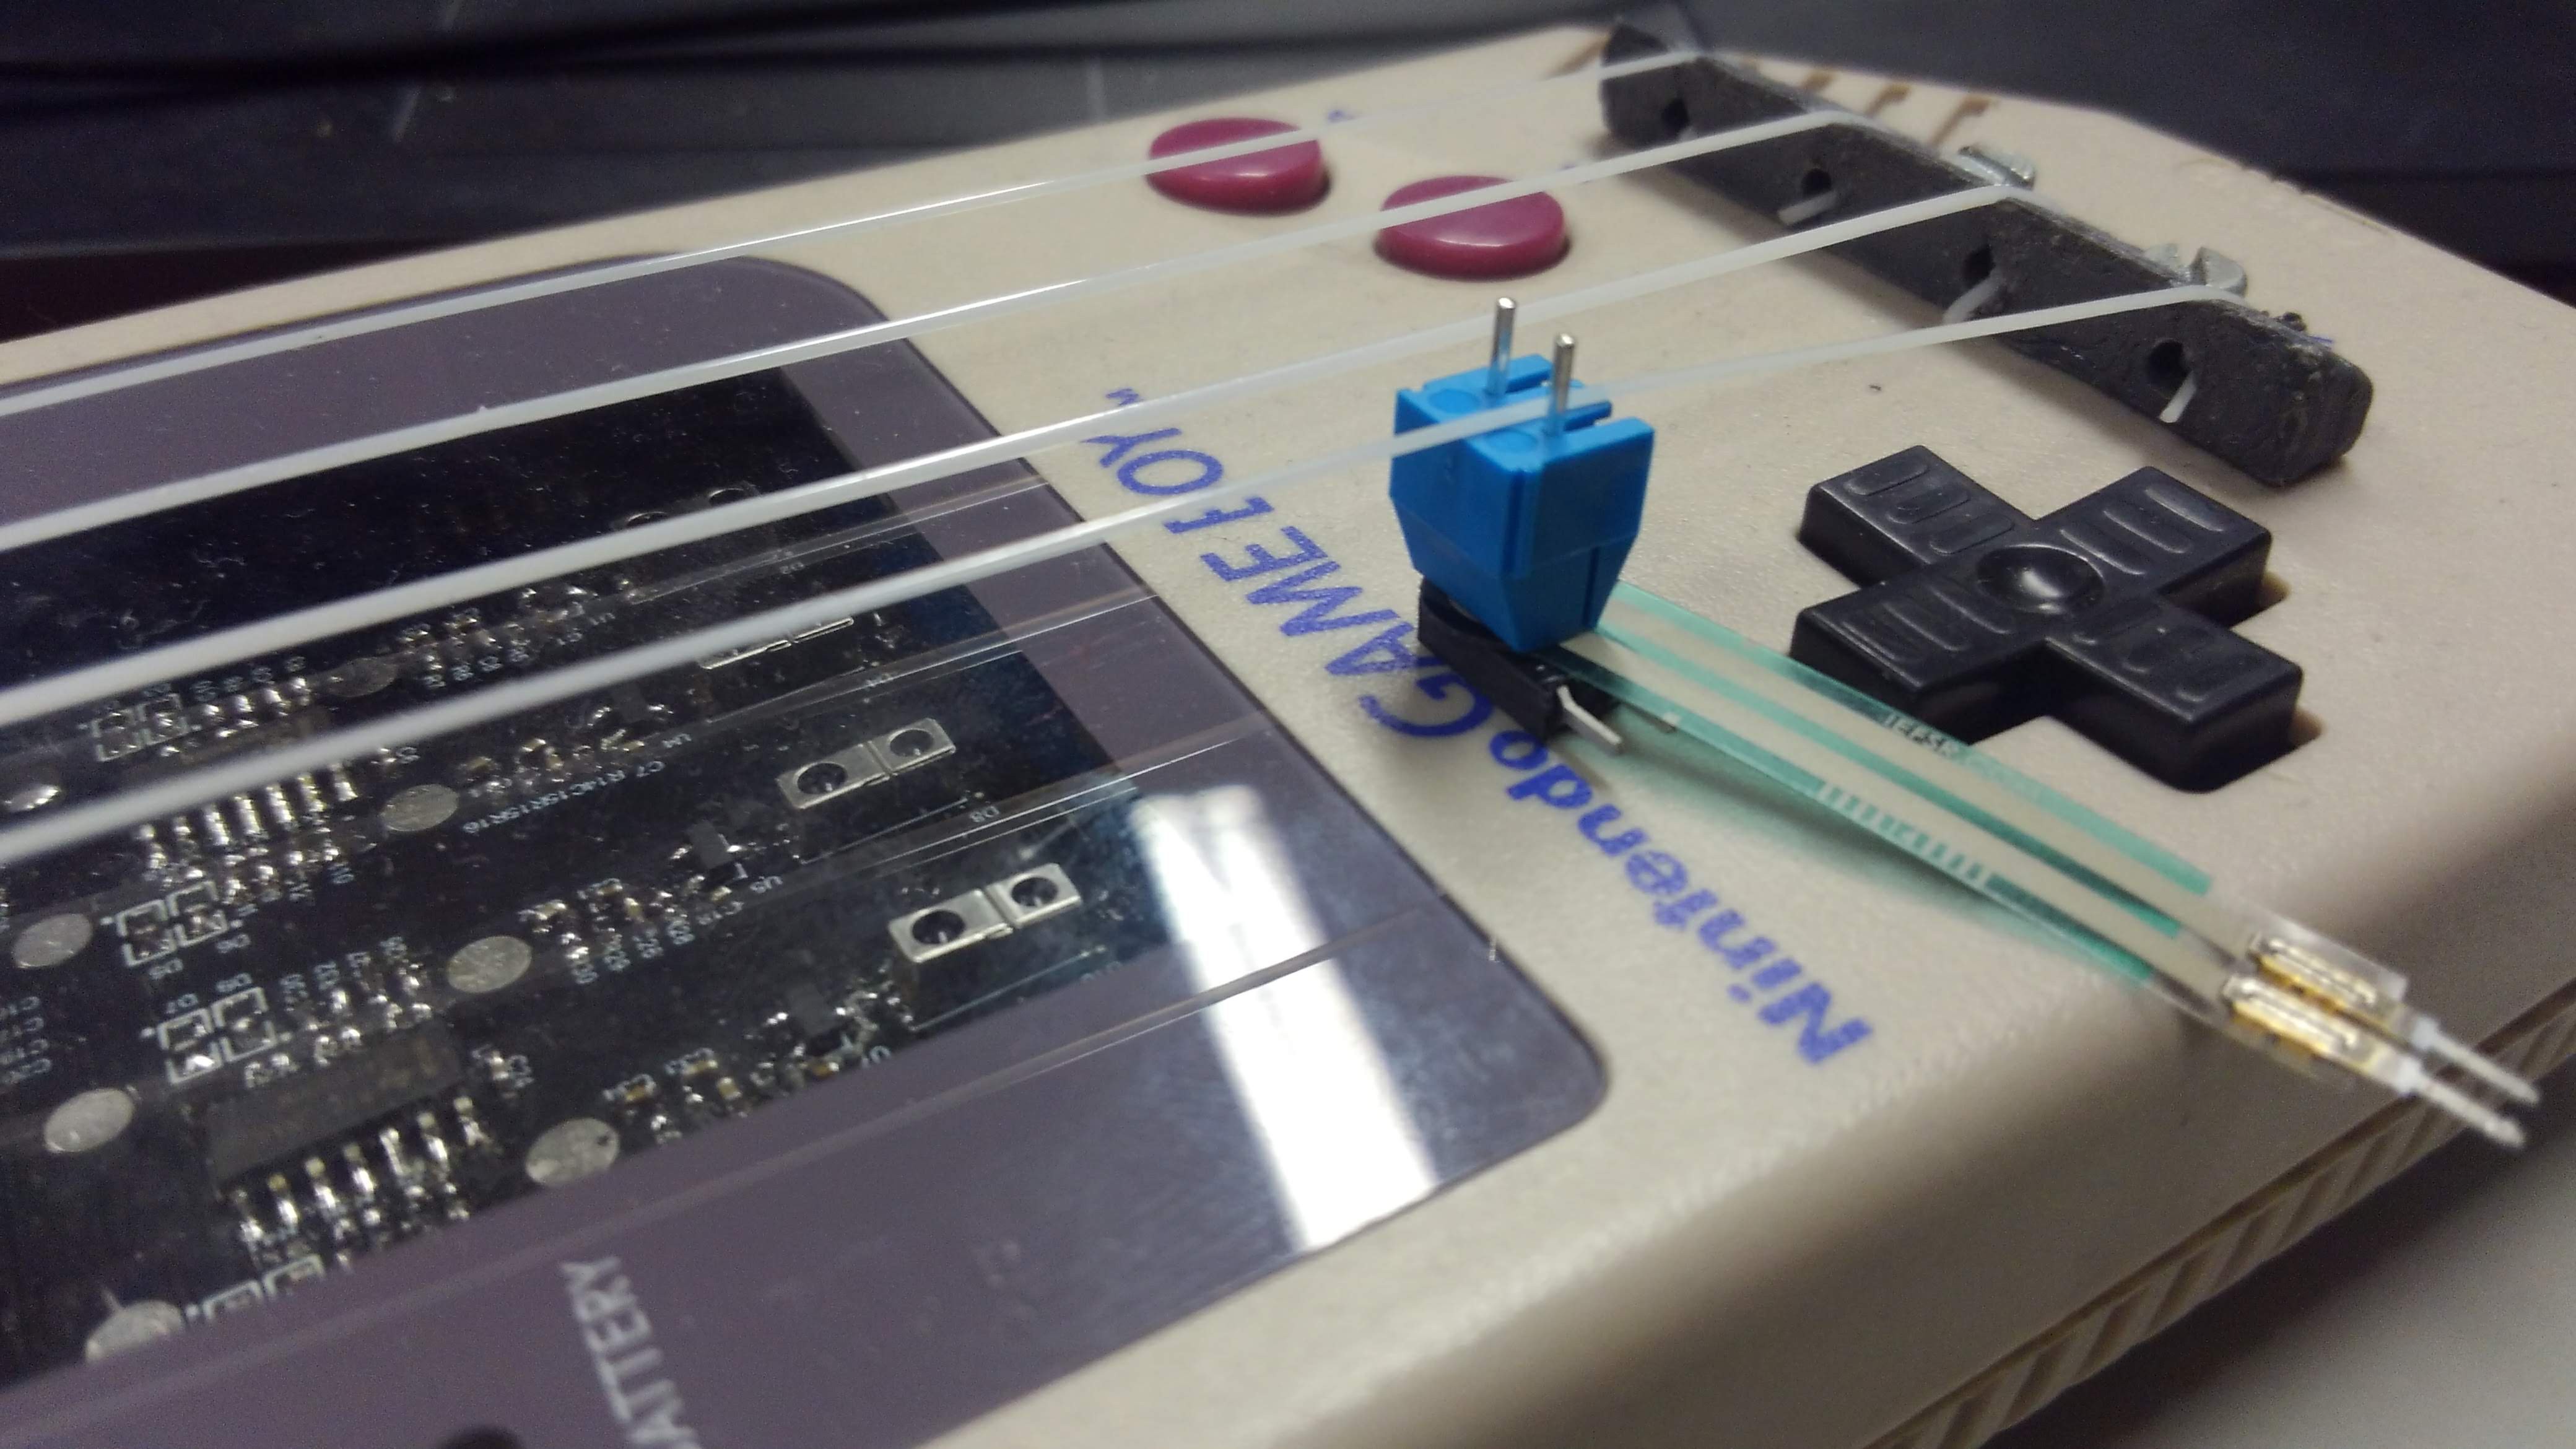
For the IR/plexiglass, the 50Hz/60Hz and the consumtion problem, the best way to fix it is to change the sensor.I try a force sensor like this one :
![]()
I install this sensor in a custom brigde polarized with a 100Kohms resistor :
![]()
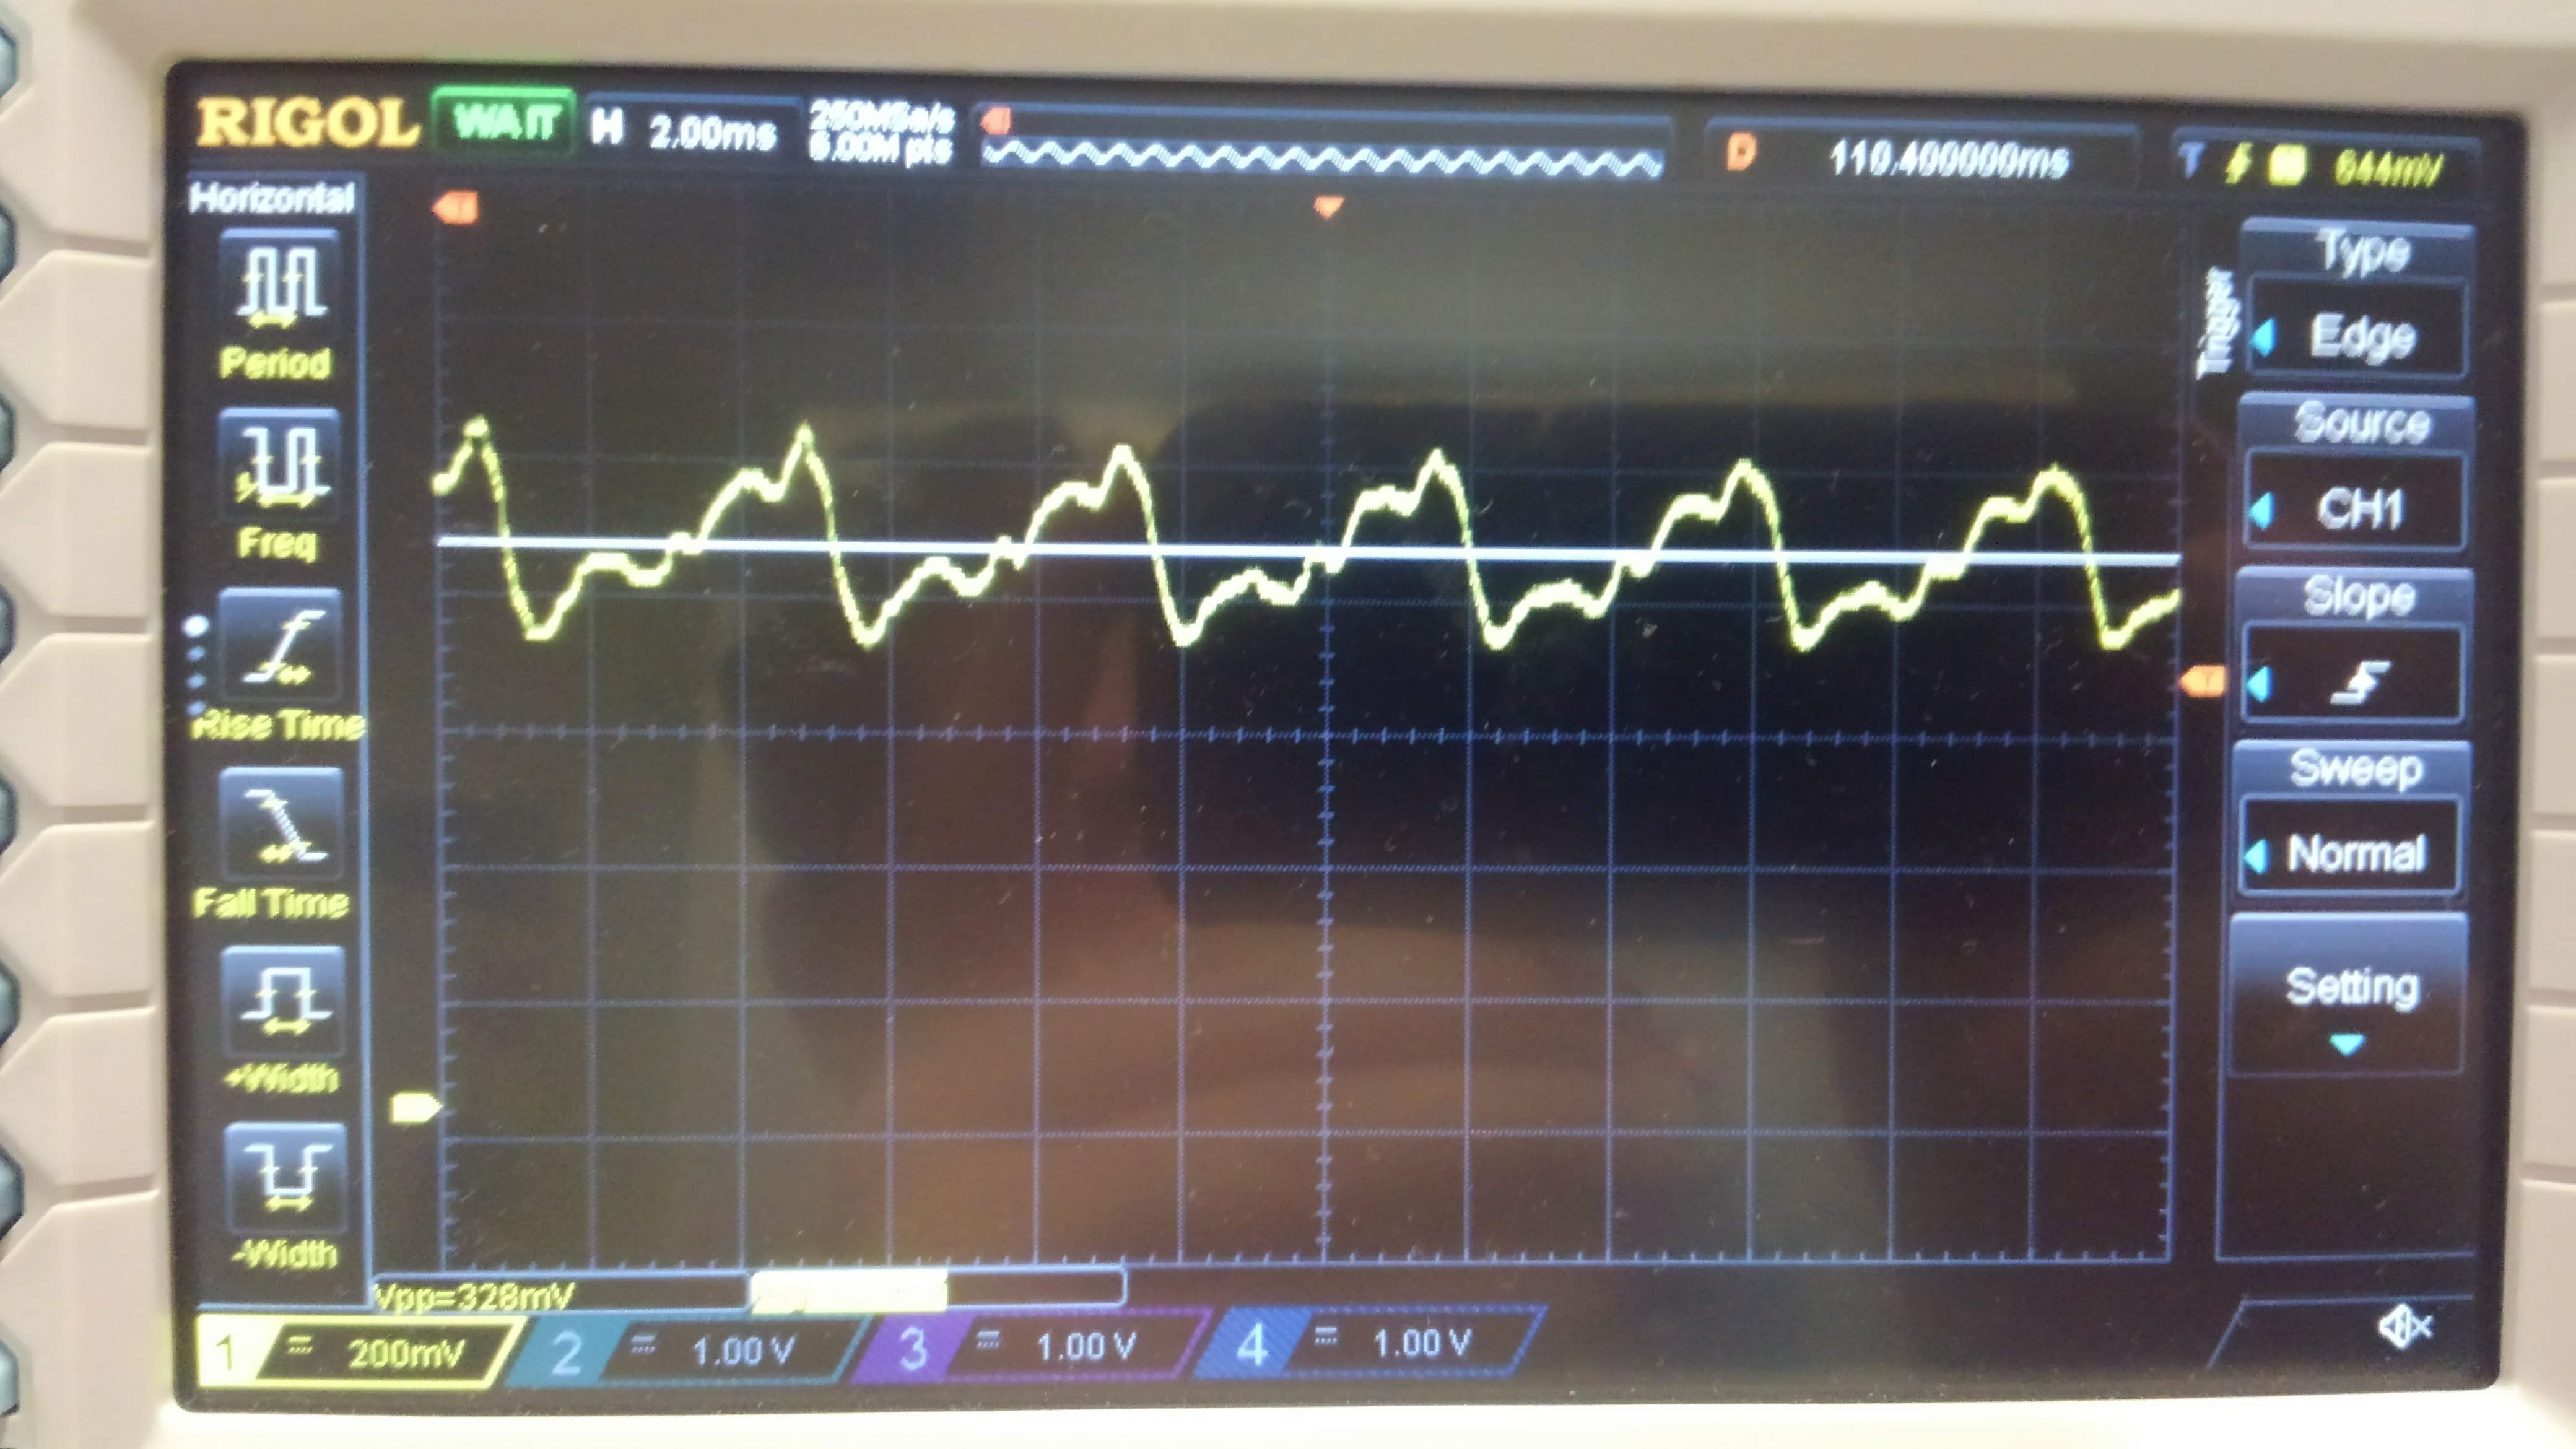
When I play a string the pressure sensor act perfectly as pickup!
The output voltage if far enought and the signal beautiful enought to this project, we don't need the true tring signal but only the frequency and the power.
![]()
The next step will be to try the DSPs, the IR pickup work enought to test it.The pickup with pressure sensor need to redesign the bridge and some try to find the best solution, maybe carbon ink depose by PCB's maker can work for this due...
-
First electric sound
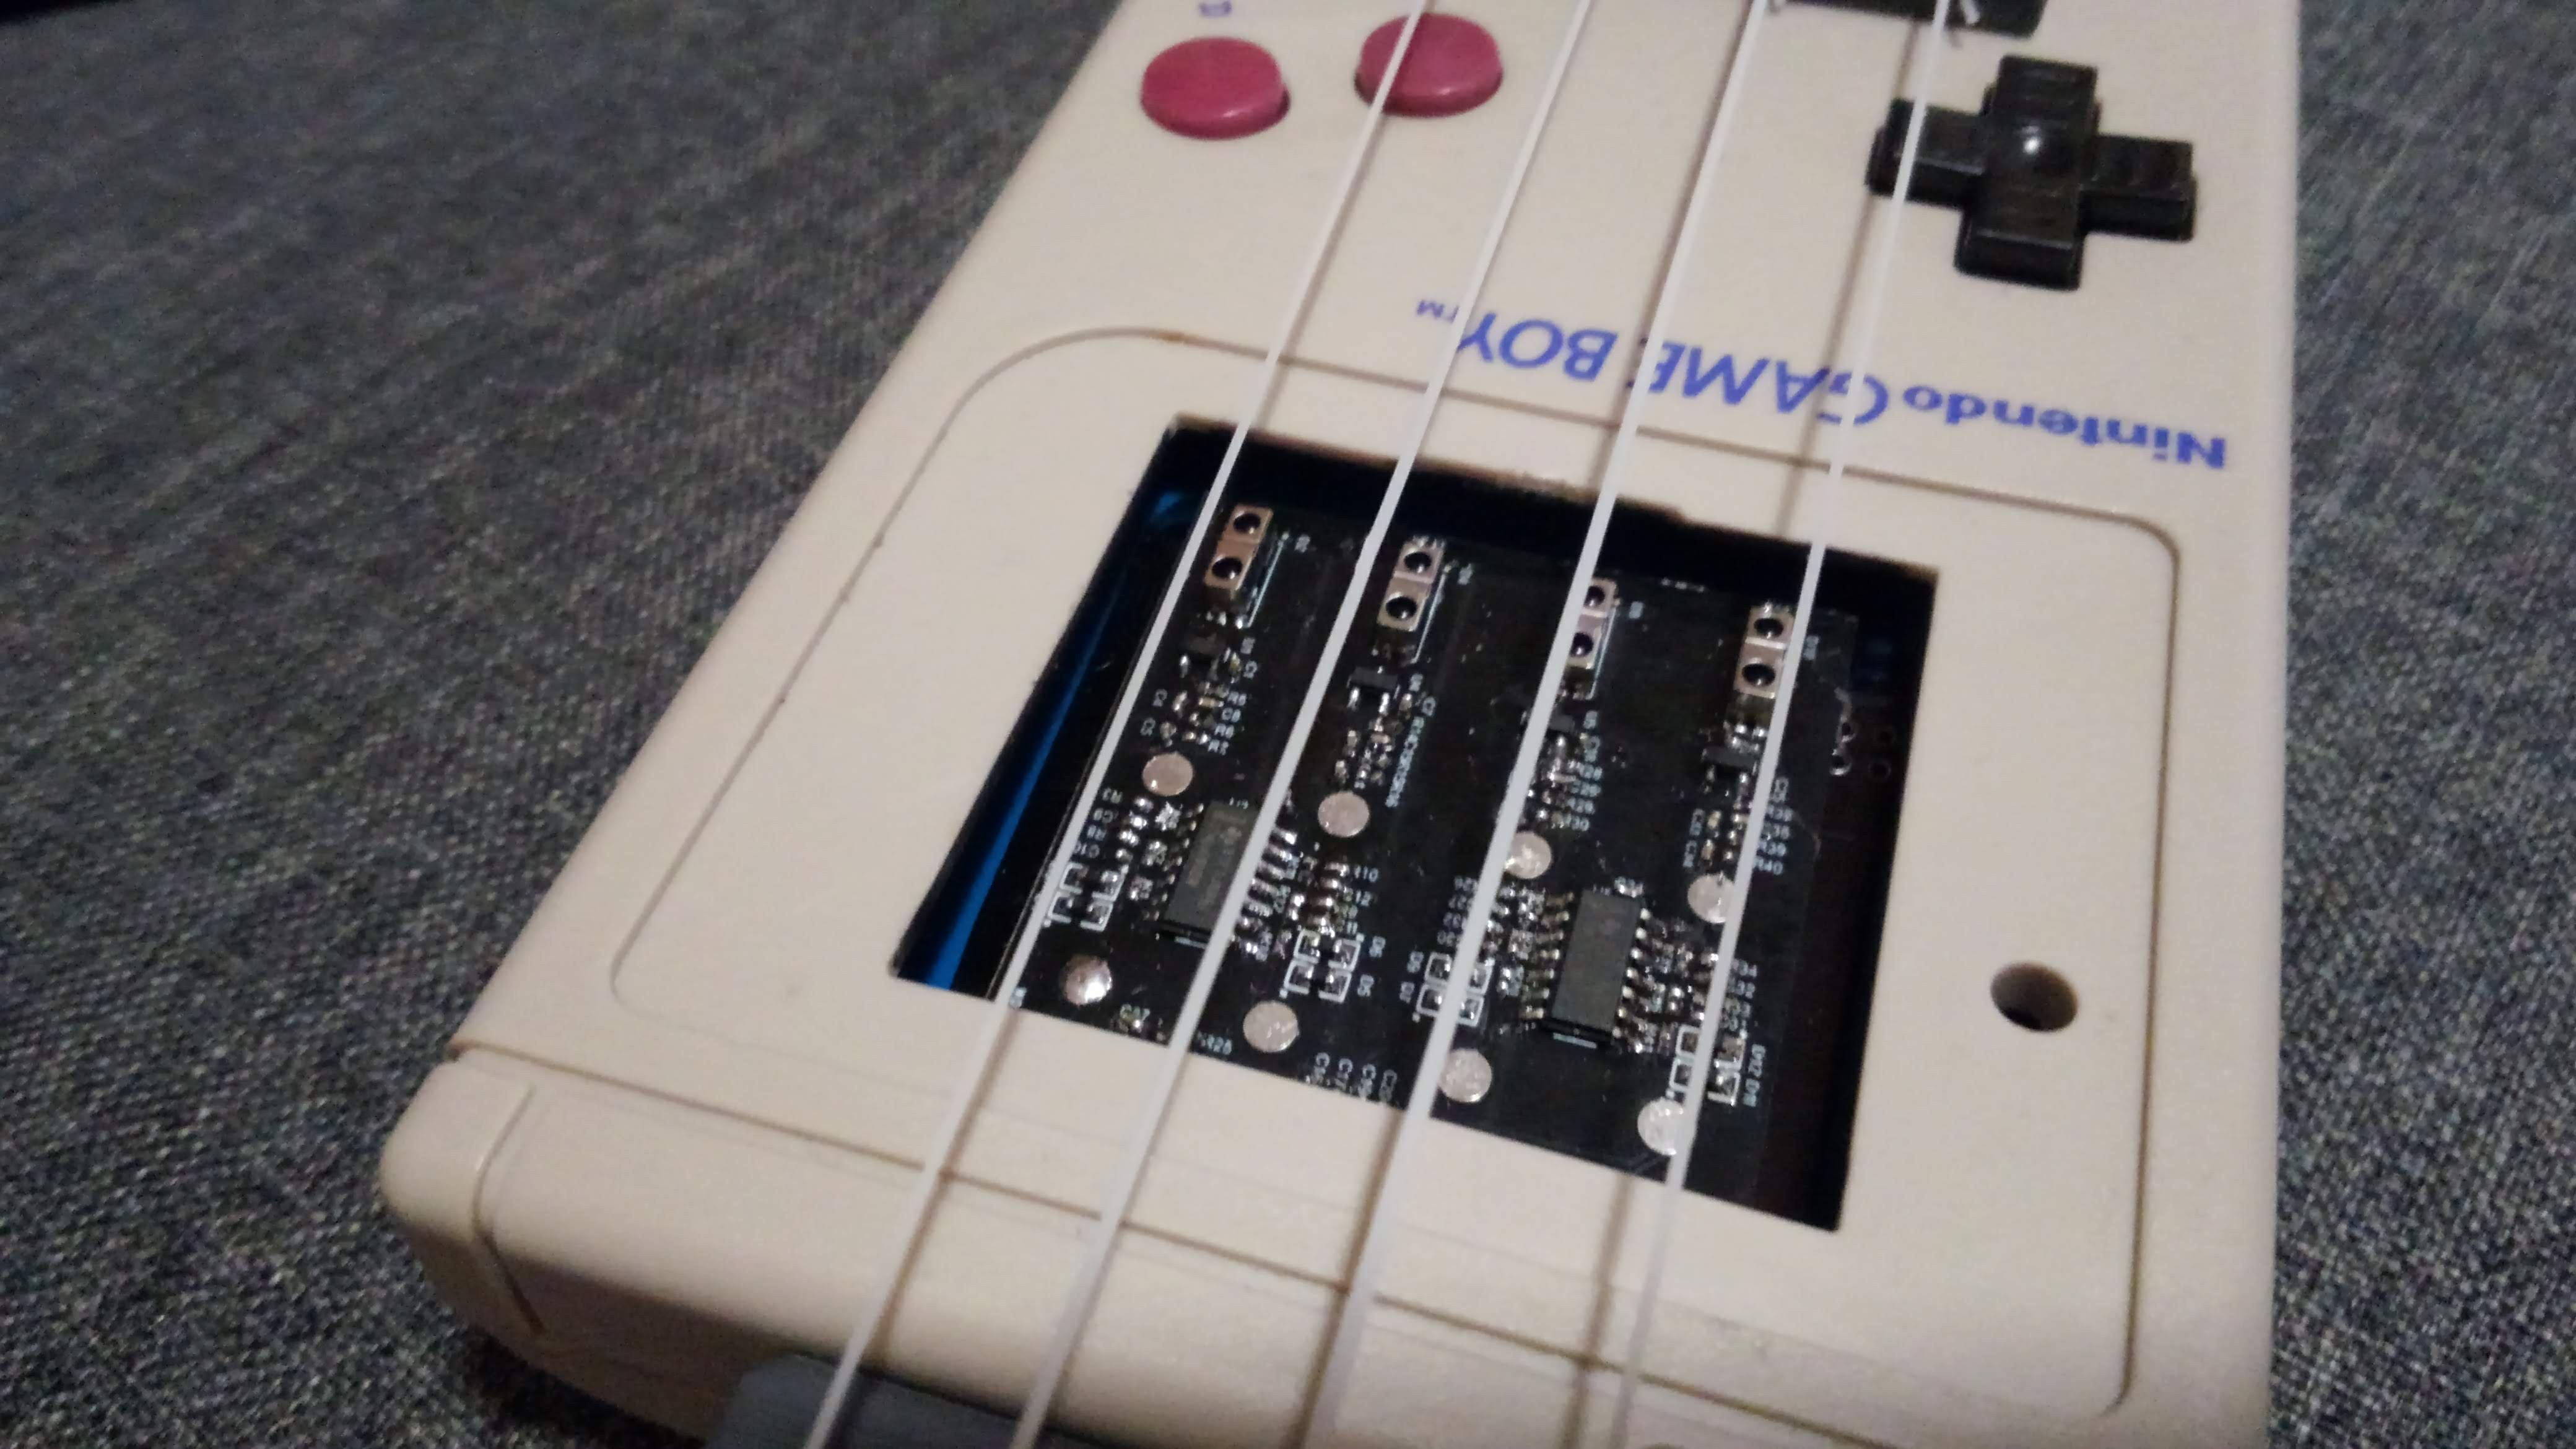
10/07/2018 at 16:28 • 0 commentsHere are the first version of the electronic!
It's funny to see le IR led on camera! the sensor work very well even in front of the sun.
But the IR not pass throught the original plexiglass and I don't want to cut it with laser, and the 50Hz/60Hz too present with neon light.
And the sound can be good for a guitar, but the CD4069UB are too linear to handle the end of the sound and become just noisy. The sound does not sound like a gameboy
LET'S FIND ANOTHER WAY !!!!!
-
Electronic and Boards
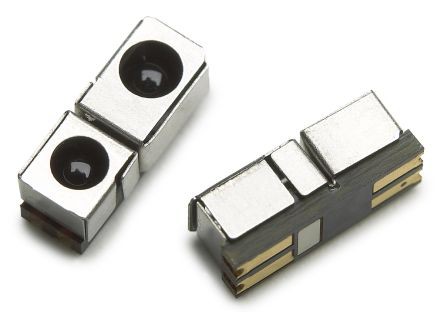
10/07/2018 at 10:40 • 0 commentsTo sense the String vibration, I will use an IR refelctive sensor as the HSDL-9100-021 which is analog with the good sensing range (3-20mm) and easy to source.
![]()
with a PNP transistor as photodiode amplifier and a 15kHz low-pass filter as polarization tail and 100Hz high-pass filter wich I hope will cancel the 50Hz-60Hz hum.
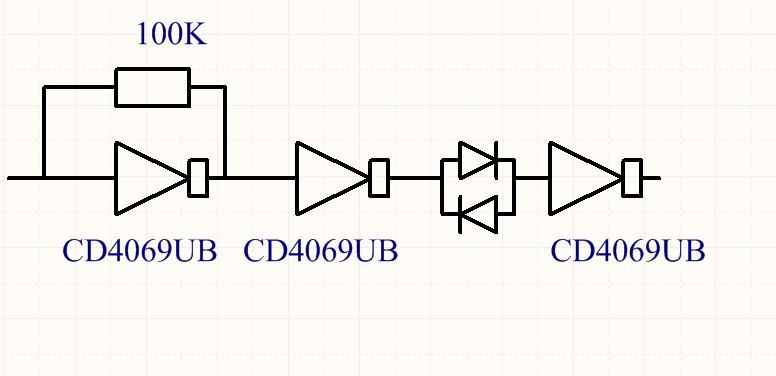
Now we got an analog signal from the string, we have to square it up. For that I choose to use an guitar effect FUZZ distortion.
A FUZZ distortion is an hard clipping distortion with high gain stage, in this project I will do it with logic gate use in linear mode.
![]()
The diodes are here to transforme the last logic gate as a schmitt-trigger.
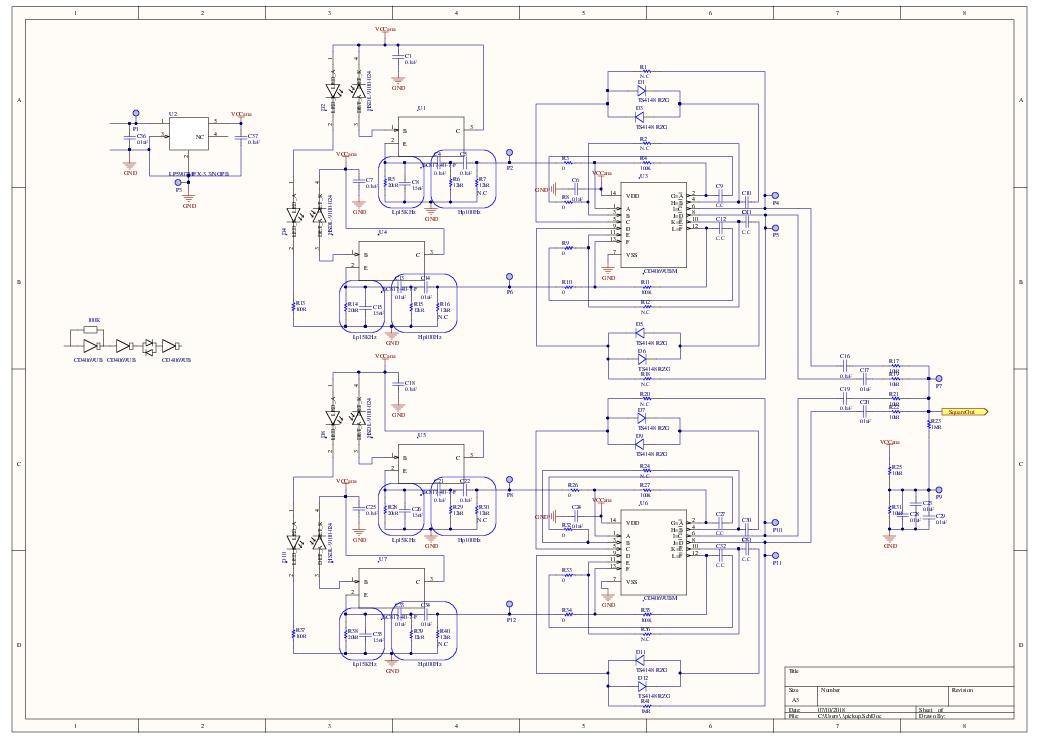
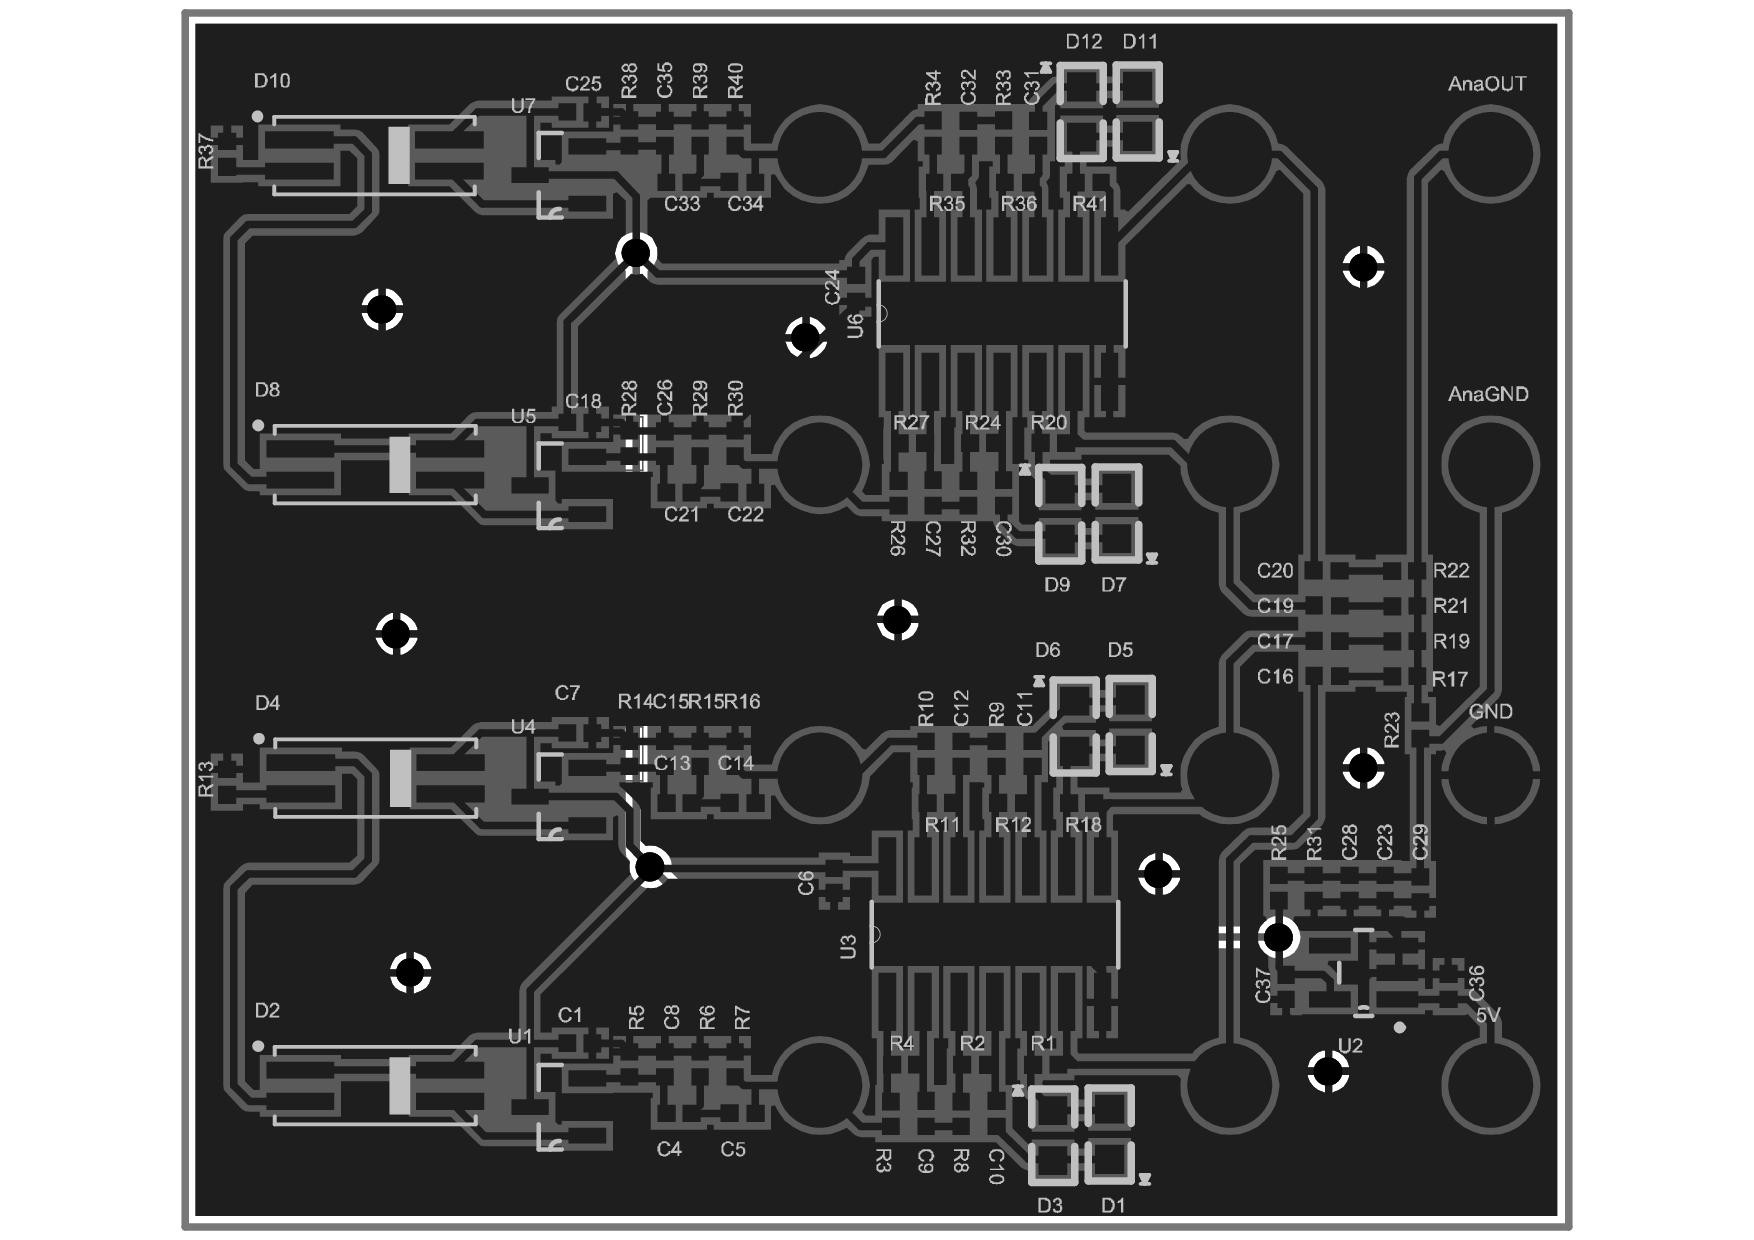
Here are the coplete schematic for the first try of chiptune analog sound :
![]()
all the files can be found on my github.
To be faster I prefered go step by step by choosing a maximum of already created board to keep the soul of the Game boy creator Gunpei Yokoi and his philosophy of "Lateral Thinking of Withered Technology".
with this mantra in mind i will use a gameboy zero AIO board
![]()
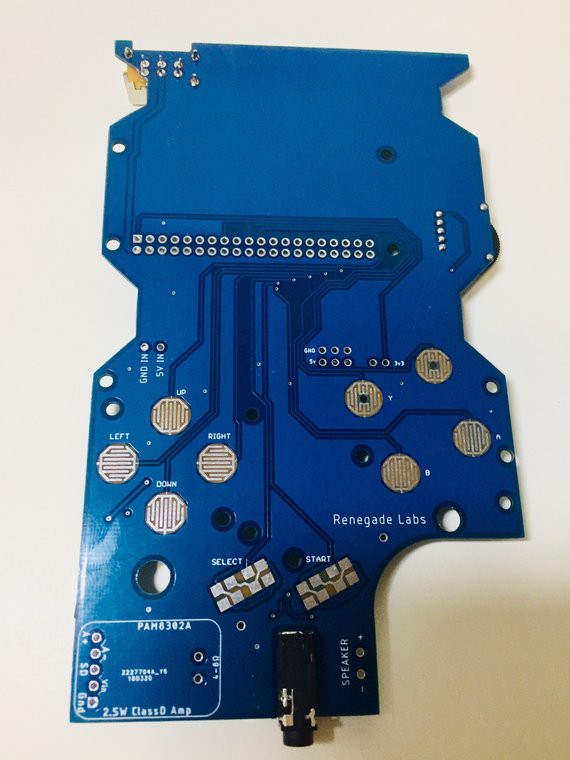
add the adafuit PAM8302A audio amplifier and the board I design
![]()
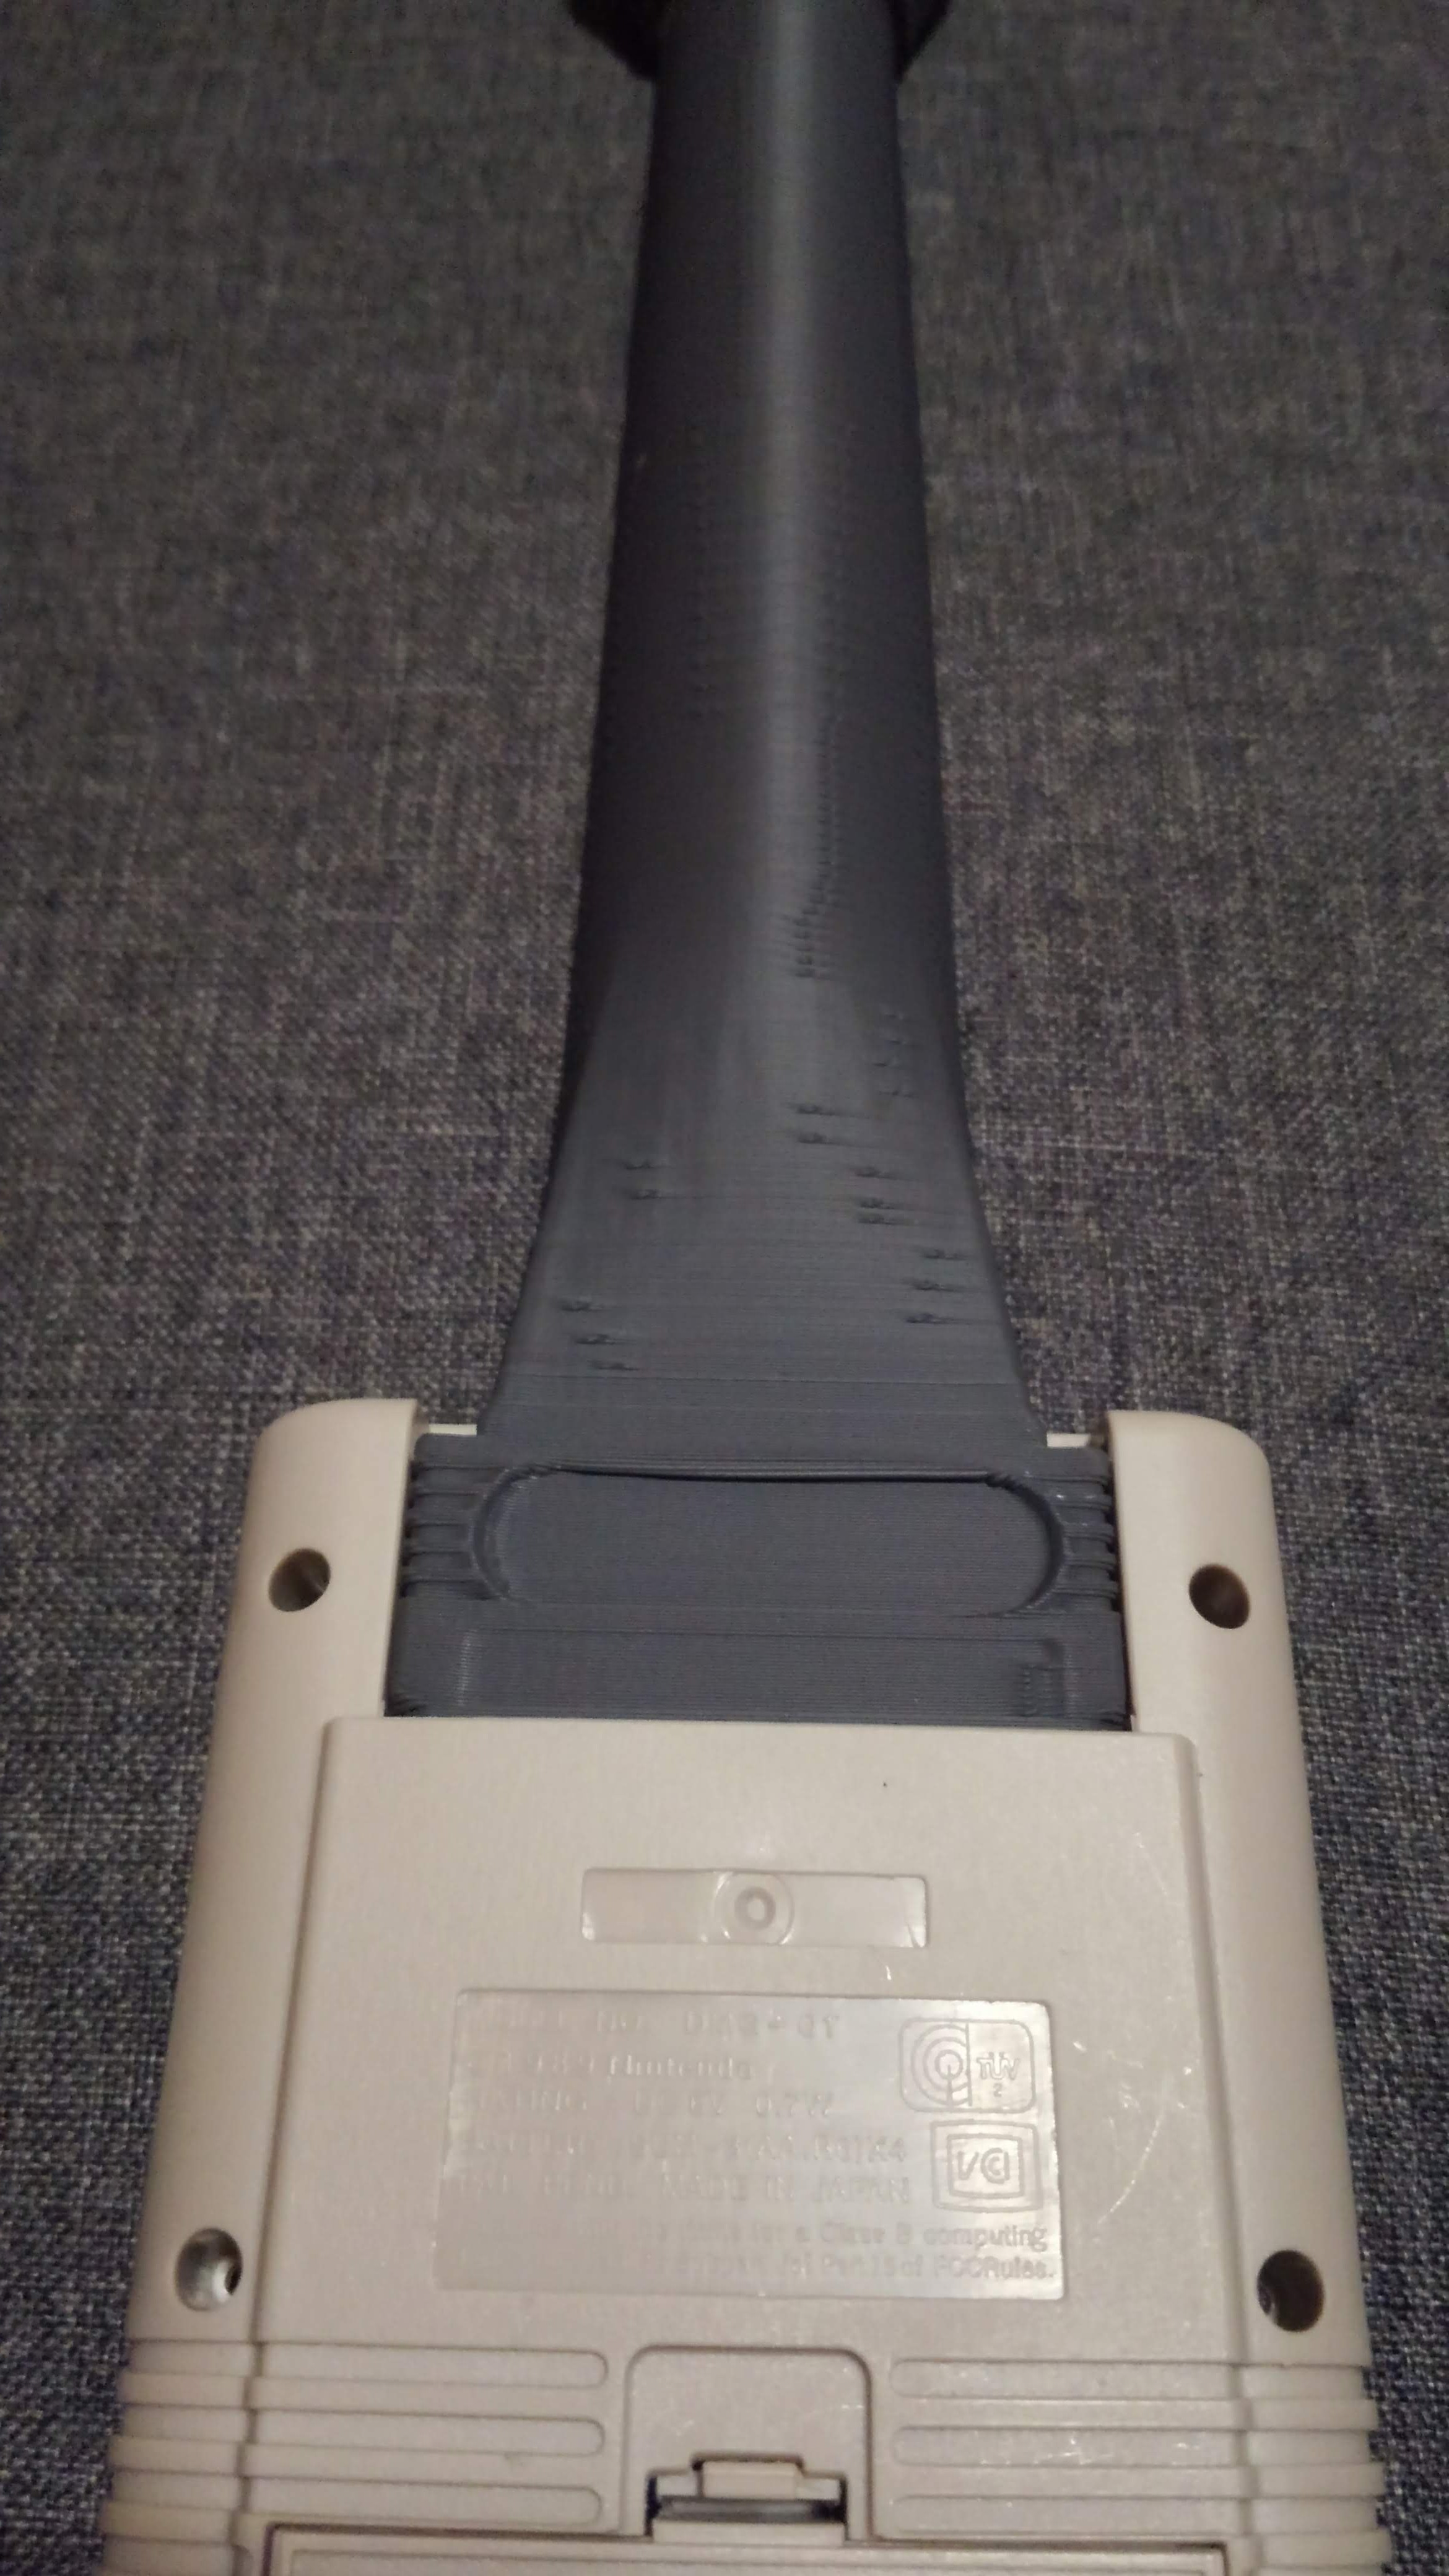
And solder wire in place of the raspberry pi to power up the board and send audio to the power amplifier
Here are the board in place and working!![]()
I am looking for a better camera to have a good sound to recording!
-
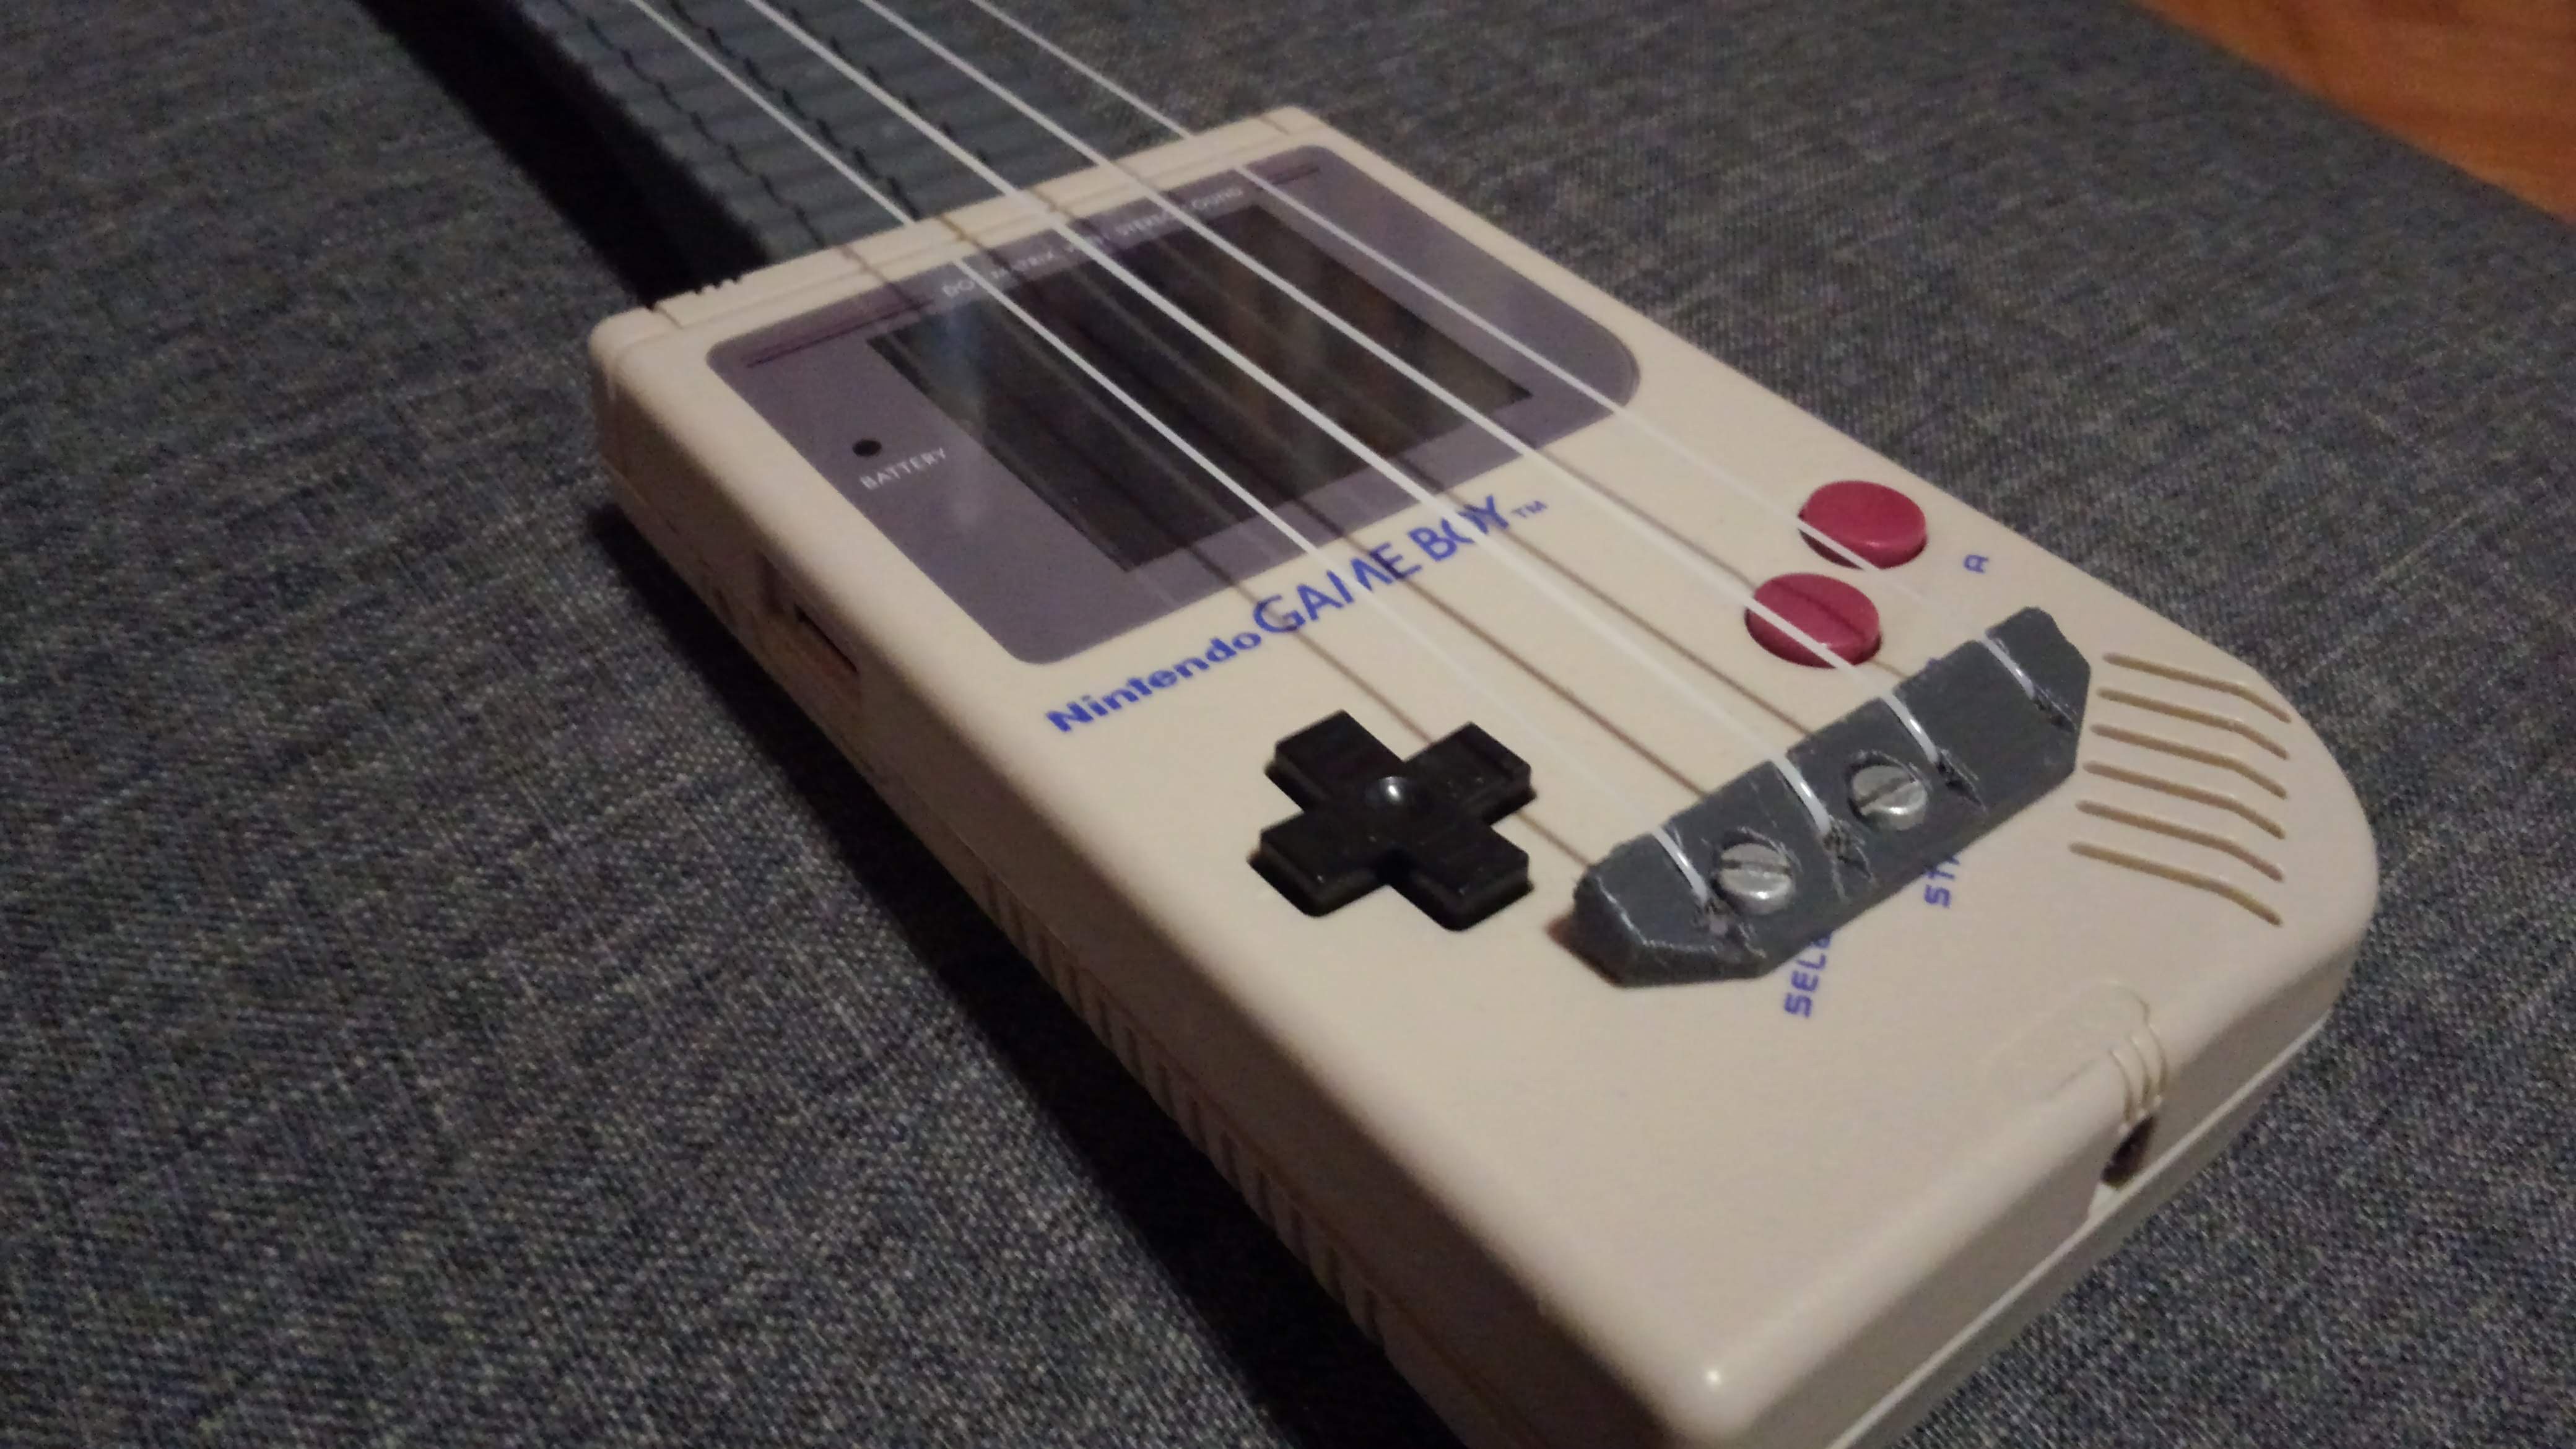
First Sound
10/06/2018 at 20:32 • 0 commentsThe bridge is finished to print and installed!
![]()
After some adjustement, I fill the bridge with the strings.
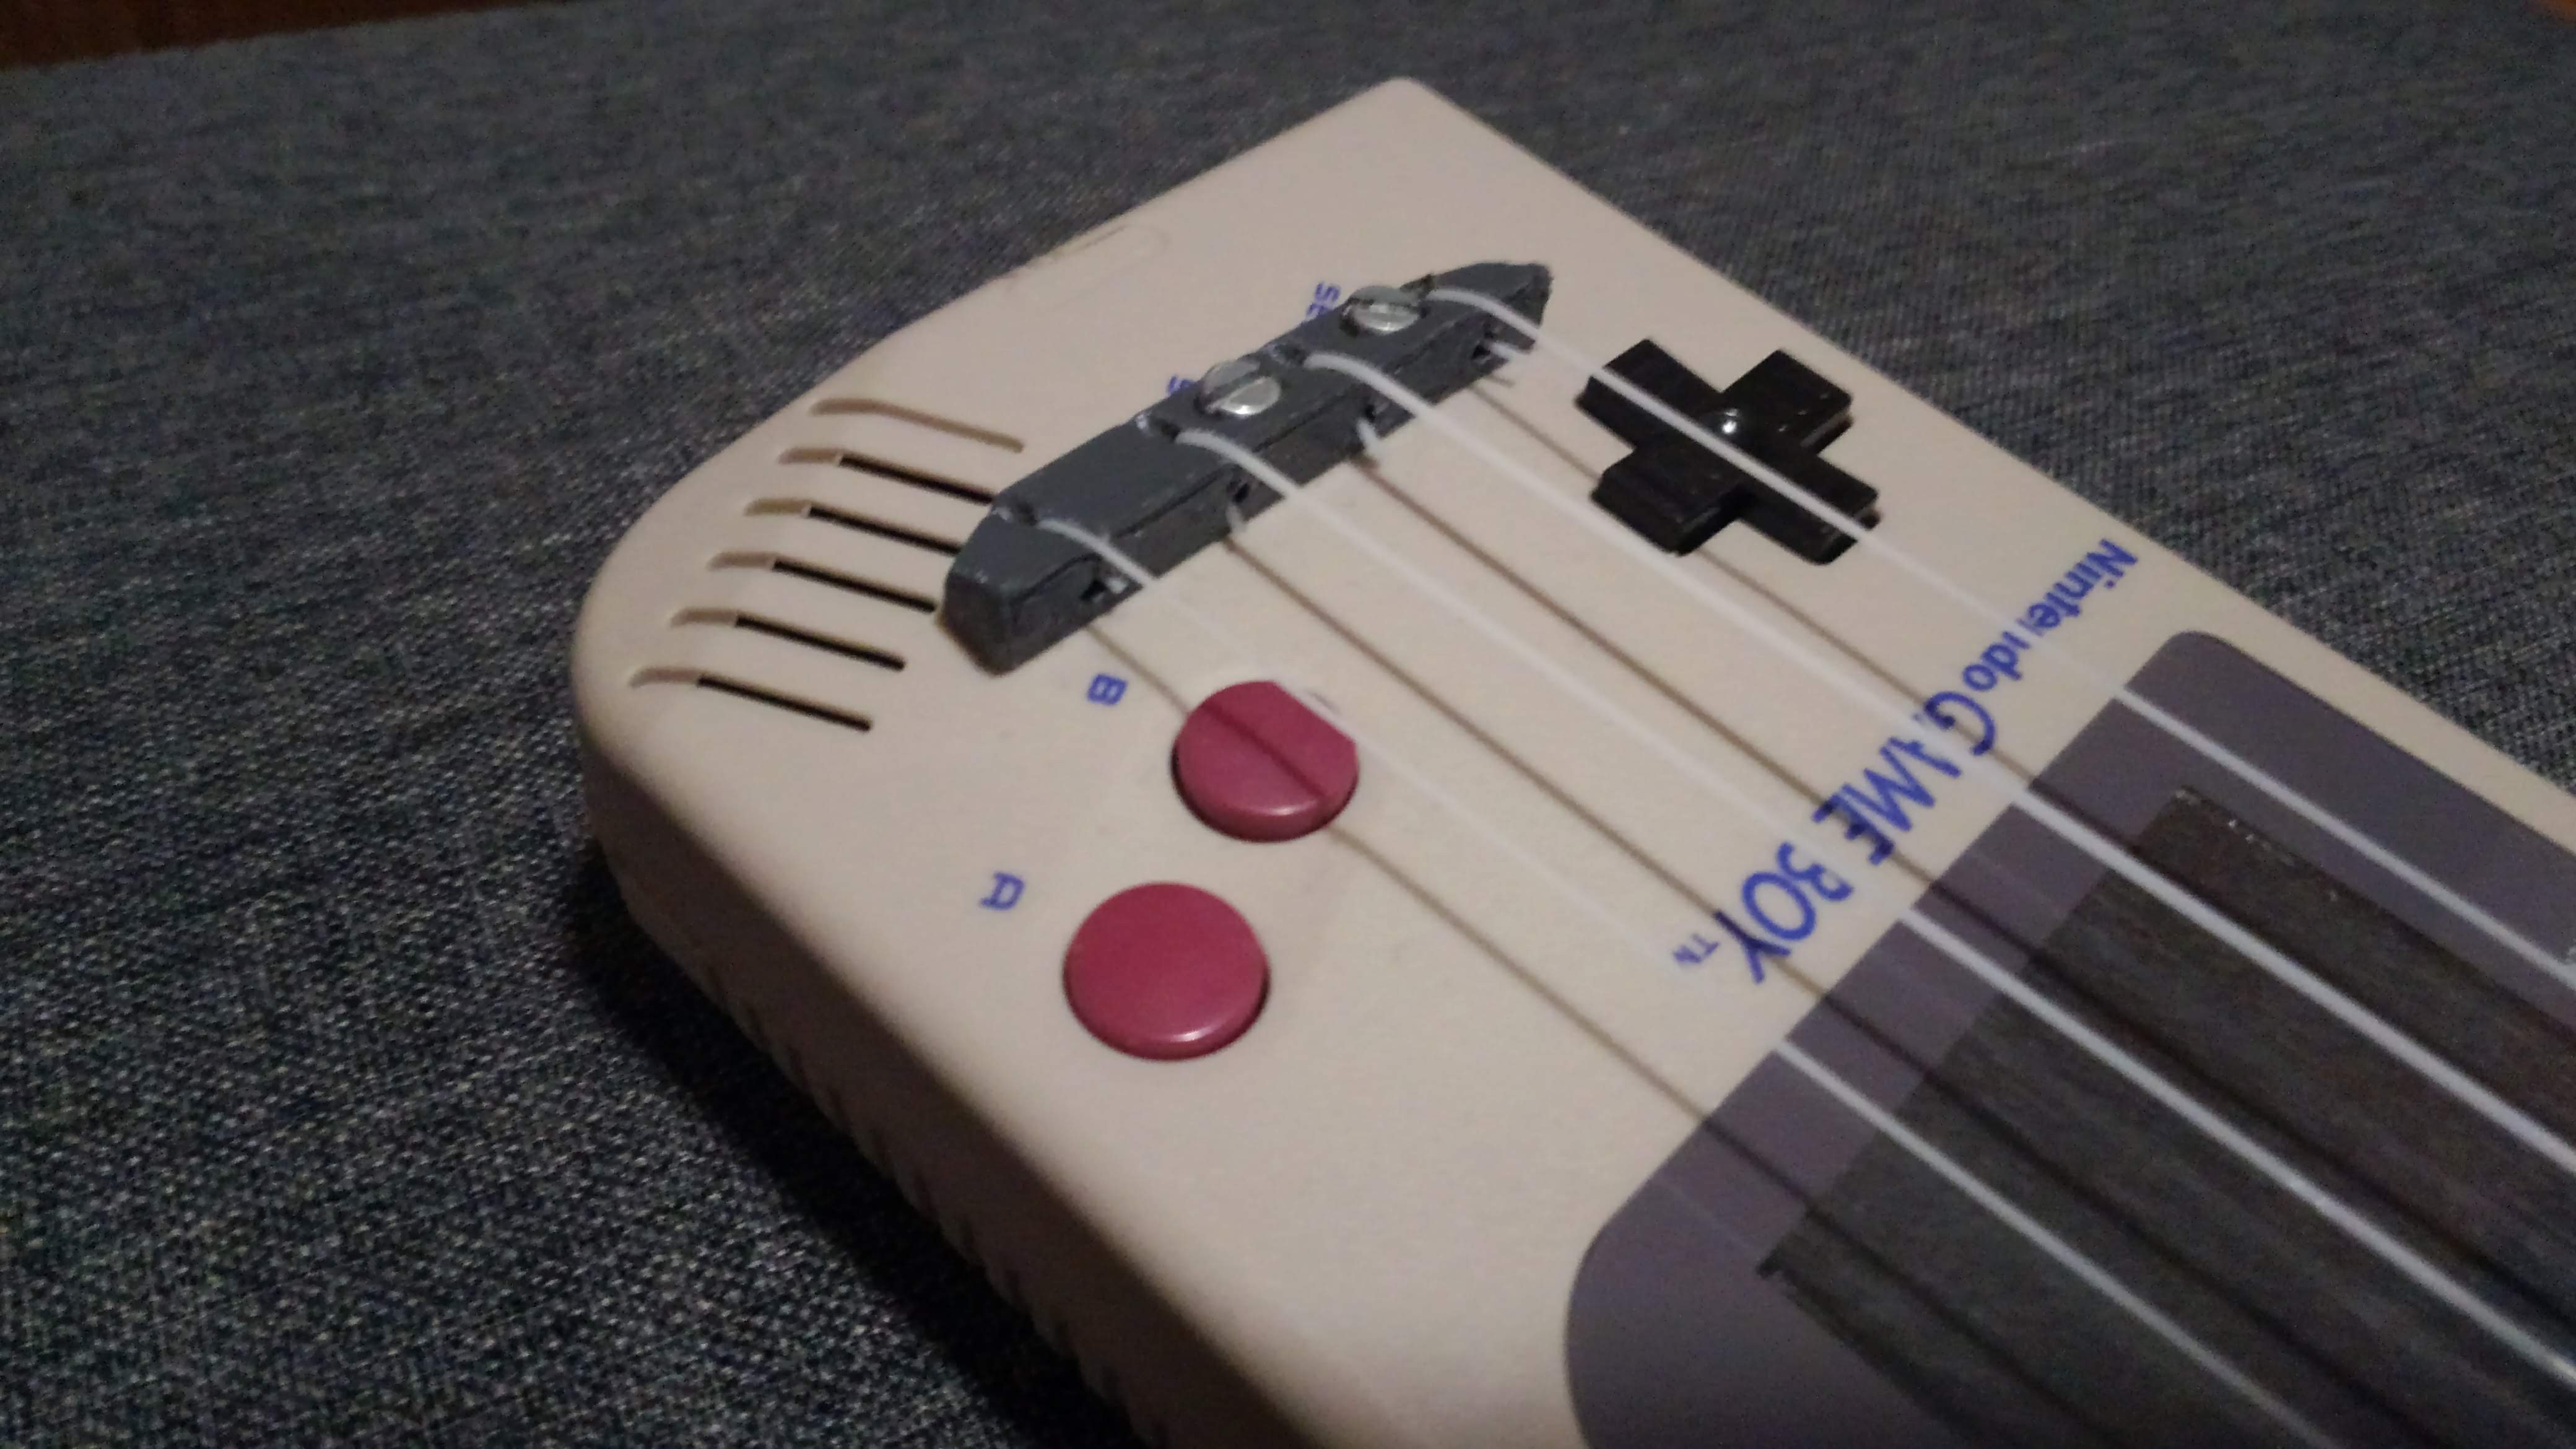
The knot to set the string on acoustic guitar may be difficult for beginer so I designed the bridge for easier attachement without hole in the body
![]()
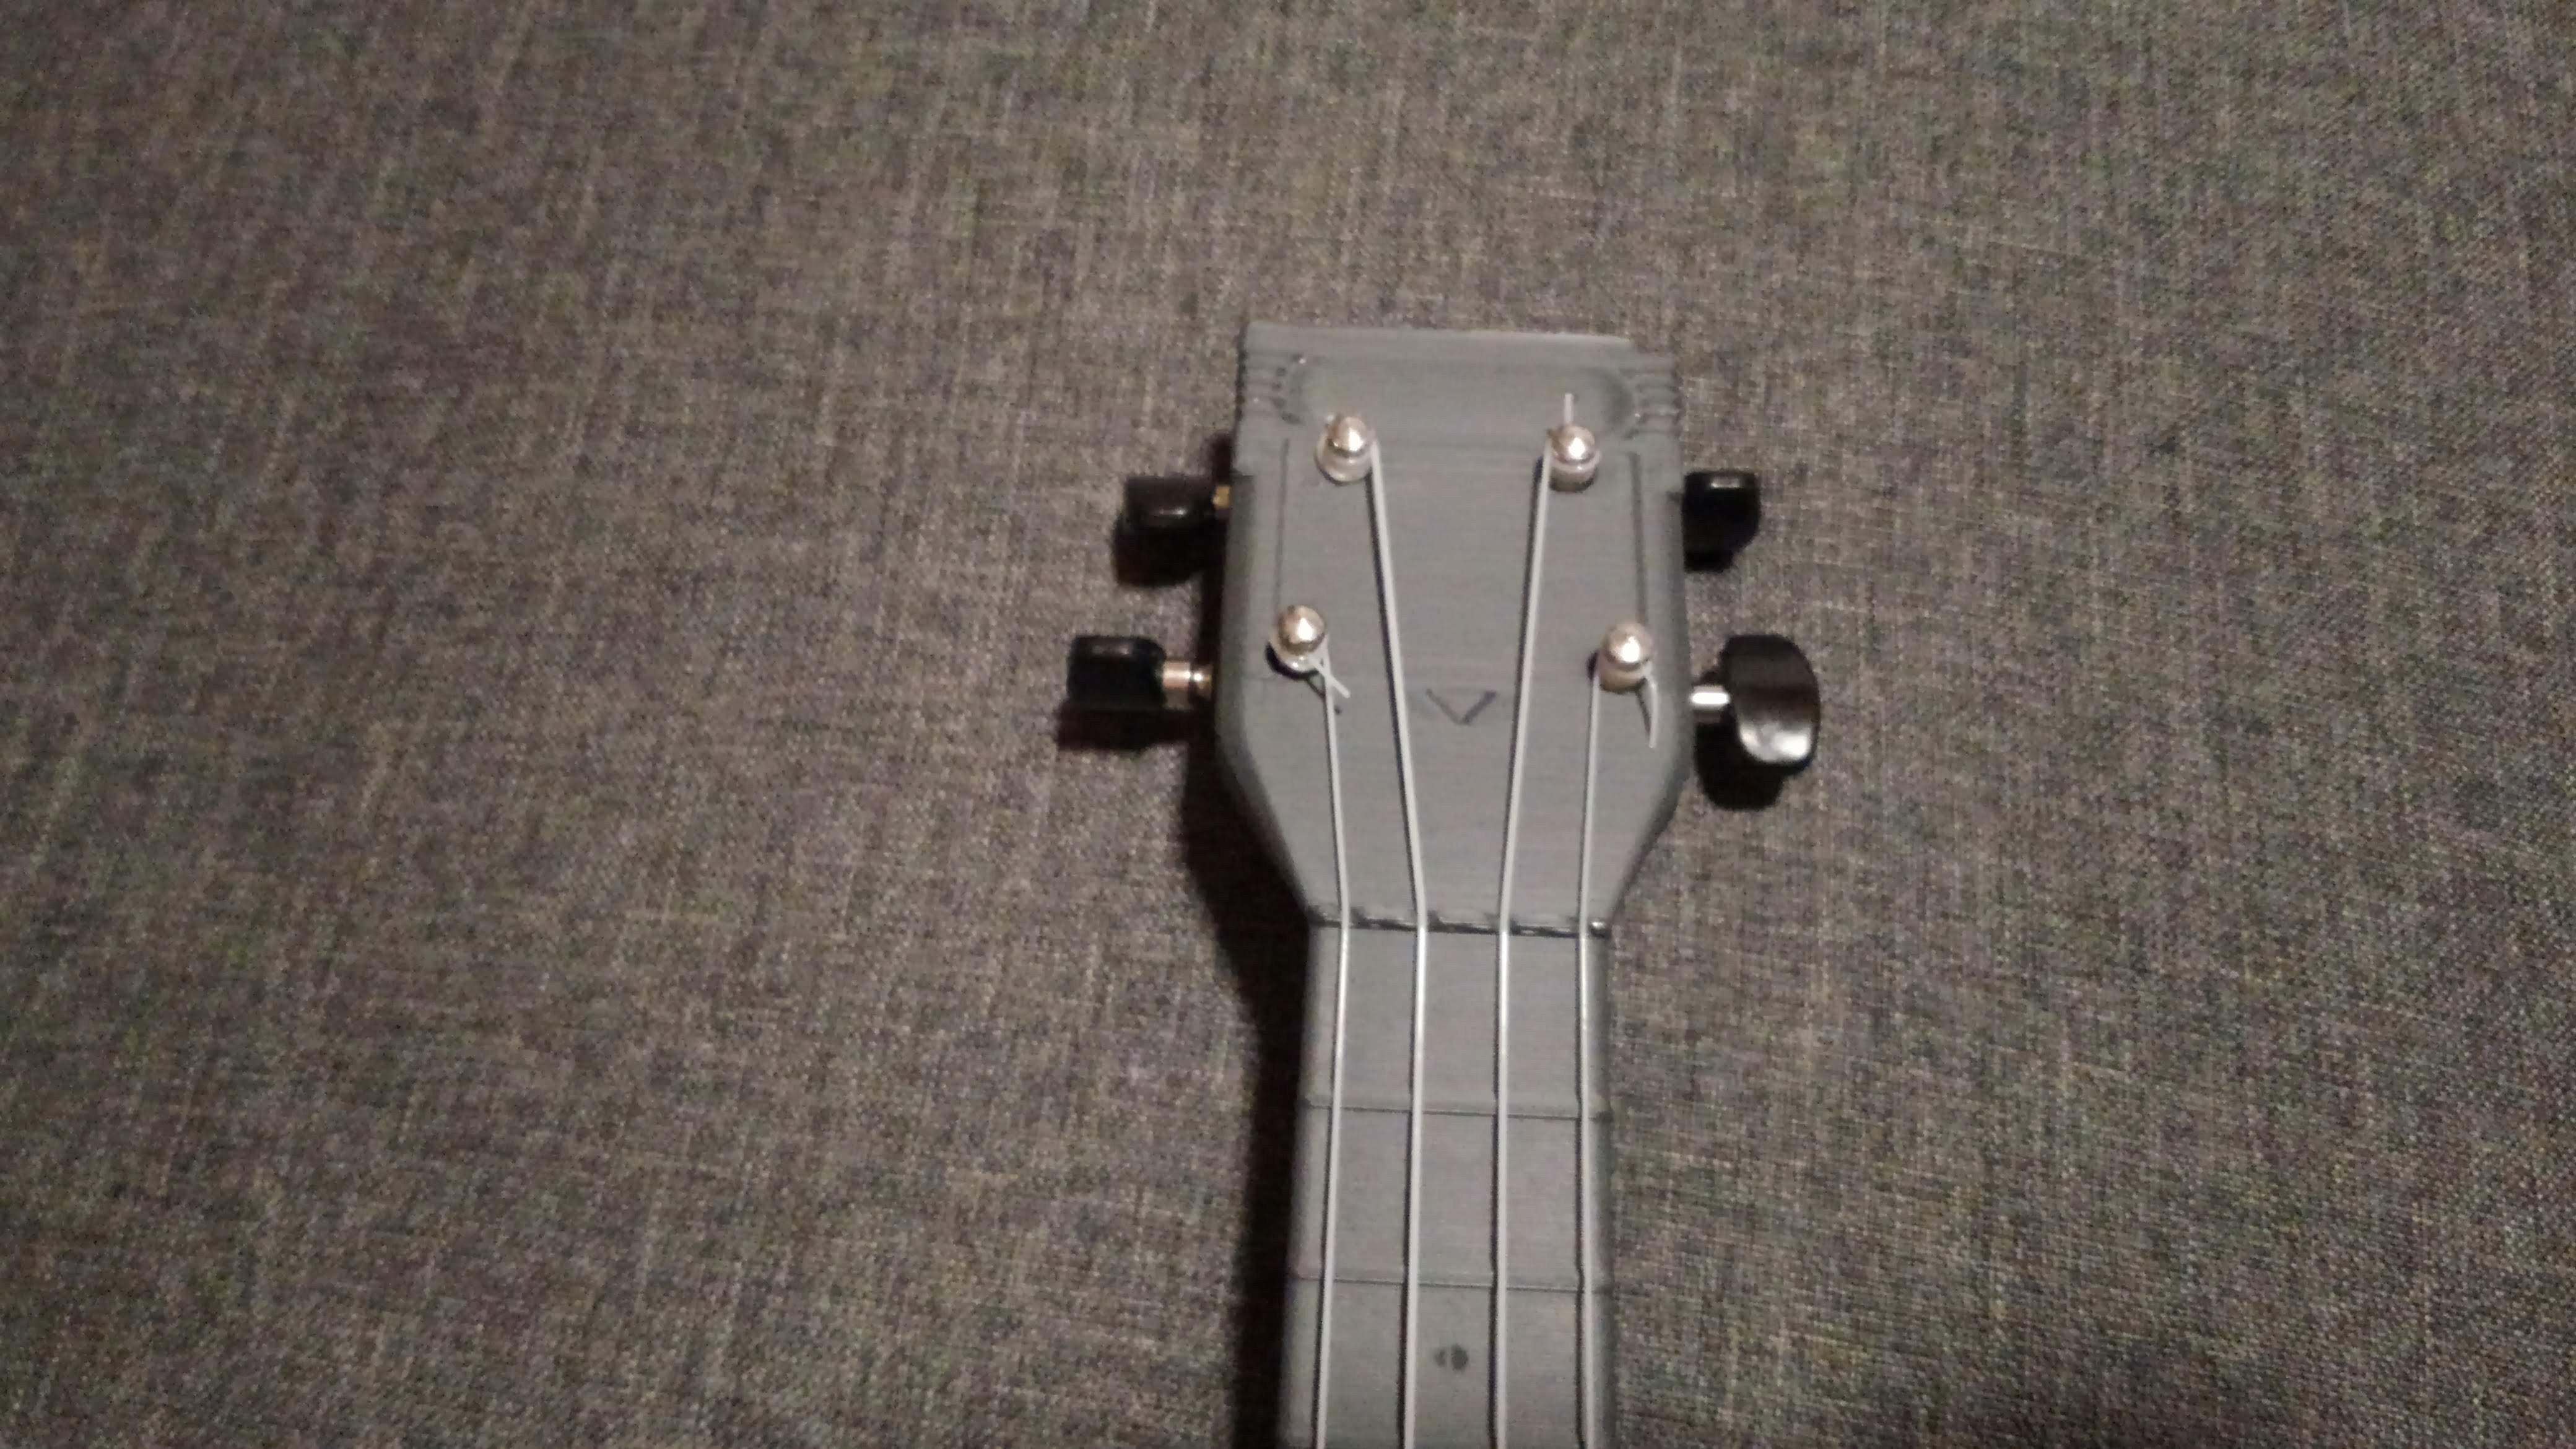
The head get the same size than the gameboy cartridge but thicker for the mecanics shaft.
![]()
Here are the first sound of the ukulele!
I am not the best ukulele player (it's almost my firts play) sorry for the quallity, I am usualy a guitar player.
The sound of my phone is far to be perfect but in fact the sound is prety and round but lower than a wood ukulele. We can make the same sound comparaison with a acoustic guitar and jazz guitar.
For a fisrt try it's fully playable with a good sound. Next step will be to add electronic go get chiptune sound!
-
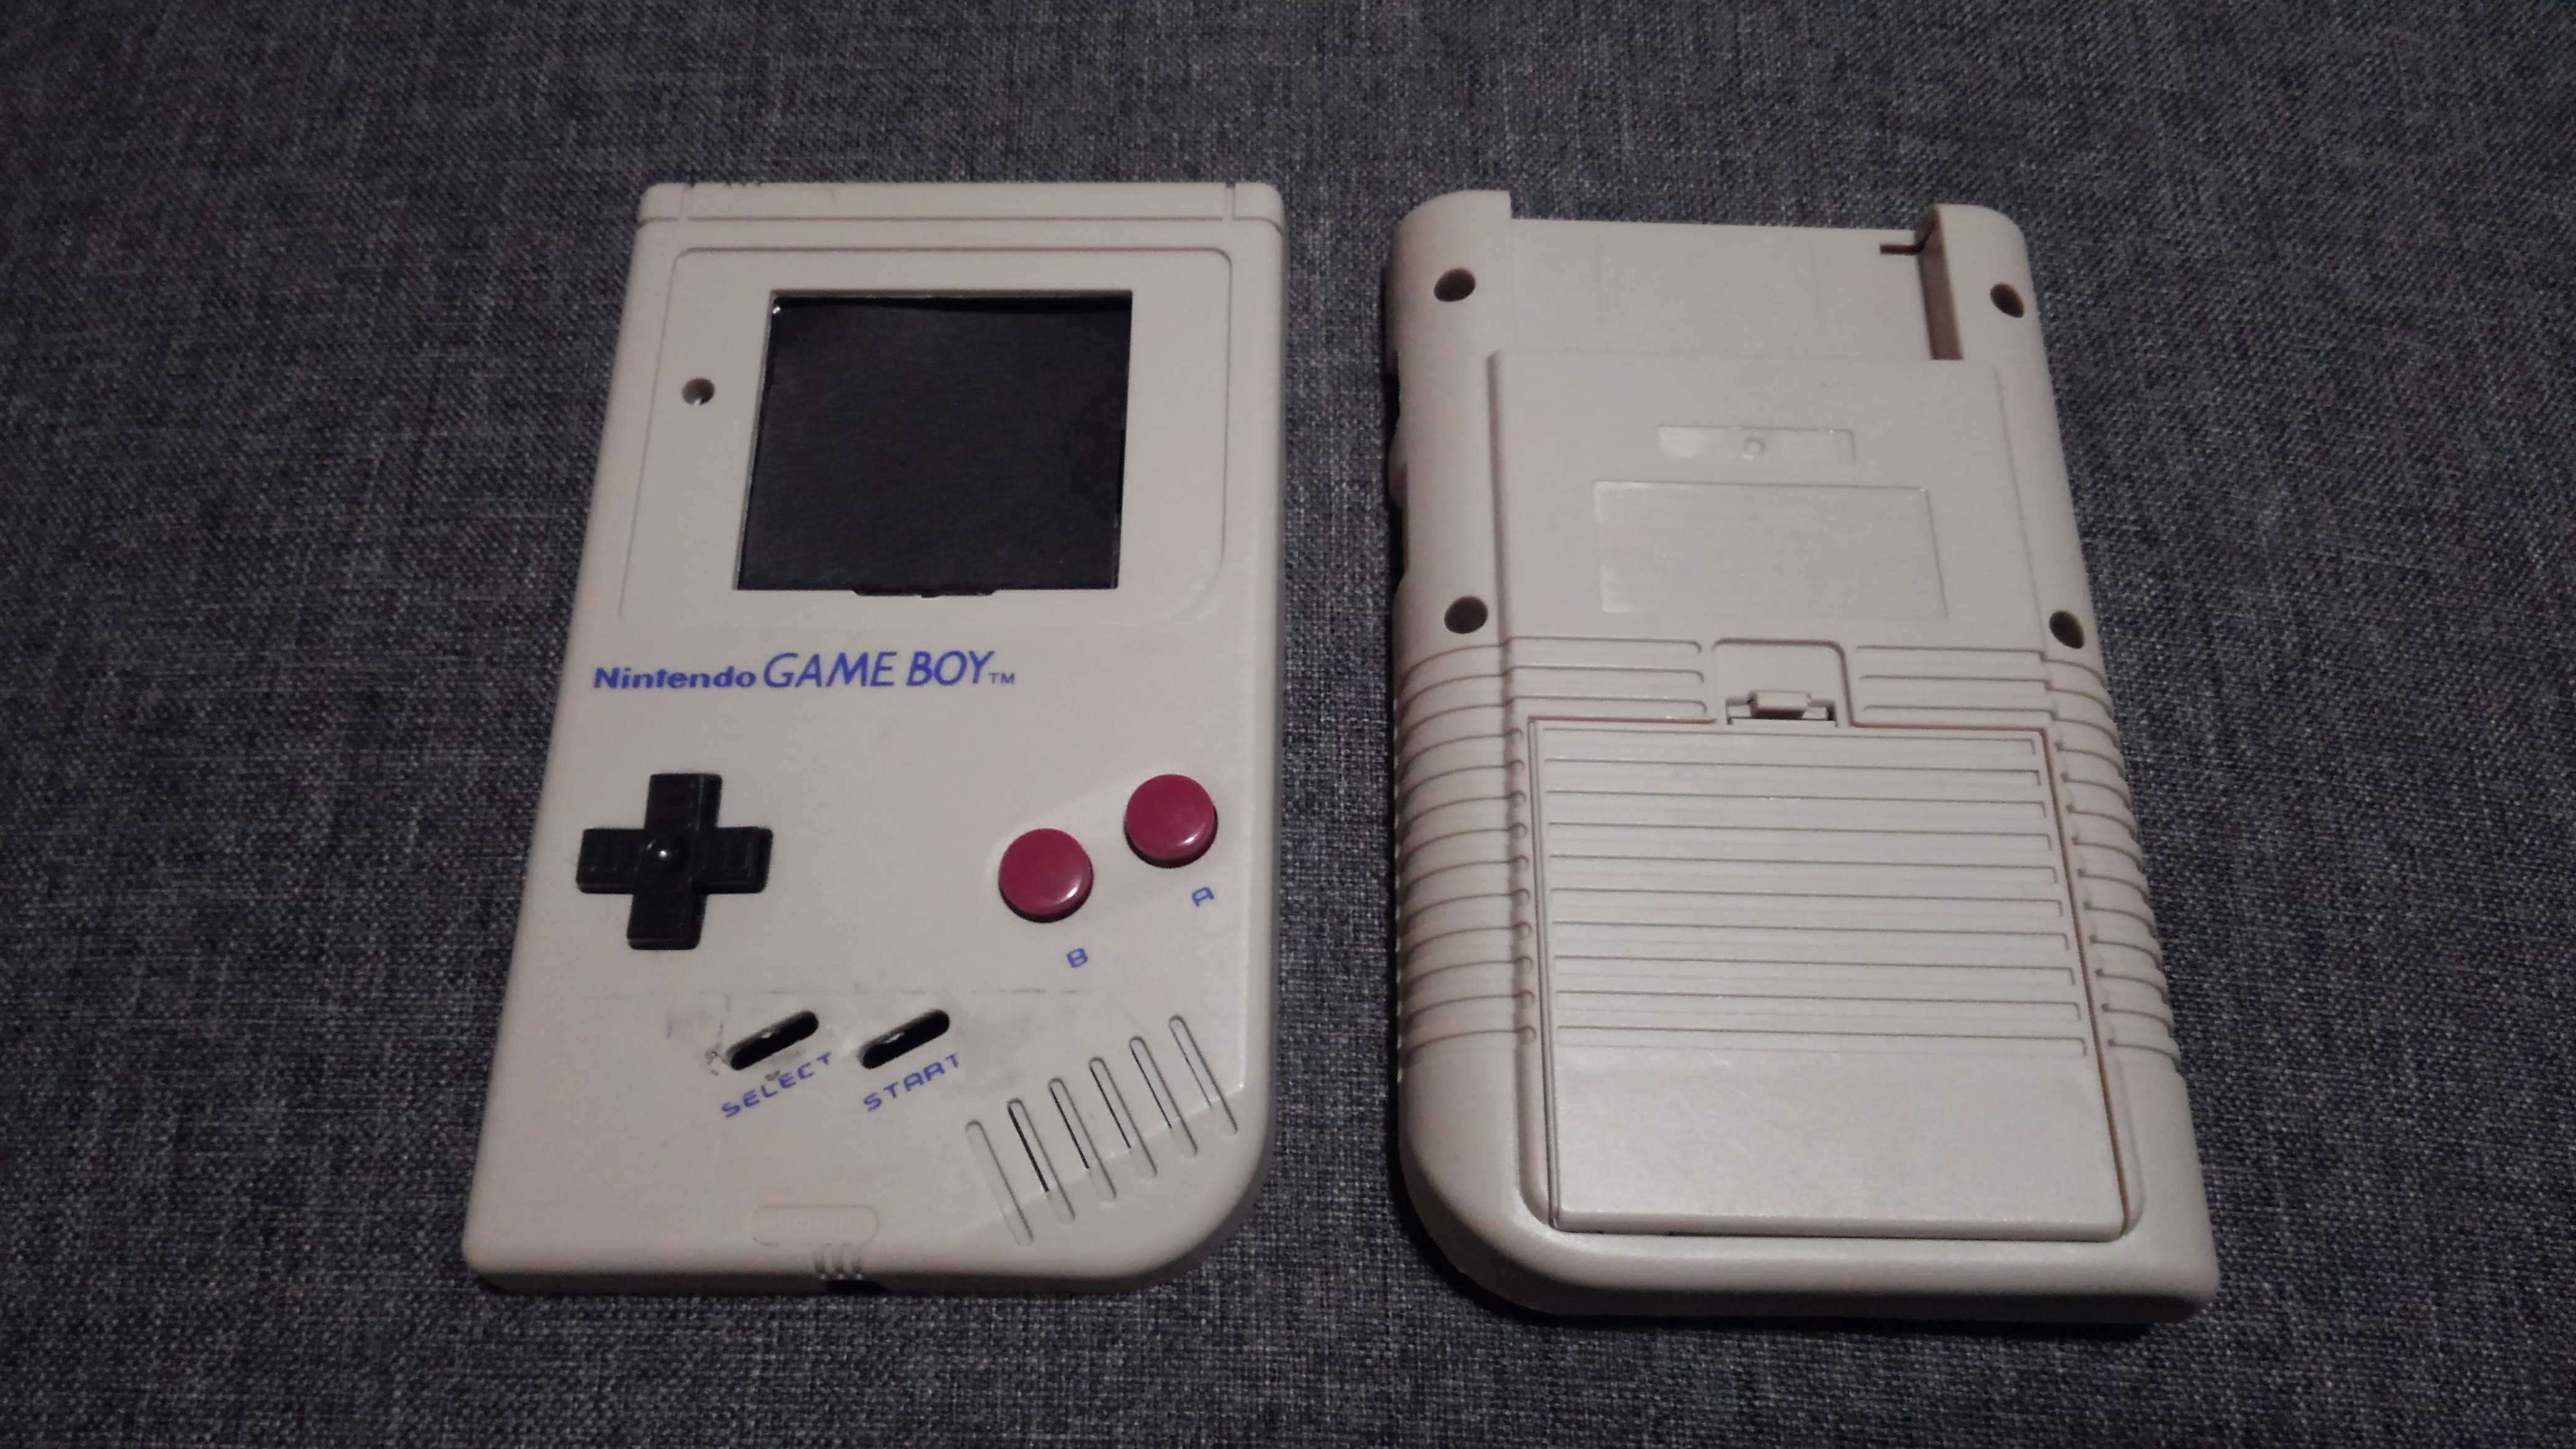
First Move
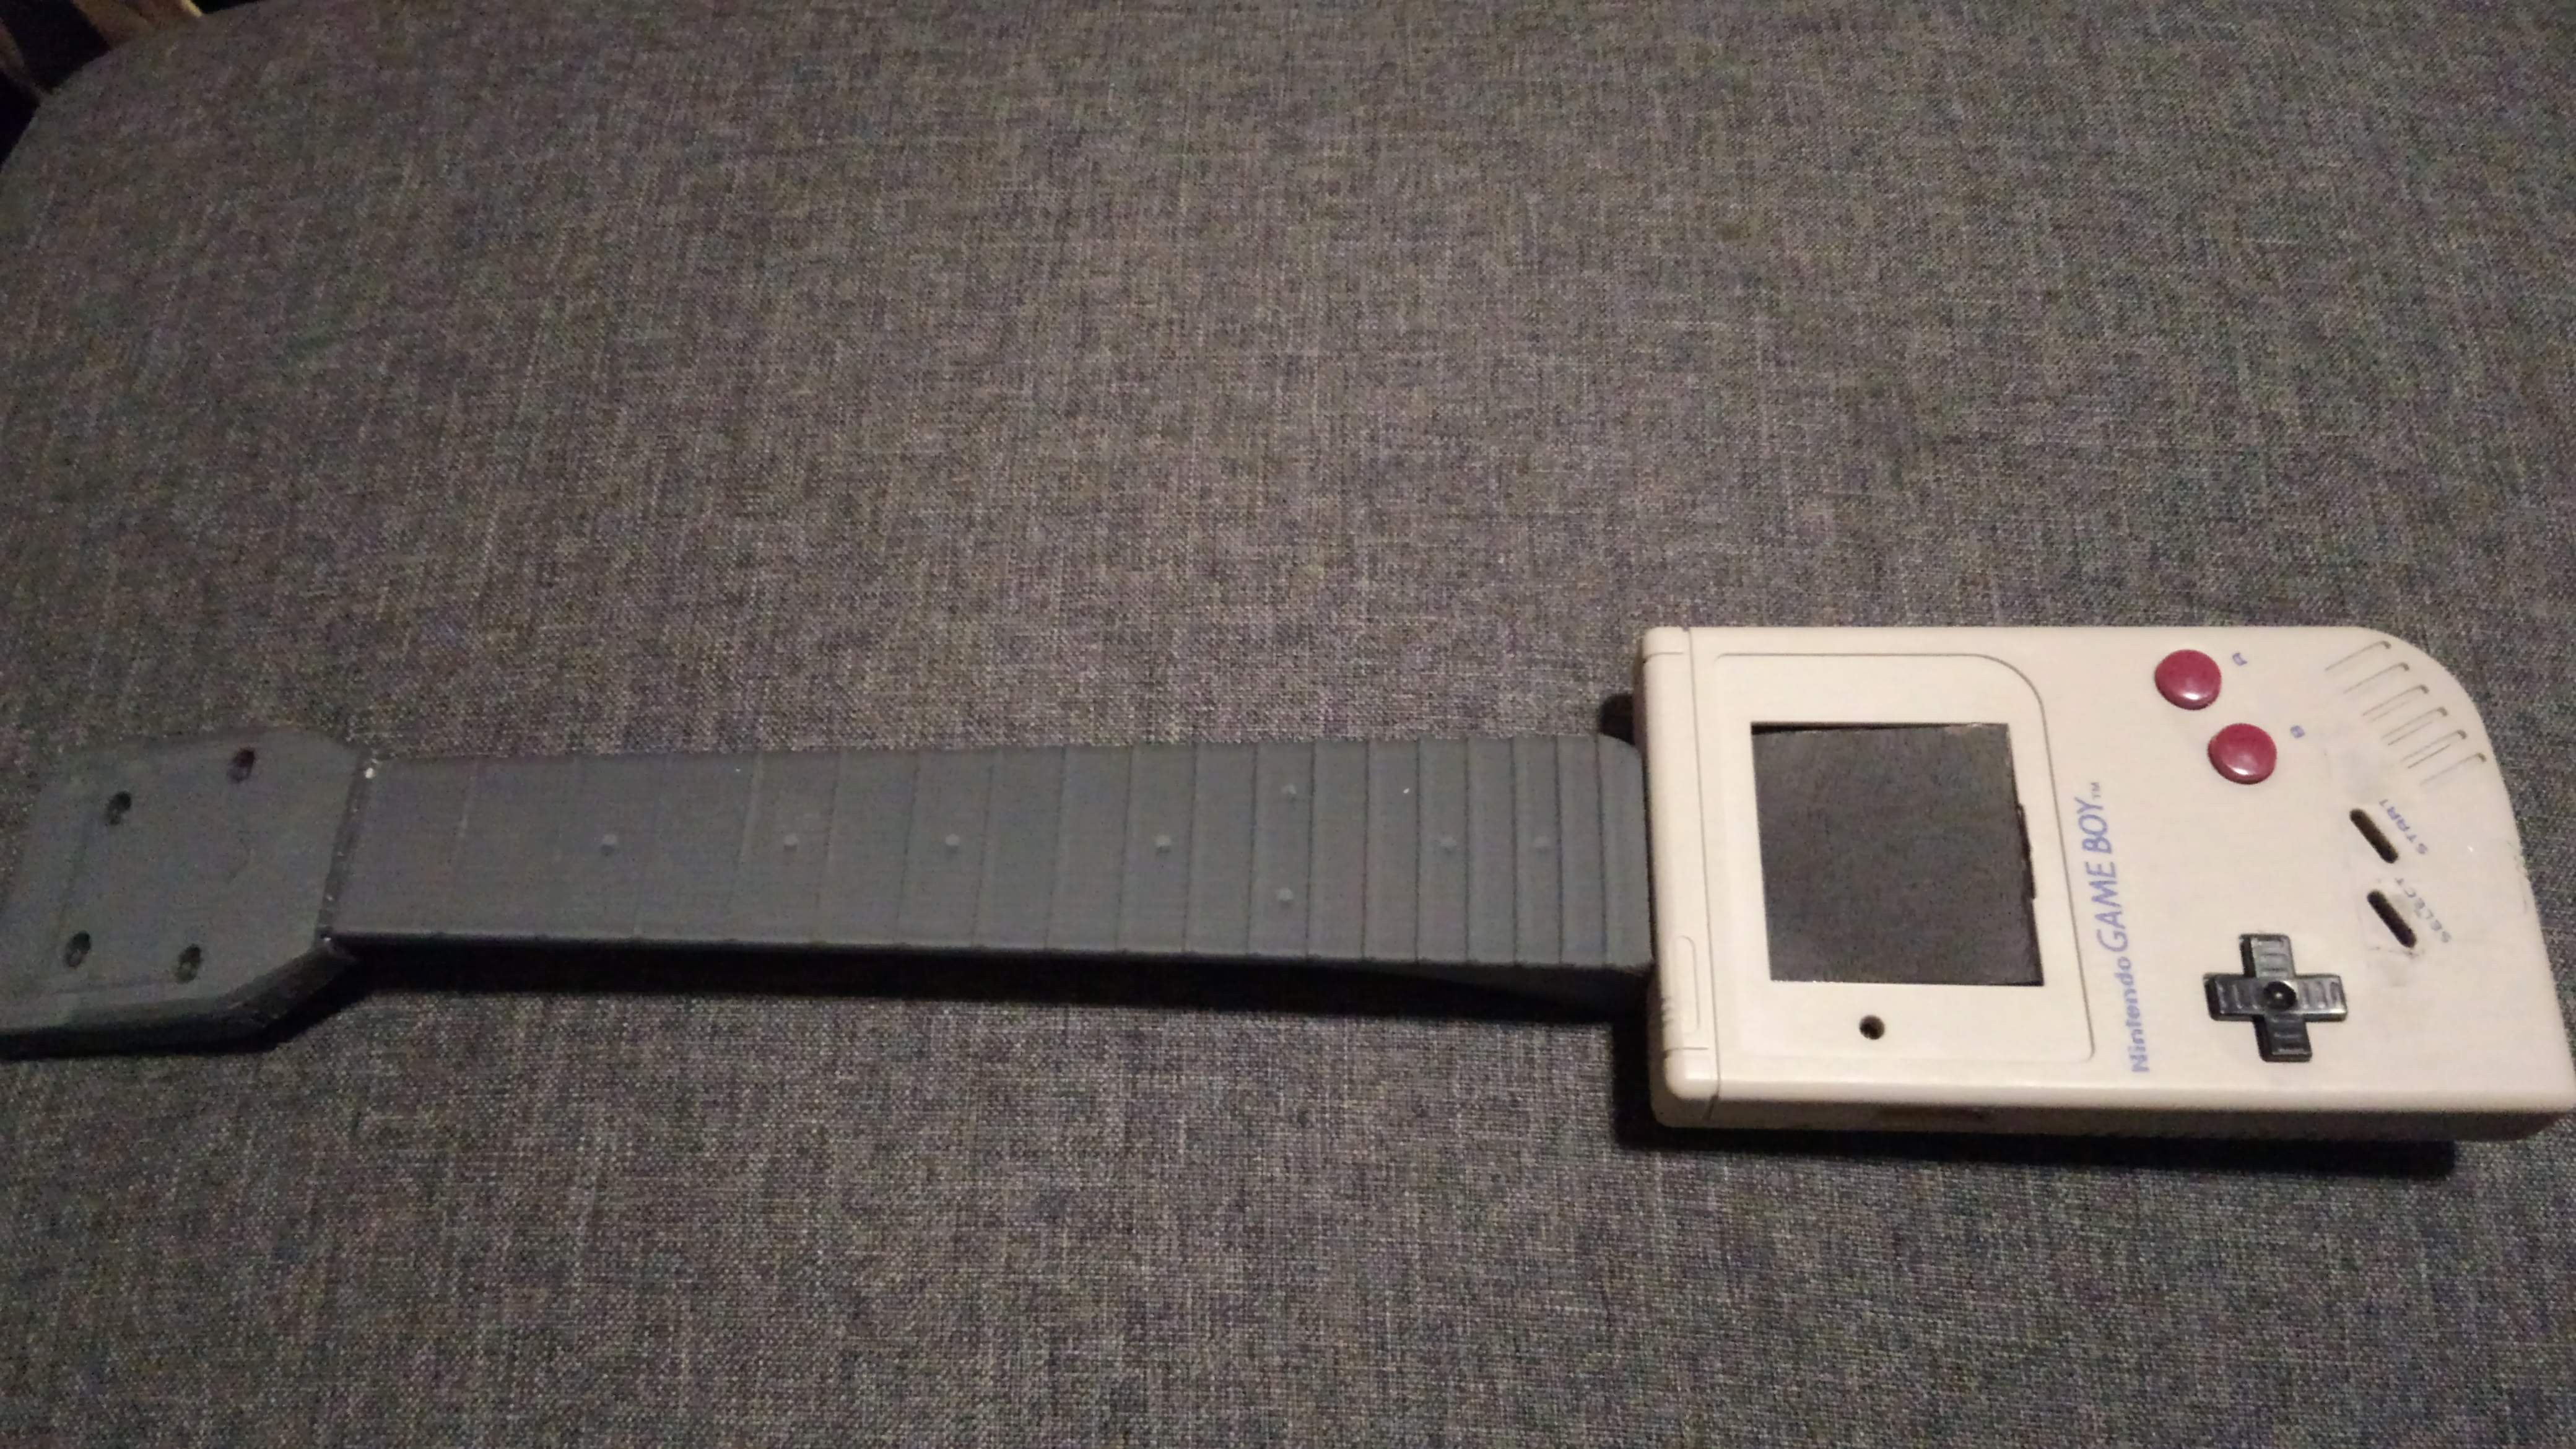
10/04/2018 at 19:40 • 0 commentsAfter hour of design and 3D printing, here are the start of this project!
![]()
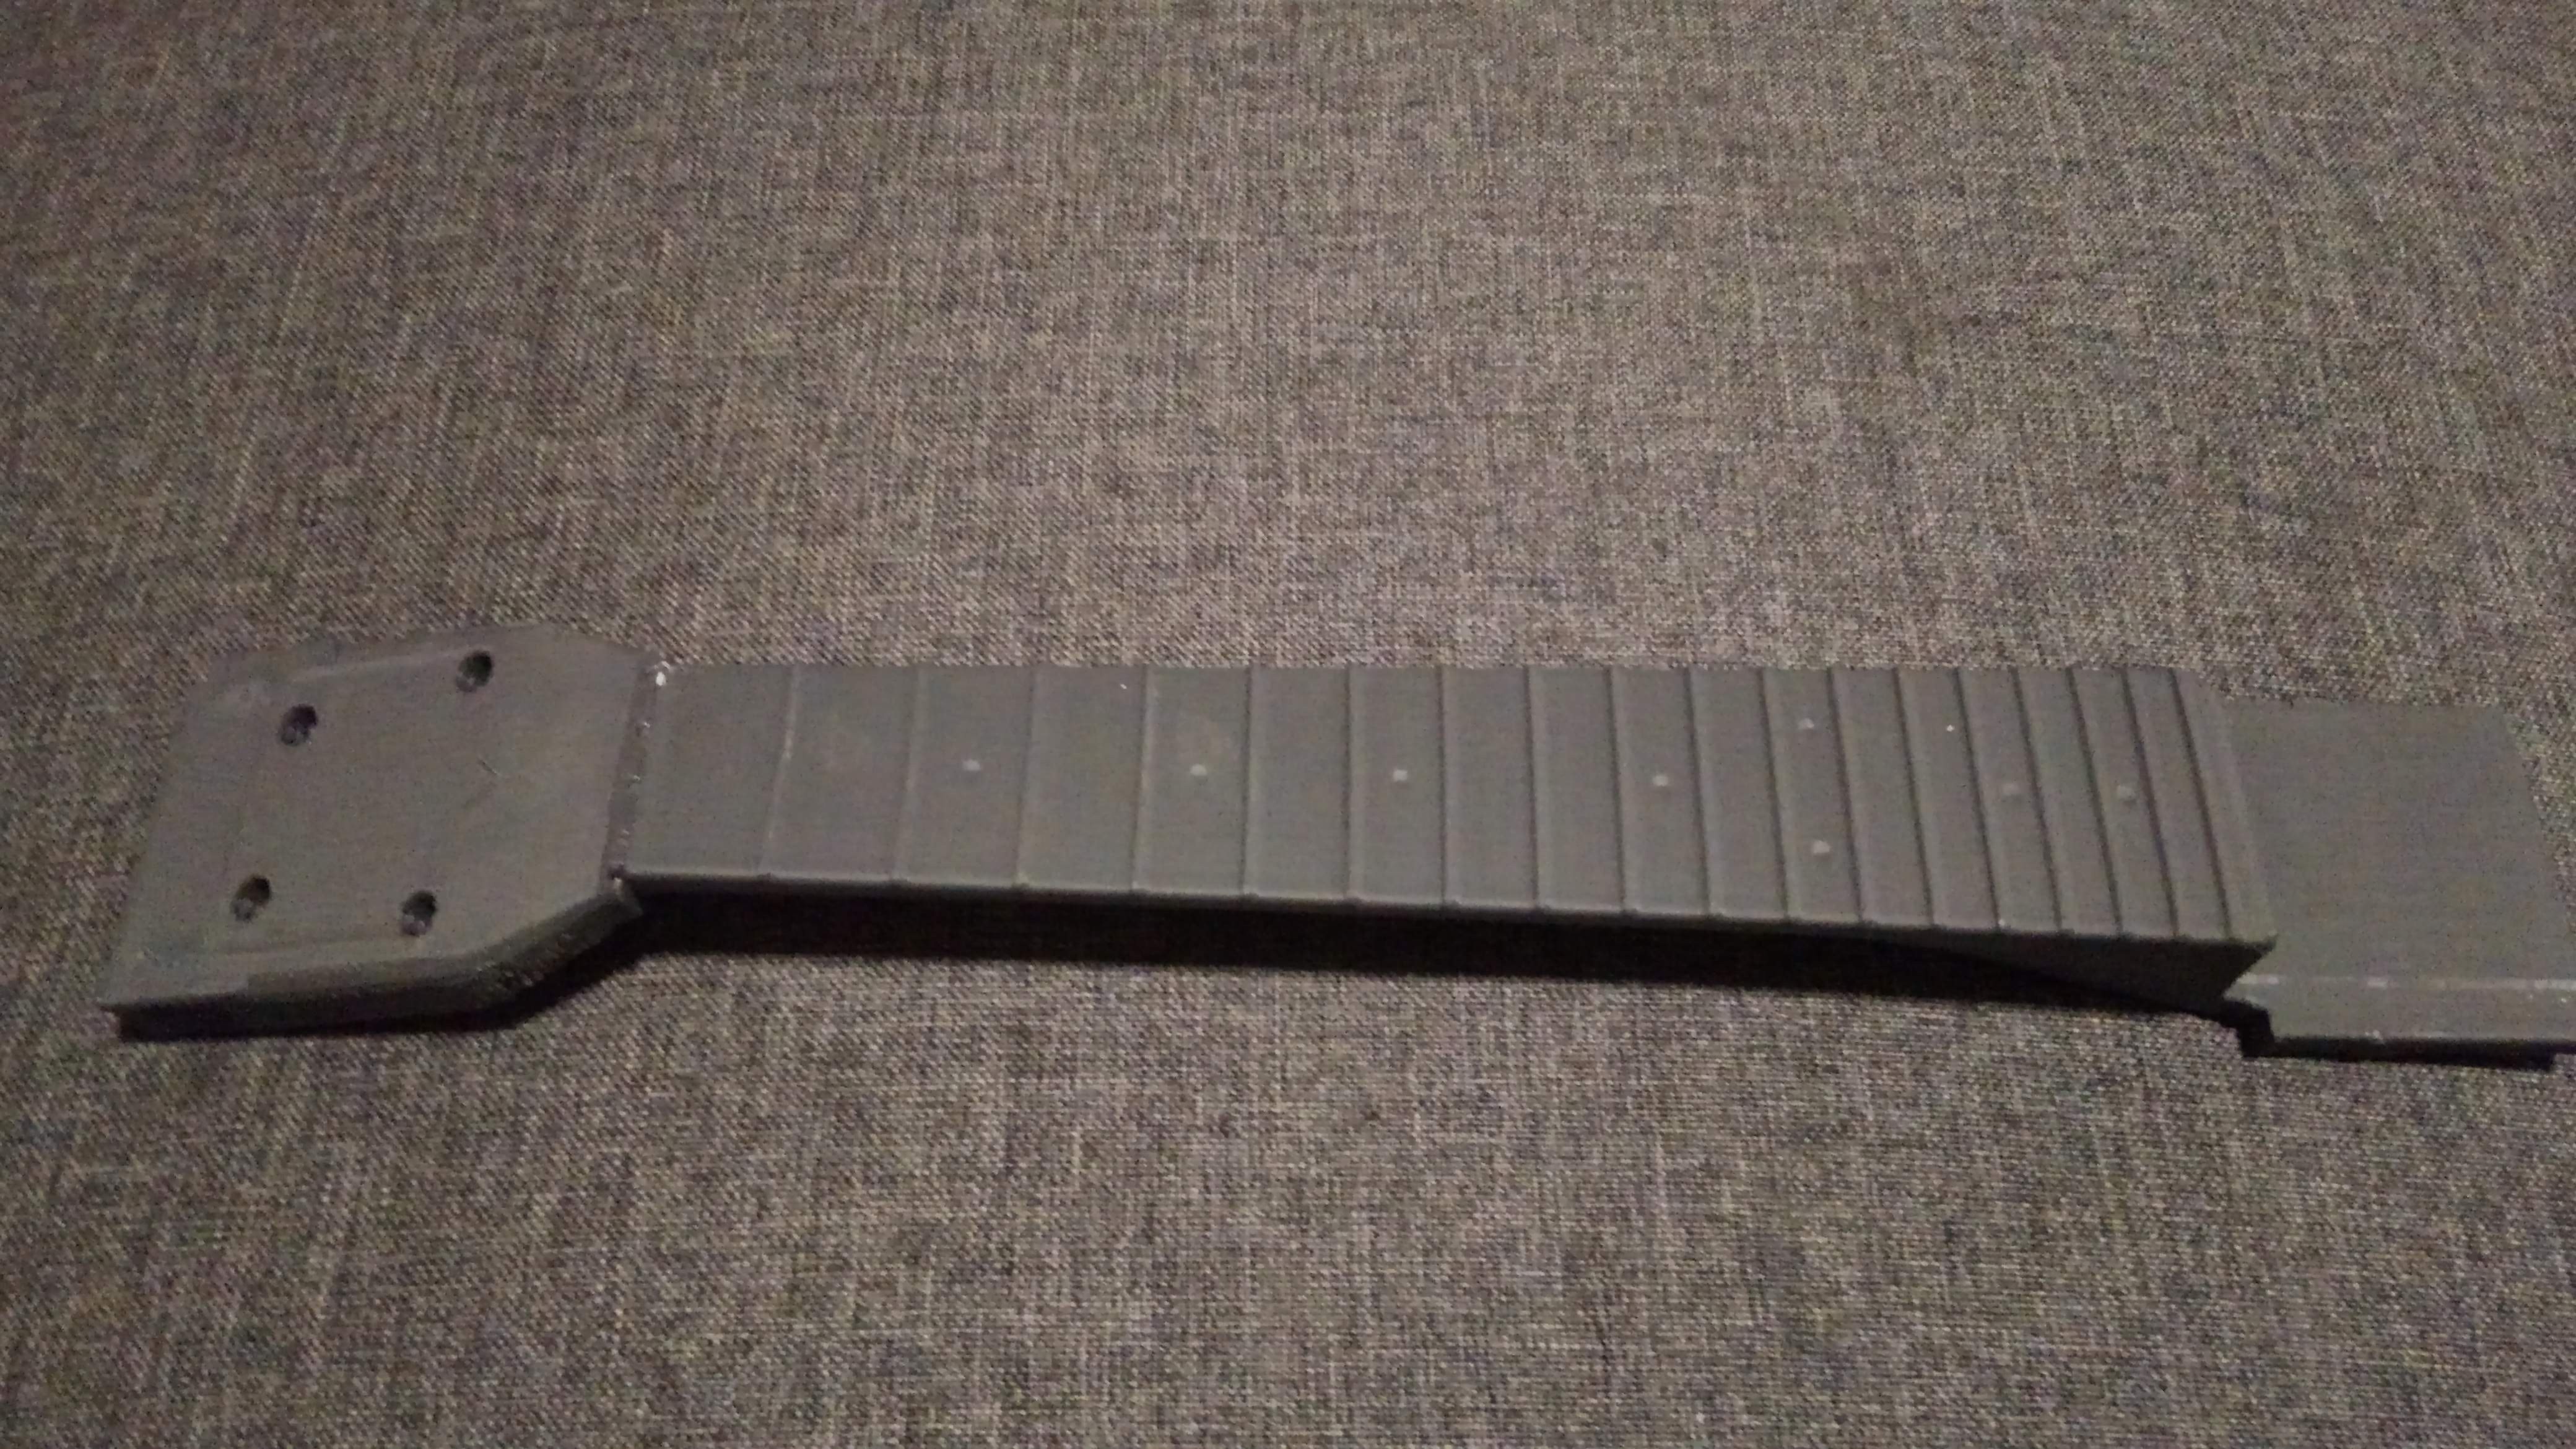
The neck of the Ukulele can be print in one piece in a tall 3d printer as a CR10 and design to fit as a gameboy cartridge perfectly without any glue or screw.
This print will need a little tuning to be fully OK but for a trial i will work
![]()
![]()
With a diapason of 350mm this is a soprano which fit perfectly for travel!
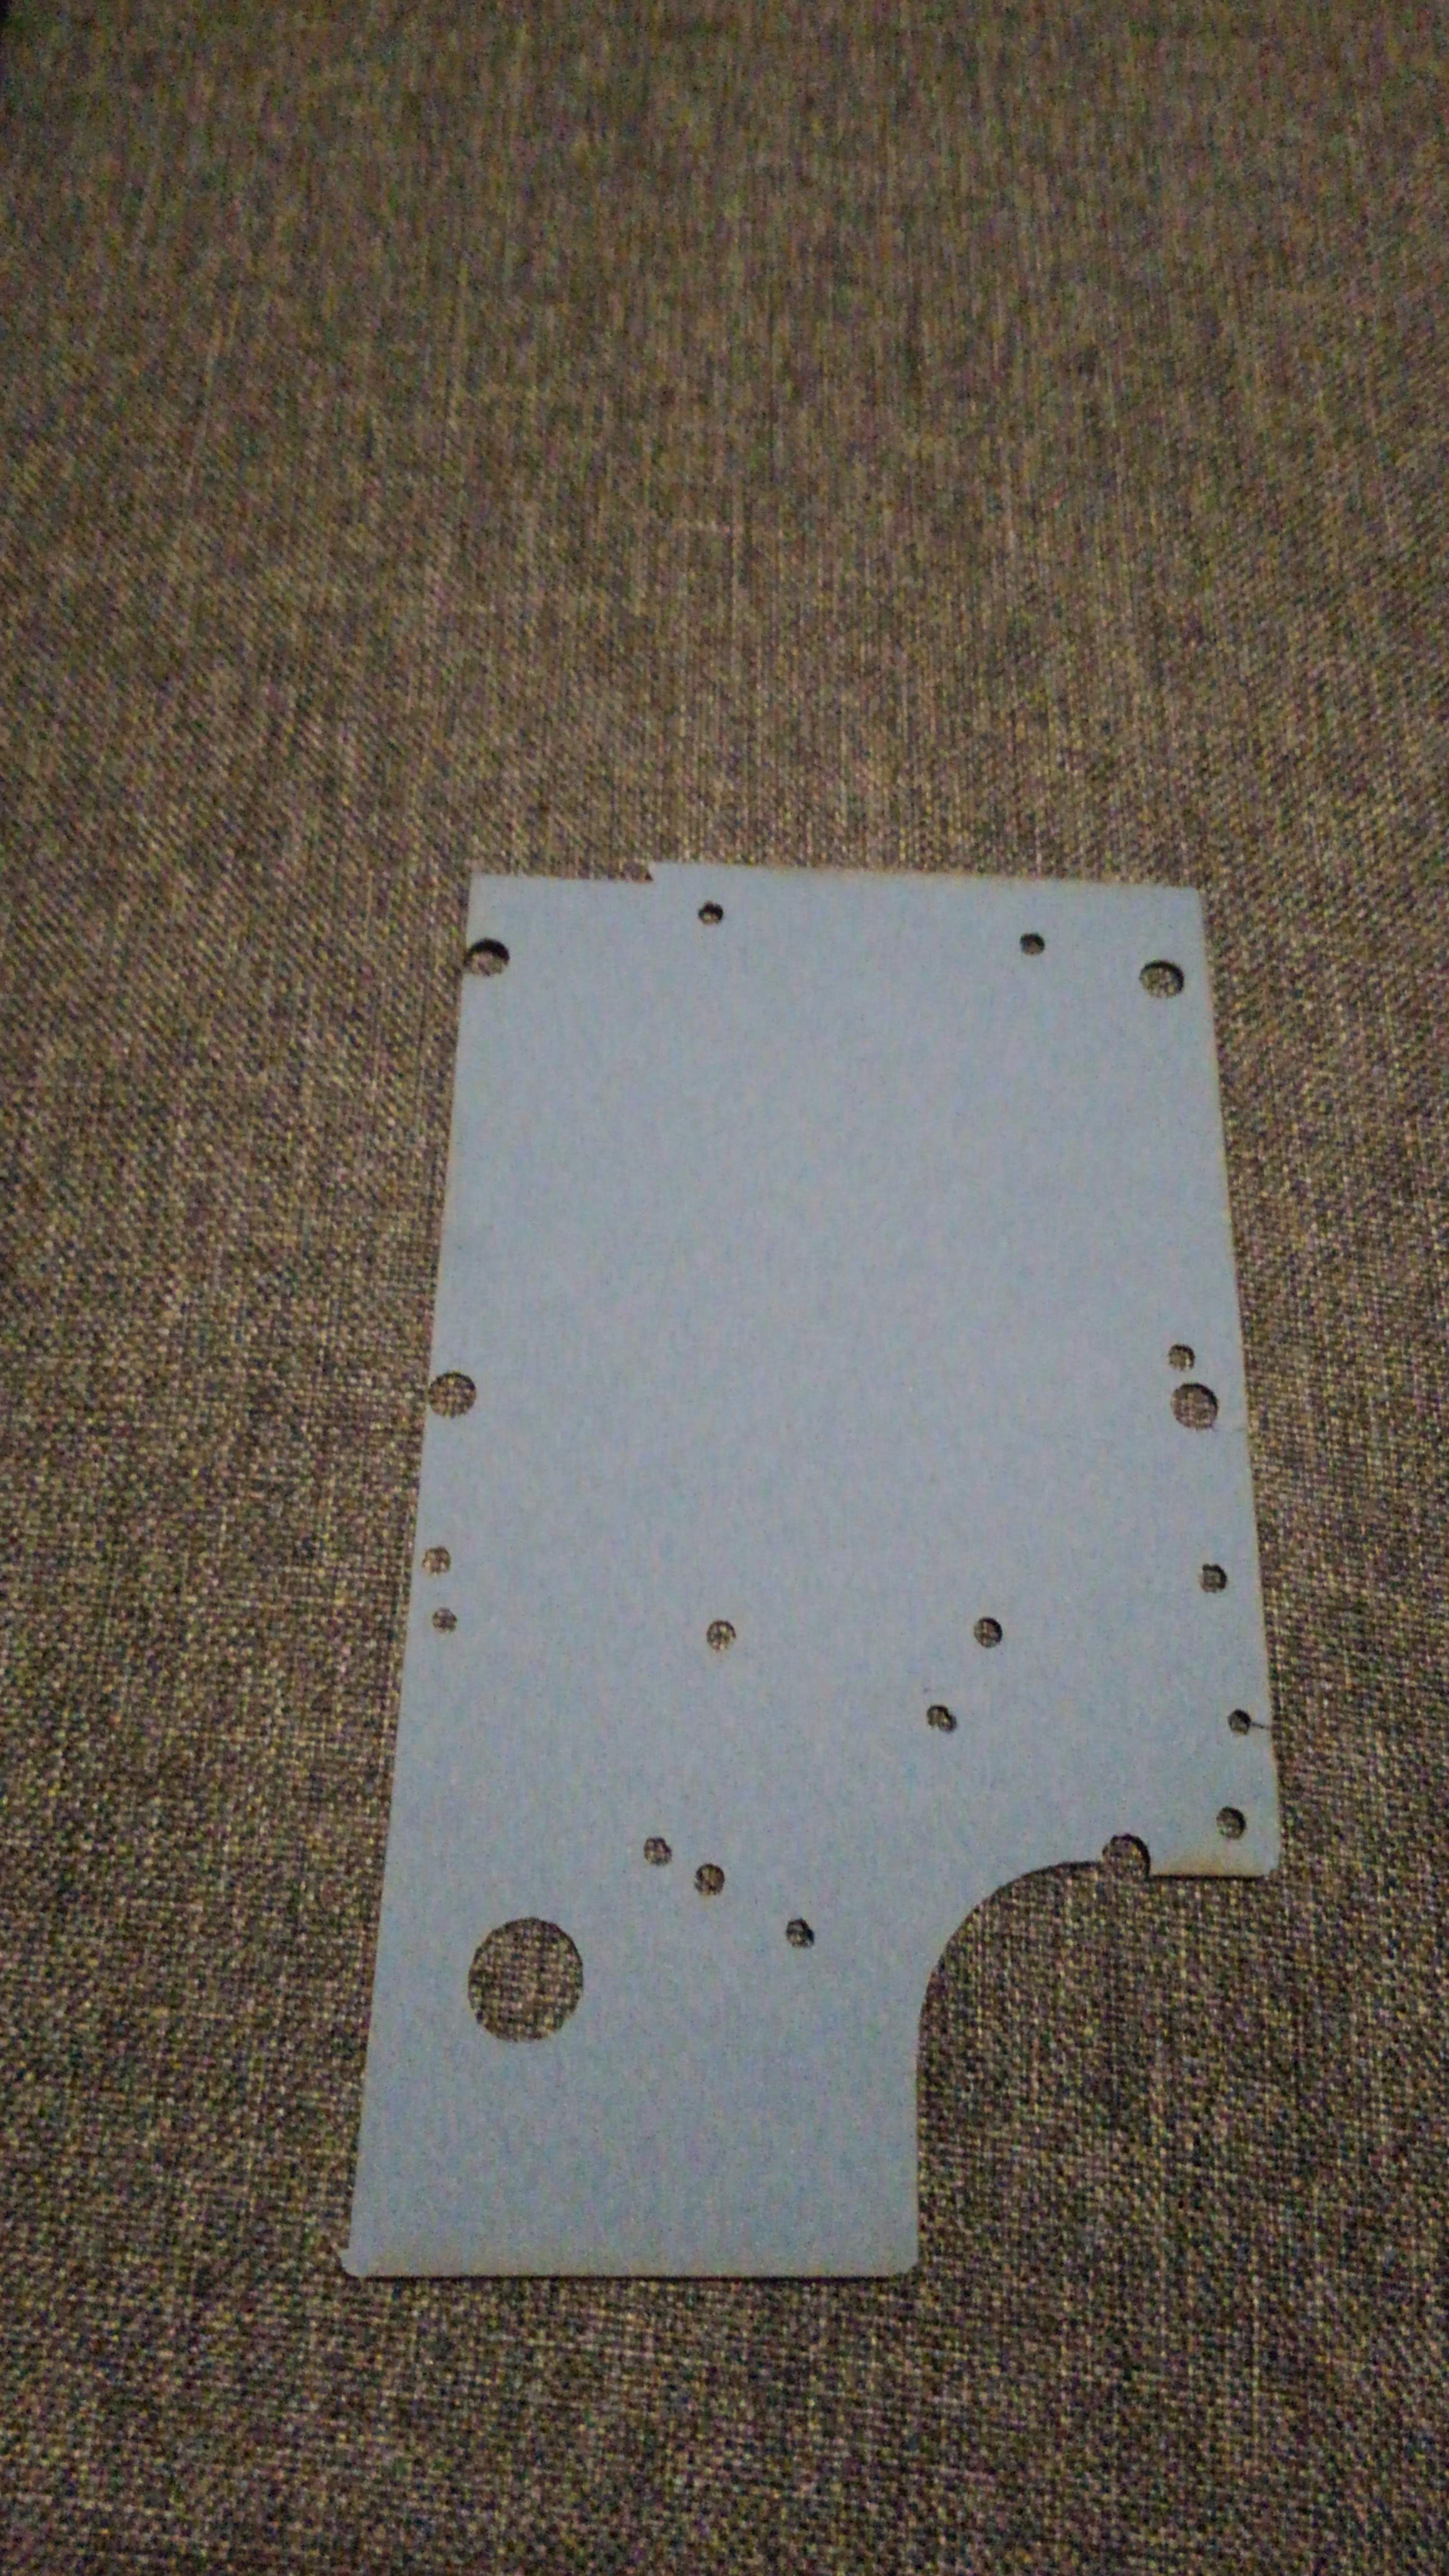
To reinforce the body, a thick cardboard is lasercut to replace the original PCB
![]()
![]()
The bridge will be out the printer tomorrow to the first build an try!
![]()
DMG-01_Ukulele
Ukulele with GameBoy body as MIDI instrument with Bluetooth connectivity and chiptune sound for new music experiences