-
Pentasynth in Action!
10/07/2018 at 11:30 • 0 commentsHere's a little video of me playing around on Pentasynth showing off what it can do:
-
Pentasynth Code and Operation
10/07/2018 at 11:28 • 0 commentsThe Metro is used to read key presses and to output an audio square wave to the amplifier/speaker. The Metro also routes MIDI messages across the USB, so you can have a software synthesizer on a computer/laptop playing the sounds. The code also implements an accompaniment system. This consists of a drum beat, base line pattern and four-step chord progression that runs along at the user selected tempo. The control button for each of the drums/bass/chord is used to cycle through the available patterns: the player can therefore experiment and choose a combination of drums, bass pattern and chord progression that they like and then improvise a melody over the top of this using the keys. A fourth control panel button is used to switch between different pentatonic modes (at this stage either a major or minor pentatonic scale).
The main keyboard audio square wave runs on Timer 1, accompaniment square wave on Timer 2 and Timer 0 is used to run a pseudo-random noise generator a 1kHz which is used for the accompaniment drum beat.
-
Designing and Building Pentasynth Electronics
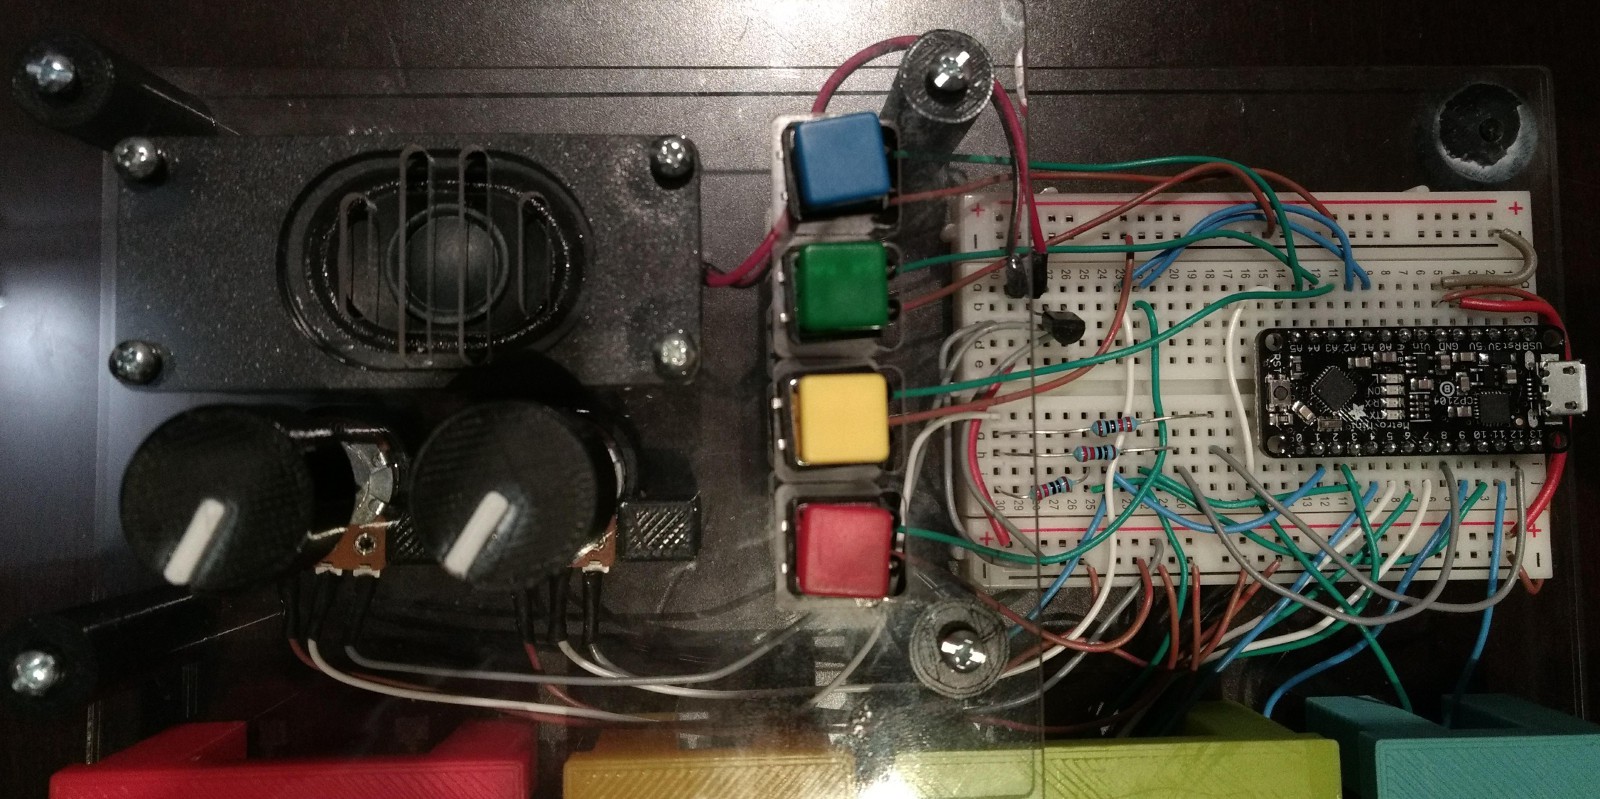
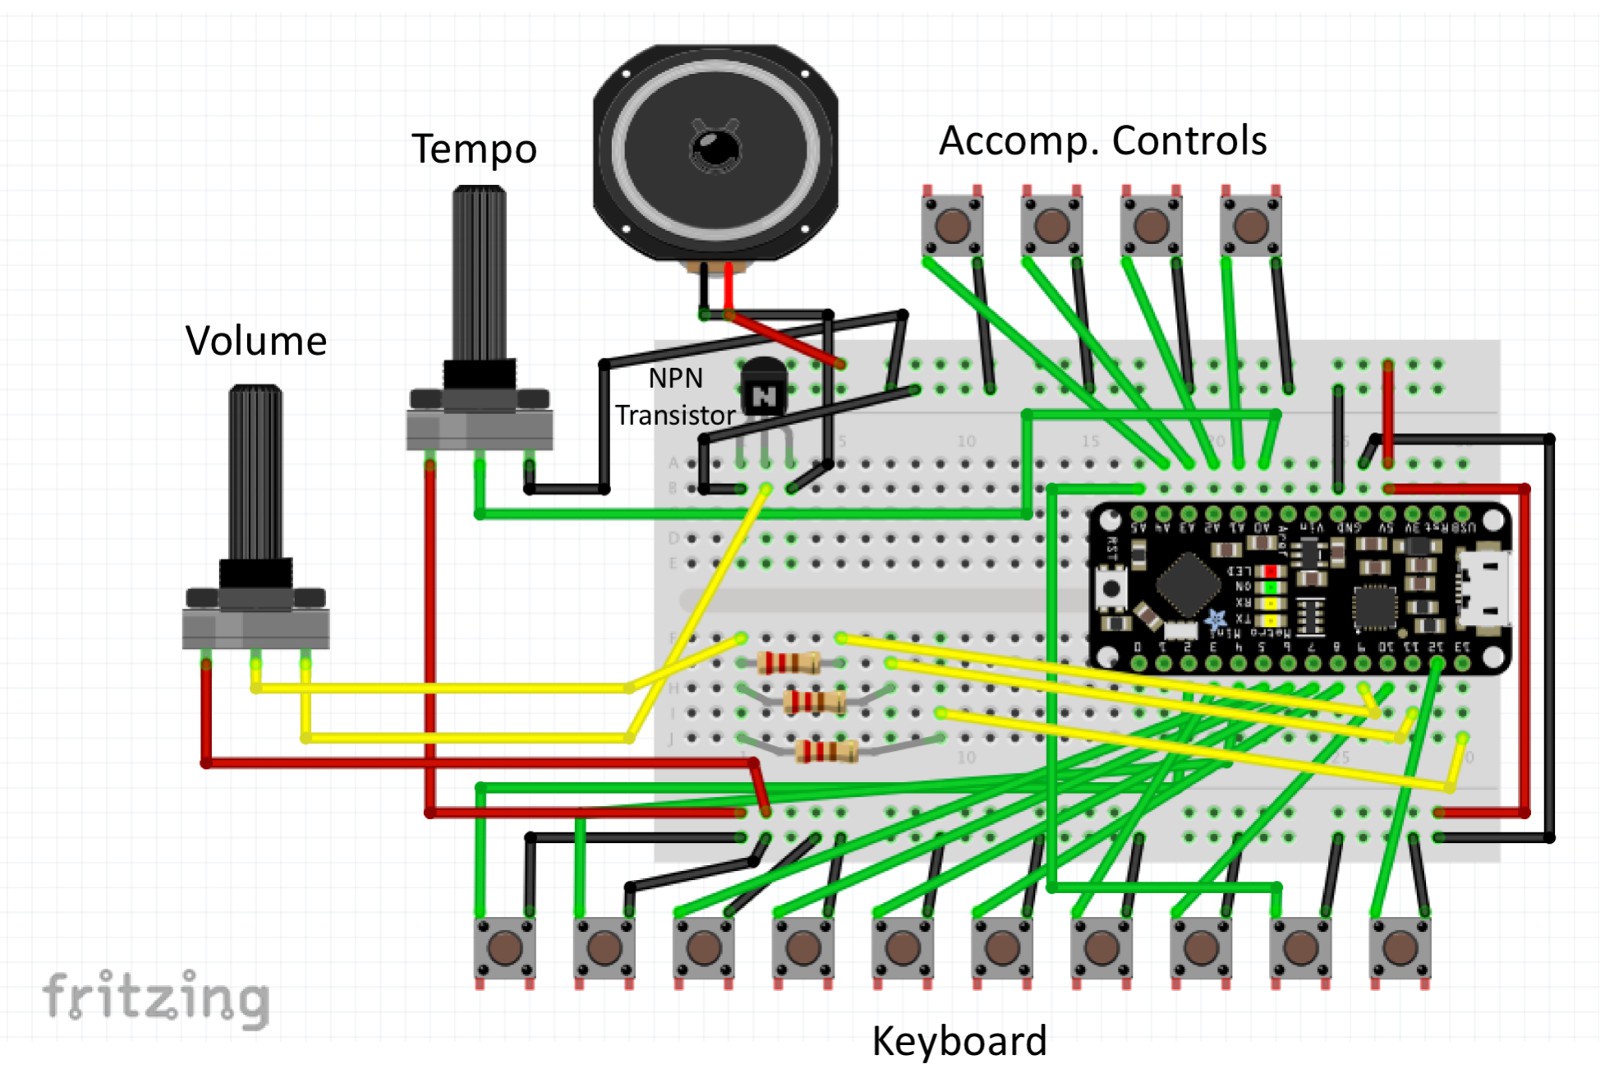
10/07/2018 at 11:22 • 0 commentsI ended up going with the Adafruit METRO Mini, programmed via the Arduino IDE to run the whole synth. Since there are only 10 keys, I linked each one directly to a digital input pin on the Metro. The remaining inputs are connected to 4 digital inputs and 2 potentiometers which are used to input accompaniment controls, and audio waveforms are output via three different output pins that are then combined together using a voltage divider. This is then run through a simple amplifier circuit using a single transistor and straight into a 3W, 4Ohm speaker on the front panel.


I 3D printed custom knobs for the potentiometers.
-
Designing and Building Pentasynth Keyboard
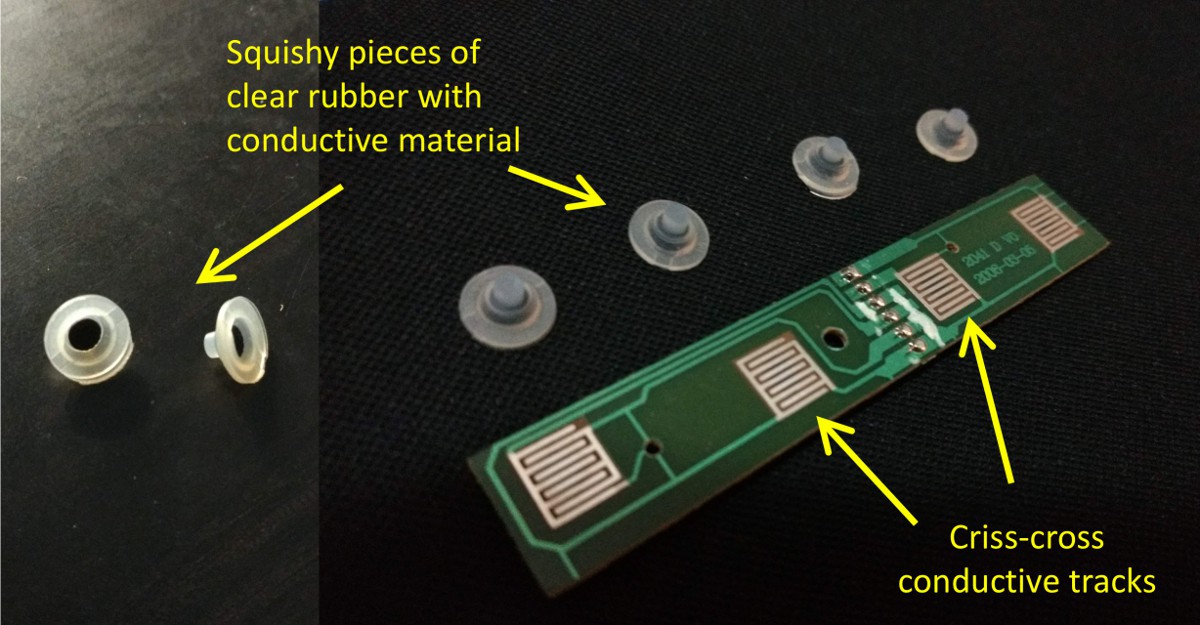
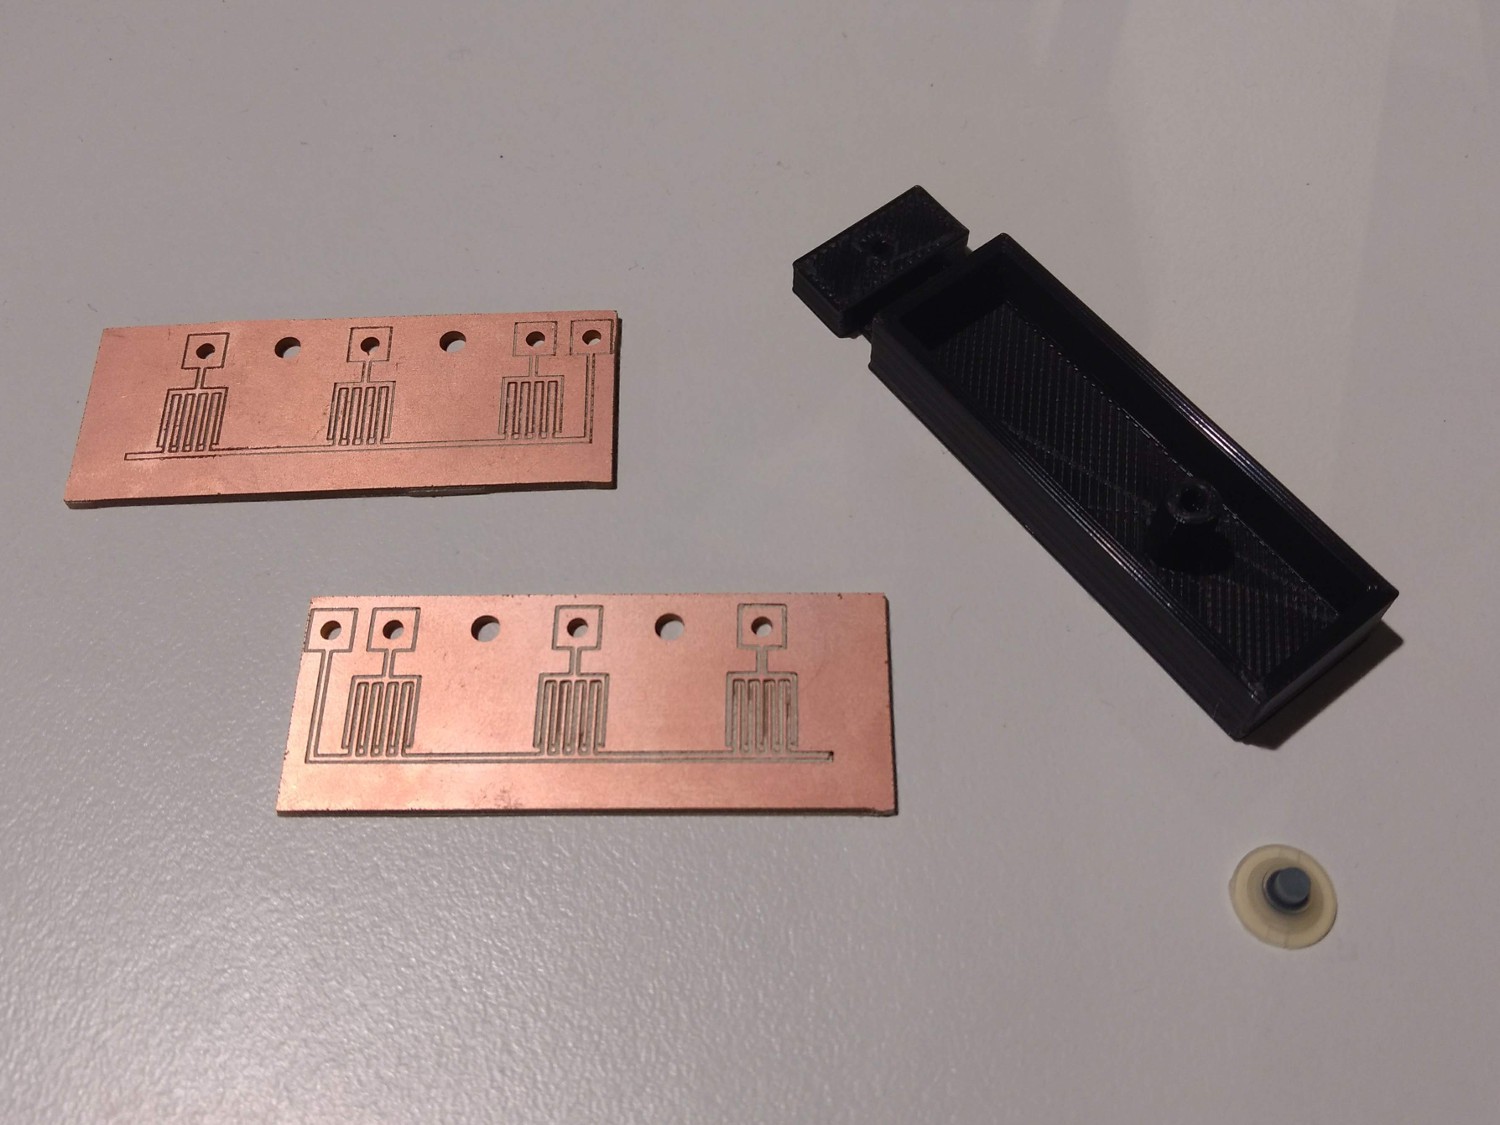
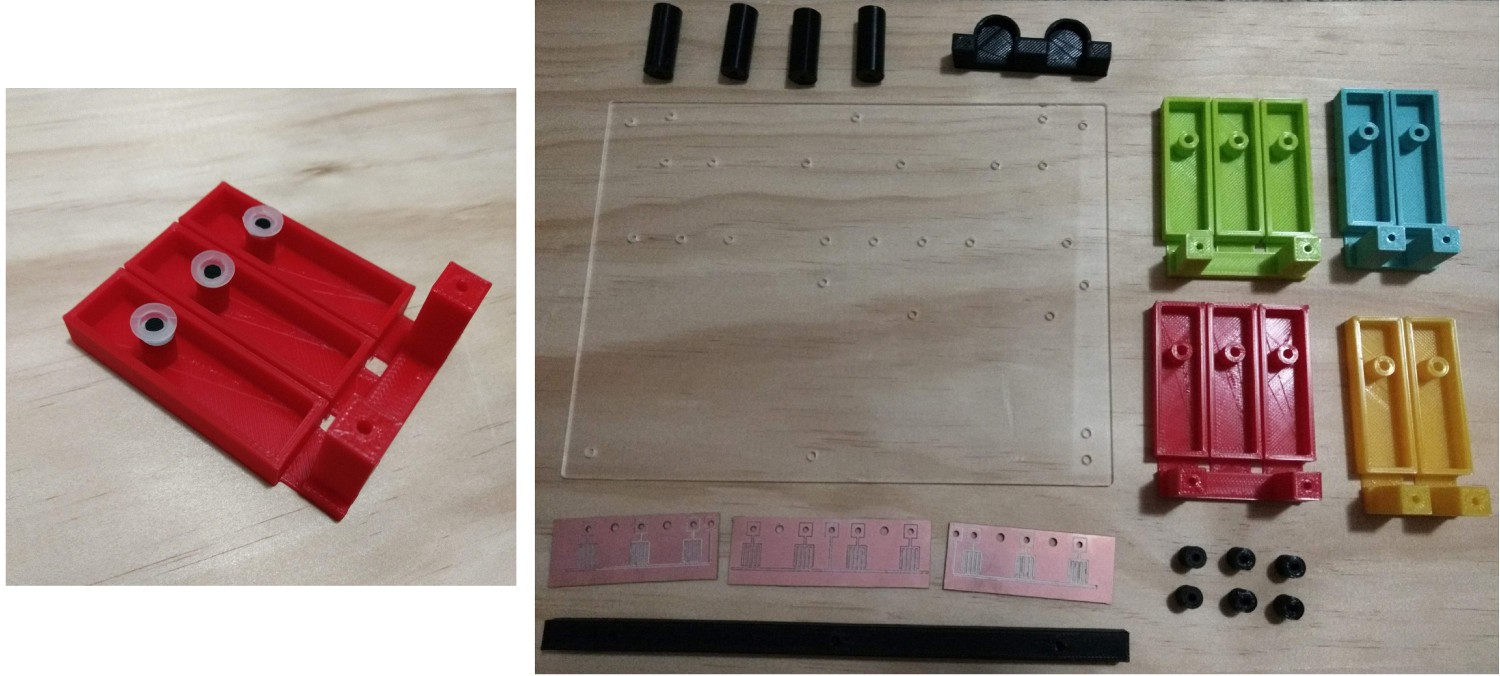
10/07/2018 at 11:16 • 0 commentsI built Pentasynth a few months ago as an experimental project around a musical instrument that could be played by people with limited musical knowledge. My local makerspace had got in some carvable PCB blanks for Carvey last year, and I wanted to try them out. I'd been thinking about making my own 3D printed keyboard, but wanted to find a better way to detect key presses than mounting horrible "clicky" switches under each key. From a salvaged toy guitar, I pulled out a bunch of these little rubber contact things that were used to drive the buttons: I carved my own PCBs to detect the switch presses and glued these rubber contacts into the bottom of some 3D printed keys I designed and made. The resulting feel is quite nice, and no clicky sounds.


I originally wanted to 3D print the whole case, but it was going to take too long, so I opted to design the case to be carved from clear acrylic on Carvey, a "soft" CNC. The case has a fairly open-plan sort of design, which gives it a bit of a rough look, but I like it. I kept the electronics connected in via a breadboard, so I'd always have the options of swapping and changing things easily in the future.


 randomprojectlab