An upgradable, scalable 200$ Lathe for everyone*
(*with some basic tools)
To make the experience fit your profile, pick a username and tell us what interests you.
We found and based on your interests.
DrillingPlanLatheMold.pdfThis file contains the dimensions for drilling the holes into the boards of the mold. I printed them and placed them onto the boards and carefully centrepunched each hole through the paper into the wood before drilling, this way i got pretty precise results. Also note that due to the fact i could only print A4 format the "mid-upper linear-rail board" stencil has to be turned around to centre punch the other side of the board. You should also make sure you drill all the holes for screwing together the mold. it helps to put together everything loosely to make sure you didn't forget anything before start assembeling. Also you have to drill the holes into the Base-plate, i did that free hand by drawing the contours around the mold onto it and then placed some holes where i thought they would be needed.Adobe Portable Document Format - 20.52 kB - 10/23/2018 at 09:38 |
|
|
Here we go, to be honest i'm quite disappointed with the result. I kinda hoped i could avoid the "problem" of having huge gabs and holes in the block by compressing the concrete layer by layer, probably it helped but still, there were some huge holes in the bottom section of the block, since i couldn't get the concrete mix 100% under the 40mm cutout tube, and the white 100mm*100mm bearing cutout board. There were also quite a few smaller holes and air bubbles at different places. SOO What does that mean? i HIGHLY recommend to use concrete liquifier and a liiiiittle bit more water than i did, since my mix was pretty dry (25kg concrete mix to 2,5 litres water). Don't simply add more water until it's moist enough to flow into position, there is special concrete liquifier which doesn't affect the structure of the concrete, while adding more water will weaken the concrete later. After using a more liquid mix don't forget to vibrate it a little so the air bubbles will come out. My mix didn't really flow, you should read the instructions on the concrete liquifier but i guess it would even help if it's barely floating into position, but it don't has to be like maple sirup though..
I filled the holes with the same concrete mix i used before, but i ran it throug a sieve so only the fine bits and the cement would remain, which makes it much easier to fill in all the holes. It helps to rub it in by hand if you want to fill the small cheese-like air holes on the surface..
To get the block easier out of the mold later you can apply a thin coat of vegetable oil or seperating wax on the inside of the mold and the place holder pipes, but be careful not to apply anything on the threaded spacers or the rebar since these parts are supposed to stick to the concrete.
For the concrete i used a mix (screed concrete) from the hardware store which is not too coarse and worked well for other projects in the past. I also mixed in some glas fibres (AR-Glas, 12mm) i used 20 grams for each 10kg concrete mix, this might sound like nothing but already improves the properties of the concrete and prevents fine cracks during the curing process.
Besides that i also mixed in some pigments, so it would look cooler, that is totally not necessary but if you want to be creative there are pigments in many cool colors, so if you have a huge block of concrete in your shop, why not making it at least look good.
I used a 2% ratio of the pigments. so 200g for each 10kg concrete mix.
You will need 37,5kg of concrete mix (I bought 2 bags each 25kg and ended up using exactly one and a half, so just for you as orientation.
Edit: Please read my advice about the viscosity of the concrete and the recommendation to use special "Concrete Liquifier" here before continuing since i ended up having some holes and gaps in the bottom section of the block.
I used the amount of water they claimed on the bag with was 2,5 liters of water for 25kg concrete mix. That results in a nice viscosity/consistency maybe a few drops more would be fine too, but you don't want to end up with a soup, that will just weaken your concrete. If you compress the mixture every ~5cm while filling your mold, you will end up with a nice result better than filling the entire mold and then try to compress anything, you will probably end up with air holes and pockets. I added two pieces of rebar inside the concrete to improve tensile strenght.
Now the fun part begins. I thought a while about how to mount the parts to the concrete block, many people used these anchor bolts or simly reversed bolts which sticked with the head in the concrete. I kinda didn't like that solution of bolts sticking out of the block, so i tried on a testing block if a spacer nut welded to a short piece of rebar would work properly in concrete without breaking away:
The results actually surprised me a little, even after only a few days of curing time i couldn't force the spacer out of there (with a bolt, a washer and a piece of pipe between the washer and the concrete, so it could properly direct the force to pull on the spacer). I only used a 1/4" Ratchet to be fair, but nevertheless it worked without breaking free:
After this successfull test i welded together 36 M6 and 8 M10 Spacers with pieces of rebar.. Plan in some extra time for that, because that will take longer than you'll think ;-)
But of course if you don't have a welding machine, you can use bolts secured in place with nuts.
After some hours of welding you should finally be able to screw the rest together, don't overtighten the bolts, the spacers should sit flush on the melamine surface, not too loose so the councrete will sneak it's way into the spacer, but not too tight so the spacer eats into the wood and sticks out of the concrete later. Now you should have something that looks like that:
In this picture the M10 Spacers are still missing but therefor the 40mm pvc pipe is already inserted, which will act as placeholder for our main shaft.
First i built the mold for the concrete where the threaded sockets and placeholder-pipes are mounted to, i used 19mm melamine chipboard. Here at my place you can get the parts cut to size in the hardware store for ~15$/m².
QTY | Edge A | Edge B |
---|---|---|
1 | 308mm | 788mm |
1 | 750mm | 200mm |
1 | 308mm | 200mm |
1 | 179mm | 200mm |
1 | 94mm | 200mm |
1 | 104mm | 200mm |
1 | 487mm | 200mm |
1 | 169mm | 200mm |
1 | 195mm | 200mm |
2 | 100mm | 200mm |
Unfortunately i made a mistake first and cut one board too long, in the list above the value is of course corrected, but after that you should(n't) end up with something like that (The horizontal mid upper board should actually fit between the two vertical boards not below them):
The Files for drilling the Holes and placing the two 100mm * 100mm Boards can be found in the Files section.
Well, after drilling all the holes you can start with screwing together everything, but make sure everything ist flush and 90°, so nothing leaks out later and you don't have to correct a huge misalignment in the concrete block, which will safe you a lot of work lather, take your time here. And don't use woodglue or anything like that here, we want to be able to take the mold apart later to get the lathe-block out easily.
(The board i talked about above is still not correct on this picture in case you are wondering). The Drills held in Place the smaller boards while screwing them to the outer boards. since they must be accuratly positioned.
Well, seems like the mold itself is done! :-)
Create an account to leave a comment. Already have an account? Log In.
I really like this idea, as a hobbyist this could be exactly what I've been looking for. I'm looking forward to seeing this project as it progresses.
Thanks a lot! Me too, it'll probably take until end of the year until it's far enough to see some actual machining on it. Currently the concrete is curing which also takes at least two weeks. But i'll keep on updating this page until then. :-)
Become a member to follow this project and never miss any updates
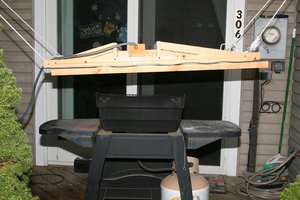
This looks great! The liquidizer you mention is called plasticizer. With it you can greatly decrease the amount of water you need to use and create a much harder concrete (15,000 psi is possible). You can get better results by not using the bagged concrete but instead use cement, sand, glass fiber, water by weight at 6 parts cement, 6 parts sand, 1.8 parts water, 3% x the weight of the cement for plasticizer (can use more if needed), and 3% of the total weight for fiber. With this mix there is no reason to add rebar to increase tensile strength, the fiber takes care of that. If you add enough plasticizer and vibrate you should be able to greatly decrease your voids and increase the quality of your surface finish. One of the additional benefits of using this mix is that you can decrease the cross sectional area of some parts and have equal strength. For instance you could make the headstock with a void so you could have your drive pulley contained within the headstock.
I really look forward to seeing how the rest of this goes.