 ChrisG71
-
11Adding a display
The e-paper display I have makes use of the UART on the GPIO which collides with the GPS. I decided to switch to an OLED display, which only uses the I2C.
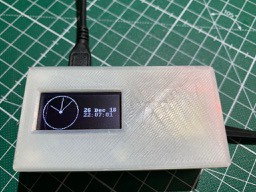
It is a 1.3" 128x64 pixel display using the SH 1106 controller.
Use raspi-config to enable the I2C and install the i2c tools:
sudo apt-get install i2c-tools
Wiring is easy but requires some soldering.:
OLED Raspberr GPIO Raspberry Pin# VDD 3V Pin 1 GND GND Pin 6 SDA SDA1 Pin 3 SCK SCL1 Pin 5 Check if the display is detected:
i2cdetect -y 1
Output should show a 3c:
     0  1  2  3  4  5  6  7  8  9  a  b  c  d  e  f
00:          -- -- -- -- -- -- -- -- -- -- -- -- --
10: -- -- -- -- -- -- -- -- -- -- -- -- -- -- -- --
20: -- -- -- -- -- -- -- -- -- -- -- -- -- -- -- --
30: -- -- -- -- -- -- -- -- -- -- -- -- 3c -- -- --
40: -- -- -- -- -- -- -- -- -- -- -- -- -- -- -- --
50: -- -- -- -- -- -- -- -- -- -- -- -- -- -- -- --
60: -- -- -- -- -- -- -- -- -- -- -- -- -- -- -- --
70: -- -- -- -- -- -- -- --
I found the some python libraries here:
sudo apt-get install python-dev python-pip libfreetype6-dev libjpeg-dev build-essential
sudo -H pip install --upgrade luma.oled
Installation and building will take some time. Don't panic.
There is some nice example code available if you want to play around before continuing. This will also make sure your display is working correct.
You might want to clone the git repo from here: https://github.com/rm-hull/luma.examples. Before you need to install the git client:
apt-get install git
git clone https://github.com/rm-hull/luma.examples.git
The examples default to the ssd1306 display driver, but mine is using a sh1106. So you need to run the example scripts with option -d sh1106. Else the display looks broken, but it is just using the wrong driver.
Here is a picture running the clock demo:
![]()
Yes, I already made a 3D printed case for everything. Not yet perfect, STL files are in the files section.
-
12Python script to wait for a 3D fix and get the coordinates
I like to keep all the bash and python scripts at /home/pi/. So this time not working as root.
Let's create a new file:
nano get-gps.py
This is the script:
#!/usr/bin/env python

import sys
import time
from gps3 import gps3

gpsd_socket = gps3.GPSDSocket()
gpsd_socket.connect(host='127.0.0.1', port=2947)
gpsd_socket.watch()
data_stream = gps3.DataStream()

def getgps():
   for new_data in gpsd_socket:
       if new_data:
            data_stream.unpack(new_data)
       if data_stream.TPV['mode'] != 'n/a':
            mode = data_stream.TPV['mode']
            latitude = data_stream.TPV['lat']
            longitude = data_stream.TPV['lon']
            time.sleep (2)
            if mode == 3:
                return (latitude, longitude)
                break

def dms(deg):
    m = (abs(deg) - int(abs(deg))) * 60.0
    s = (abs(m) - int(abs(m))) * 60.0
    return (int(deg), int(m), int(s))

def celestron(deg):
    c = dms(deg)
    return "{0:d} {1:d} {2:d} {3:d}".format(abs(c[0]), c[1], c[2], 0 if(c[0] >= 0) else 1)

coordinates = getgps()
print "{0} {1}".format(celestron(coordinates[0]), celestron(coordinates[1]))
Basically I took Dan Gardners script which takes GPS coordinates and returns it into the right format for the Celestron and added the capability to get the data from GPS. I'm not very happy with the for-loop and the break, as I don't like breaks in general. I might need to improve my python skills a little.
Don't forget to change permissions:
chmod +x get-gps.py
And give it a try:
./get-gps.py
After a few seconds (and if your GPS has a 3D fix) you should get an output like this:
pi@raspberrypi:~ $ ./get-gps.py
48 5 30 0 11 32 8 0
Finally let's put everything together:
nano hc-location-gps.sh
Copy & Paste this:
#!/bin/bash

readonly serial=/dev/ttyUSB0

location=$(/home/pi/get-gps.py)

if [ ${?} != 0 ]; then exit; fi

stty -F ${serial} 9600

HEX="\\\\x%02X"
unset FORMAT
for i in {1..8}; do
  FORMAT="${FORMAT}${HEX}"
done

echo "Location: '${location}'"
hex_text="$(printf "W${FORMAT}" ${location})"

echo "Writing location to HC: '${hex_text}'"
echo -ne "${hex_text}" > ${serial}
Connect your hand controller and give it a try:
./hc-location-gps.sh
Raspberry PI wireless Telescope Control
Advanced SkyFi 3 replacement for Celestron
Discussions
Become a Hackaday.io Member
Create an account to leave a comment. Already have an account? Log In.
I had some issues with the get-gps.py. I believe since this guide was written python changed to python3. I had to edit the first line to #!/usr/bin/env python3 to fix a no gps3 module found.
My python skills are very basic but I also got syntax errors on the last line of the file. I believe there are 2 missing parentheses print("{0} {1}".format(celestron(coordinates[0]), celestron(coordinates[1])))
Are you sure? yes | no
Another issue: When I added the commands to the rc.local file to force a NTP time update, the boot hung up with address resolution errors. If I run the same commands after I'm able to log in over SSH, they work fine. Is it possible that /etc/rc.local is running before the autohotspot service?
Are you sure? yes | no
I found one issue with my install after following your instructions: the hostapd service was masked for some reason so that it couldn't start. For lack of console connections, I rebuilt my system 3 or 4 times before I finally broke down and bought a Mini HDMI-to-HDMI cable and a cheap USB keyboard to troubleshoot it.
Anyway, the fix was to issue the command "sudo systemctl unmask hostapd". Once I did that, the autohotspot script was working as it should, both in client and hotspot mode.
Are you sure? yes | no