ChrisG71
-
Getting closer to the finish line
01/11/2019 at 16:41 • 4 commentsFinally I found some time to work on the python script to send the GPS location to the hand controller. The files are already in the GitHub repository.
Finally I have a replacement for the Celestron SkyQ Wi-Fi and SkySync GPS. Or for the SkyPortal Wi-Fi.
Now I need you guys for testing. Does it work? Where are the bugs? What needs to be fixed?
I'm planning a few SD card images with different options. Also the case needs some improvements for a better snap. The OLED is pretty bright and might be annoying, so I need an idea either to turn it off after some time integrate a cover into the case.
-
Created a git repo with some of the files
01/05/2019 at 18:44 • 0 commentsYou can find some of my python script files in my GitHub repo:
Simply clone https://github.com/ChrisG71muc/astro.
Just clone it to you PI and move the files you want to use to /home/pi
git clone https://github.com/ChrisG71muc/astro.git
-
STL files and new SD card image
12/30/2018 at 19:44 • 0 commentsJust uploaded the STL files for the case (look at the project files here) and a new image with the hotspot to Dropbox.
Take care of the changes to the other image below!
The new SD-card image on DropBox: https://www.dropbox.com/s/tqi5yzdyyuuqd3b/astro_gps_hotspot.dmg.zip?dl=0
You need a 16GB SD card. larger are OK as well of course.
*** UPDATE: Even I am using an 8GB to create the image it seems to be too big to write it back to an 8GB card. So please use a 16GB card. It's anyway difficult meanwhile to get an 8GB card. ***
It should boot on PI 2 B+ and PI 3 B+ and also on PI Zero W. Username: pi Password: raspberry
I finished all config steps I described in my project. But there are a few to-do's;
- Wi-Fi is NOT configured, but the PI will create a hotspot: SSID: AstroPI PSK: 12345677890
- Once connected to the SSID you can SSH to the PI at 10.0.0.5
- System is RO! To make any config changes edit /boot/cmdline.txt and reboot. Don't forget to go back to RO once you are done.
- HDMI is not turned off to allow you to boot a PI Zero with keyboard and screen so you can configure the Wi-Fi
- you should add a GPS, everything is configured, just connect the hardware.
- hand controller time is set from NTP or GPS. If you don't have the GPS set time and location manually or push from SkySafari. Please edit rc.local accordingly.
- location is set to a fixed location, have a look at /home/pi/hc-location.sh
- Check the script to disable the green LED and run it manually /home/pi-led-off.sh You might need to change one value for your hardware.
This should give you a quick start in just 30min.
Let me know if you found the little easter egg.
I know, pictures or it did not happen:
![]()
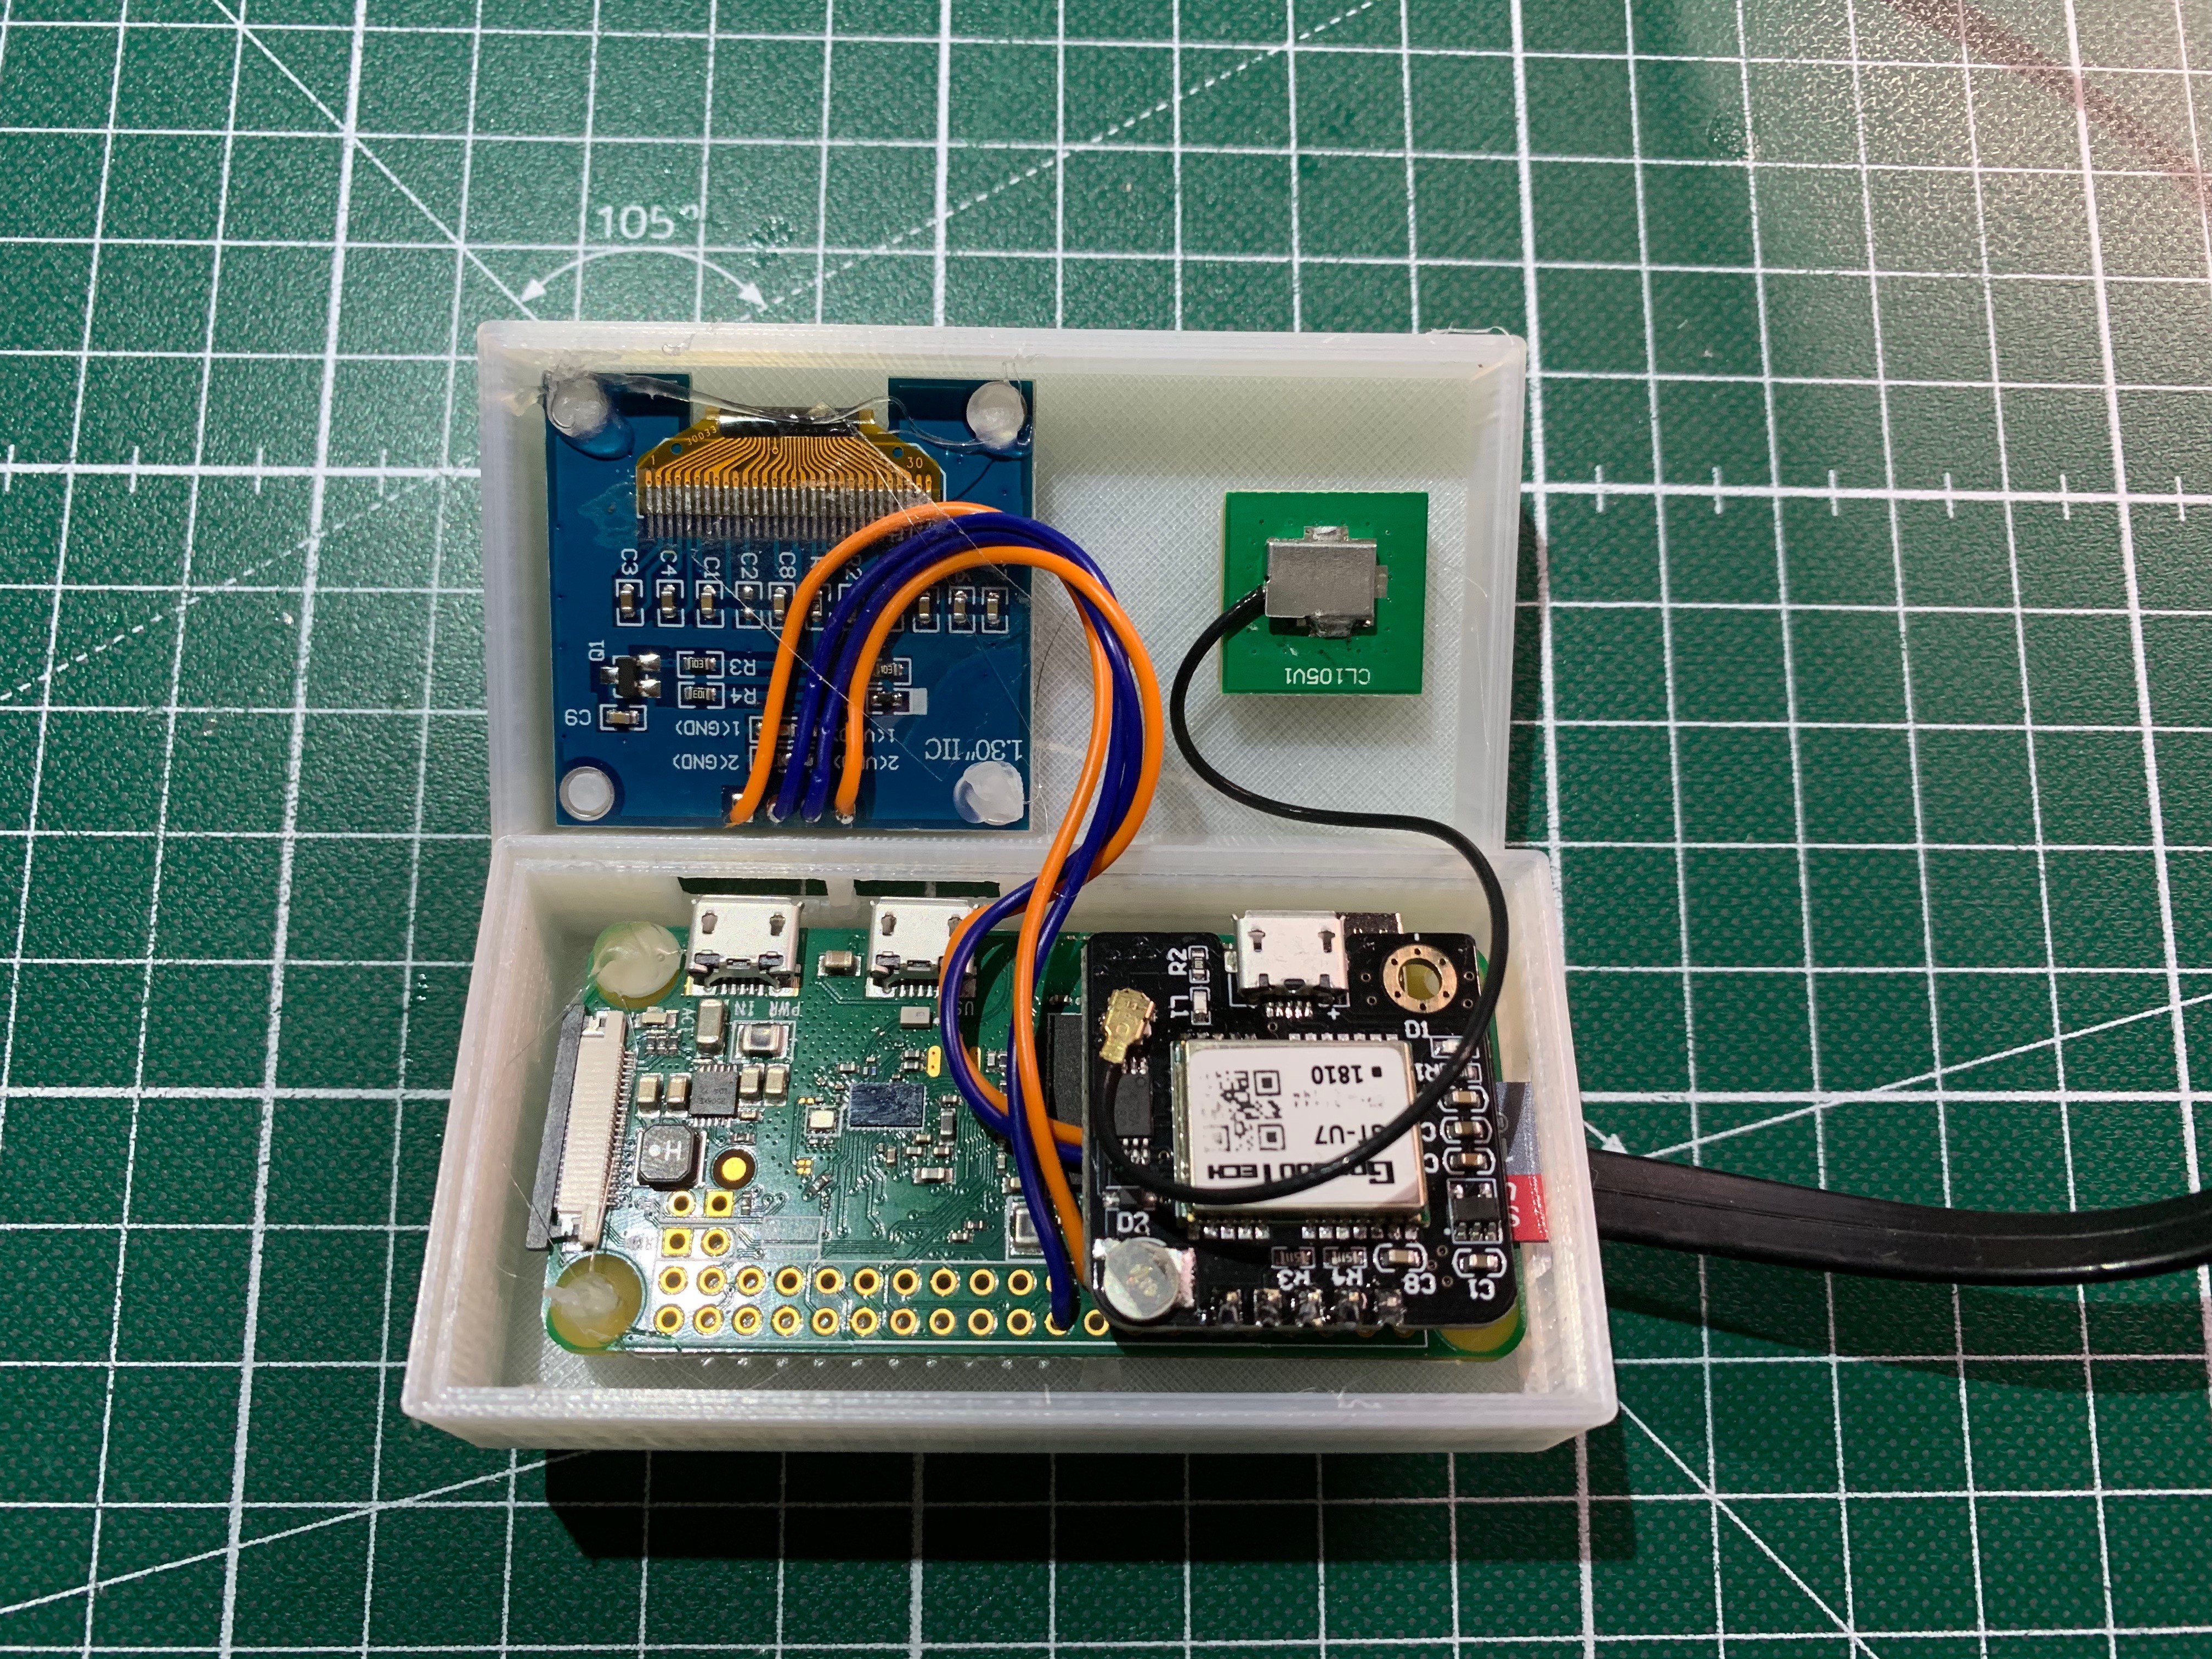
I found a way to use header pins to solder the GPS directly to the PI. Make sure to add I2C wires for the display first. On top you can see the back of the display and the GPS antenna (you should put some isolating tape at the back). I used some hot glue to keep everything in place. The voltage regulator is under the PI, also hot glued. It is a pretty tight fit, I might need to add 1mm here or there in the next version.
-
Wi-Fi Hotspot, OLED display and 3D printed case
12/26/2018 at 22:15 • 2 commentsI am a little bit behind with documentation, but in the meantime I finished the configuration for the Wi-Fi Hotspot, added an OLED display and created a 3D printed case.
![]()
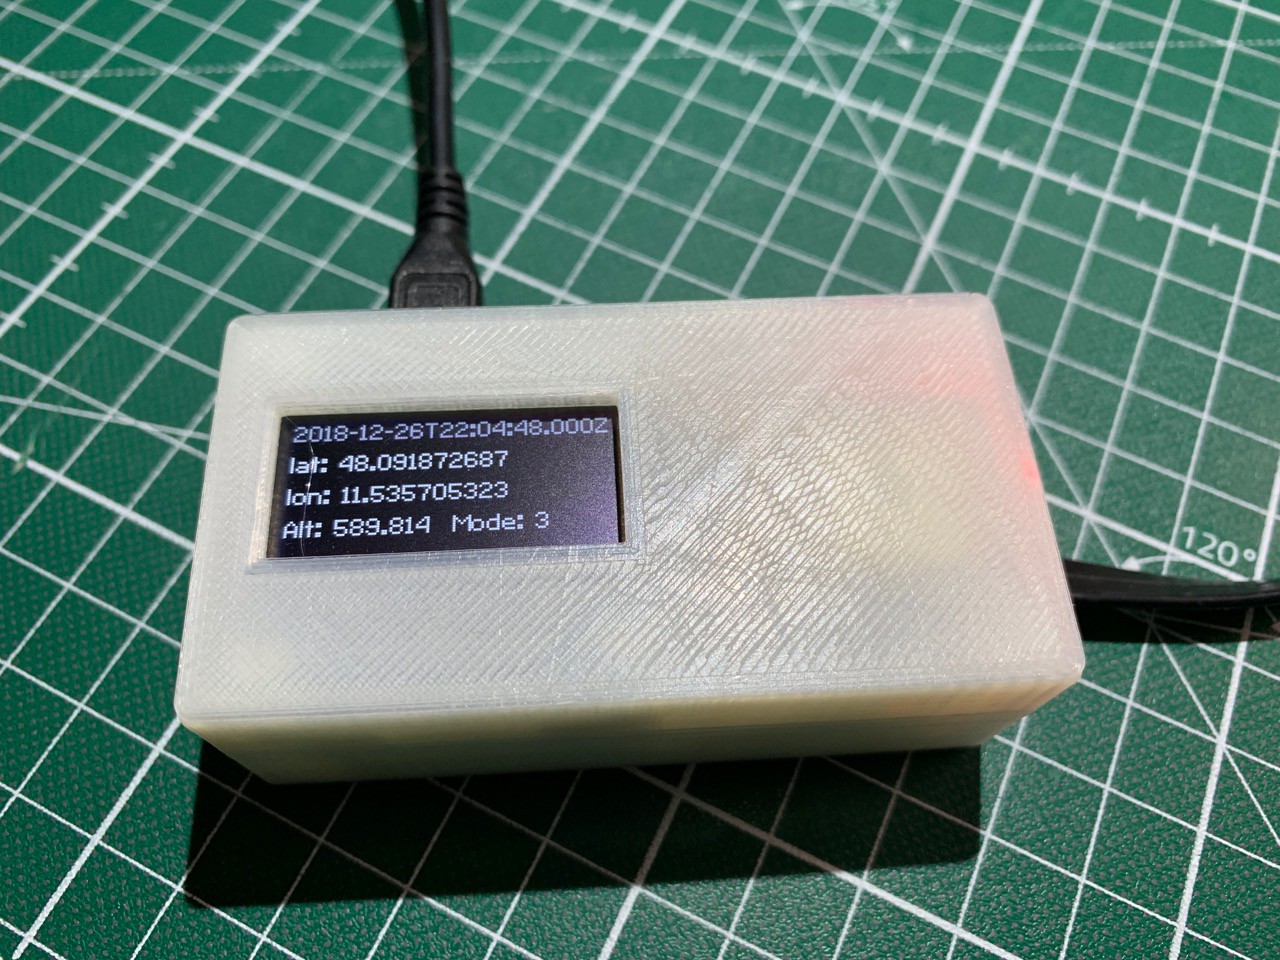
Here I am running a script which shows the current GPS data on the OLED.
![]()
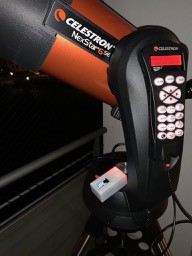
Clear sky. First time I could really test my creation. You can see the USB cable with the red ring connected to the hand controller and the PI showing current time and GPS coordinates.
(still need to finish the script to set location as well. I would like to combine this with the hotspot enabled.)
-
Power from AUX port
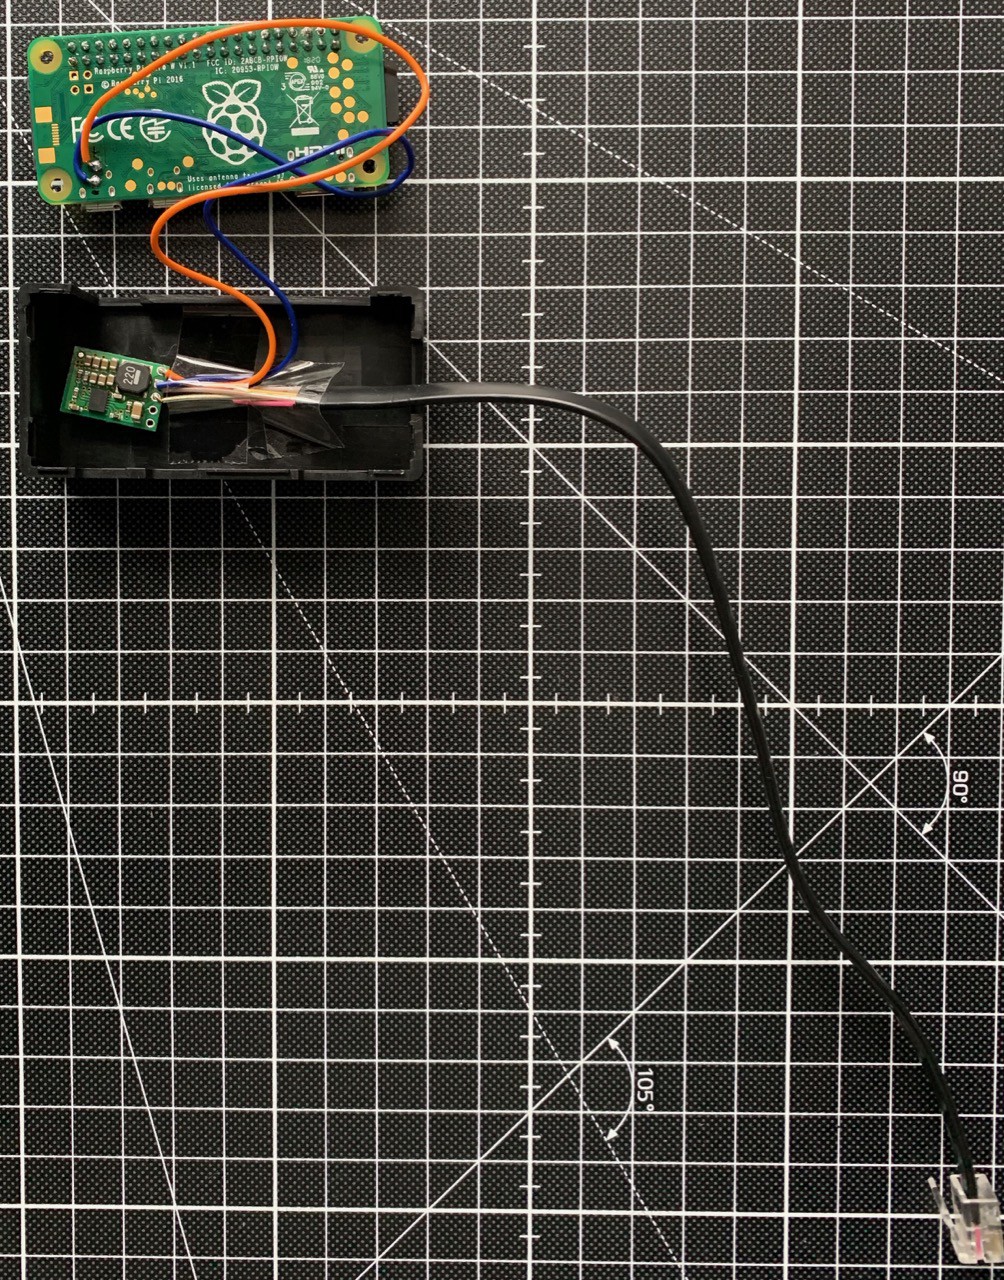
12/16/2018 at 12:48 • 0 commentsFinally the step-down arrived. I am using a Pololu D24V10F5. To connect to the AUX port I ordered a RJ12 to RJ12 cable and cut it in half. Pin3 on the AUX port is +12V and PIN 5 is GND. Have a look at the instructions for more details.
![]()
-
Ready to go SD card image
12/12/2018 at 07:25 • 0 comments*UPDATED* fixed a few config issues. Should work now as described.
I posted an SD-card image on DropBox: https://www.dropbox.com/s/idmsyydqbjci9l3/pi_for_telescope.dmg.zip?dl=0
You need an 16 GB (8GB might work) SD card, larger are OK as well of course.
*** UPDATE: Even I am using an 8GB to create the image it seems to be too big to write it back to an 8GB card. So please use a 16GB card. It's anyway difficult meanwhile to get an 8GB card. ***
It should boot on PI 2 B+ and PI 3 B+ and also on PI Zero W. Username: pi Password: raspberry
I finished all config steps I described in my project. But there are a few to-do's;
- Wi-Fi is NOT configured. You have to configure yourself with sudo raspi-config. For Pi 2 B+ add a USB dongle of course.
- HDMI is not turned off to allow you to boot a PI Zero with keyboard and screen so you can configure the Wi-Fi
- System is prepared for RO, but booting RW. Just change /boot/cmdline.txt
- you can add a GPS, everything is configured, just connect the hardware.
- hand controller time is set from NTP or GPS
- location is set to a fixed location, have a look at /home/pi/hc-location.sh
- Check the script to disable the green LED and run it manually /home/pi-led-off.sh You might need to change one value for your hardware.
This should give you a quick start in just 30min.
Let me know if you found the little easter egg.
-
A litte bit of optimization
12/09/2018 at 14:30 • 0 commentsI am adding a few instructions for optimization.
- turn off HDMI, to save a little power.
- turn off LED after we send the time to the hand controller (and location)
- change to a RO filesystem, so a hard power cut should not cause any havoc on the SD card and increase the lifetime.
I have decided to setup two boxes. One PI zero W for observing from home:
- Wi-Fi via the home network. (and of course you have to make sure you have coverage where you are using the telescope.
- No GPS. I have not yet found a case for the PI where everything fit's in. So the location I am sending to the hand controller is fixed to my home location.
- Time is synced to NTP public NTP servers.
- I will use power from the telescope mounts AUX port with a RJ12 connector. (not yet finished)
Currently I have the time set on the HC after less than 60s.
Another unit, most likely a PI 3 B+ or PI 3 A+, as the cases have a little bit more space to add the additional components. Or maybe a PI Zero in a case of a PI 3.
- Wi-Fi via home or if out of reach enable Hotspot.
- With GPS to fetch time and location
- Power from the telescope mounts AUX port.
I dropped the idea of adding a RTC. NTP is pretty fast, and with the GPS I will have a super accurate time.
-
Time sync with GPS
12/07/2018 at 15:03 • 0 commentsStep 5 and 6 show how to add the GPS module to the PI and use it as a time source. This will be helpful if there is no internet connection.
-
Time sync with NTP and setting time on the Handcontroller
12/07/2018 at 15:00 • 0 commentsStep 3 and Step 4 show how to sync the time to a NTP server on the internet and set the time on the NexStar hand controller.
-
Setting up the PI and USB connection to the NexStar hand controller
12/07/2018 at 07:38 • 0 commentsIn the beginning I wanted to make things easy. No soldering required. As I do most observations from home I am in the range of my home Wi-Fi. The PI connects wireless to the network and power is supplied by a power adapter. Connection to the NexStar hand controller is over USB. I am using the micro-USB adapter that came with my PI Zero W and a USB to mini -USB cable.
After finishing Instruction Step 2 you have a replacement for a SkyFi3 adapter and can control your telescope over wireless for less than $50.
Raspberry PI wireless Telescope Control
Advanced SkyFi 3 replacement for Celestron