MasterOfNull
-
Get a grip
08/08/2019 at 06:29 • 0 commentsNo real time to work on stuff today, so I did a quick thingy. I added the grip to the top deck cover.
I could have just bought some grip tape (even in clear) for like $10 and been done with it, but you know me... why do anything the easy way.
First I tried heating sand to 500C and then sprinkling it on the polycarbonate. It did nothing and brushed right back off. So I started over with the bright idea of then heating it with a heat gun.
Heat, sprinkle, turn on the heat gun... blow away the sand. :) I laughed at myself.
So.. I gave up and did it the 'normal' way.
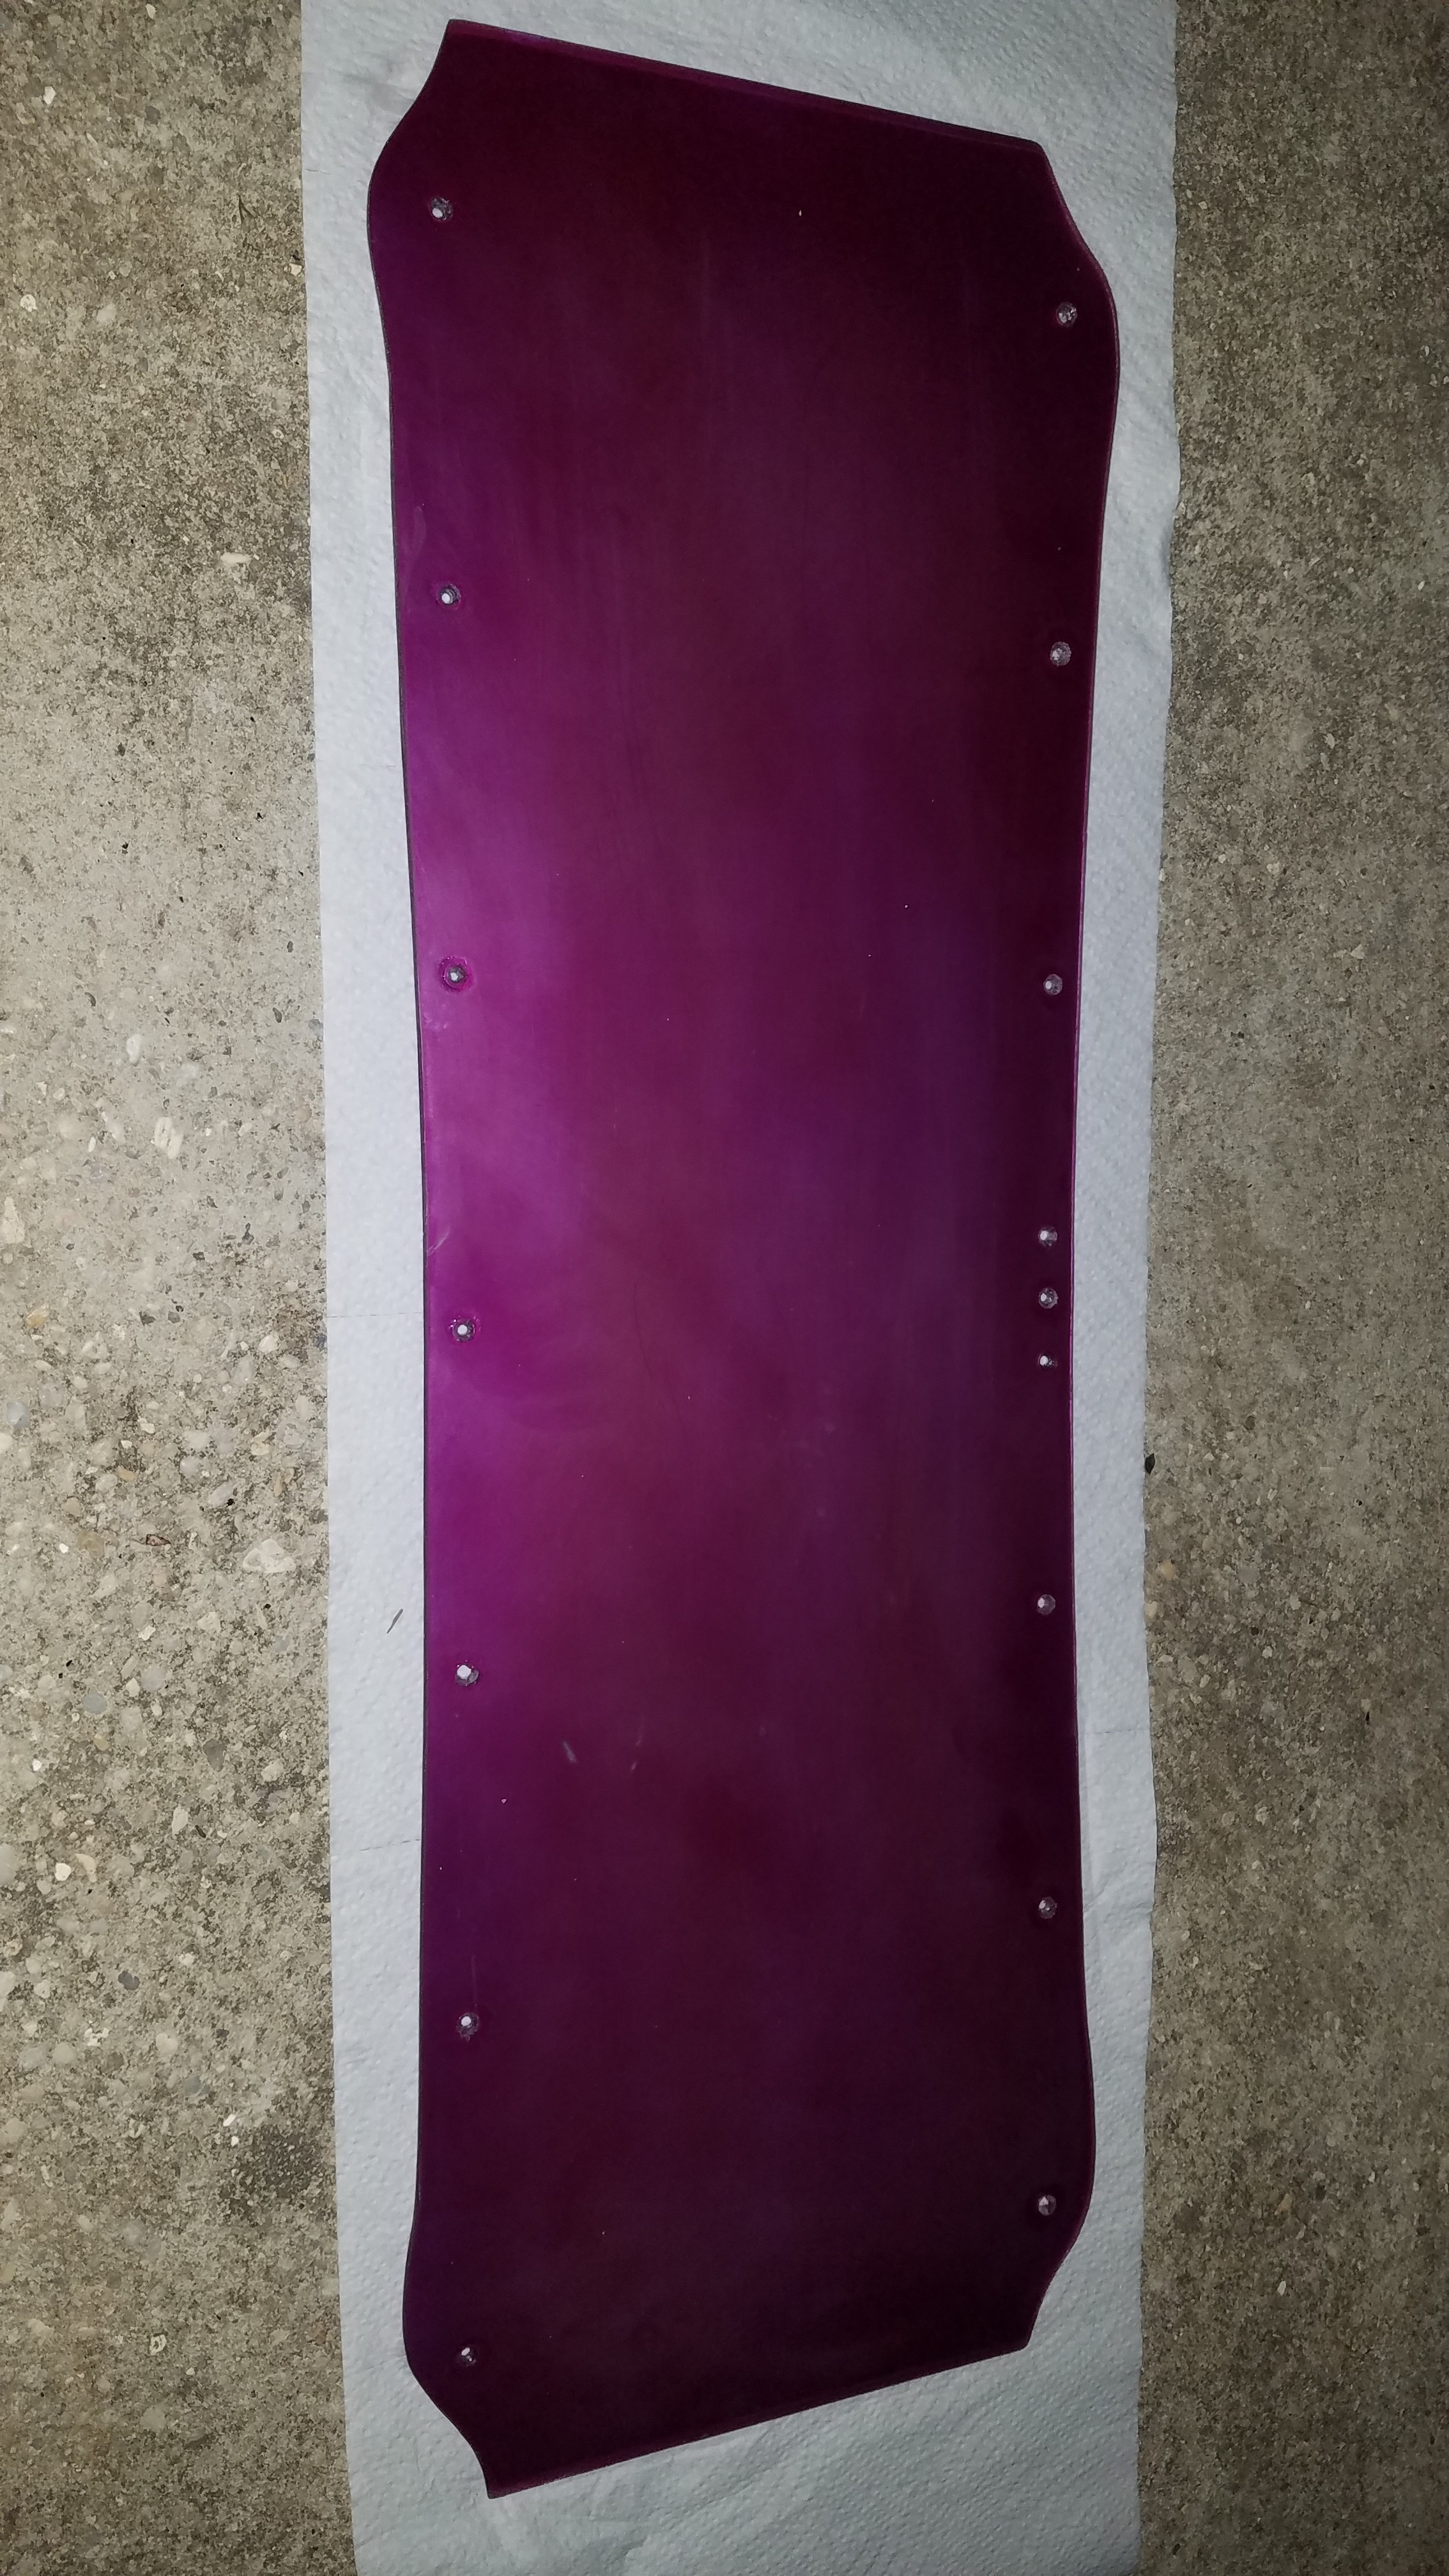
Wet sanded the cover with 1000 grit,
![]()
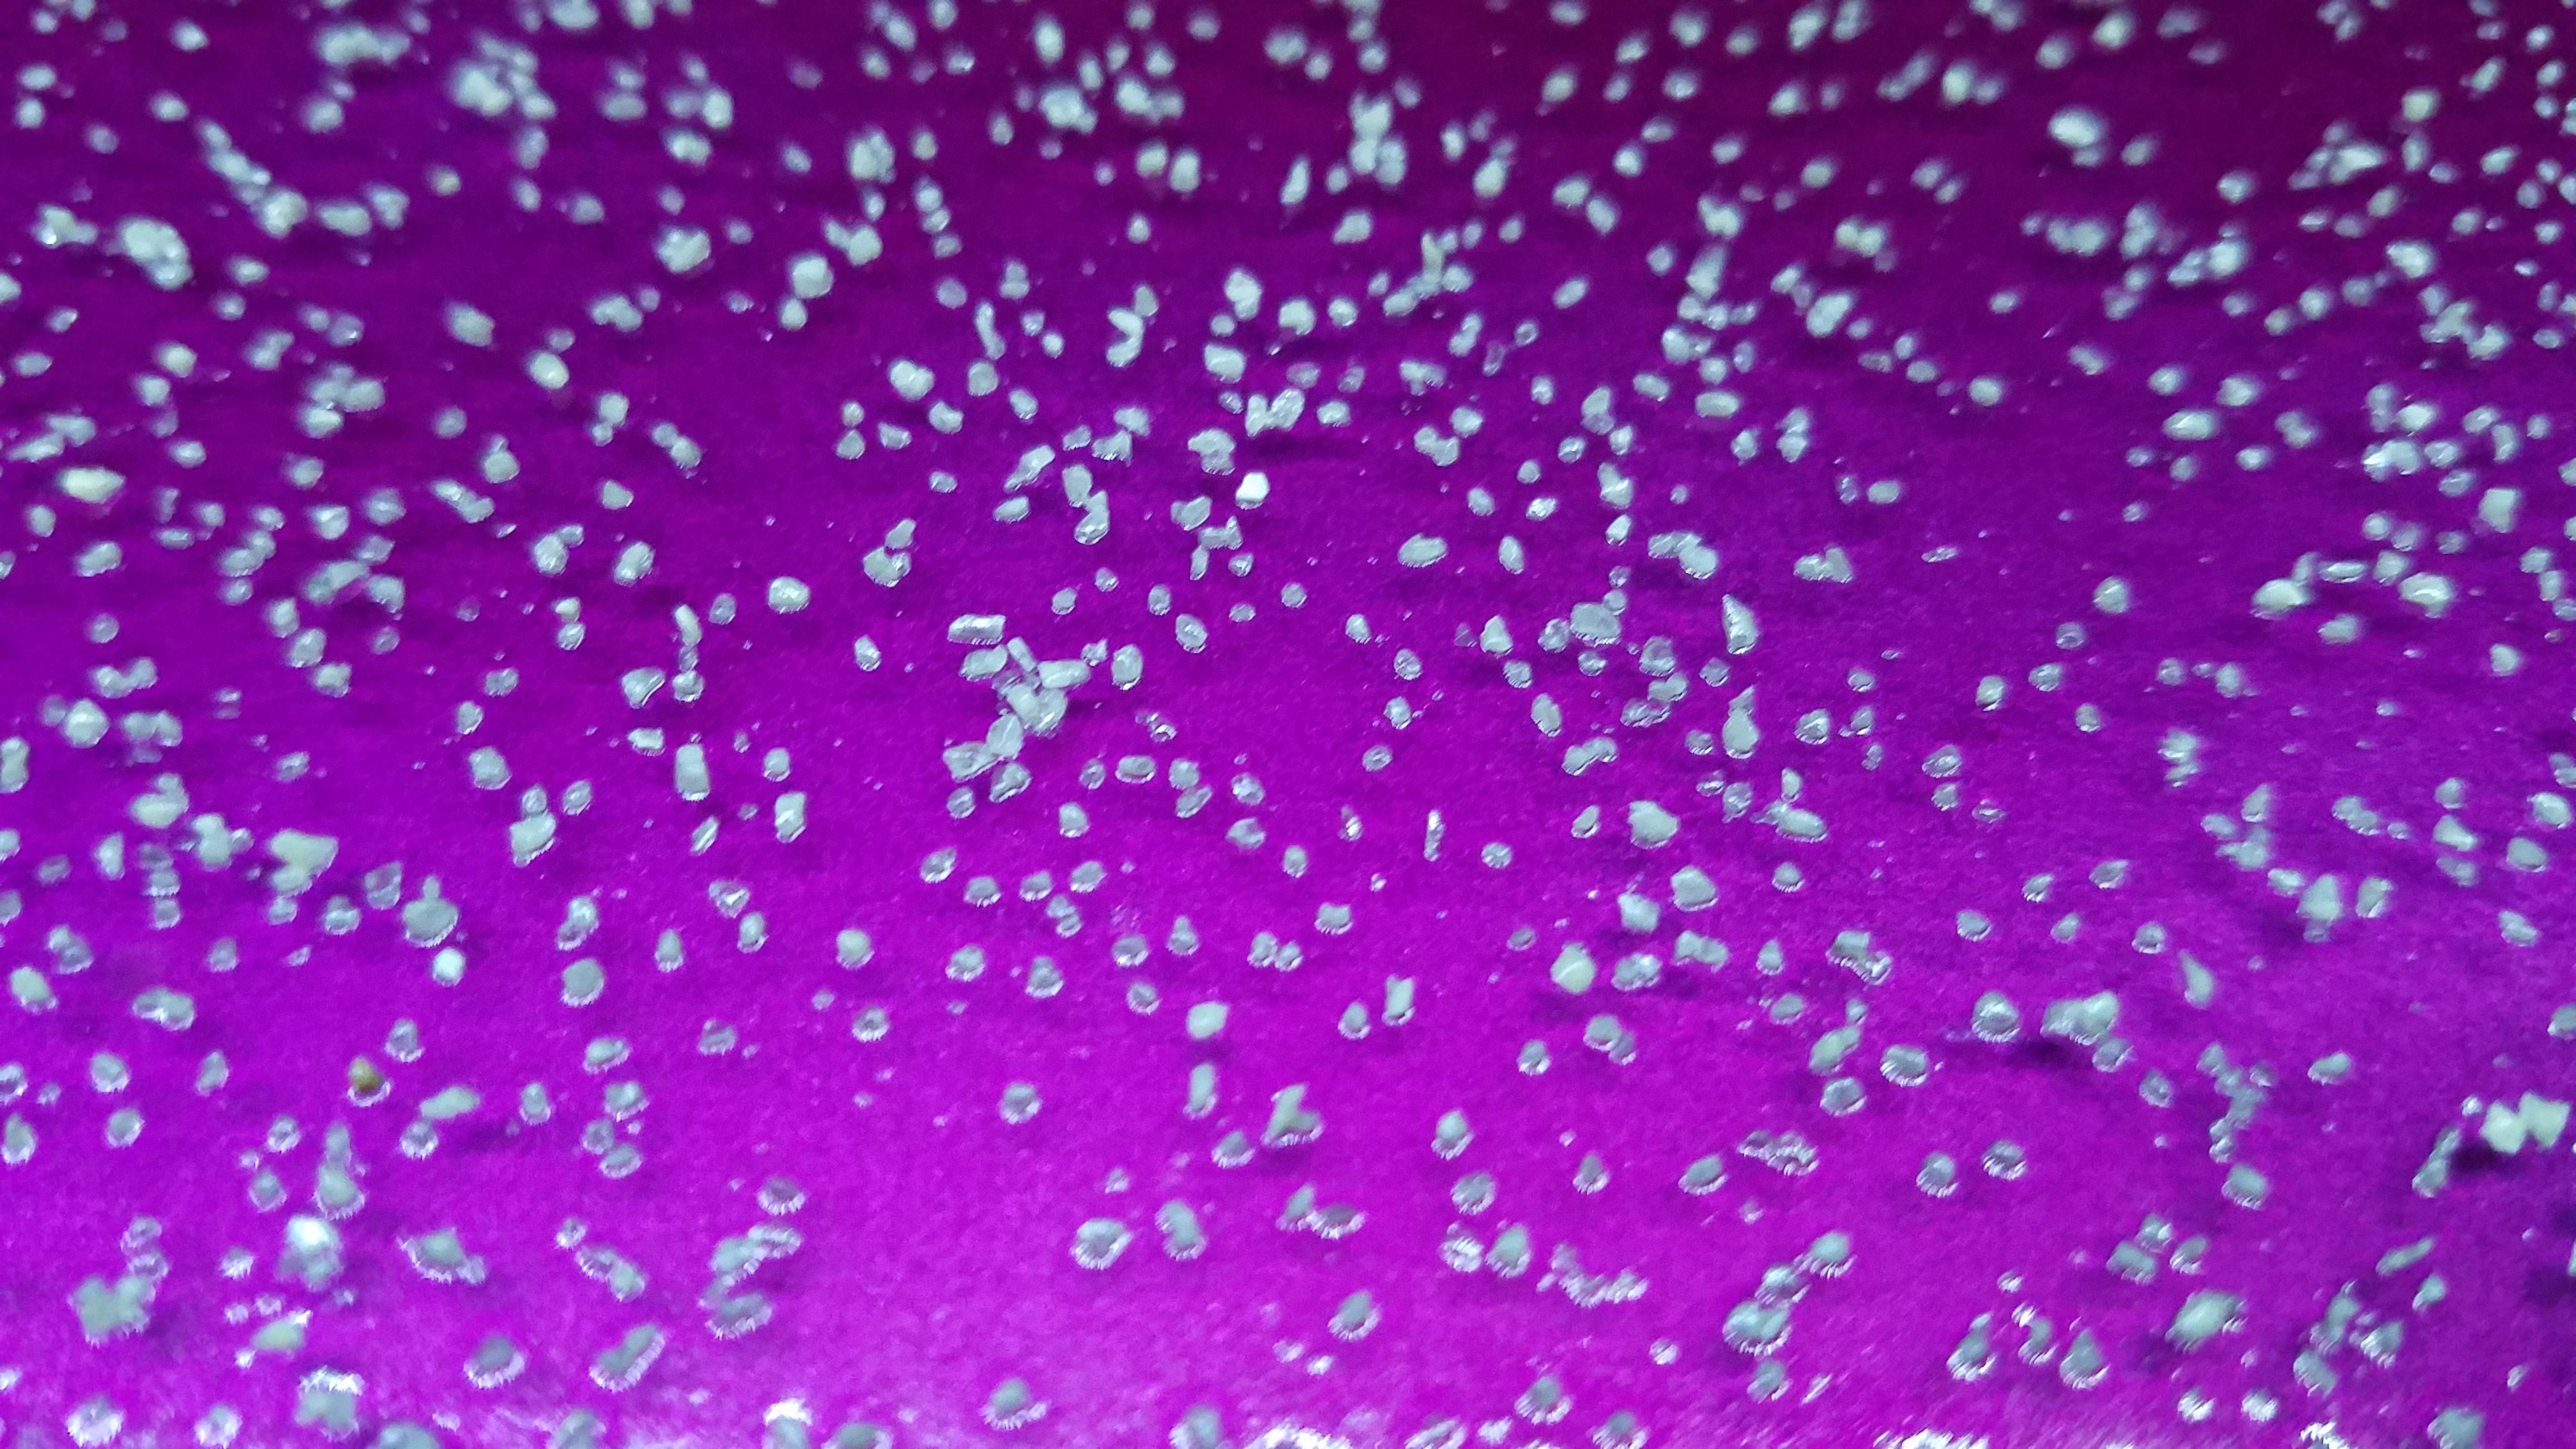
Sprayed it lighty with polyurethane and sprinkled it with sand.
Then it got two more heavy coats about 45 min apart.
![]()
Tomorrow it will bake in the sun all day.
-
Take the Blue Pill/VNC for OLED
08/07/2019 at 08:09 • 0 commentsBeen going down the road of building the remote and trying to fit everything on an Arduino Pro mini 3.3v 8Mhz. It's not been going well. I can fit all the libraries I need, set everything up for communicating, and establish a loop, but then there is not much room left for logic and actually doing stuff like drawing to the display.
I've been toying with the idea of just rendering everything on the mountainboard CPU (Blue Pill) and then streaming just the raw content of the framebuffer to the remote display. I think that might actually work pretty well with my 128x32 monochrome display as the the whole framebuffer fits in 4096 bits. Even at the lowest data rate for the NRF24L01 module, that means I can still get 60fps. Sending the whole content also means missed frames wouldn't matter much.
I found the commands I would need to dump the internal display buffer and pipe it over. I would run all my drawing commands on the STM32 which would modify the local buffer, and then on every transmission from the remote I send those buffer contents back. The remote becomes a dumb terminal.
Then I killed my first Pro mini when a fleck of loose solder shorted two pins near reset.
I think I might undervolt a Nano and be done with it. Alas, the Blue Pill is a little too big to fit in the controller.
Speaking of the Blue pills, I flashed a bootloader! Not sure it works yet as I believe I need to do the D+ data line resistor swap thingy on this one. It doesn't show up via lsusb when I plug it in. :(
-
Battery and BMS bodgery
08/01/2019 at 13:46 • 0 commentsI repainted the bottom cover as I didn't like how my slots for the lights turned out. In the process of removing the paint, the polycarbonate got a haze on it that I never got rid of again. Polishing it would leave a coat of wax on it that I wouldn't be able to remove with what I have on hand, so I left it that way. I can come back to this later when I have more fresh polycarbonate to play with.
![]()
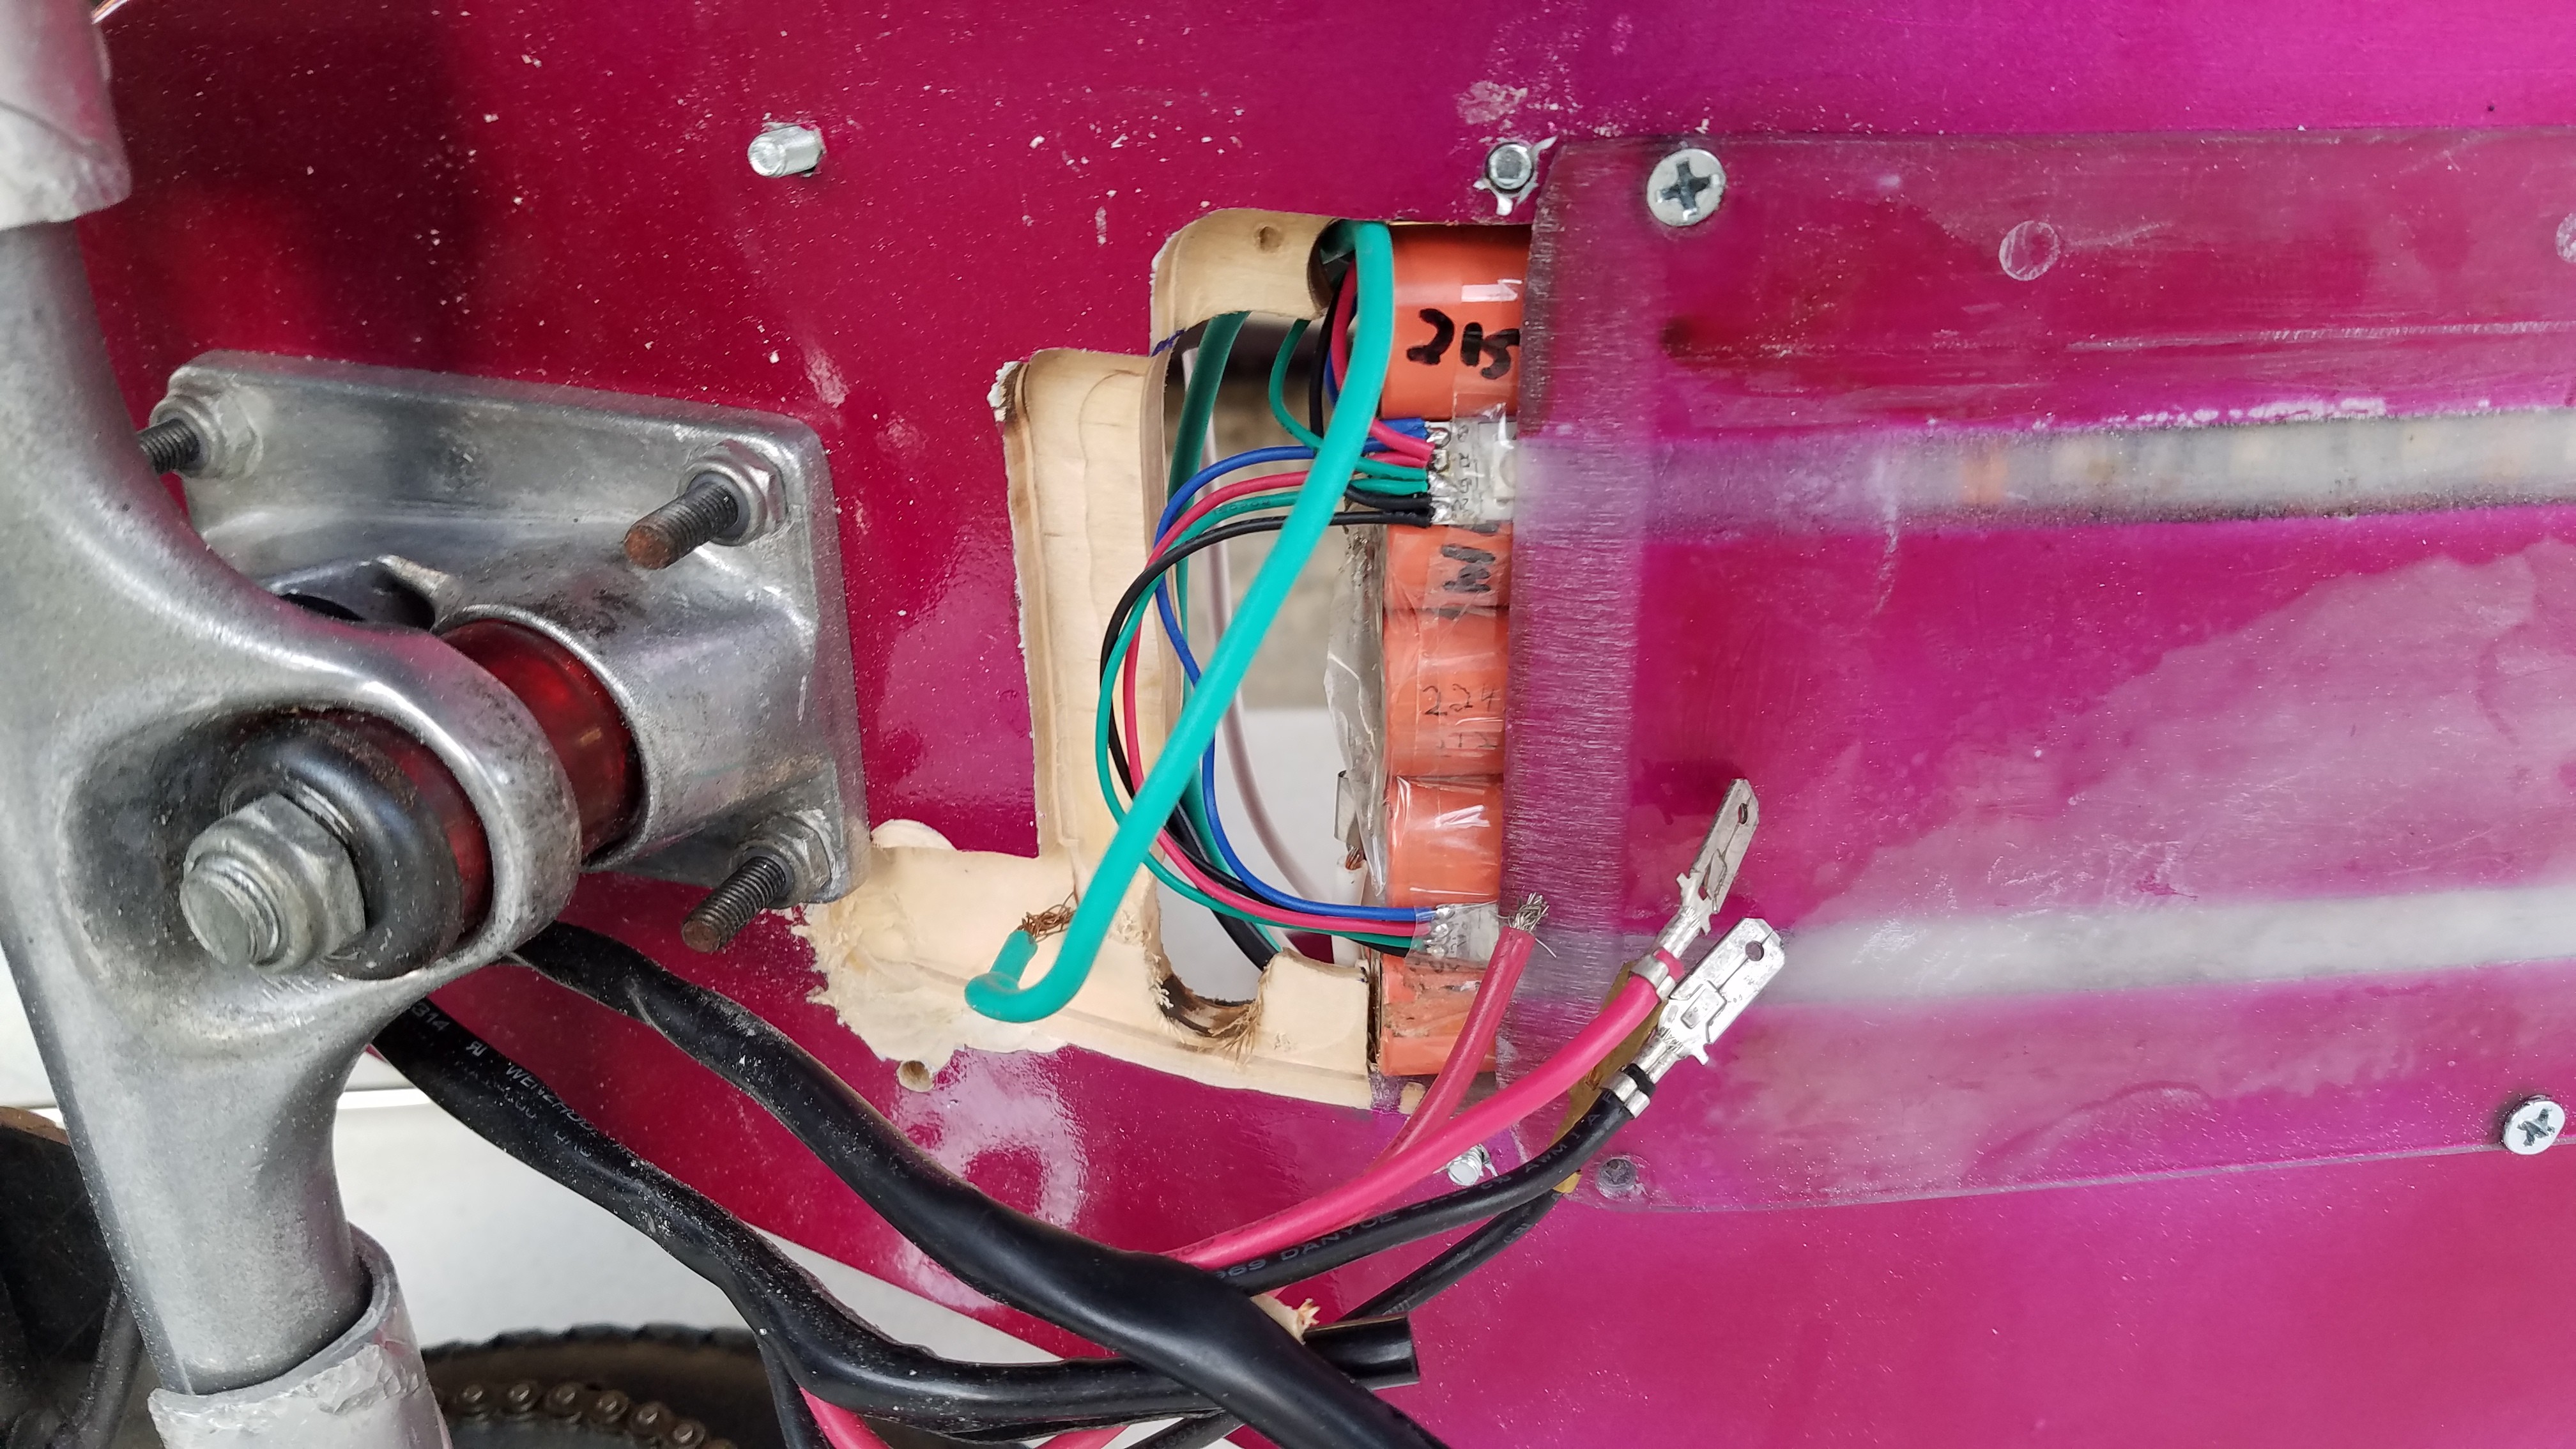
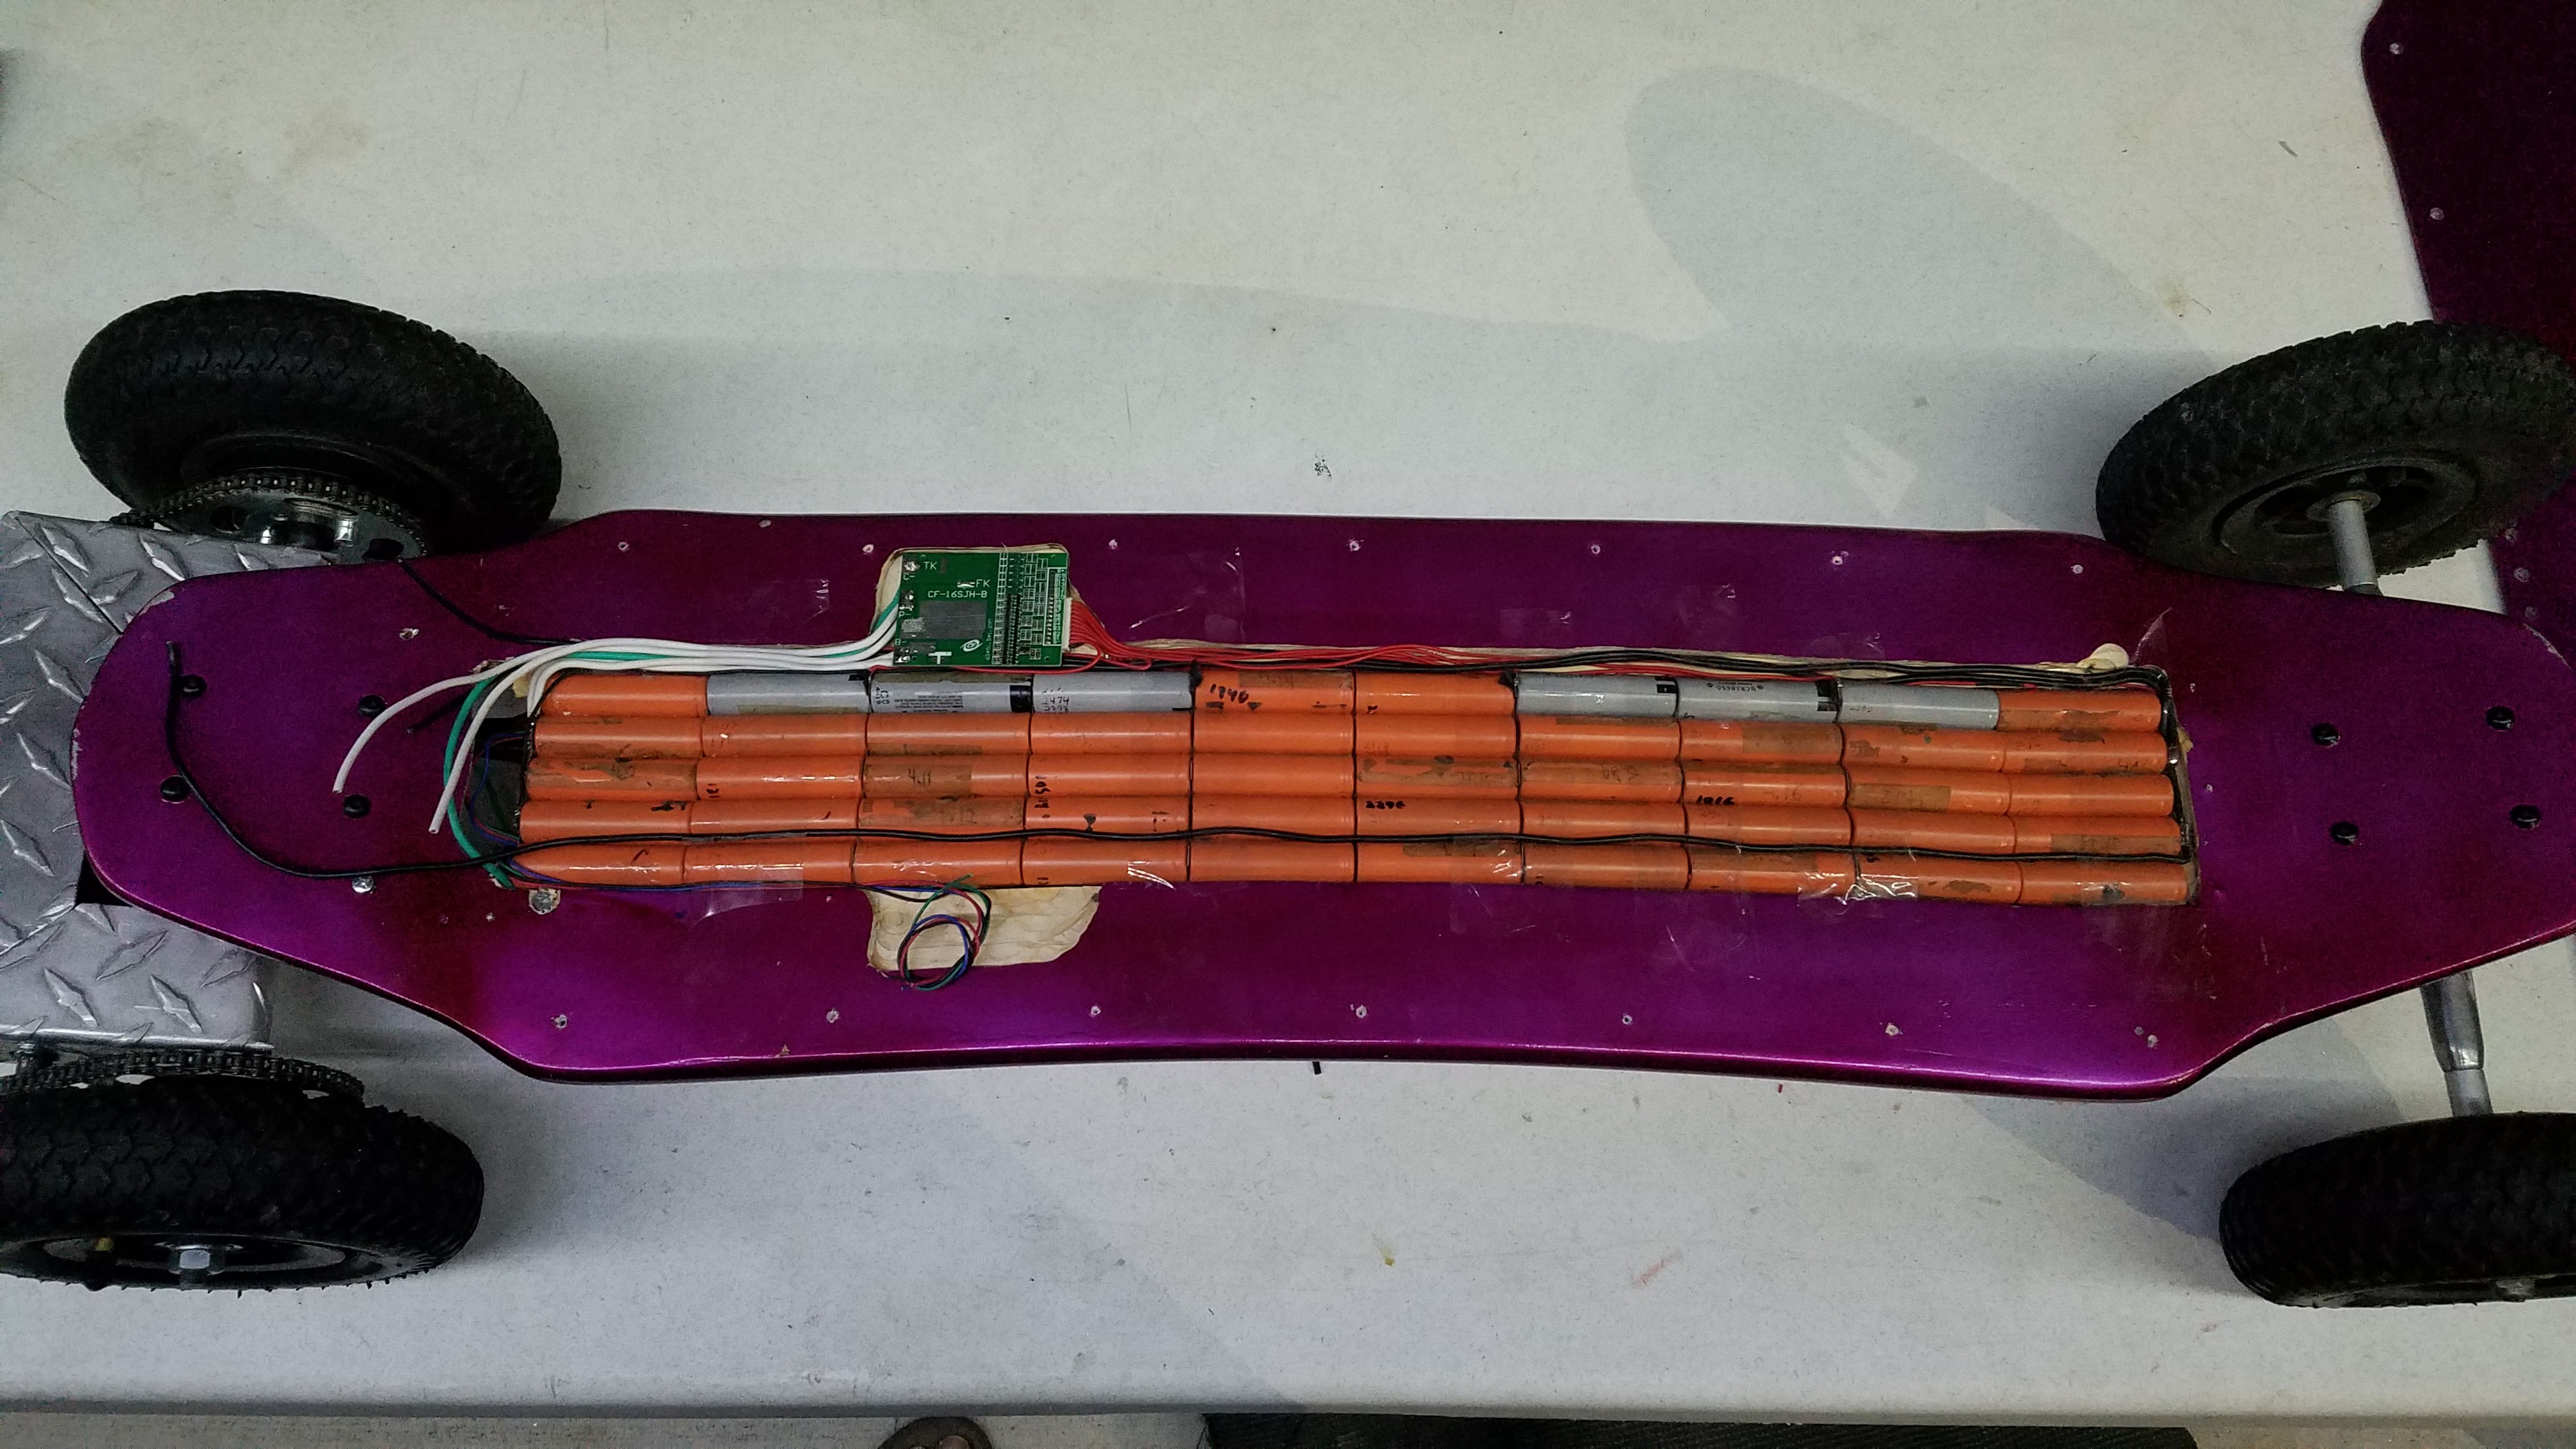
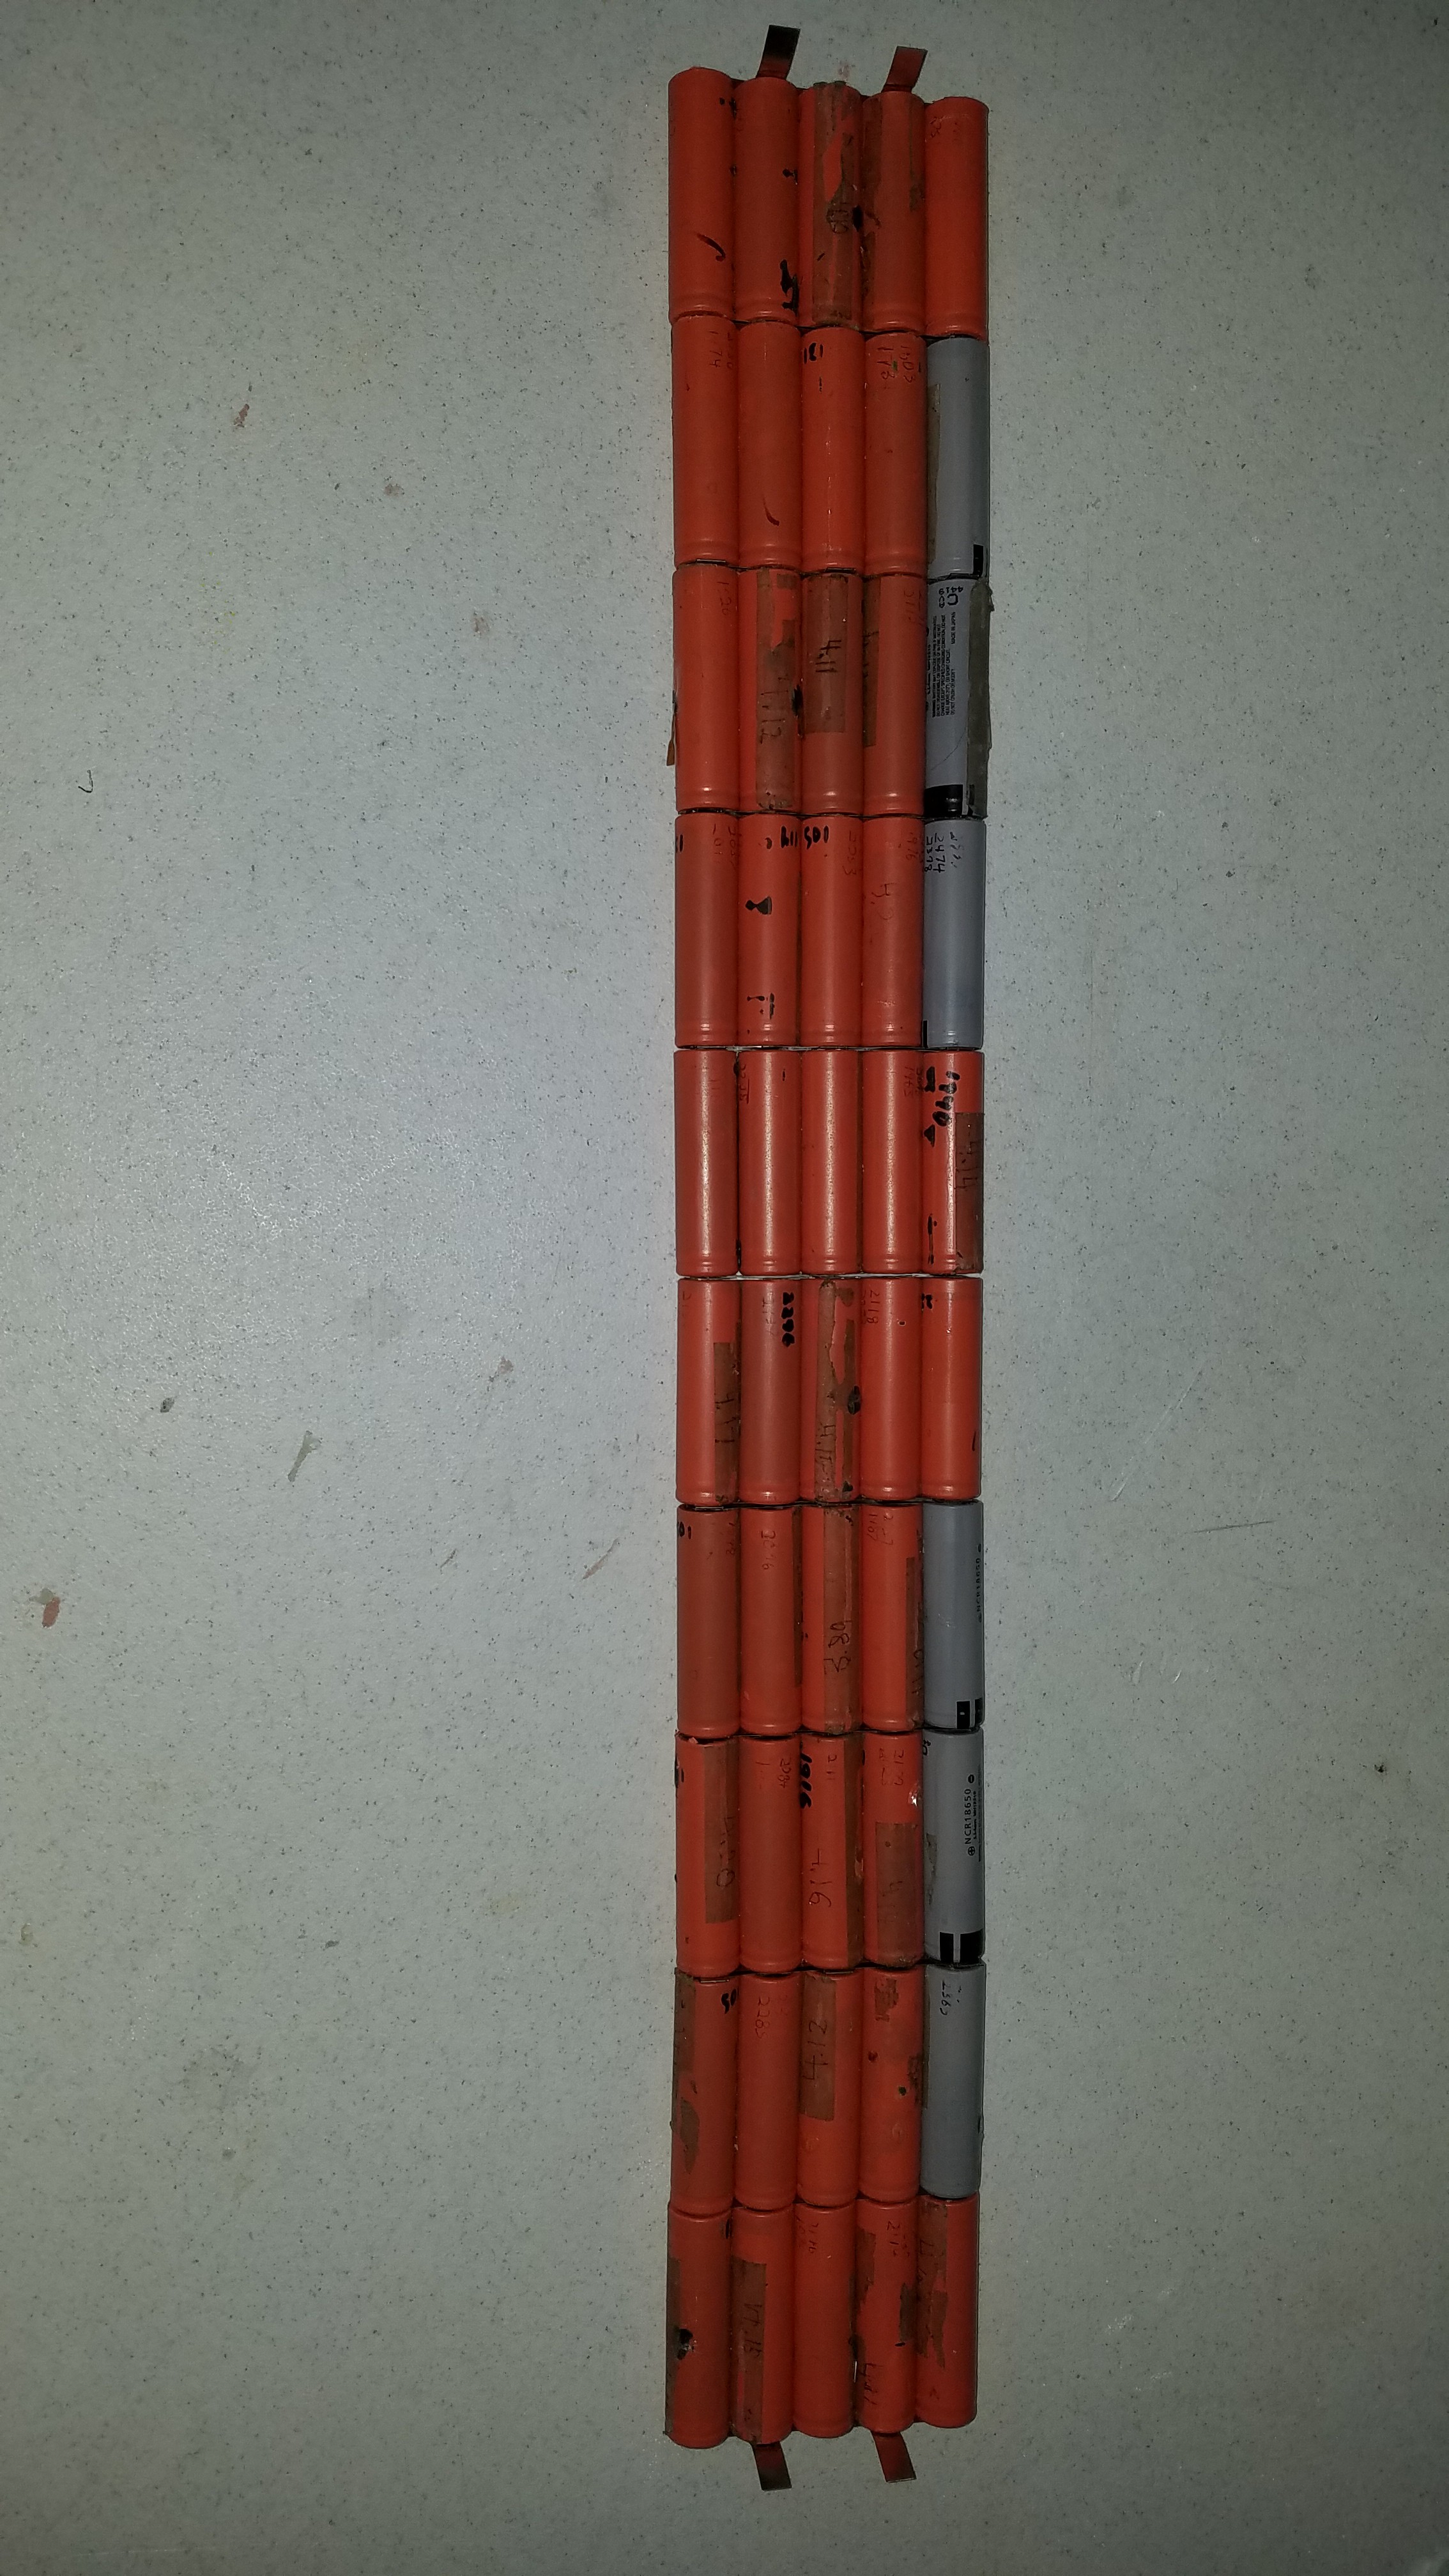
The battery was installed and wired up to the BMS. After some sparks flying and a close call touching an adjacent cell with the soldering iron tip, all of the balancing wires got a spacer of heat shrink tubing to protect the can of the lower cell from shorting to my folded nickel strips.
![]()
Power delivery is via two 12 gauge stranded wires in parallel which should allow me to draw 40A without heating. The 1.0C rating of these batteries is about 2500mAh, so for a 40A draw, that would put my 5 parallel cells discharging at 3.2C. That should be a pretty comfortable rate for them.
![]()
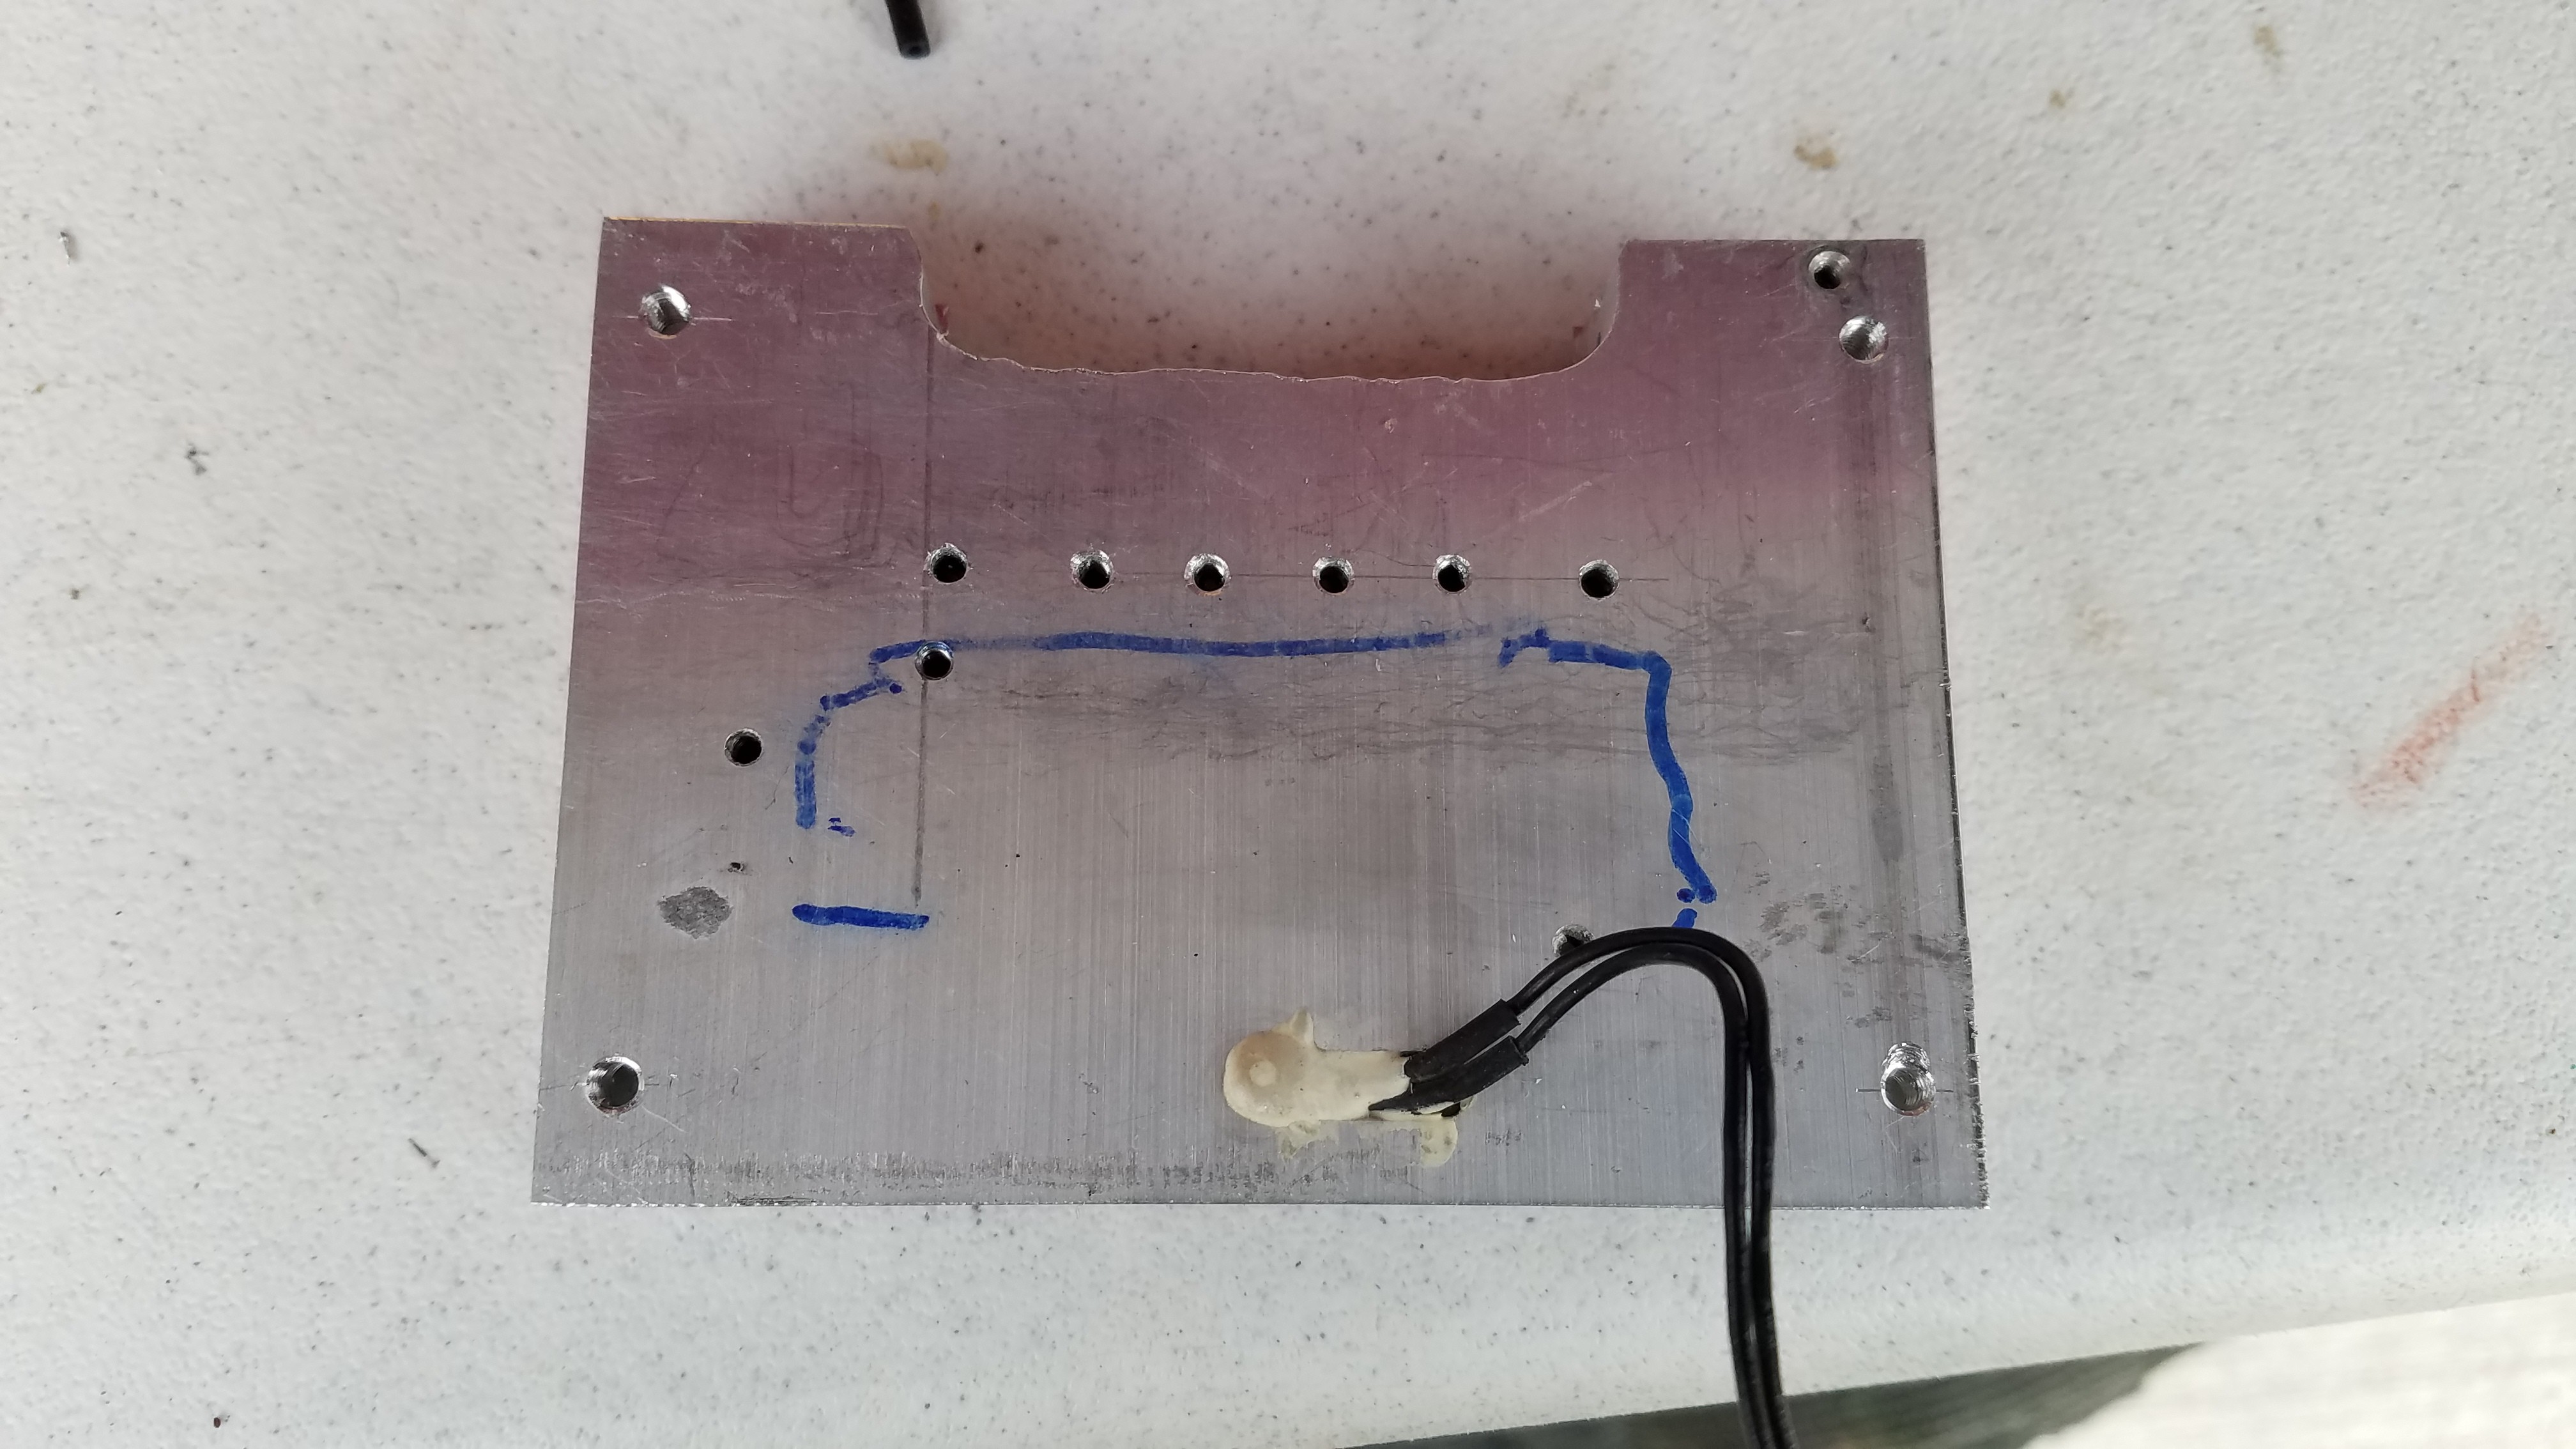
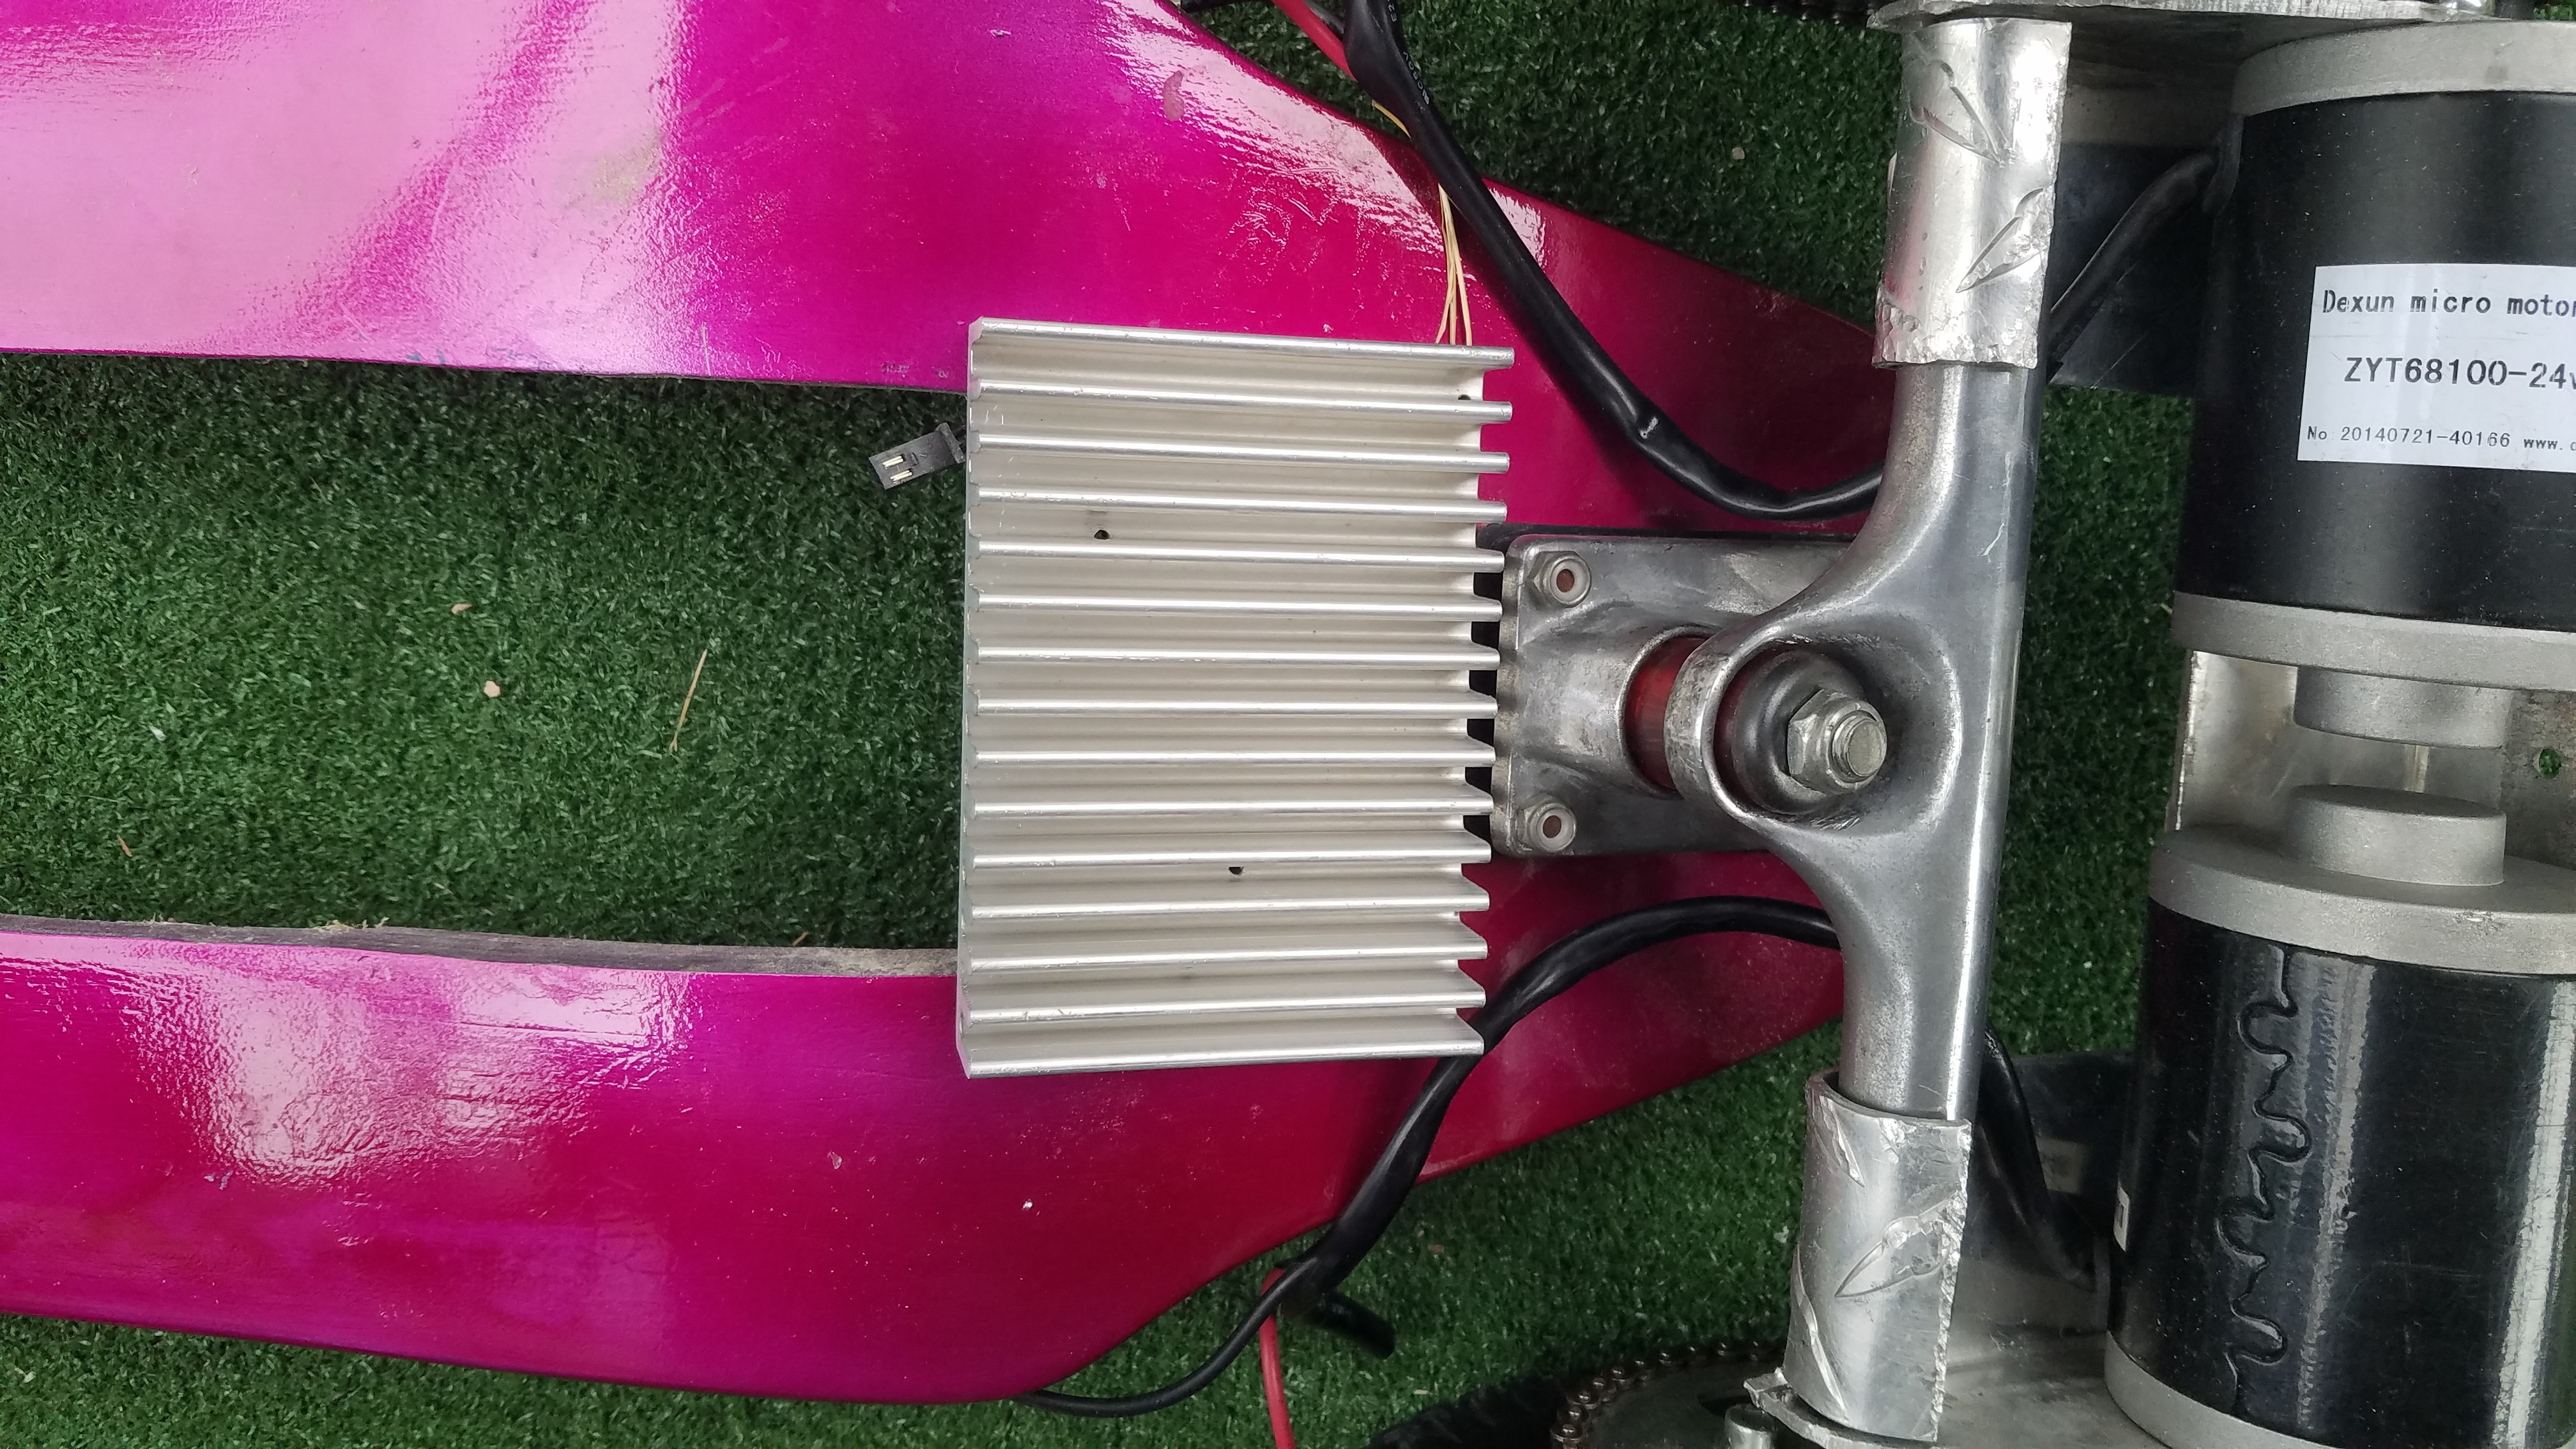
The heat sink got drilled and tapped with M4 screw holes in the corners for mounting, and M3 holes for the six mosfets which will be providing the motor control. This will give me independent control over each motor utilizing two N channel mosfets in parallel for forward, and one P channel (with an NPN transistor driving it) for braking. I've also included a pair of external schottky diodes to make coasting/passive braking regenerative. Active braking will just dump the power as heating of the motor windings, but I don't believe it will be used much anyway. The heatsink also got a slot cut with a wood router to make it fit better close up to the truck. That was really dangerous... and I would not recommend trying it.
-
Pockets
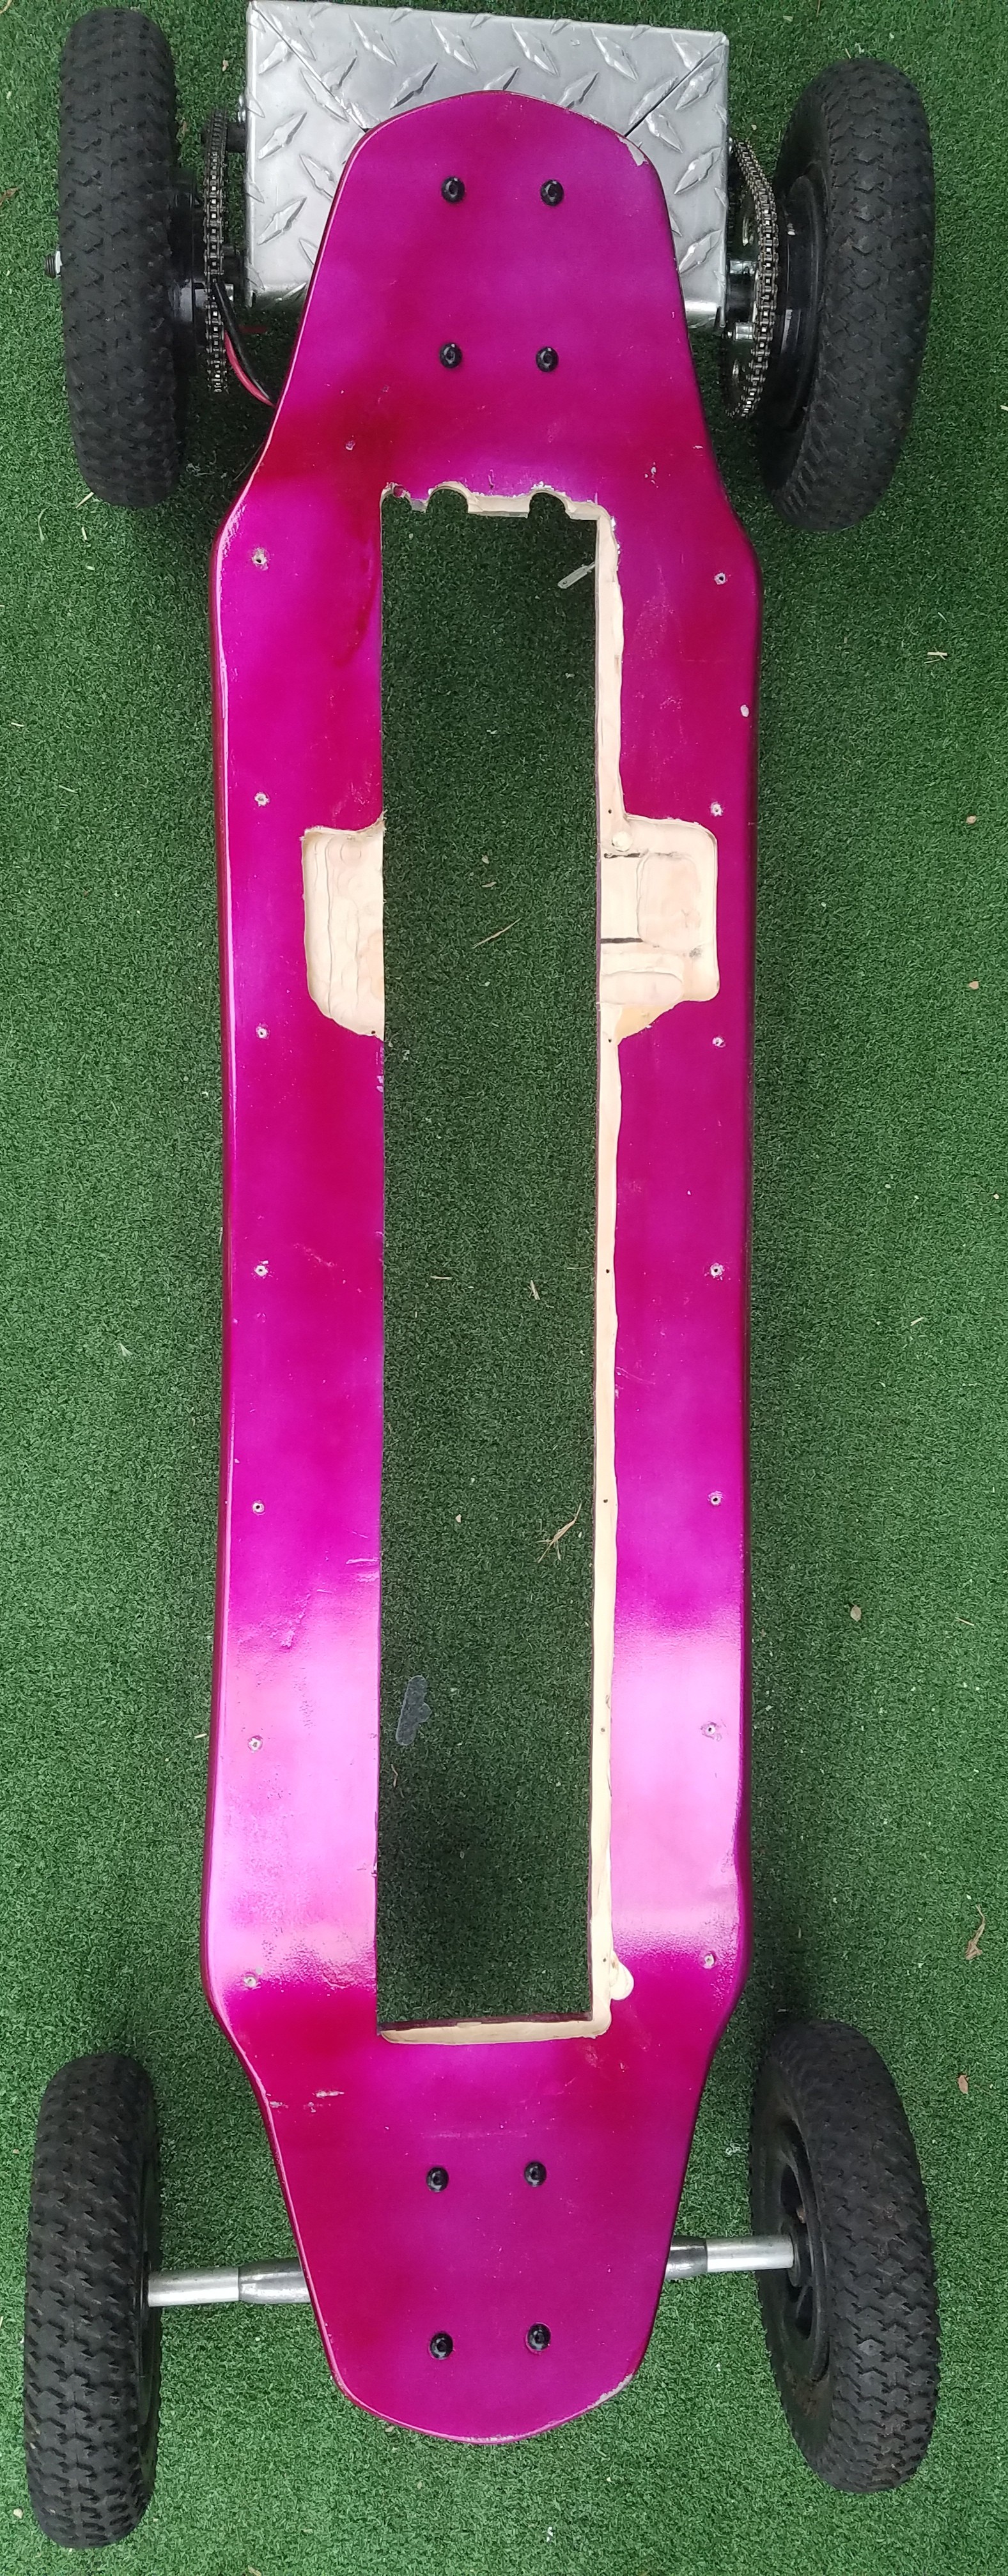
07/30/2019 at 00:24 • 0 commentsRouted out the pockets for the receiver (I have yet to build), BMS system/charger, heat sink/mosfets, wires, etc... It's not very clean, but it is inside the board, so...
![]()
![]()
Good thing Ryden is not that heavy. I'm running out of board here beyond what the covers will provide in stability.
-
Pink/purple pretty paint
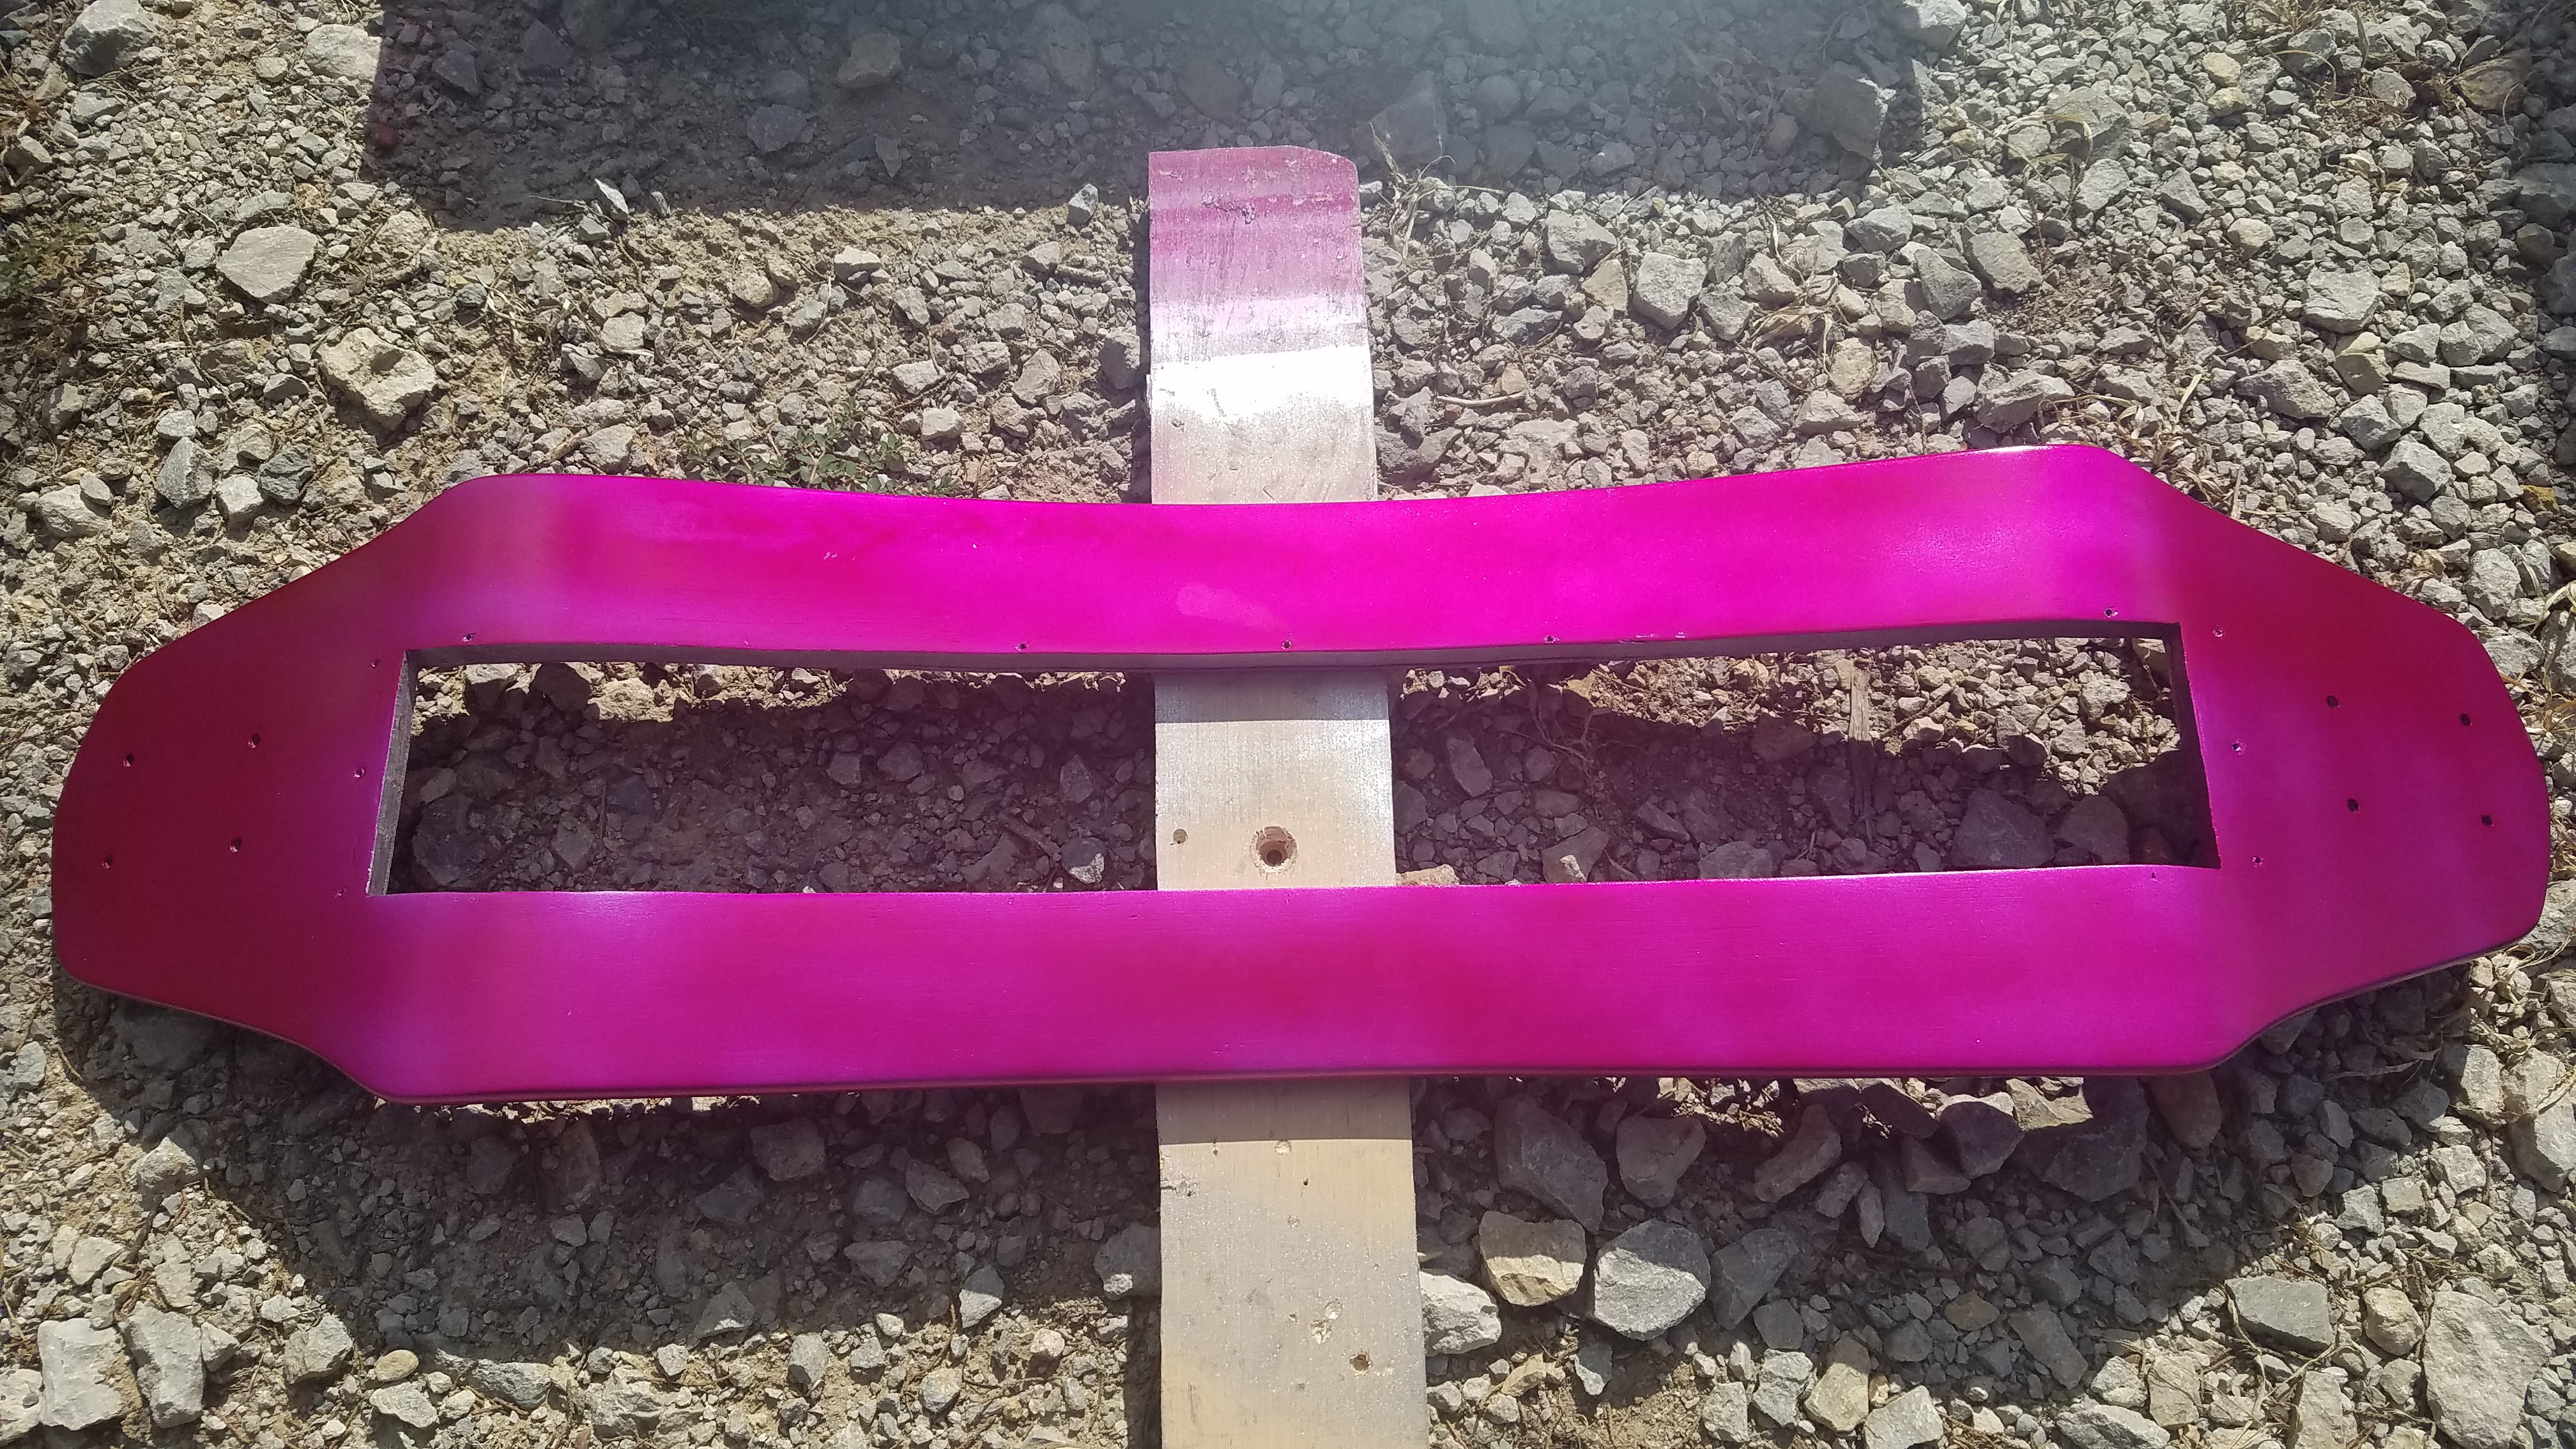
07/28/2019 at 23:39 • 0 commentsFinished up the painting.
The board got a couple coats of bondo and sanding, then a couple coats of silver metalic paint and more sanding as a base.
Over that, I applied some Metalcast purple. It came out more pinkish.
![]()
I had intended on doing this as a base for a fake carbon fibre effect I'm pretty good at, but Ryden seems to like it how it is. Hugging without touching..
![]()
The covers get the reverse treatment as being transparent, they can be painted on the back side. So the Metalcast paint went on first, then the silver.
![]()
![]()
The bottom cover didn't get the silver coat yet as I need to mask off where the lights are going to shine through first, and I'll need it back on the board to mark that.
<EDIT>
The board got a coat of polyurethane tonight, so purple it is.
</EDIT>
-
Bondo and bending batteries
07/28/2019 at 05:31 • 0 commentsThe chains got shortened. Punching the pins out straight away didn't work. I had to push the pin one way, grind the flared ends with a diamond bit in a Dremel, and then punch them back through the other way. The pins were harder than my file..
![]()
The board got coated in body filler today a number of times and sanded. I decided to plug the holes for the foot straps and clean up the transition better where I added the plywood to the top. It then got a couple coats of silver paint which will get wet sanded tomorrow.
Silver isn't the color the board will be, but it needs to be the base color for the effect I'm going for. More later..
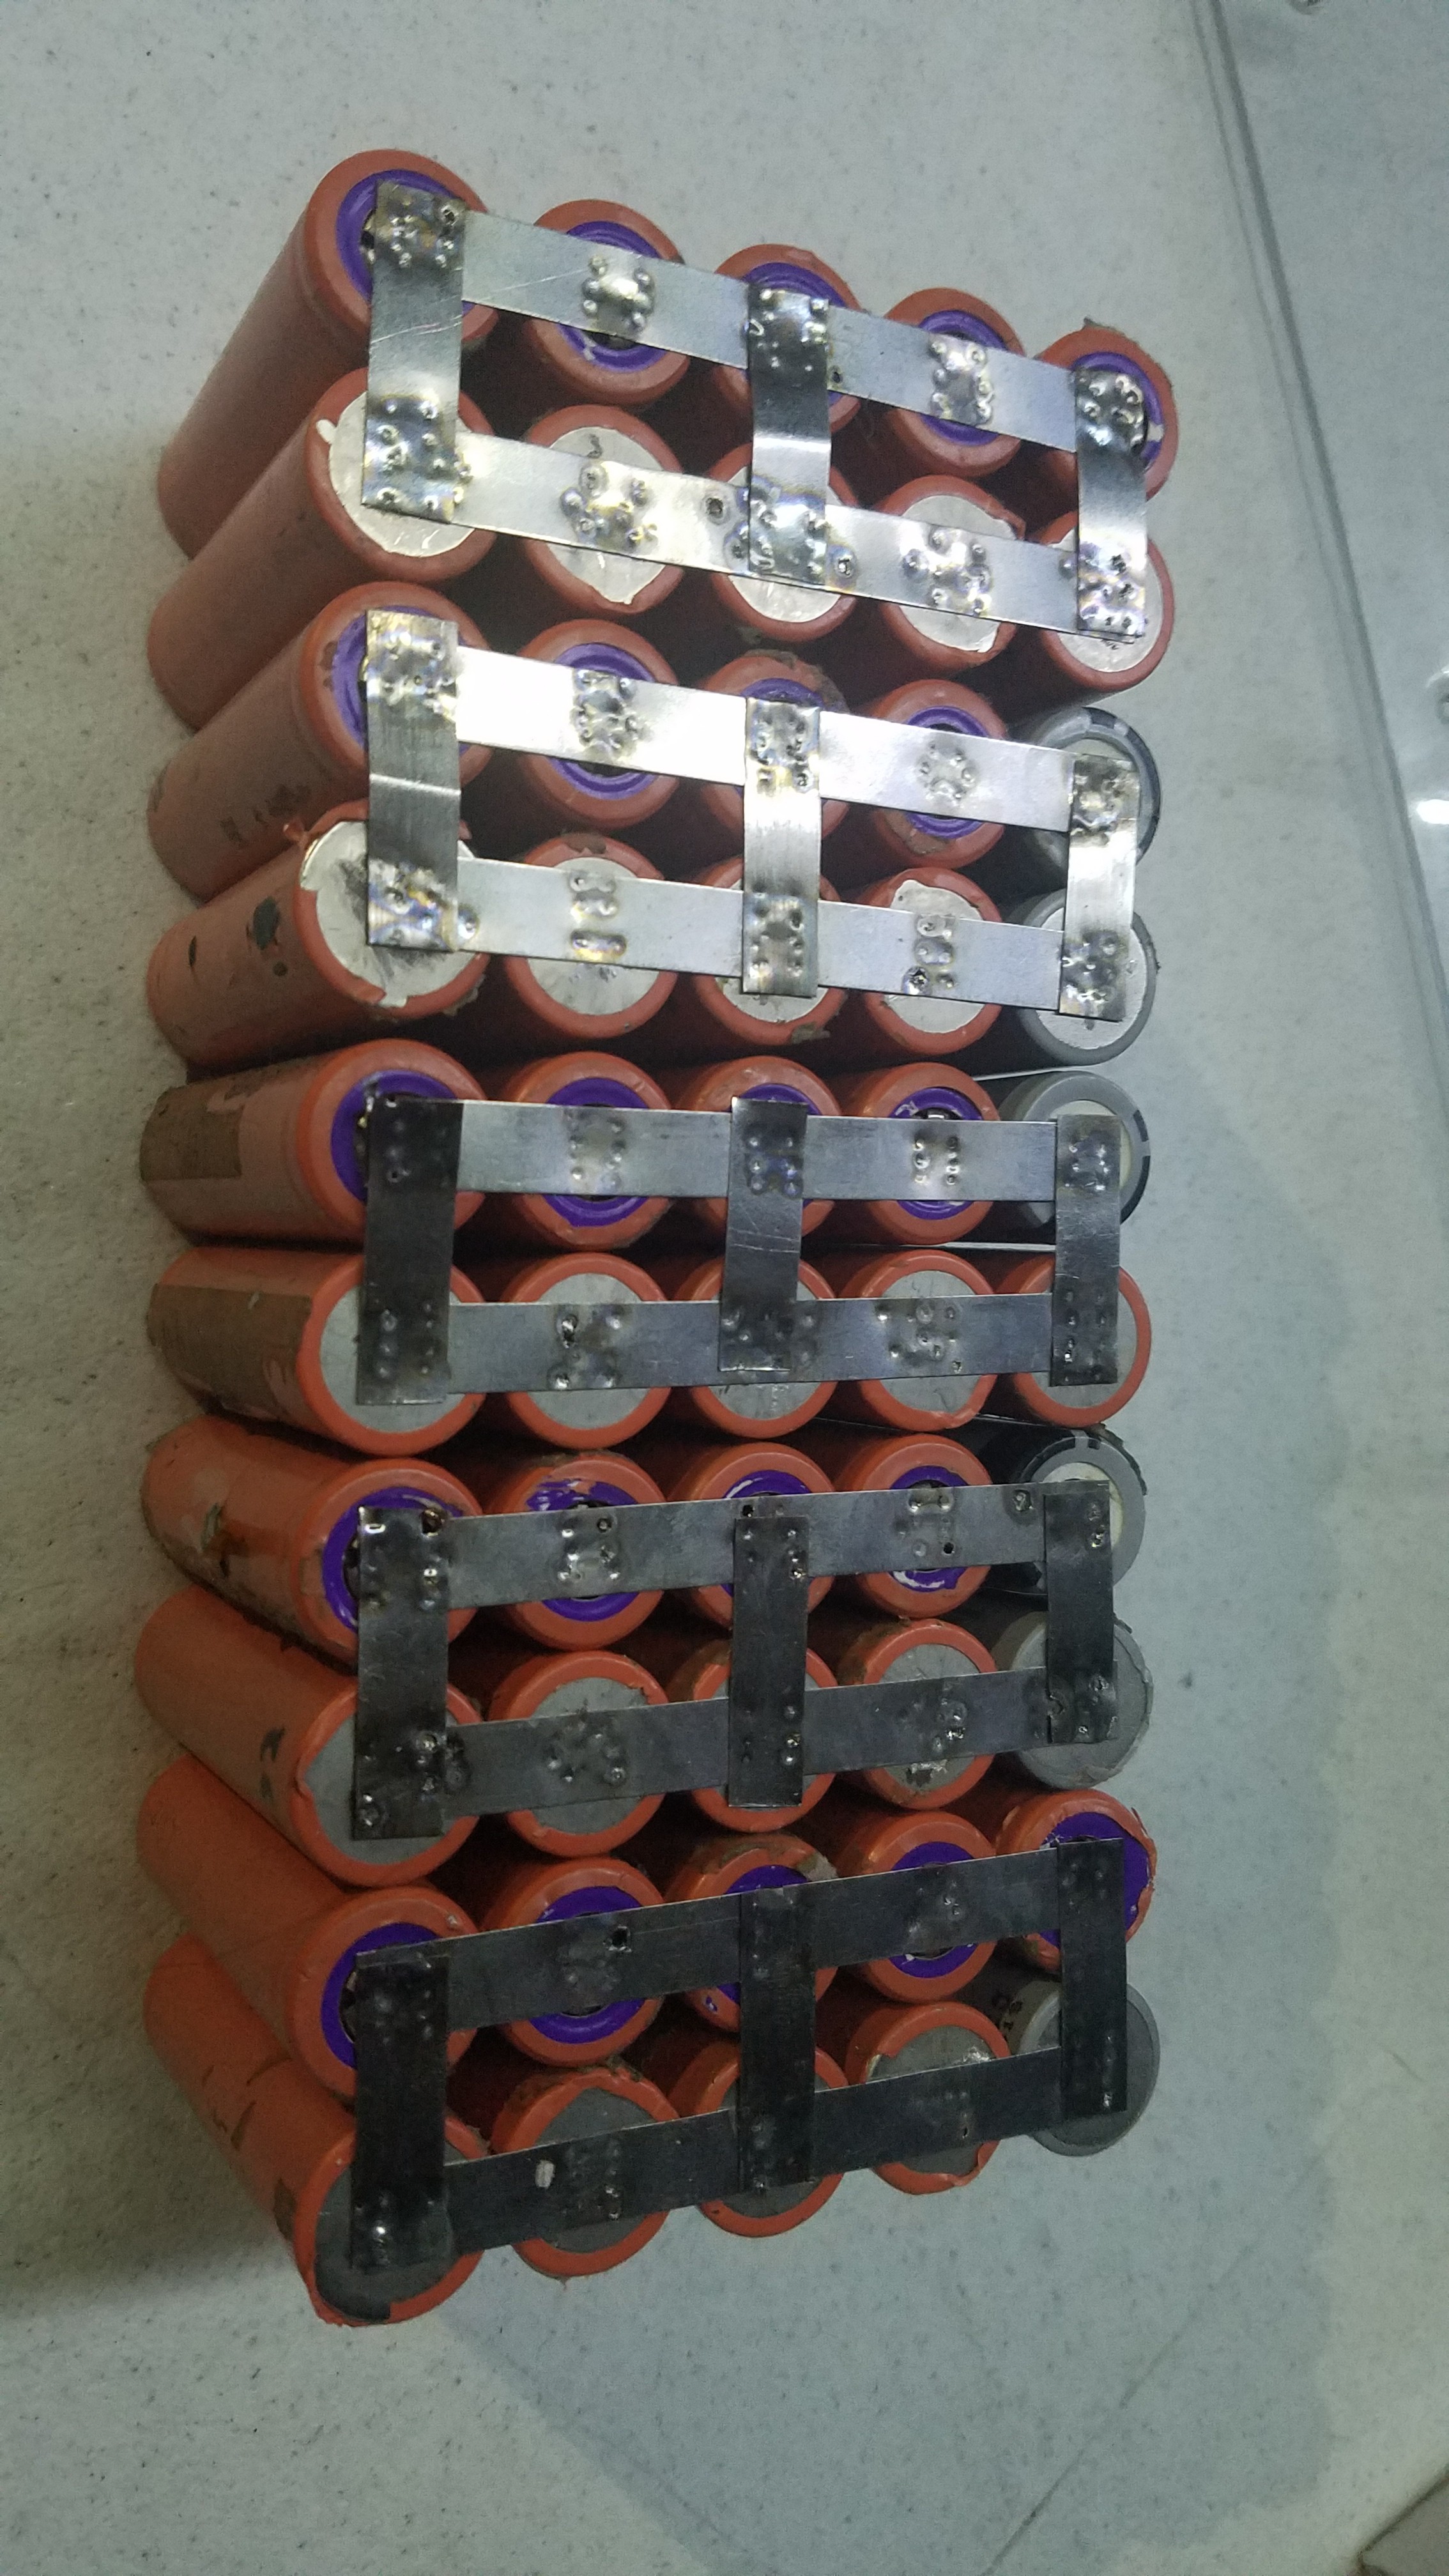
I figured out why my welds sucked. My battery was basically dead. When I went to charge it the other day, it didn't. I could not be bothered to find my actual battery charger as I had a 14v wall wart handy. When I charged it up today, it took most of the day to do it. I went over the sucky ones again and we are good to go. Kinked the connecting straps...
![]()
Then I folded it flat into it's final form, ready to go in the board.
![]()
-
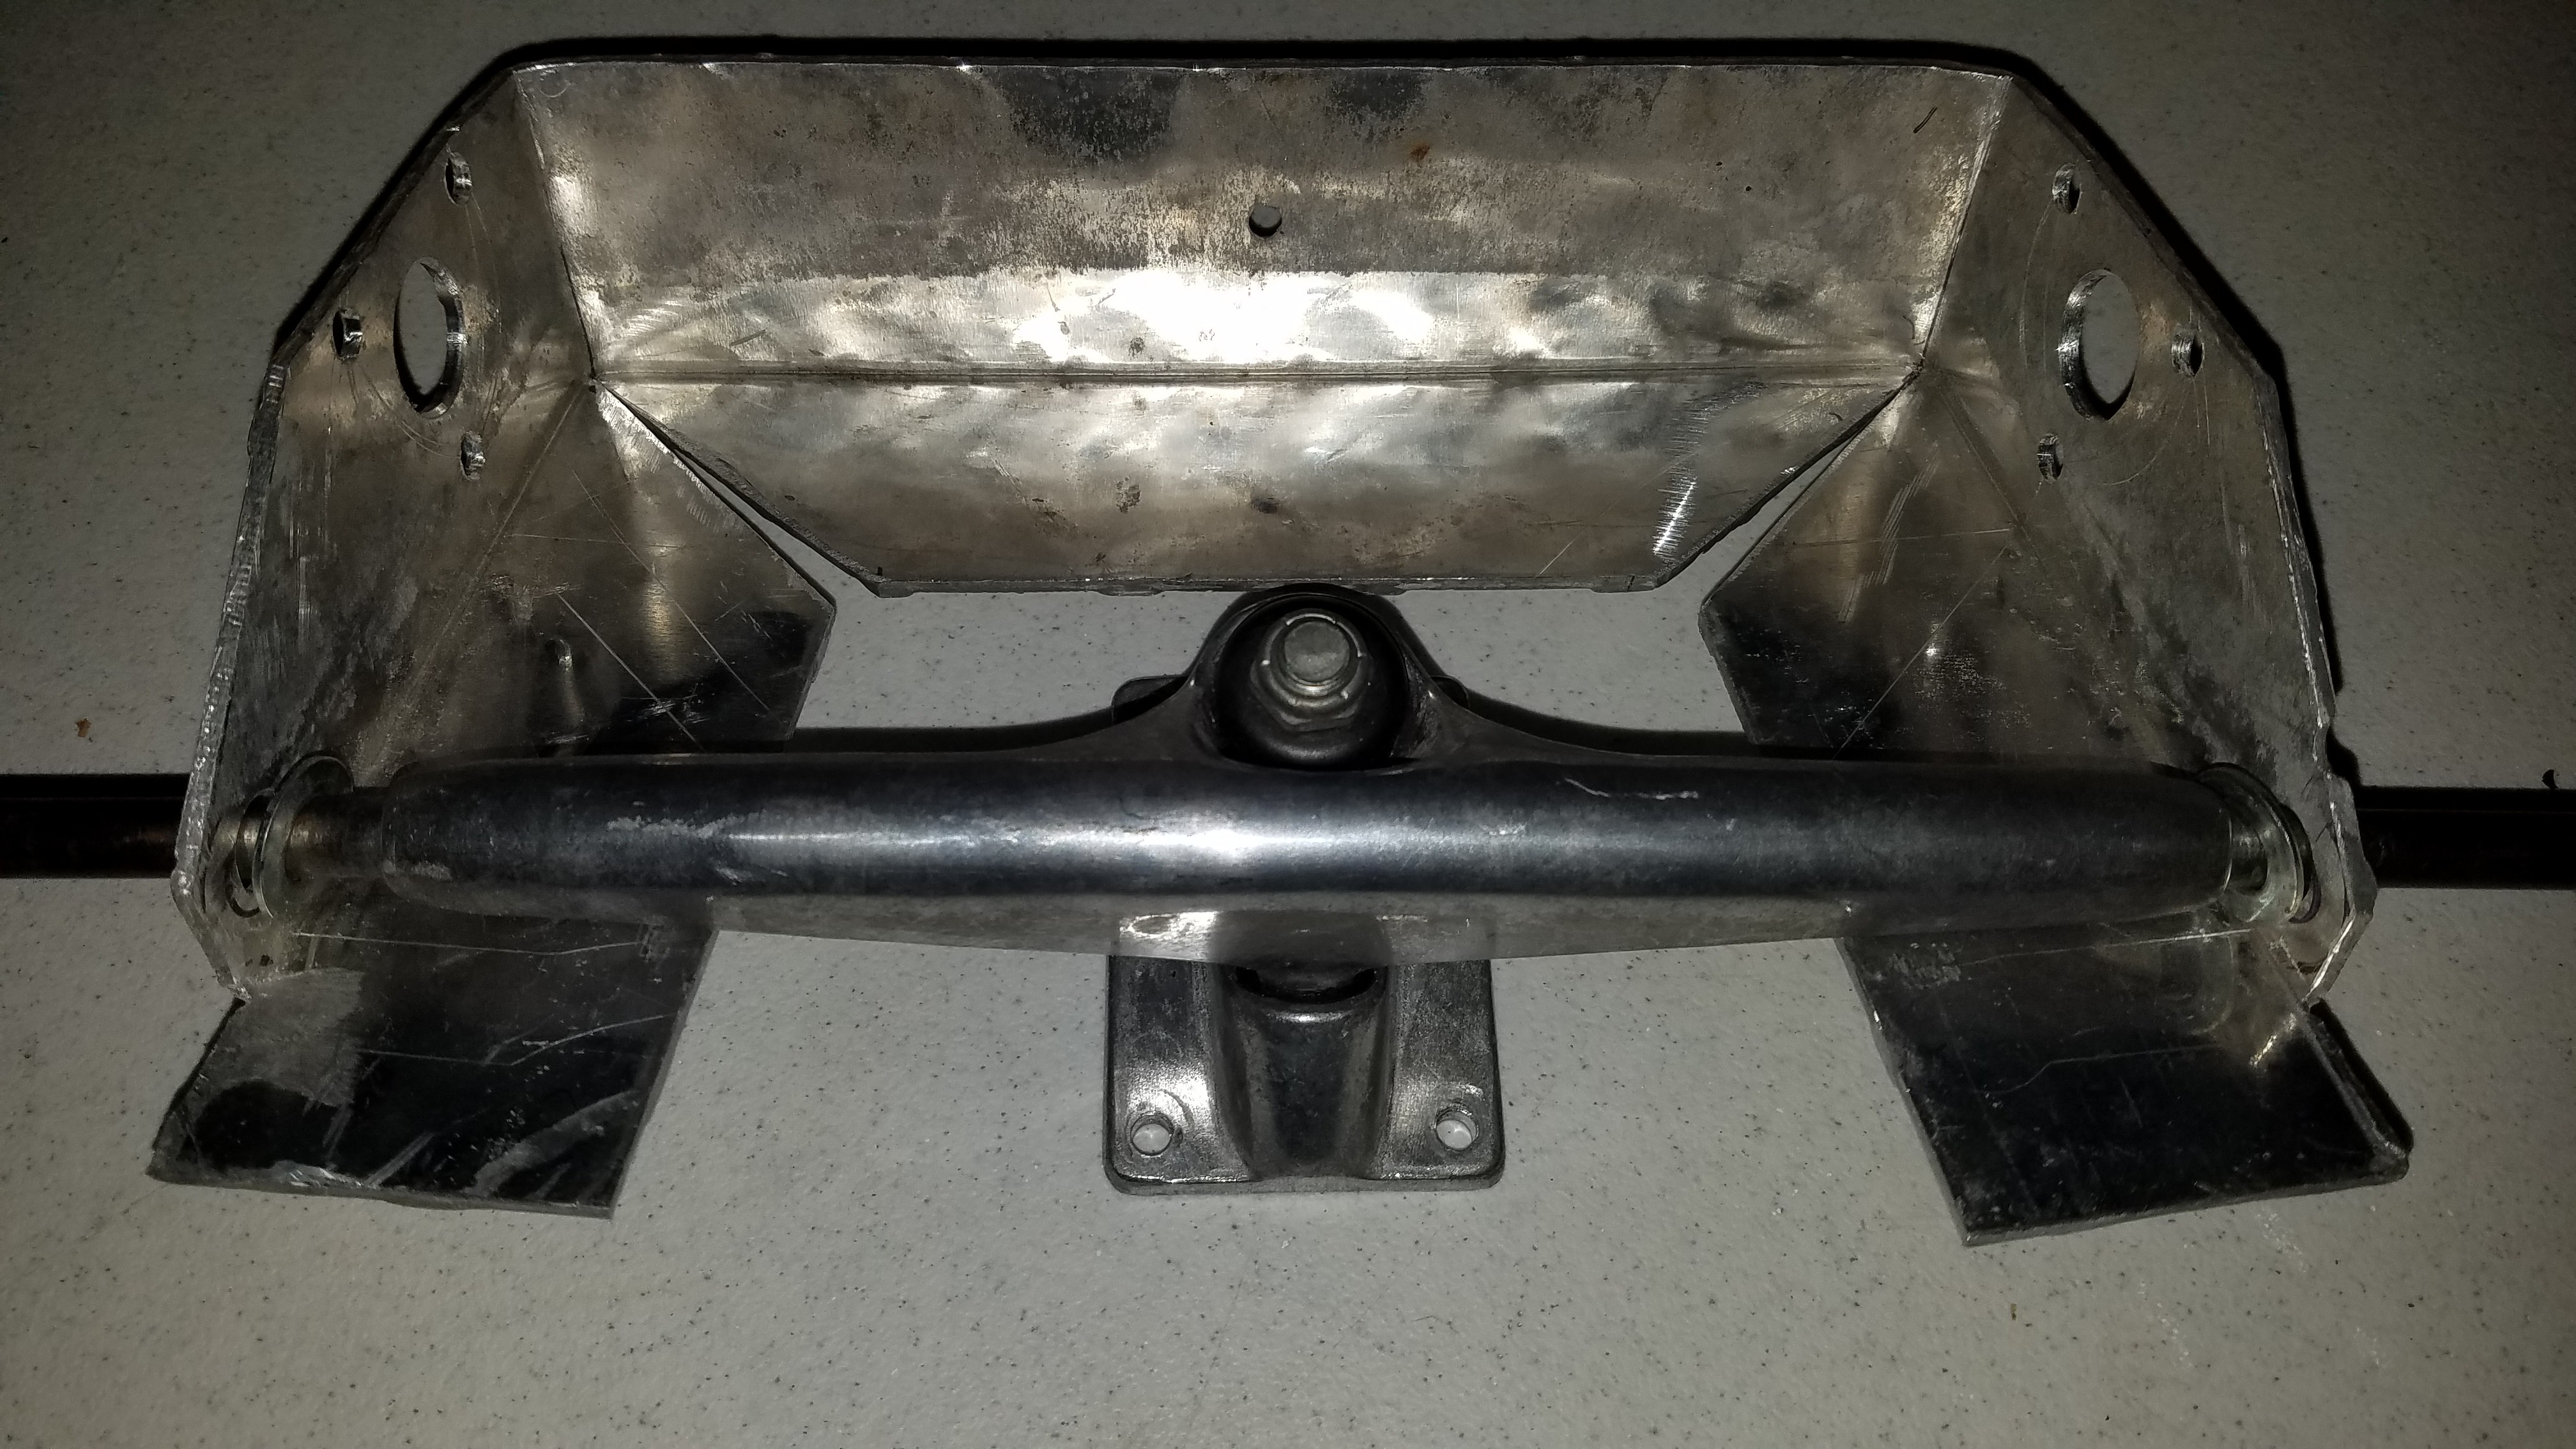
Bend it like Benchoff
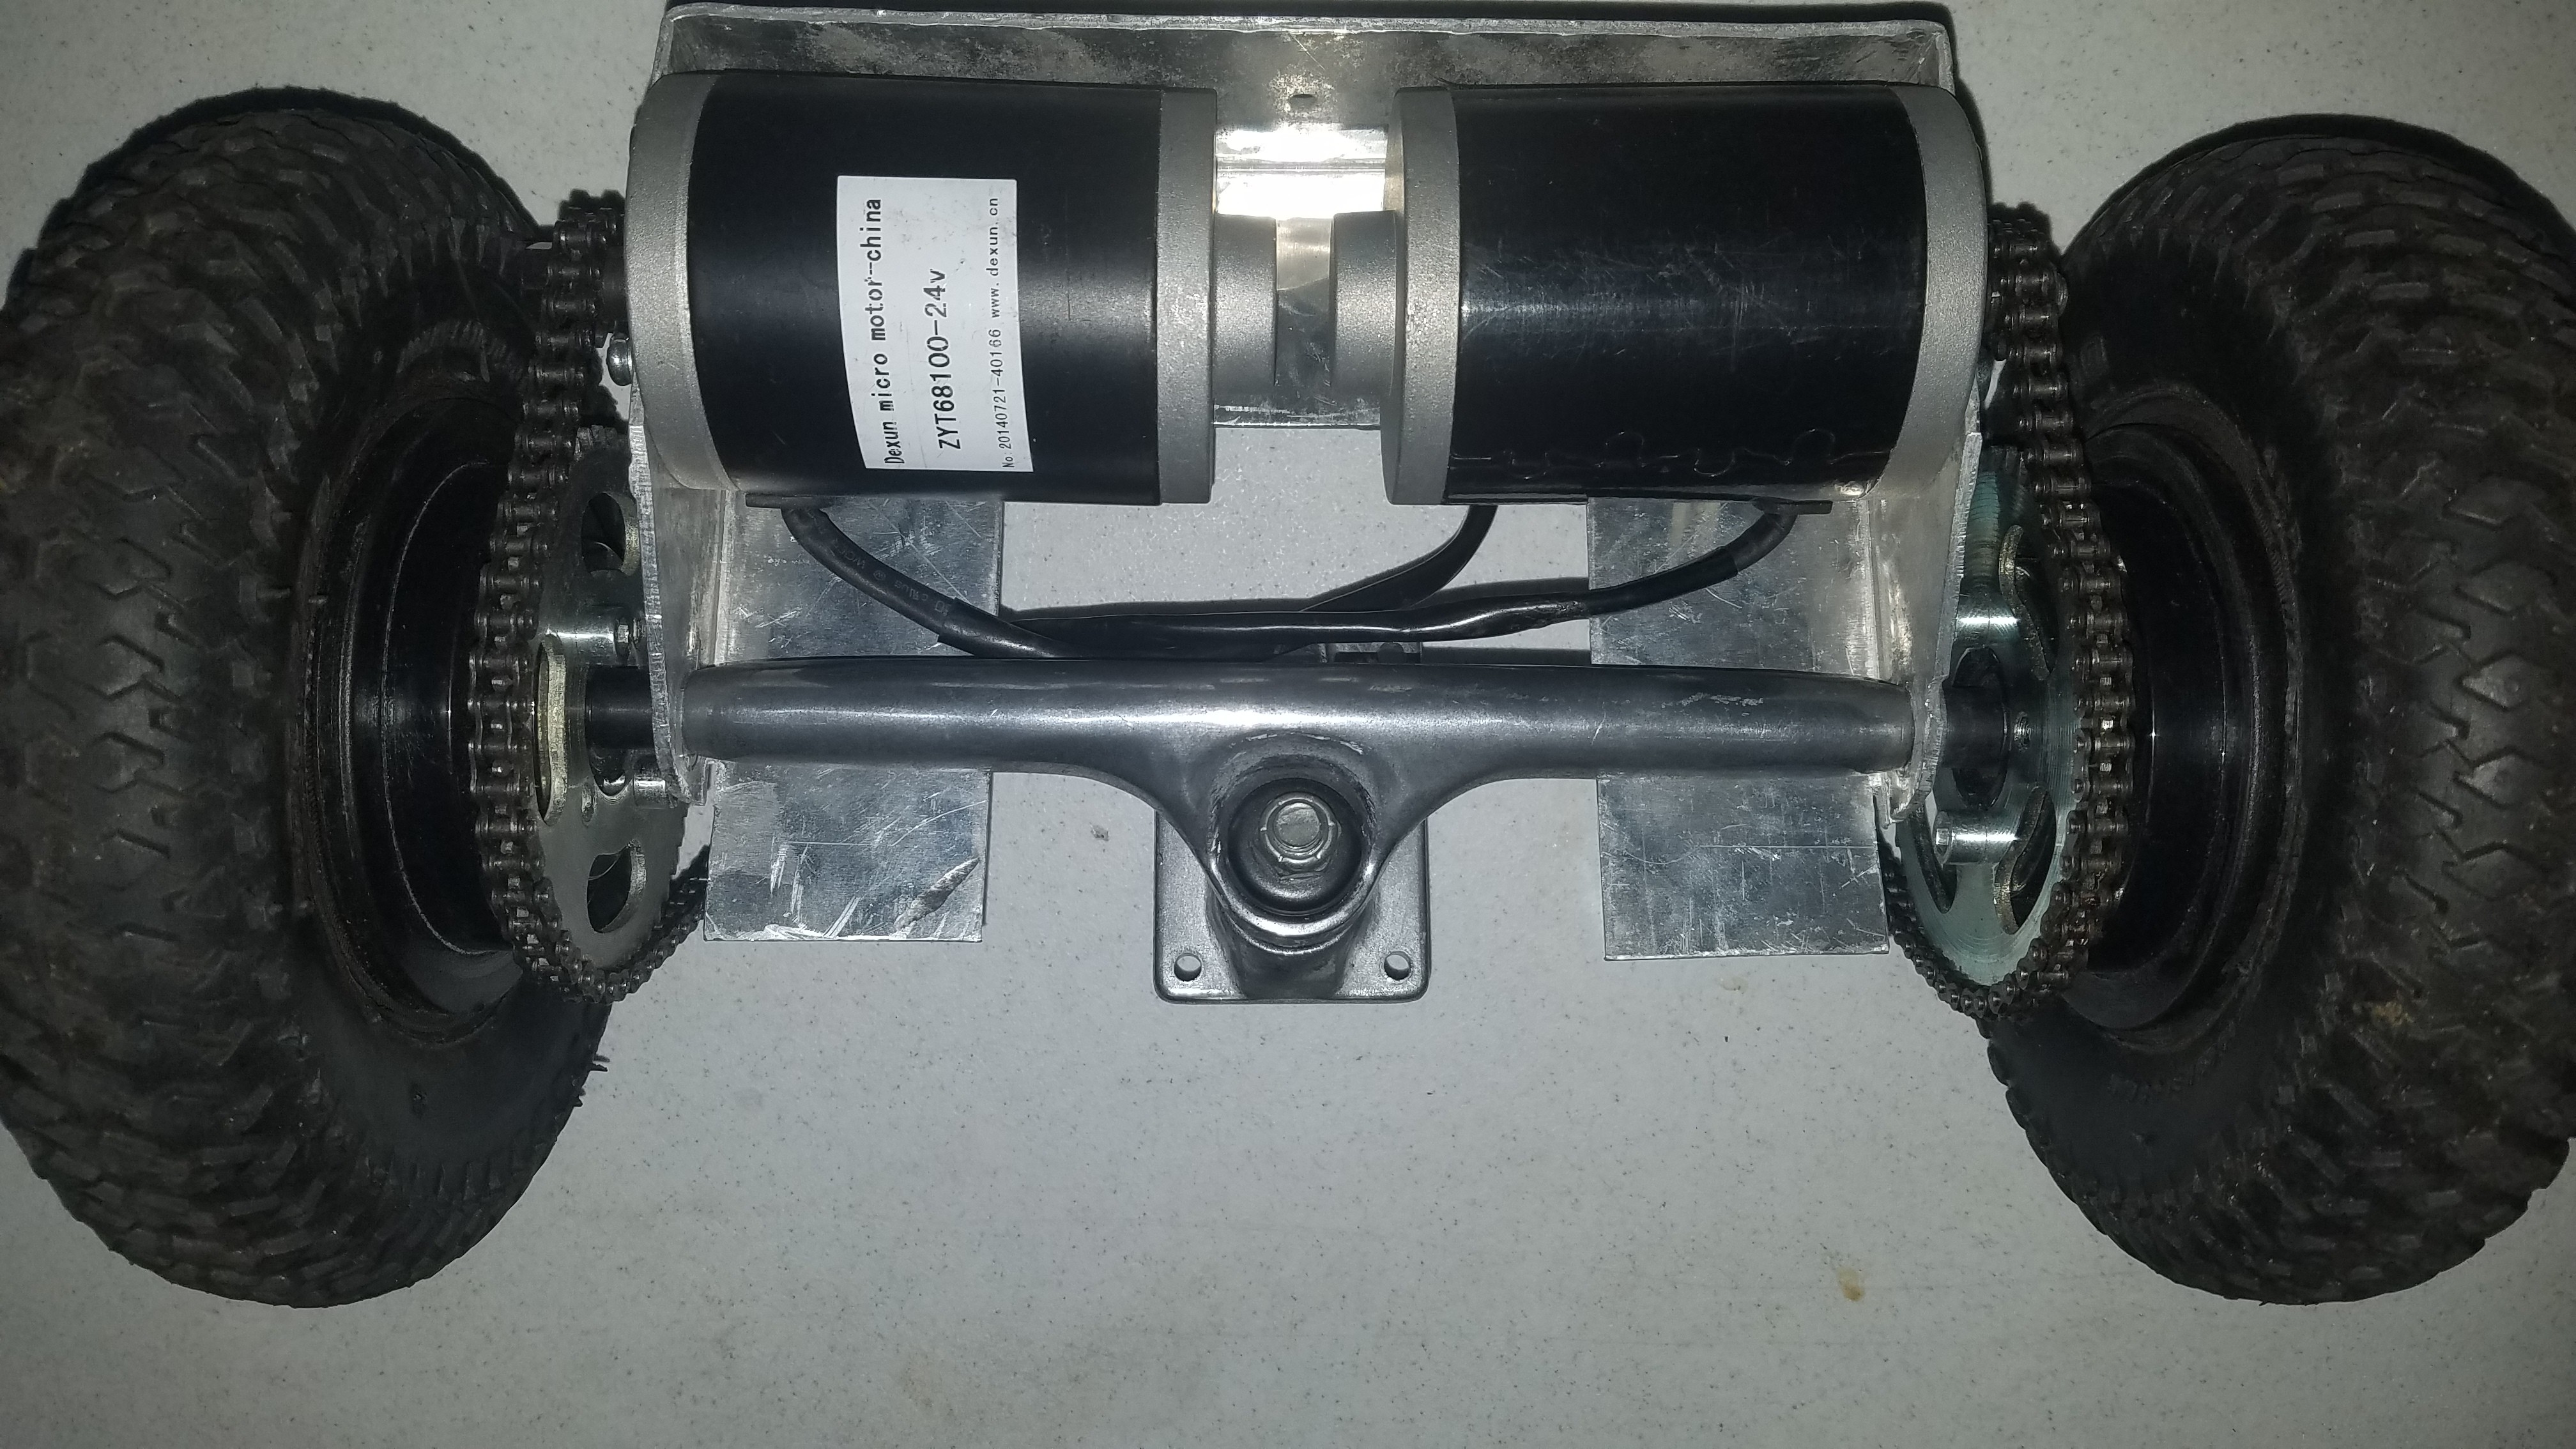
07/26/2019 at 03:54 • 0 commentsA lot of hammering and clean up of my cuts later, the drivetrain is coming together. The motor alignment was just about spot on. I also made new bearing spacers today so I can actually tighten things up. Yay!
Did I mention this is all being done with hand power tools and parts brought along, in an RV park, on a plastic table? We are currently in Mineral Wells, TX and are rolling across the US headed for Seattle. This would be a fun toy here for Ryden, so time to get off my butt and finish it up.
![]()
![]()
![]()
The chains still need to be shortened.
My latest welds suck worse than ever and I will need to redo a lot of them, but the battery is in its final form.
![]()
I'm still having a hard time getting the weld current right. I burn through or don't penetrate at all. I tried adding a ballast resistor made from some AL wire so I could tune the current better, but the contact area needs tweaking now. I still haven't checked if I killed that one cell yet either. Of course it was one of the strong ones, so replacing it would throw my whole pack current balancing off as well. Cross your fingers...
More is better for welds, right? :P
-
Salvage find/New motor mount.
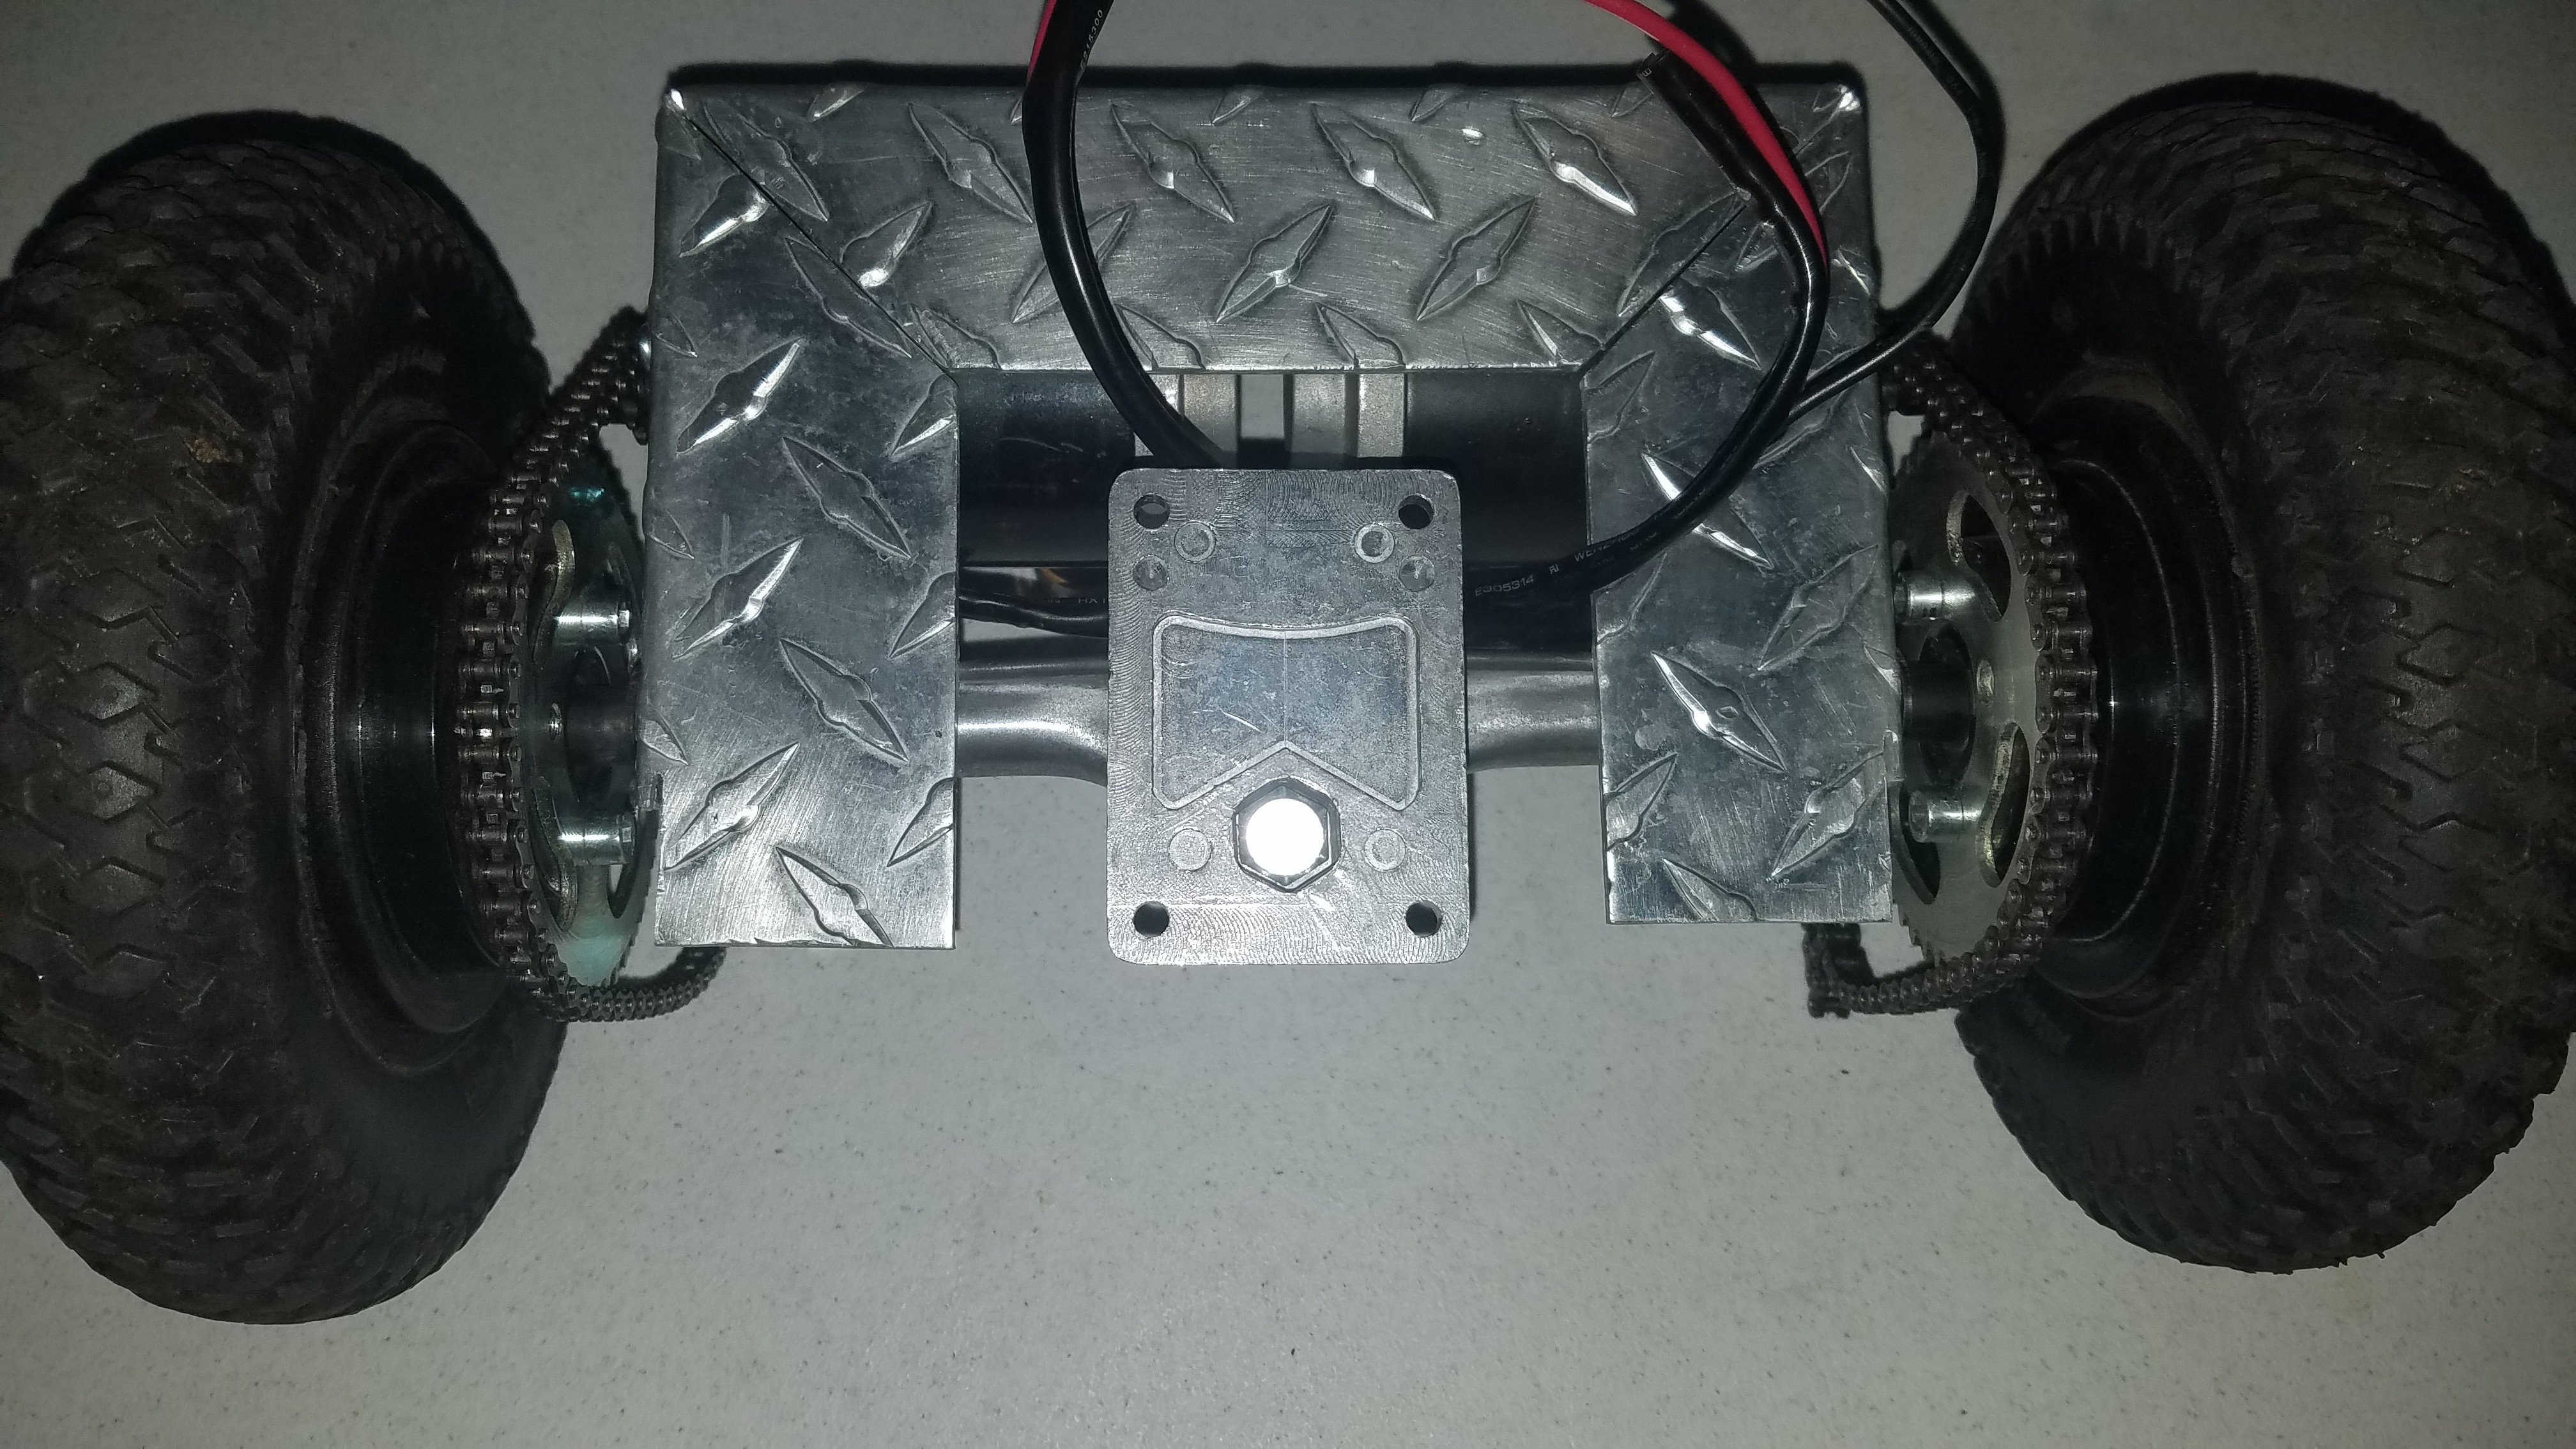
07/25/2019 at 04:27 • 0 commentsI wasn't happy with how my motor mounts were turning out so I scrapped them and started over. I stopped by the salvage yard today and picked up a nearly perfect bit of diamond plate angle.
It is mostly done at this point, but it needs to have the final bends done while it is on the mountainboard truck axle, and I put it on upside down. Oops..
![]()
This should be a lot stronger than the first try without adding a lot of weight. The tabs near the axle will get wrapped around it and bolted through.
I finished most of the battery welding, but I have some bad ones I need to go over them all again. I also had one cell which felt a bit warmer than it should have. I am wondering if it failed. I'll check each group for any significant voltage loss tomorrow.
On an unrelated note, there was a stack of seven beefy oxygen concentrators sitting at salvage as well. I grabbed the one with the lowest hours (15k) for $5. Borosilicate glass work here I come. :)
-
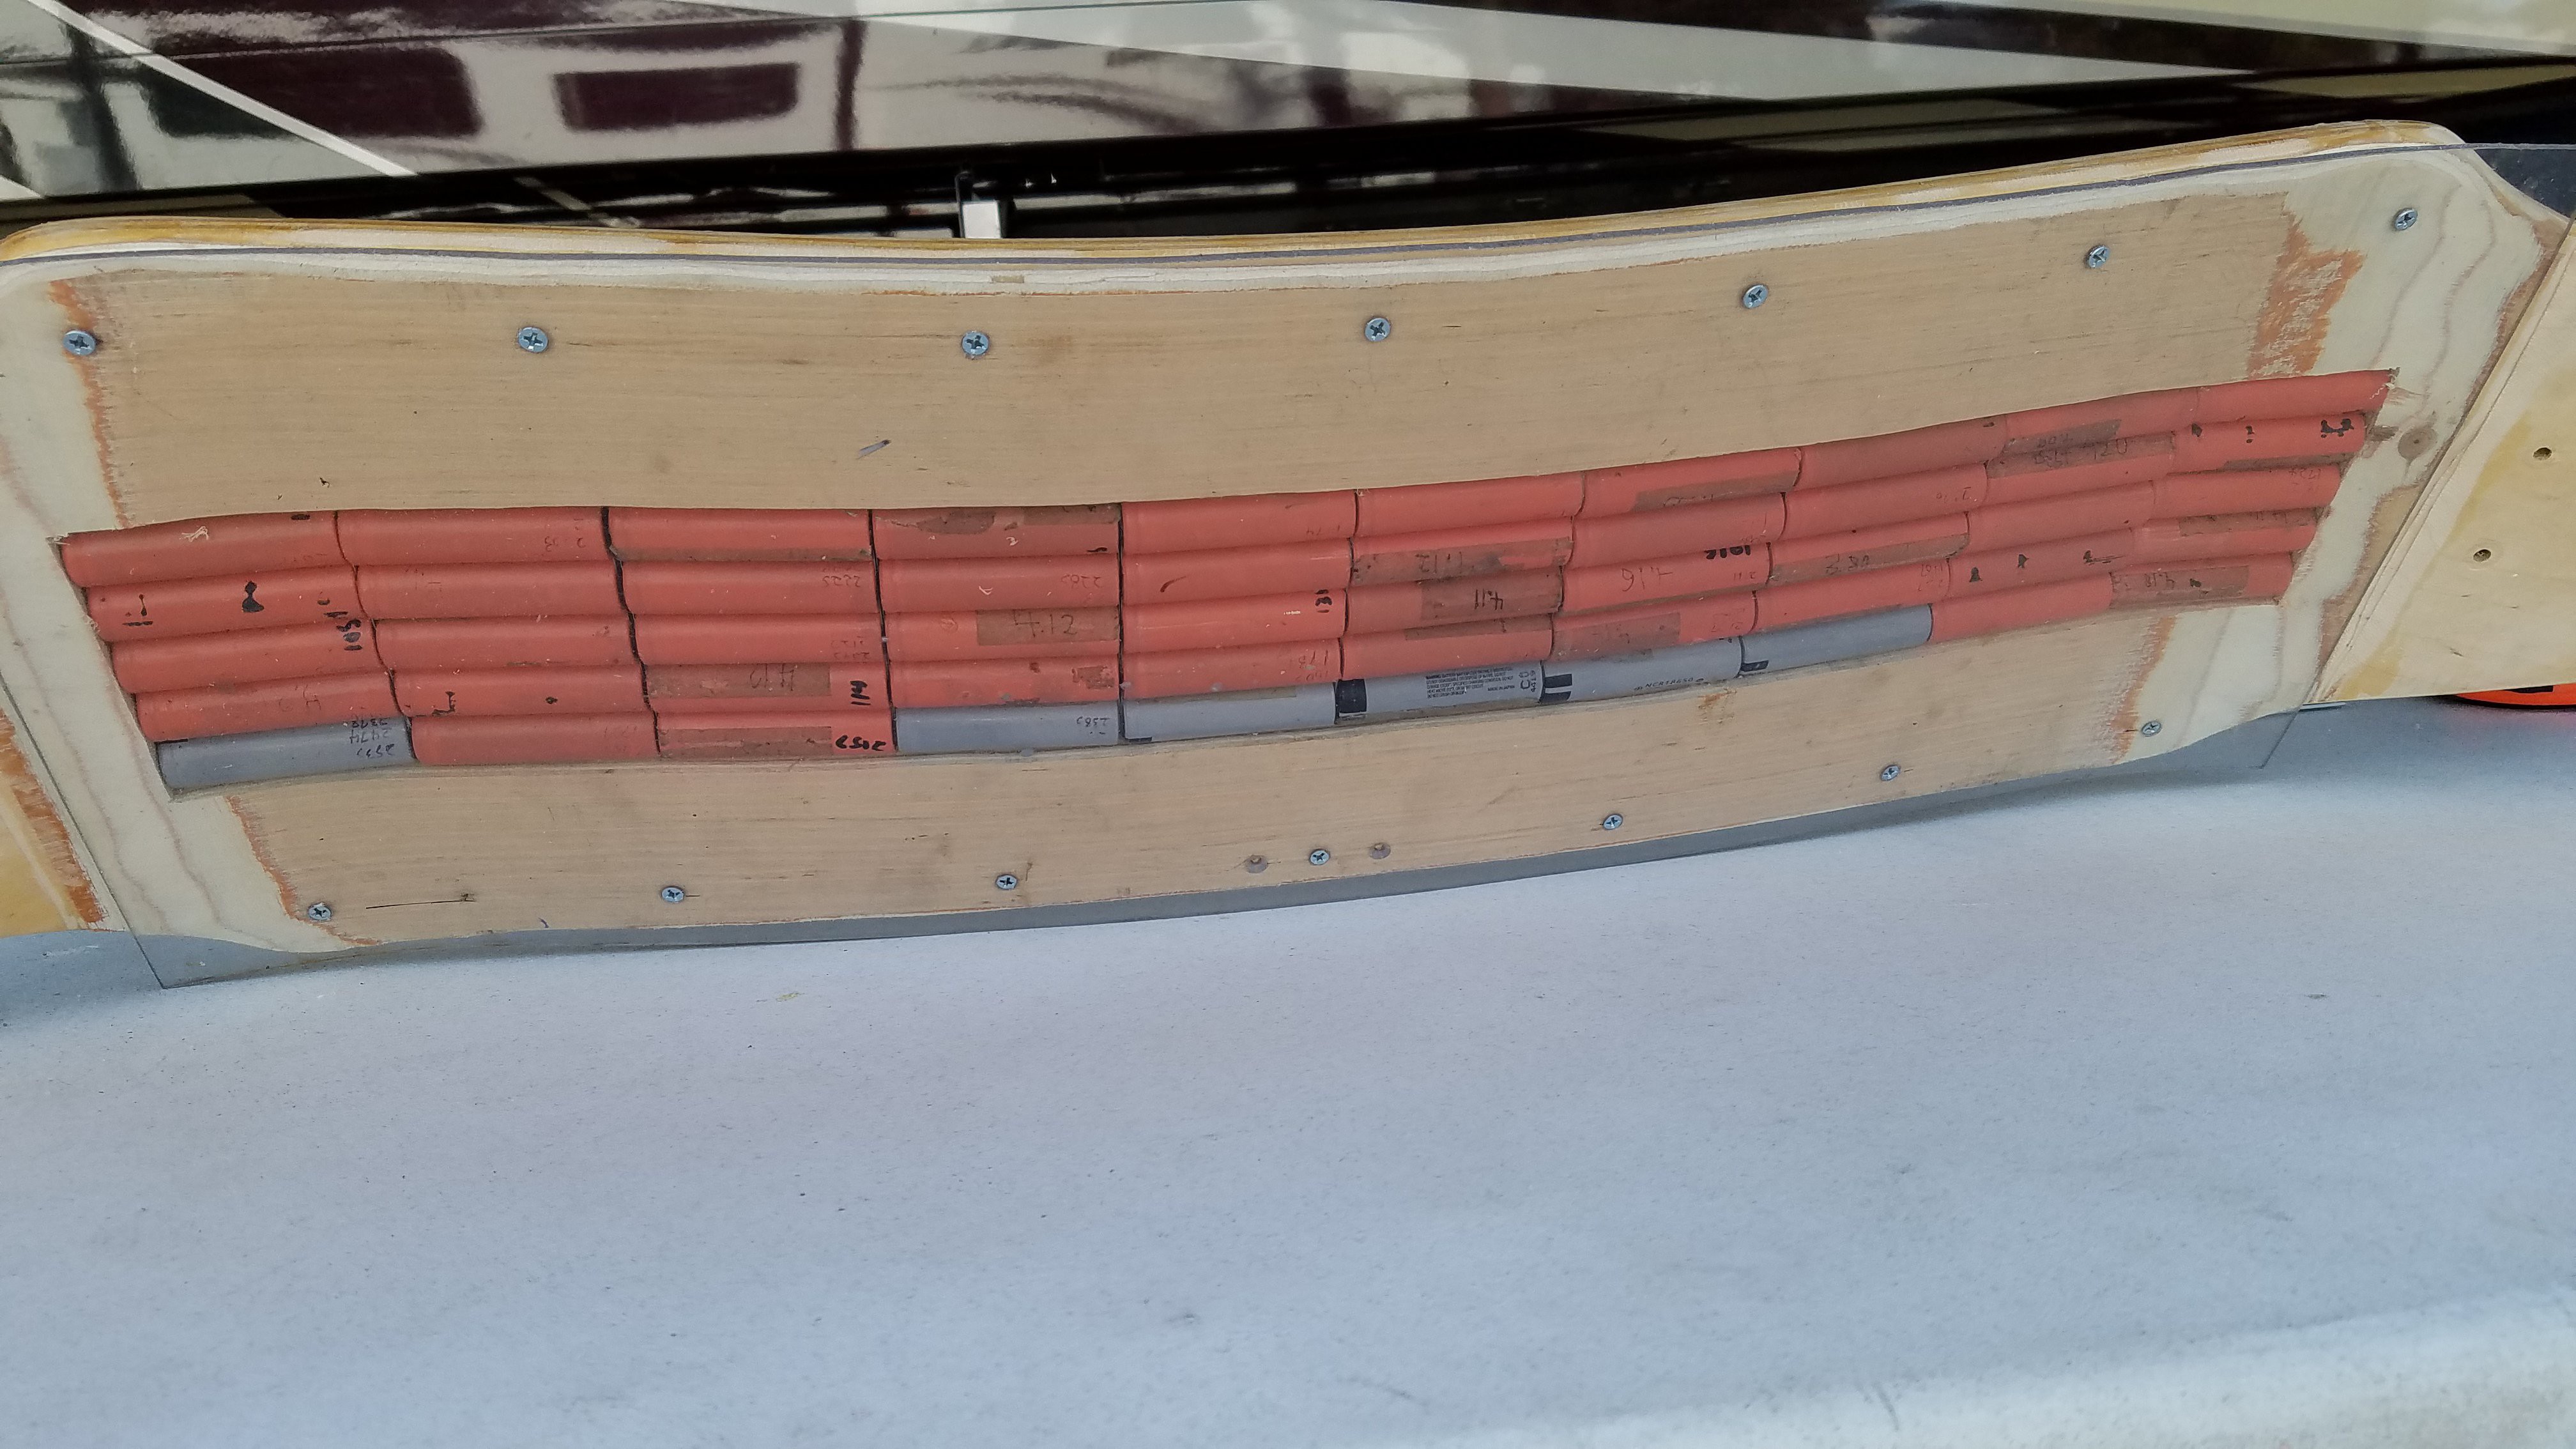
Battery inlaid
07/23/2019 at 04:41 • 0 commentsThe board was just thick enough now to contain the battery, but not thick enough to leave the bottom intact. I decided to go all the way through with my battery slot and sandwich the cells between two covers. I sanded the ends of the plywood I added to ease the transition and make the top cover fit flat.
![]()
The top got a full polycarbonate cover. The bottom got a strip of it. Both were made from the old door to one of my 3D printers, so the size was pretty much set by that. If I had a choice about the size, the top would go all the way to the ends.
![]()
The bottom strip was attached at both ends, and then bent down/heated with a heat gun to make it conform to the compound curve. That part of my stock was noticeably damaged from being the printer door, so I sanded it on the underside to hide this a bit. It could use some more sanding.
The top edges were cleaned up with a round over router bit and then razor scraped/sanded. The top was a convex shape and so it kept the bend just by screwing it down. It also needs a bit more cleanup, but good enough to move on to the electronics/motor mounting.
The clear/translucent covers open up the possibility of some lighty goodness under your feet. I think I will light the underside through the cover I had to sand. -
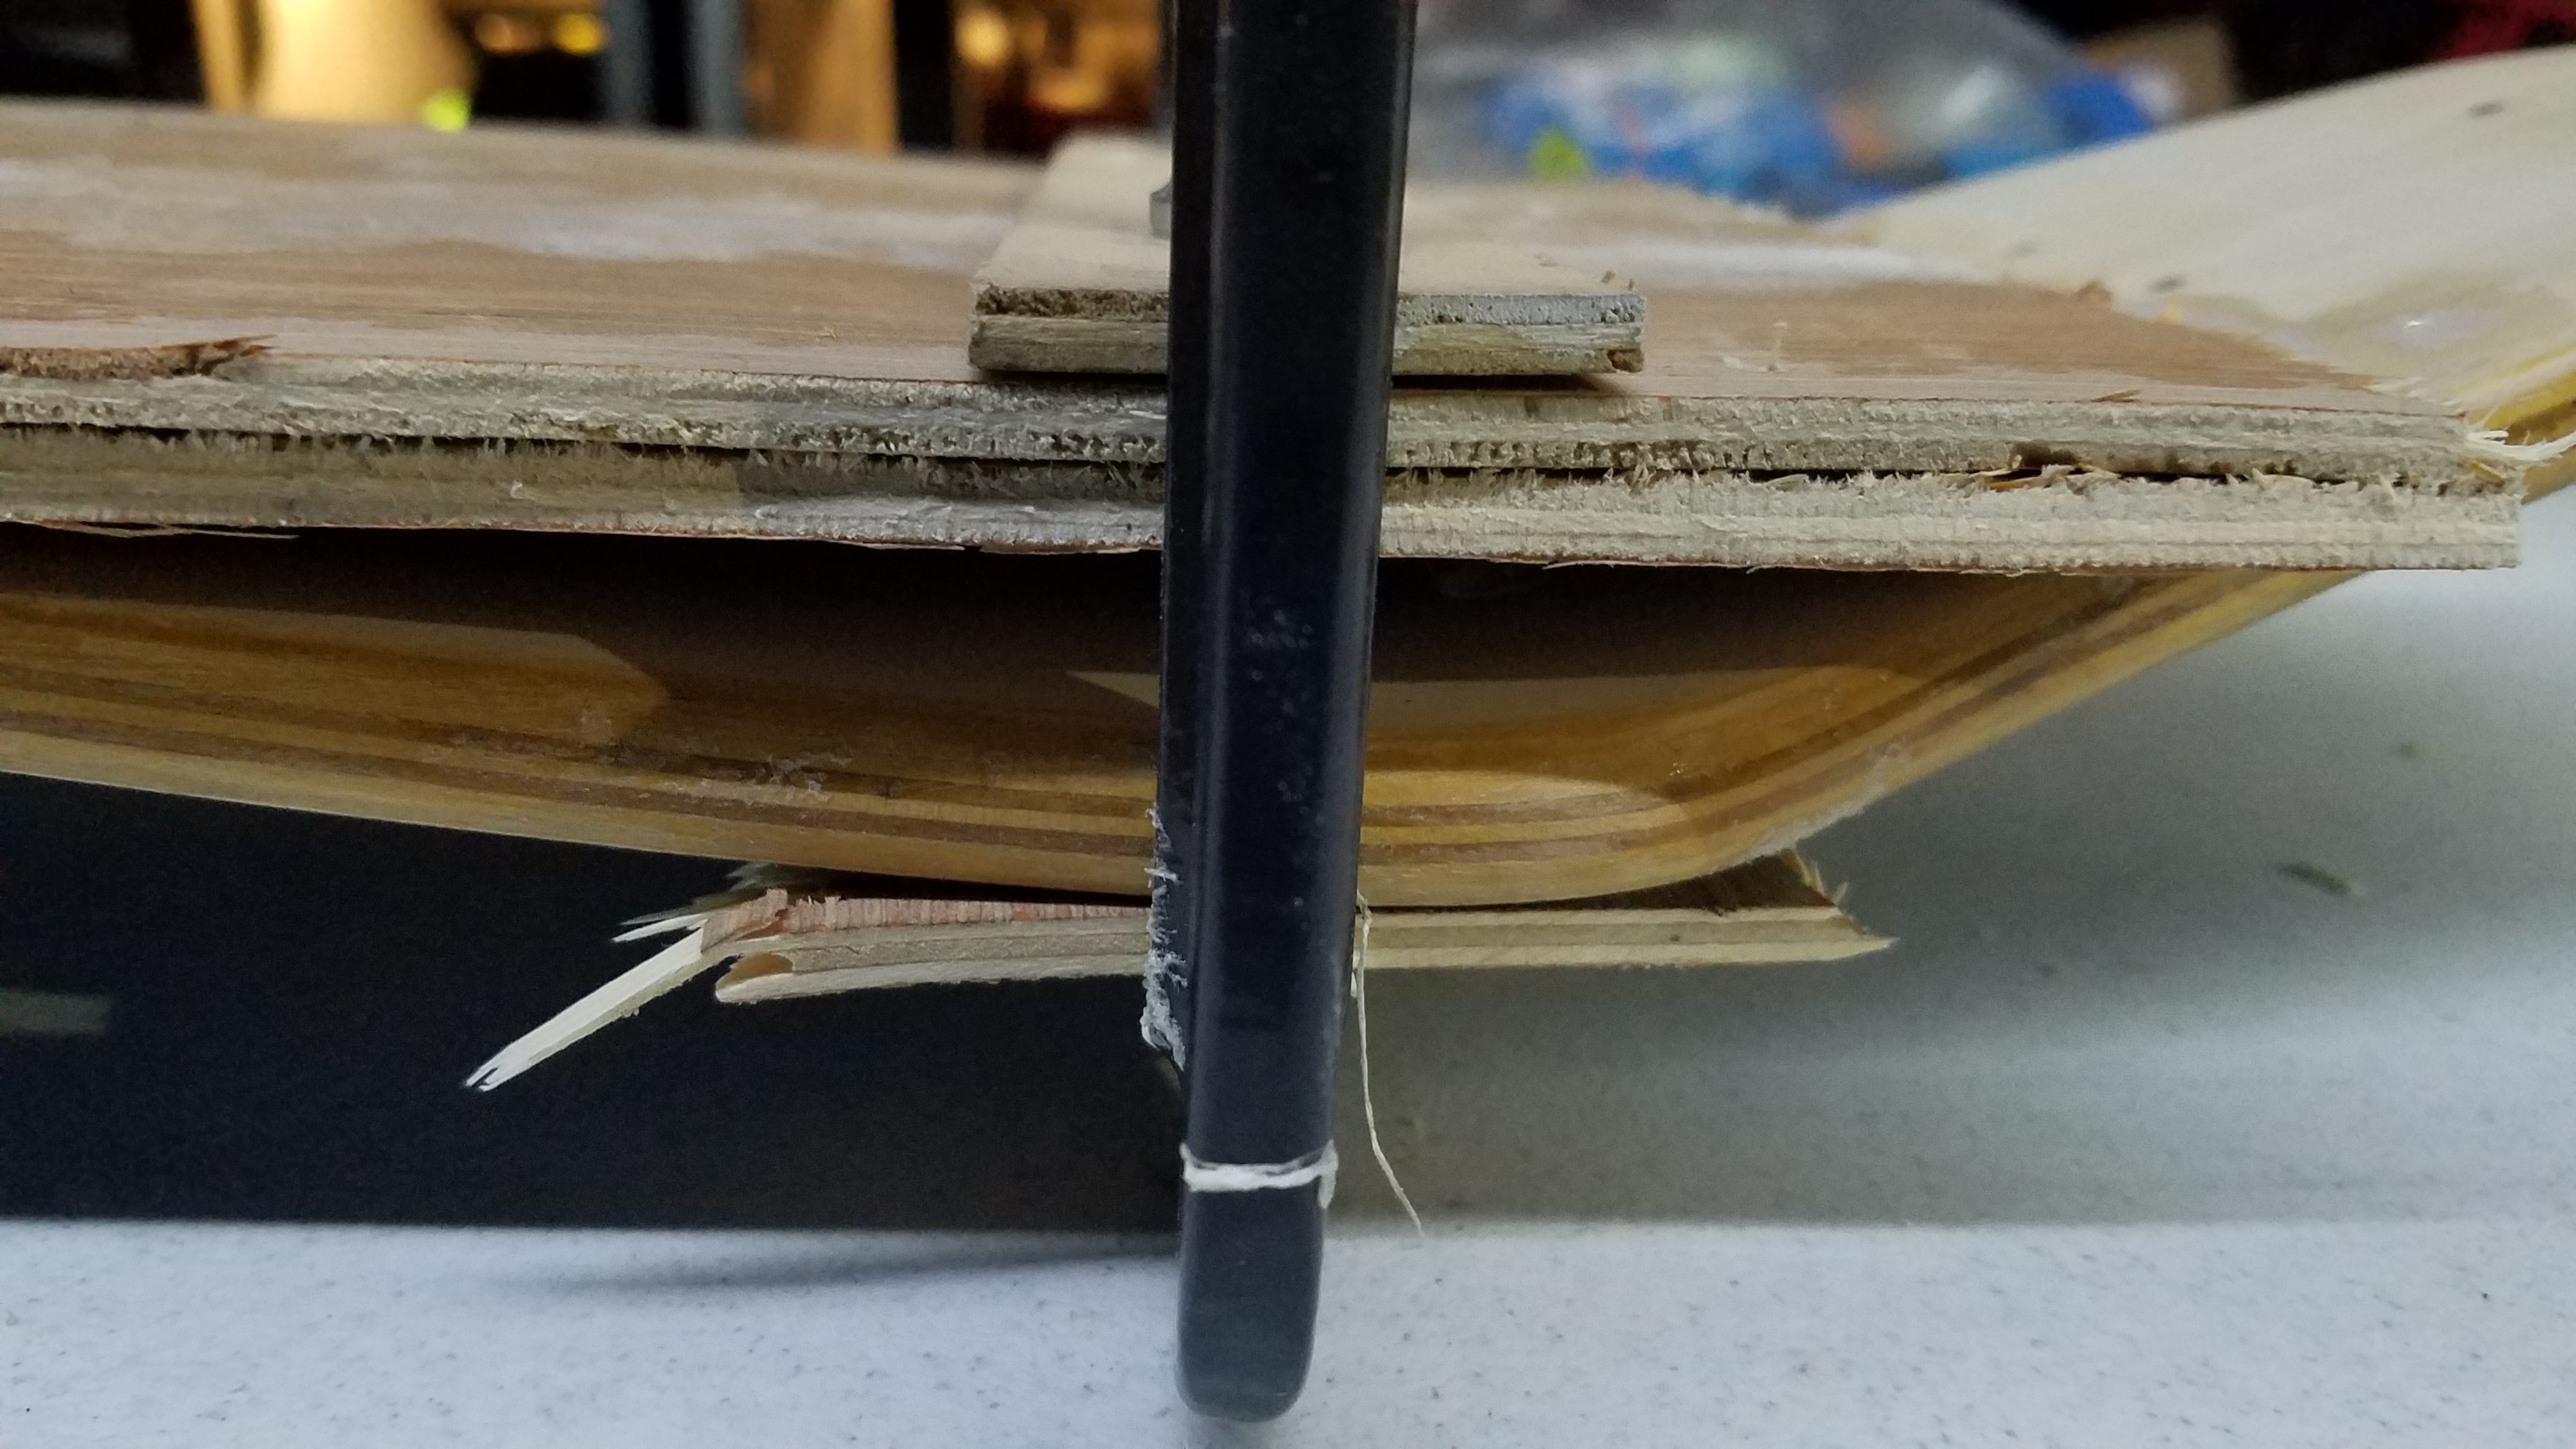
Board thickening
07/22/2019 at 03:44 • 2 commentsI want to put the cells in the thickness of the board. It's too thin for that.
I decided today I was going to leave the bottom alone and instead glue some flooring plywood to the top to make it thicker.
![]()
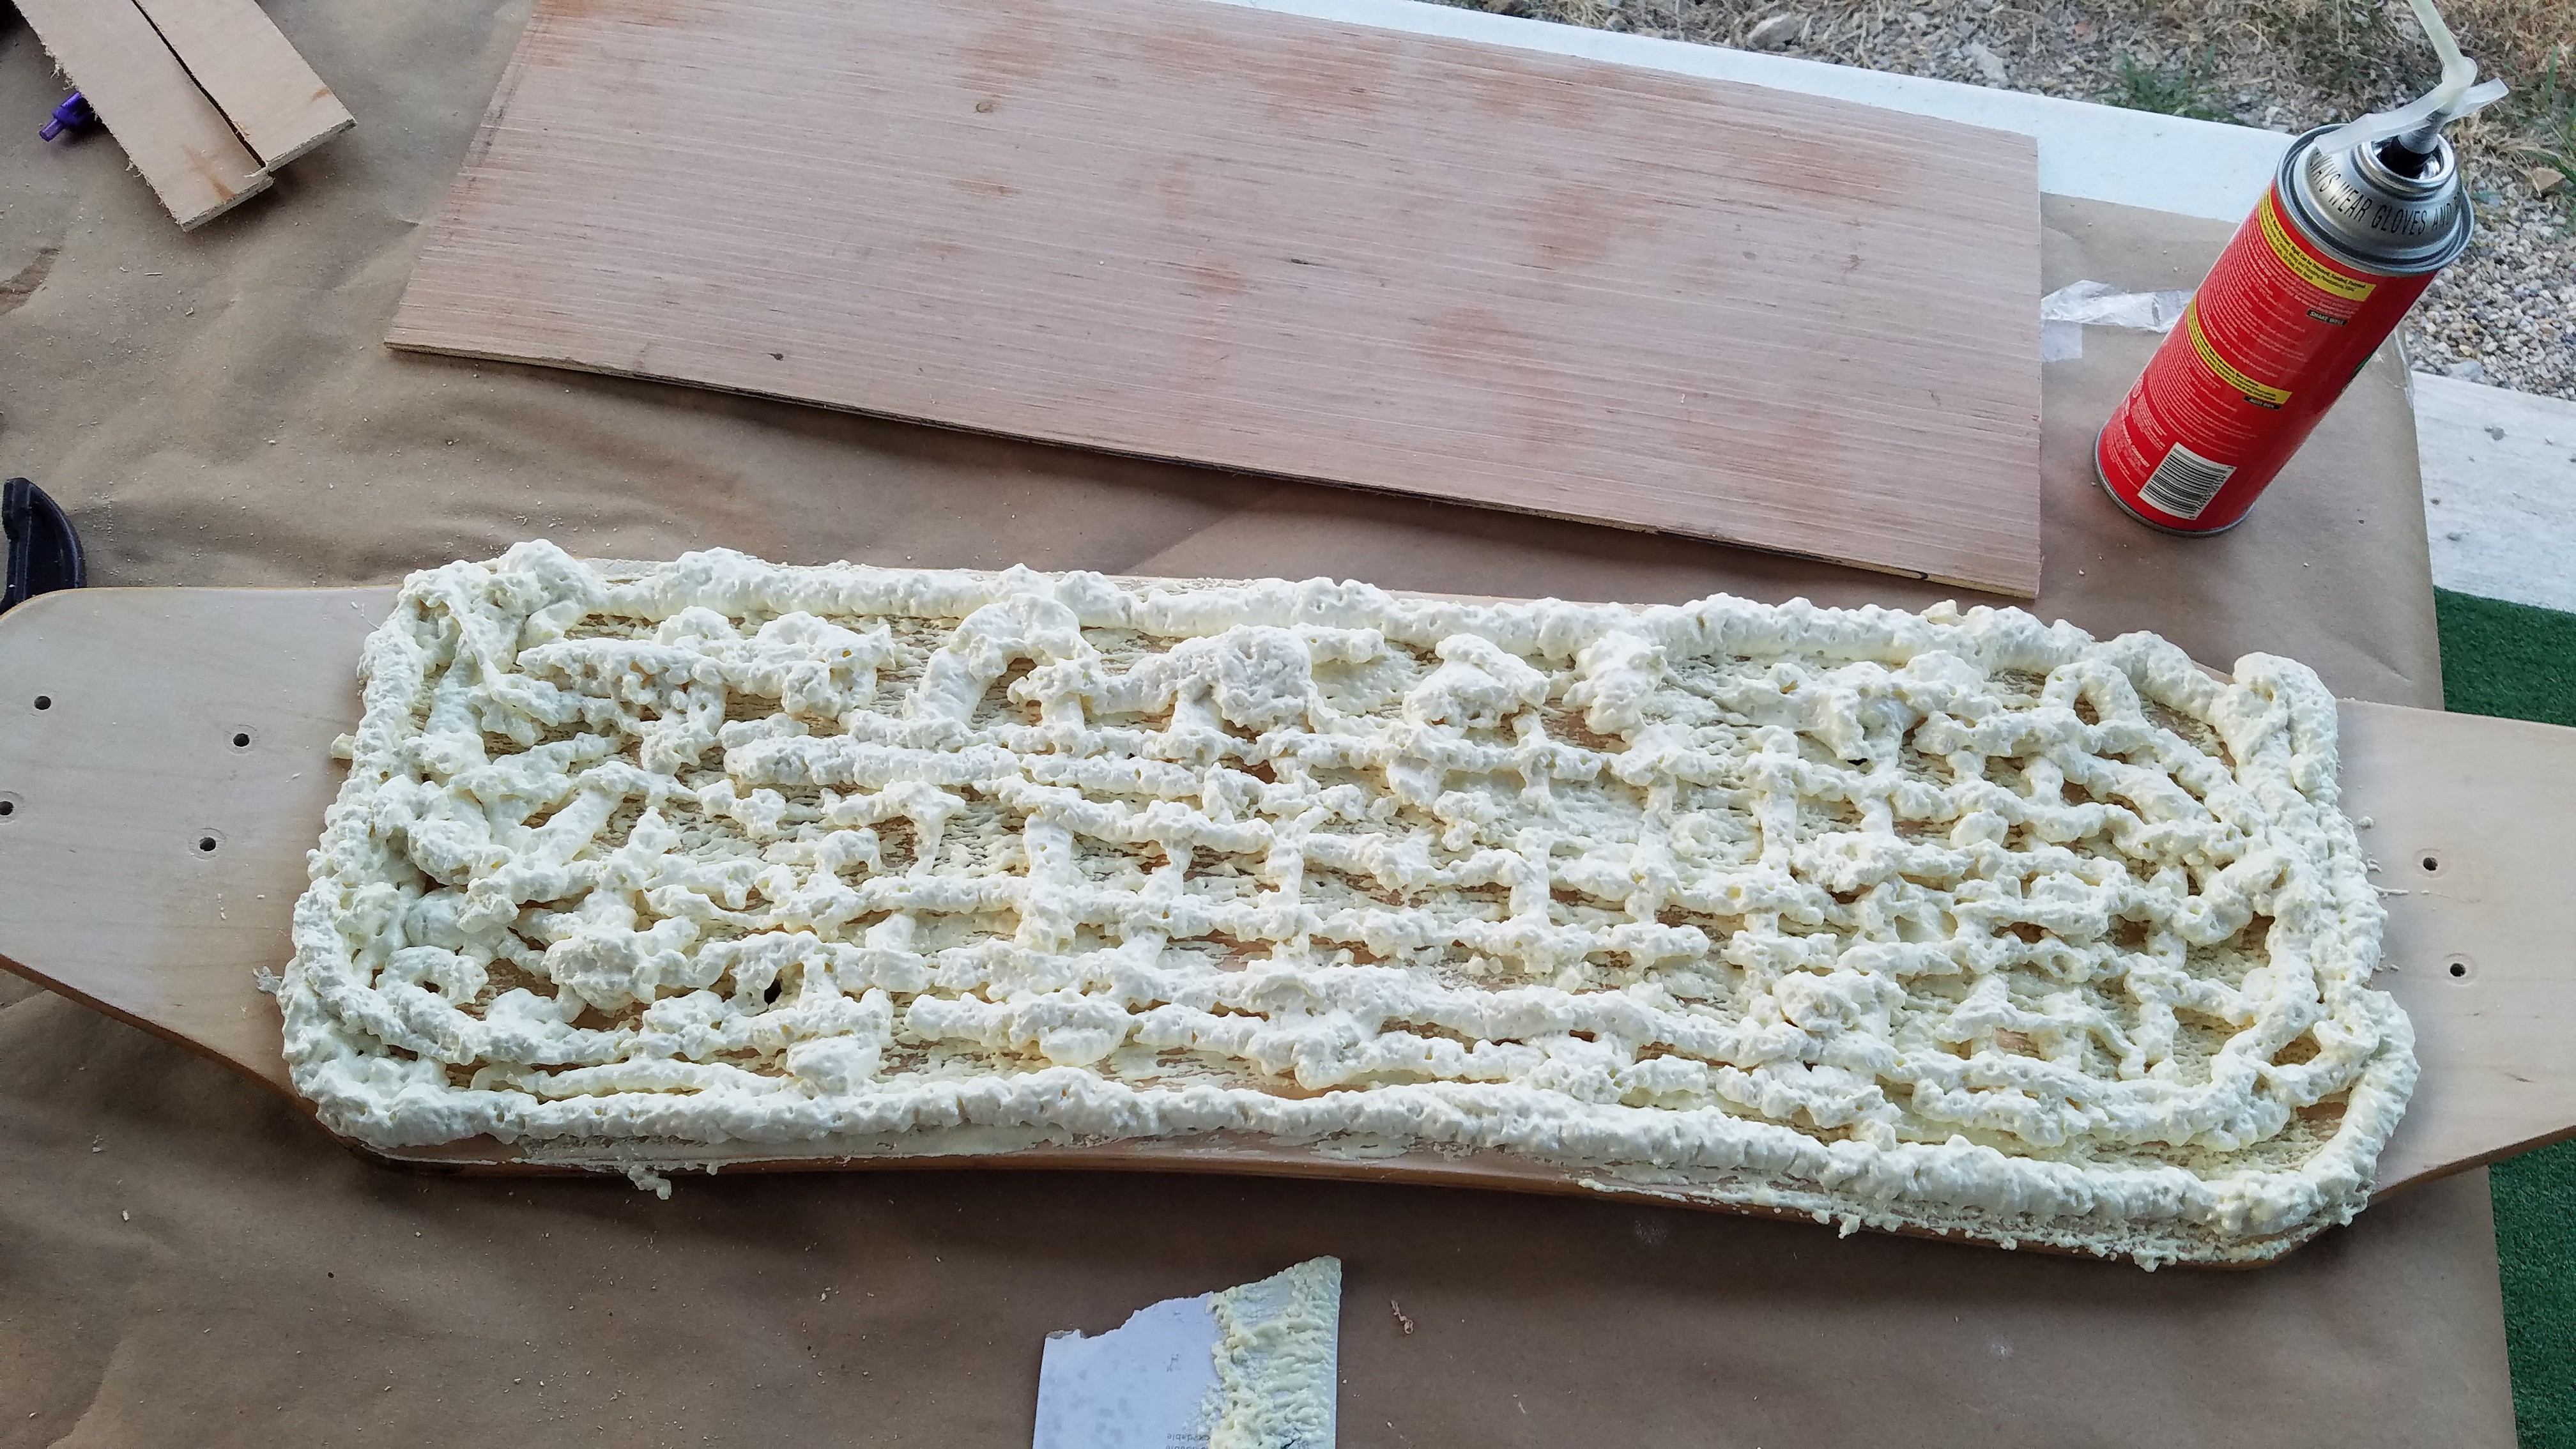
Some flailing about attempting to use urethane to make a foam core happened. If I had a press, perhaps. I did not.
![]()
I was too slow, it expanded too much and got too hard to press it back down. Normally if you are quick, you can flatten out the foam and it then acts very much like urethane glue.
I scraped it all back off and replaced it with some regular wood glue.
![]()
One layer may not be enough thickness though without the foam expansion. Drying overnight and we will see tomorrow.
REMB - Raz0r Electric Mountain Board
An electric mountain board, built from scooter parts.