Apollo Timbers
-
Let there be light!
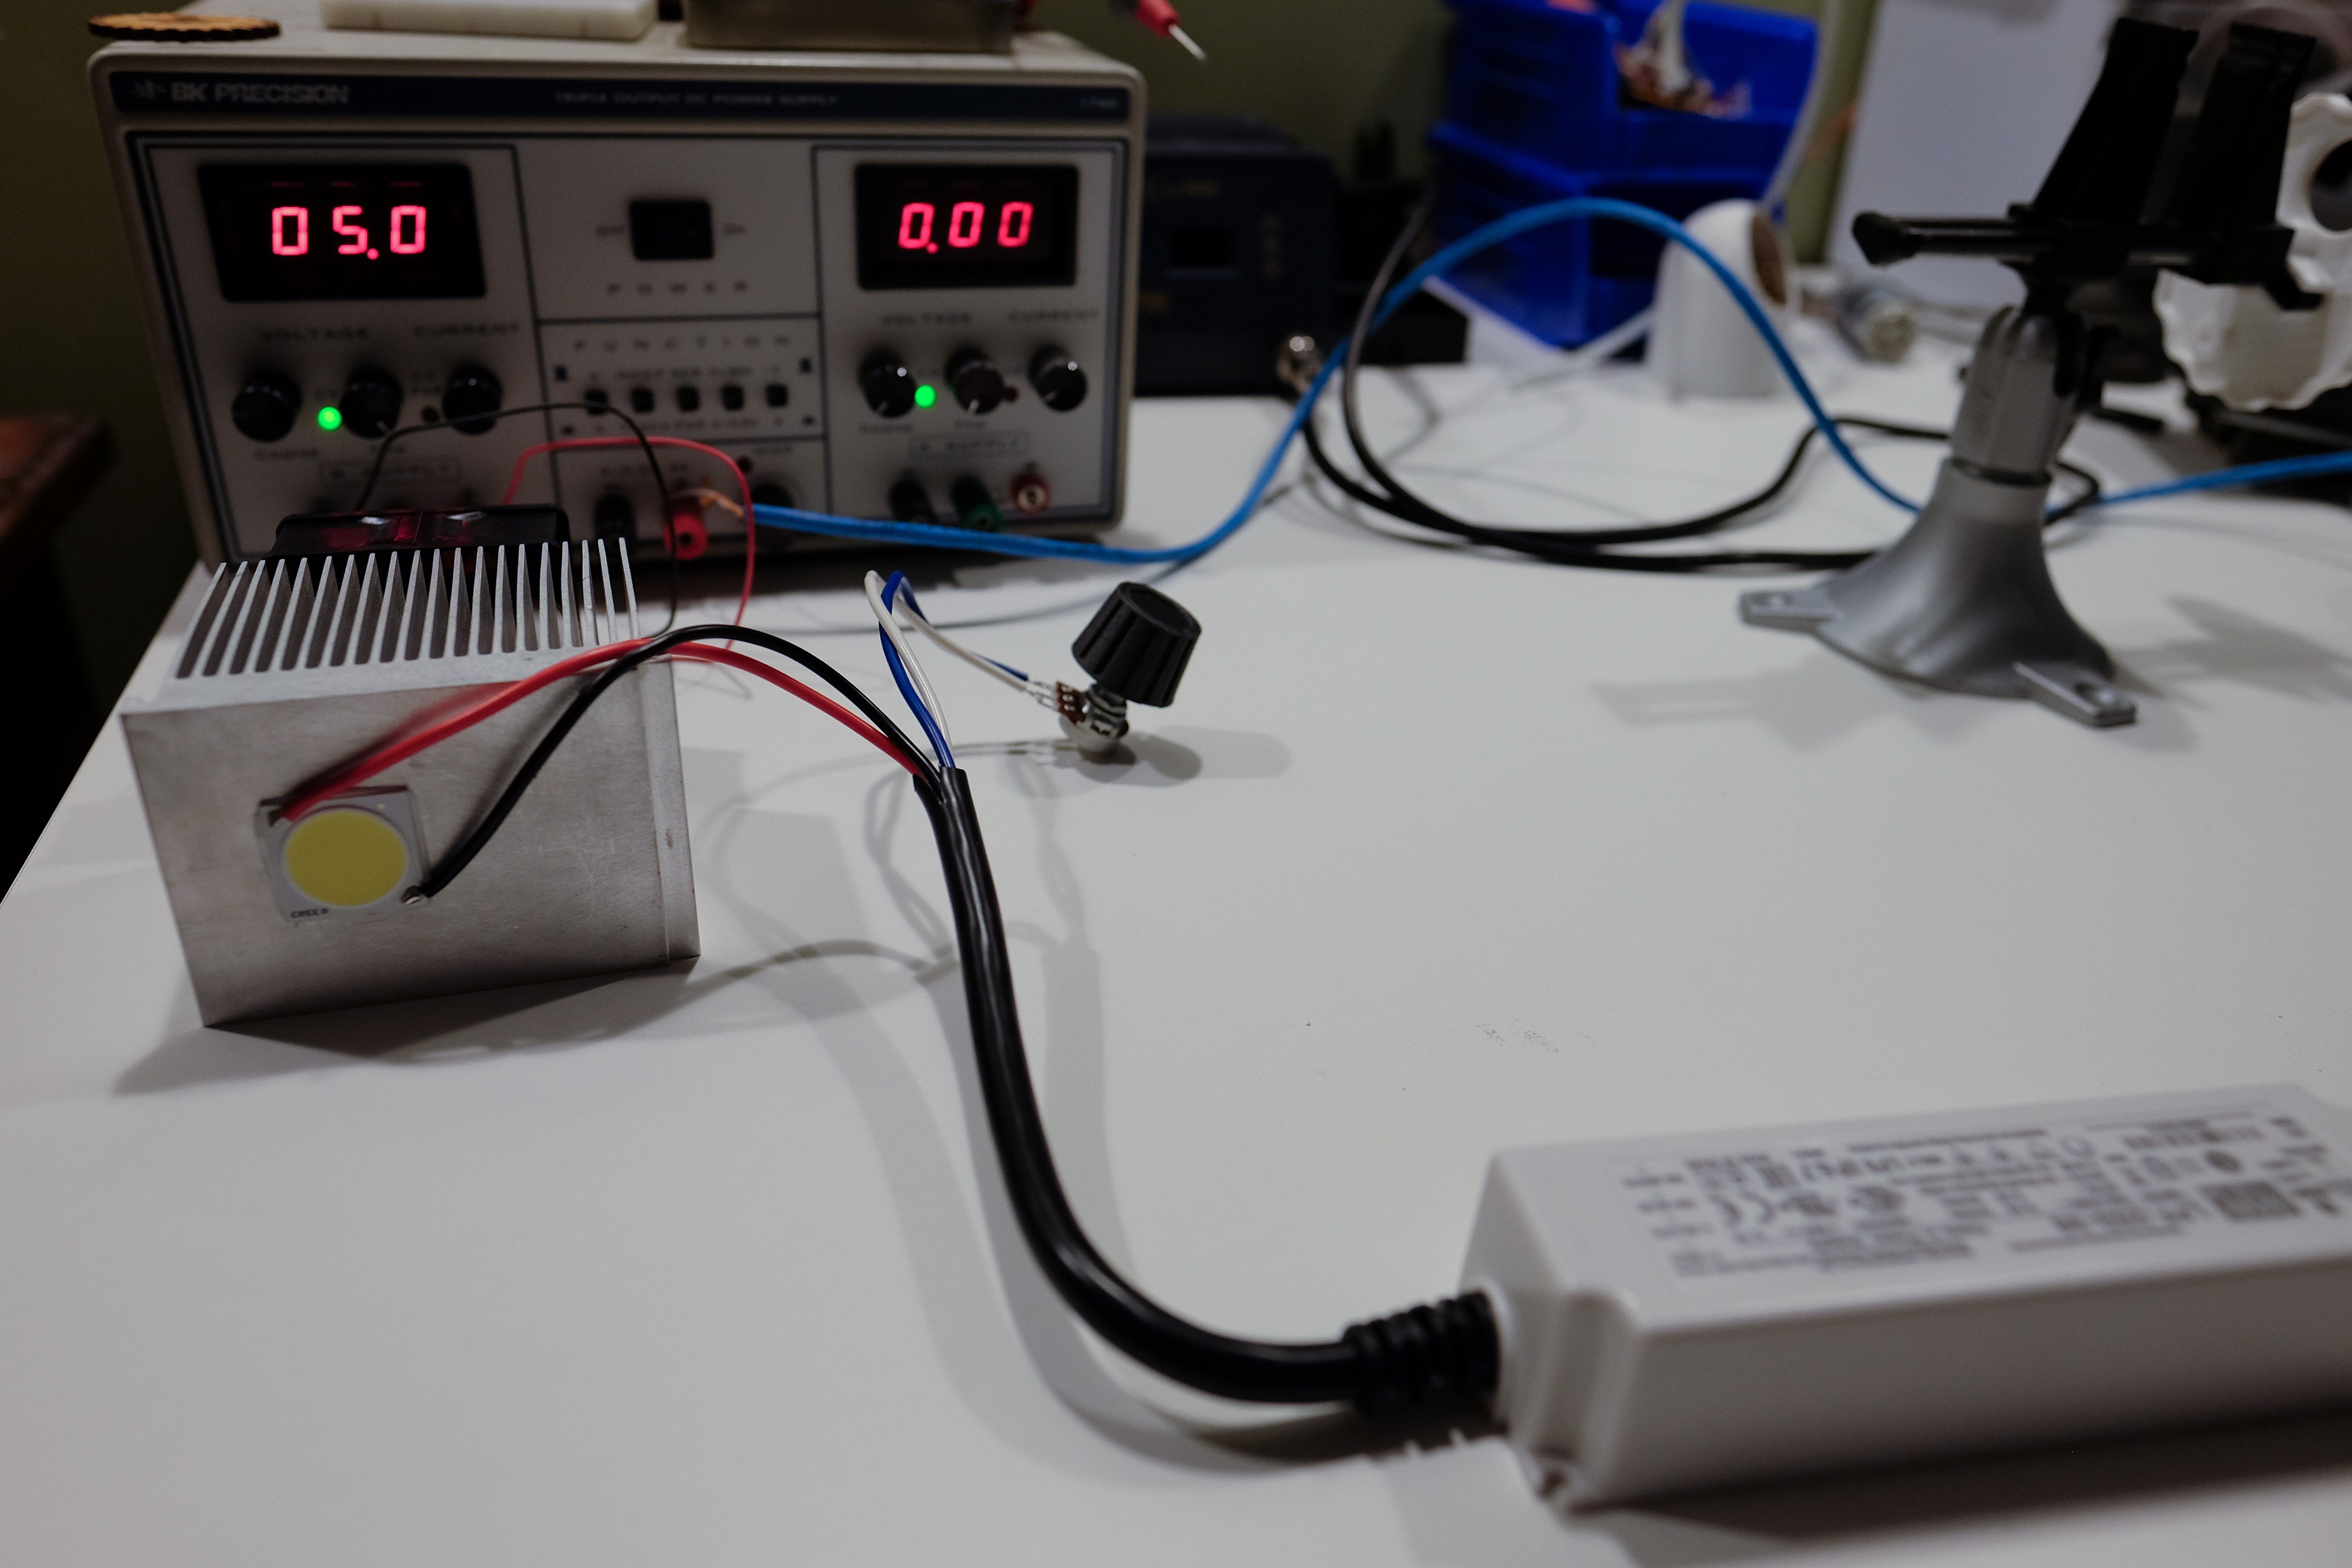
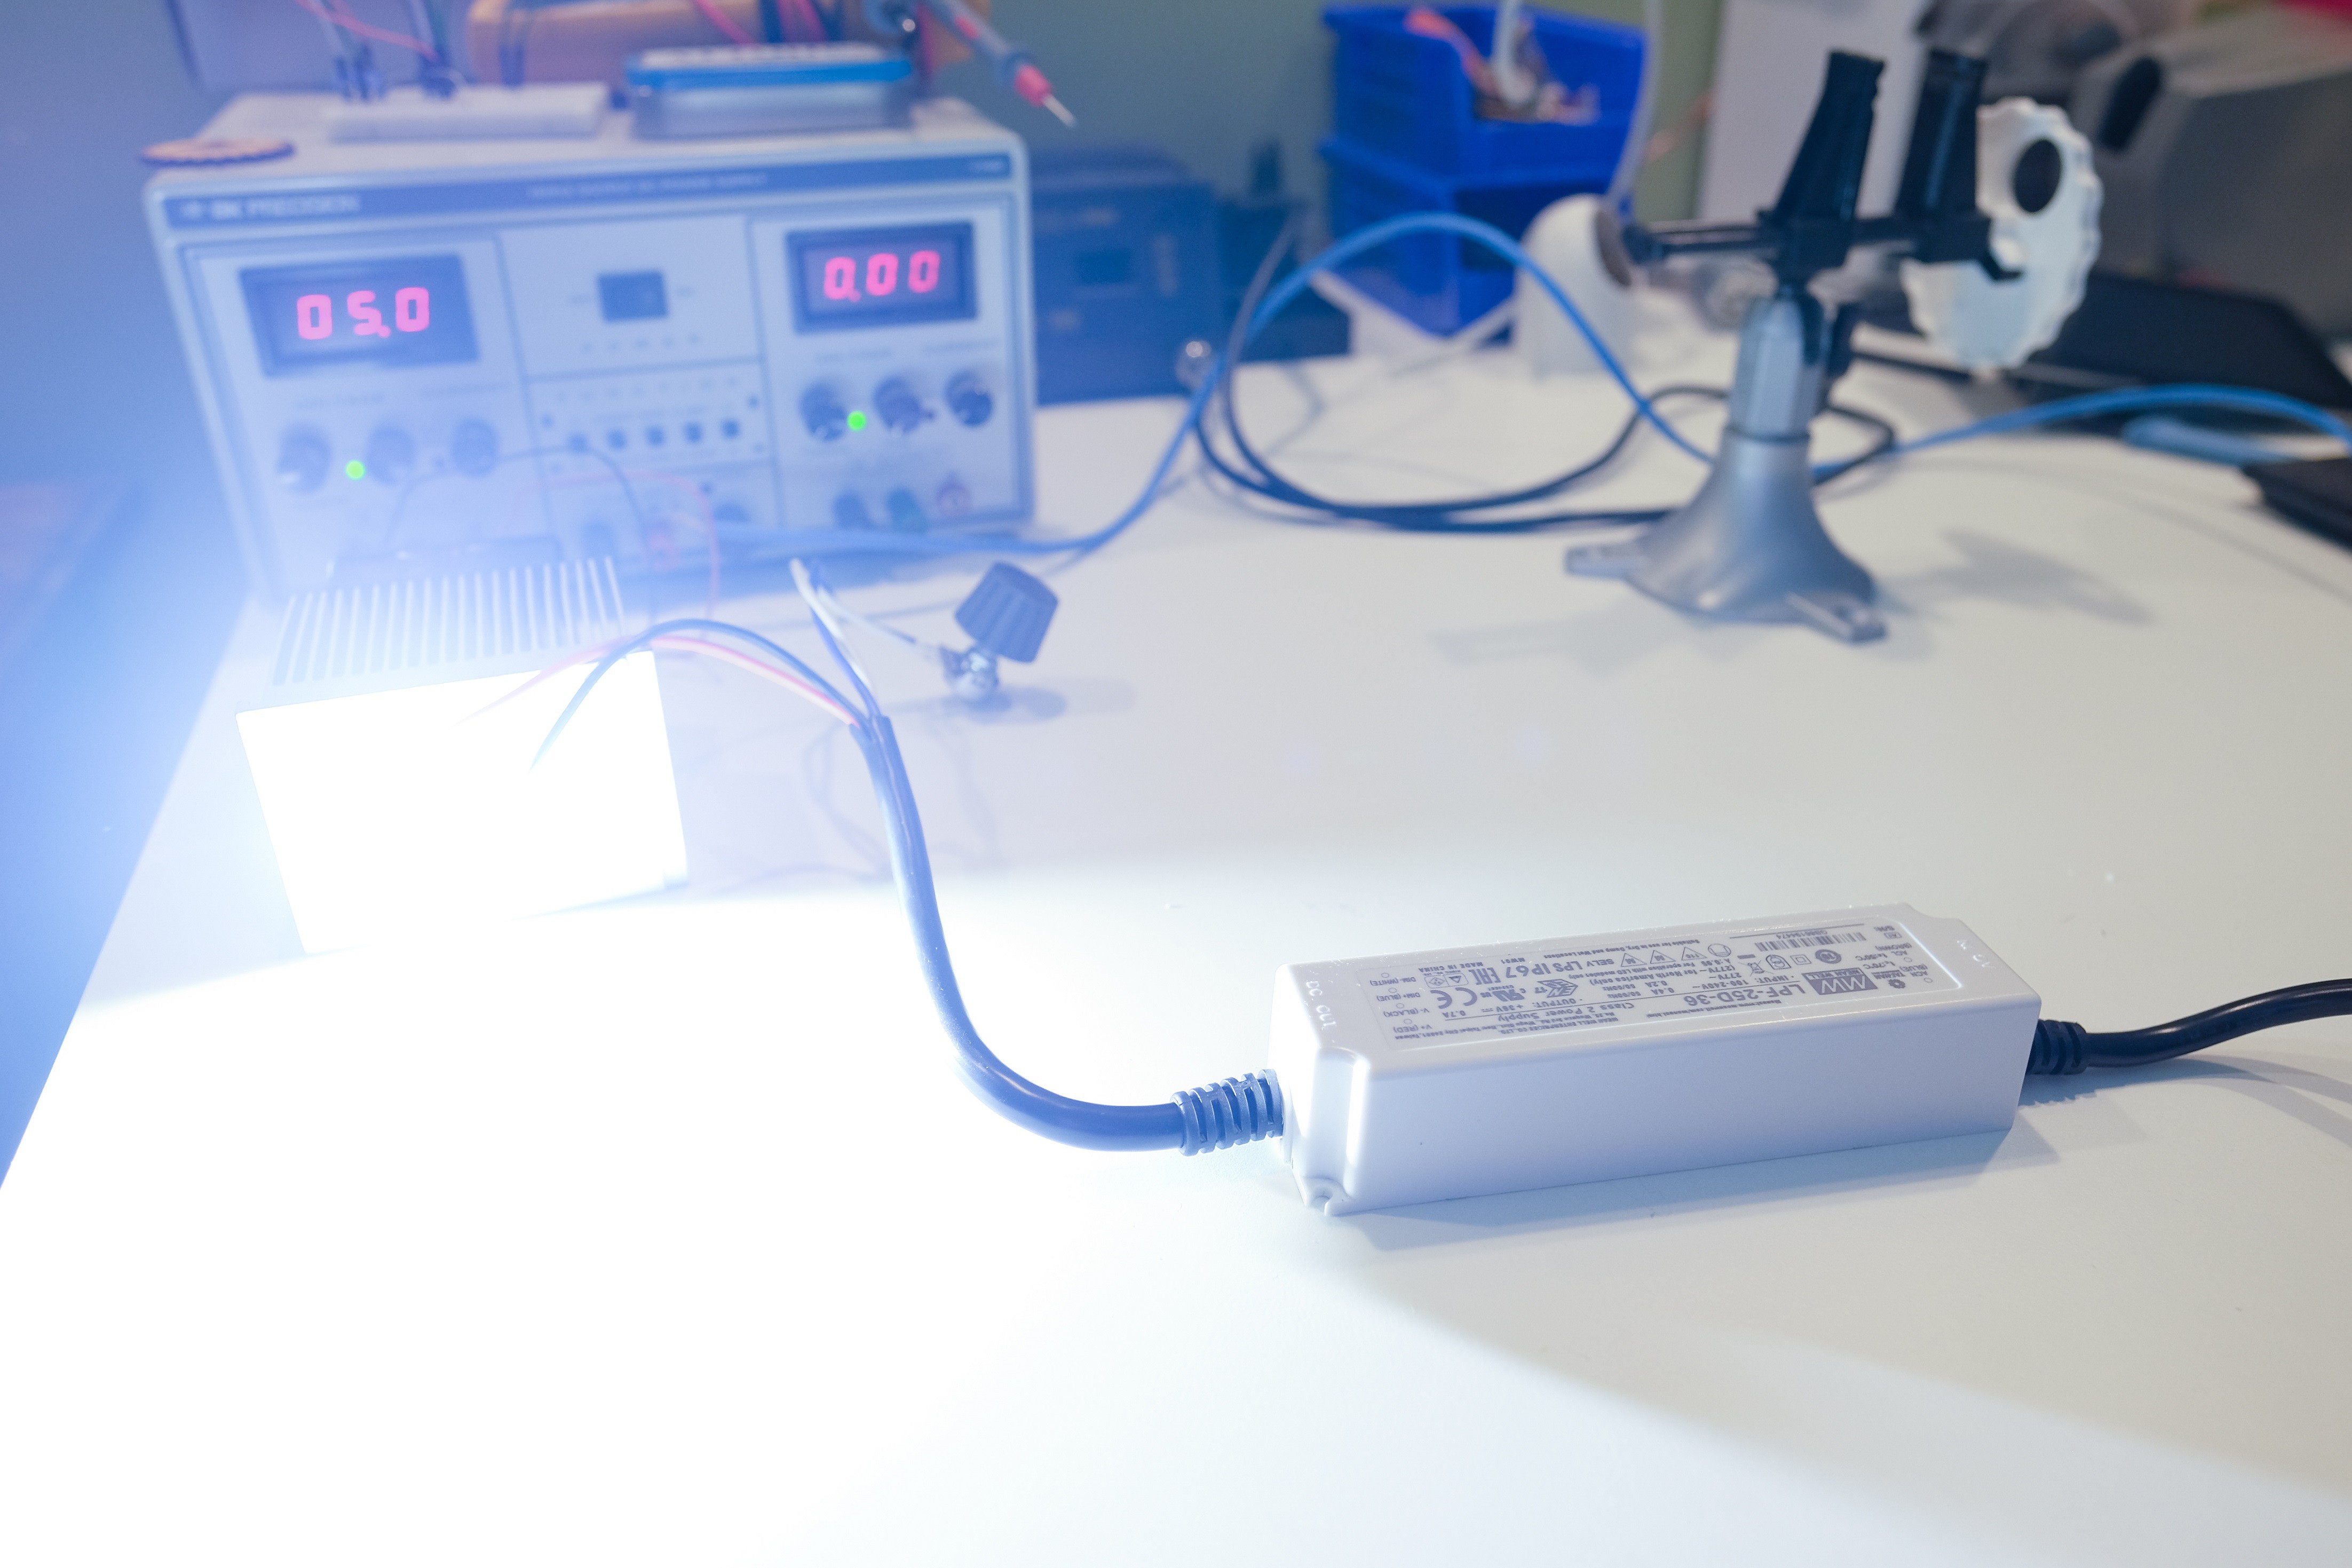
04/06/2019 at 20:27 • 0 commentsI was able to order some parts for the build after a long pause on the project. The high power CREE LED, power supply and DC fan came in. I did go with a 5v fan instead of a higher voltage one. I thought since I have a Pi 3 running on 5 volt power I could just piggy back the fan on that supply. At the moment for testing the fan is running off the power supply and the Meanwell supply is directly wired to a extension cord. Once I get the base printed I will look at wiring up a proper fuse, PC power socket and power switch.
The LED is mounted to the heat sink with Arctic Silver 2 part epoxy. The dimming is working though my 100k pot seems to top out at 80k so I will need to grab a better one. It may just be I grabbed the wrong one from the bin.... Below are three photos of the current setup, I tried to keep the camera on the same settings to show the brightness. It is a new level for sure and I dare not look at it directly at full power.
![]()
![]()
![]()
-
Math Time :(
12/19/2018 at 20:32 • 1 commentSo doing a few *rough calculations I attempted to find out if the heat-sink I used for the design is big enough for the thermal load of the 20 Watt LED.
So first I found a simplified equation to work off of.
V= (Q*Rv)/Delta T
V = Volume needed
Q = Heat source power in Watts
Rv = Volumetric thermal resistance (amount of air flow)
Delta T = Tjunction - maximum ambient temperature
Ok so we are solving for V, For Q or Watts we have a 20Watt LED (calculating for a power efficiency of around 50%)
Rv I chose 200 which is about the middle of gentle to low noise air flow
Delta T came out to 40 °C with Tjuction at 100 °C and a max ambient air temp of 60 °C
Entering the above into the calculation:
V=(20*200)/40 solve for V and we get 100 cm³
So 100 cm³ is the size of heat-sink we need to dissipate the heat load of the LED. Now it's best to oversize the heat-sink so that we have a bit of play with airflow and to extend the life of the LED.
We then need to calculate the volume of the heat-sink I chose.
Volume is a bit more simple we use the following:
a*b*c
Yes I know it is simplified equation to properly account for the shape of a heat sink...
We use 6.3cm * 8.2cm * 7.0cm = 361.6 cm³
So with the fan on we have a over sized heat-sink by 261.6 cm³
Now what if the fan dies or is removed? We then use 700 for Rv (close to or natural convection)
V=(20*700)/40 solve for V and we get 350 cm³ needed for a heat-sink to handle the heat load
This tells us if the fan dies the heat-sink should be enough to handle the load of the LED at full brightness. A better calculation would also include the the junction between the LED.
We can also calculate the luminous efficacy of the LED, by taking Lumens (2741) divided by Watts (20) we get 137%. Though the specs seem a bit misleading on Watts, I may have to revisit the calculations.
Apollo
-
Adding additional functionality
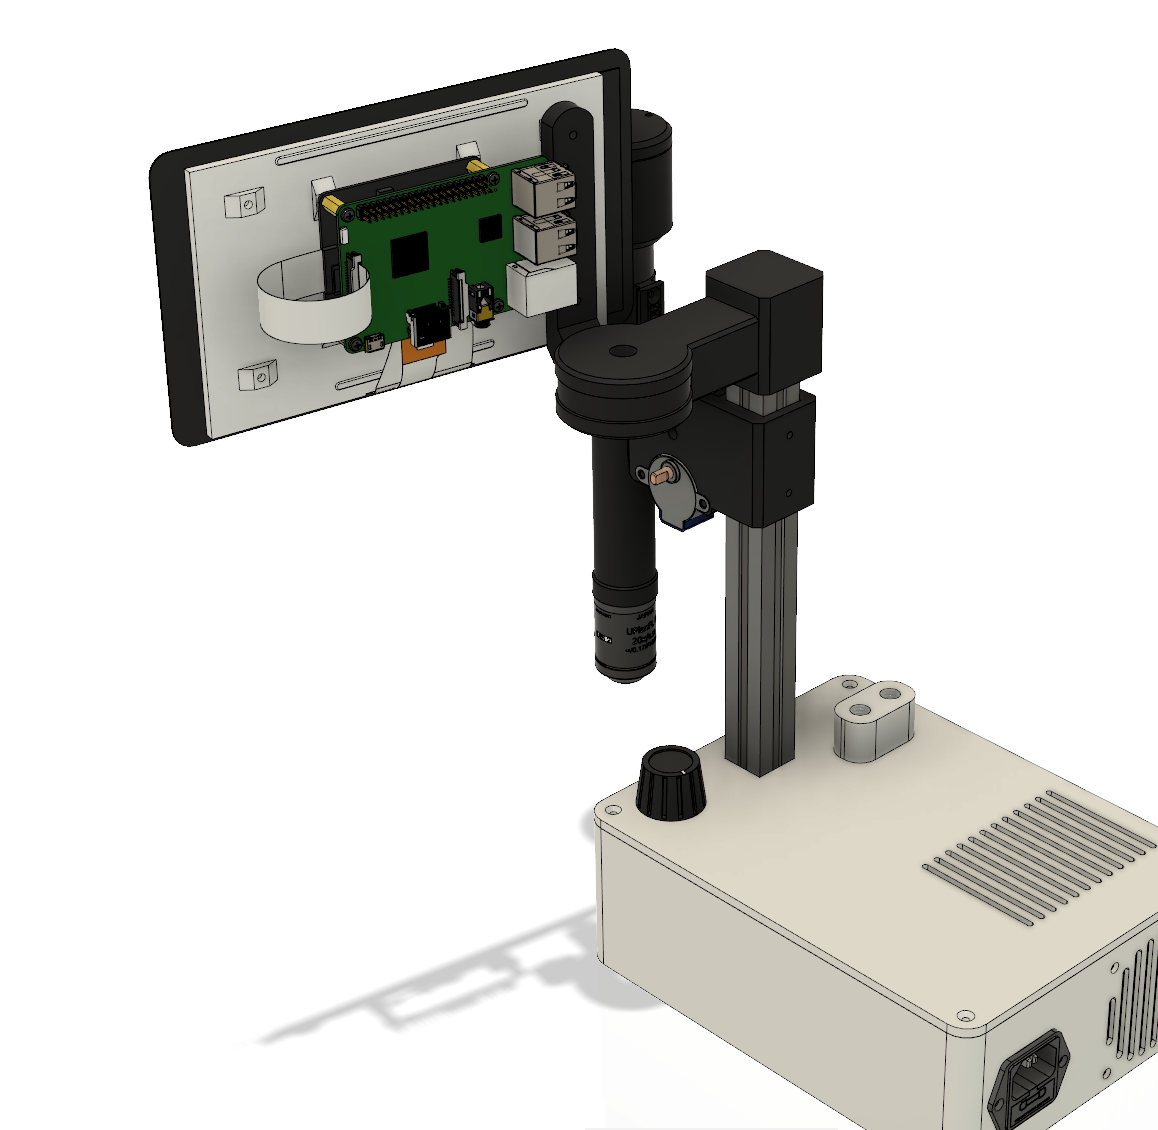
12/19/2018 at 15:26 • 0 commentsIn a effort to make this a tool that I would not hesitate to use day to day I have made a few small improvements to the design and one large one. As this scope will be running off of a Raspberry Pi I found a nice display model off of GrabCAD (credit to max morozov for his work). This display is from the Raspberry Pi foundation and features capacitive touch. Its small, light and interfaces with a Pi well. Only downside is the resolution is not as high as I would like, but this is one of those times where you use what you got. To be honest it is still a cool display. I went ahead and modeled up a support arm for it that has angle adjustment. The small changes were moving the power switch to the front of the machine for easy access. I also made the case a little taller overall to accept different heat-sink sizes. This was mainly so that people would be able to mix and match a few different sizes in the future if they decide to build one. This should be fine as long as they don't put too small of a heat-sink in place of the one shown. I went and ordered two 40cm gooseneck conduits online, that I will stuff with end to end fiber cables.
Well enough of me rambling here is the newest revision of the scope:
![]()
A view of the back (not rendered)
![]()
-
Design Checkpoint
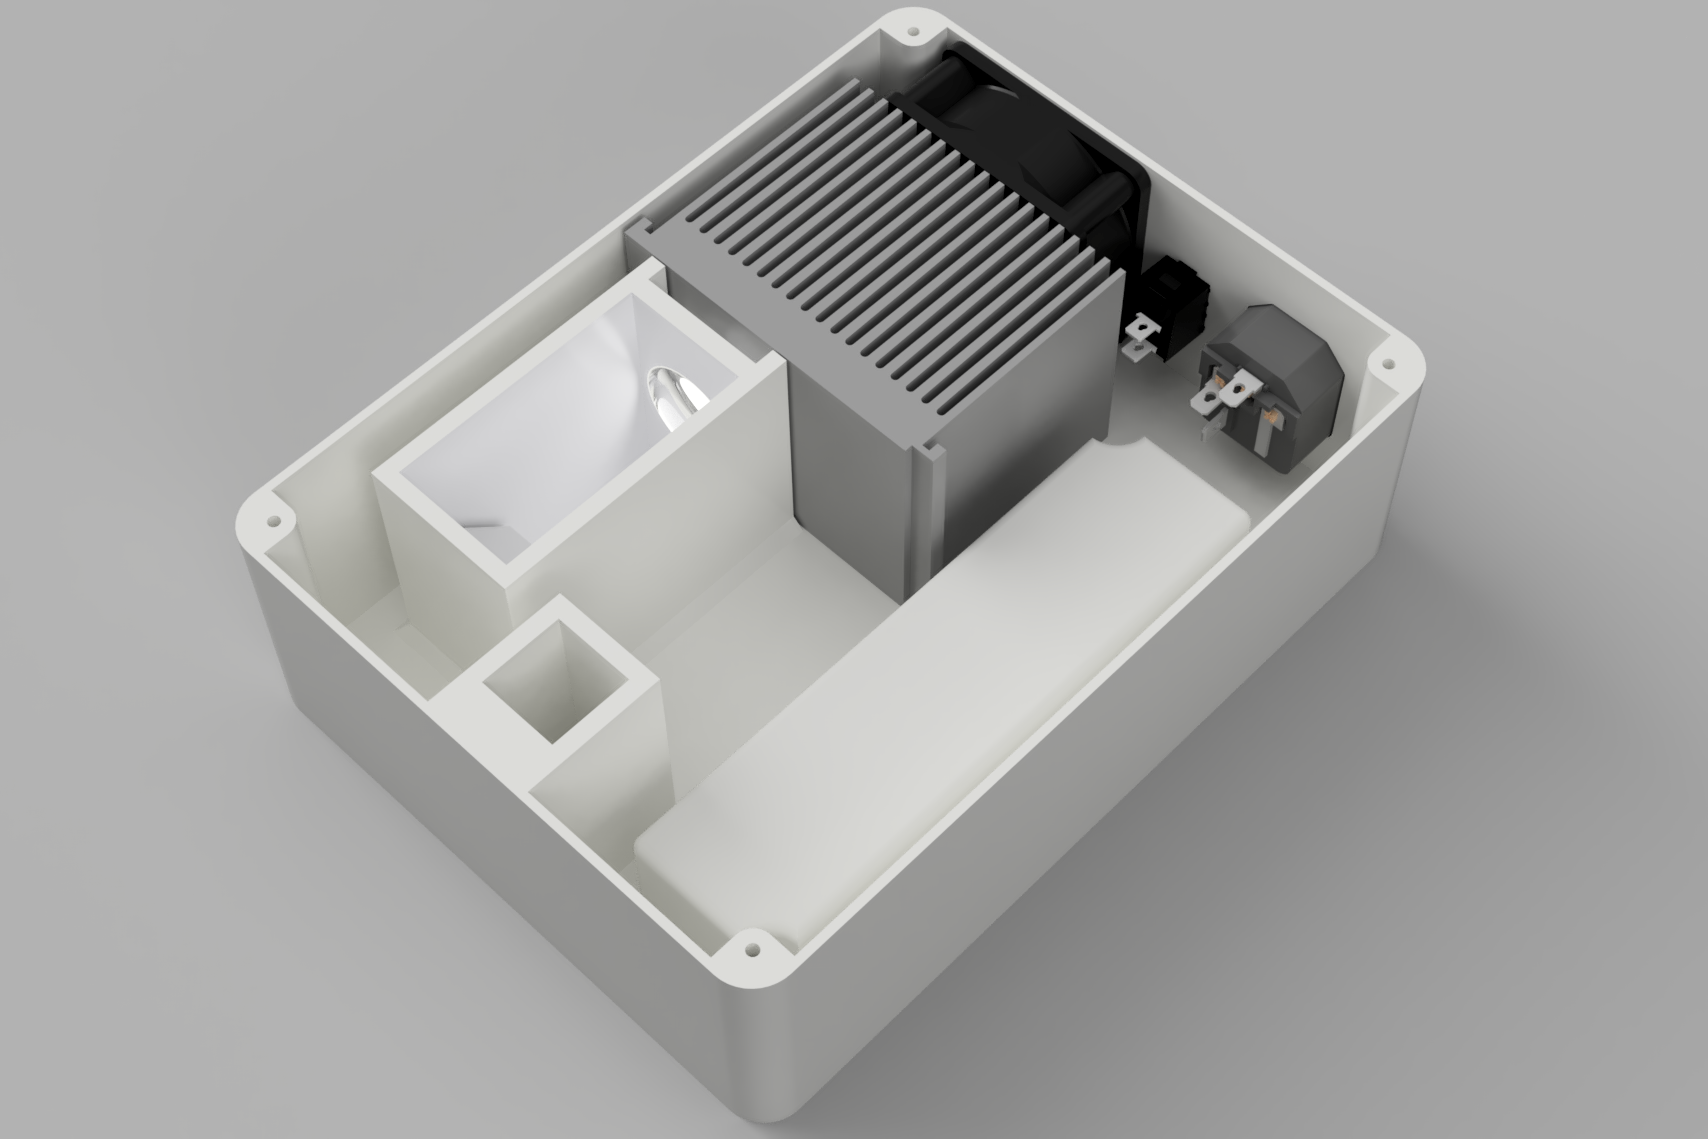
12/17/2018 at 15:48 • 0 commentsI went though the design and found a few flaws. One of them being the power supply did not come with a dimmable feature, so I selected one that did off of Mouser. As it is a little closer to the exact rating I needed, it happen to be a bit cheaper as well. Next I need to go and order the LED, power supply and fan off of Mouser and then head to the local electronics store to see if I can find a heat sink that will work in the case. Unfortunately the case is filling up pretty fast, though I would still like to see if I can squeeze a Raspberry Pi into it.
Below is a full change list.
Completed:
- Design fins for intake and exhaust air vents
- Added rocker switch for main power
- Added 3pin AC socket and fuse assembly
- Changed out original spec power supply to one with a dimming feature (modeled dimensions in case)
- Designed threaded dual goose neck adapter part
- All internal components are in place
![]()
Apollo
PCB inspection microscope
Create a fiber optic light illuminator for the 3D printed microscope v3