lion mclionhead
-
Faster pose tracker
02/05/2022 at 04:25 • 0 commentsThere was a rumor that running a raspberry pi in 64 bit mode would make pose tracking run as fast as a GPU. Sadly, raspberry pi production joined GPU production in valhalla so these notes won't be applicable to many animals.
Traditionally, 64 bit mode was slower because it entails moving a lot more data around. That plagued IA64. It might have an advantage in executing more parallel floating point operations.
The journey began by downloading ubunt 21 for raspberry pi 4. It requires 4GB RAM & 16 GB of SD card. It required a keyboard, mouse, & monitor for installation, which the lion kingdom didn't have. There's no minimal ubunt like there is for raspian.
There were some notes about enabling the UART console & bypassing the installation GUI.
https://limesdr.ru/en/2020/10/17/rpi4-headless-ubuntu/
but nothing useful for logging in. The only way to log in was to edit /etc/shadow on another confuser, copying the password hash of a known password to the root password field.
Next came disabling some programs. There might be a need to run X someday to test an LCD panel, so lions don't delete that anymore.
mv /usr/sbin/NetworkManager /usr/sbin/NetworkManager.bak
mv /usr/sbin/ModemManager /usr/sbin/ModemManager.bak
mv /usr/lib/xorg /usr/lib/xorg.bak
mv /sbin/dhclient /sbin/dhclient.bak
swapoff -a; rm /swapfile
Then create some network scripts.
ip addr add 10.0.0.16/24 dev eth0
ip link set eth0 up
ip route add default via 10.0.0.1
echo nameserver 75.75.75.75 > /etc/resolv.conf
There's a new dance to make this run in /etc/rc.local
https://www.linuxbabe.com/linux-server/how-to-enable-etcrc-local-with-systemd
Most importantly, the default runlevel must be changed from oem-config.target to multi-user.target
systemctl set-default multi-user.target
Then install some sane programs as fast as possible.
apt update
apt install net-tools
apt install openssh-server
rm /var/cache/debconf/* if it dies because of some locking bug.
The instructions for setting up pose tracking were in
![]()
![]()
![]()
![]()
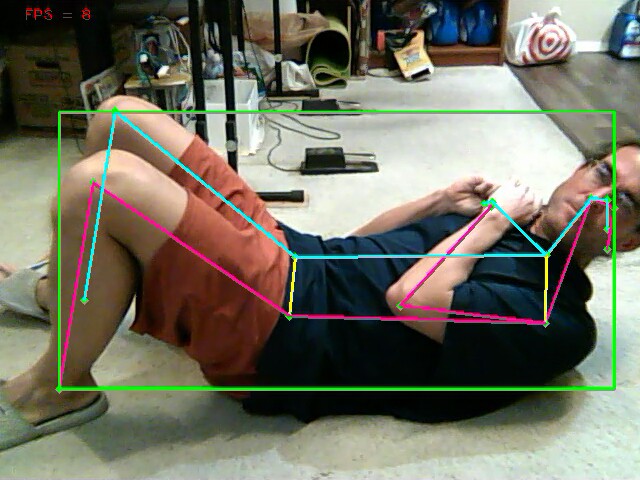
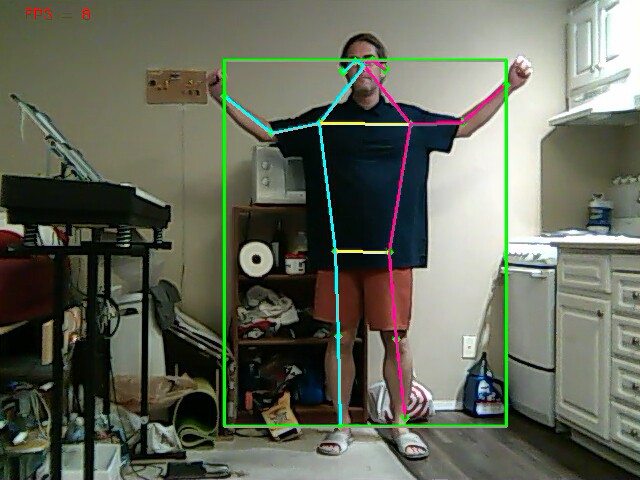
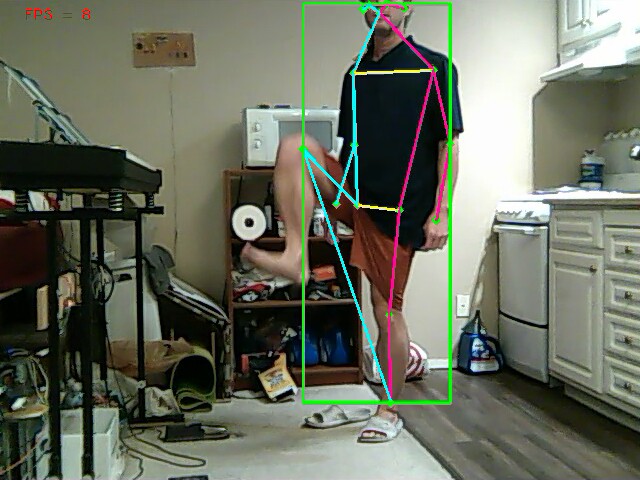
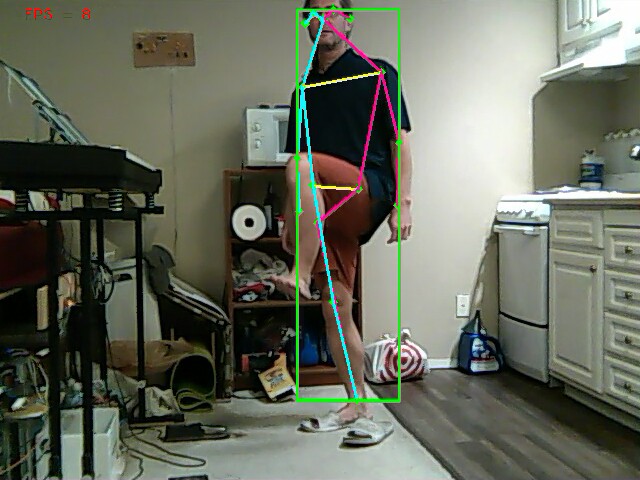
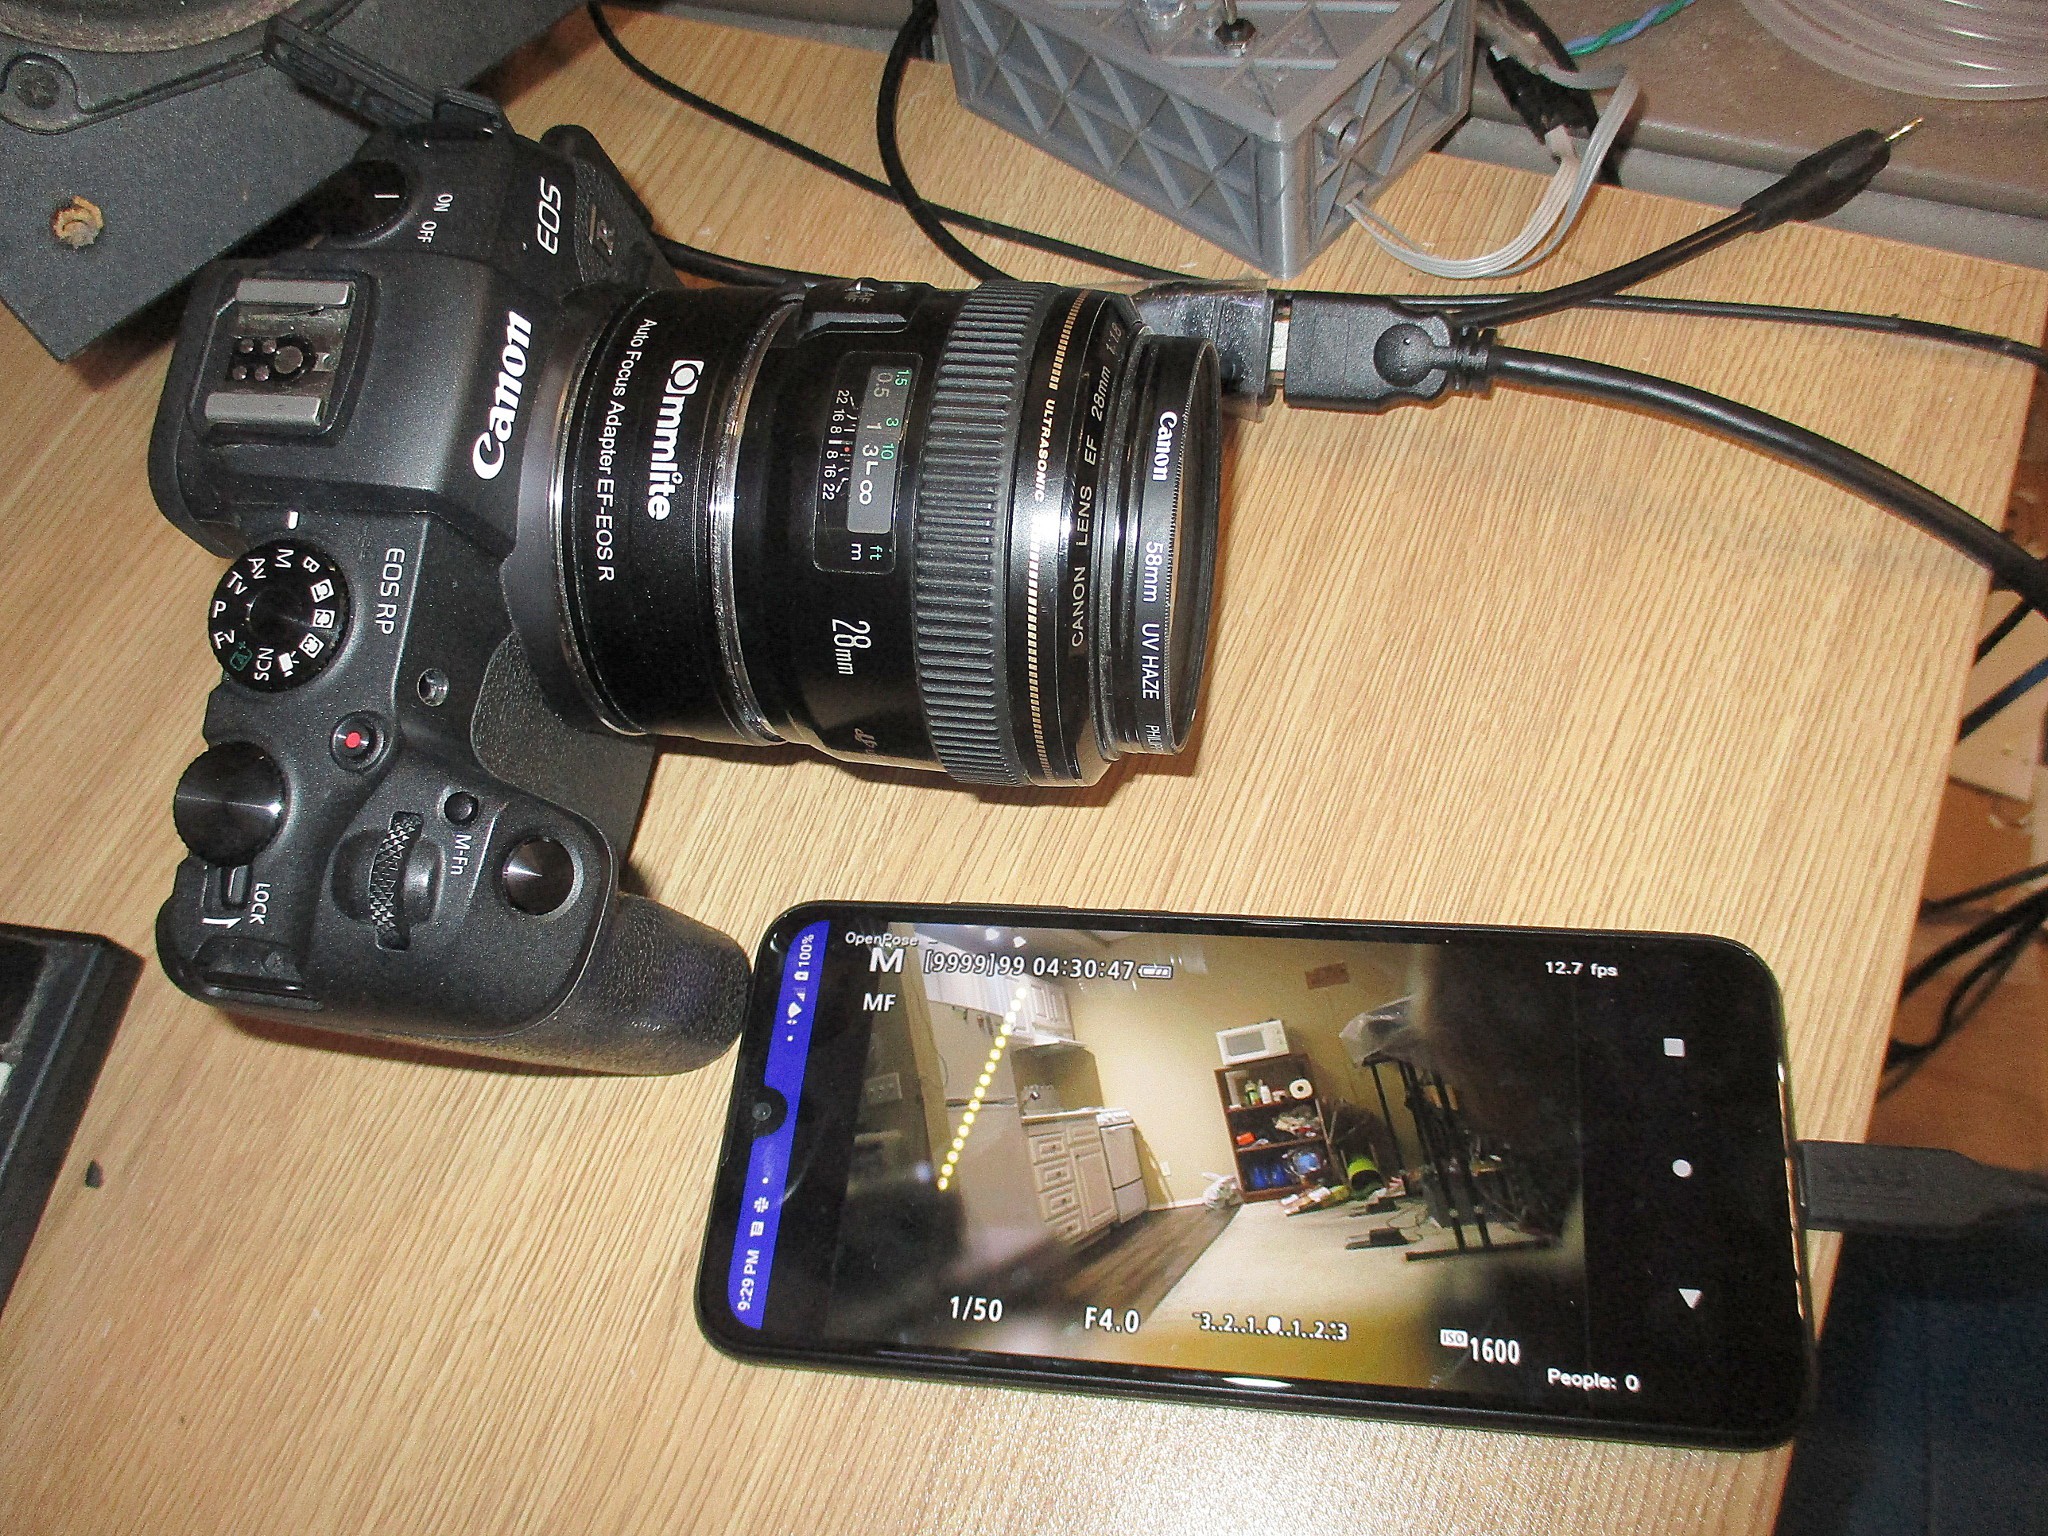
The movenet_lightning.tflite model ran at 8fps & detected just 1 animal at a time. posenet.tflite ran at 5fps. movenet_multipose.tflite crashed. There was an alternative multipose model on
https://tfhub.dev/google/lite-model/movenet/multipose/lightning/tflite/float16/1
This one worked at 3fps.
The command for changing models was
python3 pose_estimation.py --model movenet_multipose
It wasn't close enough for rep counting, but just might be good enough for camera tracking. Overclocking might get it up to 4fps. As amazingly efficient as it is in getting the most out of the CPU, it's still too slow for the ultimate goal of photographing 2 people. It's only good enough for tracking a single lion. The next step would be fabricating a compact cooling system to overclock it & running face recognition.
-
Commercial tracking options
12/07/2021 at 07:09 • 0 commentsA home made tracker by now is surely a huge waste compared to a DJI robot. Maybe it wasn't when it began in 2019. It's hard to believe a junk laptop which finally allowed pose tracking at a reasonable speed didn't arrive until June 2019, so lions have only had 2.5 years of tracking of any serious quality. 3 years of total pose tracking including the low quality tablet camera. The final tablet source code was lost despite only dating back to June 2019.
Despite inflation, the cost of webcam quality video with tracking plummeted since 2019 & we have the 1st decent look at the user interface.
https://www.amazon.com/OBSBOT-AI-Powered-Omni-Directional-90-Degree-Correction/dp/B08NPGNMV8
Fortunately, the picture quality is still horrible. There are tracking speed options & a composition option to change how high the head is in the frame. There's a differentiation between resetting the gimbal & starting tracking. That's quite difficult on the servocity because it has no center PWM. Apple introduced a tracking feature called centerstage in 2021 which crops the full phone cam in on a face.
These all track the face instead of the full body. No-one knows how well they track 2 faces.
The DJI RS2 is the only tracker which uses a DSLR. Now that more detailed reviews abound, it's more limited than expected. It tracks a feature rather than a body or a face. It's not reliable enough to track a deforming feature for 30 minutes, unattended. It receives servo commands from a phone where the tracking is performed. The phone receives video from an HDMI transmitter sold separately.
The only thing making the gimbal relevant is the proprietary wireless protocol between the phone & the motors. The phone app could use any video source to control any 2 servos, but is locked into using just a DJI transmitter & a DJI gimbal. It's not clear if the HDMI transmitter requires the gimbal to function.
The stabilization of the gimbal is worthless if it's always mounted on a tripod, but its stabilization is equivalent to the lion kingdom's hacked Feiyu. They all rely on camera stabilization to achieve perfect smoothness. It would be a true waste to buy a DJI RS2 just for tracking, although lions could use the gimbal for photographing goats.
Tracking a mane as well as a full body is the holy grail. The confuser would need to run 2 models simultaneously.There was an interesting bug where the stdin & stdout handlers for ffmpeg held the same mutex. It deadlocked since ffmpeg couldn't empty stdin without writing to stdout. The easy solution was using a file descriptor instead of a file pointer to access the streams. That didn't require the mutex.
To handle gimbal centering, it saves the last manually dialed position as the center. Going in & out of tracking mode doesn't reset the center & it doesn't rewind the camera to the center. It's essential to not have anything else change to go between portrait & landscape mode. The user can press a center button when it's not tracking.
![]()
![]()
![]()
![]()
![]()
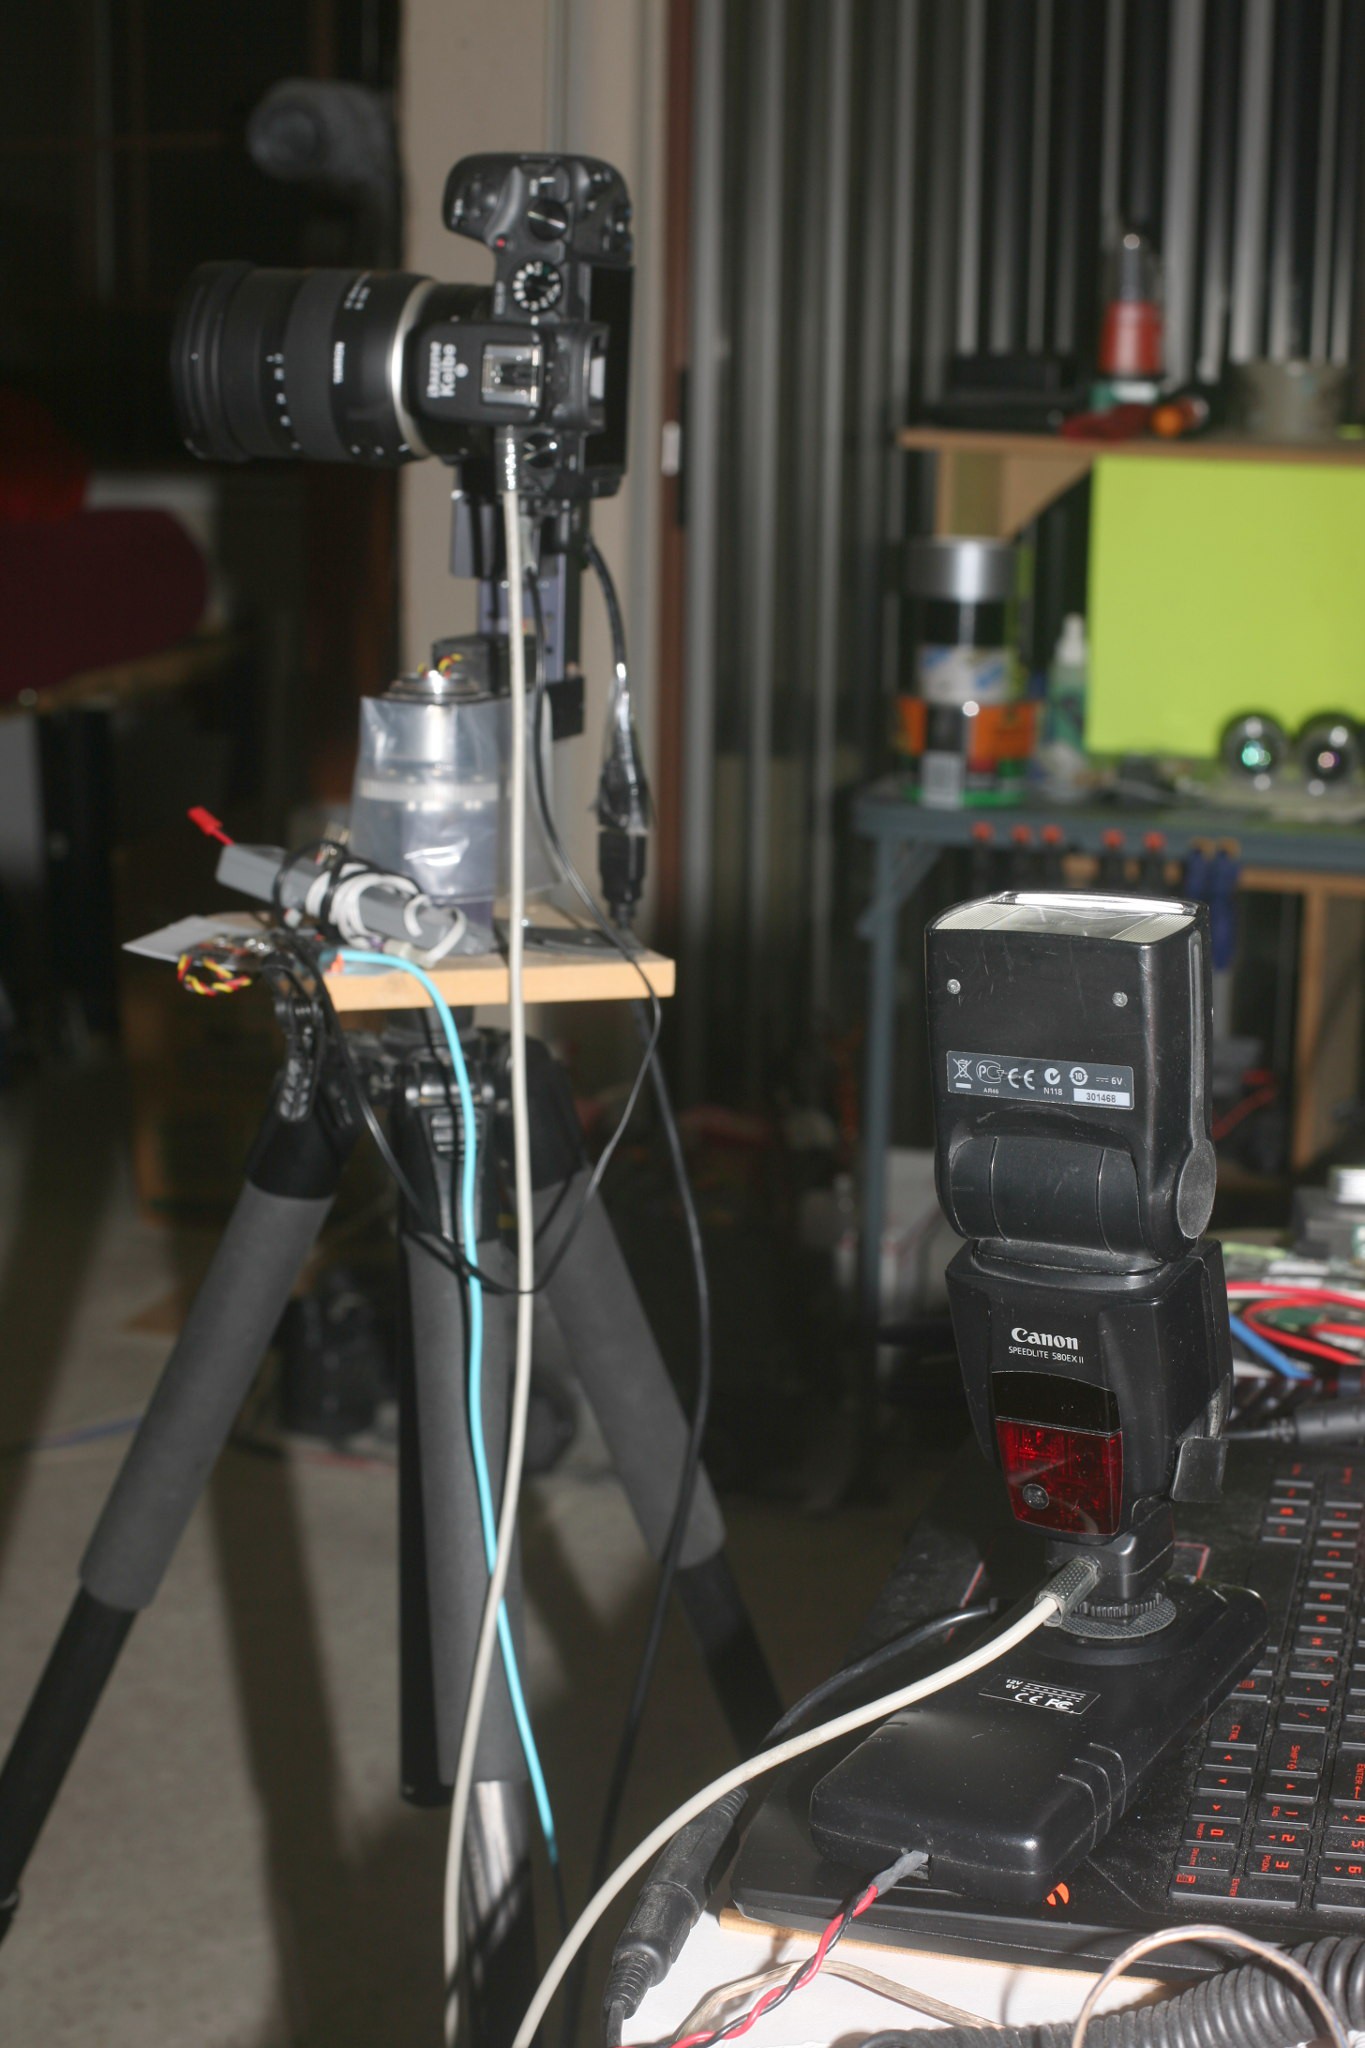
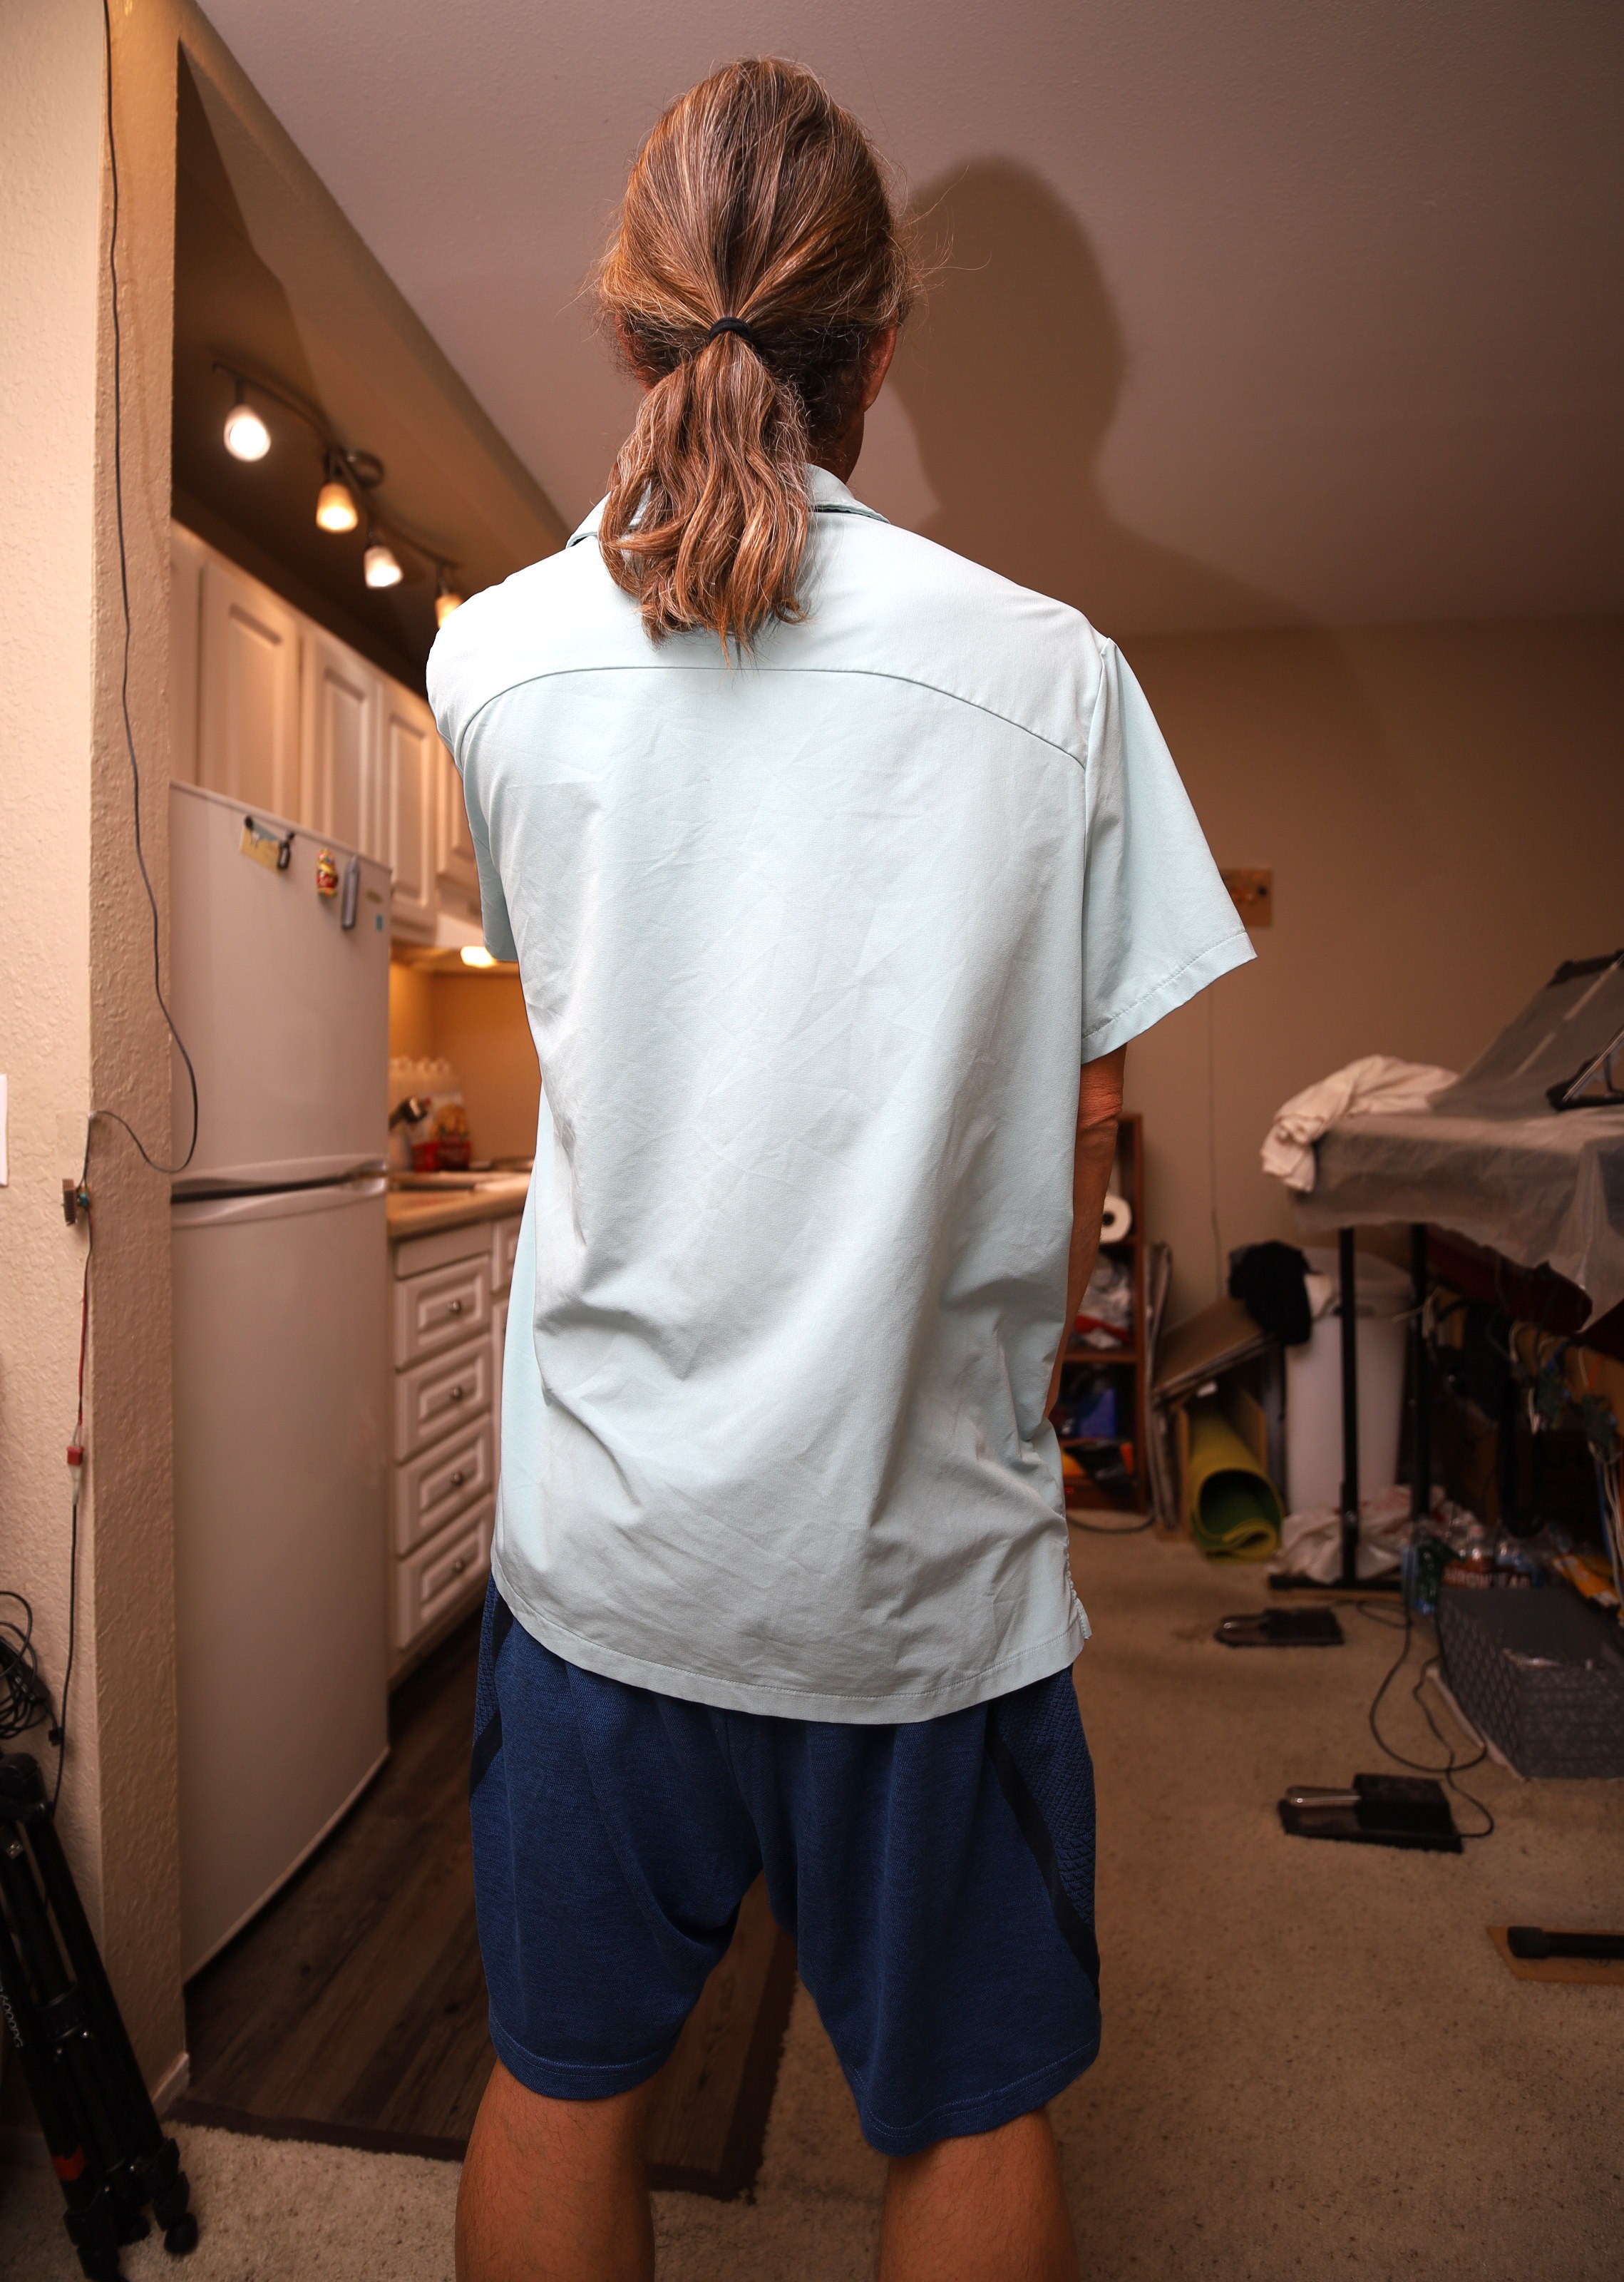
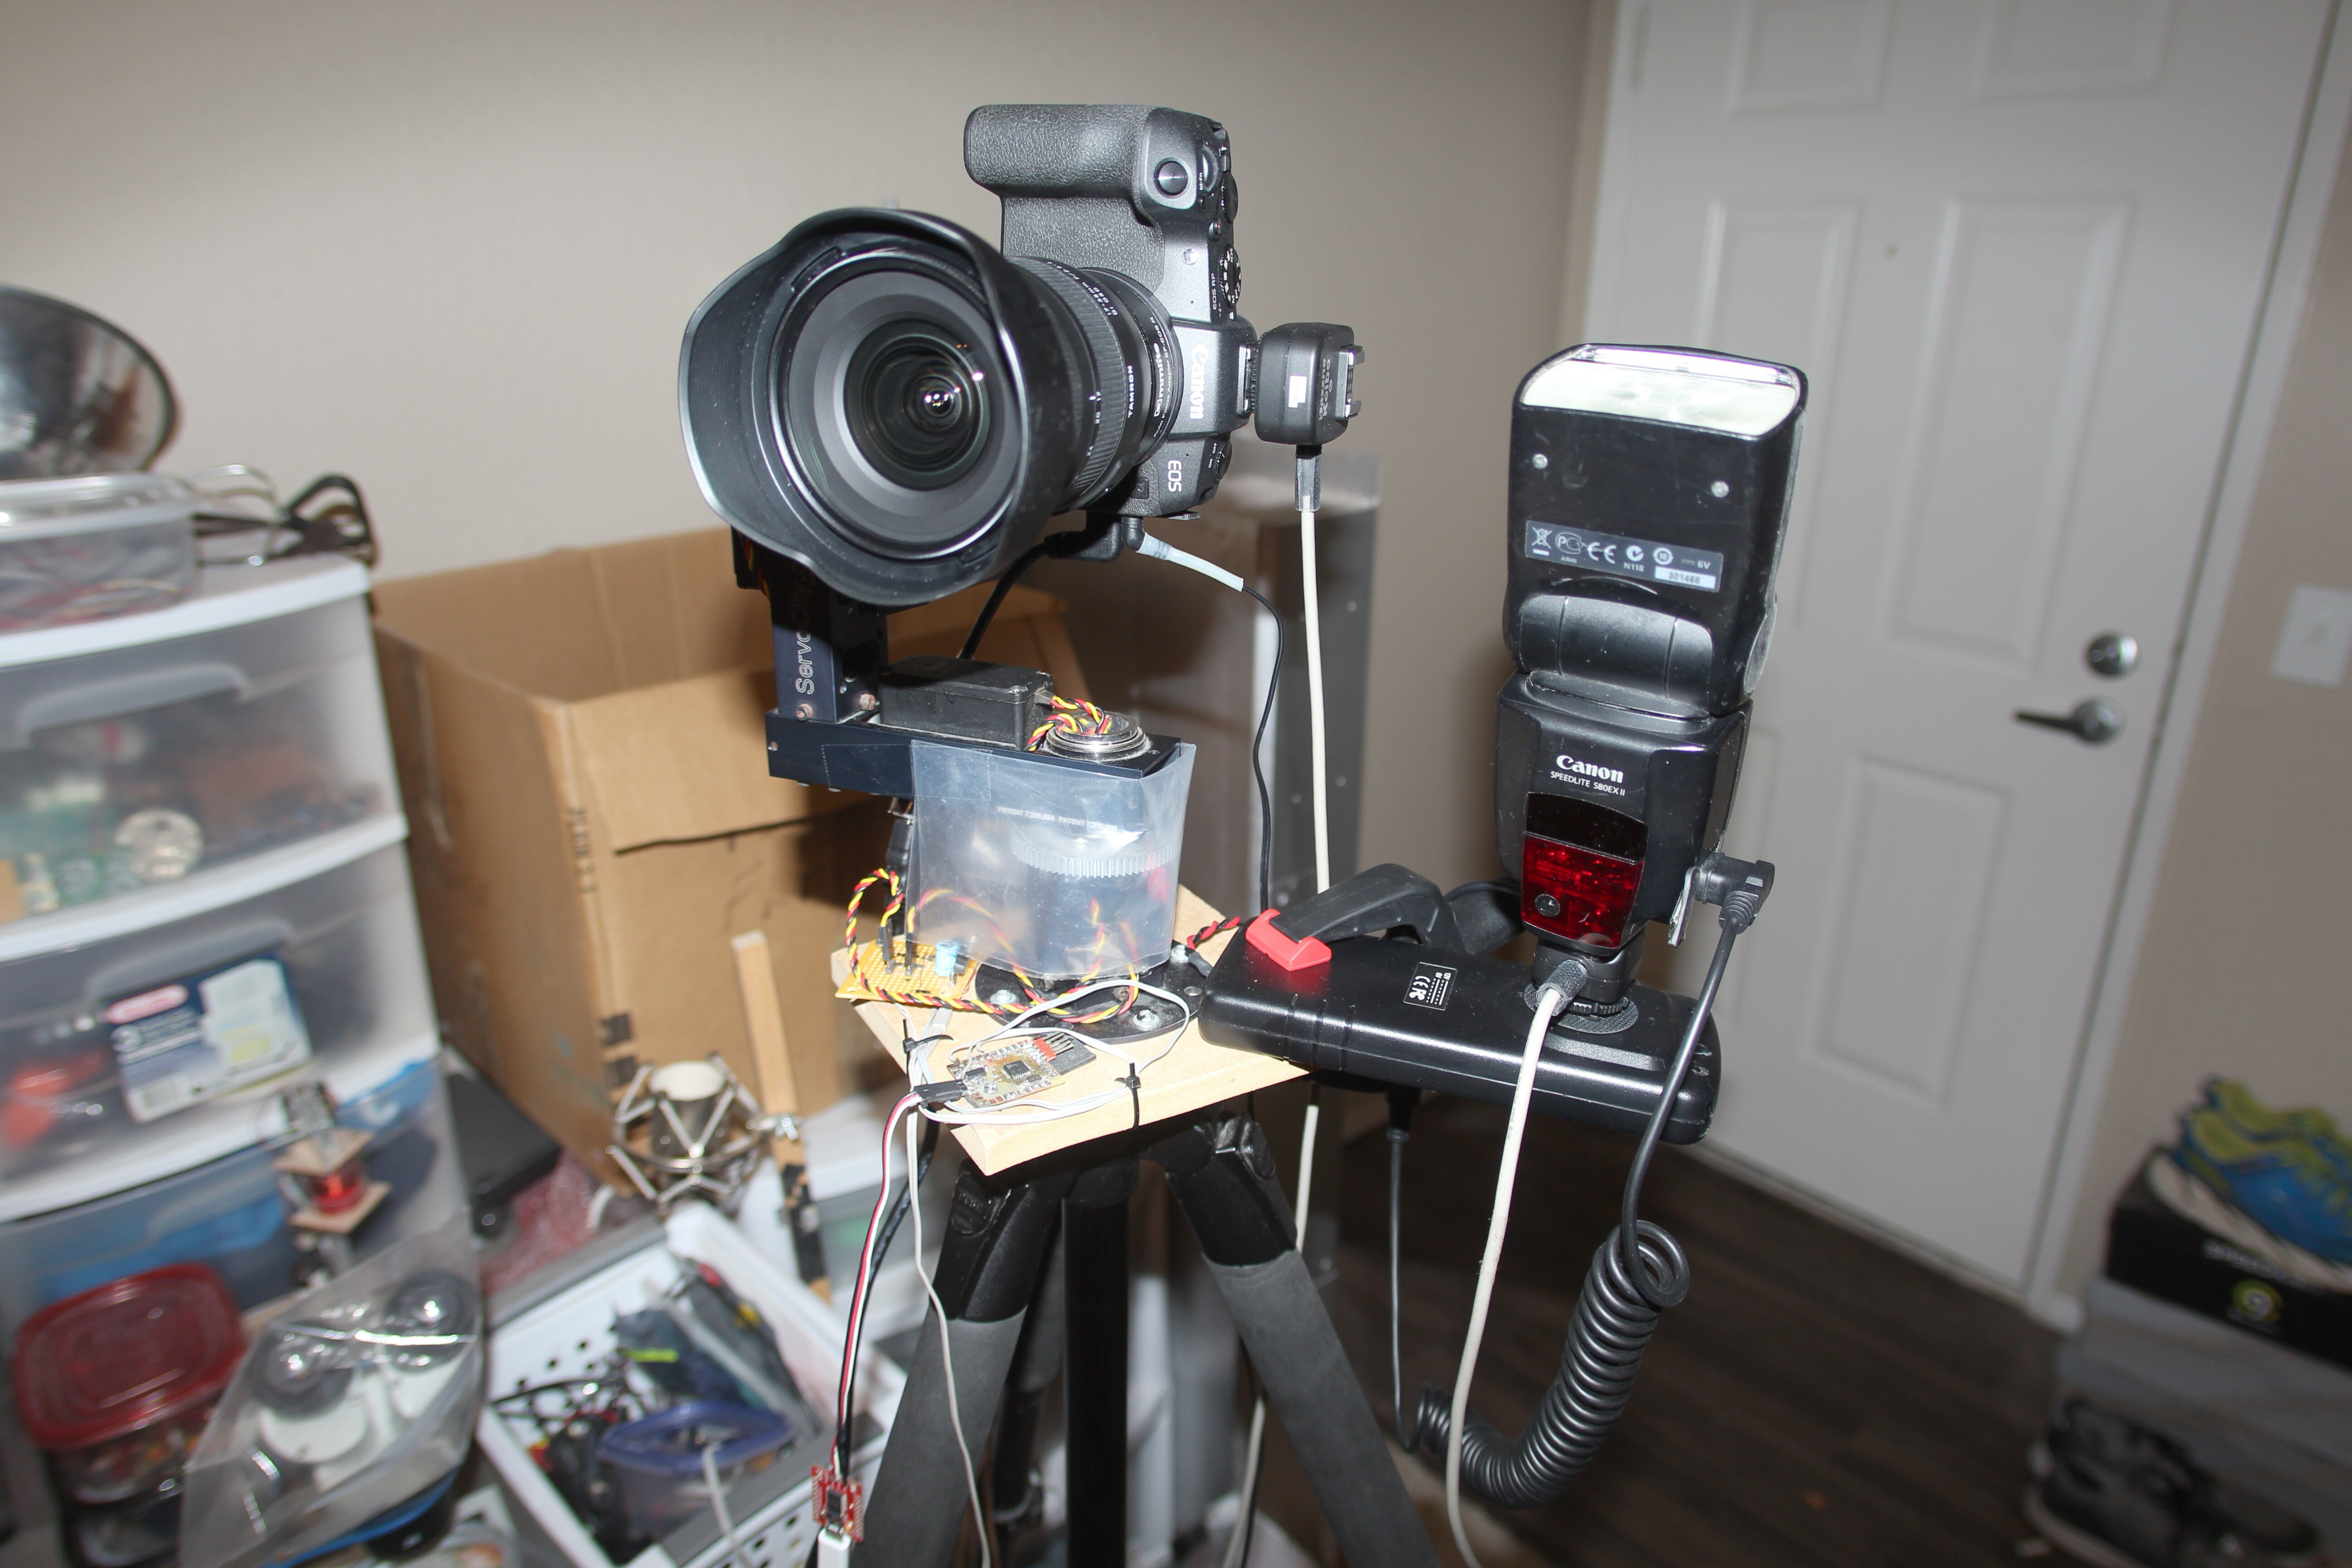
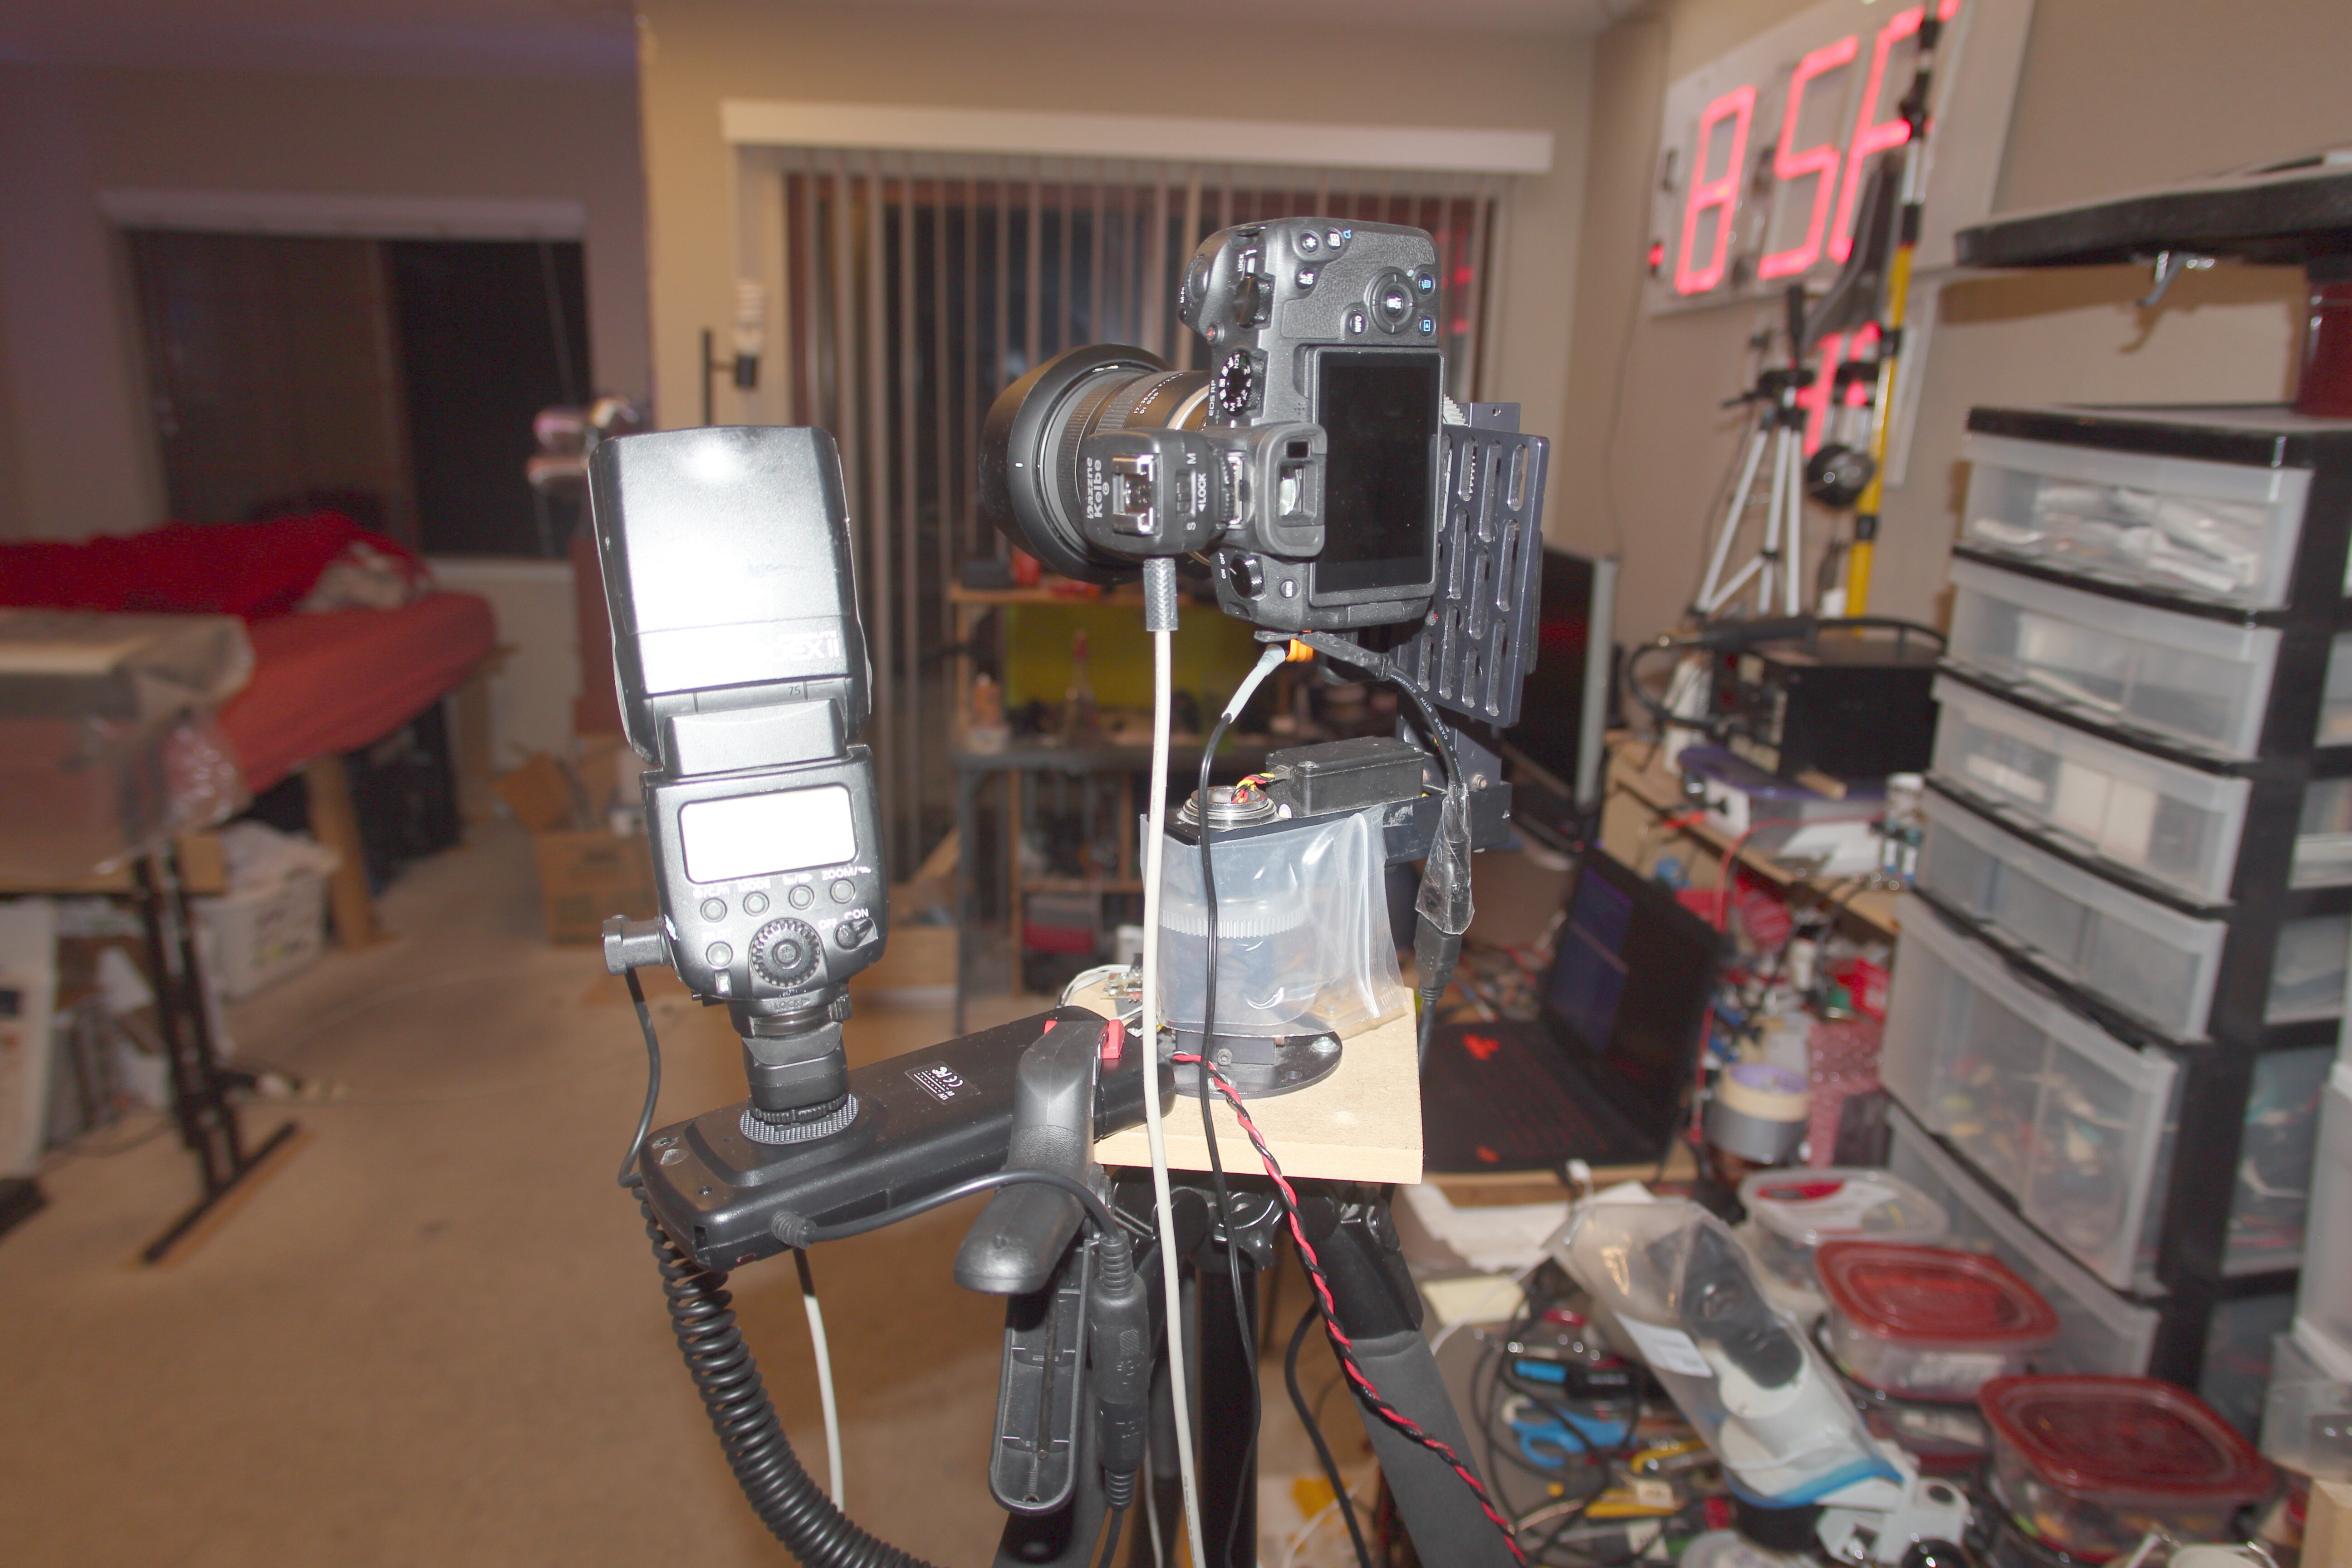
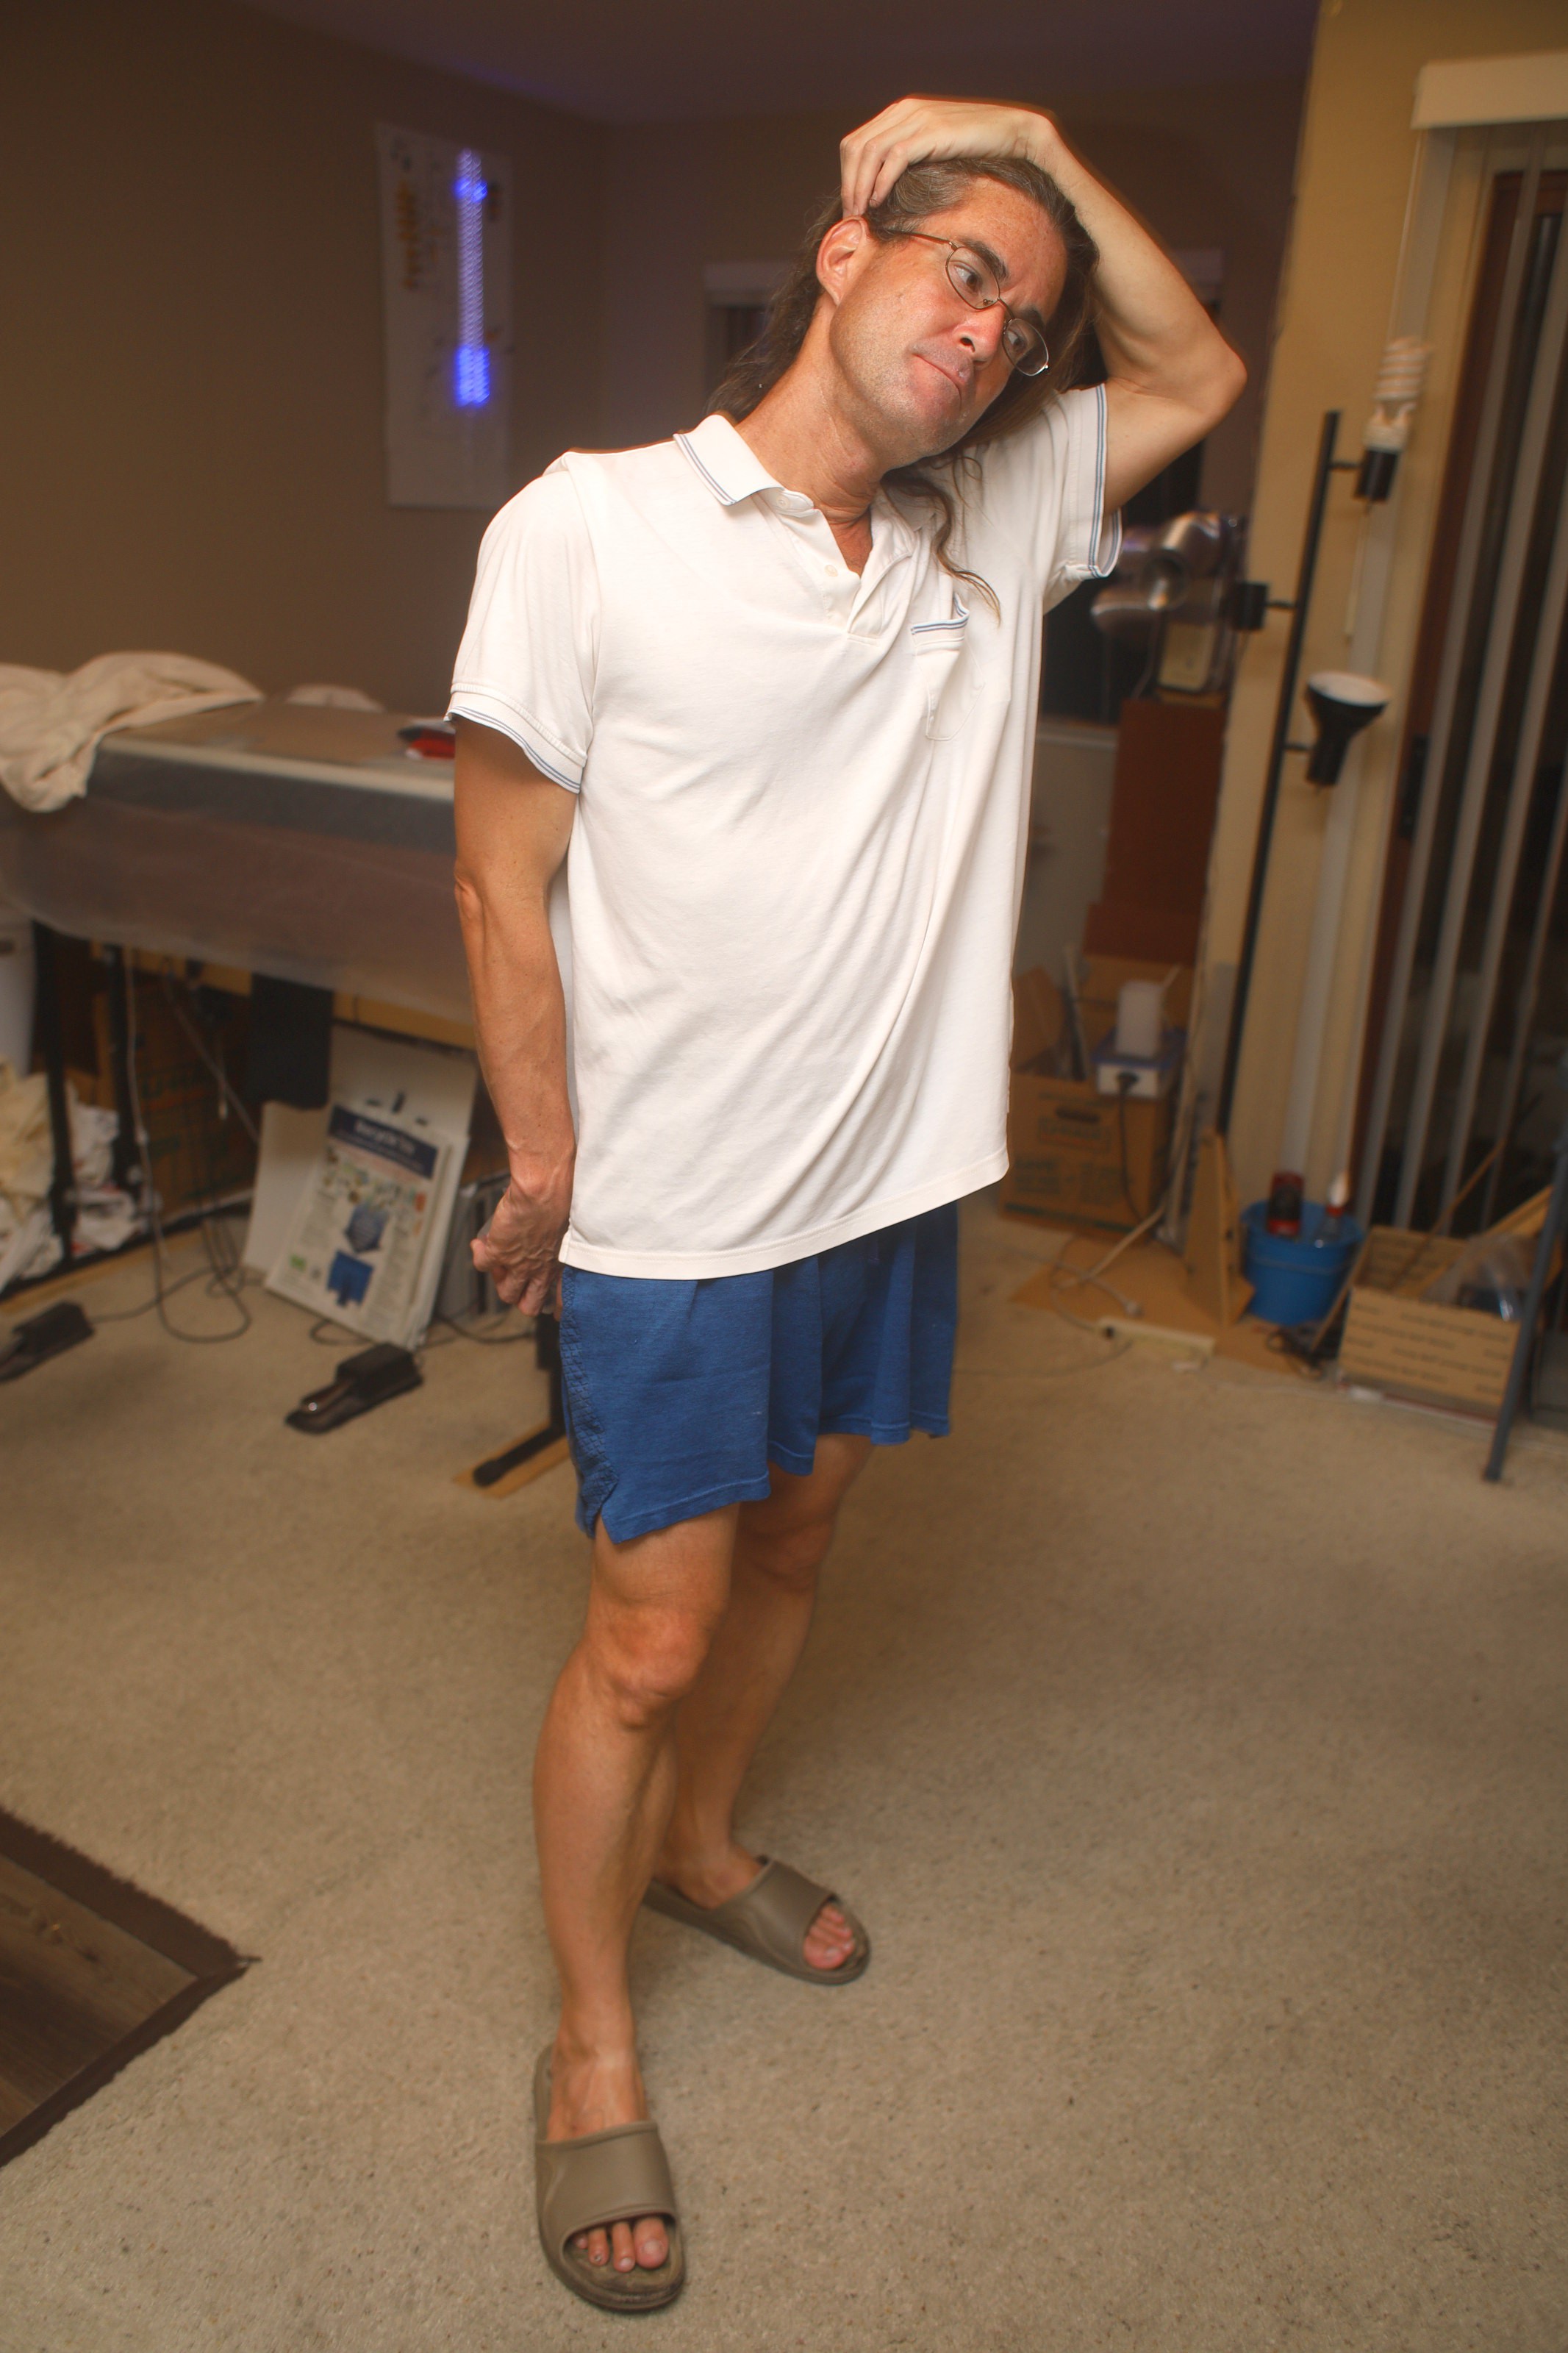
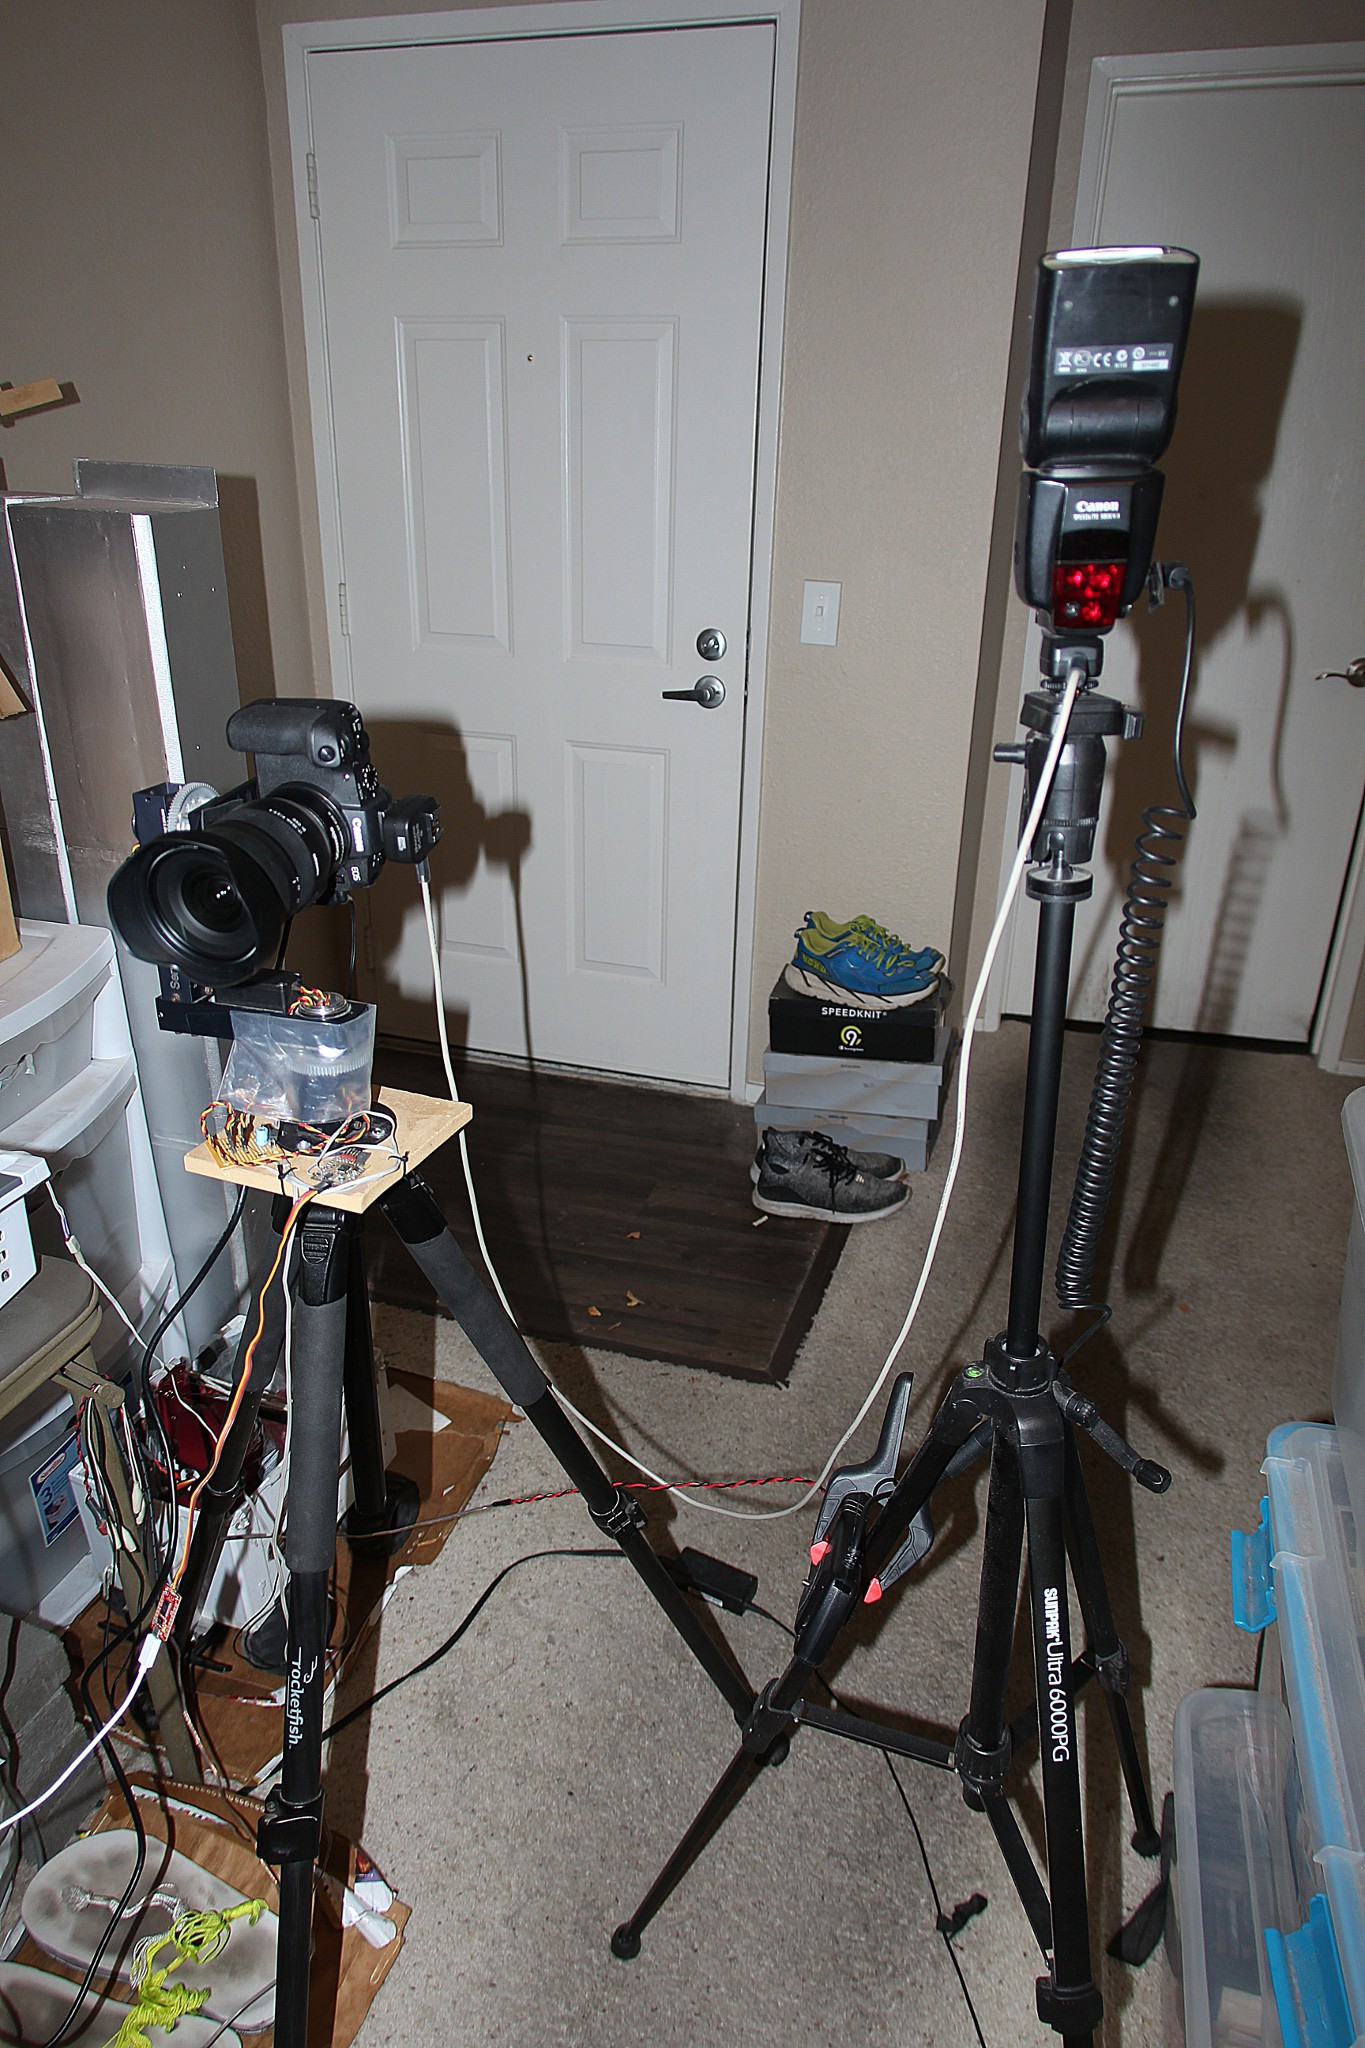
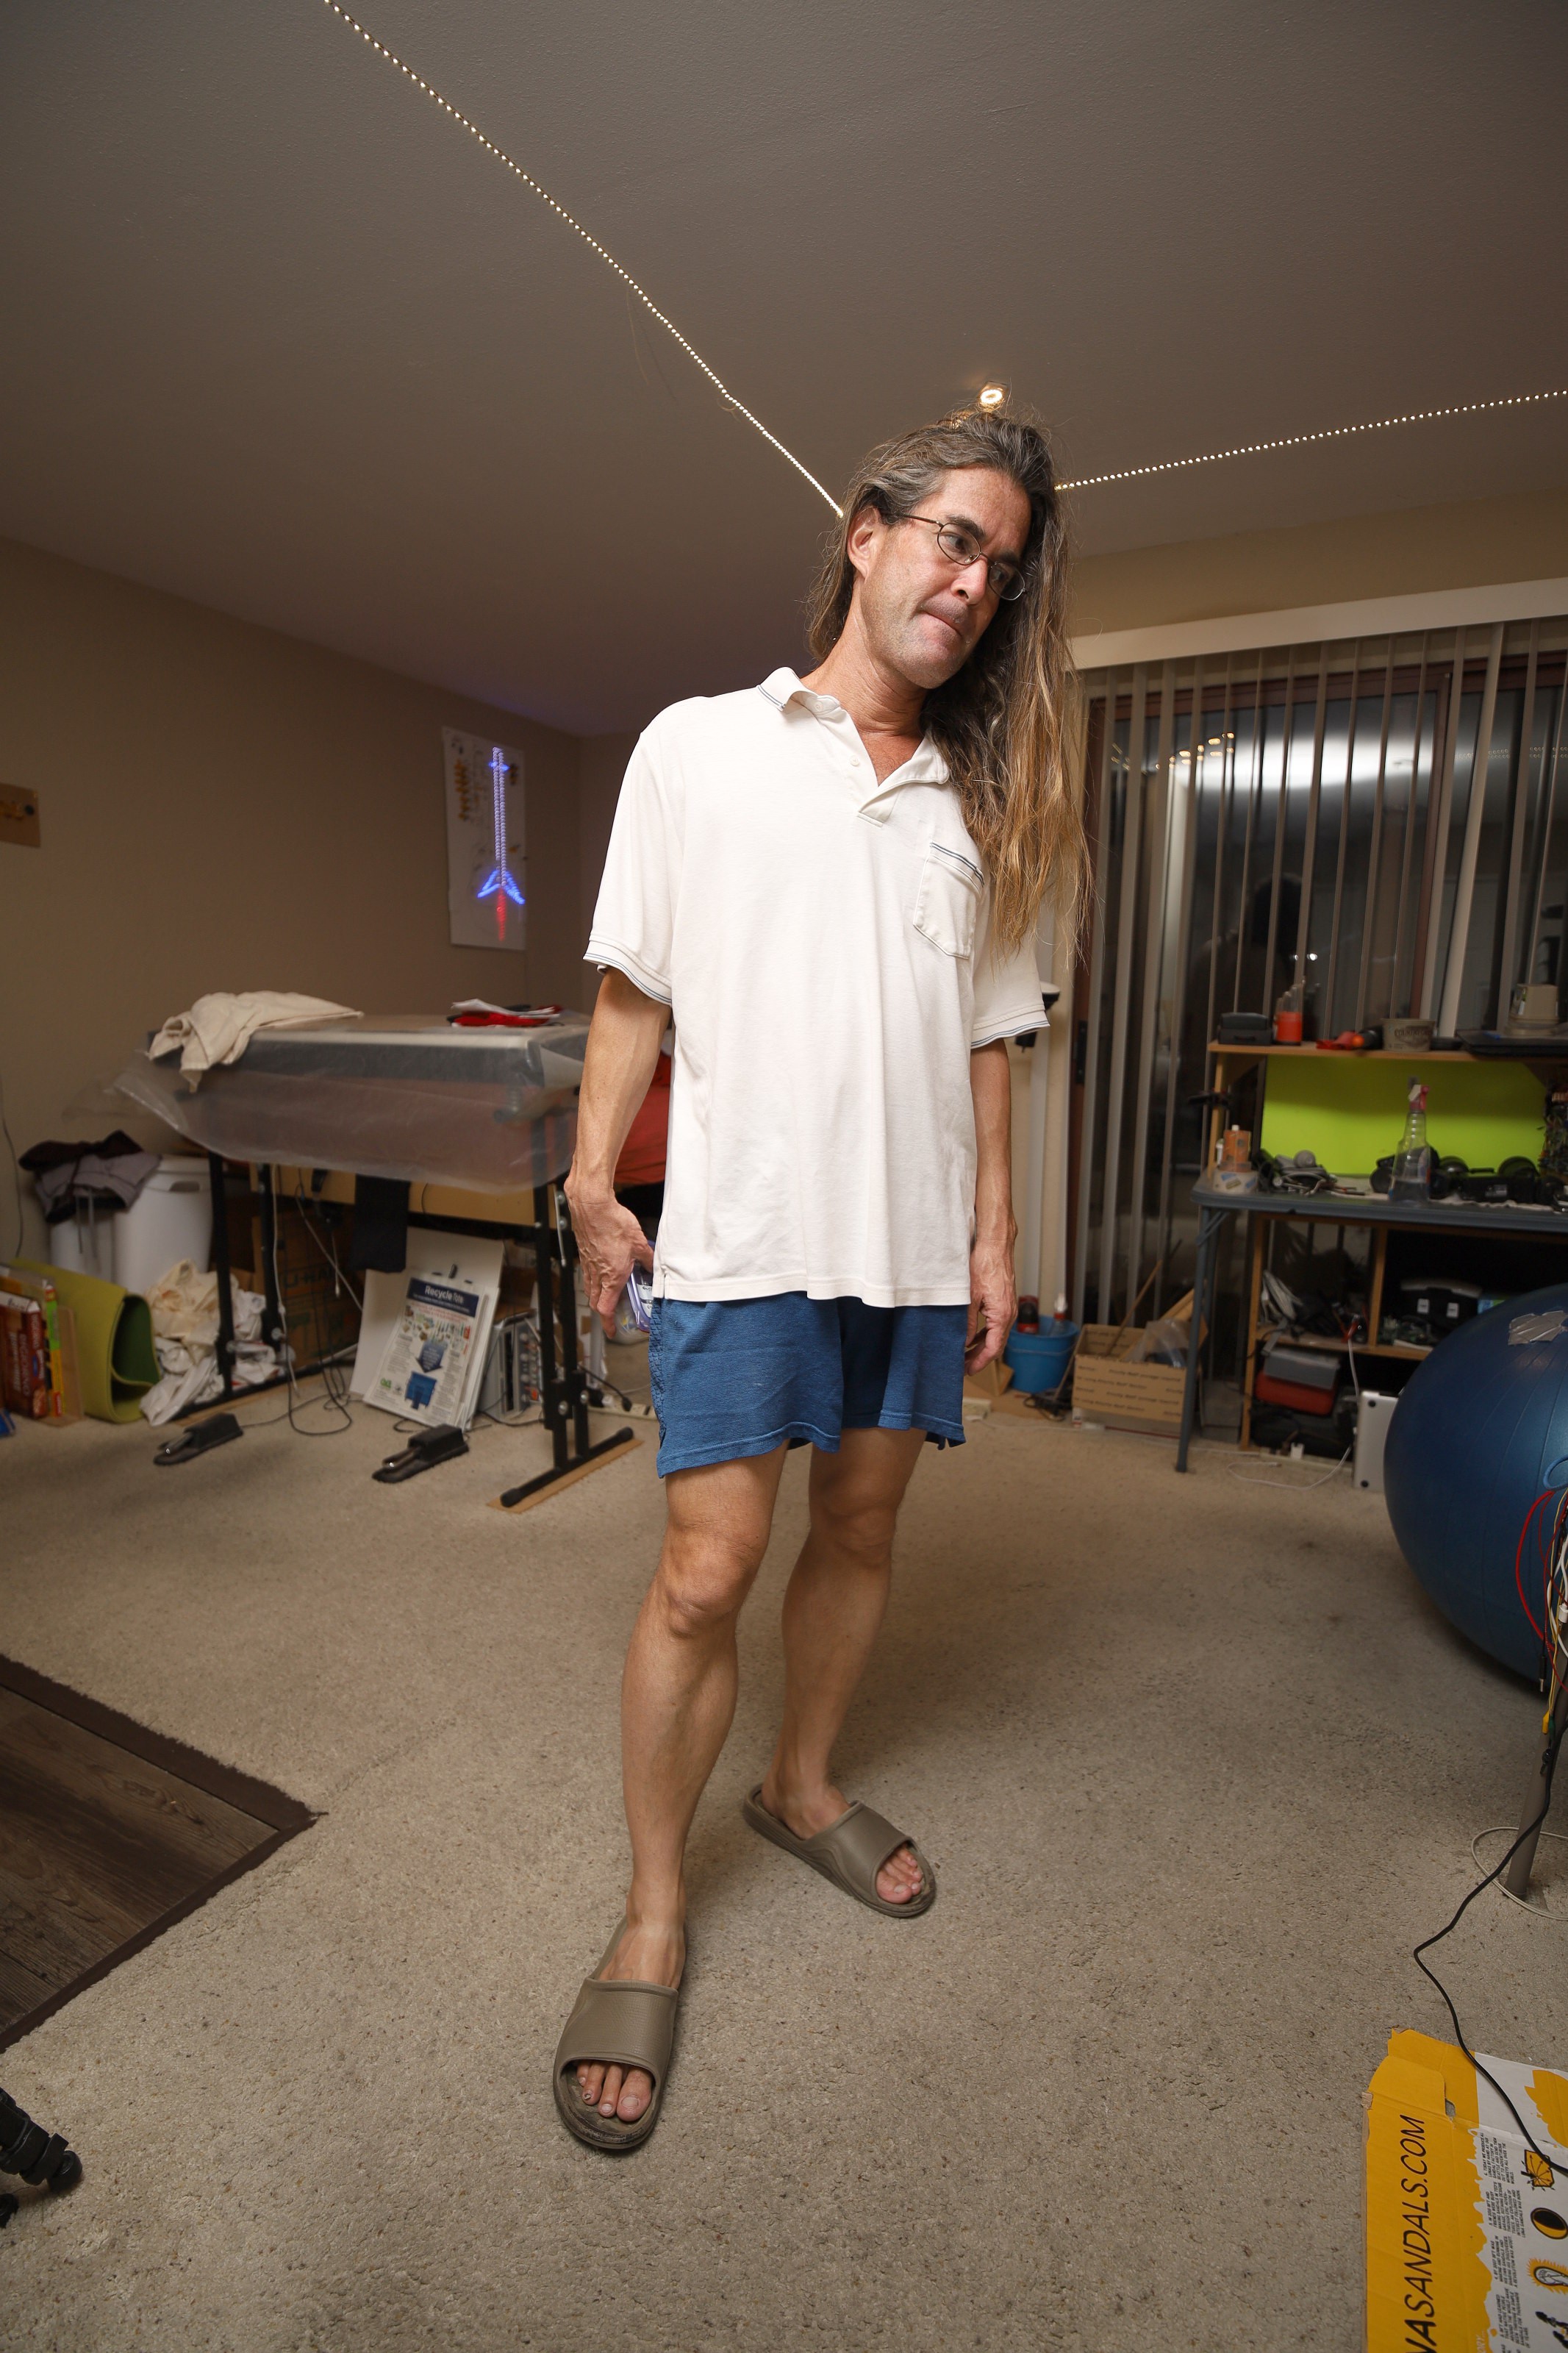
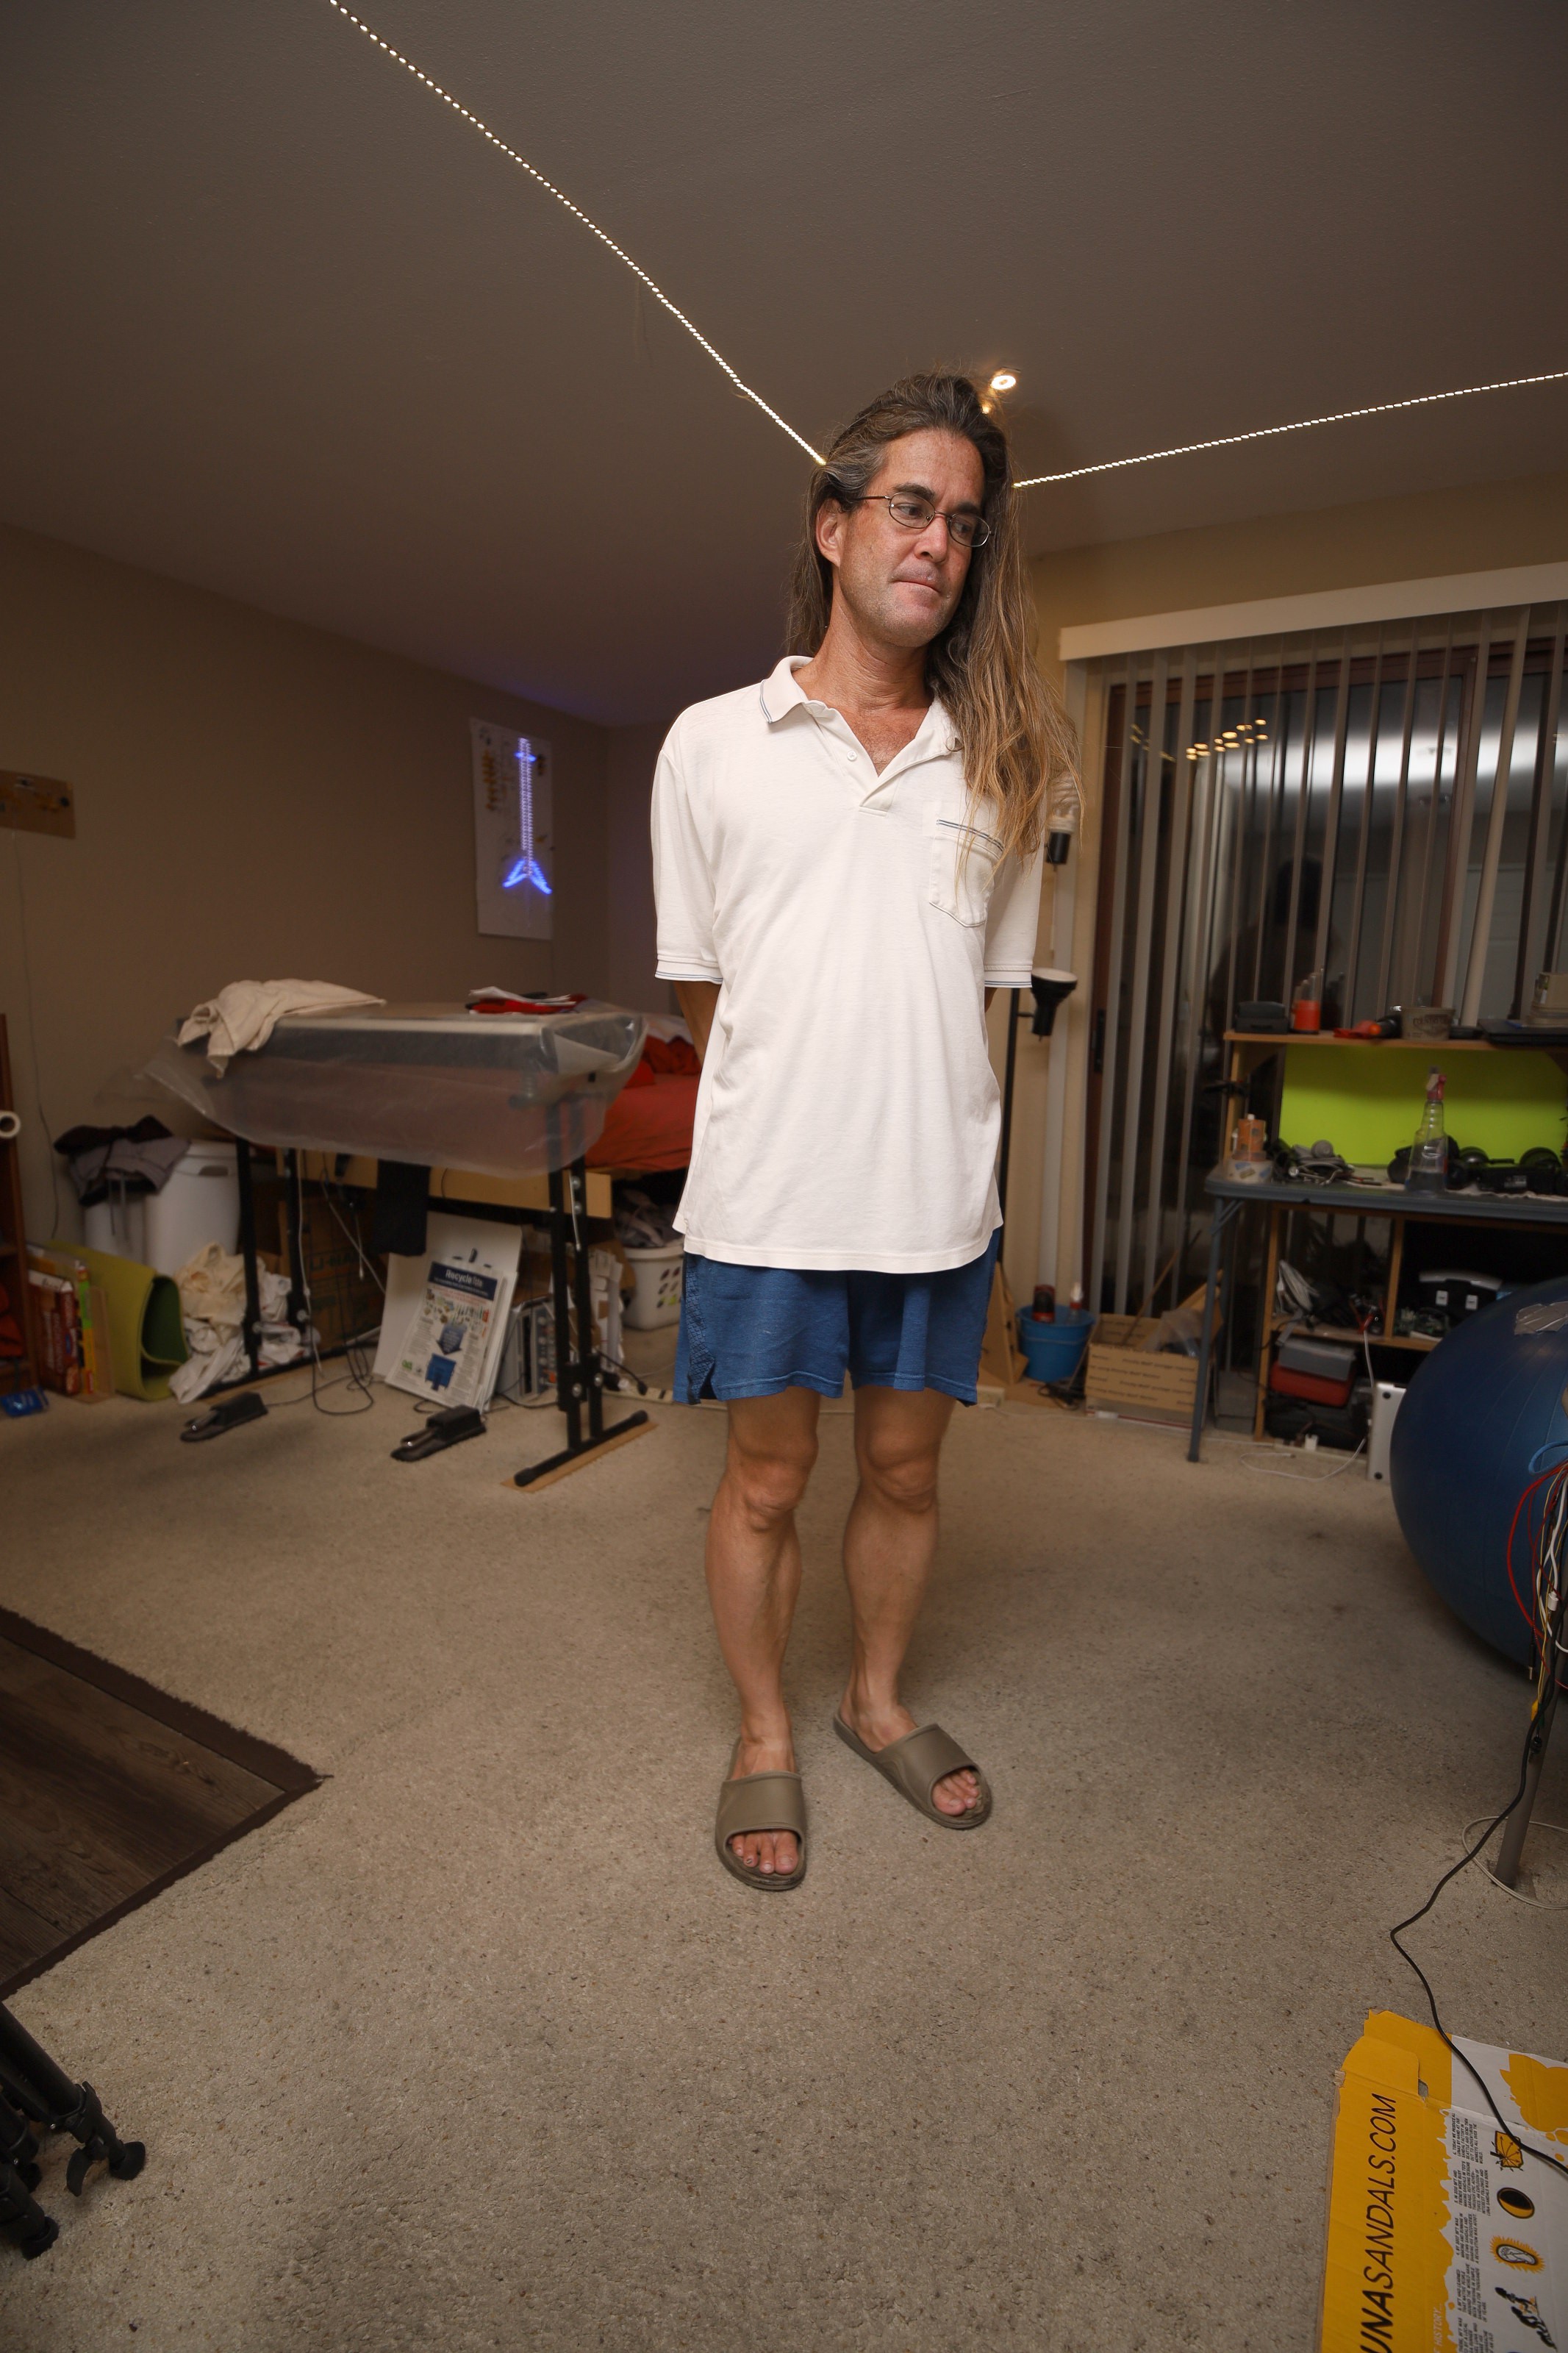
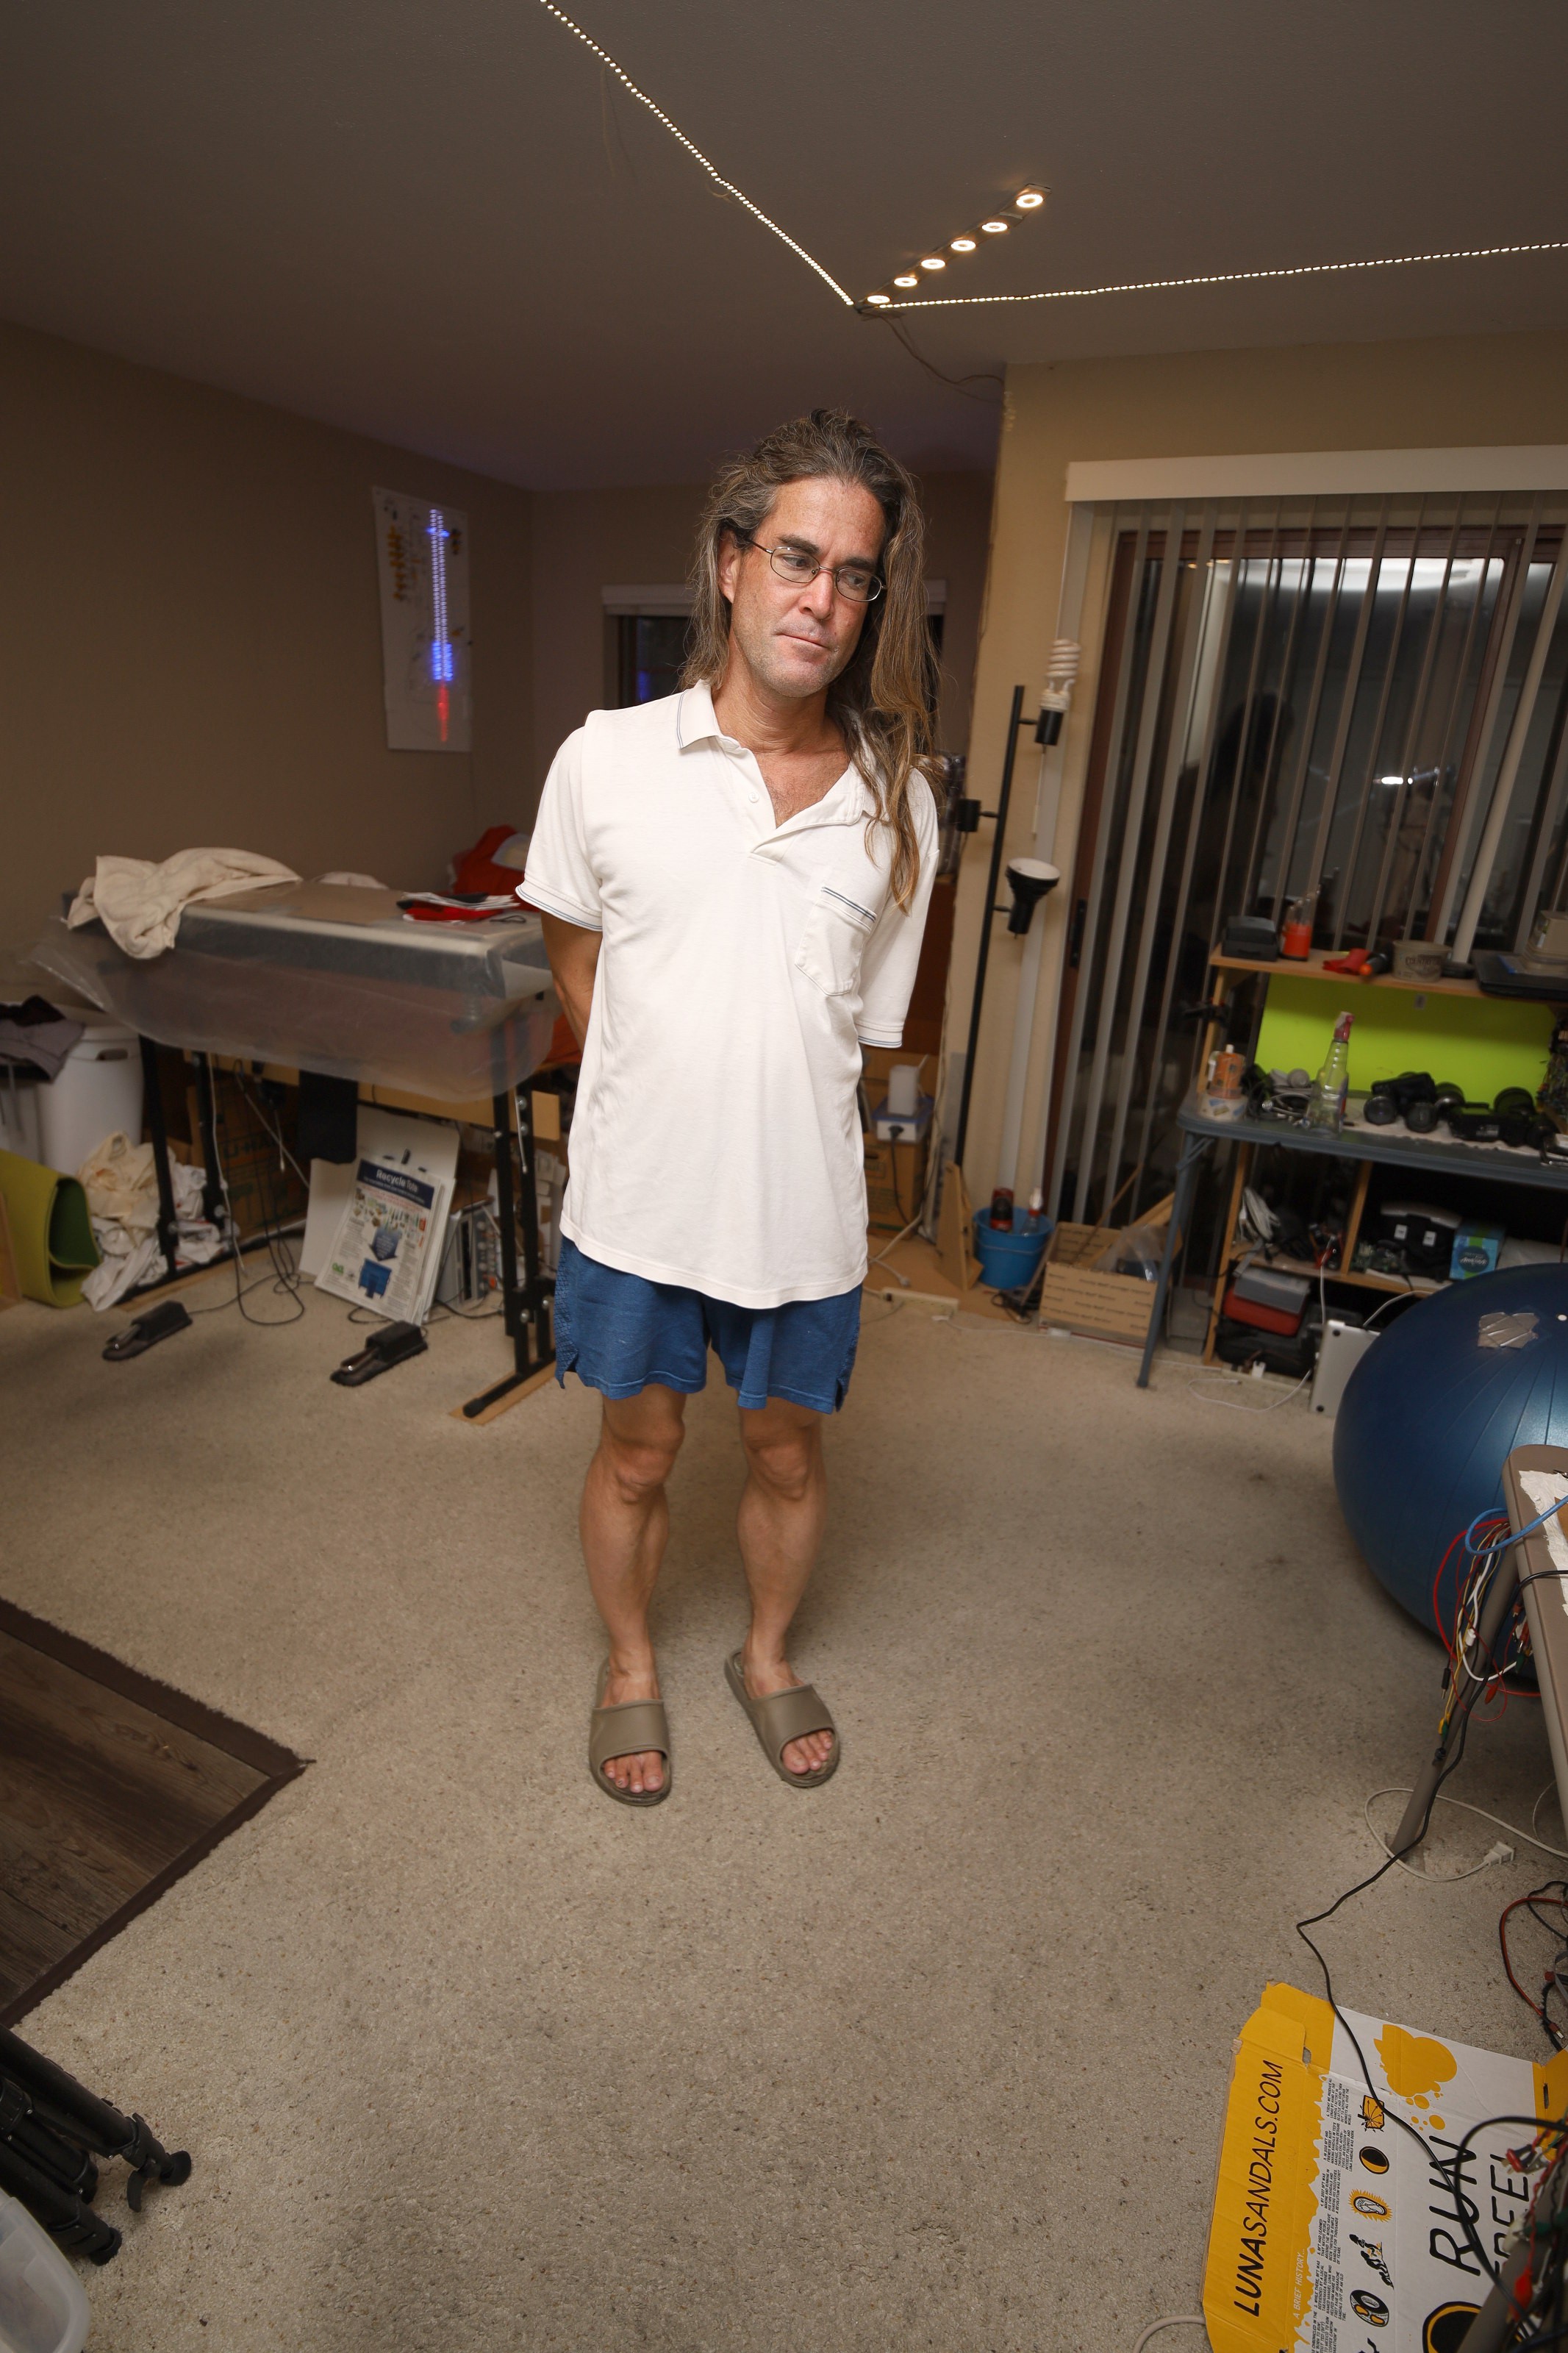
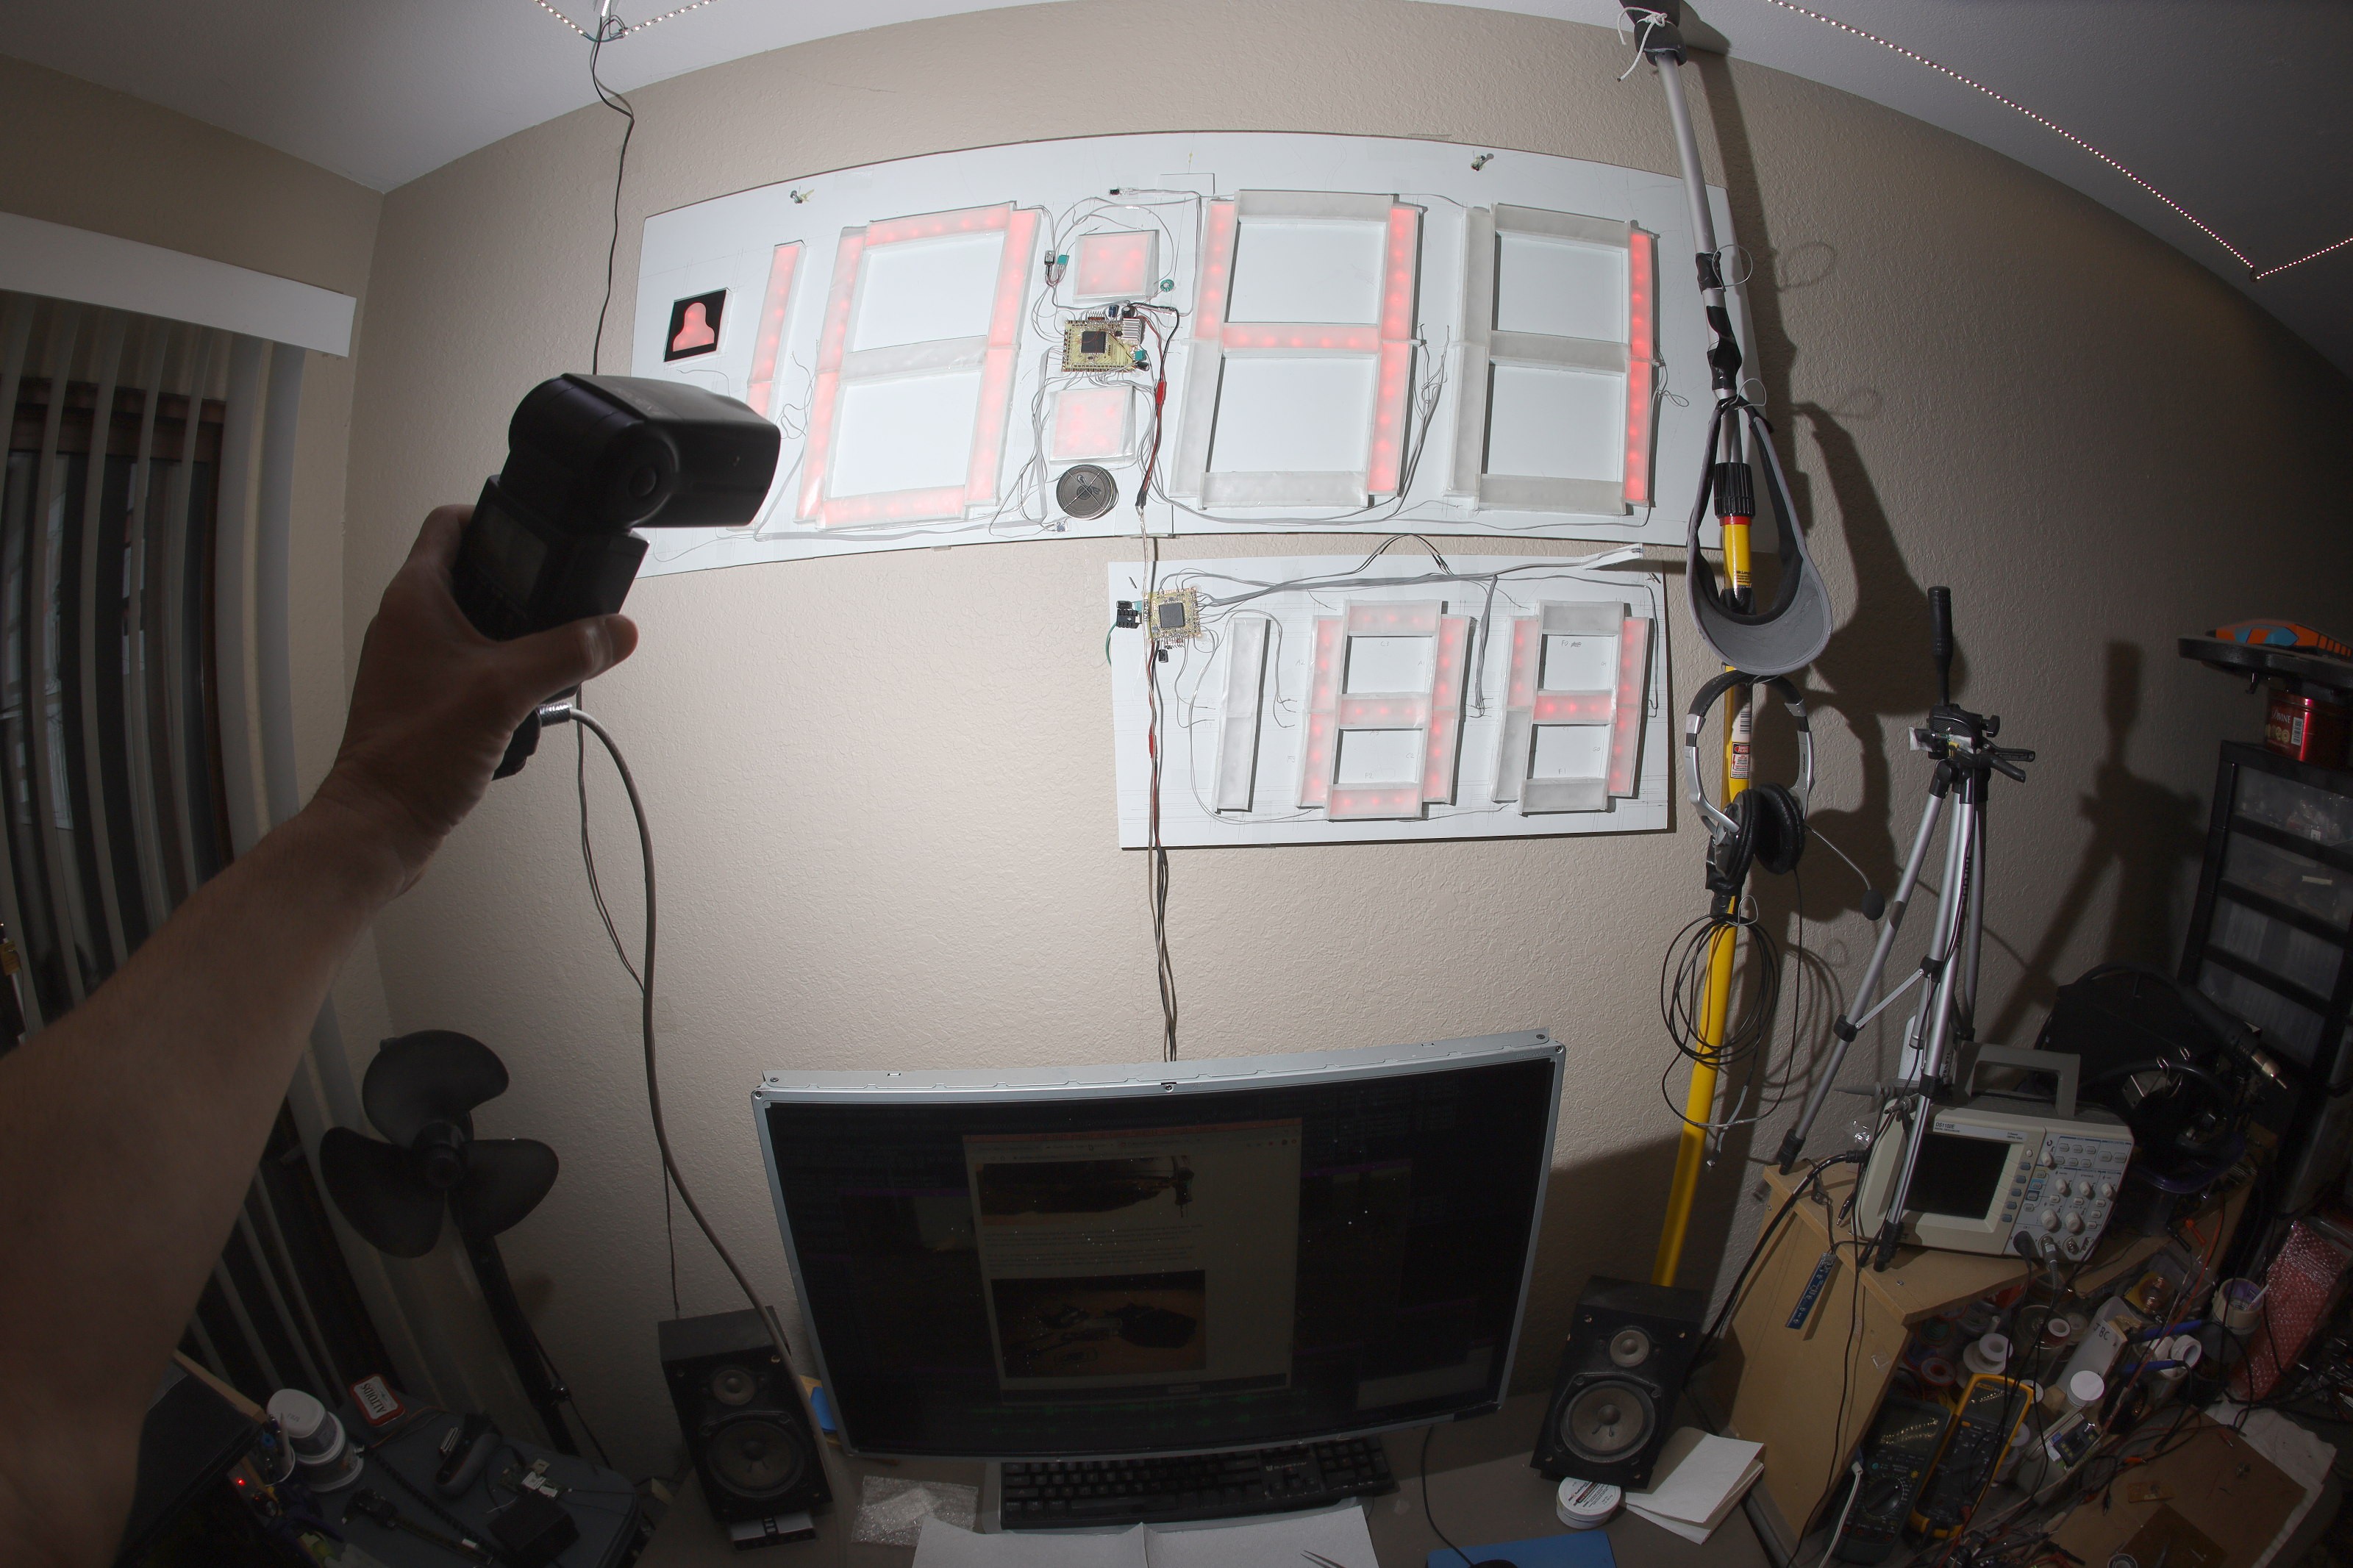
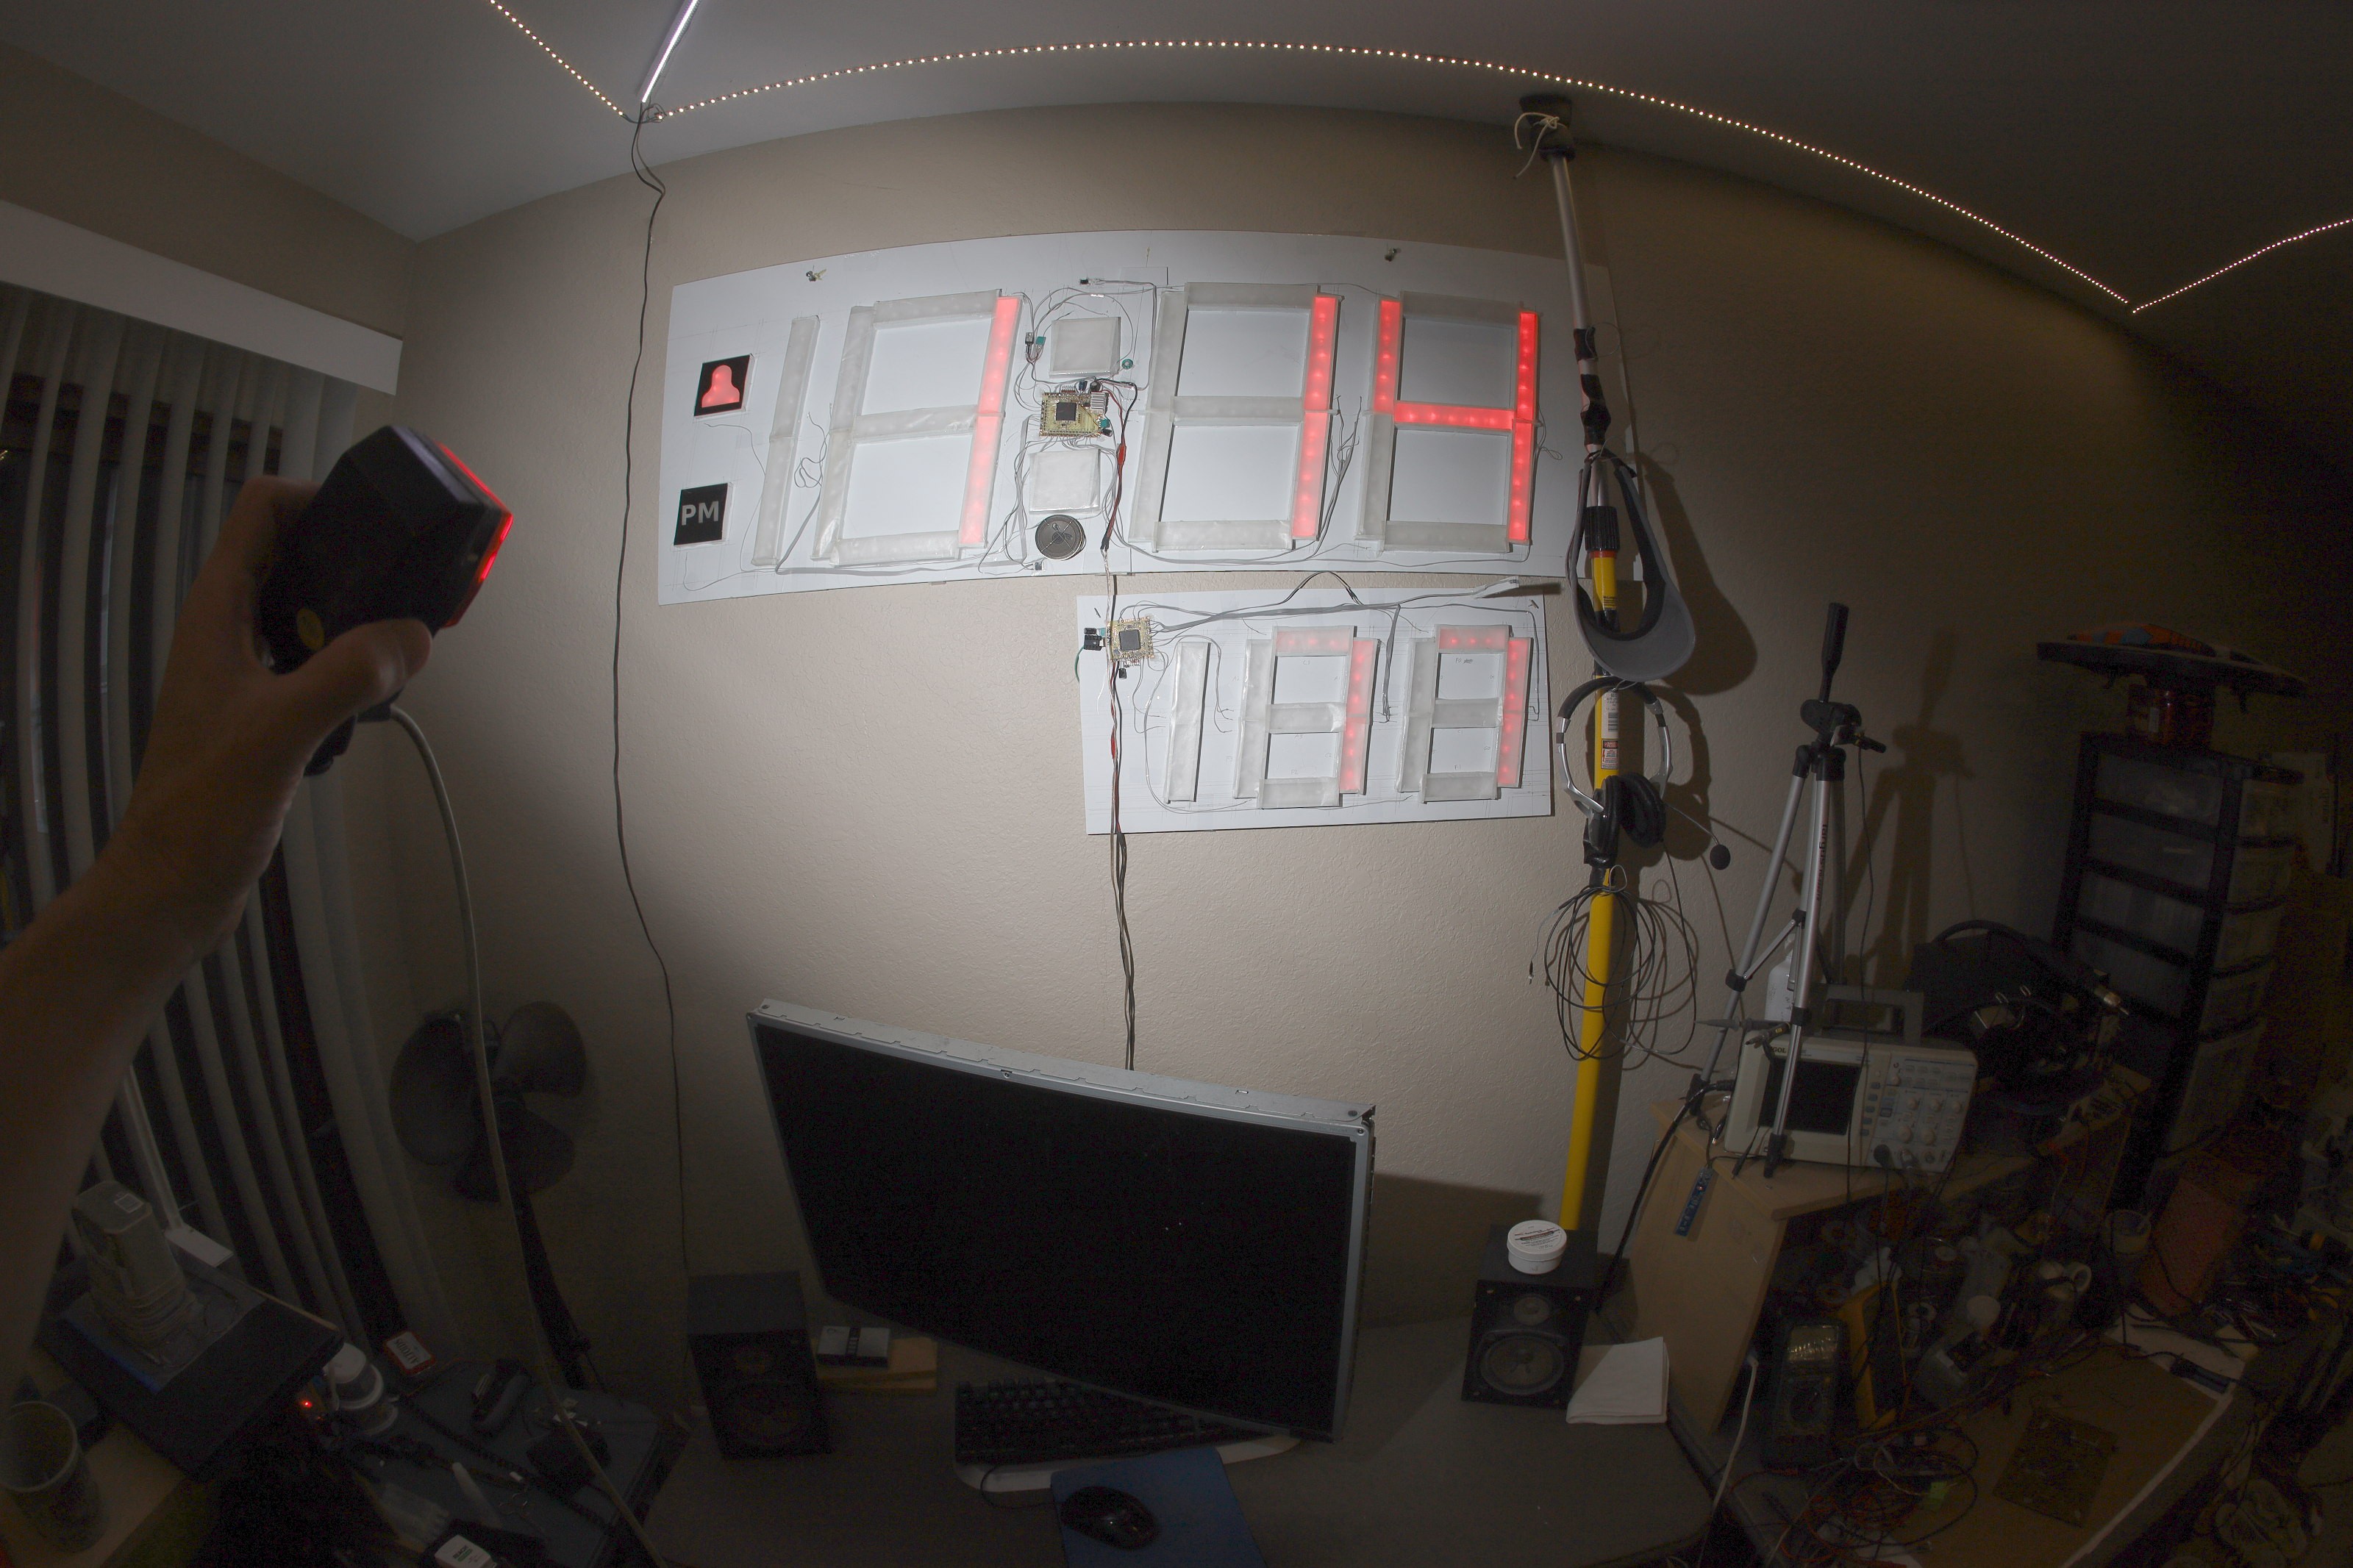
Some portrait mode tests showed how much junk is required to feed the flash & remote control. It needs a better place to install the flash & a place to install the phone. The wireless GUI allowed some mane shots without looking at the laptop. There might be a case for manual pointing with the GUI, but carrying around the phone & the camera remote would be a big deal.
![]()
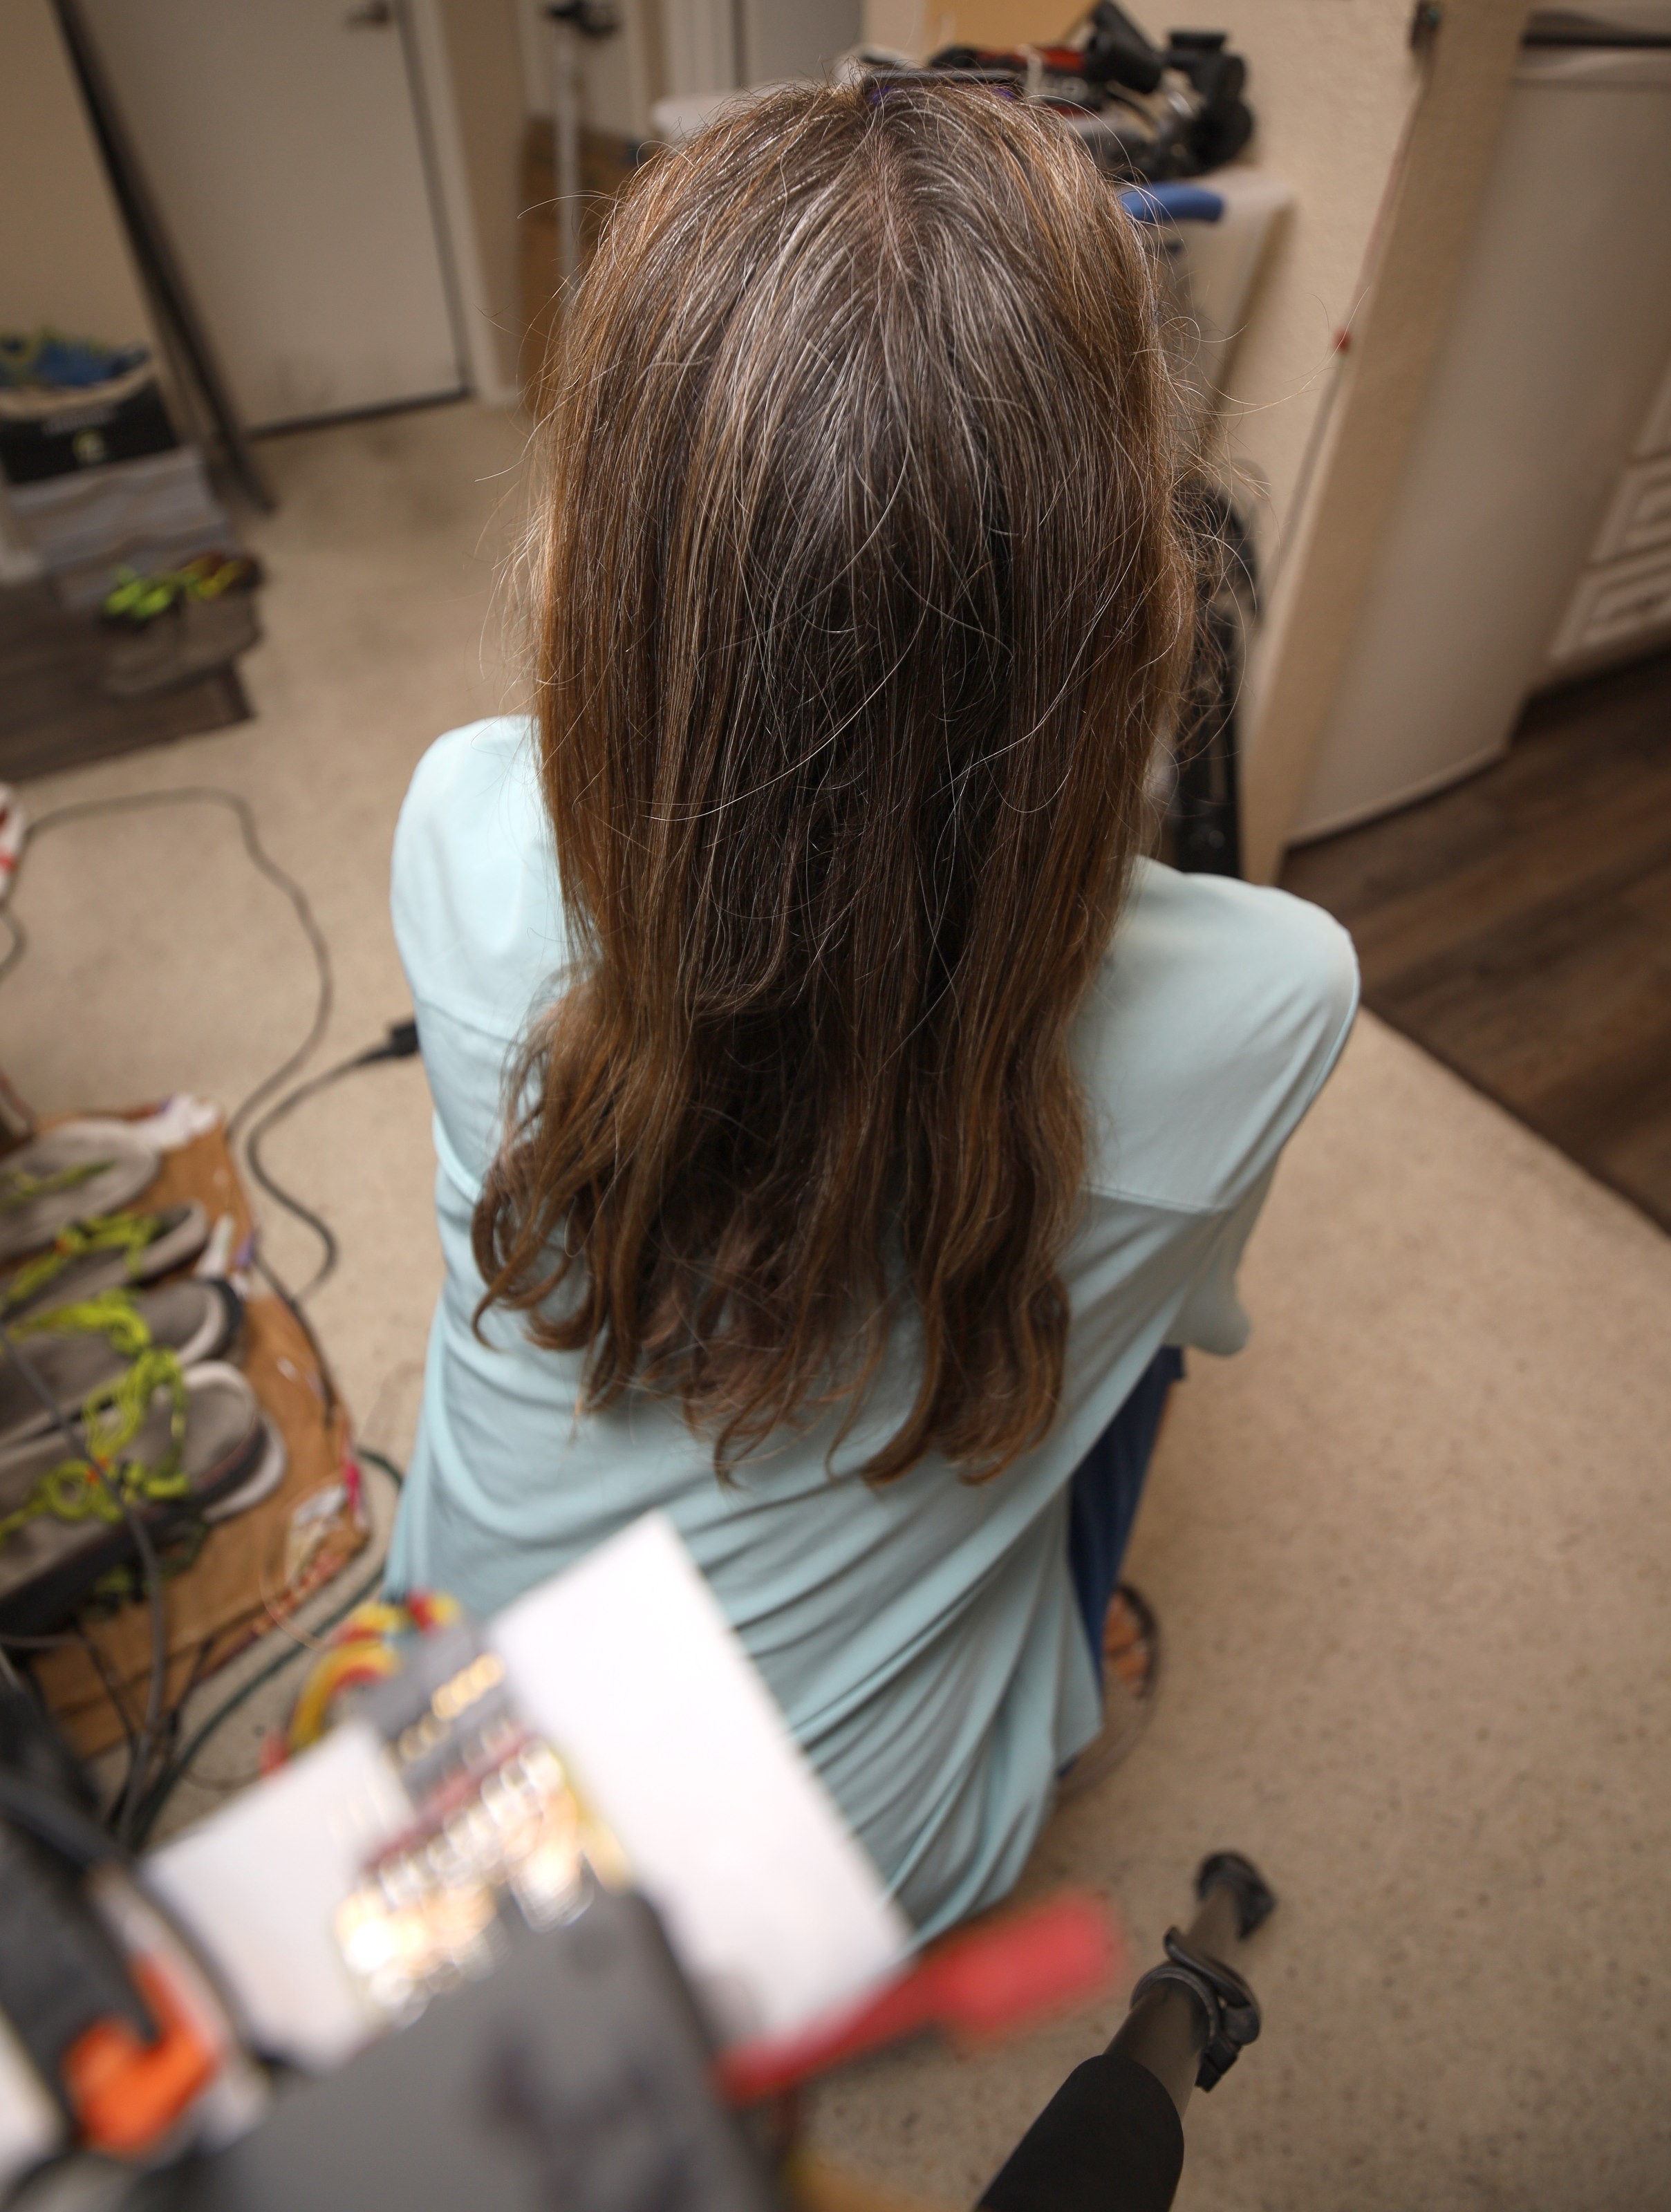
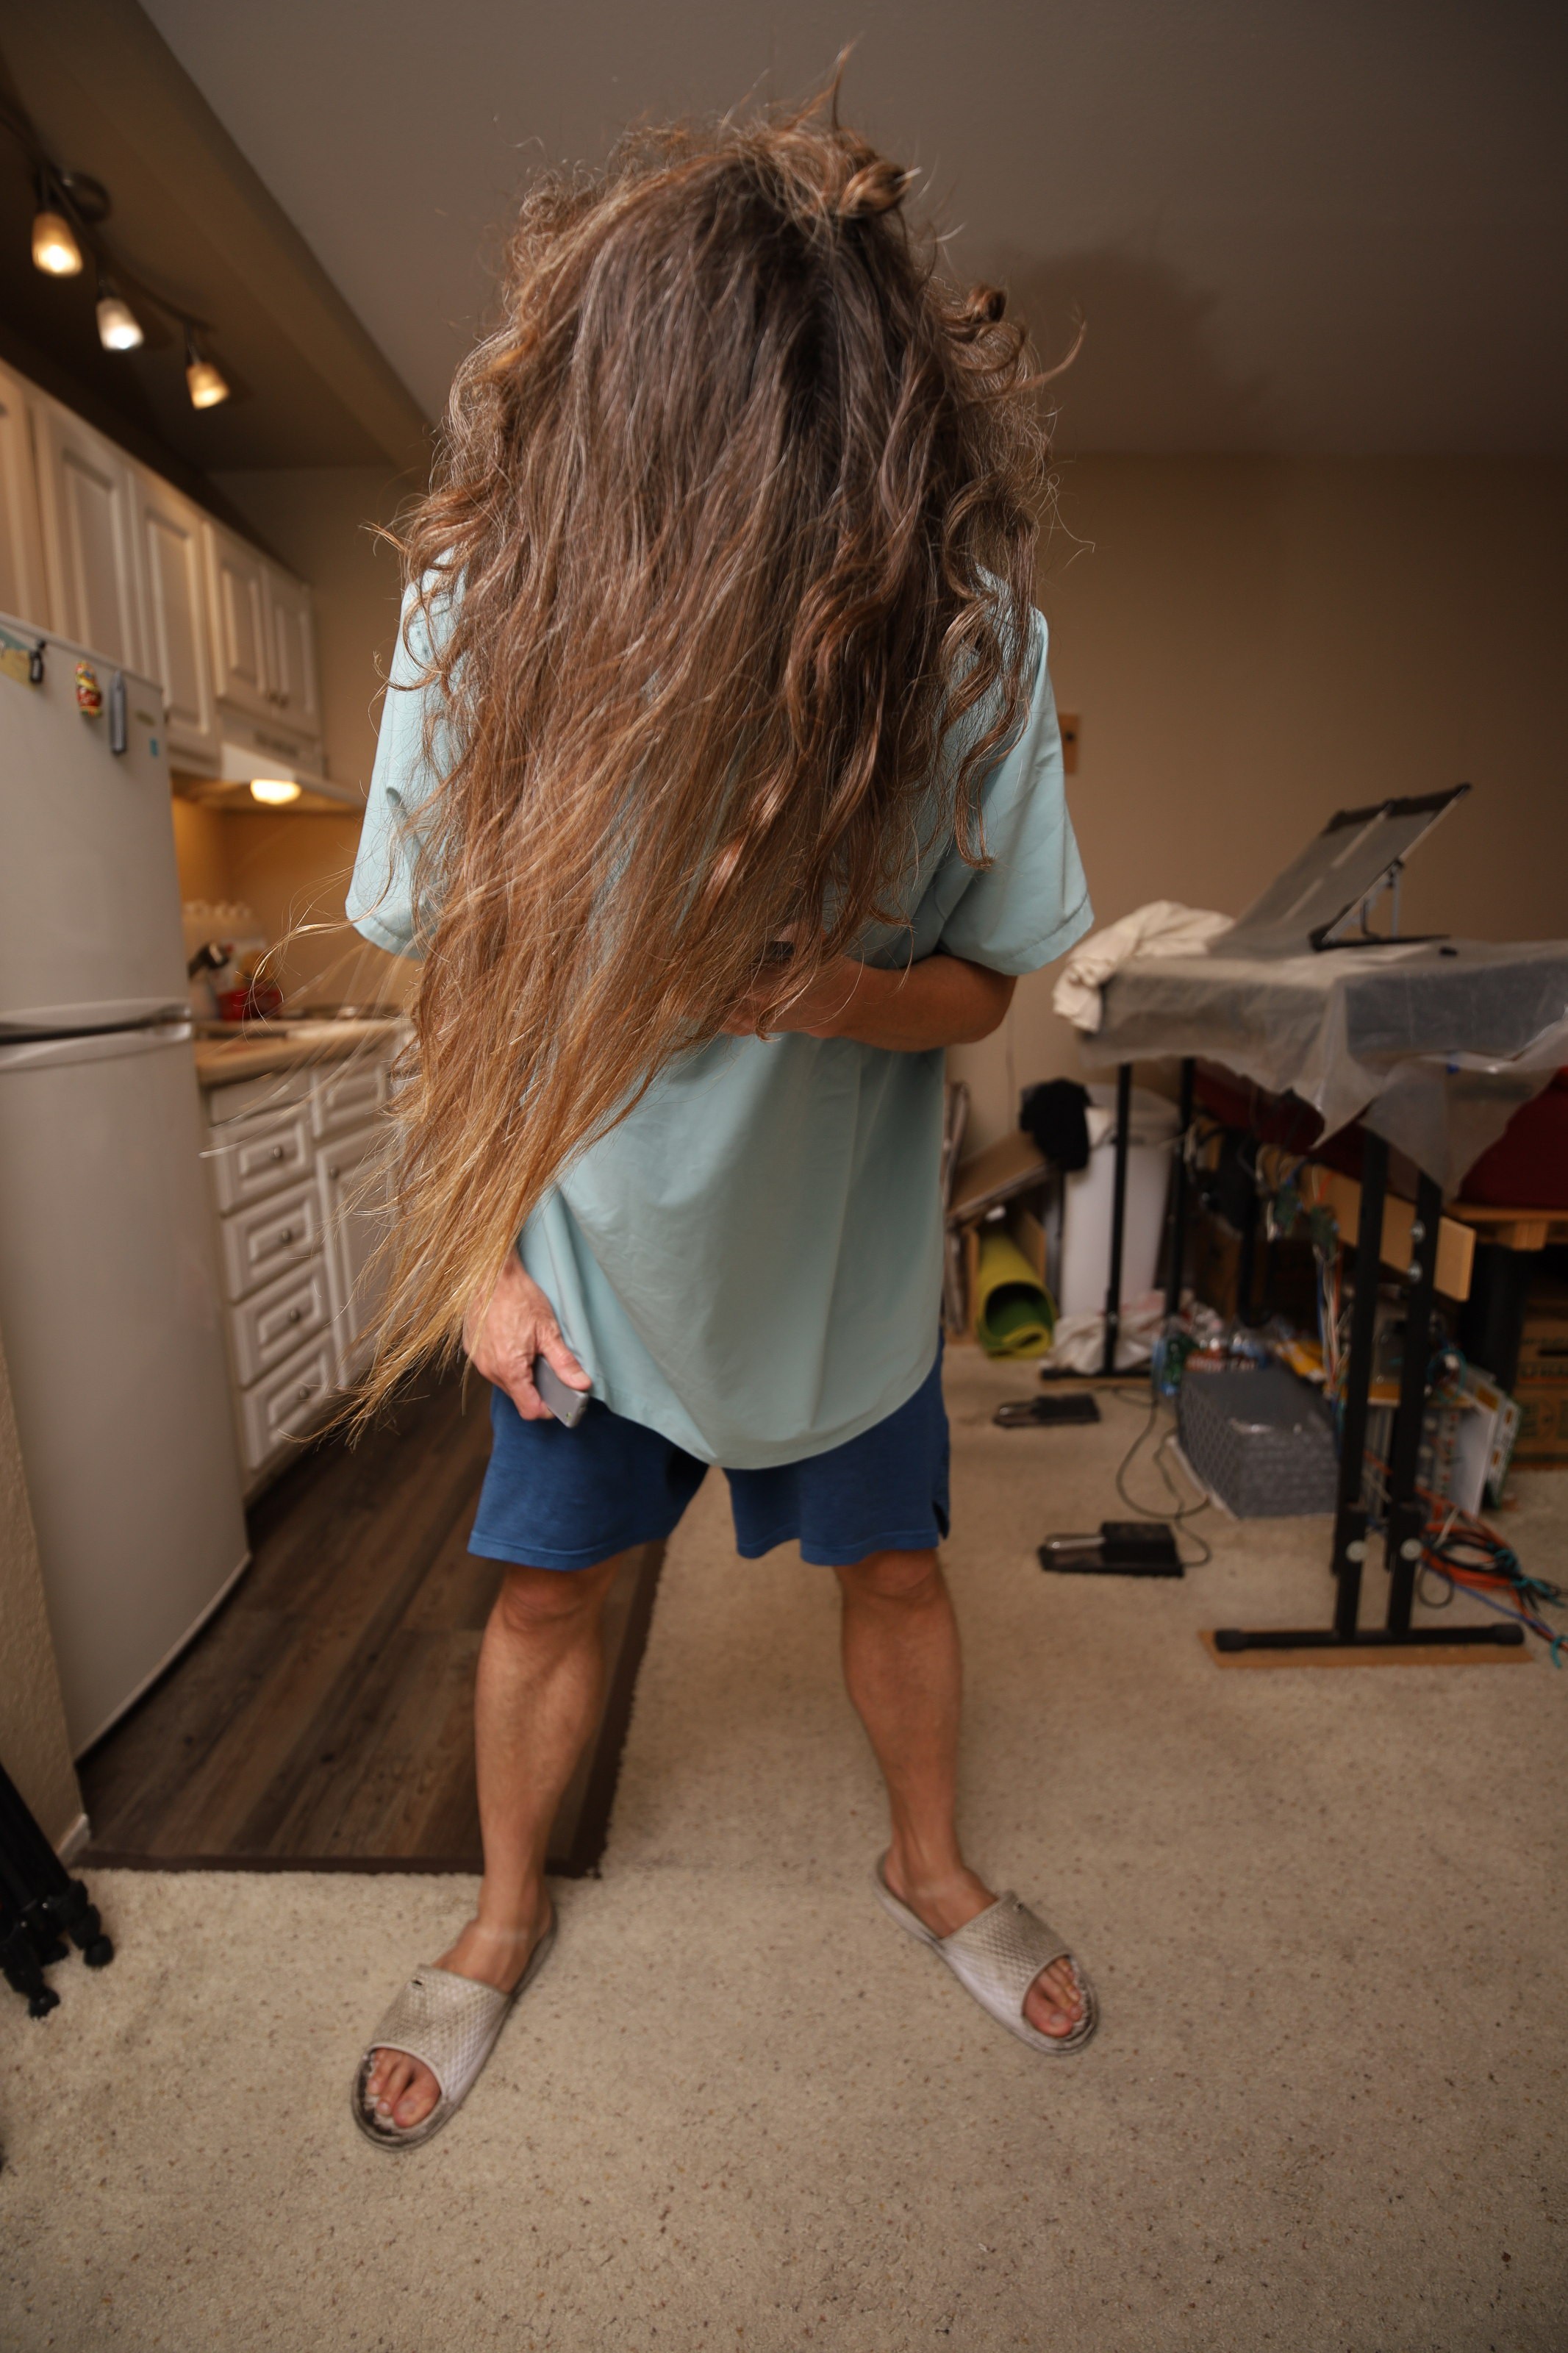
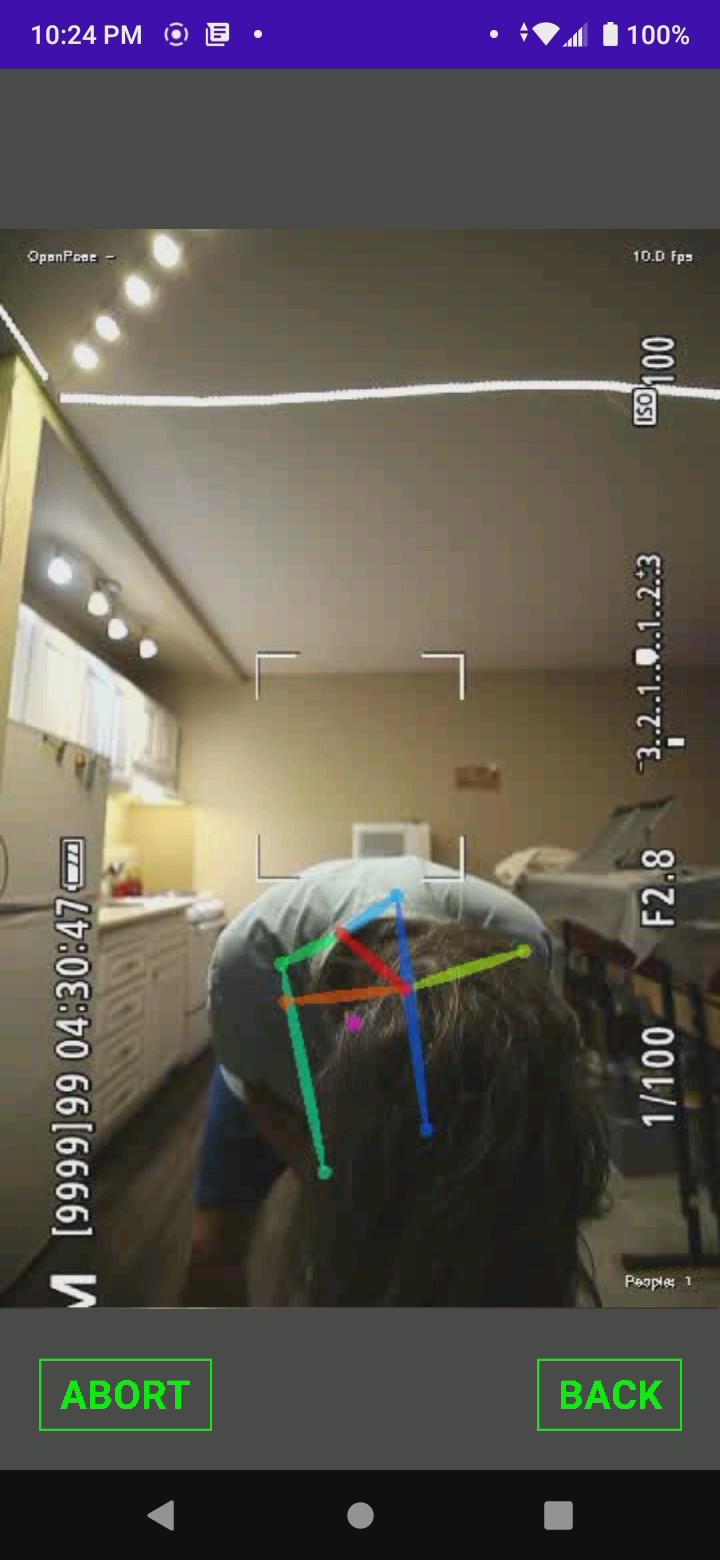
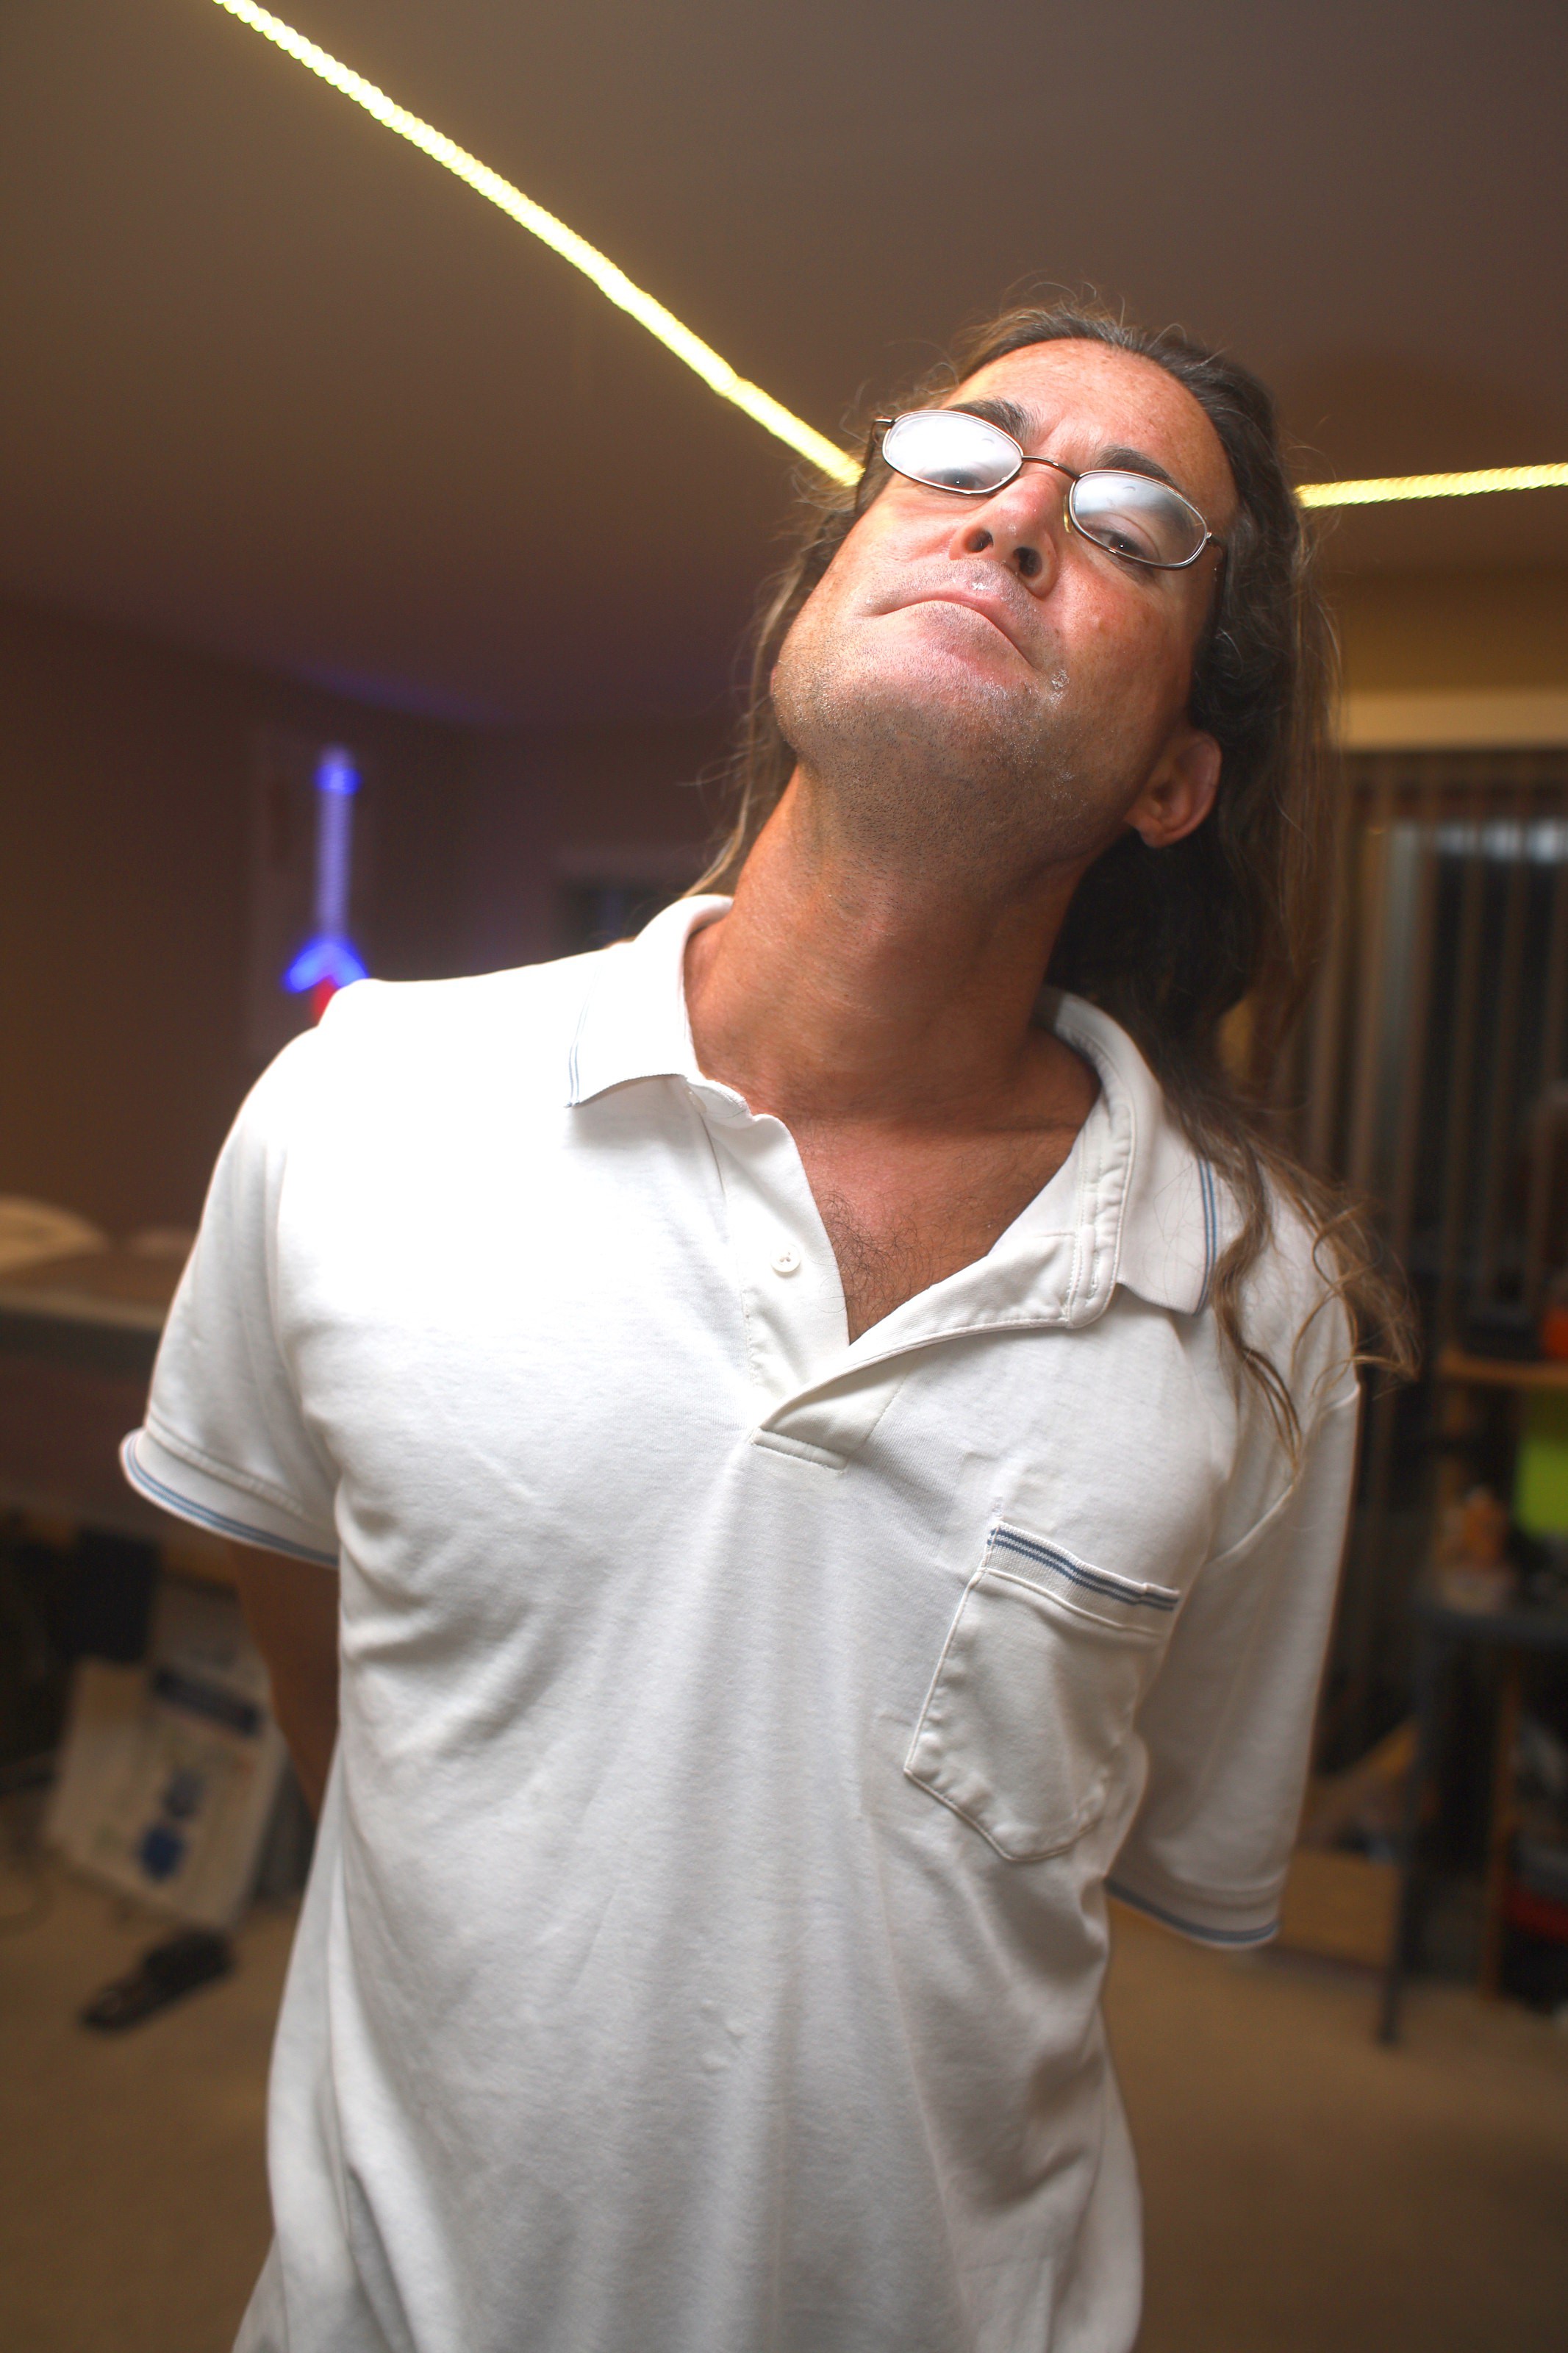
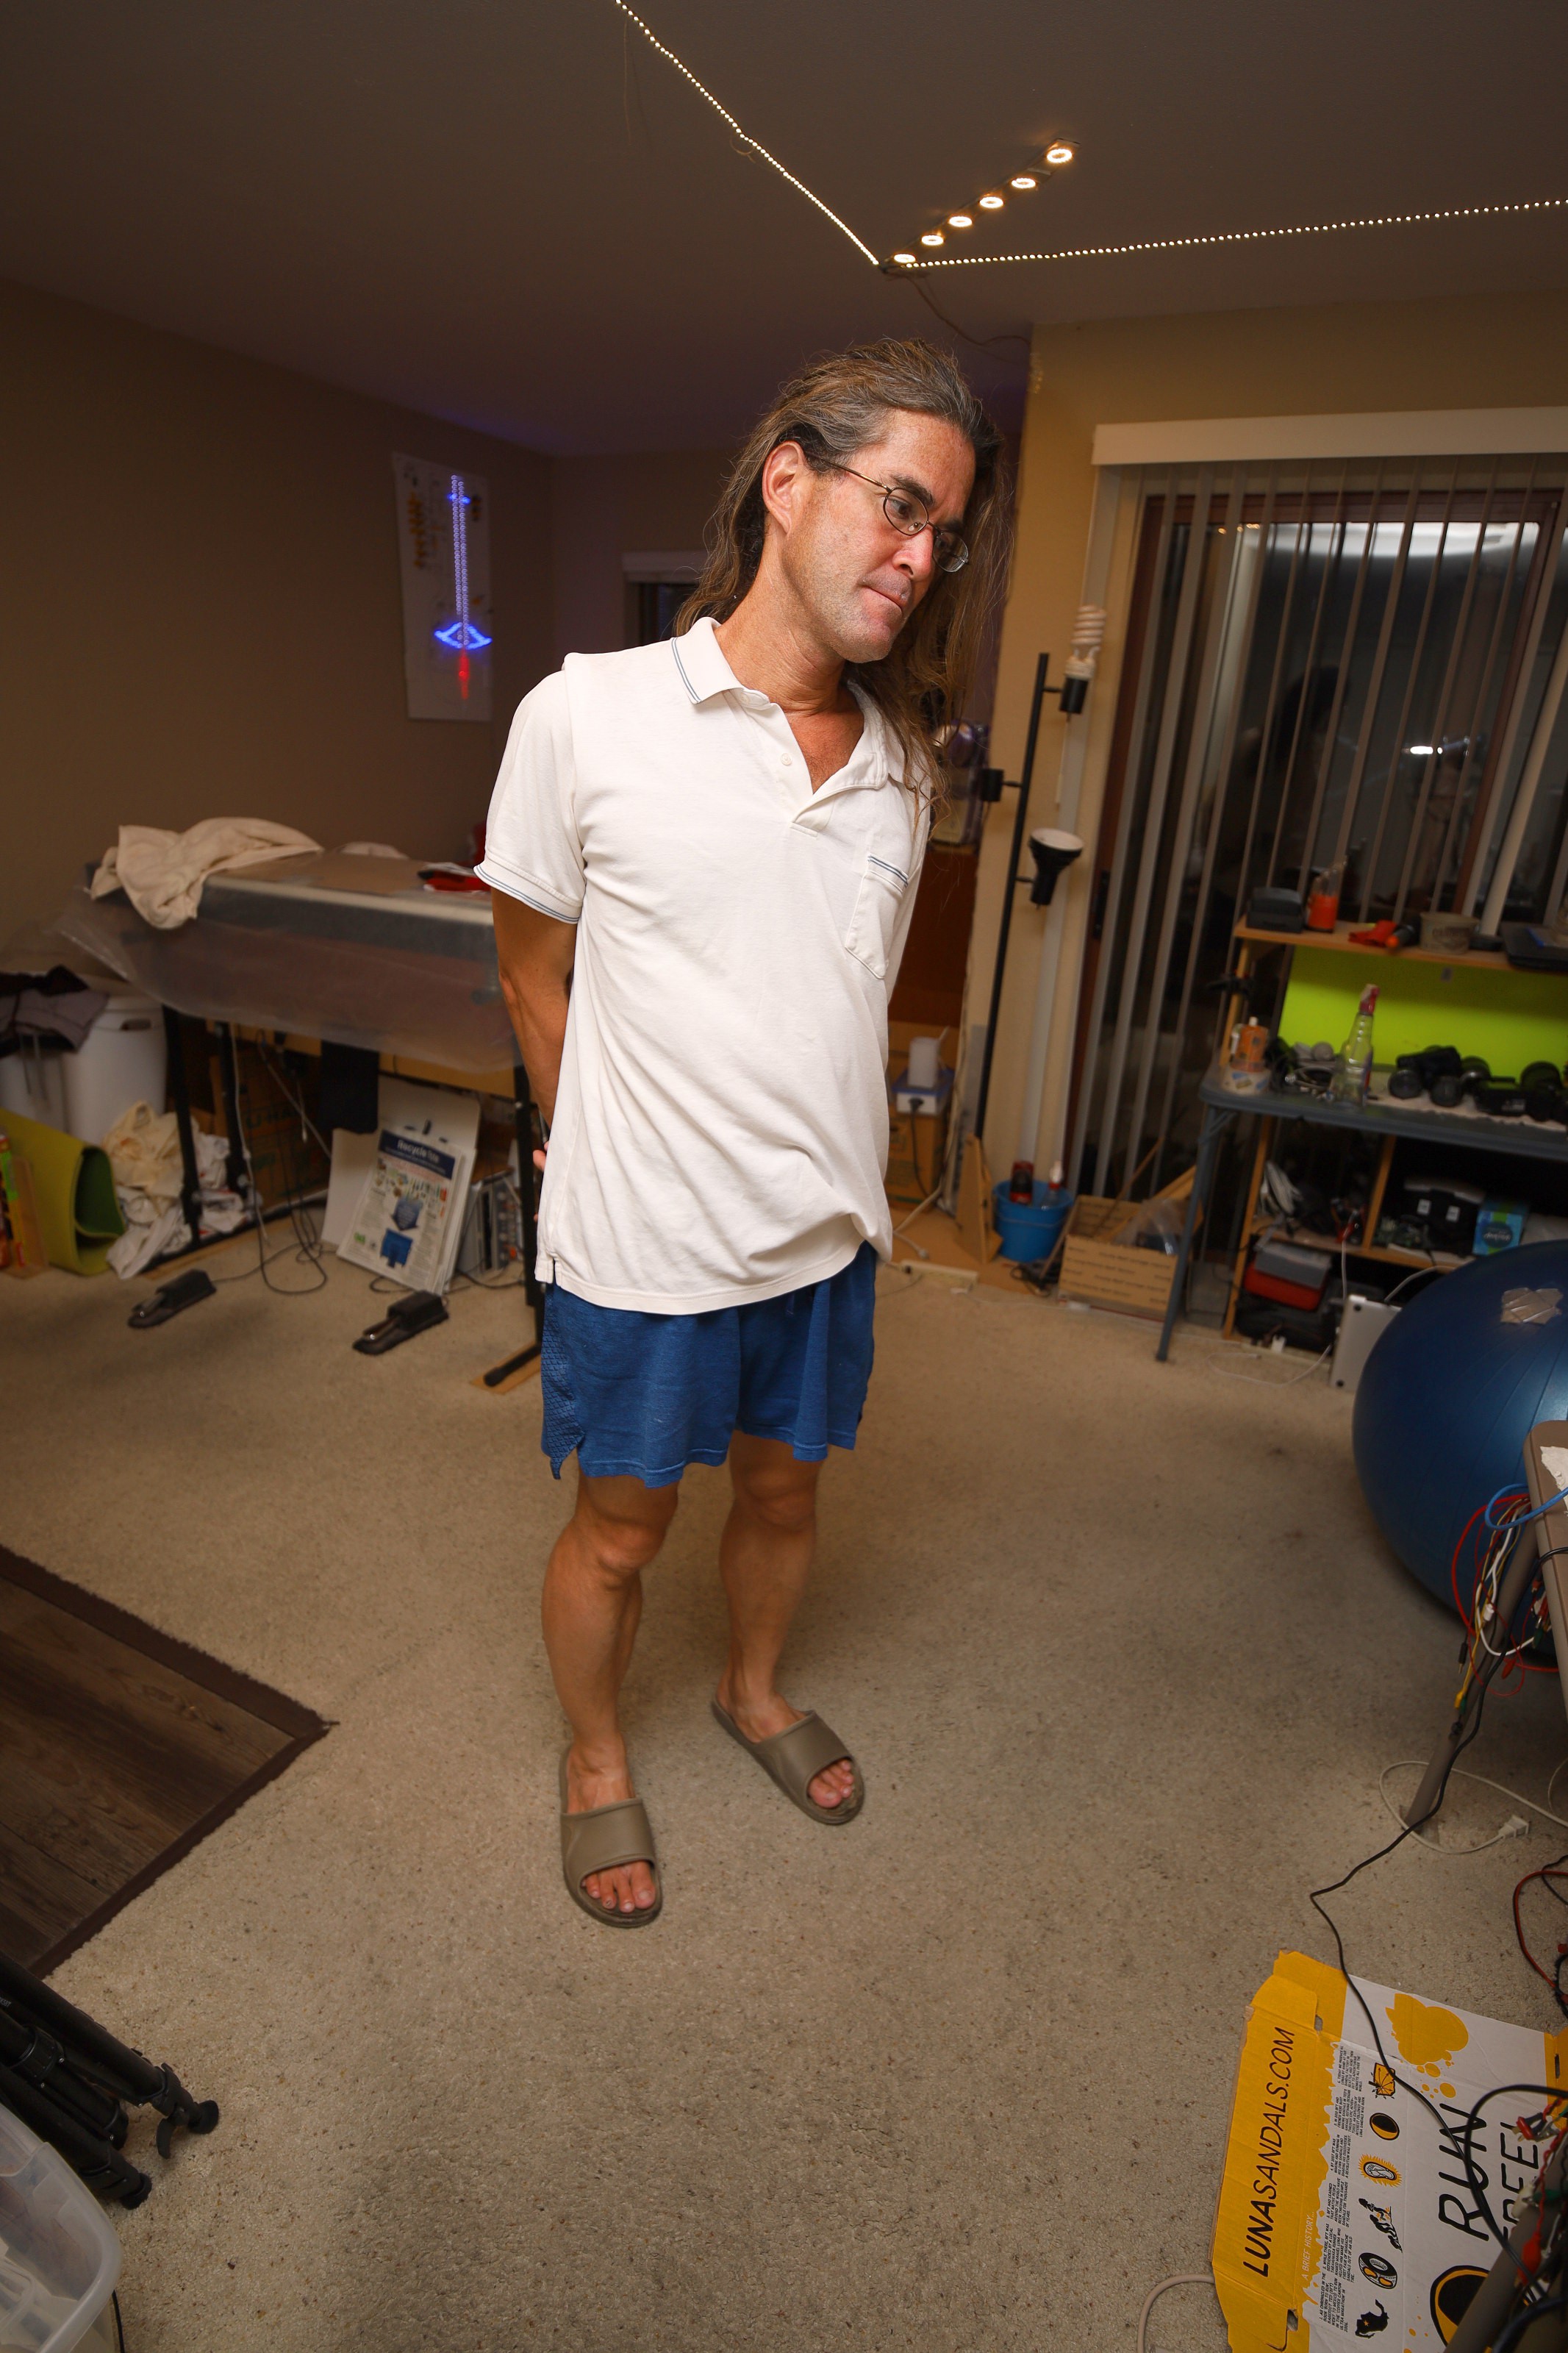
The openpose model couldn't track a lion bending over with his mane untied. It could track the mane tied up but ran away straight up when the mane was let down. Thus, limits on PWM were still needed.
![]()
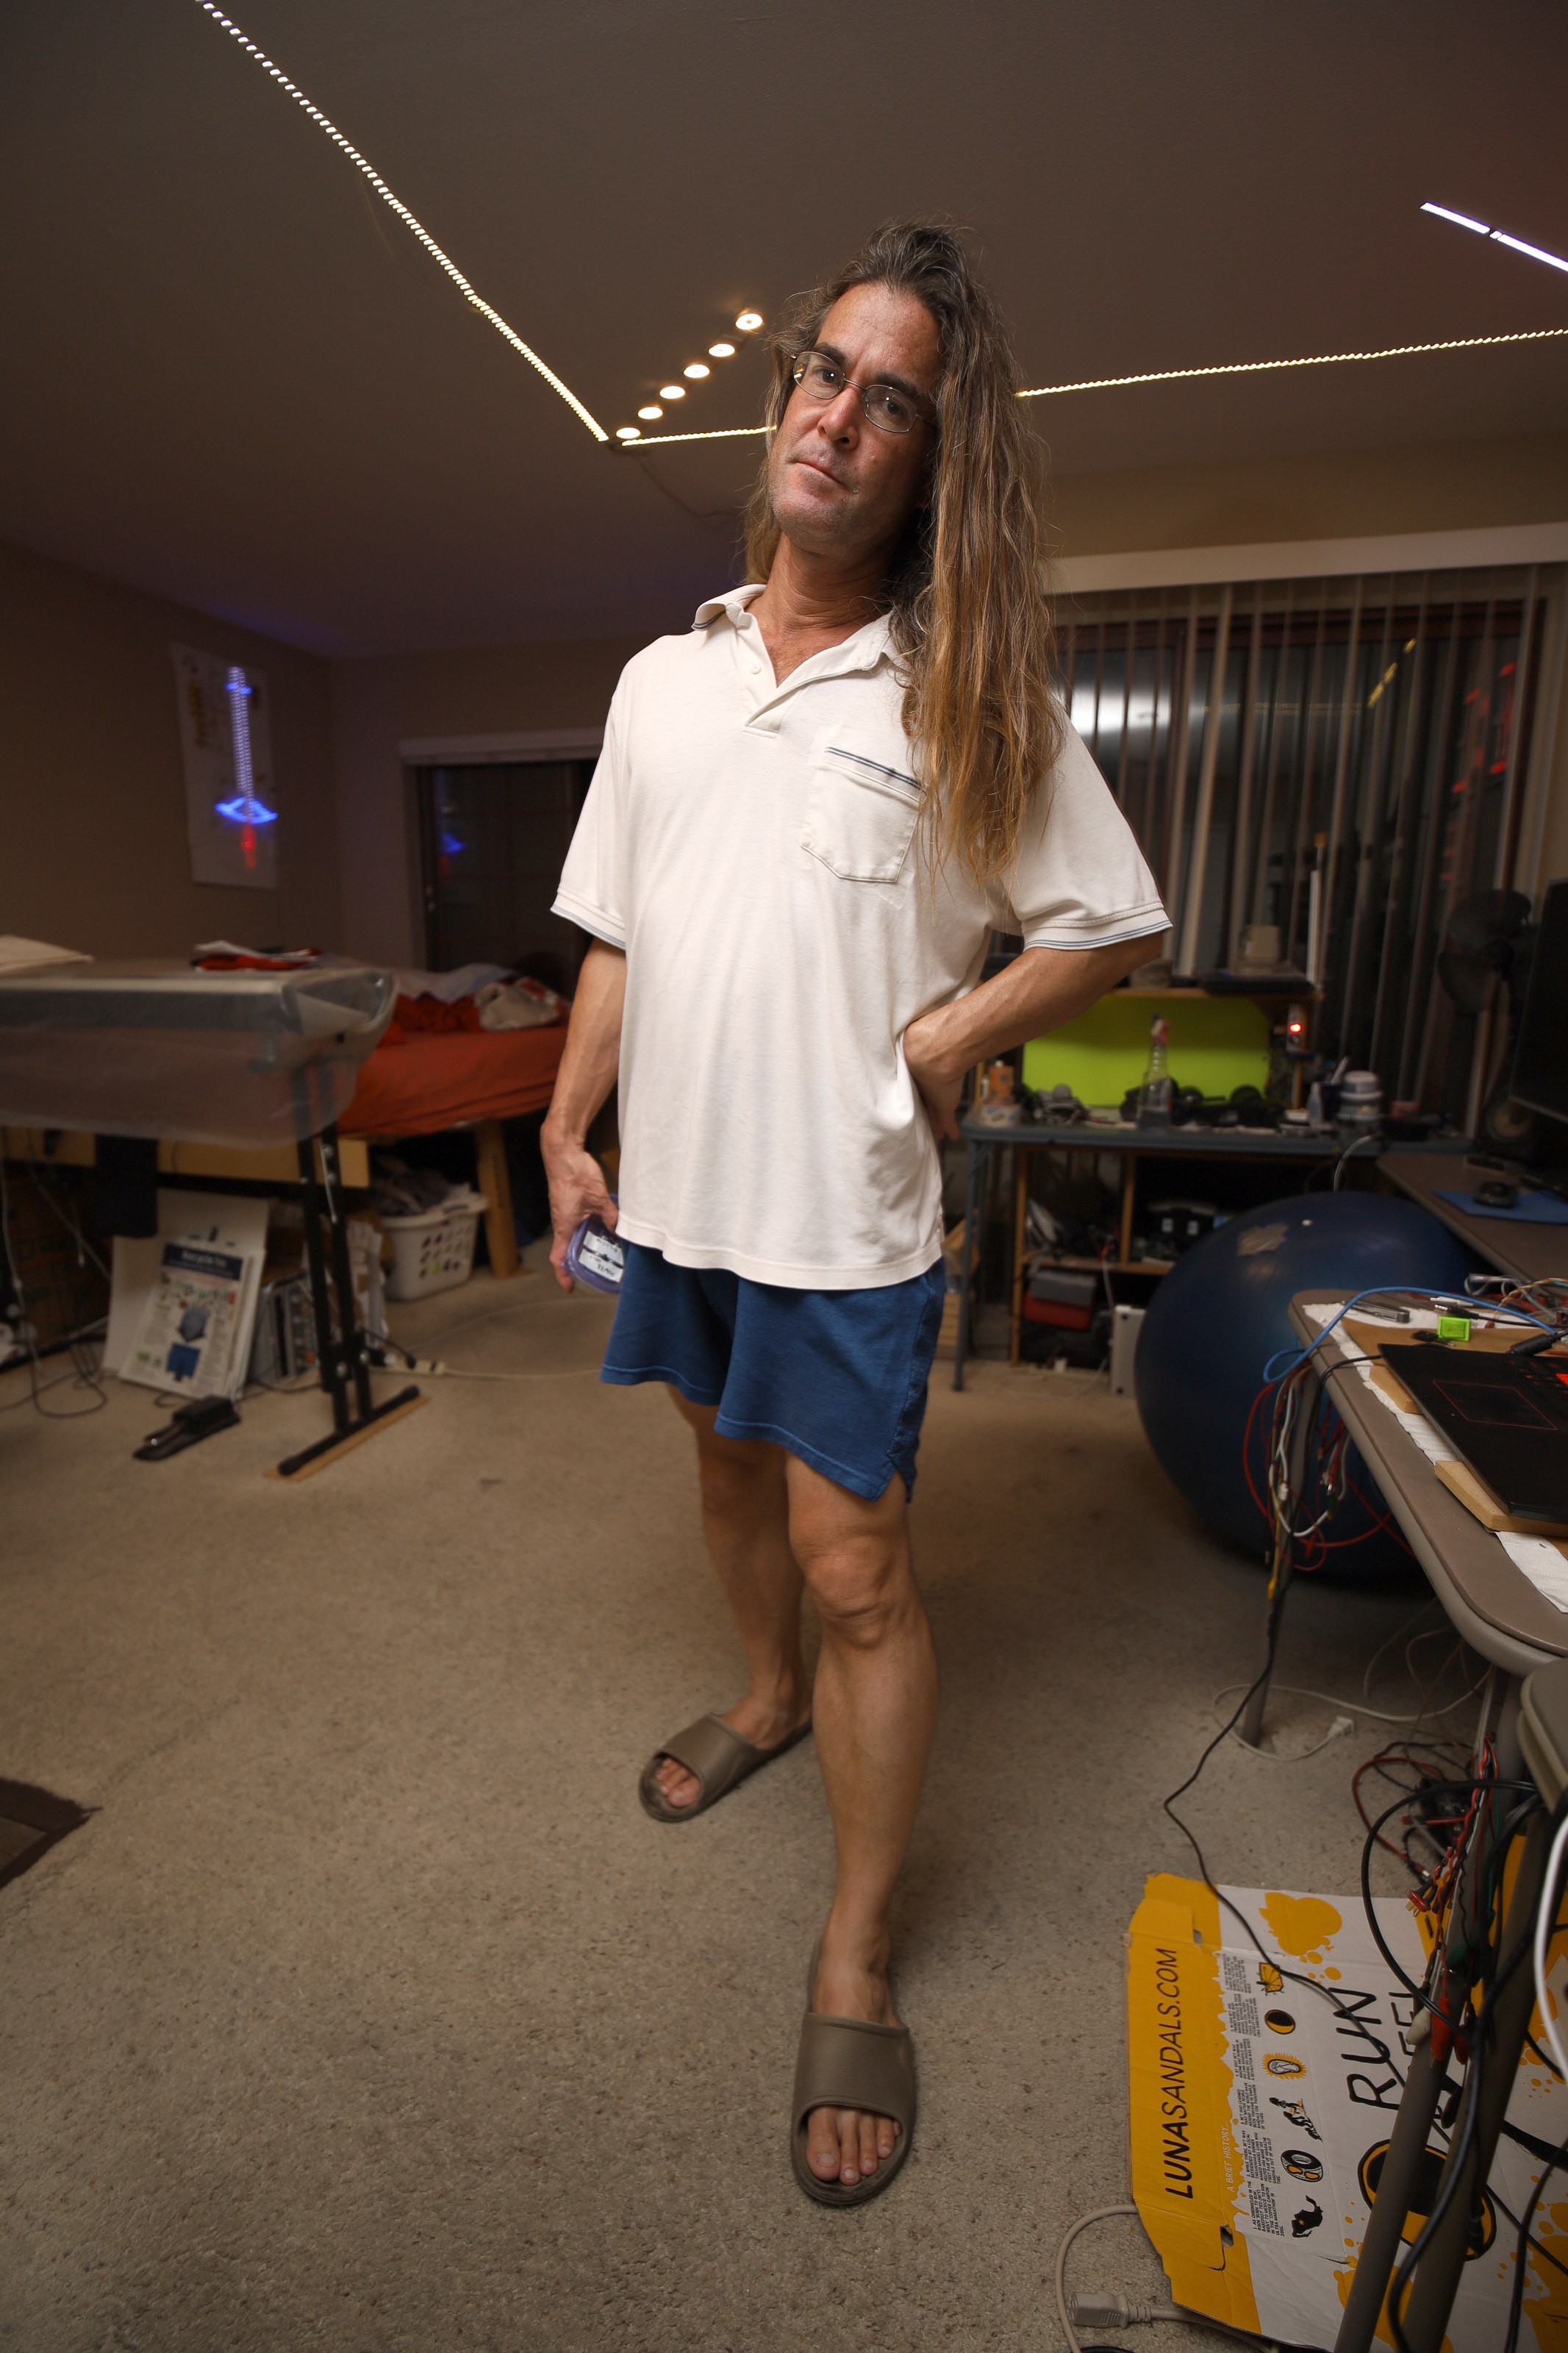
This alignment made it appear to tilt up looking for a head.
That was about all that could be done without a jetson nano. The rep counter is still trending towards a dedicated LCD panel.
-
Tracking robot evolution
11/30/2021 at 07:53 • 0 comments![]()
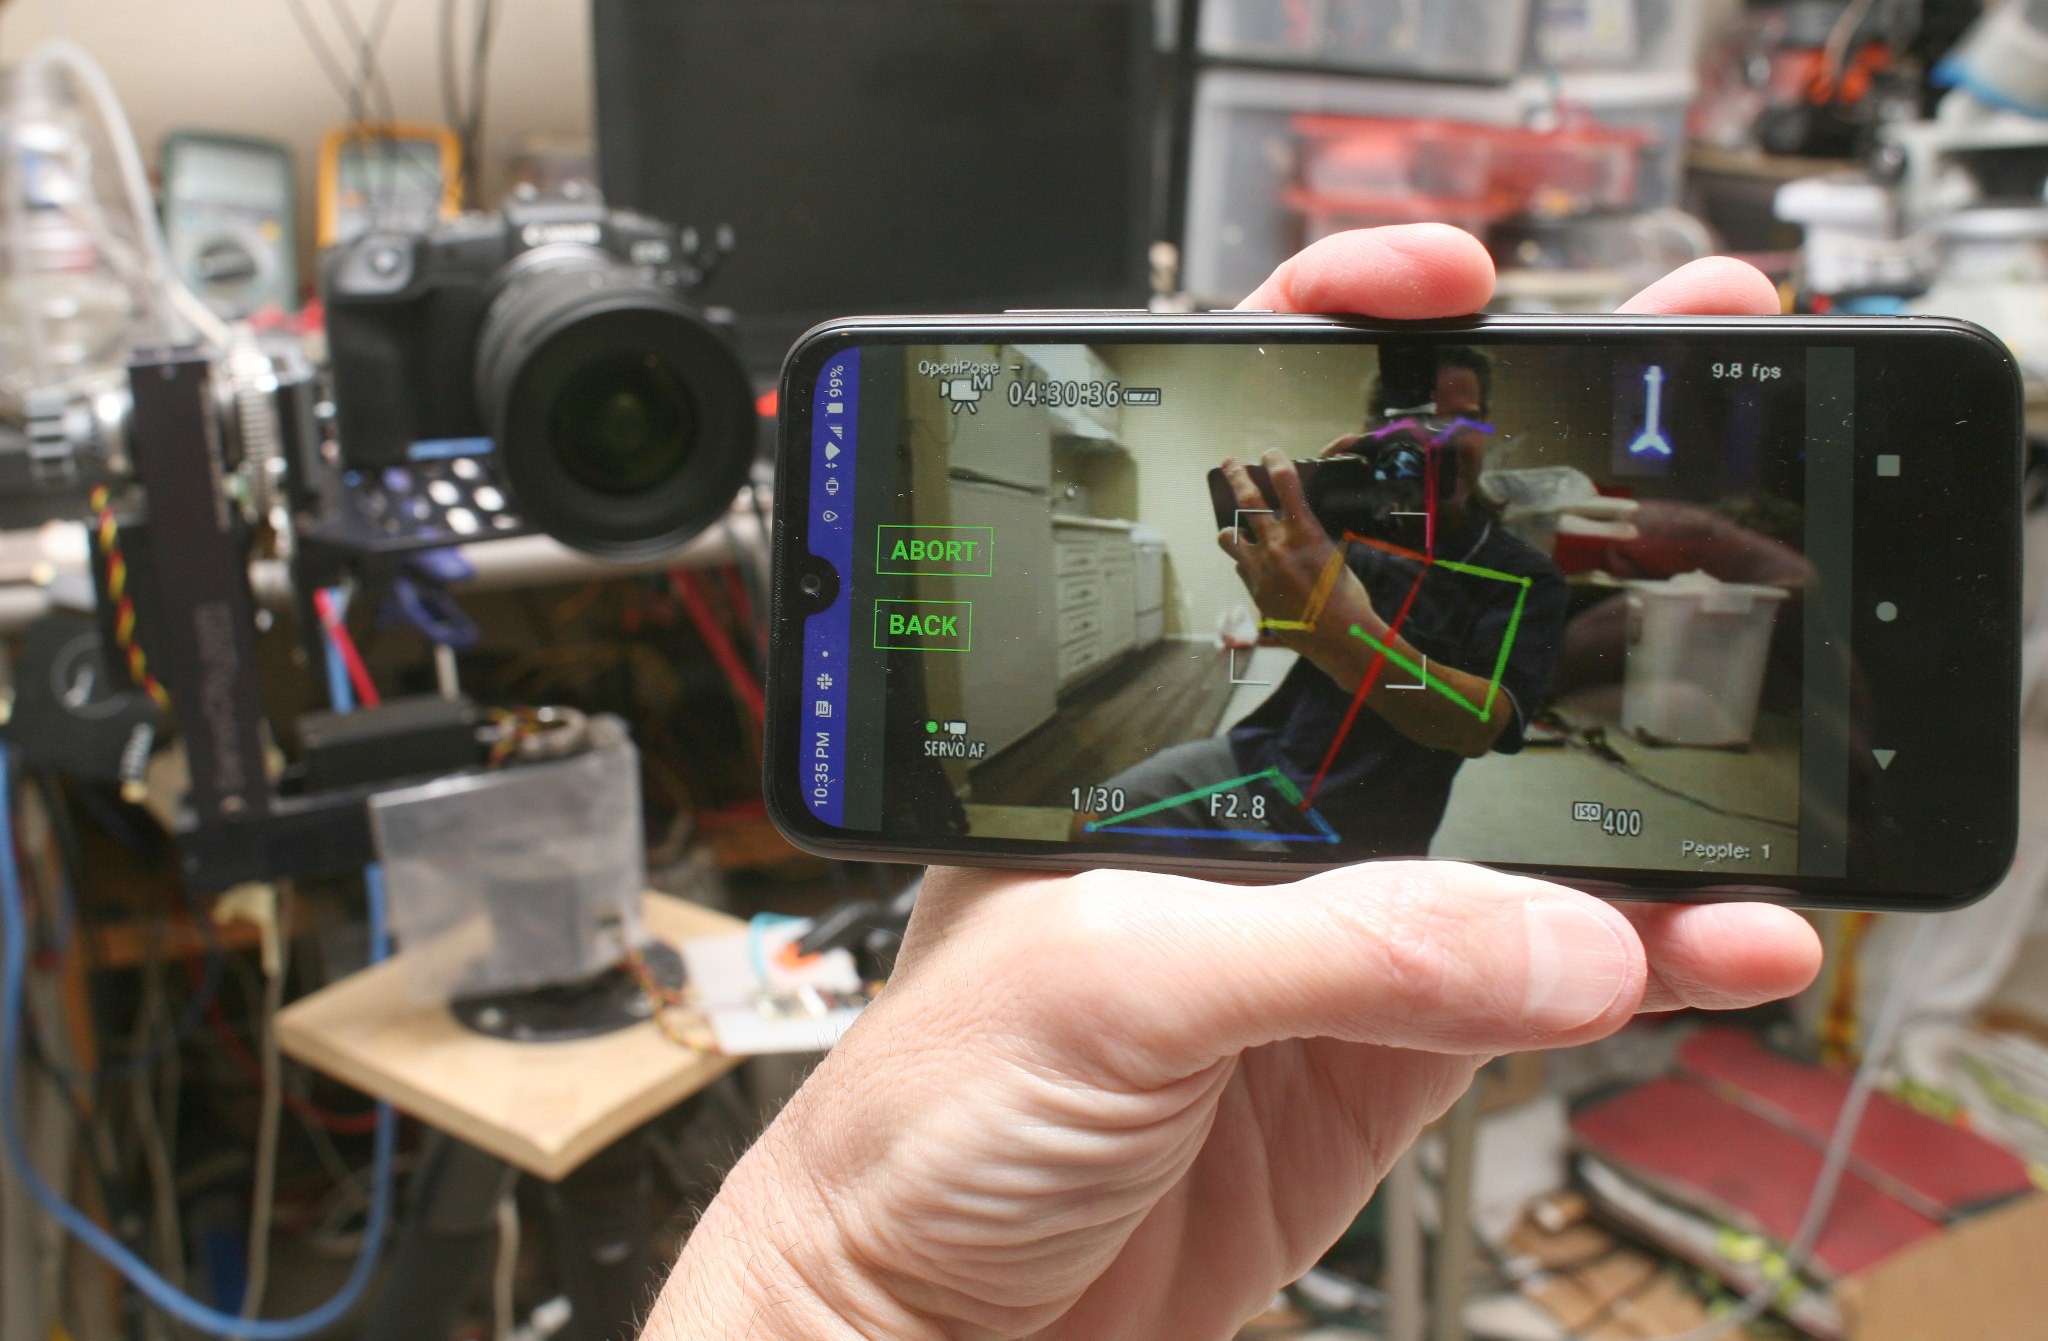
The phone GUI finally got to the point where it was usable. It crashed, took forever to get connected, had a few persistent settings bugs. It was decided that the size of the phone required full screen video in portrait & landscape mode, so the easiest way to determine tracking mode was by phone orientation.
![]()
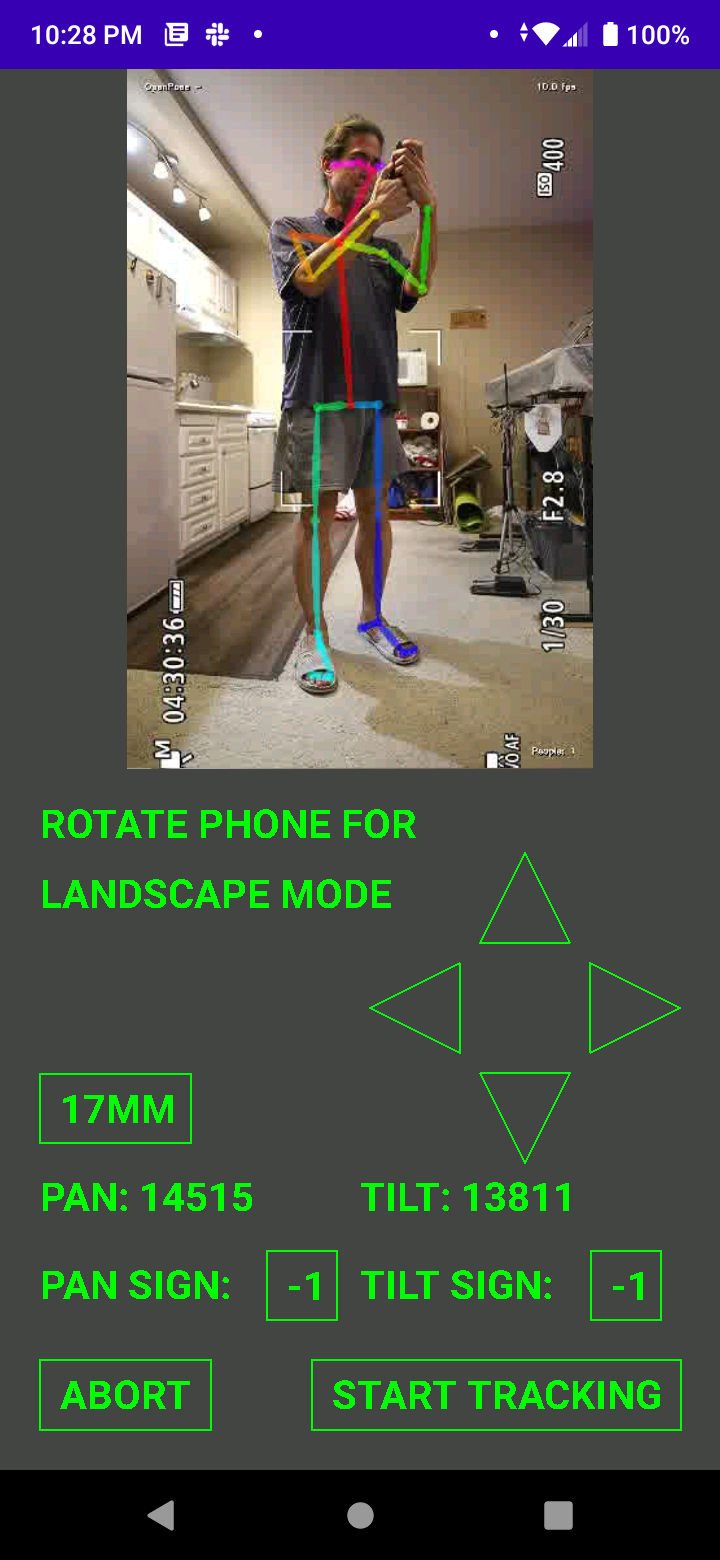
Rotating the phone to portrait mode would make the robot track in portrait mode.
![]()
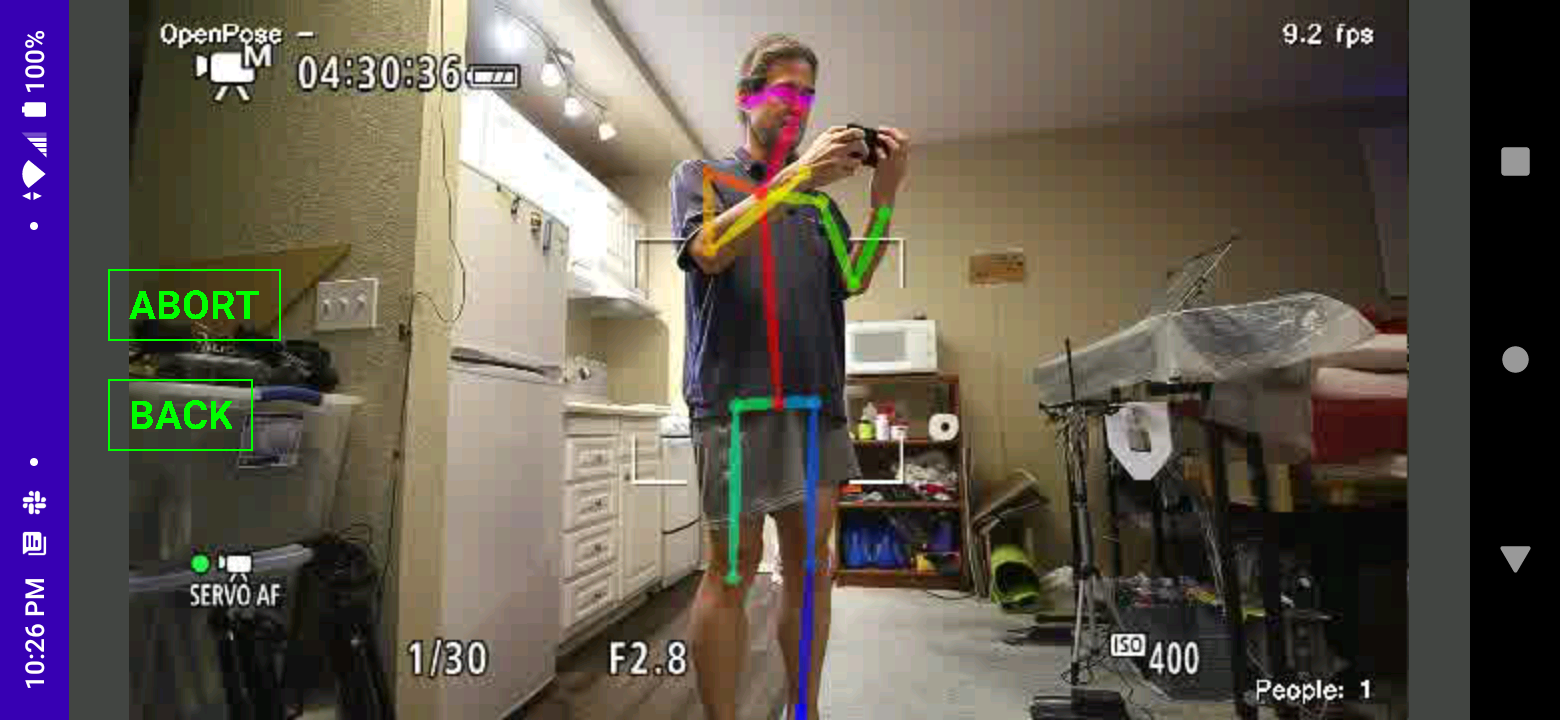
Rotating the phone to landscape mode would make the robot track in landscape mode.
![]()
![]()
Then, we have some configuration widgets & pathways to abort the motors. It was decided to not use corporate widgets so the widgets could overlap video. Corporate rotation on modern phones is junk, so that too is custom. All those professional white board programmers can't figure out what to do with the useless notch space in landscape mode.
![]()
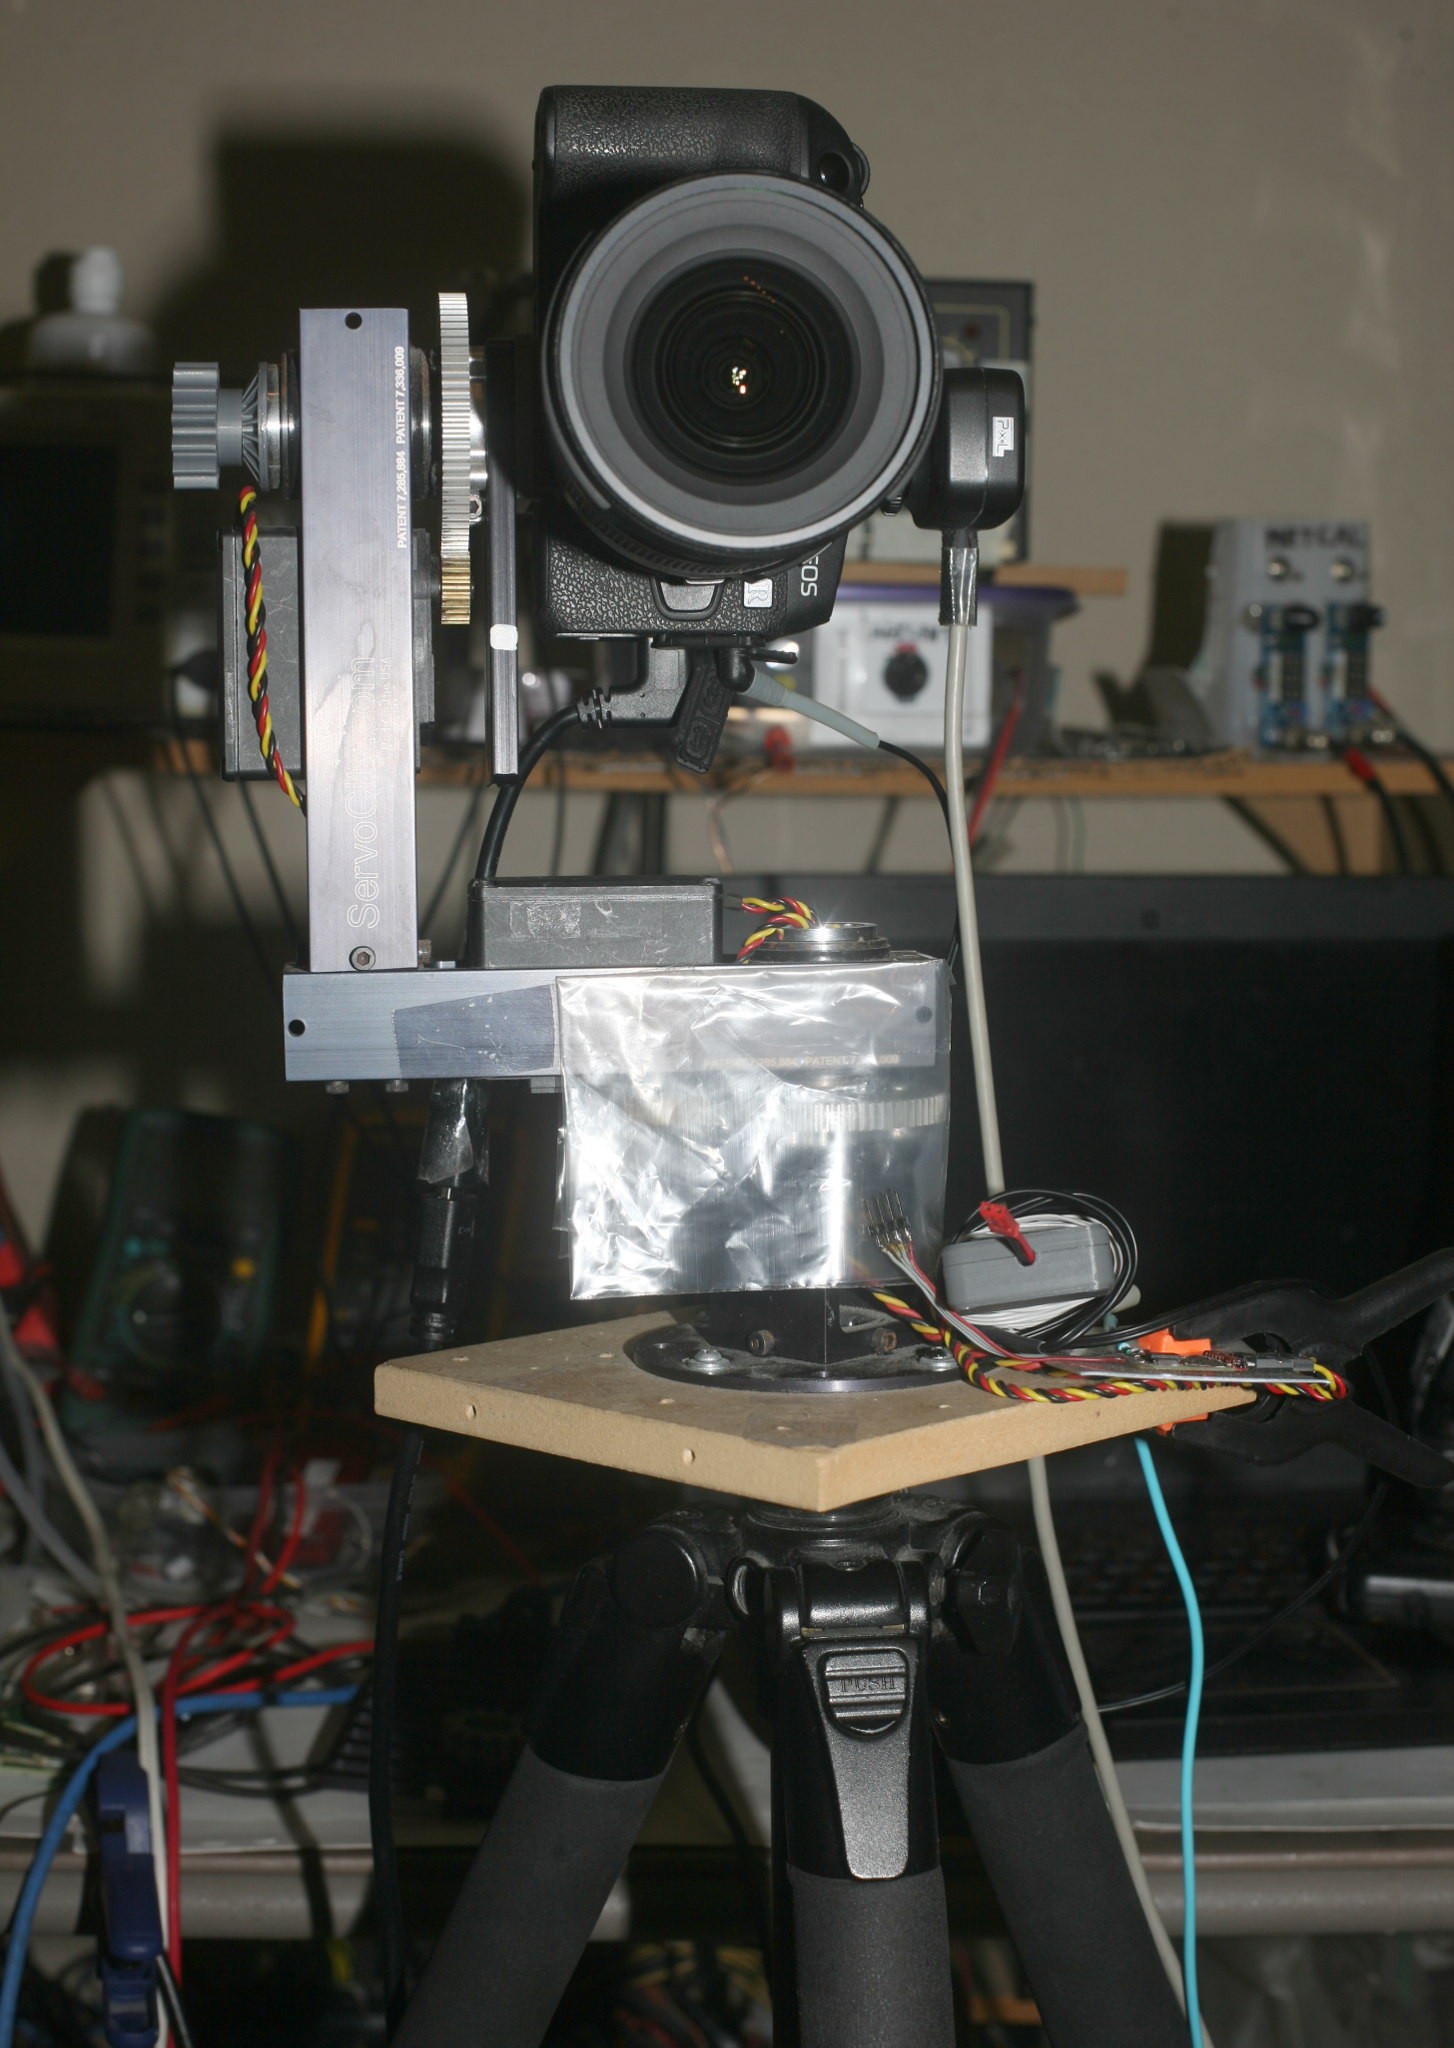
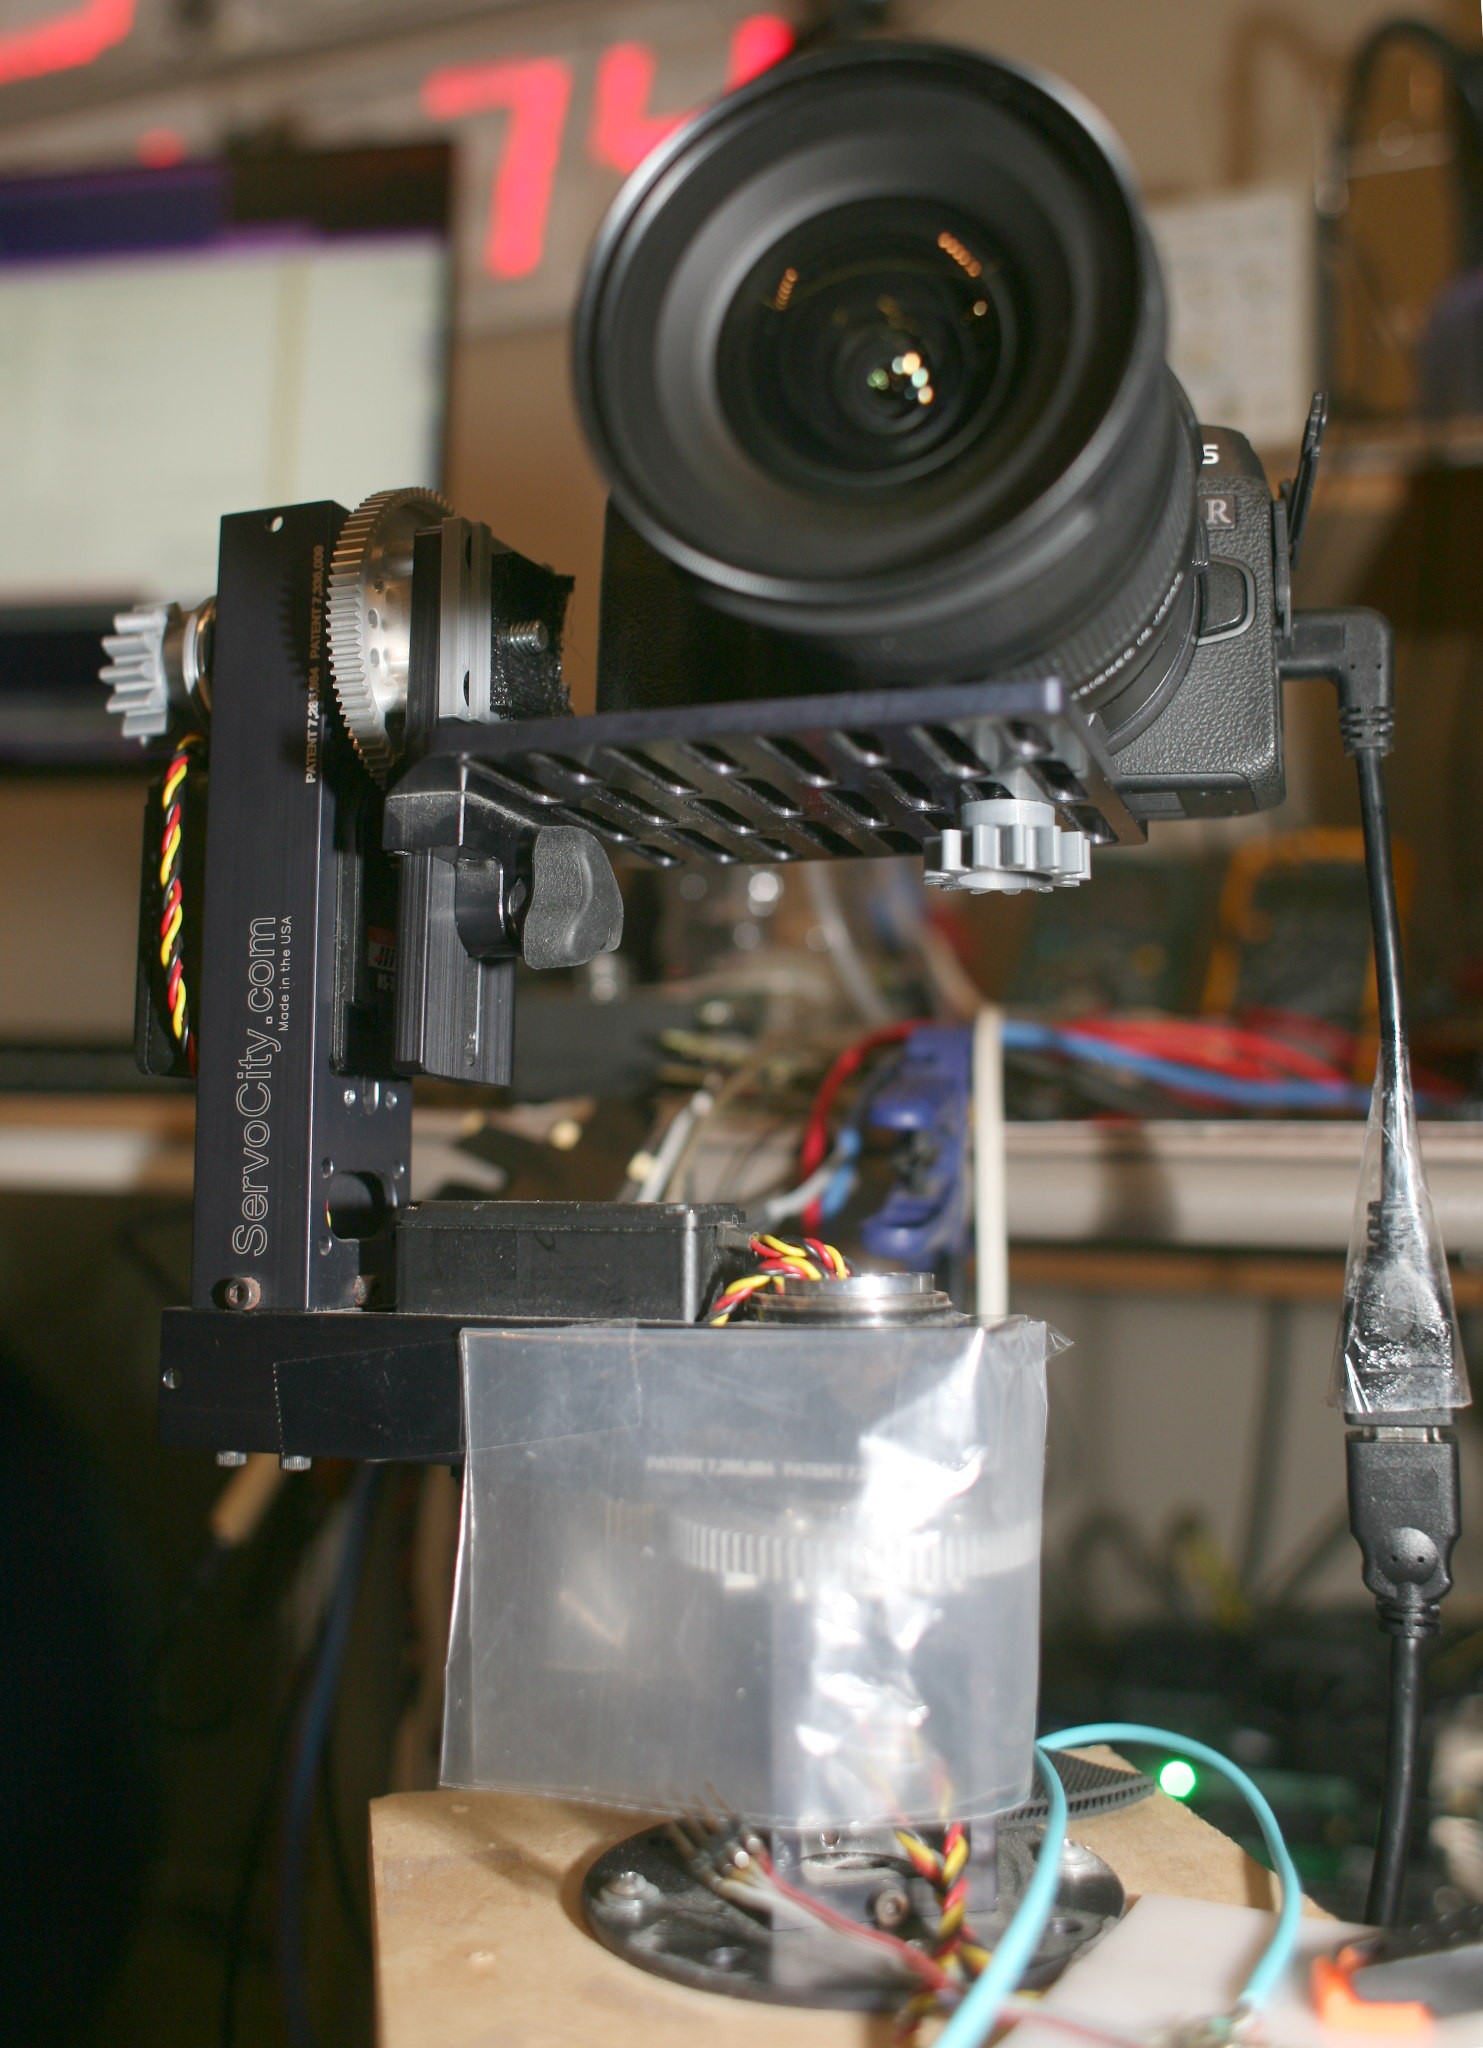
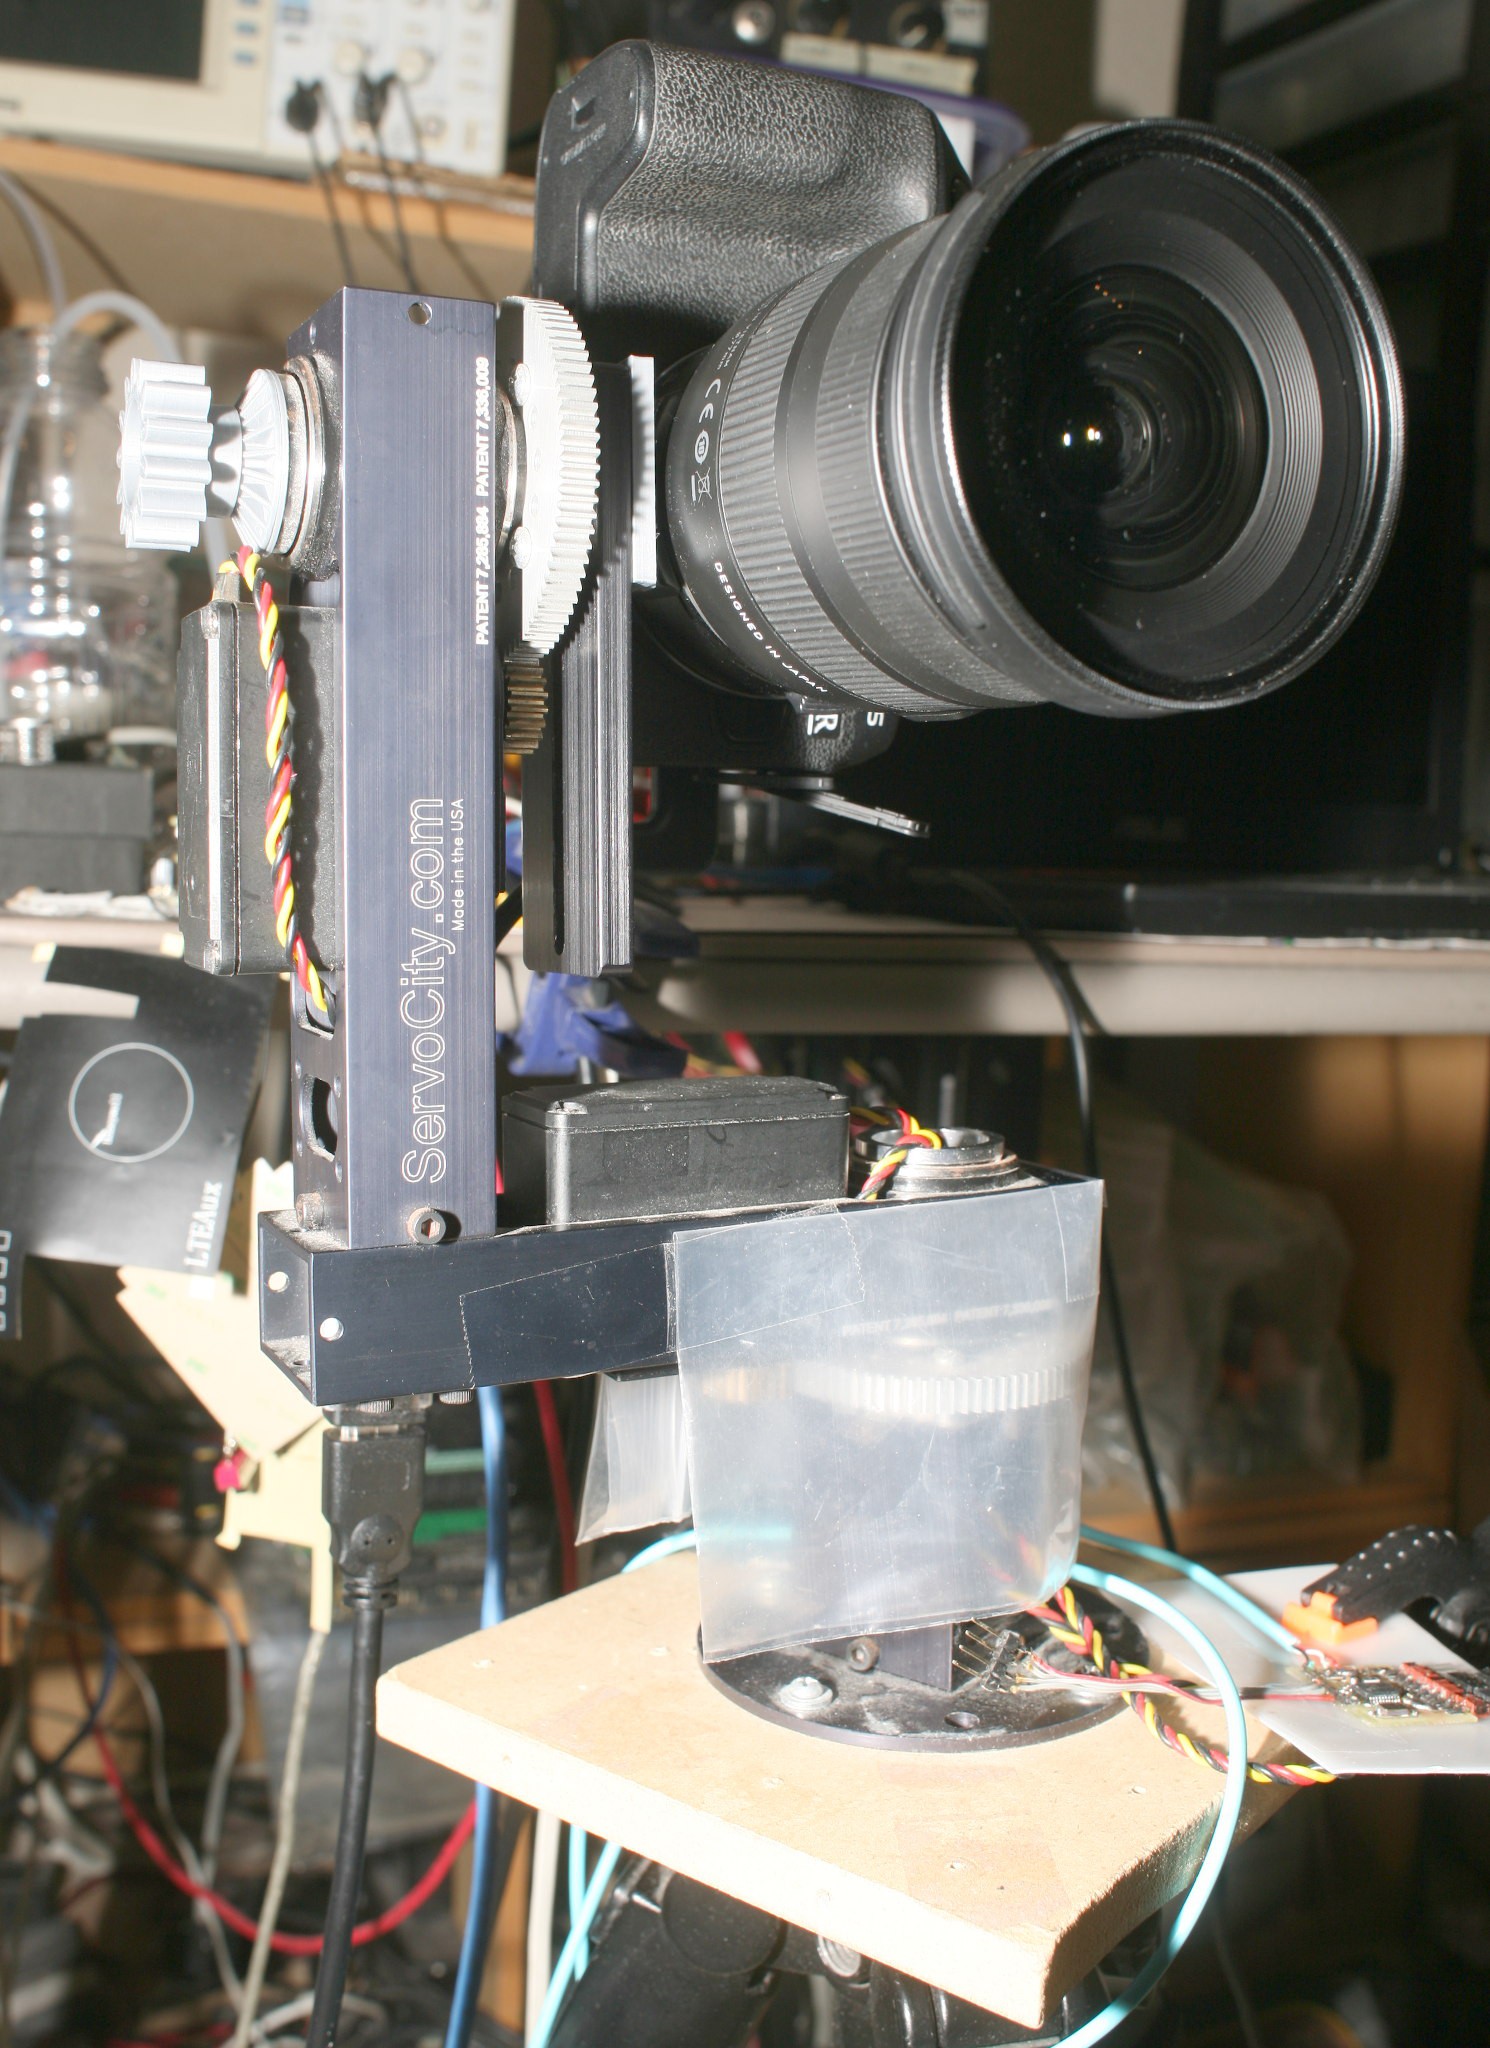
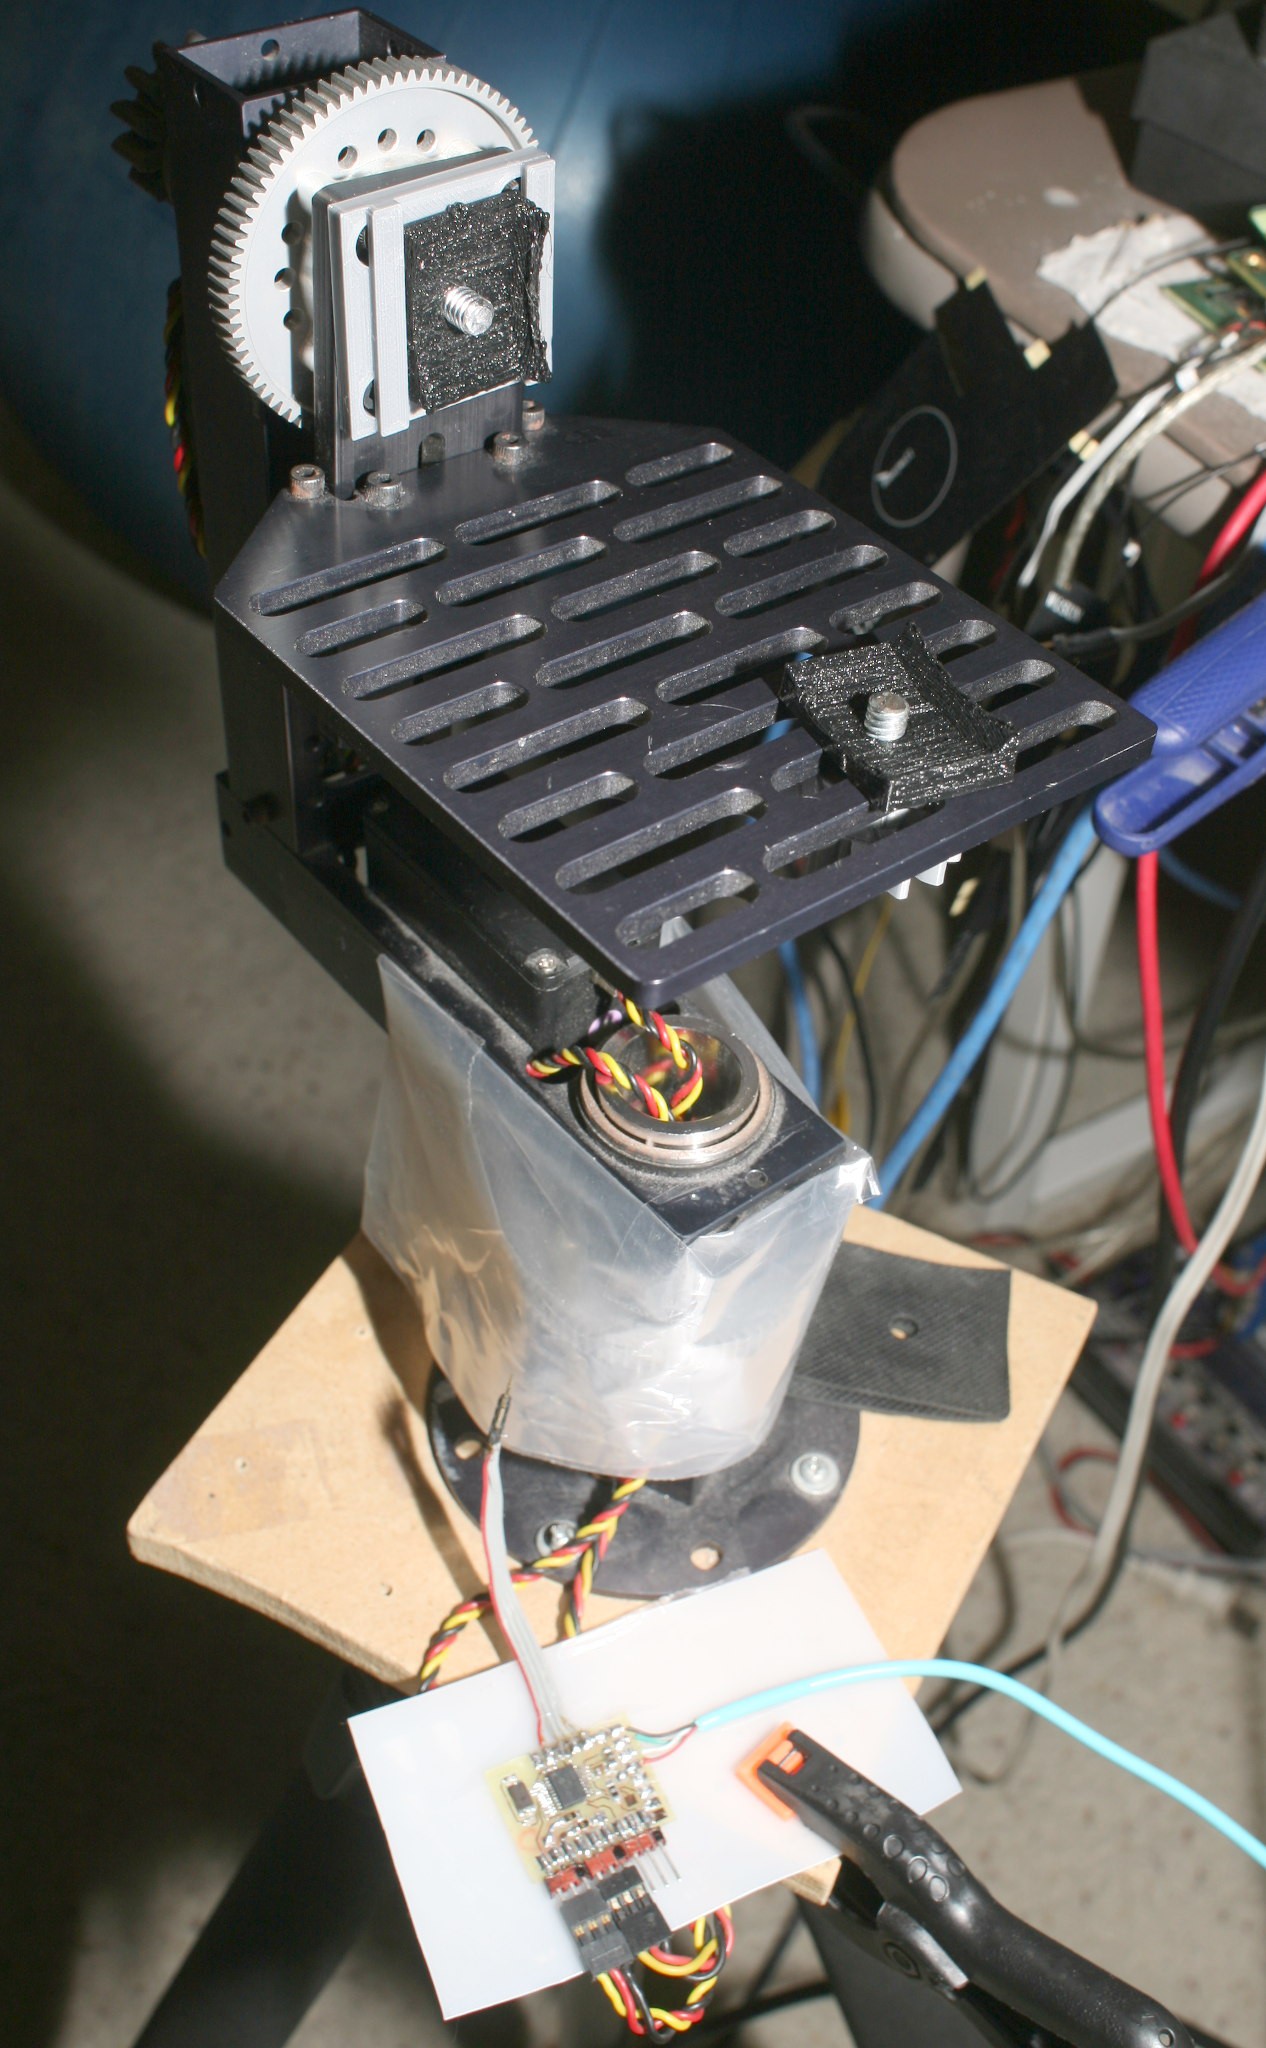
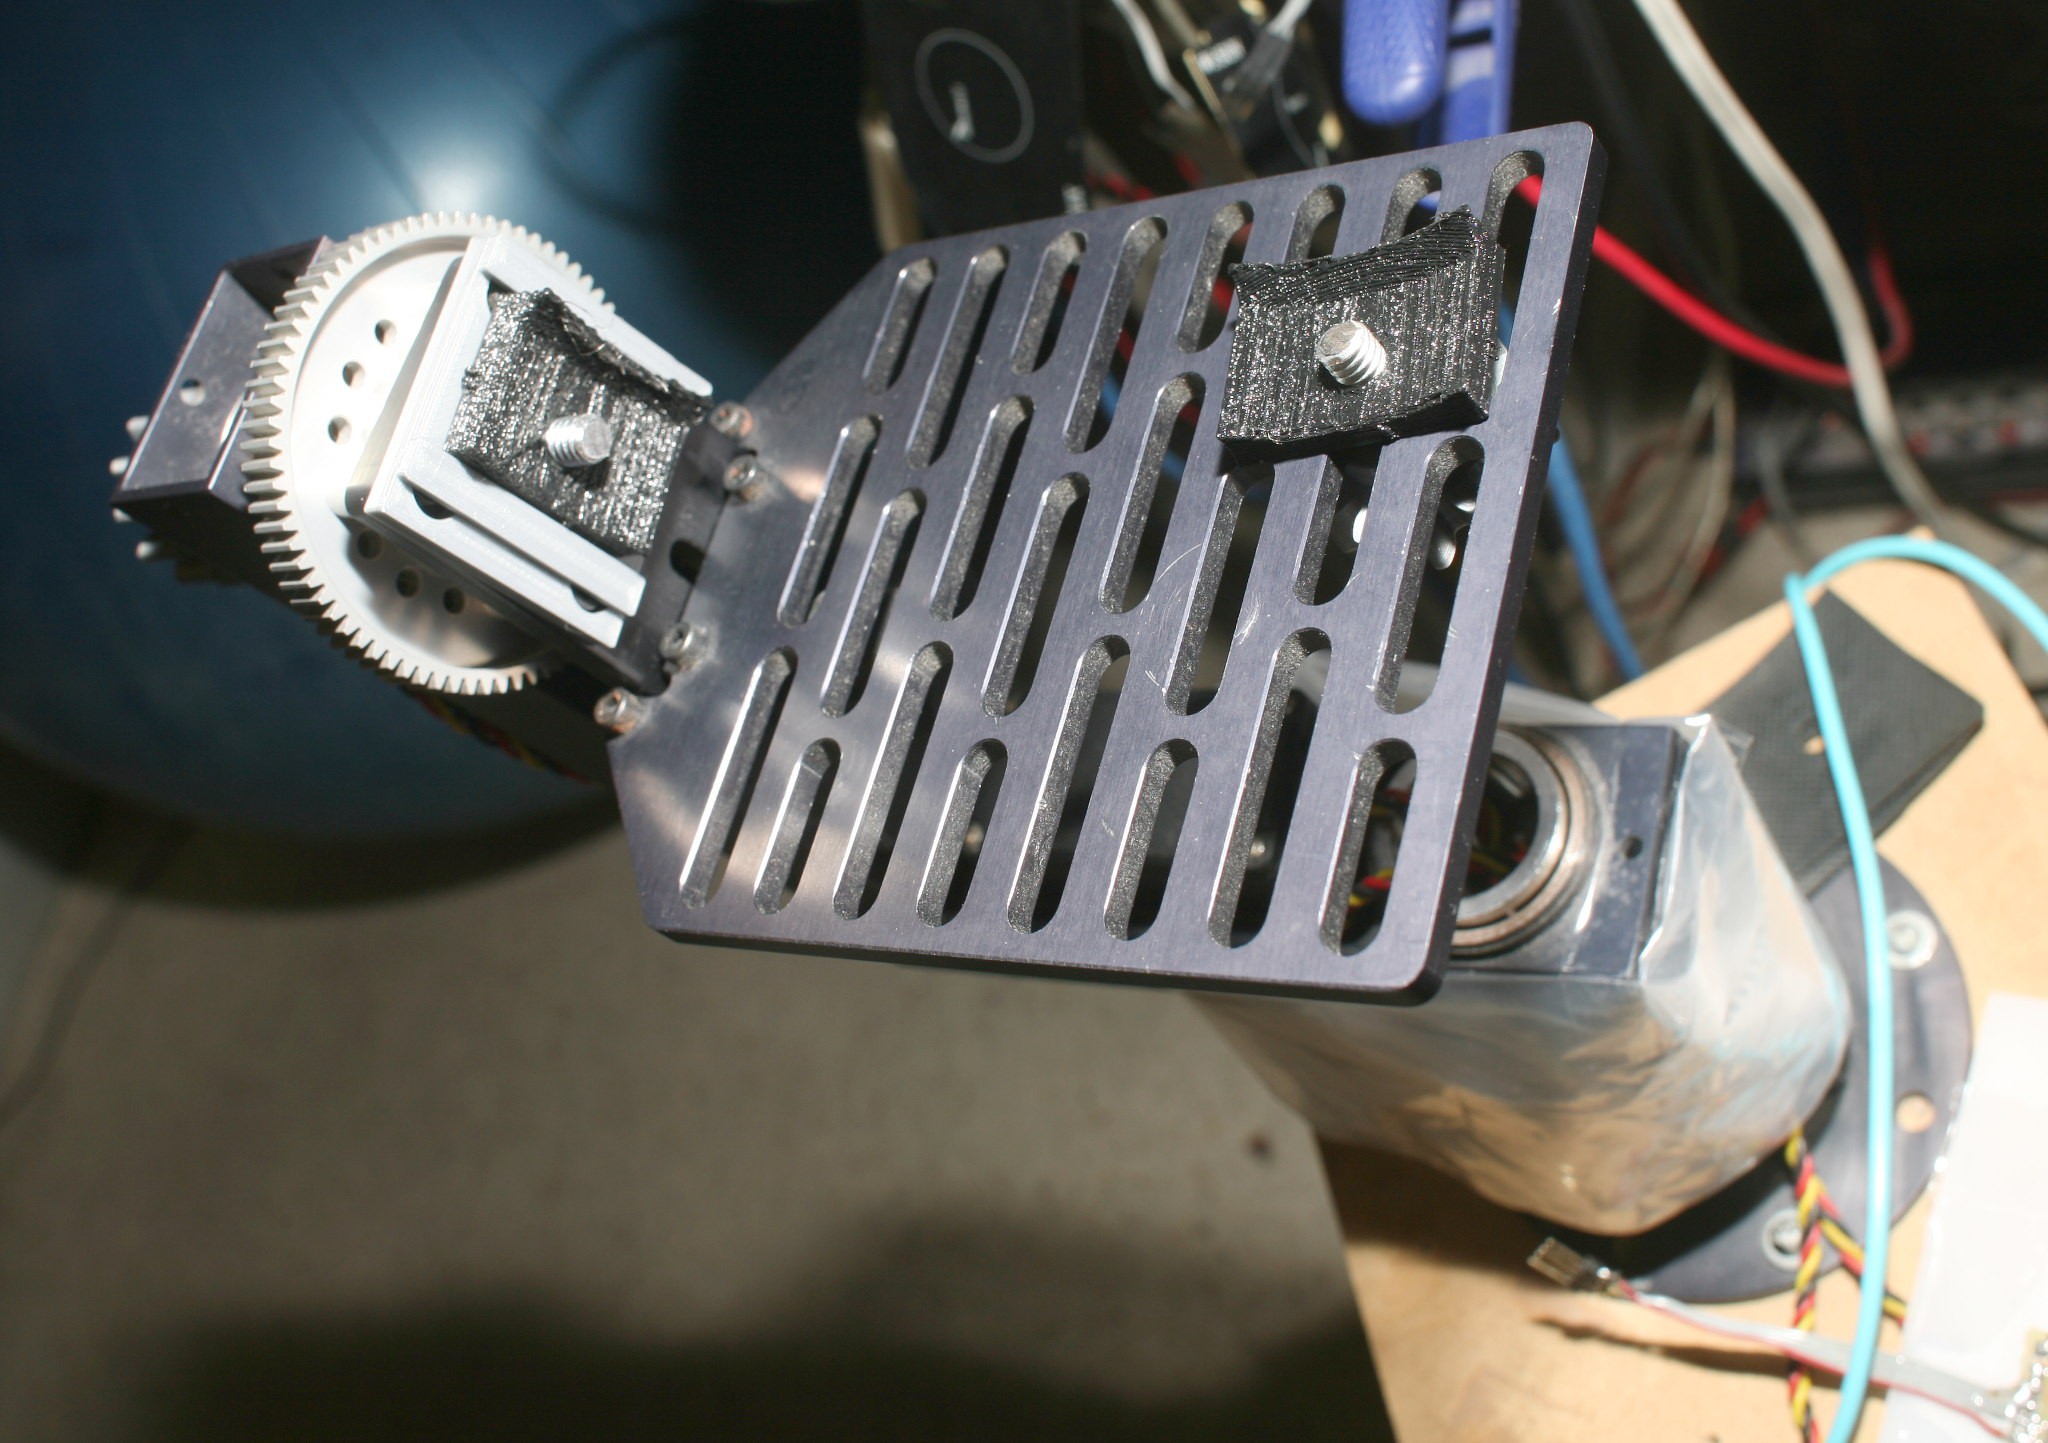
The mechanics got some upgrades to speed up the process of switching between portrait & landscape mode.
![]()
![]()
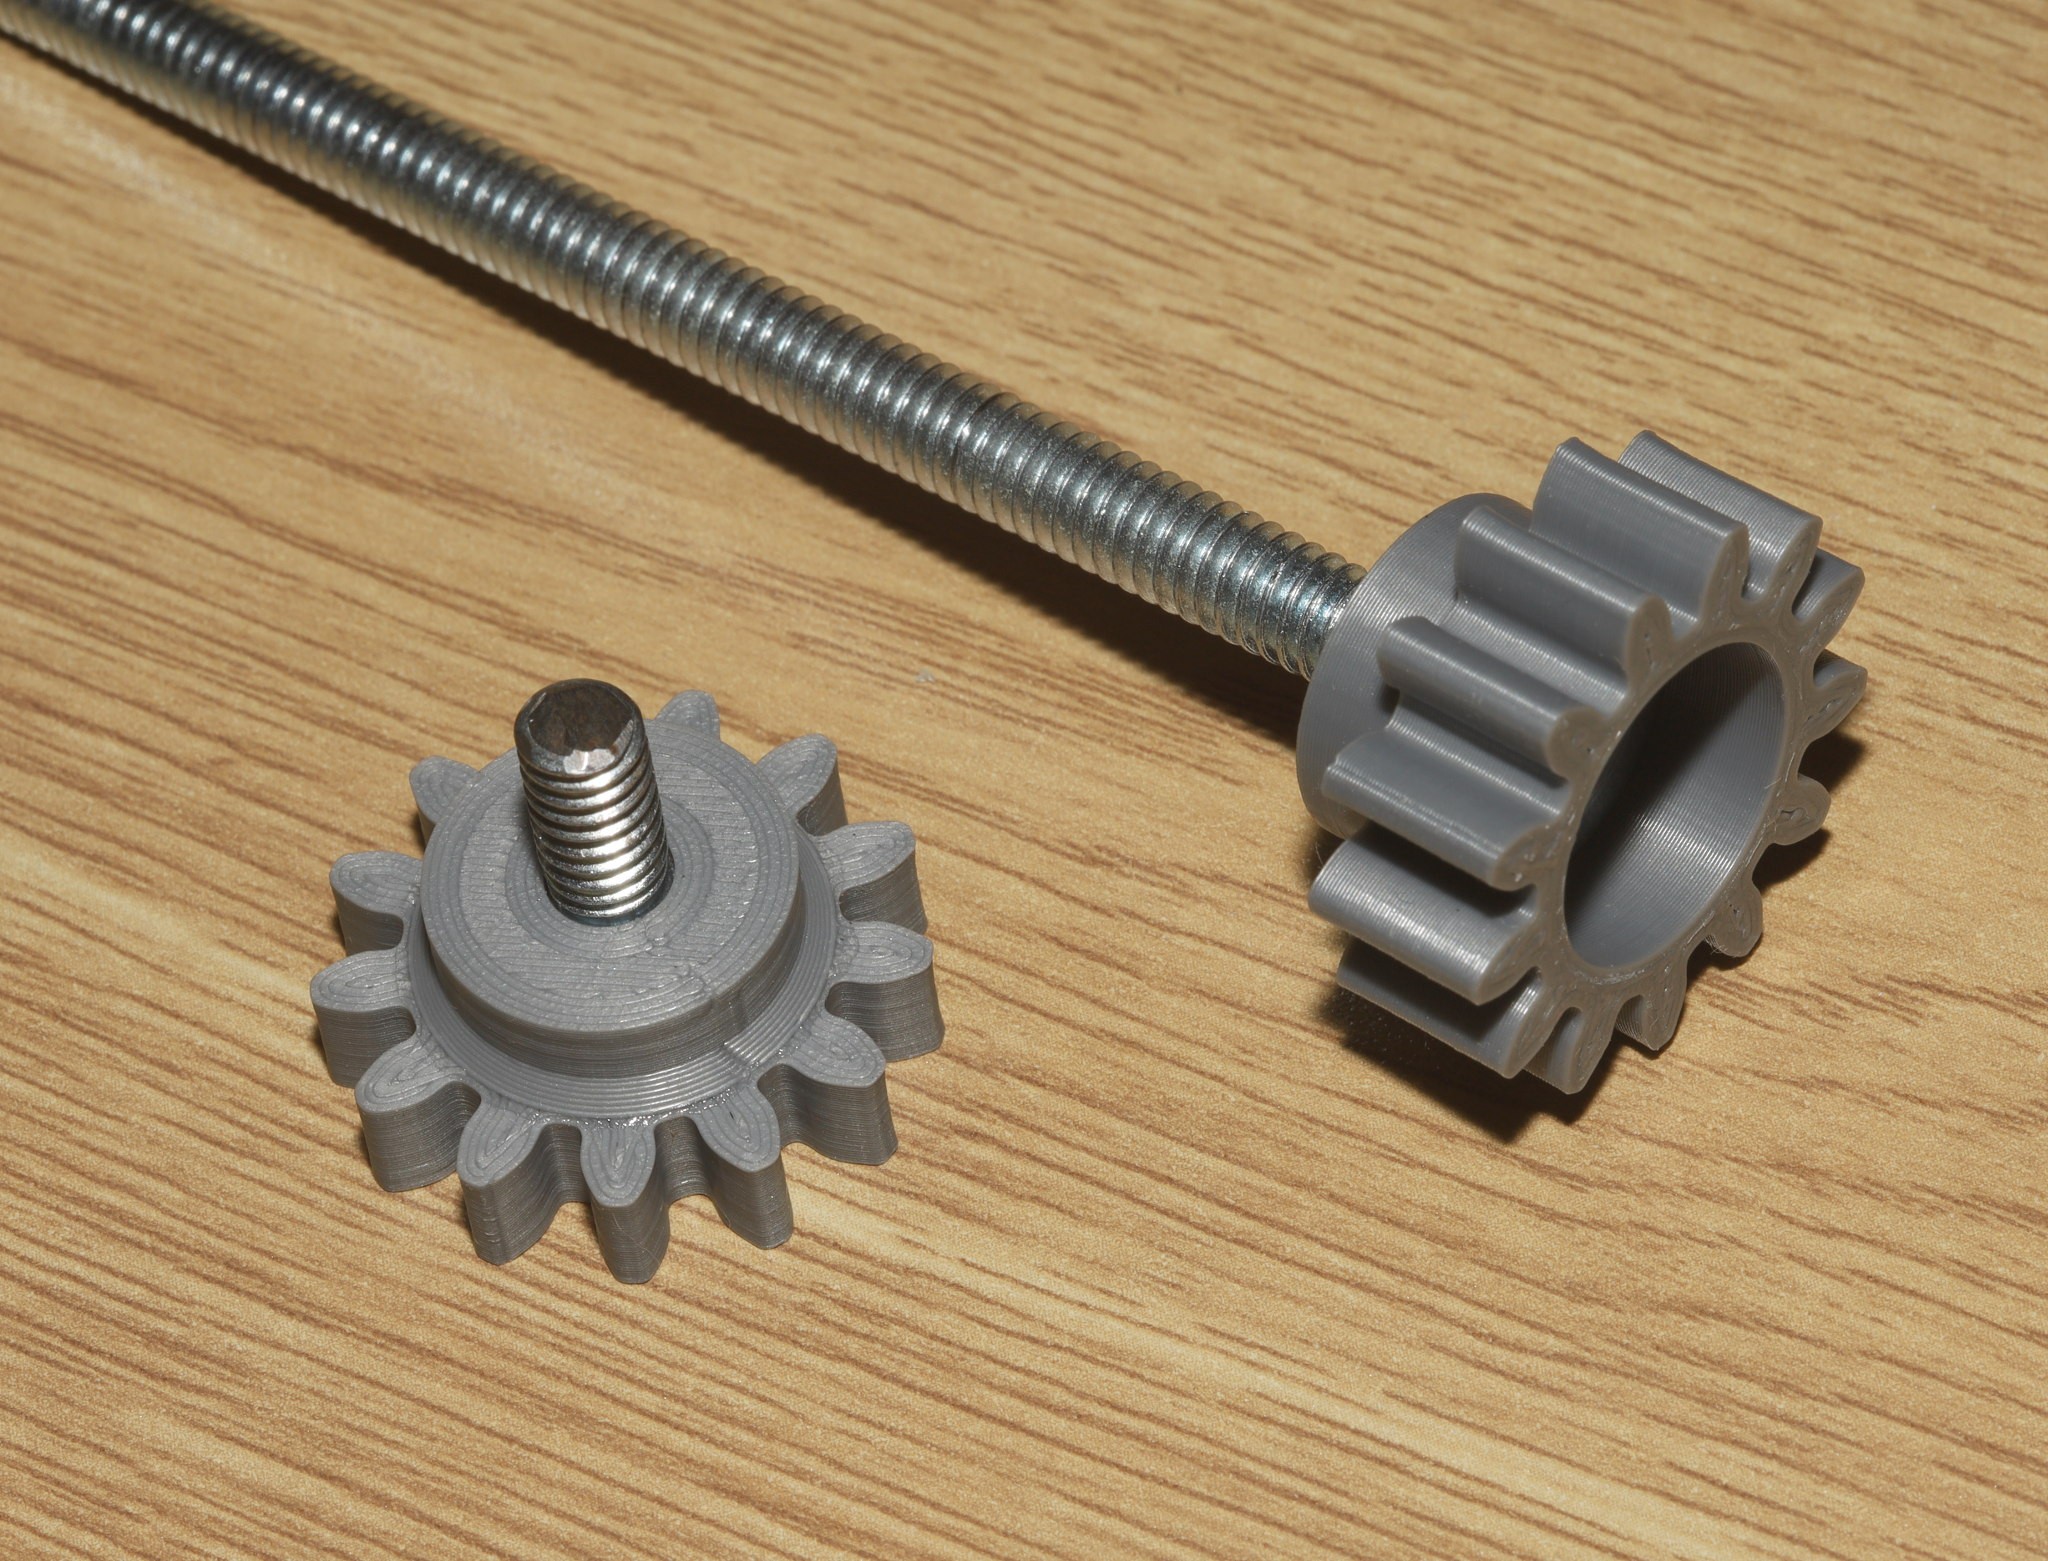
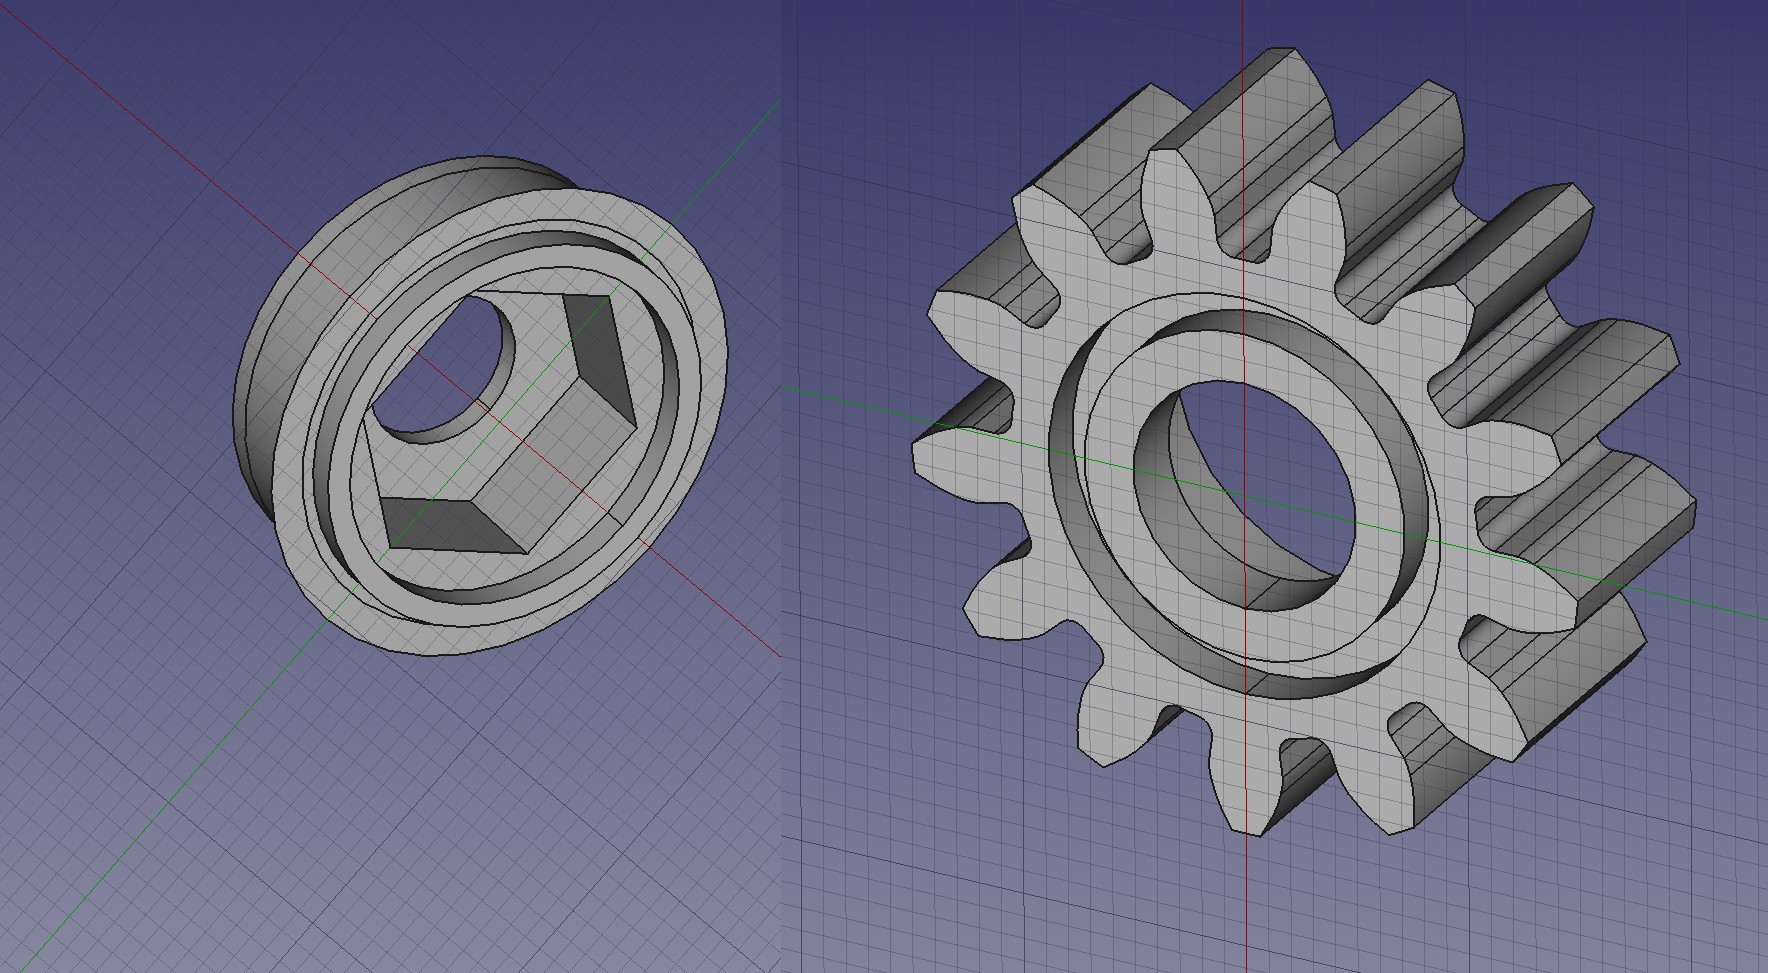
The key design was a 2 part knob for a common bolt.
![]()
![]()
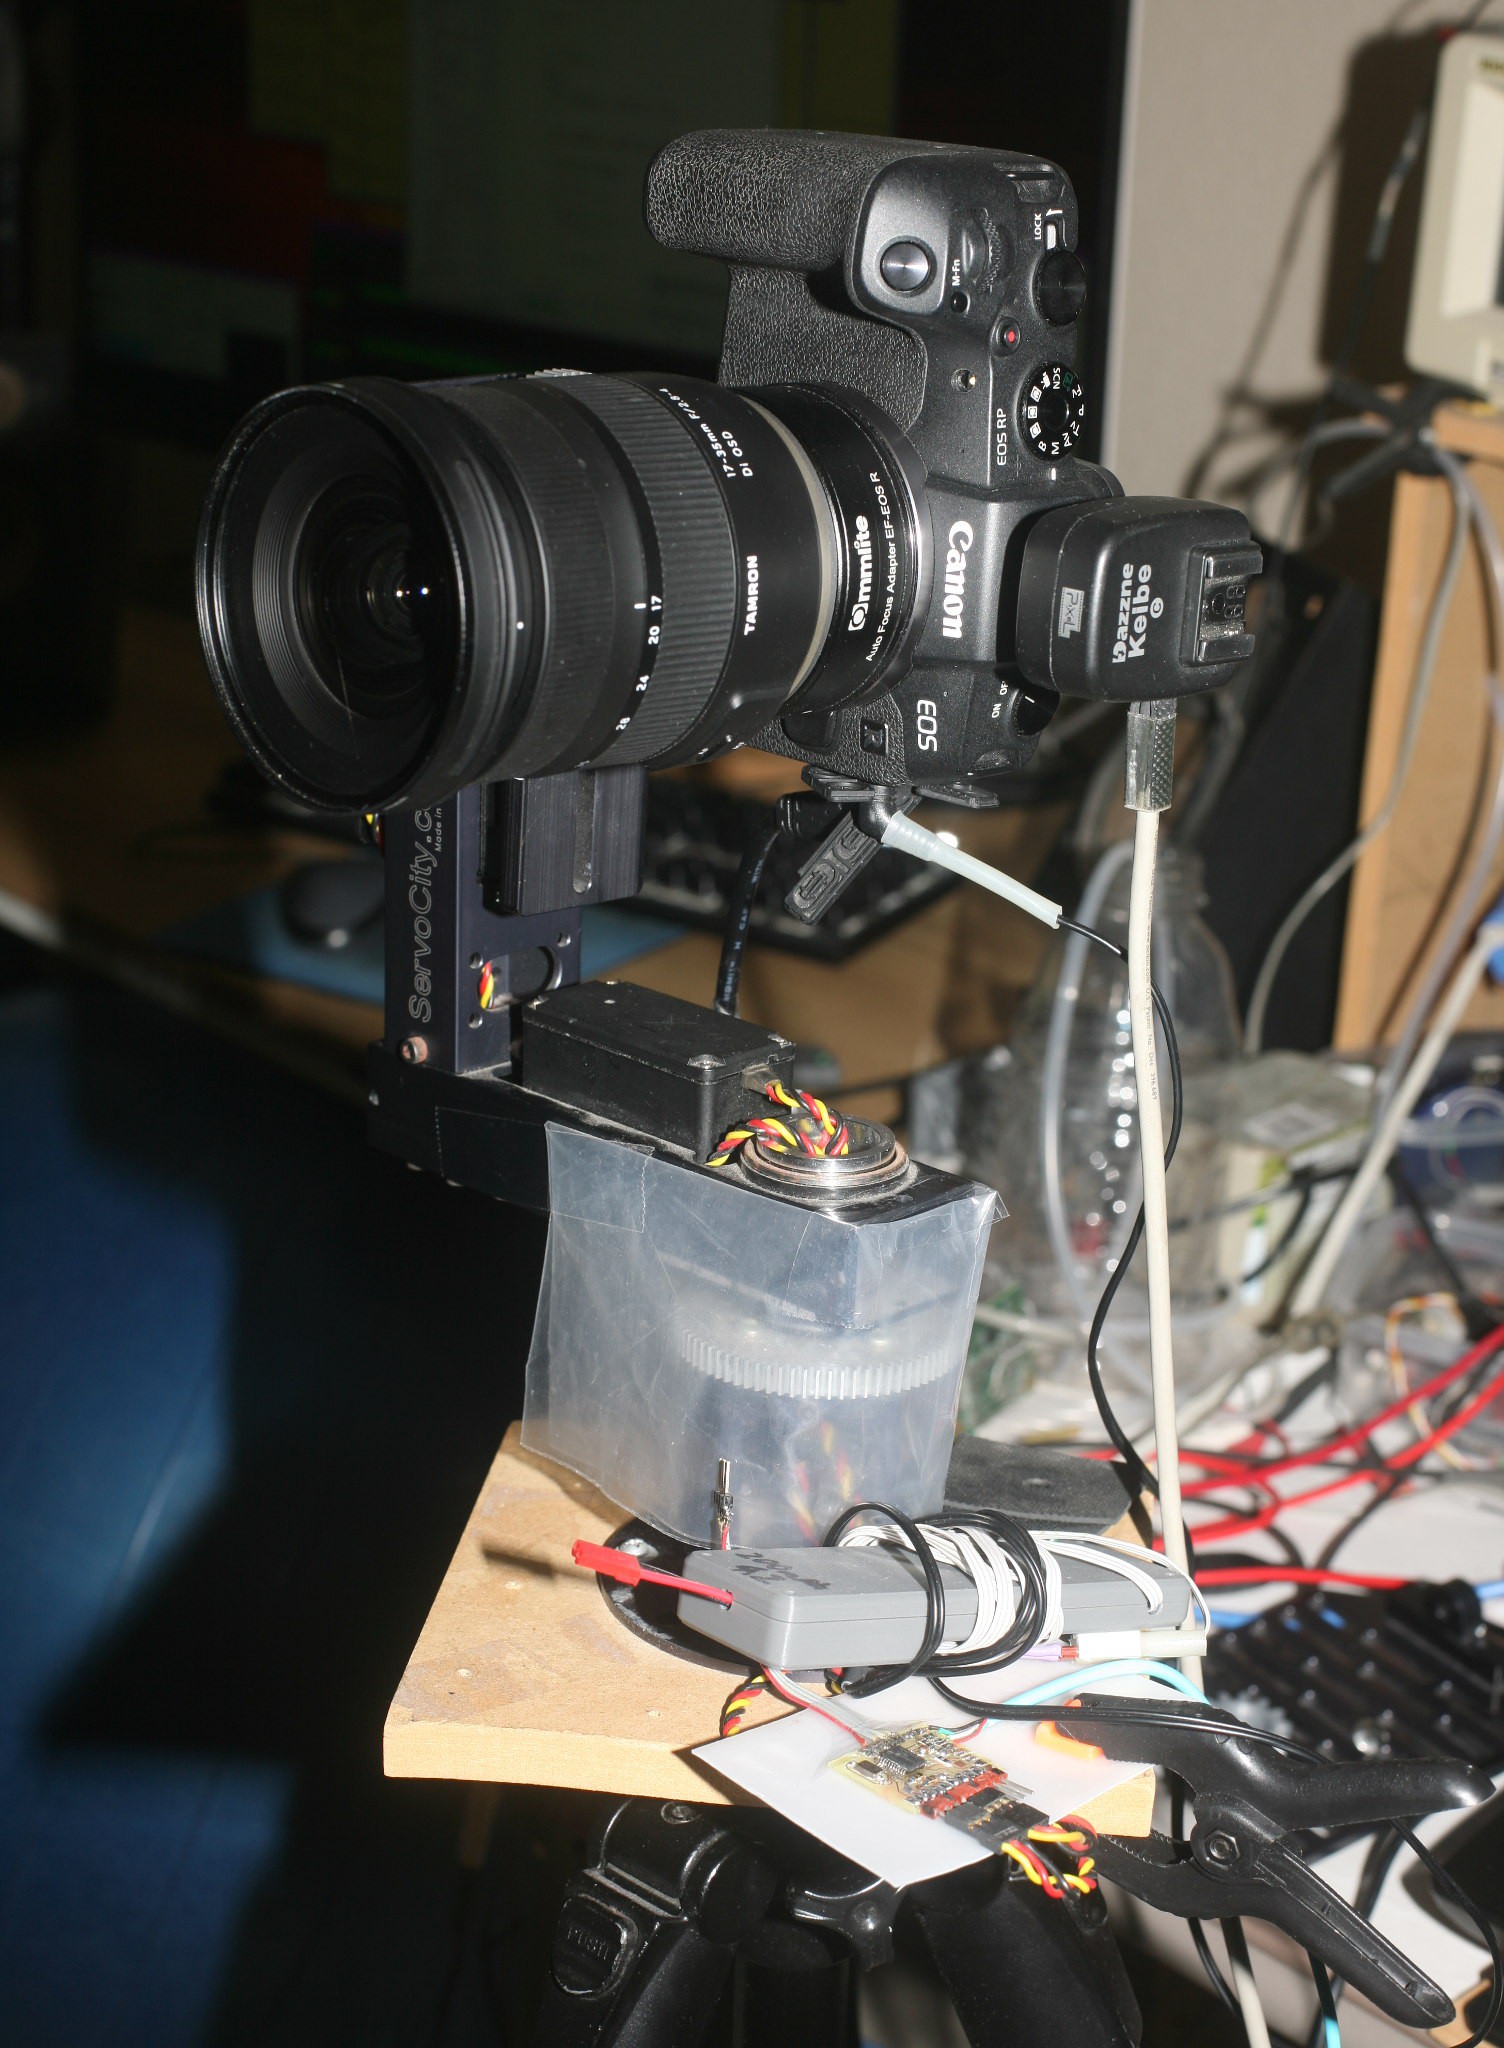
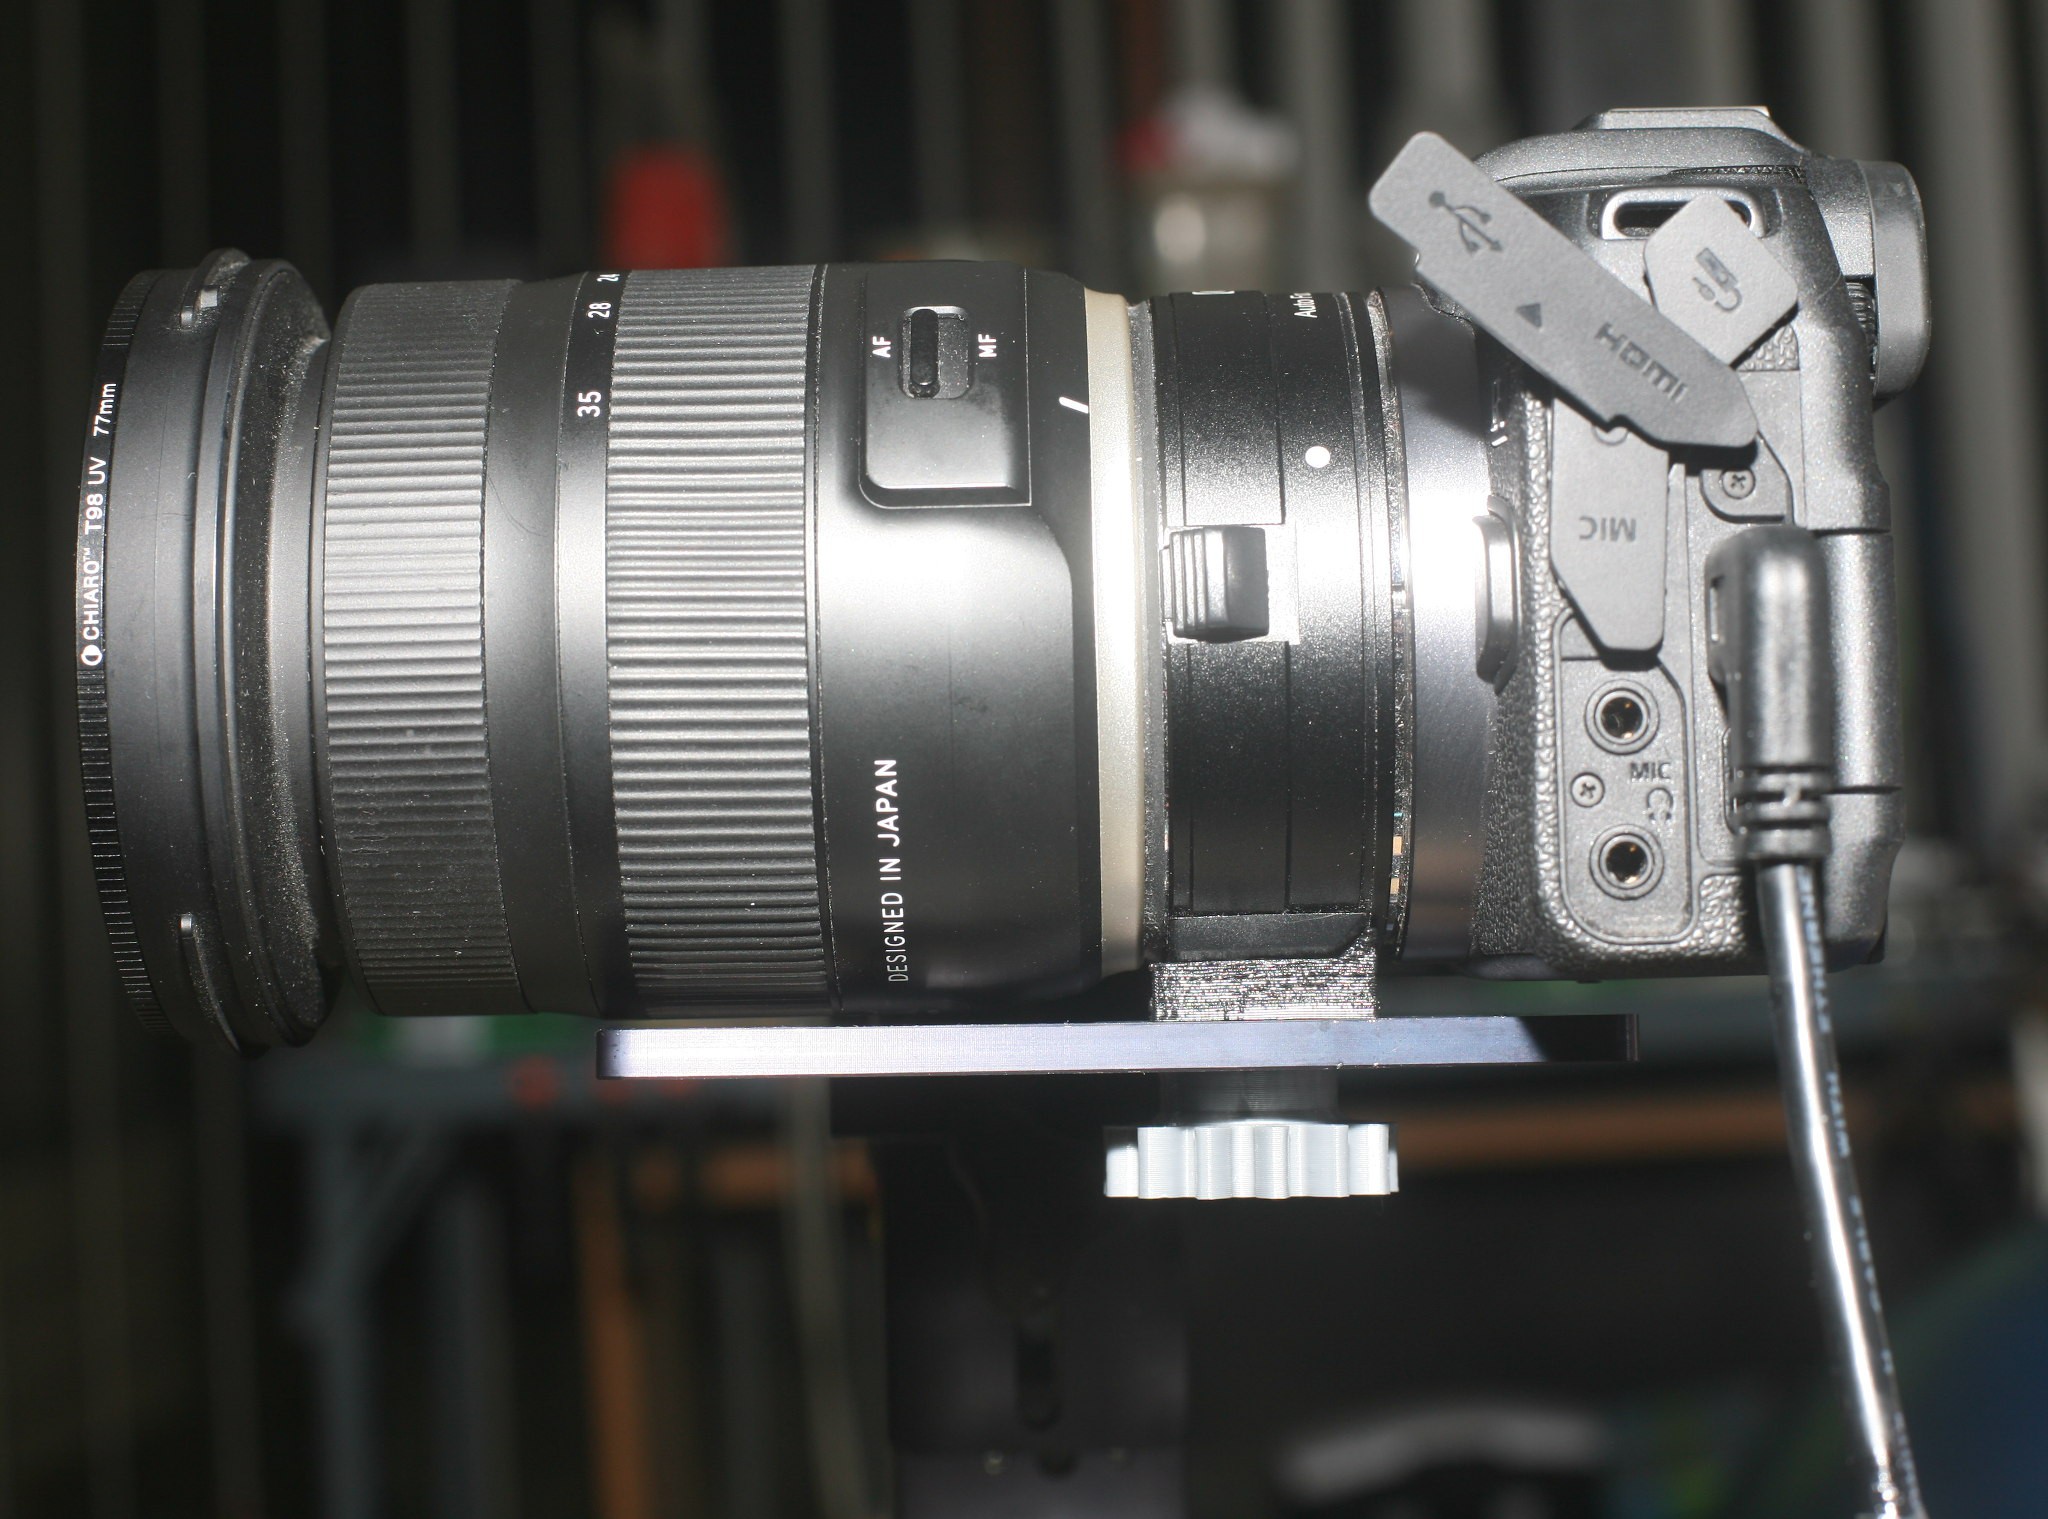
Some new lens adapters made it a lot more compact, but
![]()
The lens adapters & bolts would all have to be replaced to attach a fatter lens.
![]()
The original robot required relocating the landscape plate in a complicated process, with a socket wrench. The landscape plate now can be removed to switch to portrait mode with no tools.
The quest for lower latency led to using mjpeg inside ffmpeg. That was the only realtime codec. The only latency is buffering in video4linux.
On the server, the lowest latency command was:
ffmpeg -y -f rawvideo -y -pix_fmt bgr24 -r 10 -s:v 1920x1080 -i - -f mjpeg -pix_fmt yuv420p -bufsize 0 -b:v 5M -flush_packets 1 -an - > /tmp/ffmpeg_fifo
On the client, the lowest latency command was:
FFmpegKit.executeAsync("-probesize 32 -vcodec mjpeg -y -i " + stdinPath + " -vcodec rawvideo -f rawvideo -flush_packets 1 -pix_fmt rgb24 " + stdoutPath,
The reads from /tmp/ffmpeg_fifo & the network socket needed to be as small as possible. Other than that, the network & the pipes added no latency. The total bytes on the sender & receiver were identical. The latency was all in ffmpeg's HEVC decoder. It always lagged 48 frames regardless of the B frames, the GOP size, or the buffer sizes. A pure I frame stream still lagged 48 frames. The HEVC decoder is obviously low effort. A college age lion would have gone into the decoder to optimize the buffering.
The trick with JPEG was limiting the frame rate to 10fps & limiting the frame size to 640x360. That burned 3 megabits for an acceptable stream. The HEVC version would have also taken some heroic JNI to get the phone above 640x360. Concessions were made for the lack of a software budget & the limited need for the tracking camera.
-
Death of IR remotes & return of wireless GUI's
11/22/2021 at 03:53 • 0 comments![]()
The journey began with a new servo output/IR input board. Sadly, after dumping a boatload of money on the LCD panel, HDMI cables, spinning this board, it became quite clear that the last IR remote in the apartment wouldn't work. It was a voice remote for a Comca$t/Xfinity Flex which would require a lot of hacking to send IR, if not a completely new board.
The idea returned to using a phone as the user input & if the phone is the user input, it might as well be the GUI, so the plan headed back to a 2nd attempt at a wireless phone GUI. It didn't go so well years ago with repcounter. Wifi dropped out constantly. Even an H264 codec couldn't fit video over the intermittent connection.
Eliminating the large LCD & IR remote is essential for portable gear. Gopros somehow made wireless video reliable & there has been some evolution in screen sharing for Android. Android may slow down programs which aren't getting user input.
Screen sharing for Android seems to require a full chrome installation on the host & a way to phone home to the goog mothership though. Their corporate policy is to require a full chrome installation for as little as hello world.
The best solution for repcounter is still a dedicated LCD panel, camera, & confuser in a single piece assembly. It doesn't have to be miniaturized & would benefit from an IR remote. The same jetson could run both programs by detecting what was plugged in. The user interfaces are different enough for it to not be a horrible replication of effort.
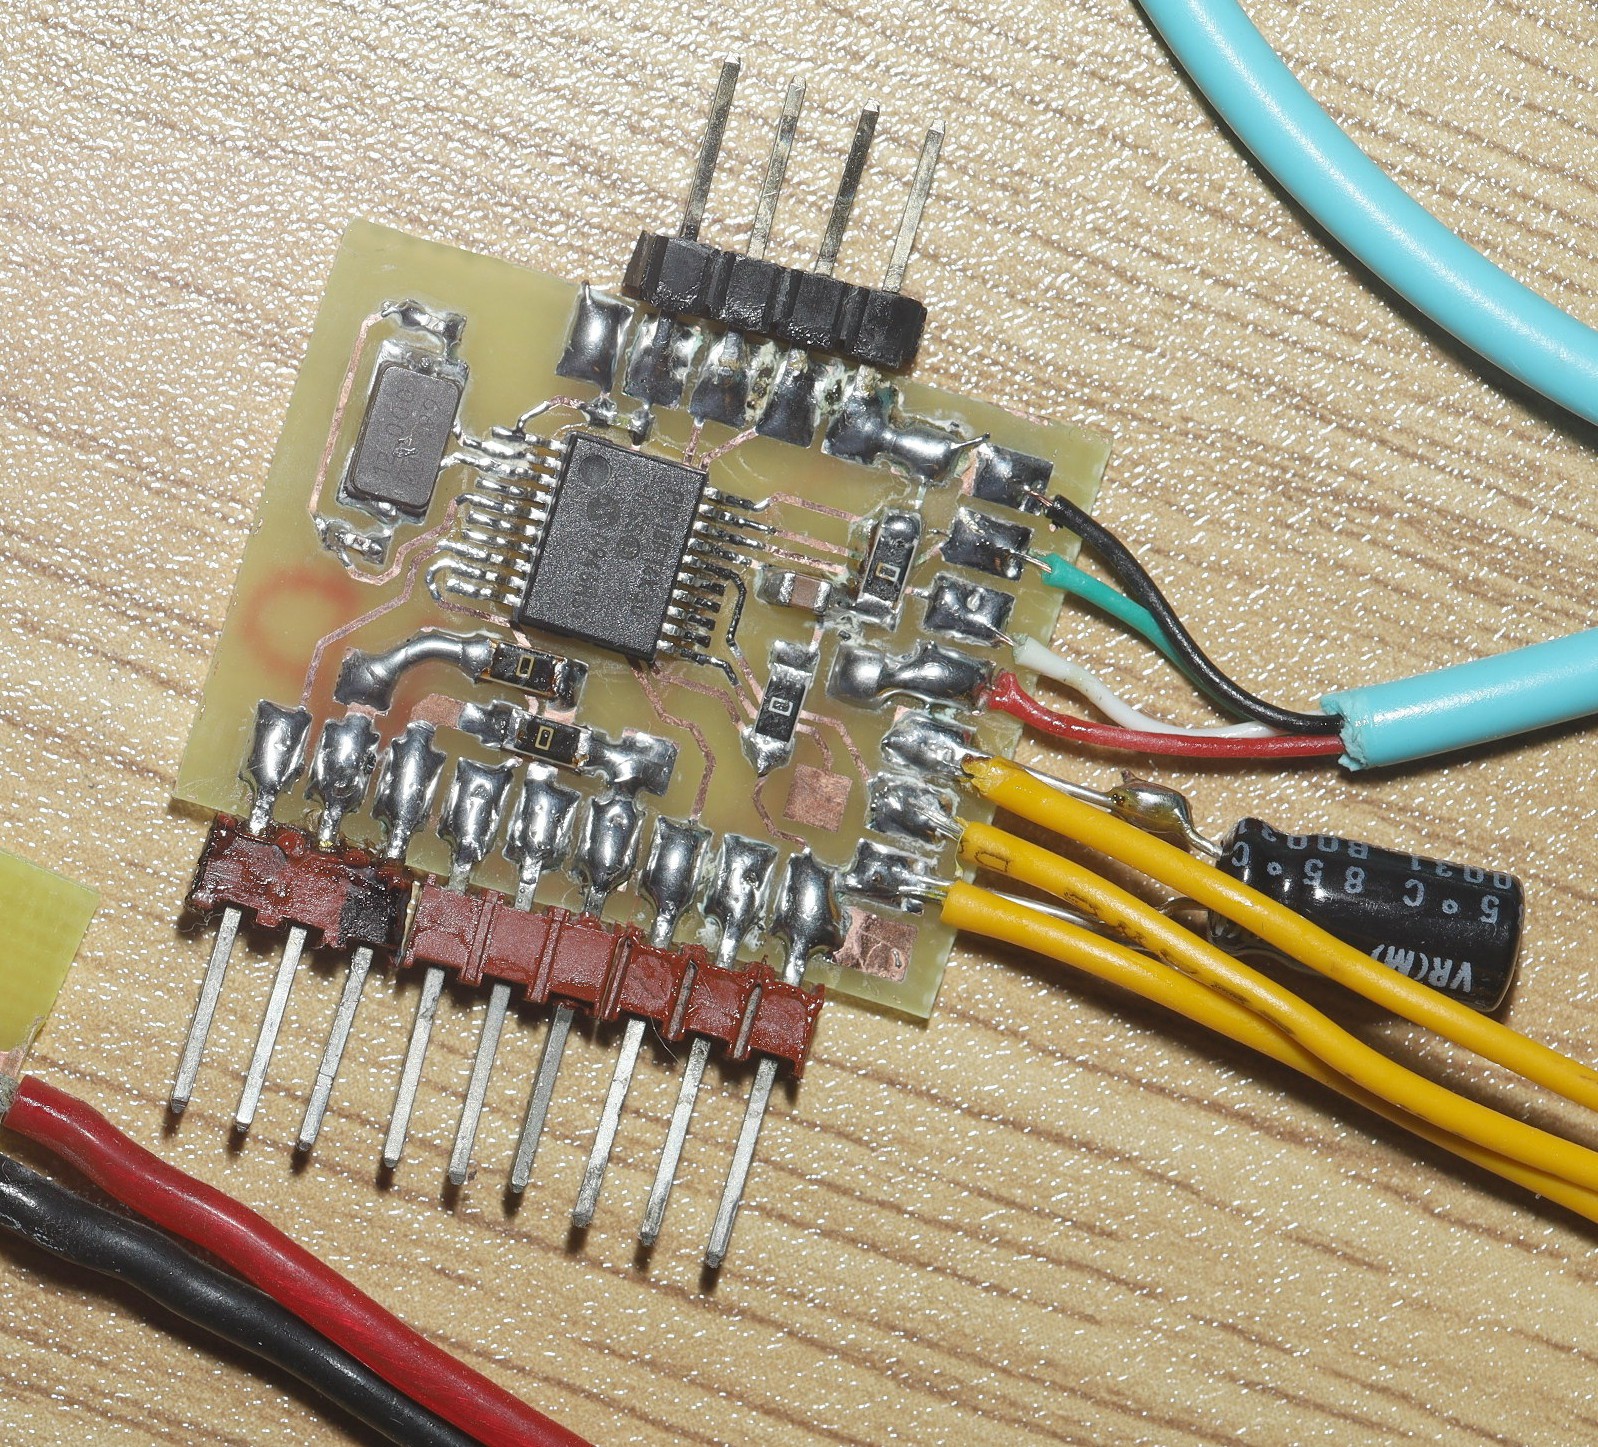
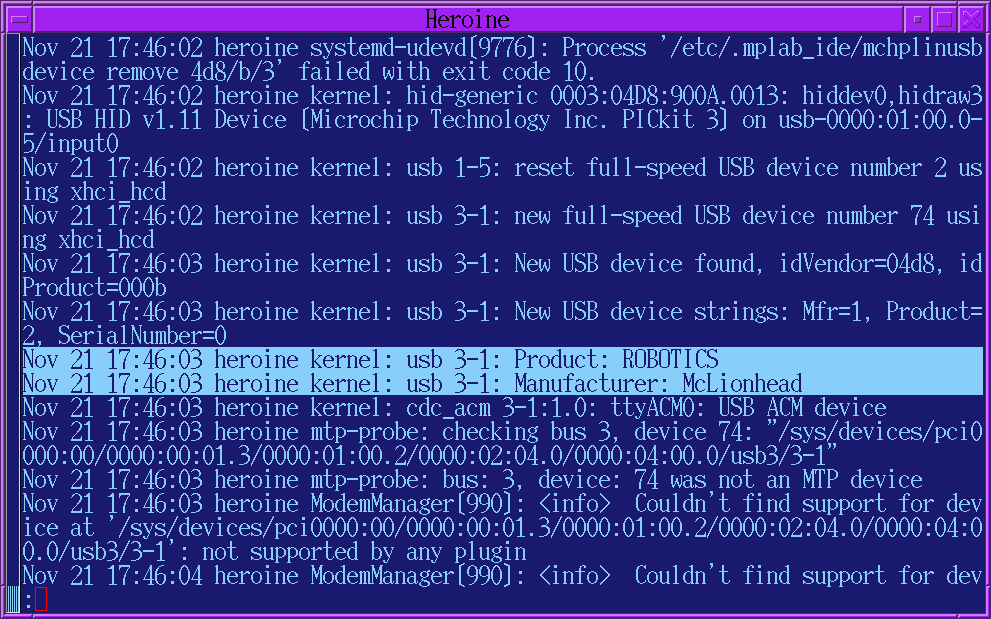
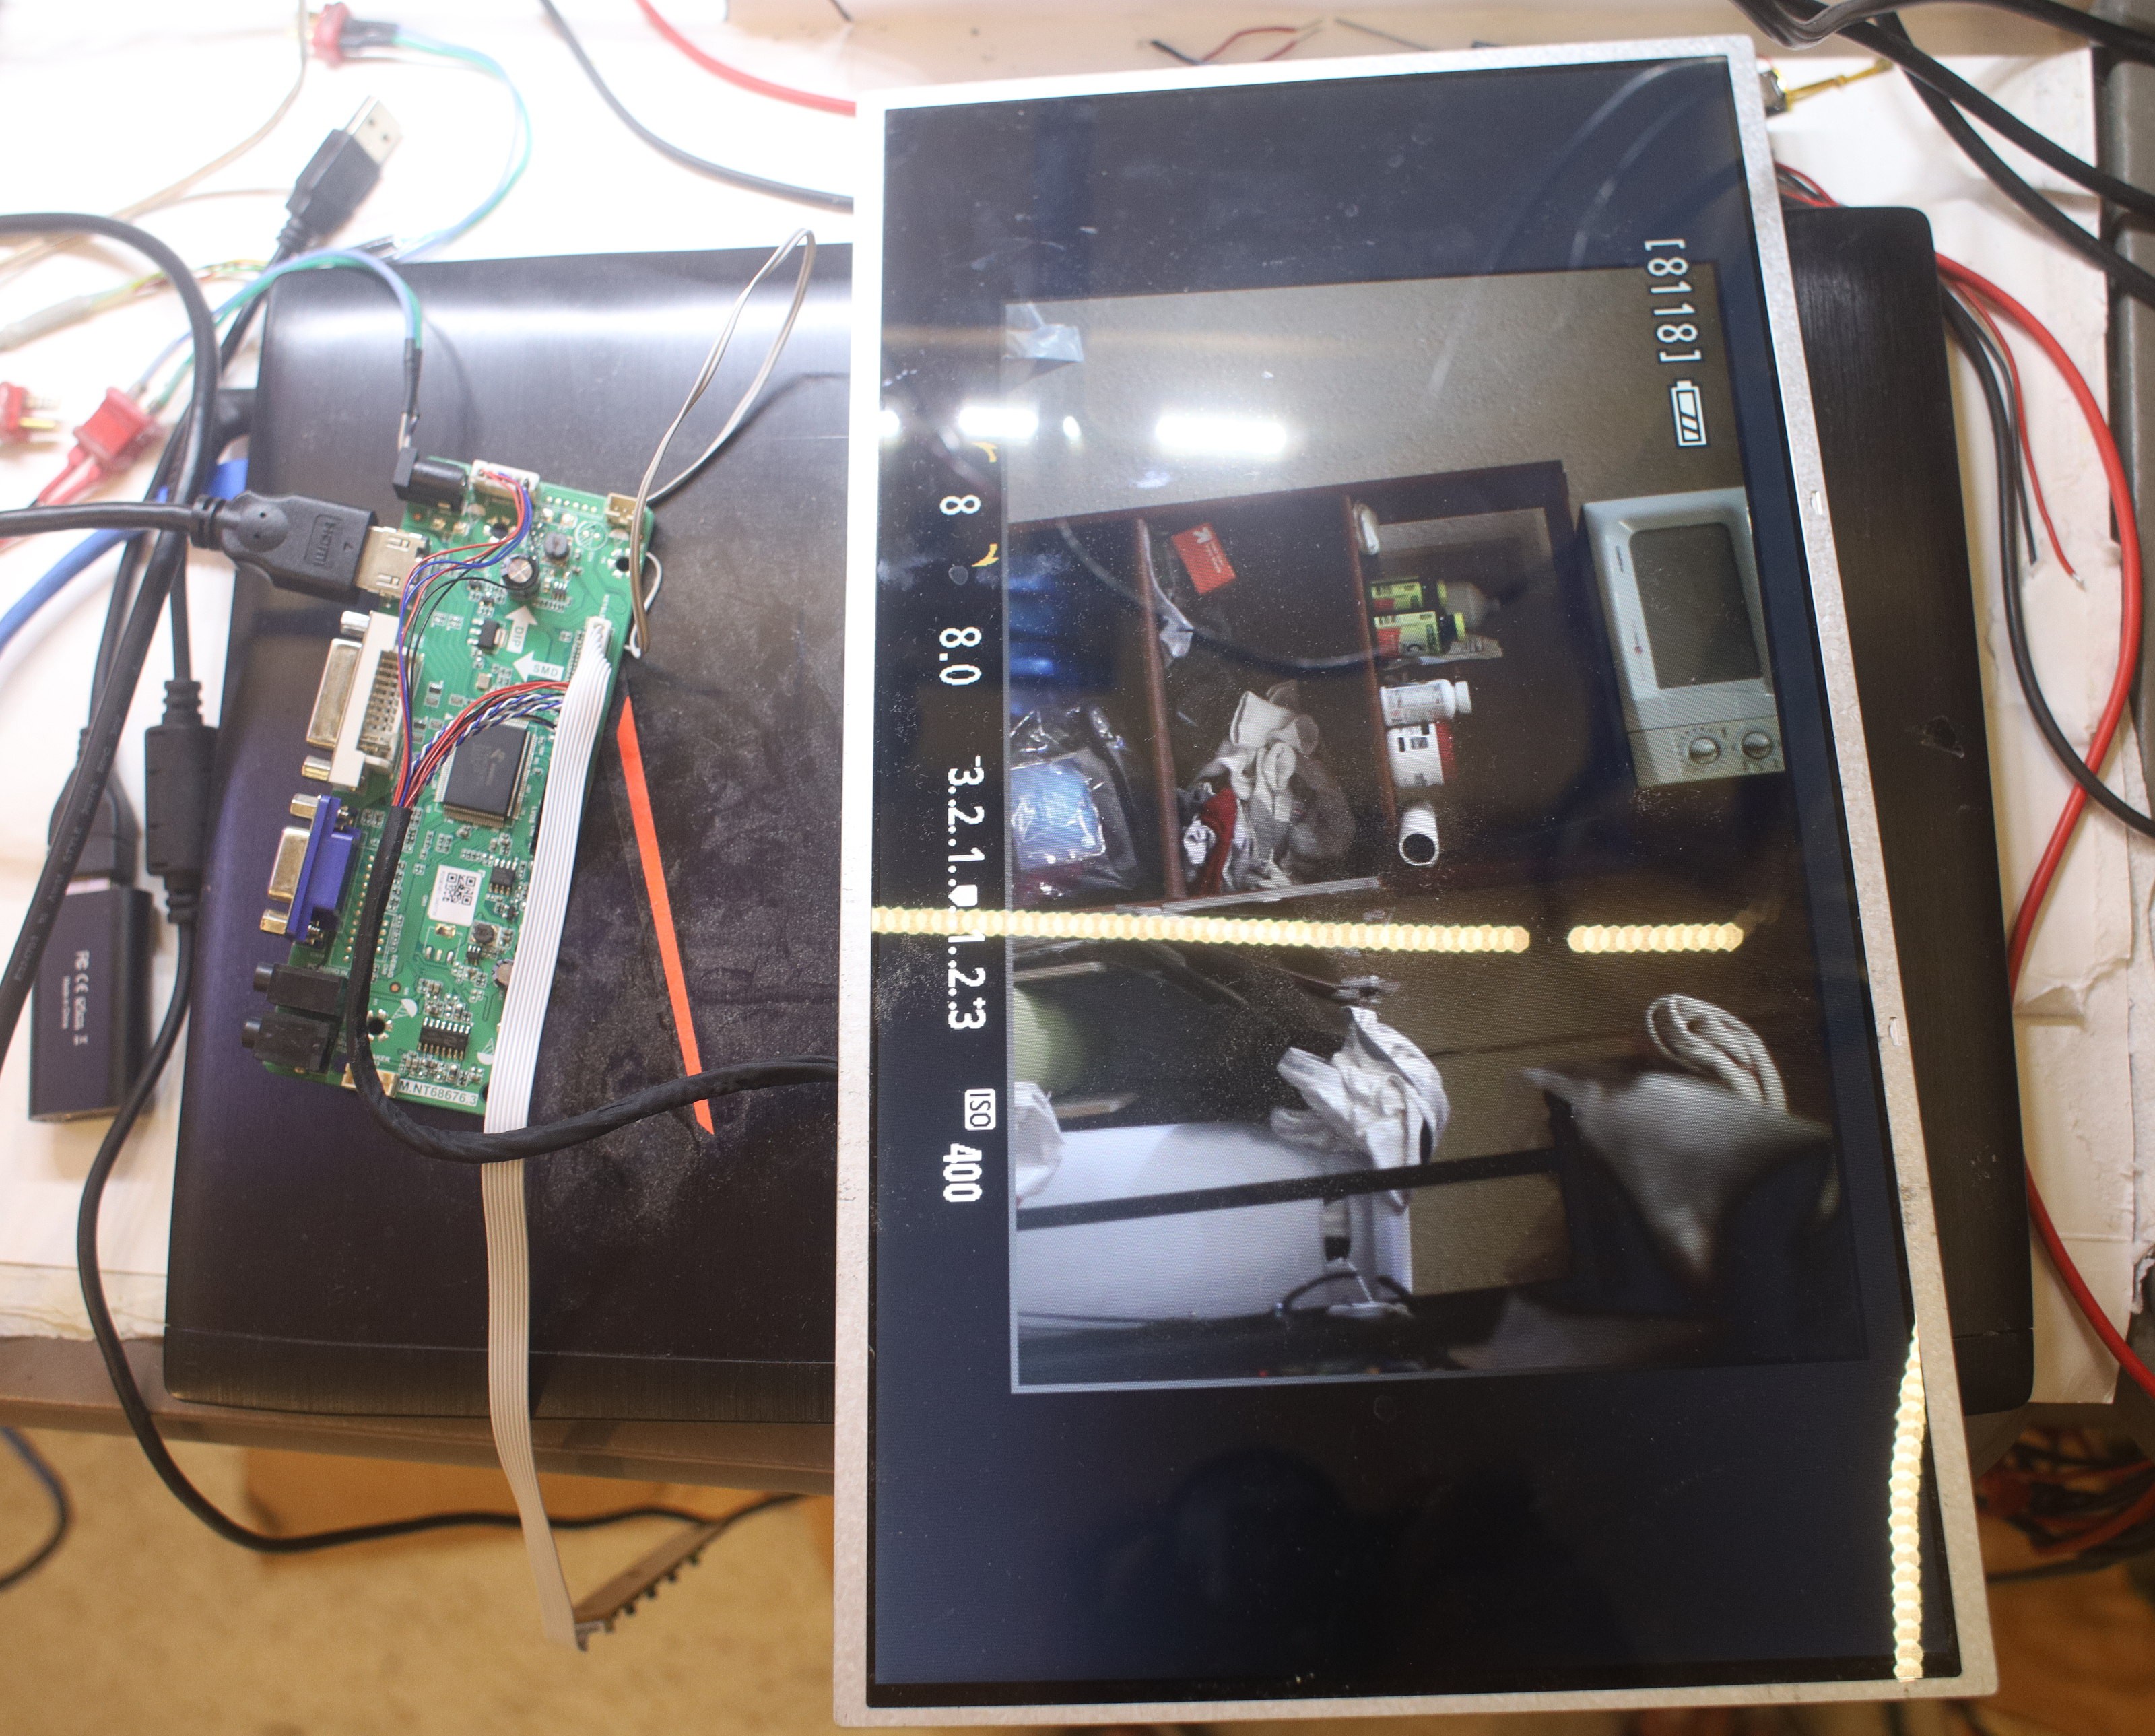
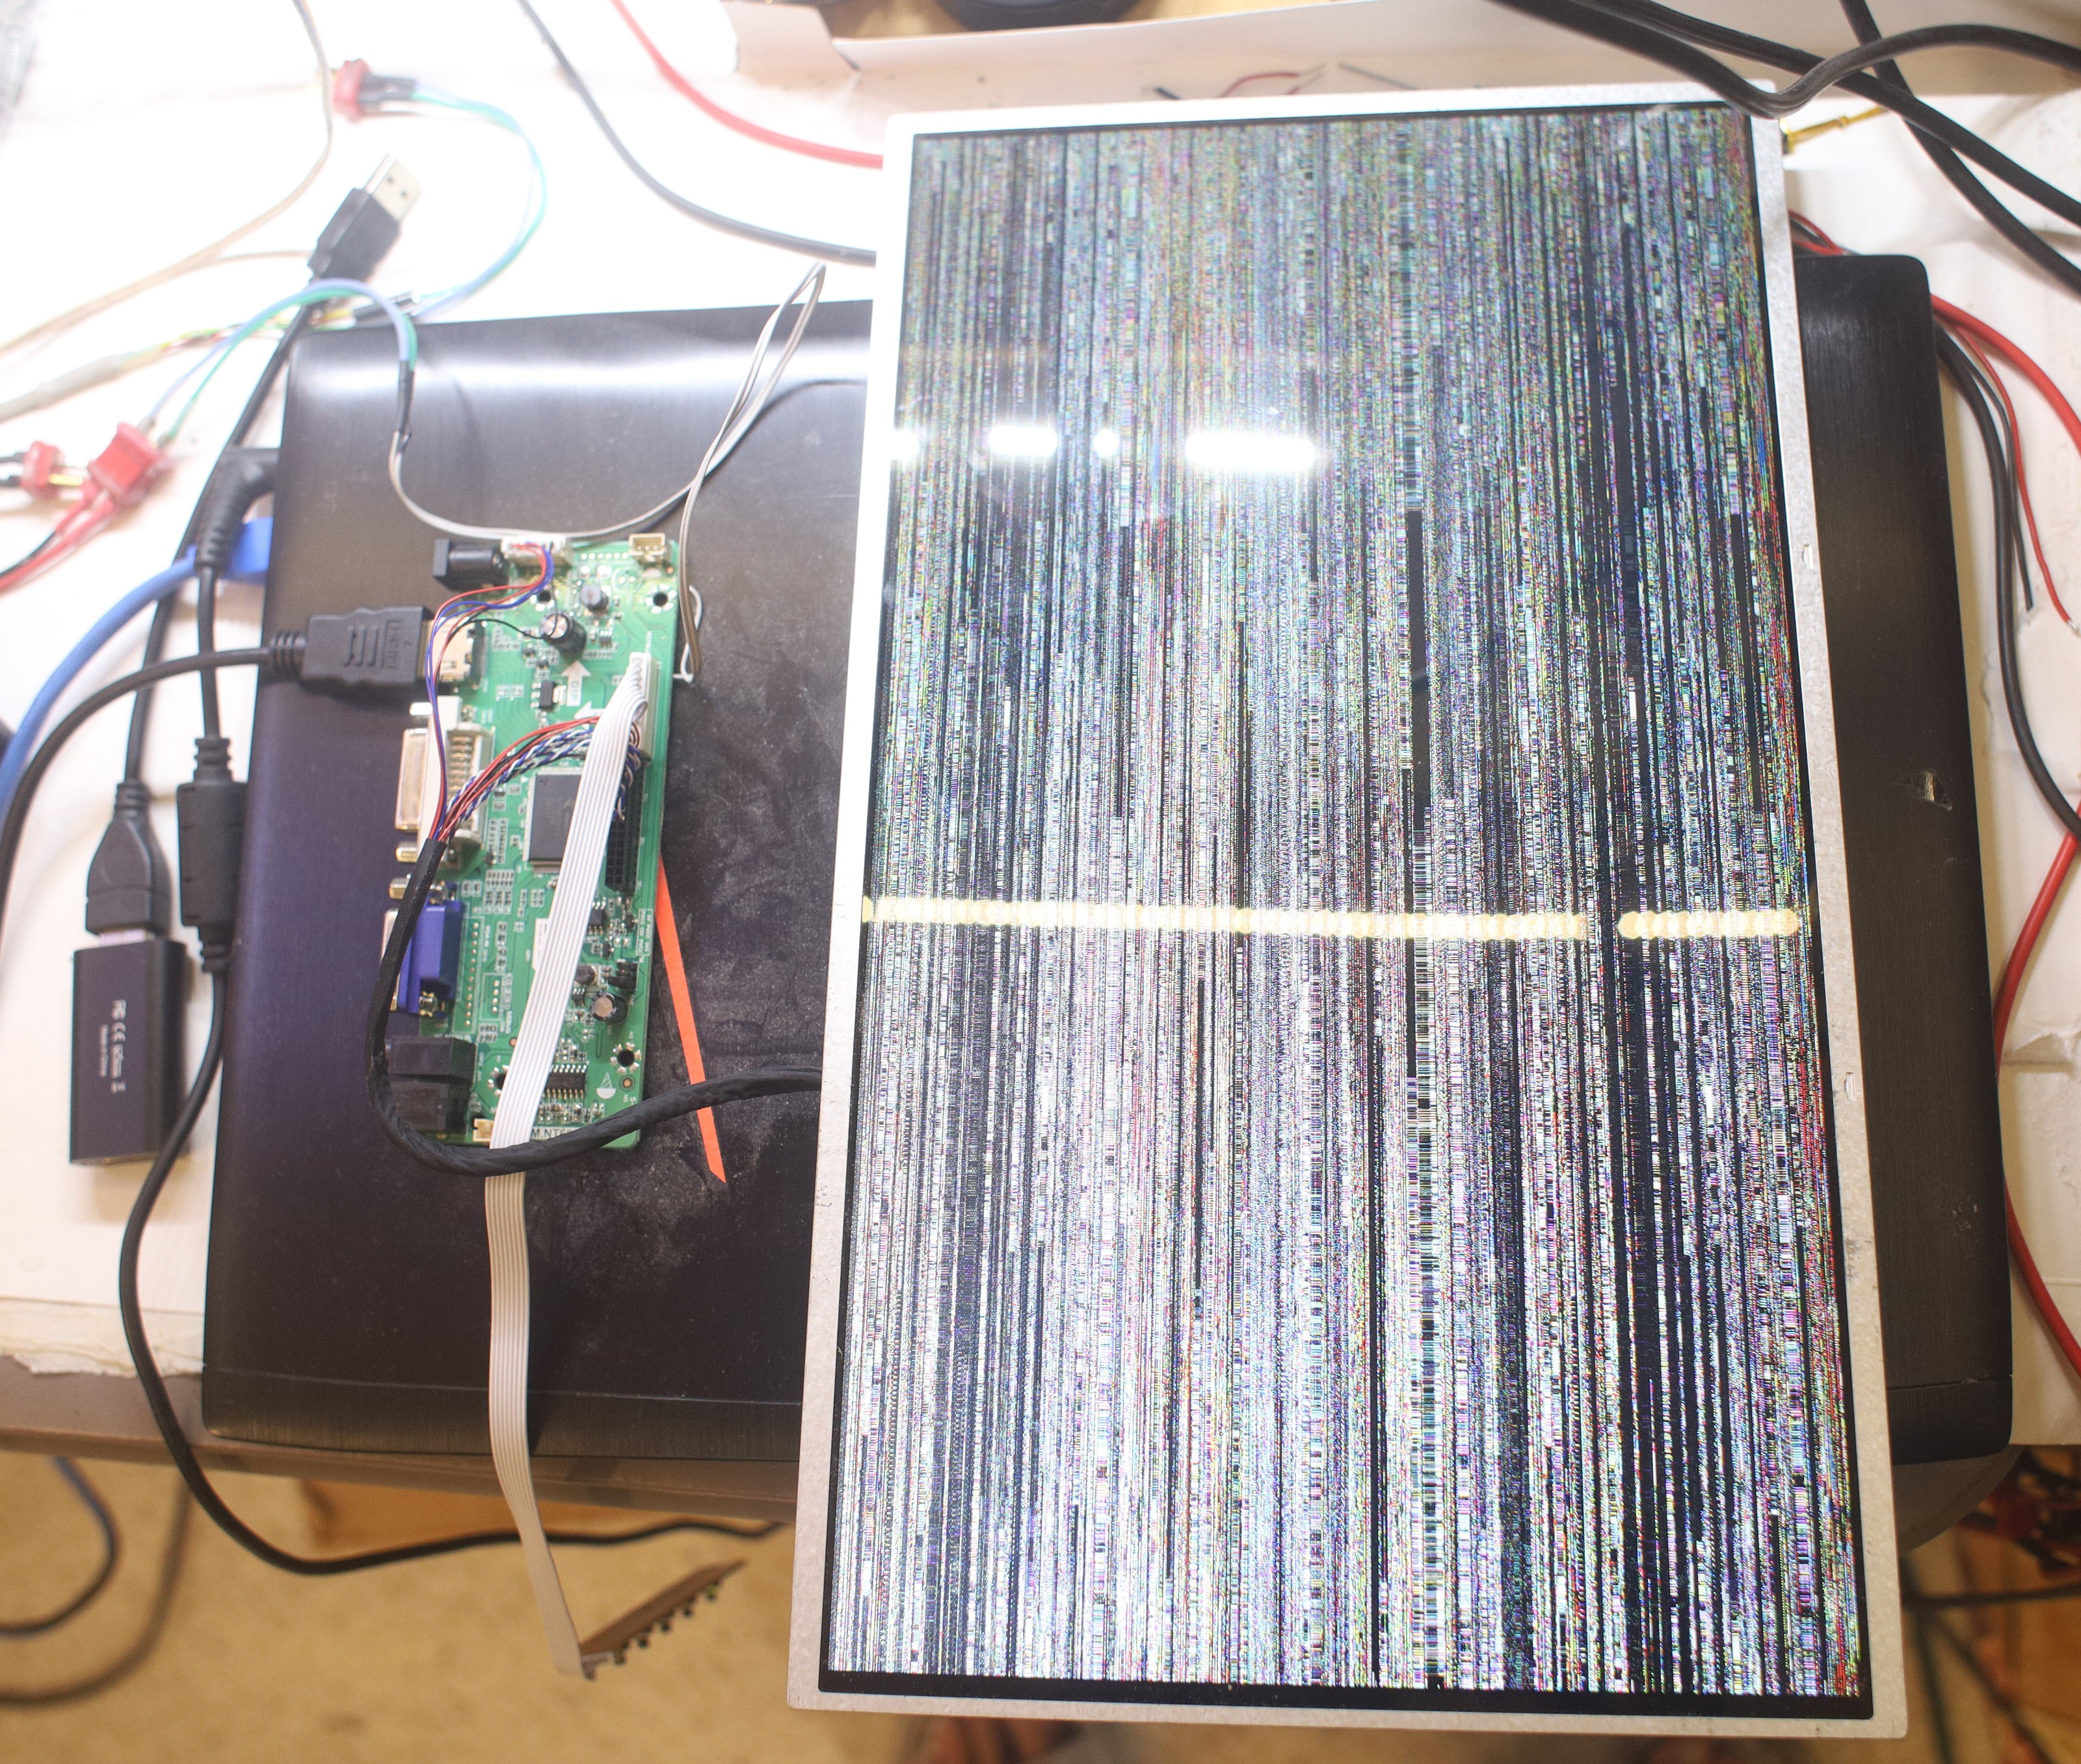
![]()
Anyways, it was rewarding to see yet another home made piece of firmware enumerate as a legit CDC ACM device.
![]()
![]()
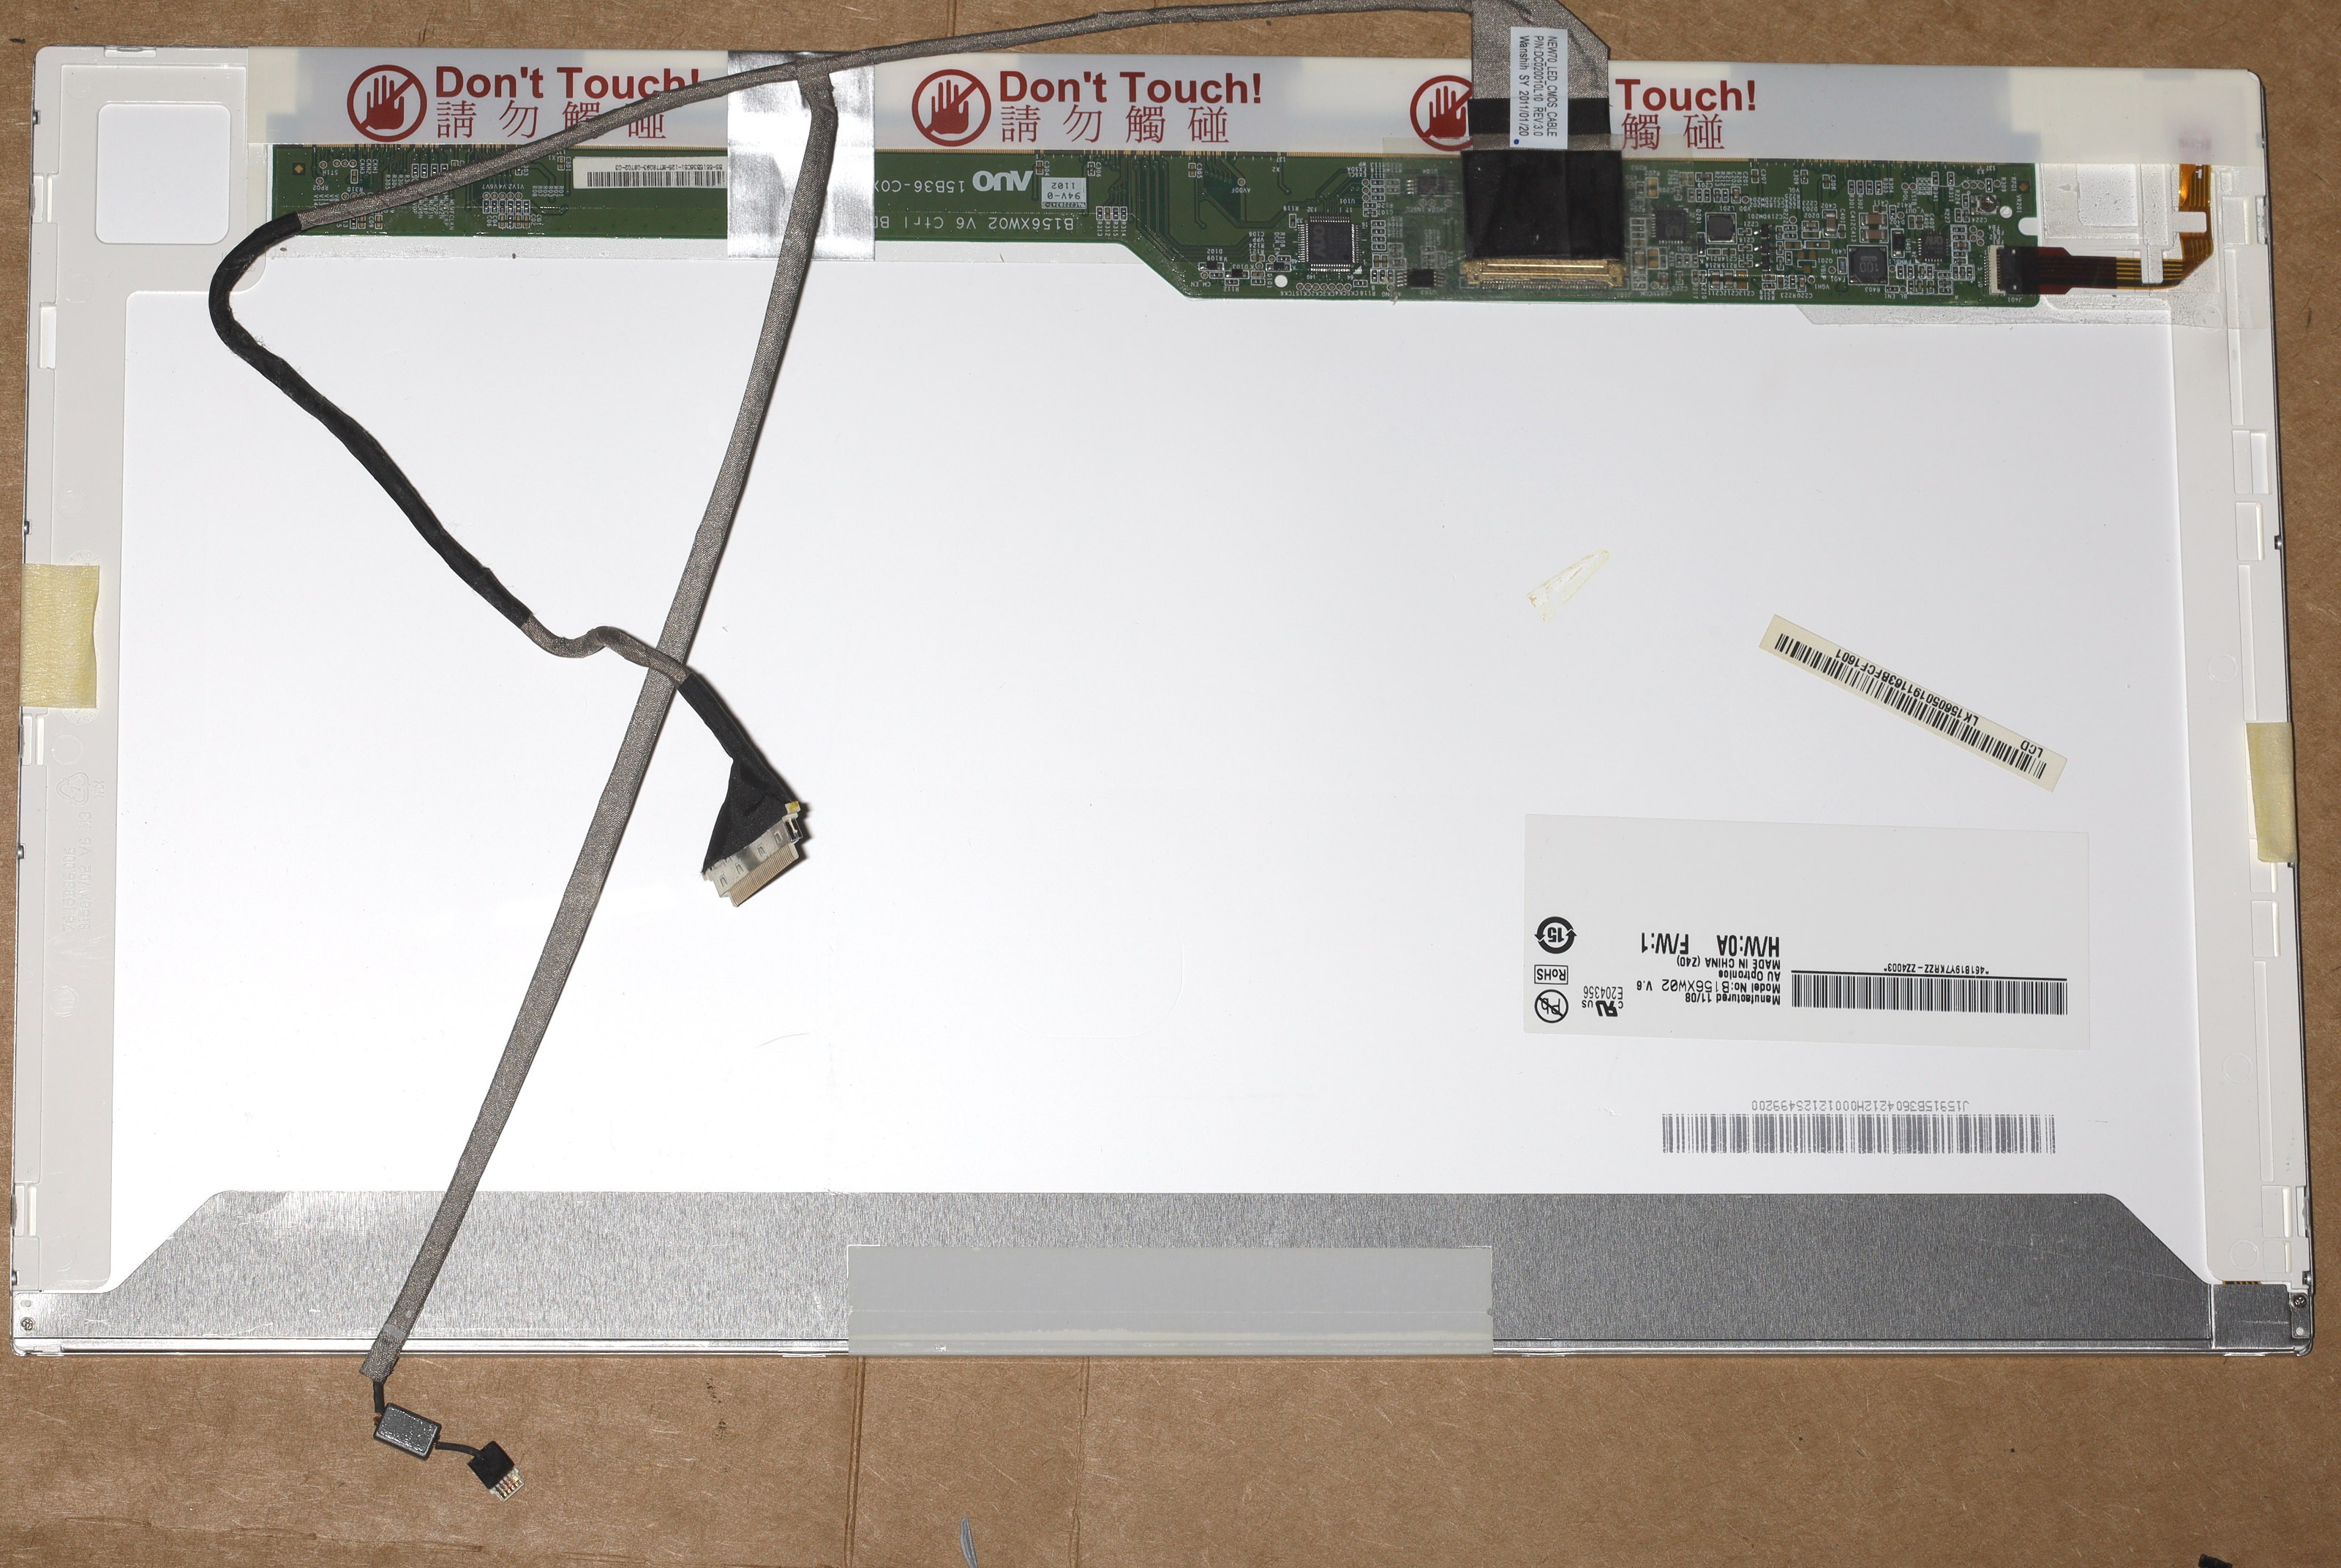
The new LCD driver from China had a defective cable. Pressing it just the right way got it to work.
Pressing ahead with the wireless option evolved into sending H.264 frames to a VideoView widget on a phone. Decoding a live stream in the VideoView requires setting up an RTSP server with ffserver & video encoder with ffmpeg. The config file for the server is
Port 8090
BindAddress 0.0.0.0
RTSPPort 7654
RTSPBindAddress 0.0.0.0
MaxClients 40
MaxBandwidth 10000
NoDaemon

<Feed feed1.ffm>
File /tmp/feed1.ffm
FileMaxSize 2000M
# Only allow connections from localhost to the feed.
ACL allow 127.0.0.1
</Feed>

<Stream mystream.sdp>
Feed feed1.ffm
Format rtp
VideoFrameRate 15
VideoCodec libx264
VideoSize 1920x1080
PixelFormat yuv420p
VideoBitRate 2000
VideoGopSize 15
StartSendOnKey
NoAudio
AVOptionVideo flags +global_header
</Stream>

<Stream status.html>
Format status
</Stream>
The command to start the ffserver is:
./ffserver -f /root/countreps/ffserver.conf
The command to send data from a webcam to the RTSP server is:
./ffmpeg -f v4l2 -i /dev/video1 http://localhost:8090/feed1.ffm
The command to start the VideoView is
video = binding.videoView;
video.setVideoURI(Uri.parse("rtsp://10.0.0.20:7654/mystream.sdp"));
video.start();
The compilation options for ffserver & ffmpeg are:
./configure --enable-libx264 --enable-pthreads --enable-gpl --enable-nonfree
The only version of ffmpeg tested was 3.3.3.
This yielded horrendous latency & required a few tries to work.
The next step was a software decoder using ffmpeg-kit & a raw socket. On the server side, the encoder requires a named FIFO sink created by mkfifo("/tmp/mpeg_fifo.mp4", 0777);
ffmpeg -y -f rawvideo -y -pix_fmt bgr24 -r 30 -s:v 1920x1080 -i - -vf scale=640:360 -f hevc -vb 1000k -an - > /tmp/mpeg_fifo.mp4
That ingests raw RGB frames & encodes downscaled HEVC frames. The HEVC frames are written to a socket.
On the client side, ffmpeg-kit requires creating 2 named pipes.
String stdinPath = FFmpegKitConfig.registerNewFFmpegPipe(getContext());
String stdoutPath = FFmpegKitConfig.registerNewFFmpegPipe(getContext());
The named pipes are passed to the ffmpeg-kit invocation.FFmpegKit.executeAsync("-probesize 65536 -vcodec hevc -y -i " + stdinPath + " -vcodec rawvideo -f rawvideo -pix_fmt rgb24 " + stdoutPath, new ExecuteCallback () { @Override public void apply(Session session) { } });Then the pipes are accessed with Java streams. The stream constructors have to come after ffmpeg is running or they lock up.
OutputStream ffmpeg_stdin = new FileOutputStream(stdinPath);
InputStream ffmpeg_stdout = new FileInputStream(new File(stdoutPath));
HEVC frames are written to ffmpeg_stdin & RGB frames are read from ffmpeg_stdout. This successfully decoded raw frames from the socket. The resolution had to be downscaled to read the RGB frames from stdout in Java.
![]()
This too suffered from unacceptable latency but was more reliable than RTSP through VideoView. The next step would be old fashioned JPEG encoding. JPEG requires too many bits to be reliable over wifi, but it could work over USB. The whole affair made the lion kingdom wonder how video conferencing & screen sharing managed to make video responsive.
-
Portable plans
10/17/2021 at 21:24 • 0 commentsThe tracking camera isn't useful unless it's portable. It's been running on an Asus GL502V for years. It only goes full speed on manes voltage & with ice packs. NVidia jetson is the only portable hardware specifically mentioned by openpose.
The peak openpose configuration seemed to require 8GB of video RAM for a -1x384 netInputSize, although it gave acceptable results for years on 4GB of RAM & a -1x256 netInputSize.
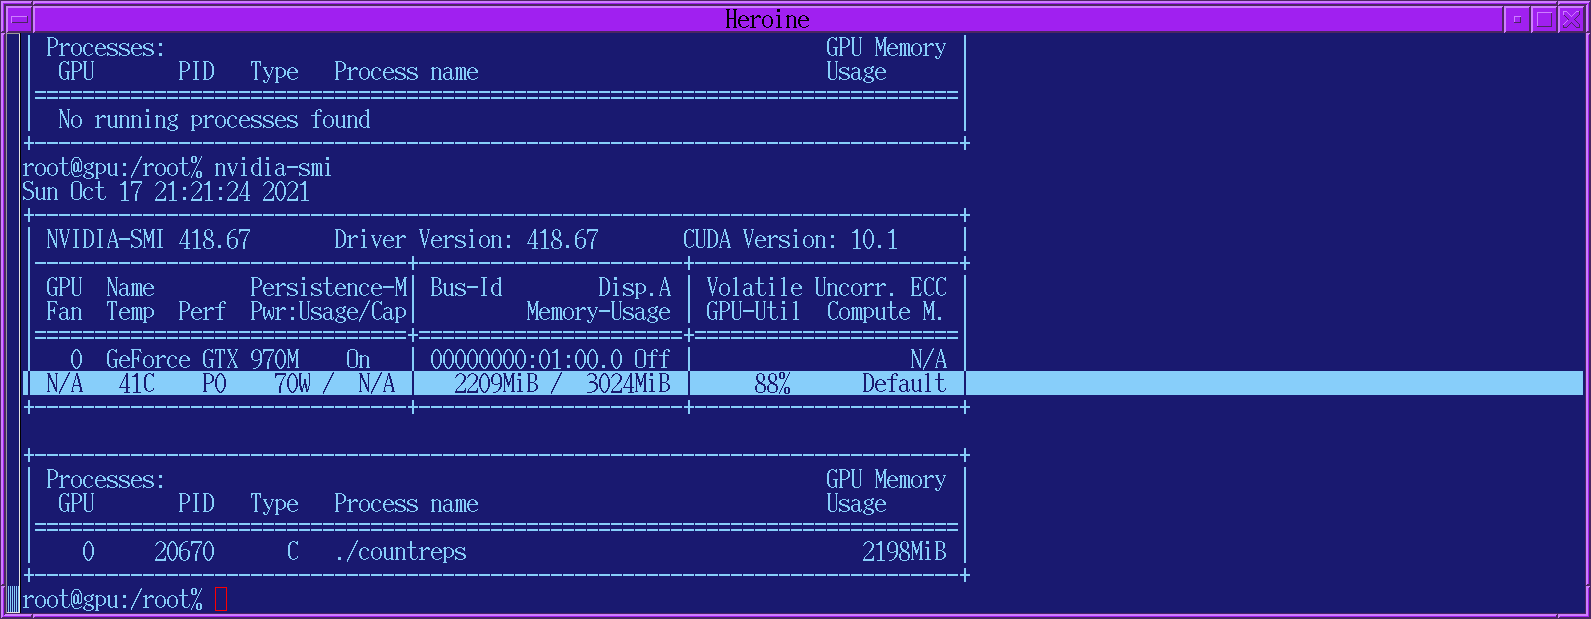
![]()
Running nvidia-smi with openpose running gave the memory requirement of a -1x256 netInputSize.
The Jetson nano has evolved from 2GB to 4GB over the years without any change in model number, which has caused a lot of confusion. It's based on the Maxwell chip which is what the GTX970M used. Jetson nano's with 4GB range from $100 to over $200 & are all out of stock.
https://www.sparkfun.com/products/16271
https://www.okdo.com/us/p/nvidia-jetson-nano-4gb-development-kit/
There is another pose estimator for goog coral.
https://github.com/google-coral/project-posenet
But a rare comparison shows posenet being nowhere close.
We don't know if it was processing in realtime or offline with maximum settings, how much memory was allocated to each program. Goog coral modules are similarly priced to jetson & equally out of stonk.
![]()
![]()
The plan envisions a Jetson module & LCD driver strapped to the back of the last LCD panel. There will be a webcam on a new pan/tilt module for rep counting & the DSLR on the servocity module for animal tracking. A new board will convert USB output to servo PWM for camera pointing & convert IR remote signals to USB input for user input. The servo power will come from the USB cable, by hacking the USB ports on the jetson to output 5A. It'll all be self contained with the LCD panel.
The user interface will be an IR remote with key maps shown on the screen. The only way it could be debugged in the field would be a phone with a USB cable & some kind of ssh terminal.
The jetson burns 5V 2.5A itself. The servos burn 5V. The LCD panel burns 8-12V. There need to be 2 BEC's to power everything from either a 12V battery or ATX brick. The 16V batteries envisioned for the truck wouldn't do much good for the LCD. The mane thing keeping it a plan instead of reality is of course that pesky 2 year disruption in the transient supply chain.
Obtaneing the required confusing power has been so problematic, the lion kingdom believes the total confusing power of the world is less than it was 2 years ago, due to lack of new confusers being created & old confusers going out of service, but no-one is actually counting. If we have gone backwards, it would be the 1st time it ever happened since the bronze age collapse.
There was an estimate of the world's confusing power from 1950 to 2018.
https://incoherency.co.uk/blog/stories/world-computing-power.html
The lion kingdom's obsolete Ryzen 7 2700x is rated at 59000 MIPS or the entire world's confusing power in 1973.
-
Face tracking dreams
04/04/2021 at 02:45 • 0 commentsThere has always been a dream of running a face tracker simultaneously with the pose tracker to refine the composition, but getting enough confusing power has been expensive.
Impressive demo of face tracking with downloadable software components, though no turnkey package is provided. The goog coral is a way to get portable image recognition without dedicating an entire confuser just to the tracker. The NVidia jetson requires porting everything to their ARM platform.
The DJI/Ryze Tello is a remarkable achievement in indoor navigation by itself. It would be a good platform for anything that required 3D positioning indoors & is what lions originally envisioned as the ultimate copter, something which was compact & could be thrown in the air to get an automatic selfie. If only lions could think of a need for it now. It also has a finite lifespan with brushed motors.
Frustrating to have battled with inferior cameras, sonar, & IMU's 10 years ago, never to get anywhere close to what the Tello can do. The accelerometer based localization all modern copters use started taking off right when lions moved on. No-one really knows how modern quad copters work anymore. They don't use sonar anymore. They use lower cost lidar modules invented in the last 10 years & extremely expensive as loose modules.
-
Portrait mode with the flash & different lenses
06/04/2020 at 04:21 • 0 comments![]()
![]()
This arrangement was the fastest to set up.
![]()
![]()
28mm
![]()
17mm. Then, there was a more spaced arrangement which took longer to set up.
![]()
![]()
![]()
There were more shadows. For a single flash, it's better to have it closer to the camera. The only lens to be used in practice is the 17mm with an optimum distance from the camera, but the lion kingdom put some effort into making it work with longer lenses & less optimum distances from the camera. In testing, it gives most useful results with the 17mm.
There were 2 different camera elevations.
![]()
![]()
The desired material looks better at waist height, but the flash is farther from the ceiling. There were many algorithms to try to improve the tilt tracking. Trying to estimate the head size was required. The head estimation leads to a different tilt when looking at the camera & looking sideways.
Other problems are camera motion while shooting & seeing a preview after shooting. The tracker starts tracking the preview. A beefed up remote control could allow the lion to freeze the tracker when showing the preview, but the same amount of manual intervention can also clear the preview before the tracker goes too far off. In practice, the camera usually isn't moving during a photo so the preview doesn't make it move.
The 17mm has proven to be 1 stop darker than the 28mm & 50mm. That's why it was only $600. Forget about discovering that from the adsense funded internet. F stop doesn't account for light transmission efficiency, so lenses with the same f stop can have wide variations in brightness.
Then, there was a boring test of video.
-
Replacing the bulb in the 580 EX II
06/02/2020 at 06:42 • 0 commentsThe lion kingdom's 580 EX II died after 12 years. Lions took many indoor photos with it.
![]()
Then, this arrived. It behooves humans to get a bulb assembly rather than a bulb.
The bulb is very hard to replace on its own. There was a starting guide on
https://joelgoodman.net/2012/07/19/flash-bulb-repair-canon-580ex-ii/
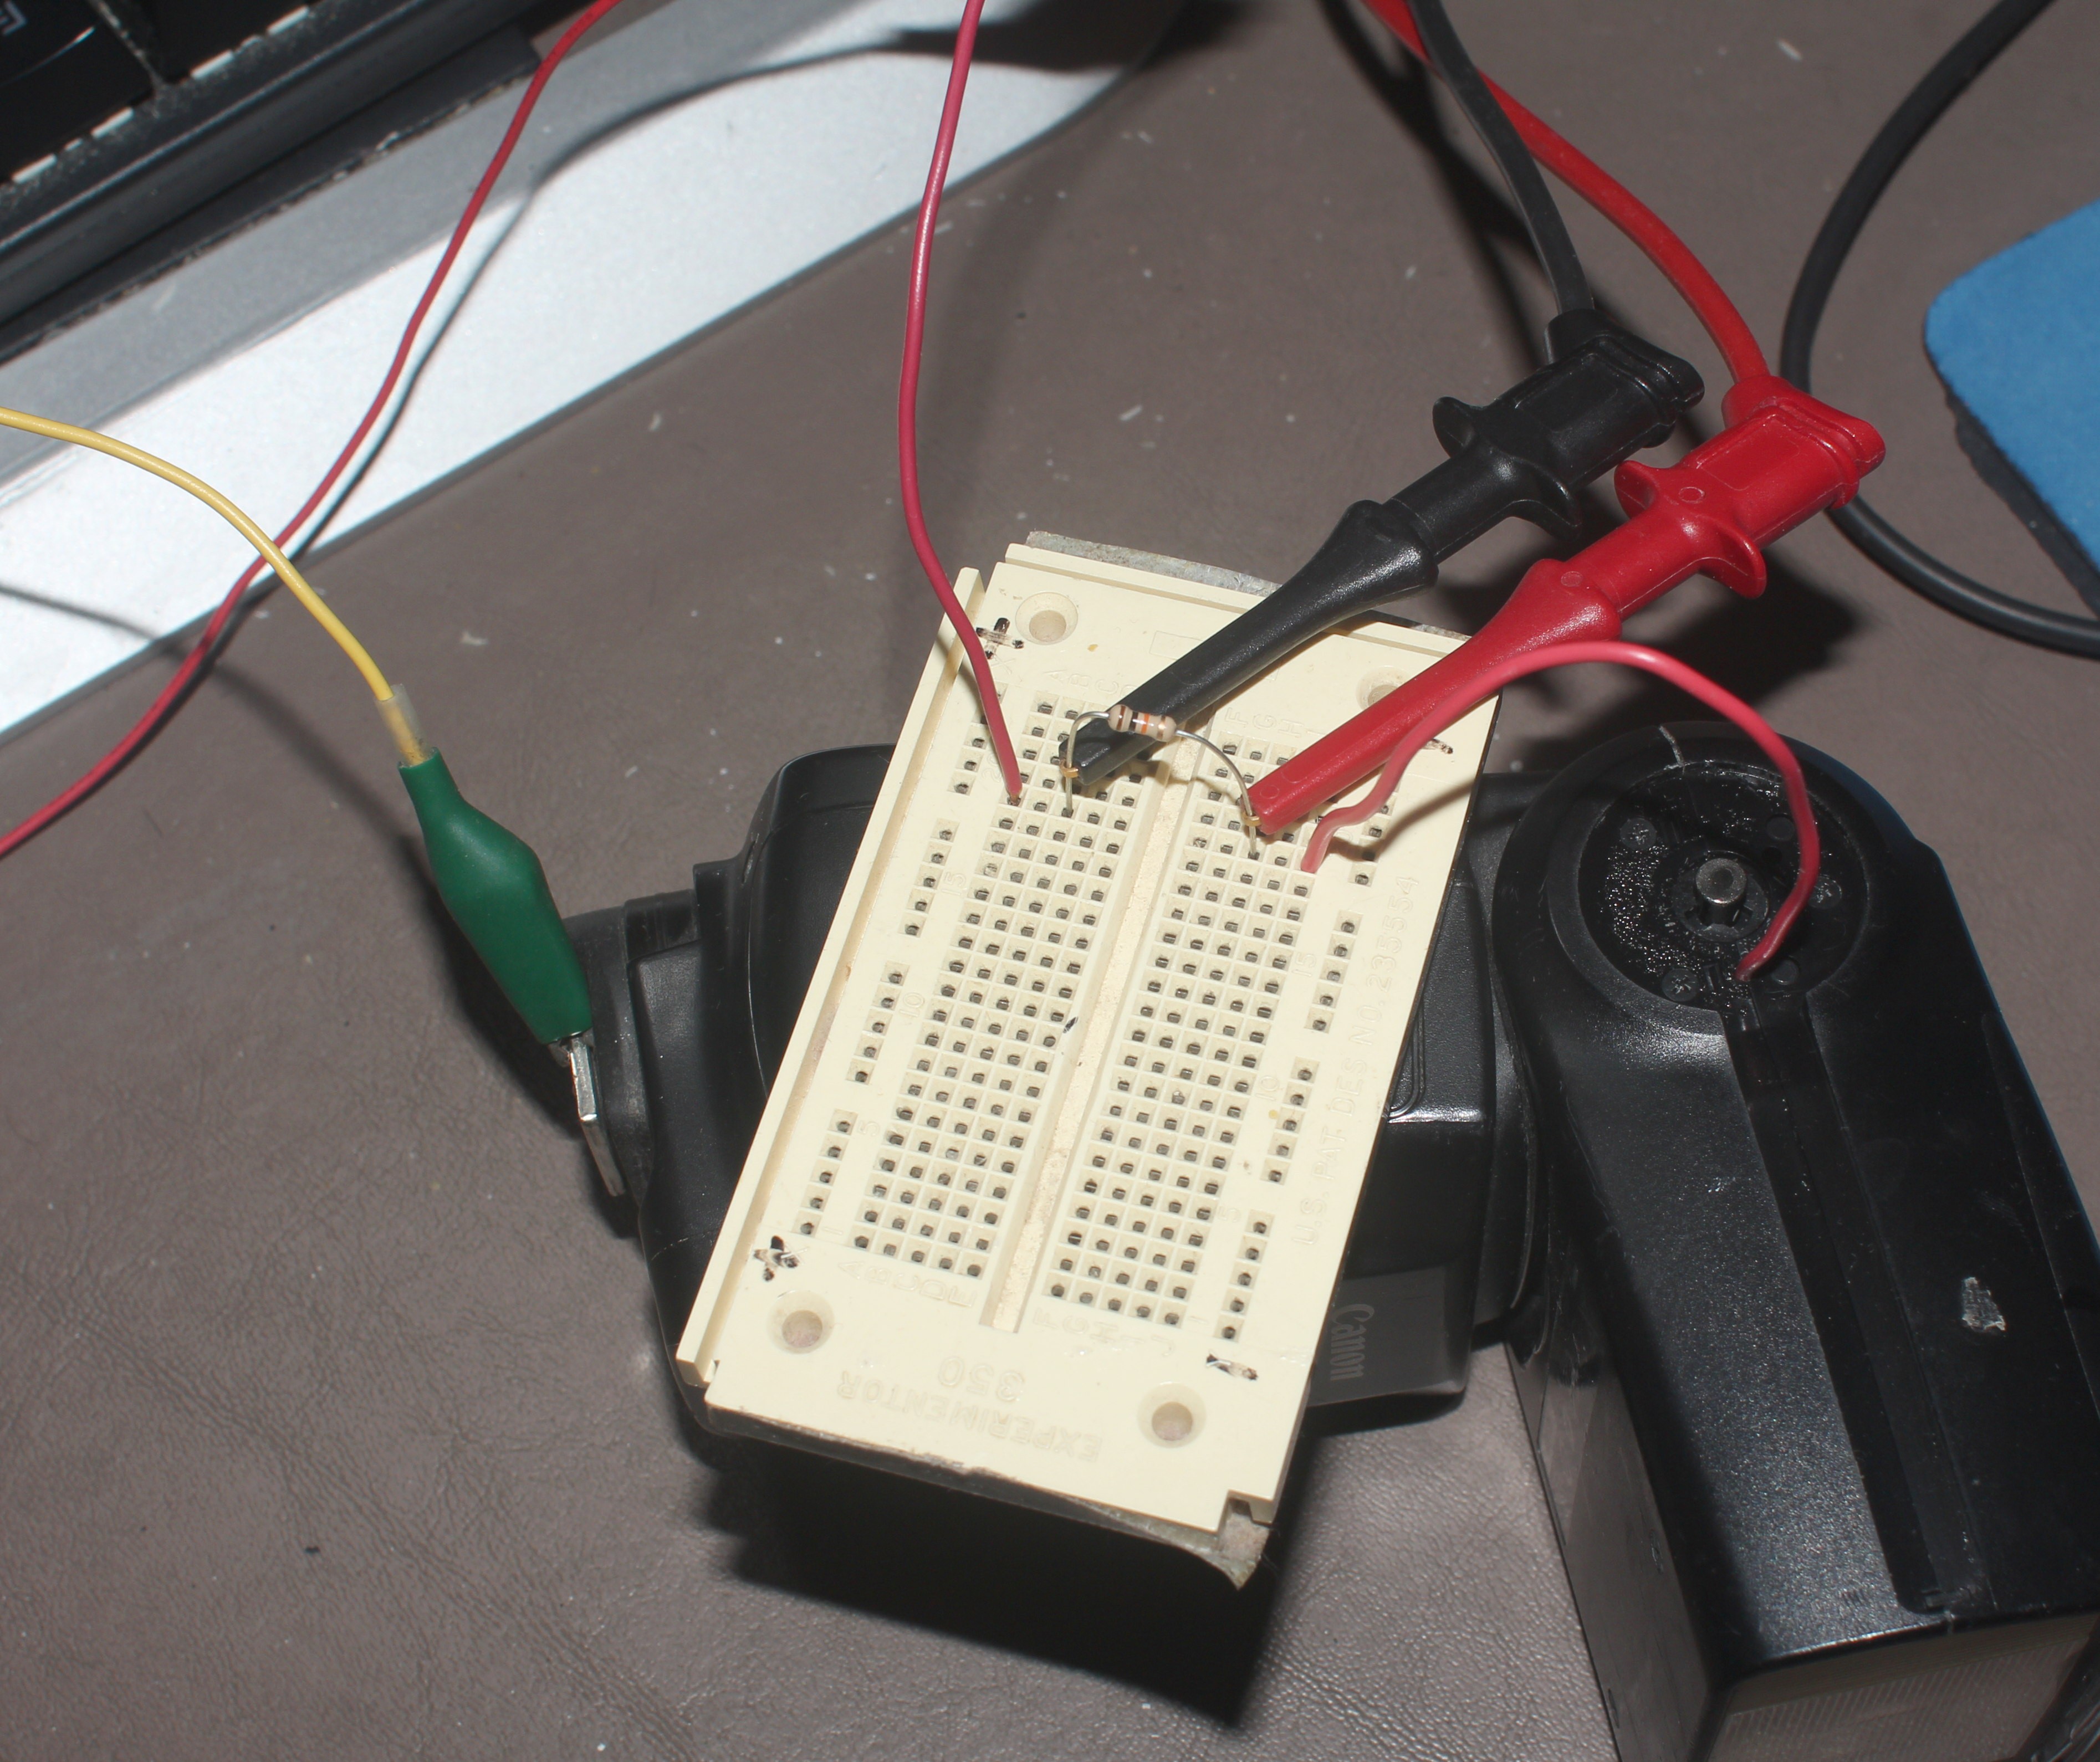
It's essential to discharge the capacitor. It still had 200V after 2 weeks with no batteries.
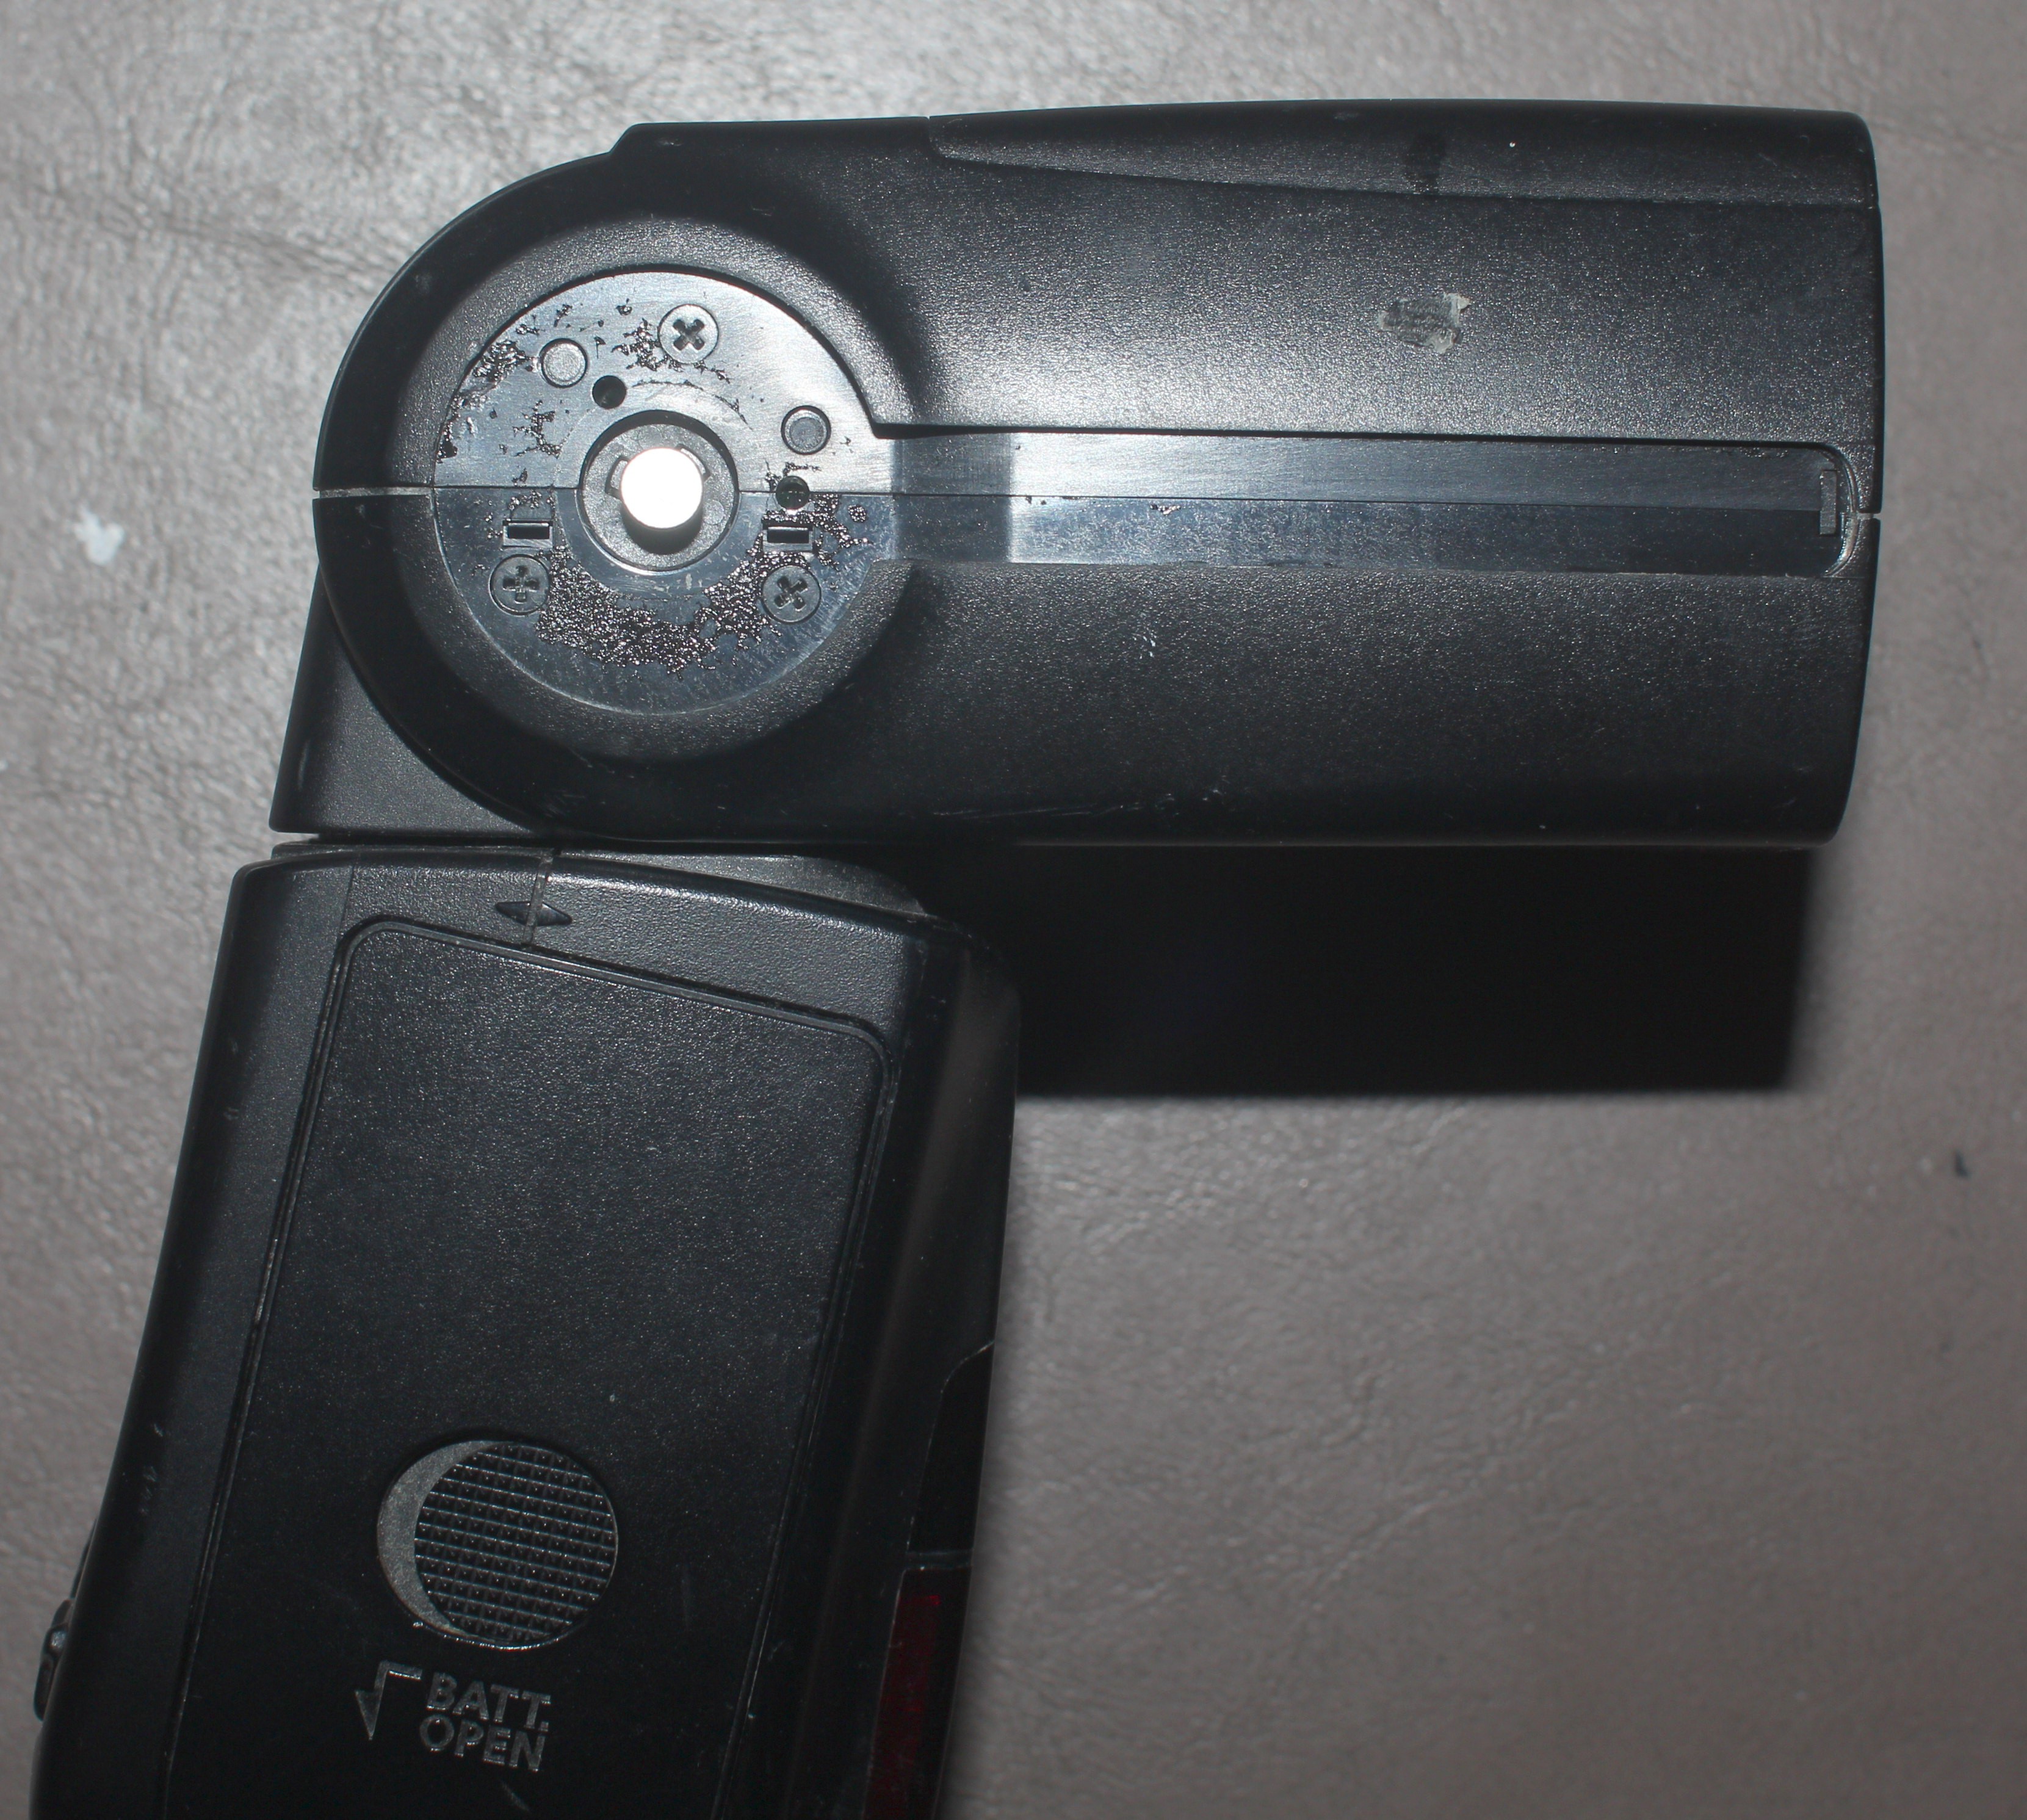
![]()
![]()
![]()
There is a discharging hole with electrical contact inside, exposing the capacitor's + terminal. This must be grounded through a 10k resistor to the flash ground, without touching the resistor or ground while touching the + lead. The trick is to keep 1 paw behind your back while holding the + lead with your other paw. Helas, this burns off the orange band on the standard 1/4 W resistor but doesn't kill the resistor.
![]()
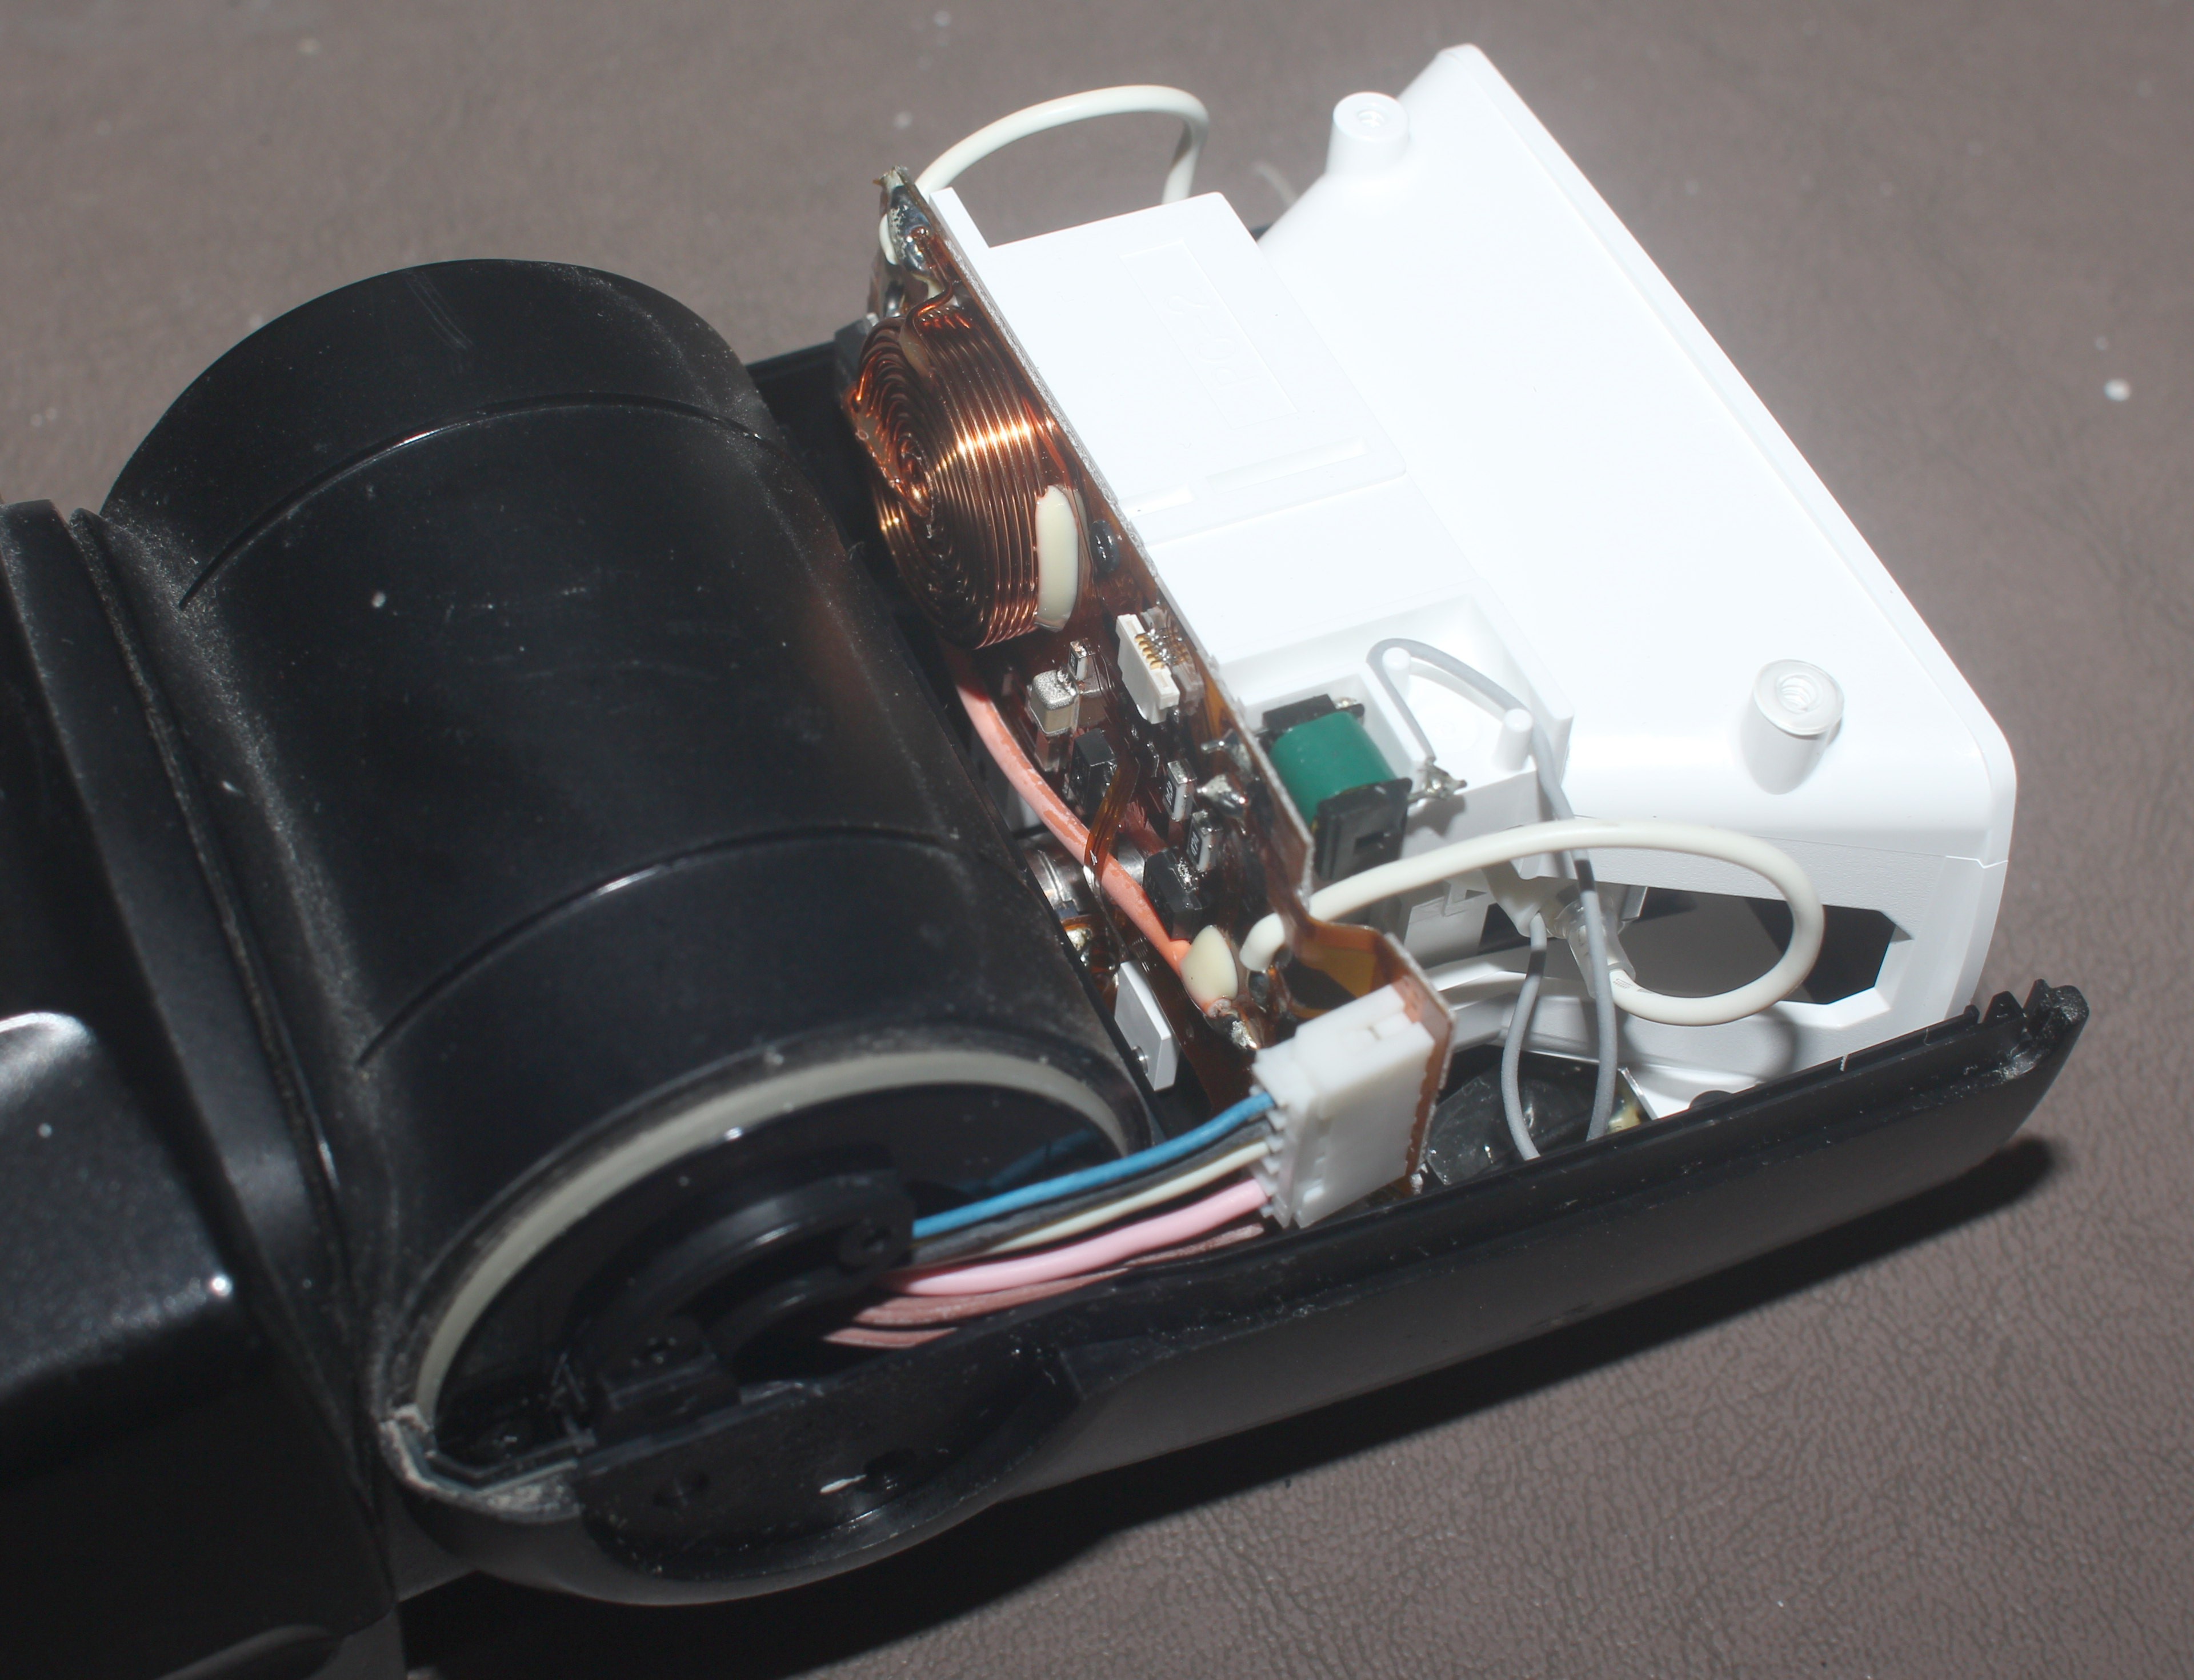
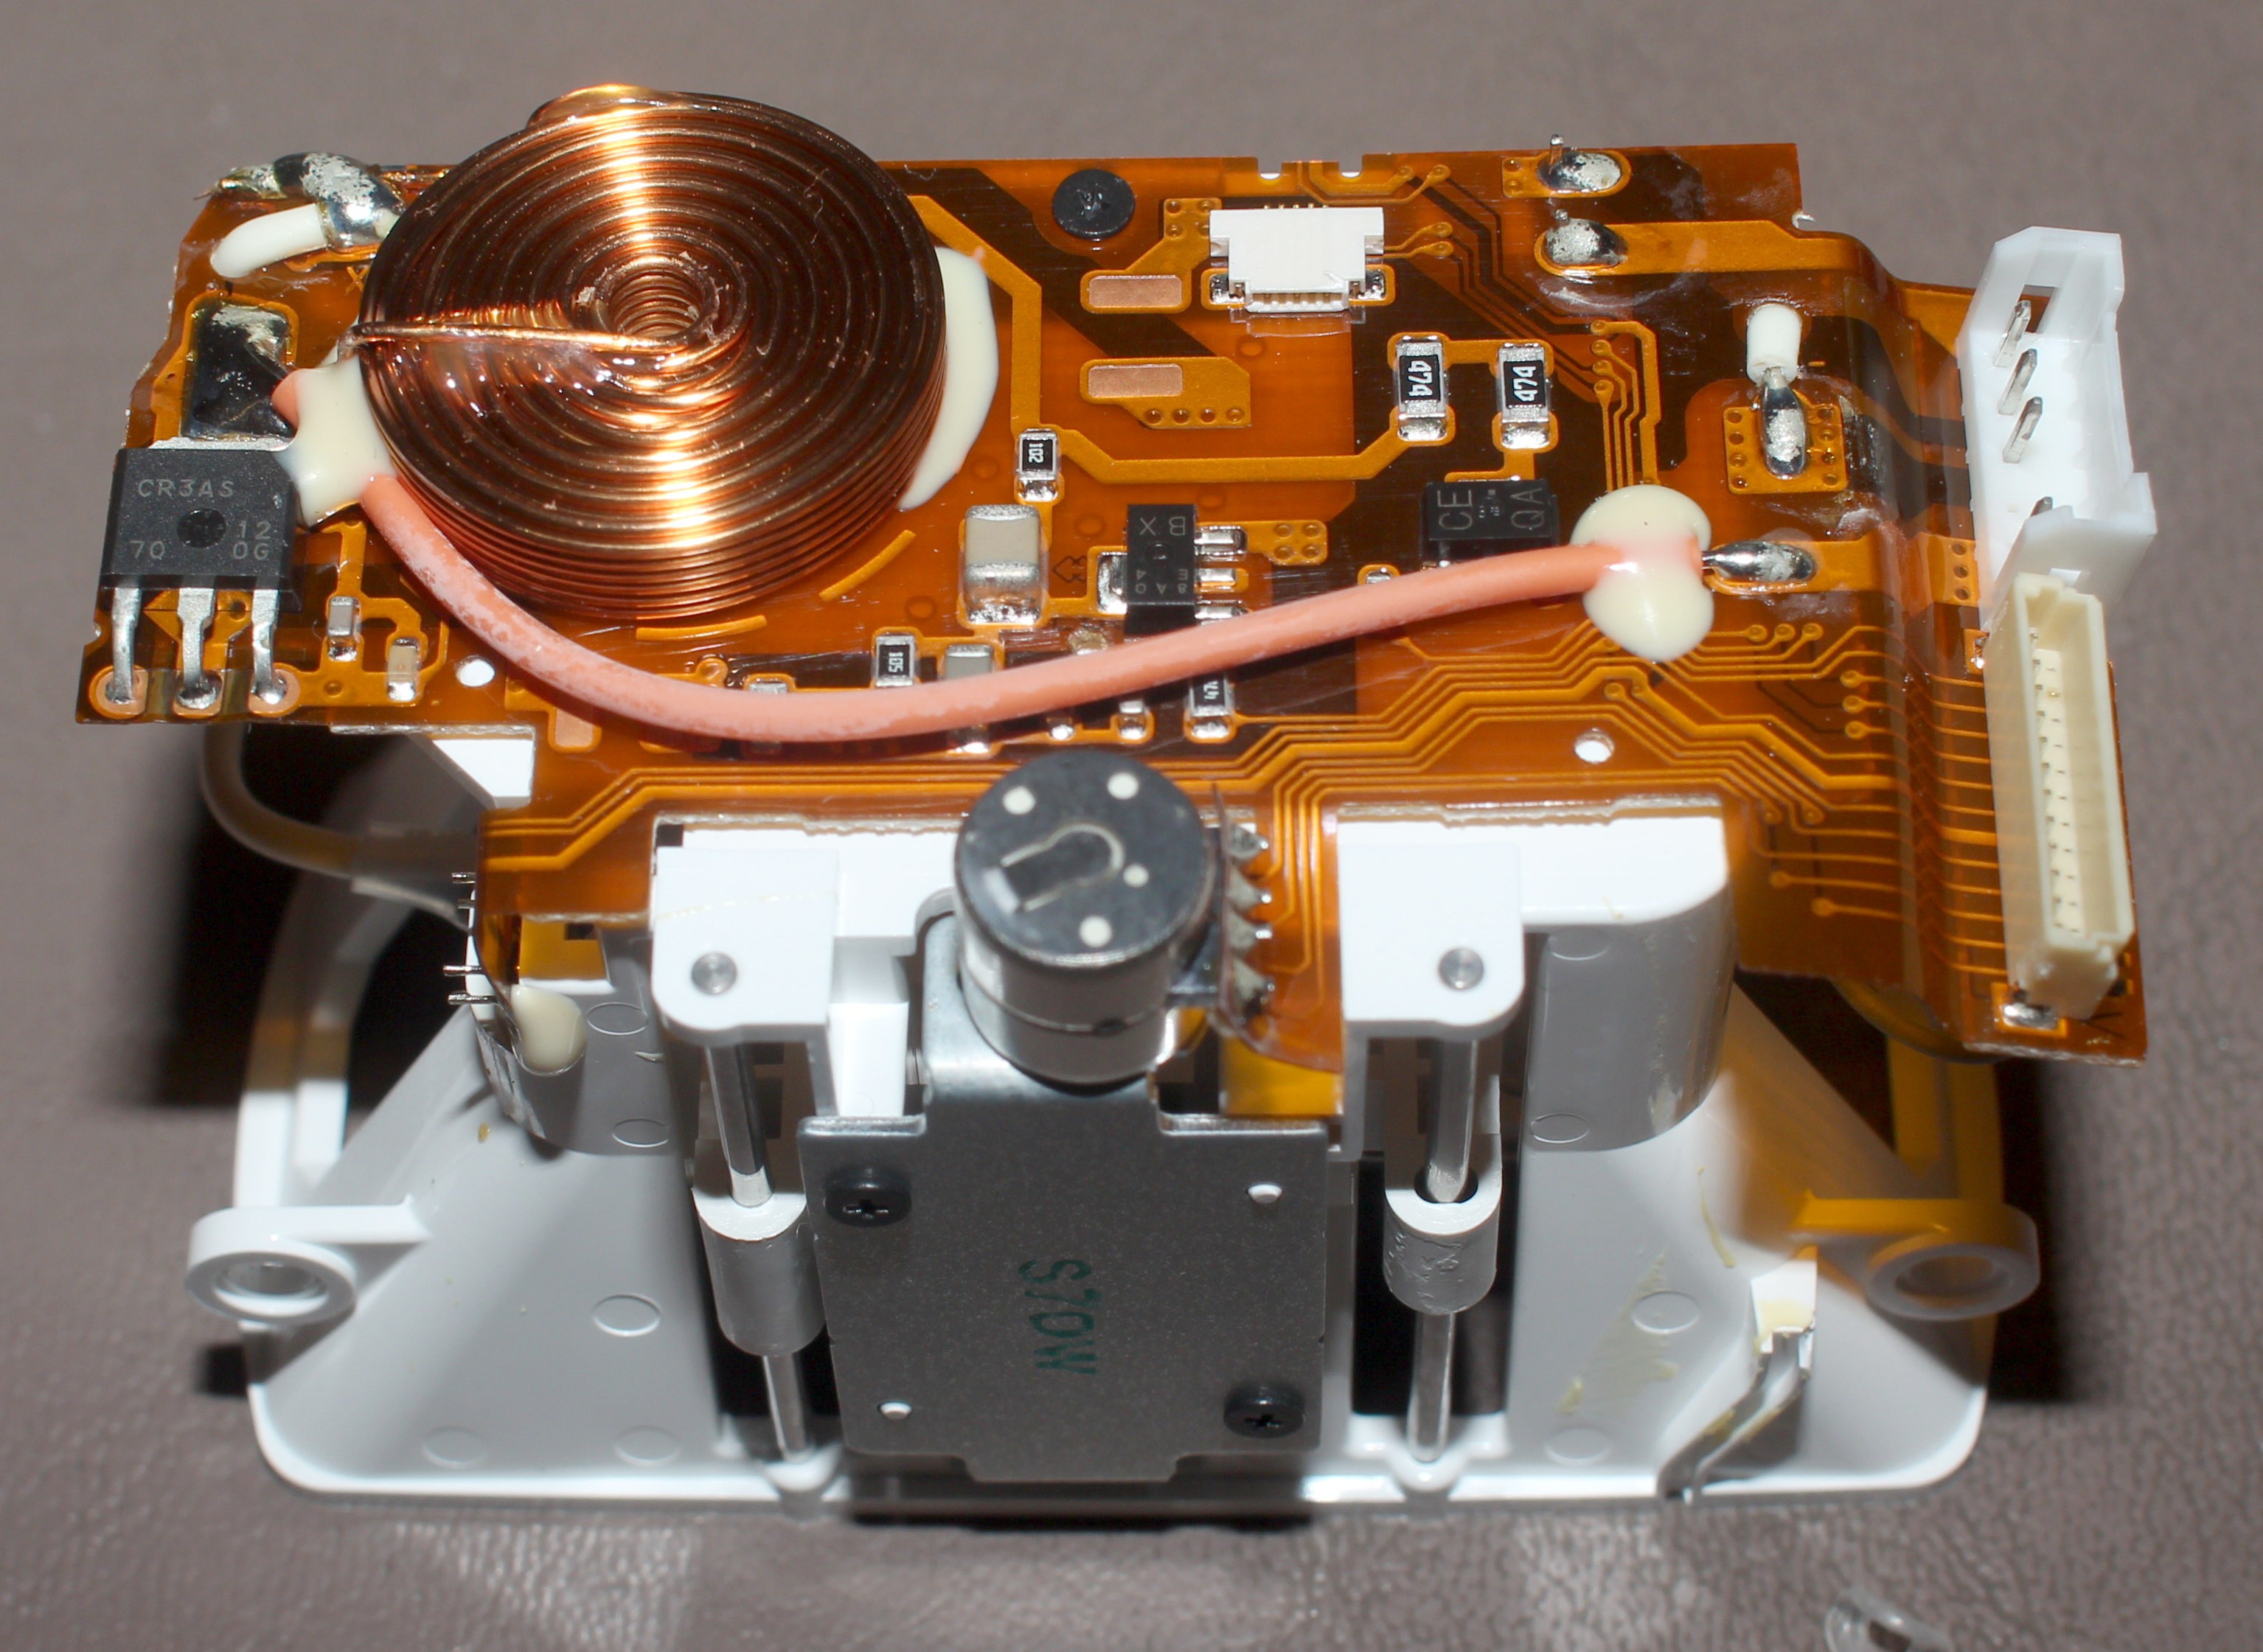
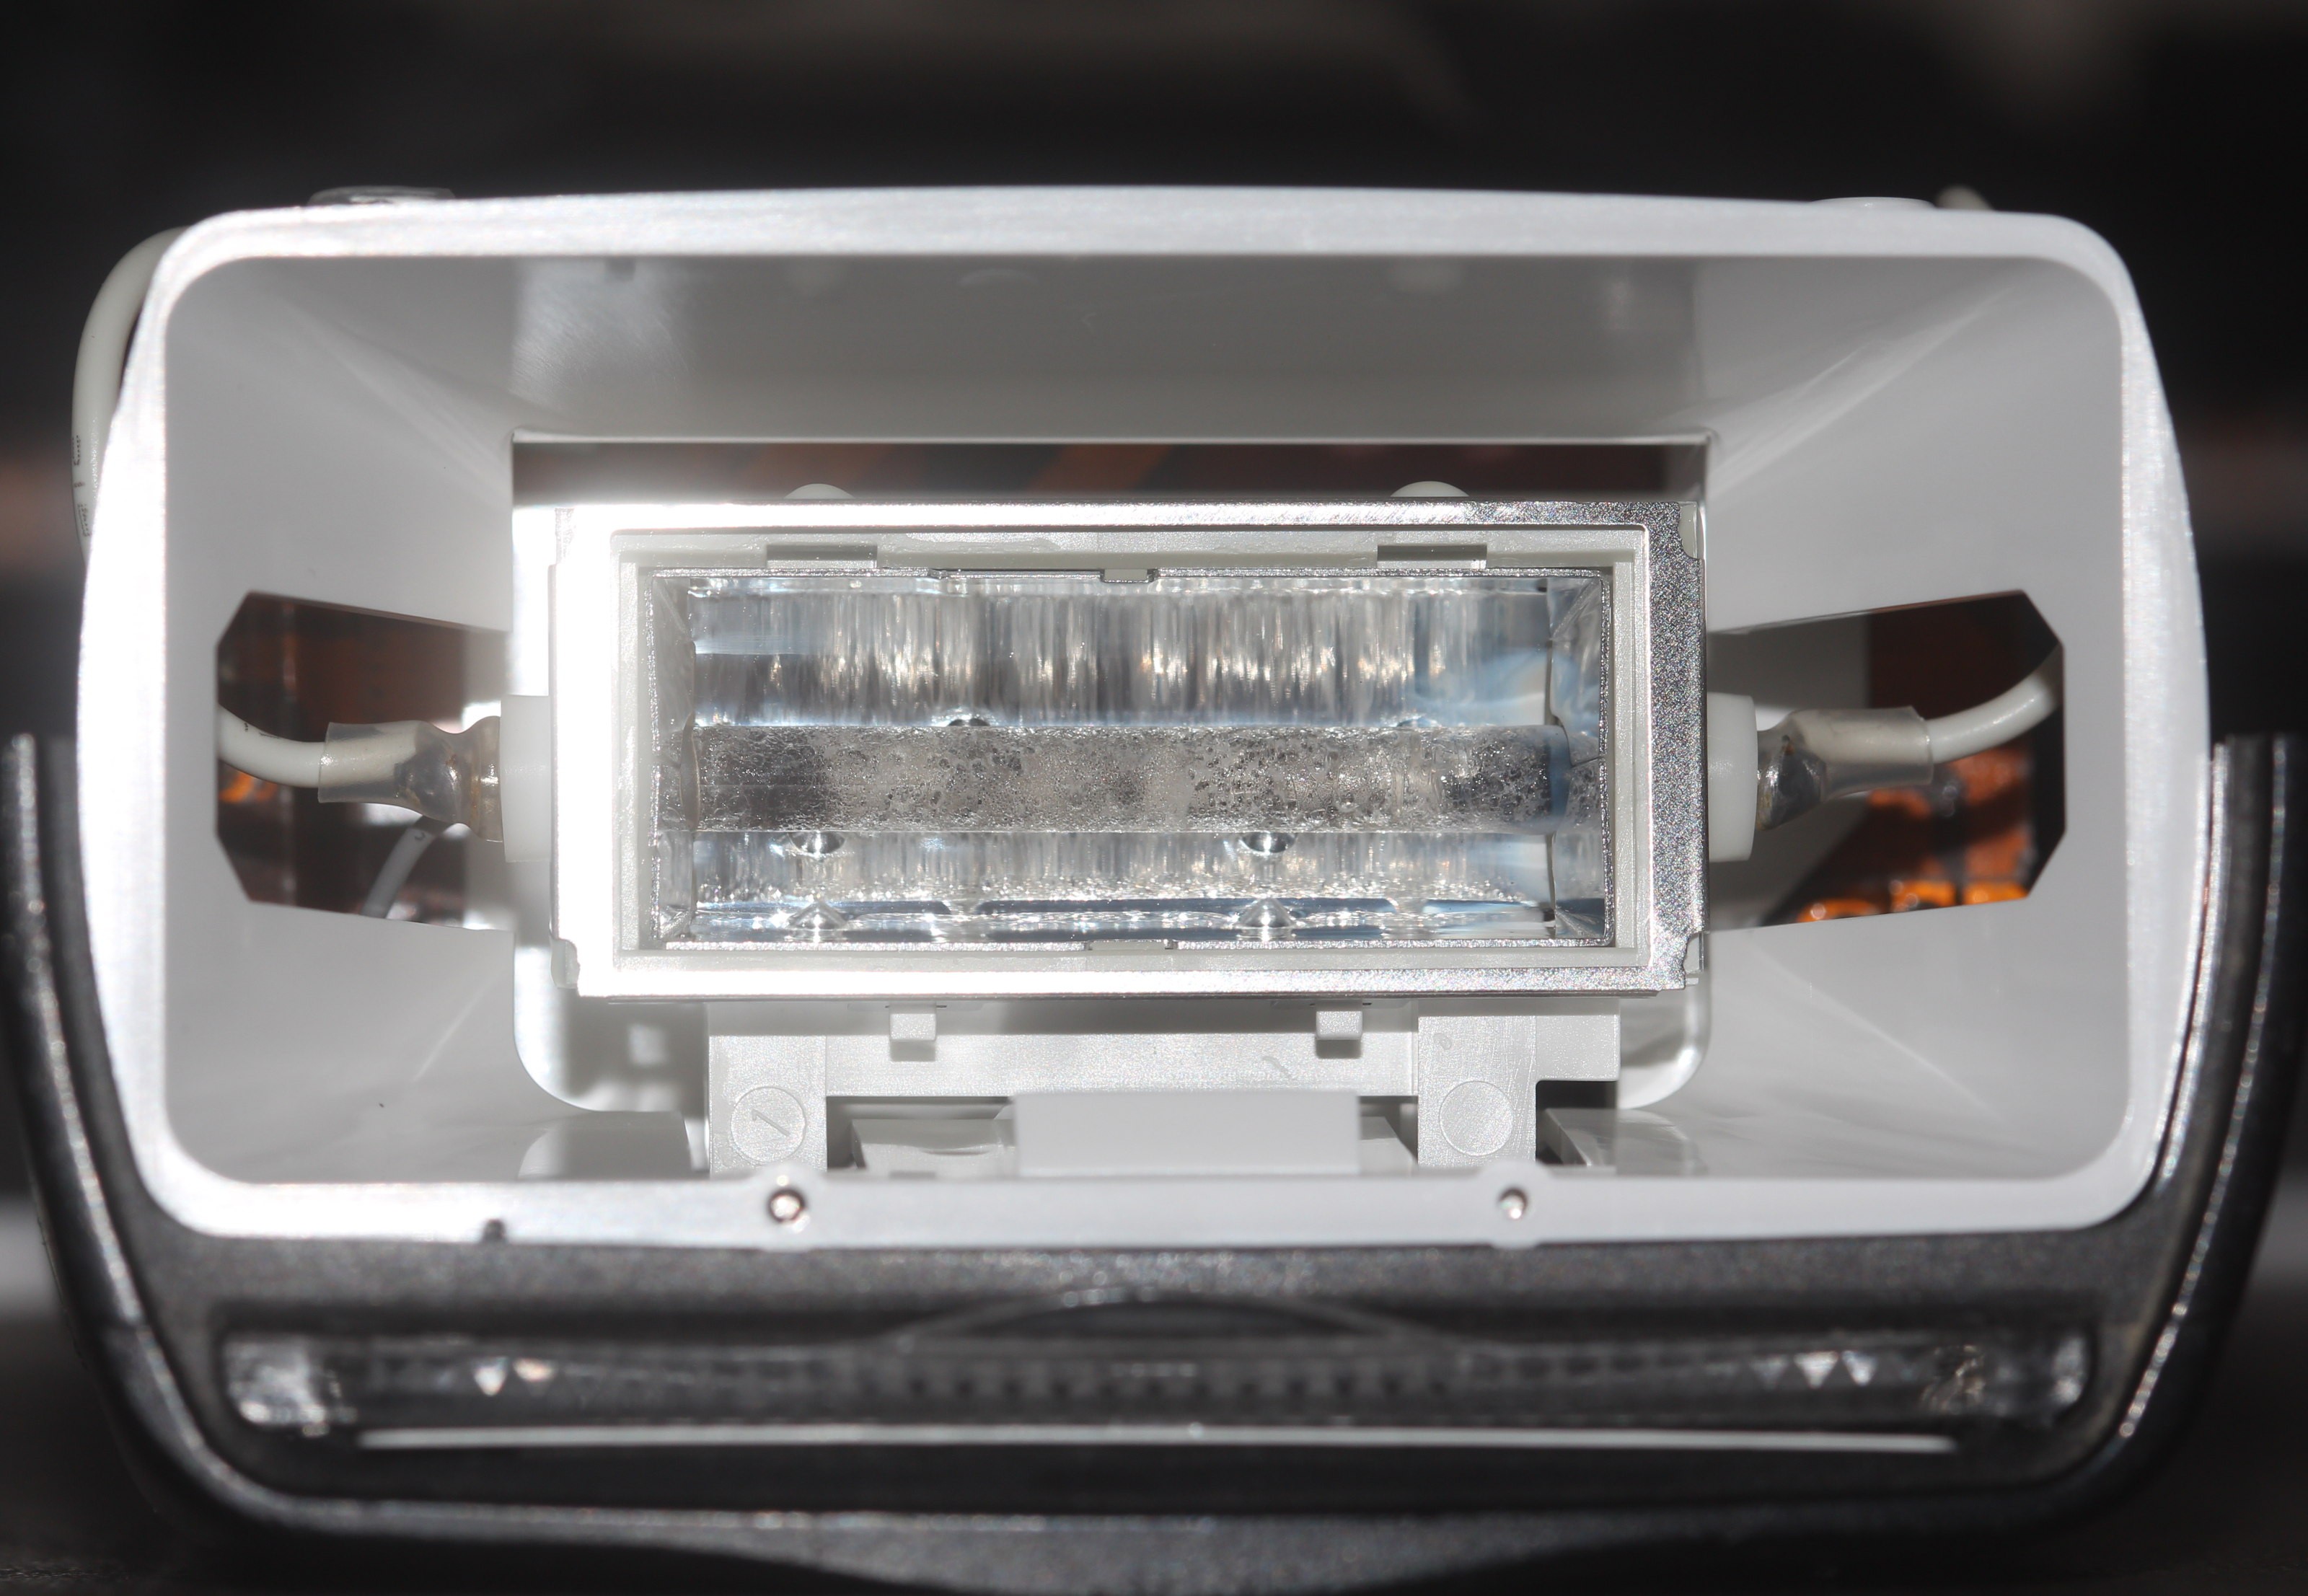
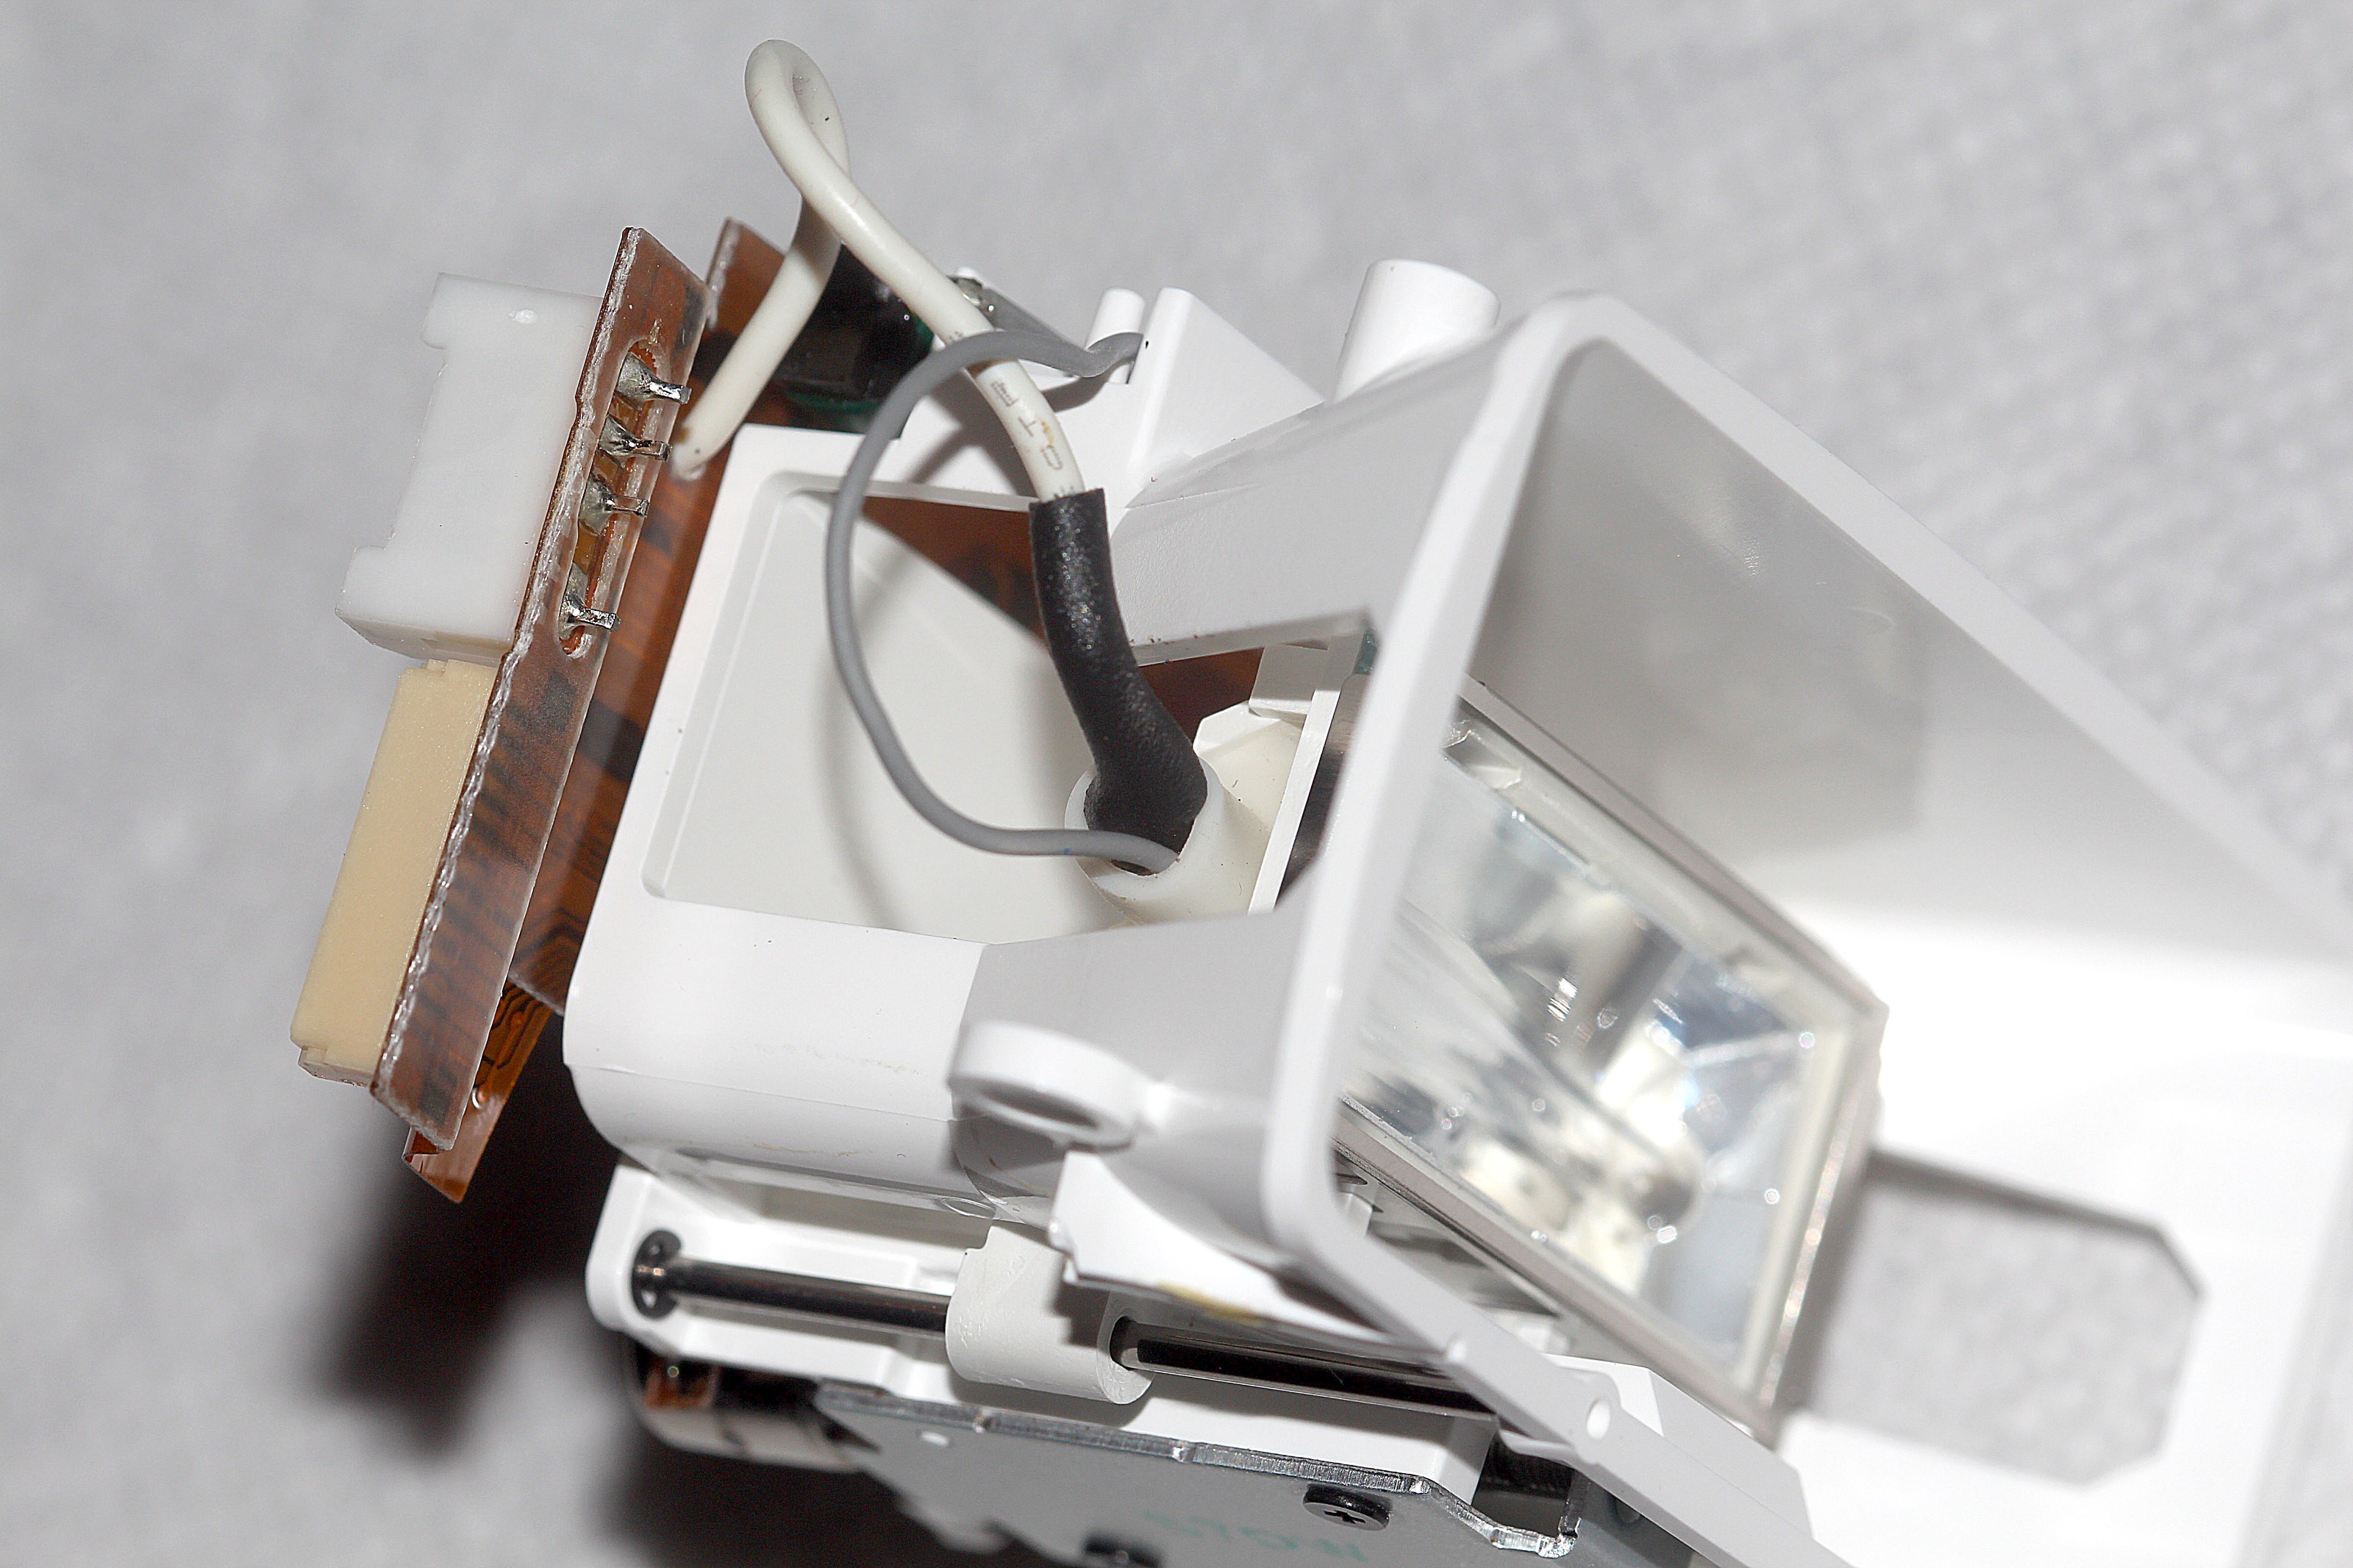
A few screws revealed the electronicals.
![]()
The bulb assembly is on a corkscrew drive. The corkscrew drive moves it to adjust the spread of the beam.
![]()
The 12 year old bulb was cactus.
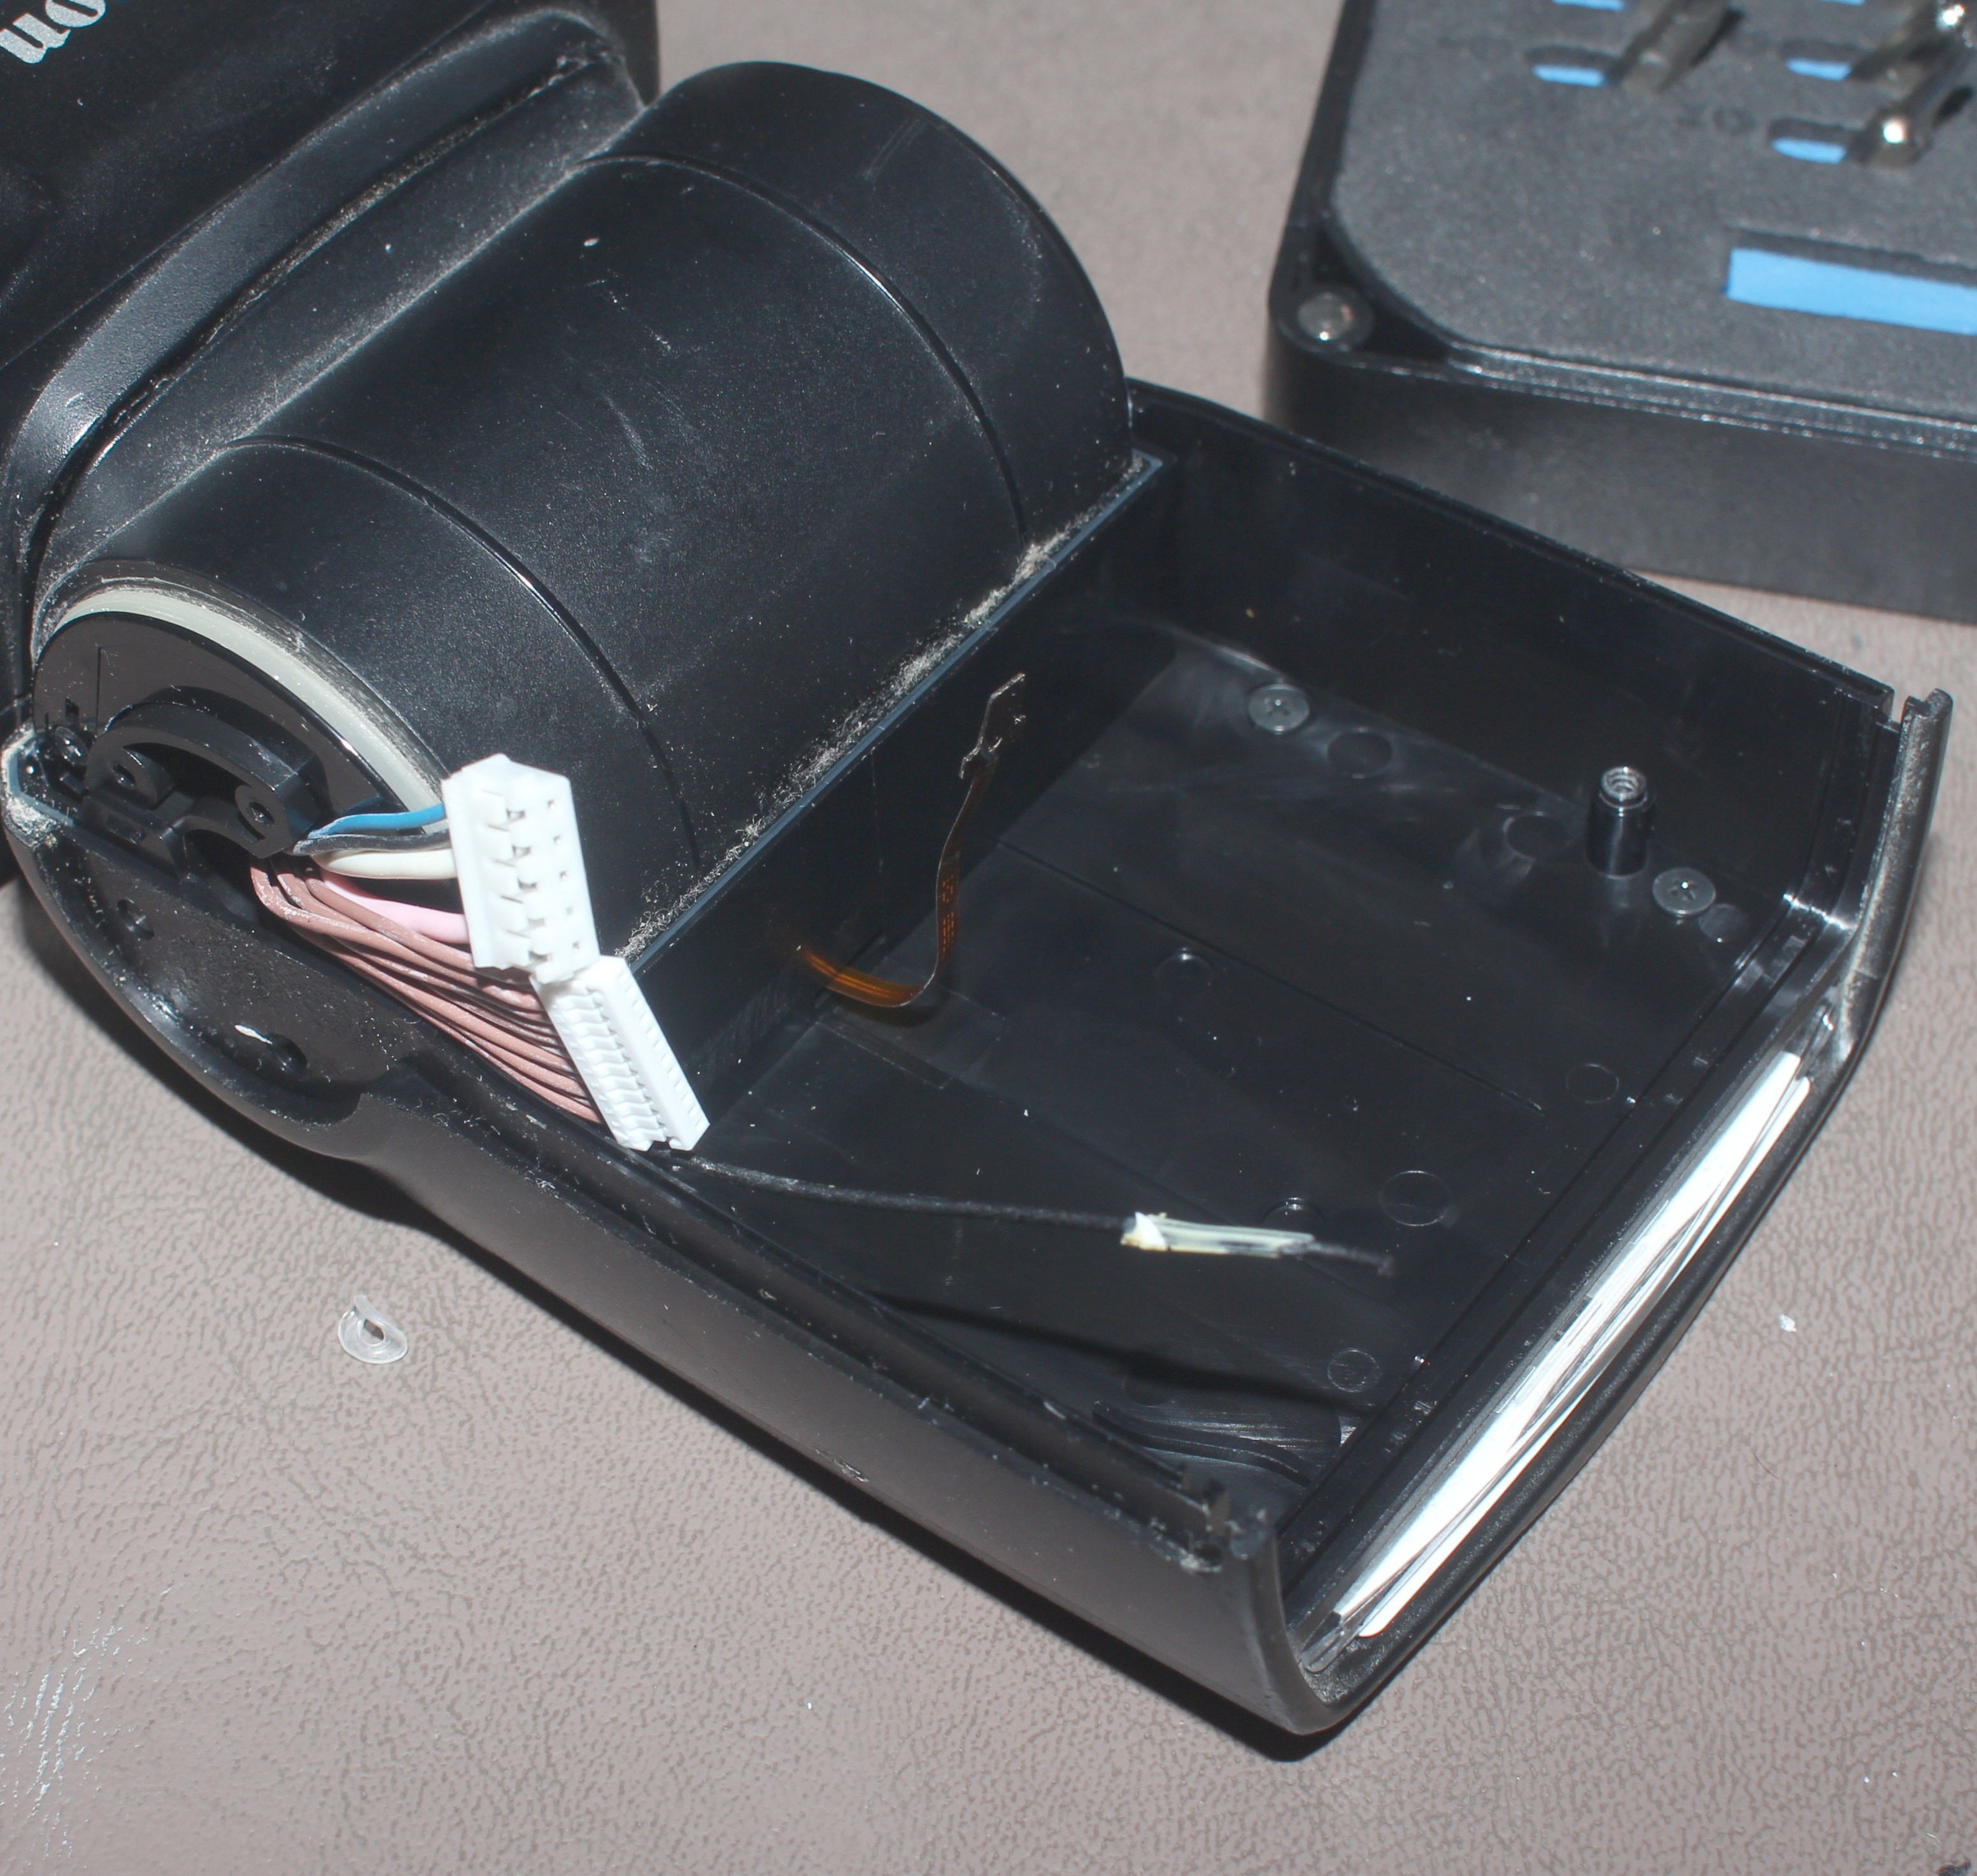
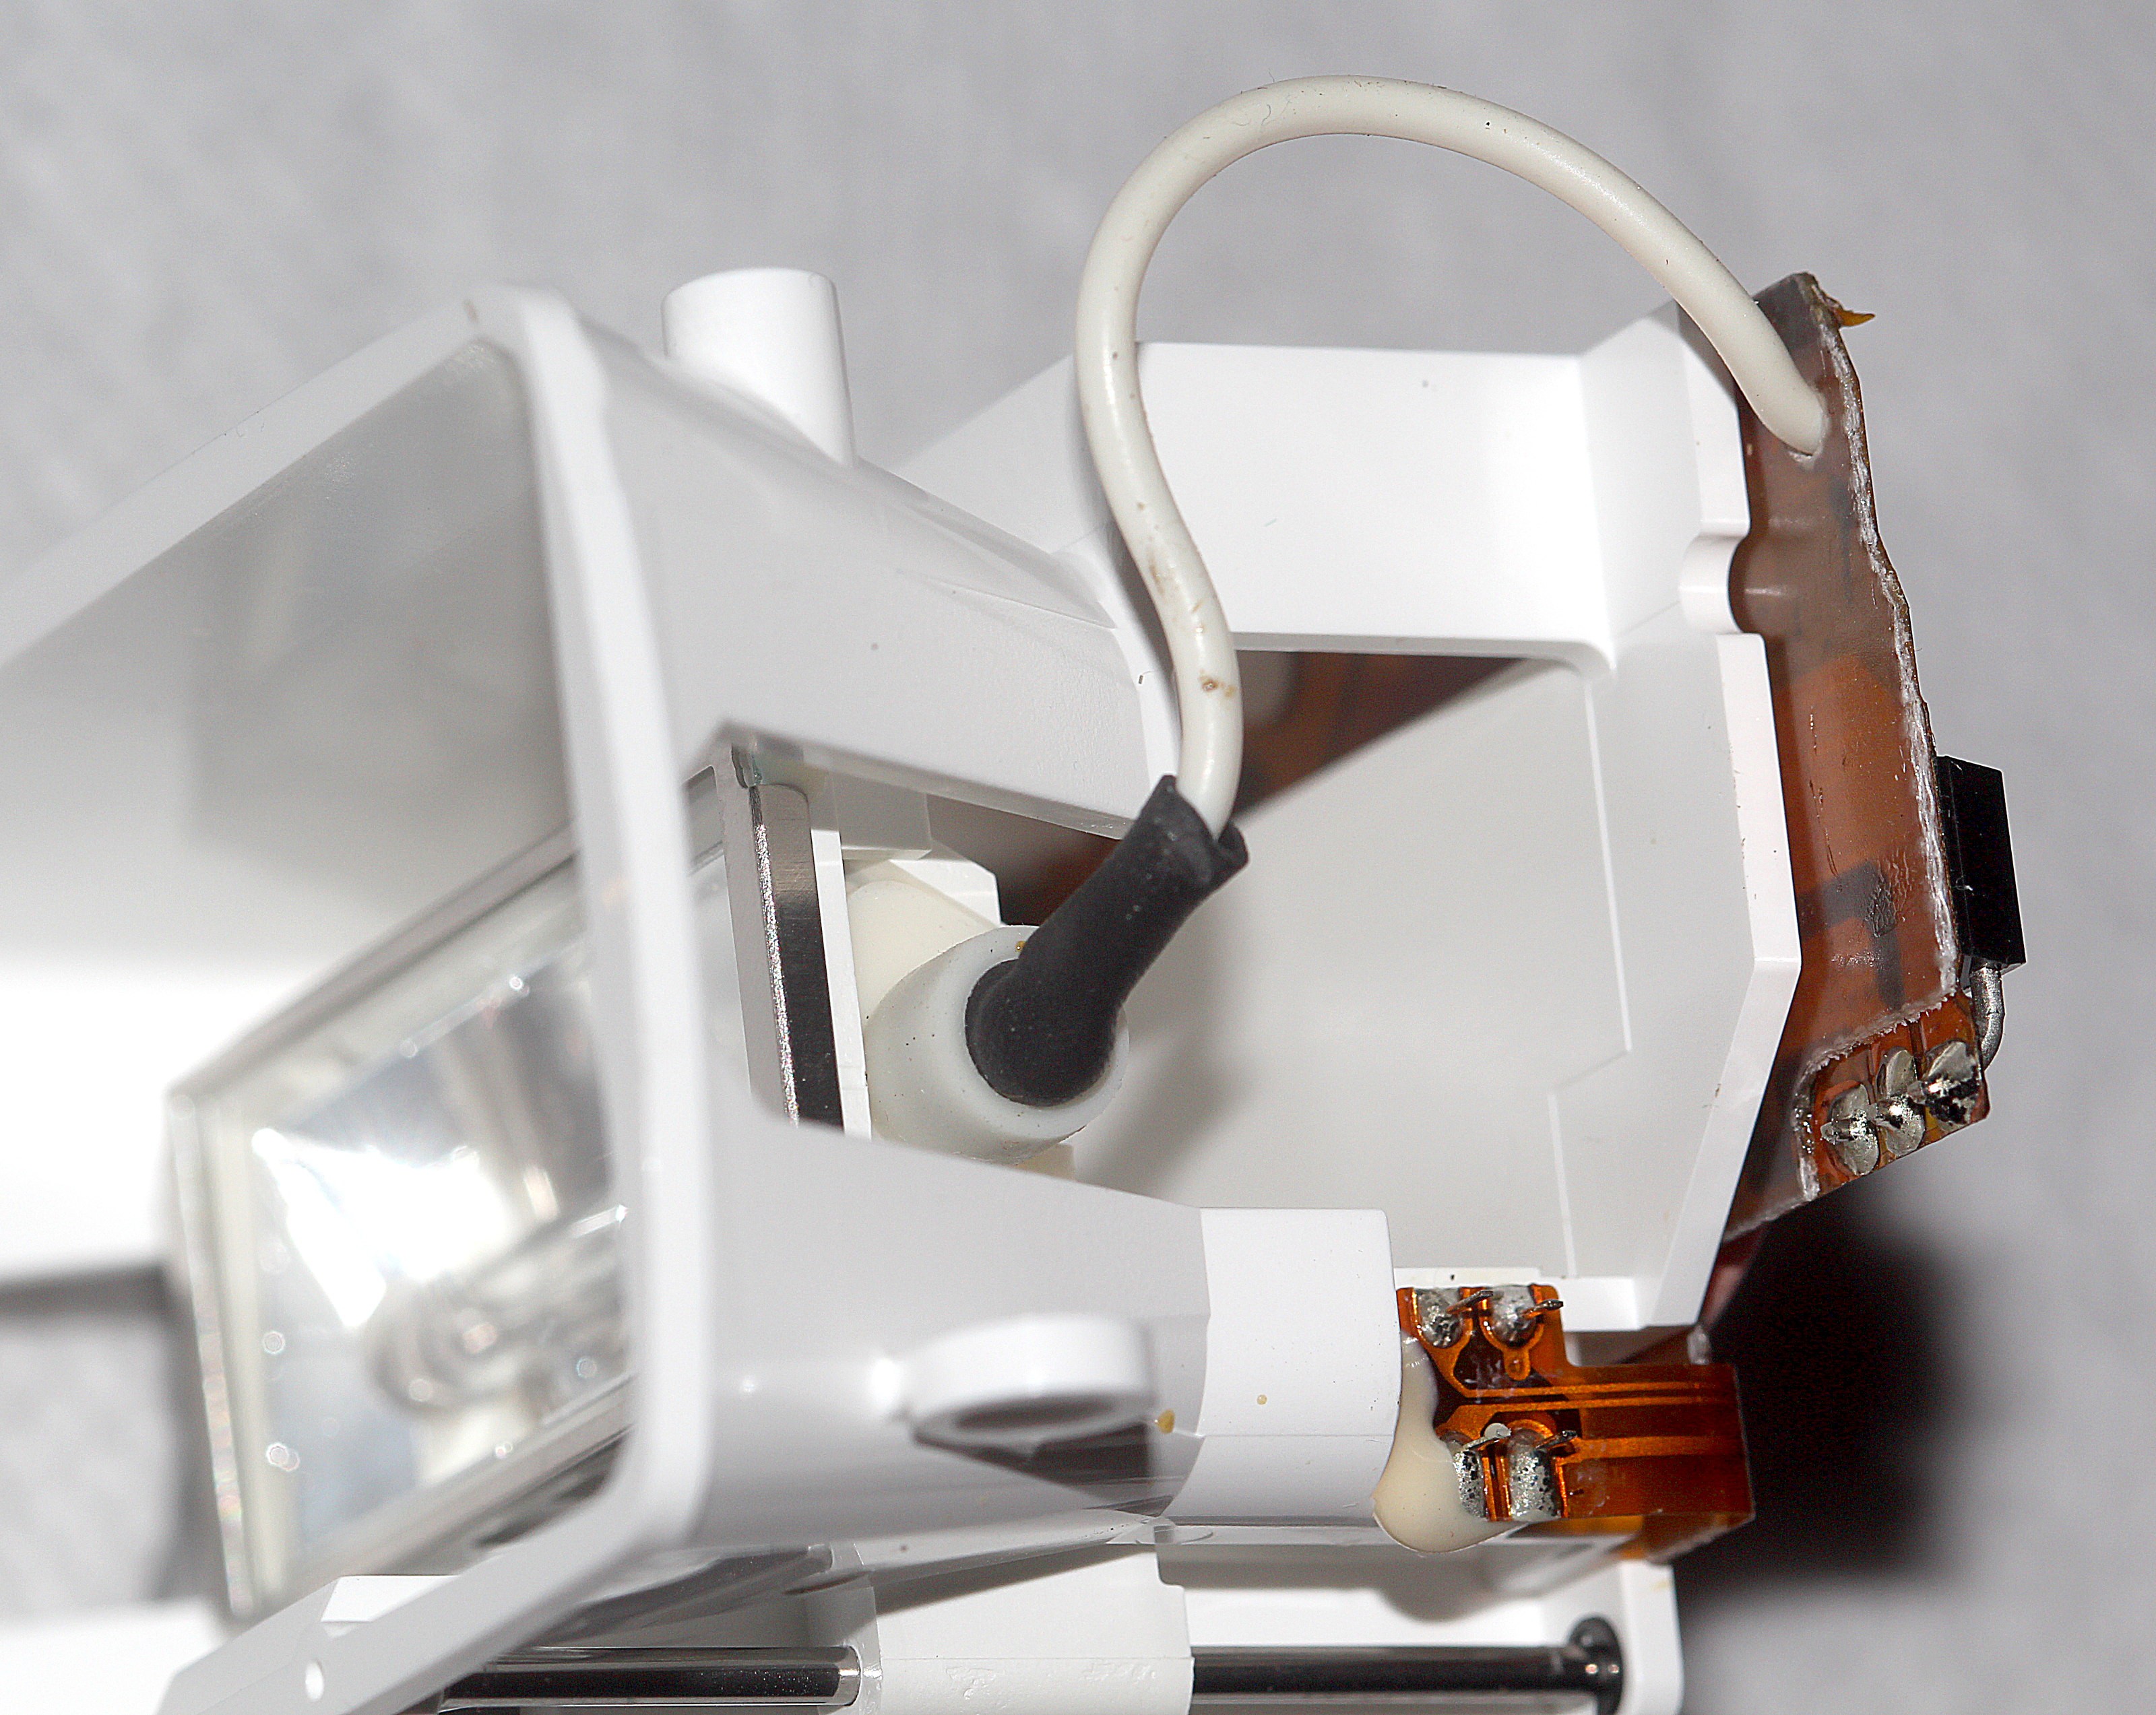
![]()
4 cables connected to the assembly.
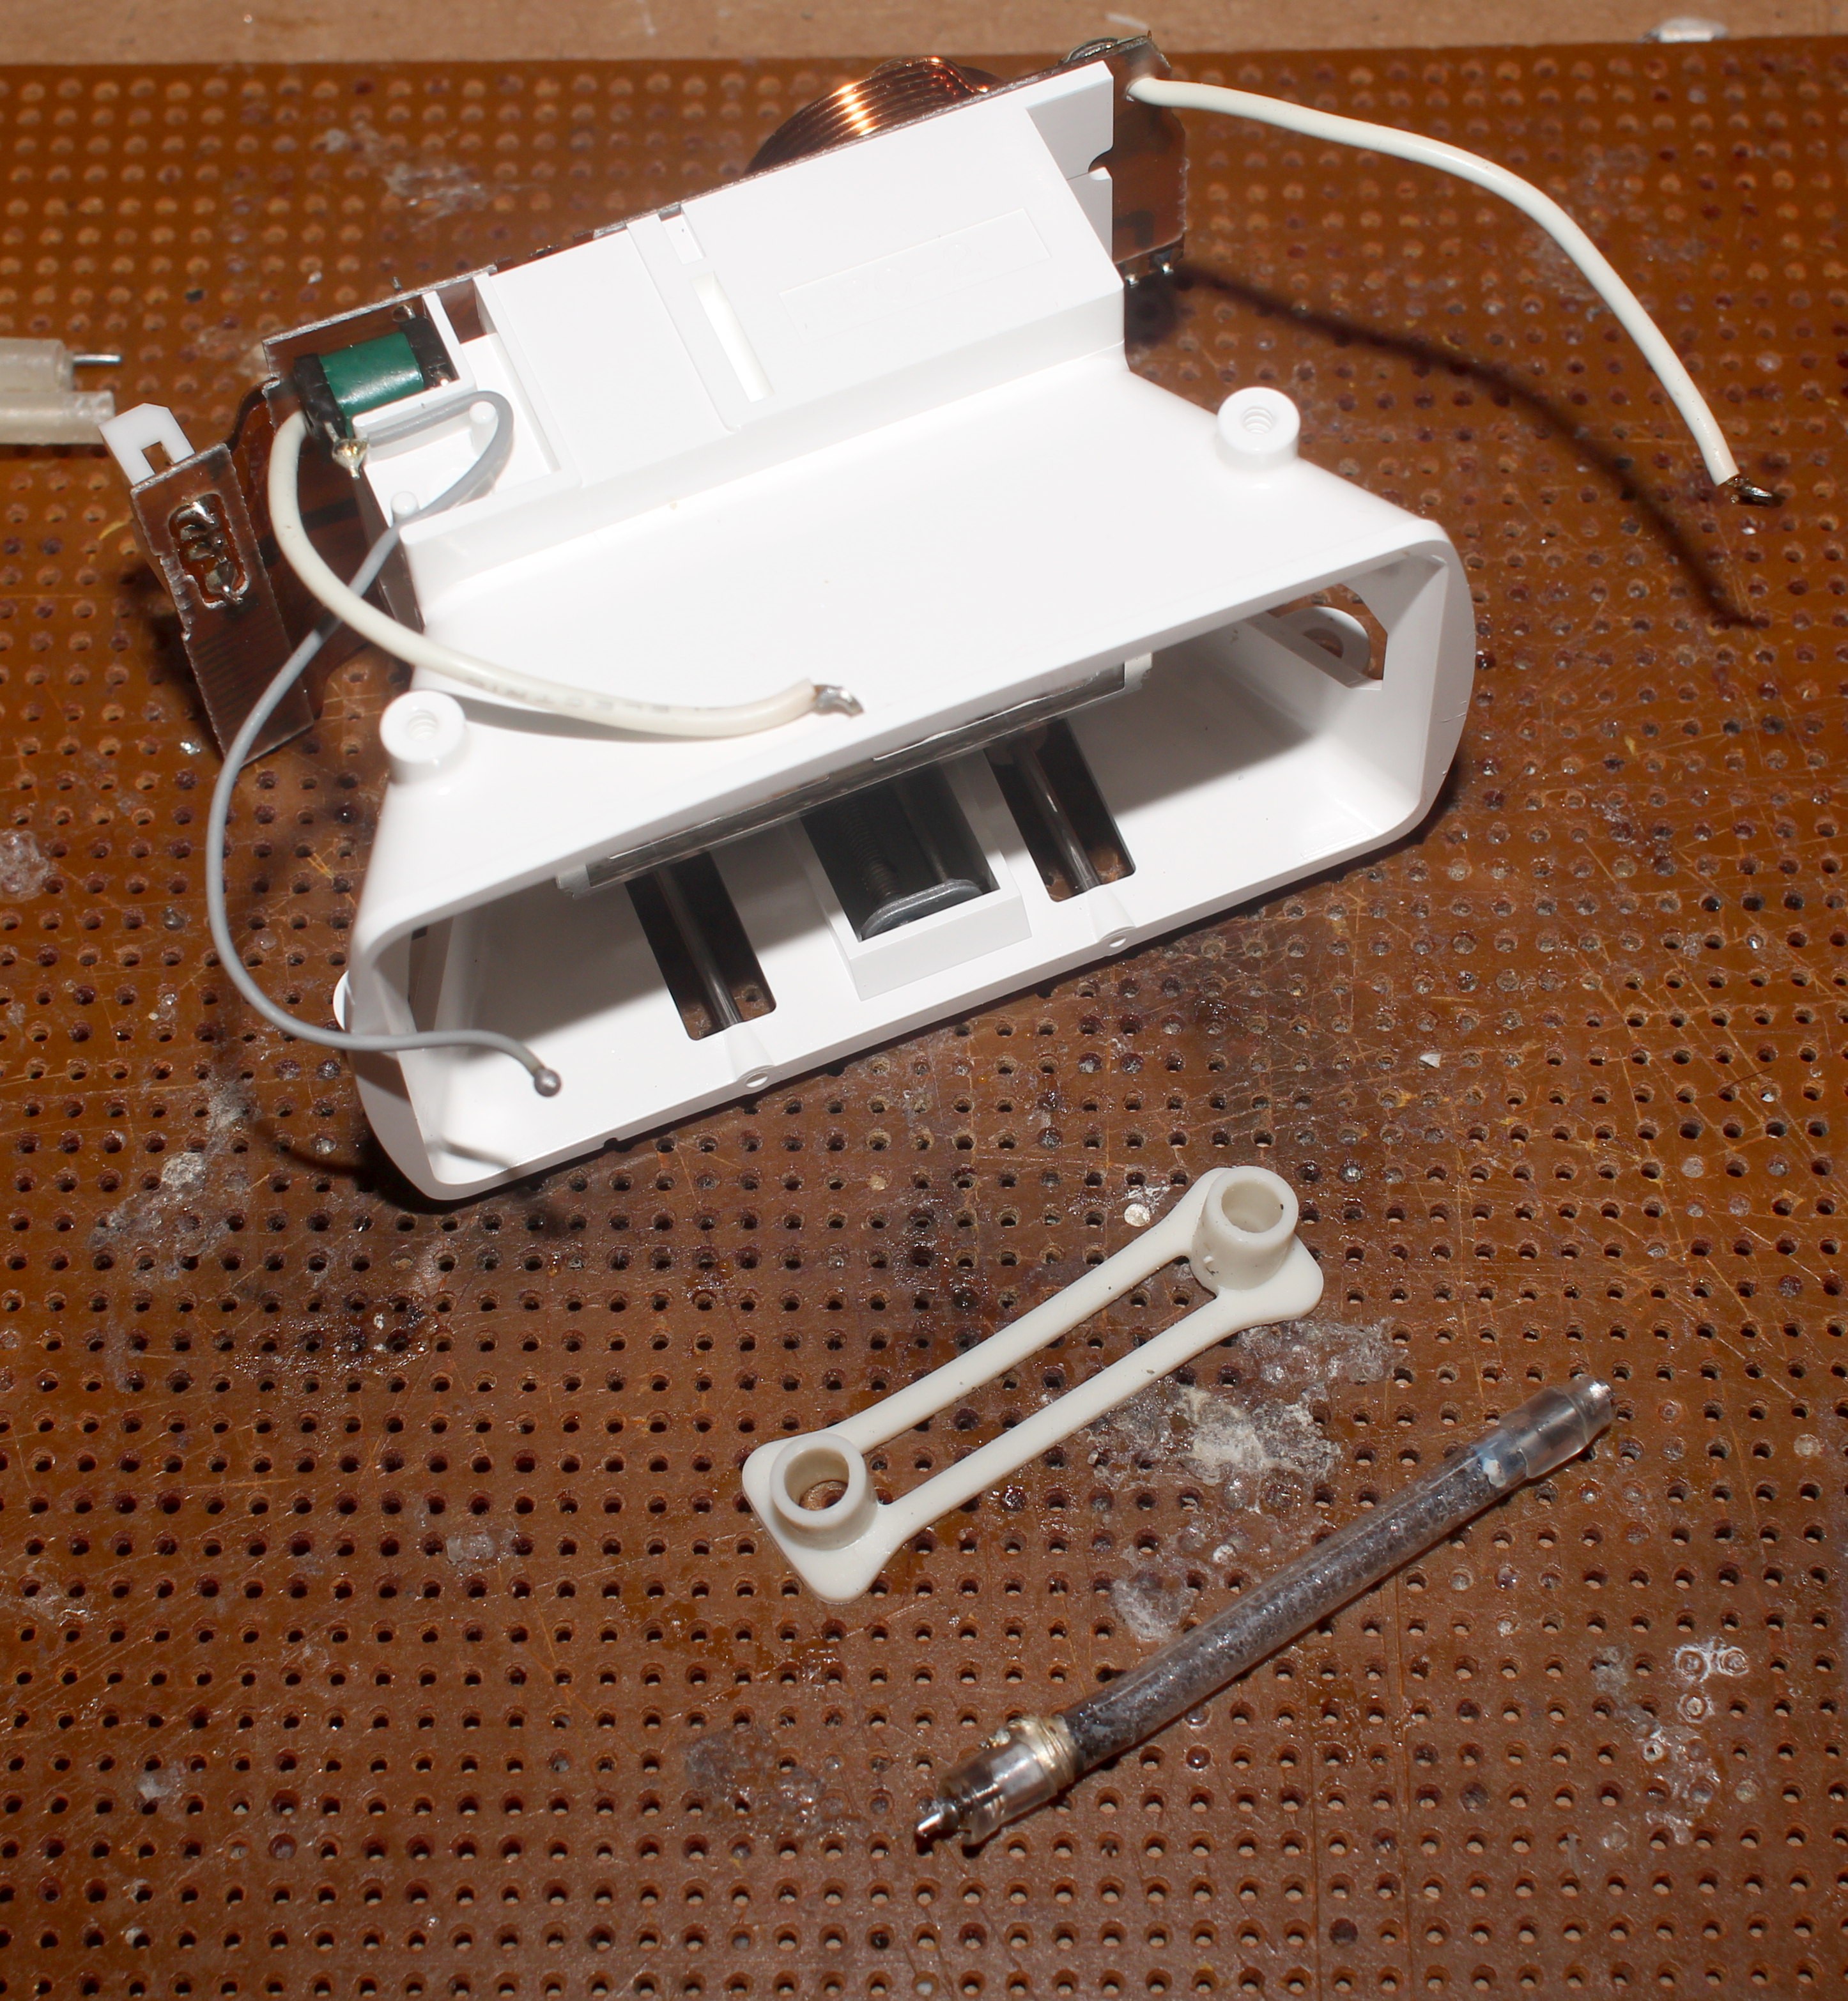
![]()
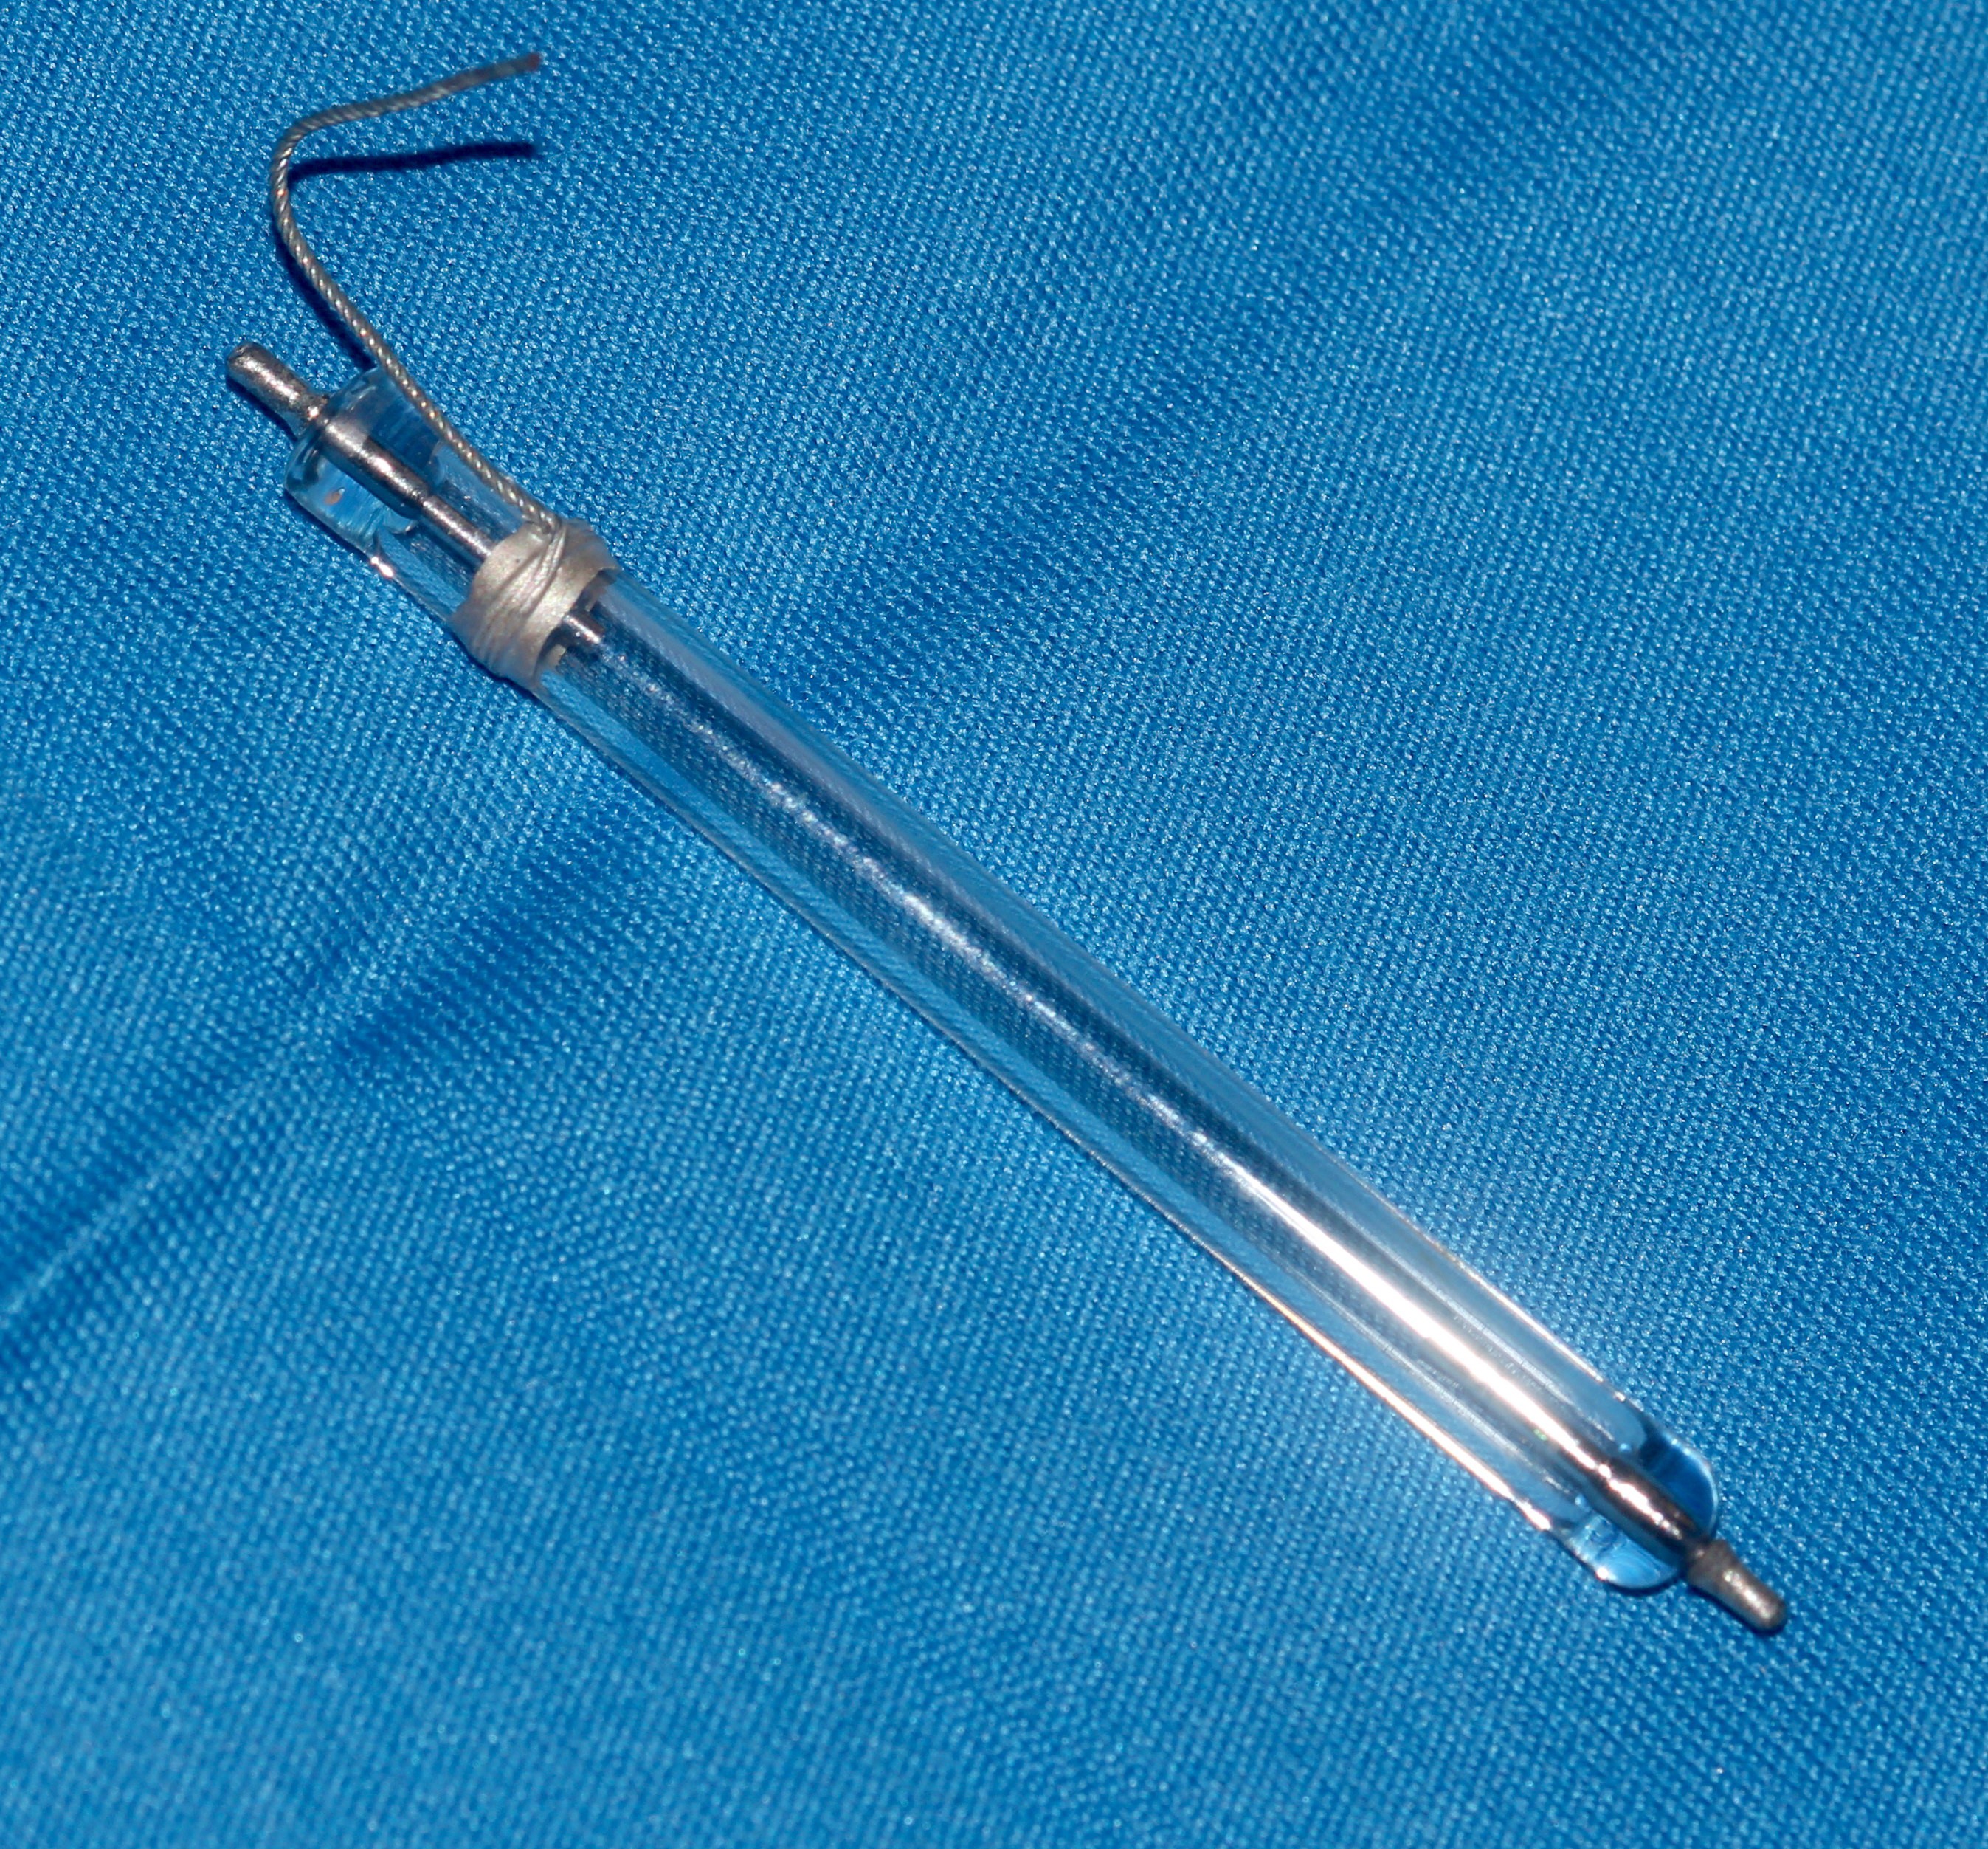
The old bulb & silicone were liberated, after discovering the bulb was as fragile as paper.
![]()
Then 1 end of the new bulb was soldered in before inserting it back into the enclosure.
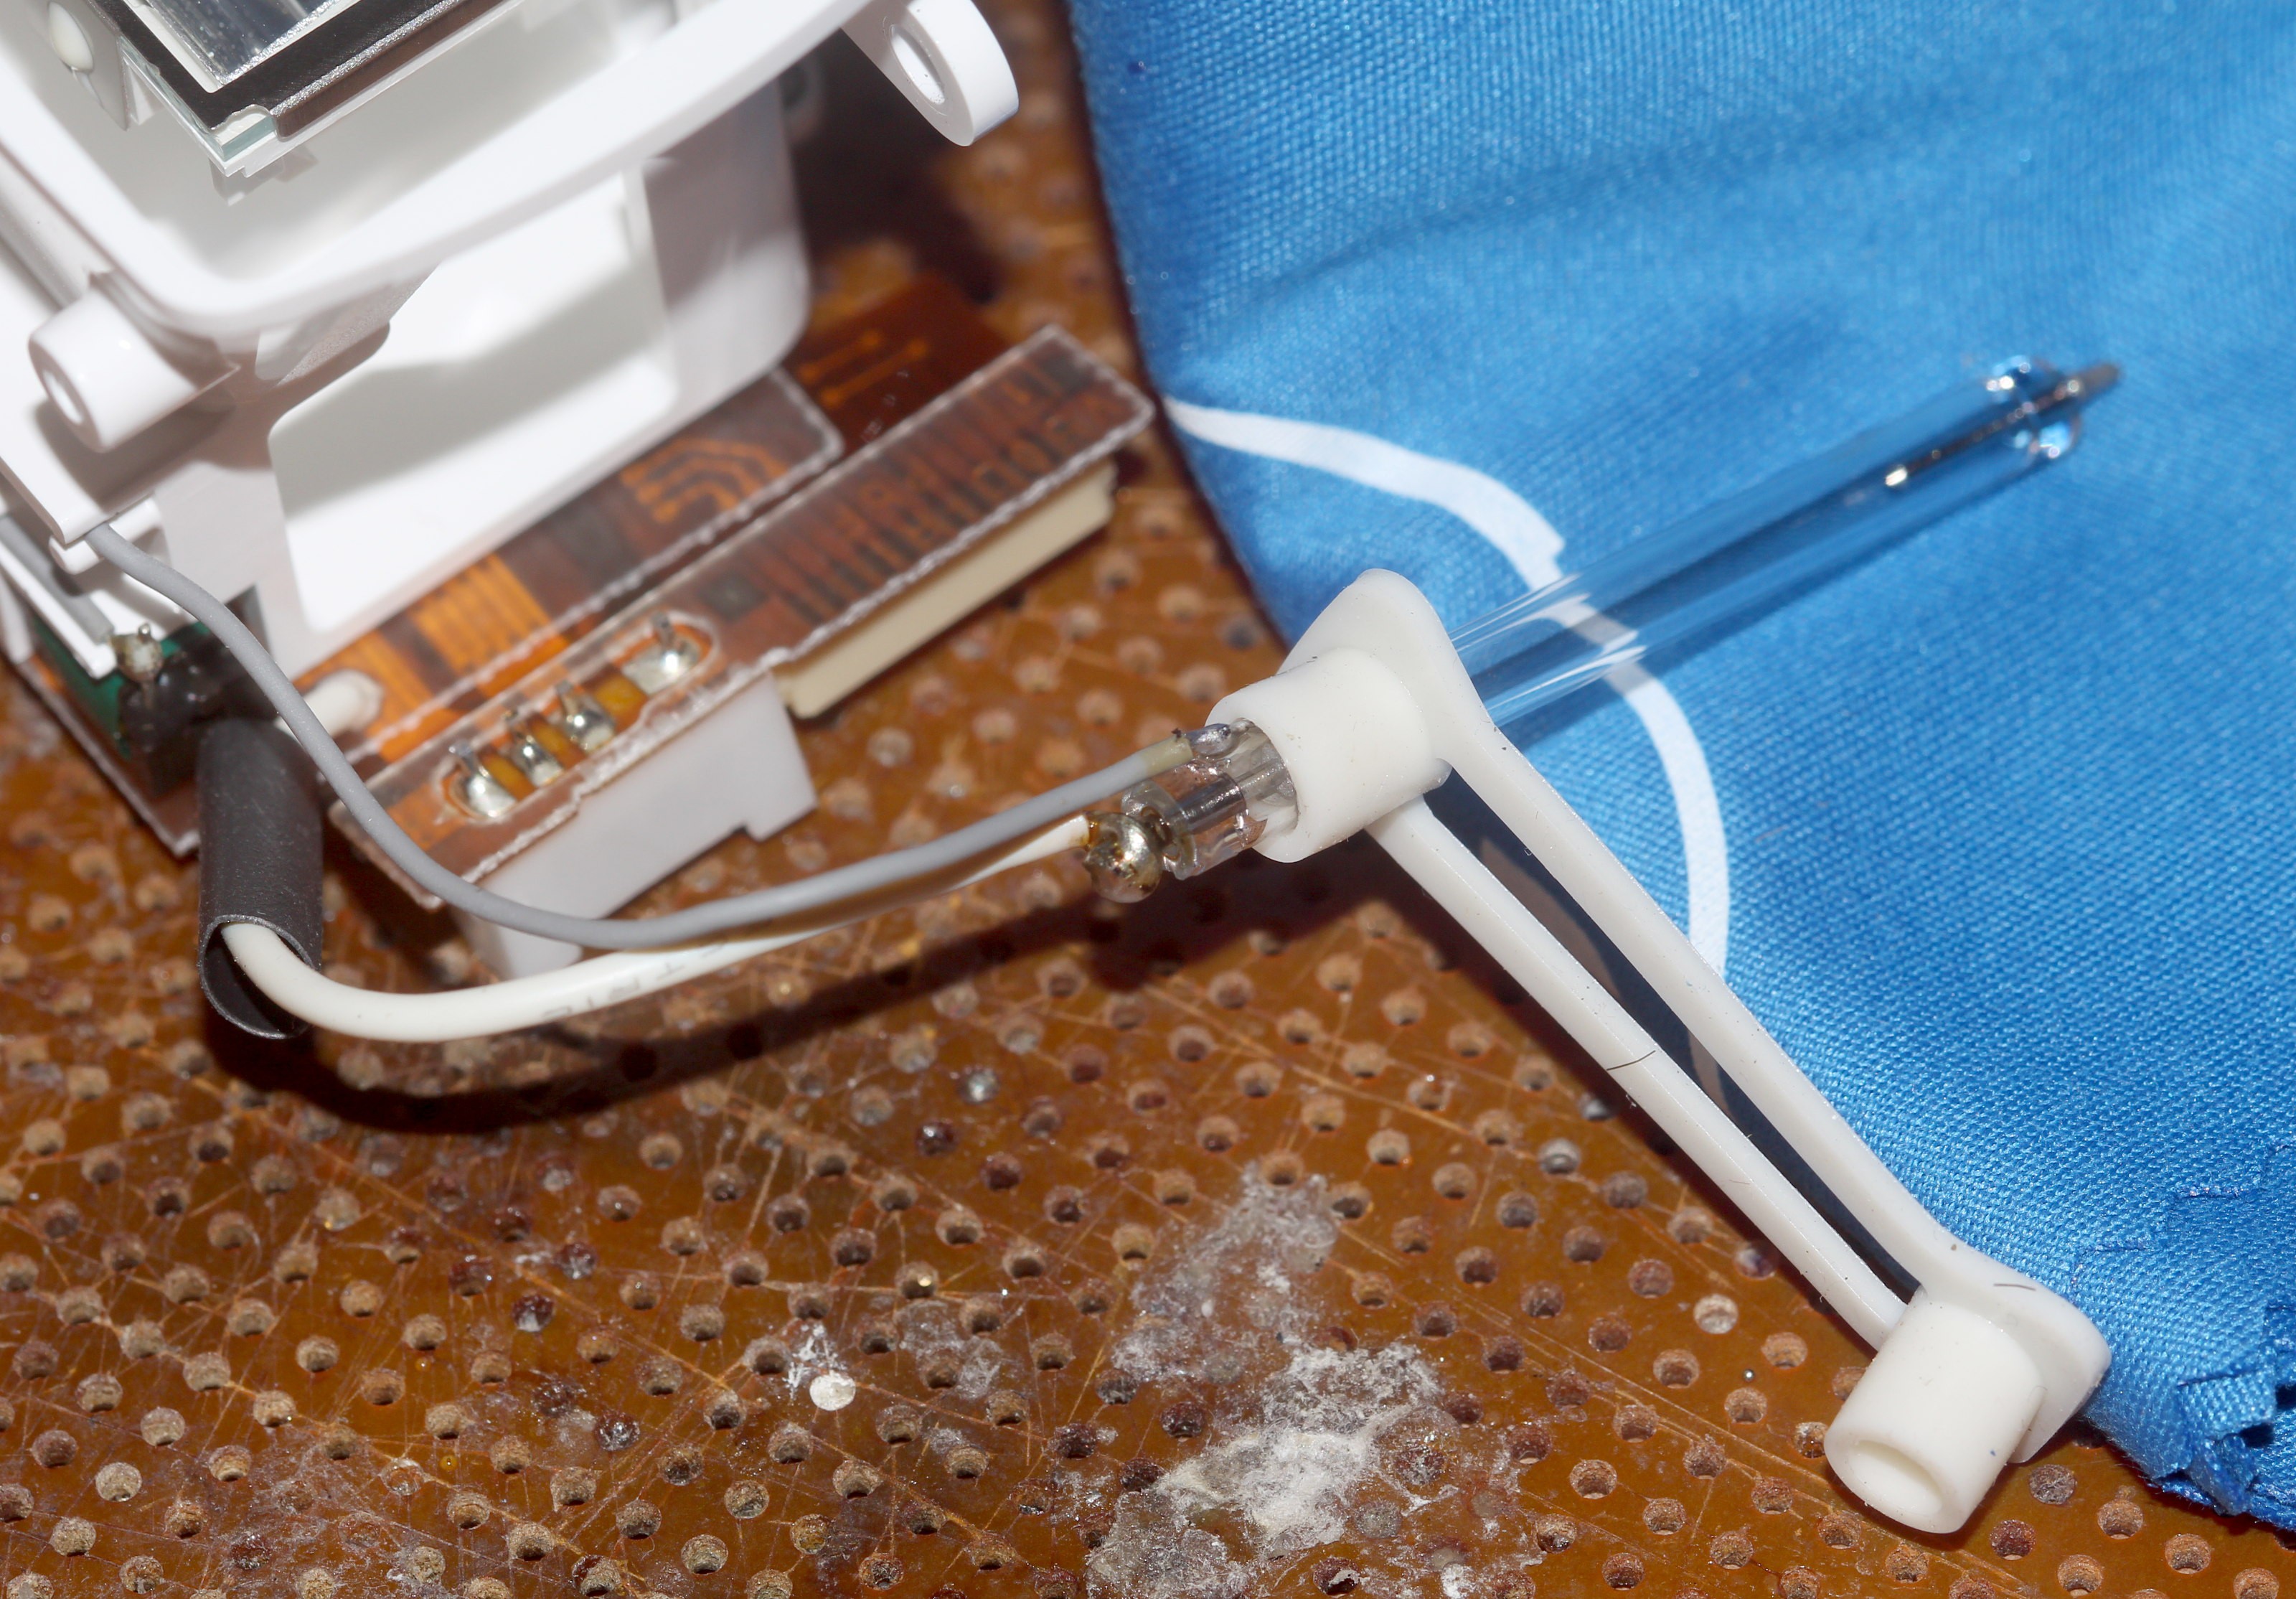
This was the wrong way to insert the silicone.
![]()
![]()
The lion kingdom did what it could with the silicone on 1st. The soldered end went back into the assembly. The unsoldered end received its silicone 1st, then wire, & finally heat shrink. The heat shrink was too long, but if the sharper turns break the wire, there's more wire from an old LCD backlight in the apartment.
Based on the challenge of getting the silicone on, all 3 wires clearly need to be desoldered from the PCB 1st. The wires should be soldered to the bulb without the silicone. Then, the heat shrink should be put on. Then, the silicone needs to be fed around the wires before soldering the wires back on the PCB. The assembly probably doesn't need to be taken off the corkscrew drive if you have the right tweezers.
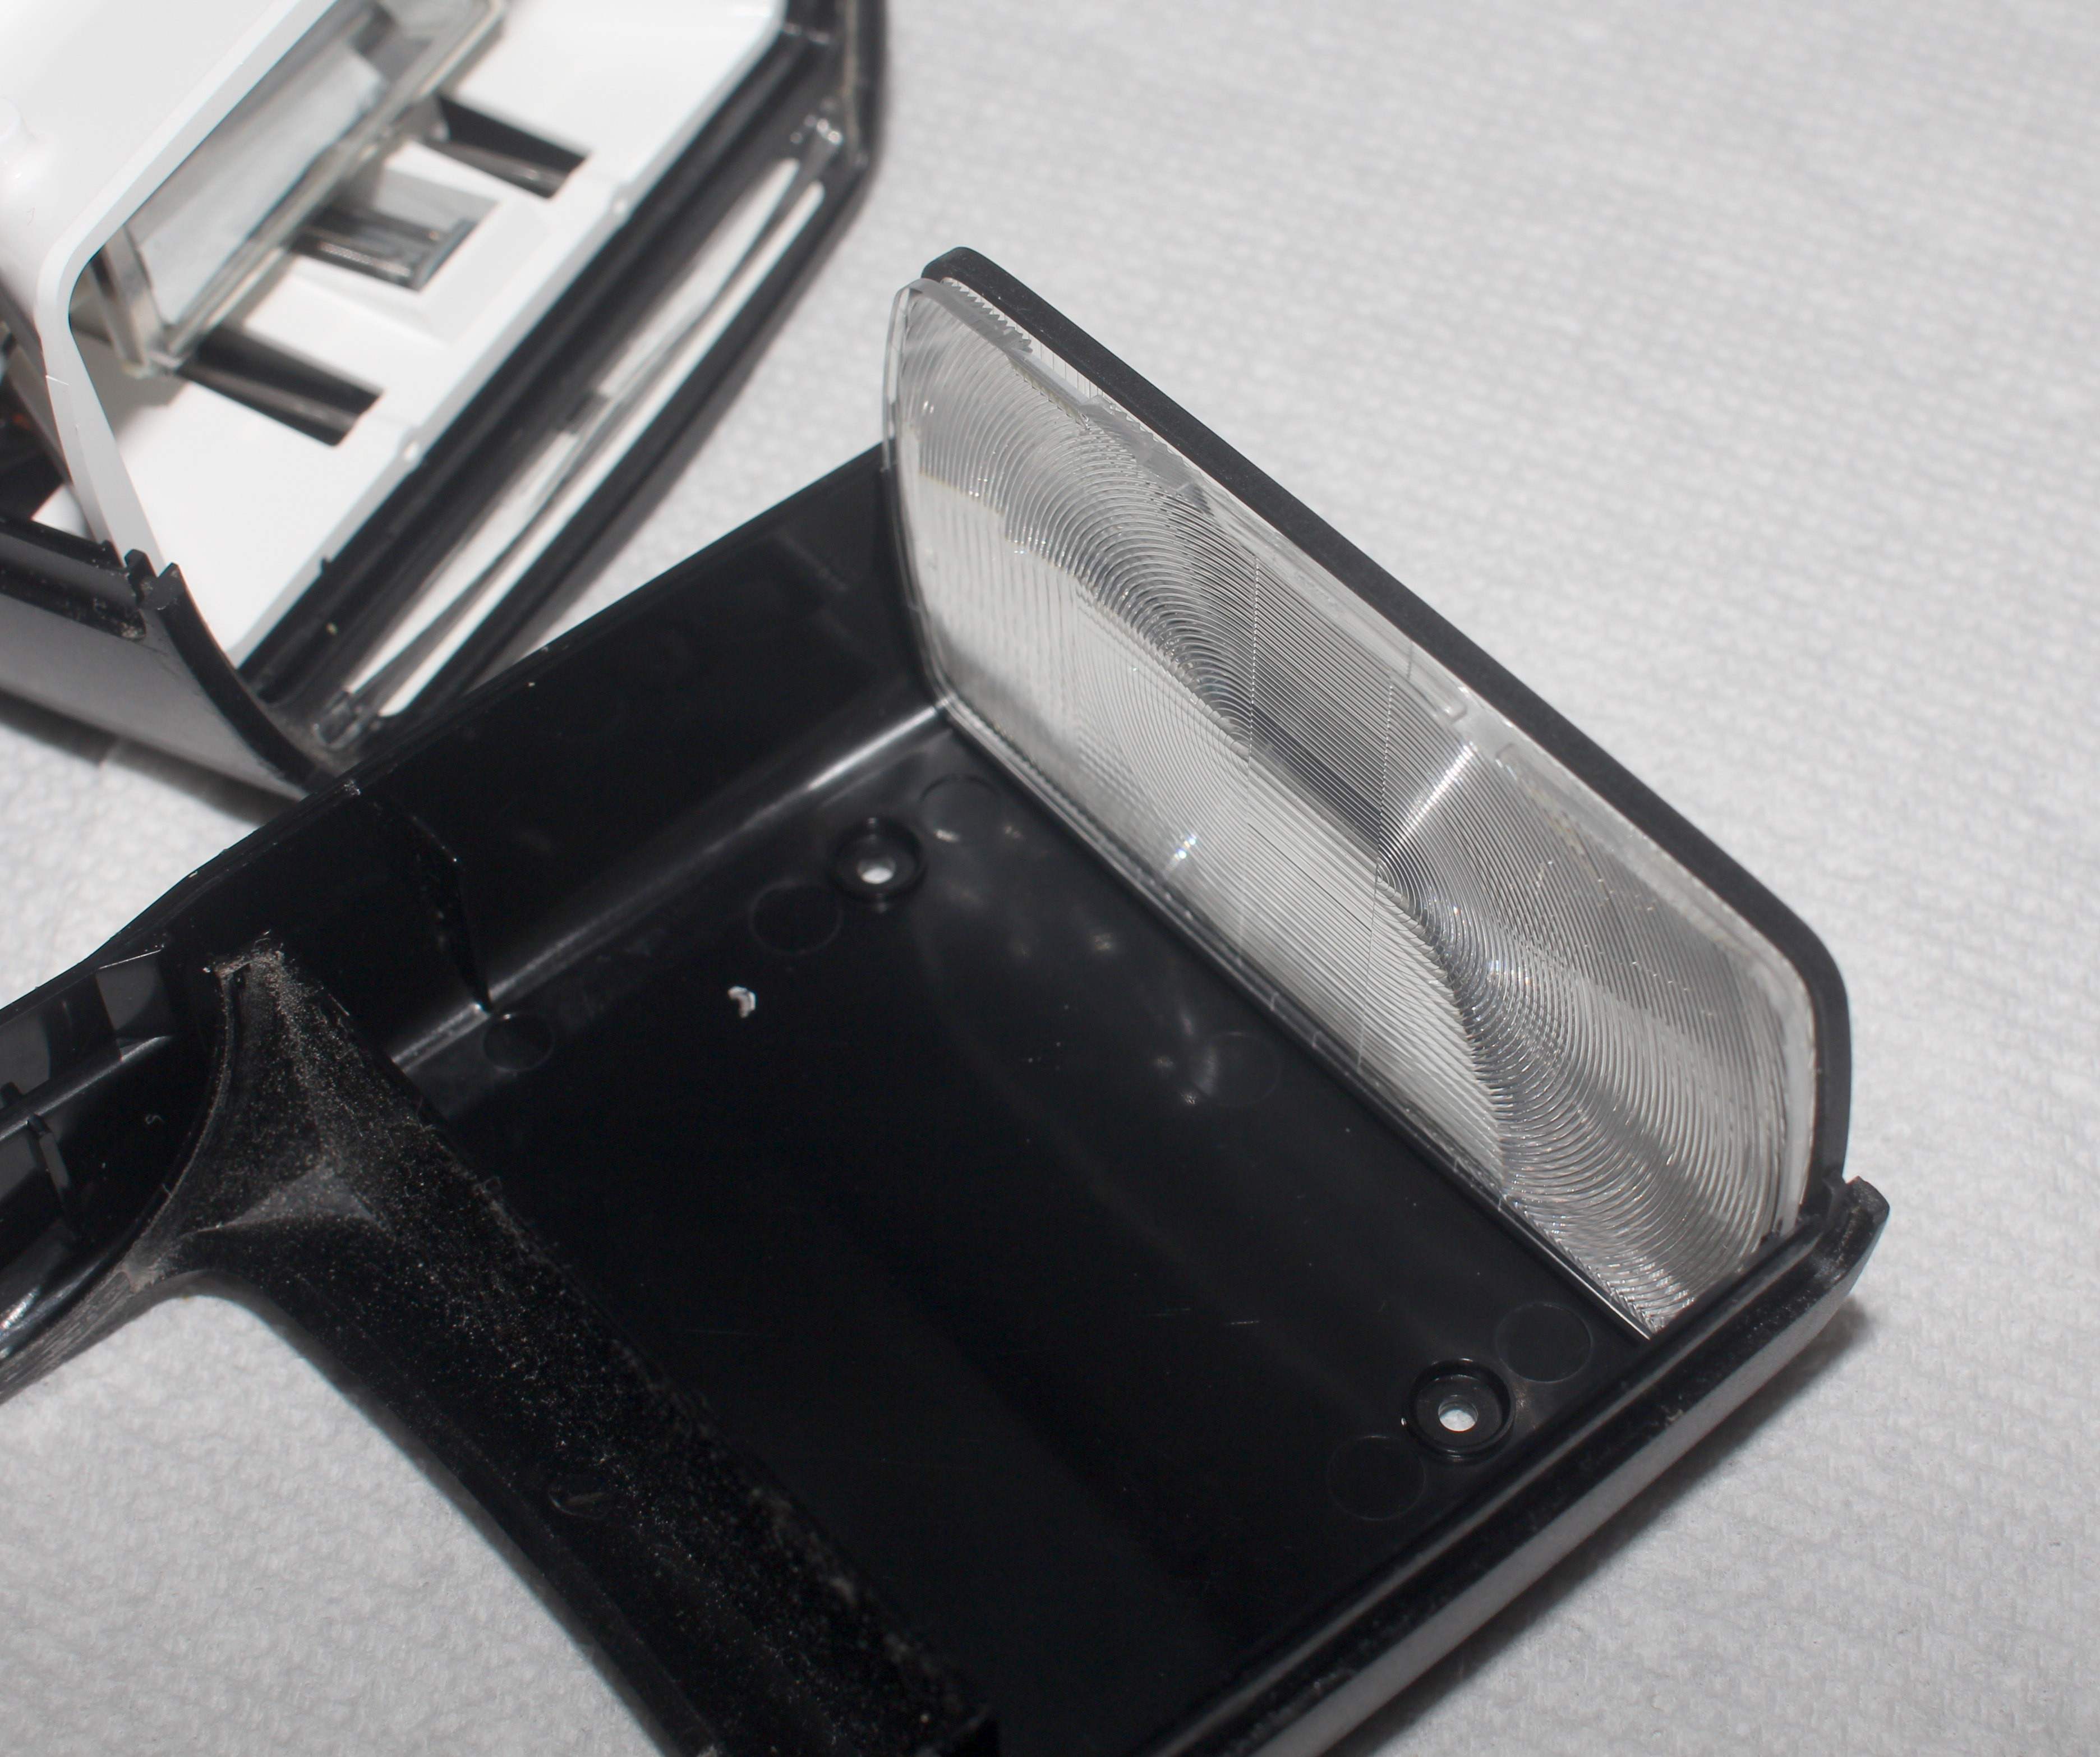
![]()
The lenses only go on 1 way.
![]()
Reassembling the 4 wires showed how the 580 EX II wasn't designed at all for manufacturability. They wanted the best possible flash, no matter how expensive it was.
![]()
Then, the deed was done, showing what a luxurious flash it was compared to a cheap flash from 40 years ago.![]()
-
Tracking 2 people
05/28/2020 at 07:11 • 0 comments
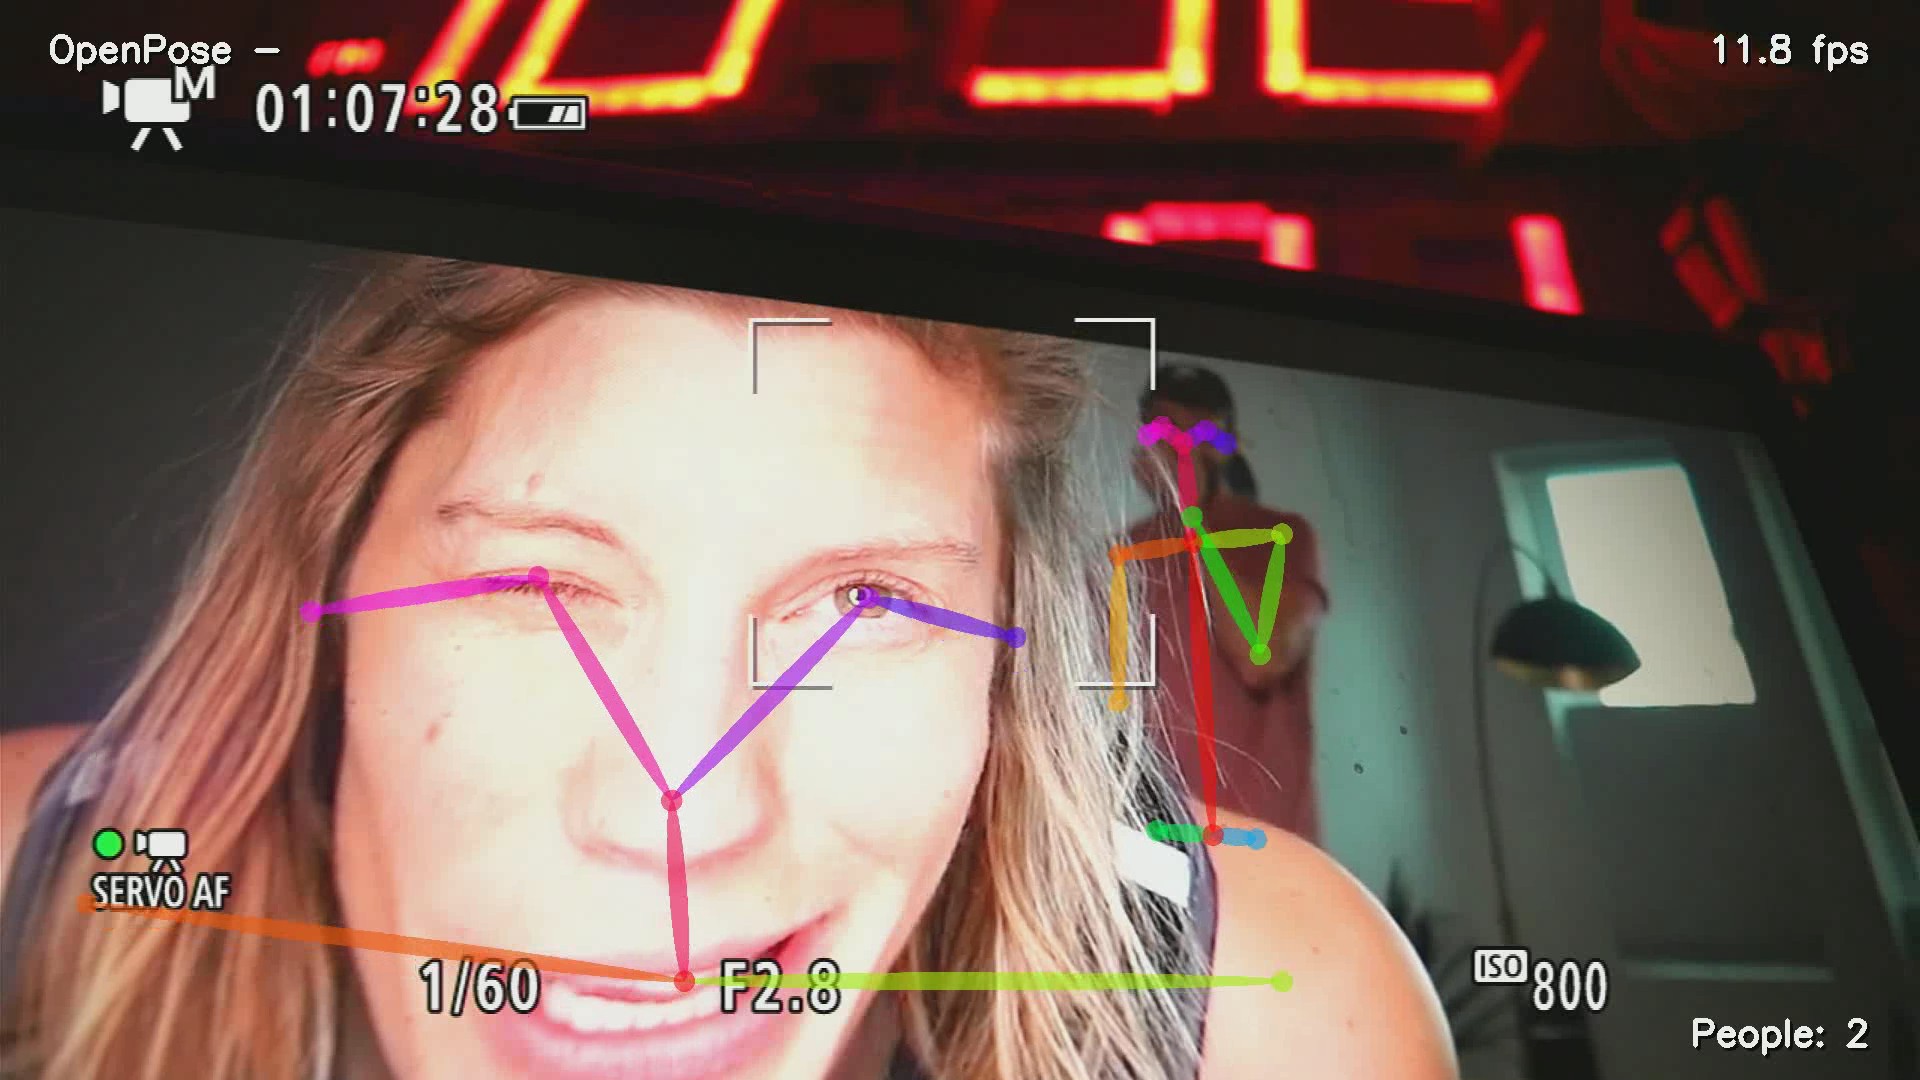
This was some rare footage of 2 people doing random, intimate movements from a stationary camera. Showing it on a large monitor & having the camera track the monitor might be good enough to test 2 people.Automated tracking cam with 2 subjects was a disaster. Most often, 1 animal covered part of the other animal, causing it to put the head in the top of the frame. When they moved fast, they caused a sympathetic oscillation. Setting up the test was quite involved.
![]()
Eventually, the corner cases whittled down.
![]()
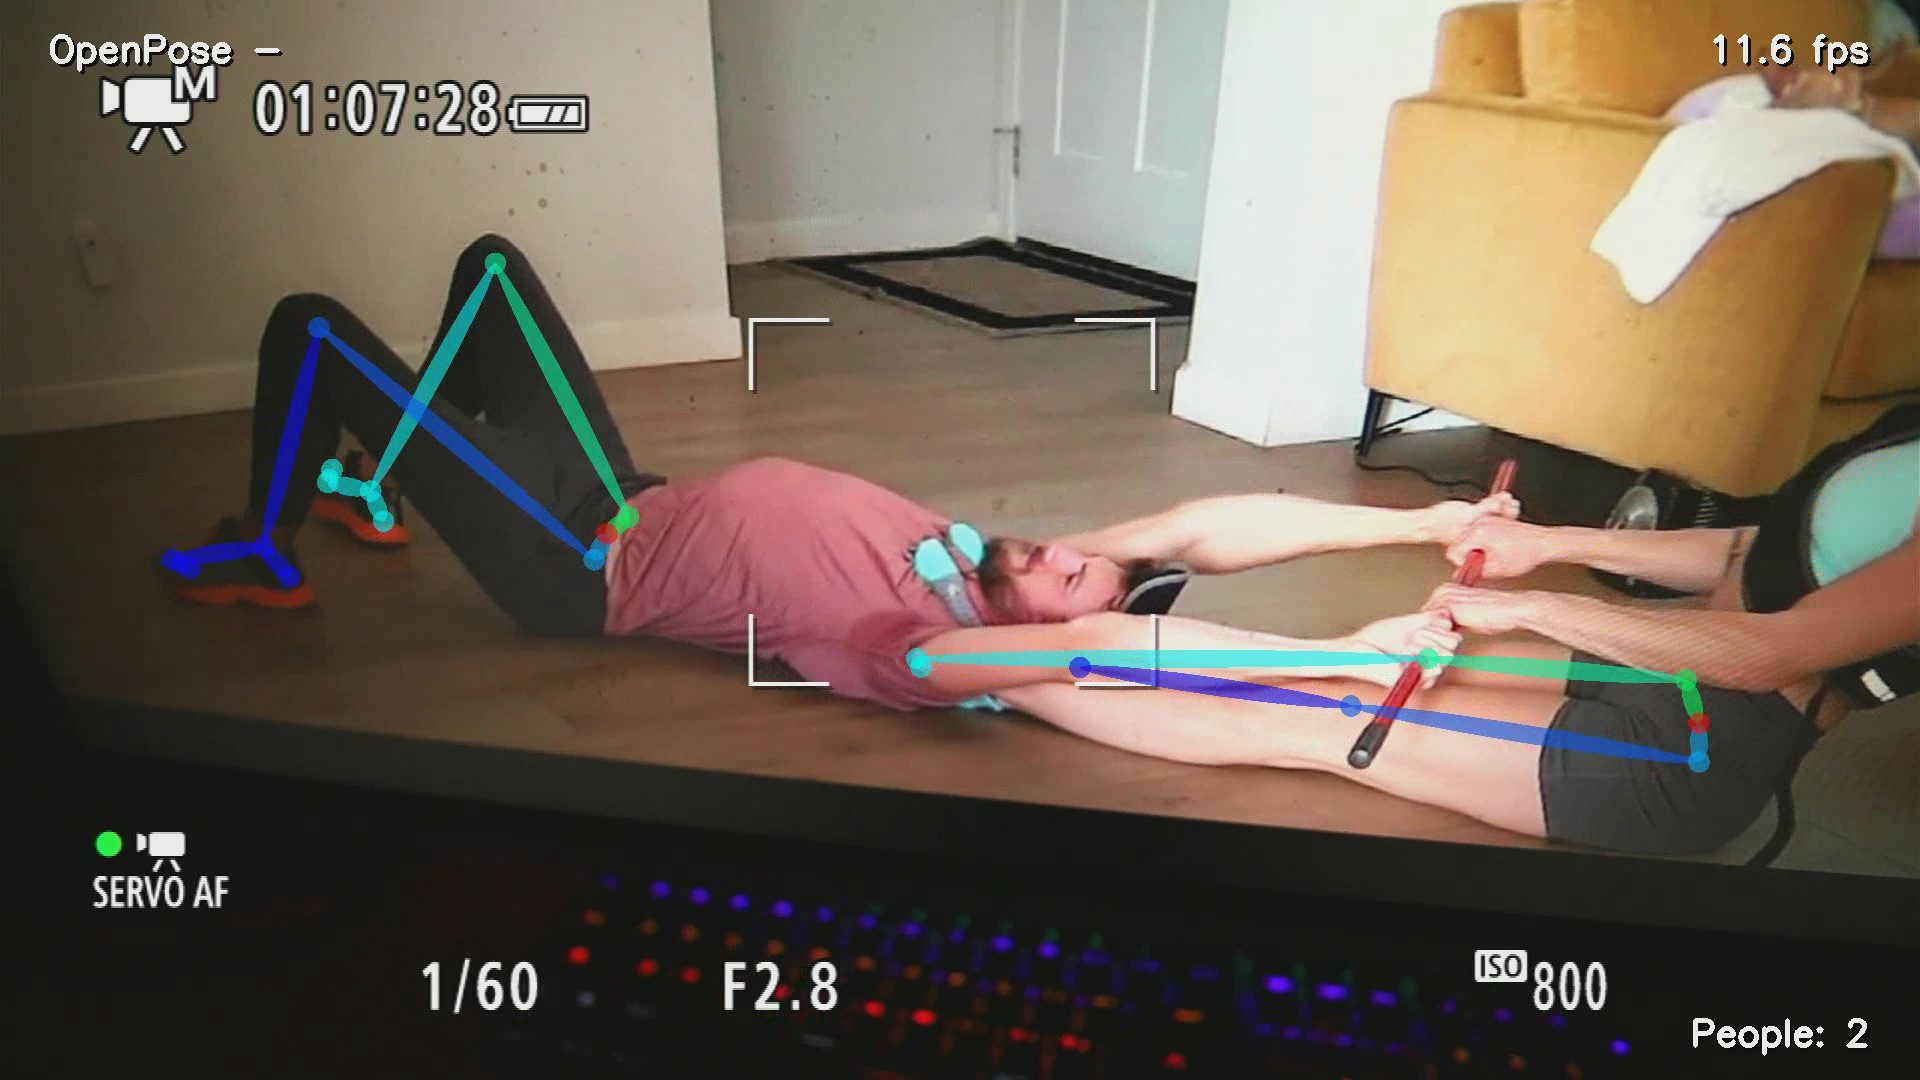
Openpose lost tracking when they were horizontal, but it didn't know to look to the right for the missing head either.
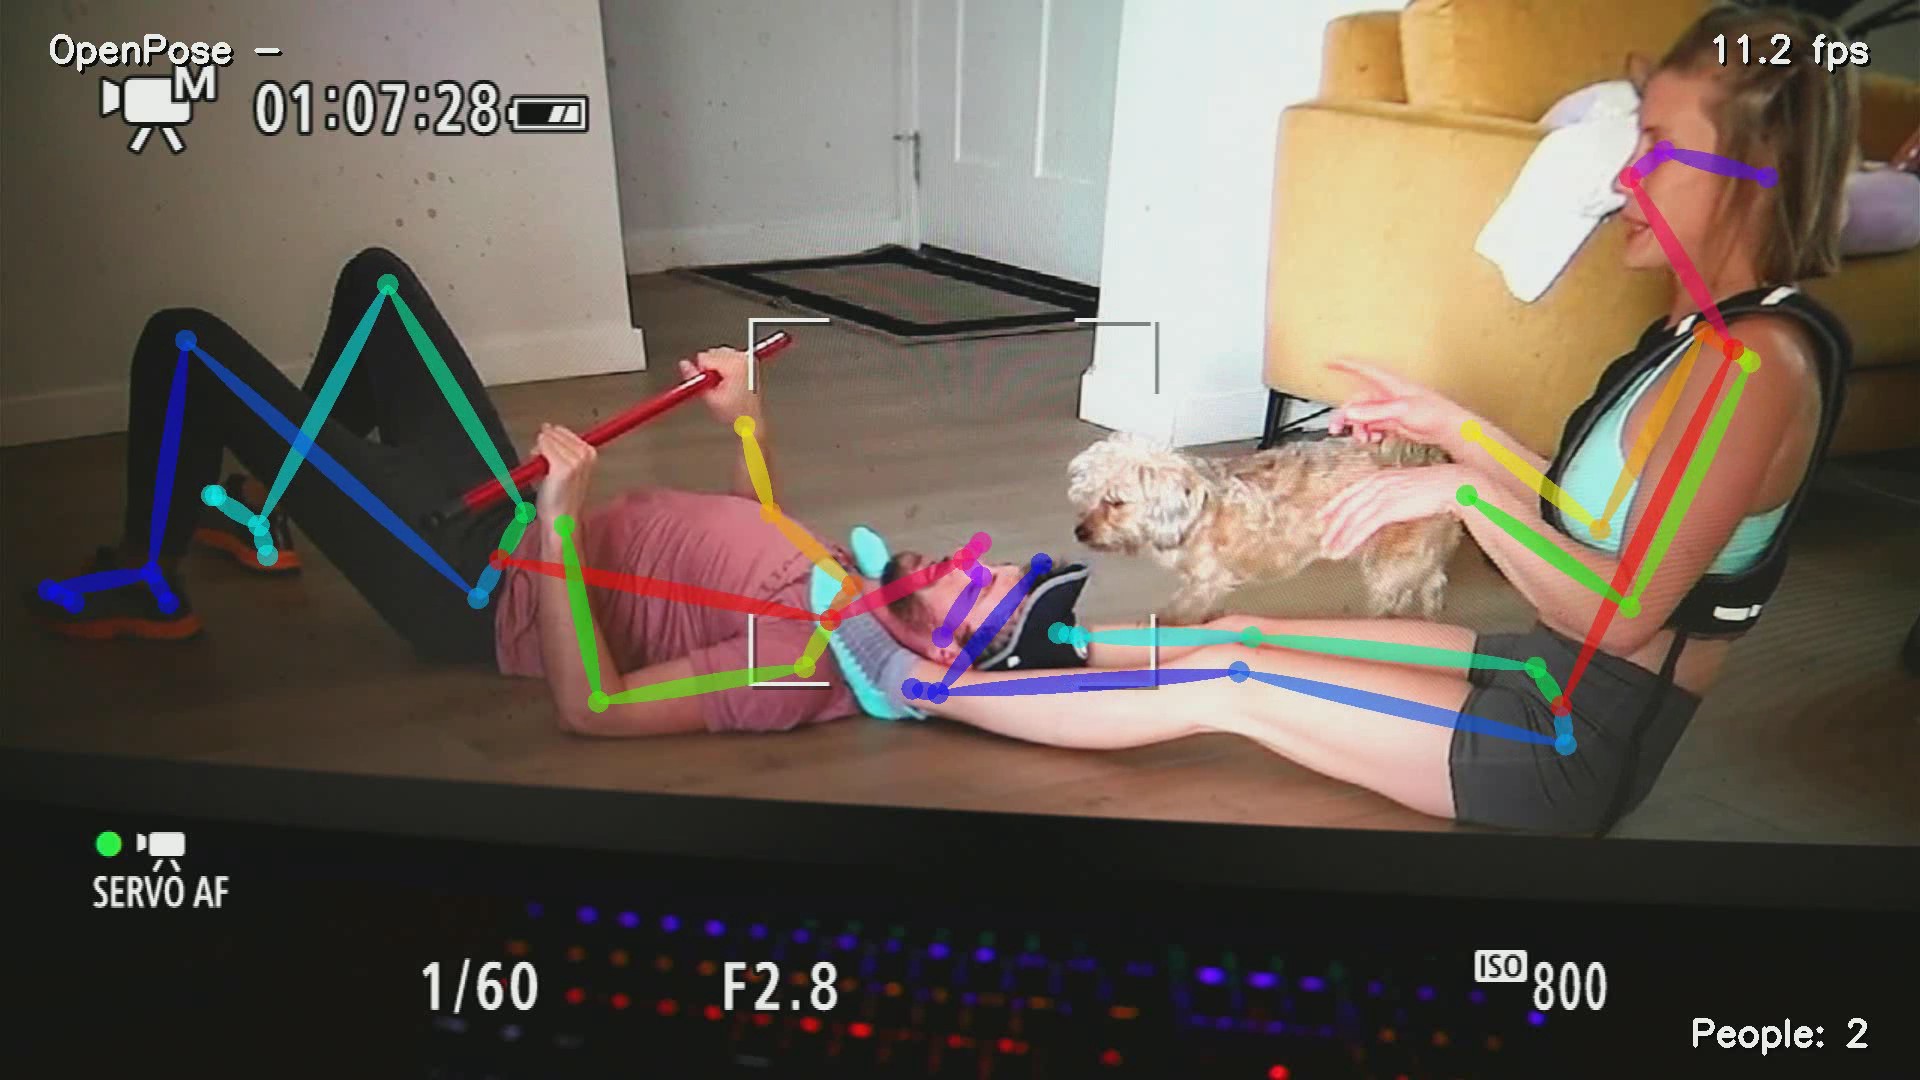
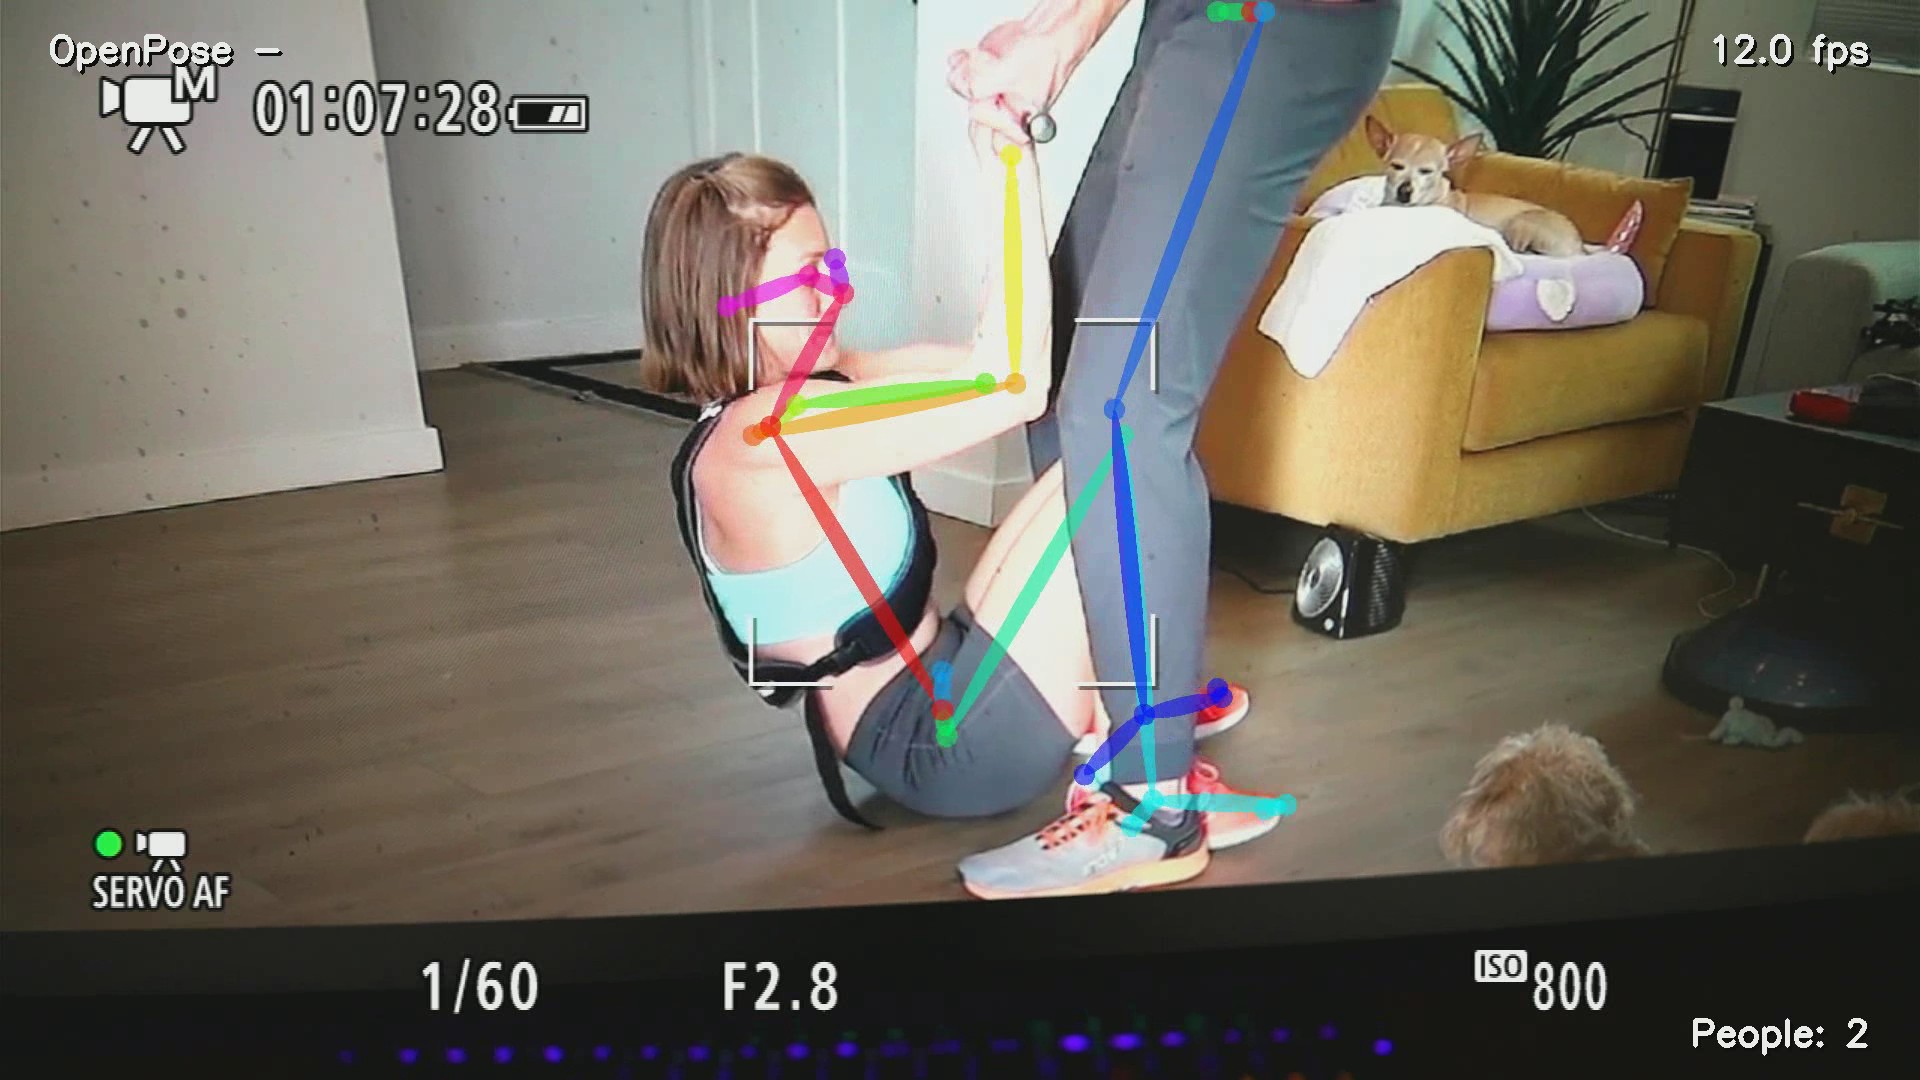
![]() When both were visible, it tended to look down. This may be from the lack of tracking the head outline.
When both were visible, it tended to look down. This may be from the lack of tracking the head outline.![]()
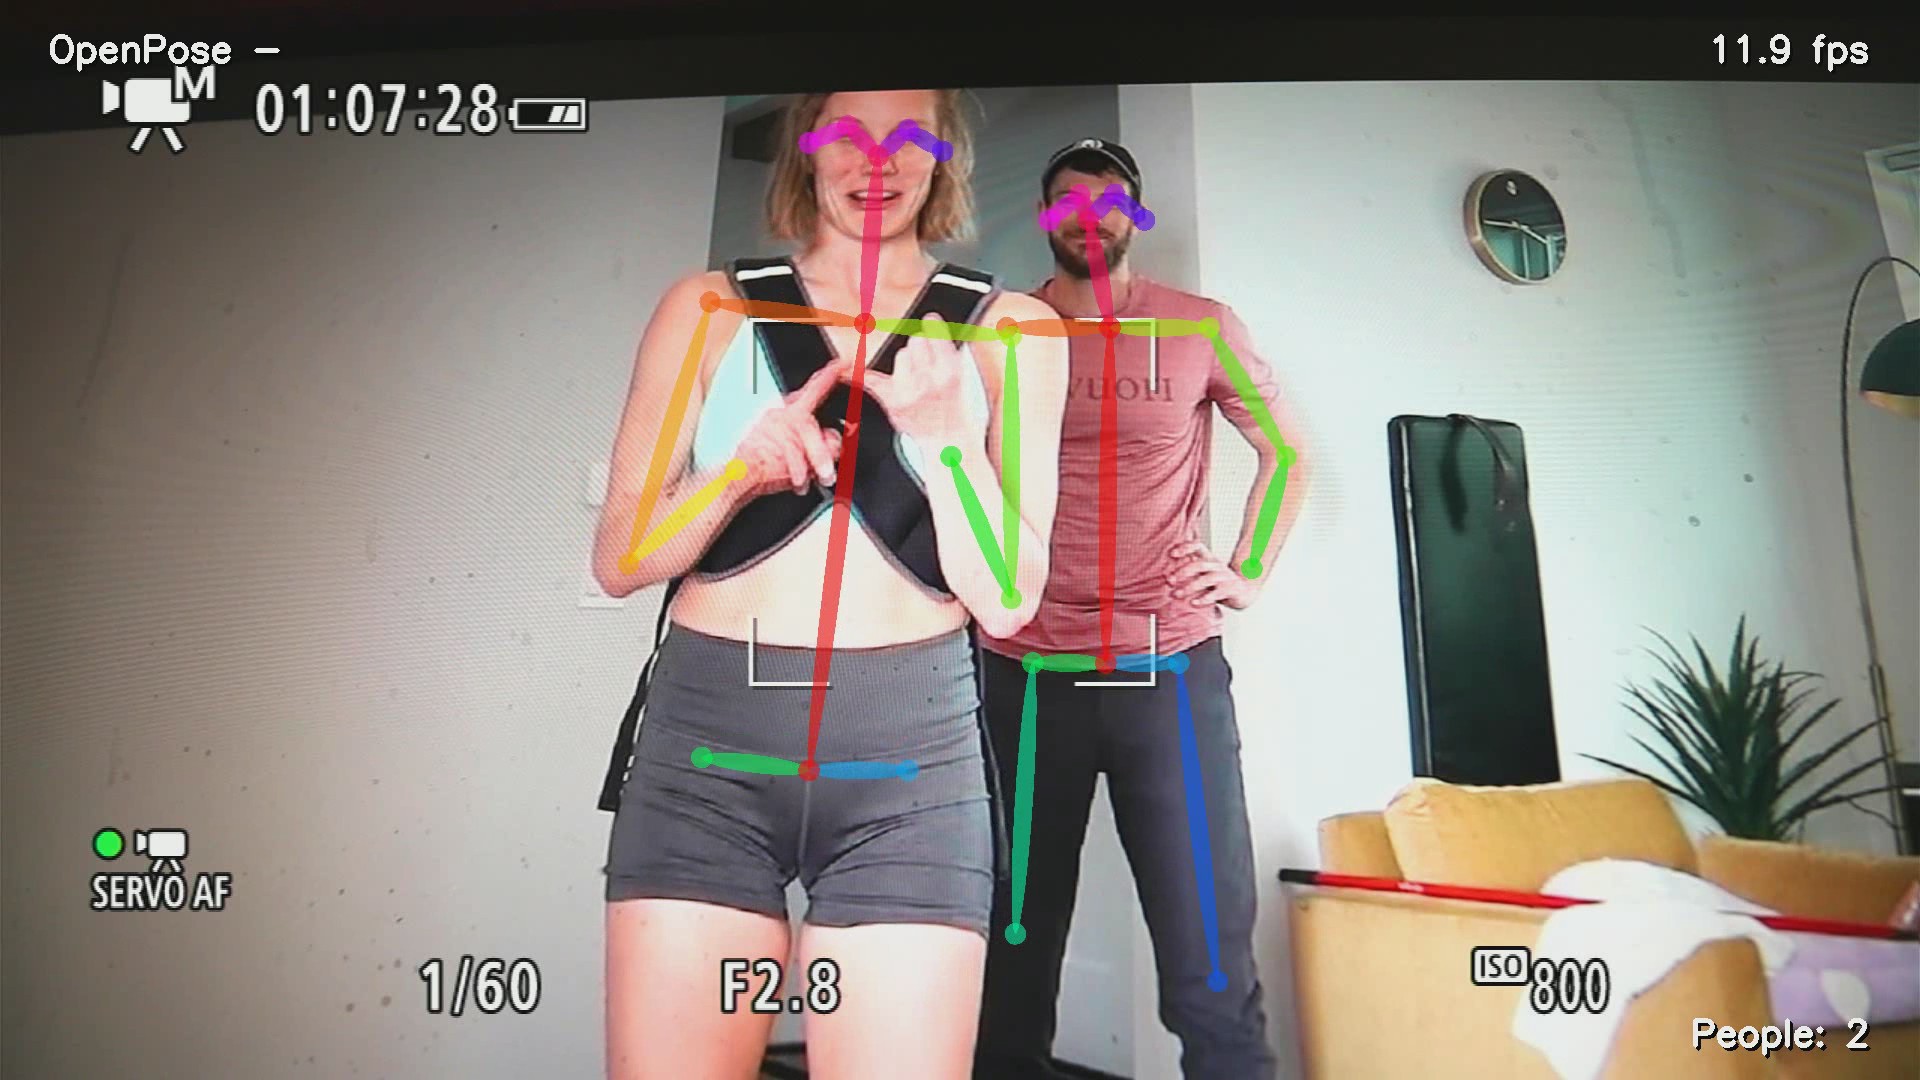
![]() When both were standing up but too different in height to fit in the frame, it tracked 1 or the other.
When both were standing up but too different in height to fit in the frame, it tracked 1 or the other.![]()
A tough composition with partially visible bodies & 1 head much closer than the other made it place the smaller head where the bigger head was supposed to appear & place the bigger head at the bottom.
![]()
Another tough one with 2 partially visible bodies.
![]()
When both were standing & close in height, it tracked well. Since it tracks heads, the key is to keep the heads close in height. The trick is no matter how bad the tracking was, it never permanently lost the subjects.
-
Hacking a flash battery pack to use a lipo
05/25/2020 at 22:52 • 0 commentsThe flash needs to be externally mounted to keep the tracking mount as light as possible. Also, in a high pressure photo shoot, the flash should be powered externally. After Ken Rockwell extolled his frustrations with battery powered flashes https://www.kenrockwell.com/tech/strobes.htm, it behooved the lion kingdom to give the 580 EX II an extra boost.
The lion kingdom invested in a cheap JJC battery pack, for just the cost of a boost converter & a cable, only to find the JJC's are sold with 1 connector type for 1 camera. The goog reported the cables can't be bought separately.https://www.amazon.com/JJC-BP-CA1-External-600EX-RT-YN600EX-RT/dp/B01GUNLQLW
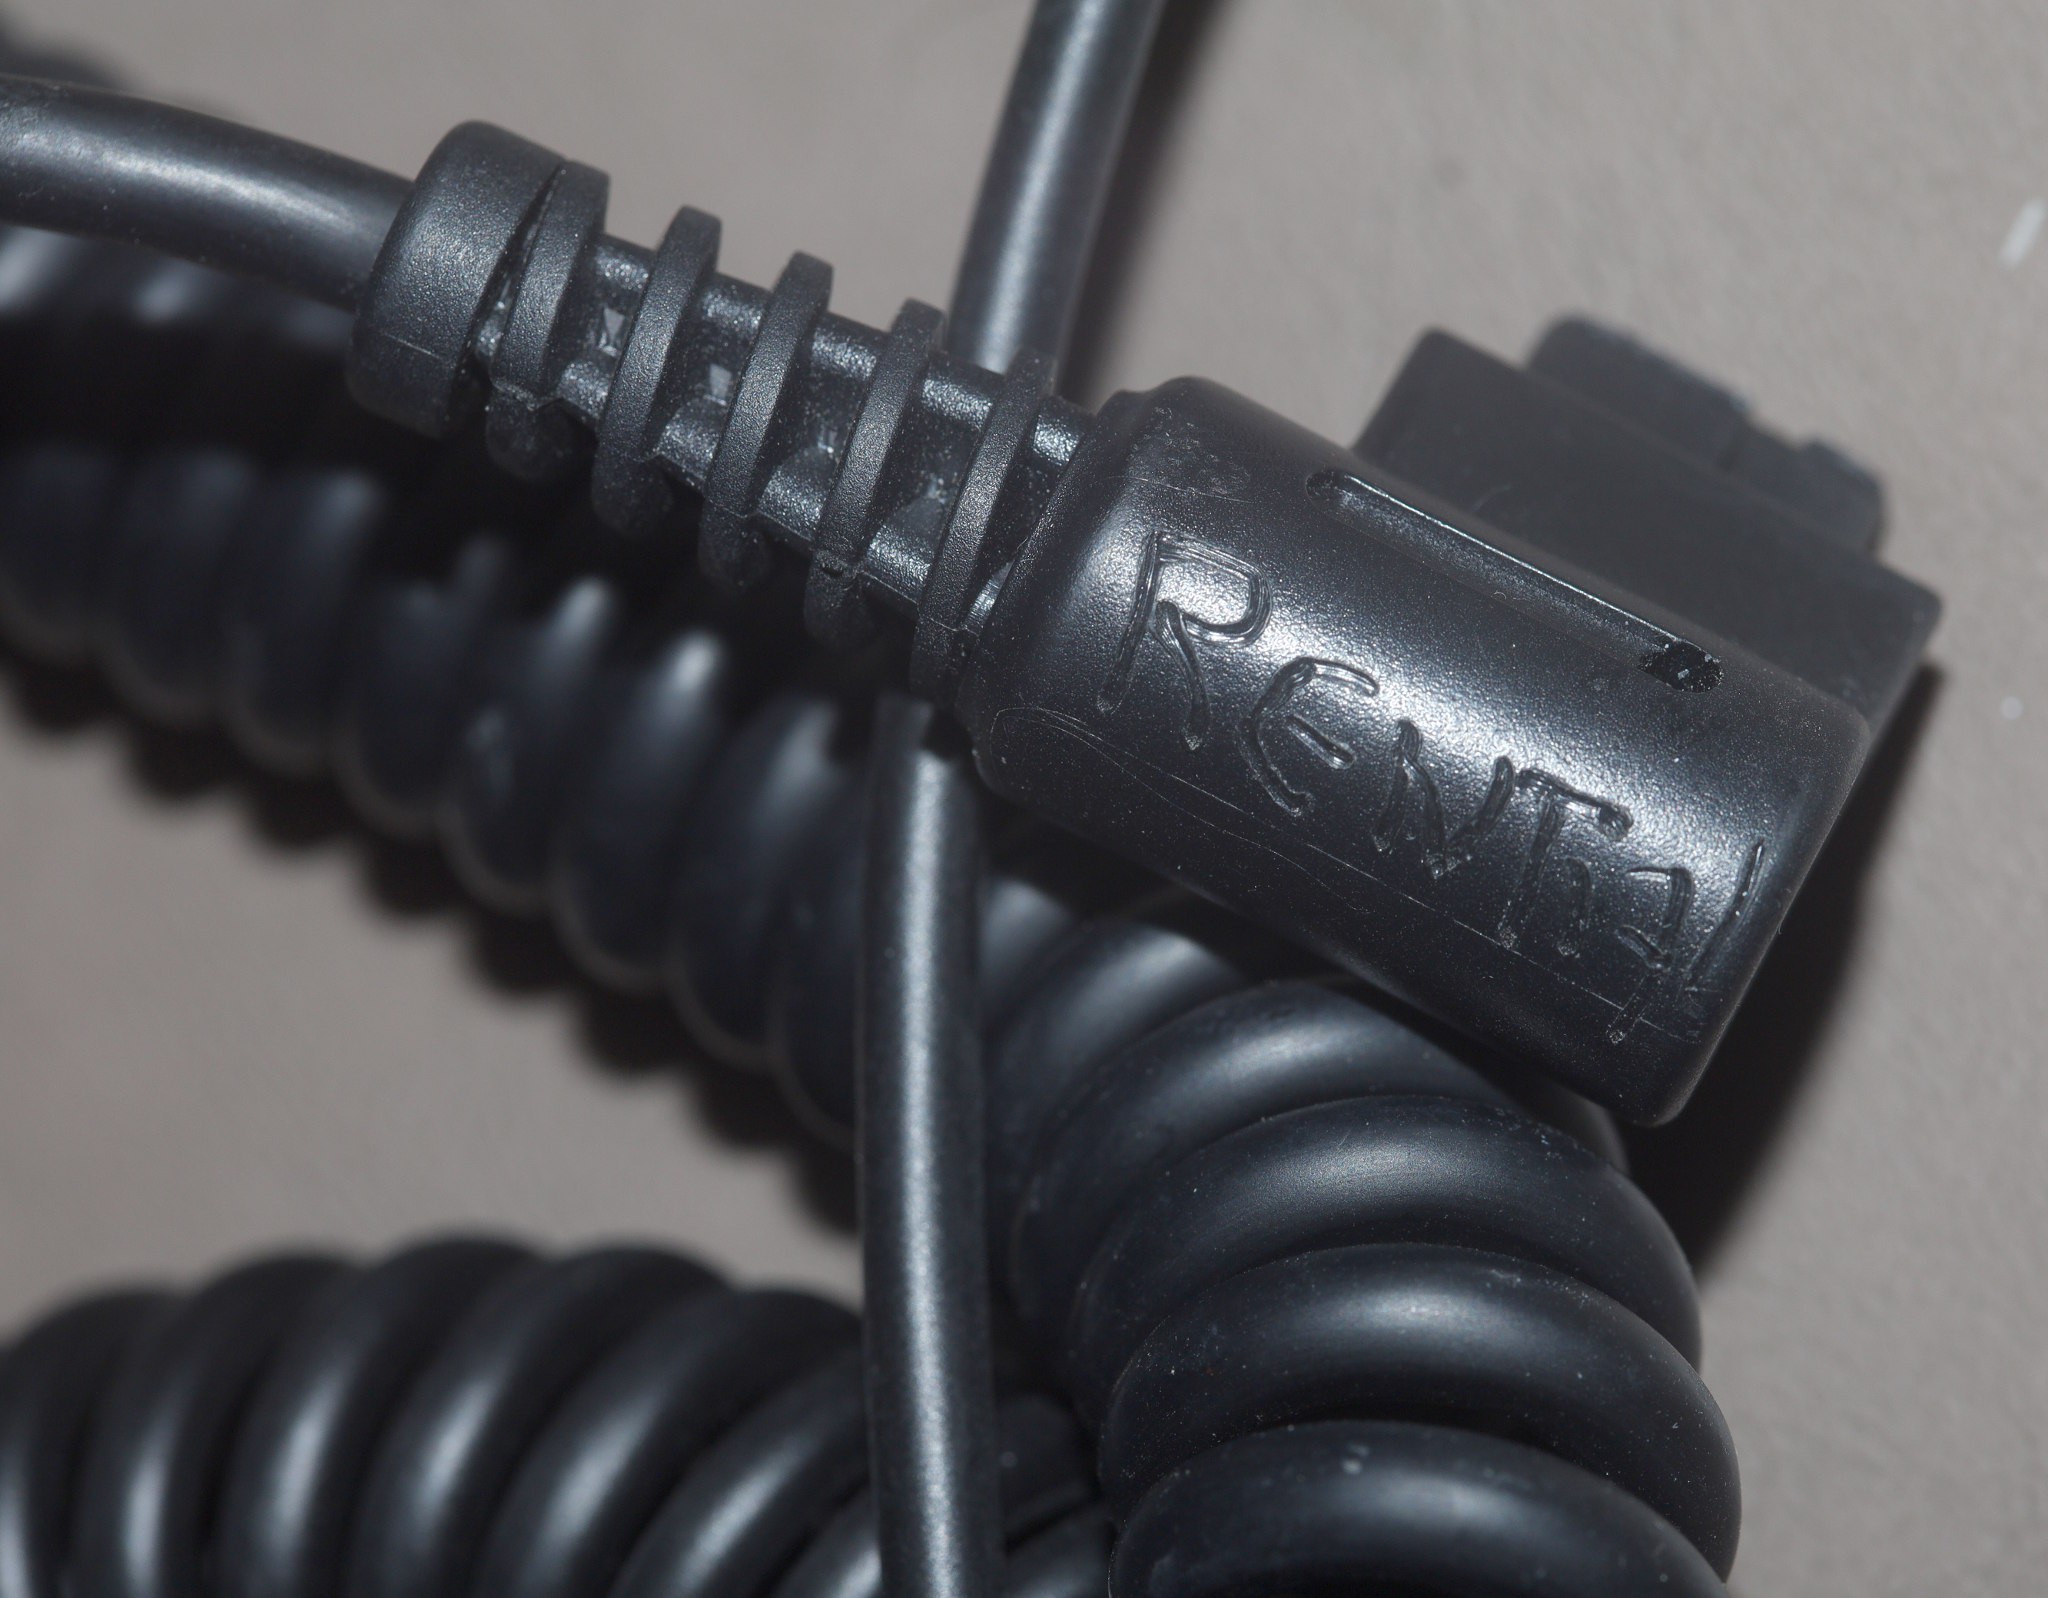
So in its haste, the lion kingdom spent $18 on used a cable from fleebay which ended up broken.
![]()
![]()
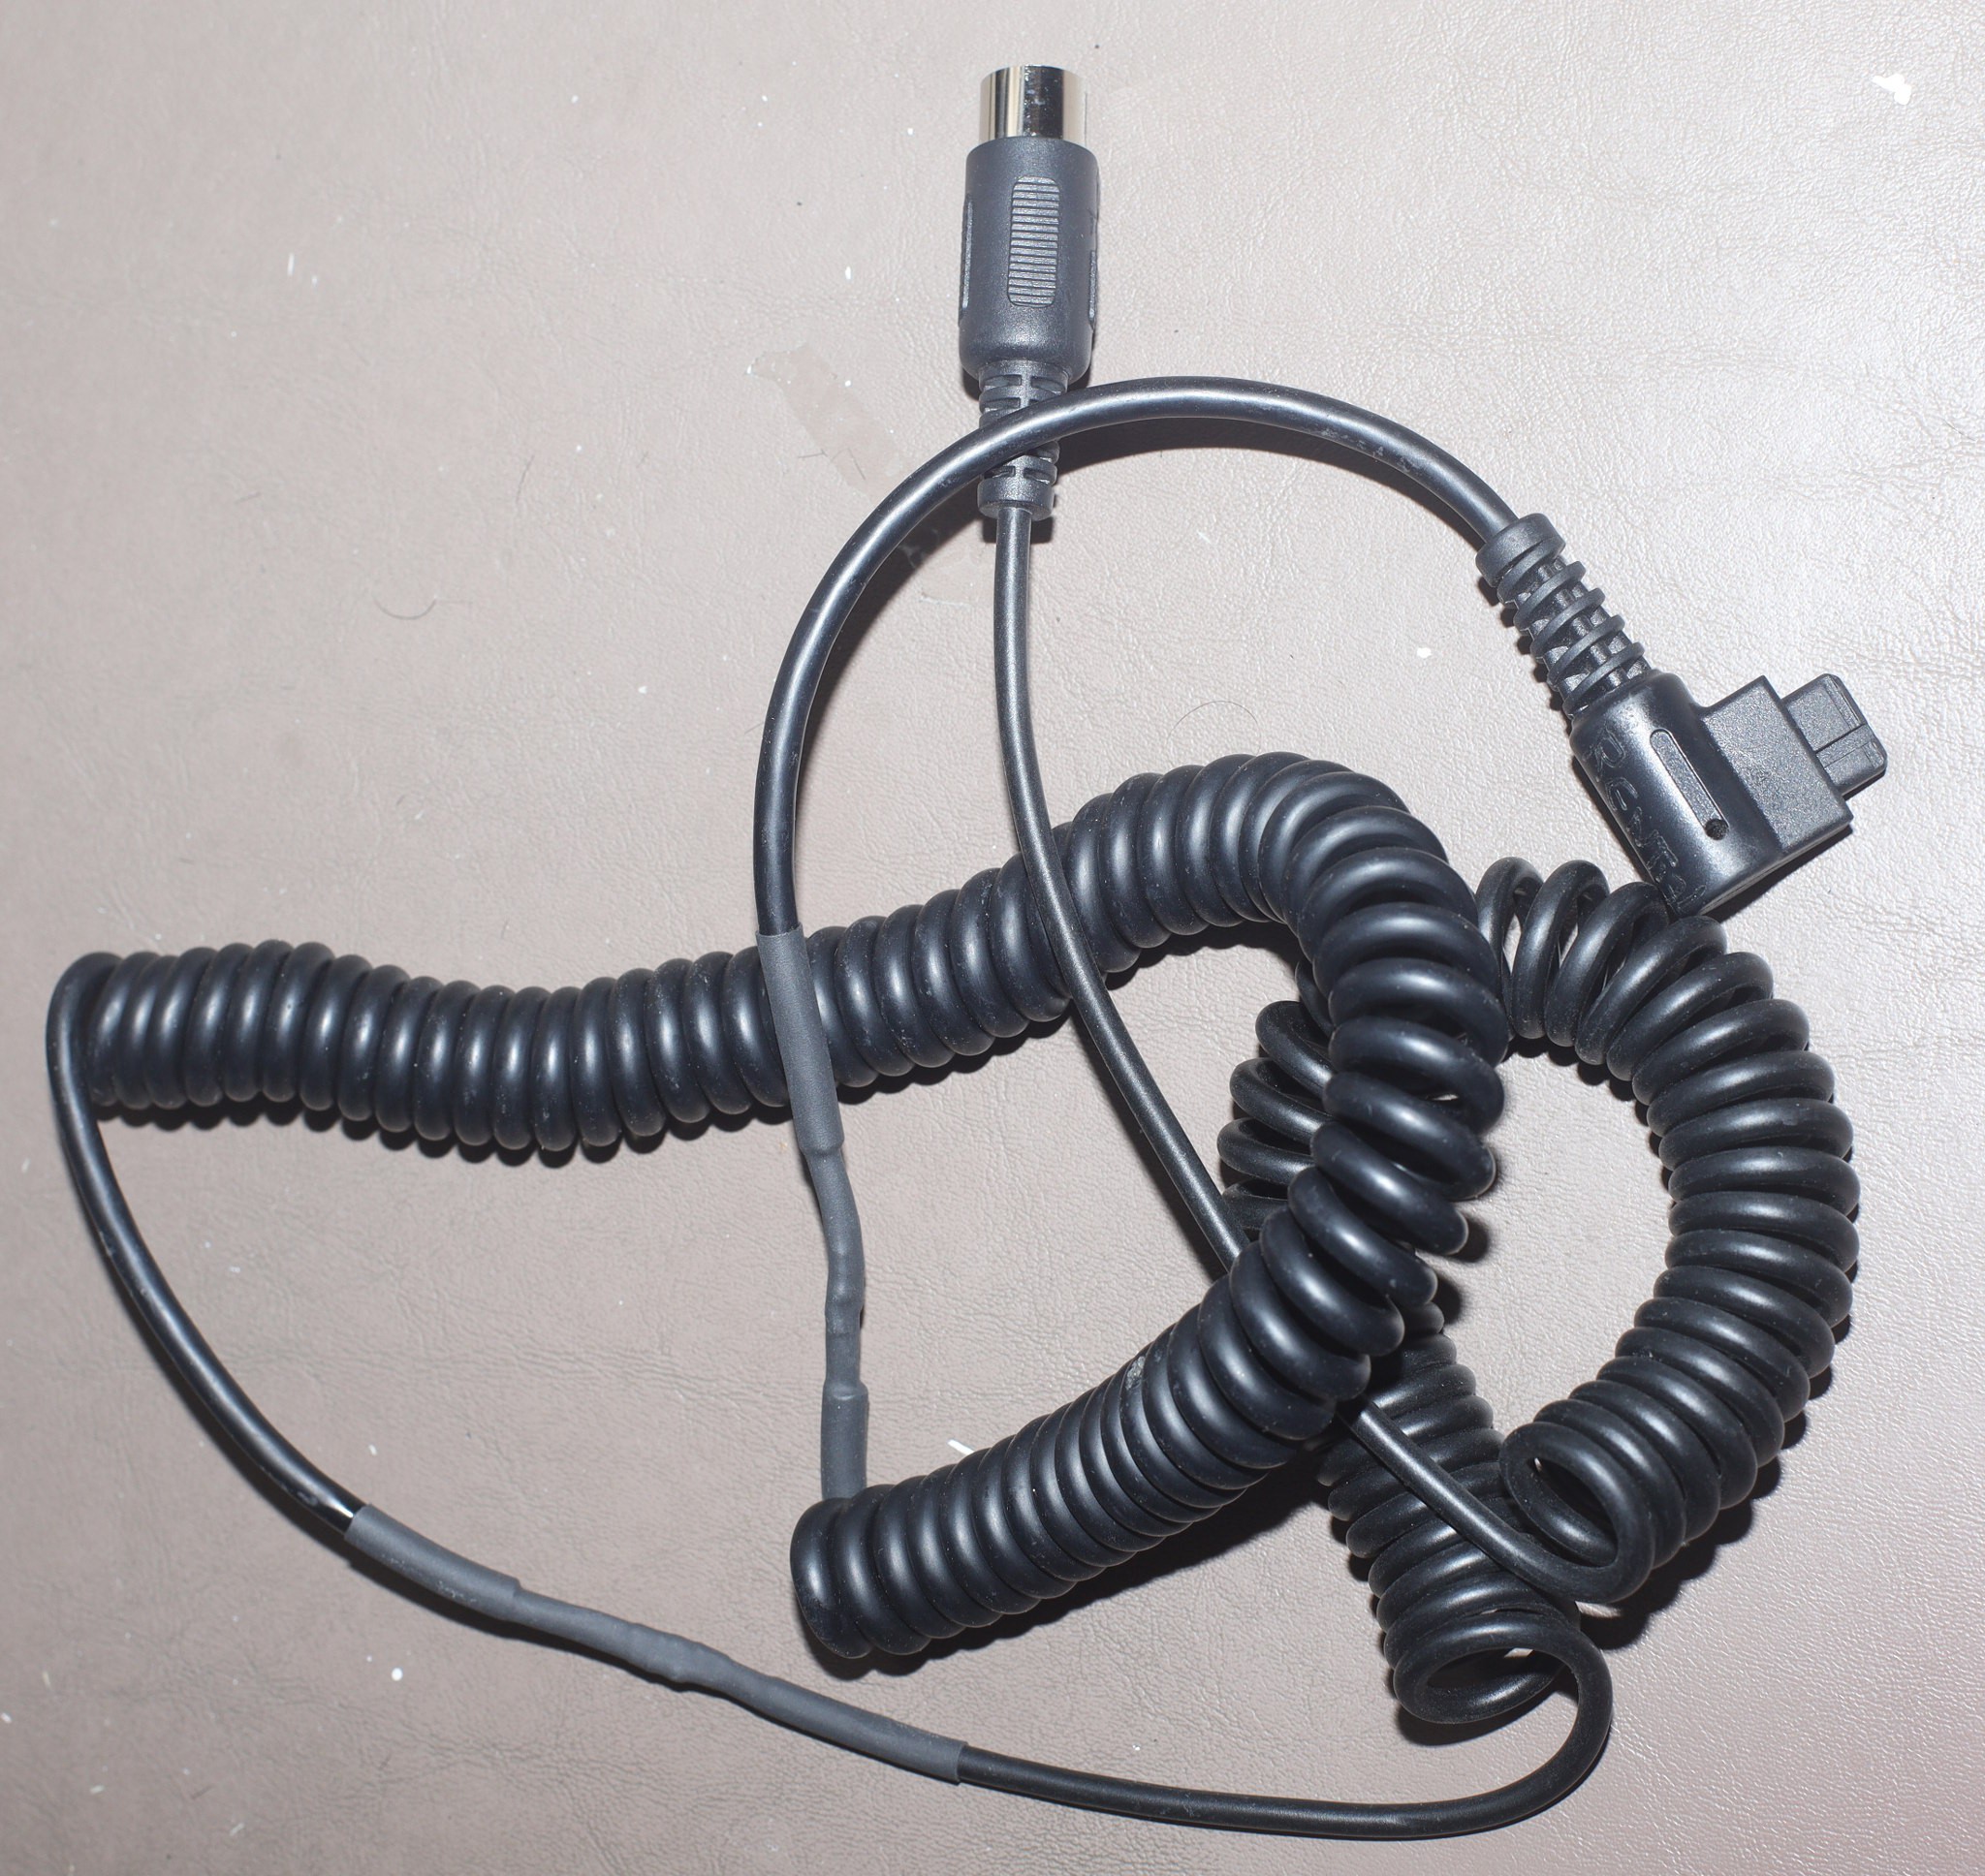
In the meantime, the goog updated its search results 5 days later to yield a brand new $12 cable.
https://www.amazon.com/Connecting-Replacement-JJC-Recycling-YN600EX-RT/dp/B01G8PMZ12
The total cost of the 1 hung lo JJC ended up more than a high end battery pack, not unlike how bang good soldering irons end up costing as much as a JBC with all the accessories. It wasn't the 1st time lions were ripped off by the fact that goog can take 5 days to perform a novel search.
![]()
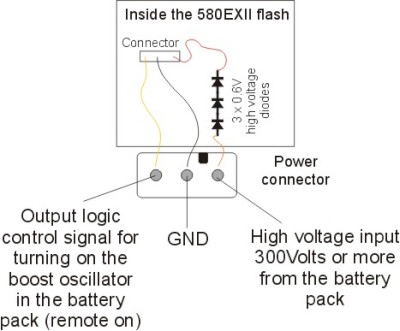
Since 2011, a drawing has circulated around the internet with the 580 EX II pinout, but nothing useful on the voltages. Fortunately, there actually is a servicing manual for the flash.
https://www.manualslib.com/download/379083/Canon-580exii.html
The control signal is 0-5V with 5V being the on signal.
The external battery pack directly feeds the mane capacitor through some diodes. The mane capacitor normally charges to 330V (page 24) but the status LED turns green when it's 213V & red when it's 268V (page 25). The flash MCU resets if the voltage goes above 350V. The external battery pack boosts what the internal charger already does, but doesn't have to completely charge the capacitor.
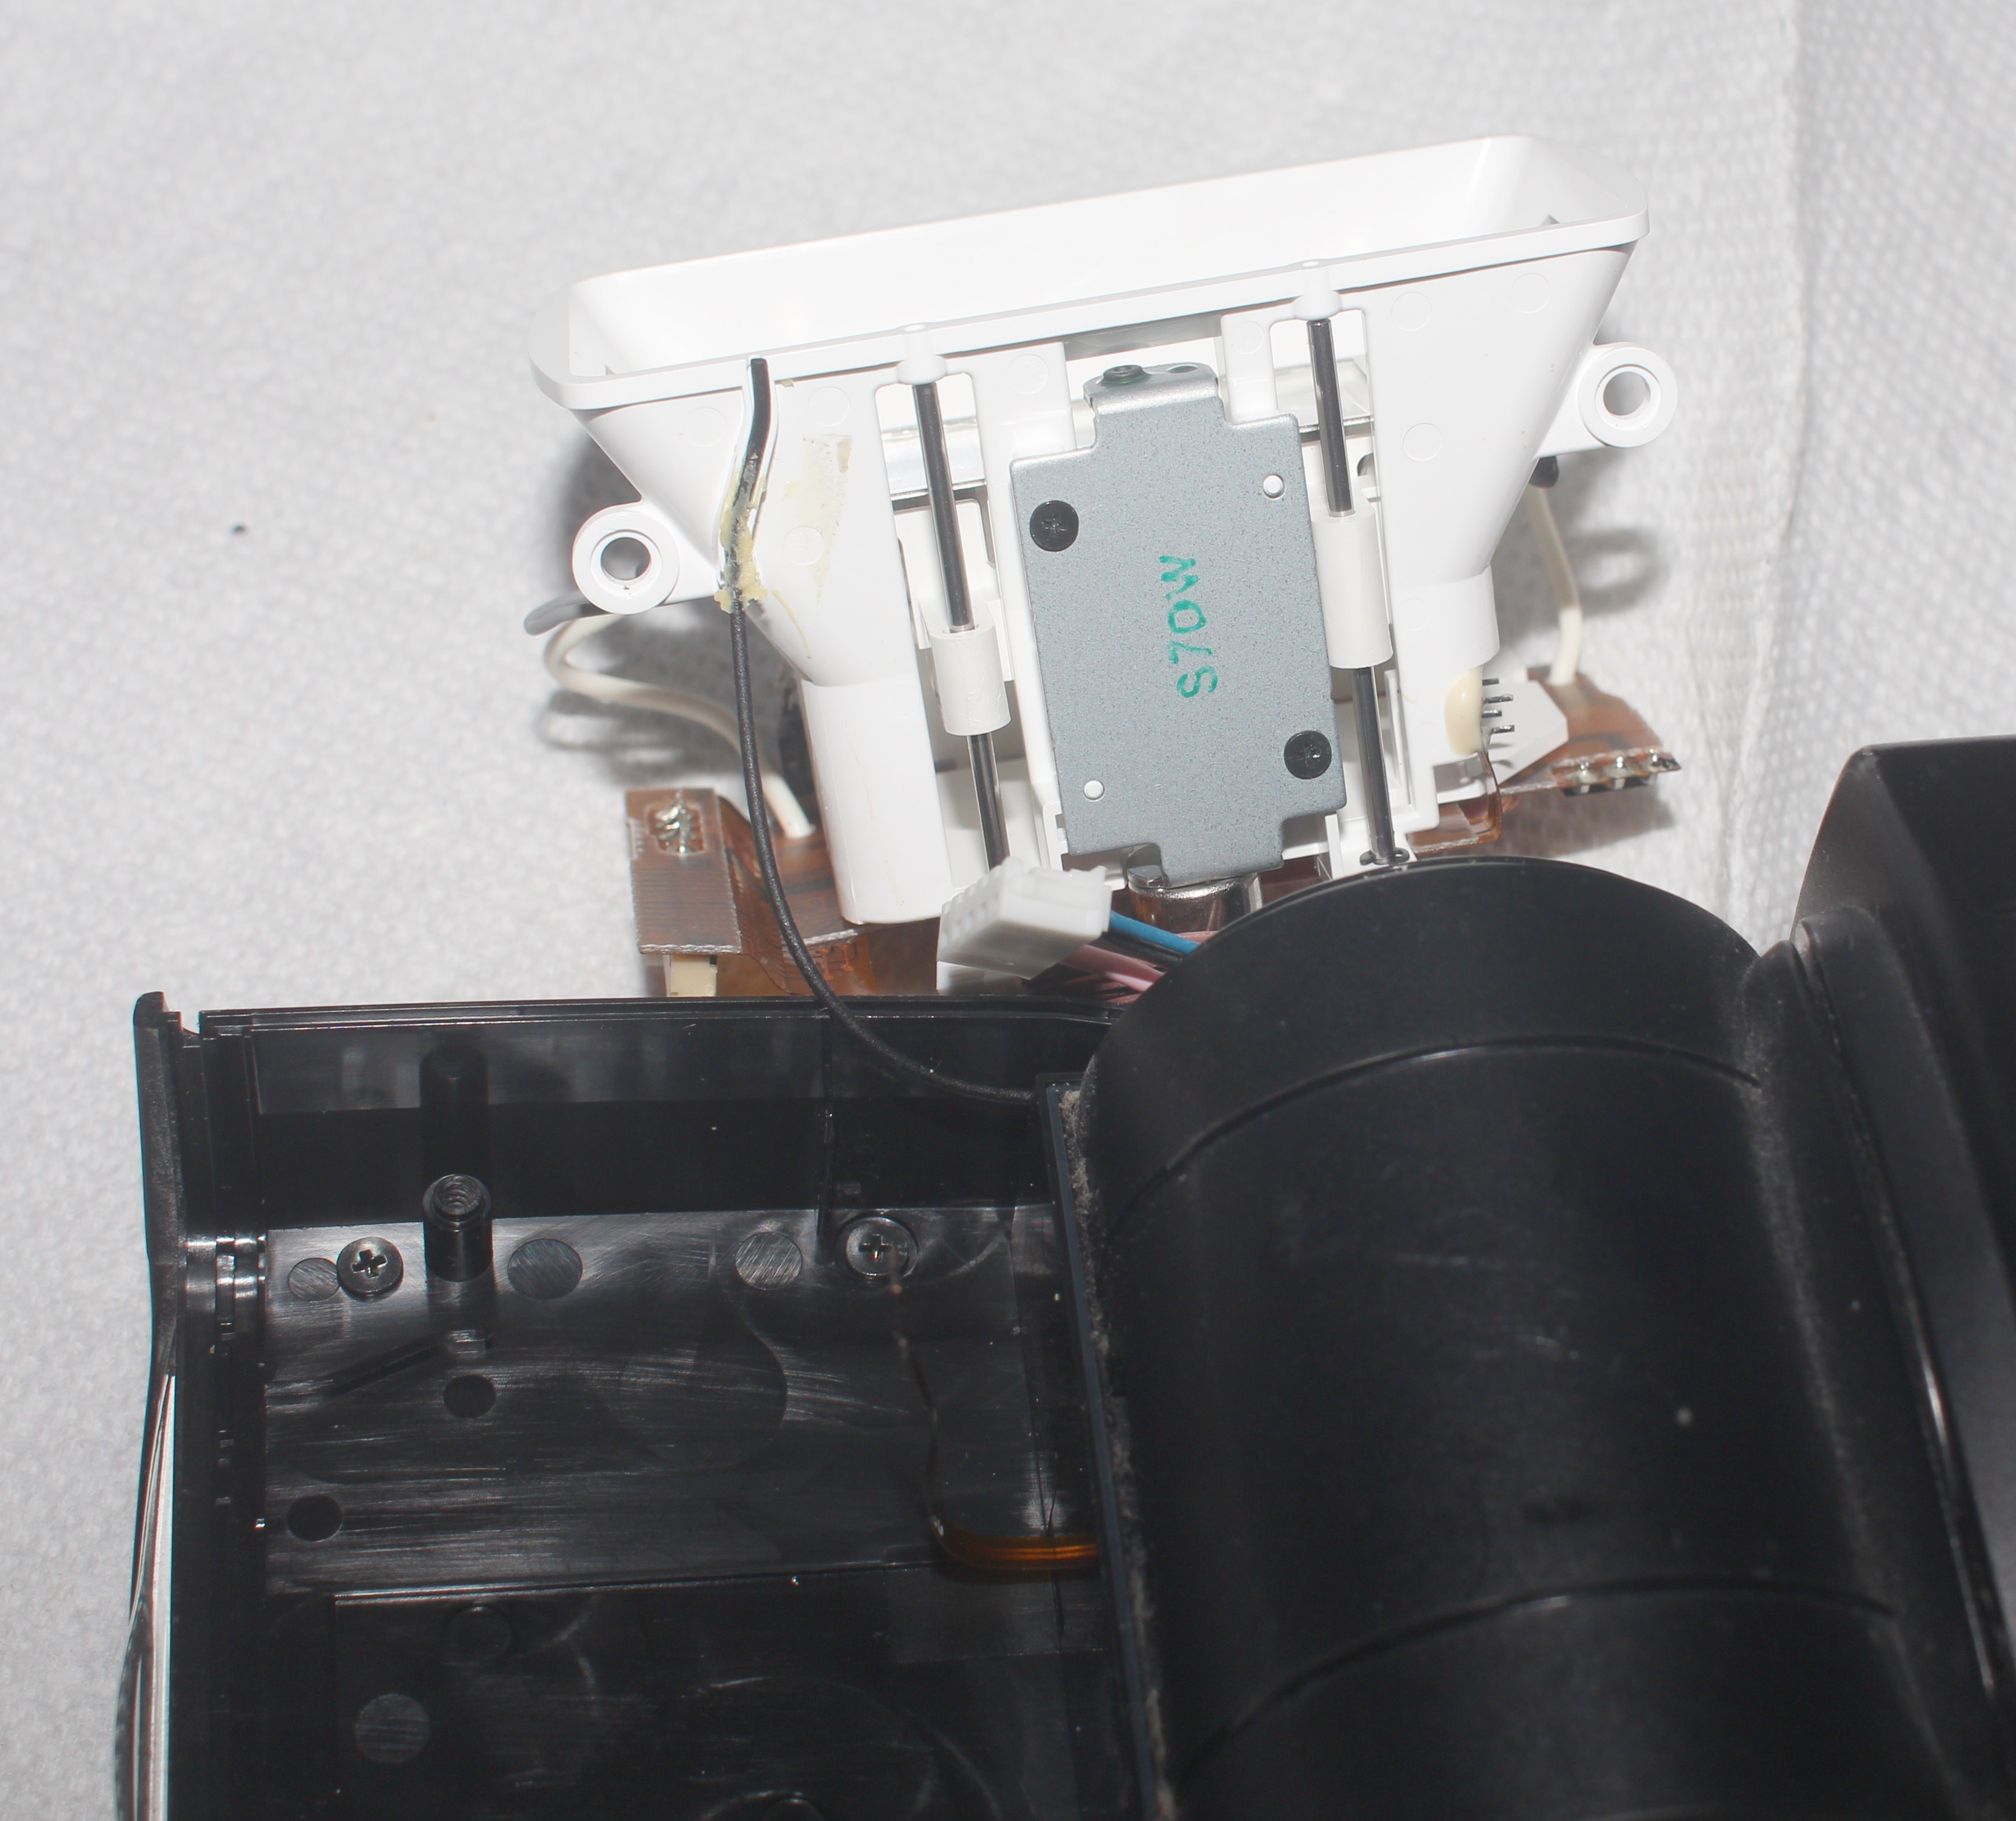
![]()
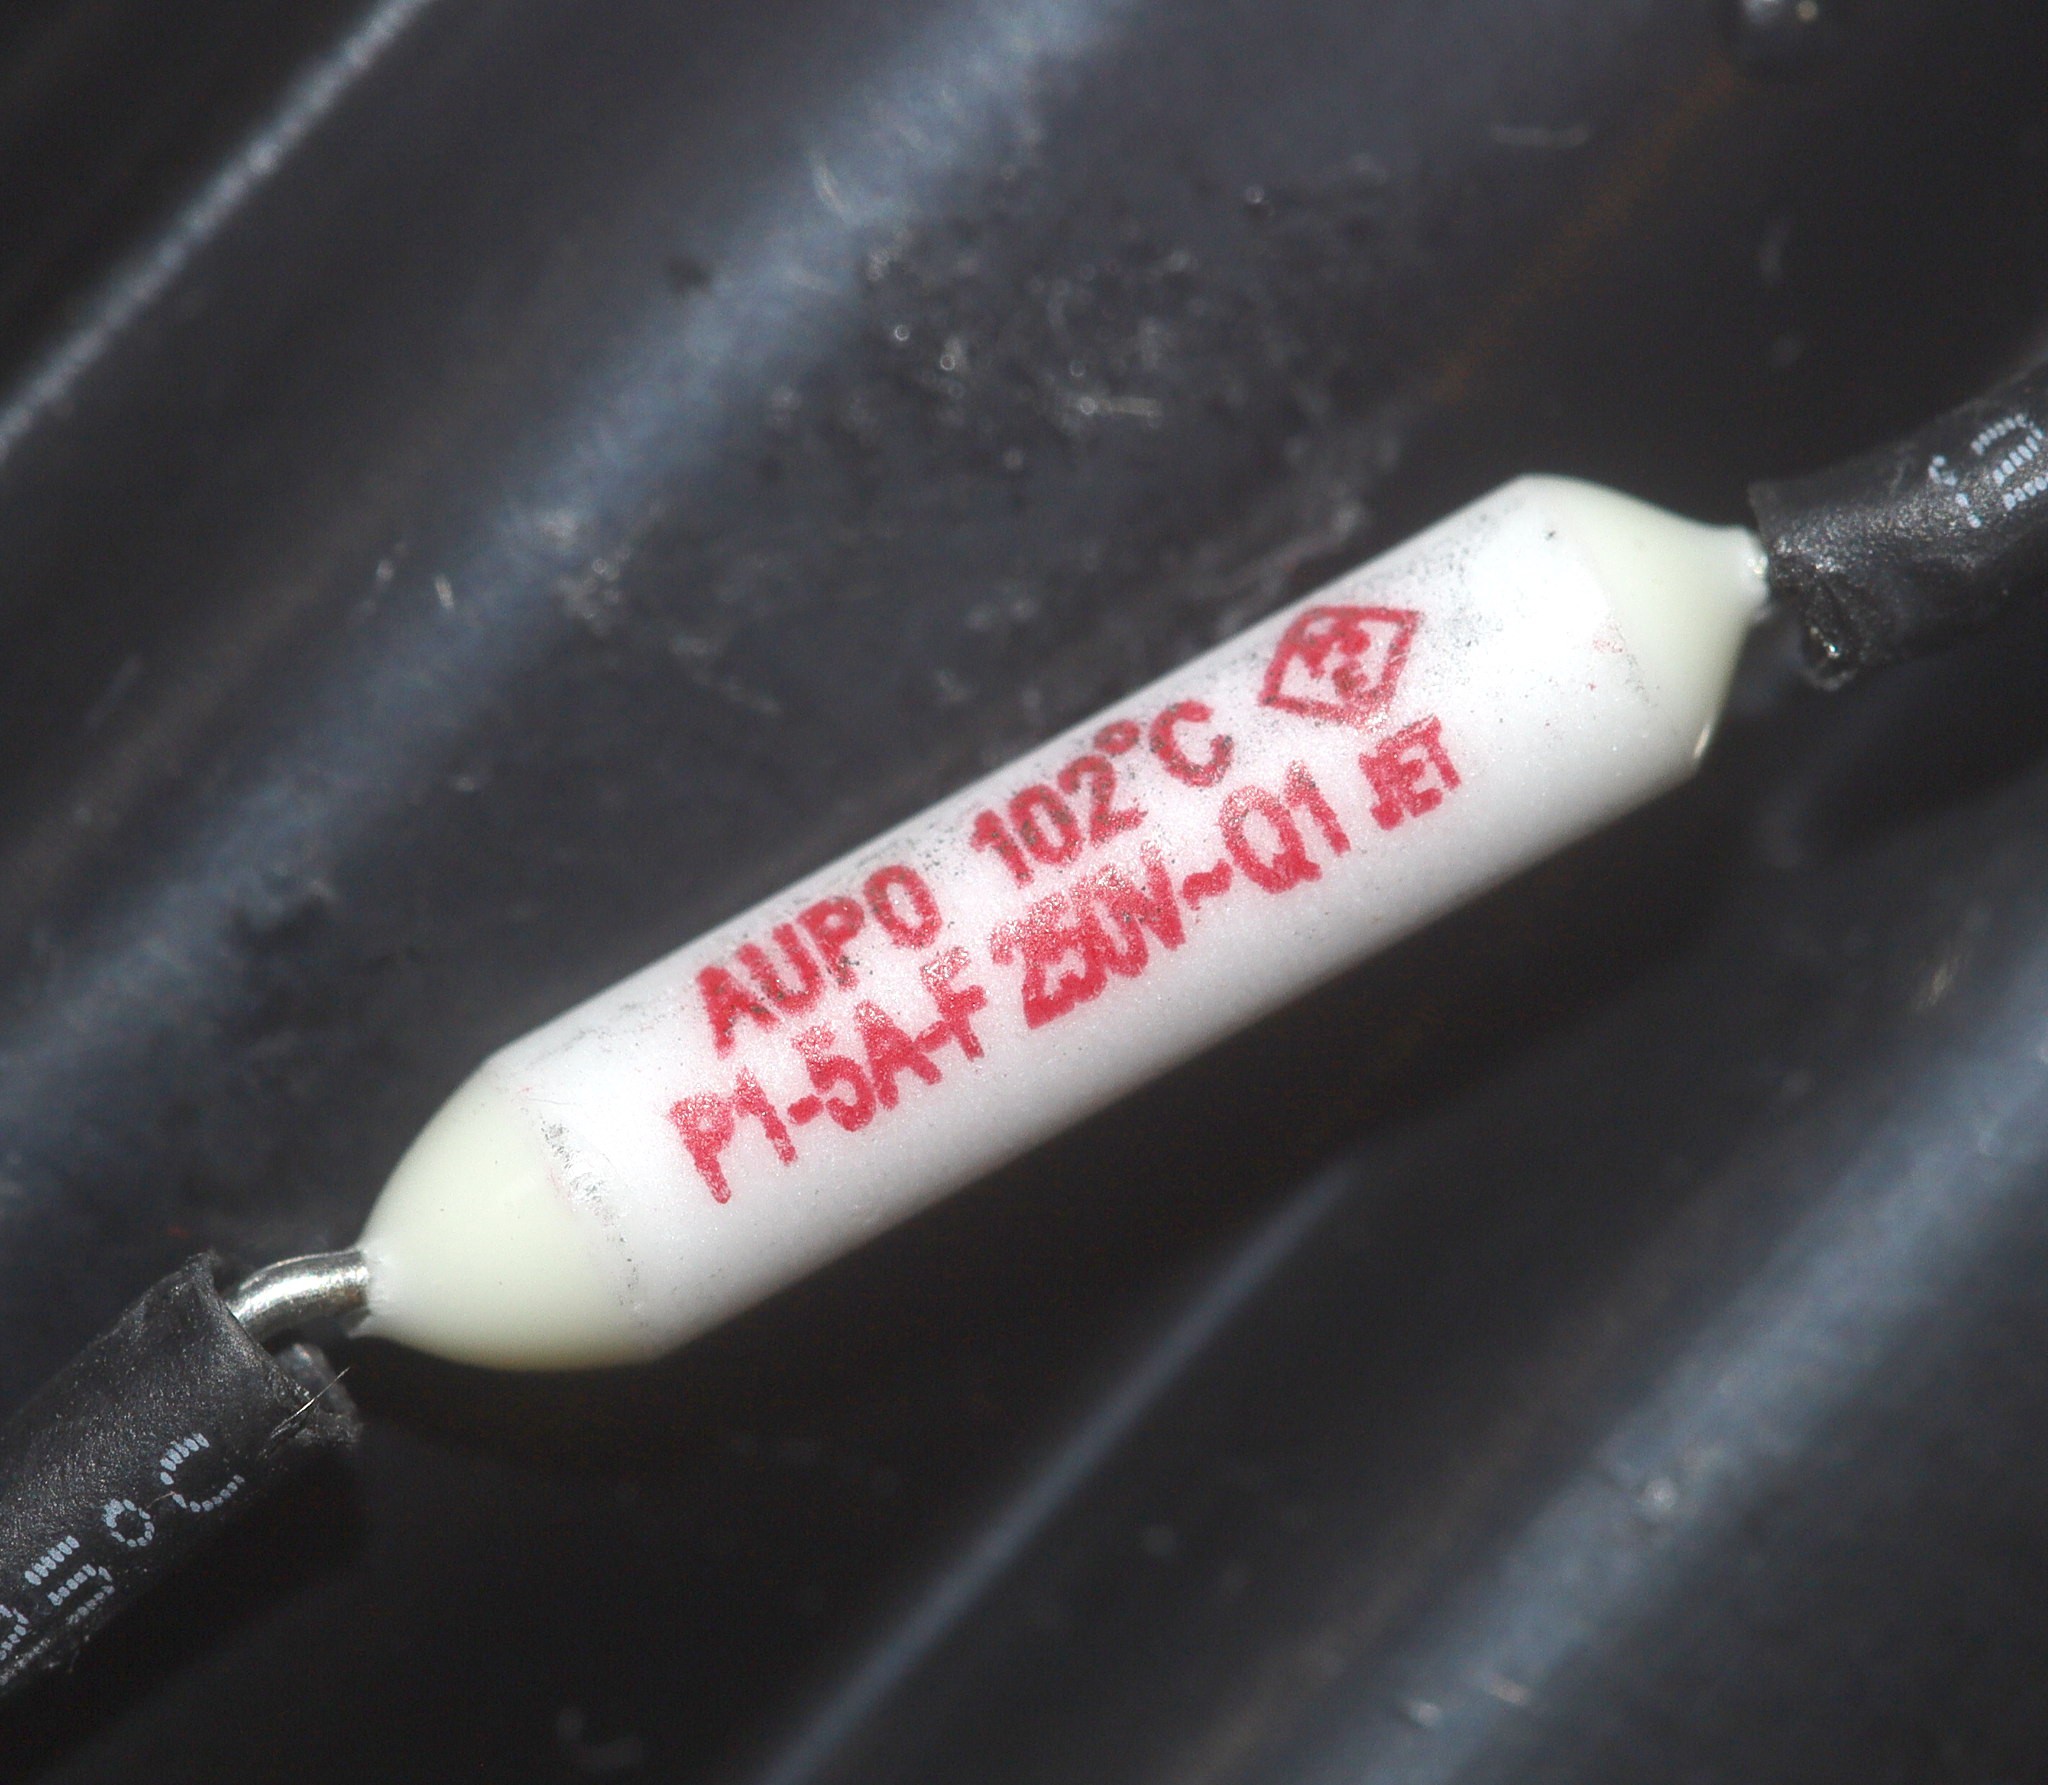
Interior after modifications to use a LIPO. Manely, the 3 battery terminals have been replaced.
![]()
Turning to the JJC battery pack, the Nikon cable has a 100k resistor from K1' to K & a 100k resistor from GND to K2. PH+ is the high voltage. The resistors are probably selecting the voltage. CNT is the control signal from the flash.
The Canon cable has no resistors. All the K pins are floating. Only PH+, GND, & CNT are connected.![]()
A quick test with the Nikon resistors showed it makes an unstable 290-320 volts.
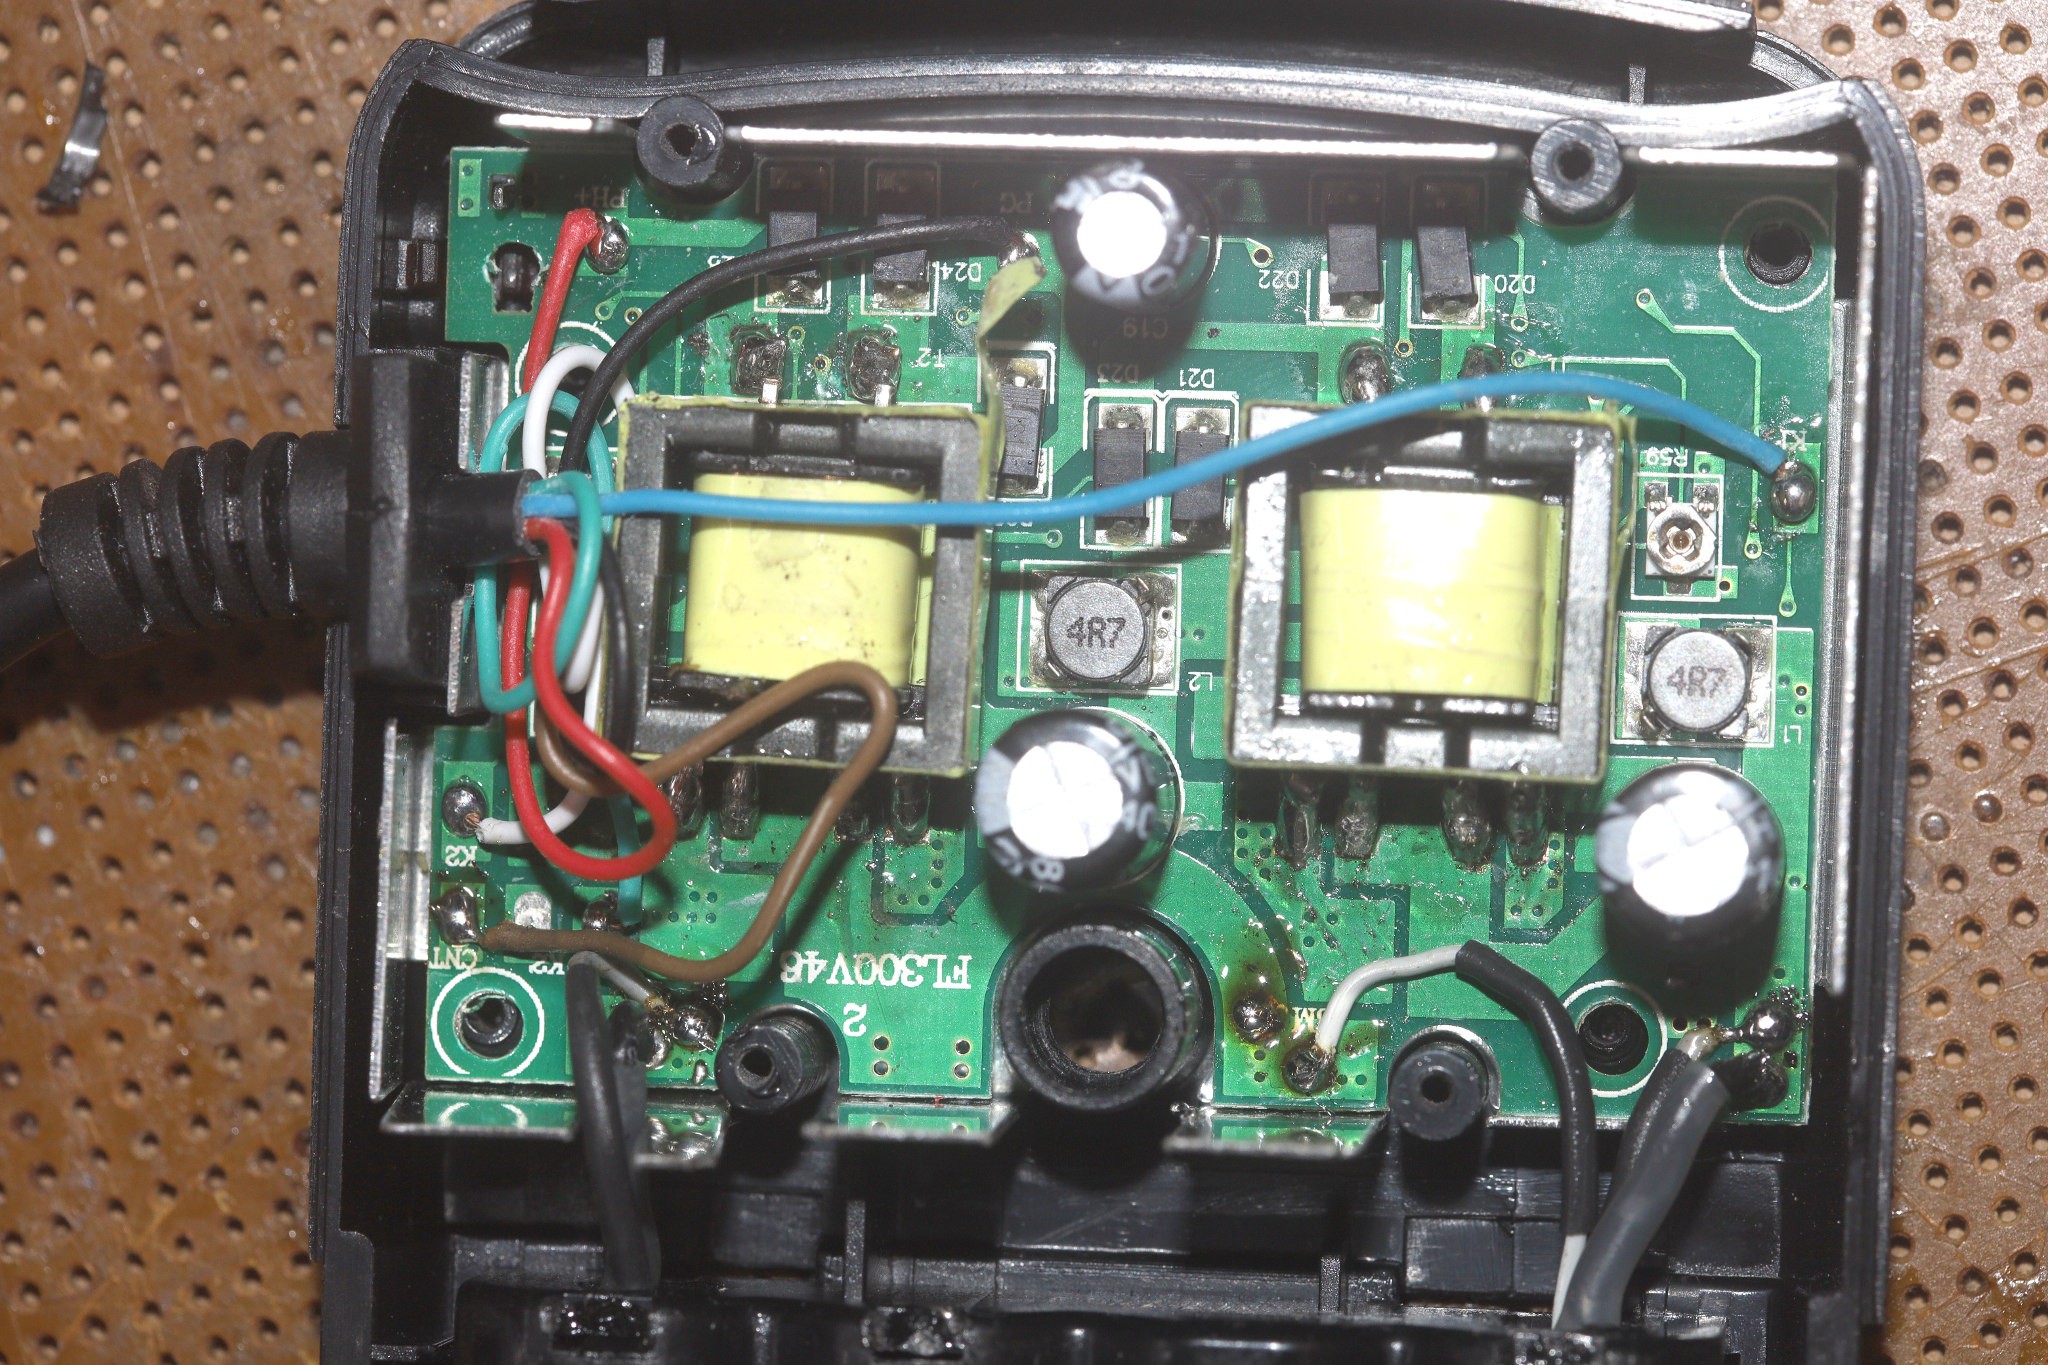
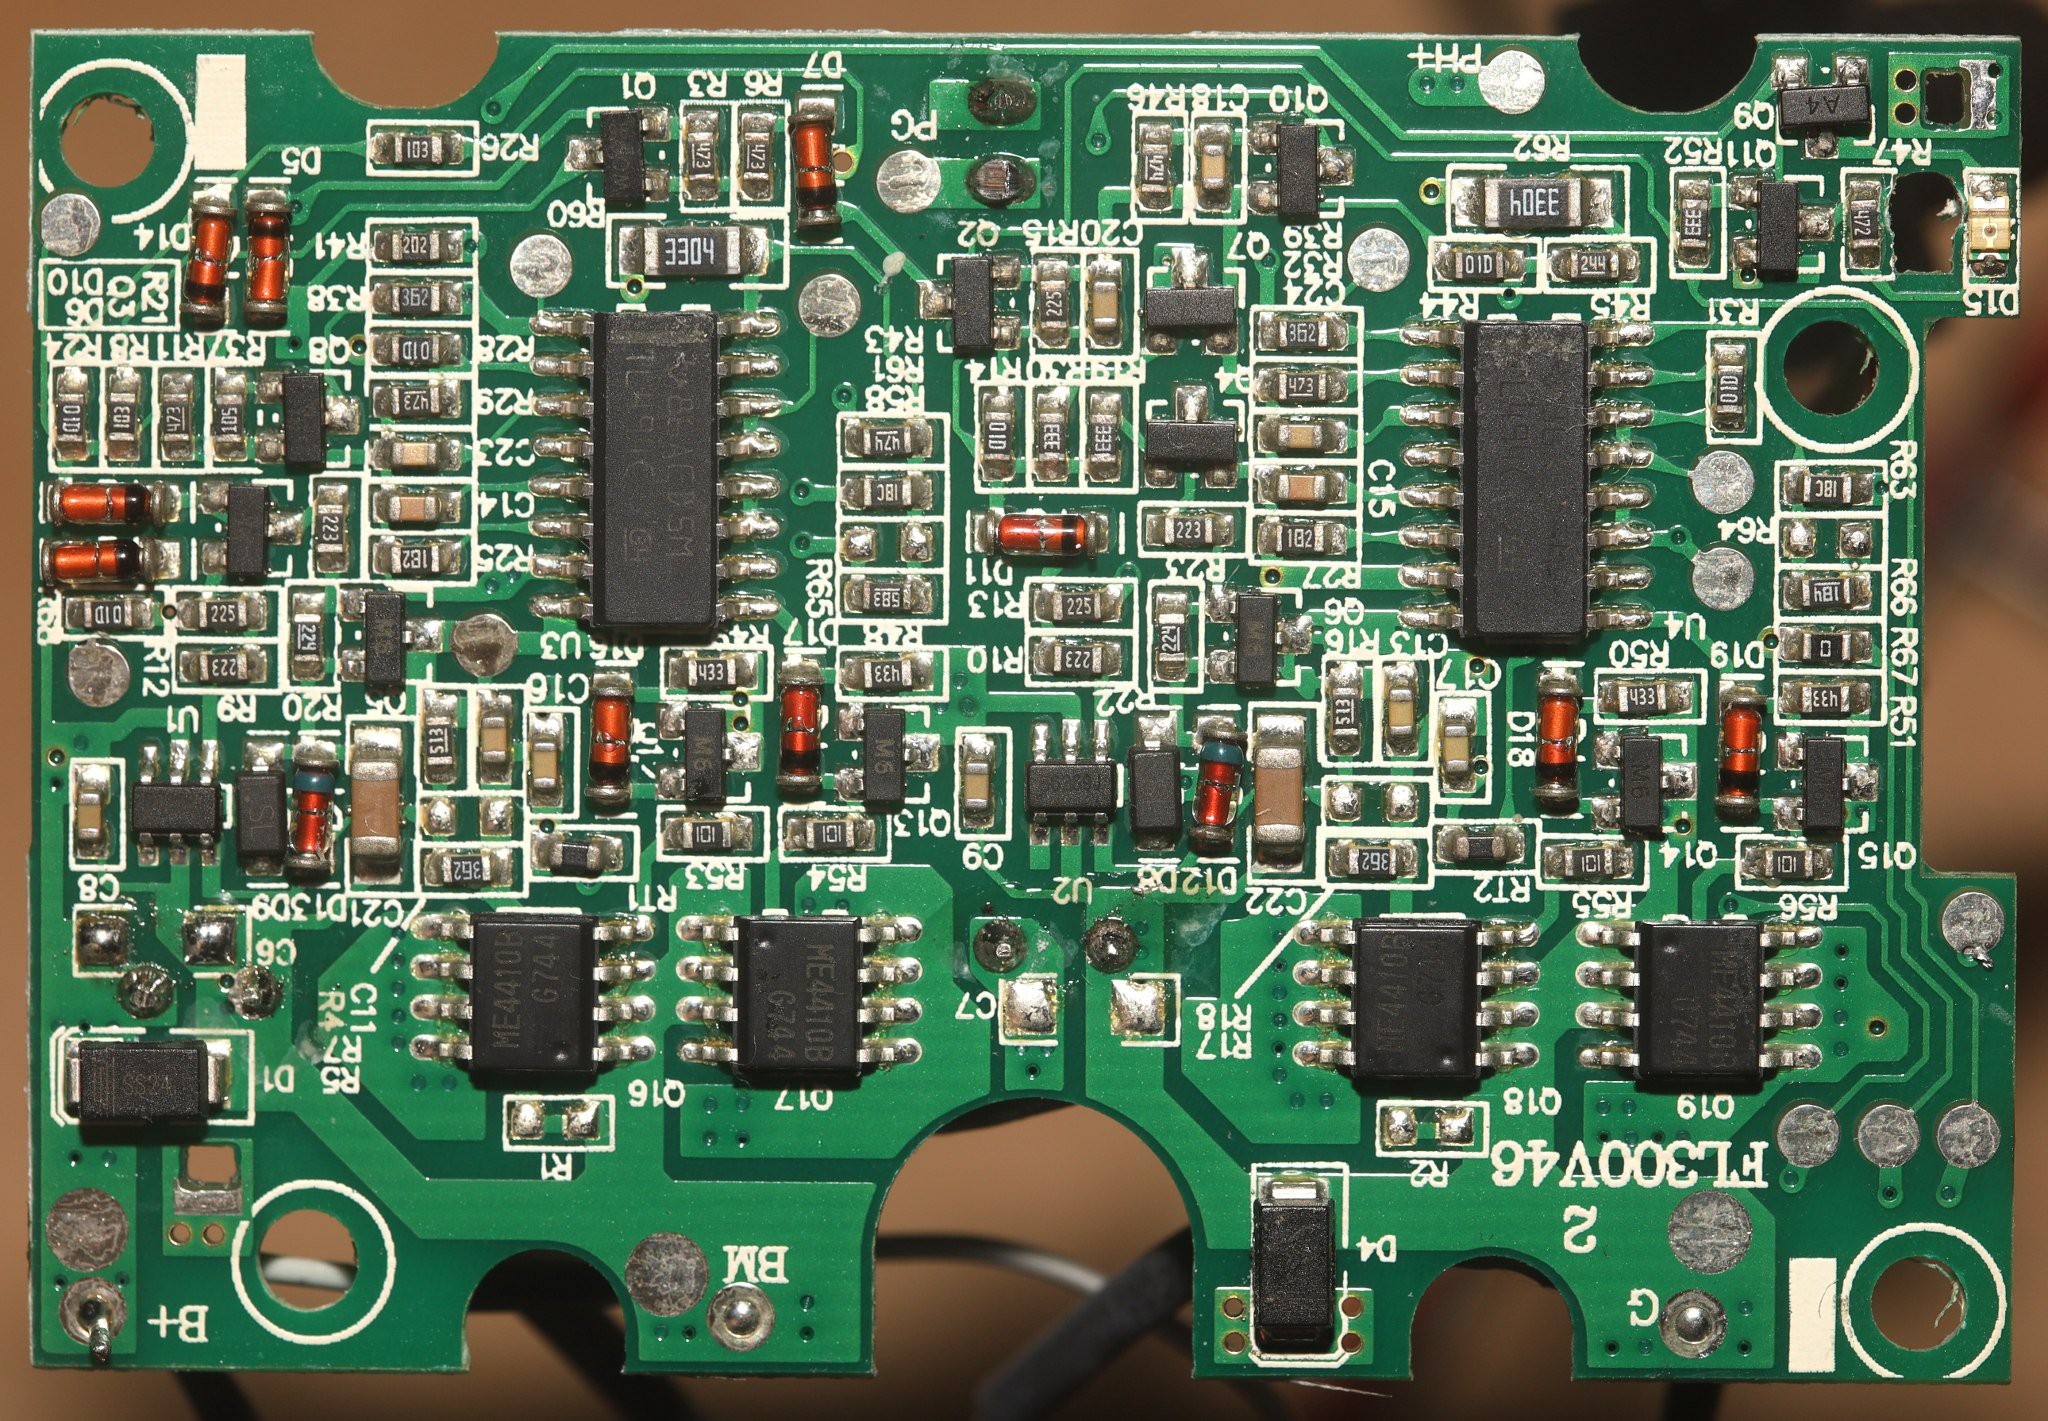
All the external battery packs use 2 boost converters in parallel. Each boost converter runs on 6V. If they have 8 AA's, they run both boost converters. If they have 4 AA's, they run 1 boost converter.
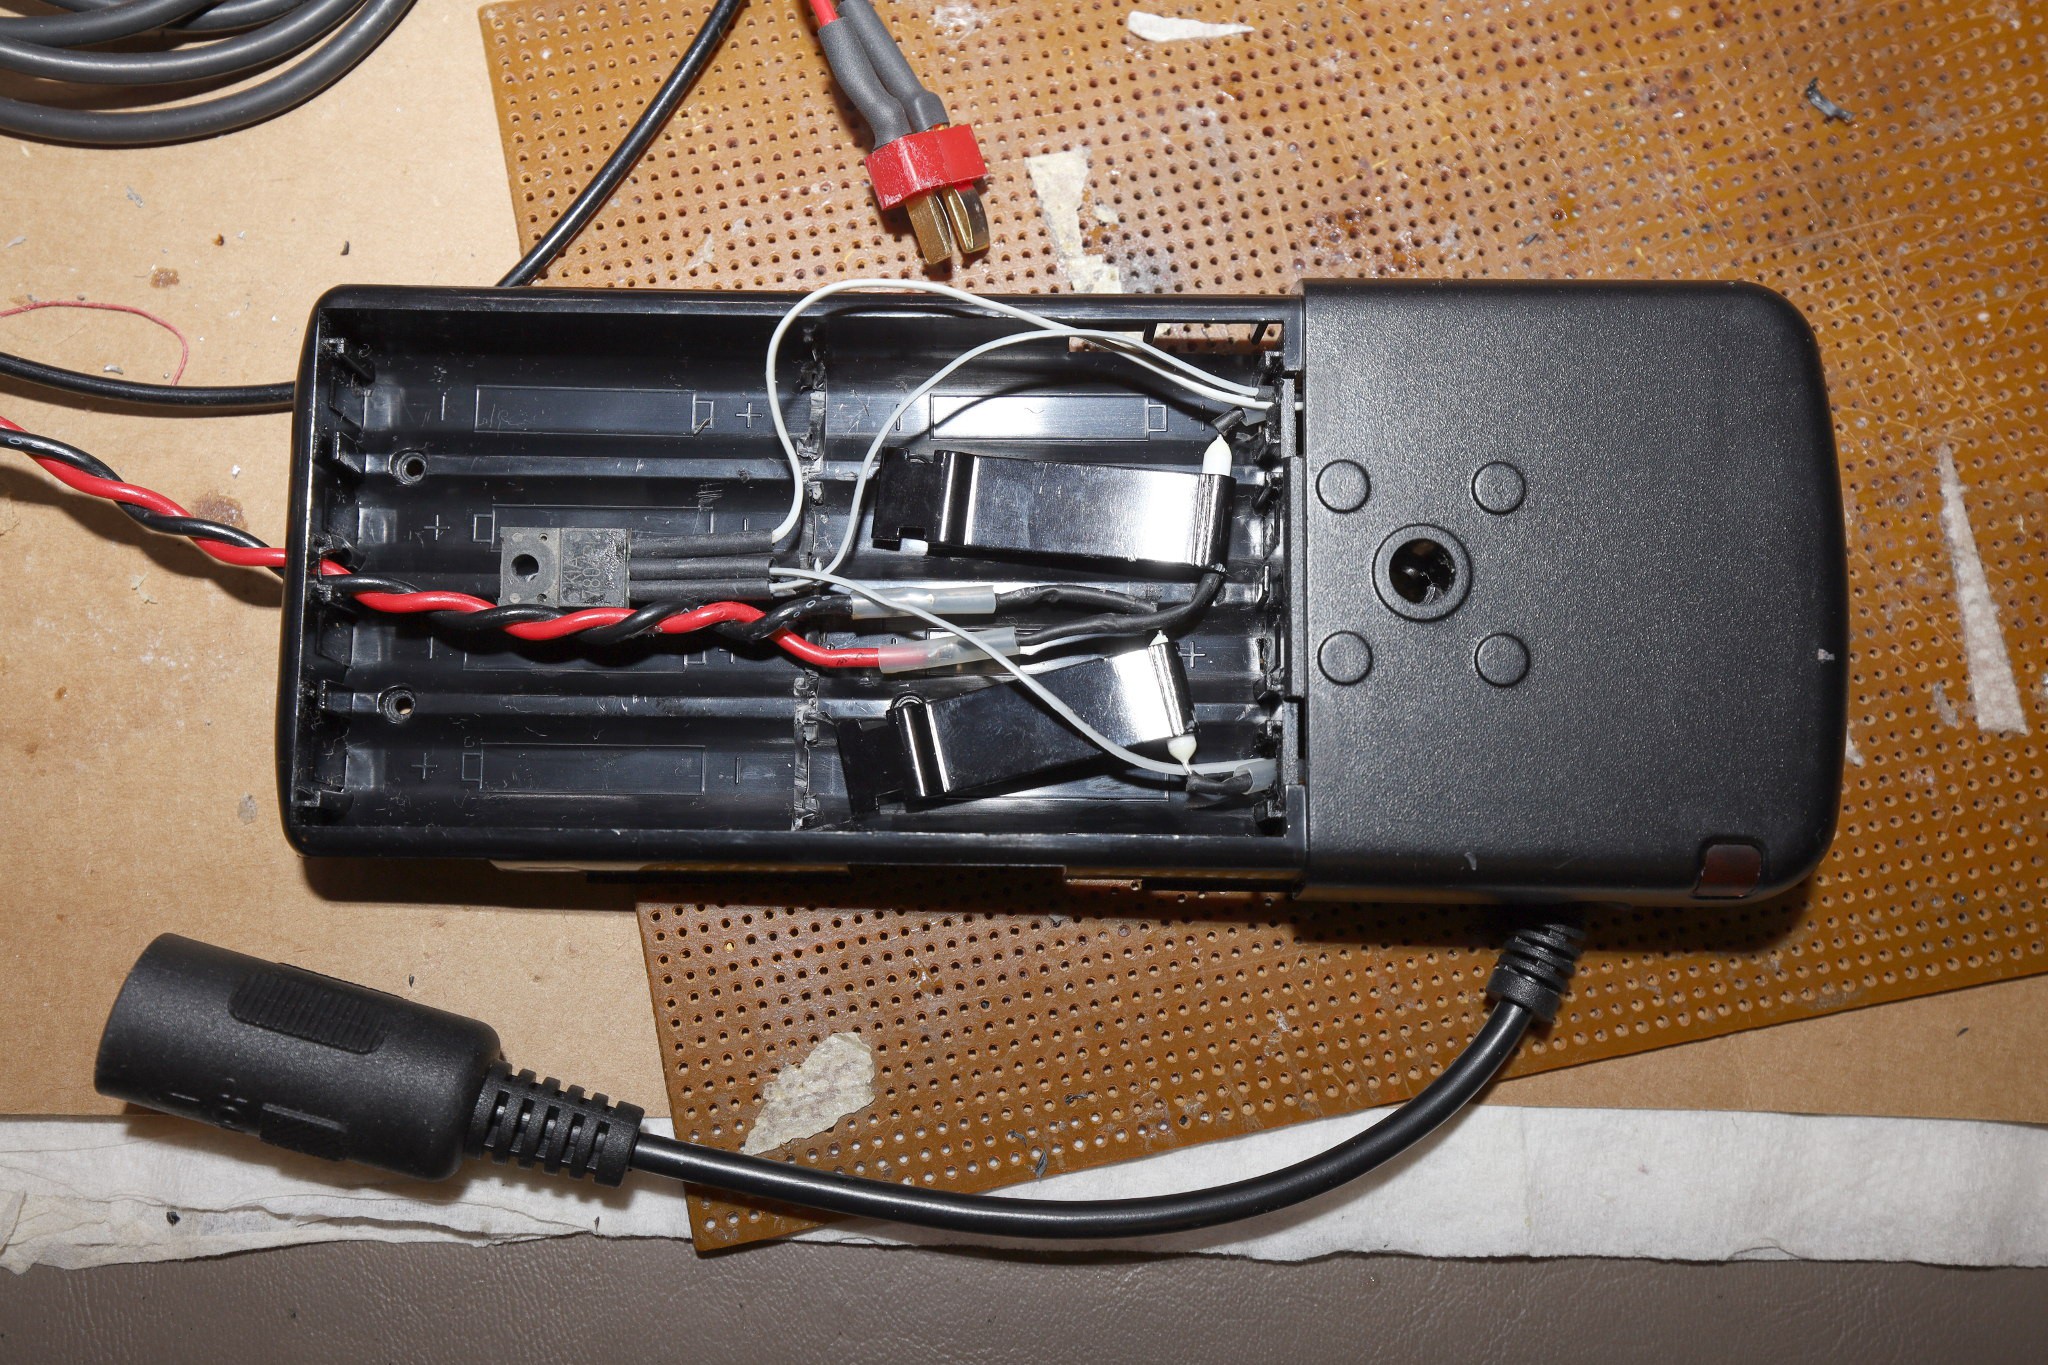
The battery pack has 3 taps: 12V at B+, 6V at BM, GND at G. It can run on 6V from B+ to BM, or 6V from BM to G. To run it on a 12V lipo from B+ to G, a regulator has to supply the 6V tap to get both boost converters to fire. The lion kingdom whacked on an LM7806.![]()
The JJC has 2 5A current limiting fuses going to the batteries. It's essential to leave these in place with their heatsinks.
![]()
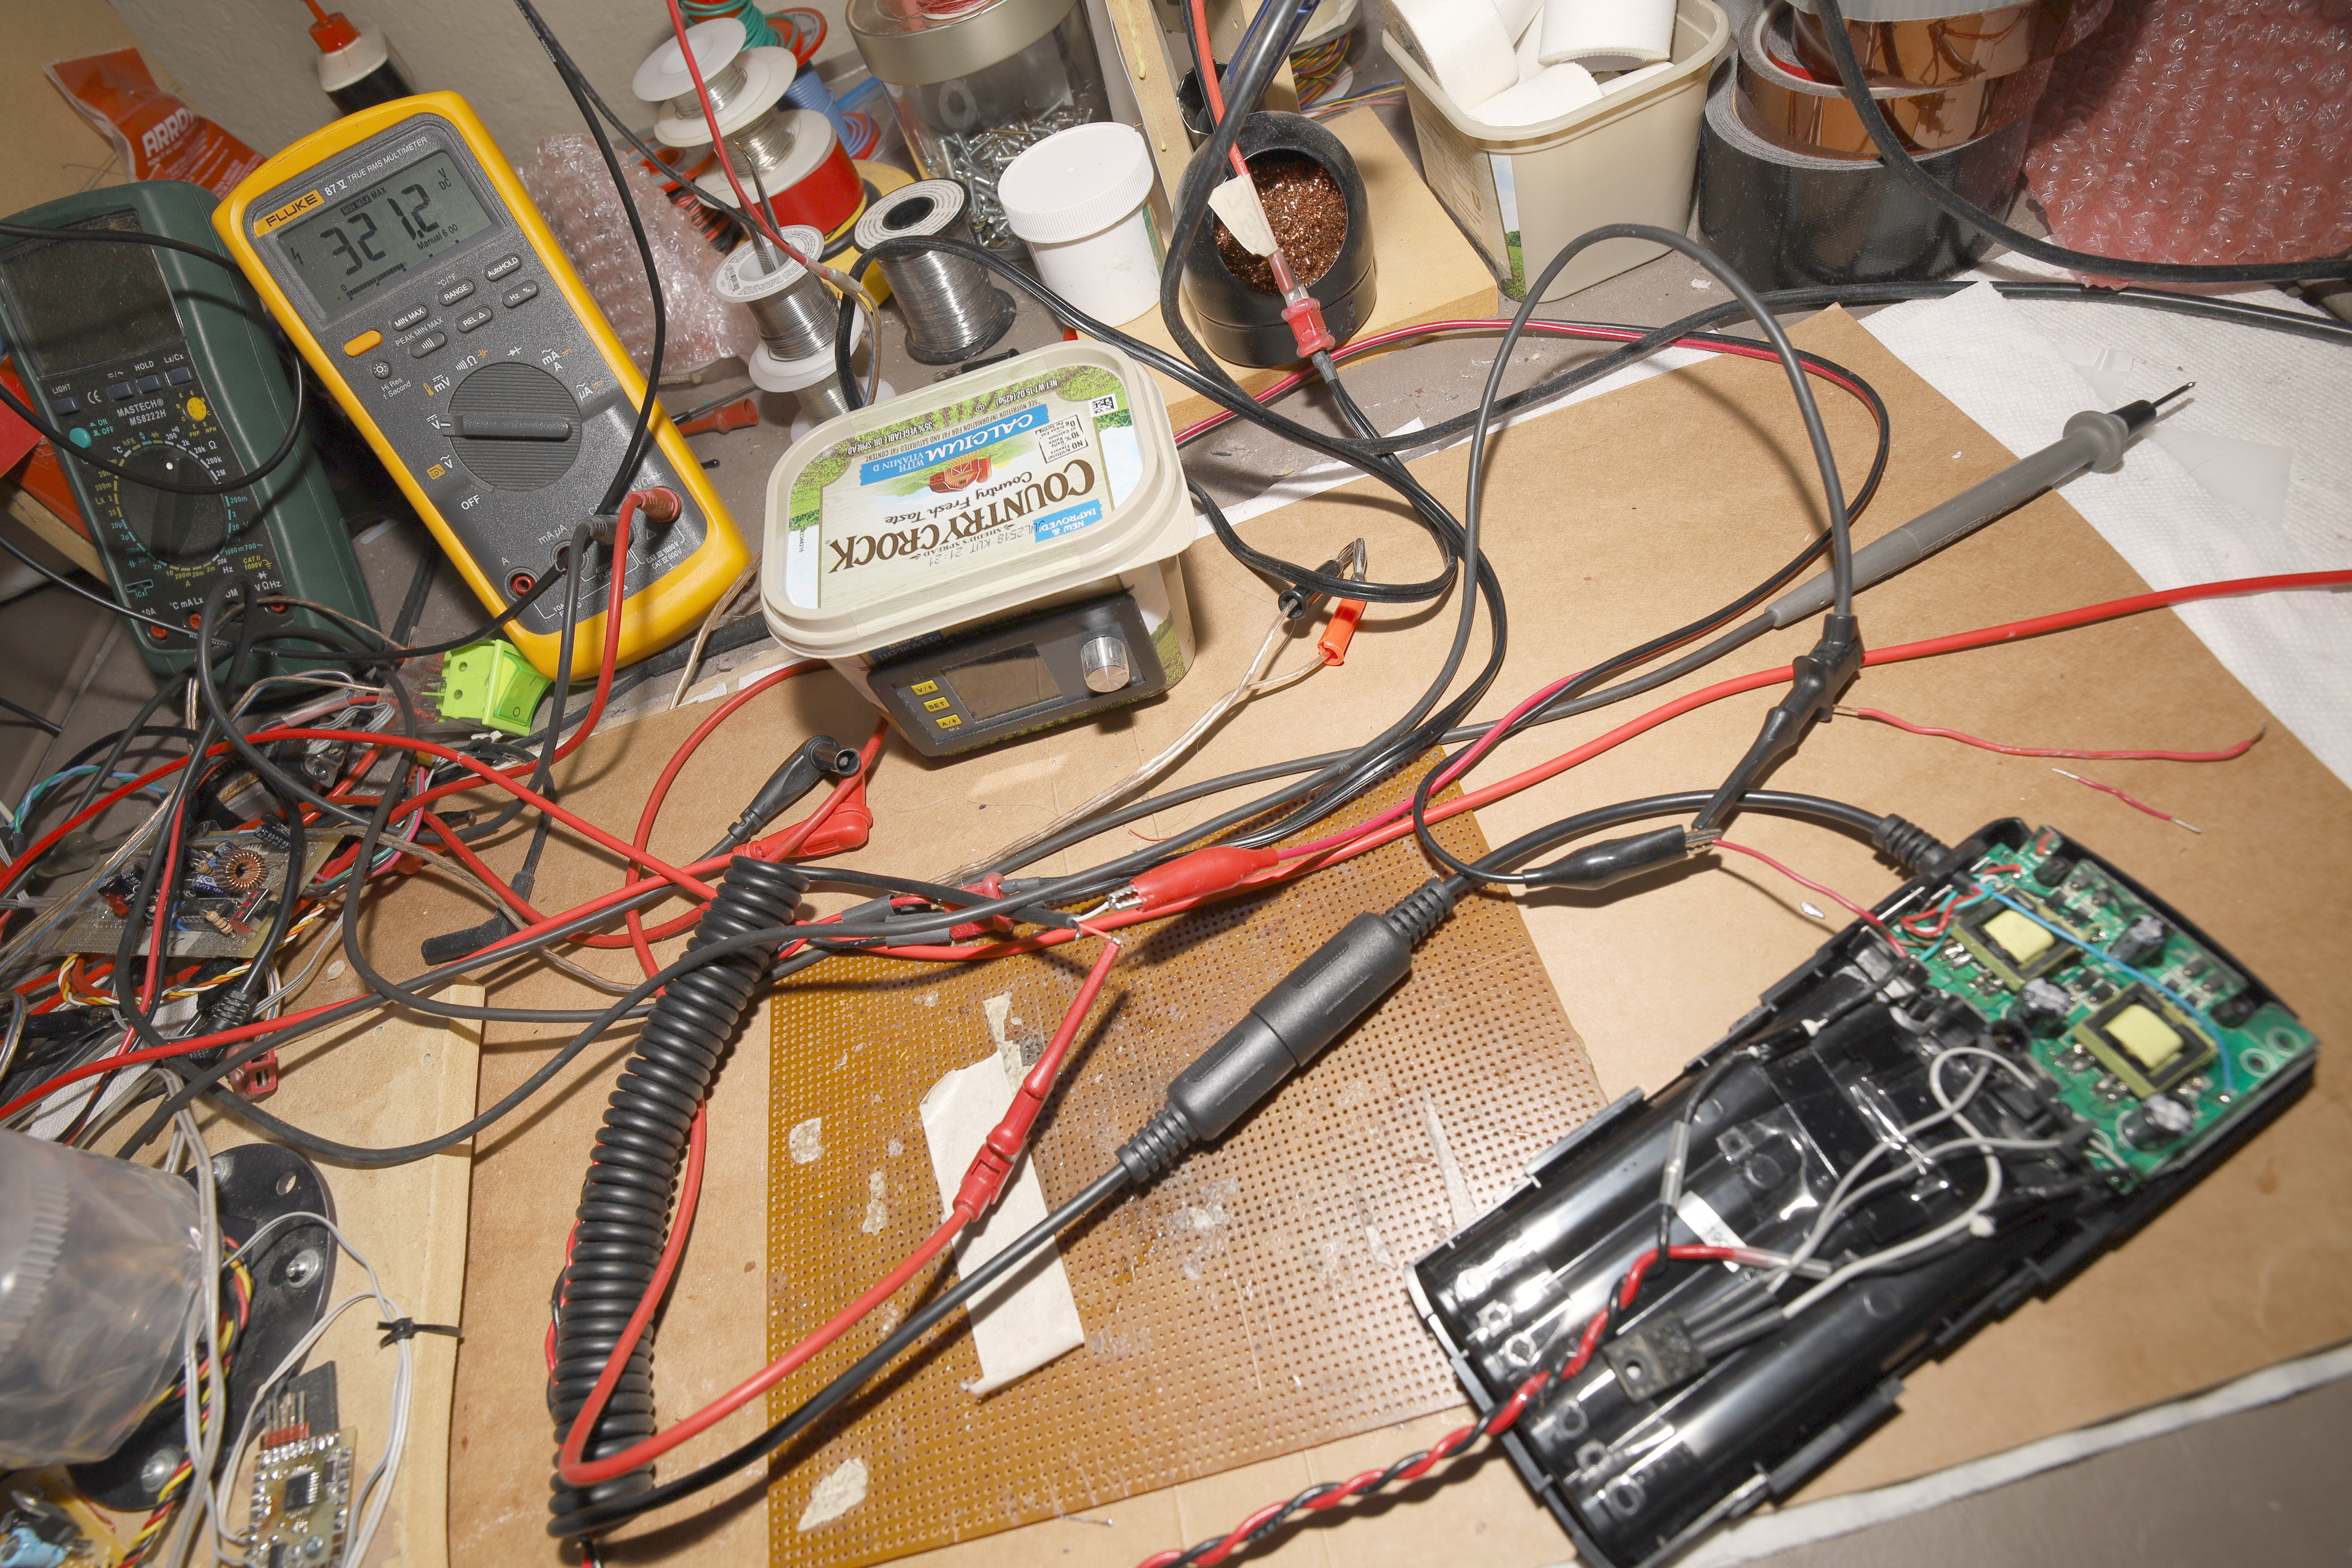
The JJC was modified with the 6V regulator & current limiting fuses in the battery compartment. In testing, the JJC drew 5A to charge the flash. Combined with the fresh batteries in the flash, it supplied more power than the flash could use without destroying itself. Running on a lipo, the 580 EX II is basically a very expensive manes powered strobe.
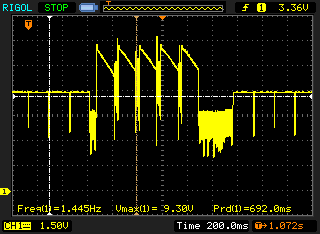
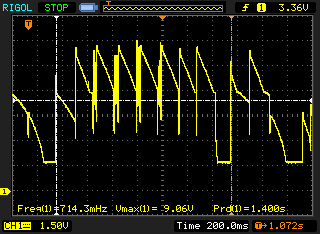
The 6V regulator got momentarily hot, but the flash couldn't draw enough power to keep it hot. It was time to see if it did anything useful.![]()
BM with the LM7806 when recharging
![]()
BM without the LM7806 when recharging.
![]()
BM without the LM7806 when idle.
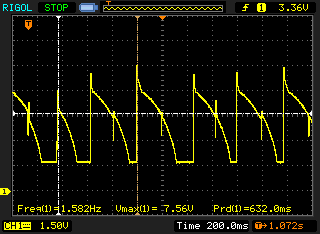
It's peak current is 2A while the boost converters are running 5A in series. It's obviously making a prettier waveform when idle but doing nothing when its recharging. BM is equally messy, so the LM7806 can be considered optional. The 2 boost converters just run in series when it's recharging.
Auto tracking camera
A camera that tracks a person & counts reps using *AI*.


 When both were visible, it tended to look down. This may be from the lack of tracking the head outline.
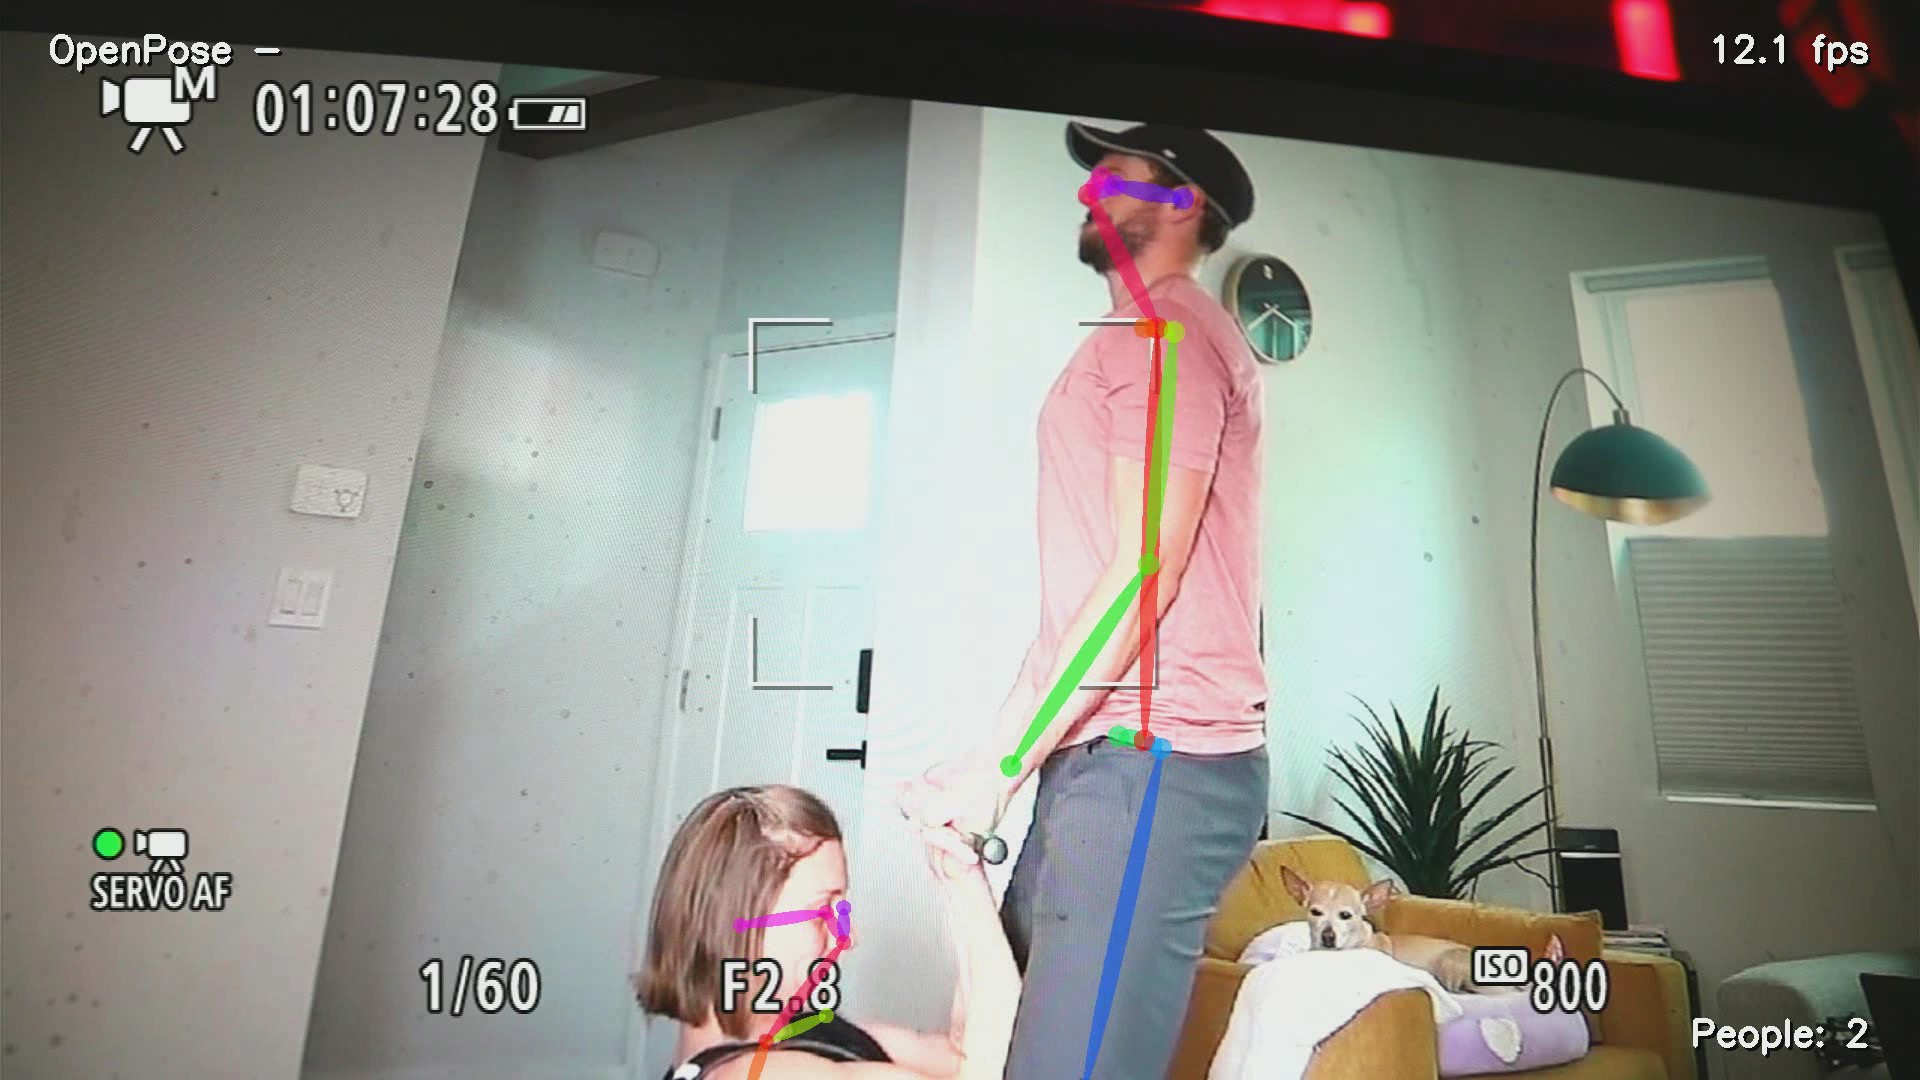
 When both were standing up but too different in height to fit in the frame, it tracked 1 or the other.