 Nathan Brown
-
13D Print Some Parts
I suggest starting by printed some parts. You'll need most, if not all, of the parts from the original Pikon: https://www.thingiverse.com/thing:2200862
To build this out of paper I would exclude the Tripod mount & Raspberry Pi mount. Instead you're going to need to print a few extra parts (See attached files):
TubeSupportRing.stl - Support ring to help in building and supporting (3 or 4)
TubeSupportJoint.stl - Used to support the junction points between paper and for each end (1 to 3)
I printed everything out of PLA and bumped up the perimeters to 3 or 4 to give some additional radial strength on the rings.
You certainly don't have to print everything before building the tube, but you will need the support rings above and I would be sure to print the Base & the Spider so you can be sure to make the tube the right size.
-
2Build Tube
First, I would suggest if you are not comfortable bending poster board then pick up one technique from Eric Strebel in this video.
The standard Pikon diameter is 125mm Inner Diameter (ID) and 610mm long. My paper was 0.7mm thick so this results in a ~395mm diameter (125 + 0.7) * pi. This roughs in at 16in X 24in so it fits well in an easy to source sheet of poster board (which is 22" X 28" where I am). BE SURE TO GET BLACK such as this so you won't have to paint it.
To make the tube, bend the paper without wrinkling it and glue it with some reinforcement strips that you cut from the scraps. As Eric suggests, standard white glue it great choice for this. To help glue the joint I did you two meter sticks to help clamp. I also use rubber bands to and the printed support rings to keep it together until the glue dried. Be sure not to glue the rings in place yet. Also make sure the Spider and Base fit into the ends.
To make it longer you may need to get multiple sections and glue them together. In my case I made one tube with the exact dimensions above. Then I made another 395mm diameter and 500mm long as an extension tube for my 1000mm focal length (so if you got a 750mm FL mirror then you would just need to add a 250mm long section).
I used all the scraps from poster board to make additional support sections in the middle. I just curved them a bit, clued them on and used rubber bands for clamps.
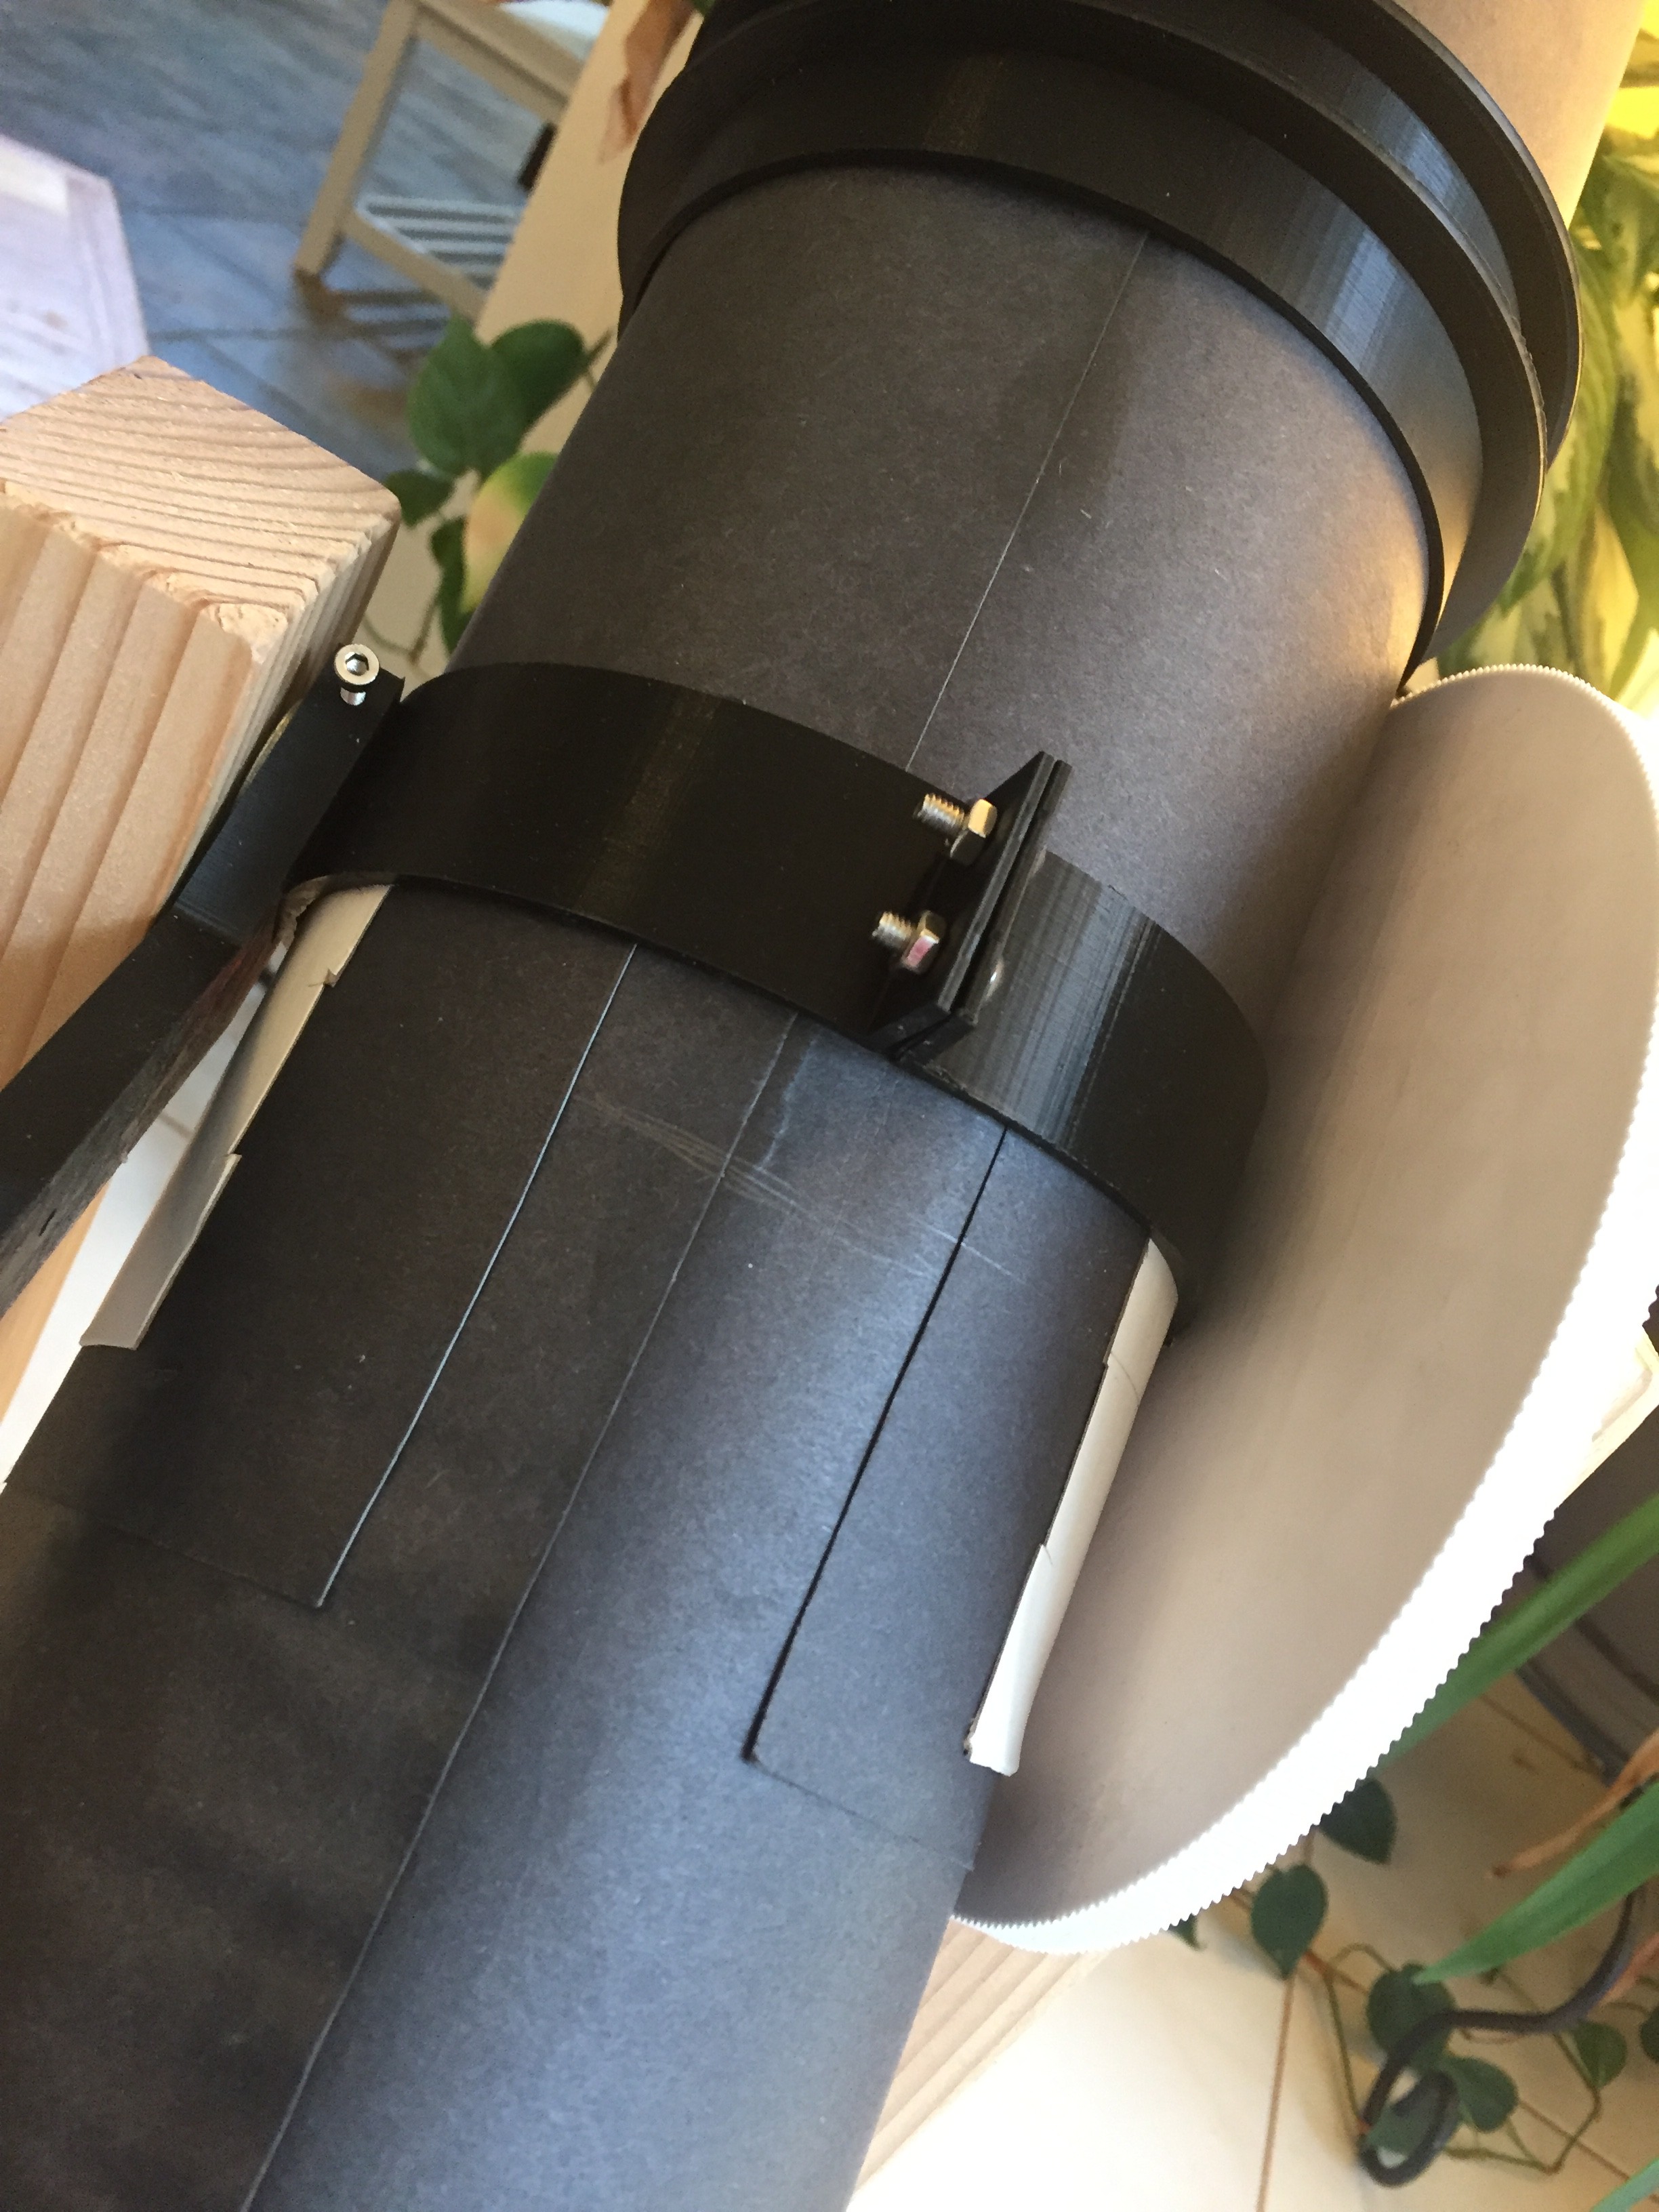
You can see below the sections where I added some reinforcement with the scraps.
![]()
-
3Finish off the Telescope portion
Follow the rest of the instructions from the standard for the standard Pikon here. But, please read the rest of this post before final gluing anything.
Once you have that together then you'll need to put on the Pivot Clamp in the center of gravity and then build some kind of base to hold the thing. Before you do this you may want to plan out a little bit where you want to go with this whole build.
For the most stable build you want the pivot point at the center of gravity, but if you are going to add ANYTHING else to the telescope then you'll either have to add weight to the other end or move this clamp. You will need to at least account for the Raspberry Pi, but if you want to have a dust cap, focus knob, focus motor, etc. you should think about that now and make it possible to move your center clamp as needed. So don't glue any support rings in the center area until you are really ready to lock things down.
Next, I built a simple stand out of some 2X sticks that I had around and a piece of 3/4" plywood. I suggest starting with something that may not be 100% permanent to start with until you decide if you want to build a motion system.
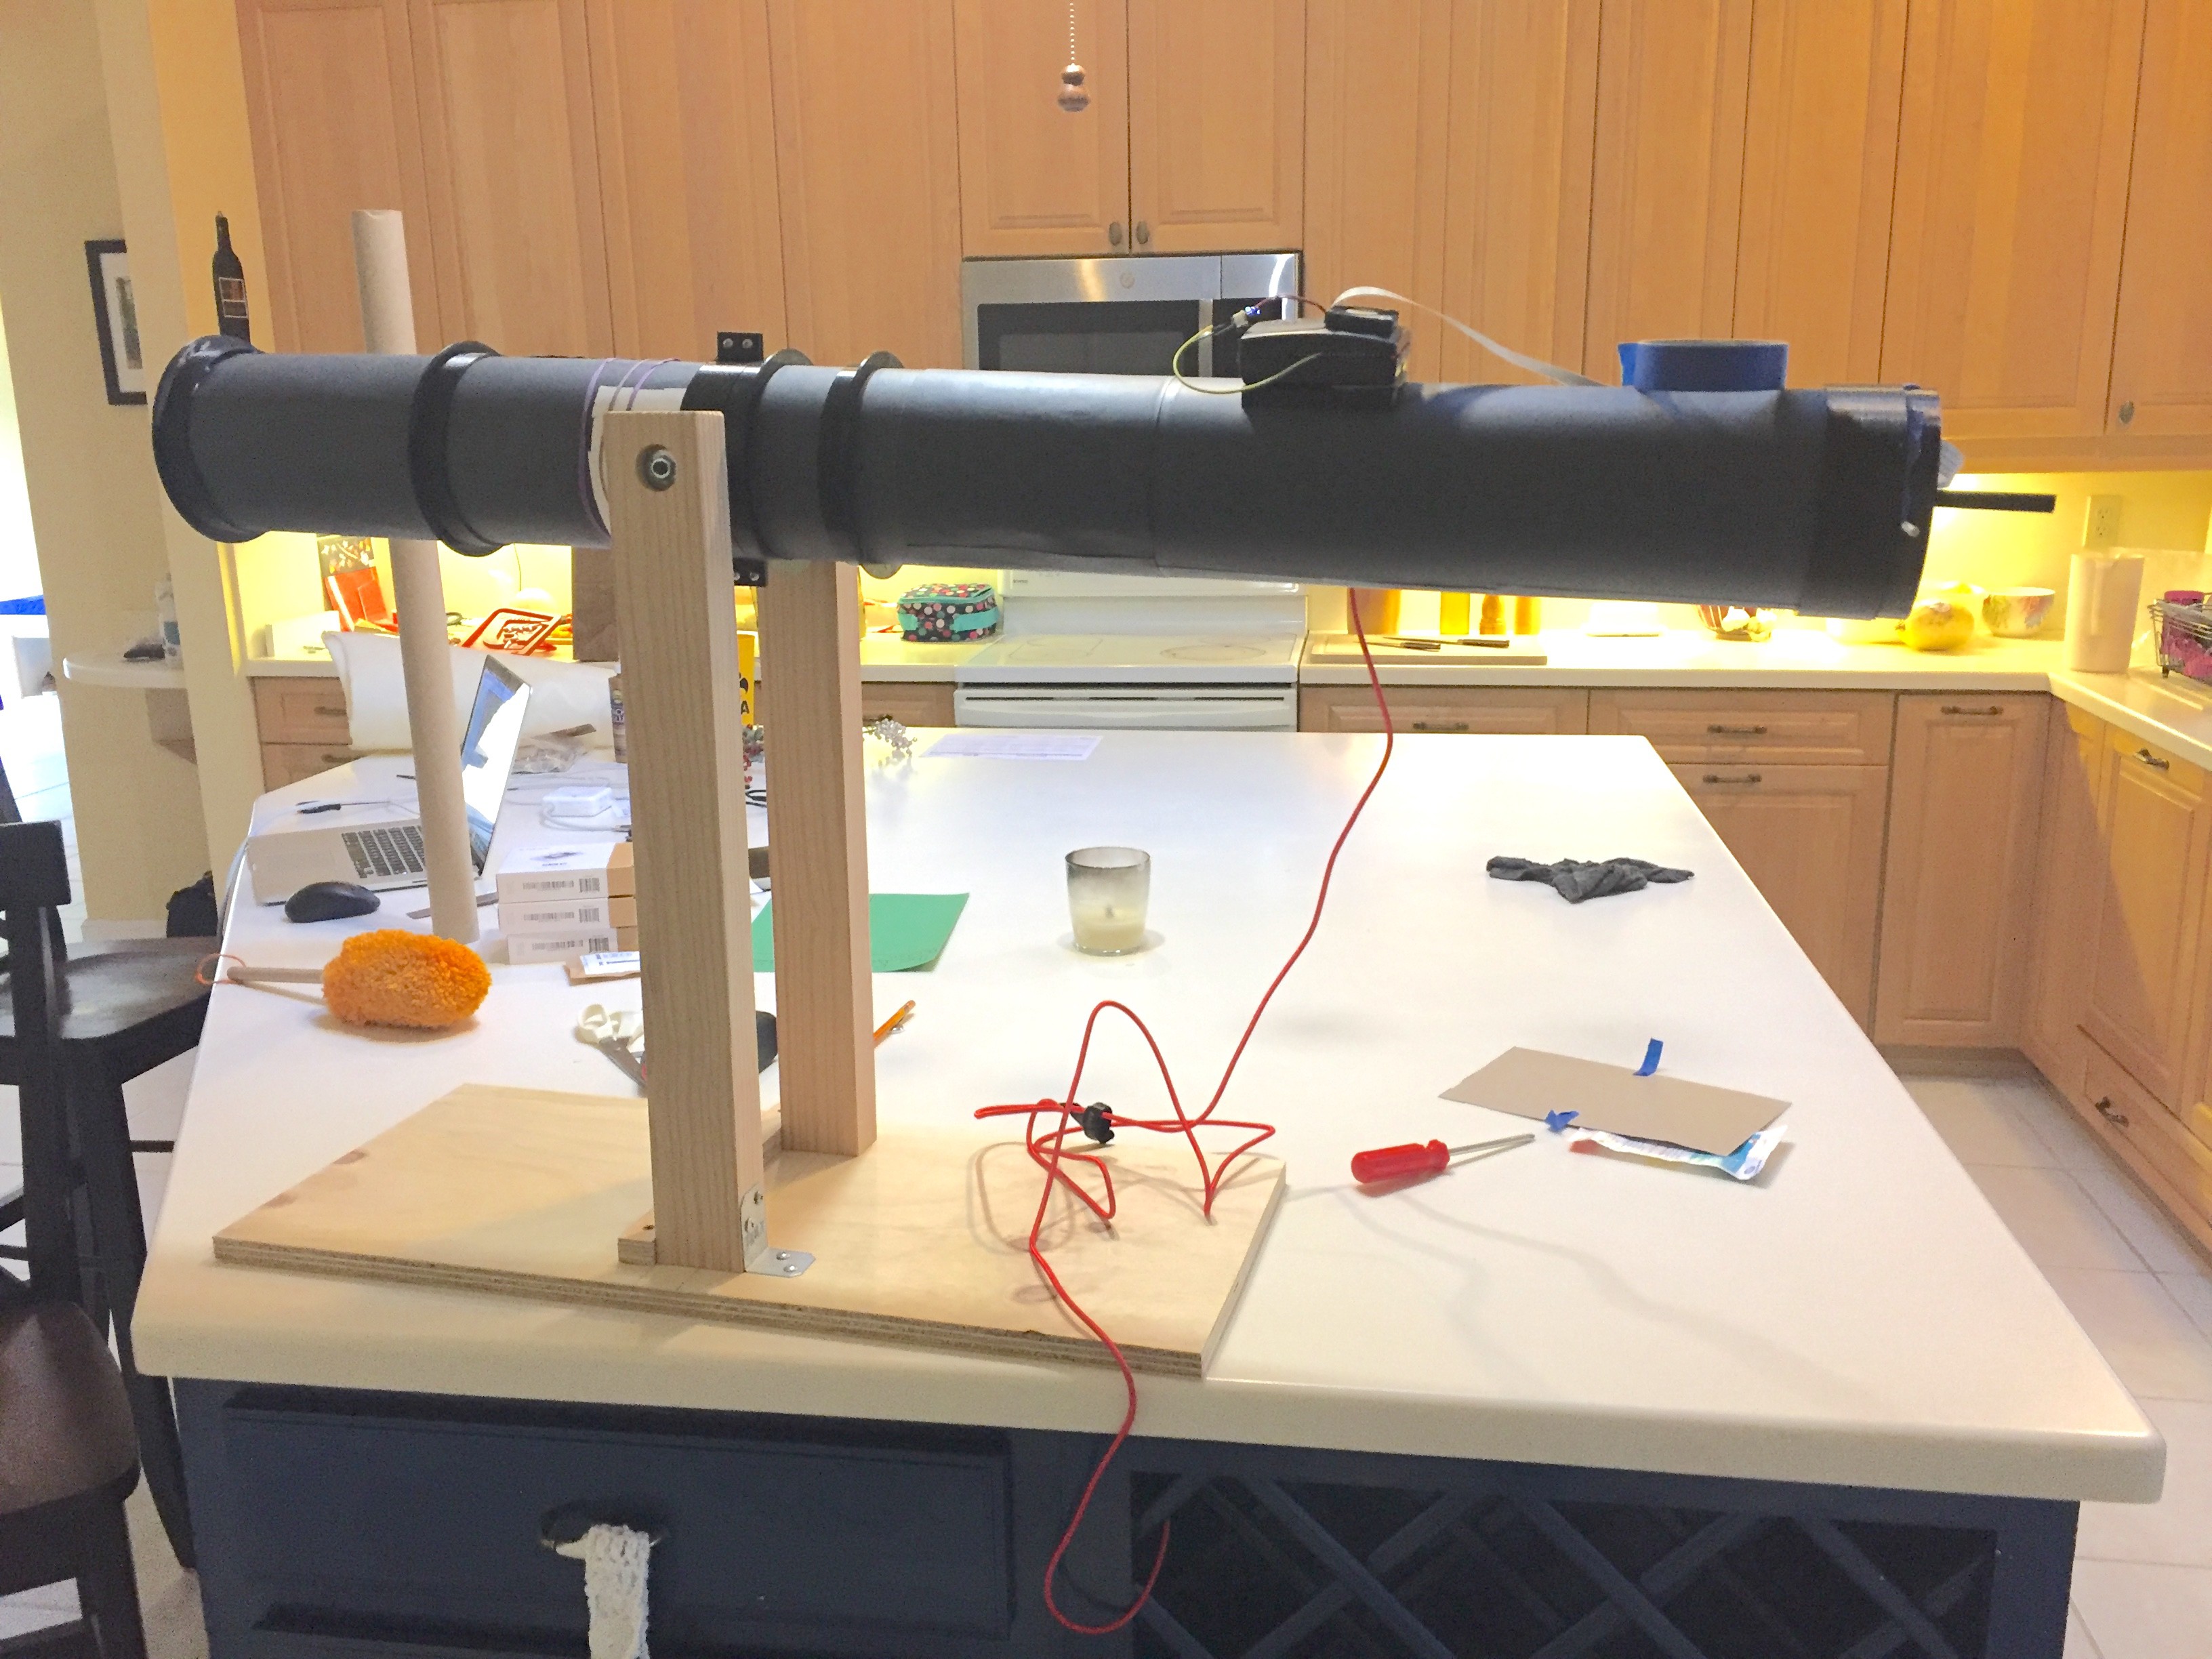
At this point you should have something that might look like this:
![]()
You can see the construction of my base from here. It is not too fancy because I'm still designing the motion system. It was helpful to get to this point then start dialing in the telescope. Next steps:
Pick software for the PI
Focus the back mirror
Design your Motion System
Paper Pikon with 1000mm Focal Length
Pikon Telescope made from poster board
Discussions
Become a Hackaday.io Member
Create an account to leave a comment. Already have an account? Log In.