 Dmitriy
-
11Step 11
Mandatory Setup, Calibration of Accelerometer and Compass Calibration.
It is neccessary to configure the following settings: Initial Setup-> Mandatory Hardware
1. Frame type : in our case it is 'X'
2. Accel calibration.
To successfully configure accelerometer you'll need a smooth surface. I recommend to use measuring level. Follow the instructions after pushing the button "Calibrate Accel".
Note: Accel calibration is APMPlanner might be not working. I wasn't able to calibrate my copter with this GCS.
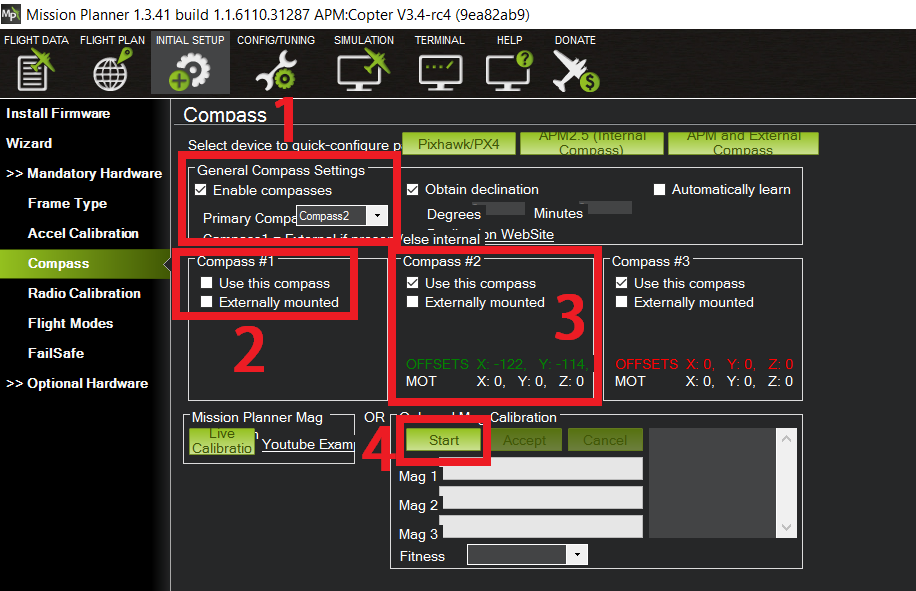
3. Compass setup.
![]()
Go to "Compass" in Mandatory Hardware and in "General Compass Settings" select Compass2 in Primary Compass. Then uncheck "Use this compass" in Compass1, check this parameter for Compass2. To calibrate it - push "Start" in "Onboard Mag Calibration". Then start move your copter with NAVIO2 like on this video:
After calibration reboot your Raspberry Pi. While reboot till ardupilot will reconnect to Mission Planner stay in Compass window!
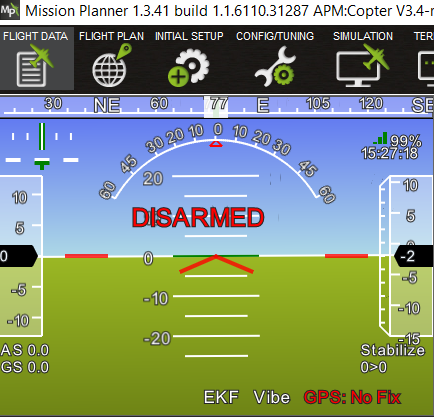
If your calibration was successful in Flight data window you won't have any warnings.
![]()
-
12Step 12
ESCs calibration
When Radio is calibrated and battery is charged we can calibrate ESCs. I was following arducopter docs to cover this step.
For successful execution of this very important step check twice that:
1. Motors are connected right to NAVIO2
2. Propellers are not attached to motors.
3. USB is not connected. Future powering will be with battery.
So I recommend to make "All at once calibration" offered in provided manual of ardupilot. I made the video for my ESCs calibration process:
-
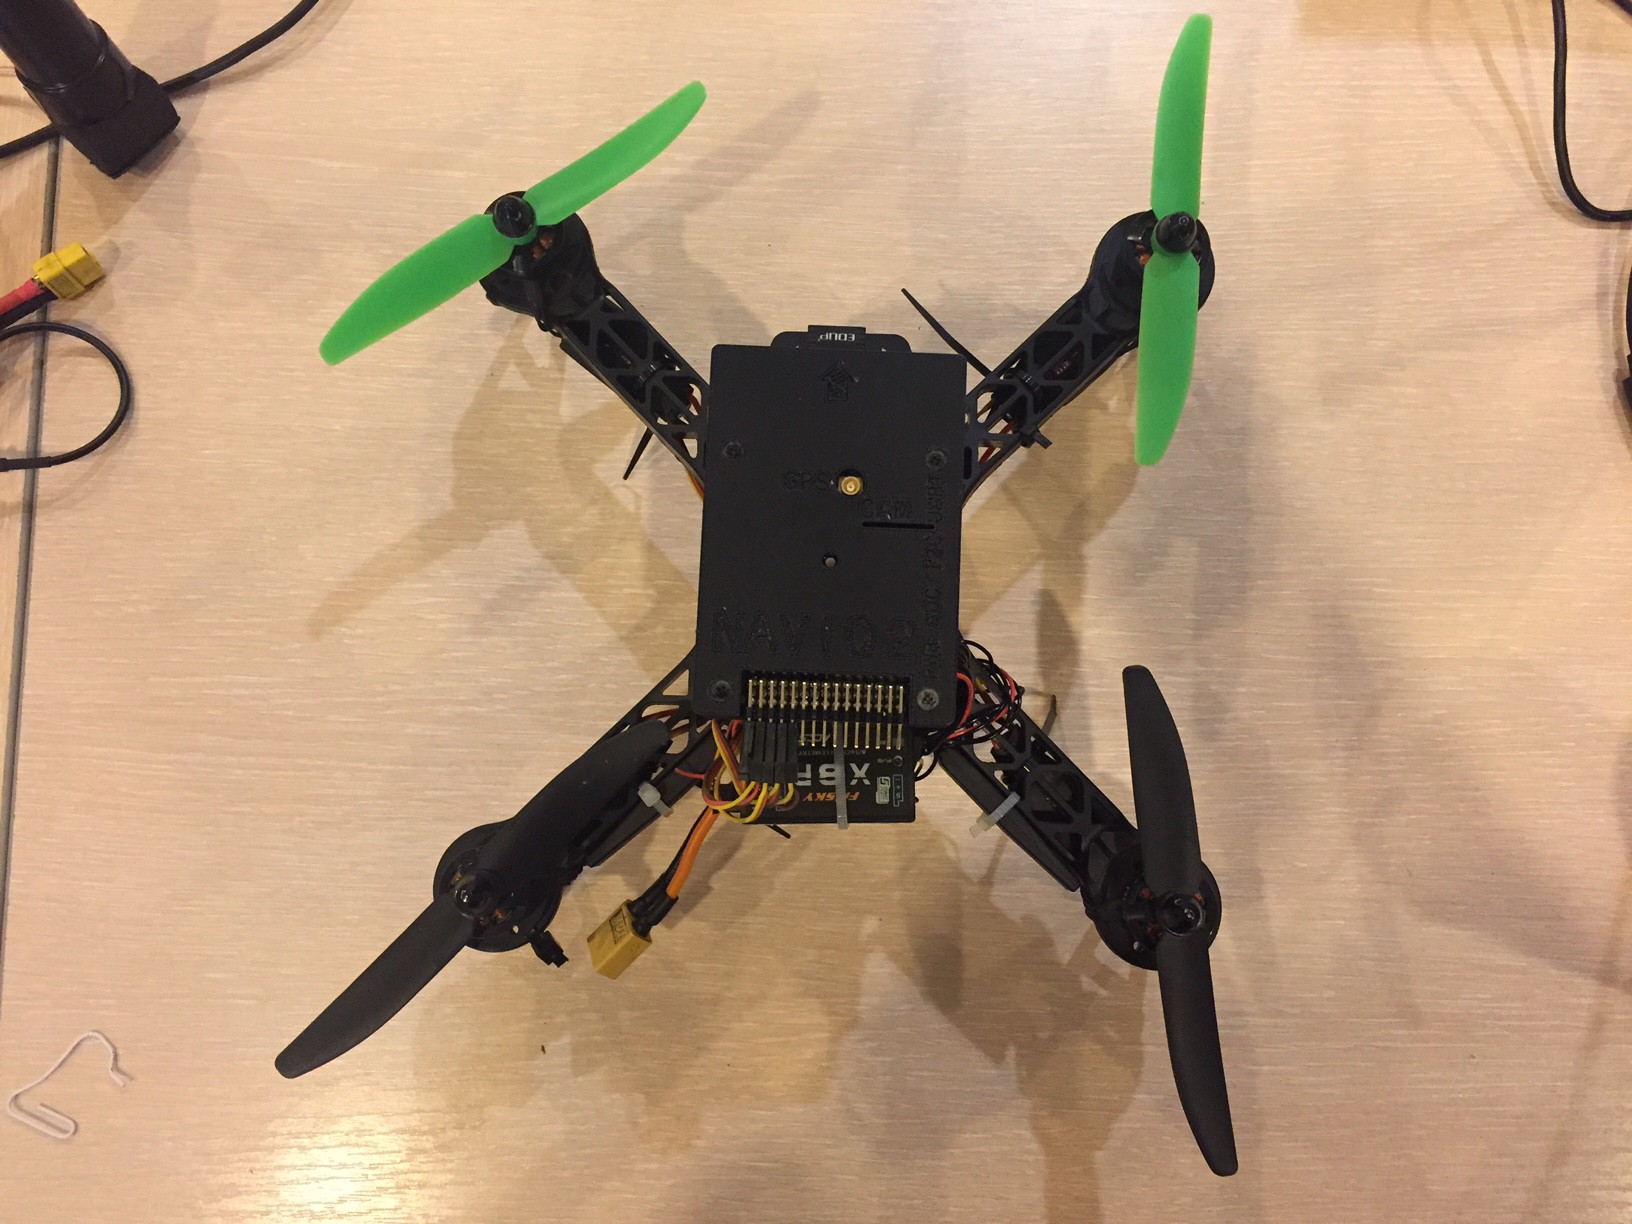
13Step 13
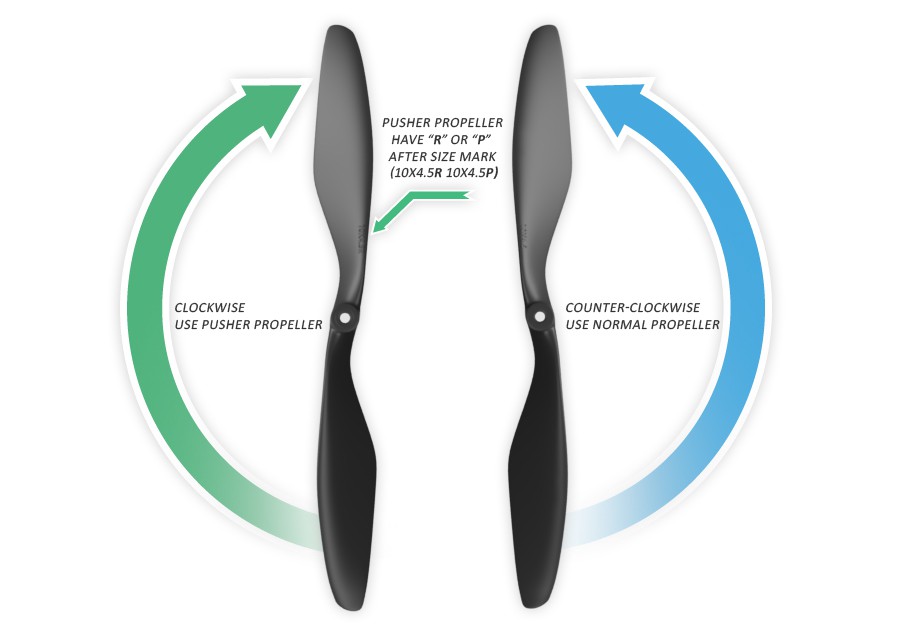
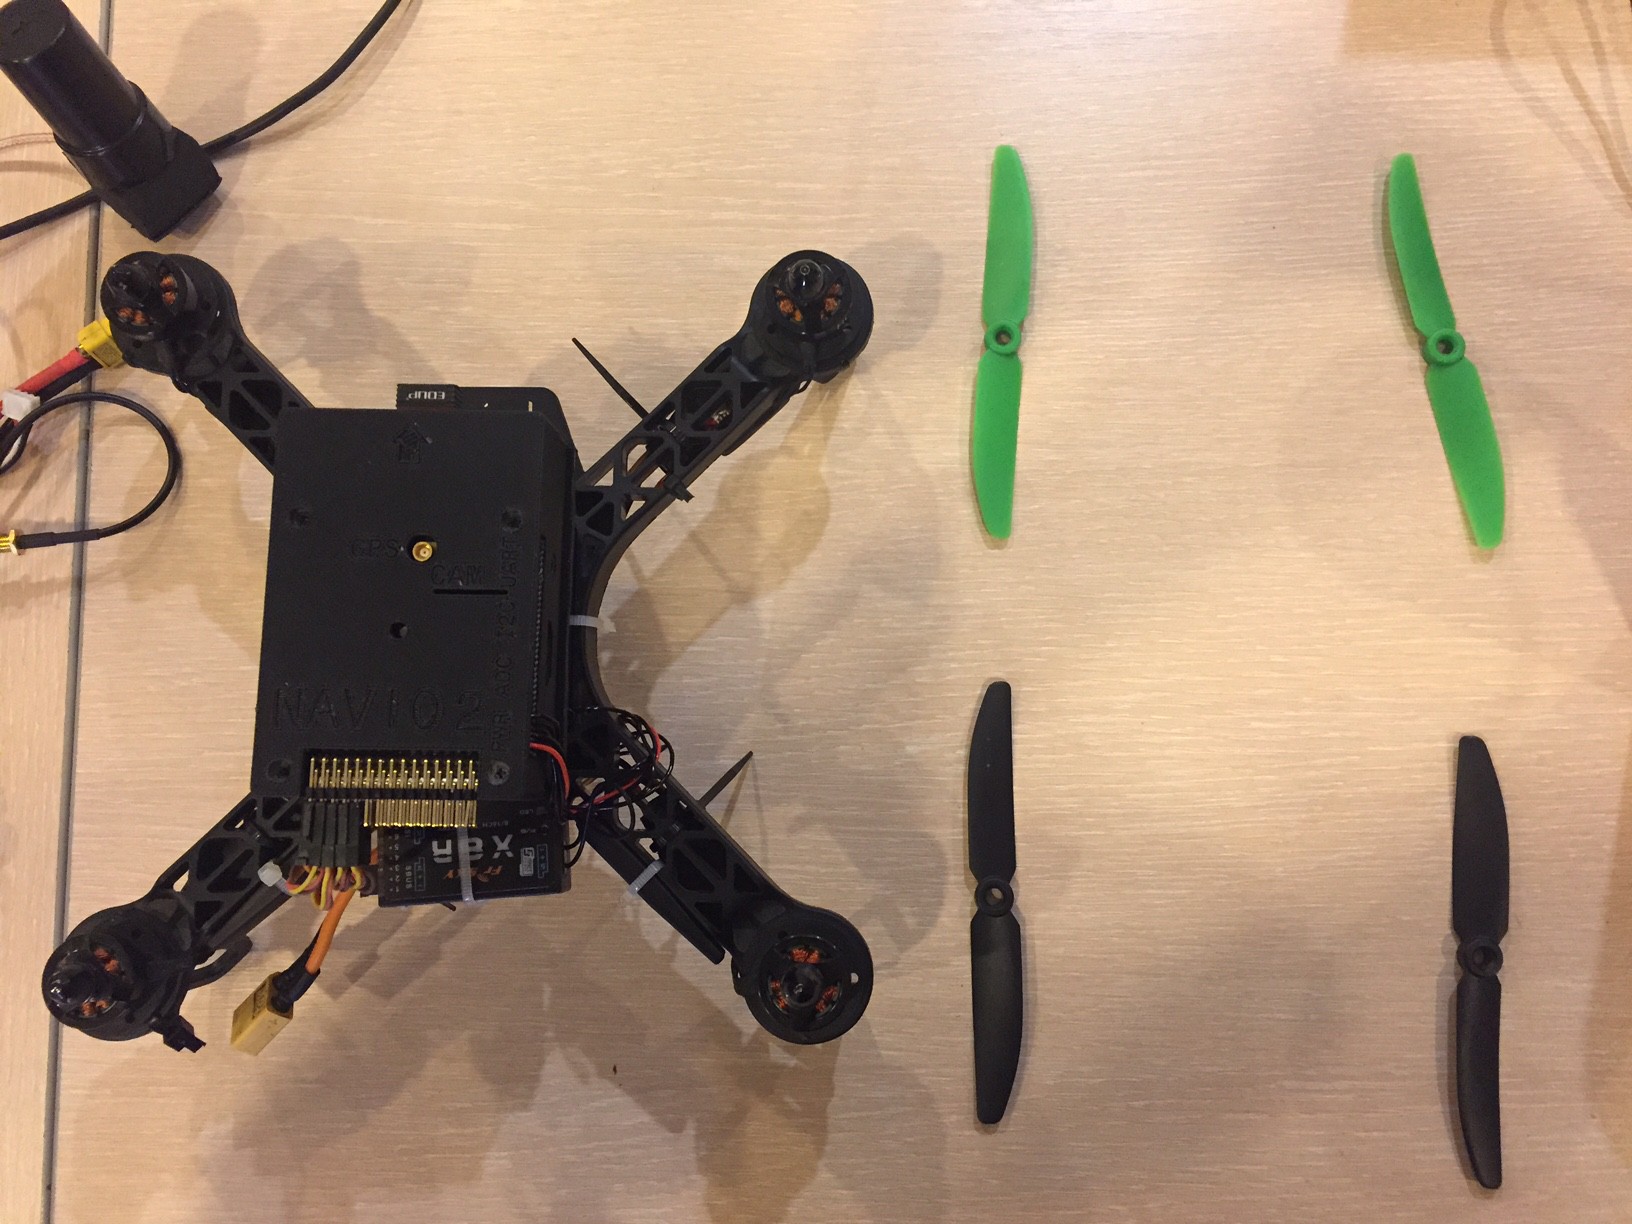
Propellers mounting.
Firstly, read the article. We've already mentioned that there are CW and CCW propellers. Look once again on copter scheme in 7th step. Front right and back left are rotating CCW while front left and back right are rotating CW. Look at the pic below to understand the propeller type.
![]()
I have set of propellers, I'll intall green in front and black to the back.
![]()
![]()
-
14Step 14
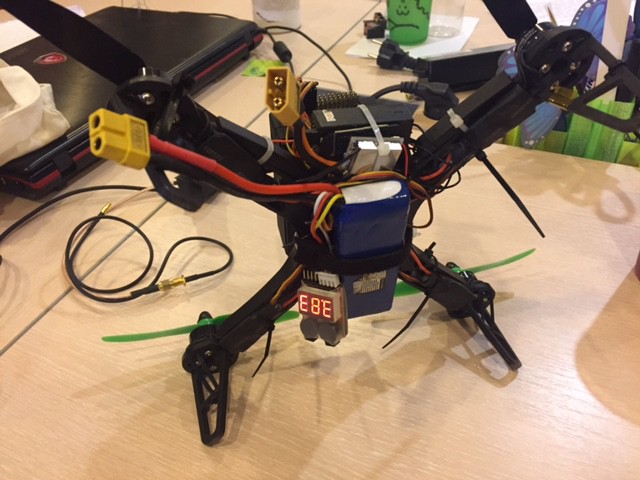
Attaching rest of hardware and final check.
There are only few steps from the first flight.
Check that the battery is charged, attach the voltage checker to it. Attach battery tight to copter frame. Don't power copter for now.
![]()
Prepare you GCS, power the copter. Check that you don't have any warnings and errors (exept GPS, we haven't connect it yet). If your NAVIO2 is ready for arming you'll see the LED is blinking blue. Try to arm and disarm it. If you are successful, you now can try to fly in stabilize mode.
Video with final check:
Before proceed to First flight I strongly recommend you to check your build with this drone calc: http://www.ecalc.ch
Moreover it will be very useful to setup battery monitor in advance.
-
15Step 15
First Flight.
The first flight will be without GPS, so the only flying mode is Stabilize. I just wanted to check calibration and feel how copter will behave itself.
-
16Step 16
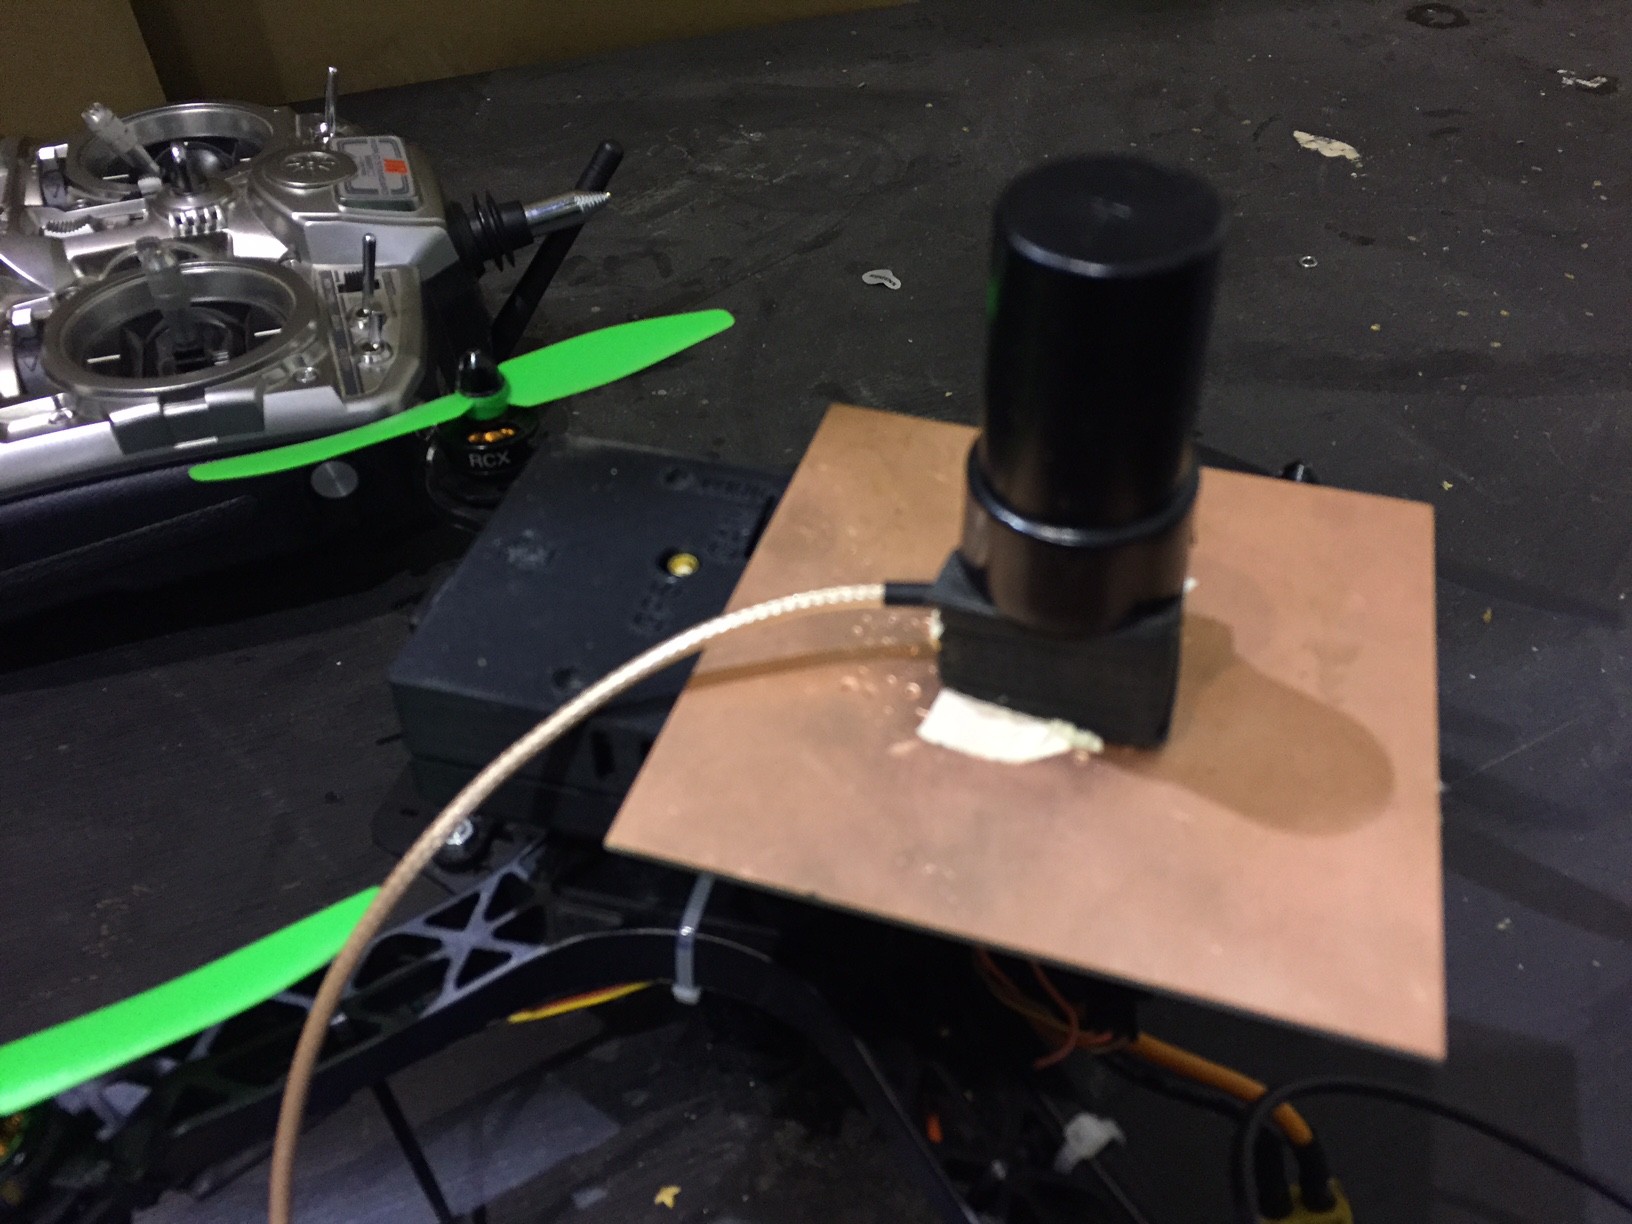
GPS antenna attaching.
More interesting is to try flight modes. You can set them up in mission Planner: Initial setup->Mandatory Setup->Flight modes. I found a stick on Transmitter responsible for mode switching and assigned 3 modes:
Stabilize - fly your vehicle manually
Alt Hold - Copter maintains a consistent altitude
Position Hold - the vehicle maintains a constant location
![]()
Next I should install and connect GPS intself. My copter is very small and it is not many place where I can install antenna. To isolate antenna from NAVIO2 I used copper plate and attached it with double-sided tape.
![]()
![]()
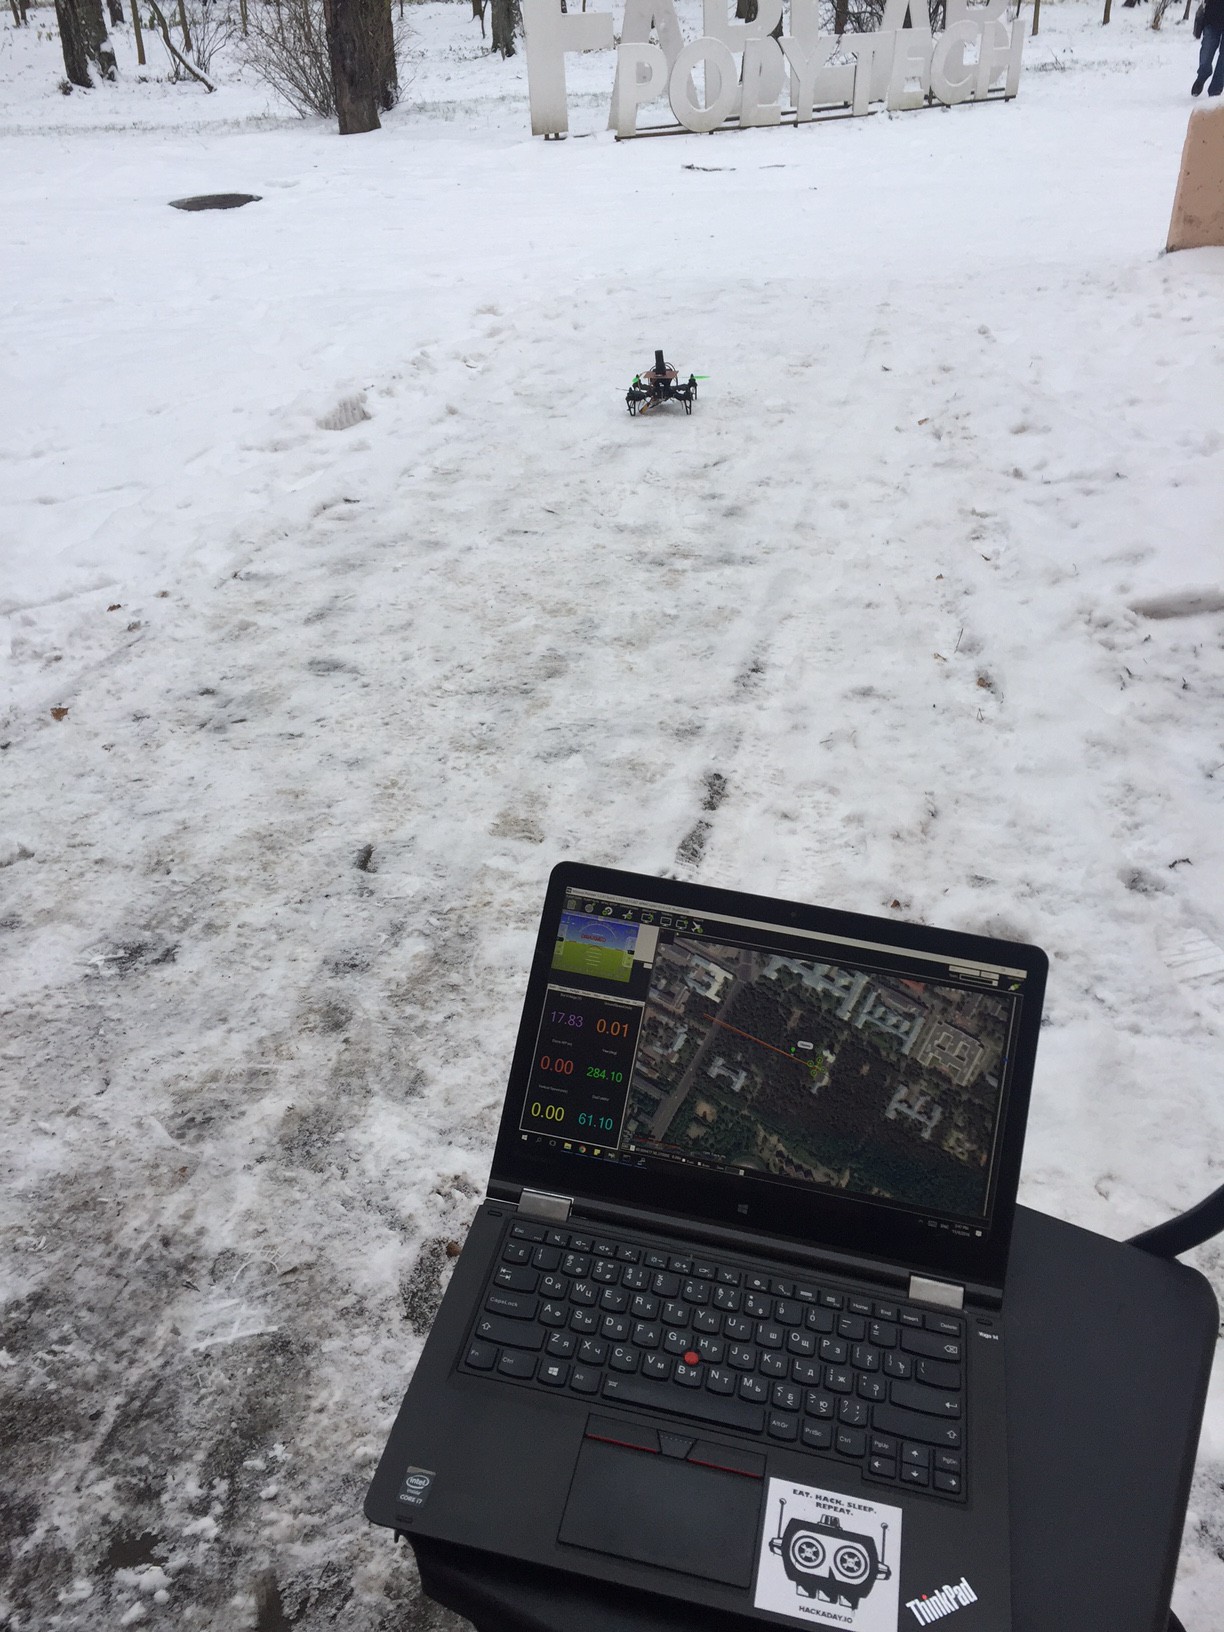
This time when you run Mission Planner and power your copter, you must have green LED blinking on NAVIO2 and see "3D Fix" Status in Mission planner, if GPS is ready. An important factor of getting 3d fix is area and weather around you. It is better to test copter in the field or at least far from high buildings.
First flight in different modes:
![]()
Video will be soon
My first copter build with RPi2 and Emlid Navio2
Focused on making clear every building step with helpful links and tips for total noobs (like me) who wants to get started with drones


Discussions
Become a Hackaday.io Member
Create an account to leave a comment. Already have an account? Log In.