Matt Bradshaw
-
Explaining the Randomness
08/03/2019 at 10:43 • 0 commentsSo far, almost all my build logs for this project have been about technical challenges, design choices, etc - there has been very little about the most interesting aspect of this drum machine: the way that randomness creates a beat. Now that I'm happy with the basic design and am well into the coding section of the project, this seems like a good time to explain the algorithm (if that's the right word?) behind DrumKid.
DrumKid starts off as a pretty regular drum machine. It begins with a basic 16-step drum pattern, e.g. "kick hat hat hat snare hat hat kick kick hat kick hat snare hat hat hat" (it can play multiple sounds at once, but that's much harder to write in a sentence!). This basic pattern is then modified using random numbers in the following way:
Imagine that for each type of drum (kick, snare, hat, etc), and for each step in the sequence, you roll a dice. If you roll a six, a drum hit is added to the sequence. So, as well as the original pattern, about a sixth of the steps (for each type of drum) that would have been empty now have drum hits. These dice rolls will be different every time, creating an unpredictable beat.
If we want the beat to be more unpredictable, we could lower the threshold of when we add an extra hit - say, when we roll a six or a five. This threshold effectively controls how much randomness we allow into the beat, and is controlled by a knob on the drum machine (obviously with a much bigger range than the one to six of a dice!). Turning the knob to zero will mean that only the original pattern is played, while turning it up to maximum will mean that every drum is triggered on every step. This parameter is called chance.
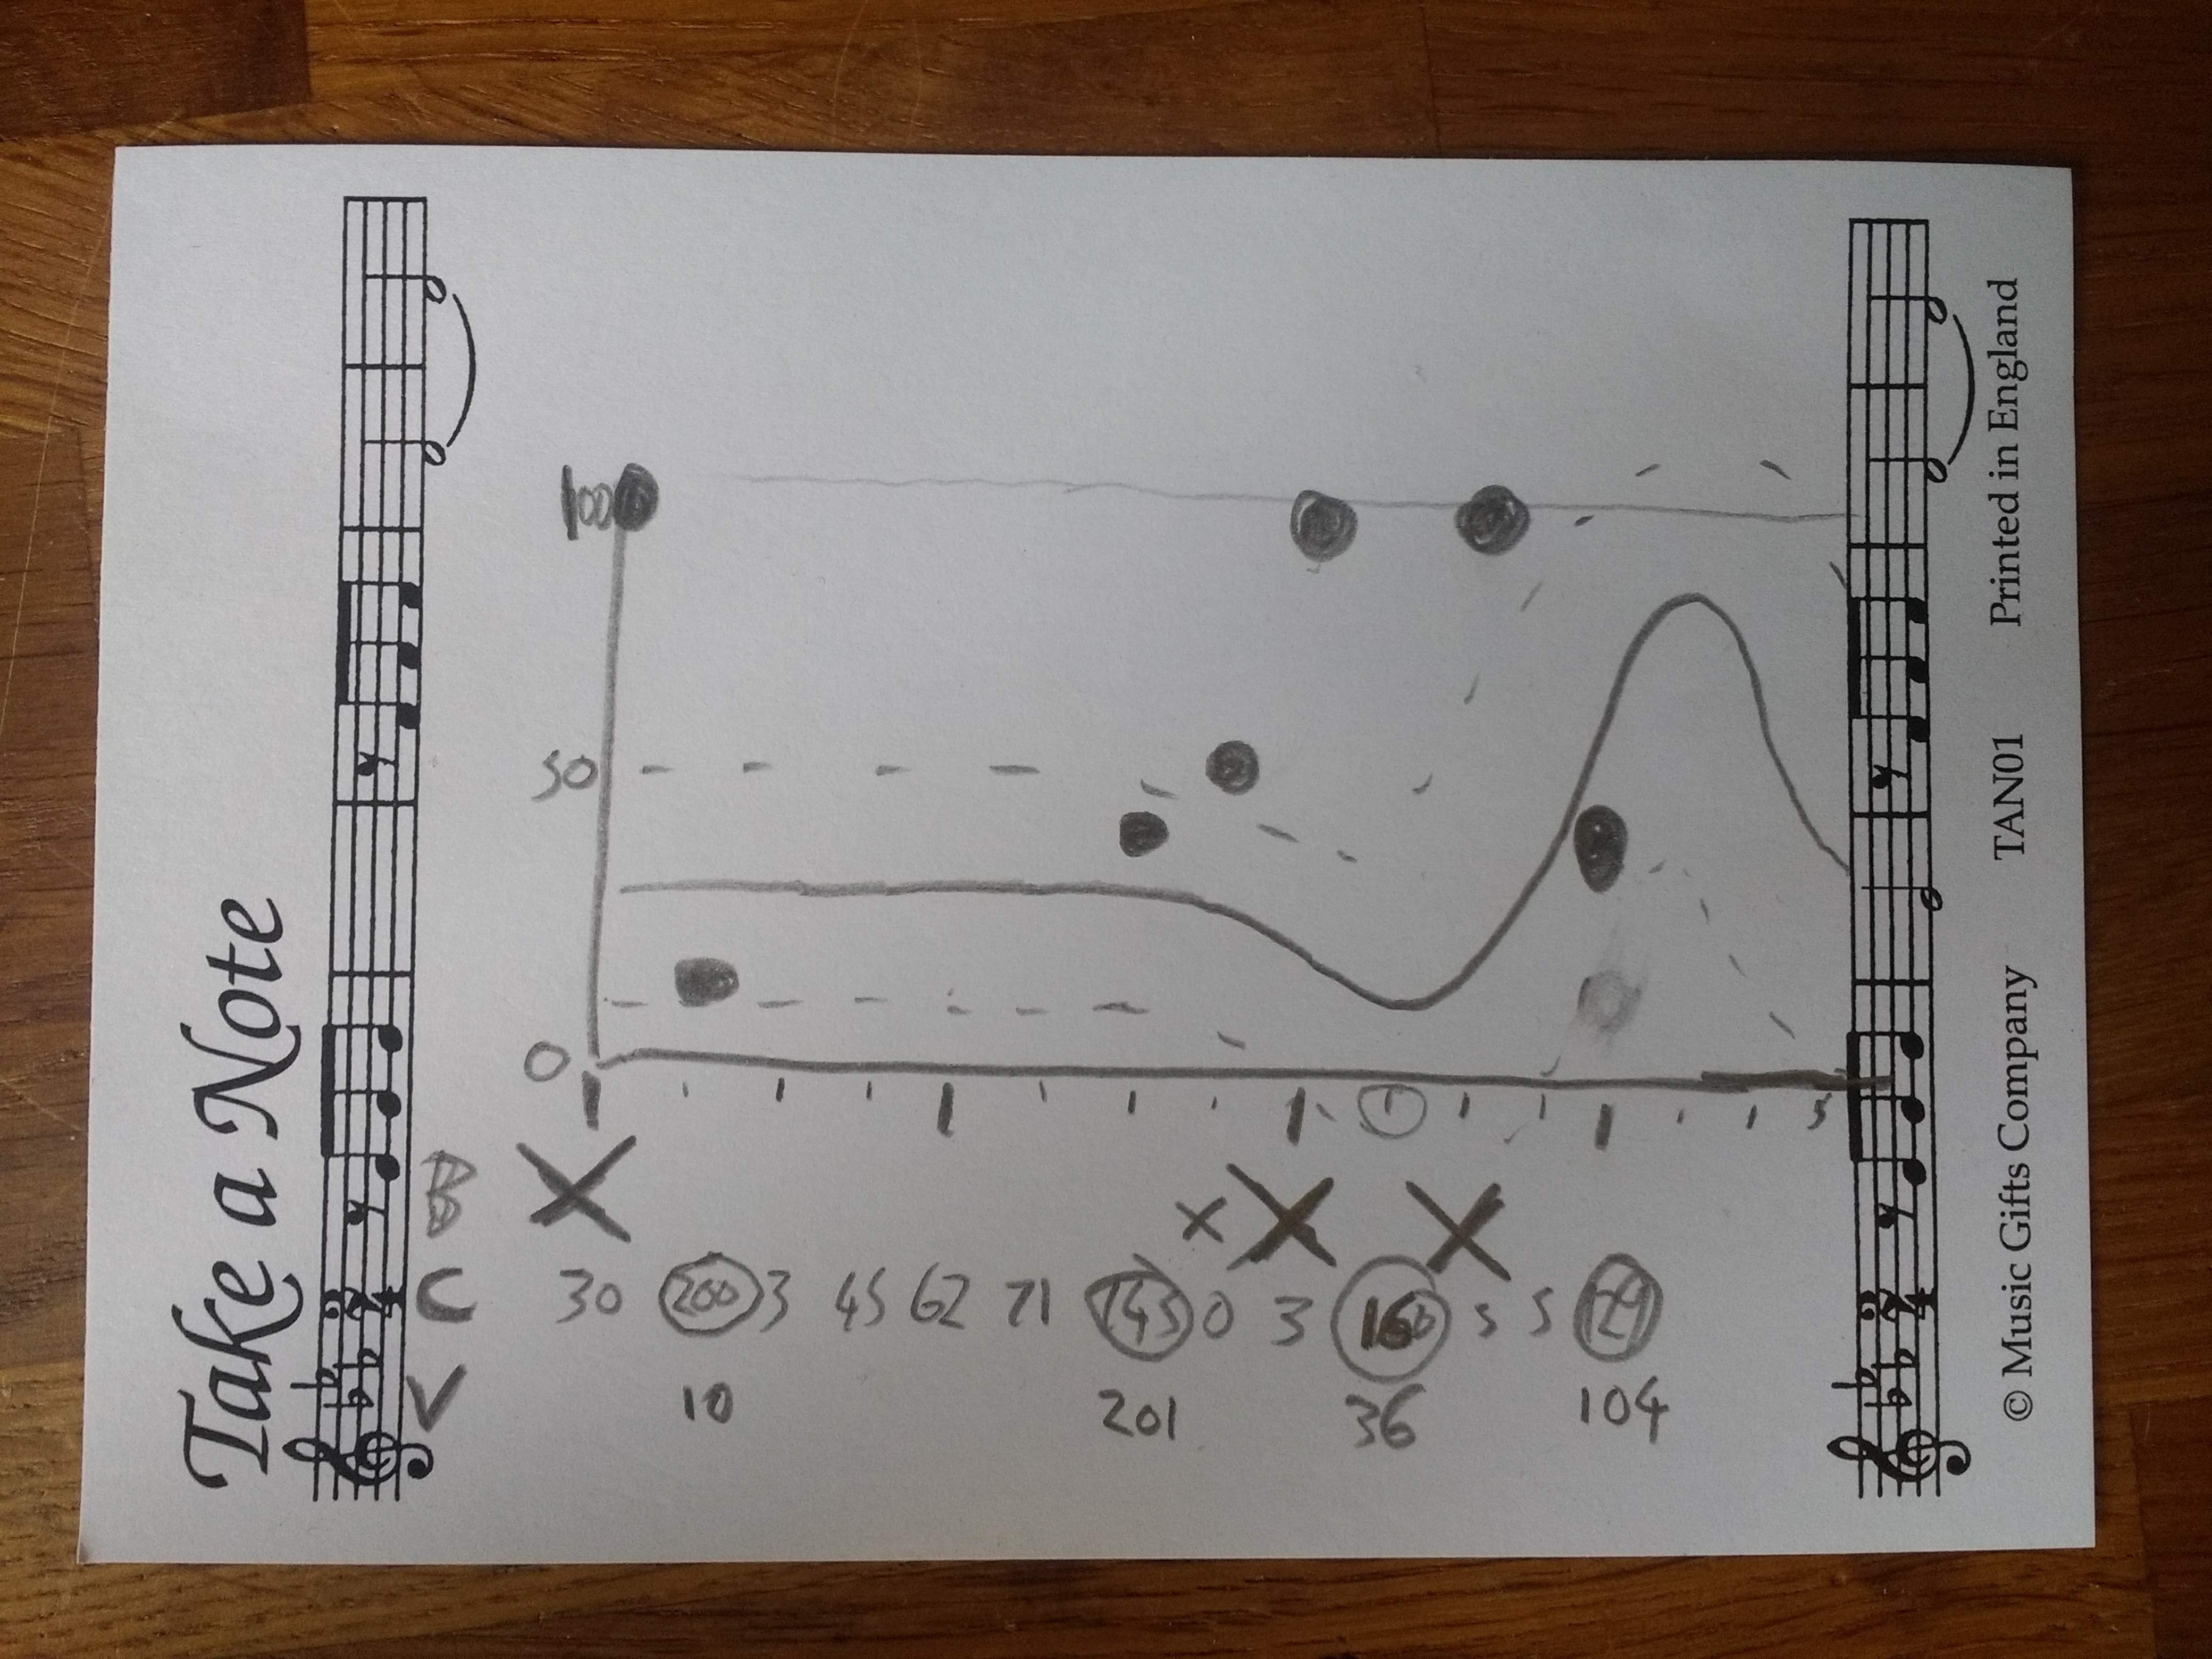
![]()
This sketch helped me figure out how to code DrumKid's aleatoric algorithm, but is probably deeply unhelpful as an explanatory diagram This is an interesting start, but it sounds much nicer when we also vary the volume/velocity of each drum hit. Let's imagine that every time the first dice has determined that there will be an extra hit, we will also roll a second dice to determine the velocity, with a roll of one creating a very quiet hit, and six creating a very loud hit. This will sound interesting, but a little bit wild - we want a way to tame this randomness.
We can define a minimum and maximum value for these random velocities, so that, for instance, all of the extra hits are between 30% and 50% volume. This allows the original pattern to remain discernible, while adding a sort of sub-groove to the beat. Alternatively, you could put the minimum at 10% and the maximum at 90%, creating a much busier feel. After a bit of experimenting, it turns out that the most intuitive, live-performance-friendly way to control these parameters is not with "min velocity" and "max velocity" knobs, but with one knob to determine the midpoint the random velocities, and one knob to control the range. This means you can create a drum fill simply by turning up the midpoint knob.
Manipulating these three knobs, chance, midpoint, and range, gives a lot of expressive control over a drumbeat, and these will be the main default controls on DrumKid. By pressing different buttons, it will be possible to switch the knobs to other functions, including audio effects like pitch shift, bit-crush, etc, and there may be other more obscure randomness-based parameters (perhaps an inverse of the process described here, which removes hits rather than adding them), but these three controls are the heart and soul of DrumKid, and provide its signature sound.
Coding is going well, so hopefully there will be an audio/video demo soon!
-
Prototype Version 4 - Success!
07/31/2019 at 15:43 • 0 commentsSo, the previous prototype looked cool but a routing error meant that it was completely non-functional. Unperturbed, I rerouted the design in KiCAD, fixed a couple of other errors I'd noticed, and ordered a new run of five PCB's, which arrived last week. I soldered everything in place, plugged in the battery pack, and... disappointment. The LEDs were flickering dimly, and a drumbeat was barely discernible through white noise in the headphones. I was frustrated, and busy with other work, so I put the barely-functional prototype to one side for a few days.
![]()
Spot the difference - version 3 on the left, version 4 on the right Yesterday, with a free afternoon ahead of me, I waded back into the problem. My first thought was that the batteries weren't powerful enough, perhaps due to some bad soldering that was causing the circuit to leak power somehow, but I tried a few different power sources and the results were the same. I tried a simpler Arduino sketch, and managed to get the LEDs working at full brightness, which led(!) me to realise that I'd done something stupid in the original sketch. I corrected my original mistake and moved onto the audio problem.
![]()
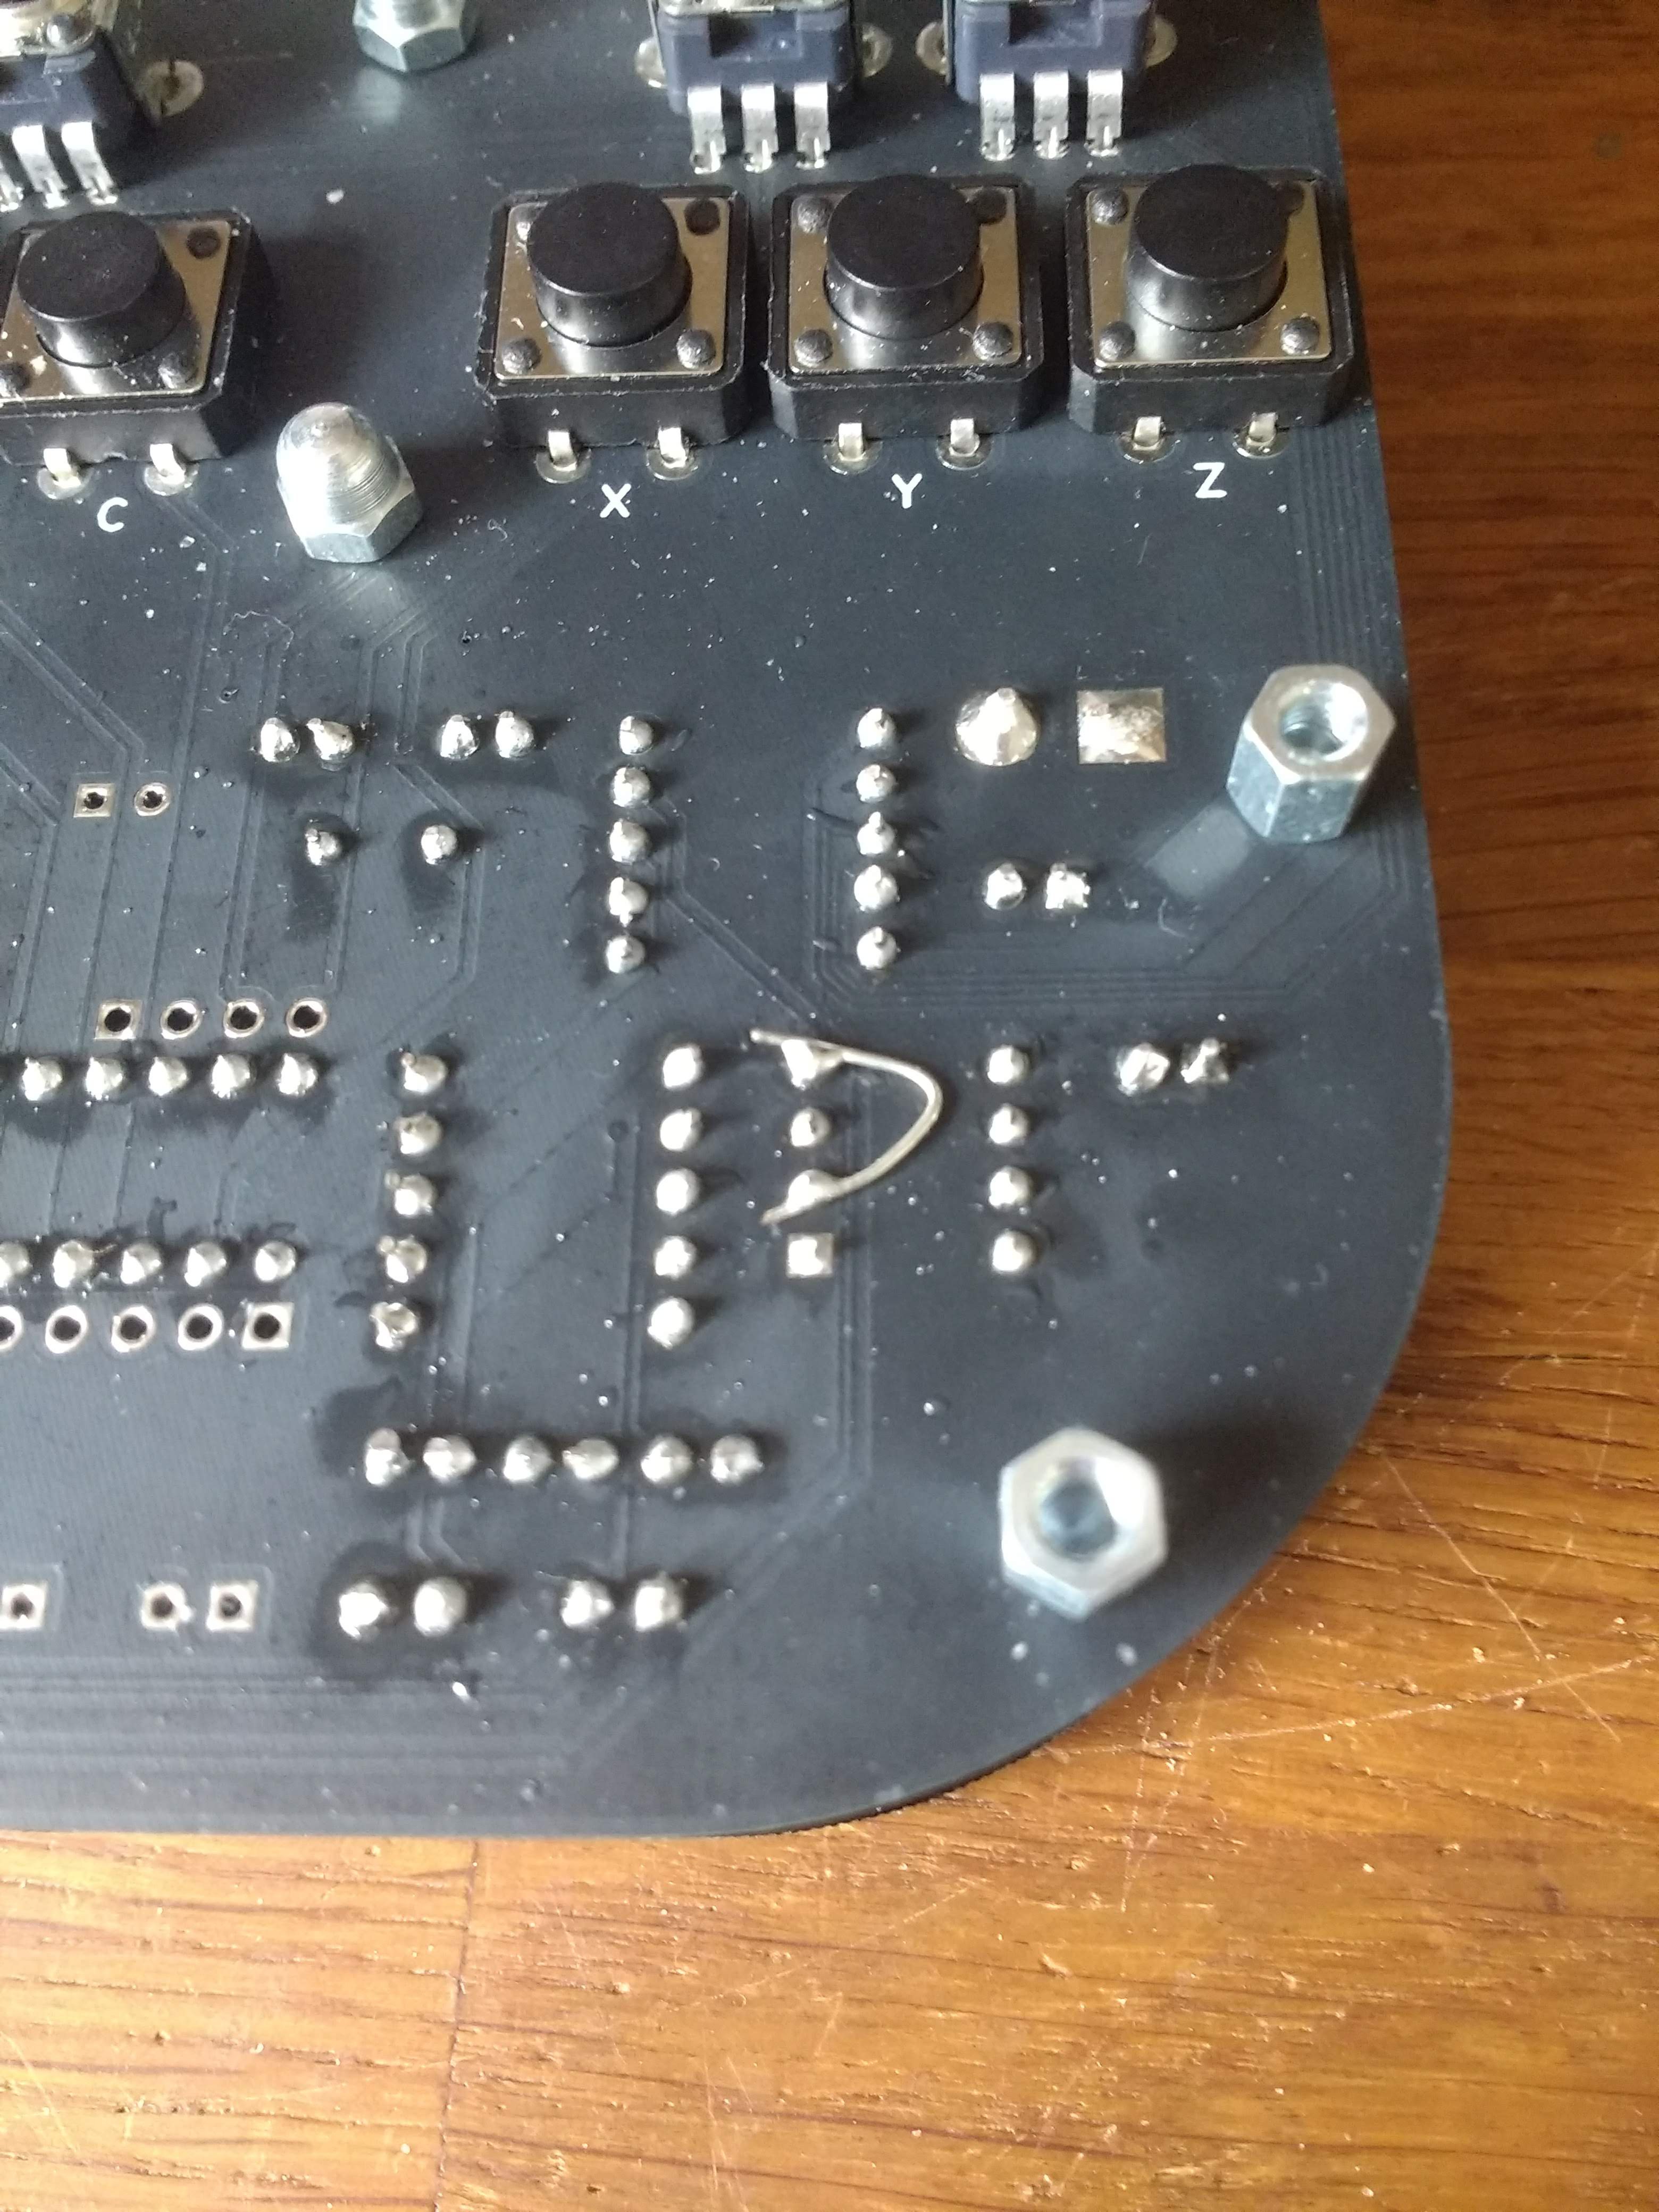
The audio was noisy, inconsistent, and had an annoying high-frequency buzz. Cunningly, I had included breakout pins in the PCB design, which meant I was able to easily intercept the raw, low-voltage audio output before the amplifier chip (LM386) and have a listen. I fed it through what should have been an identical amplifier circuit on the breadboard prototype, and the sound was much nicer, albeit not perfect, so I painstakingly double-checked whether my KiCAD schematic accurately reflected my breadboard. It did not! I had forgotten to ground pin 4 of the LM386. I briefly thought "oh no, I guess I'm ordering another PCB" before realising that this mistake could be fixed by soldering a small wire from pin 2 to pin 4. Obviously not a long-term solution, but fine for a prototype.
![]()
Quick and dirty hack to ground pin 4 of the LM386 Suddenly there was progress. The volume control went from near-silent to super-loud, with no white noise, but there was still a high-frequency buzz. I showed the almost-working drum machine to my always-supportive partner, secretly hoping she might not even notice the buzz, but she pulled a face and said it sounded horrible. This problem turned out to be super-easy to fix, though - I just added a single decoupling capacitor (I had left optional holes for several on the PCB layout), and everything was perfect!
![]()
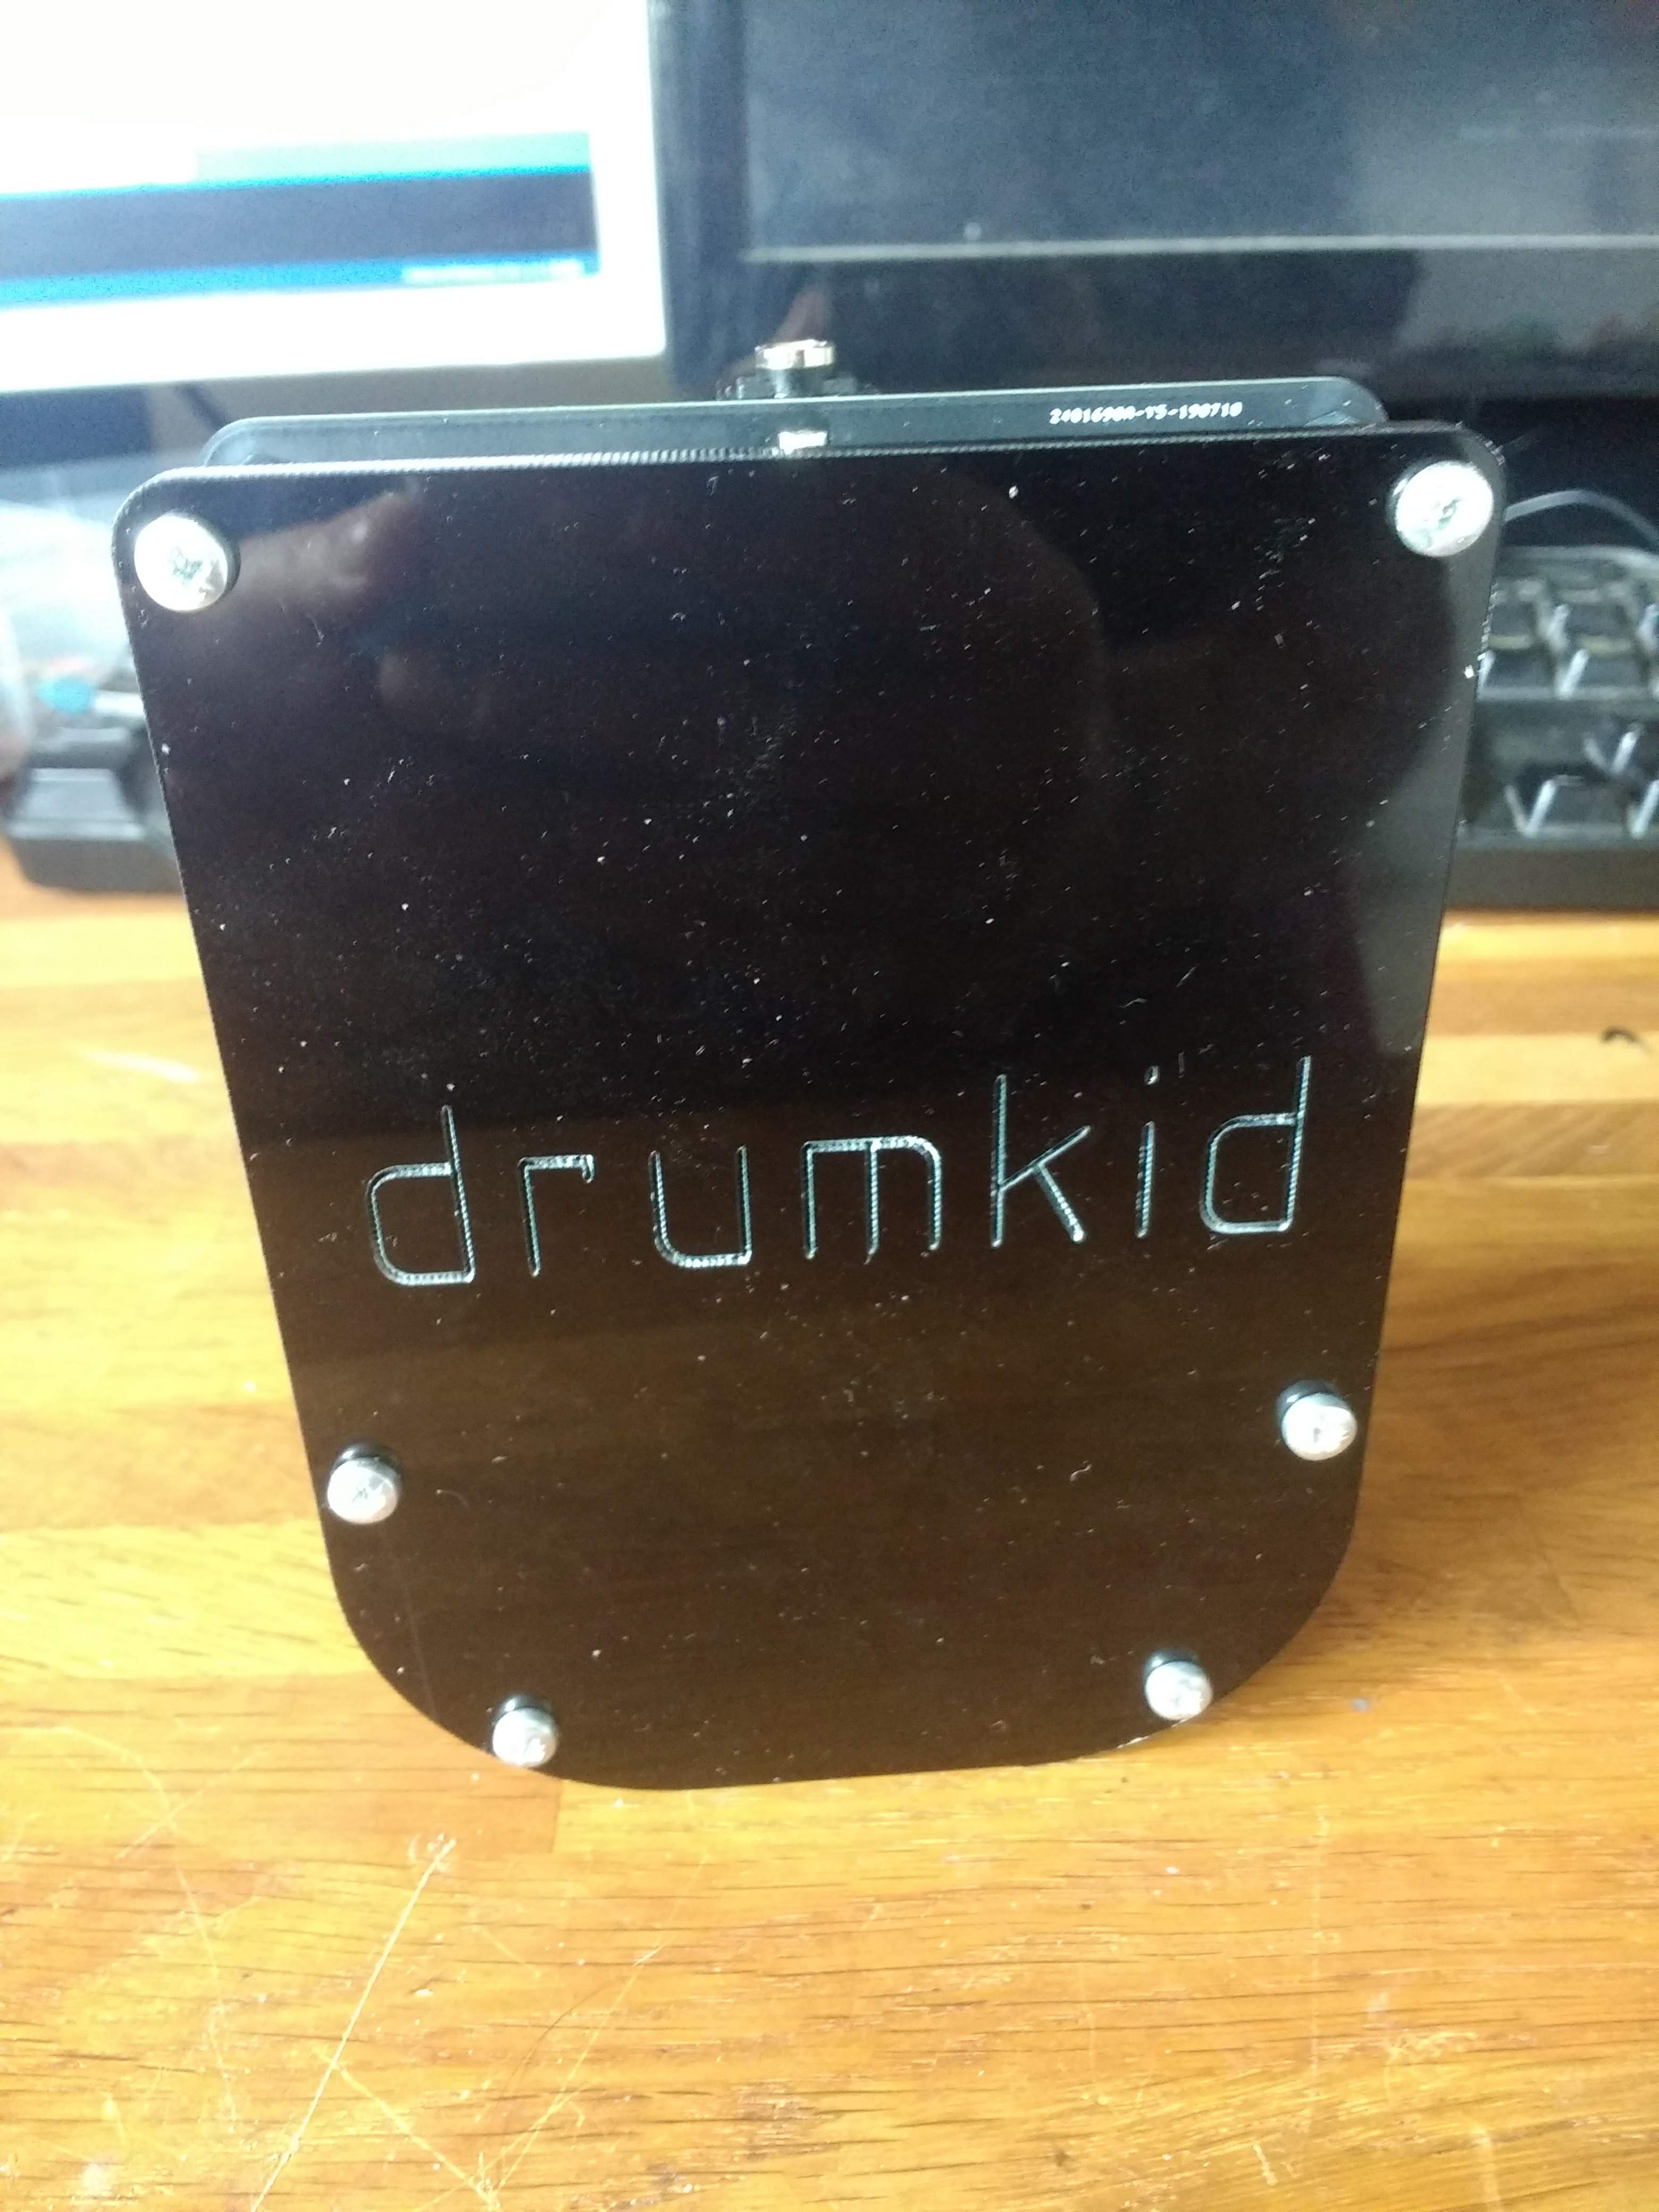
First assembly with laser-cut pieces And not only was the PCB working, but a very generous Twitter-friend had laser-cut the two parts I needed to complete the prototype, and sent them to me in the post. This means that I'm now at a very exciting stage:
- The PCB works, with only one tiny extra wire needed to account for a minor error in the design
- The laser-cut parts look and feel great, and I'm happy with the overall aesthetics of the drum machine
- The Arduino sketch is producing nice, clean audio via the Mozzi library
- The PCB now matches the breadboard design pretty much exactly, which means I can work on the code using an Arduino and a breadboard, safe in the knowledge that it will work on the PCB once I'm happy with the code
I've now got a couple of weeks to focus on the code before the Hackaday Prize deadline, making sure the drum machine is intuitive, fun, and (most importantly) musically interesting.
![]()
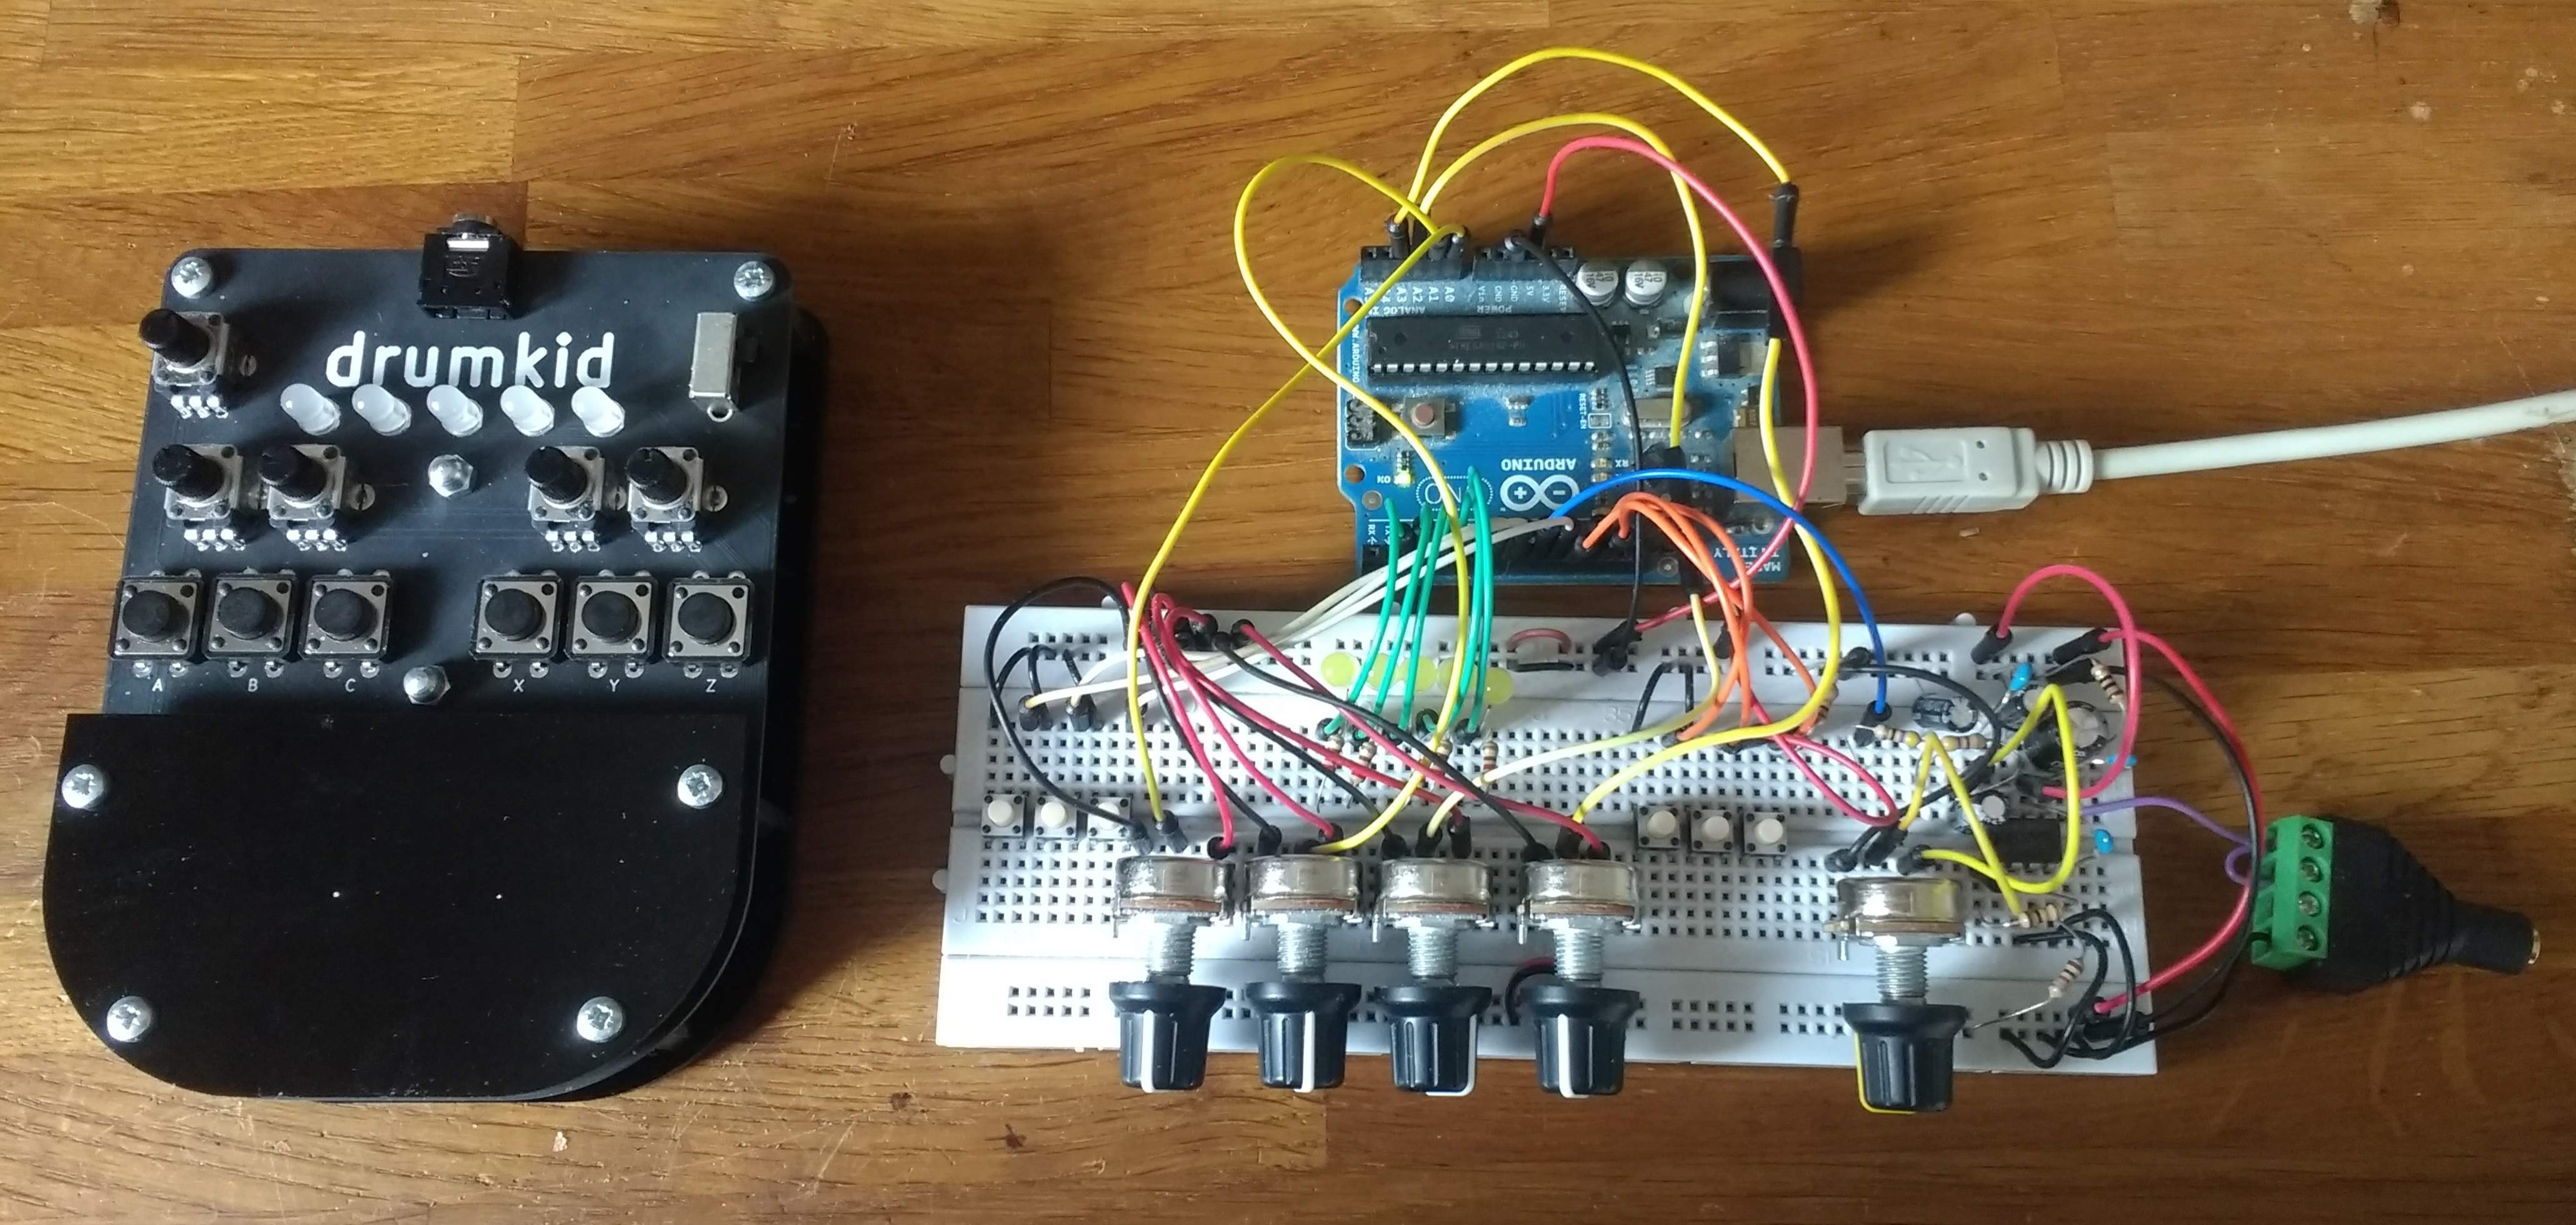
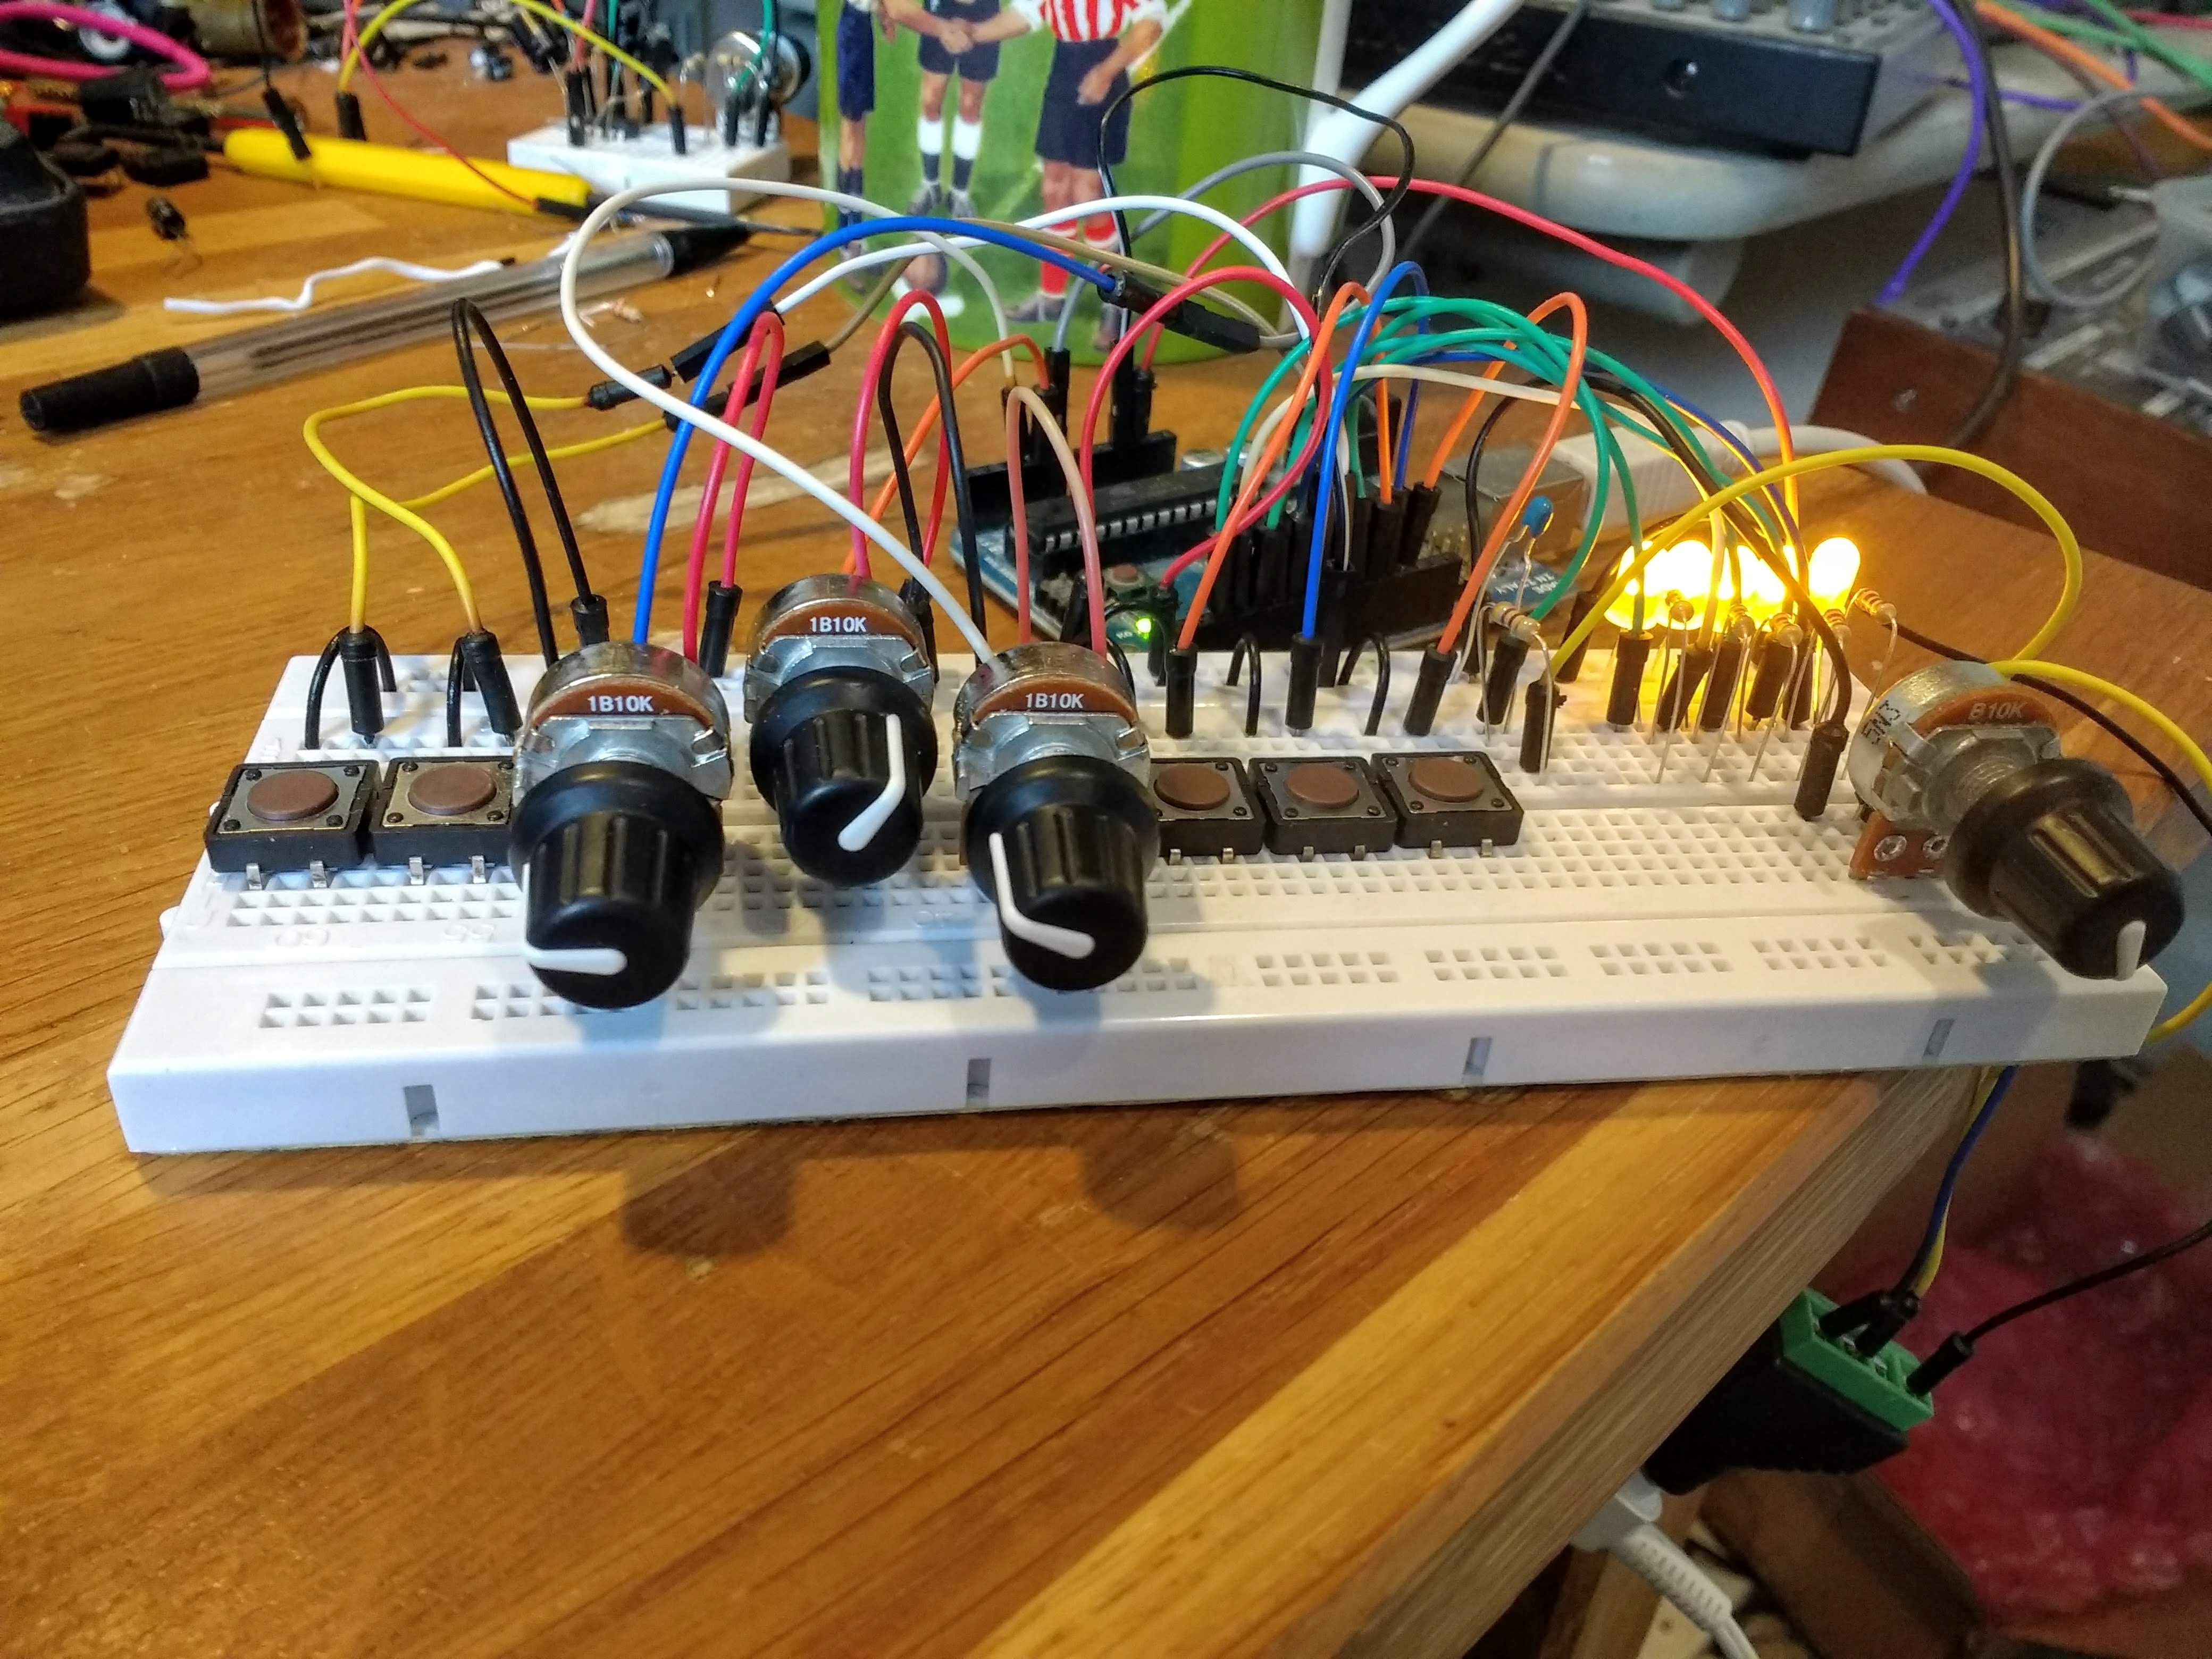
Two drum machines, identical in function but not form - this will be my prototyping setup while I work on the code -
Prototype Version 3
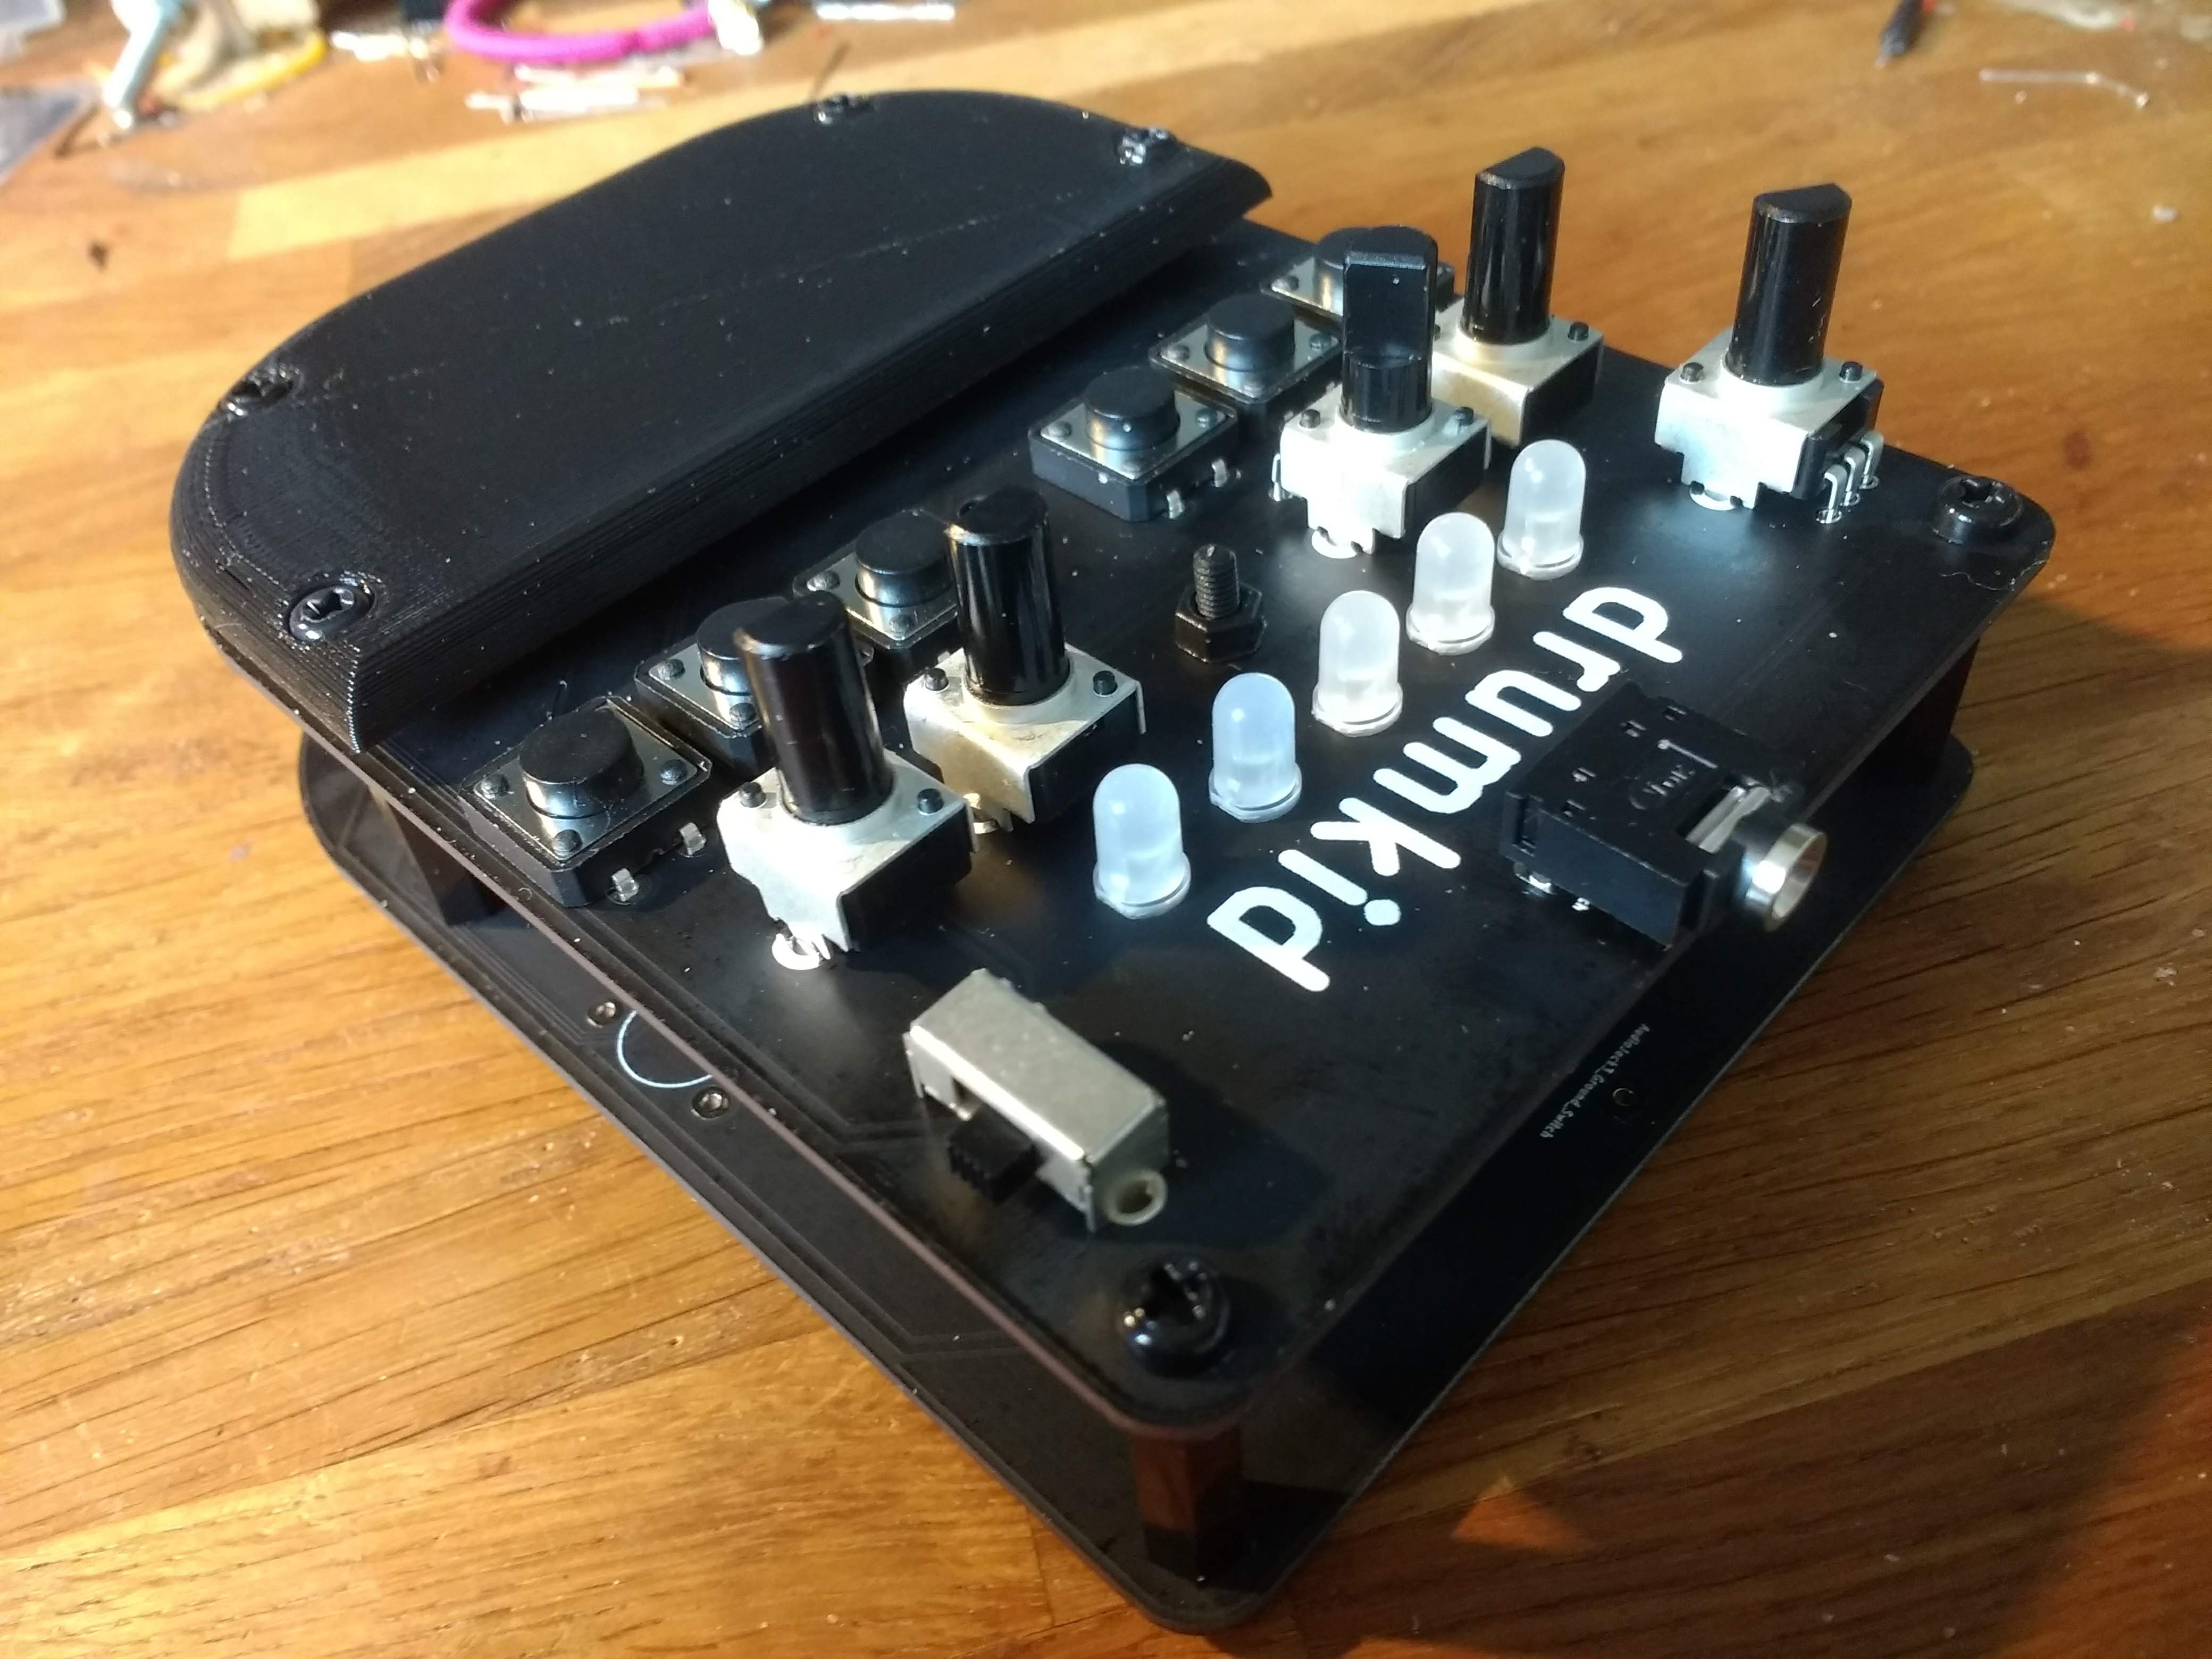
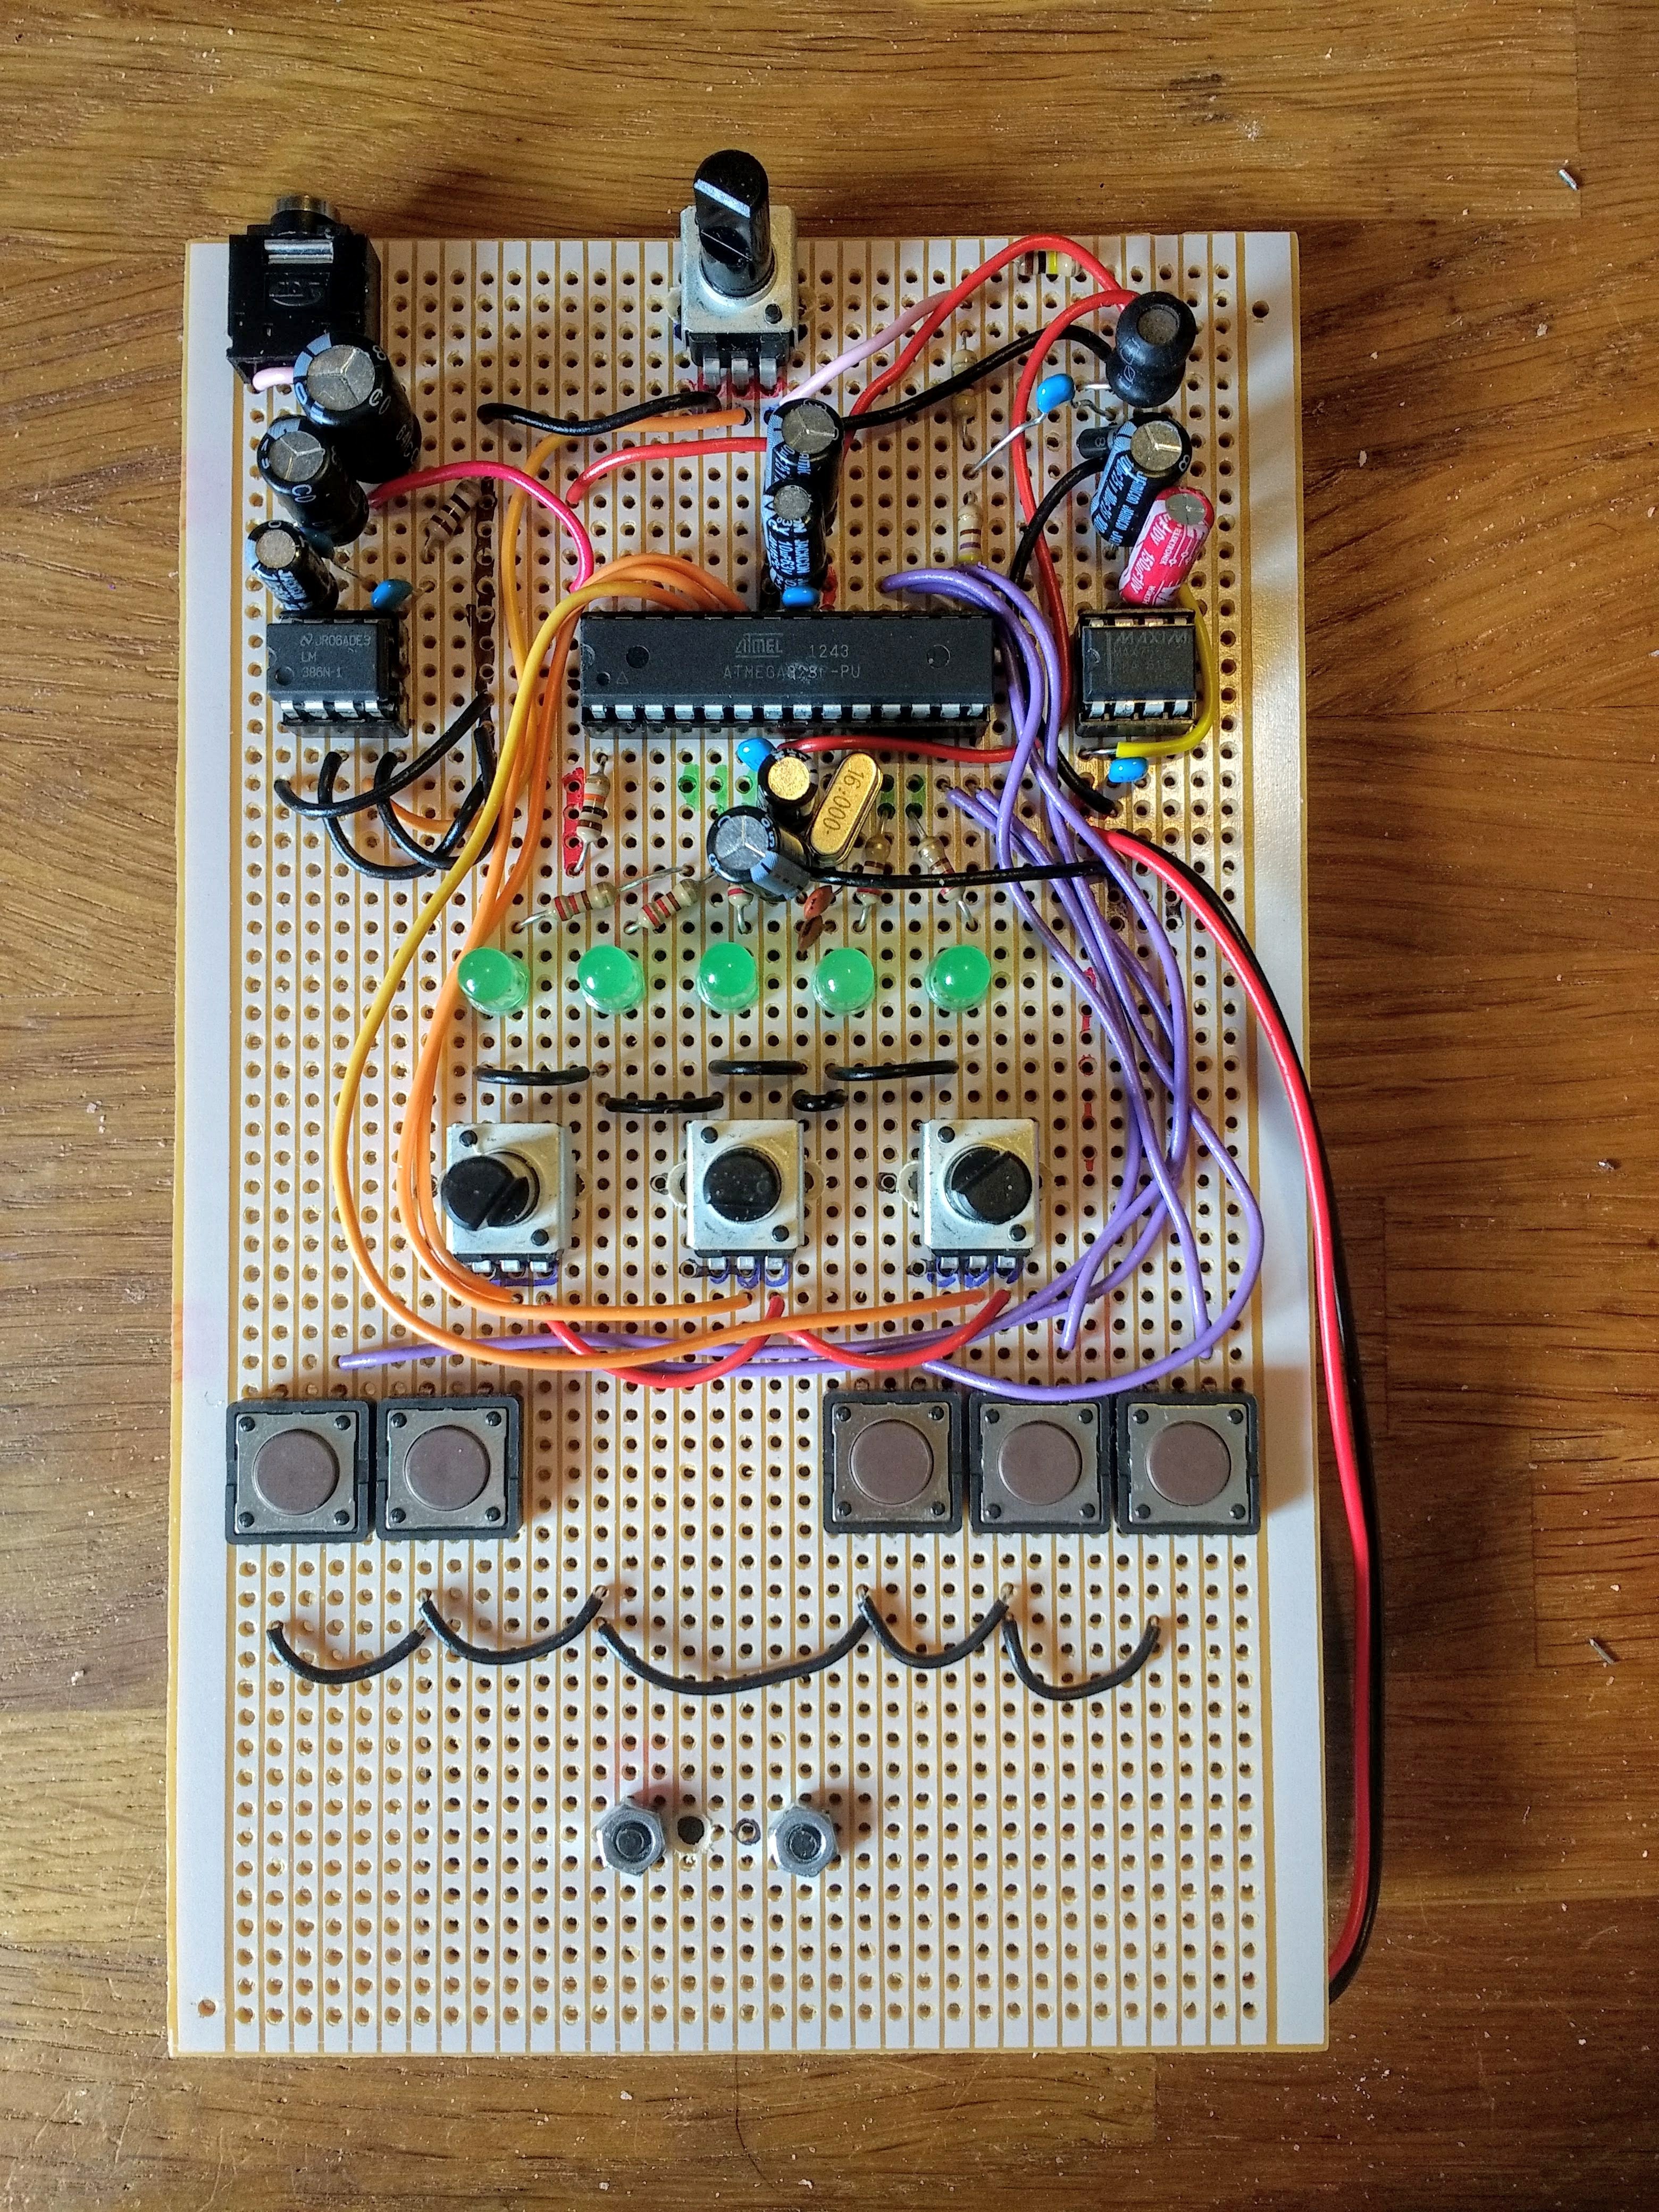
07/12/2019 at 08:34 • 0 commentsHappy with recent progress! After deciding to go for a more simple, bare-bones design, I designed a new PCB which ran off 3 AA batteries instead of 2, eliminating the need for voltage regulation. I also made the decision for the top surface of the PCB to be the actual front of the instrument, eliminating the need for a traditional case. Long story short, the PCB arrived and this is approximately what it looks like when assembled, with a few caveats to be discussed further down:
![]()
You can see that the design consists of a top and bottom layer, separated by standoffs, as well as an extra "palm rest" piece on the top layer, to cover ugly/sensitive electronics. The main circuitry is on the underside of the top PCB - the "palm rest" piece just hides the solder. There are now six buttons and four knobs on top to control the instrument, plus a volume knob. I'm really pleased with the look and feel of the instrument, but there are a number of ways in which the final version will differ from this mock-up:
- The potentiometers will be slightly shorter and knurled for better ergonomics
- The standoffs and machine screws will be metal for better durability
- The battery holder, which is mounted on the underside of the PCB, will be secured in place with machine screws and dome nuts, for better aesthetics than the current temporary nut
- In this photo, the top "palm rest" cover is 3D printed, while the bottom, protective layer of the case is actually just a spare, unpopulated PCB - both these pieces will likely end up as laser-cut plywood or acrylic
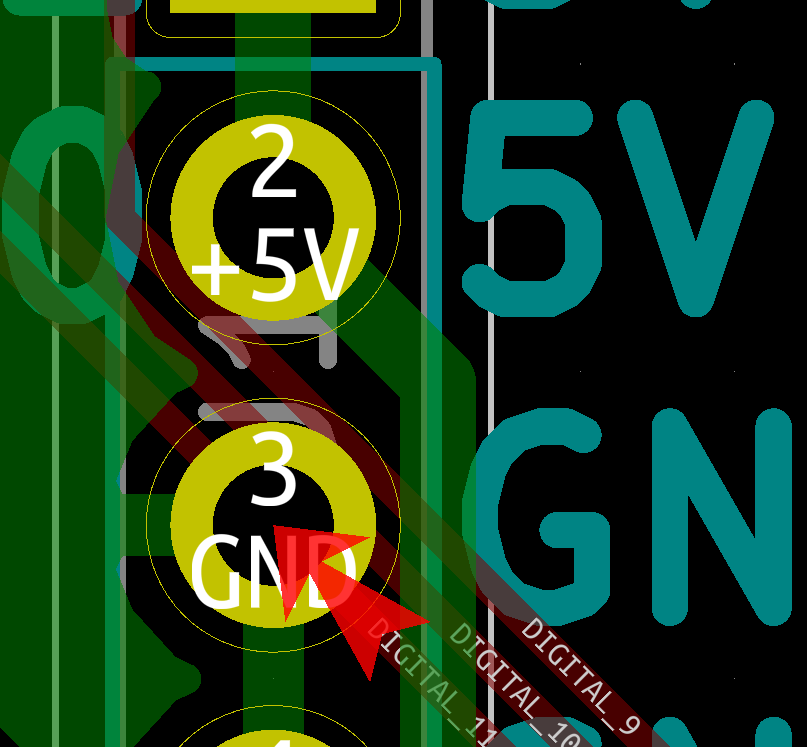
There is also one other key way in which this prototype can be improved: it doesn't actually work! I'm embarrassed to say that I was rushing to finish the PCB design before heading to Glastonbury music festival with some friends, and ended making a silly mistake which rendered the entire board unusable. I am very keen for this design to be "hackable", so I have added breakout connections for all the main Arduino pins (5V, ground, 14 digital pins, 6 analogue pins), but I was struggling slightly for space and, as far as I can tell from reviewing the KiCAD files, I must have attempted to move the breakout pins halfway through routing the board. In doing so, I created a short circuit which I only noticed when testing an assembled board. Here's what I did:
![]()
All I had to do was click the "run DRC test" button, and this mistake would have been glaringly obvious, but by this point it was midnight and my mind was focused on packing for the festival. Never mind! It was a good lesson, and there were a couple of other minor issues with the board which I noticed anyway (mounting holes in the wrong place, poor layout choices, etc), so I've created a minor revision of the board and ordered another small run of 5 PCBs from China. Fingers crossed! In the meantime I can keep working on the code/firmware using my breadboard/Arduino circuit.
-
Overcoming Fatigue
06/24/2019 at 10:04 • 5 commentsI've hit a bit of a slump with this project so I'm writing a log to try and clarify my thoughts.
I like to think that I'm not the only maker whose shelves are littered with half-finished projects. Initial ideas are exciting, and that excitement often propels me as far as an initial proof-of-concept build, but then the grind of iterating the design kicks in and that often causes me to give up. "DrumKid" has already surpassed the vast majority of my previous projects, in that I've created several breadboard versions, a stripboard version, and two PCB versions, as well as a 3D-printed case. This is something to be proud of, and yet, paying-the-bills work has pushed DrumKid development off my immediate list of priorities, and the Hackaday Prize deadline is steadily moving closer. What to do?
At the start of this project, I promised myself I would take the simplest route where possible. Getting bogged down with power management, amplification, and case design has taken me away from the super-simple design I was imagining. It's time to be brutal and come up with a simple, bare-bones product. My mentoring session gave me some really good tips about how to simplify the circuit design, and now I think I have a good plan for simplifying the case design - by not building one.
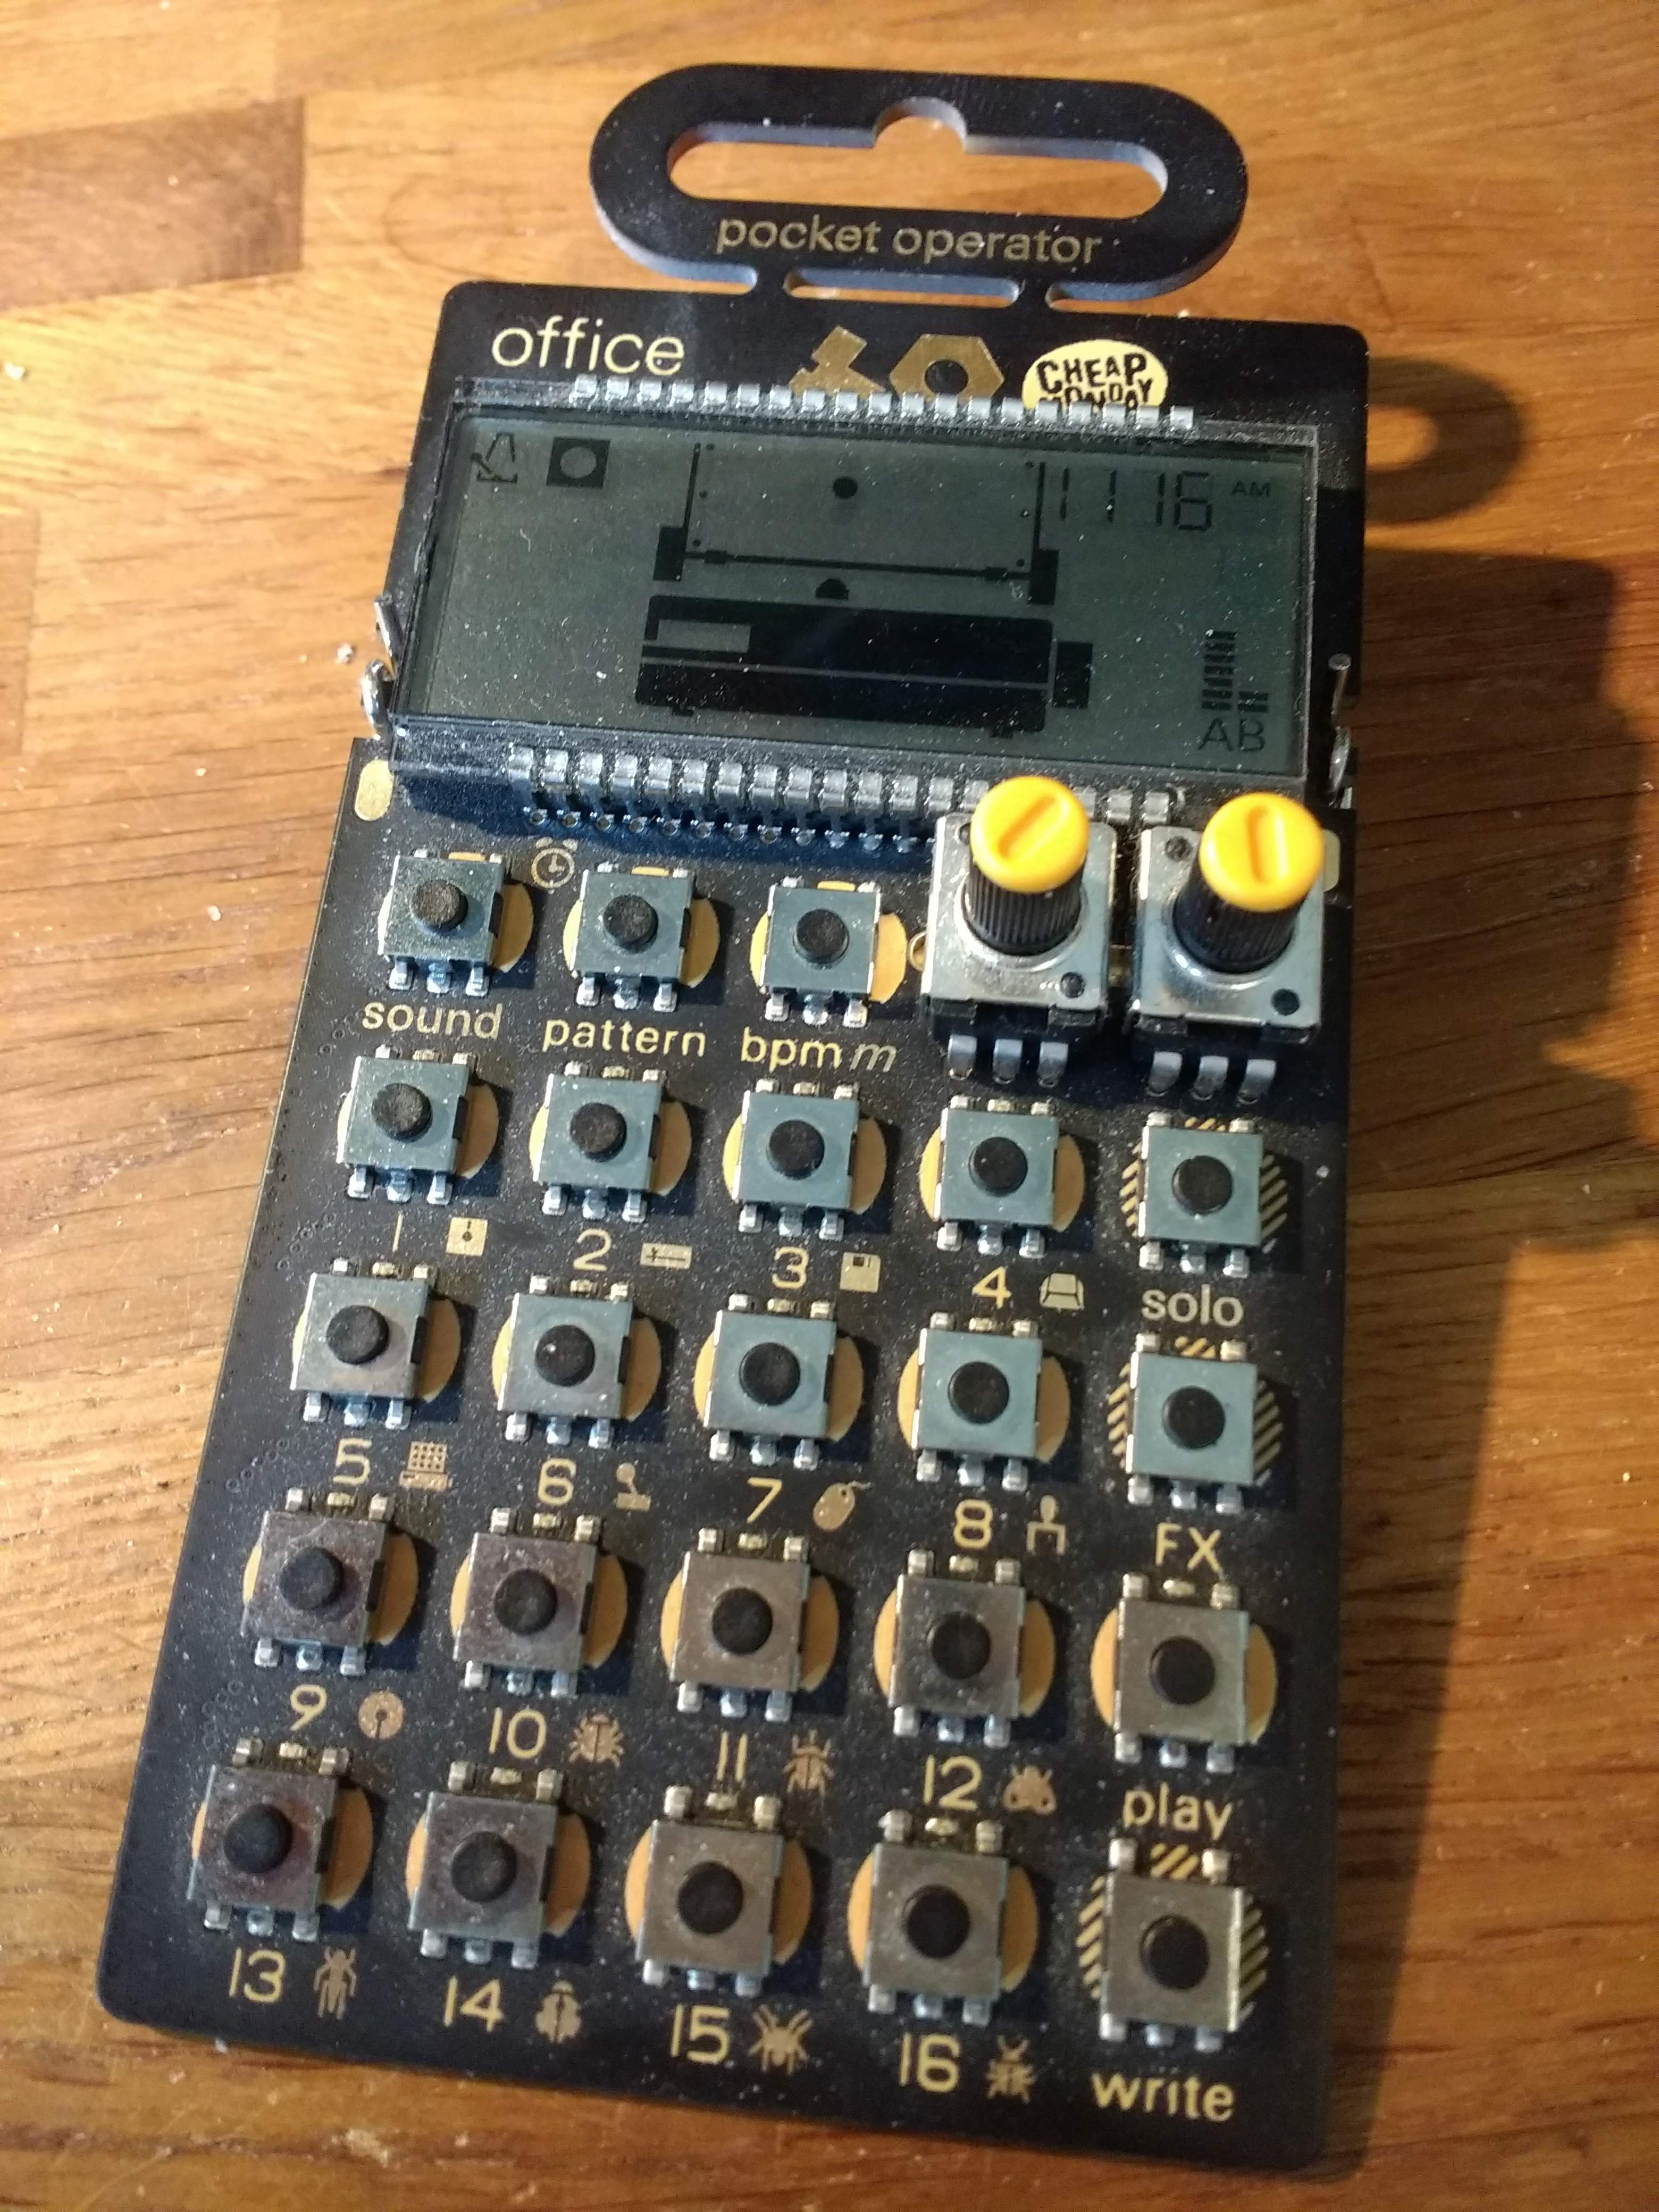
A friend bought me a Pocket Operator drum machine for Christmas. This instrument is made by Teenage Engineering, who seem to specialise in stripped-down design. The Pocket Operator is simply a single PCB, with buttons, knobs, and a display on the front, and batteries on the back. All the other components appear to be hidden under the display.
![]()
Pocket Operator drum machine by Teenage Engineering - possible inspiration for my next prototype If I can design DrumKid in a similar way, I think that would solve a lot of my problems. Since I'm using fairly chunky through-hole components, I might need to use two PCBs (separated by stand-offs), one for the interactive components (buttons, knobs, LEDs) and one for the "other stuff". I might also need some sort of covering to prevent fingers touching sensitive circuitry.
I like the aesthetic of the Pocket Operator, too - it's simple and utilitarian, but playful at the same time. I'm going to do a few sketches and see how practical it is to make a DrumKid prototype in a similar style.
-
Mentoring Session
05/24/2019 at 09:18 • 0 commentsI had a really useful mentoring session with Mitch Altman, Majenta Strongheart and two other Hackaday Prize entrants on Thursday. It was really interesting to see how the other entrants approached their projects, and I learnt a lot from talking to Mitch about the development process.
Coincidentally, Mitch has previously built an Arduino-based synth with a lot of similarities to my project. I looked at his schematics before the session and noticed a few things:
- Both our projects used an Atmega328 to generate audio
- Both projects used an LM386 to amplify the audio
- While my project uses a relatively expensive chip to boost the voltage of 2 AAA batteries, Mitch's synth runs directly from 3 AA batteries
This comparison was really interesting and useful - it told me that my approach to the circuit was fairly uncontroversial, but it also suggested that I could do away with the most problematic element of my design, the expensive and noise-producing voltage boost chip. I hadn't previously realised that the Atmega328 could run happily on less than 5V (forum posts had suggested otherwise), so it was very gratifying to hear Mitch confirm that it works fine on 4.5V. Straight after the mentoring session, I hooked my breadboard circuit up to three AAA batteries and was excited to realise that it worked fine, with barely any noise.
A few other things I took away from the mentoring session:
- My problems with making mistakes during PCB design are normal, and it's an accepted part of the development process to just hack the incorrect design and then incorporate the fix into the next version
- It might be worth investigating Seeed Studio in future for board assembly (in case me hand-soldering the boards becomes a bottleneck when producing larger quantities)
- CNC routing could be an option for the case if laser-cutting isn't suitable
Overall, really happy that I was able to take part in this mentoring group - it helped me with both big-picture thinking and with the specifics of my project.
-
Filtering / Second PCB Design
05/09/2019 at 22:38 • 0 commentsI feel like I have a handle on the noise issues now. Part of the issue was the PWM noise (Mozzi generates audio via pulse width modulation rather than a "proper" digital-to-analogue converter). The Mozzi website gives a useful low-pass filter circuit for filtering out this noise, but I found that it wasn't sufficient once I started amplifying the signal. Although the signal is only just within my range of hearing, I could tell from recording the signal into my computer that there was a lot of high-frequency oscillation that I wanted to get rid of.
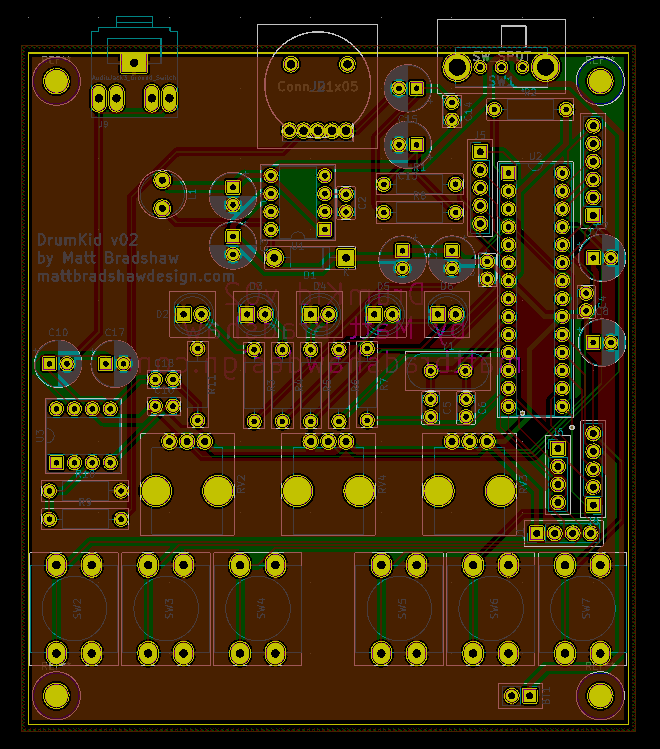
I played around with different resistor and capacitor values, but found that in order to filter out enough of the noise, I was also having to filter out the higher frequencies of the drums, leaving an unwanted muffled sound. I searched the web for "make steeper low-pass filter", and suddenly felt like I was back at university again. I came across this great explanation of passive low-pass filters, which had a really useful section on building a second-order filter. This is basically a chain of filters, and gives a steeper "roll-off", cutting out more of the unwanted frequencies (about 15kHz and above) and keeping more of the frequencies that actually contain drum sounds. I played around with a few different components (why are ceramic capacitors so hard to read?) and found a sweet spot, meaning I was ready for my next PCB...
![]()
There are a few key differences from the first version:
- LM386 amplifier for louder headphone signal (friends told me the last version was too quiet)
- Different button layout after testing the first design
- Three control knobs instead of one after testing the first design
- Different type of button - the previous ones were hard to source and impossible to find with an RoHS certification, which is worth thinking about before I start selling DrumKid
- Bigger on/off switch for better ergonomics
- Horizontal thumbwheel volume control for better aesthetics
- Mounting holes because I forgot them last time
- Better power management - decoupling capacitors for the Atmega328
- Arduino and power pin breakouts for better hackability
I'm still learning about board layout, and should probably get some professional feedback at some point, but for now I've got my fingers crossed that this will be a good improvement on the previous PCB. Now I've got about three weeks before the boards turn up - I could have shelled out the extra money for fast shipping, but I need some time to work on the code anyway, so I'm happy to wait.
Next steps: more work on the code, 3D-print a new case, try DrumKid with my band.
-
Working Through The Frustrations, Slowly
05/07/2019 at 13:53 • 2 commentsAfter yesterday's rant about not knowing what to do next, I decided to invest some time in making a new stripboard prototype. I was worried that the current design (batteries to voltage boost IC to Atmega328 to LM386) was just fundamentally too noisy, yet I couldn't think of a way to omit any of those elements without going all the way back to the drawing board. With this worrying thought in my head, I decided to convert my latest breadboard circuit into a stripboard circuit, in the hope that I would be able to build something with a clean enough audio output to give me some hope for the PCB version. It was a half-logical, half-desperate step, but (after several tense hours) it just about worked.
![]()
Before adding the decoupling capacitors, the noise was still horrible, but I tried adding a few different values to both sets of power/ground pins on the Atmega328 and gradually the noise became almost acceptable. Perhaps "acceptable" is a bit strong, but given that the stripboard circuit doesn't have a proper ground plane, I'm happy enough to now recreate this as a PCB, with slots for numerous decoupling capacitors.
Apologies that the last couple of posts have been a bit dull - I'm trying to be disciplined and sort out the fundamental issues like power supply, audio volume, and noise, before I keep working on the fun features.
-
Frustrations
05/06/2019 at 17:02 • 0 commentsI'm reaching a tricky point in the development process. Skills-wise, I'm someone with a fairly good grasp of coding, but only a patchy (if gradually improving) grasp of electronics. This means that, while I'm pretty capable of solving weird software problems, things like grounding issues or noisy power supplies send me into a cold sweat.
I've never really had to worry about problems like this before this project, because I could always avoid them. My previous musical instrument builds were one-offs, and I could choose a platform that didn't require me to do much "real" electronics. For instance, a lot of my recent instruments have used a Teensy 3.X (£20+) with a Teensy audio adaptor (£13), which instantly gives lovely clean audio and plenty of processing power. I also power most of my projects with a USB power supply rather than batteries, which simplifies things.
DrumKid, though, is my first attempt at a real-world "product", and developing it is a very different process. I've used a £2 Atmega328 chip to try and keep costs down, but doing so is causing me all sorts of problems that I wouldn't hit with a Teensy. I can't just put £33 of extra components in there, though, because I'll then have to put the price up by that amount. Then again, with the better components, it's probably a better instrument and probably worth more, so maybe that's okay. And by using a Teensy instead of an Atmega328, I would probably save myself a bunch of time and money on the development process.
The problem is, I have no idea how to do the calculations that would tell me whether my current strategy of trying to be as cheap as possible is the right one. I've also sunk a lot of time into this design, and I don't want to change tack, which I know is bad logic.
Anyway, my current problem is this: DrumKid works nicely when using a proper Arduino and a nice clean 5V power supply for testing, although the audio is a little quiet. I can boost the audio with an LM386 amplifier, but then it becomes really important to have a clean power supply. The finished product will be powered by batteries, run through a boost converter to get to 5V, and it's quite hard (but possible) to get that power supply clean enough for good audio. Basically, everything should work fine together, but when I try all the elements together on a breadboard, I get horrendous, unacceptable amounts of noise. Now, I know that a solderless breadboard is probably not the best way to test a fairly sensitive circuit like this, but I don't know what else to try. Is it worth spending time making a stripboard version? Do I have to resort to doing another iteration of the PCB, knowing that it probably won't be the final one, and might not even work?
I think I'm starting to see the difference between being a "hacker" and a "designer"...
-
Metamorphosis + Audio Sample
04/24/2019 at 15:41 • 1 commentSpent a good day working on the project today, and made a few decisions about the design. While looking back at the initial, web-based version of this drum machine, I remembered that the most pleasing thing about the interface was changing multiple parameters at once, by touching the different sliders on the touchscreen. This was previously something I had decided to sacrifice for this physical version, in favour of having one big potentiometer whose function could be changed by pressing different combinations of buttons.
Today I decided to experiment on the breadboard with three potentiometers, and only five buttons instead of seven, and it definitely felt nicer, so I'm going to carry on with that layout for now - I think it will look just as good (if not better) when translated into a new case design, and will only raise the component cost by £1 or so (although I've said that about a few components recently, so it's probably time to do another cost check soon).
![]()
I've also spent quite a bit of time on the code today, implementing a system which loads two copies of each audio sample, allowing them to overlap with each other. Before I added this feature, a loud bass drum followed immediately by a very quiet one would cause an annoying "click" sound as its signal was suddenly attenuated by the quieter sample which replaced it.
This system is working nicely, but it is a bit more processor-intensive and has consequently caused me to get rid of the resonant filter effect. Analogue filters are really cool, but this was a fairly weedy-sounding digital filter, and I don't think it's any great loss.
To show where I've got to so far, I recorded a sample of how DrumKid sounds in its current state. The following recording starts off "clean", with no additional bit-crush effect, although it's still pretty crunchy (a feature not a bug!). I begin by adjusting the "hyperactivity" parameter to modulate how many extra hits are added to the basic beat. Then I start to increase the bit crush effect while also modulating the pitch of the samples. The only post-processing I added to the recording was a low-pass filter, because I could still hear a faint high signal (Mozzi's carrier signal?) which I haven't successfully filtered out on the breadboard yet.
Here's the recording:
-
DrumKid: A History
04/24/2019 at 05:31 • 0 commentsWork continues apace on DrumKid. A brief update: I took the prototype to the pub to show some friends, who unanimously concluded that it was "cool" but "too quiet" through headphones. I had been hoping to avoid this problem - the better I clean up the output signal (using an RC circuit), the quieter it becomes, and it's now officially too quiet to contend with the background noise in a pub garden. I've been reluctantly playing with an LM386 amplifier chip, with a mixture of success (it's louder) and frustration (the noise from the power supply is also louder).
Anyway, I thought I'd write a bit about the genesis of DrumKid, since it already existed in another form before this Arduino-based iteration of the project. A few years ago, I decided to start a band. I found a bassist and a synth player to complement me on guitar and vocals, but I didn't want to use a drummer. My opinion was that having real drums in a band always pushed my music towards a pastiche of rock, so I wanted another way of generating rhythms, something with the expressiveness of a good drummer but without the robotic tendencies of a simple drum machine.
At the time I had been playing with the Web Audio API (the surprisingly full-featured Javascript synthesizer engine found in modern browsers), and stumbled across this article about scheduling precise drum hits in Javascript. I stole the code, spent a long time playing around with it, and ended up with a web-based drum machine I called "DrumKid".
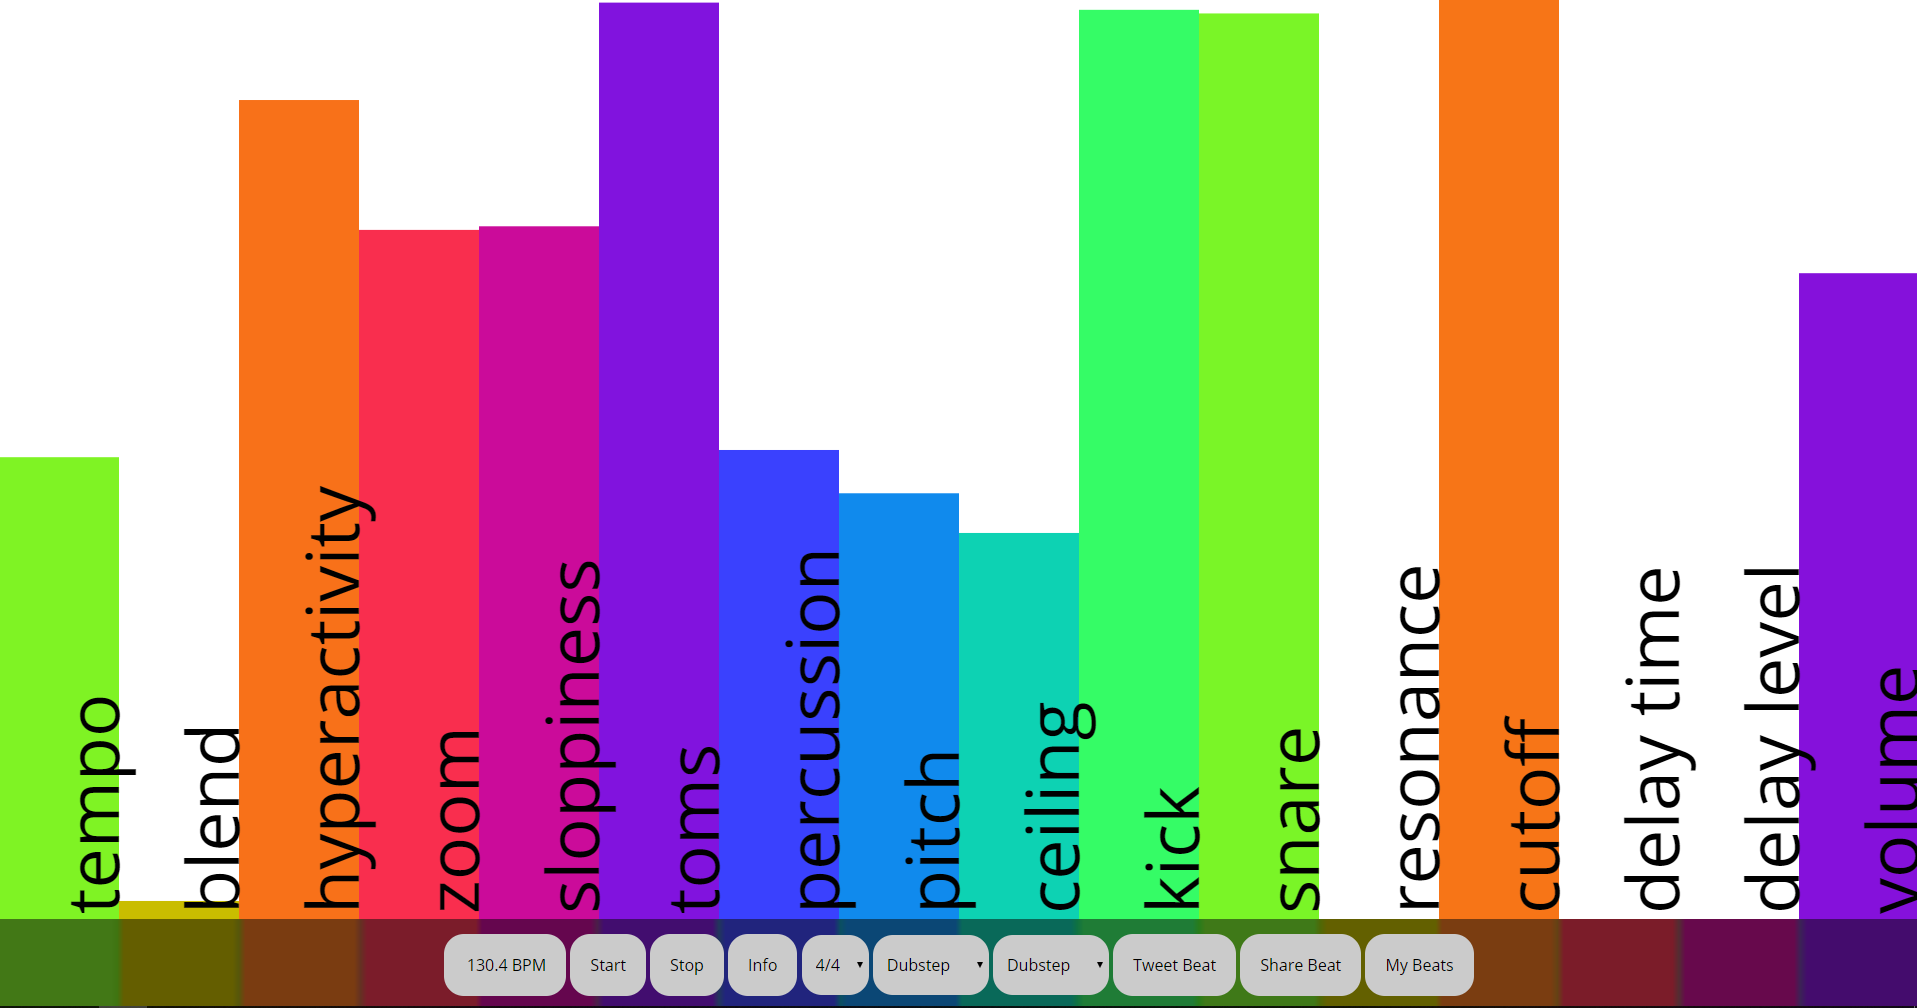
![]()
Screenshot of the original browser-based DrumKid The basic premise was/is to start with a simple drumbeat (e.g. kick, snare, kick, snare), then modify it with a number of continuous controls (sliders). The main controls are:
- "Hyperactivity" - how likely the algorithm is to add an extra drum hit on a given step
- "Zoom" - changes the subdivision of step which can be heard (on its lowest setting, only the first beat of the bar is heard, but the highest setting will allow 64th-notes, sounding much more "hectic")
- "Ceiling" - silences any notes below a certain threshold, creating a less "busy" sound
- "Blend" - interpolates between two different basic drumbeats
- "Sloppiness" - shifts the timing of each step by a random amount (basically a random quantize function)
These parameters, and especially the first two, could be manipulated in real time to produce dynamic, non-robotic beats. I also added a number of audio effects such as resonant filter, delay, reverb, and pitch shift.
The interface was optimised for a touch screen - I would borrow the iPad from my office, tape it to a music stand, and our bassist would control it during songs. He modified his playing style to allow him to control DrumKid while also performing bass duties, for instance by playing a long, loud bass note which would sustain for a couple of bars while he increased the "hyperactivity" and "zoom" controls before a chorus. Here's a video of our band, Robot Swans, in action with DrumKid a few years back:
We made a whole album with DrumKid, The Tyranny of Robot Swans, and a few of our friends used it in their own music. When our bassist left the band, we changed our style slightly and DrumKid fell out of use for a while, but I had always held onto the idea of making a proper, standalone physical version of it. When I decided to leave my programming job and become a freelancer, I soon focused on the idea of making my own off-kilter musical instruments, and DrumKid seemed like the ideal first project. It can be made small, and doesn't require much processing power, allowing it to run on an ATMega328. I've had to compromise on a few things (audio quality is reduced, reverb is unlikely, not all parameters can have their own knobs, etc), but the limitations of the Arduino version are actually making it more rewarding to develop for - squeezing extra features out of a £2 chip becomes almost like a game, and I've been able to add things like bit-crush which weren't in the original Javascript design.
If you'd like to play with the original DrumKid online, here's a link.
DrumKid: aleatoric drum machine
A lo-fi digital drum machine which uses randomness to create unpredictable beats. Runs on Arduino, with audio provided by the Mozzi library.