 Marius Taciuc
-
1Printing the propeller
- 0.1mm layer height
- 6 top and bottom layers
- support material
- 2 rafters
- no skirt
- print as it is and do not flip over. It should be with the nose down and with the hole up
- sand, prime, sand and paint for smoother surfaces. See the pictures and the video for example.
![]()
-
2Printing the nose
- spiral vase
- 0.1mm layer height
- 6 to 10 bottom layers
- print as it is and do not flip (it should be small flat base down).
-
3Printing the cockpit
The spiral vase optimized version:
- 0.1mm layer height
- the spiral vase model has two mirrored cockpits
- trim one of them after printing
- use a marker to color the window trims after printing and cutting the excess material
The solid version:
- 0.1mm layer height
- 5 top and bottom layers
-
4Printing the wheels
- 0.2mm layer height
- 4 top and bottom layers
- no rafters or support material
-
5Printing all the other parts
- 0.3mm layer height
- no special settings and leave the default infill settings. Most likely it does not matter as all the pieces are having only 6 layers
-
6Step 6
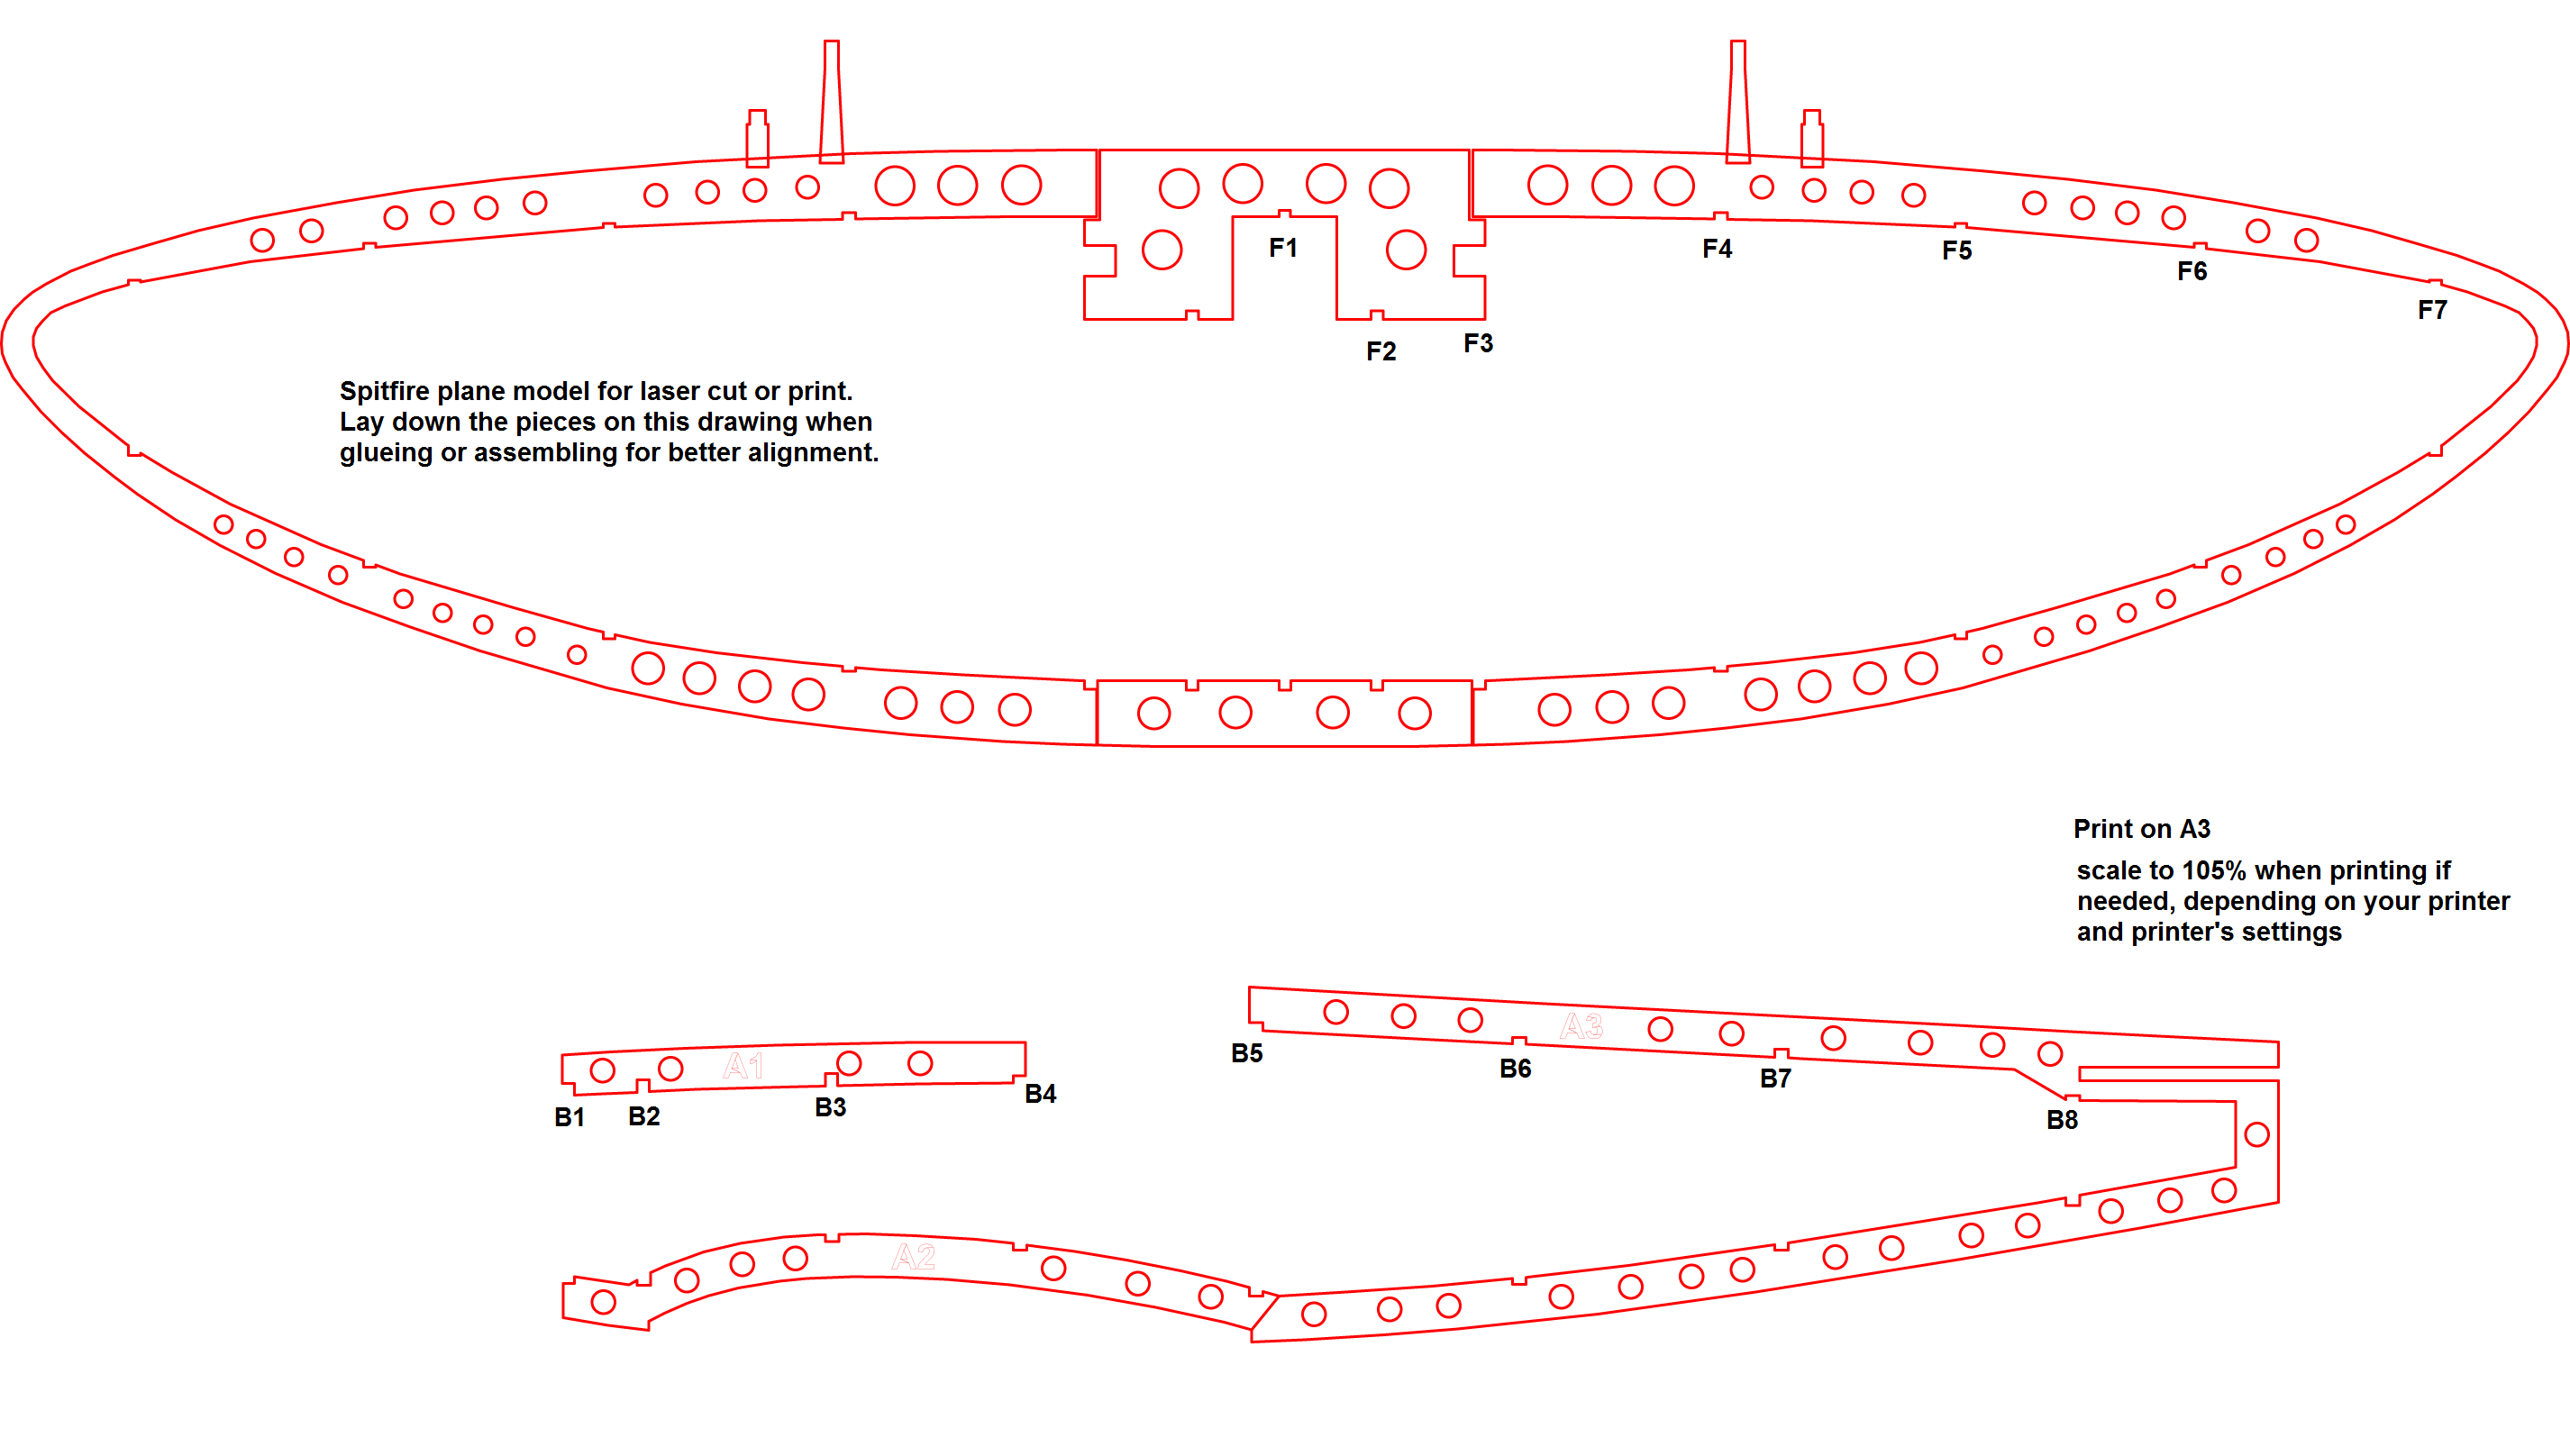
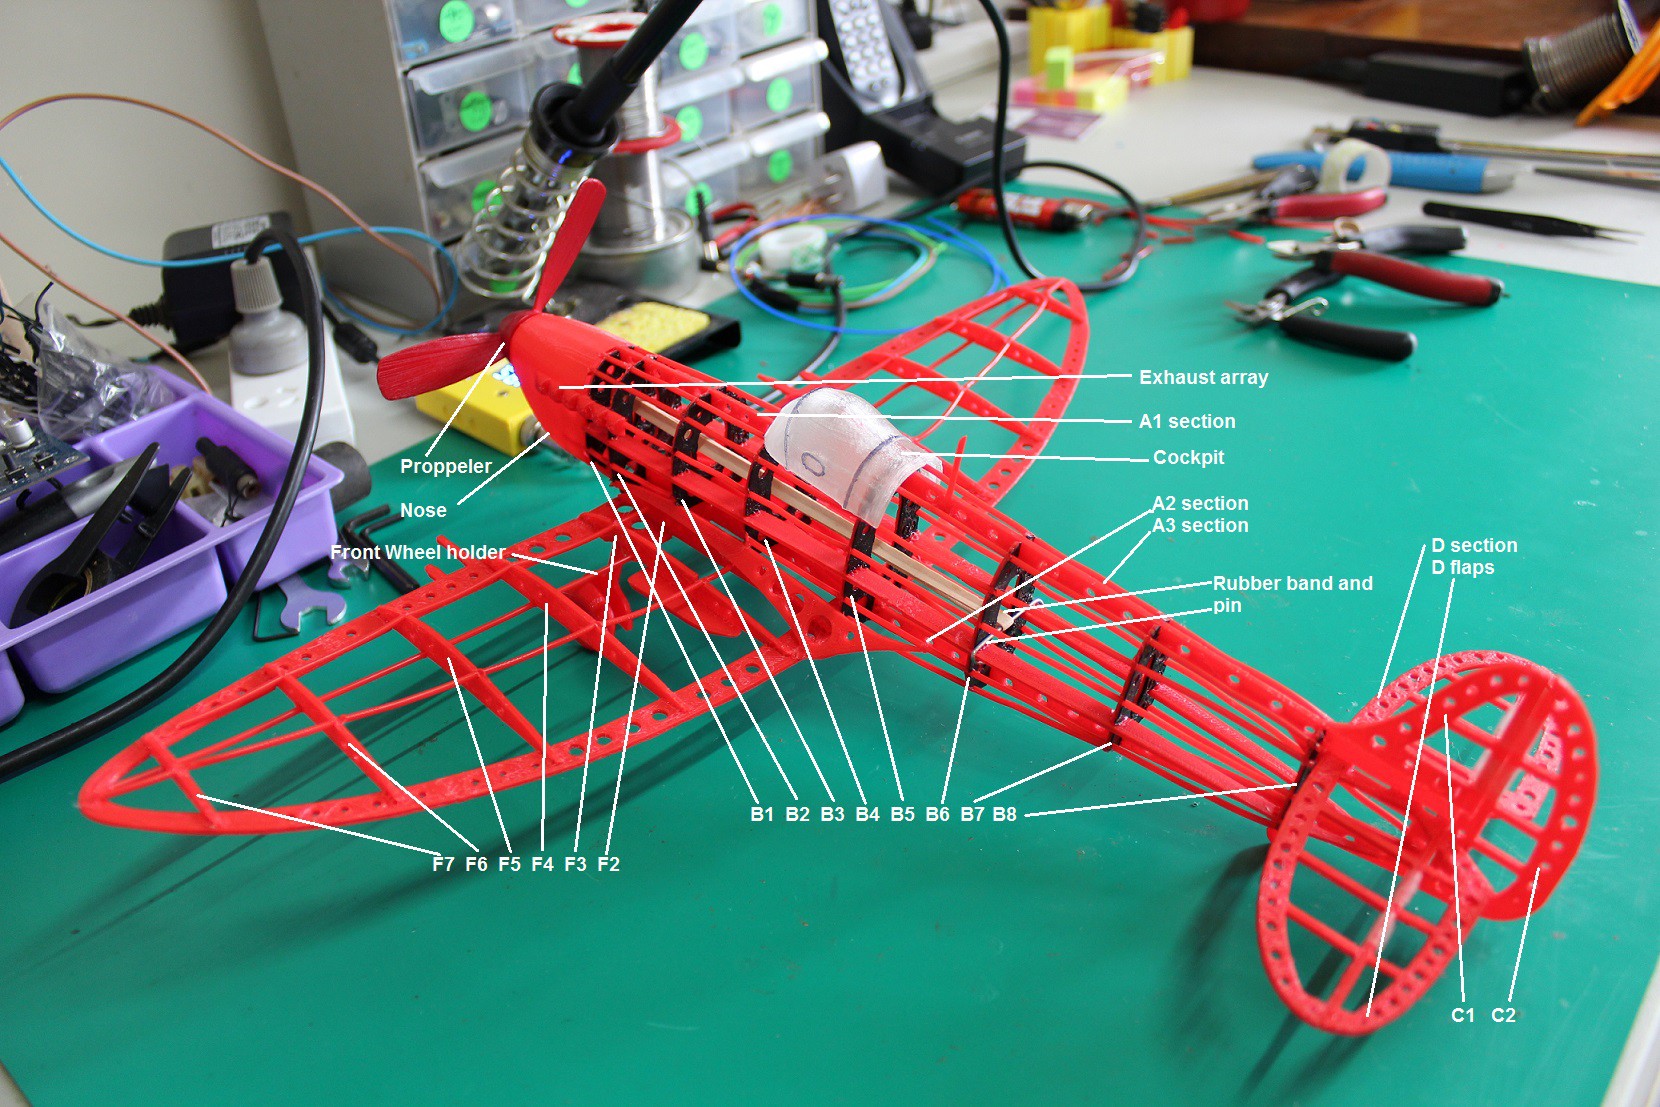
Use the provided A3 layout to get the right position of the fuselage and wing pieces. When you assemble the wings to the central section, elevate the outer edges of the wings with 1.8cm as in the video. Notice that I used a couple of green li-ion batteries as stands. You can use any object that has similar heights. Also, check the overview picture (with labels and arrows) to get an idea of where each part should be placed. Otherwise, the name of the parts could get confusing at some point.
![]()
![]()
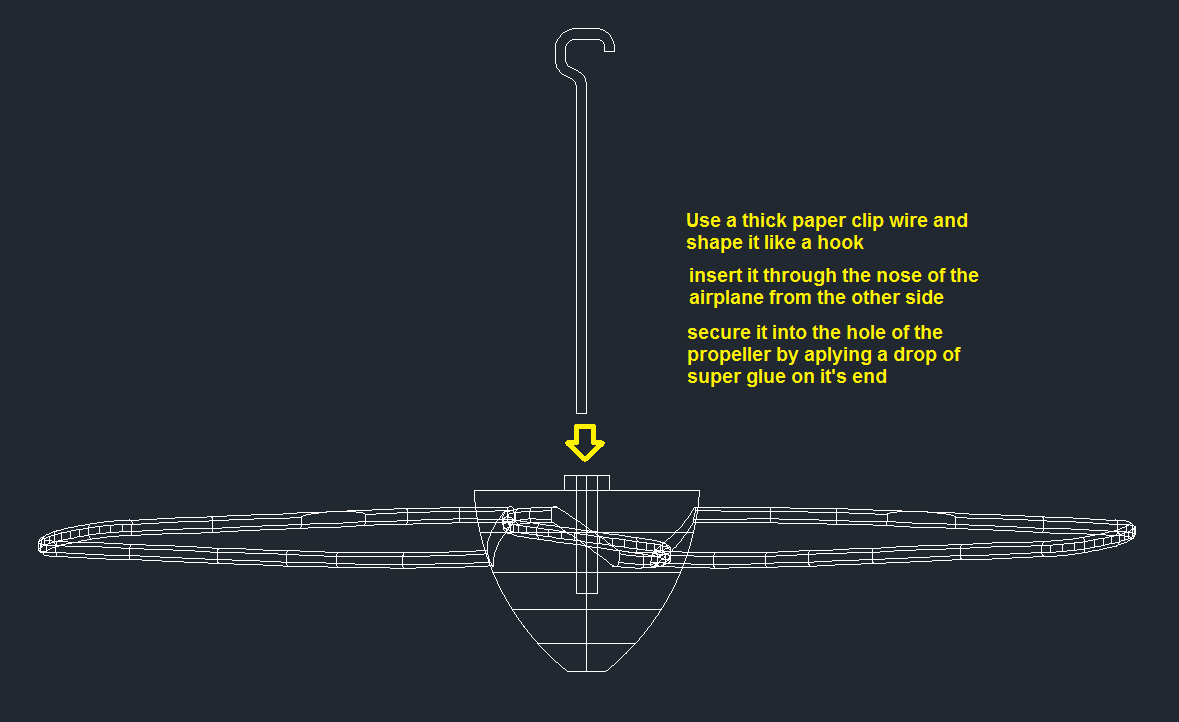
Use a thick paper clip to make the hook and the pin for the rubber band. You can cut the paper clip wire in half. Use one of these half as an axel for the propeller. At one end, the axel will connect with the propeller and it will be inserted into it's hole and at the other end you will have to shape it and make it into a hook to attach the band. Insert the hook from the inside of the nose cone as you see me doing in the video and once is inserted through the nose hole, secure the propeller into position using a drop of super glue (see the black picture at the first step).
Have fun and post pictures after you make your own.
Building a Spitfire model plane with my son
STLs and instructions included
Discussions
Become a Hackaday.io Member
Create an account to leave a comment. Already have an account? Log In.