sparks.ron
-
Software and Remote Data Logging
04/16/2021 at 22:10 • 0 commentsCompletely rewrote the software to make it more modular based on the process flow. This took a major effort, but will allow for future modifications and customizations. It will also increase reusability for my other projects, like the weather station. There is still a long to-do list of things the software needs like OTA updating, moving of data and credentials to the data section of the ESP8266, etc. But it is currently useable and has been working without a problem for the last few months with a temperature sensor only. Work still needs to be done to better understand the non-linearities of the scale and what is causing them.
Last month the data logging software I am using, InfluxDB, had a breaking version upgrade from 1.x to 2.0. Unfortunately I had the automatic update feature working on Docker and it messed up the system. I am now creating two instances, one 1.x and one 2.0, in order to try to recover the data fully as it seems that is what is recommended for a manual upgrade as well.
The bees survived the winter and the arctic blast without a problem. It dropped to -12F (-24C) here for at least a day and was below freezing for a week. That may be normal for some places, but the animals and plants in Southeast Texas are not in any way prepared for that. Never mind that the power went out for days. Here at our place it was out for 2 1/2 days. However, here in the Houston area we get a LOT of unexpected weather surprises (hurricanes, tornados, ice storms, hail, high heat and humidity, etc.) so you learn to be prepared and resourceful. I put sugar water feeders on the hives the first day I could so that they would have the extra food to keep moving and heat the hive enough. I guess Texas bees are as hardy as most Texans.
This project will continue to be down the priority list for a while to ensure I have time to prepare for hurricane season before the summer heat starts up in mid to late May.
-
Slowly moving forward
10/30/2020 at 02:21 • 0 commentsWell, we have the HX711 and scales figured out but each set seems to require its own calibration. For the scales we were converting the actual performance is a curve (exponential) and not a straight line. The two github HX711 libraries we tried are linear approximations only and do not work over the full range of the scale. The solution is to approximate the response on our own, which we have done. First you access the raw ADC reading from the HX711 and then plug it into our exponential curve equation. The ESP8266 has the needed exponential and logarithmic functions to handle this easily. For you math lovers the best fit equation is in the traditional exponential form Rdg = A*exp((wt-mu)^2/(2*sigma^2) where wt is the actual weight on the scale and Rdg is the corresponding ADC raw value. For our first scale the constants were A = 69,470 mu = 301.48 sigma = 88.42 Our next test is to install the clone controllers on the other modified scales and see how much these constants vary from scale to scale. Once that is done we can deploy them under the hives and start real world testing. After all this complication with the sensors and ADC, we have decided we will hold back one unit and put it on a mounting frame with a constant fixed weight on it. That will give us a control to use to back out any noticeable variations due to temperature, etc. The whole focus for these scales is on the relative changes day-to-day and not the absolute accurate weight. If we can just reliably tell the change in weight, that can be plotted over time and give the answer we need about hive size and honey production/use. Another thing that was accomplished this summer was extensive continuous real time data collection for temperature and humidity. Both the Sensirion and Honeywell sensors did well in our hot and humid environment. Neither one showed any signs of saturation even though they often experienced 97-100% RH. An old queen cage has been modified to hold this sensor for placement inside the hive. We are still looking for a suitable wiring option and will be testing 4 conductor ribbon cable, Cat5 Ethernet cable, and 2 shielded 2 pair audio cable. The winner will be the approach that has the easiest mechanical installation combined with no signal degradation. The software was completely rewritten this summer to allow easy changing of sensors, MQTT broker data, WiFi data, etc. Now that the program is modularized, the next step will be to convert the various functions and move them out to a library where that makes sense. The long term goal is to have the main program hold all the needed data that will change from unit to unit and the library(ies) hold all the computation, communications, and control functions. -
High Humidity Sensors
07/27/2020 at 17:04 • 0 commentsI do not want to double post so the link below will point you to the relevant text for this topic. The TL;DR is that the DHT21 type sensors will not reliably work outside in any place that regularly sees relative humidity above 60%. That makes it a poor choice for the inside of a warm bee hive.
The SHT21 from Sensirion and the HDC1080 from TI seem to be good value sensors that have successfully passed our testing at humidities in the 95-99% range.
See the full description at:
-
Wrestling with the HX711
06/30/2020 at 03:18 • 0 commentsFinally, we got the HX711 reading correctly. Still don't know whether the problem was with the HX711 or the scale/load cells we were using, but they refused to operate correctly at 3.3.v. We confirmed, from the Expressif official, that the ESP8266 is 5v input tolerant. The solution to our woes was to simply move the supply for the H X711 to +5v instead of 3.3v. Then everything worked fine, irrespective of whether we had modified the module for 3.3.v or not! At this time, in a controlled temperature, the scale is showing a 0.03% standard error (95.7 percentile). It was necessary to go to the raw Analog read function to ensure we were getting the correct data without any intervening HX711 adjustments.
When we did a least squares fit to various calibration weights, the equation was beautifully linear . Going forward, we will likely use these "raw A/D" numbers and do our own calibration adjustments just to avoid the unknown and ambiguity that the chip adjustments add to the calculations.
Based on these results it is now time to "polish" the software and begin final deployment. In the interim we may create a new calibration program though. It will be based on the raw A/D data.
-
Software Rewrite & HX711 woes
06/24/2020 at 18:00 • 0 commentsWe have now completed a major software rewrite from the prototype software. As with most prototypes it had been written in a "good 'nuff" method to quickly test the various hardware and internet protocols, but had little (or no) error checking, fall back options, etc.
The new software is structured to allow it to be modular and when each piece is fully operational it is extracted from the main loop and put in an appropriate function with the main loop calling that function. This paves the way for the functions to be put into library module format for better management, reusability, and isolation.
In the process we added support for either of two types of temperature-relative humidity sensors. As noted earlier, testing of the DHT11/21 sensor showed it is useless for outdoors in coastal climates. Most of the summer, our night time humidity is well above 70%. That is the point where the DHT sensor saturates and reads 100%. It then requires the humidity to drop to about 60% for it to begin working again. In the summers here, that may not happen for many days. We have not yet completed testing on the SHT21 and HDC1080 sensors, but the early results are promising.
Most of the time with hardware has revolved around the HX711 A/D module. First as noted by Ken Meyer in his excellent project log Modifying the HX711 for 3.3v operation, the module fails to regulate voltages properly when run on 3.3v instead of 5.0v. The result is wildly varying scale readings. While his log was clear (thanks to pointing out a datasheet error), how it all worked was not obvious for us. It took a bit of measuring and soldering/desoldering to be able to understand it all. We then created a spreadsheet to properly calculate things. In our case piggybacking the 20k resistor with something between 20k-22k worked perfectly. However smaller values did not. This means there is a lower bound as well as the upper one. The upshot is that for our modules the larger divider resistor value (singly or in combination) must not be lower than 10K or higher than 11.5K in order to maintain proper regulation.
Now we have excellent calibrated performance at a single point and zero. However, other issues will remain. Temperature stability, load cell "creep", power use, software OTA updating, etc. are all upcoming issues.
-
Slow progress, but progress
01/01/2020 at 22:25 • 0 commentsFall and winter are always busy times here in the "third coast". The weather finally cools off enough to allow outside activities to happen without all the humid, hot misery. It is a bit reversed to the northern US. We have times in the summer months that are just brutal and make it advantageous to do inside projects, like software coding.
The hive monitor prototype was finished and the first software implementation is working. But the cooler weather has moved priorities to the outside portions. We moved one hive in late August to bring it out of a remote field and put it with the other hives in a new site closer to the house. That will hopefully, allow the little Robotdyn ESP8266 boards to communicate with the WiFi network without a lot of extra RF engineering. We also built a new hive support frame setup that includes several fire ant and beetle exclusion systems. That seems to have helped enormously and kept the hives we still have alive through the worst of the pest season.
I am still working on the issue of strain gauge creep that occurs when the scales are kept under load continuously. Thus far it seems that once they have time to "settle in" the curve goes asymptotic and the resulting measurements are remaining stable with the 10 lb (4.5 Kg) calibration weight. After 12 months outside and 4 months in the lab with the weight applied continuously, the variance is in the ±0.5 lb (0.2 Kg) range.
One other item that had to be resolved was the conversion of the HX711 module from 5v to 3.3v. This was causing random glitches and was a pain to find the root cause. But once identified we had a "forehead slapping" moment and felt a bit dumb. The thing that obscured the problem was that the interface pins on the HX711 worked fine at the lower voltages, but the internal amplifier didn't. The fix was a simple bridging of one divider resistor with a second one of identical value. I will show this mod in the next update.
In the meantime I wish all of you the best and most prosperous New Year and New Decade (from all of us who use a Gregorian mode 0 calendar). :-)
-
The key to the Project
08/15/2019 at 23:20 • 0 commentsThe first step of this project is the selection of a suitable scale or load cell platform. You can certainly make your own for less money than buying one and modifying it. If you have a 3d printer and wood, plastic, or metalworking ability, then if you have the time and interest by all means make one. You can get inexpensive load cells from the usual vendors and mechanically all you need to do is create a platform that is fully supported by one side of the load cell and a base that is the support underneath it. We decided that our time was more useful in building the rest of the system than reinventing a platform system that someone else had engineered and manufactured.
Either way, here are the key items we felt were important to have in the mechanical system:
- Corrosion proof (or at least resistant). This will be in the open elements and underneath the hive where dirt and debris can collect. Constant temperature changes and humidity will destroy accuracy in a system that is weather sensitive.
- No edges that can catch water or moisture runoff.
- UV resistant. For the same reasons as corrosion, the sun will be impinging on the setup and will quickly degrade many (most?) plastics unless they are coated.
- Non-toxic. It goes without saying that in a place where sensitive bees are making food you will eat, you do not want unknown plastics out gassing or such.
- A large enough platform to hold the hive without it rocking, moving, or being unsteady. We found that 14 in by 16 in (35 cm by 41 cm) was a minimum for our hives.
- Direct access to the load cell circuit. In commercial scales we have found this is the case all those with a controller/display separate from the scale with a cable connecting it to the platform.
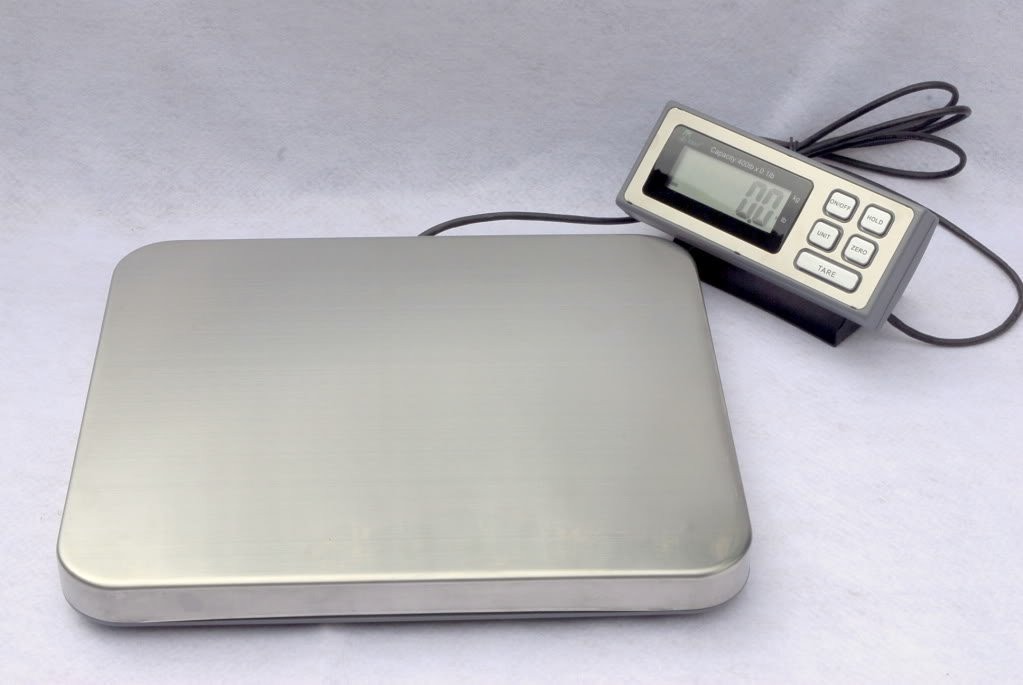
Here is a picture from an Amazon listing for a scale like the ones we are using:
![]()
Notice that it has no edges or seams in the stainless steel platform. It is a press fit to the plastic base and covers it well enough to protect it from most UV. It also separates any plastic away from the hive bottom and leaves a fully ventilated area underneath. On this unit, the bottom was very nearly sealed with the load cell feet in protected recesses. After one year outside we have seen no degradation in our to test units.
You can see from the pictures that we use a couple of different methods of supporting the scale and then fitting the hive to the top of it. One important facet of the hive mount is that it does not sit tightly down on the scale. This is to allow air to move freely below the hive and above the scale. One of us uses screen bottom hives and this arrangement also allows a very quick check for Varroa Mites. This invasive pest is wreaking havoc on hives all over the US.
Once you have your mechanical arrangement (scale) and hive mounting system, you can then proceed with the electronic part. More on that in the next log.
Bee hive health monitor
This project will monitor the weight changes in the hive along with some environmental items to provide real time indicators of hive health