-
Always Be Willing To Question
09/06/2019 at 12:57 • 0 comments![]()
Have the opportunity to showcase the Reformer at a workshop held by a well respected International Pilates Instructor
It is a very nice chance to get feedback from a larger group of established Instructors
But it started us thinking
Being in the middle of building up another Reformer we’re taking the time to give it another once over as far as final build
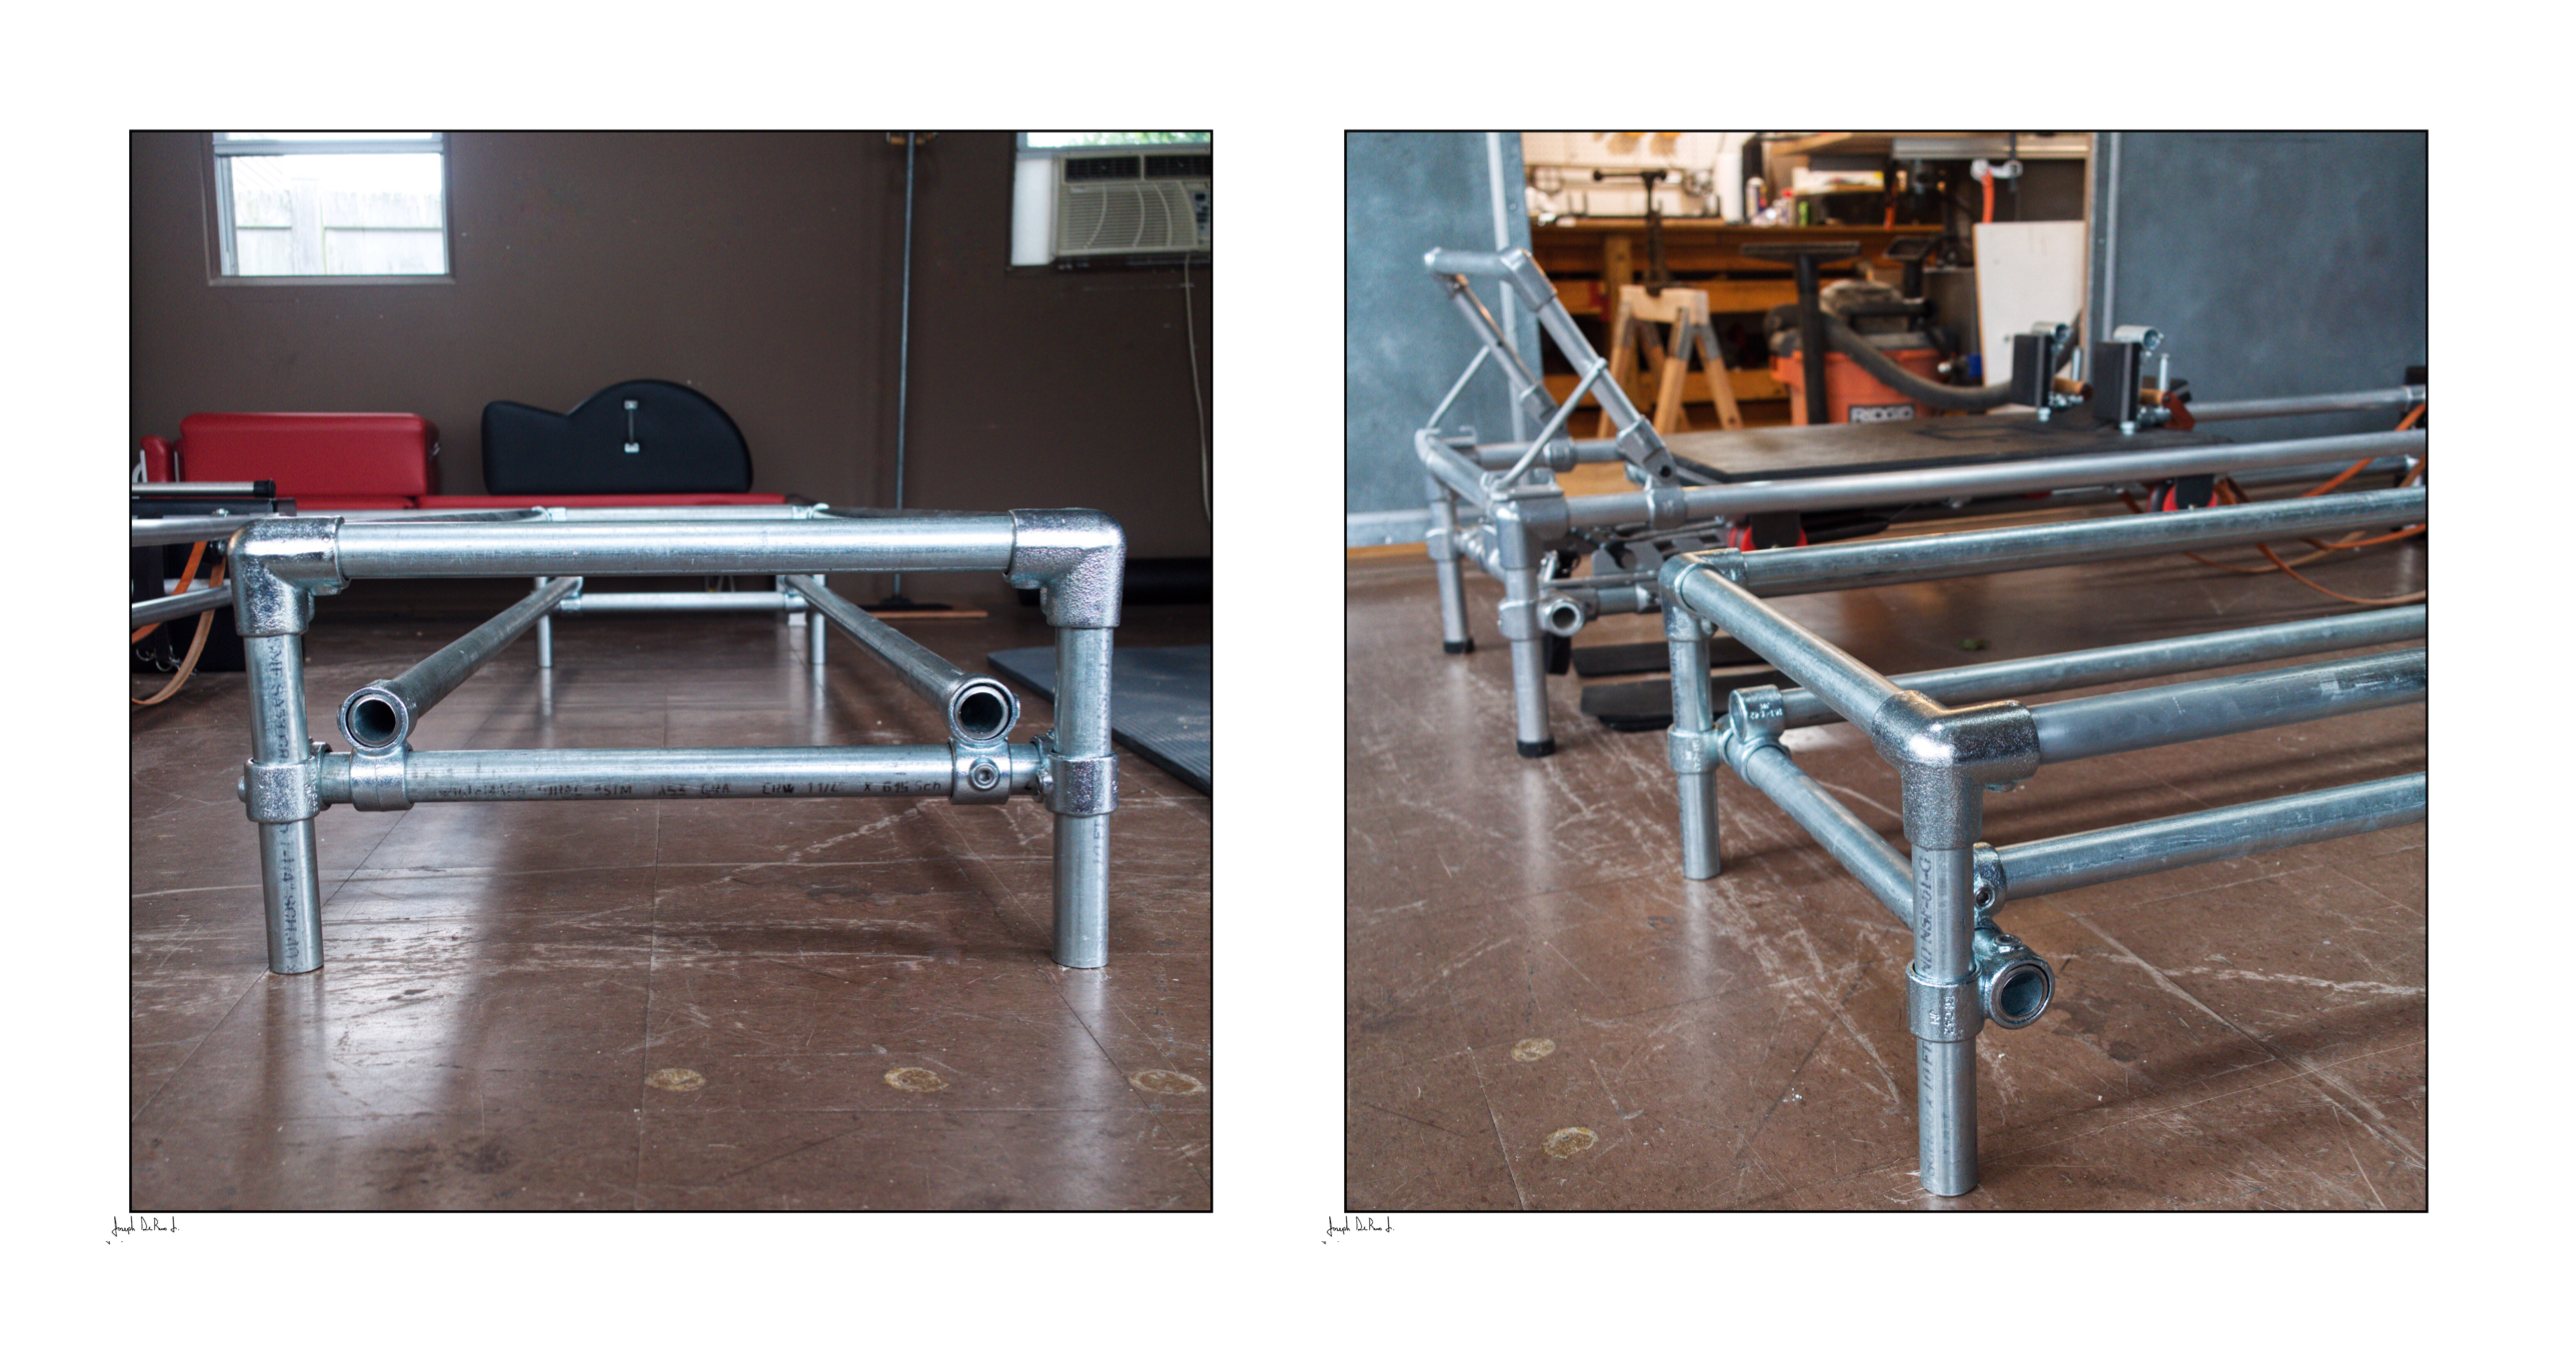
Thinking of disassembling the current Reformer to bring it to the workshop one of the choices we had made in the past was to use a “Tee Joint” in attaching the Track to the cross member
The “Tee” creates a rather clean line, but it does mean that it is a bit harder to get the tracks into parallel (the joint has to much movement in it)
So with that realization we’re switching to a “Crossover”
A “Crossover” will be a more ridged support, and will be easier for keeping the tracks parallel, also faster when it comes to assembling
Making the time to always question, putting aside what your assumptions might have been in the effort to make the process smoother for others (those using the device as well as those manufacturing it) is the fun of all this!
-
3/8” Pipe For Carriage
09/02/2019 at 07:06 • 0 comments![]()
There were two primary reasons for making a new Carriage
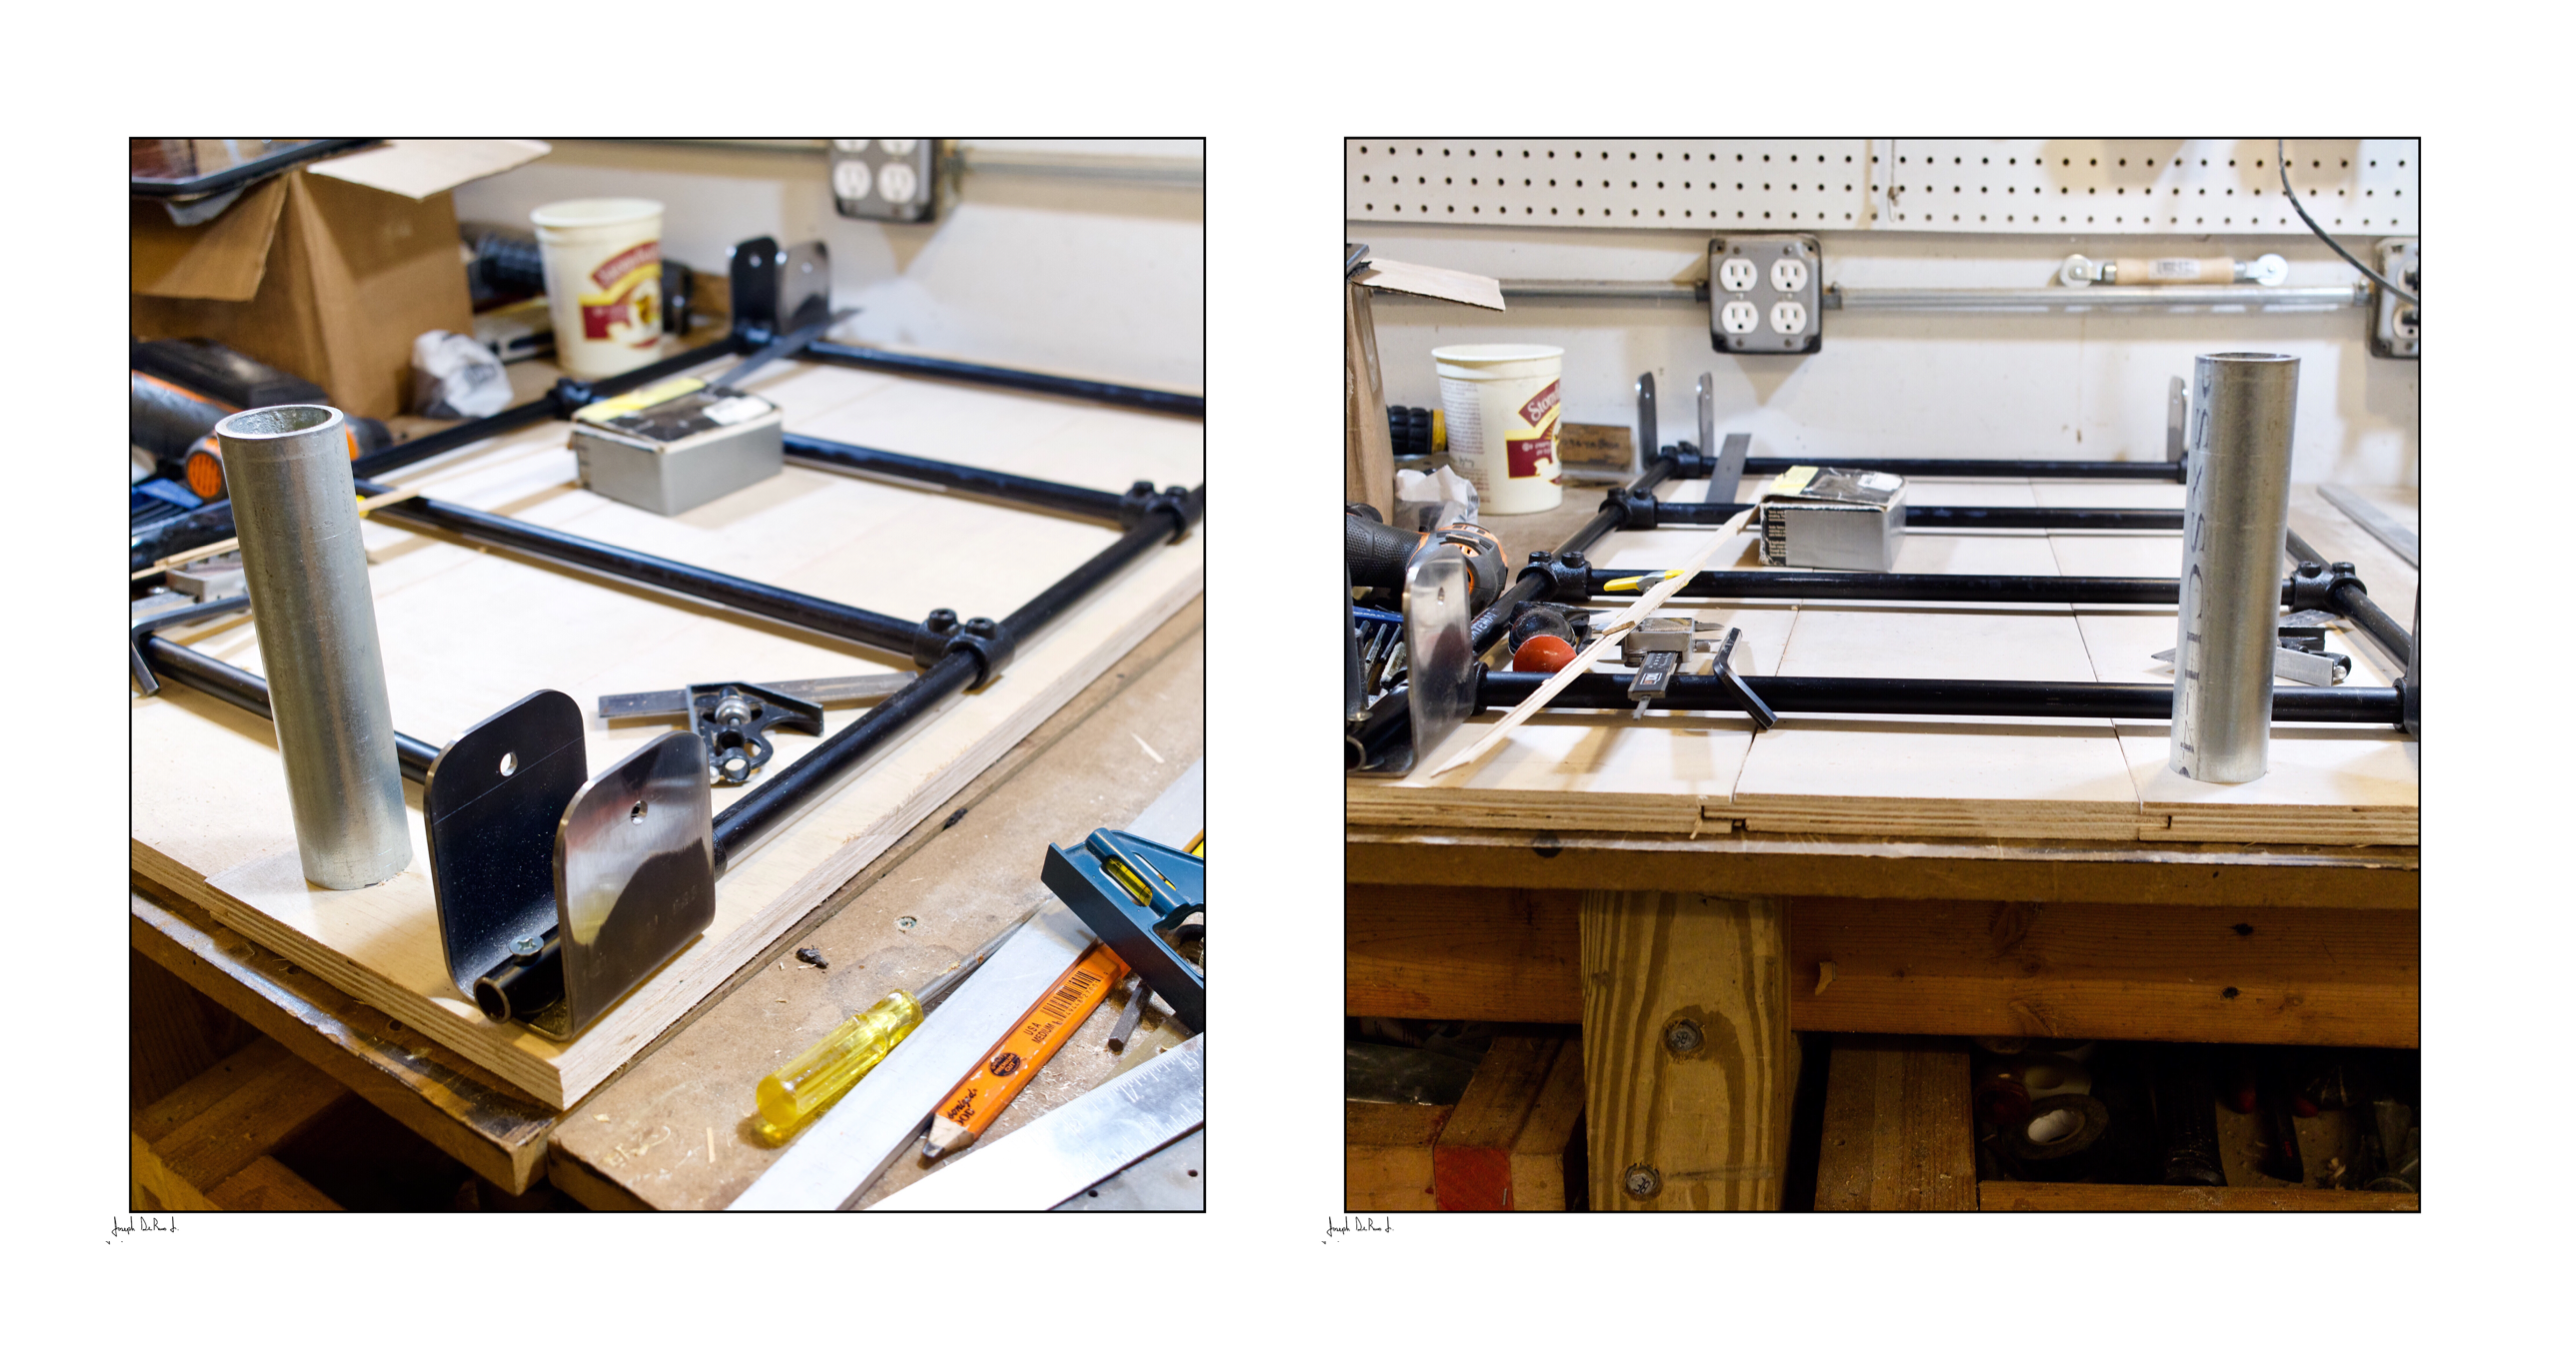
First was using smaller diameter pipe, and second was seeing if using three panels of wood that are tongue and grooved would work for the Carriage platform
In an attempt to keep the weight down and make things more manageable for shipping the thought was to try dropping down to a smaller diameter pipe for the Carriage frame
We had some concerns as far as the strength and if flexing would be a problem!
Happy to have discovered that it looks pretty rigid and should work fine!
As far as the wood platform one of the issues with using panels (panels was necessary if it were to fit in the shipping tube) rather than a solid piece of wood was getting it to hold together
We didn’t want the user to have to glue it, and using screws or brackets seemed cumbersome
The thought of a simple tongue and groove was considered to be the simplest of solutions
The panels needed to be bolted to the frame for the casters already so that meant they would have a bolt to fasten them to the pipe frame
Jigging up to cut the groove and tongue was a bit finicky but definitely in the long run seems to be worth the effort!
-
Starting Fourth Build!
08/21/2019 at 04:23 • 0 commentsSo things move along and sometimes take an unexpected turn!
A conversation was started with the folks over at Steel Tek
If you don’t know them it’s worth going into most any Lowe’s
They have a full selection of speed fittings that make any DIY project much easier
The convenience of being able to run down to the nearest Lowe’s and pick an odd fitting up makes things much more fluid!
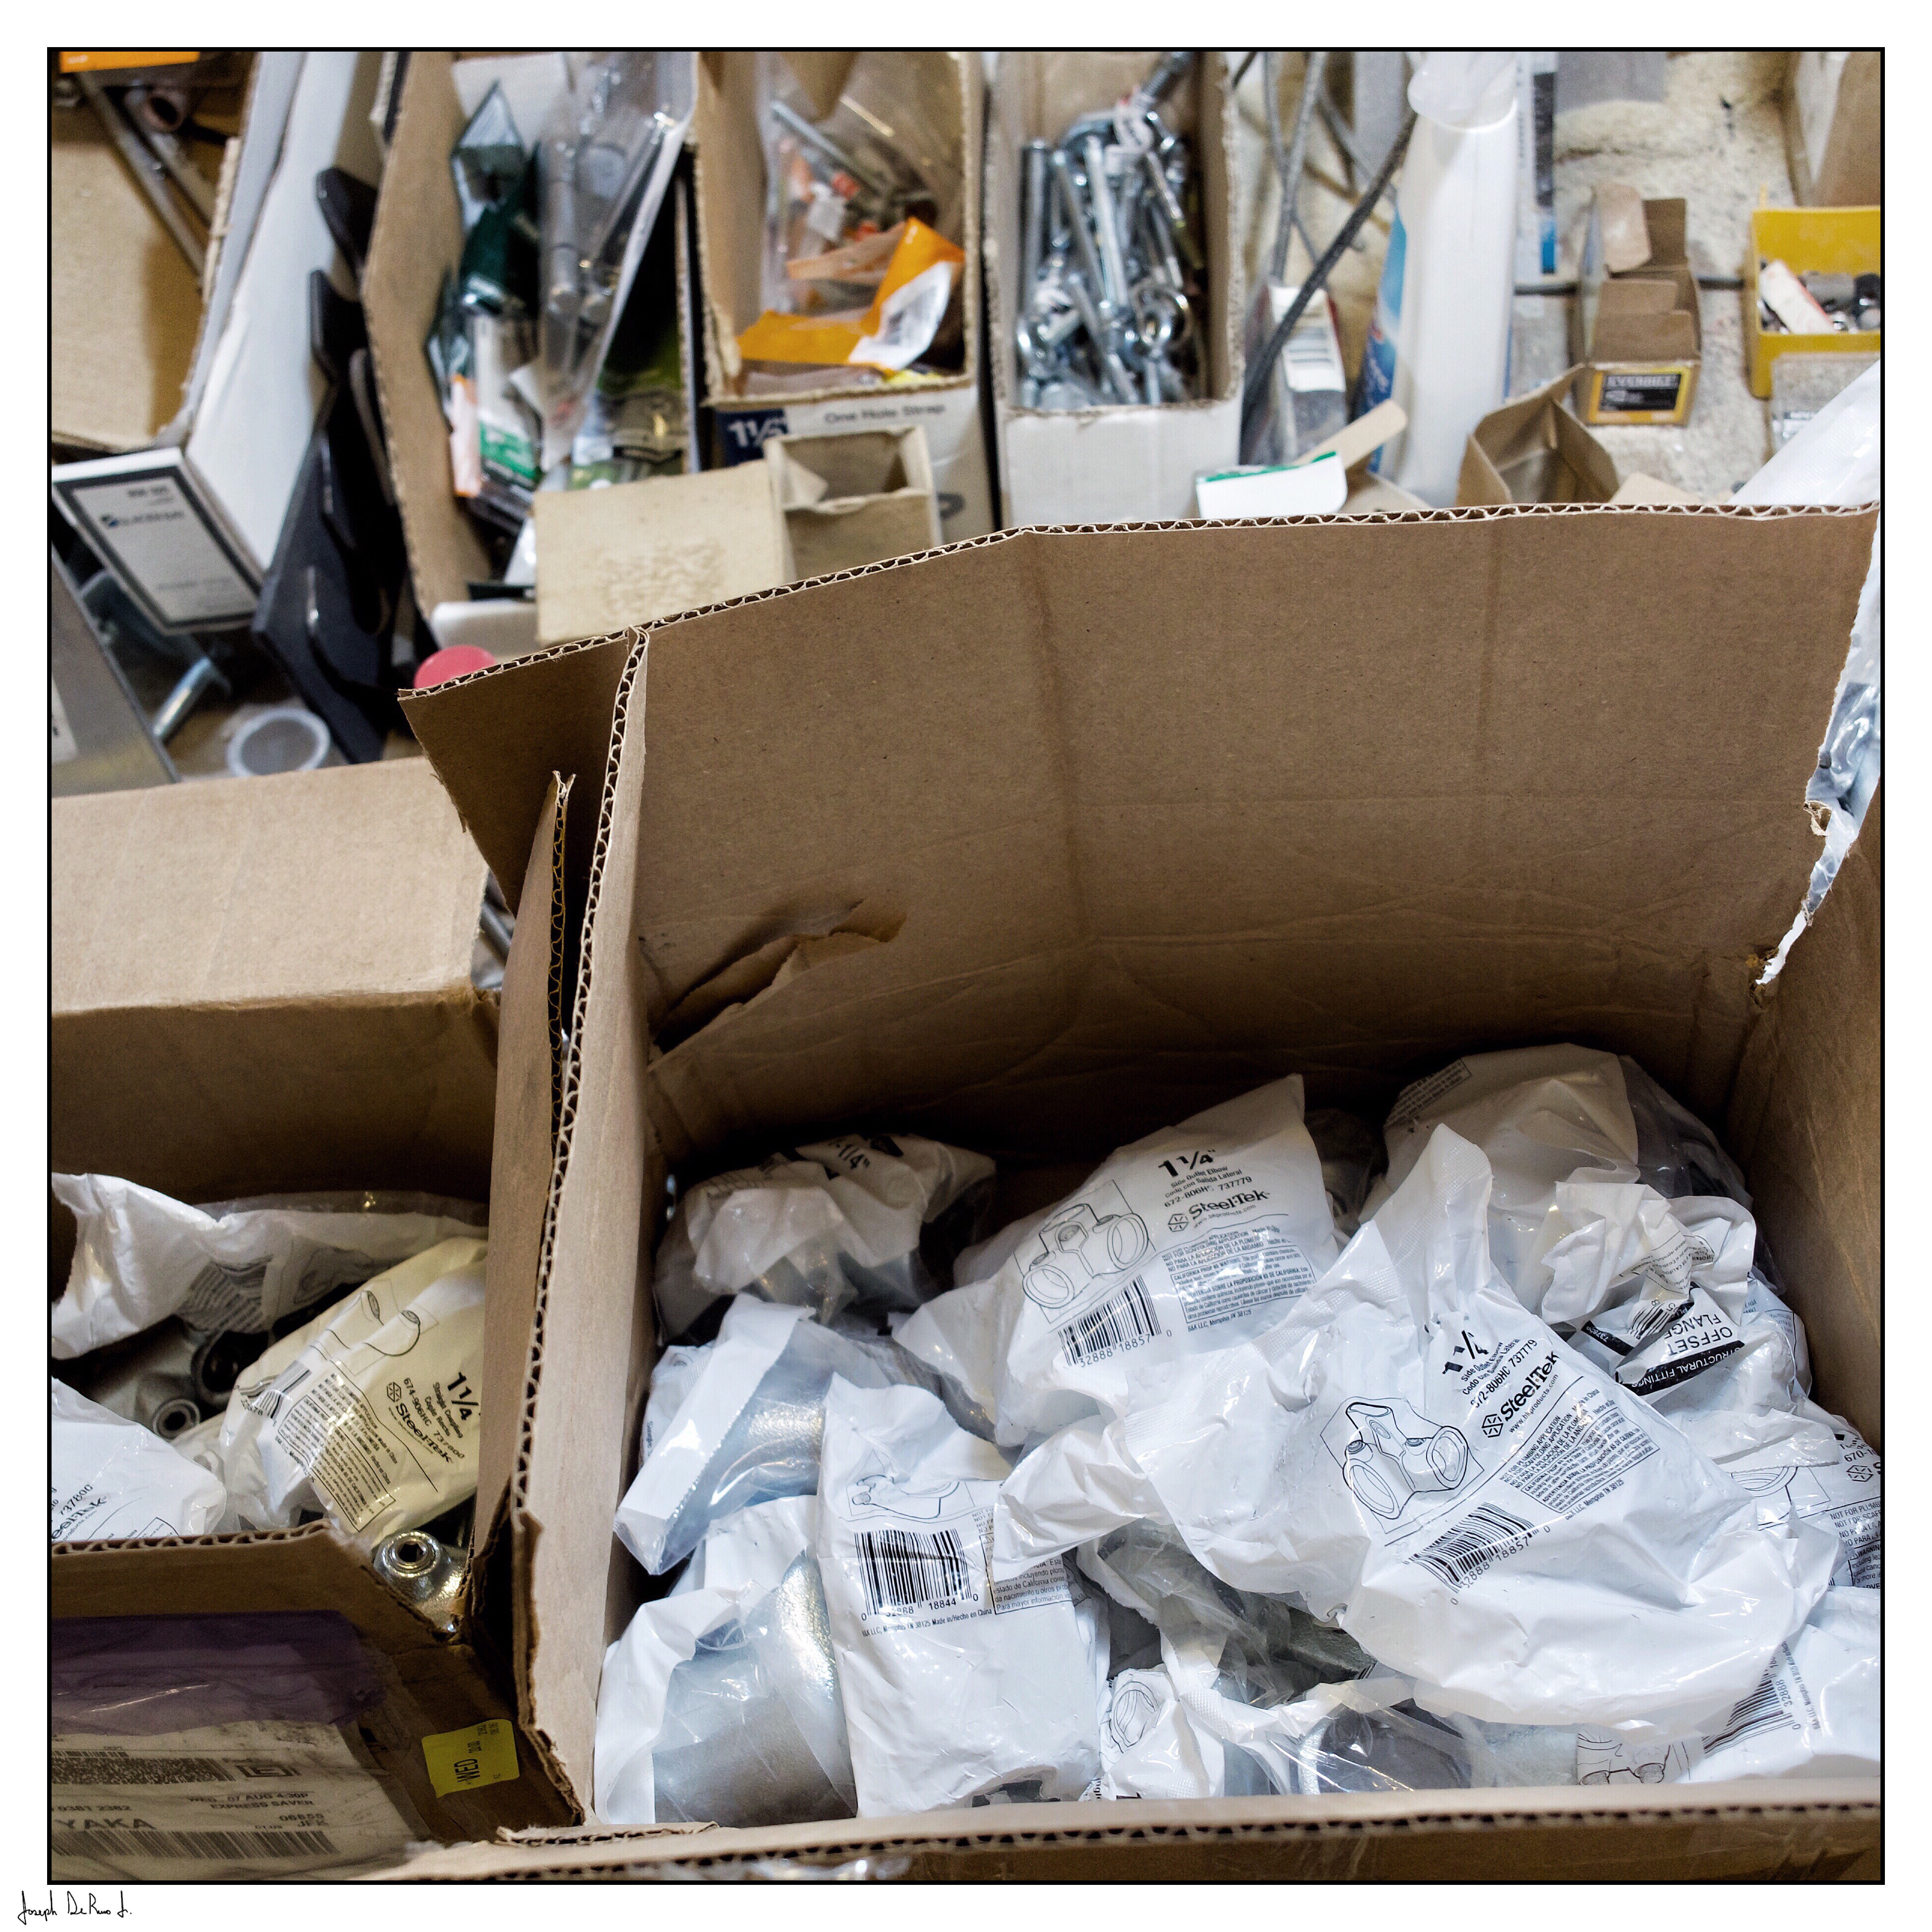
They were excited to see the Hack A Day entry and offered to send some fittings our way in support of the competition
With a box full of fittings (a friend coming into the dining room seeing the box with fittings exclaimed “looks like Christmas came early) we got to work on a new frame!
This iteration is being used to nail down the final cutting dimensions
Often the process of “hacking something together” is closer to sculpture then that of engineering
You chip away at this problem and the next, having things evolve and take shape as you progress
But, designing something for production is a very different story
Once you recognize that 100, 1000 units might be built it is no longer a piece of sculpture but becomes an act of engineering!
The decisions you make are no longer about how will I make this particular piece to solve problem “X” but how will 100 of these be made, and is there a smarter solution that doesn’t need that particular piece at all!
So where some might look at the process and think “how do you have the patience” or “how boring it must be to keep having to redo this”
No! The simple fact of the matter is that this is the process, this is how things get built, this is how meaningful change comes, how you make an impact on people’s lives
It is a discipline, it is work!
But the truth of the matter is that it brings us such pleasure, every part of it, it is what we have always done and trust by God’s Mercy what we were made to be!
![]()
-
Starting A New Carriage (Casters)
08/08/2019 at 04:07 • 0 comments![]()
Decided to build up a new Carriage
This is now the third one
One by one we’ve been dropping down the pipe size each time
There are a number of other refinements
Cutting the base in thirds, adding a tongue and grooves to the edges so that it can be broken down and assembled more easily
Repositioning the wheels for greater stability
Reworking the shoulder Blocks
One of the casualties of switching to a narrower pipe dimension is that the strap lock will no longer work
So we’re left revisiting alternatives
All of this is a process and as things change we take the opportunity to make things better, if not better at least being able to resolve questions of what is scenarios is always of value! 😊
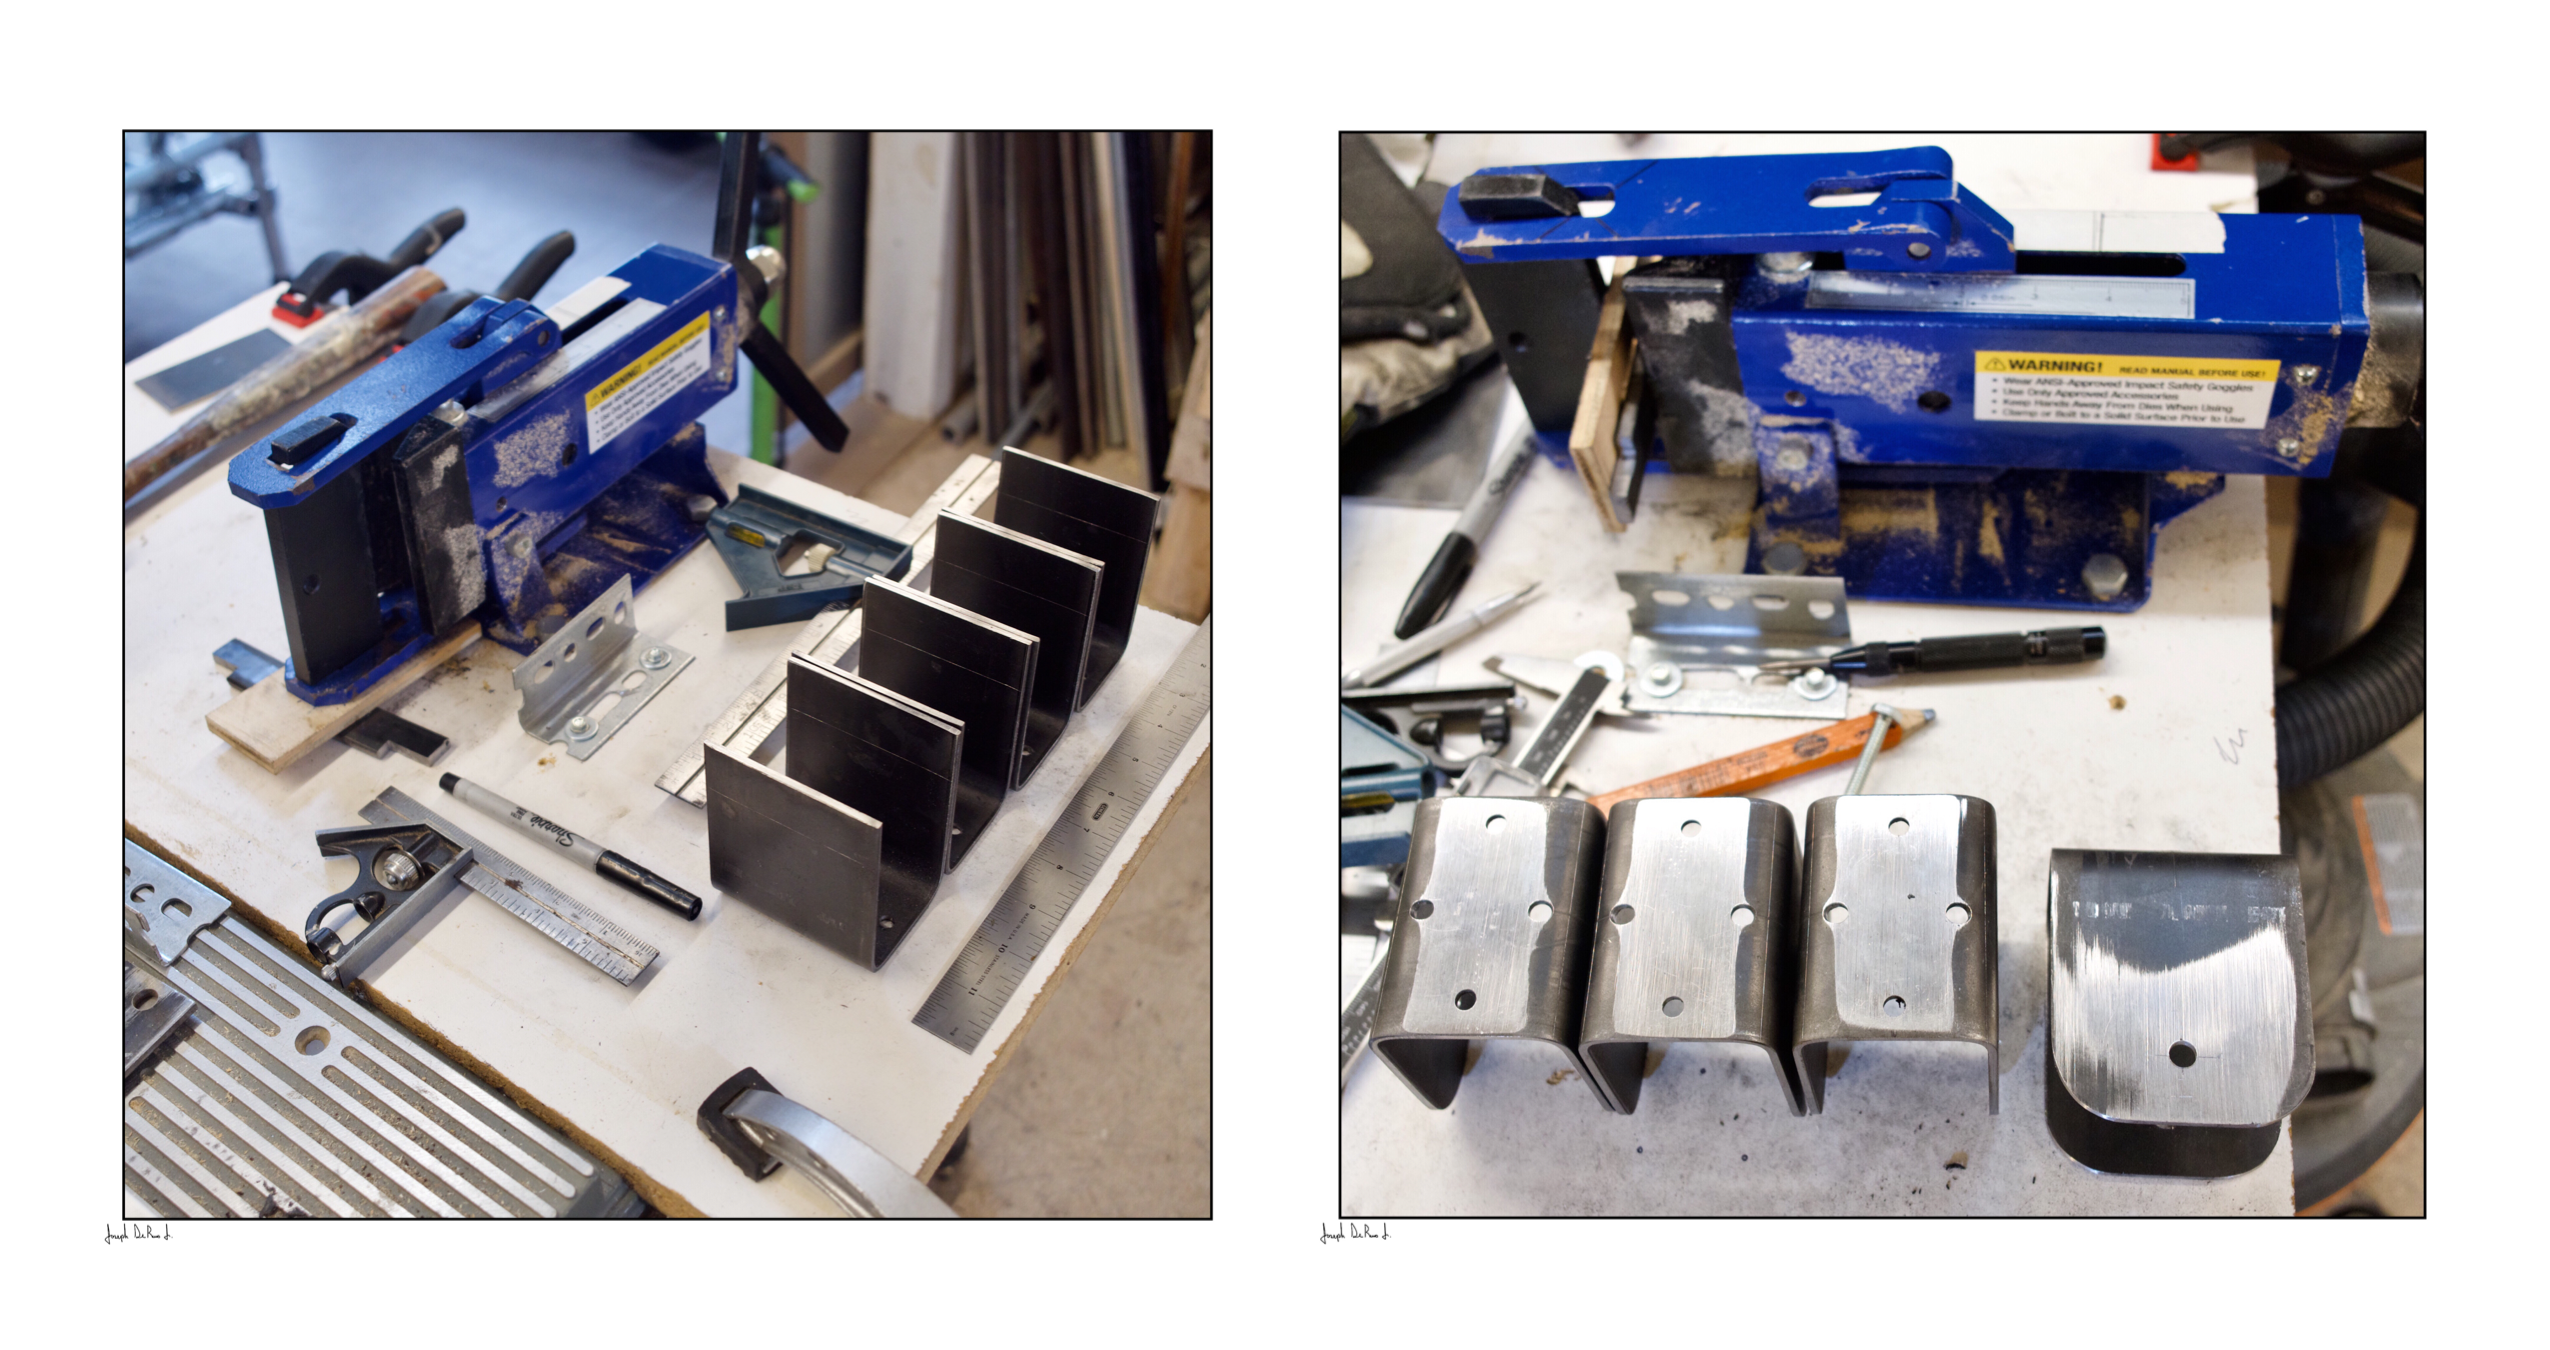
To another point was the idea of jobbing out the metal bending of the casters
At this point it is easy enough to do them by hand, figuring saving a few dollars is worth it!
-
Designing For Multiple Functions
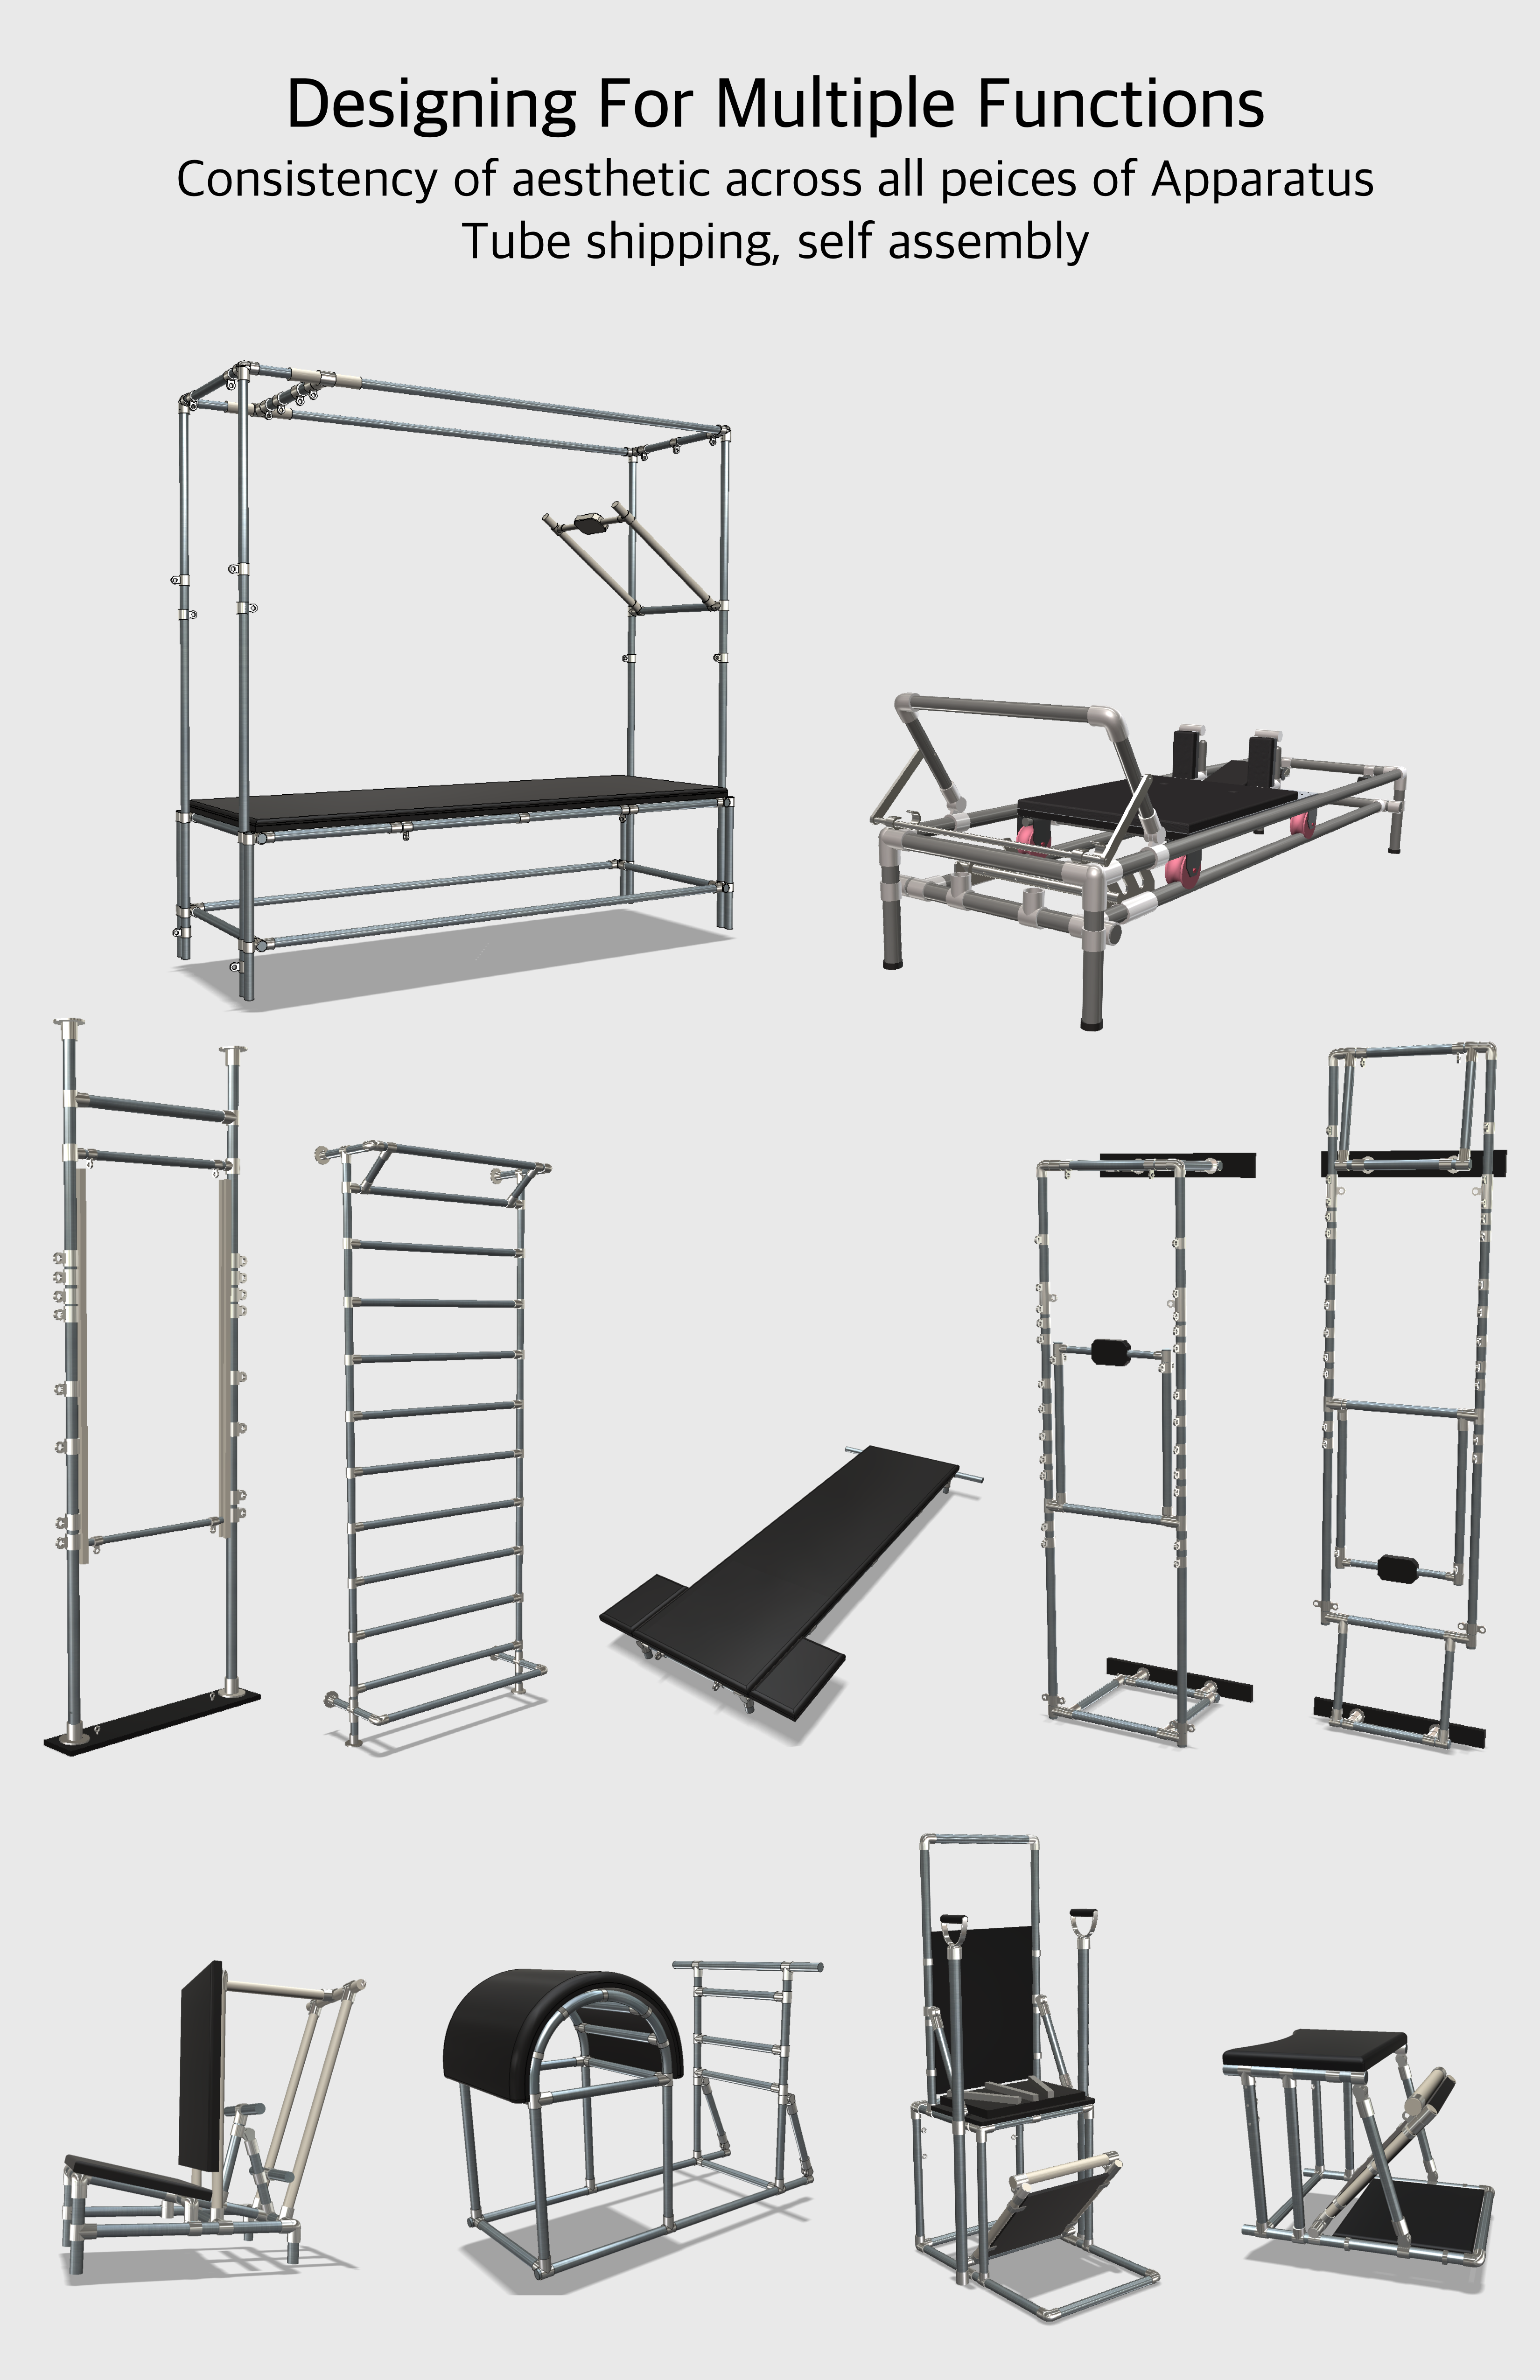
07/20/2019 at 17:30 • 0 commentsWhat you see here are the renderings for all the major pieces of equipment in a Pilates Studio
When a problem arises the first instinct is to attack that problem, and find a solution for it
That is how it was regarding this project
The Reformer is what presented it’s self as the problem, and that is where we focused
We had worked through a number of designs and was getting to a place where things were feeling good
But it was at this point that the realization set in, and the larger picture presented it’s self
The problem wasn’t just the Reformer, but it was all the Pilates equipment used!
With that we had to take a step back and look at the problem from a completely different perspective
What followed was scrapping our original design, and start from scratch
This time, not just looking singularly at the Reformer, but making sure that all of the solutions and elements would ripple down through every piece of Apparatus
This was done by working through all of the individual pieces concurrently
Design elements and solutions to problems, were tried out up and down the line, to see if they not only worked in one instance, but across the board
It meant that there were far more balls in the air being juggled, but it was the only way we could see not to be blind sided, and then have to go back for something and start from scratch
It also allowed a much more holistic approach to the process, a unifying design aesthetic
This would have been near impossible if it weren’t for having an iPad Pro and running Shapr3D on it!
The combination of the two created such a powerful tool that it allowed us to keep all the balls in the air! 😊
![]()
-
Adjustable Leather Pulling Strap Lock Mechanism
07/11/2019 at 01:23 • 0 comments![]()
The Process Of Design
Leather Pulling Strap Anchor Lock
The Problem
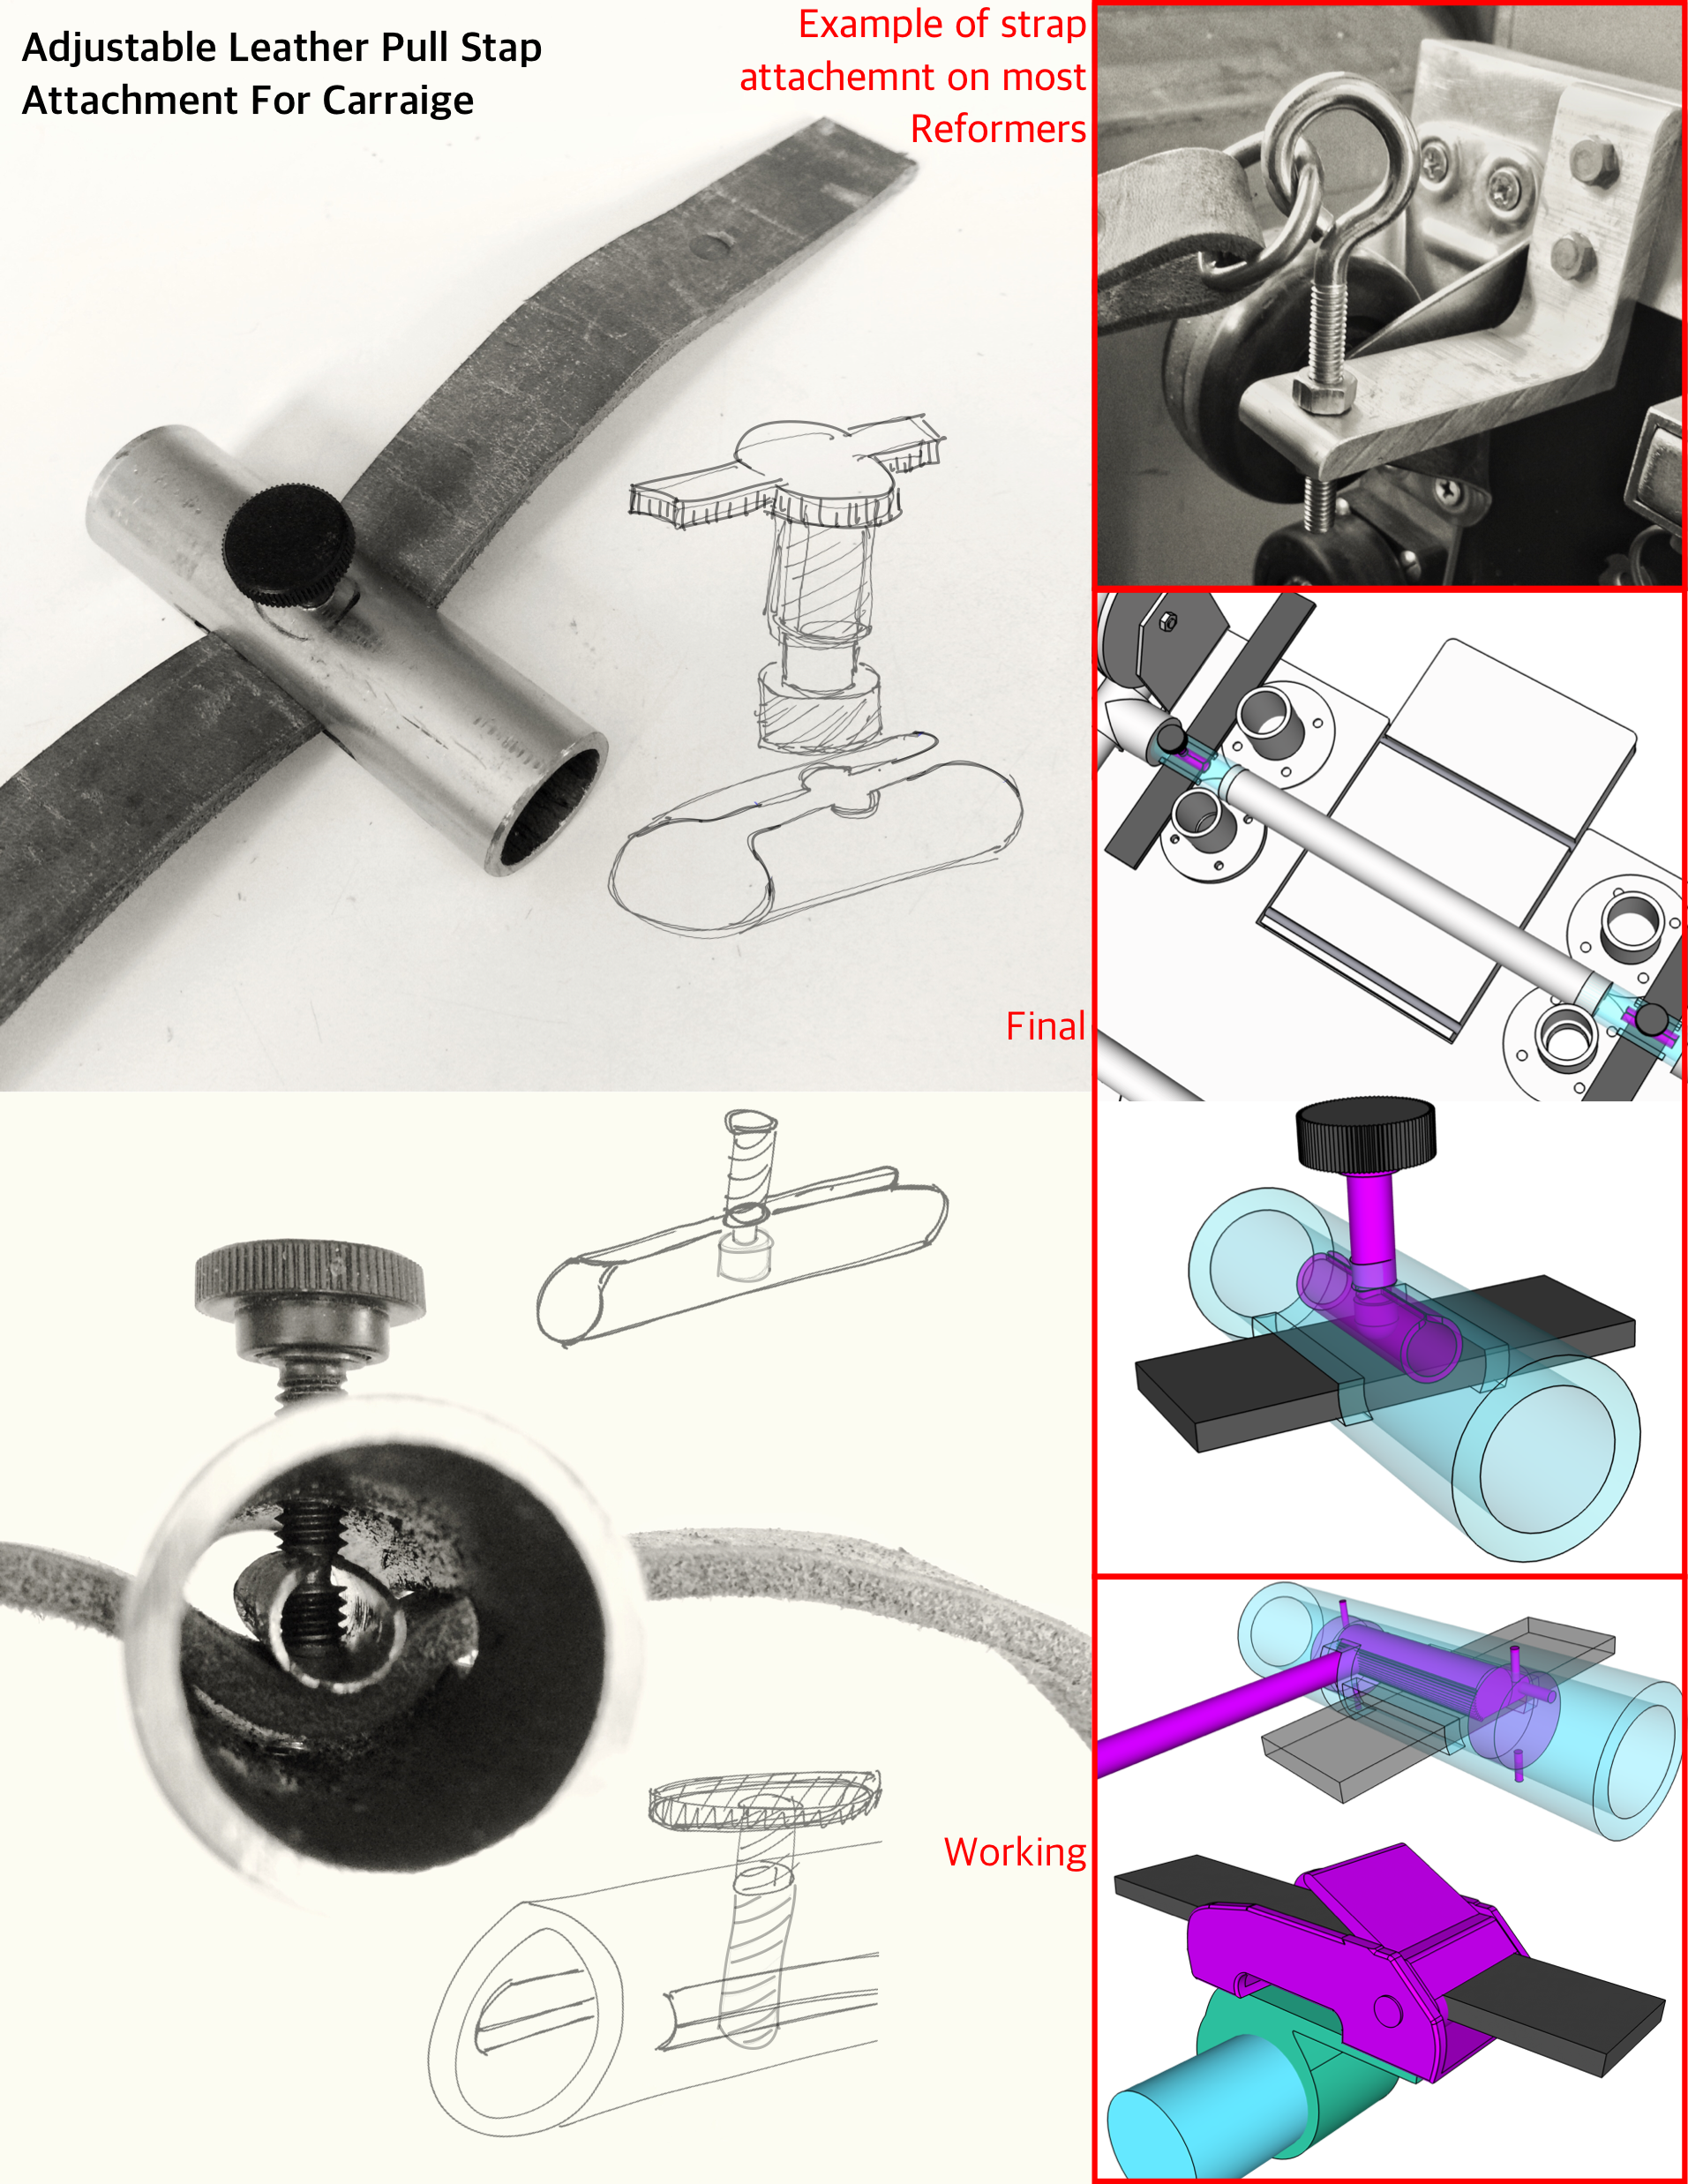
The Reformer Carriage has a leather strap attached to the bottom of it, the strap is threaded through an anchored caster wheel and on the other end is a pulling handle. On the bottom of most every “Classical” Reformer there is an “L” bracket. The bracket has a hole through it that the leather strap with a permanent D-Ring and I-Bolt attached to it is placed through the hole with locking nuts on both sides.
This setup takes two wrenches to attach and adjust the strap as it stretches with use (it is near unanimous amongst Classical Pilates teachers that leather straps are the only ones that have the correct feel)
An extra problem for our Reformer Design is that the shoulder blocks are adjustable, accommodating clients of average height and shorter. With the movement of the shoulder blocks there is a corresponding adjustment that needs to be made for the straps
Maintaining the original attachment mechanism would make this on the fly adjustment impossible
What is needed is a quick release lock for the strap
The Solution
Cut two slots into the pipe for the strap to go through
Drill and Tap a screw hole into the pipe centered to the slot
Cut a circular retaining notch into a thumbscrew
Using a piece of copper pipe half the internal diameter of the frame pipe drill a hole the diameter of the reduced thumb screw notch
Cut a slit lengthwise in the copper pipe, round off edges so the sleeve can be slid over the thumbscrew once it is threaded into the larger Carriage Frame pipe
This creates a guillotine clamp that distributes the pressure while providing a very secure hold, all while needing no more tools or much turning pressure on the thumbscrew to provide a positive lock
The Process
The process is a whole other story! The process was many many thoughts in all sorts of directions. Drawing and modeling at least five different relatively good solutions. Building two rough working proof of concepts. The first proof of concept had a rounded nose bolt, threaded into the pipe that just pressed into the leather strap. This was a simple solution, and easy to execute. Unfortunately it created an indent in the leather that over time would weaken the leather. All of this is speaking to the very mechanical and linear aspect of designing and building something. The truth of the matter is that the process is one of deep thinking, tangent connections while pouring over the most abstract details of others solutions to other problems not your own. But you go through all of this process and thinking in hopes of solving your problem! And truth be told it is not just you! It is a spouse and children who look at you and repeat simple questions multiple times waiting for you to come out of that place where you dwell most of the time to produce an answer such as “coffee sounds good!” Now we’re not saying that every designer/hacker is this way, but in our house this is the way it goes. It is also because of a loving and understanding, an appreciative family that we have that unstructured time to just think and ponder these sorts of problems.
-
Assembly From Packing Tube
05/31/2019 at 21:39 • 0 commentsThis was the first time of packing it and then reassembling!
Putting it together took just 45min start to finish!
-
Caster Wheels
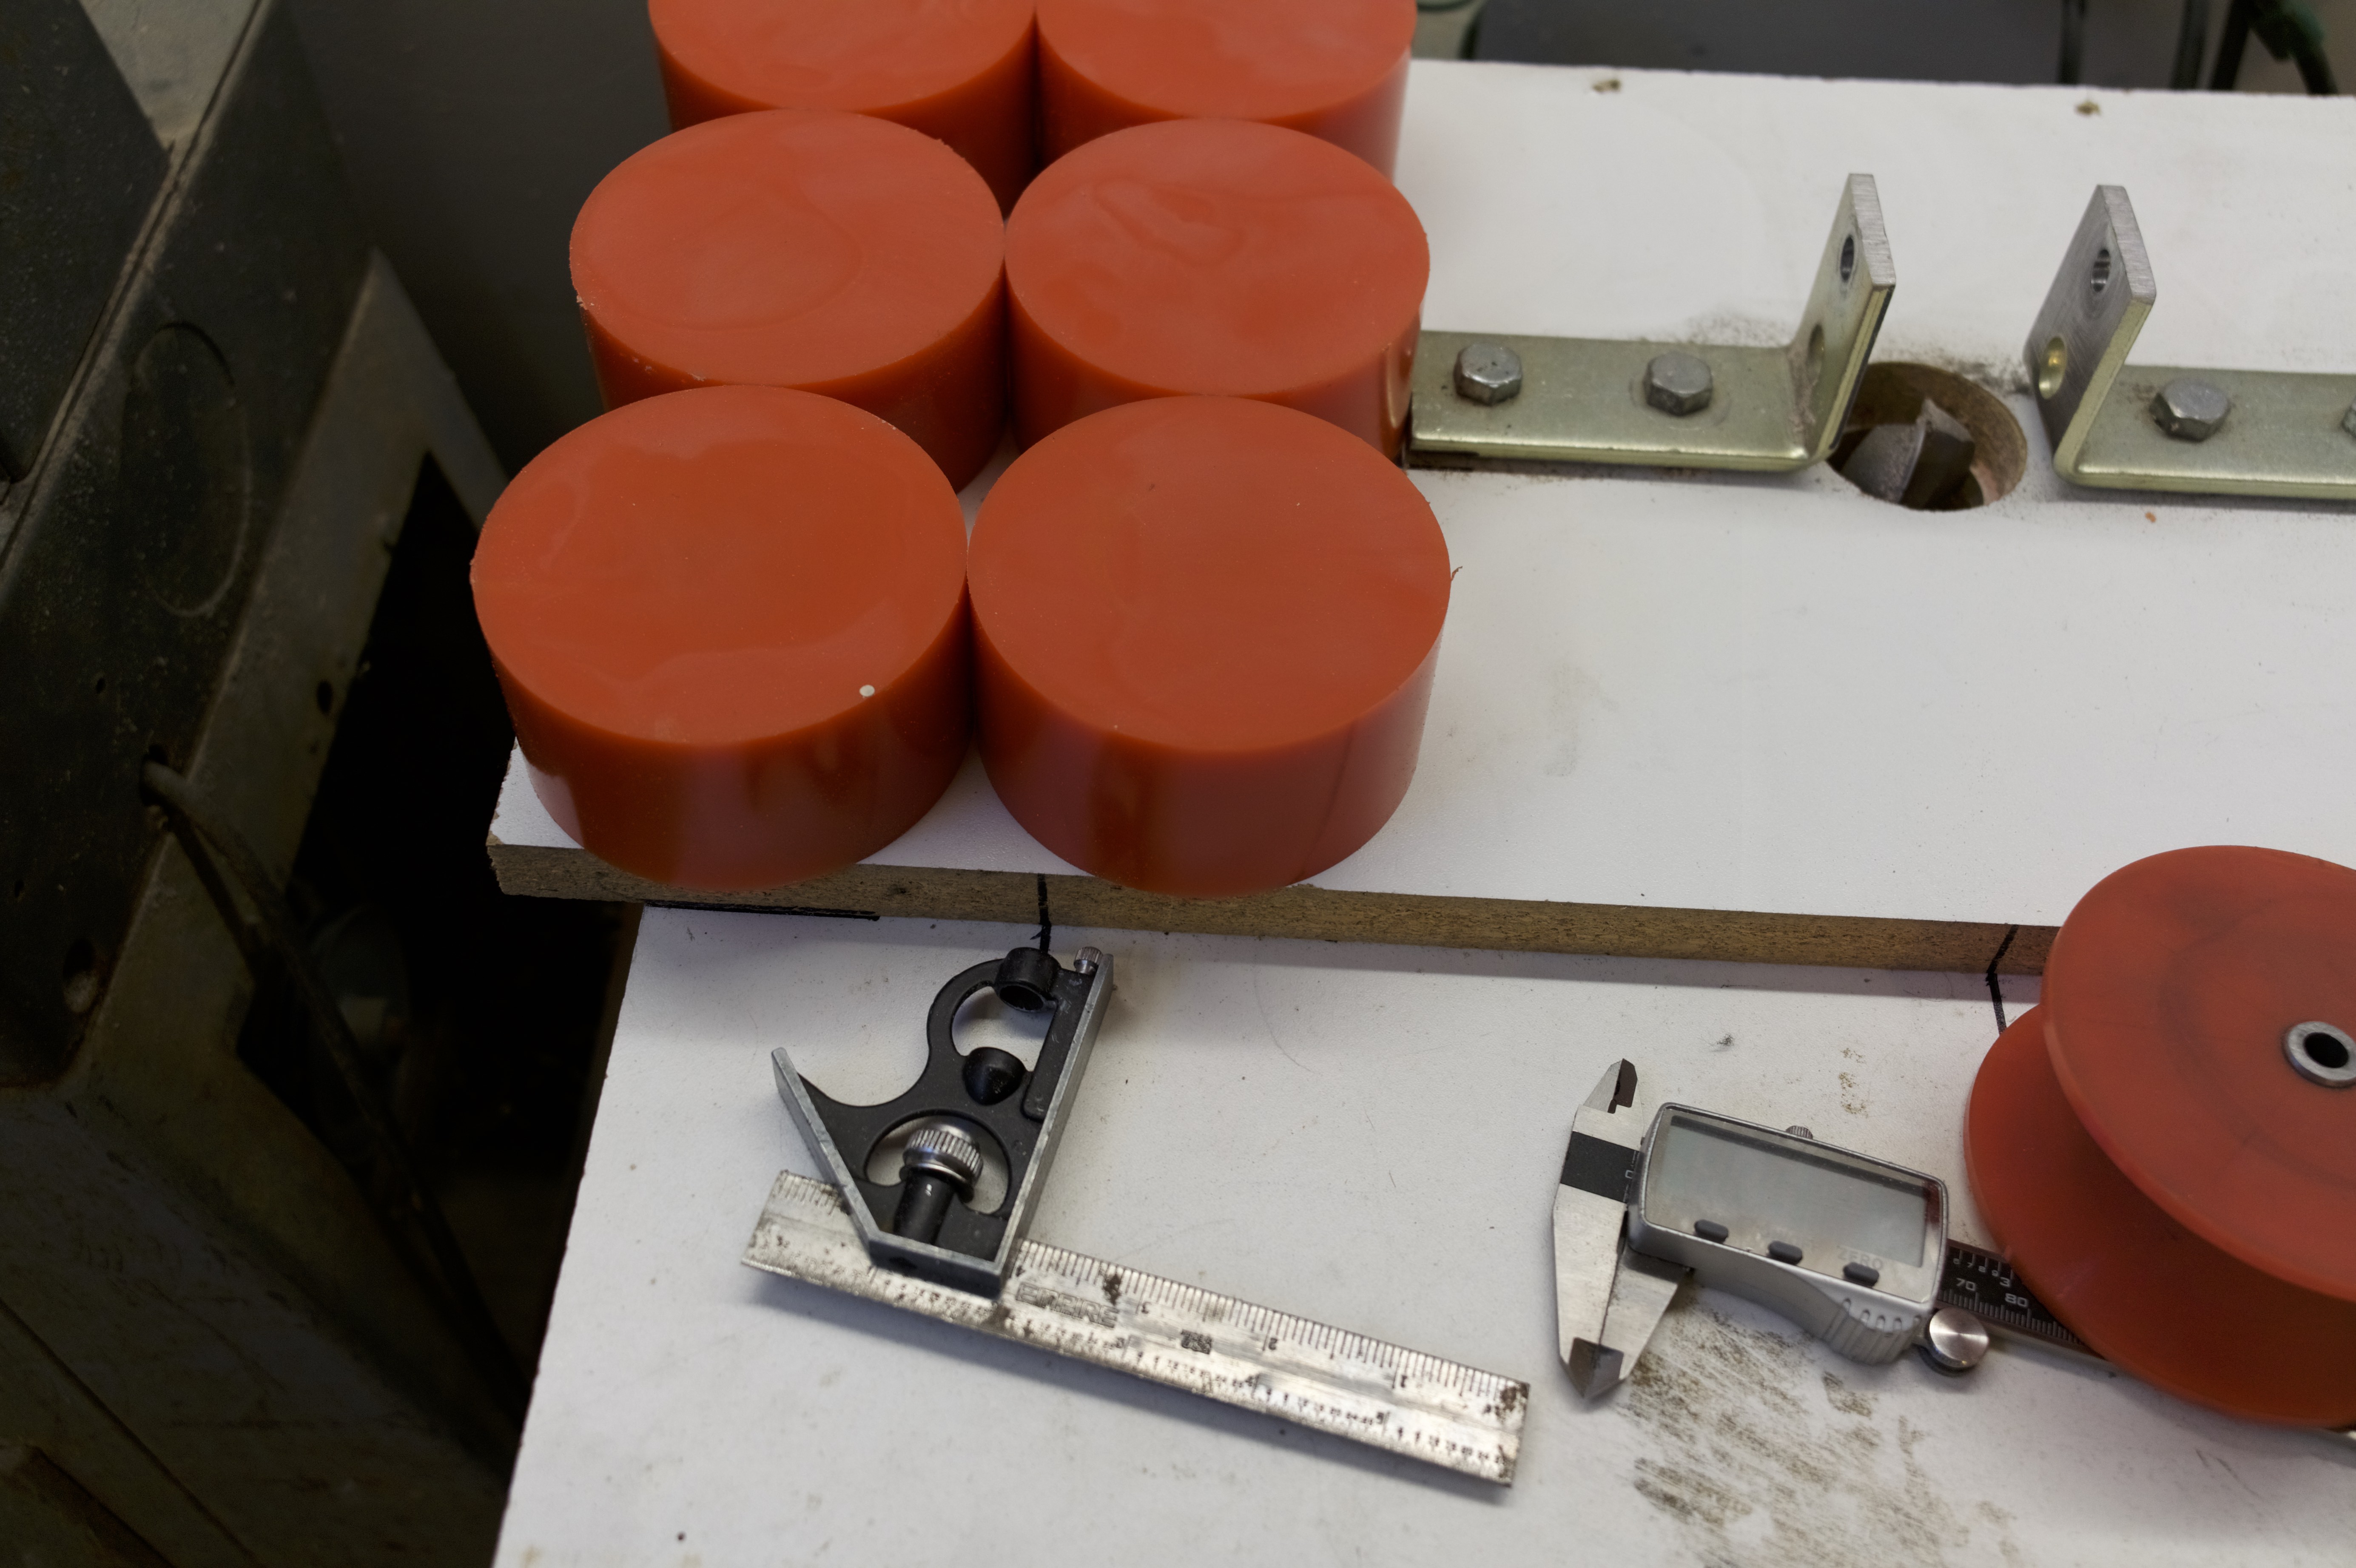
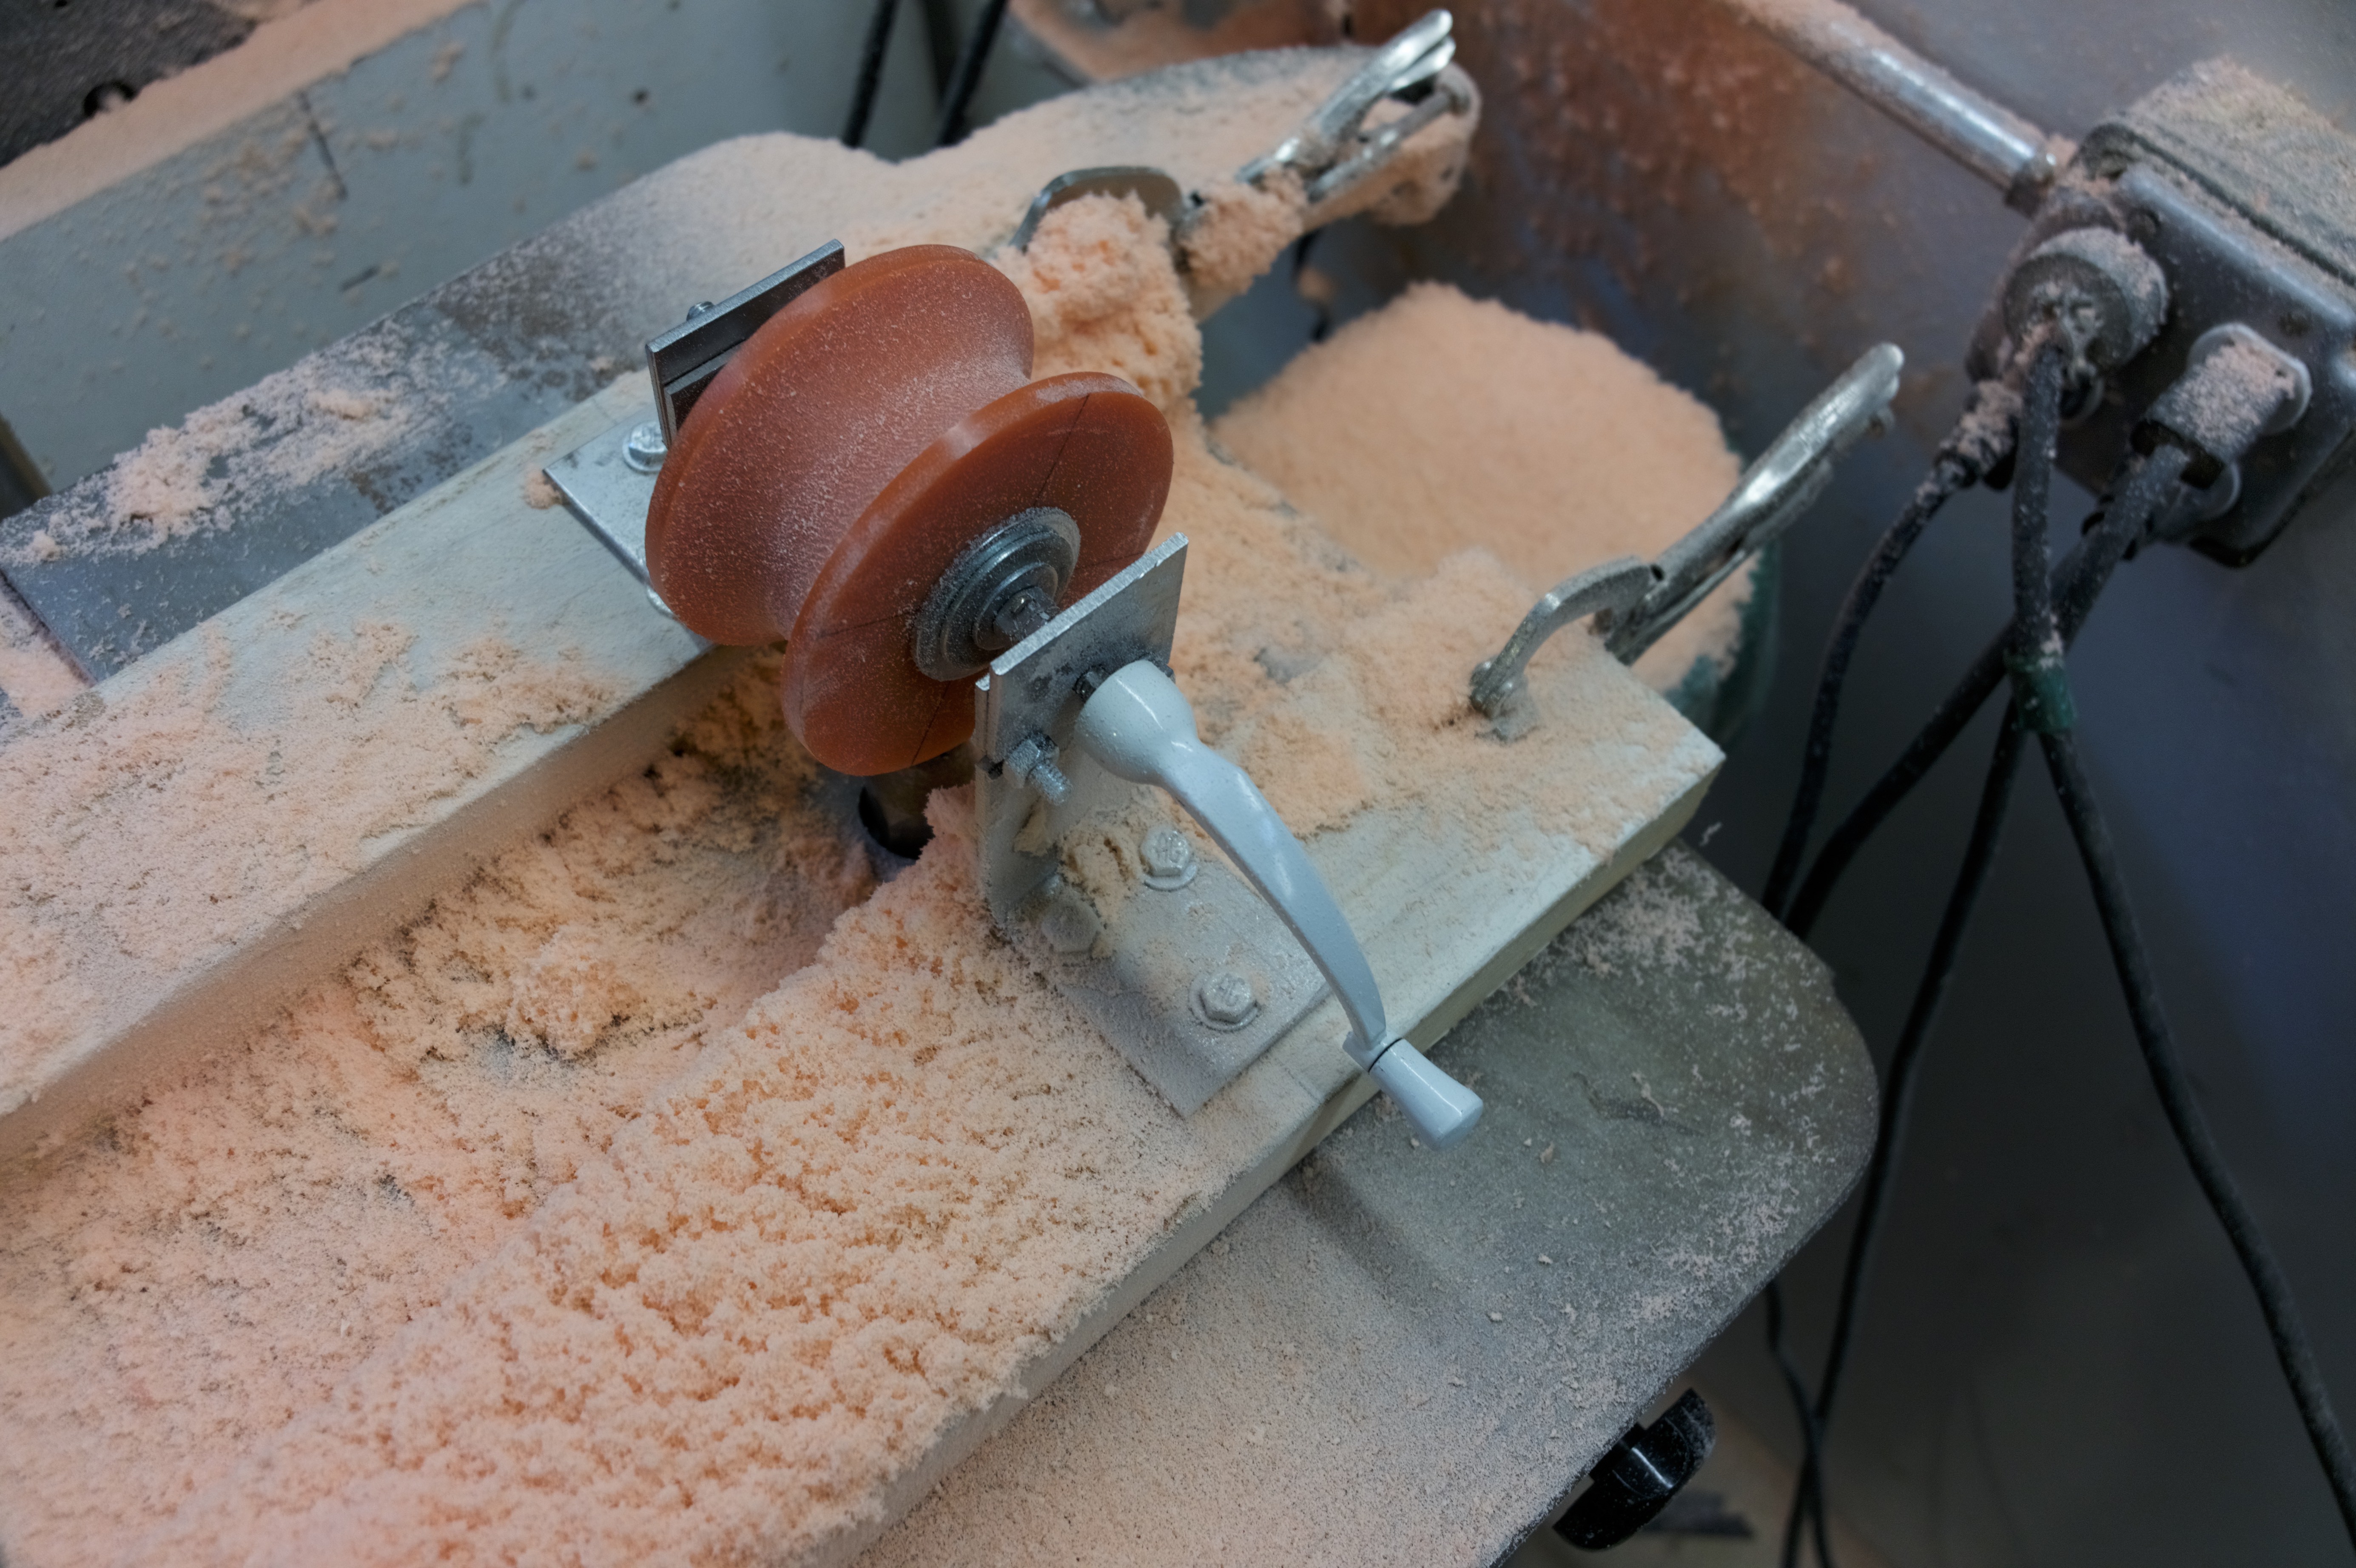
05/23/2019 at 04:14 • 0 commentsWheels have been tricky
All of the designing for the wheels as well as the whole project has been done using an iPad app called Shapr 3D (it has been a life saver)
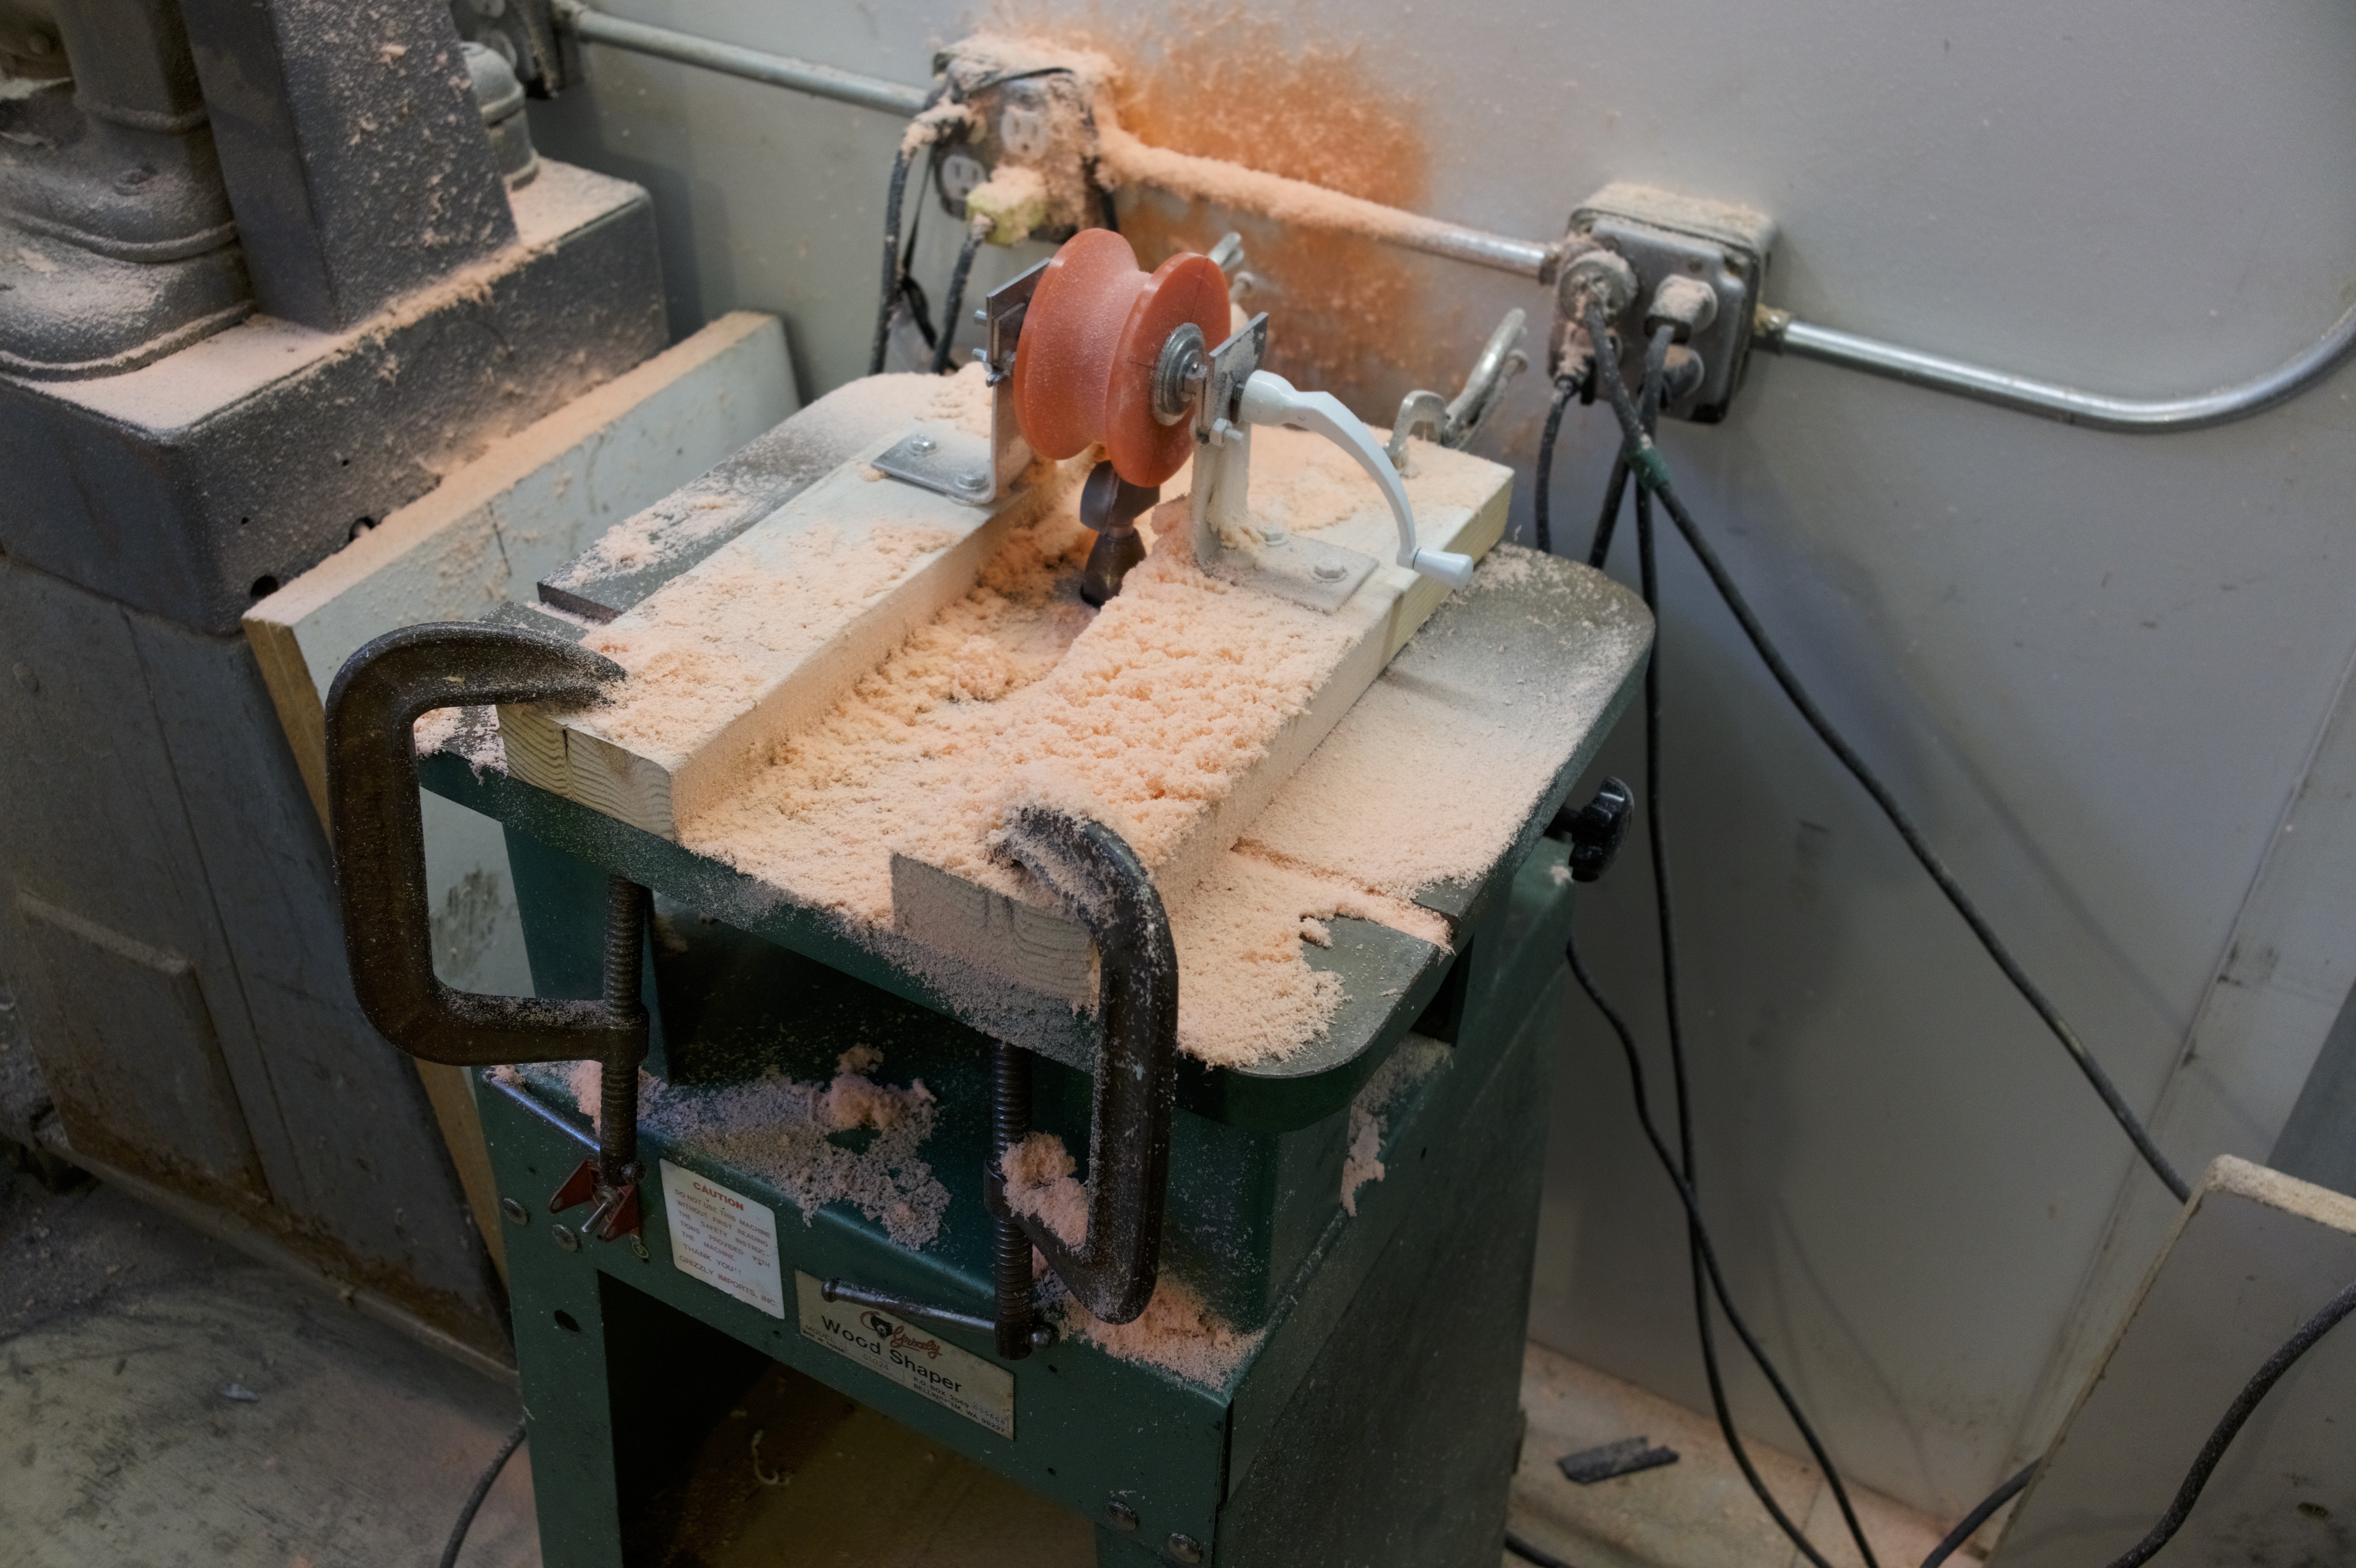
At 4" dia. they are a bit hard to cut square
This is of course without any real machining tools!
Built a new jig for cutting the groove
![]()
![]()
![]()
Pilates Reformer
A hack in the fullest sense. I’m looking to bring what is normally unaffordable Pilates exercise equipment to a much needed larger audience
 joseph