Arduino Enigma
-
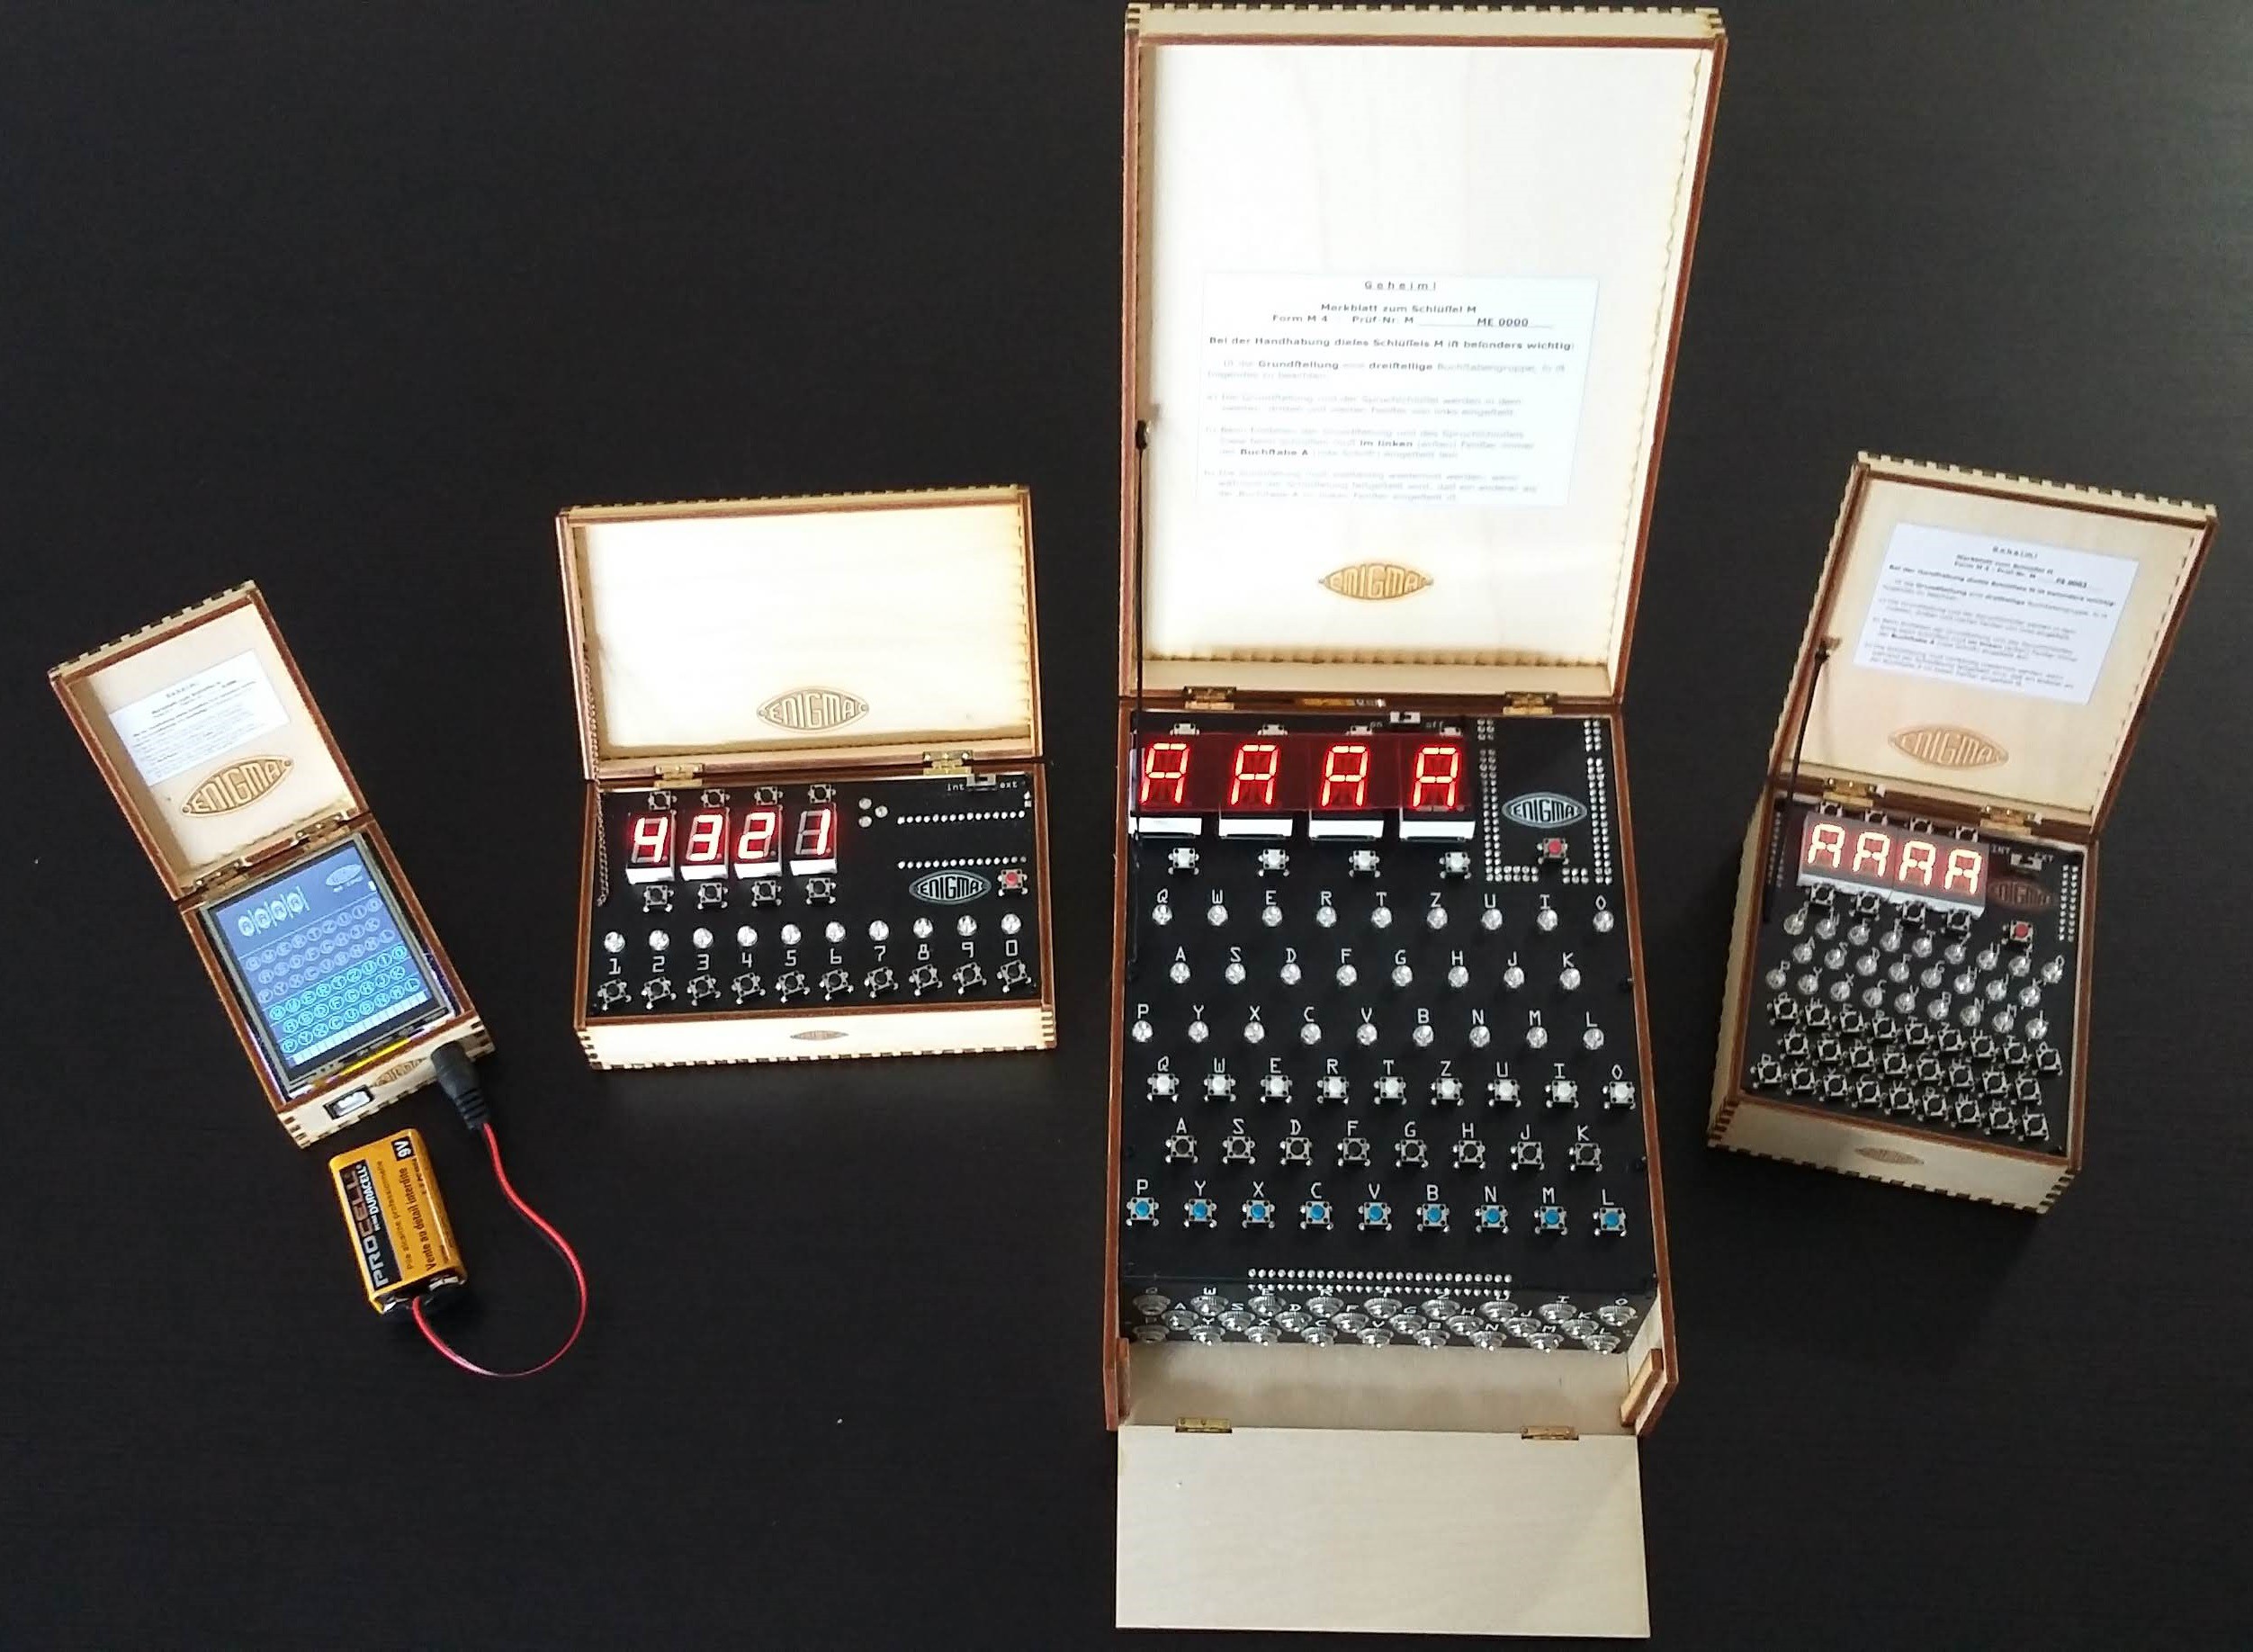
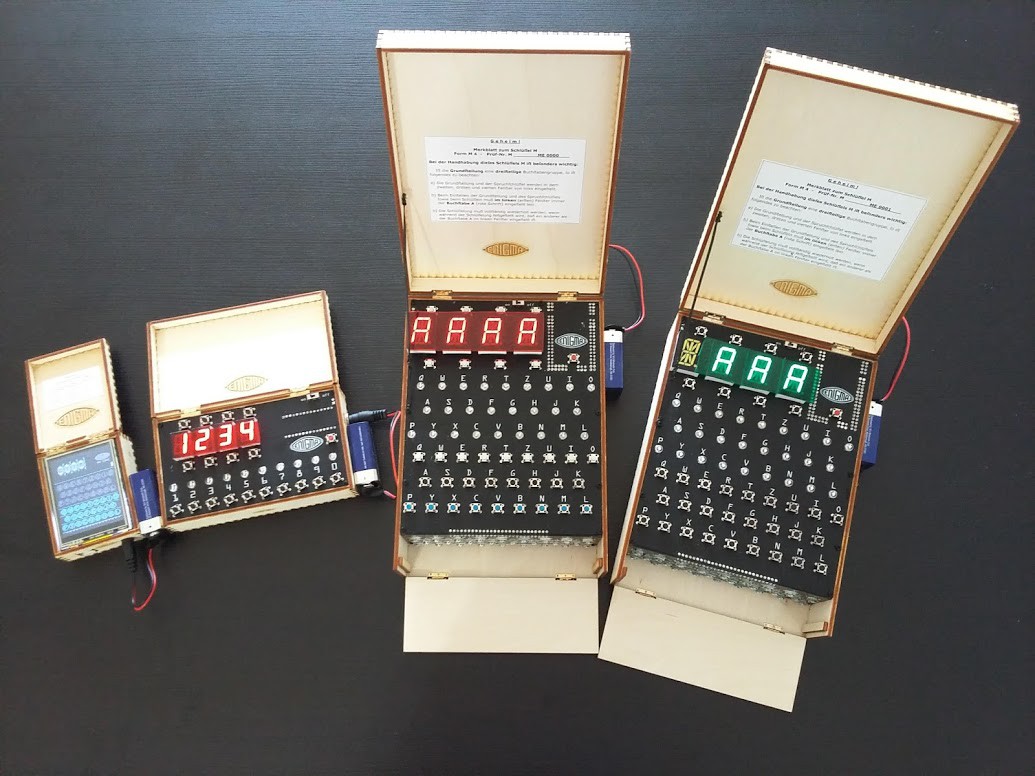
The whole family
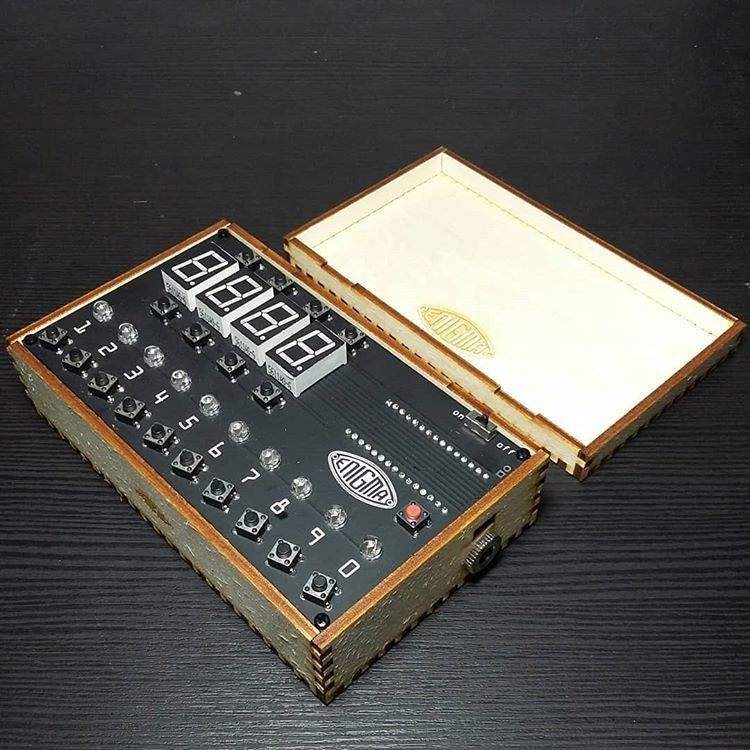
05/25/2020 at 22:55 • 0 commentsAnd finally, here is a picture of completed units:
![]()
Enigma Uno:
https://www.tindie.com/products/arduinoenigma/arduino-enigma-i-m3-m4-machine-simulator-w-case/
NanoEnigma:
https://www.ebay.com/itm/114230592101
PicoEnigma:
https://www.ebay.com/itm/114219267074
https://www.tindie.com/products/arduinoenigma/picoenigma-a-universal-enigma-machine-simulator/
-
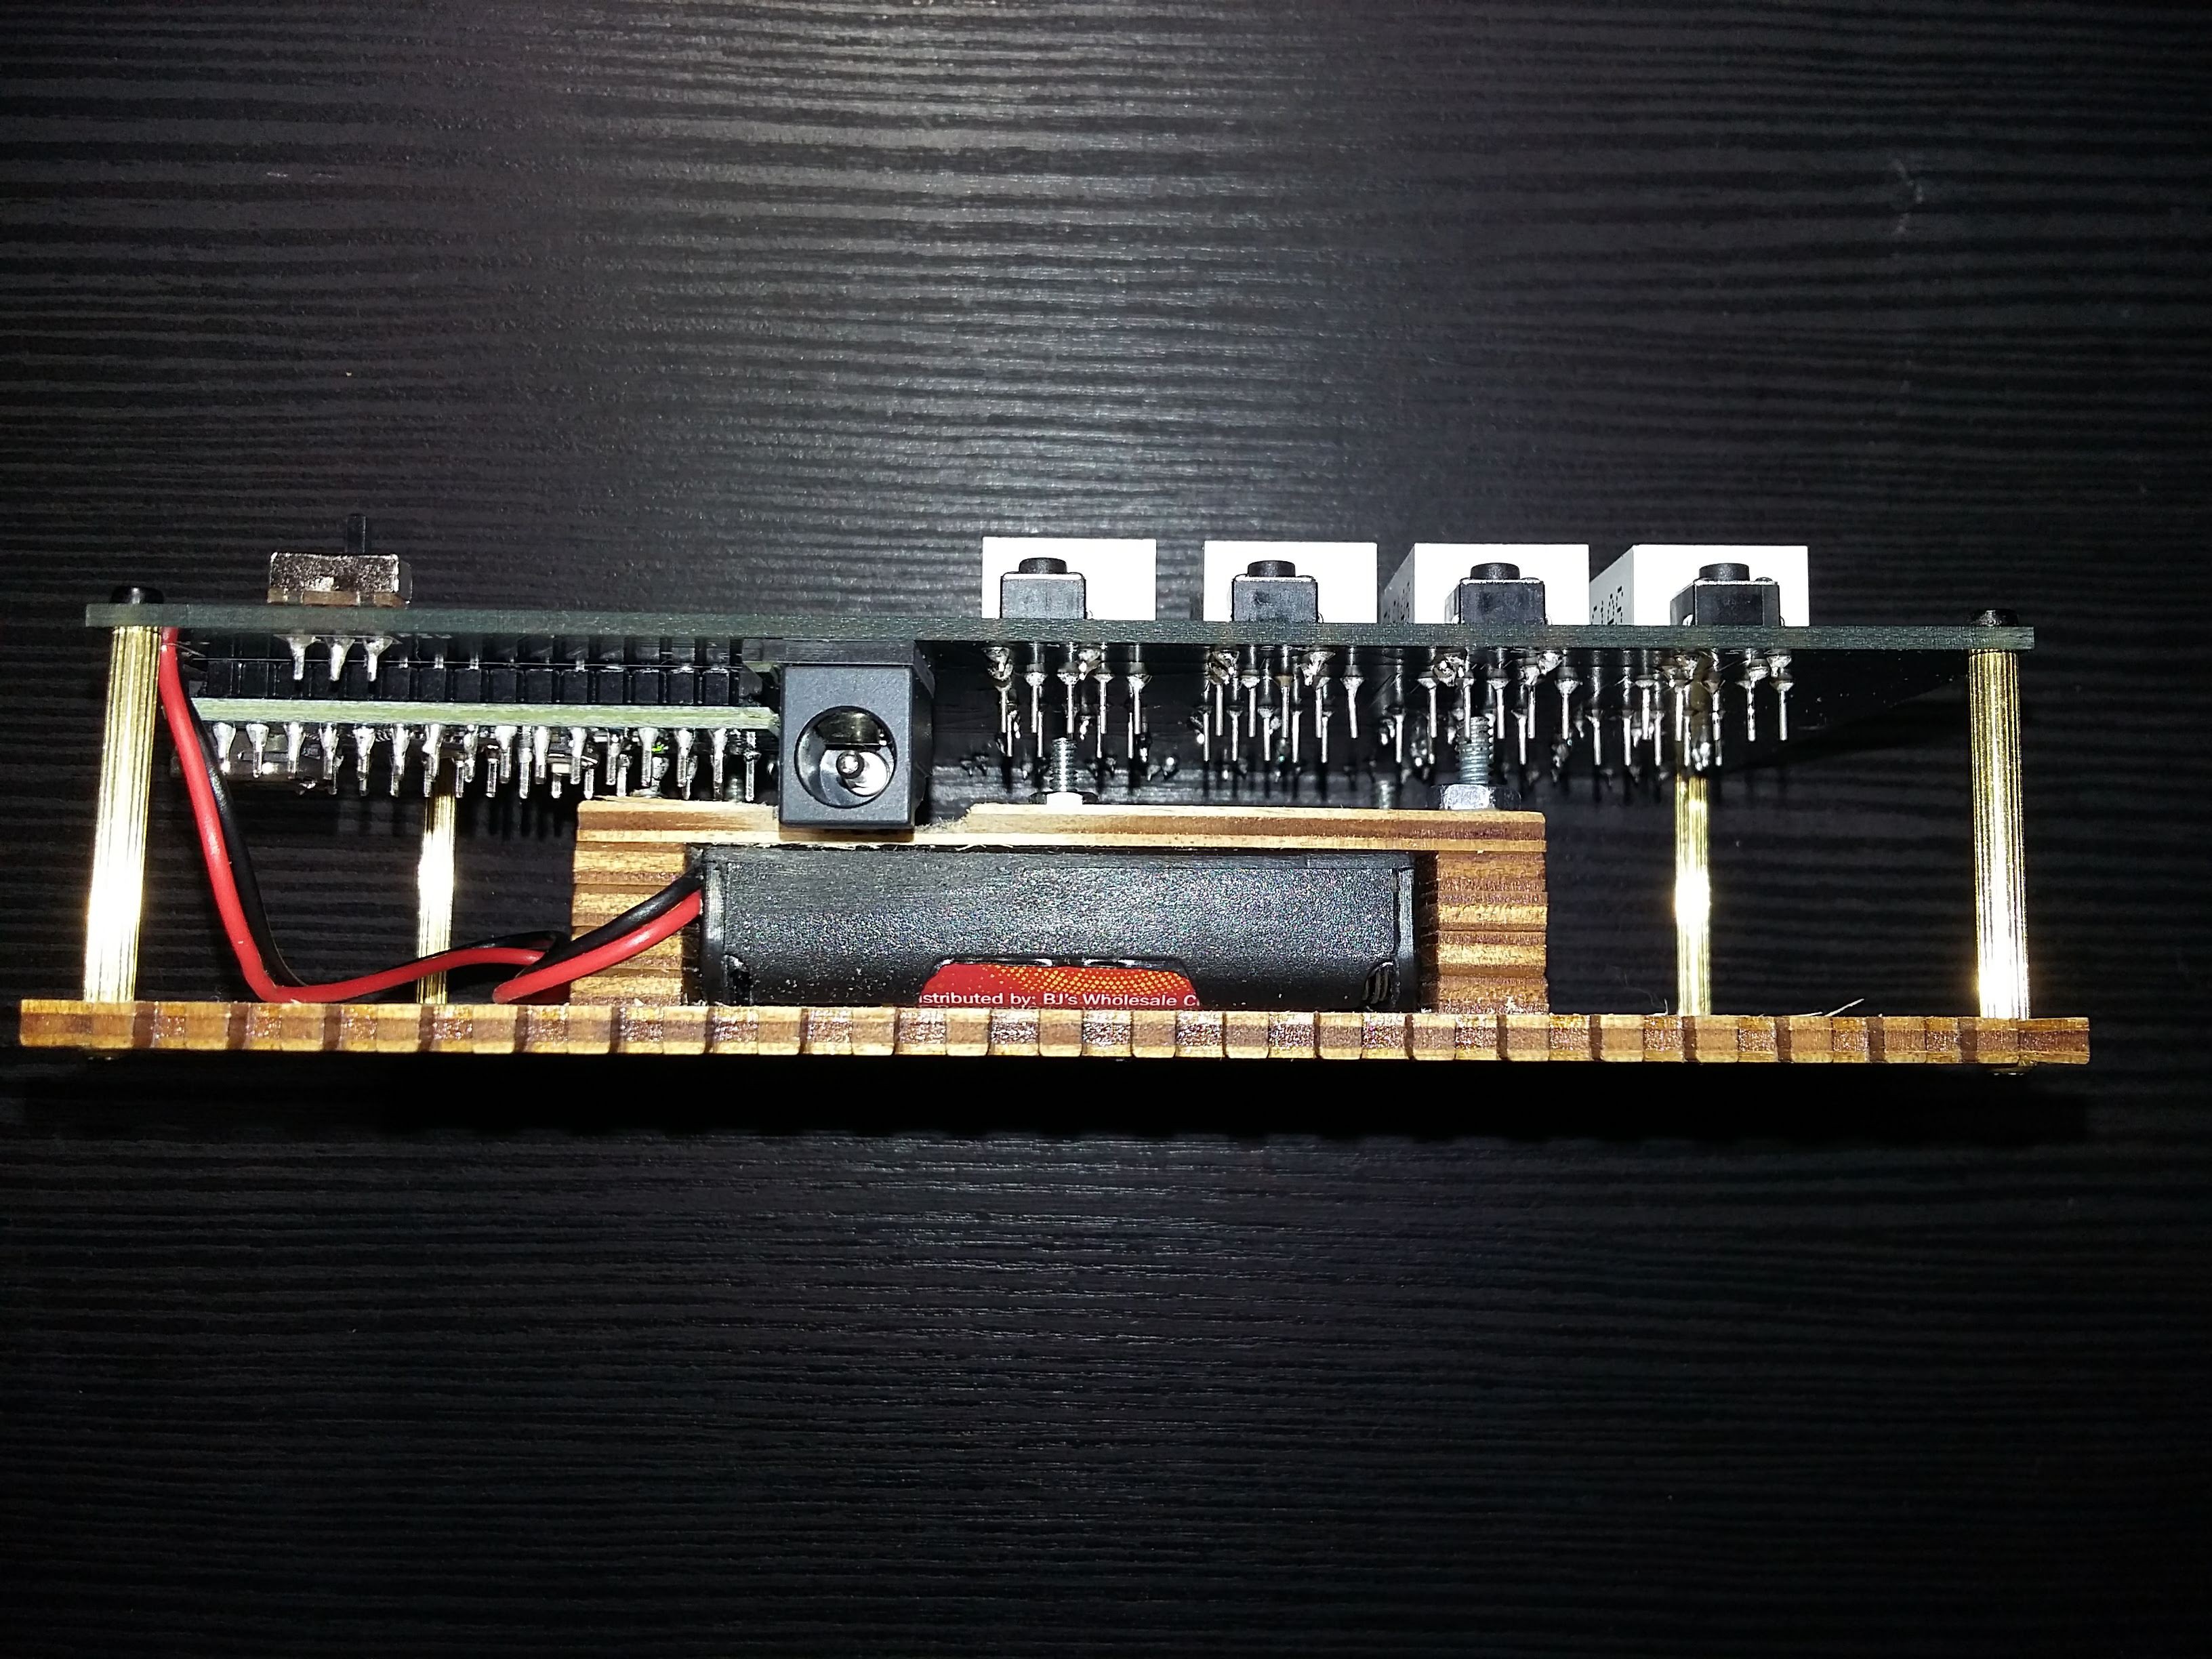
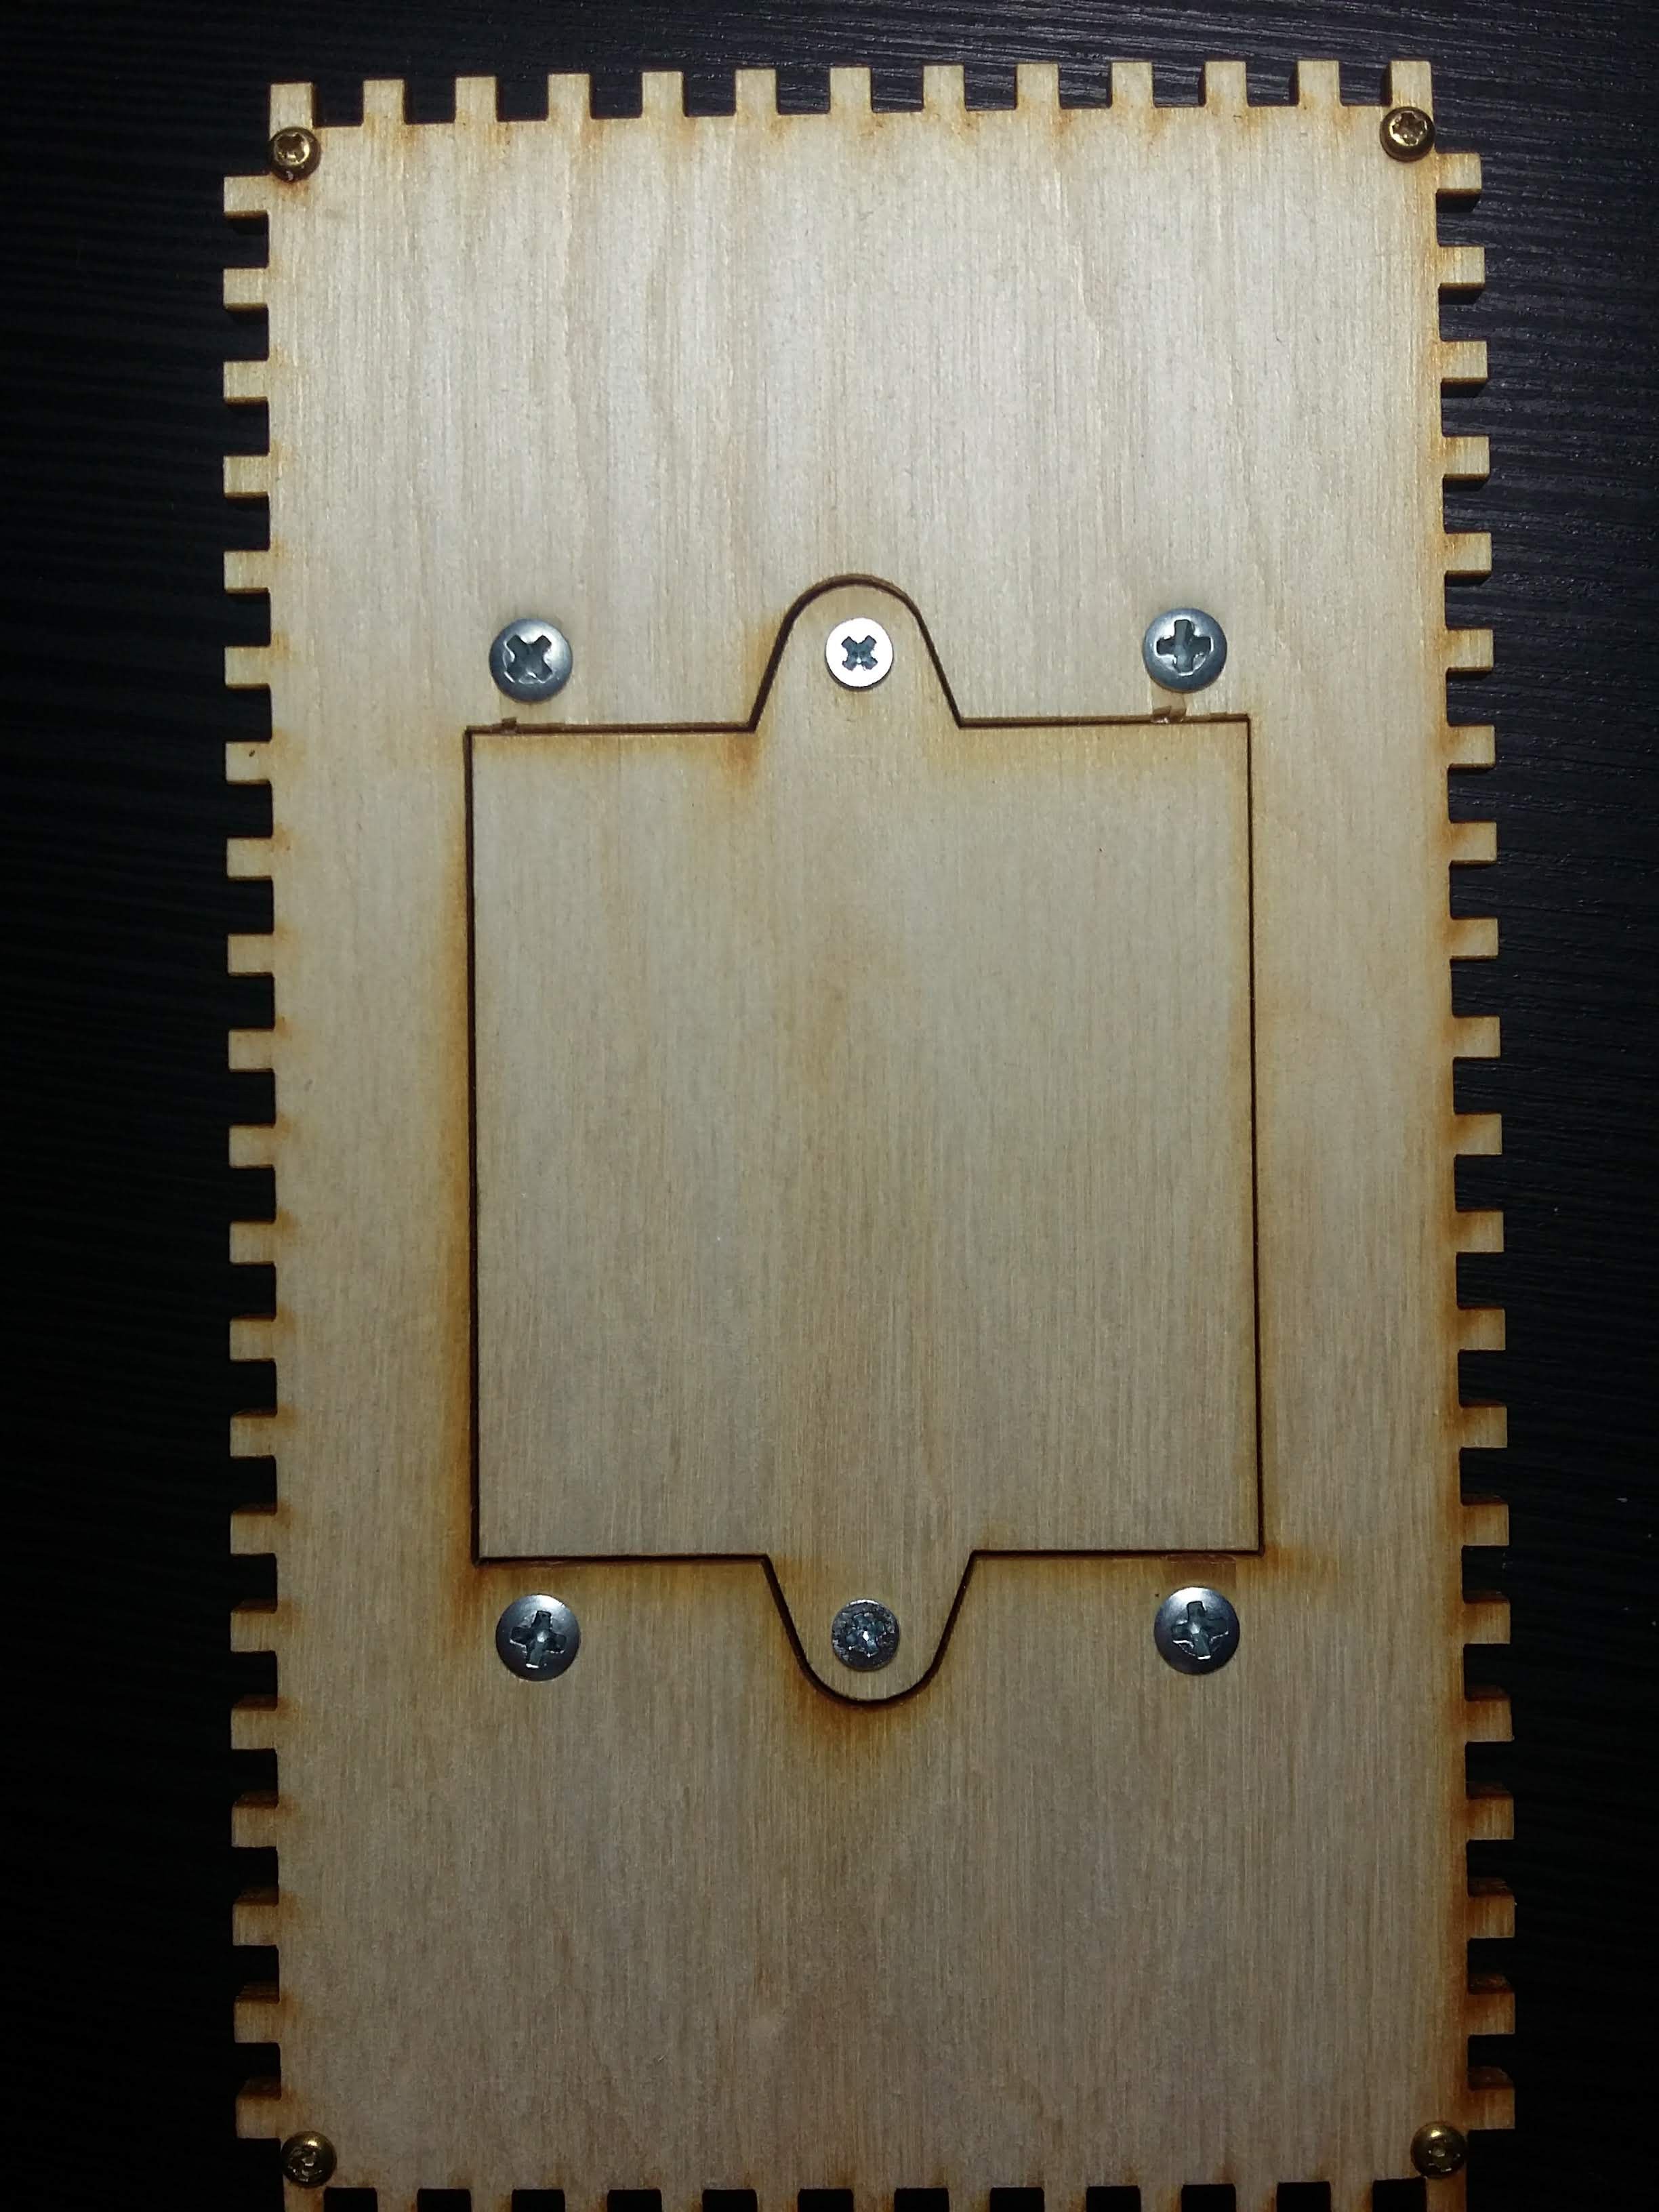
Putting batteries inside the enclosure
01/14/2020 at 05:18 • 0 commentsTo put batteries inside a laser cut enclosure, one has to think in 3D using 2D:
![]()
![]()
The pictures in this article will show how:
https://arduinoenigma.blogspot.com/2020/01/how-to-put-battery-compartment-inside.html
And now that there is a built in battery compartment, then the question of how long will it run on batteries becomes more important.
The following article shows a method of measuring run-time by writing timing checkpoints to EEPROM, no external components needed.
https://arduinoenigma.blogspot.com/2020/01/measuring-battery-run-time-by-writing.html
-
The current state of the simulators
10/22/2019 at 04:50 • 0 commentsI always wanted an Enigma-E...
Editing of UKWD pairs has been added to MegaEnigma
![]()
-
Lots of Progress
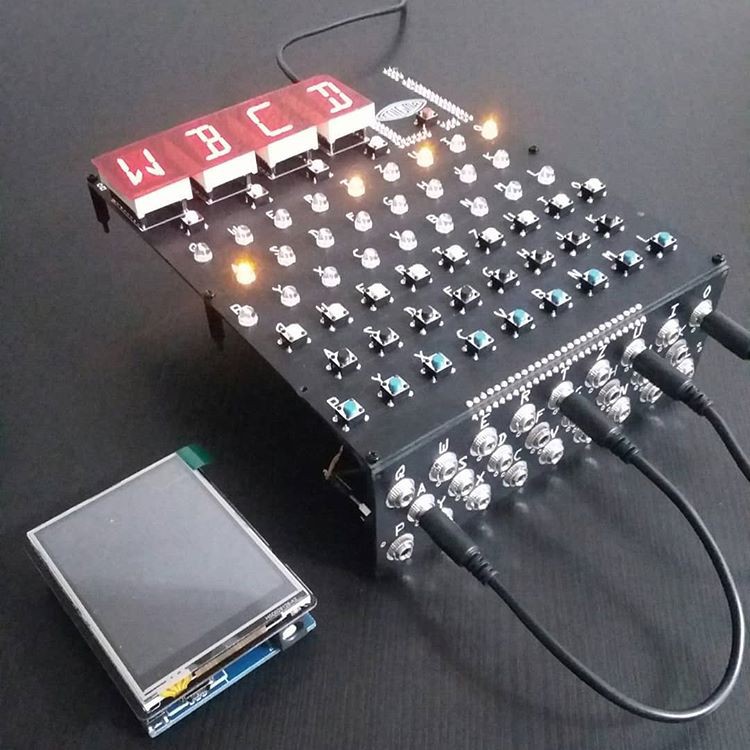
09/24/2019 at 04:21 • 0 commentsThe universal enigma engine seems to be working correctly
Here are a couple of posts with the current project status:
![]()
![]()
https://www.instagram.com/p/B2dJO-4n6Dr/
-
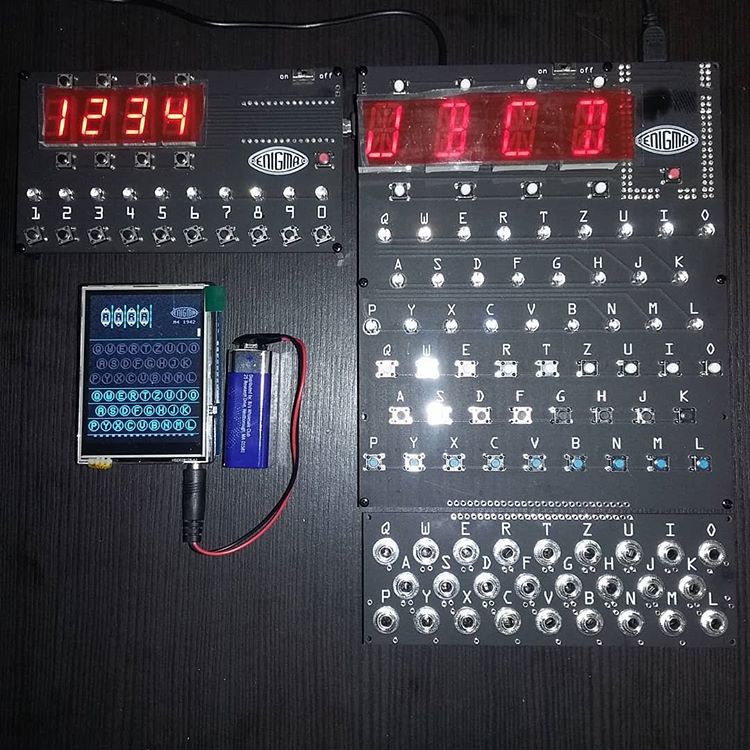
The State of Both Machines
07/28/2019 at 17:04 • 0 commentsCurrent pictures of the machines:
![]()
![]()
-
Started Soldering Both Machines
06/07/2019 at 11:05 • 0 commentsStarted to solder both enigmas.
What's wrong with this picture?
The answer and more pictures here:
![]()
-
The boards are here!
06/05/2019 at 10:40 • 0 commentsHead over to the Mega Enigma Simulator project to see them:
-
LED and Keyboard Pin Assignment Completed
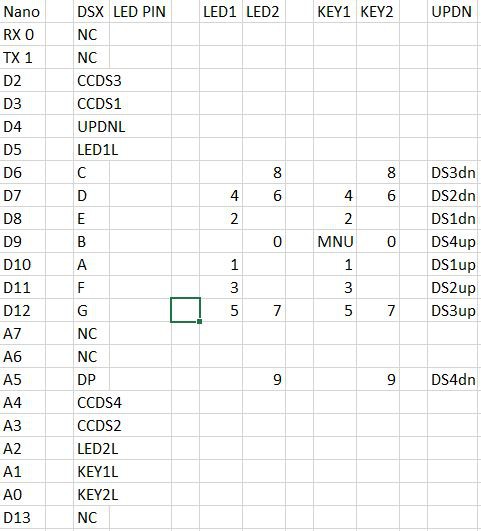
05/25/2019 at 17:09 • 0 commentsHere is the pin assignment for the Z30. Fundamentally it is the same circuit in the Mega Enigma, just smaller.
![]()
To understand how this will be illuminated and read, see the following log on the Mega Enigma project page:
-
The importance of double checking, part 2
05/24/2019 at 05:13 • 0 commentsHere we go again:
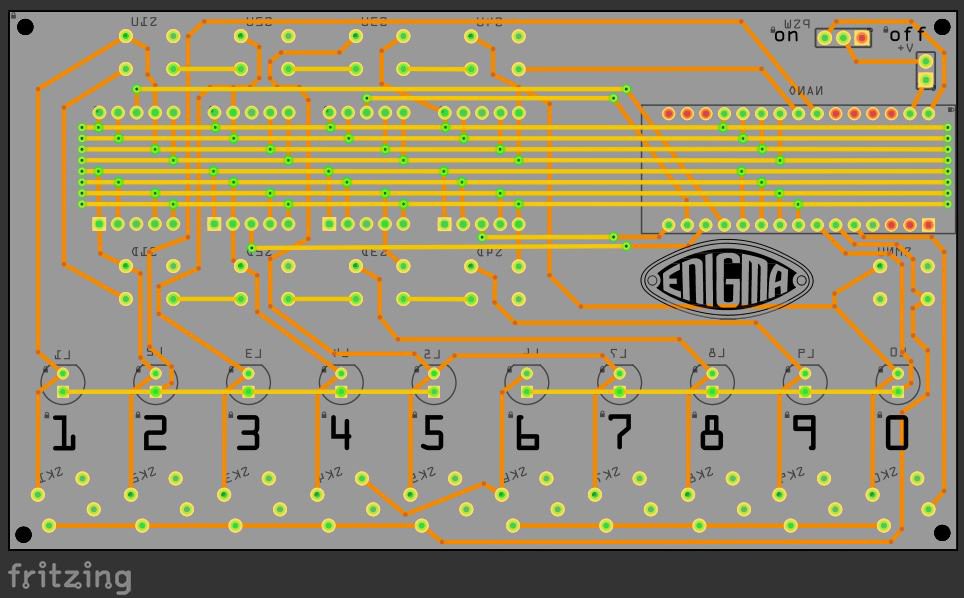
Here is an almost finished design, all it needs it a little tweaking of the bottom silkscreen. Time to add a USB label indicating which way the Arduino Nano is supposed to go.
Uh Oh...
The footprint for the Nano has been placed with the USB connector facing towards the LED displays. While this design will technically work, the USB port is concealed.
![]()
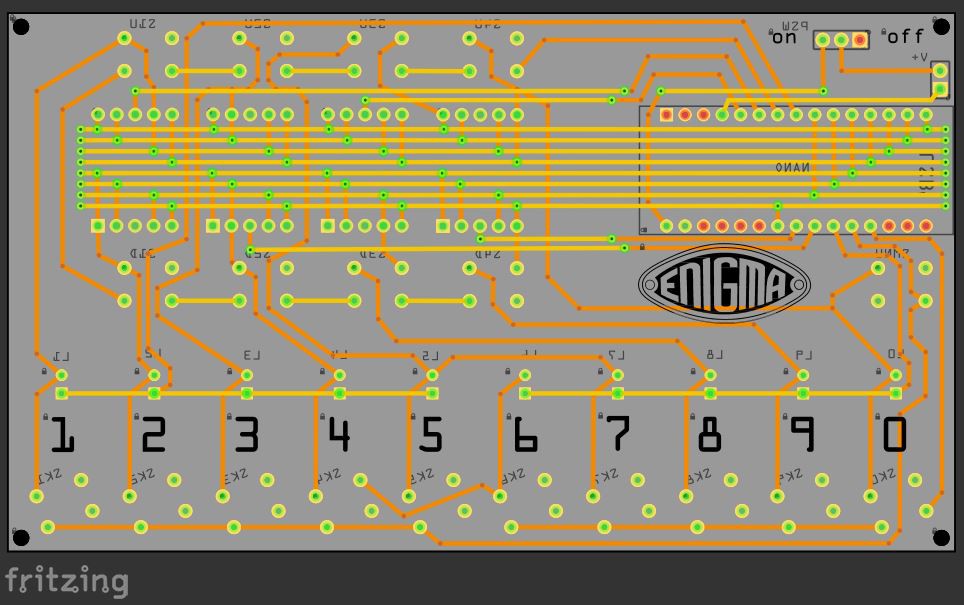
Time for a quick re-design:
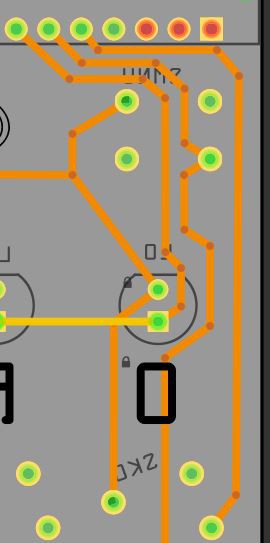
Now the USB connector is facing left. Notice the location of the VIN pin, fed from the power switch. The cost of this redesign was two more horizontal traces in the front to get power to the right location now that is away from the power switch.
![]()
Time to check all the connections carefully.
-
The importance of double checking
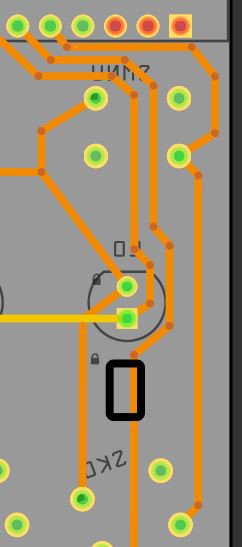
05/22/2019 at 00:38 • 0 commentsWitness the importance of double checking wiring. The menu key (above the 0, is wired to the same select/return line combination as the 0 key (bottom of image). Luckily, another return line passes by and is just a matter of switching the bottom of the pushbutton to a different return line.
![]()
By simply connecting the bottom of the key to another return line, the menu key now has a unique select/return line combination.
Since these circuits are wired without using a schematic, very careful checking is needed at the end to make sure everything is wired correctly.
![]()
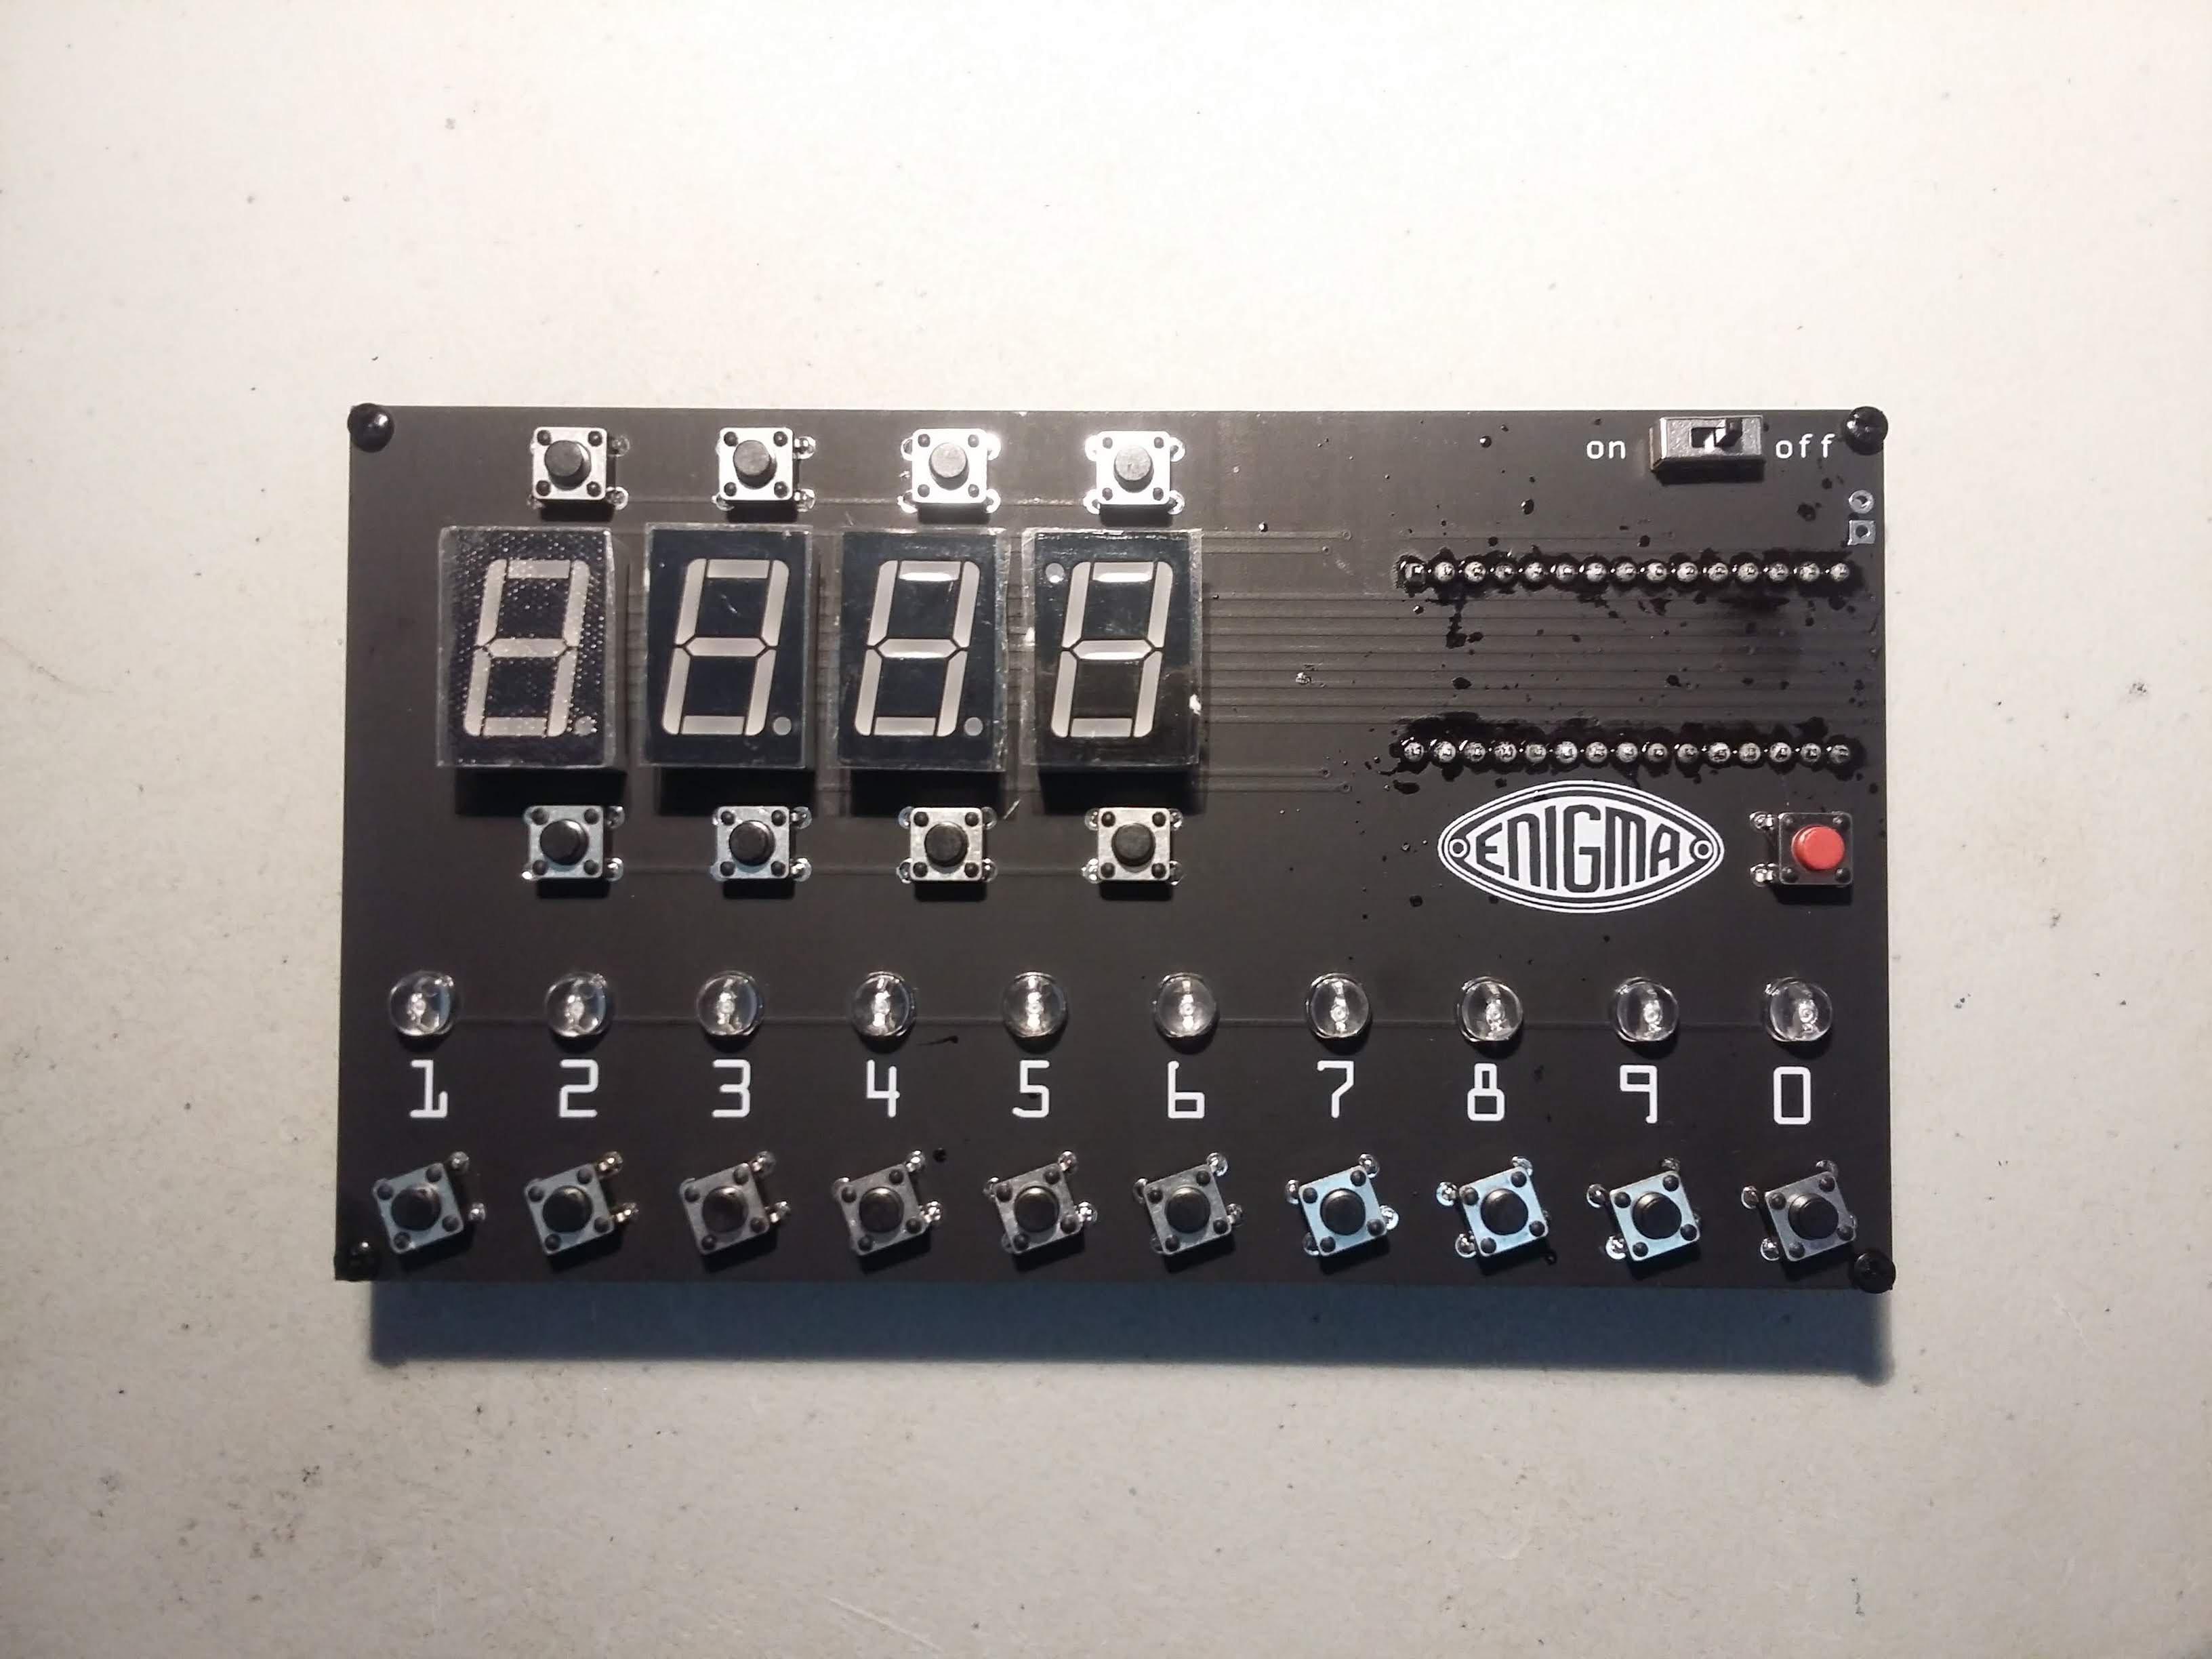
Nano Z30 a Numbers Only Enigma Machine Simulator
A minimalist 130x74mm Numbers Only Enigma Z30 Machine Simulator using an ATMega 328 powered Arduino Nano and a custom PCB