Shushanik Khachaturian
-
Batteries are being produced
12/16/2020 at 05:38 • 0 commentsWe haven't been updating for a while, but we have been working on BikeOn non-stop and are nearing the end of production :)
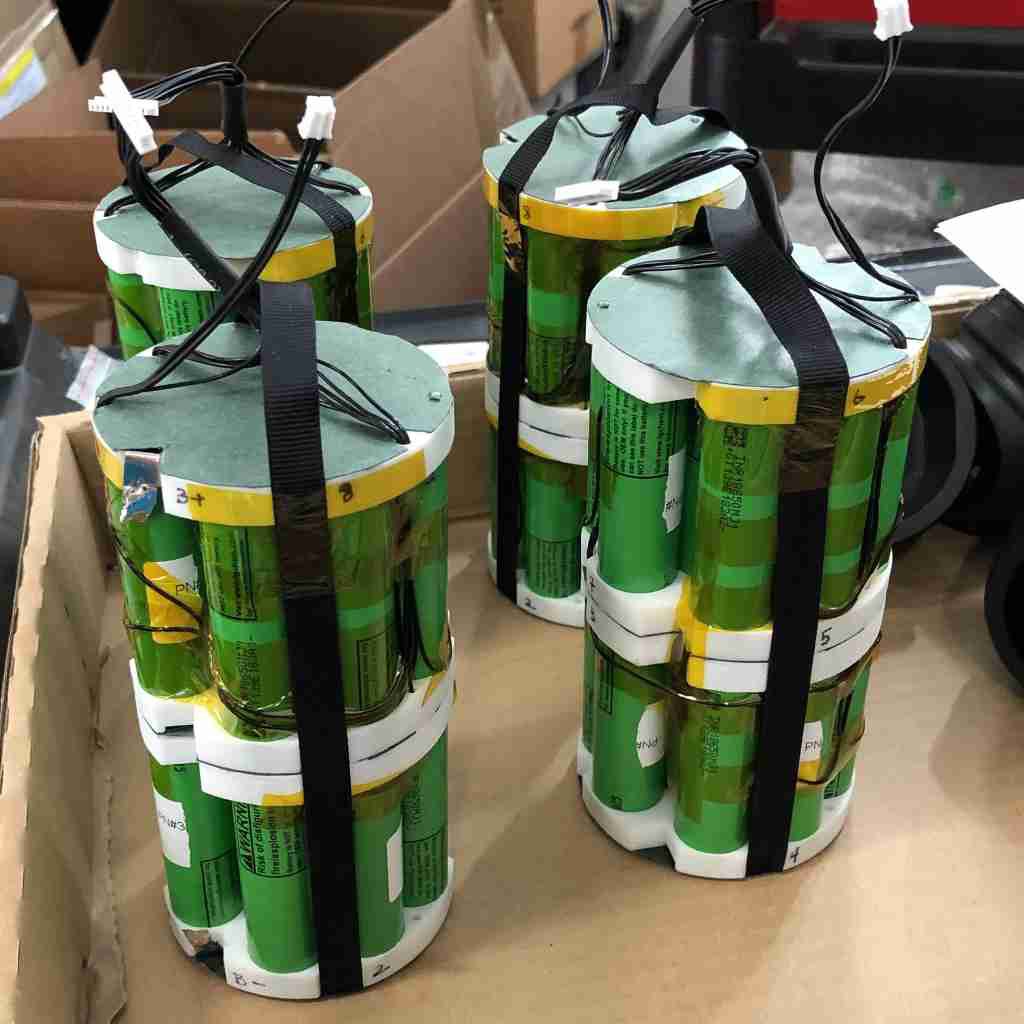
The battery pack is coming together. If you remember from one of our past updates, our challenge was to fit the battery cells into a standard size bicycle water bottle. But the main challenge was the safety of the pack, which was our top priority. After many design iterations with our manufacturing partners we came up with this design.![]()
![]()
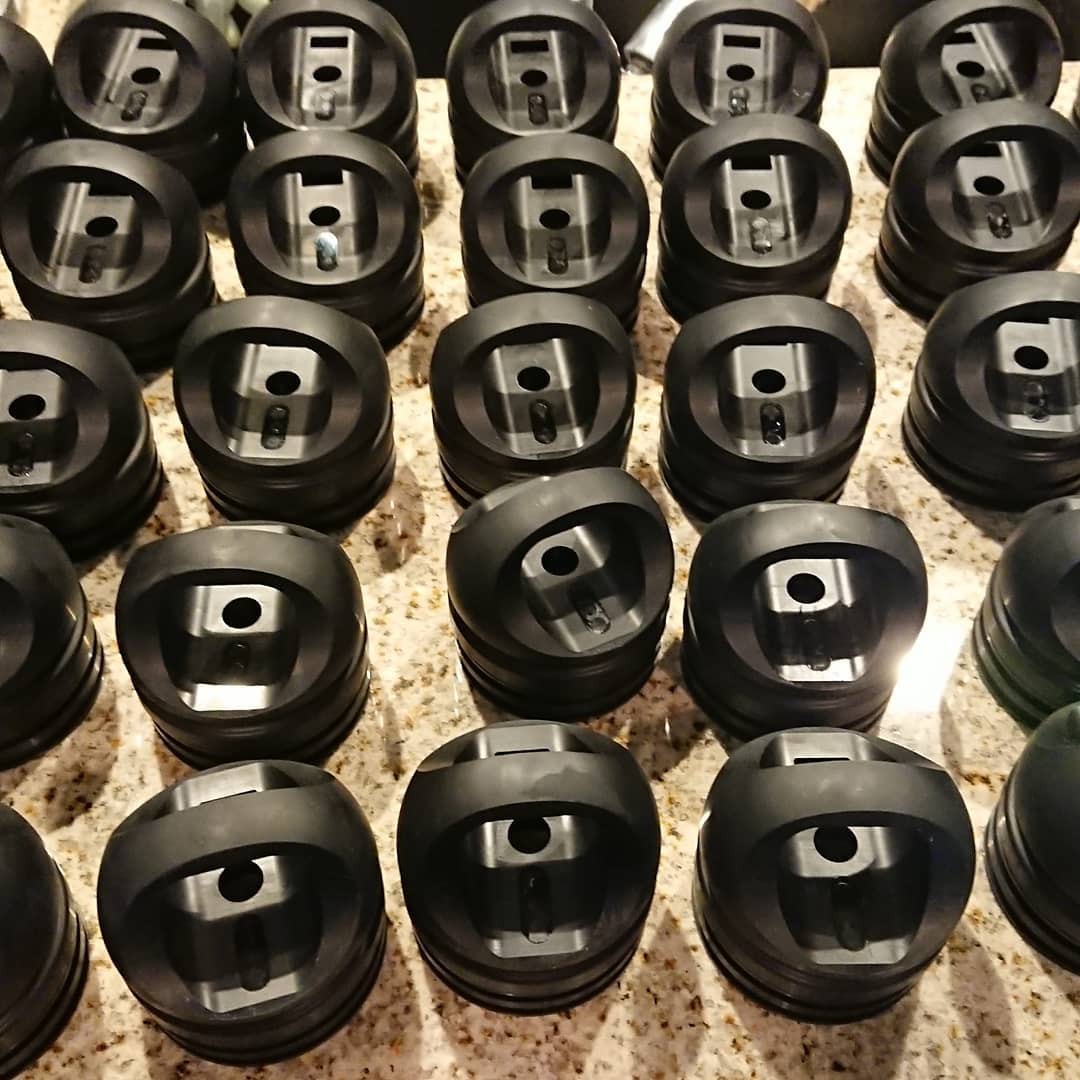
Now you can see how it's all coming together. We have ordered the first batch of batteries. They are currently being produced and tested. Here is a glimpse on batteries in production getting ready :)
![]()
![]()
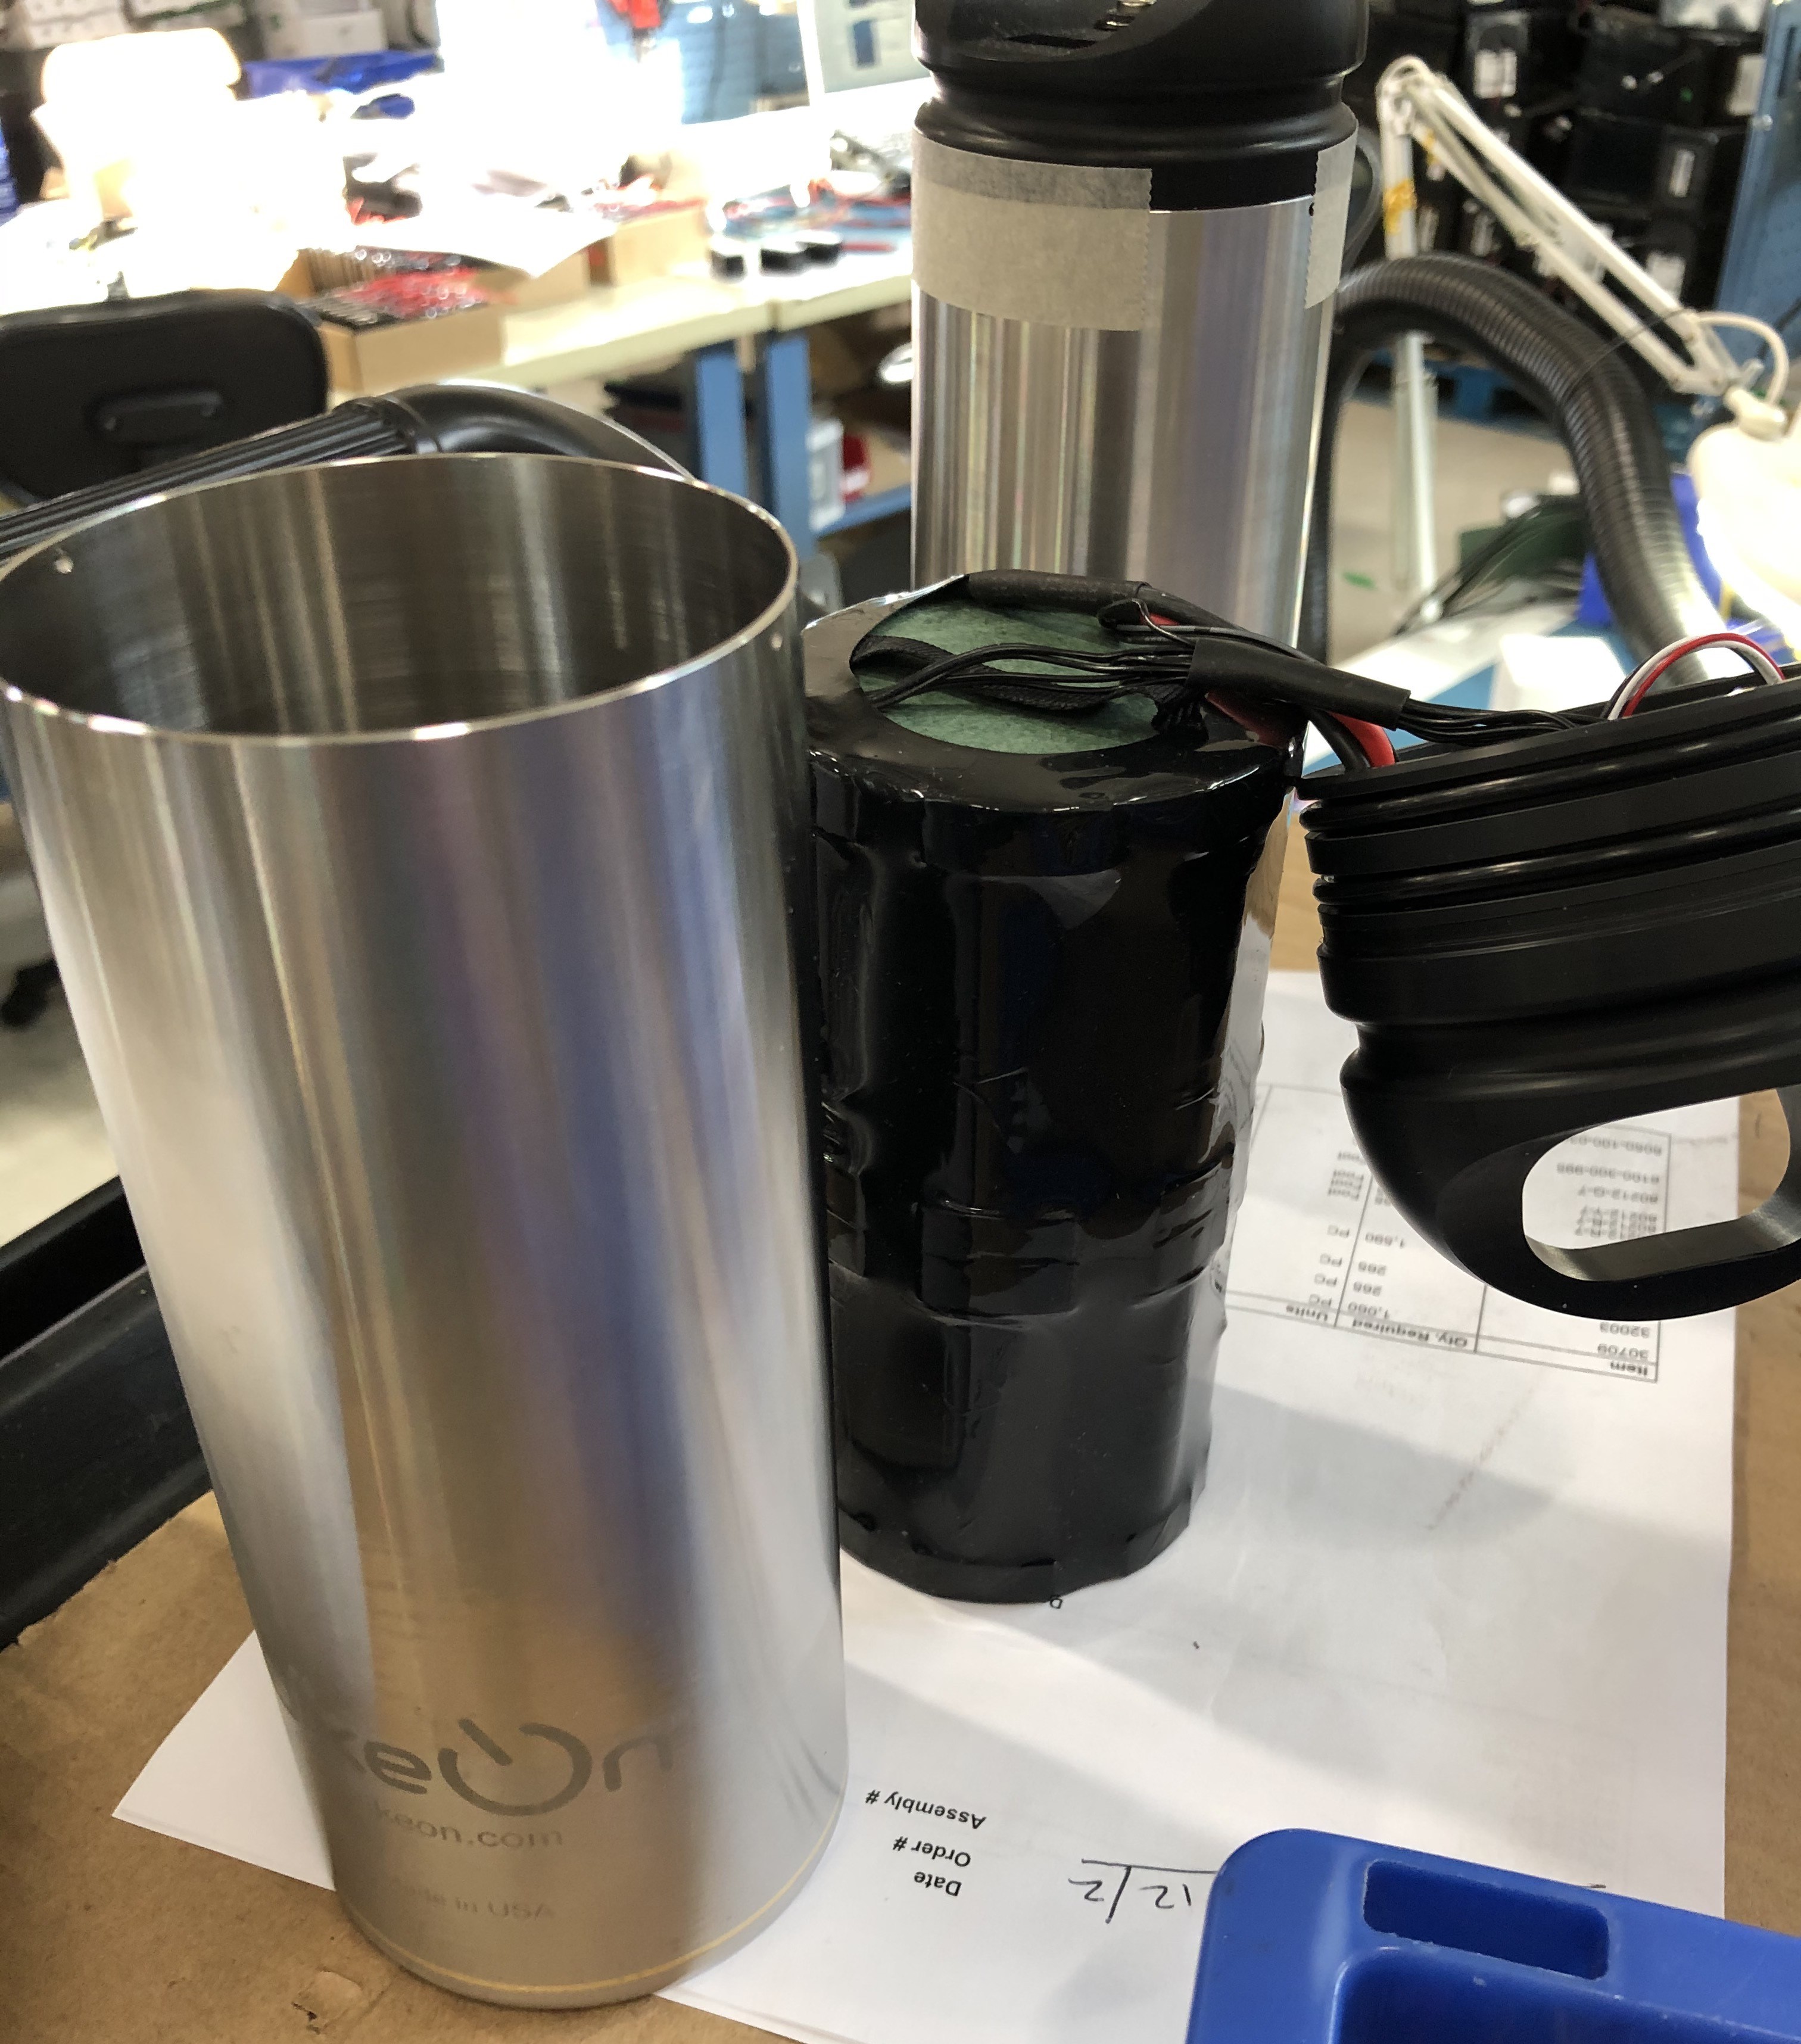
As we planned, the battery is about 220mm tall and fits the standard water bottle holder. The battery pack body is made of stainless steel and the lid is made out of hard plastic. It is 36V 7Ah battery, powerful enough for BikeOn.
![]()
Let us know what you think :)
-
Our Battery Is Ready. Demo Rides Are Coming. And Other Updates
12/08/2019 at 17:42 • 0 commentsEven though we don't write often, we are constantly working on BikeOn and are on track to start sales of the first small batch early 2020. So, here are some updates about current stage of development and our achievements.
First of all, we have launched a new website! Be sure to check it out: www.bikeon.com - we have great pictures that show BikeOn in all its beauty :)
If you are waiting for demo rides, we are on track to have them in SF Bay Area early next year. So if you are not in our mailing list yet, be sure to subscribe at our website :)
We have a lot of updates to share with you:
⚡️ We've set up the supply chain and are finishing evaluating samples from them, so we are almost ready to start the first batch production.
⚡️ Our battery manufacturing partner has delivered the first two samples of a battery pack (see the pictures and let us know what you think). We are really pleased with their work and level of cooperation. Currently we are testing the batteries to make sure they are fully operational and reliable.![]()
![]()
⚡️ We updated firmware to include Bluetooth phone connection, added firmware update option through the phone, and added a few more safety features. Several firmware functions are under test and may require further update and work.
⚡️ We have started working on a mobile software (an app that would allow to set the level of assistance and receive information about your ride).
⚡️ On a mechanical side, we have improved the design which you might have seen previously, to the level of production. Don't worry, no major visual changes. BikeOn will look the same way as on the pictures from the website, and the same as you might have seen it on Maker Faire.
We would really love getting any feedback from you. So, please, if you have any questions, concerns, or any thoughts, let us know :)
We also post updates on our YouTube channel, so be sure to check it and subscribe :)
-
BikeOn Updates 10/7/2019
10/08/2019 at 02:48 • 1 commentWe have recorded a video with updates. What we have done in BikeOn development and what we are currently working on.
-
Gate resistor and heat dissipation calculation of power MOSFETs
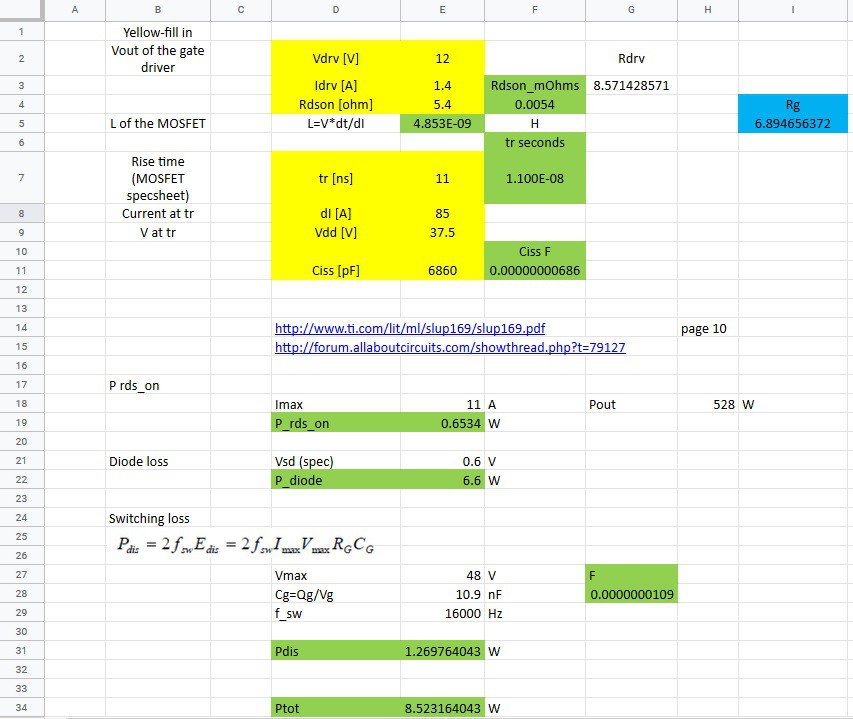
09/29/2019 at 23:10 • 0 commentsAs I was working on controller improvements and troubleshooting lately, I had to revisit the gate resistor (Rg) calculations for the MOSFETs. I remember spending quite a bit of time reading and understanding all the details related to the topic a few years ago. Today I managed to find my old spreadsheet with these calculations, so I am sharing it here.
The yellow fields are for you to fill in, the green and blue fields are the calculation results.
![]()
The first part of the calculation takes data from the MOSFET driver spec sheet, the rest takes data from MOSFET spec sheet. There is also a calculation of power losses in MOSFET due to Rds_on (internal resistance in ON state), internal reverse diode and switching losses.
I think some safety margin has to be added to the calculation results, be it the value of Rg or power dissipation on MOSFETS. After all experiment is above all.
Here is the link to the spreadsheet, you can make a copy and try it out: https://docs.google.com/spreadsheets/d/1Ve_Na2TeJ9tnqLR-a9Xq9UVWQML9zJIohvyIiXEXJX0/edit?usp=sharing
-
Design For Manufacturing (DFM) Starts From Day 1
08/21/2019 at 04:51 • 0 commentsDFM is one of the most critical parts of any project, if you are aiming to mass manufacture the device eventually.
The typical route usually is to build a prototype which looks like the future product (“looks like prototype”), then build a working prototype (“works like prototype”), then blend both together and refine the product. And only then start DFM.
We, at BikeOn, prefer the other way around. DFM was in focus for us starting with design of proof of concept prototype. Some of the questions we have been constantly asking ourselves with every iteration of the design are:
- Is this the minimum number of parts to perform a particular function?
- Can some parts perform the function of other parts in any way?
- Has anyone ever designed subassembly with similar functions, and how?
- Part level: how many setups are needed to machine/manufacture the part? How to reduce the number of setups?
- What are alternative manufacturing techniques that can be used (for example, extrusion instead of CNC machining, water jet/laser cutting cutting blanks instead of CNC machining, vacuum forming instead of injection molding, etc).
...and many others. The goal is to get to the bare minimum, minimalistic yet highly functional design even at the level of the very first prototype.
The advantage of this constantly ongoing exercise is that the eyes and the brain learn to see and think in very minimalist and efficient way. The unnecessary details fall off the focus and design ideas become much clearer.
If we don’t go through these exercises routinely, we will be forced to do so eventually by our manufacturing partners, but at that point it may be too late, substantial redesign and changes may become inevitable and may even be dictated by the manufacturing guys rather than by us.
When we started designing BikeOn back in 2013-2014, one of the best prototyping tools we had was the 3D printer at local Techshop. And we printed a lot!
It was so useful, fast and important that we even purchased our own printer. Here is a review of it:
However, 3D printing has its downsides: certain shapes that can be printed on a 3D printer are not manufacturable using other techniques. That’s why we started working closely with our friend, the owner of a local machine shop. Even at the stage of part design he gave us invaluable feedback. It is very common for us to send him models of preliminary designed parts, asking for his opinion, feedback and even ballpark quote.
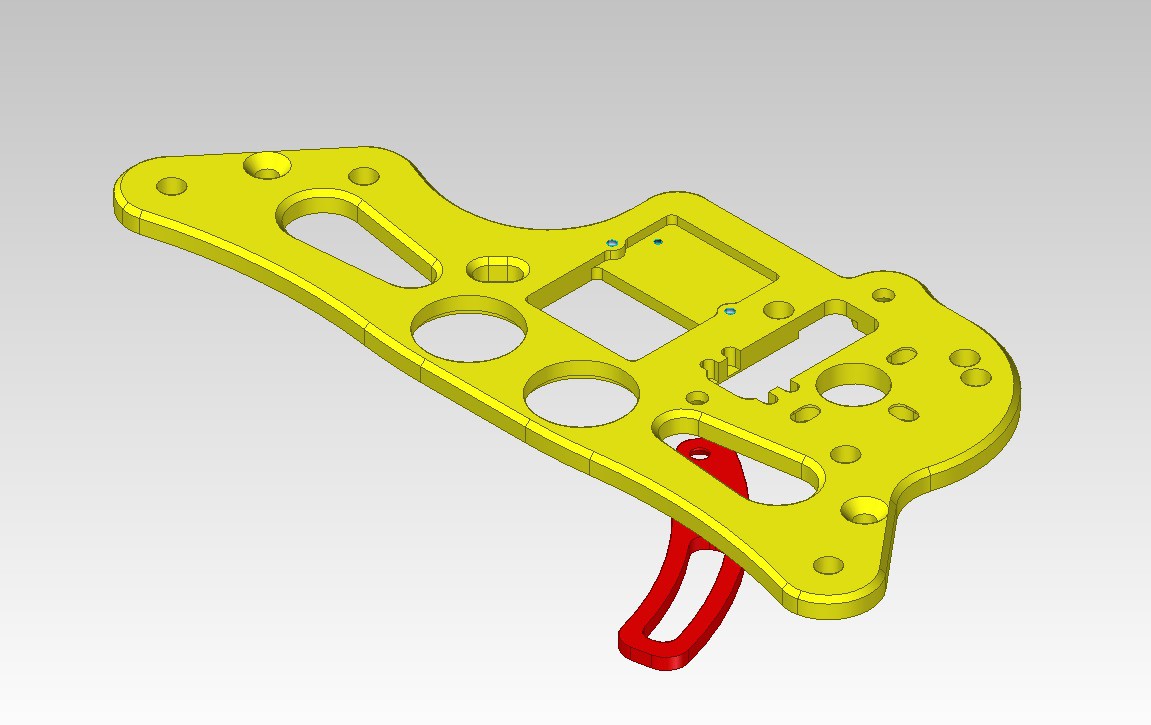
Here is an example of one of the early designs of BikeOn frame:
![]()
This frame is made of 2 parts. The top of the frame is chamfered. It is surely nicer looking. But that turned out to be much more expensive than this, final version of the frame:
![]()
Now it is made of a single part, can be stamped and then secondary processed, if needed. It is much less expensive and can be made by a shop with very simple machines/tools. That, in turn, allows to diversify the suppliers, build robust supply chain.
Here is another example of such an approach. The rotor of BikeOn is made of 2 identical blanks, as shown here:
![]()
Each of the blanks can be machined, but it also can be extruded, further reducing part cost.
Blanks then can be machined to the final shape with pretty minimal machining.
Usage of 2 identical blanks reduces the cost significantly: it is less expensive to order multiple quantities of a single part than half of that quantity of 2 different parts.
It all comes down to the evolution of thinking, which can be developed.
Aram
-
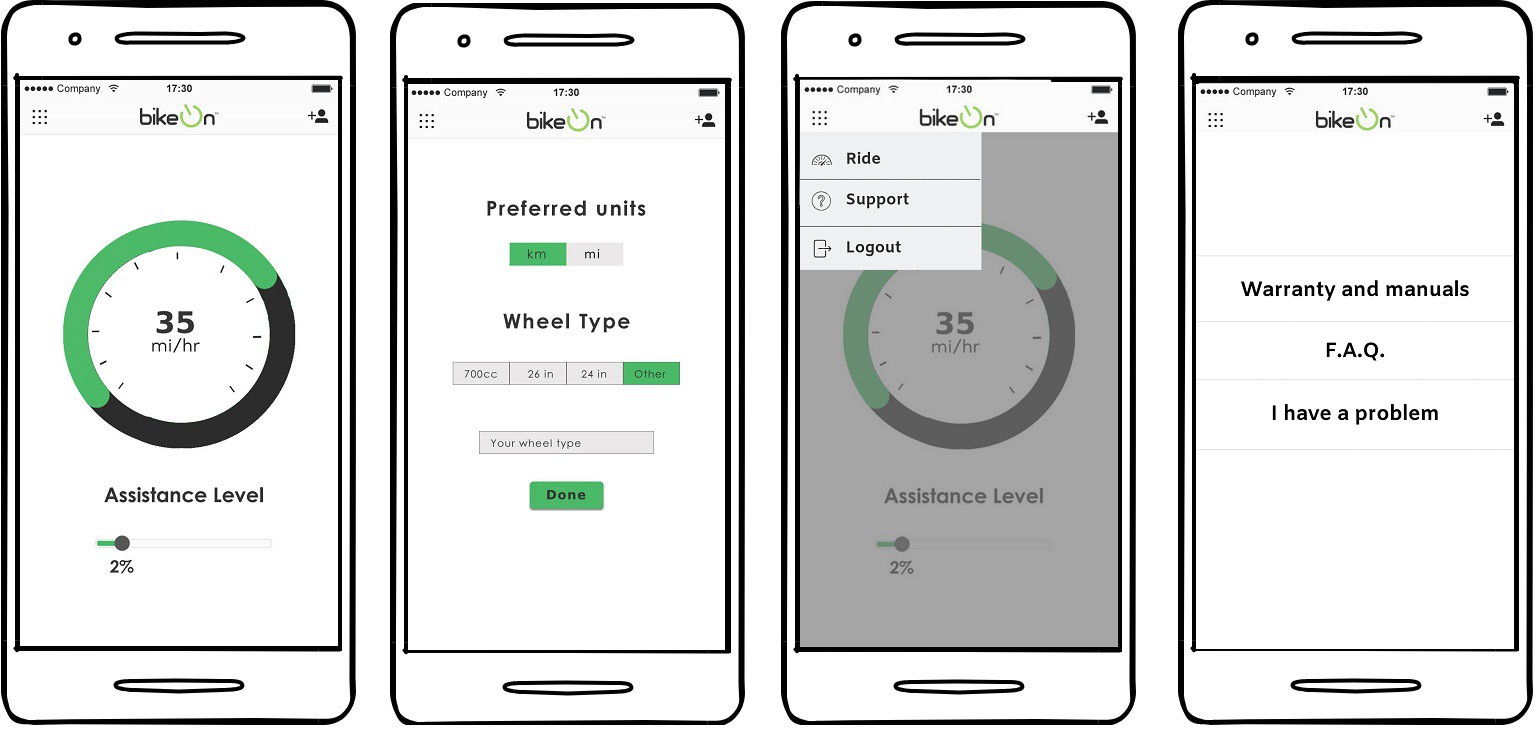
Visual Design For BikeOn App
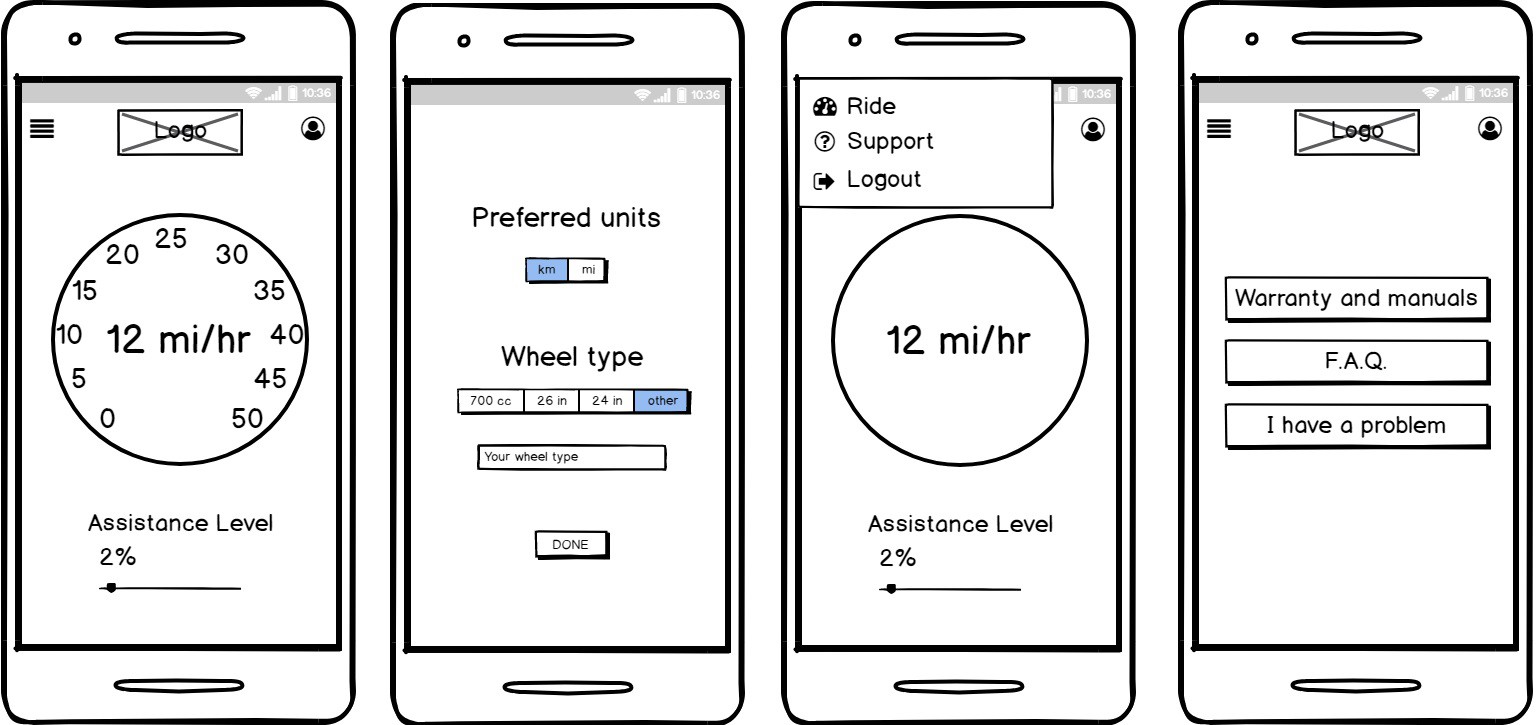
08/05/2019 at 01:25 • 4 commentsThis week I have been working on visual design for the app. As you might have noticed from the wireframes, two major features of the app will be speedometer and ability to choose assistance level. We gravitate towards clean minimalist design, ease of use and intuitive interface is a priority for us. Let me know what you think.
![]()
-
BikeOn Battery Pack Design
08/05/2019 at 00:55 • 3 commentsWhile Shushanik was working on the smartphone app, I got back to design of the battery pack.
We’ve purchased several types of battery packs for testing in the past, hoping that maybe we will be able to source a reliable, high quality bottle shaped pack, but unfortunately, we could not.
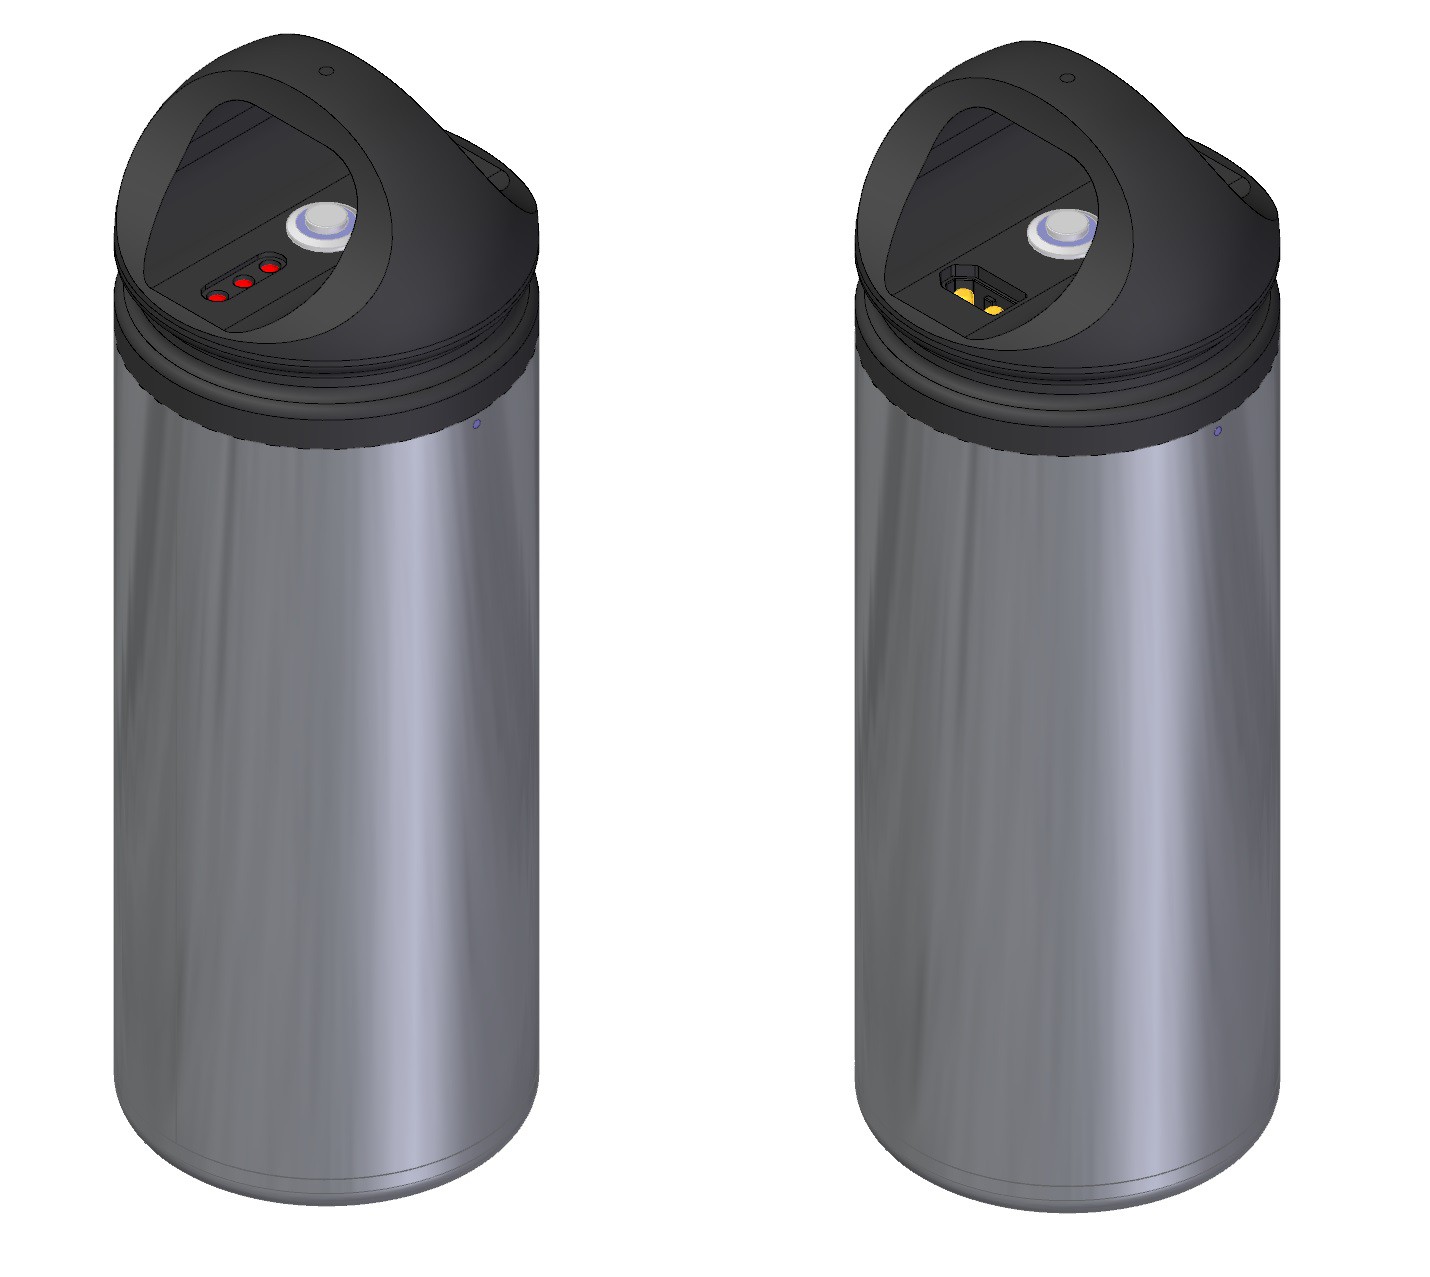
So we decided to make our own pack. We’ve started working with a company, that specializes in battery pack manufacturing. The challenge was to fit the battery cells into a standard size bicycle water bottle. But the main challenge is the safety of the pack and it is our top priority.
After many design iterations with our manufacturing partners we came up with this design.
![]()
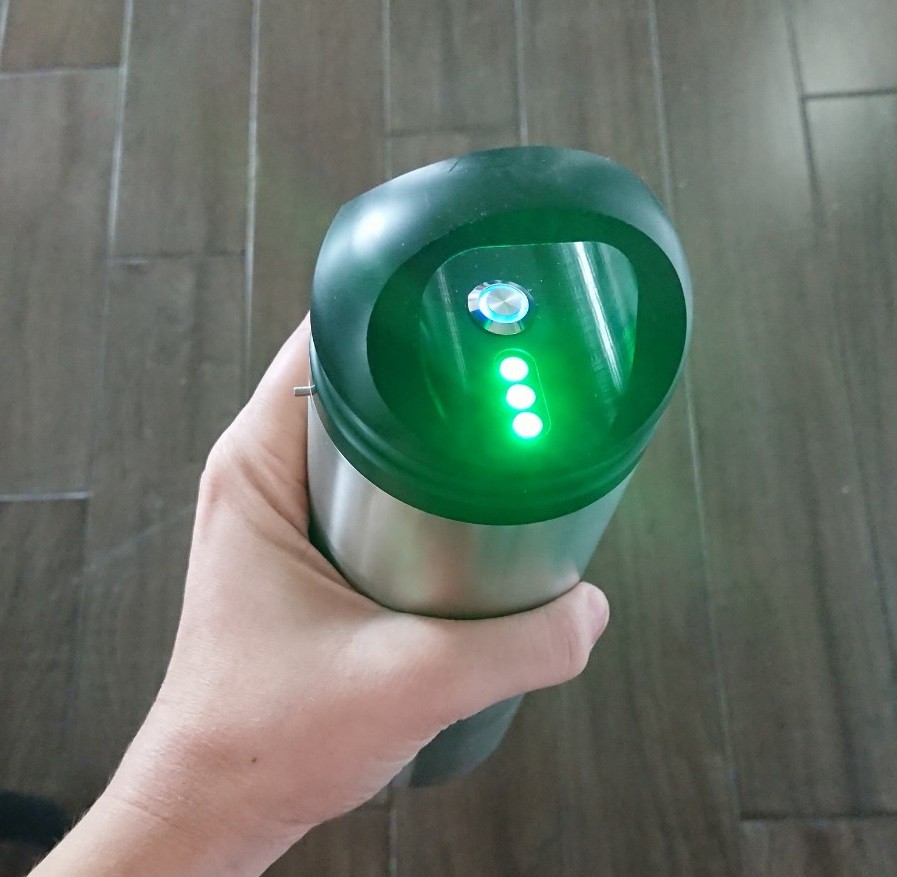
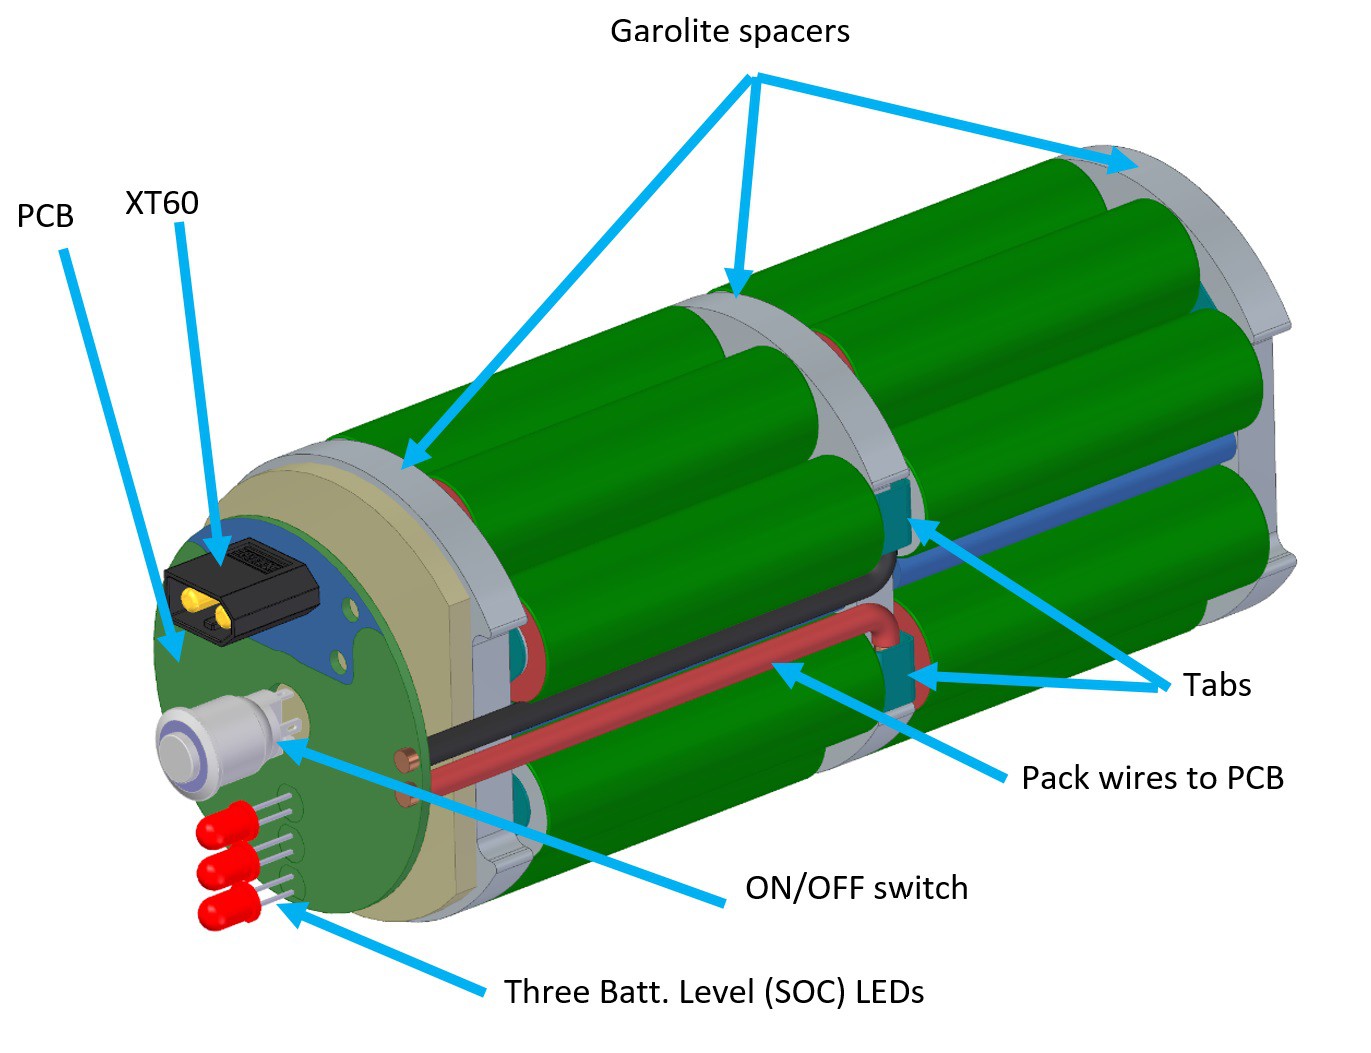
It has three LEDs that indicate the state of the charge, a button switch that turns the battery on-off and a power connector.
It is about 220mm tall and fits the standard water bottle holder. We will also provide a simple rubber band that will go around the bicycle downtube and secure the battery to the frame.
The battery pack body is going to be made of stainless steel and the lid out of hard plastic.
It is 36V 7Ah battery, powerful enough for BikeOn.
We are in preparations to pass all necessary tests and certifications, including MSDS, UN38.3.
Here how it looks inside (without shrink wraps):
![]()
It is still a work in progress. Let me know what you think!
Aram
-
Wireframing For BikeOn App
07/28/2019 at 02:14 • 0 commentsWhile Aram was having fun troubleshooting electronics this week, I have been working on wireframing in Balsamiq for our upcoming mobile app. What seemed a pretty simple app with minimum features turned into 17 wireframes. Here are some screenshots. What do you think? Next step will be the visual design :)
![]()
-
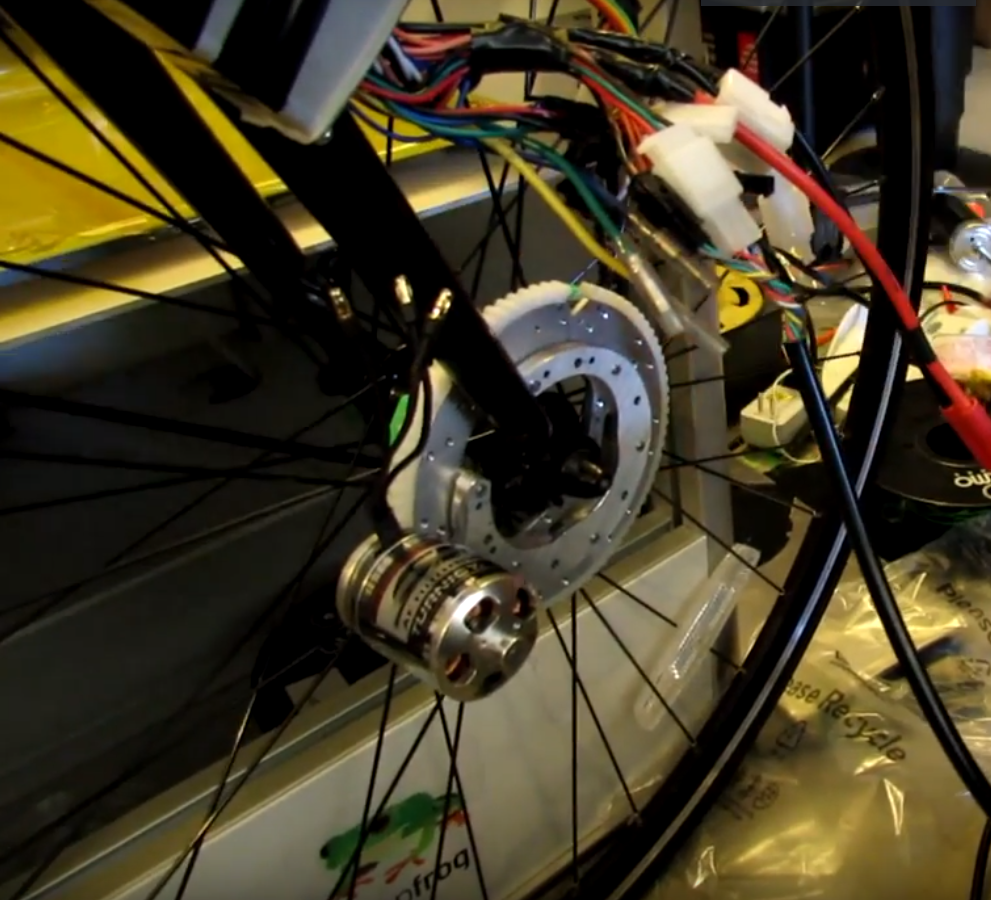
BikeOn Development: Working Prototype, 2015
07/28/2019 at 01:49 • 0 commentsThis is how later iteration of BikeOn prototype looked (2015). It still was attached to the front wheel. The prototype didn't have sensors or embedded in controller, and we had to use throttle to power it. But it worked.
![]()
On this video you can see it in action, along with the controller:
-
New BikeOn Demo Video
07/22/2019 at 01:12 • 0 commentsToday we have recorded a new more detailed video of #BikeOn demo. Our last video left some questions, I hope this one gives better understanding of our product and the way it works. If anything is still unclear, please leave a comment, so that we know what information to include in the next demo video.
BikeOn
Convert your bicycle to electric in seconds. No tools or skills required