Malte Schrader
-
V2 Build - new project page
06/14/2021 at 21:26 • 0 commentsI'm starting to build a second version of the printer. The V1 was my first attempt to build this style of 3D-printer. V1 was already quiet good but has still some problems which I want to solve in V2.
The new project page can be found here.
-
3DBenchys + Z-homing problem
03/25/2020 at 23:55 • 2 commentsI couldn't remove the backlash. I tried several things, but none of them worked. For whatever reason, the resistance to overcome the backlash of the ballscrew is very high.
The print artefacts mentioned in the last log came from the Z-motor, which lost some steps. So I adjusted the motor current. Now this is fixed.
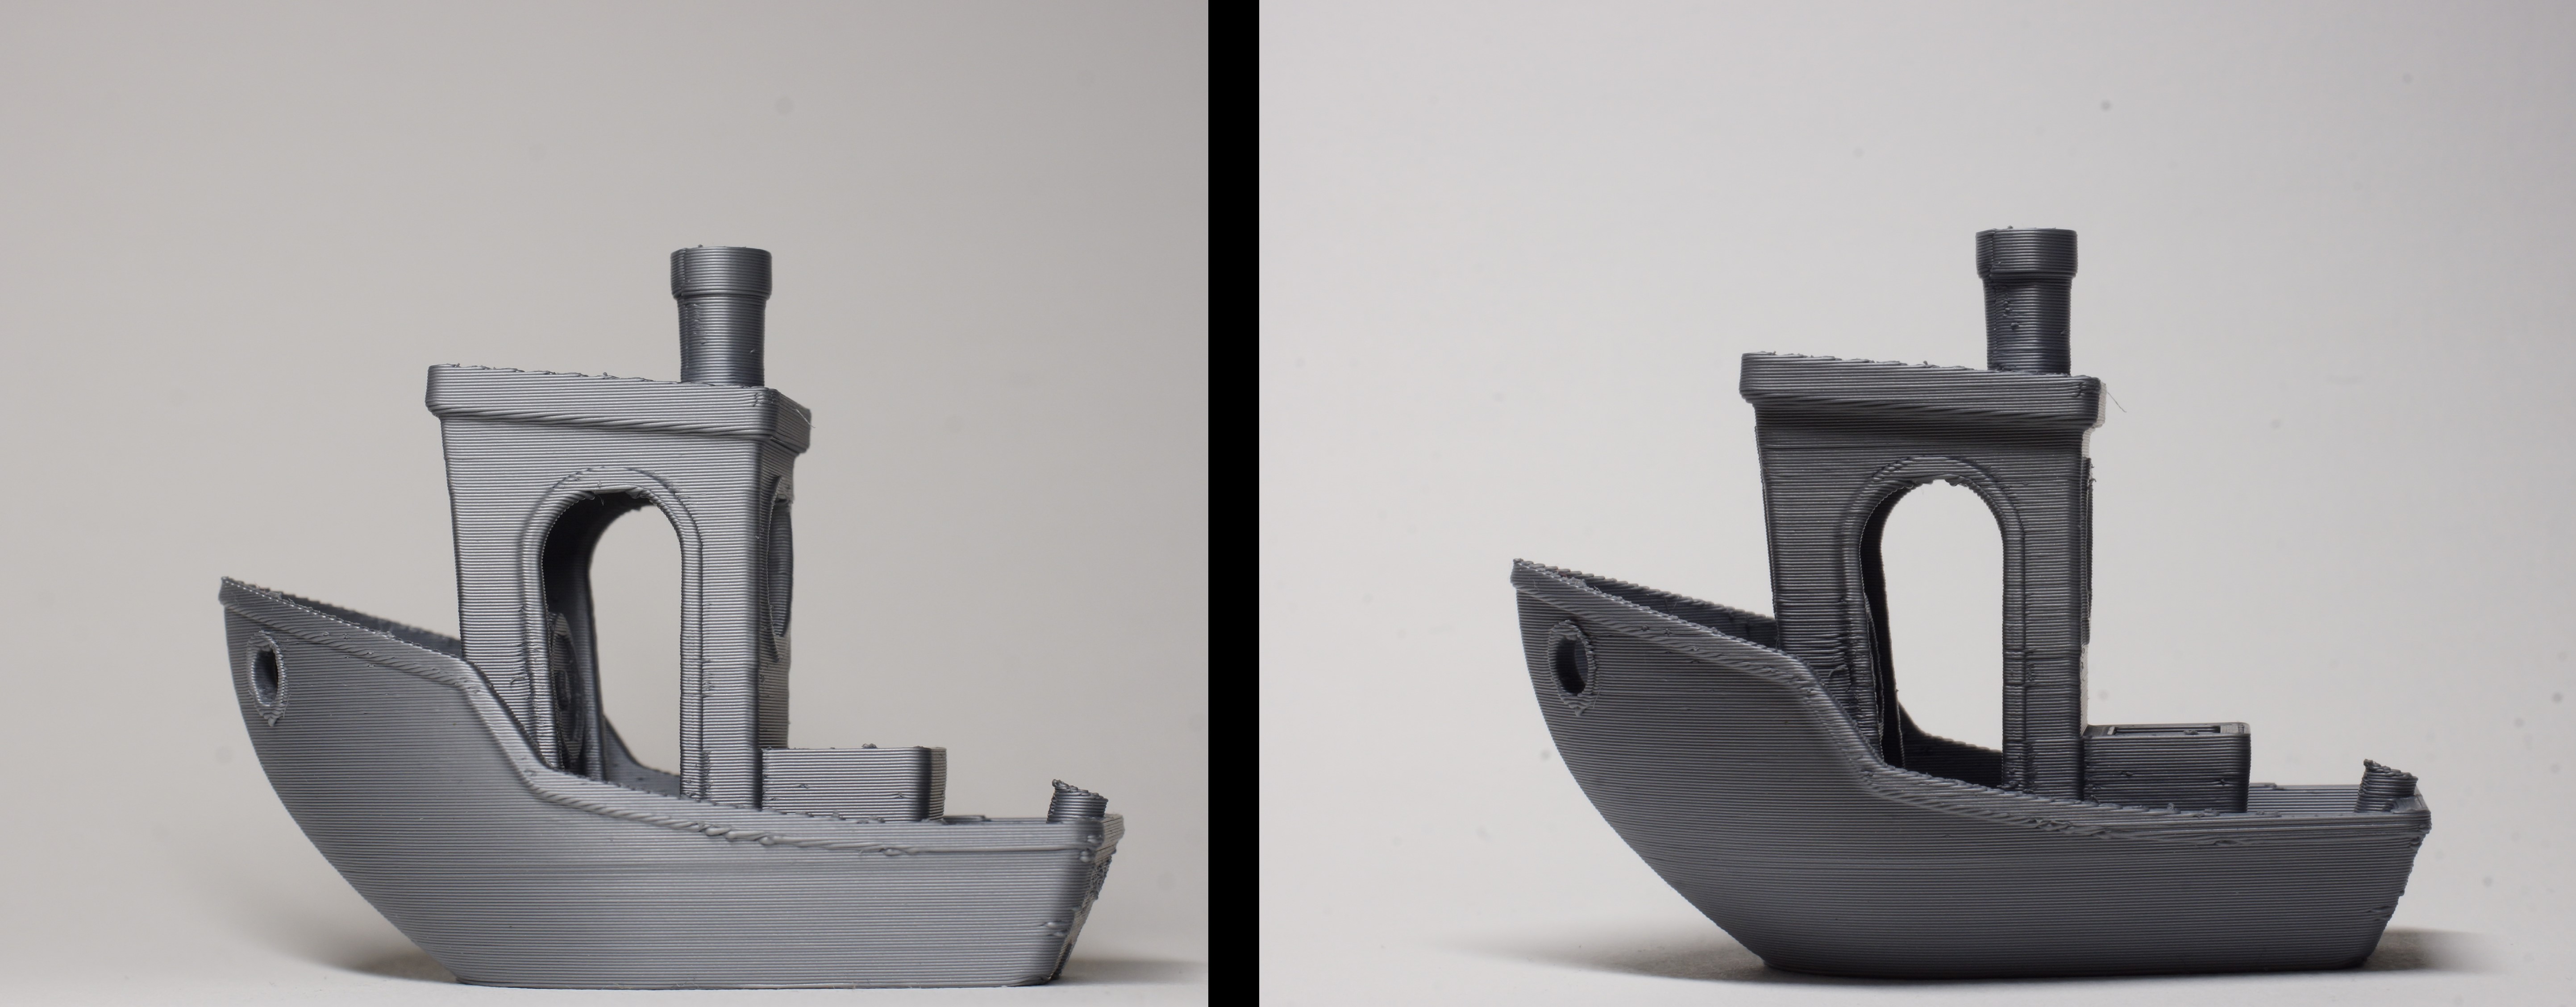
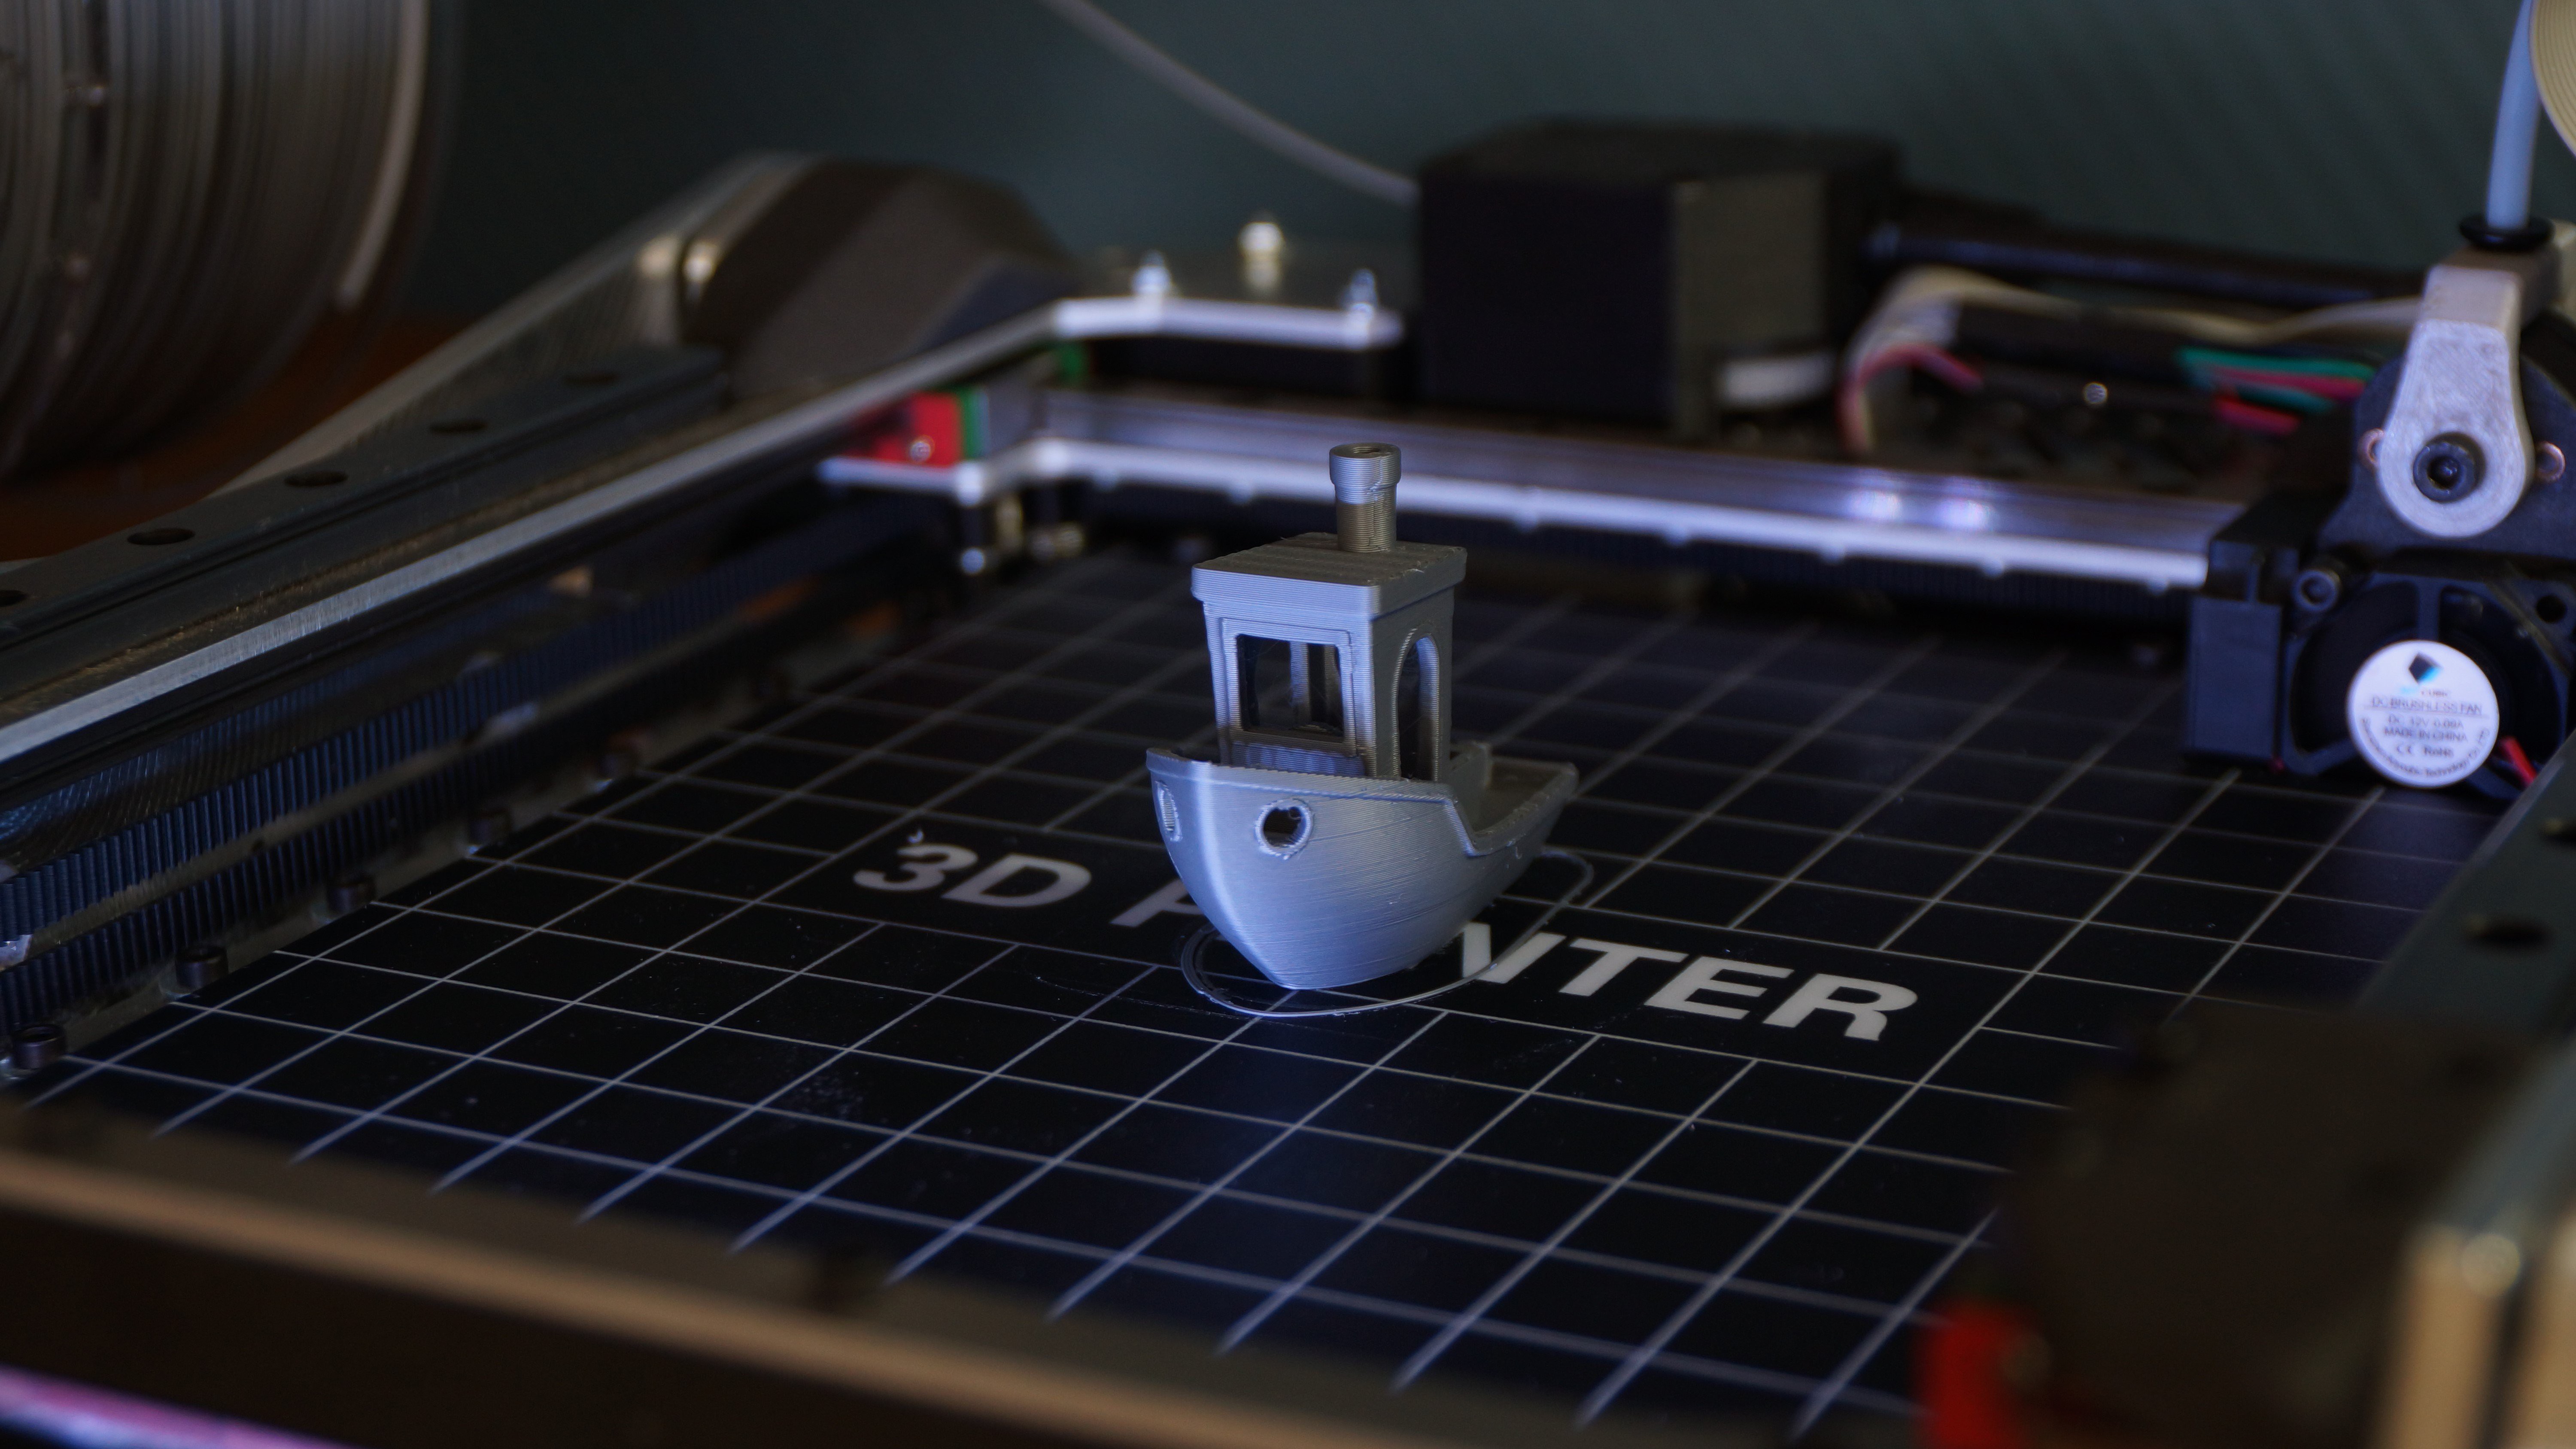
I printed some 3DBenchys, and the print quality looks very good.
![]() Layerheight: 0.2mm, print time: 78 minutes
Layerheight: 0.2mm, print time: 78 minutes
Quality:
From some light angles, you can see layer "misalignment". It looks similar to the "error 602" from the Prusa i3.
https://github.com/prusa3d/Prusa-Firmware/issues/602Perhaps it is due to the small difference in filament diameter (+/-0.05 deviation). Or can a mechanical problem be the reason for that?
![]()
Problem Z-homing:
The biggest problem I'm facing right now is the inaccuracy of the Z-homing.
When I start several prints one after the other, the distance to the bed for the first layer gets smaller with every print. I don't know what the reason for that is.The only things I can imagine are:
The axial-bearings are frictions ones, so maybe they need some kind of "warming-up" (some movement), so they are working more freely and do not get "stuck" in motion.The second reason I can imagine could be the mounting of the endstop. Right now it is mounted at the bearing-housing of the Ballscrew which is mounted to the frame. The problem is that this bearing-housing moves slightly while the printer is in the folded position and tries to unfold. This makes the homing-process probably more inaccurate.
The housing moves due to "extreme" forces while the unfolding-process. The forces cause the Z-motor mount to bend slightly.
Through the bending, the whole assembly (Z-motor, ball screw and bearing-housing) moves a bit towards the front, because these components are all connected the bearing housing moves as well. It would be better if the endstop is mounted truly fixed to the frame(I'll try that next).These are my ideas about this problem, but I'm not an engineer. I'm open to helpful comments about that.
GitHub:
I uploaded the whole assembly of the X printer(CAD-files) on the Github repository.
https://github.com/alpha3141/X_printer -
Update + Problem: backlash
12/08/2019 at 23:03 • 0 commentsThanks to Platformio I switched back to Marlin 2 because the compile times are much better than those of the Arduino IDE.
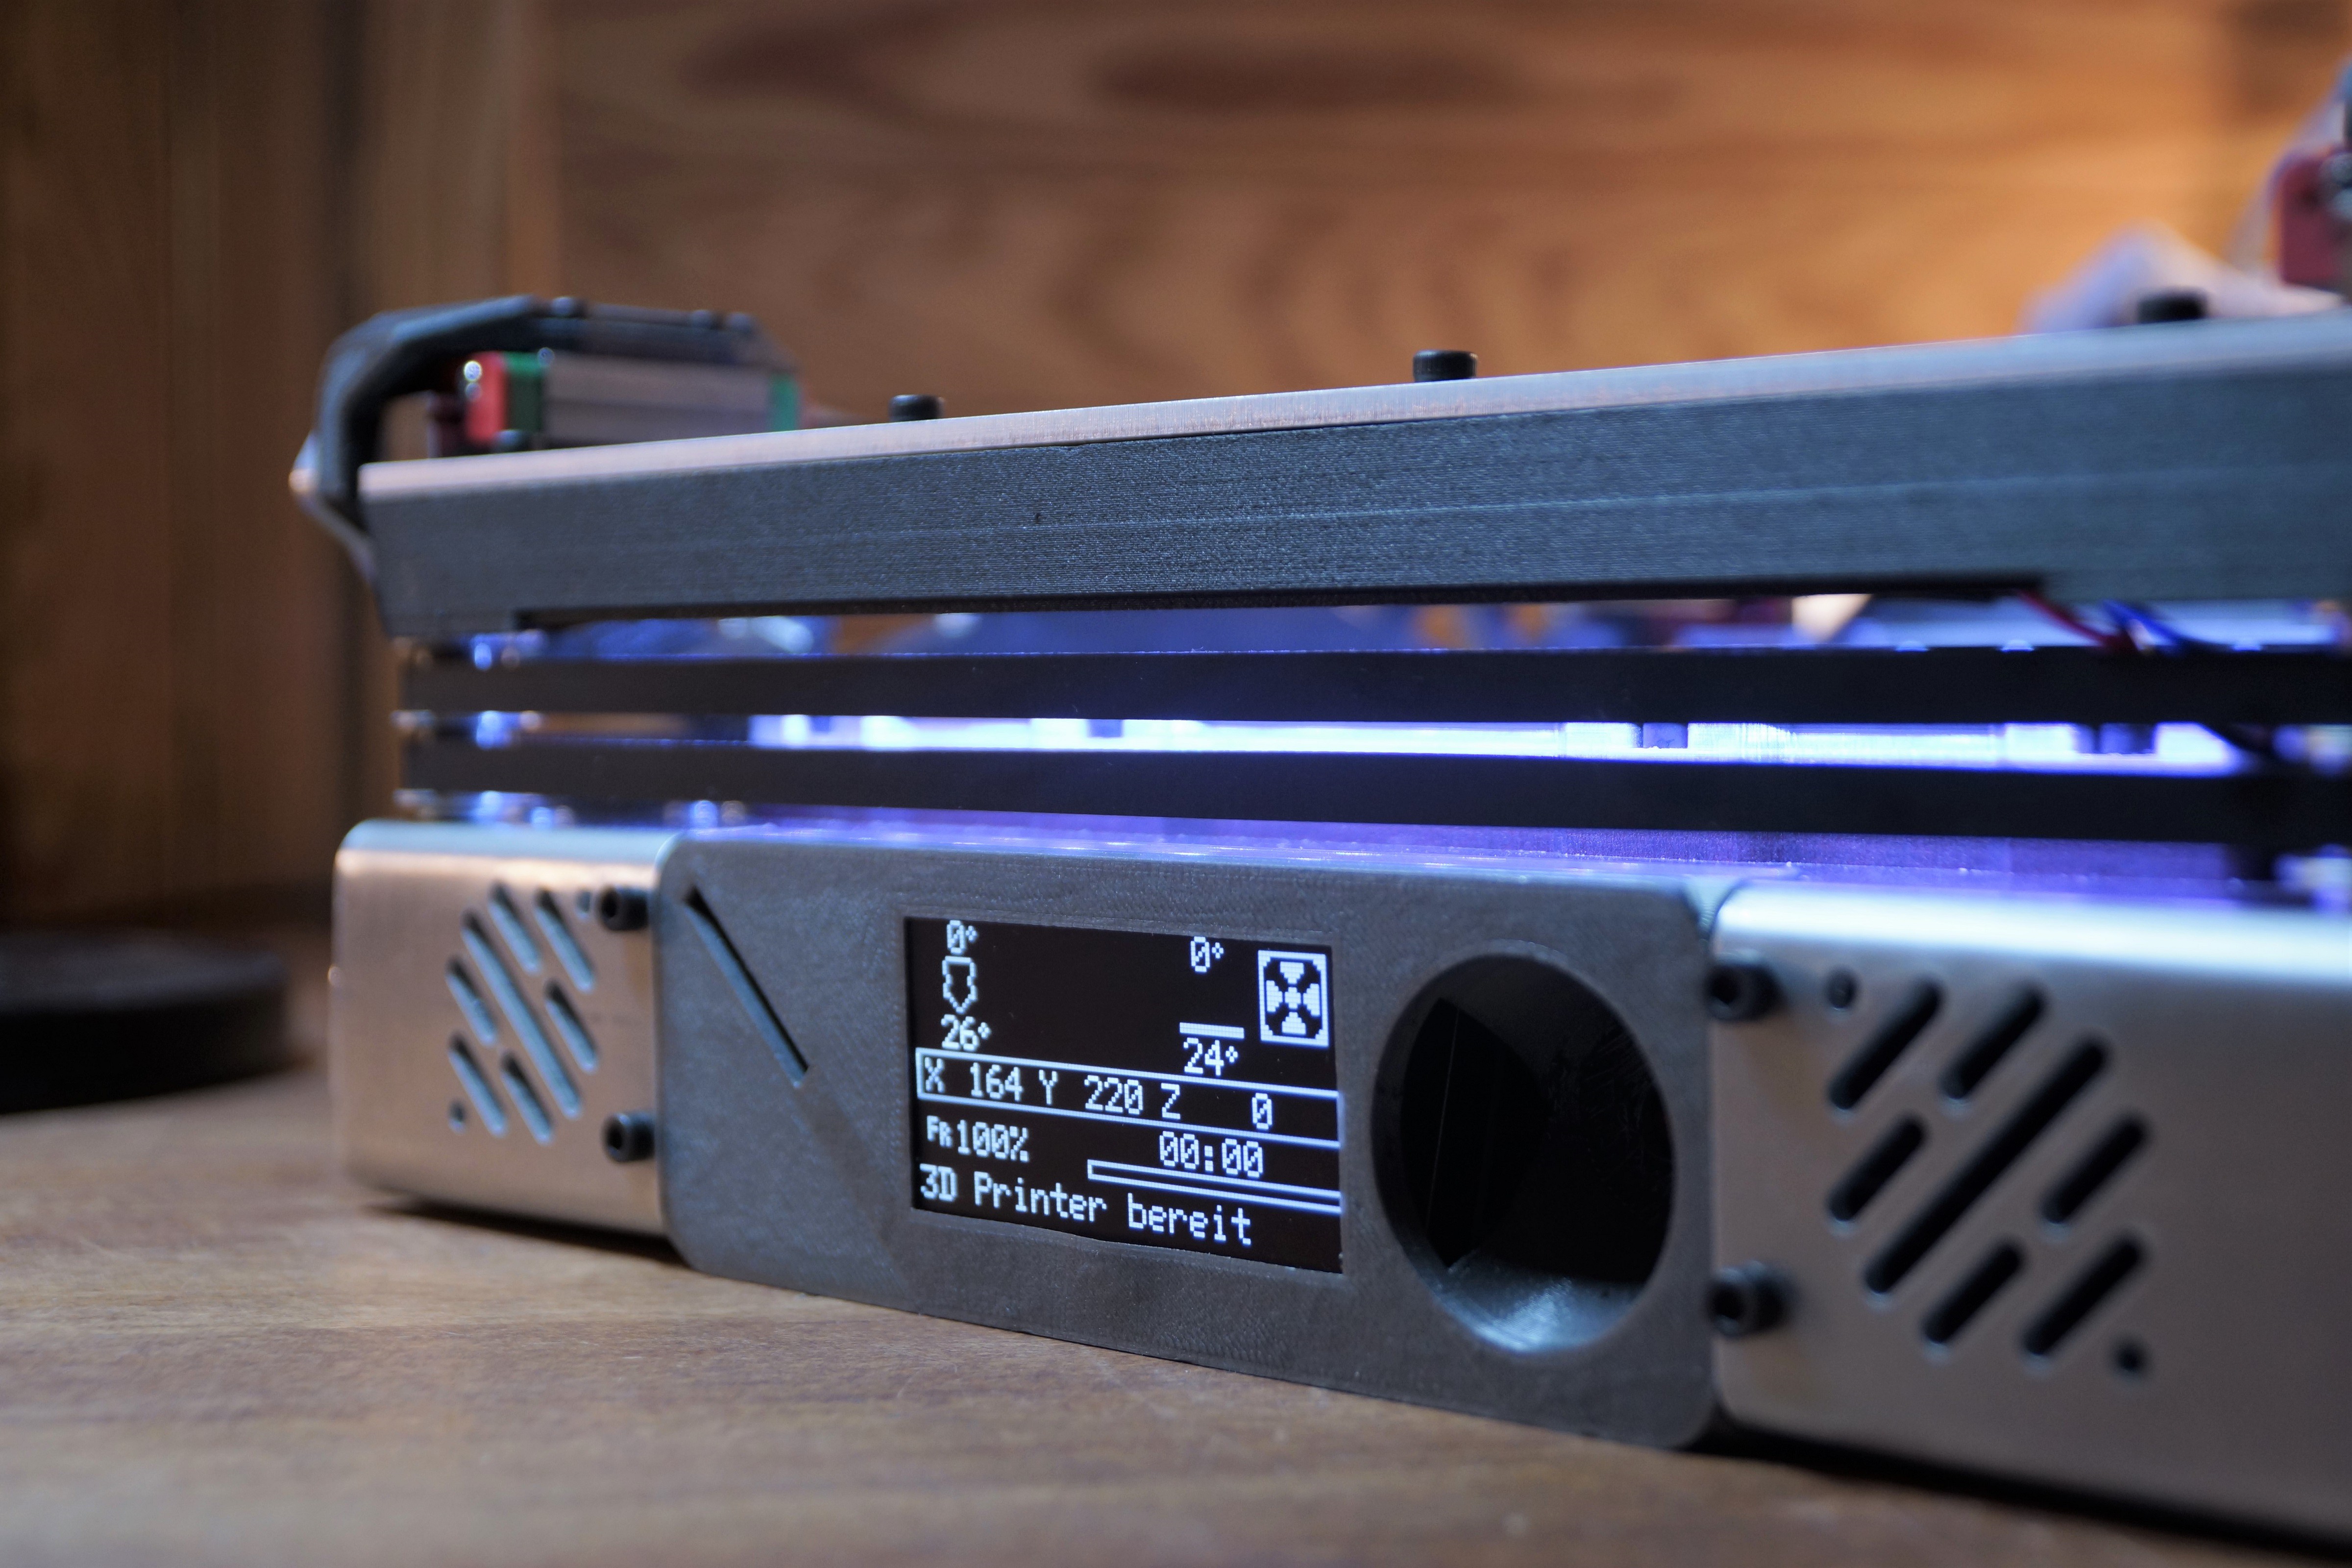
The printer now has a 12x12cm silicone heatbed, and I was able to install the OLED display.
The whole display controller assembly (3D-printed part) still needs some modifications because, at the moment, not all components fit.
![]()
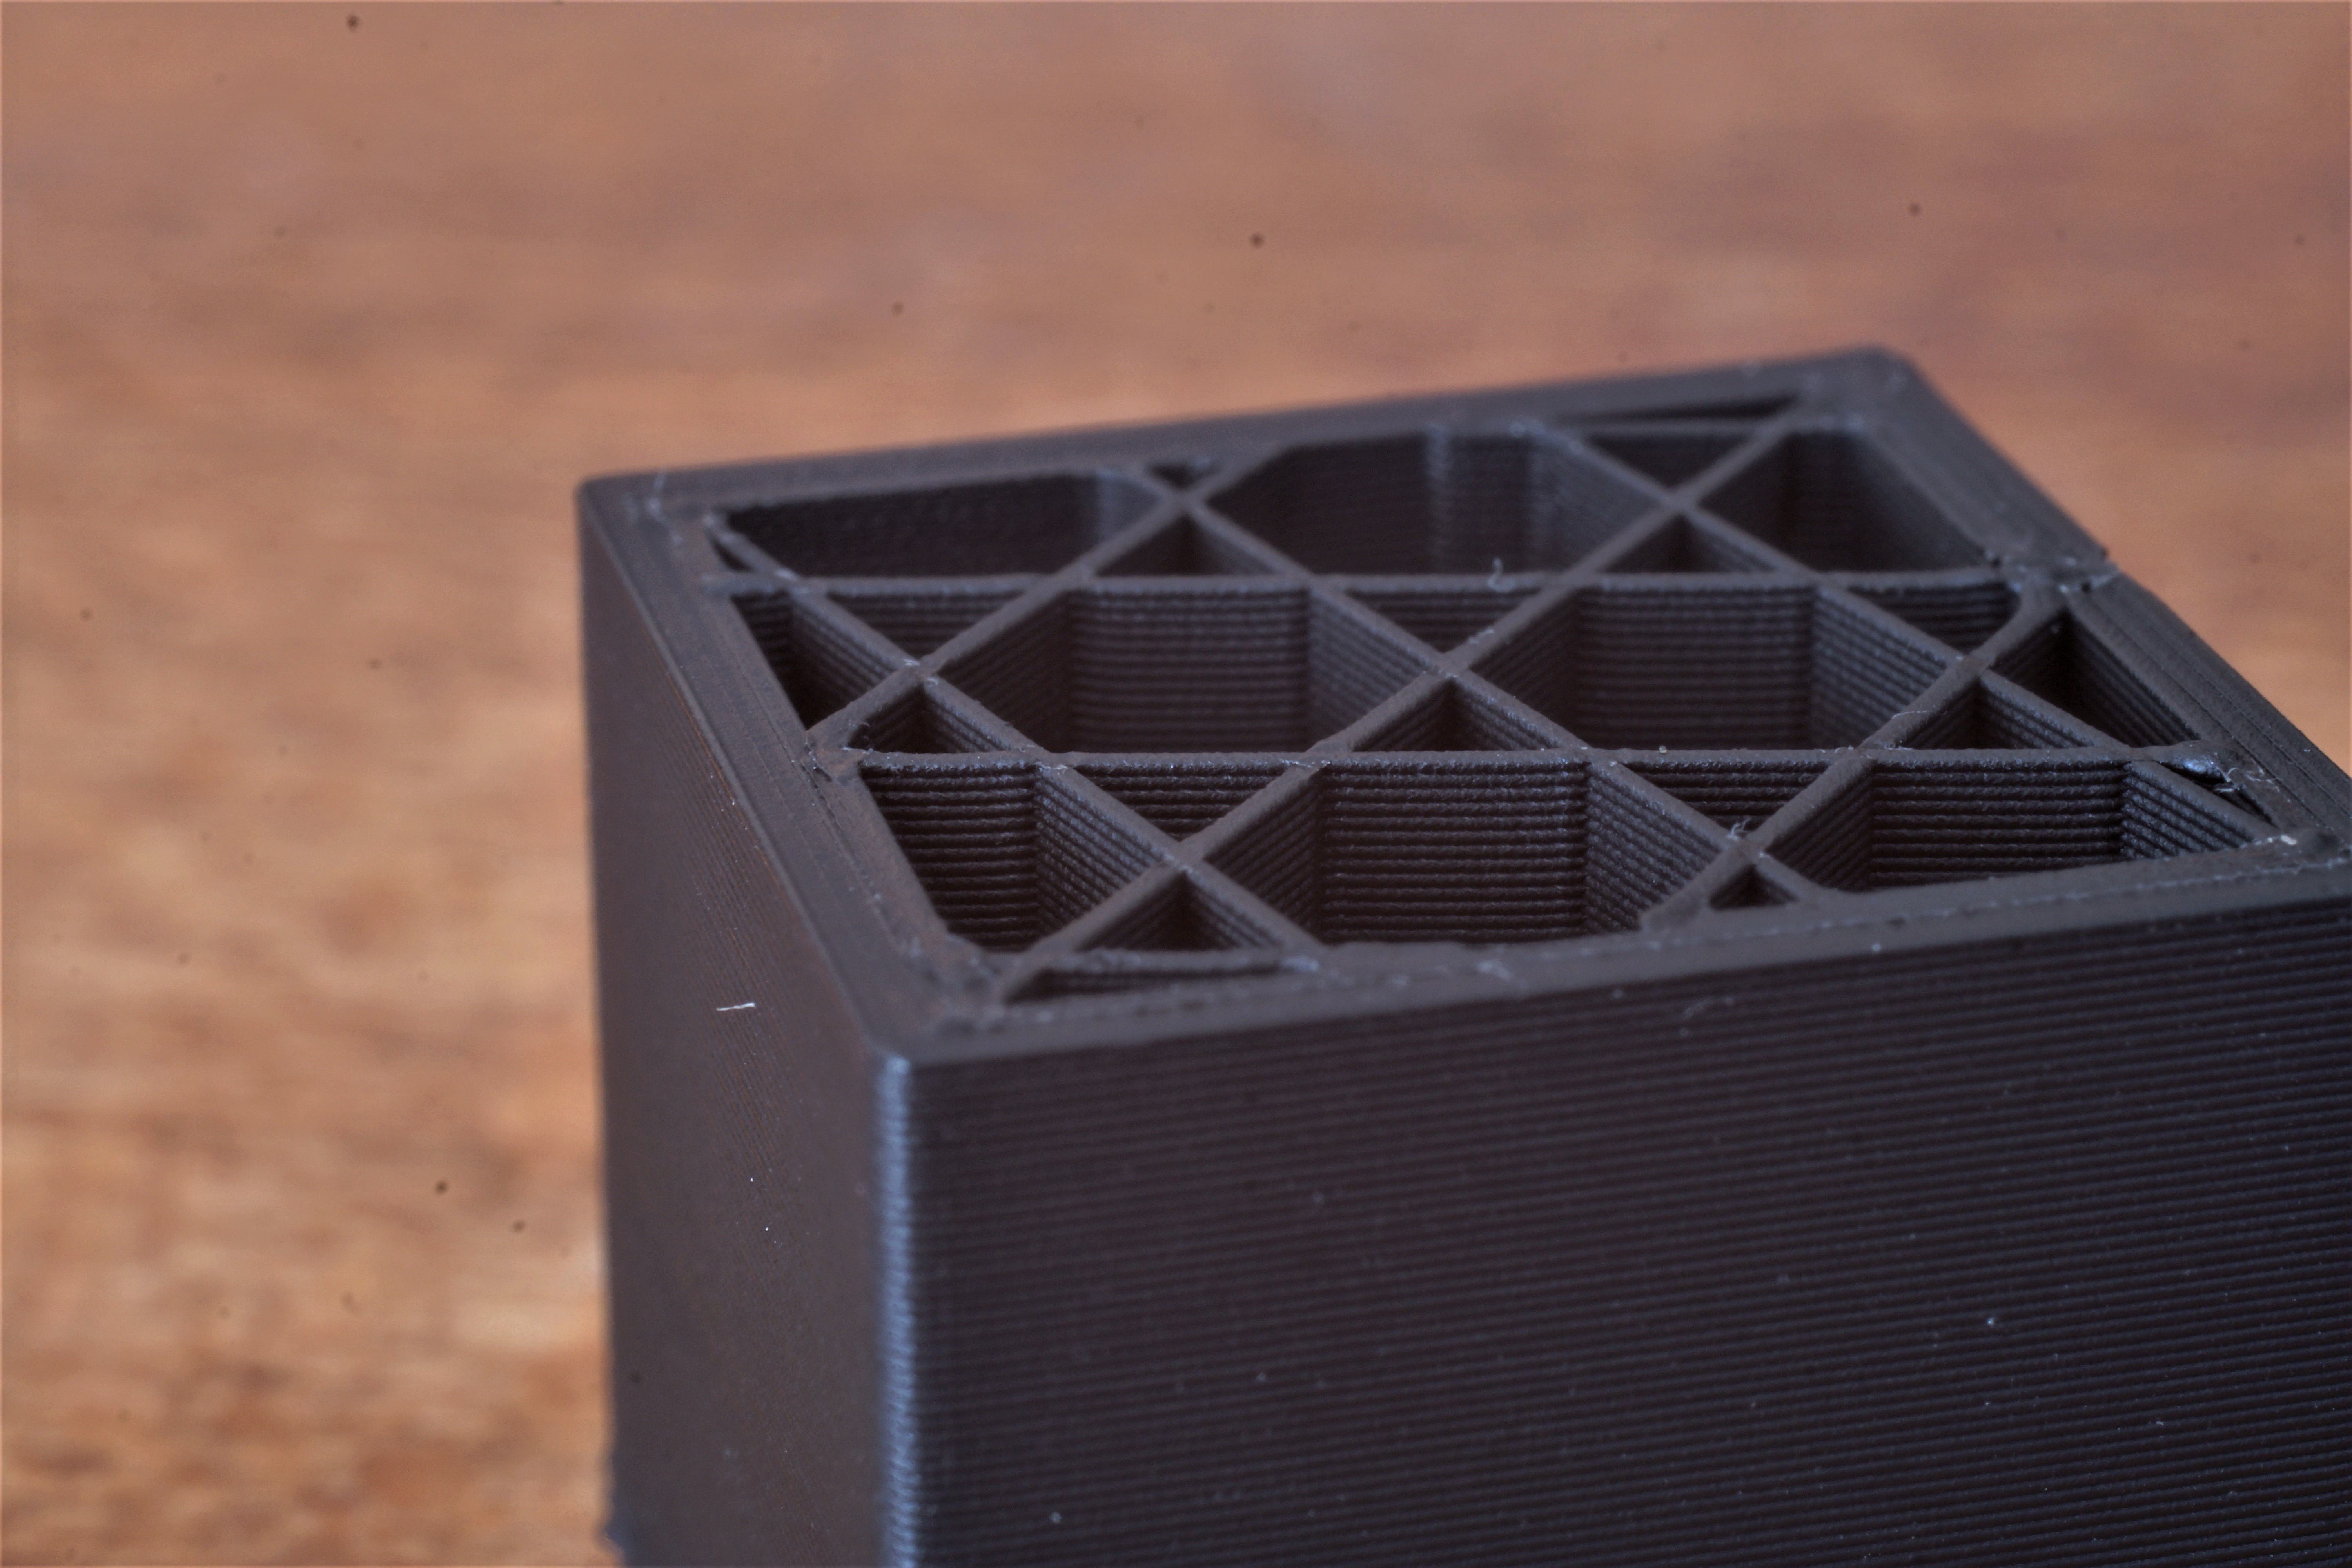
Reinforced Z-slider
I reinforced the Z-slider with another 3mm aluminium plate which I screwed onto the old Z-slider. Unfortunately, my tapped screw threads weren't very precise so that I couldn't use all screw holes to join the two parts together.
With the new reinforced Z-slider, the printer is now at all Z-heights above the printbed rigid (no Z-flex when applying extra load in Z-direction).
When The Nozzle moves under the printbed, the Z-flex starts to increase.
Which for the printing process is unimportant, but can be a problem when homing to Z min (could result in homing position inaccuracy).![]()
Backlash
The Z-axis has backlash, which I didn't aspect to happen because the axis has a preload due to the scissor lift and the weight of the upper construction.
The backlash caused the print artefacts in the first layers, which I mentioned in the last log because the standard PrusaSlicer Gcode moves the printhead at first some millimetres above the printbed before the printer moves downwards and then starts printing.To solve the problem, I have changed the Gcode so that after homing, the printer moves only upwards, which is a short term solution, but backlash limits the possible features of the printer. Z-hop and auto bed leveling will be not usable.
Even homing is hard with backlash, for more accuracy I'm pushing the upper construction manually downwards before homing, to eliminate the backlash.
I tried the backlash compensation feature in Marlin, but it didn't work very well since the printer moves slightly upwards during the compensation process.
The next thing that I want to try is to improve lubrication because I think there is already enough preload to prevent the backlash.
Maybe some of you have any ideas on how to solve that problem.Print quality
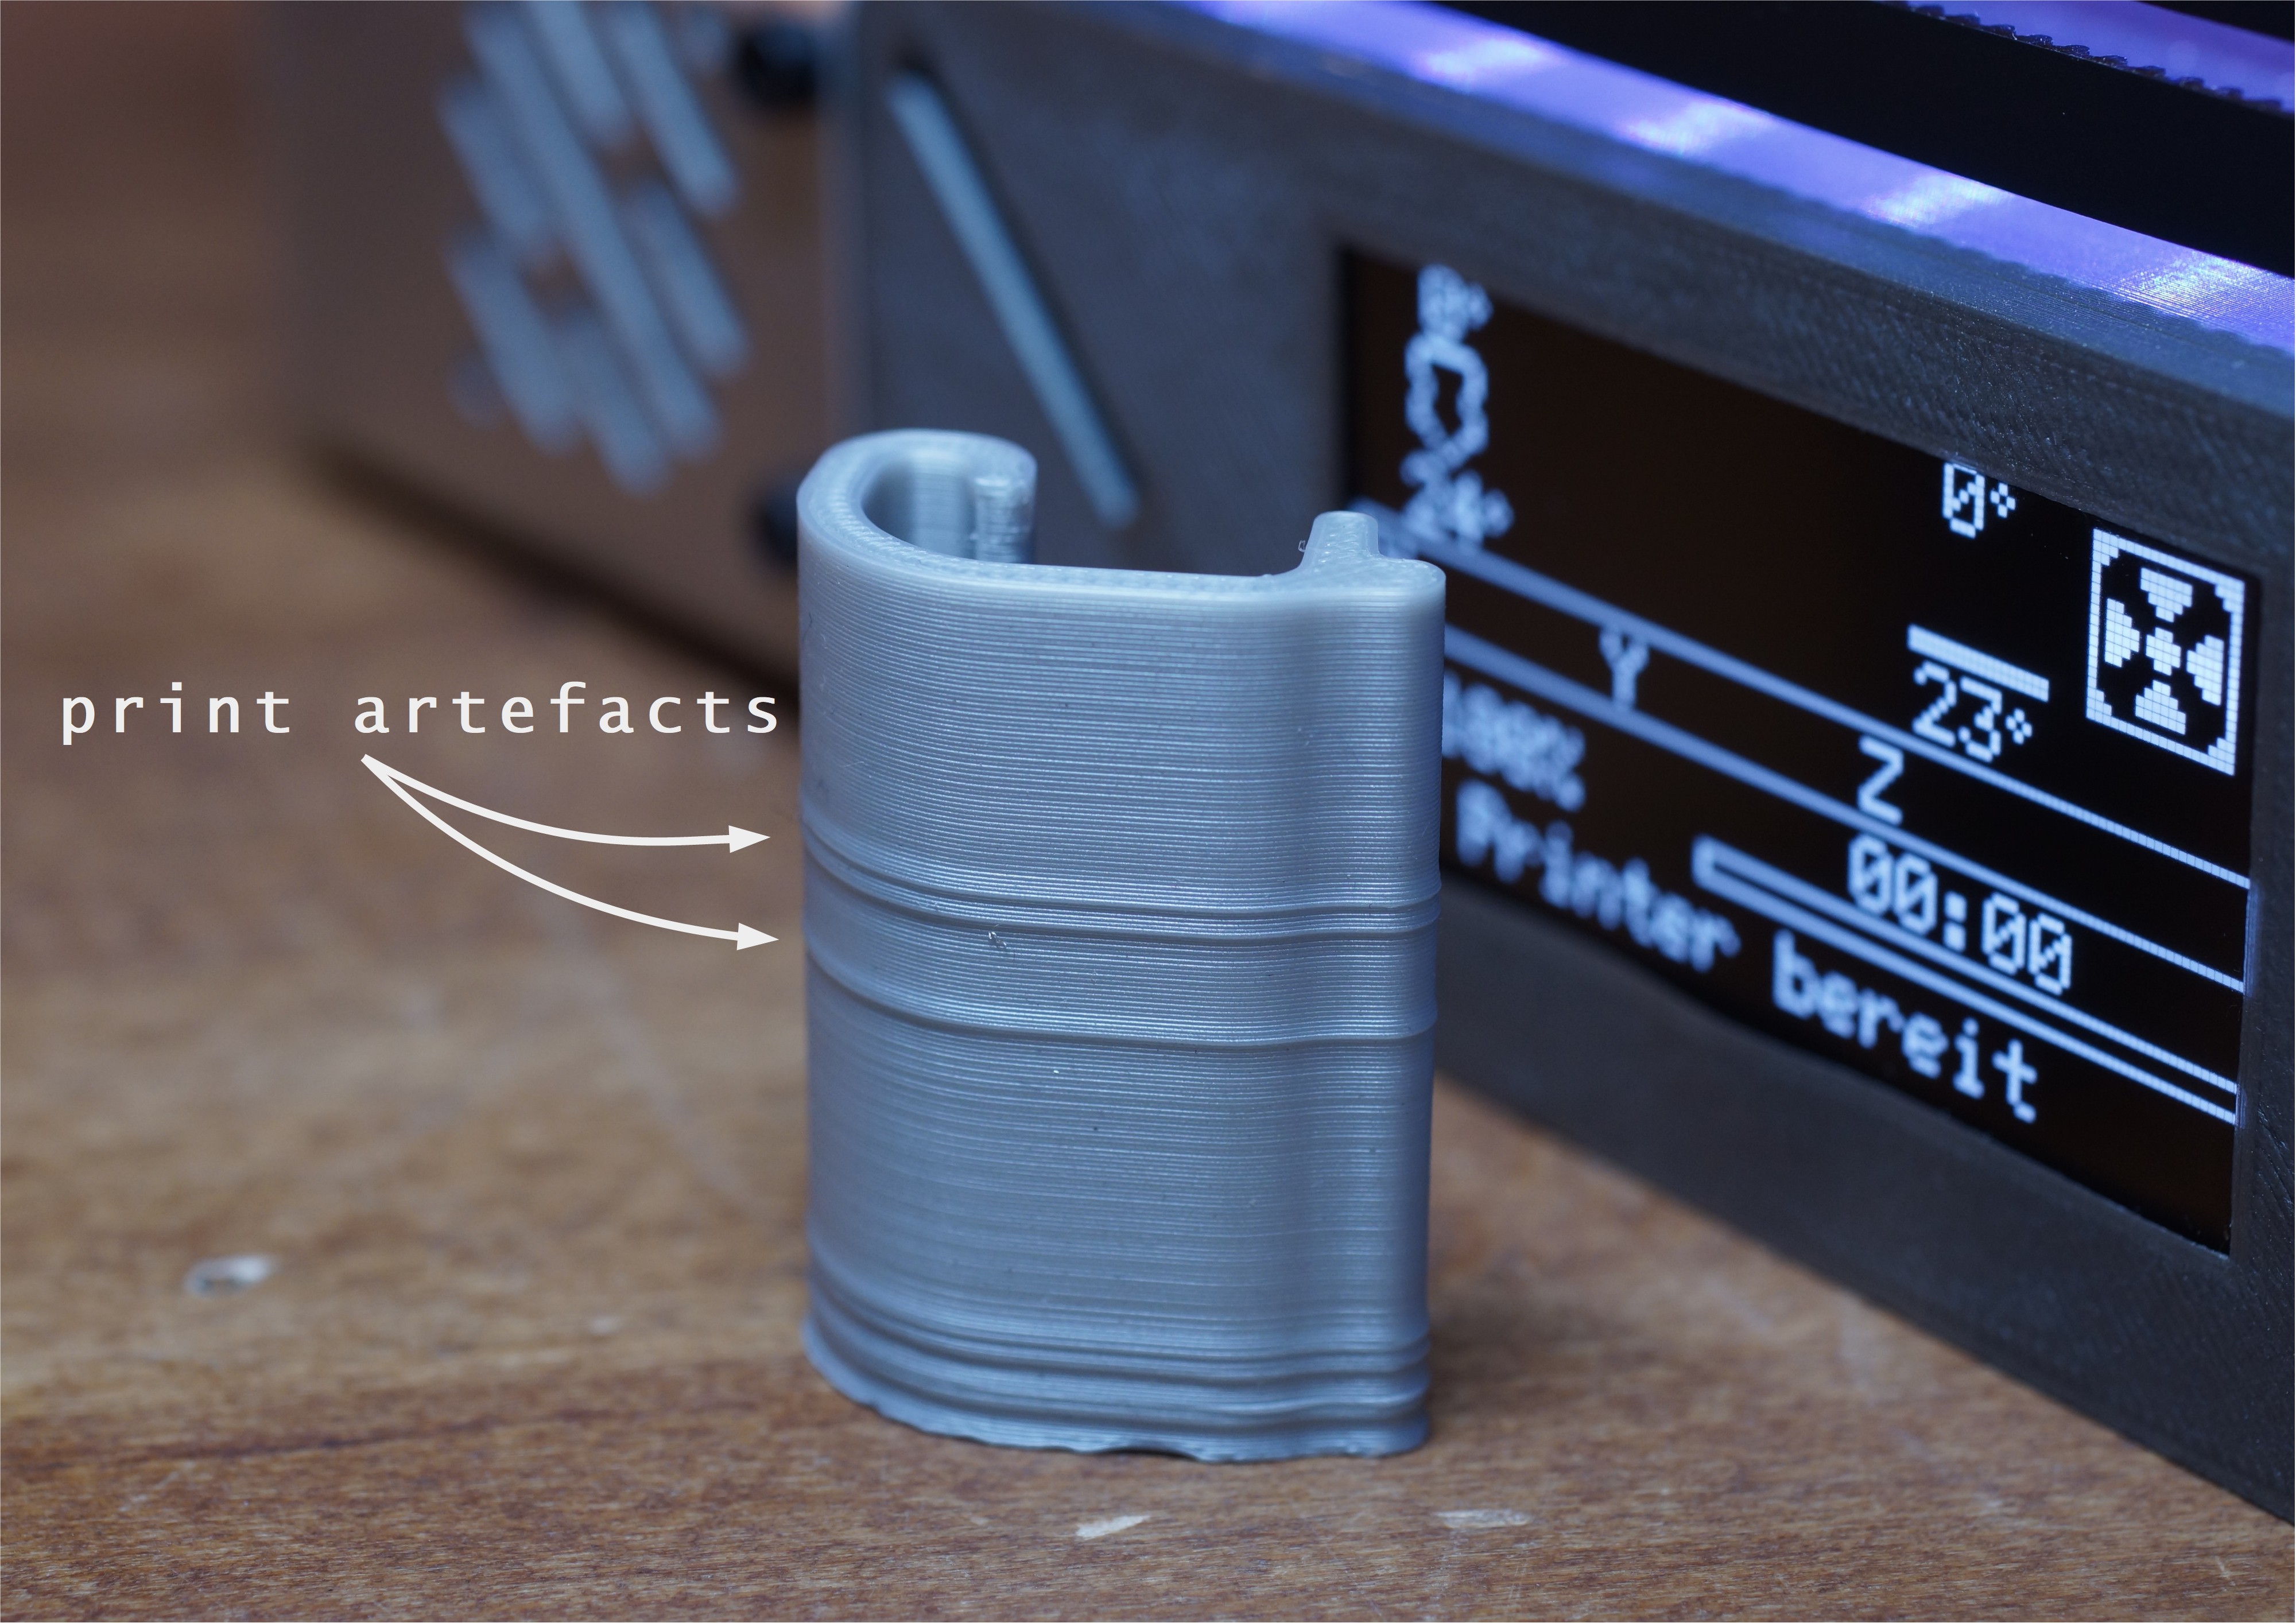
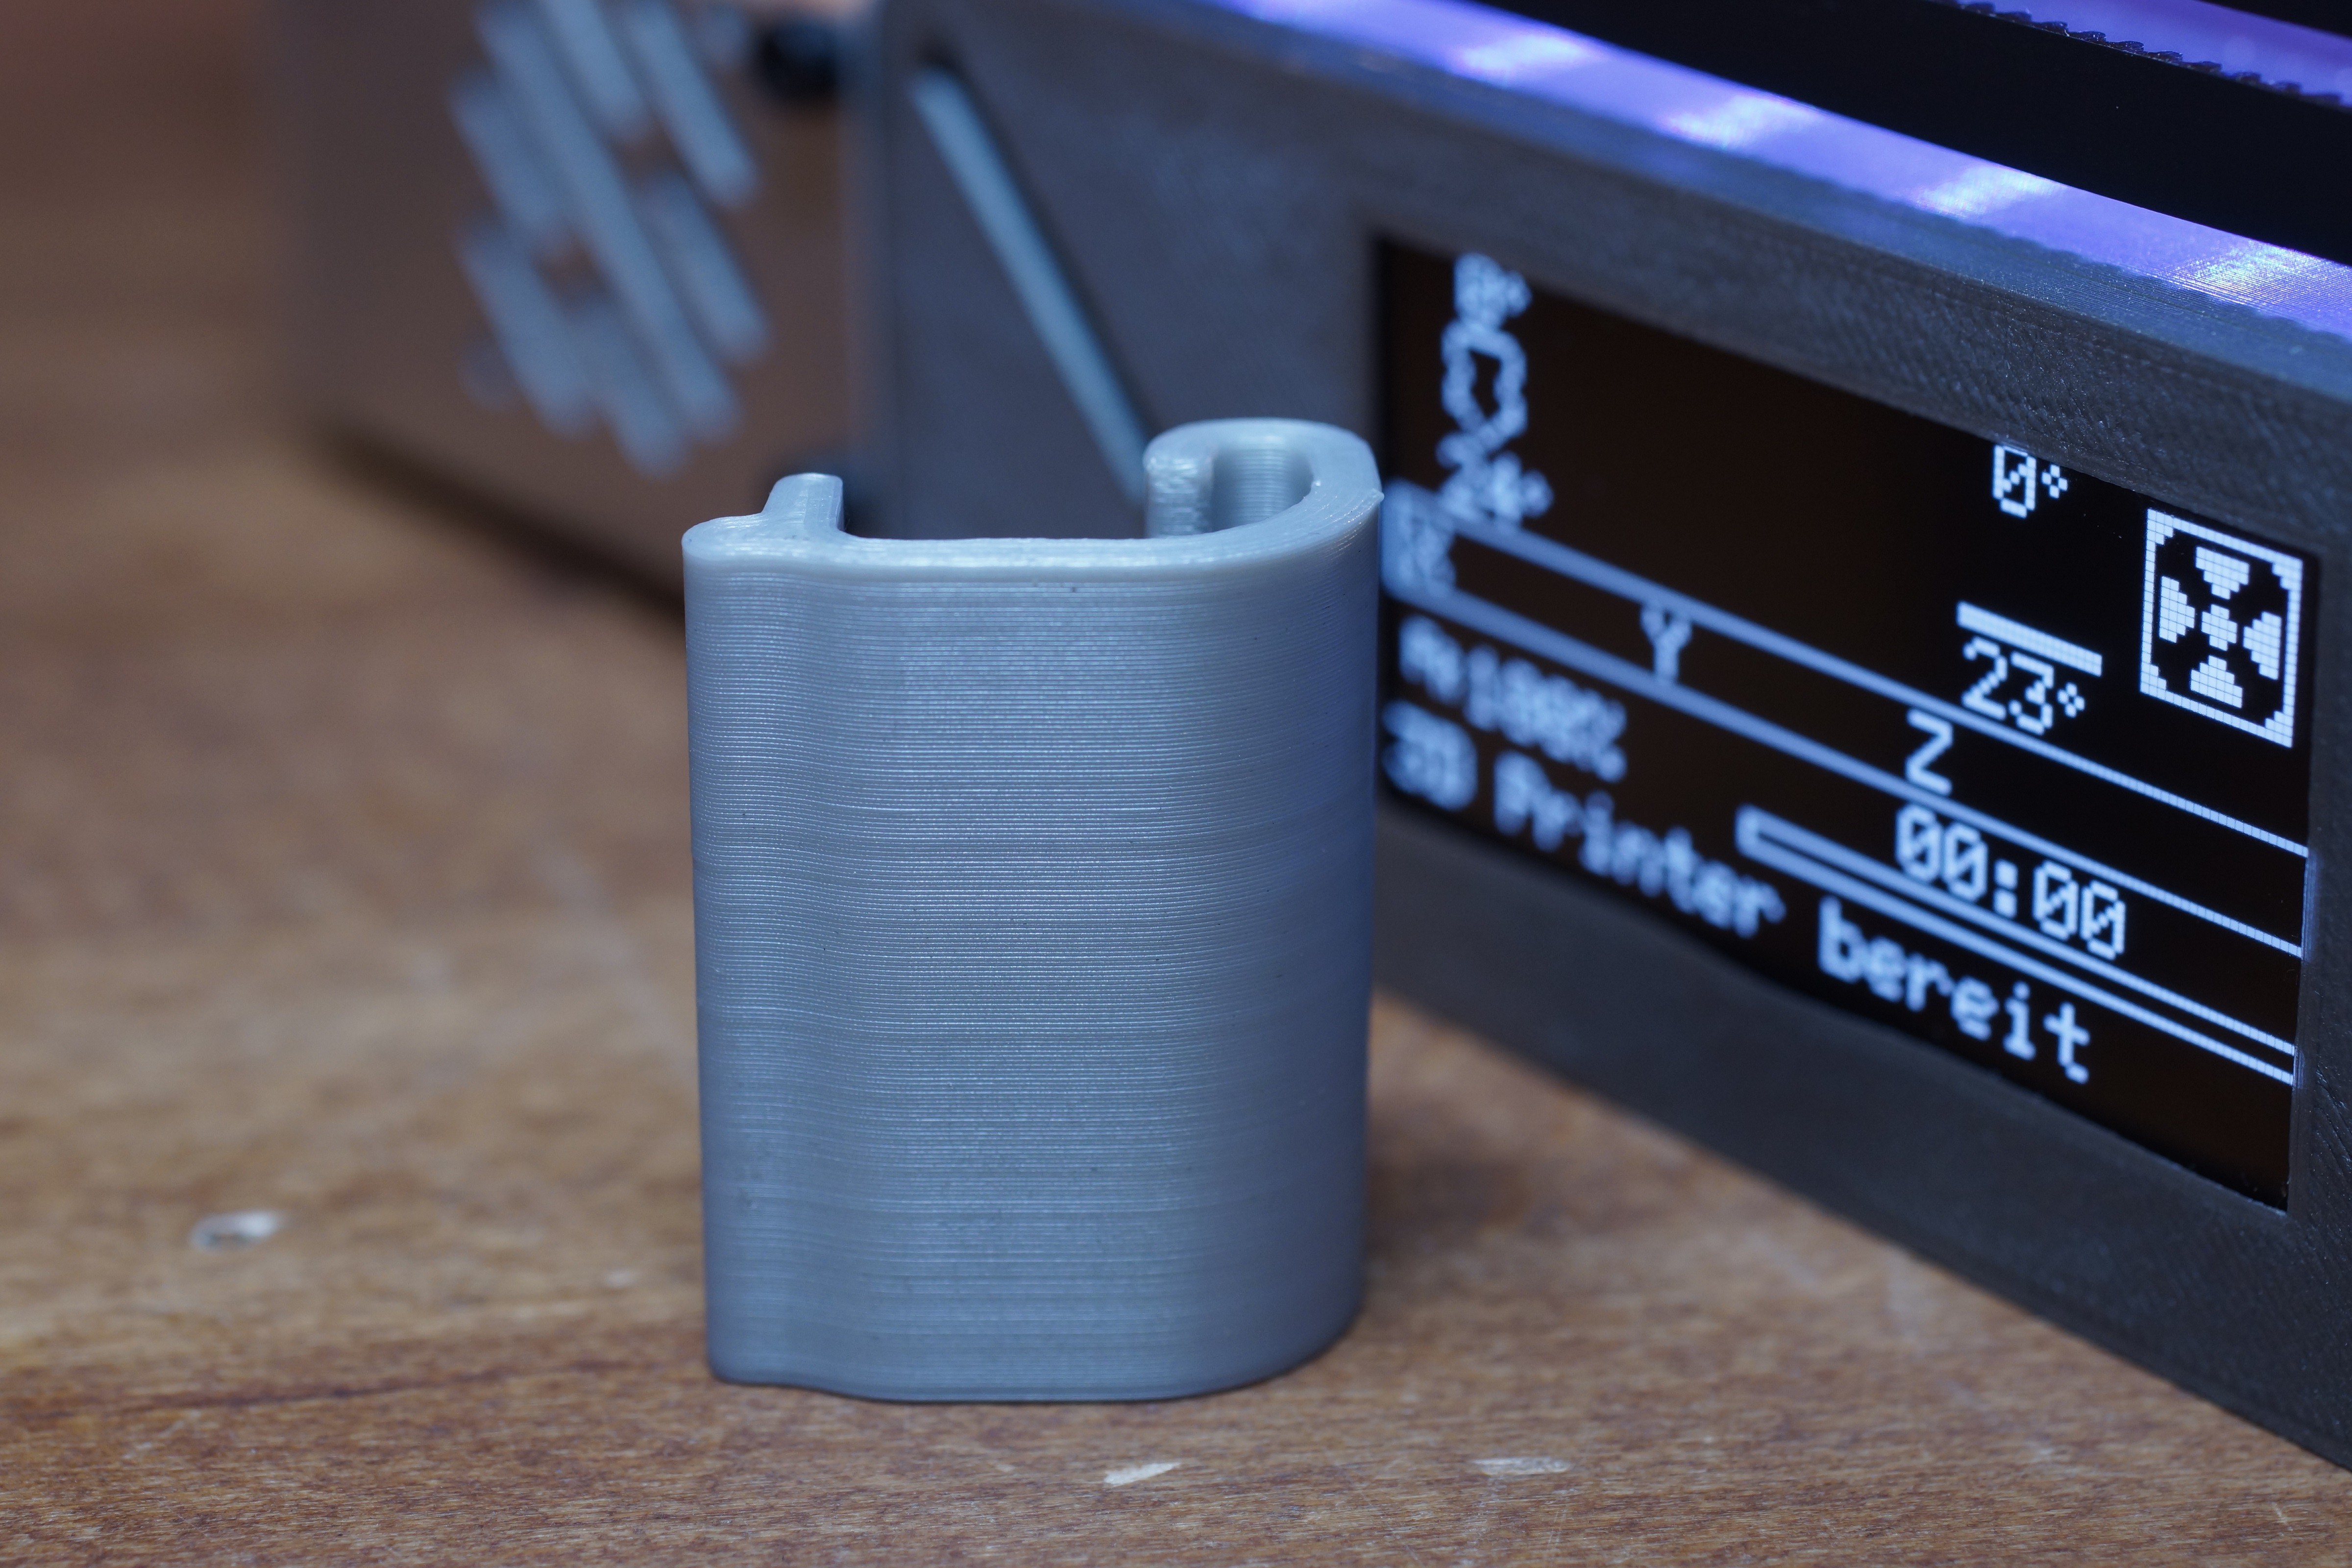
Print quality looks good. Some test parts are getting weird print artefacts from which I don't know where they come. But I think this is not a Z-axis problem. I increased the belt tensions, which improved the problem. When I print with slower speed, the artefacts are mostly gone. But I'm still not sure what exactly is causing these artefacts. Feel free to write a comment If you have any ideas.
![]()
![]()
-
wiring done + first print
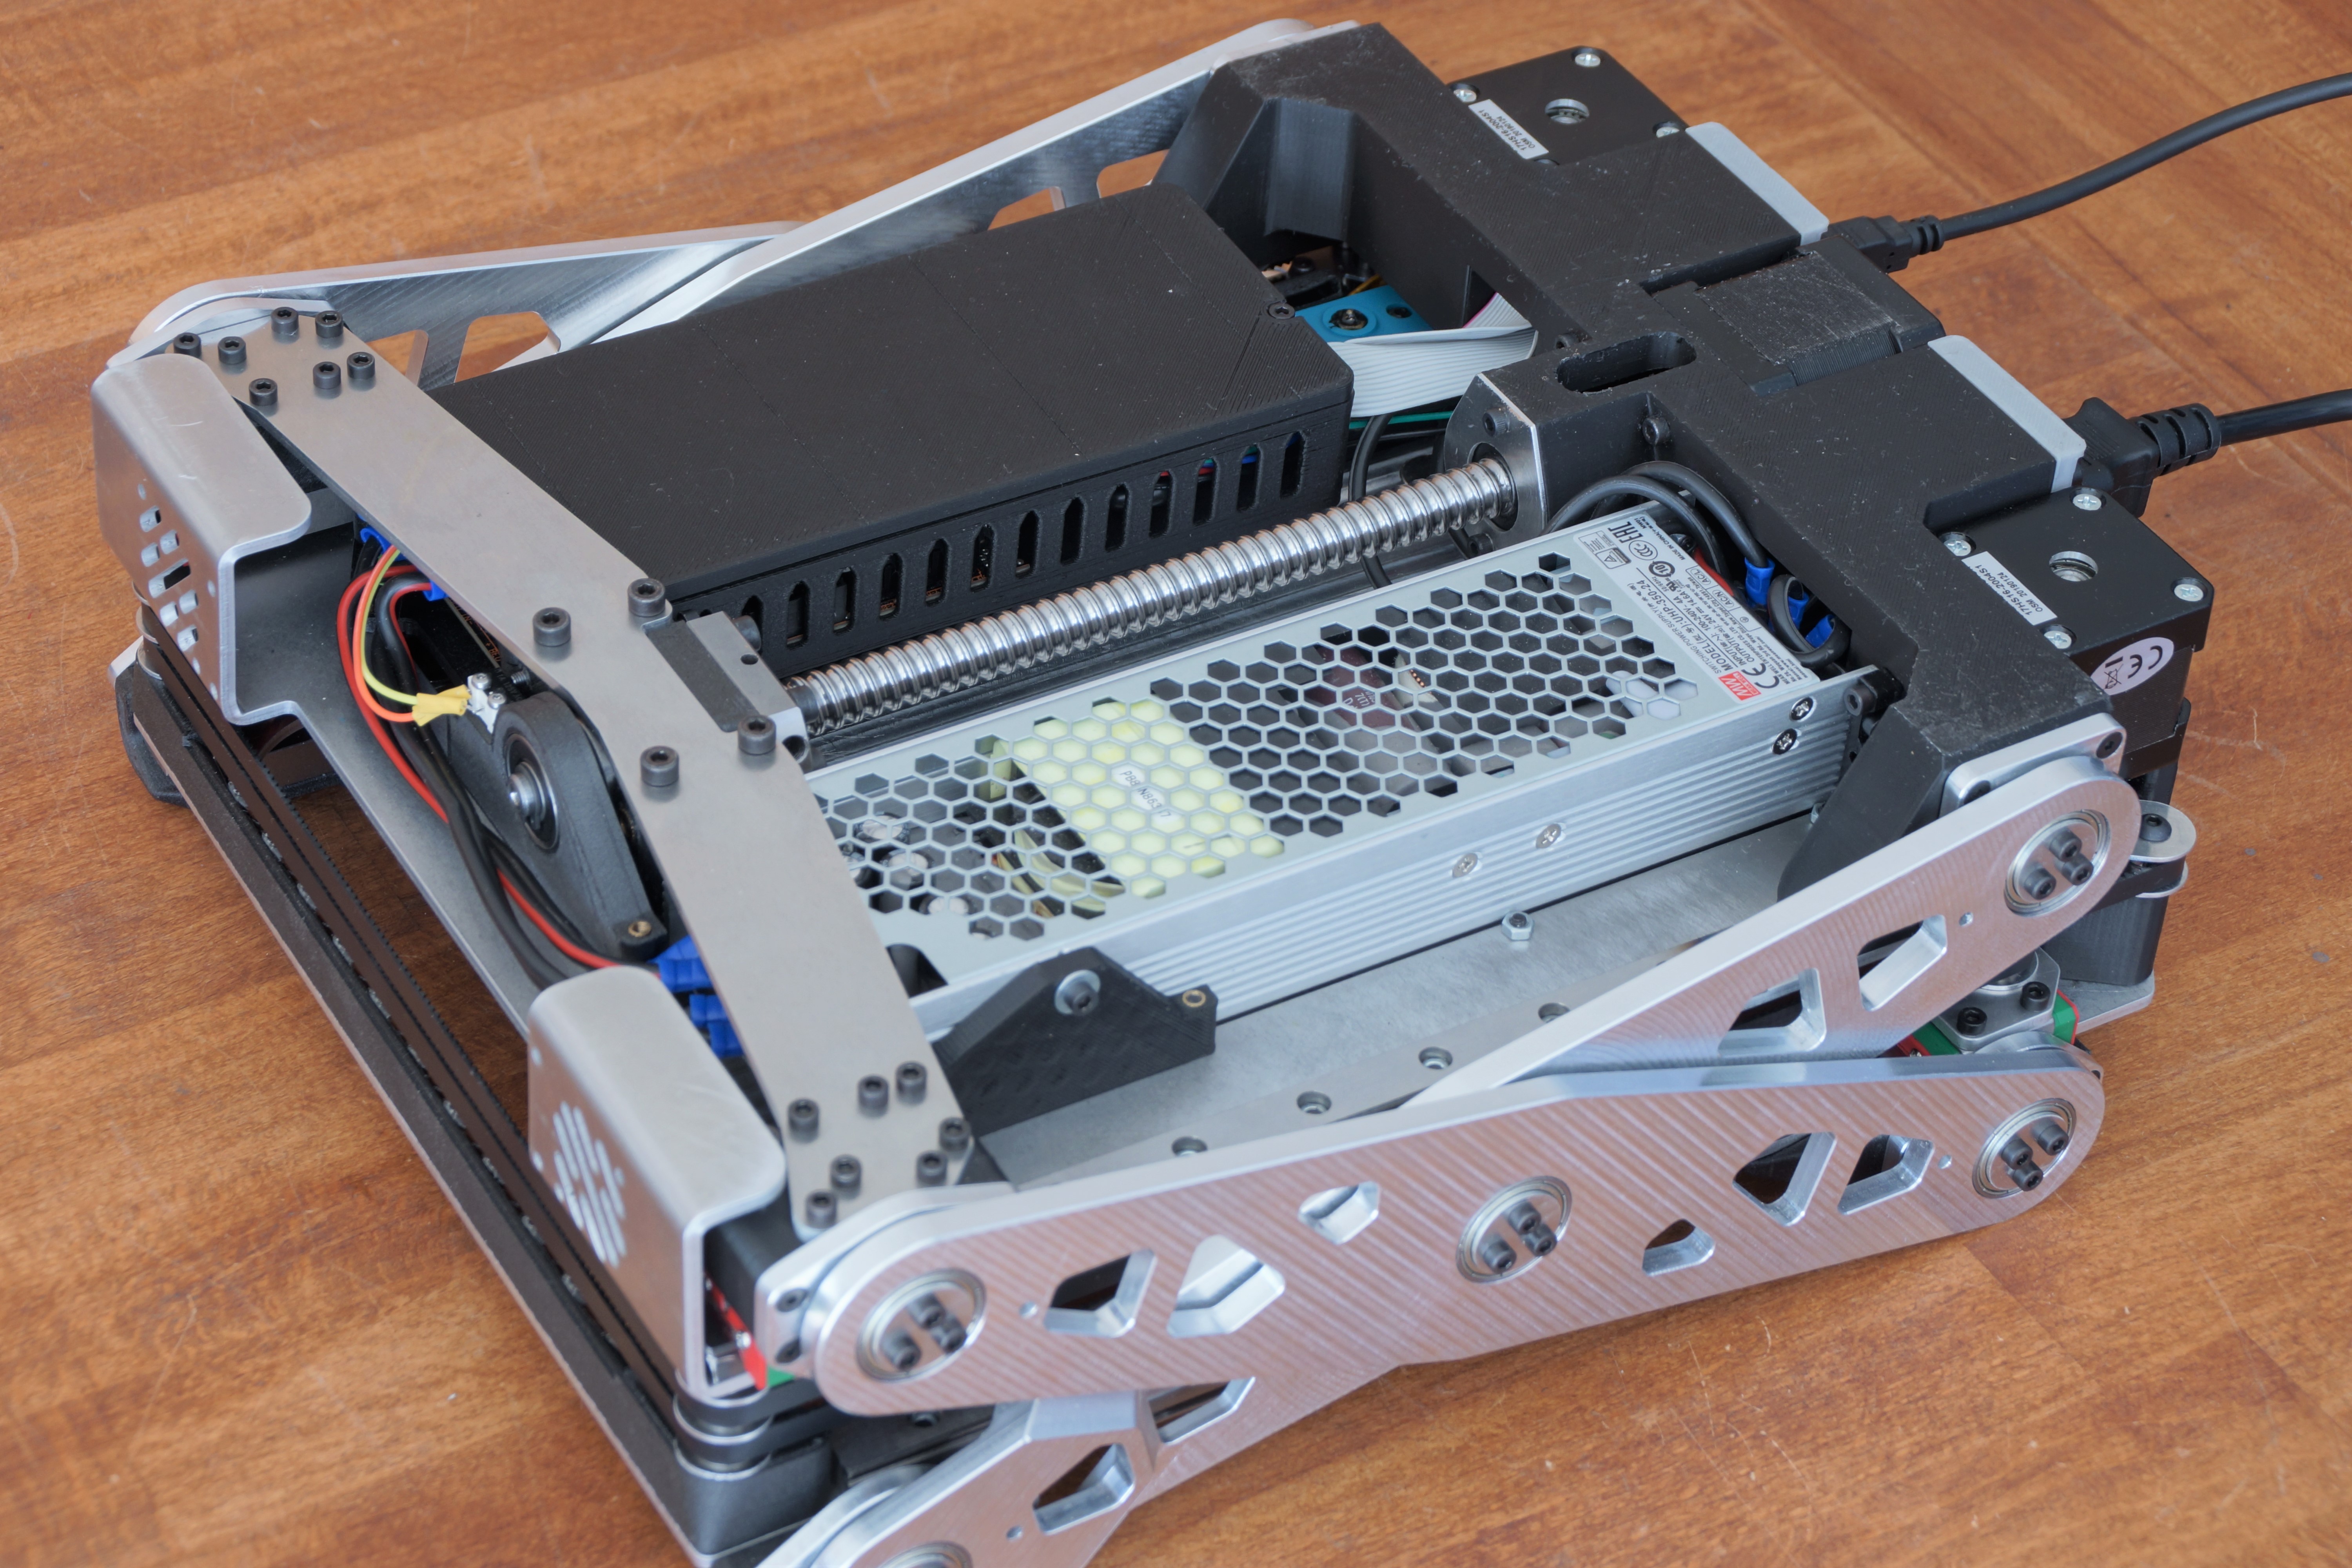
10/15/2019 at 13:29 • 0 commentsI managed to wire everything up. It is not the best wire management, but it works. I added a LED-strip at the front for better looks and usability. The power supply and EinsyRambo are mounted under the 3d printer between the Z-slider and the printbed.
![]()
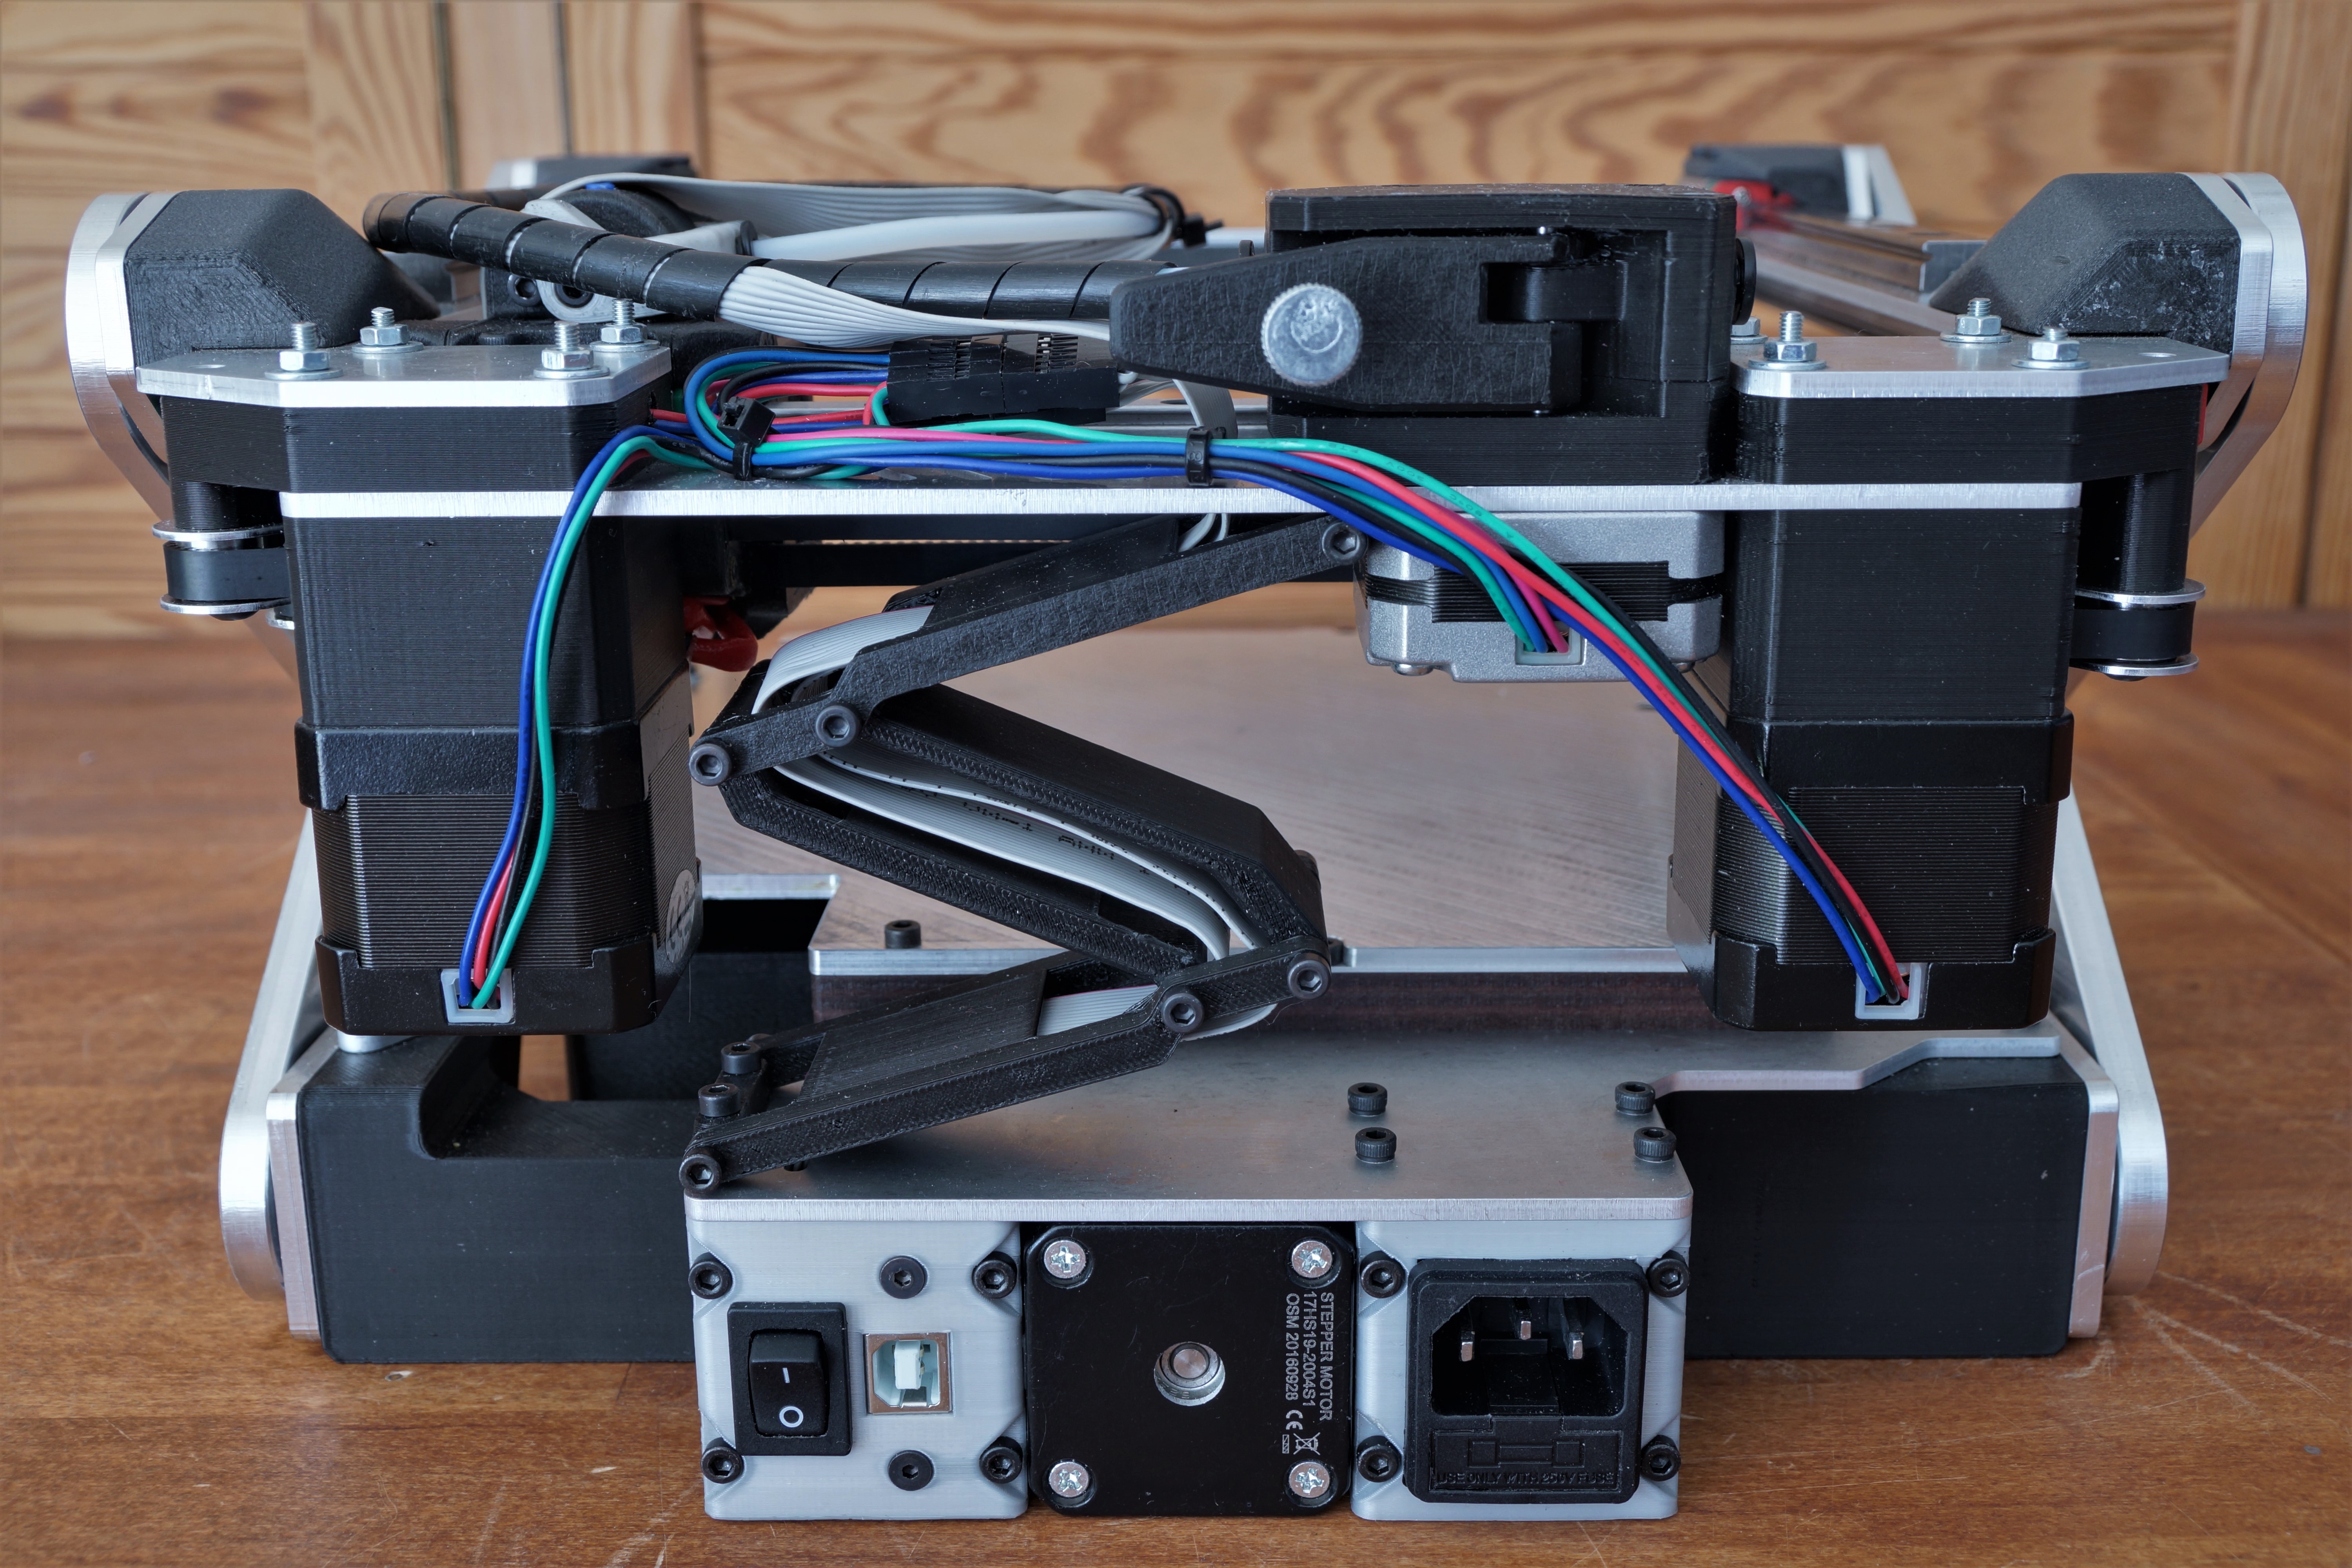
In the back, there are a power switch, a USB-port and a power connection + fuse.
![]()
First print :The first prints are looking very promising. I printed the test cubes with a 0.2mm layer height.
On the other hand, the first layers are still pretty bad.
I lifted the printbed 6mm as I thought this would improve it, but it didn't.
Without a heated bed, the print adhesion ist not good, which could be a factor as well. The Z-slider has some flex which leads to some looseness in Z-direction. It is made out of 3mm Aluminum(7075), but it is still not rigid enough. I want to try to reinforce it, maybe this will help.![]()
![]()
-
G28 - Homing
09/25/2019 at 19:05 • 0 commentsHere is a video of the homing procedure. X and Y are homed sensorless and Z with an regular endstop.
With the help of Uzair Patel I was able to solve the non-linear Z-Axis firmware problem. I decided to use marlin 1 instead of marlin 2, because marlin 2 takes way longer to compile in the arduino IDE than marlin 1.
I added the extruder and the Bowden tube to the printer.And here is a picture of the "folded" Bowden tube.
![]()
-
printhead wiring + Bowden tube
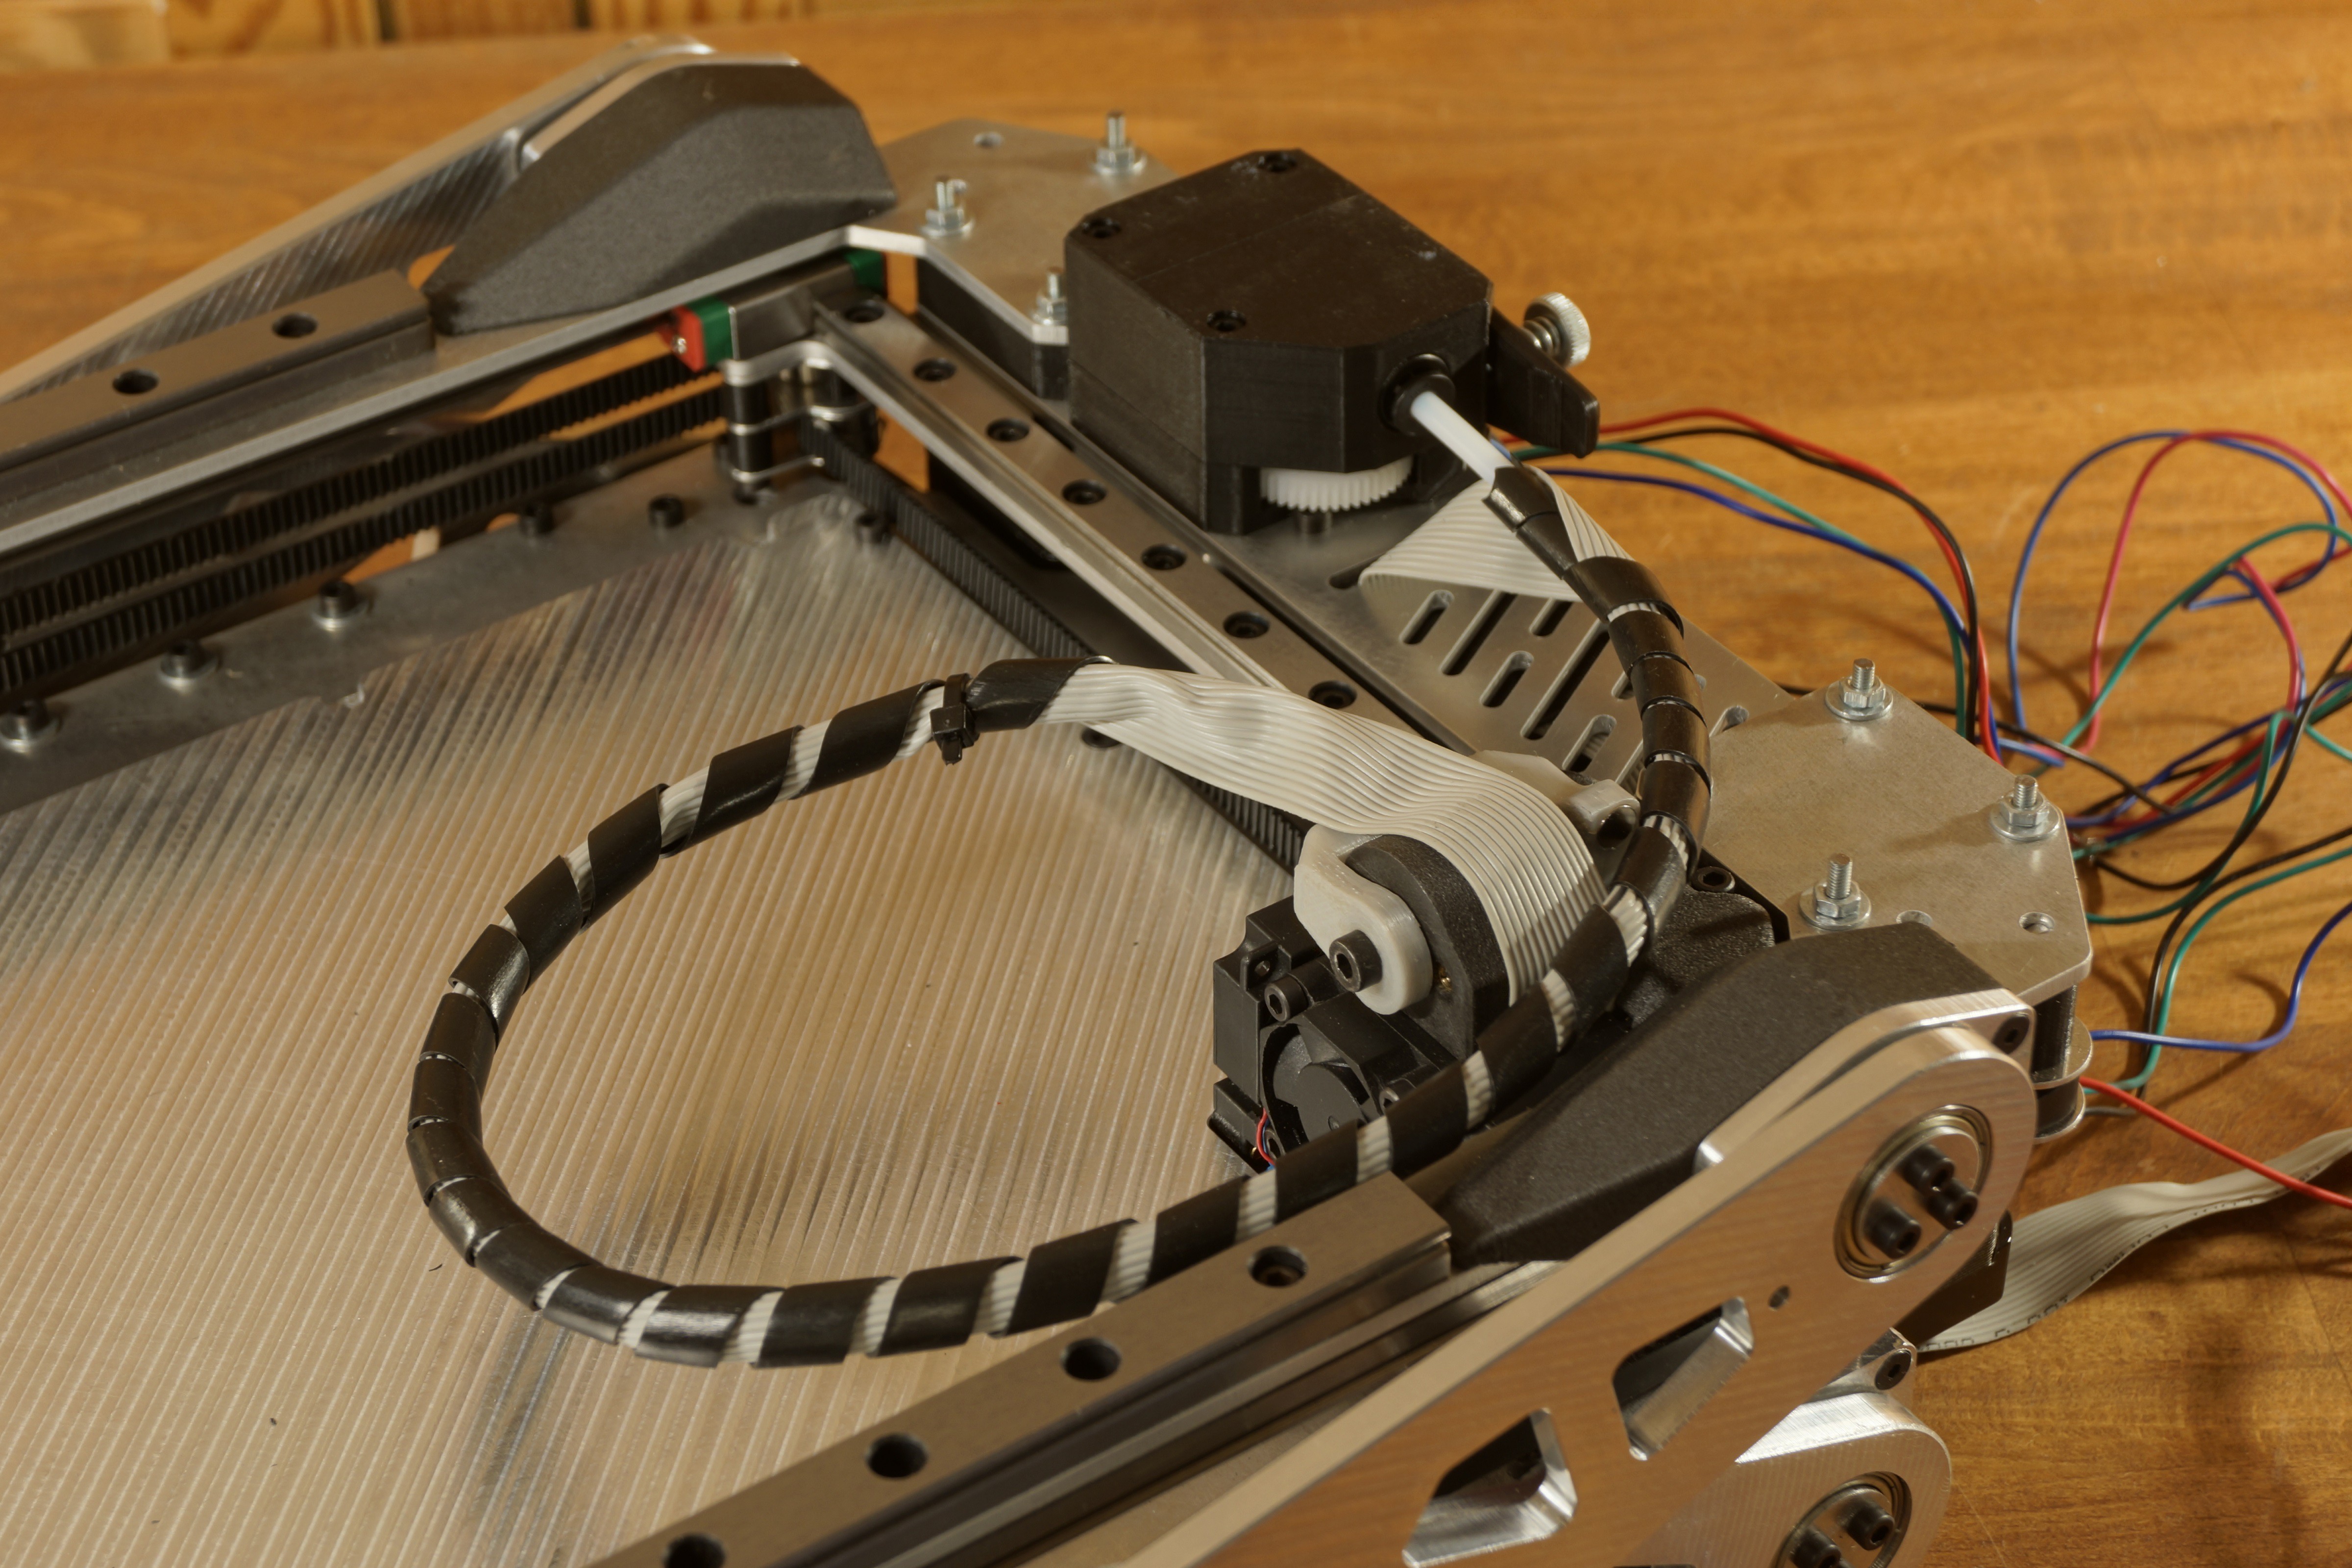
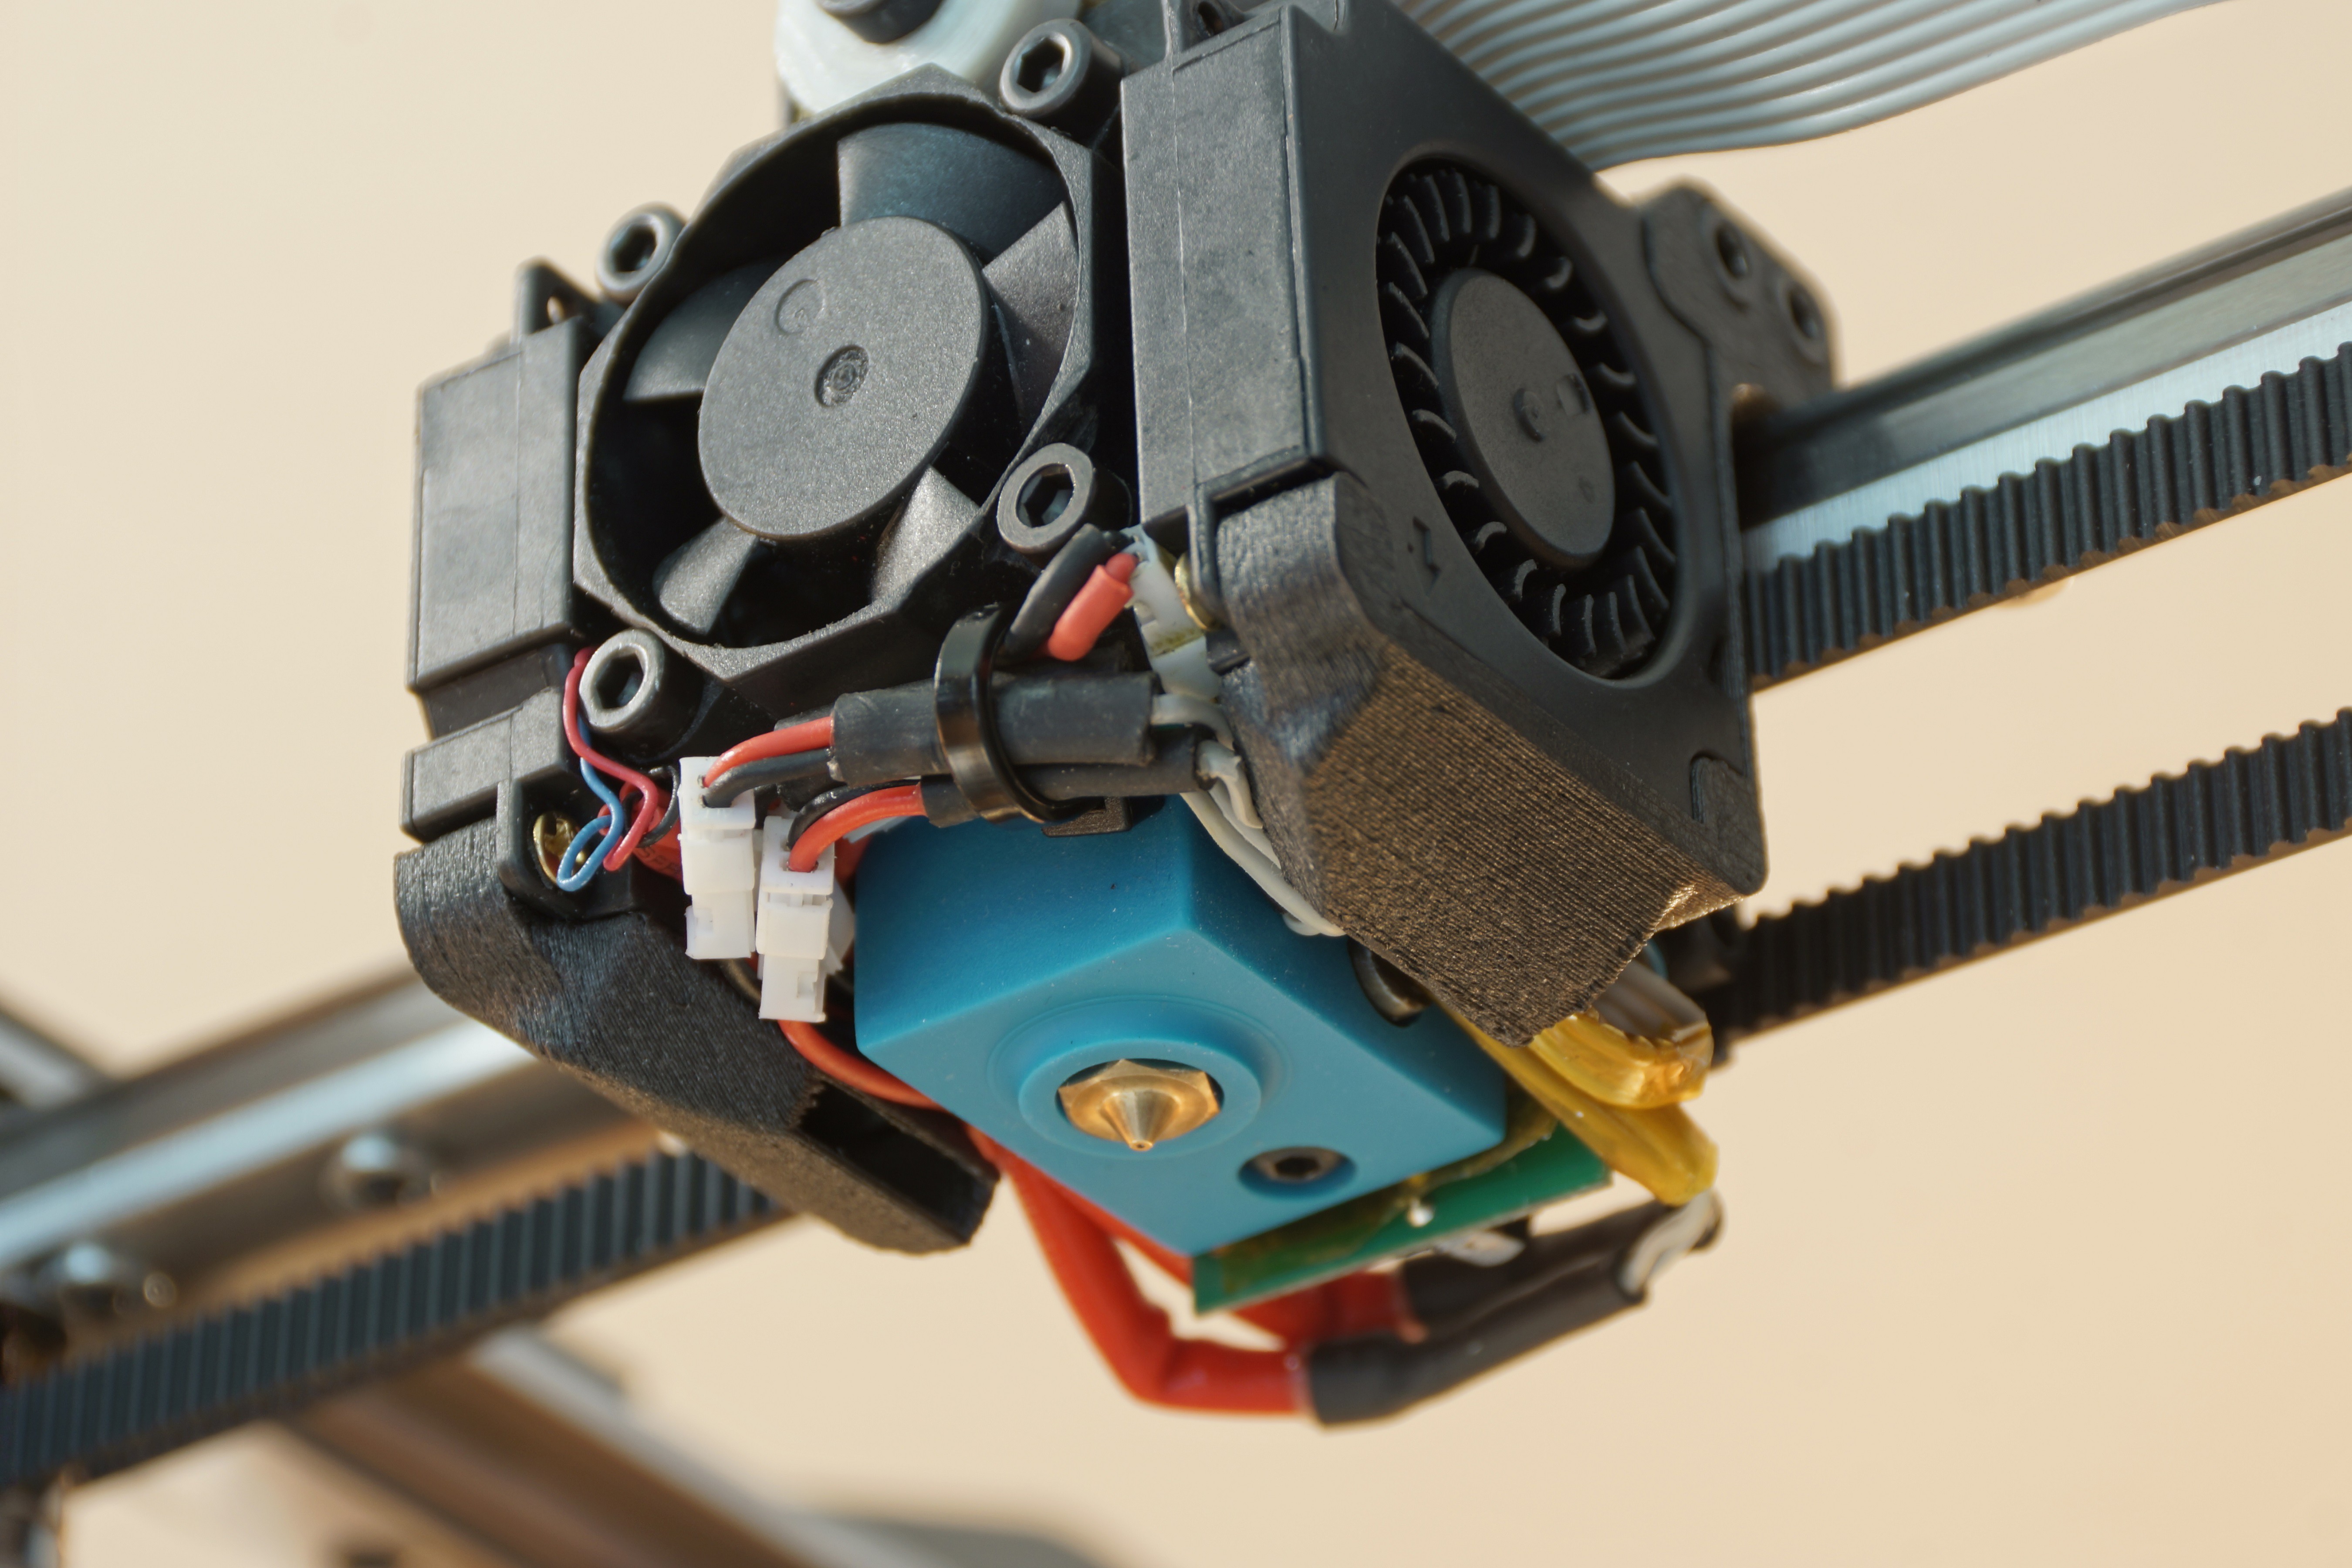
09/05/2019 at 14:38 • 0 commentsThe final printhead is mounted.
The wiring of the printhead is pretty tight and very close (too close ?) to the heat block, but the heat block has a silicone sock, so I hope everything will work fine.
![]()
![]()
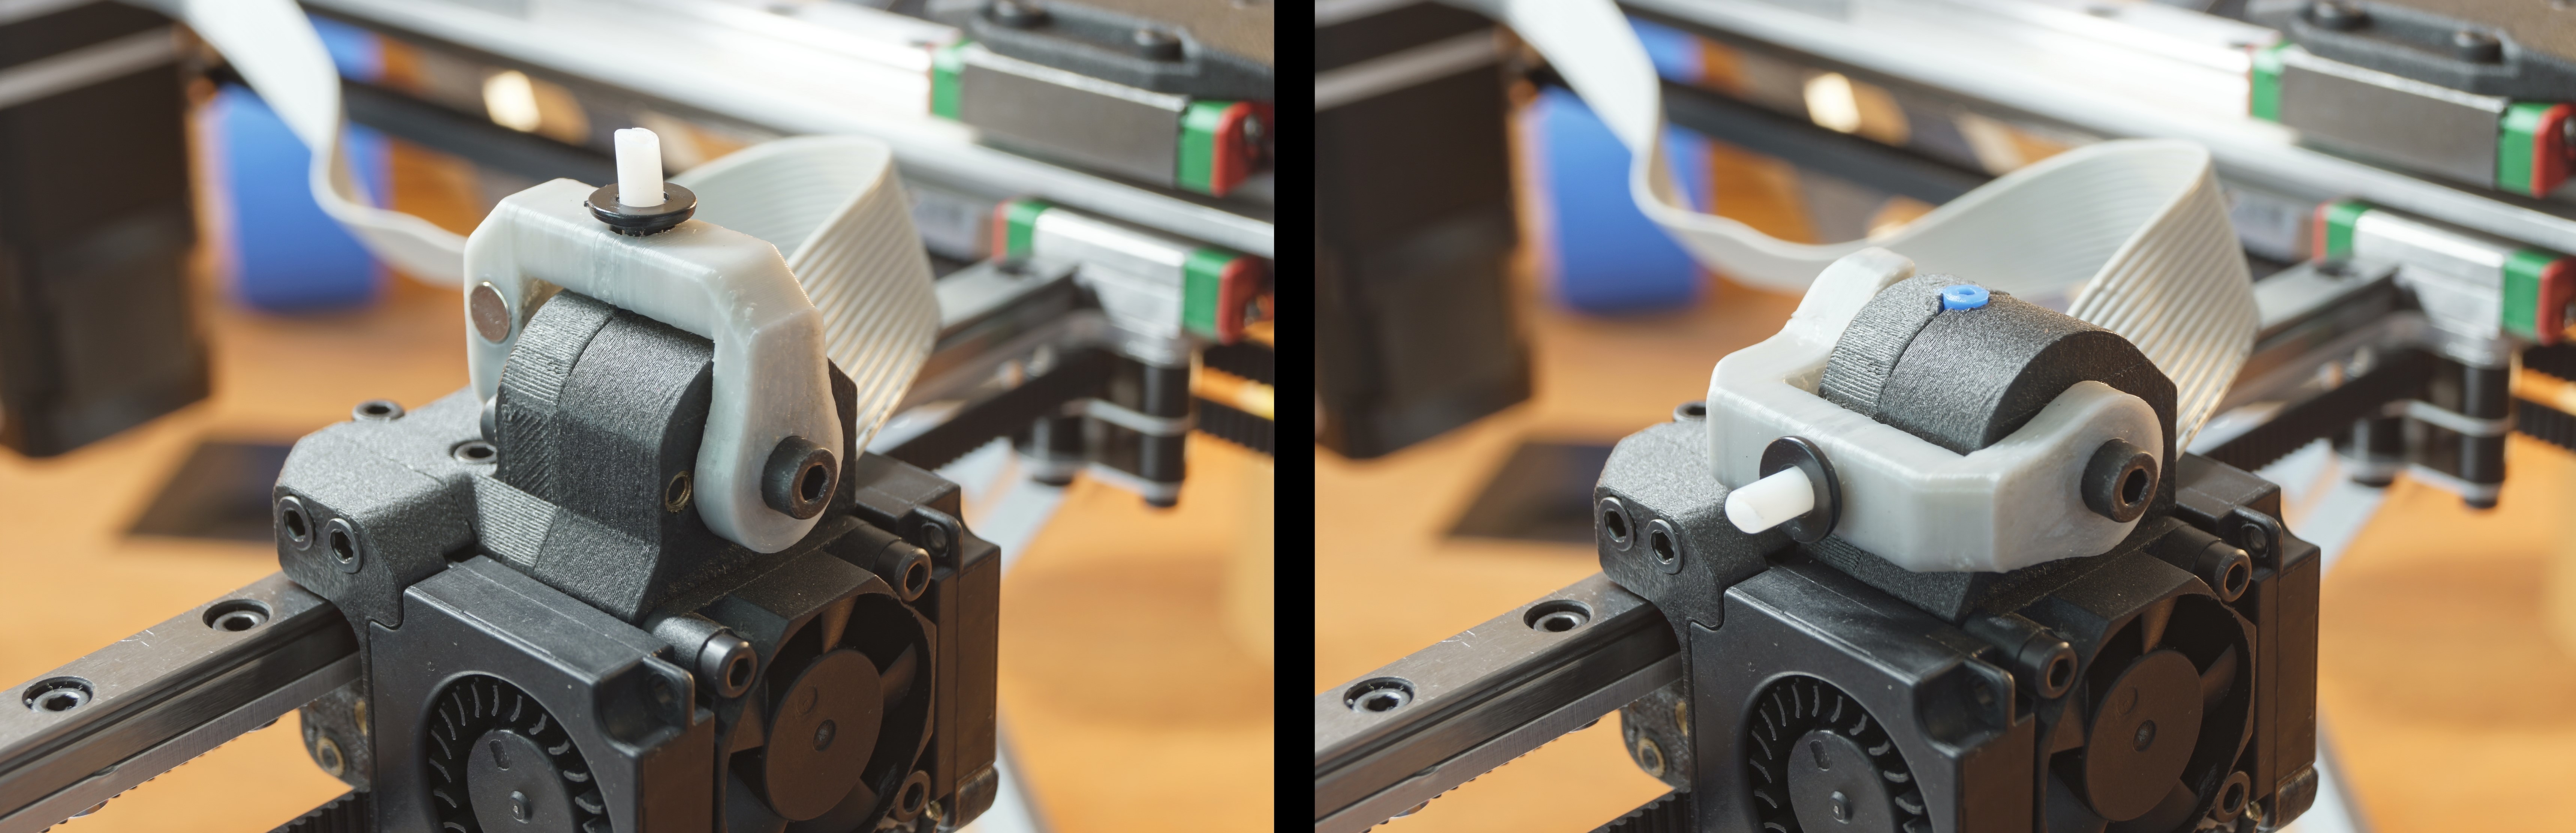
The Bowden tube is foldable mounted to the printhead for maximum portability.
![]()
-
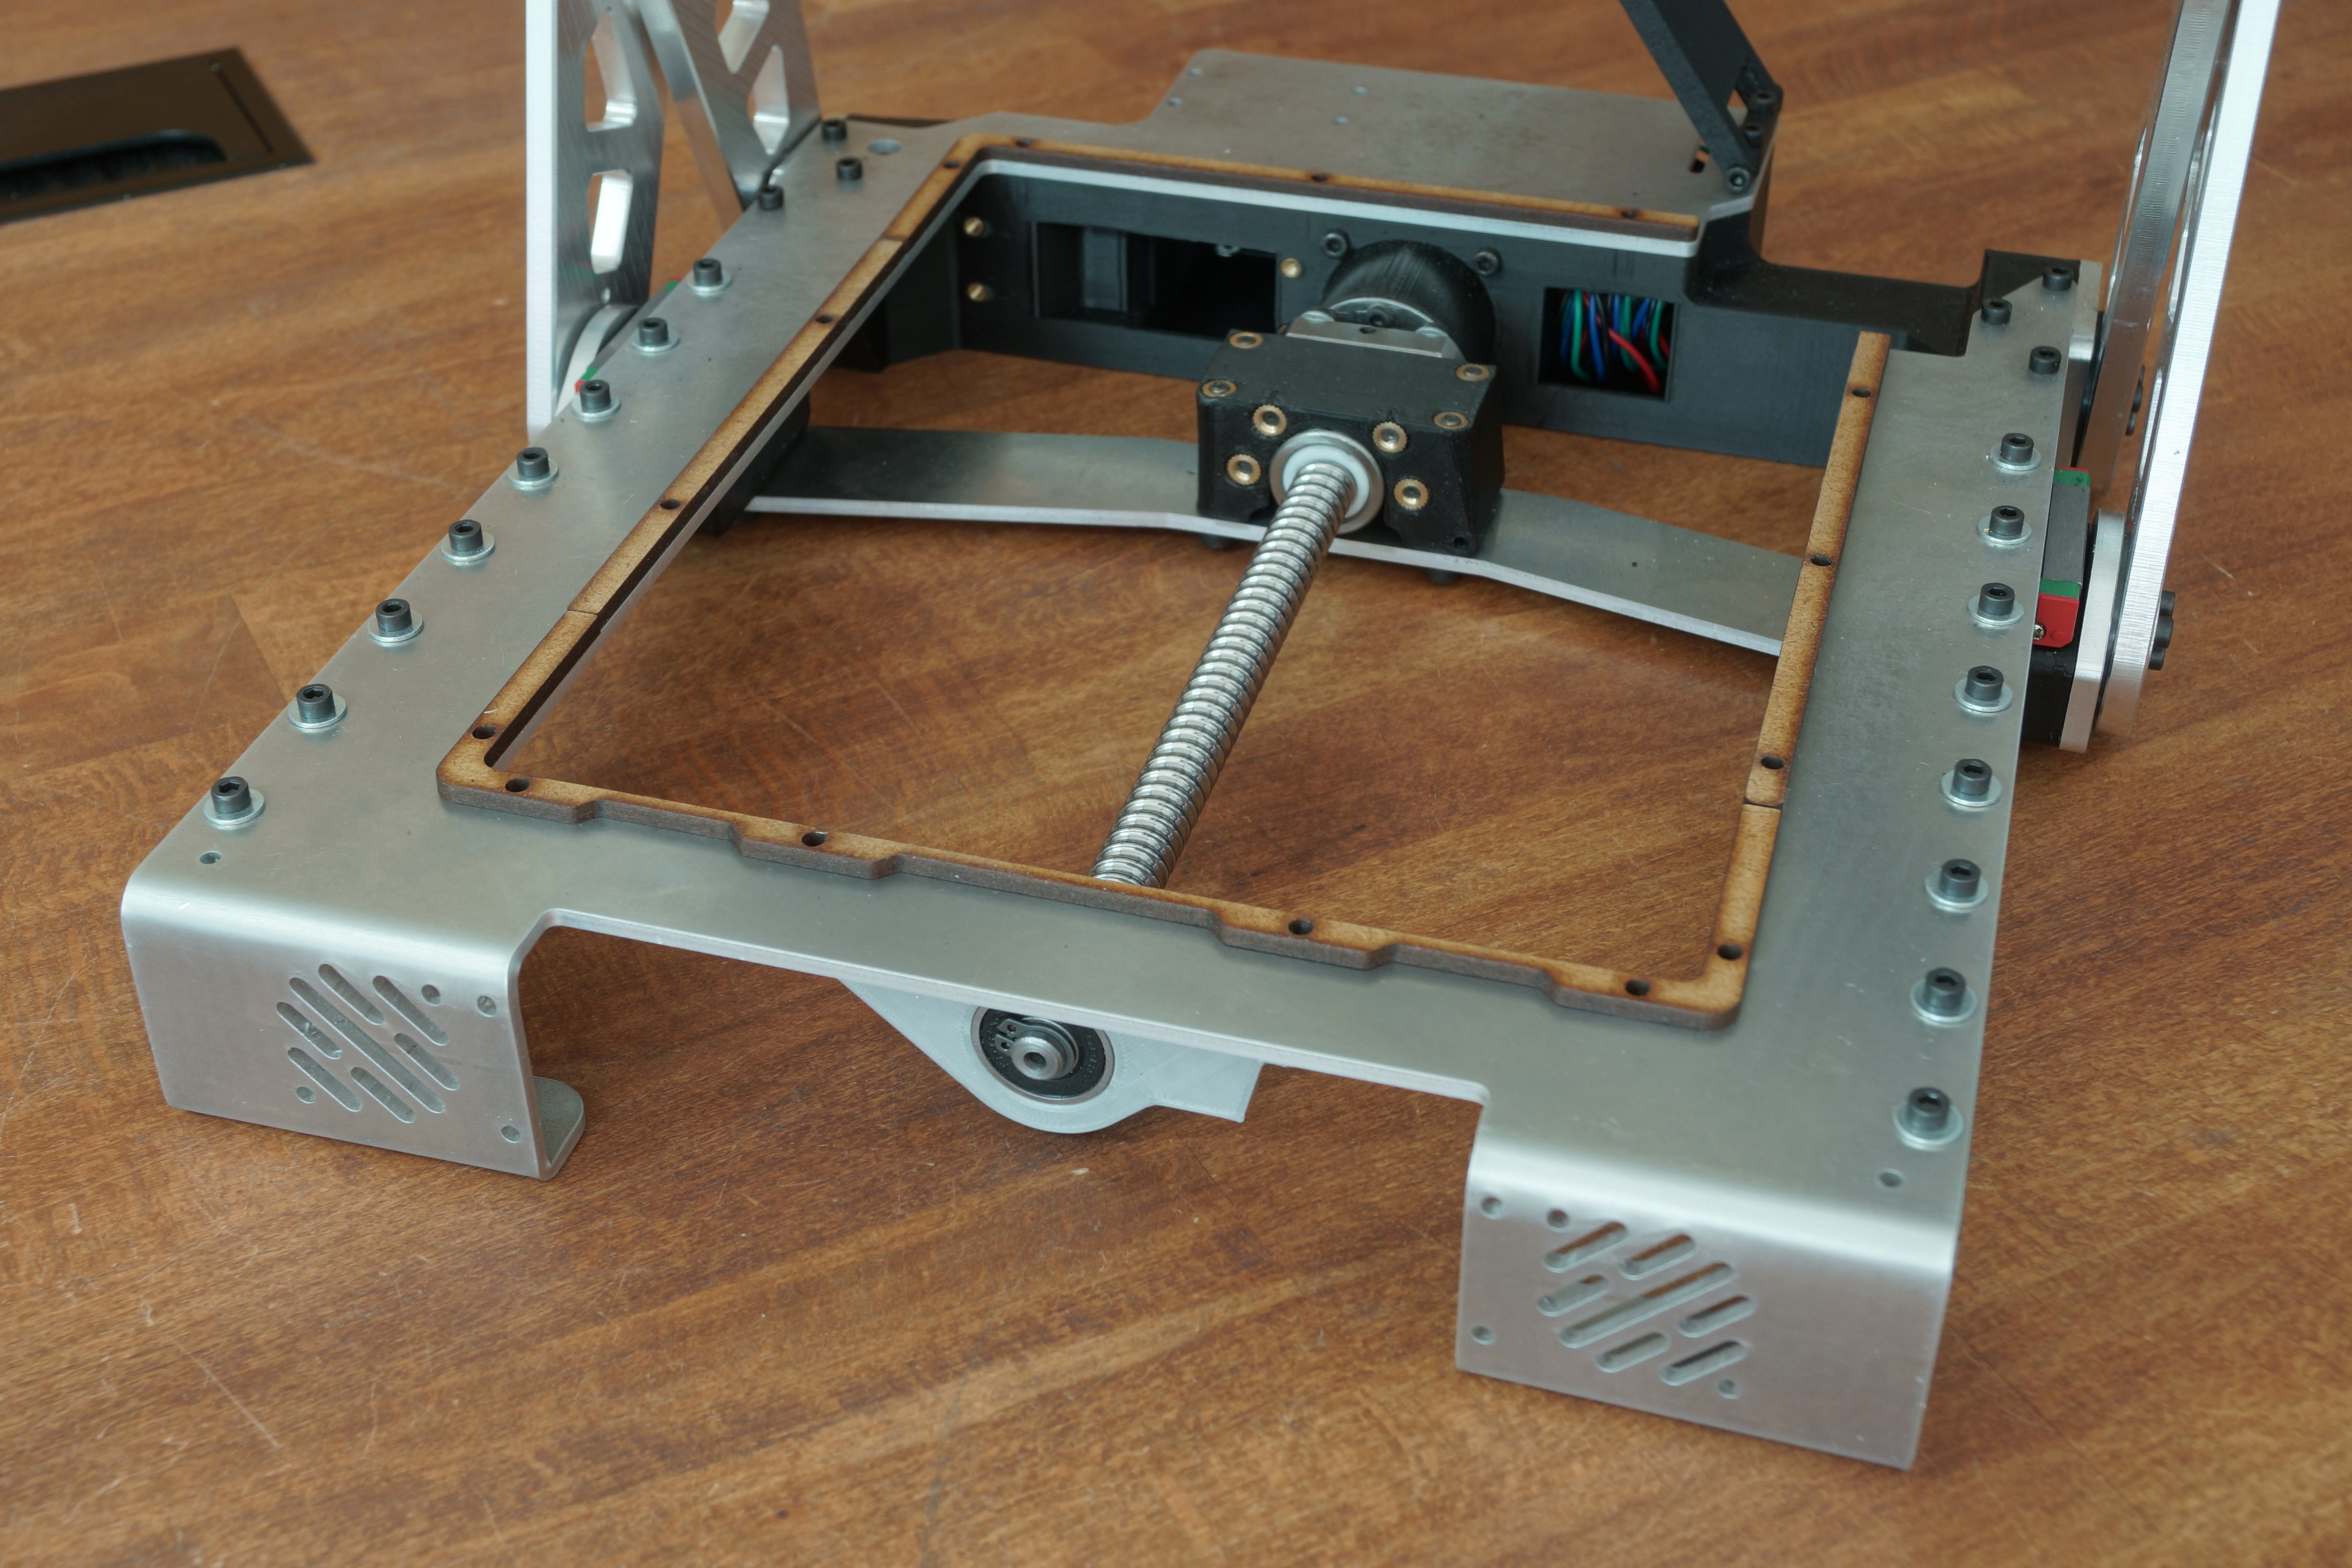
printbed
09/02/2019 at 19:12 • 0 commentsI machined the printbed.
On the bottom side are holes for high-temperature magnets which are required for the removable printbed. At the rear right corner is a cutout for the printhead, because the nozzle needs to be below the print surface so that different nozzles or print surfaces can be attached. Later I want to add a heatbed, but because of the cutout in the printbed, I can't use a standard one. I plan to build one by my self out of copper tape and capton tape.
![]()
I use 3mm MDF to insulate the printbed from the base frame.
![]()
![]()
-
belts
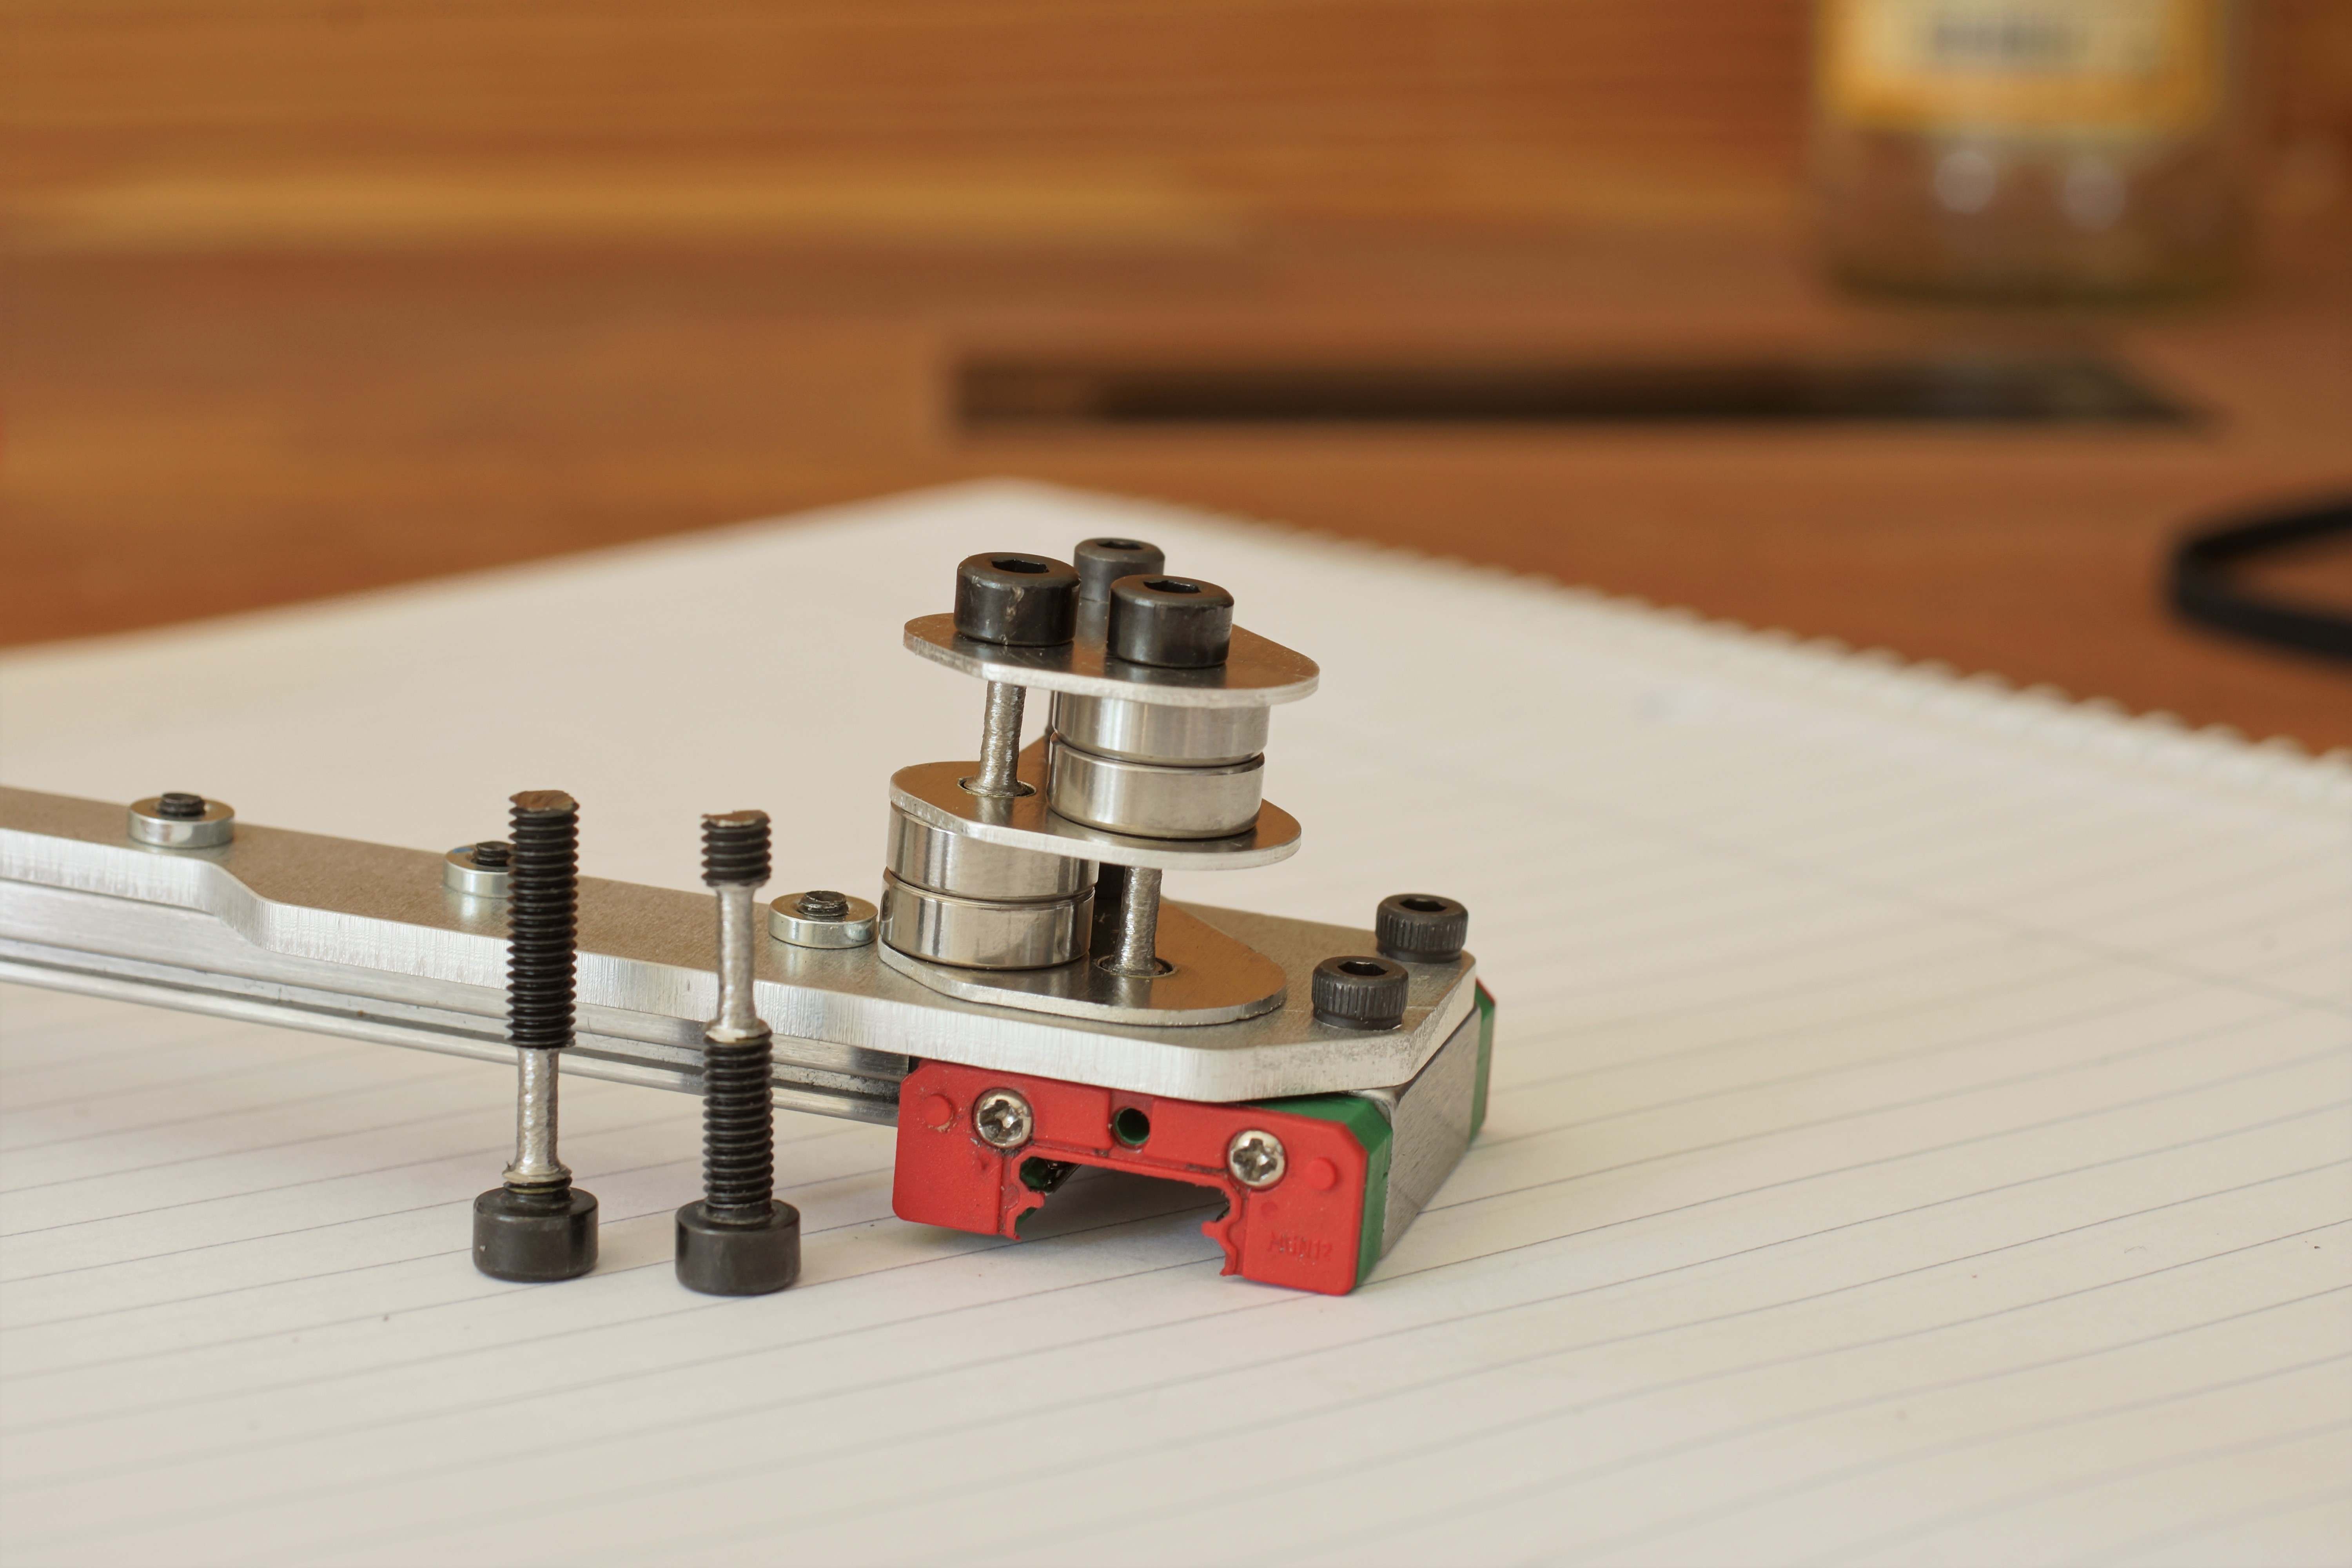
08/25/2019 at 12:58 • 0 commentsI used standoff nuts to mount the pulleys to the X-axis. For this reason, I had to modify my Y-axis carriages with an angle grinder.
![]()
Because of a small mistake in the design process, I had to modify the mounting screws so that the belts have enough space to work properly.
![]()
![]()
-
X-axis and Y-axis
08/24/2019 at 23:28 • 0 commentsThe X/Y-construction is done. I printed the parts for the printhead (prototype). The printhead has a V6 hotend, two 35mm radial fans for part cooling, and an IR sensor for auto bed levelling. The printer will use a bowden system where the extruder sits next to the left corexy-motor.
![]()

-
first movement
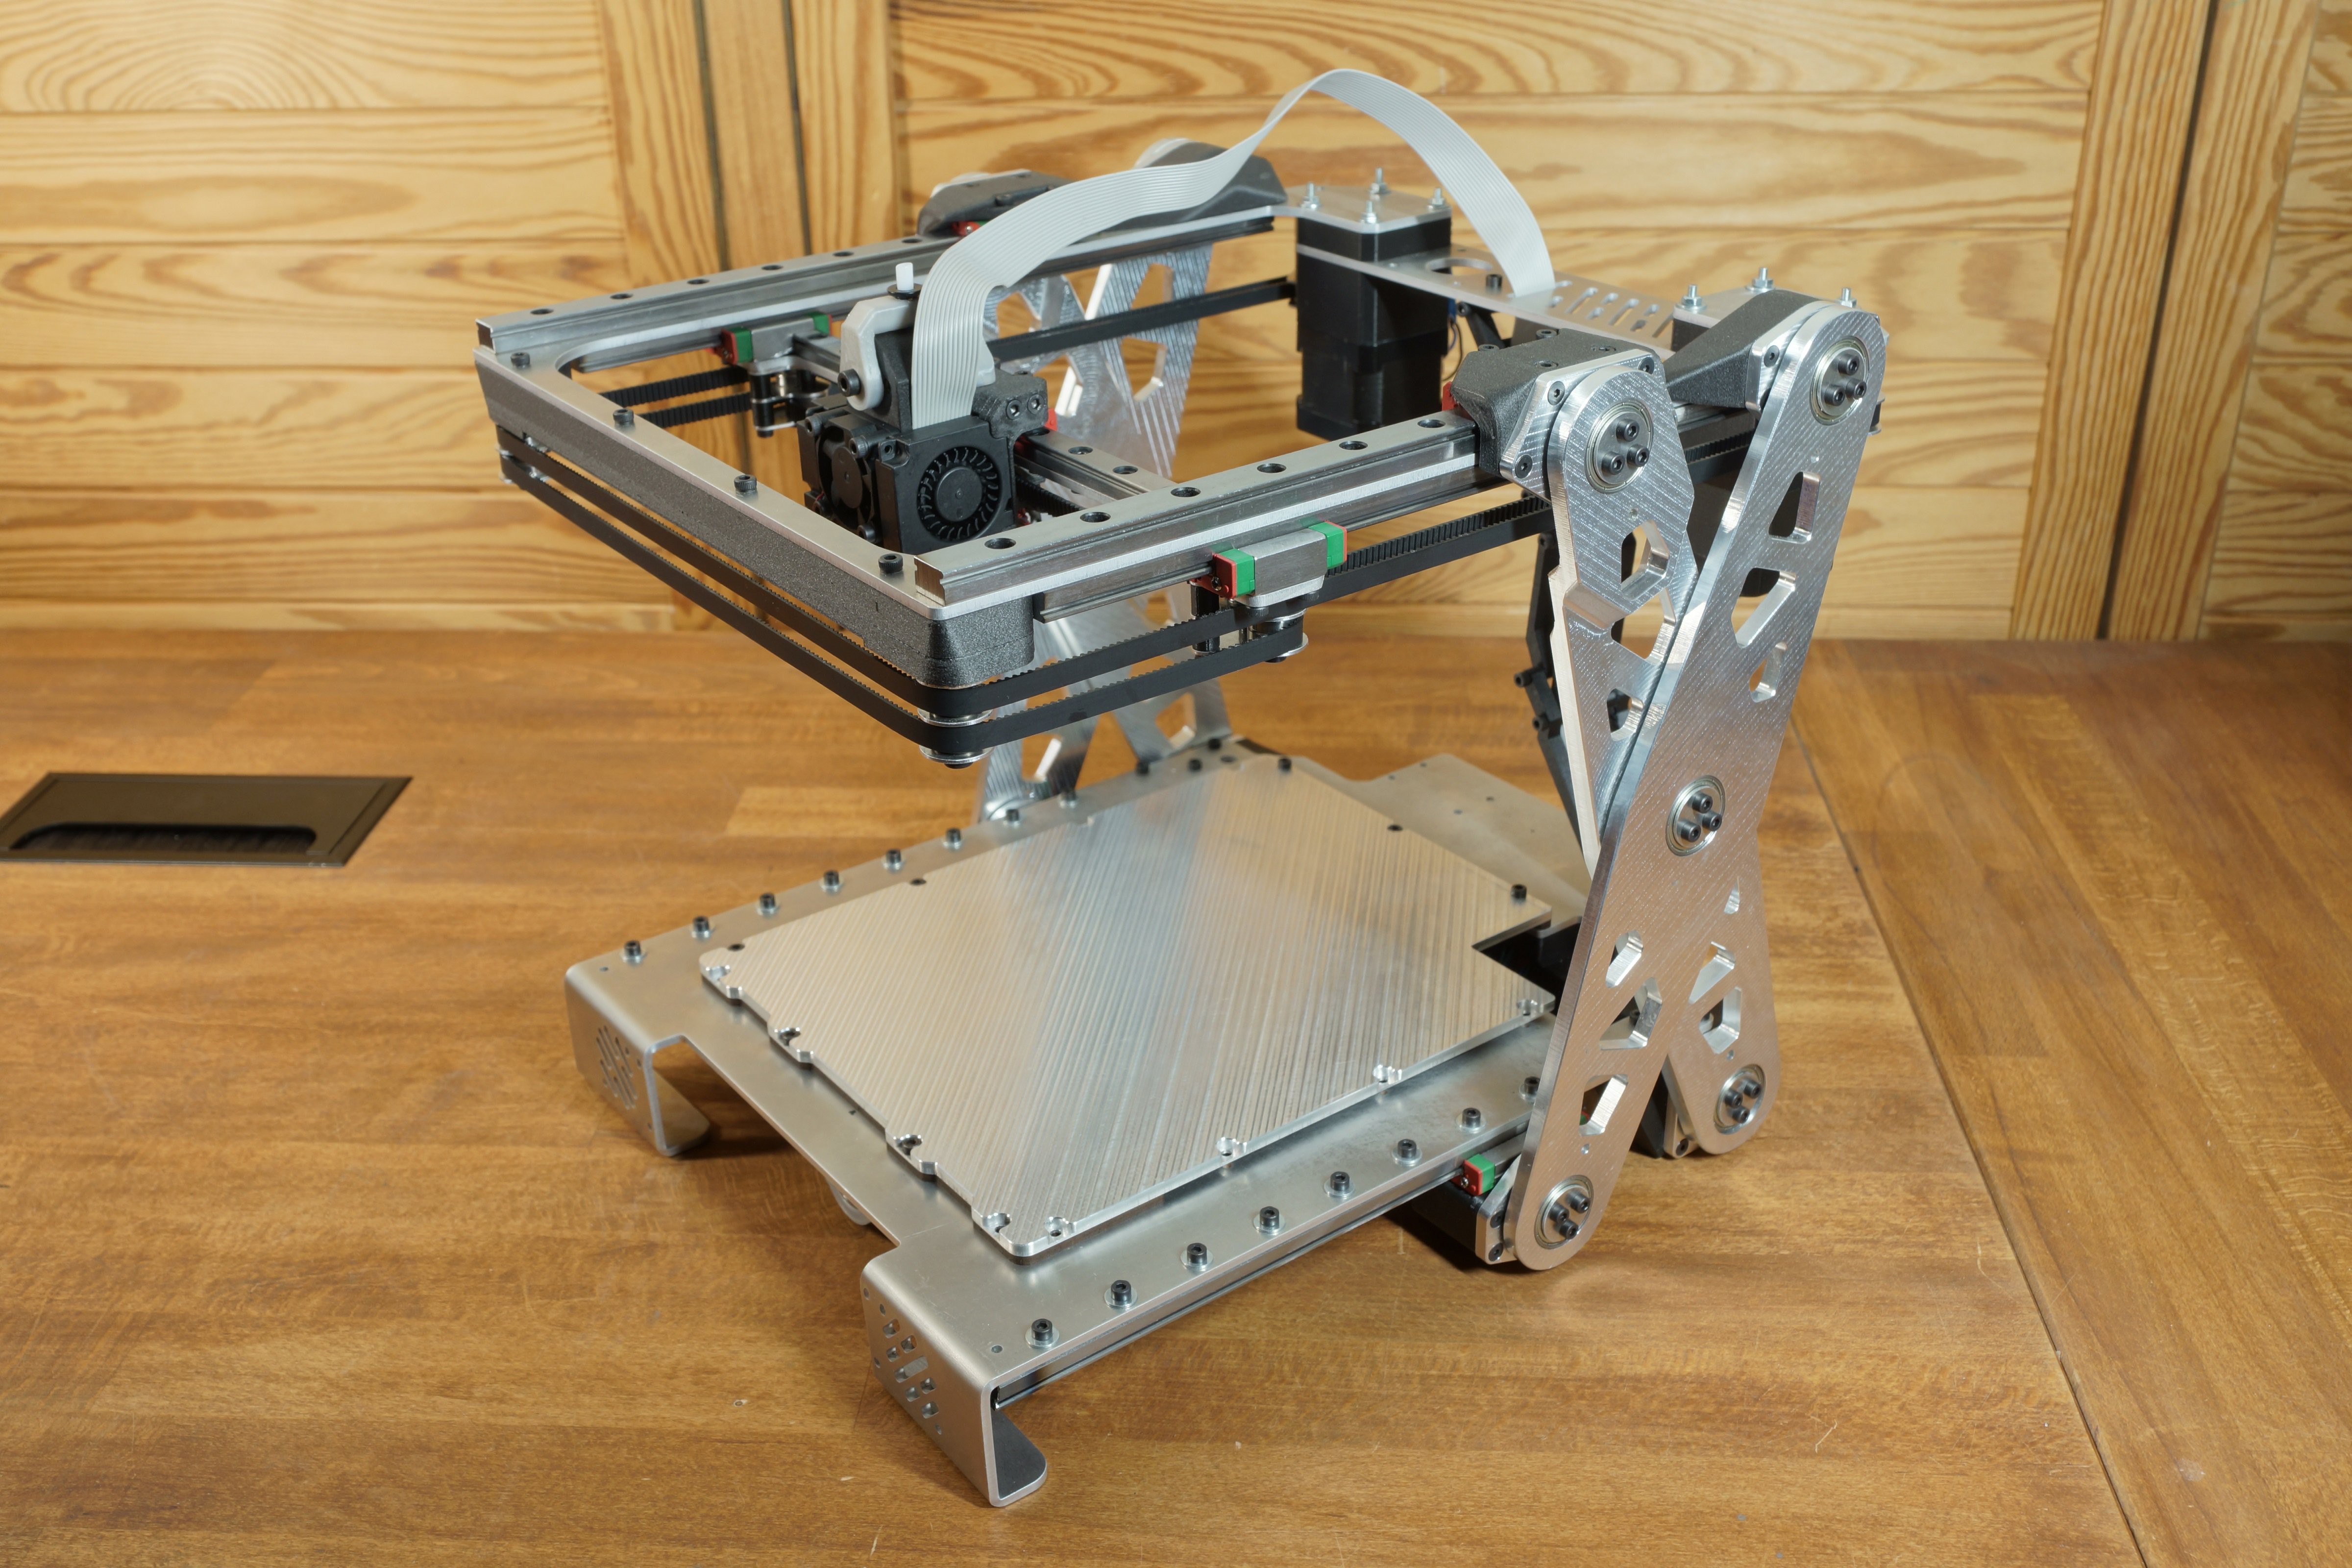
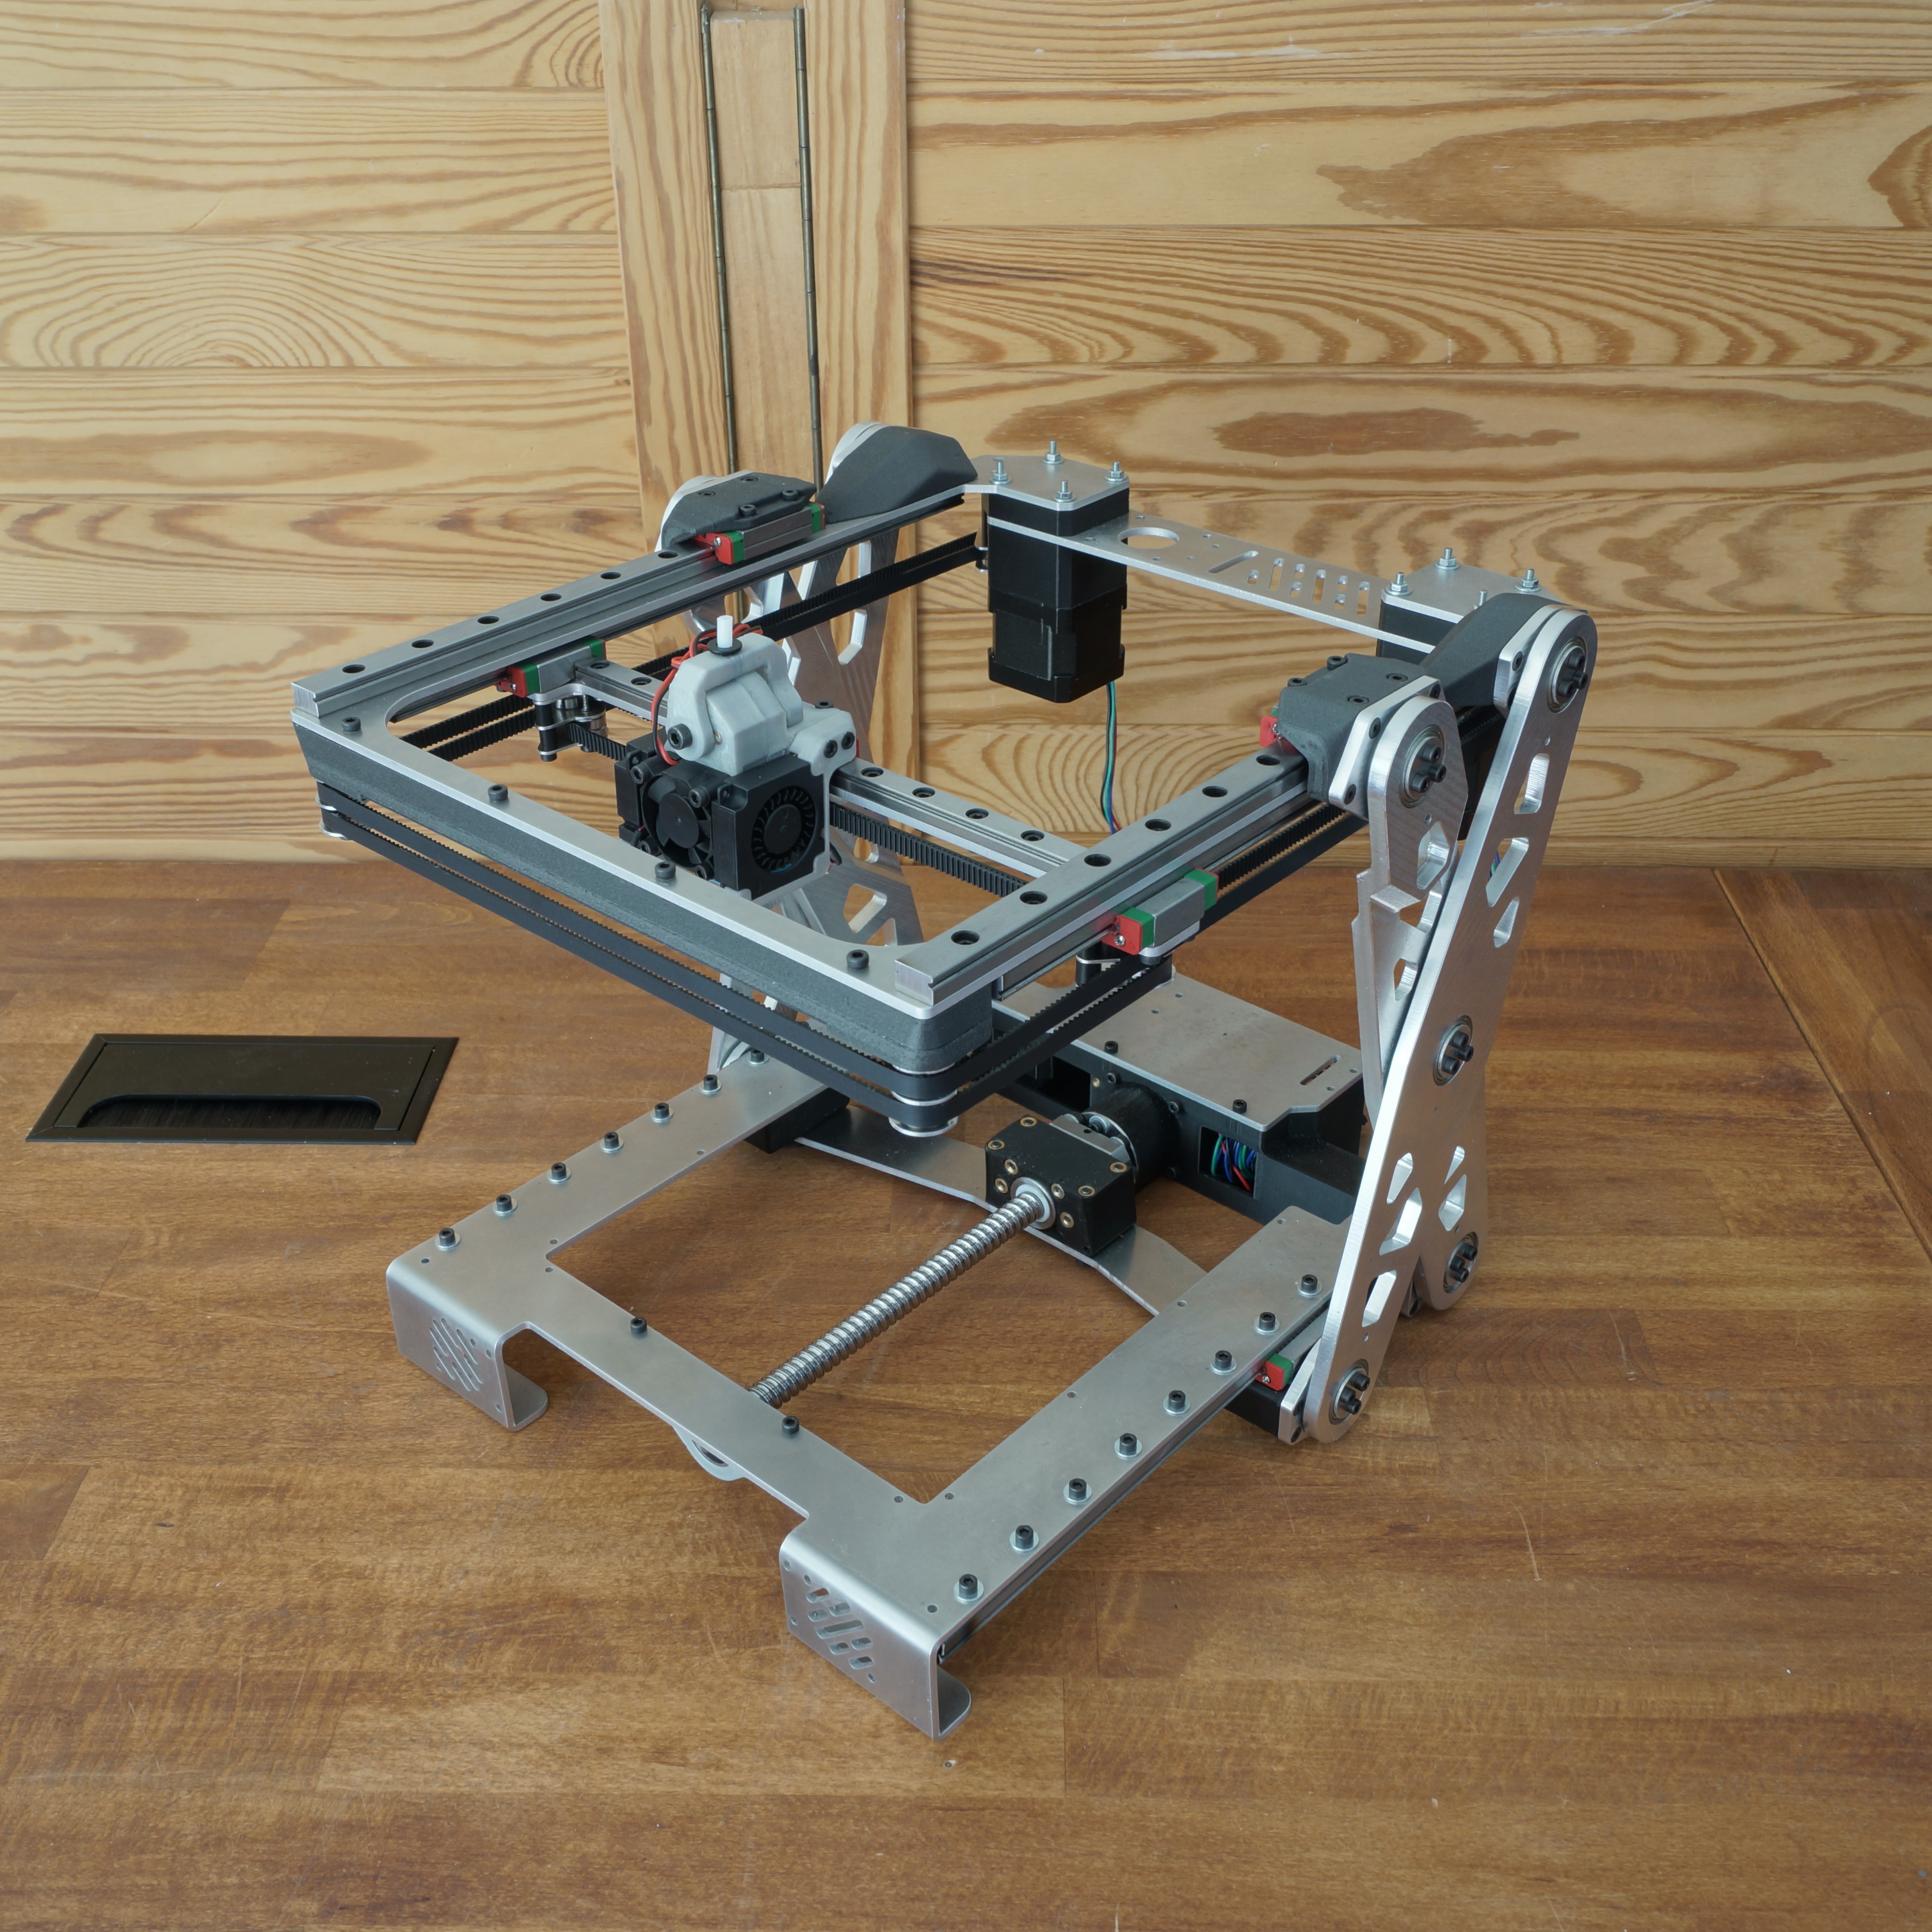
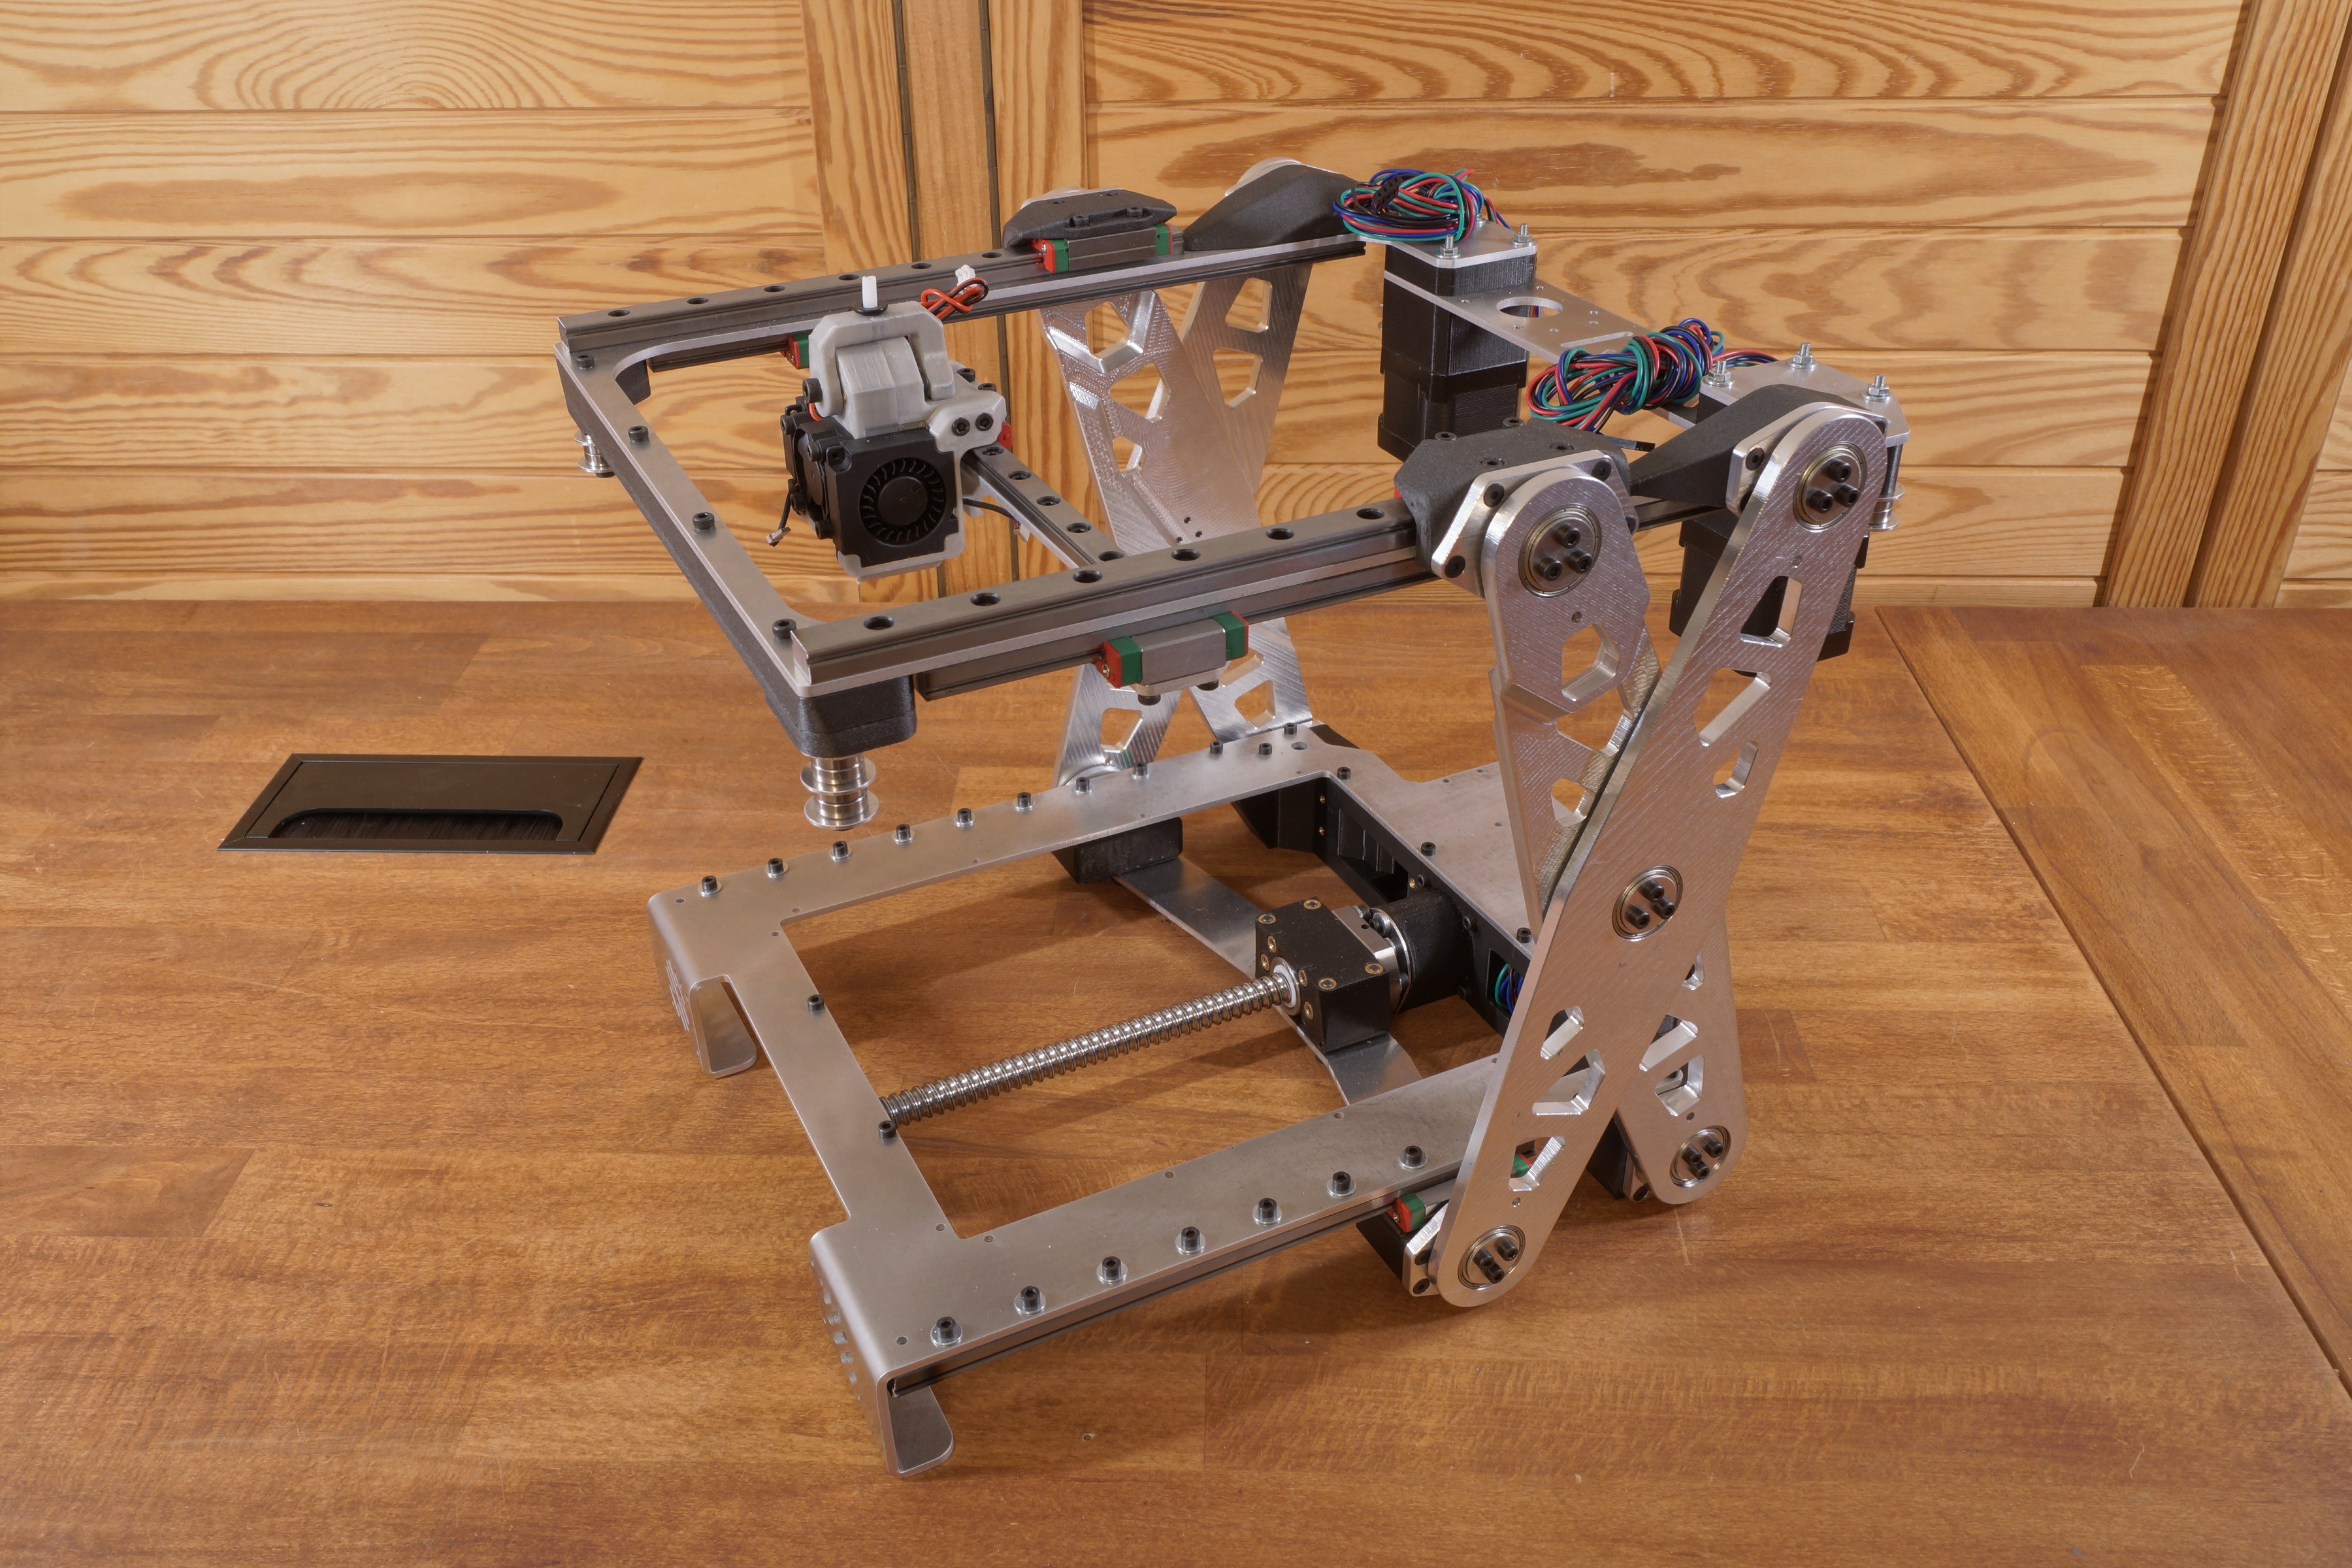
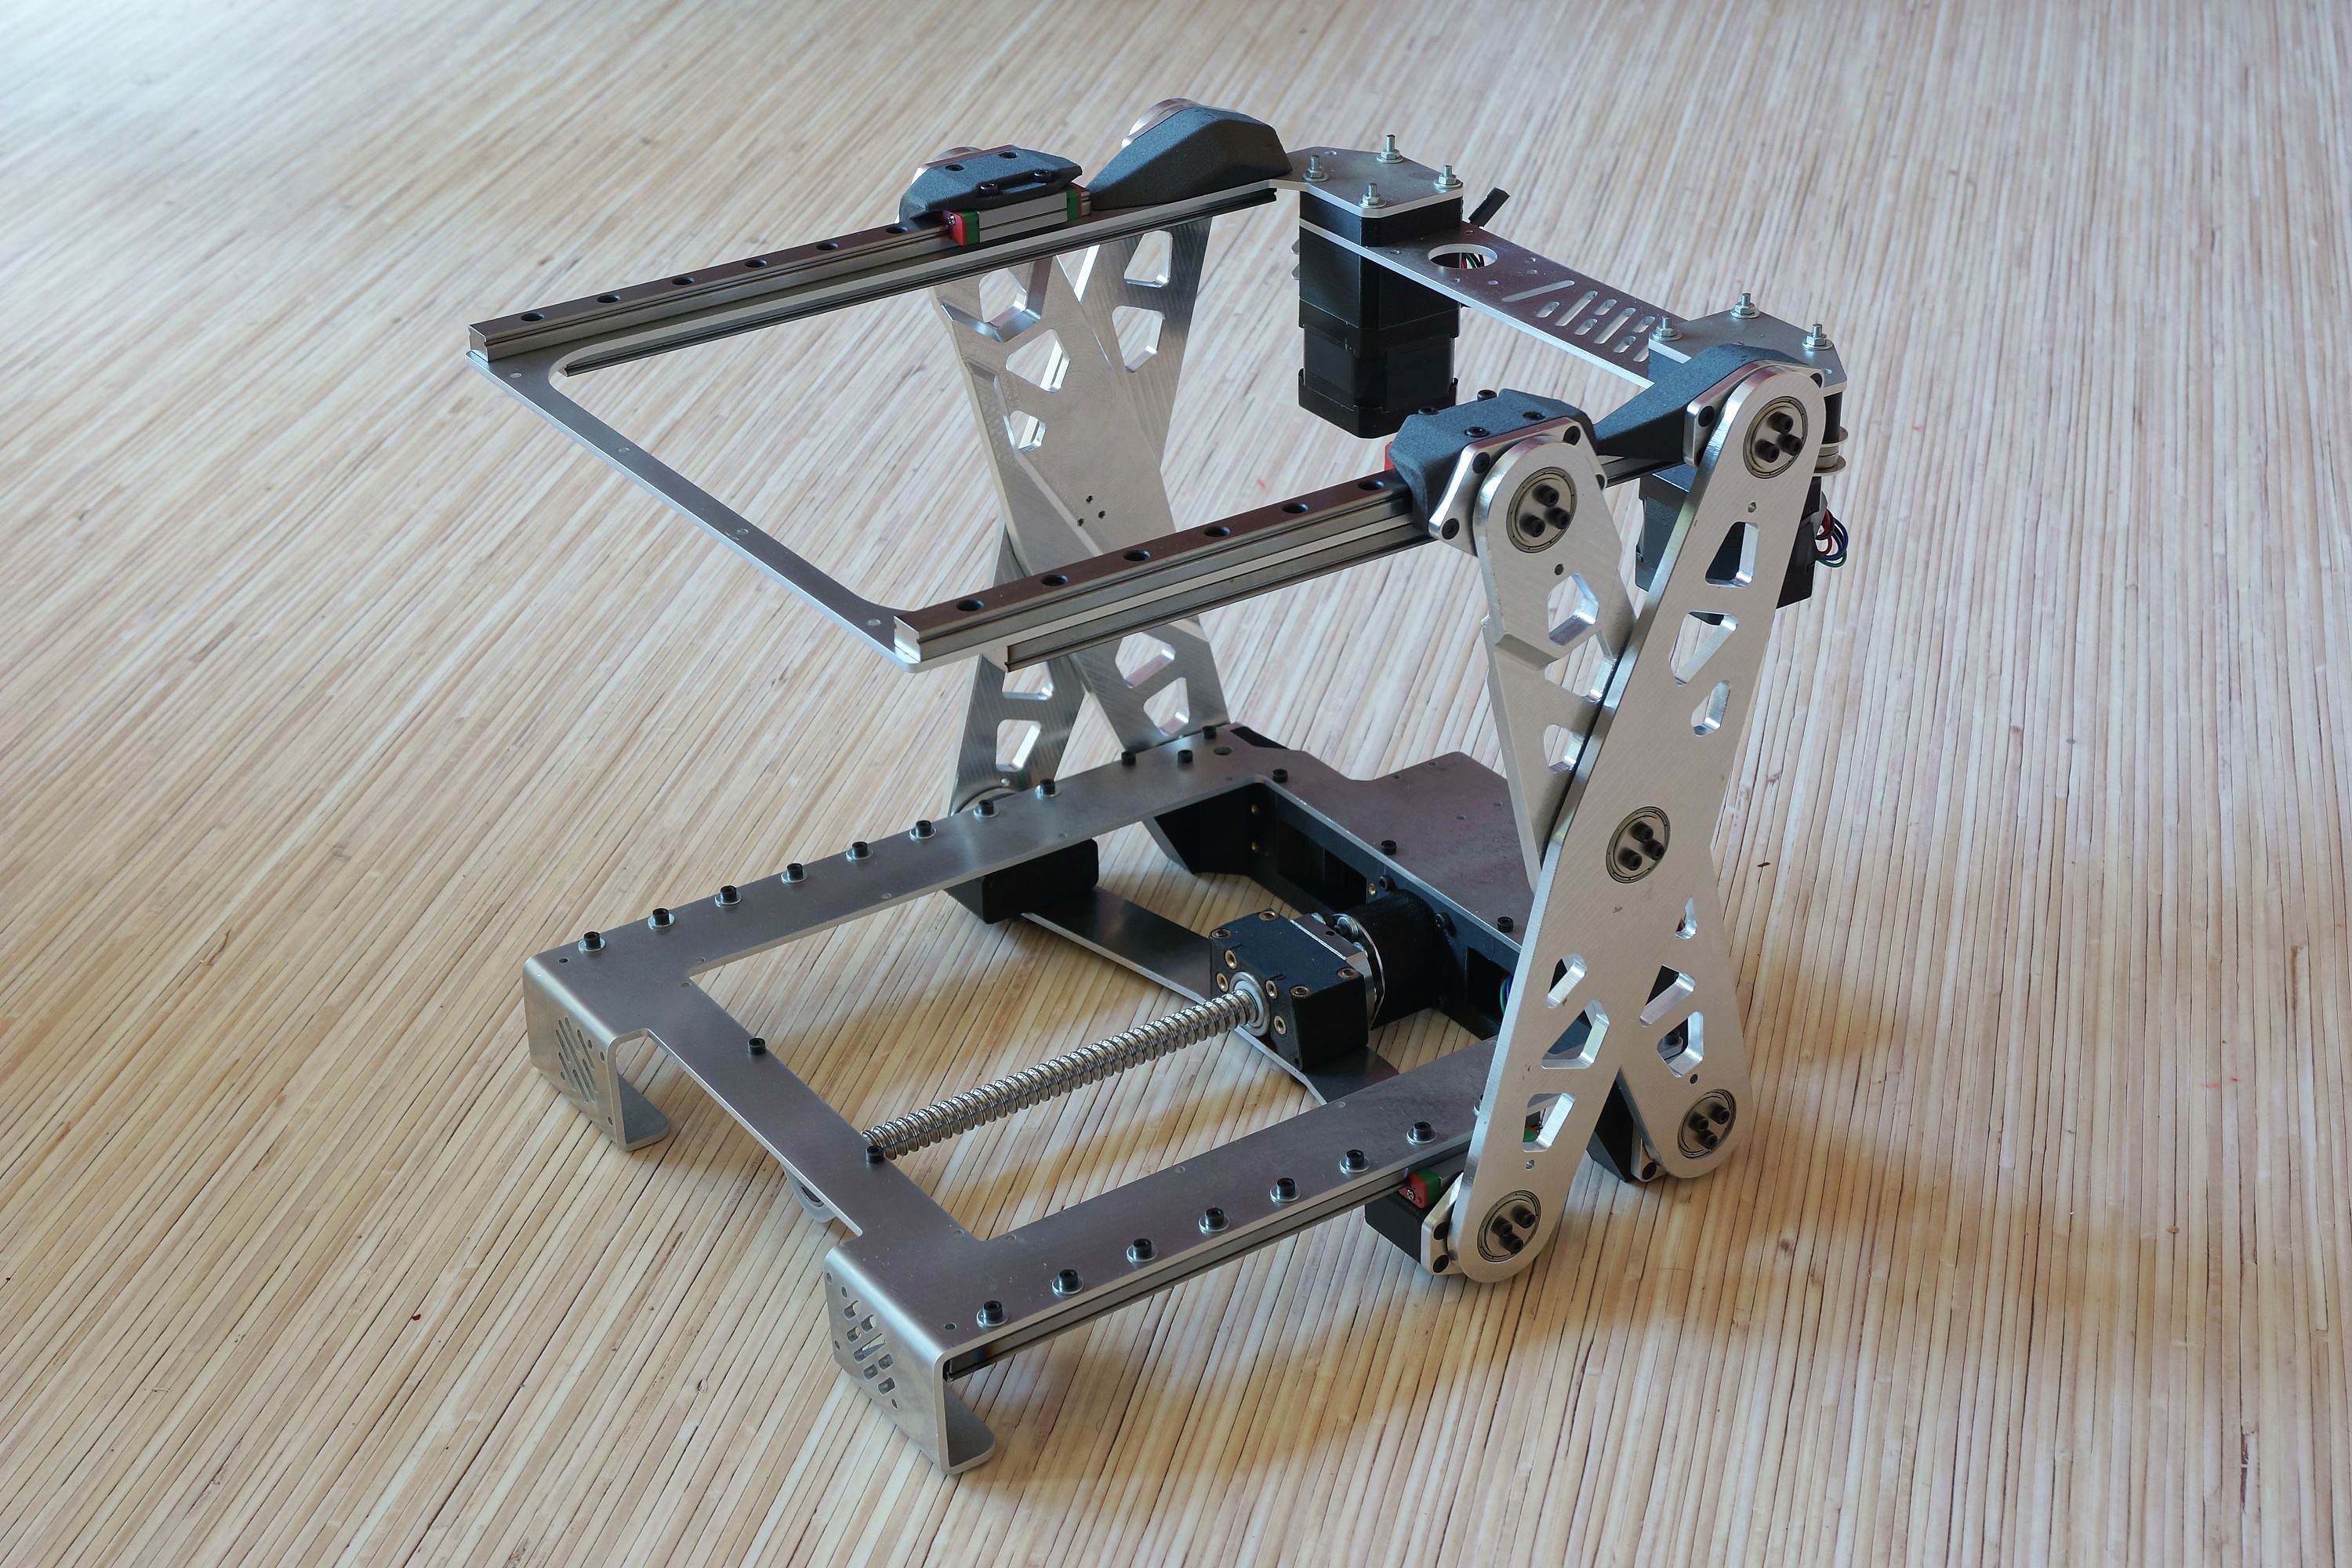
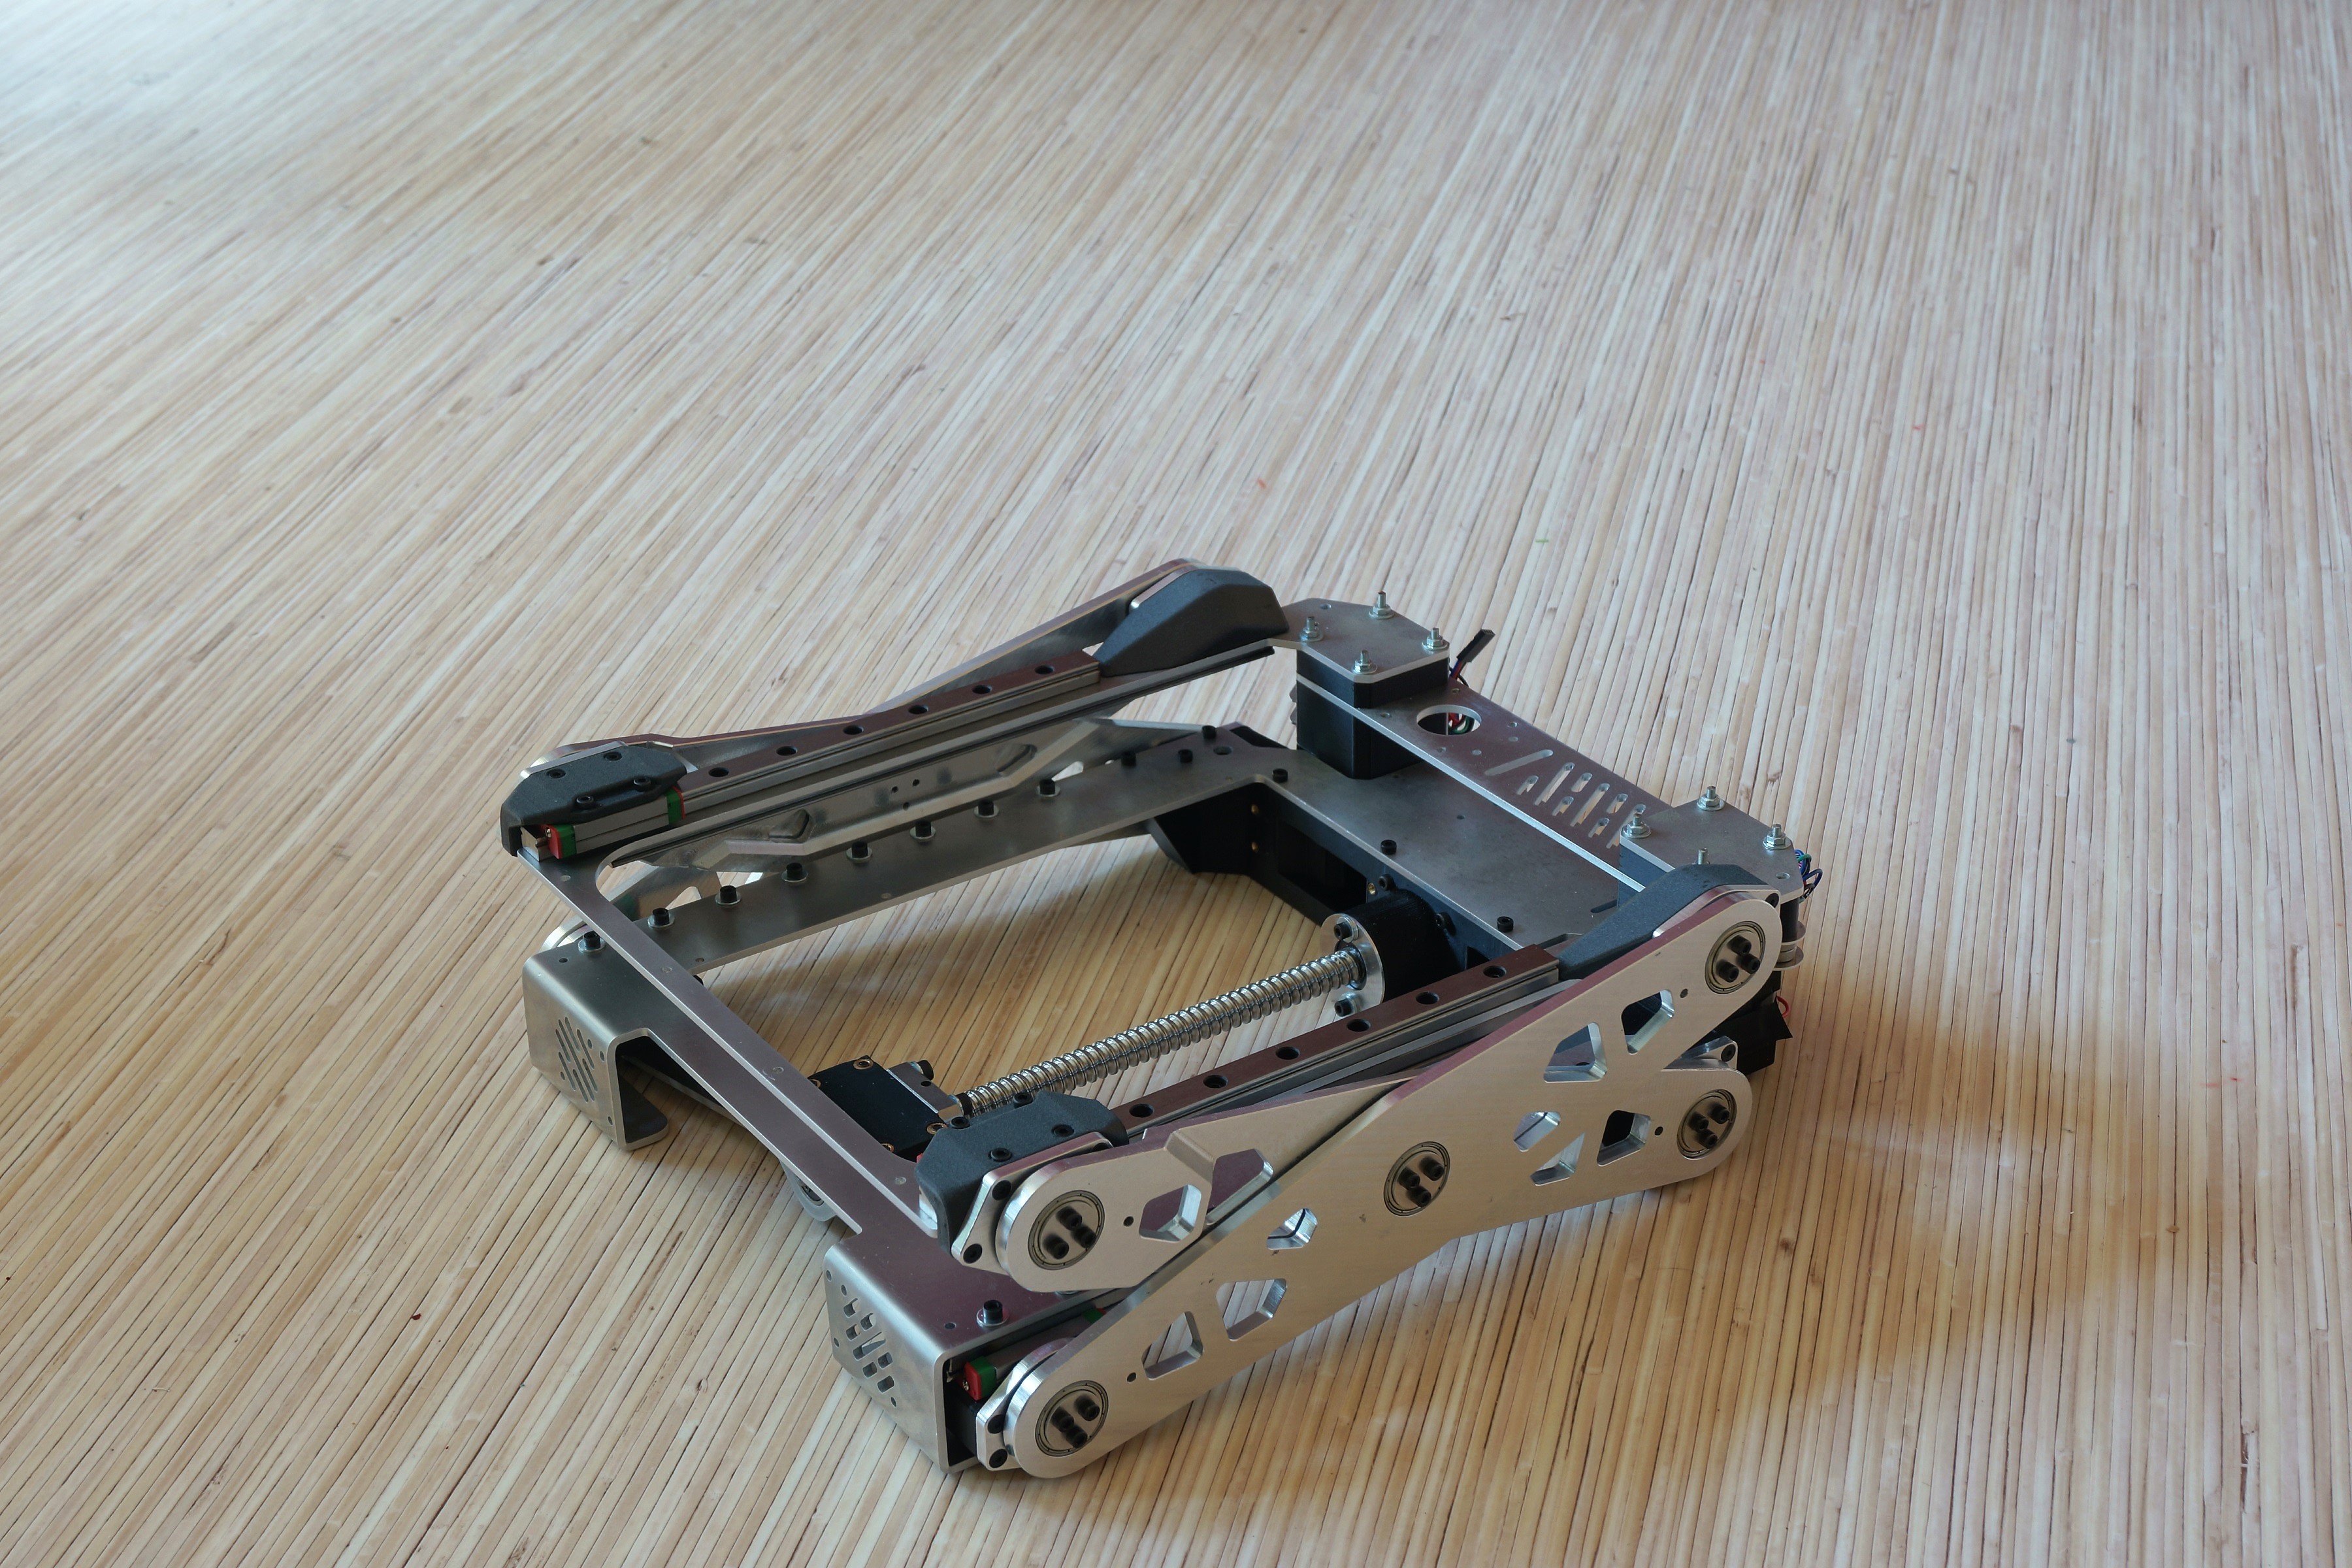
08/22/2019 at 16:54 • 0 commentsAll sidearms are mounted. The main structure is almost done.
In the video, you can see the folding process, which looks very promising.
The printer weighs already 4,3Kg, but the aluminum parts pay off because the construction is quite rigid.![]()
![]()
 Layerheight: 0.2mm, print time: 78 minutes