Grace Kull
-
Integrating each of our ArduBlock projects
07/12/2019 at 01:56 • 0 commentsWe spent some time examining the files that each team member edited, and decided which files we liked best and worked the best for the output we wanted for the Button Block. I uploaded my documents in our GitHub as the master file. This file will be our reference for now on.
After all of that was figured out, Ed wanted to add a new library to the Arduino IDE.
First, I had to create a new .jar file out of our master ardublock file using the command line (cd into the ardublock-all folder then invoke mvn clean package). Then, I created an Arduino/tools/ArduBlockTool/tool folder to my Documents, uploaded my newly generated ardublock-all.jar to the tool folder, downloaded the NewPing library from this link, and finally copied it into the libraries folder of Arduino and followed instructions on the site.
Next time I will see if I can get the NewPing library to automatically download with the rest of the Arduino libraries.
-C
-
Combining work, creating new branches
07/12/2019 at 01:53 • 0 commentsToday we wen't through the code we worked on so far and decided to use Cecilia's code.
A notable occurrence:
TranslatorBlockFactory.java contains the path for some blocks.
block-mapping.properties contains most of the paths for the rest of the blocks. It's only necessary to alter one of the files, though currently we have both altered.
We uploaded to a github project and created a couple new branches. From here on out we will be working on separate new functions and merging them once completed.
-
Changes to Button Block part.2
07/04/2019 at 02:07 • 0 commentsNot done yet but here are the changes I made today...
ardublock.xml:
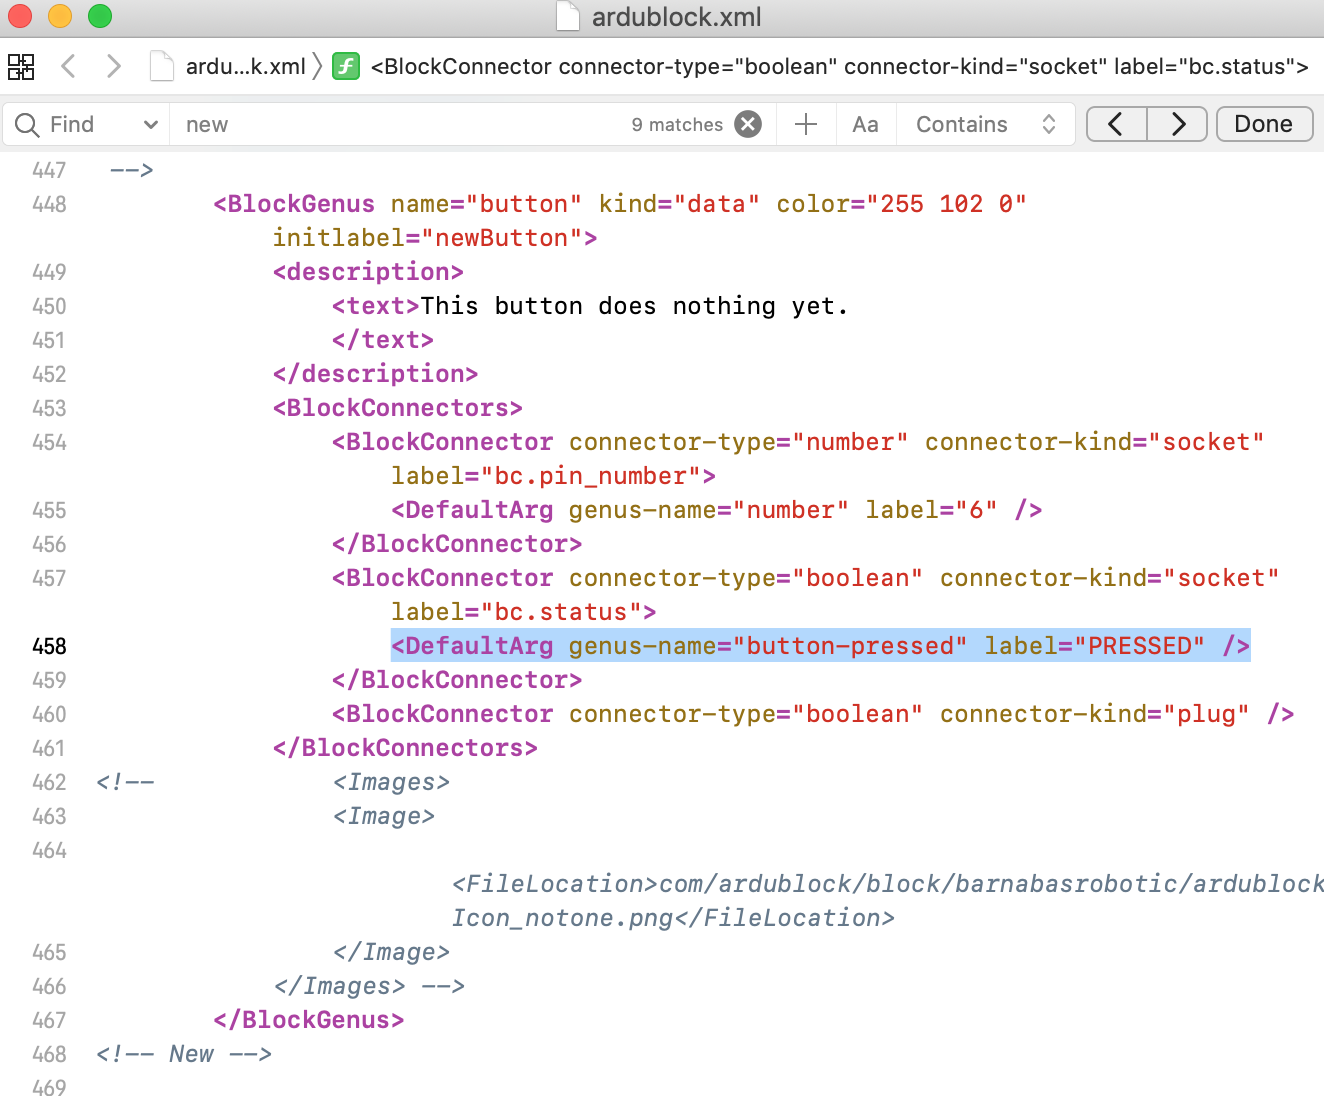
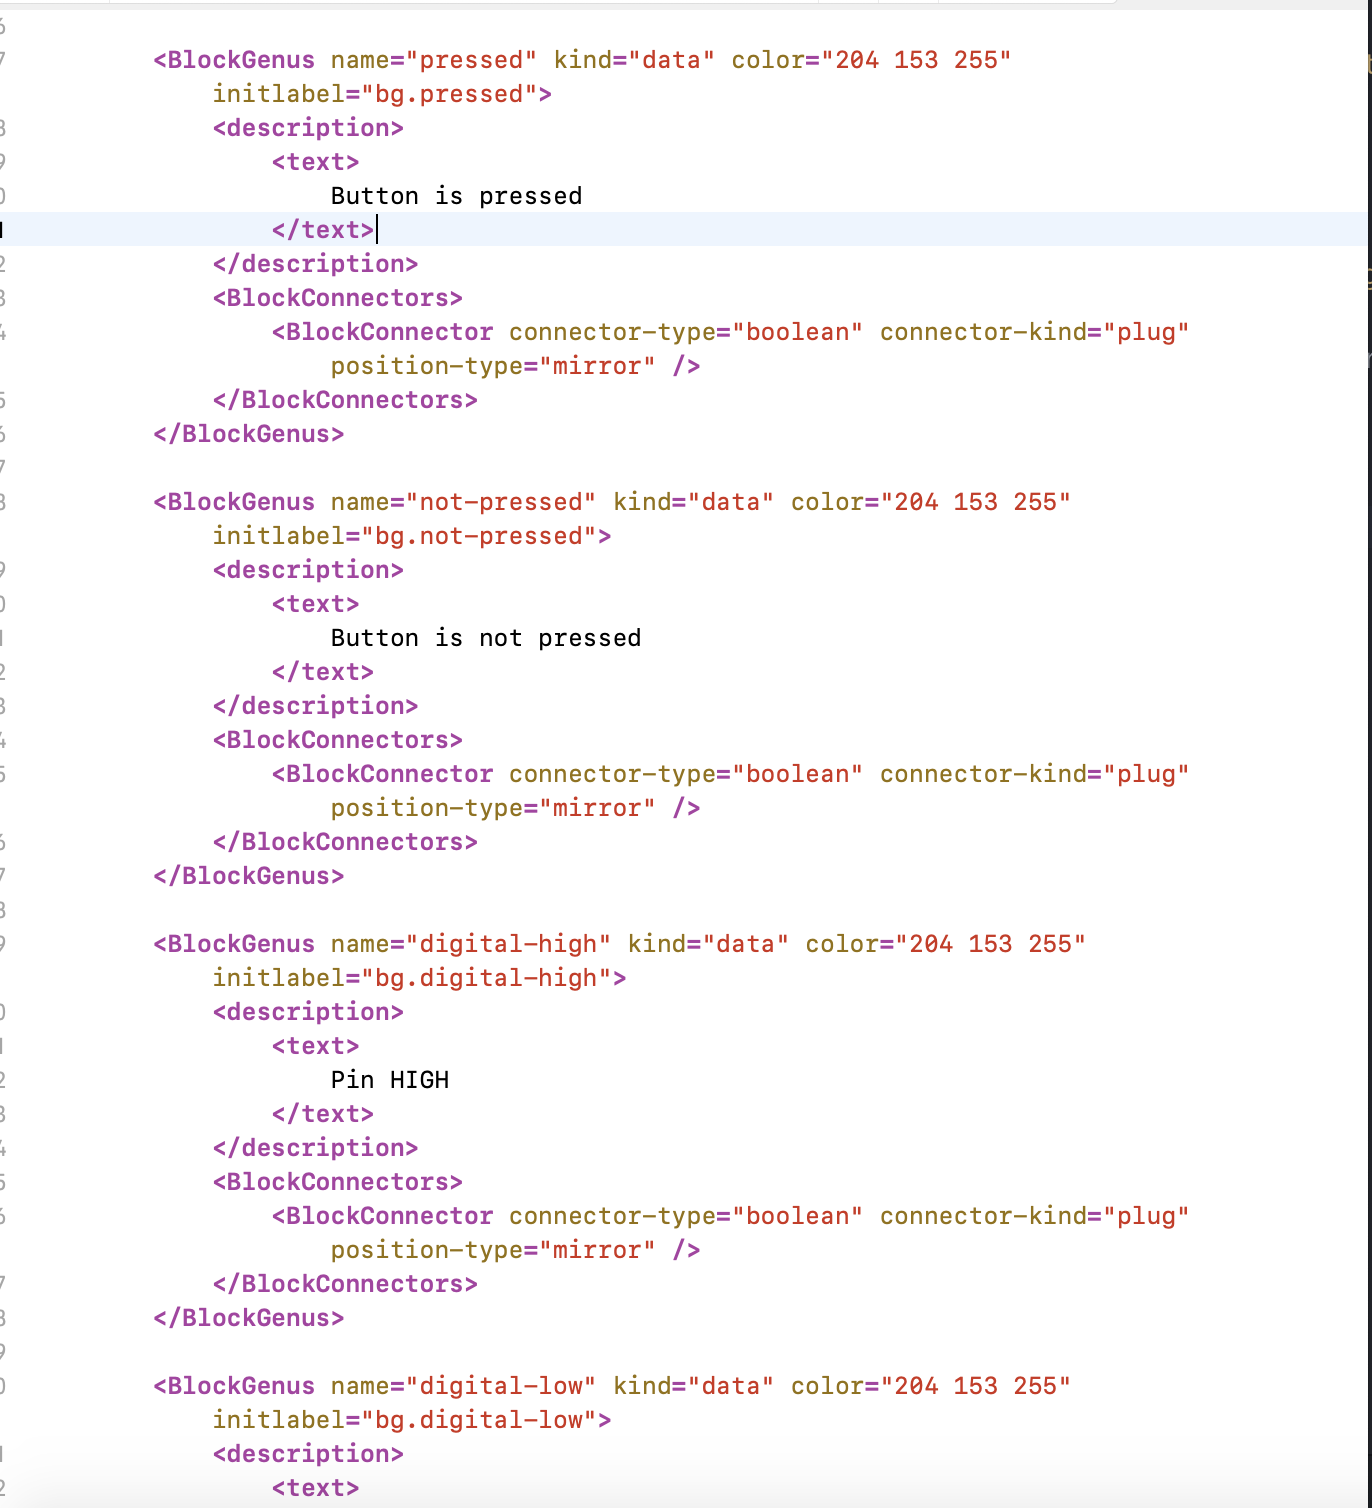
-- genus-name changed for status BlockConnector so that the dropdown will eventually show PRESSED/NOT PRESSED
![]()
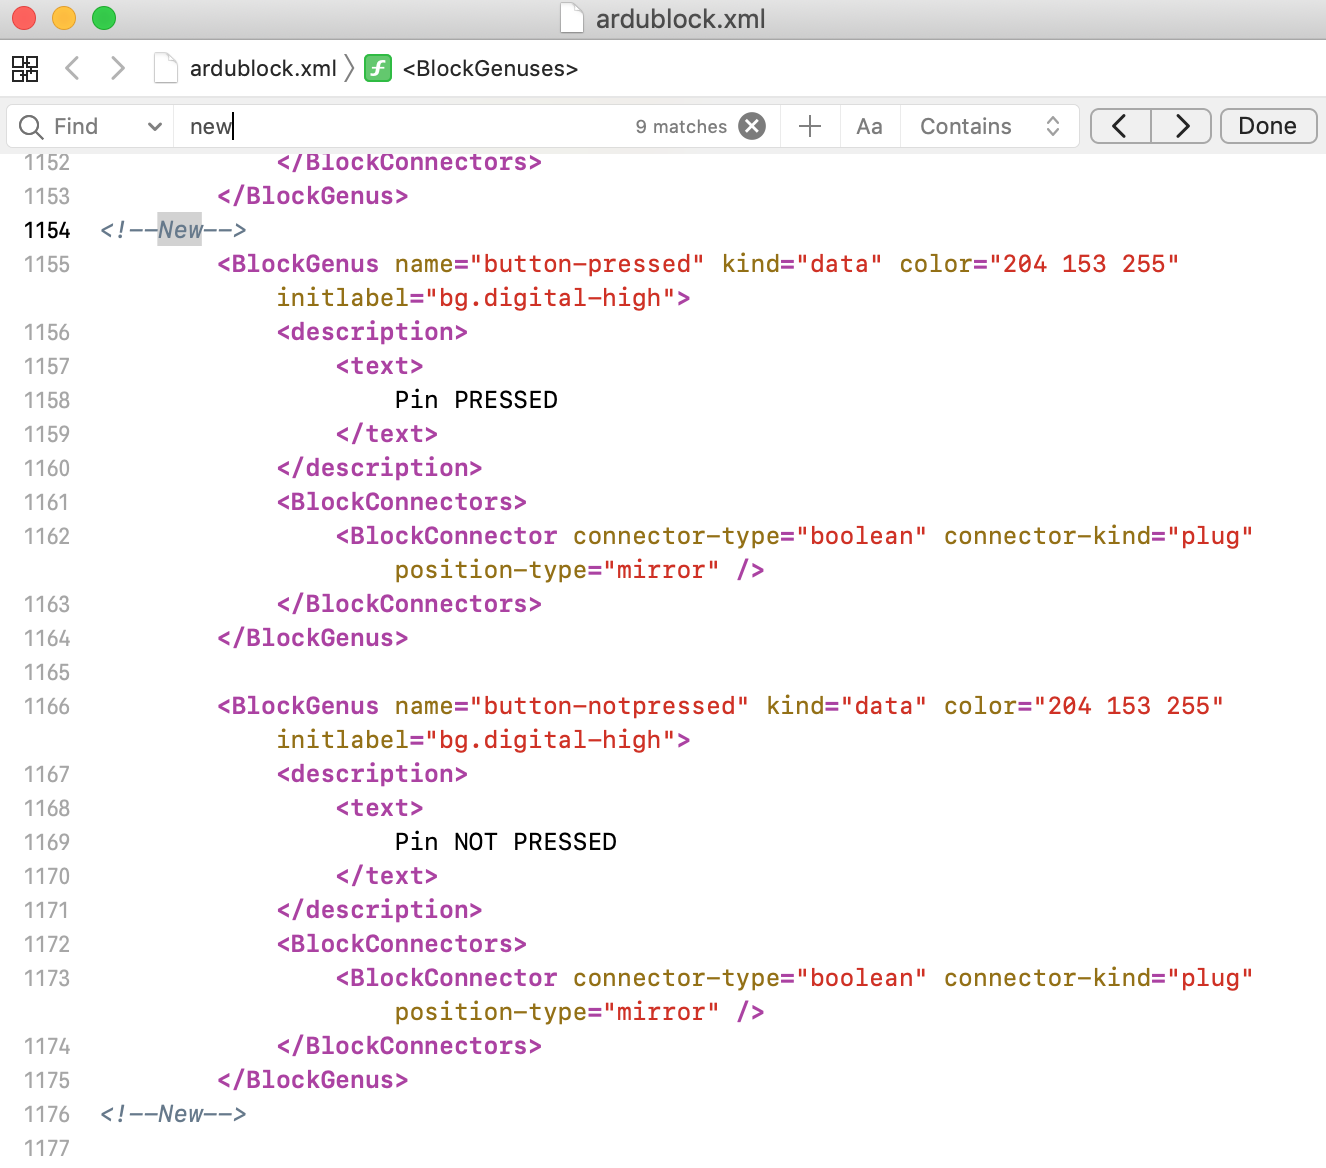
-- These two BlockGenus objects need to be changed to create two new buttons called PRESSED and NOTPRESSED including changes to block-mapping.properties/ardublock.properties/new java files.
![]()
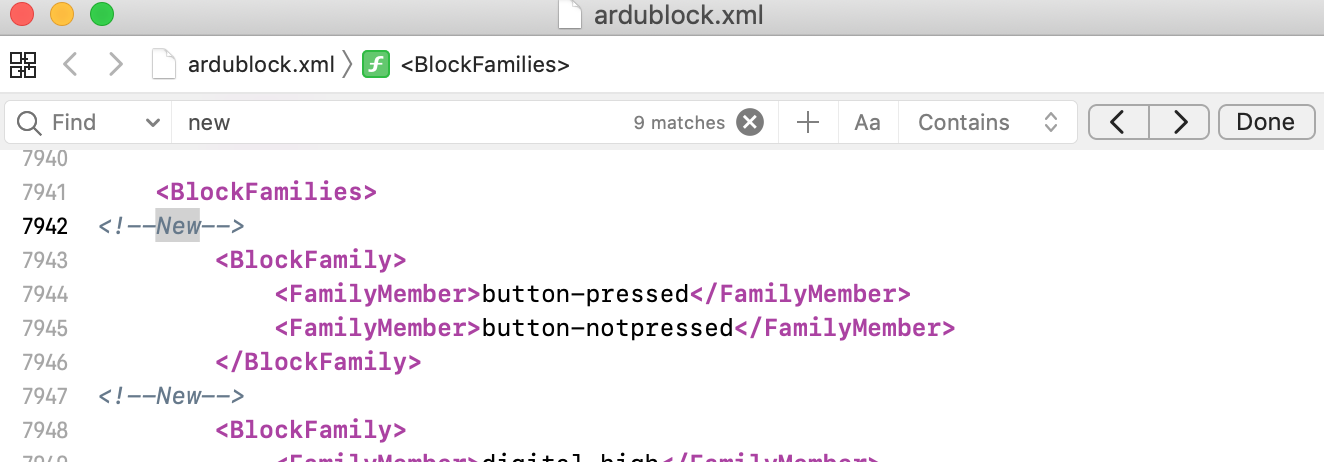
-- BlockFamilies create menus for dropdown options
![]()
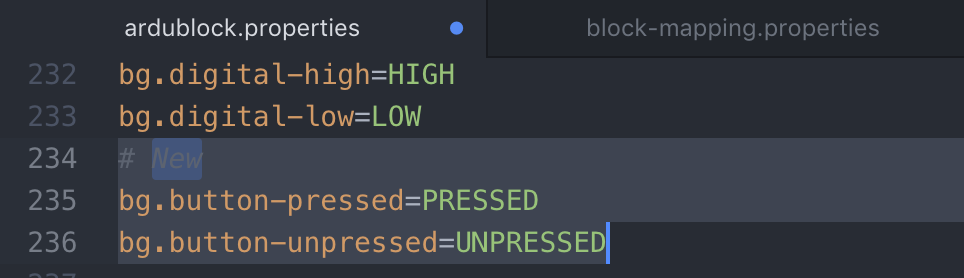
-- I added two new properties for the BlockGenus
![]()
At the end of the day I ended up with this error:
![]()
![]()
I might have deleted the BlockGenus.class file from openfiles, so I need to figure that out...😬
-
Creating a Block
07/04/2019 at 02:06 • 0 commentsThere are two components to creating the block. There is the Ardublock parameters that visually create the button and its capabilities and there is the block's java file that controls what the button does.
Ardublock works by referencing a number of different files to complete tasks. Important files include:
- ardublock.xml
- contains properties that control socket/plug shape, etc.
- ardublock.properties
- contains the text on the block and description (shows up when hovering over a block) in the ardublock program
- block-mapping.properties
- connects the java file for the block with the visual representation.
ardublock.xml instructions here:
java file "":
- ardublock.xml
-
Button block progress (7/3/19)
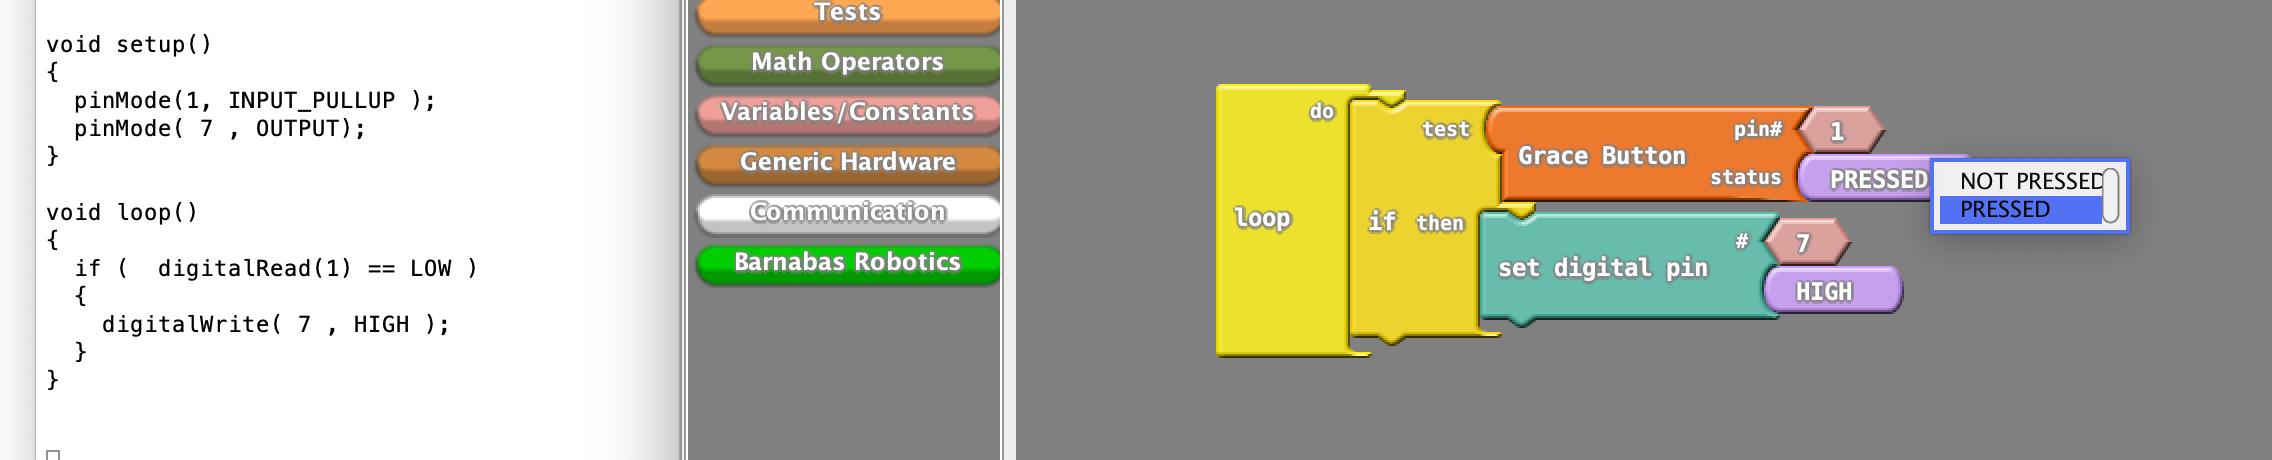
07/04/2019 at 02:05 • 0 commentsToday we managed to complete more tasks on the button block. We added two sockets for the pin number and the button status. At first our block wouldn't fit in the if block test area, but we then figured out that we needed to add a plug connector to the button block so that we could "plug" it into the if block (like a real socket and plug).
I initially changed the HIGH/LOW labels to NOT PRESSED/PRESSED, but then we realized that it would be better to create entirely new NOT PRESSED/PRESSED blocks, as there are other scenarios in which HIGH/LOW would be better to use. We weren't sure how to connect two different blocks in a drop down menu, but eventually figured out that we could put the two in the same family so that the connector block would recognize both blocks as argument options.
Screenshots of today's work are below:
![]()
The corresponding C code when uploading the blocks to Arduino.
![]()
Putting the pressed and not-pressed options in the same family so that they could be in the same drop down selection.
![]()
Added the pressed and not-pressed blocks above the original high/low blocks.
![]()
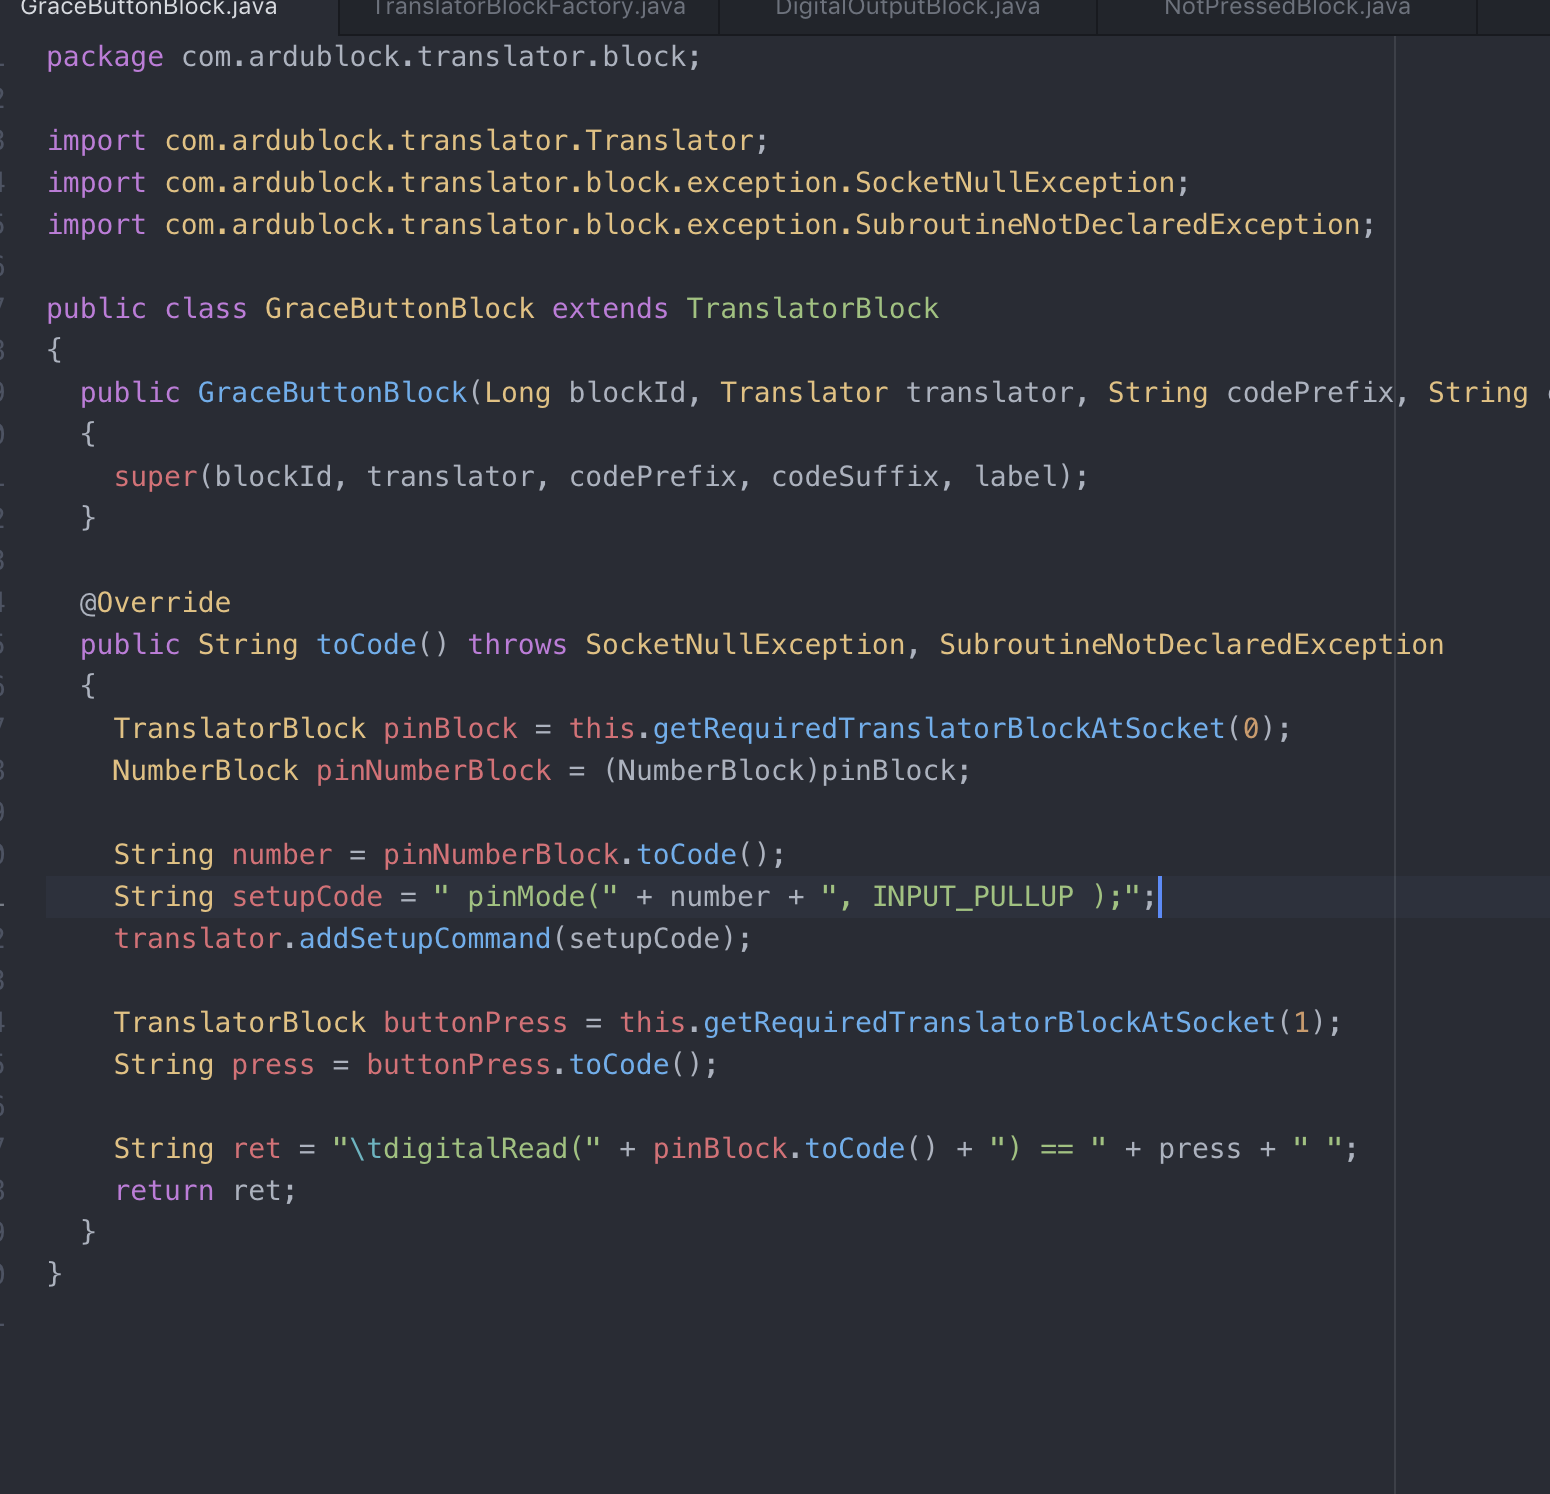
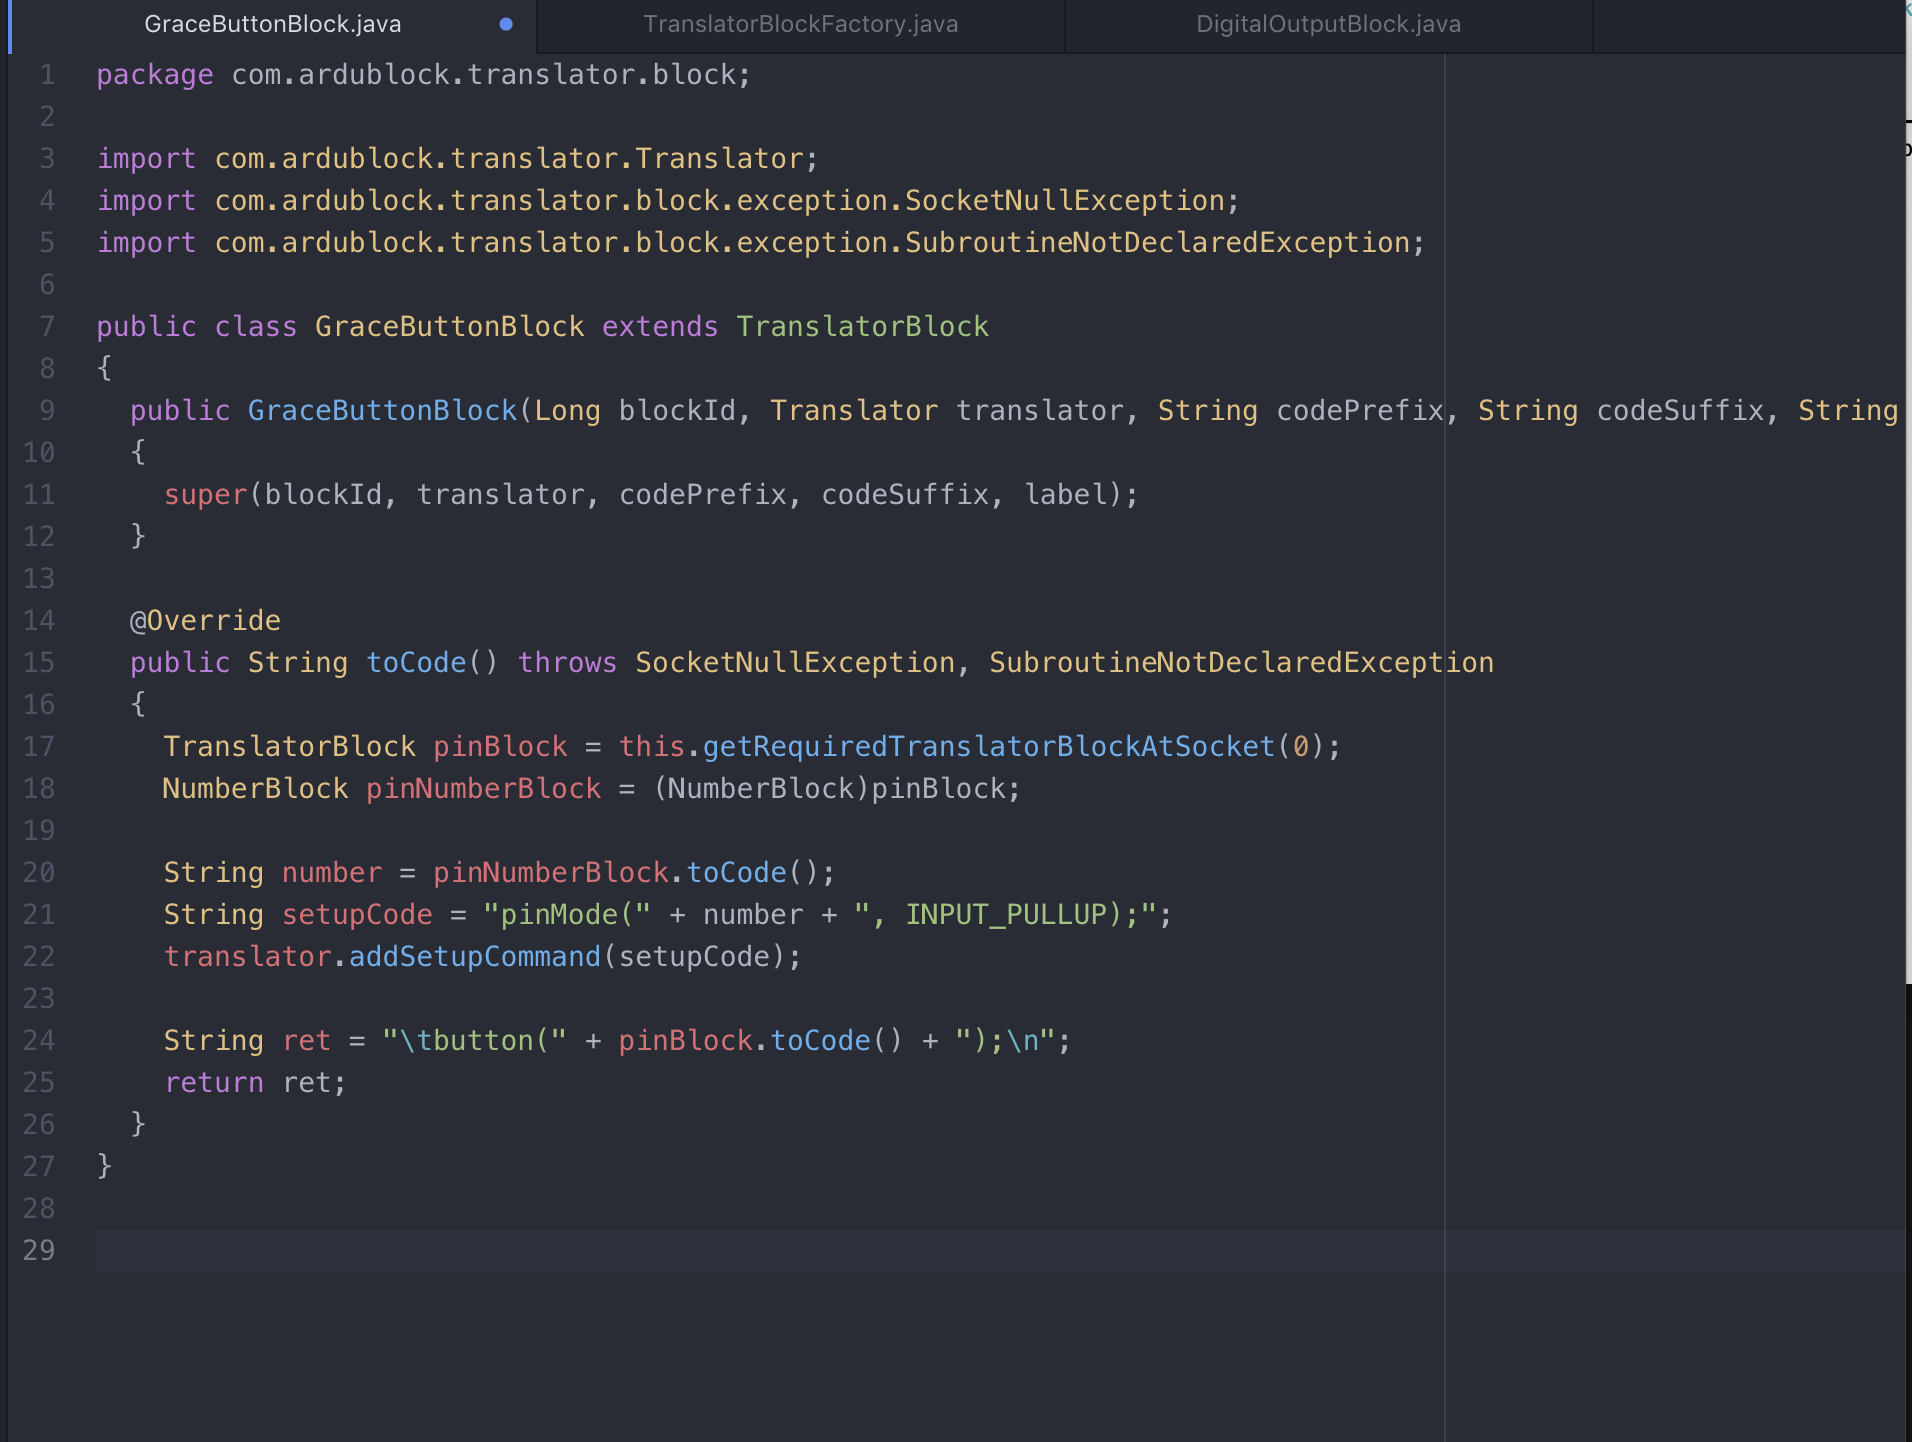
The button block's java file that converts it to C code that can be read by the Arduino.
-
MacOSX Maven Install
06/28/2019 at 01:55 • 0 commentsJust joined the project today and worked on installing maven.
Maven can be downloaded here and helpful instructions can be found at https://www.mkyong.com/maven/install-maven-on-mac-osx/.
I ran into this error: unsupportedclassversionerror..., and this was the result of my java se version being older than the version used to create maven. Updating java se should resolve this.
-
Starting to make a button block
06/28/2019 at 01:53 • 0 commentsToday I managed to continue with making a button block. The main takeaway was figuring out what Java code to put in its file, especially since I haven't used Java in 3 years. I basically looked at other blocks' Java code and from that, figured out what snippets of code to put in my block's file. Then I had to make sure it could properly upload to Arduino. To do that, I had to find a block that would allow me to write setup code. I searched through many files before finding the LED block's Java file. I then used its methods to implement the proper setup code. I had a few issues with uploading my block's code to Arduino at first, but I figured out matching the different variable names between different files, and it eventually worked!
![]()
Above is the code for my block :)
-
Creating Java file for "Button" Block
06/28/2019 at 01:51 • 0 commentsIn order for the Button Block to have some functionality, I had to create a Java file for the block named ButtonBlock.java and save the file under BarnabasRoboticsArdublock/ardublock-master/src/main/java/com/translator/block.
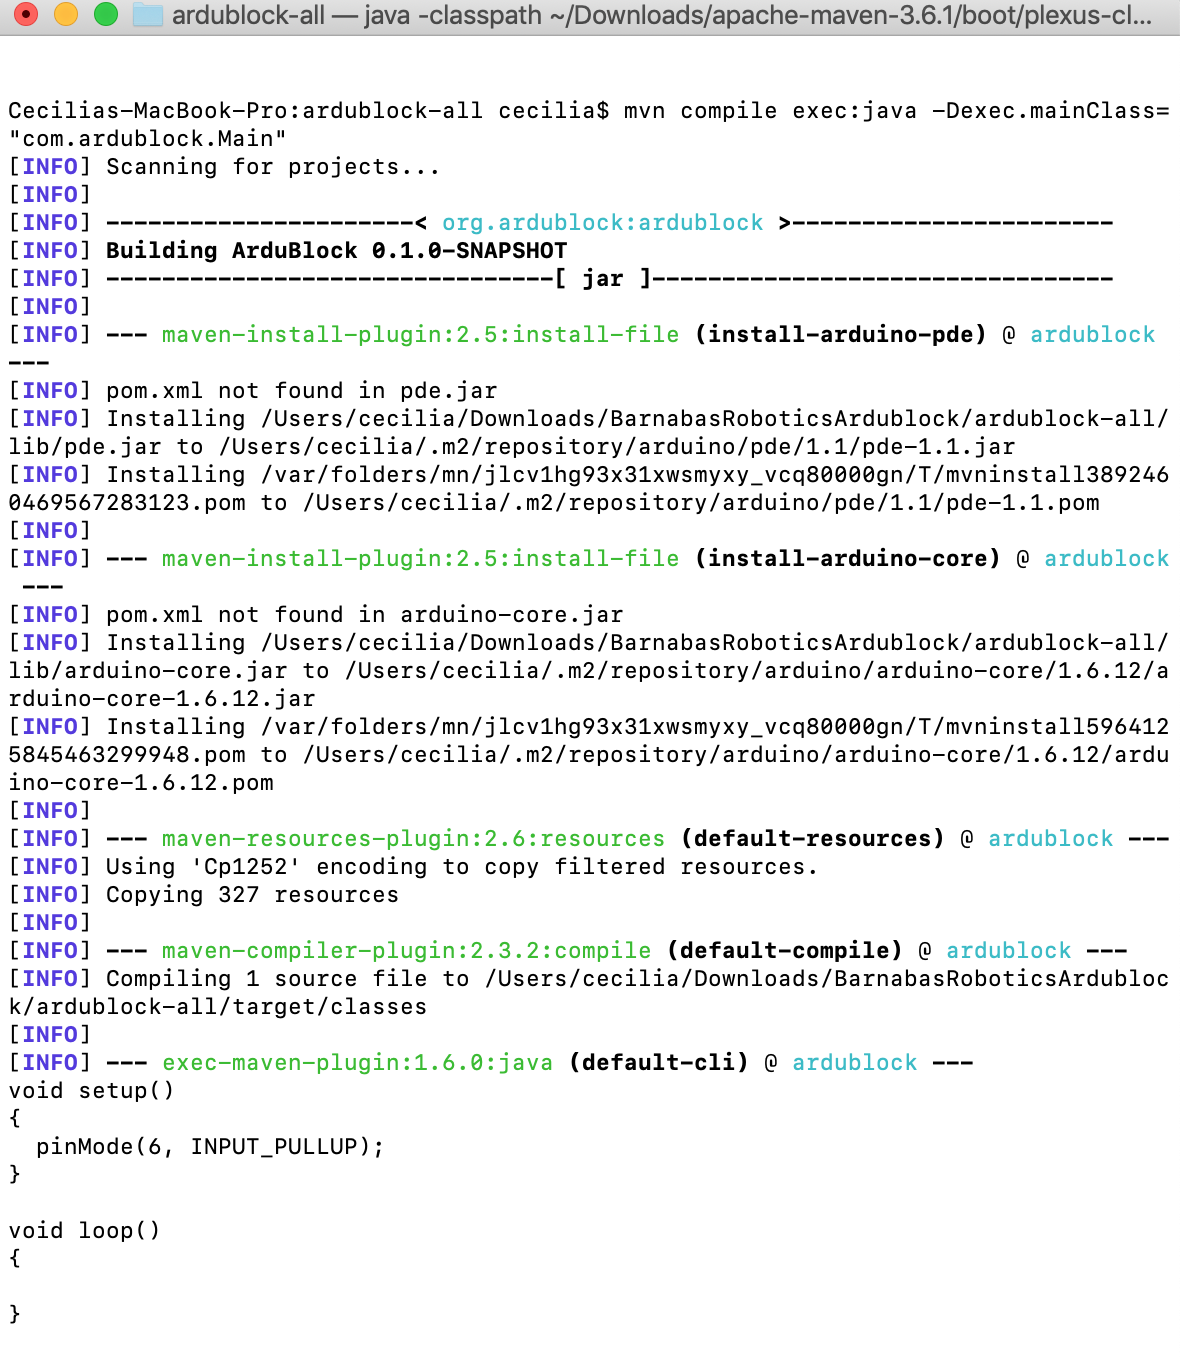
For today, we wanted ArduBlock to output this line of code when the Button Block is added inside the loop.
void setup()
{
  pinMode(6, INPUT_PULLUP);
}

void loop()
{

}
My ButtonBlock.java file contains the following lines:
package com.ardublock.translator.block;

import com.ardublock.translator.Translator;
import com.ardublock.translator.block.exception.SocketNullException;
import com.ardublock.translator.block.exception.SubroutineNotDeclaredException;

public class ButtonBlock extends TranslatorBlock
{
    public ButtonBlock(Long blockId, Translator translator, String codePrefix,    String codeSuffix, String label)
    {
        super(blockId, translator, codePrefix, codeSuffix, label);
    }

  @Override
    public String toCode() throws SocketNullException, SubroutineNotDeclaredException
    {
        TranslatorBlock pinBlock = this.getRequiredTranslatorBlockAtSocket(0);
    NumberBlock pinNumberBlock = (NumberBlock)pinBlock;

    String pinNumber = pinNumberBlock.toCode();
    translator.addSetupCommand("pinMode(" + pinNumber + ", INPUT_PULLUP);");
    String ret = "\n";
        return ret;
    }

}
In addition to creating a new Java file, I had to make a change to the TranslatorBlockFactory.java file:
![]()
Then, compile and execute the files in Terminal, add the Button Block to the loop, and finally click "Upload to Arduino."
The Terminal should then show the C code at the bottom of the screenshot.
![]()
More to come! -C
-
Creating "Button" pin in ArduBlock
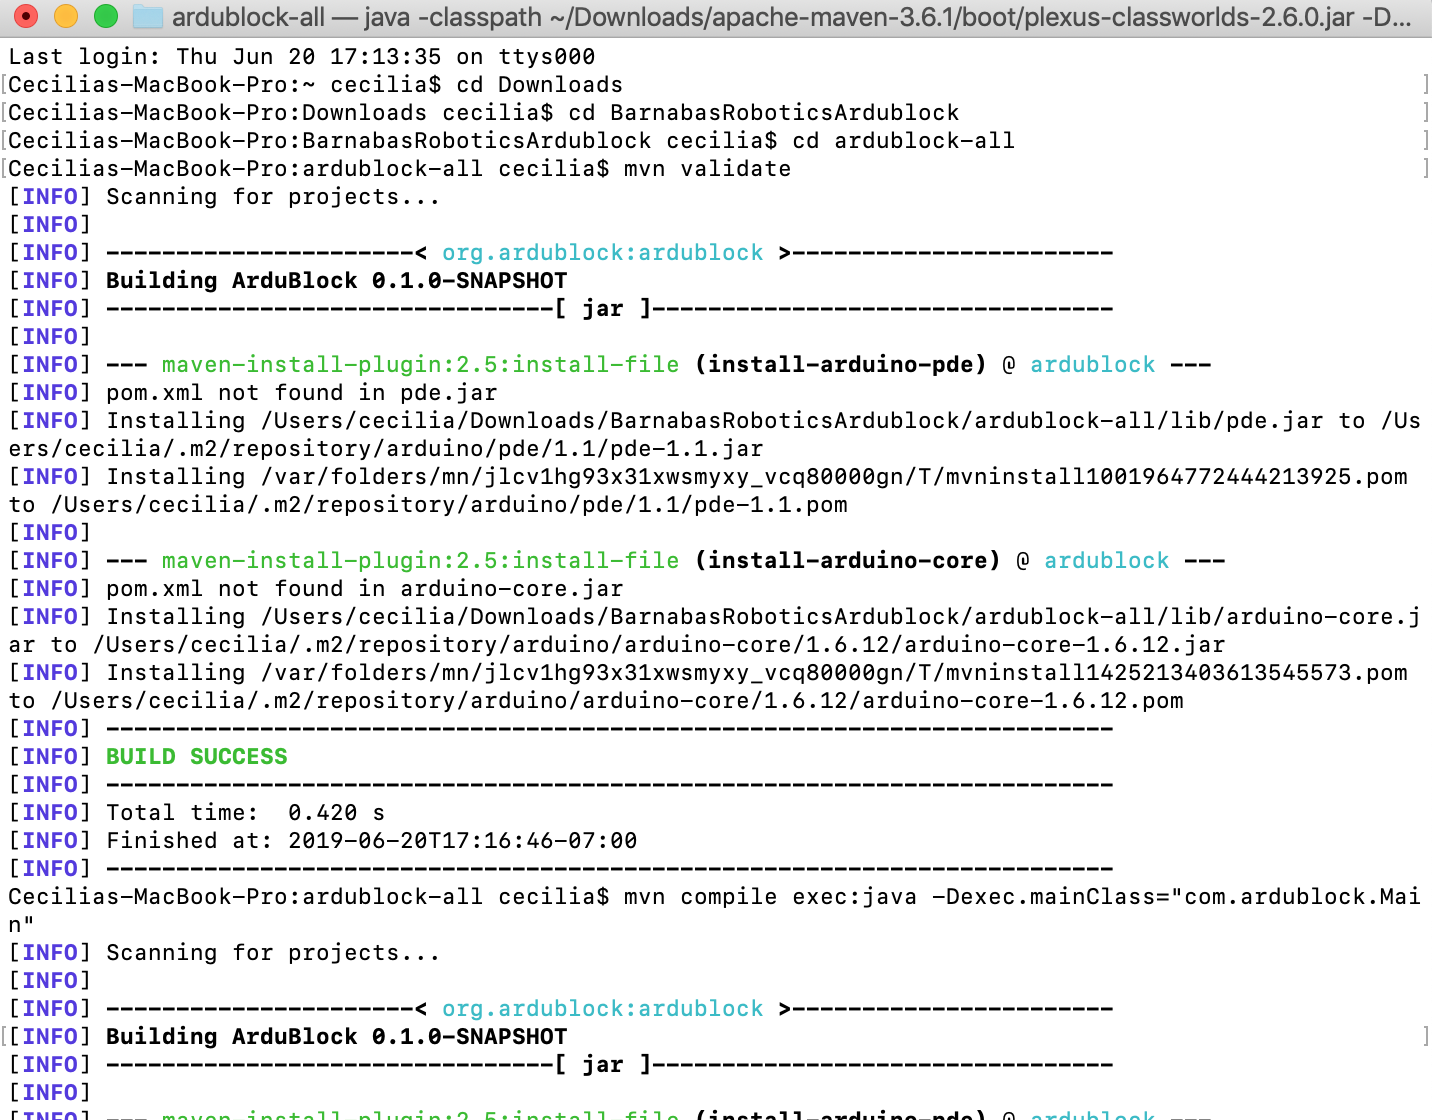
06/21/2019 at 02:02 • 0 commentsExecuting ArduBlock can be done using the following commands:
![]()
This is where I made changes to the files to create the Button.
All files can be found under /Users/cecilia/Downloads/BarnabasRoboticsArdublock/ardublock-all/src/main/resources/com/ardublock/block...
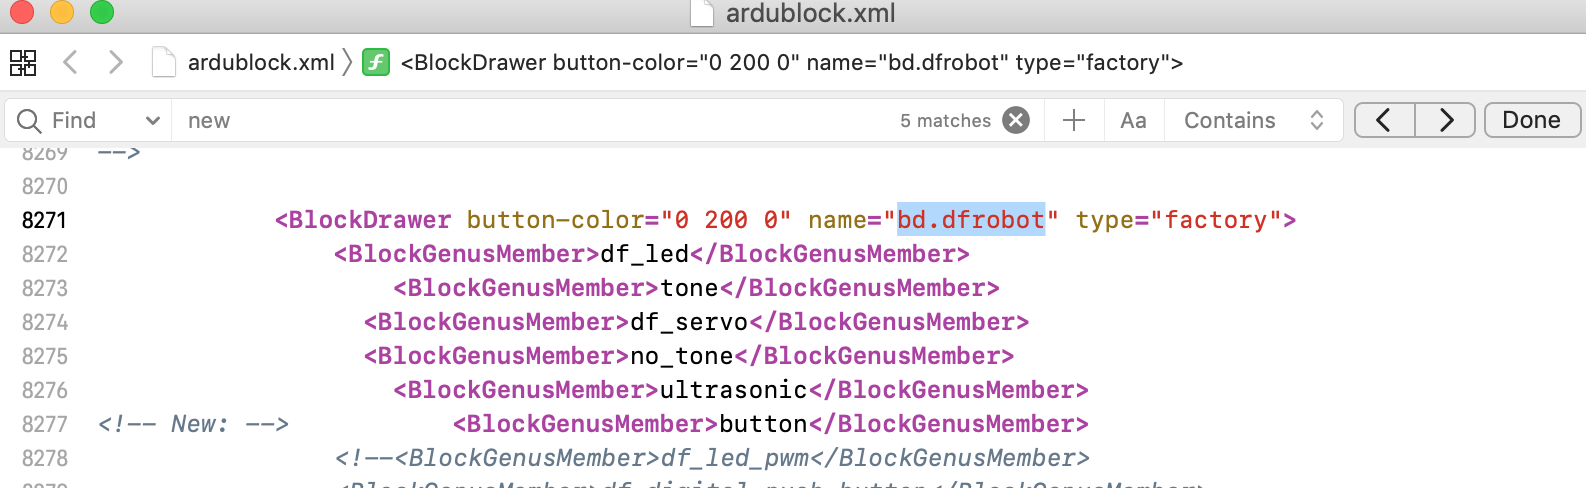
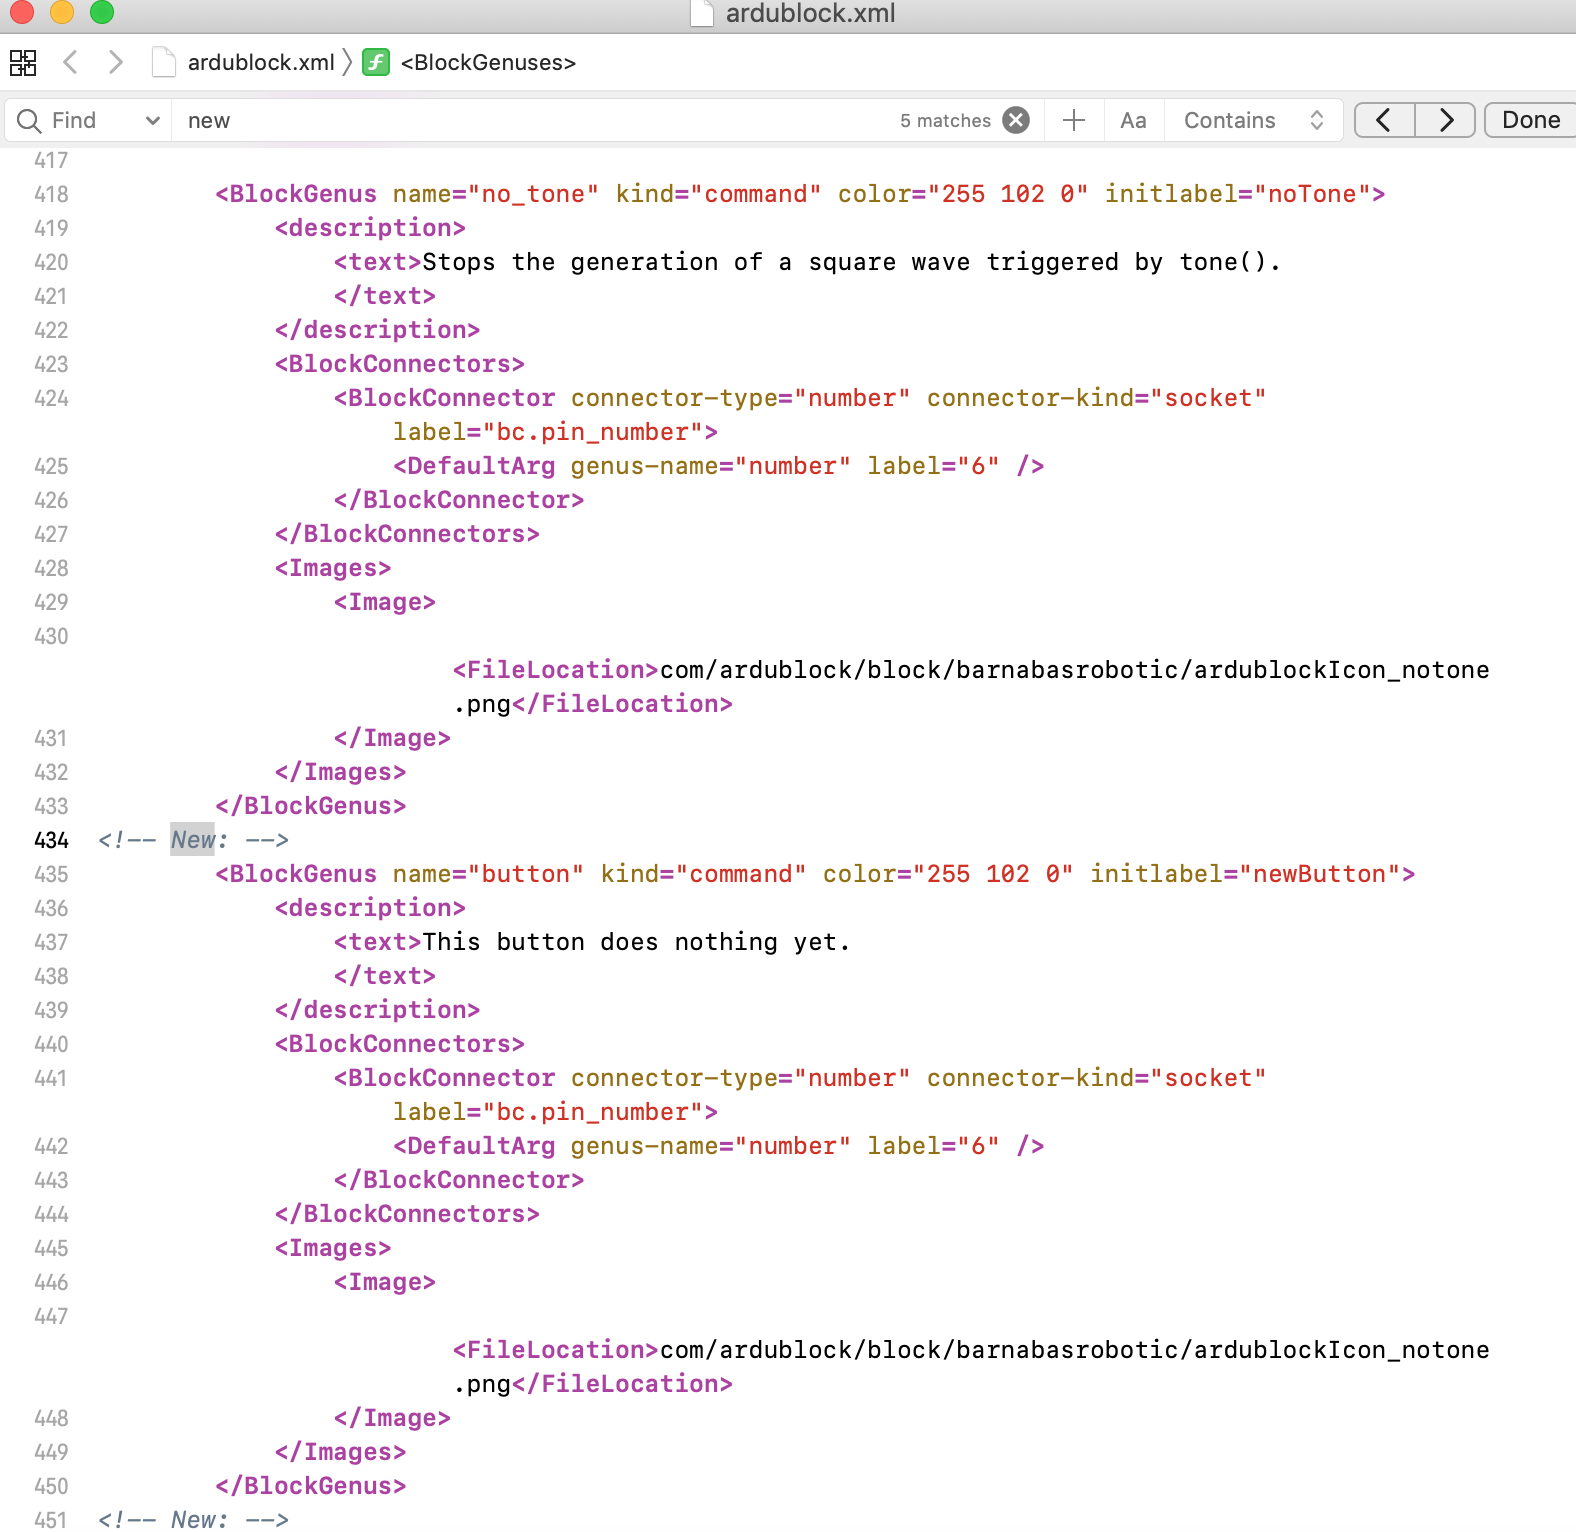
Changes to the ardublock.xml file:
![]()
![]()
Changes to the ardublock.properties file:
![]()
![]()
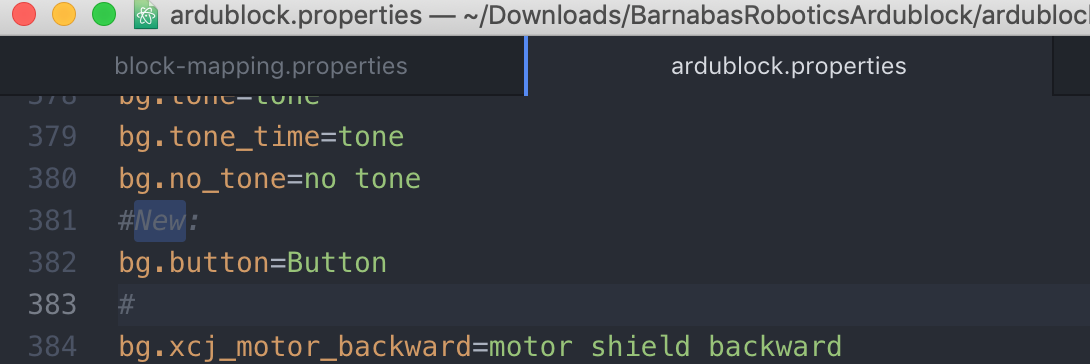
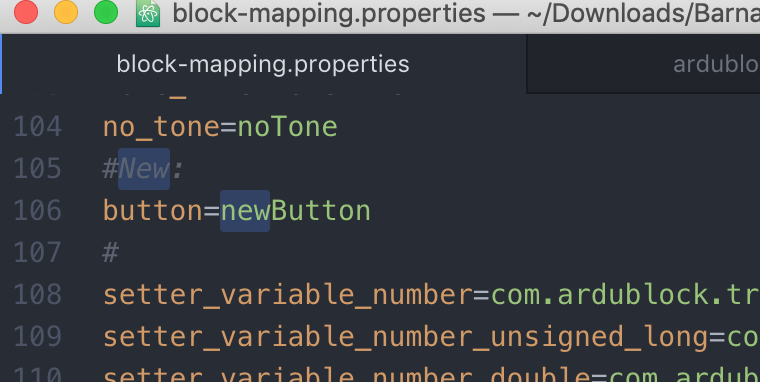
Changes to the block-mapping.properties file:
![]()
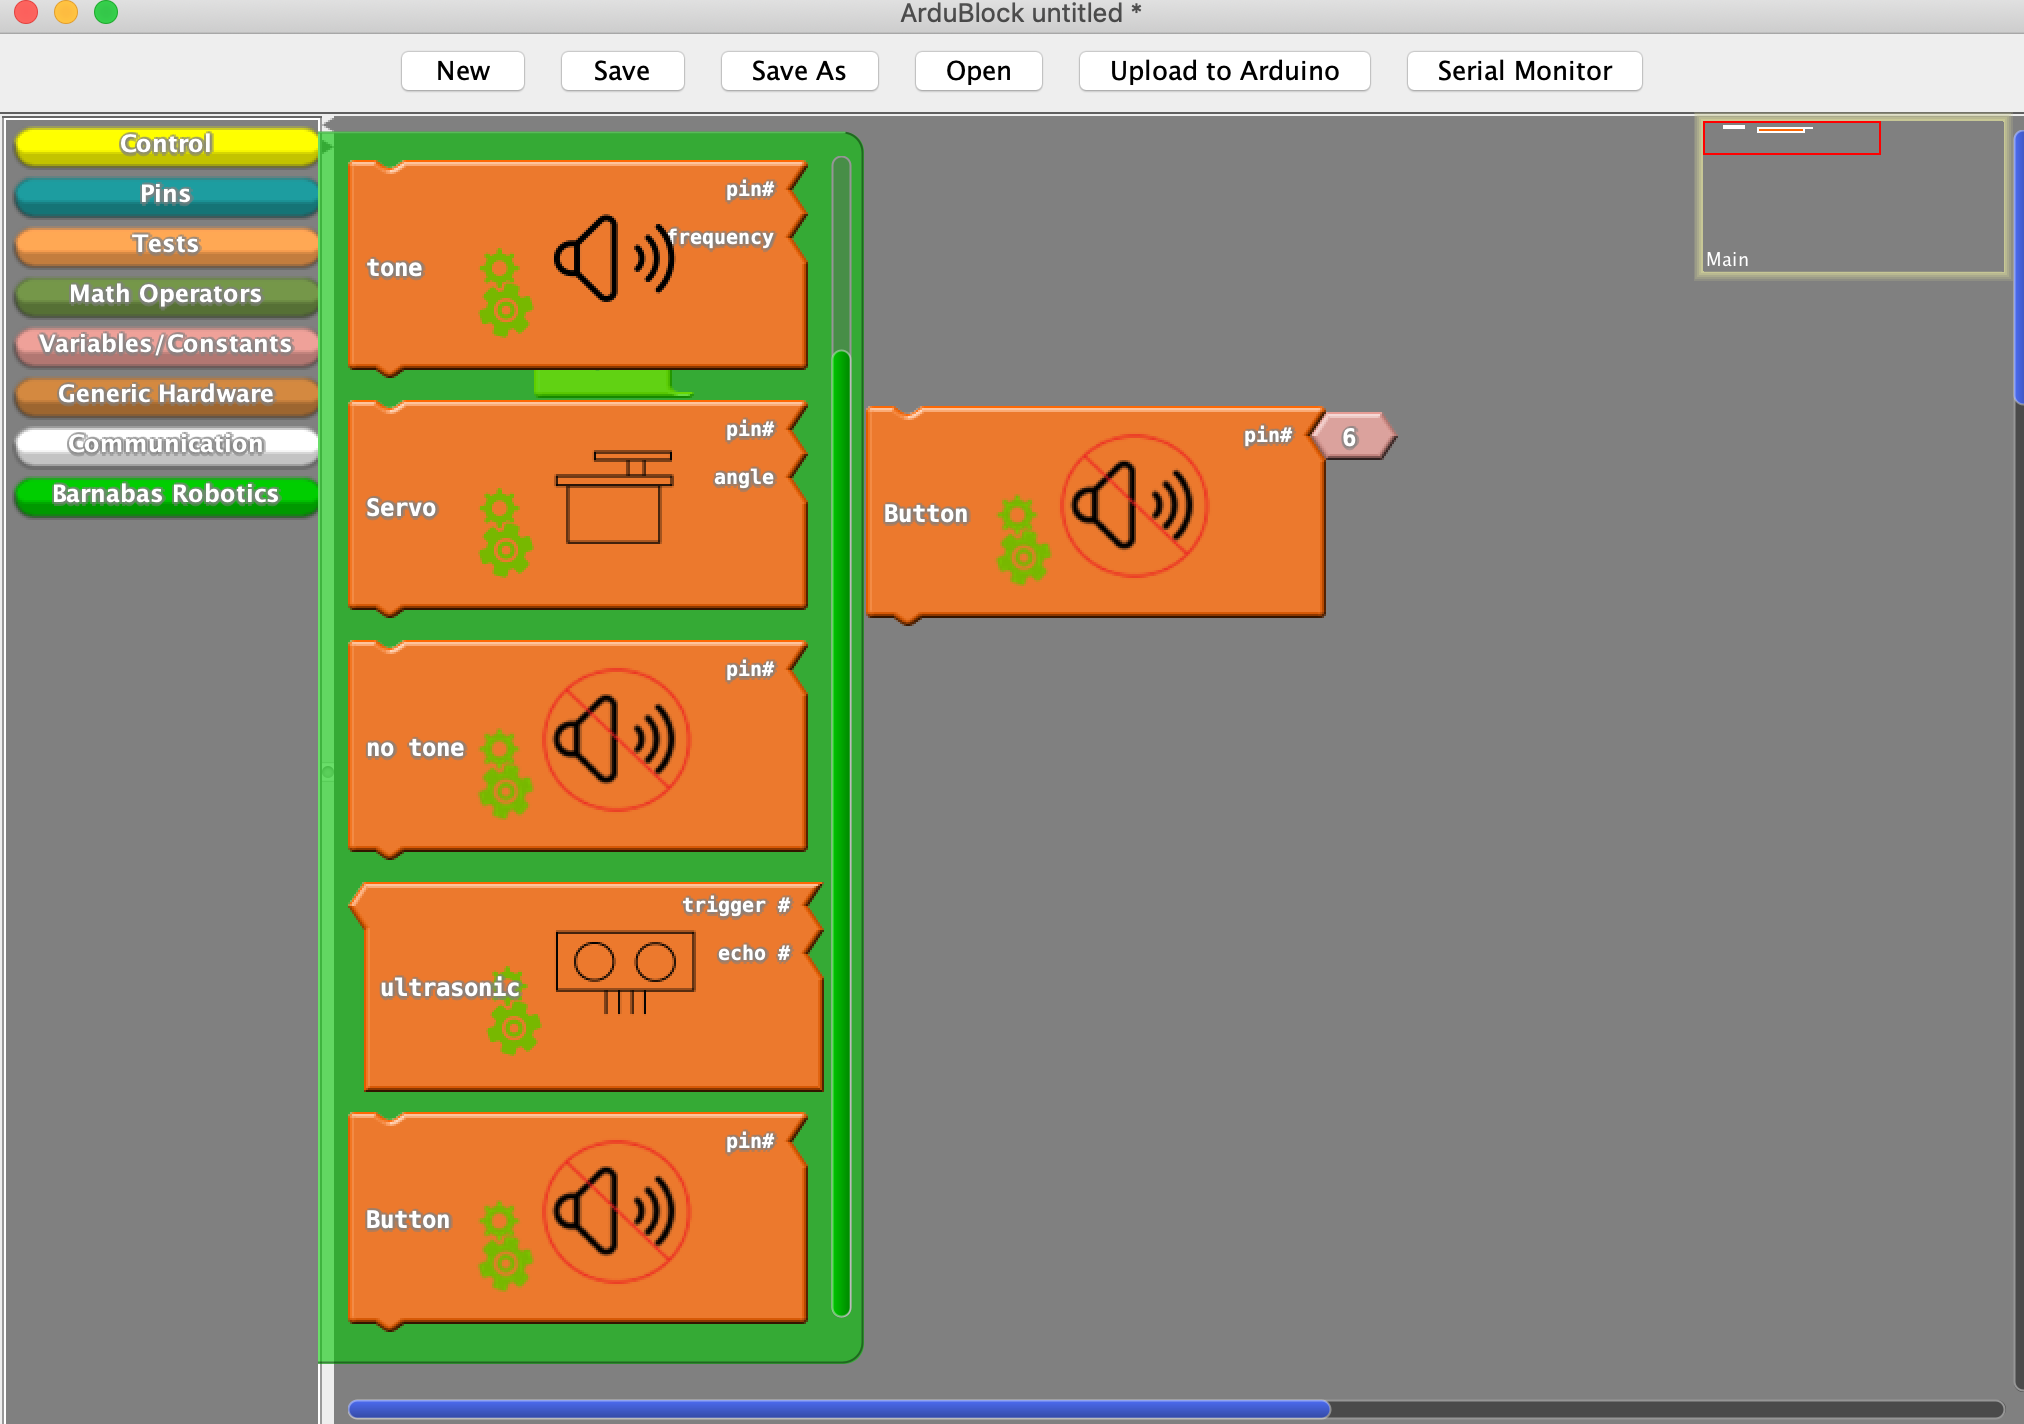
Finished product:
![]()
:)
-
Changing ArduBlock (6/20/19)
06/21/2019 at 02:00 • 0 commentsAfter installing Maven, I began to work at compiling the Ardublock code. I downloaded openblocks from GitHub.
https://github.com/taweili/openblocks
Then I added the openblocks-master to the same folder that apache-maven-3.6.1 was in. I then installed it and compiled it with maven. Then I was finally able to compile the Ardublock code.
Once the Ardublock code was compiled, I was able to execute it from my terminal so that a window opened up. I then looked through the main source code, but realized that every time I made a change, I had to close the current window before recompiling and executing, otherwise execution issues would occur.
I made a simple block and added it to one of the existing drawers. I also changed a few of the block names as well.