Close
0%
0%

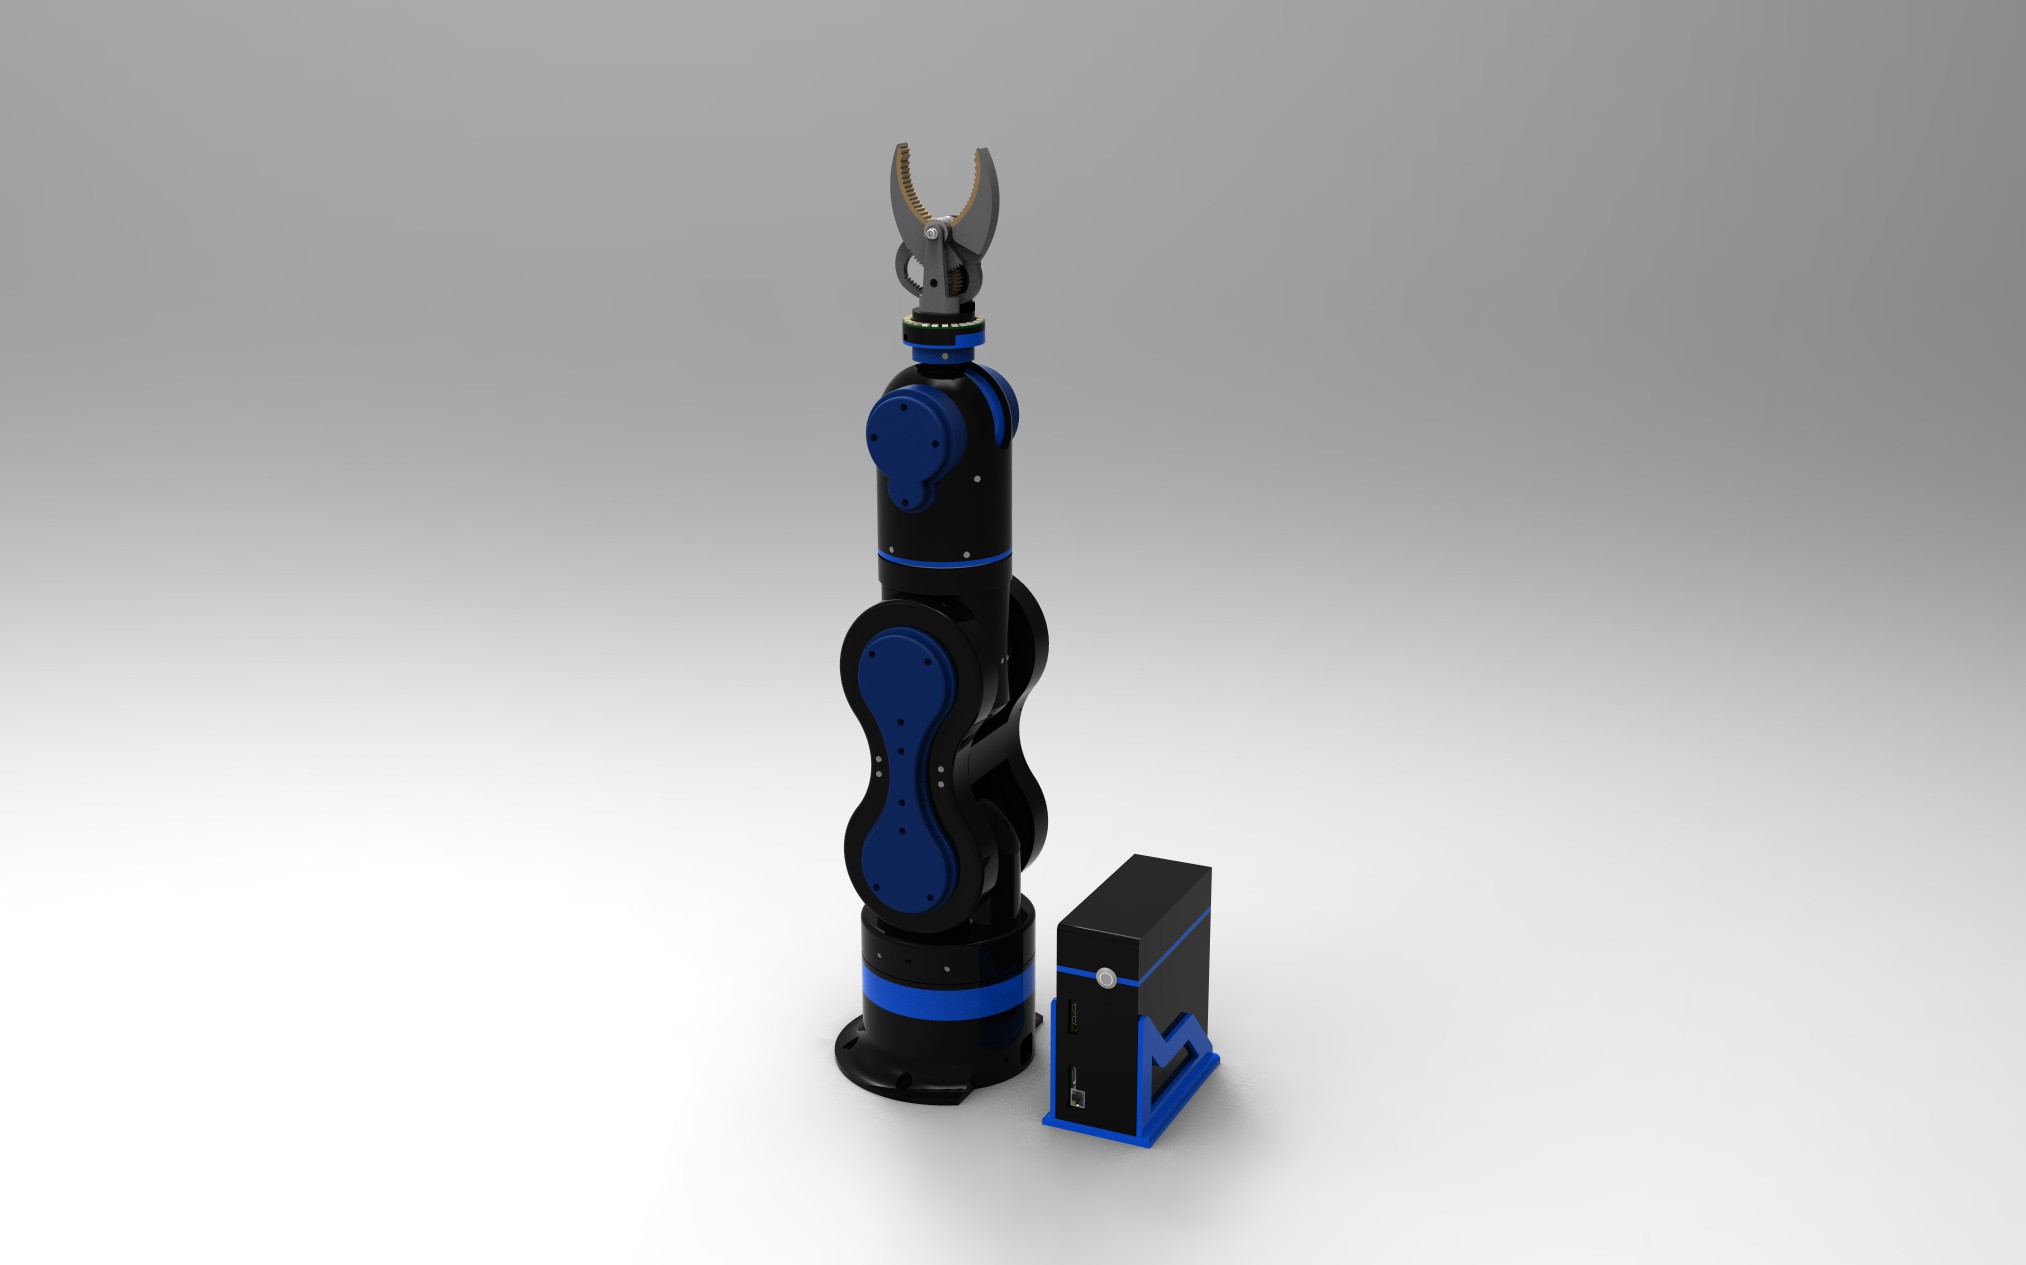
'Thor' robot with addons and GUI

Thor robot based on the author AngelLM

Similar projects worth following
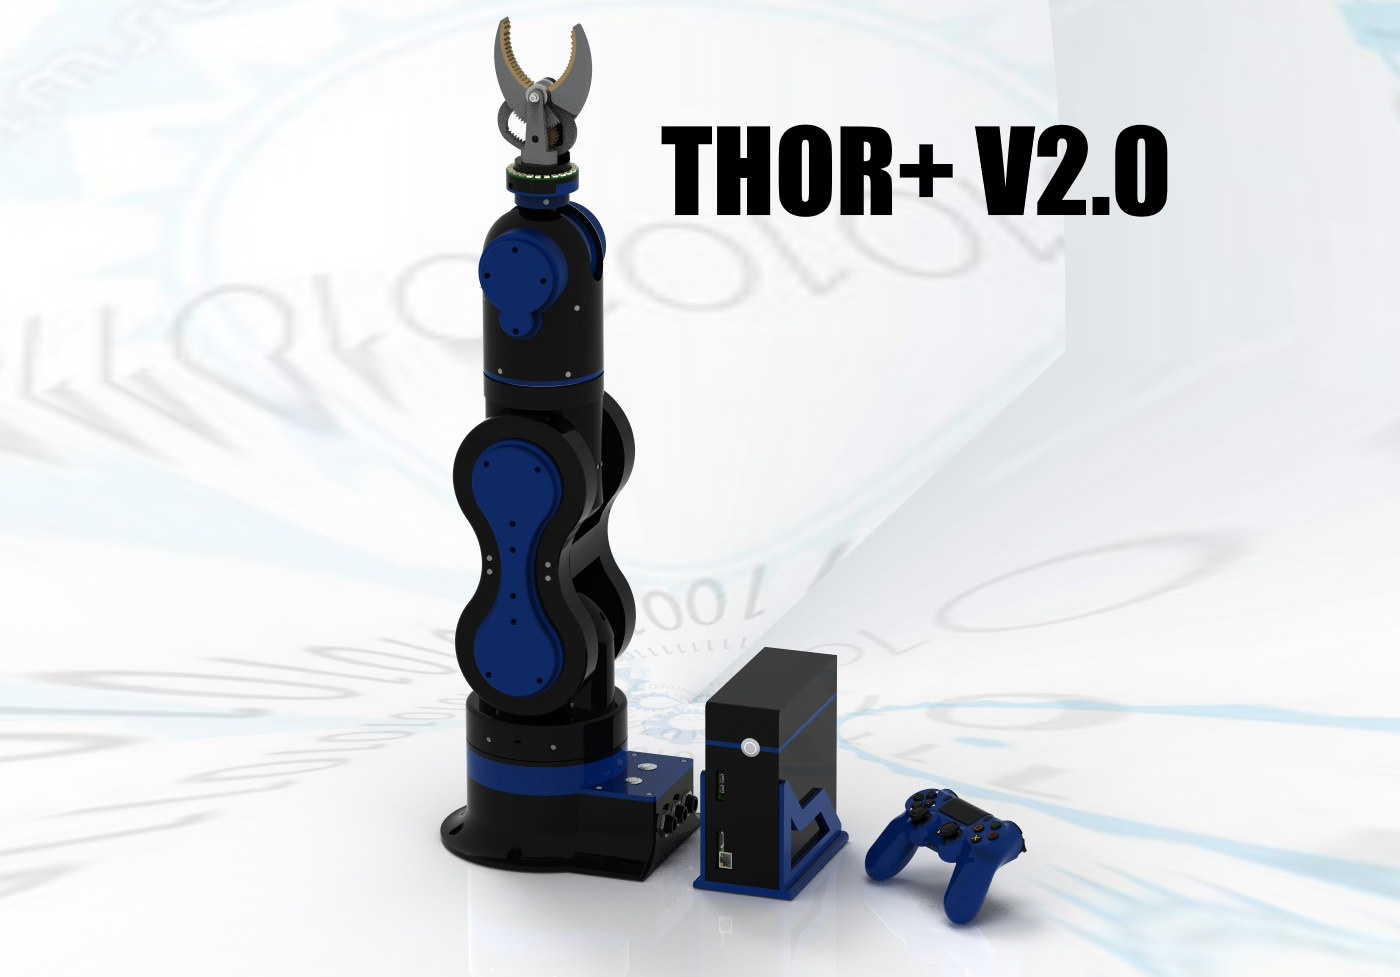
THOR robotic arm with some extra's :) based from the original design of AngelLM, thanks mate for this nice piece of work!
Trying to do something more... follow me to see the addon's and lots of improvements.

This project is based on the THOR robotic arm project from AngelLM and will be a version with lots of add-ons and especially modified for a wide range of 3D printers with a smaller print area.
Also it is my intention to improve a lot of things to the robot his hardware and software.

I am working on a graphical controller that works on PC,MAC and later on mobile devices.
You will have the possiblity to make al the movements on the controller without the need of the robot.
Ones everything is working on the GUI controller it can be transfered to the robot arduino controller
board, with the press of a button and some digital inputs you can run the sequences you programmed in the GUI controller.
There will be a hand controller to move the robot manually and store the points, afterwards you can send these points to the graphical controller. It will be bi-directional programming.
In a further stage the axis will be recorded into the controler so movements can be simulated be moving the robot by hand and can be replayed afterwards.
It's a lot but this will be my challange in the next comming days...months :-)

Any feedback is welcome!

I will send my regards to AngelLM for the original nice designed robot called 'THOR' , without him I could not started this SUPER project!

Everything stays open source, like everything should be...One for All, All for One
All software programs to build the robot are free to download

STL_V2.04.rar

Upgrade STL parts from V2.03 to V2.04 Overall stability feedback add-ons, extra fans added and design improvements.

RAR Archive - 3.17 MB - 09/24/2017 at 08:27

Download

ROBOT_THOR_V2.04.rar

Step design Thor+ V2.04

RAR Archive - 10.31 MB - 09/24/2017 at 08:26

Download

STL_V2.03_BASE-VERTICAL-HOLES.rar

Base with fan and vertical hols Thor+ V2.03

RAR Archive - 292.74 kB - 09/02/2017 at 00:05

Download

THORV2_03.rar

Step design file Thor+ V2.03

RAR Archive - 10.26 MB - 08/29/2017 at 05:48

Download

STL_V2.02.zip

THOR+ V2.02 All STL Files Feedback sensors add-on

Zip Archive - 40.59 MB - 08/05/2017 at 20:39

Download

View all 22 files

  • 1 × 3D printer to print the parts UPrint SE plus Stratasys
  • 1 × GUI software controller Unity personal
  • 1 × Ultratronics V1.0 Pro main board The main controller for the robot
  • 1 × Arduino mini board The controller inside the robot Art2 to control IO/Gripper/Leds/Feedback sensors, etc...
  • 1 × Programming software arduino arduino plugin + visual studio community 2015

View all 6 components

  • UPGRADE THOR+ V2.04

    dannyvandenheuvel09/23/2017 at 20:27 7 comments

    Upgrade Thor+ V2.04 ... Feedback stability improvements, Added extra fans and changed some design. (By Sepio & Danny)

    All STL and STEP files online!

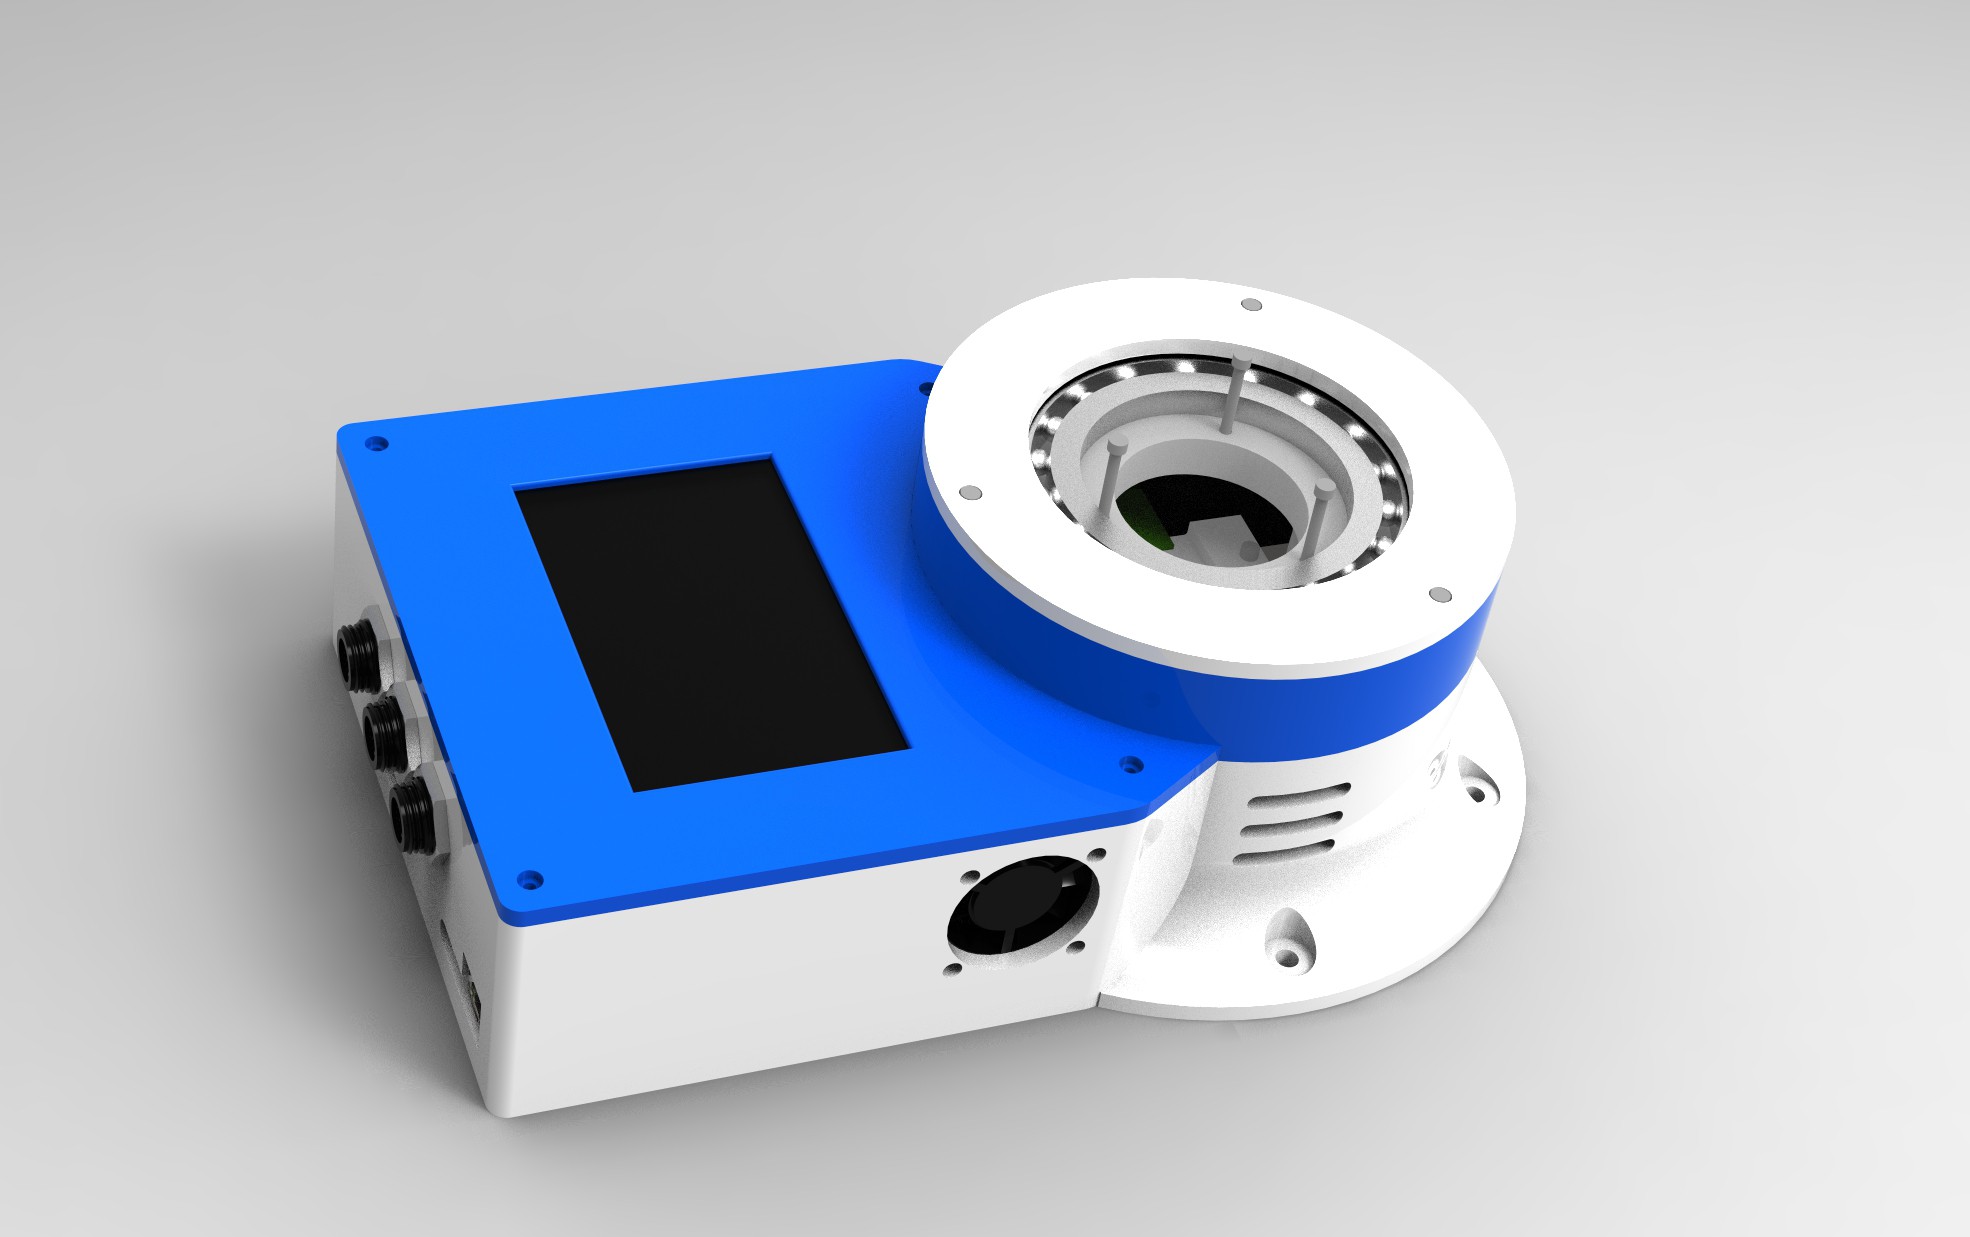
  • VENTILATED BASE

    dannyvandenheuvel08/15/2017 at 13:28 6 comments

    Add some cooling ribs in the base and added fan 40x40x10 inside

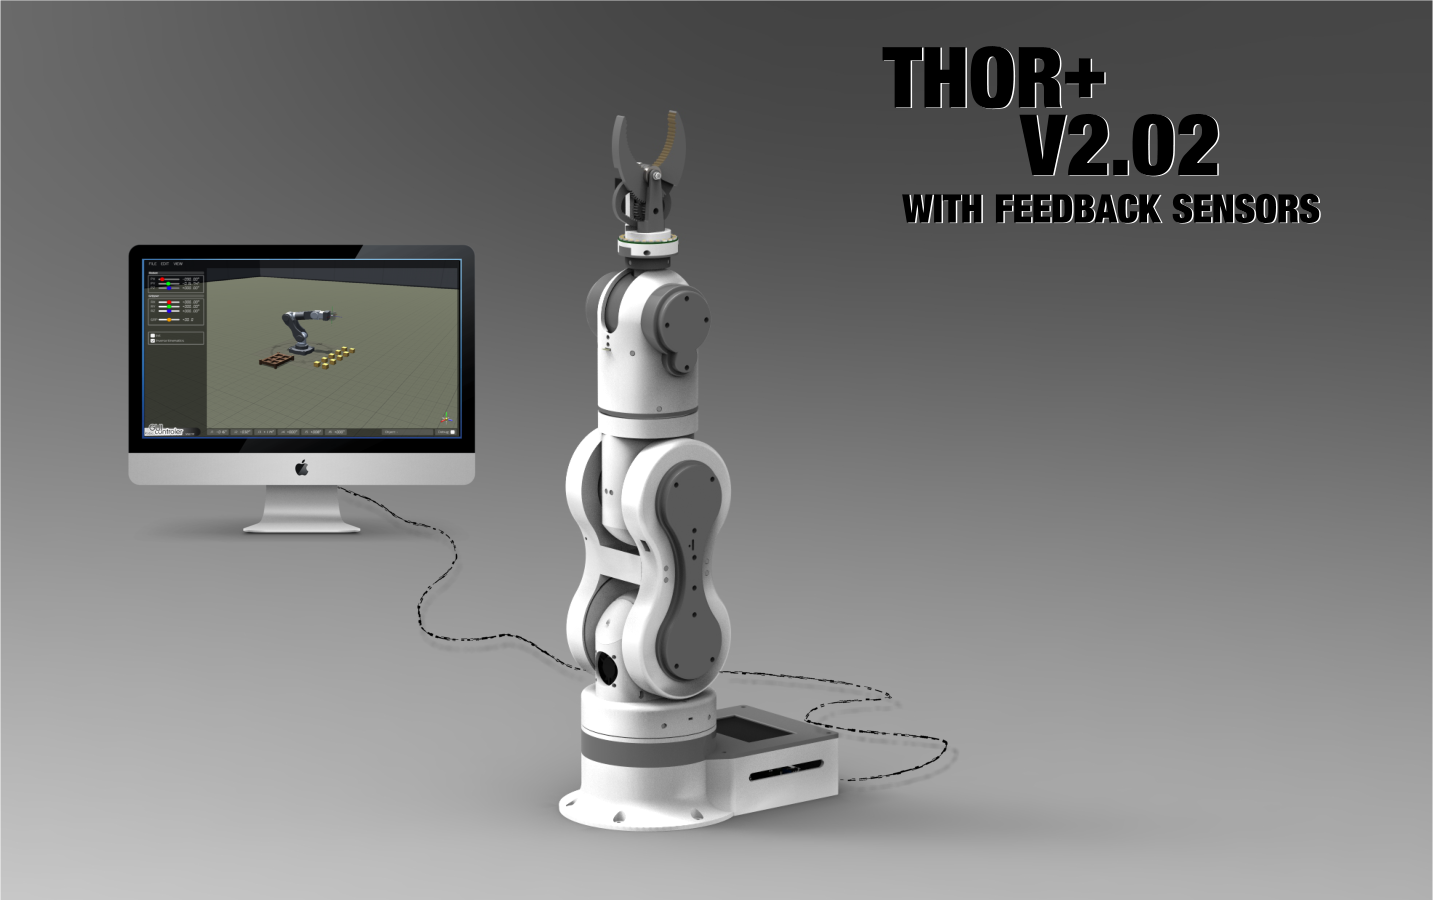
  • THOR+ V2.02 WITH FEEDBACK SENSORS!

    dannyvandenheuvel08/05/2017 at 21:07 11 comments

    Finally! It's here, Thor+ V2.02 with integrated feedback sensors :-)

    STL files all online.
    For users how have printed V2.01 all files marked with a leading underscore are new or changed in V2.02.

    Happy printing!
    Thor+ V2.02 is based from the original idea & design of AngelLM

    The difficult part in assembling the robot parts will be the feedback sensor joints, be carefully how they have to rotate around there axis. I will make a manual later on. All the rest is very clear the same as AngelLM his version.


  • Robo GUI controler 'Progress status 07-2017'

    dannyvandenheuvel07/07/2017 at 21:18 3 comments

    I wasn't prepared enough, so sorry for my bad english :-( , I hope you understand it a little bit, anyway it's funny...

  • UPDATE THOR+ ROBOT_GUI CONTROLLER

    dannyvandenheuvel04/30/2017 at 12:54 3 comments

    Now loading and saving opportunities. Playing has been more fun now because we can save and load! Yeahhh.

    Now you can play with it! Next will be save and load senarios and connection with real robot arm through ethernet. Try to upload new version in a couple of days :)


    Some progress Thor robot arm embedded, almost running inverse kinematics routine :)

    At this moment I build a recorder into the Thor robot gui controller, following will be save and load recorded movements. Then TCP socket to communicate with the real robot arm! will be continued :) I used a other model to test the routine, it's temporary :). Thanks to Luca Filippini for helping me with the Inverse kinematics scripting!

  • UPCOMMING THOR+ V2.02 WILL HAVE ABSOLUTE FEEDBACK SENSORS ON ALL AXIS

    dannyvandenheuvel04/08/2017 at 14:44 6 comments

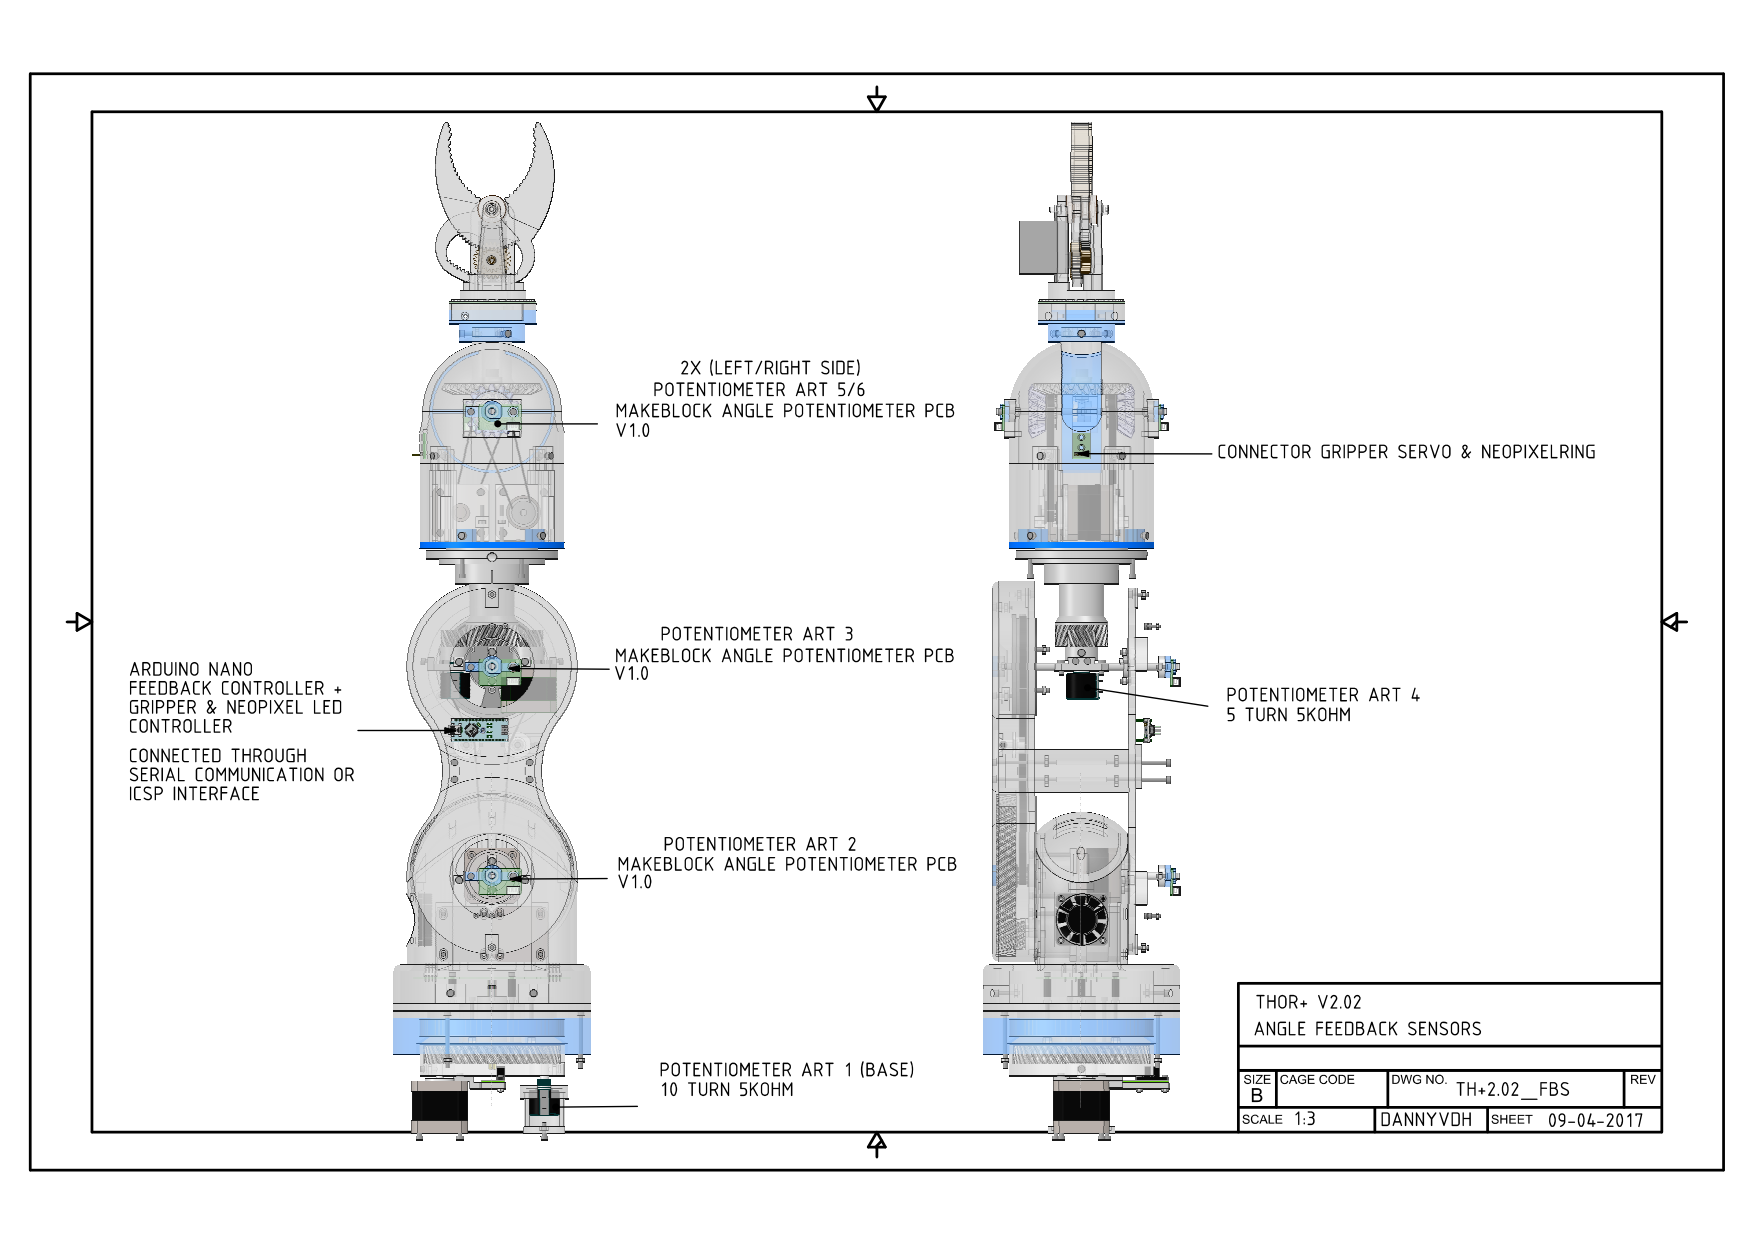
    Thor+ Feedback sensors for Art2 and Art3
    All feedback sensors, gripper servo and neo pixel ledring will be controlled by build-in arduino nano
    serial connected to the main controller board.

    Sheet all feedback sensors integrated into Thor+
    Sensors:
    4 x Makeblock Angular sensor V1.0
    1 x 10 turns potentiometer 5Kohm (burns)
    1 x 5 turns potentiometer 5Kohm (burns)

    Controller:
    1 x Arduino Nano controller

  • THOR+ V2.0 ALL STL PARTS ONLINE!!!

    dannyvandenheuvel03/30/2017 at 12:51 1 comment

    Good news! All stl parts online V2.0
    Start printing : - )

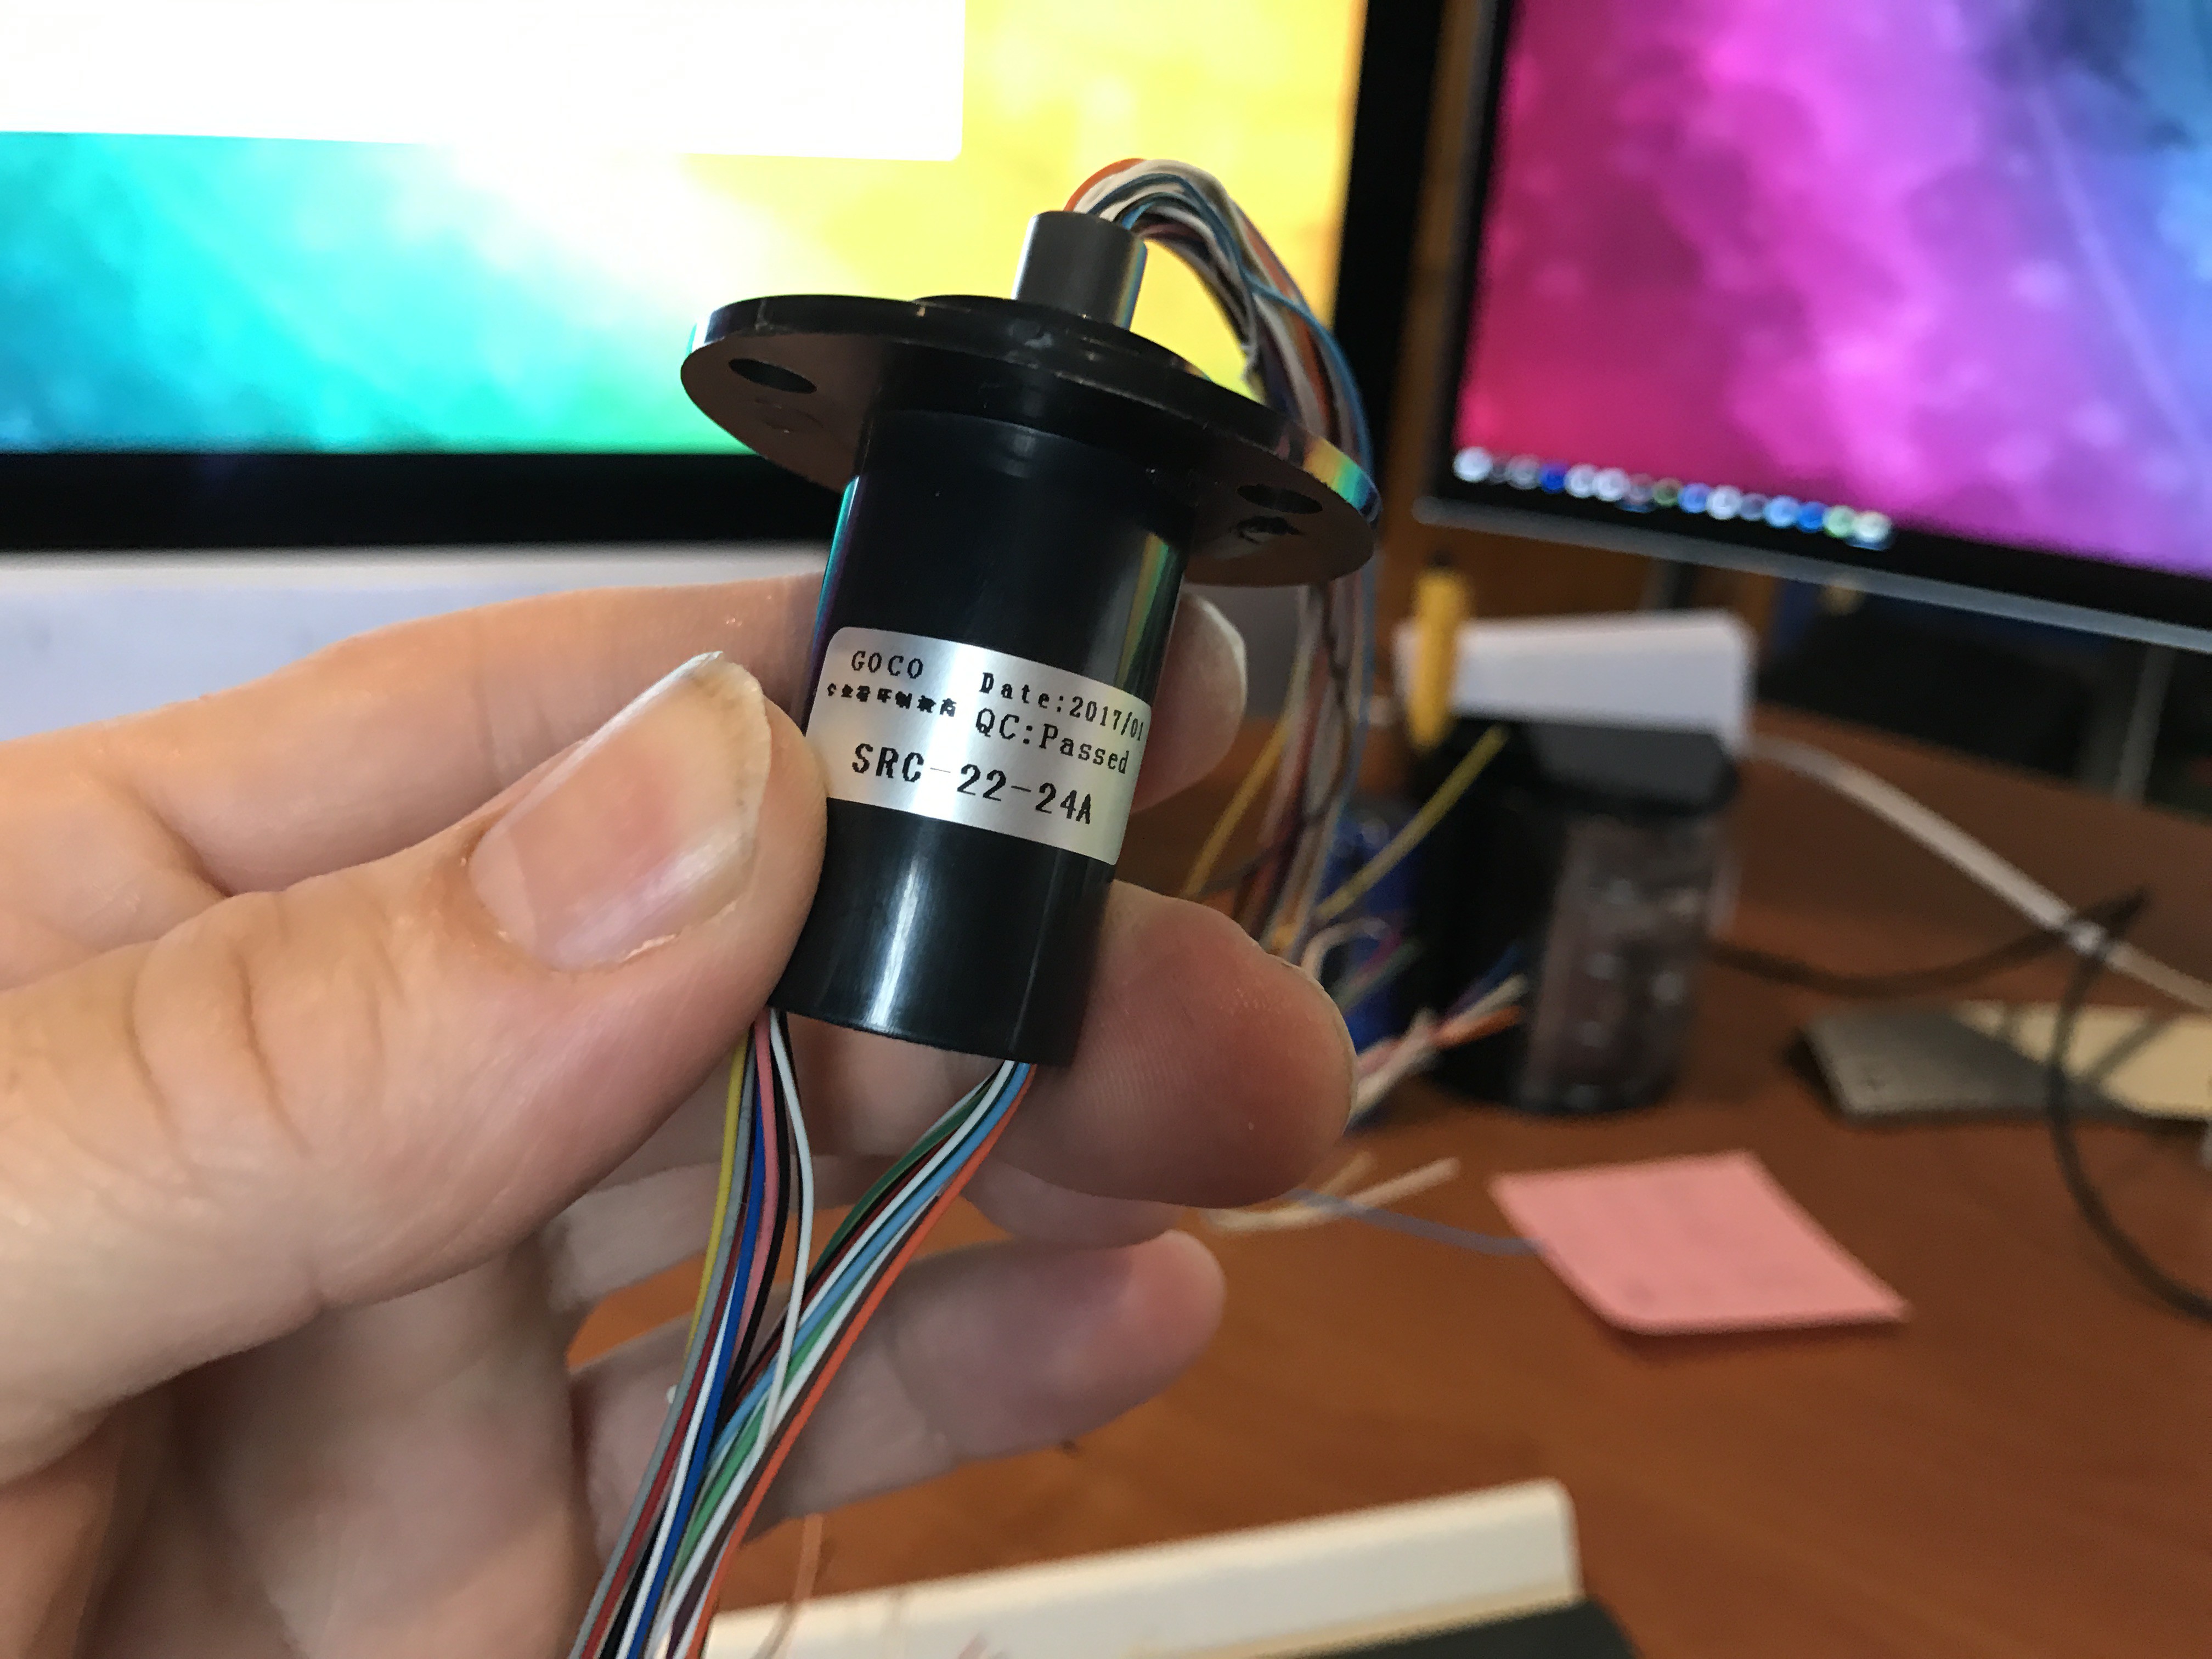
  • 'ADDING SLIPRING TO THOR+'

    dannyvandenheuvel02/19/2017 at 14:47 1 comment

    Finally get my slipring from ebay! It's going to connect my 6 stepper motors and arduino mini.
    I didn't like the many wires hanging around.

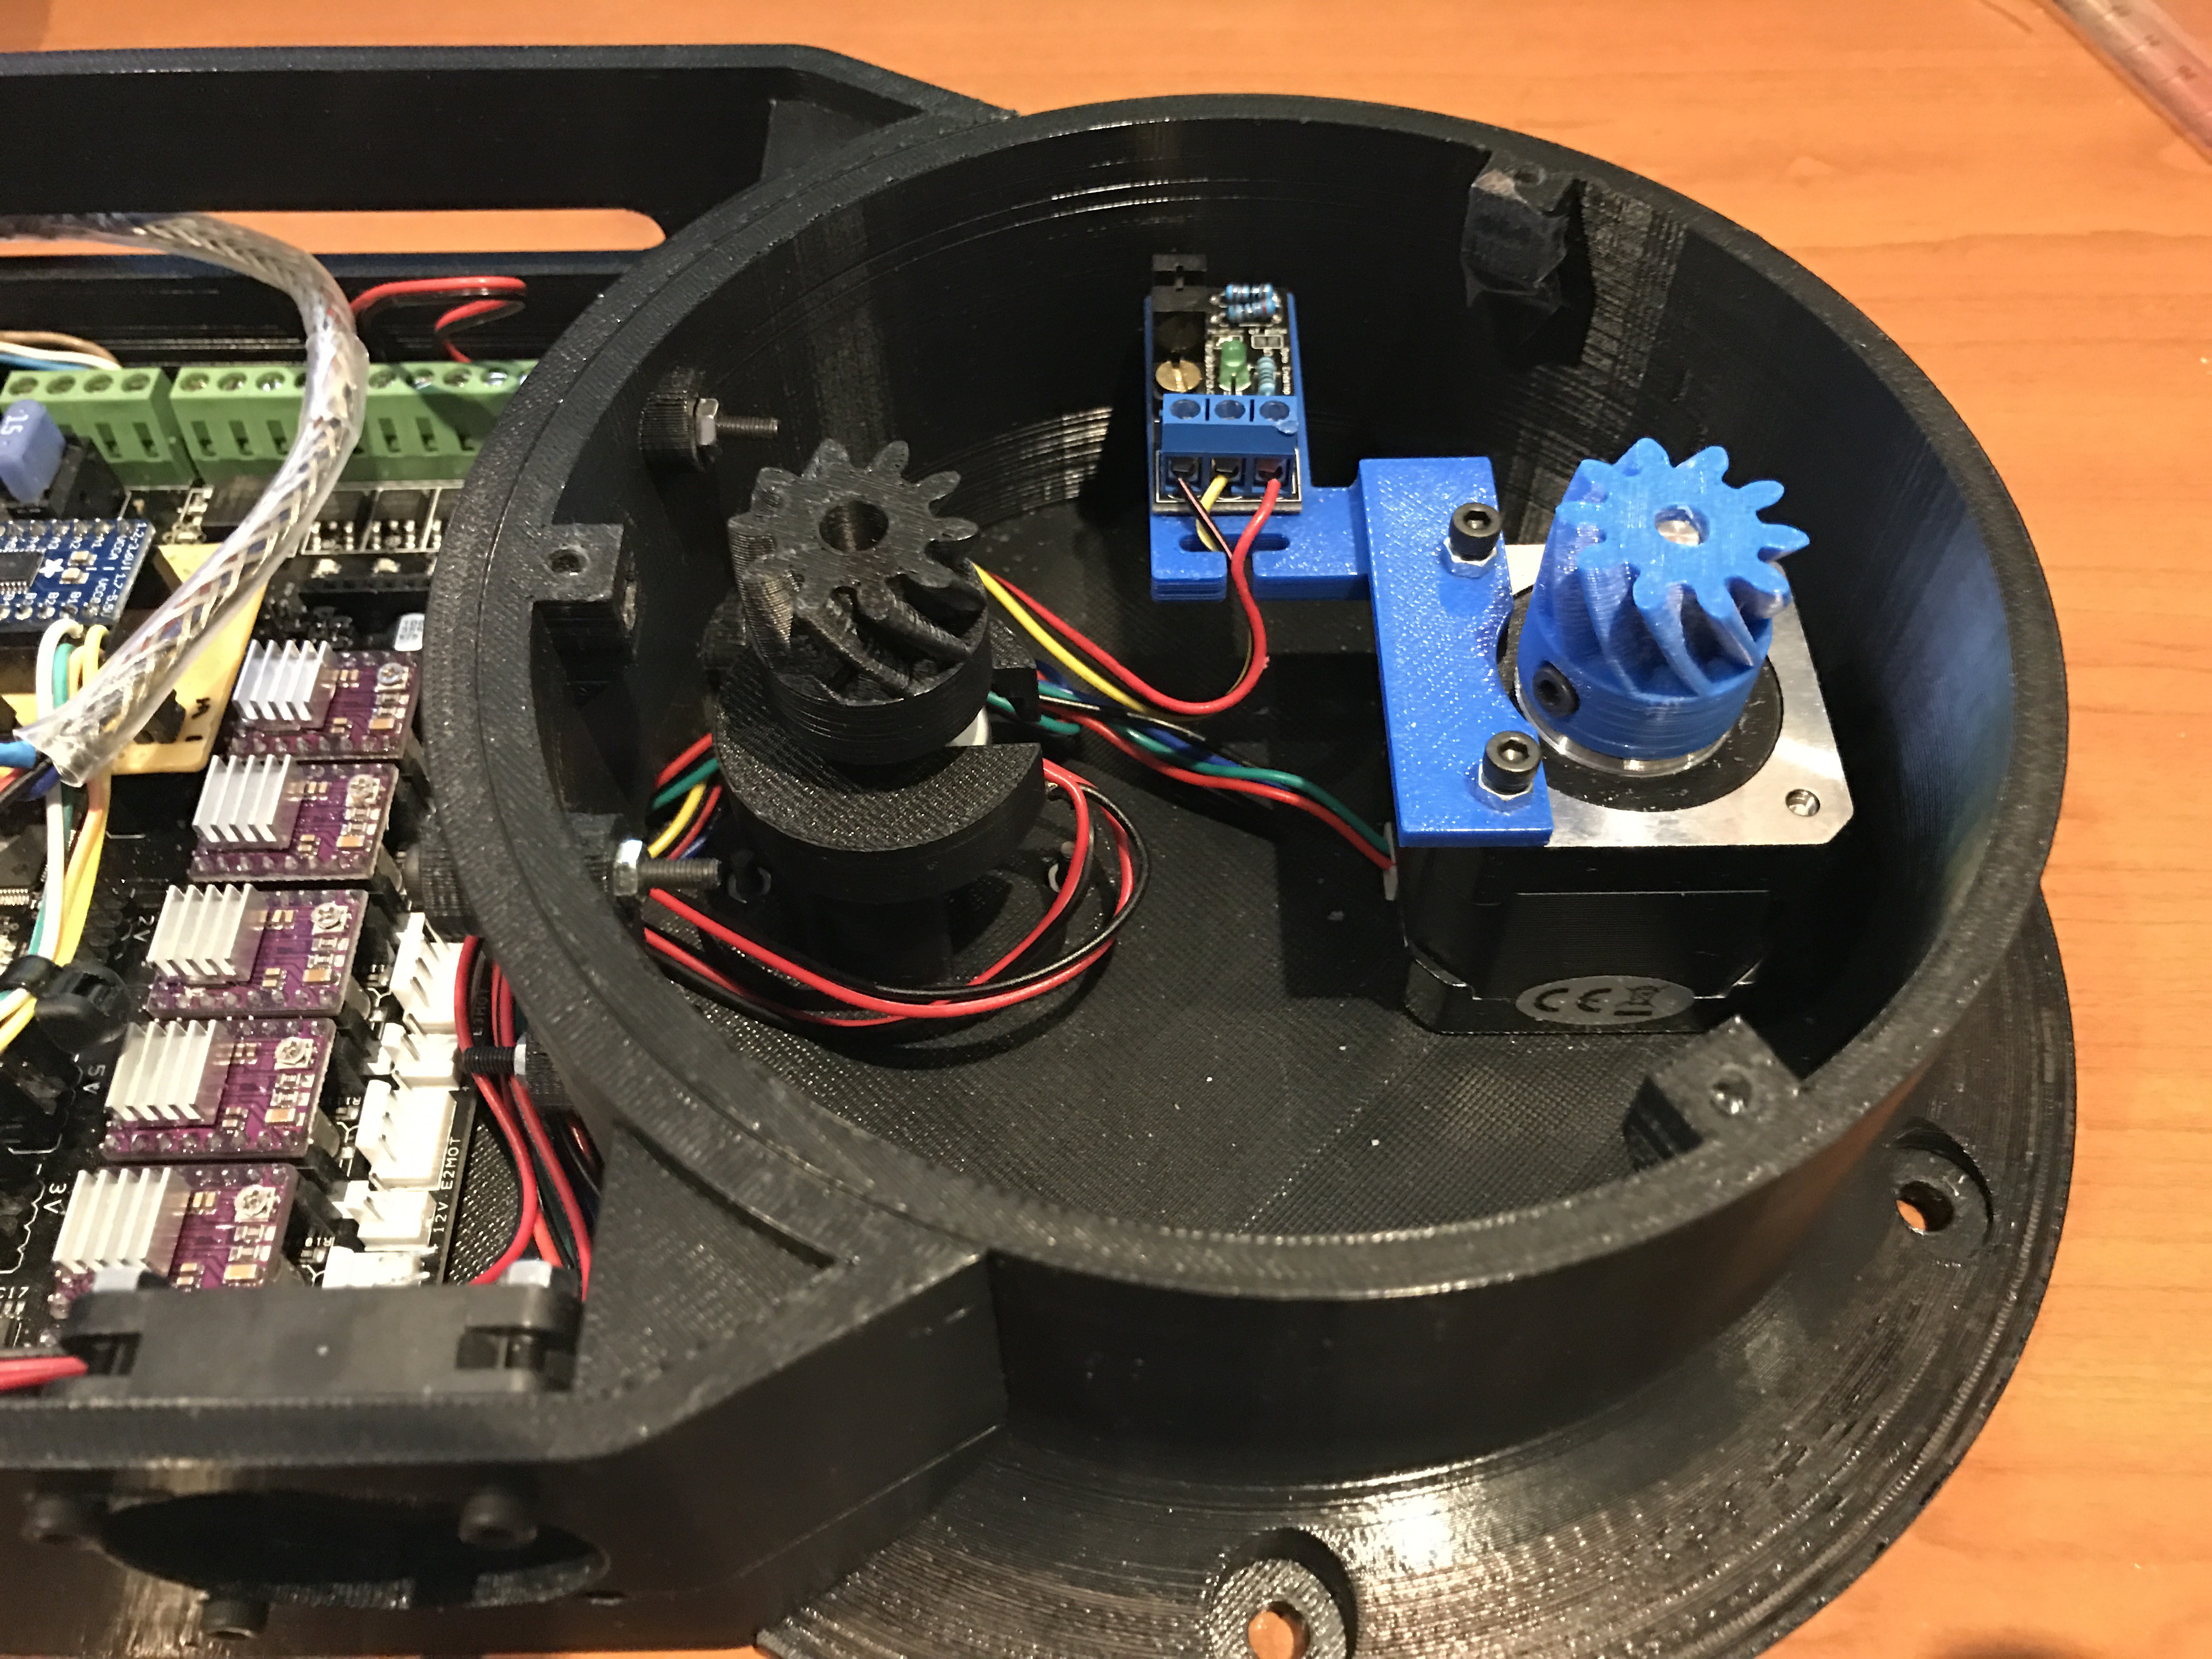
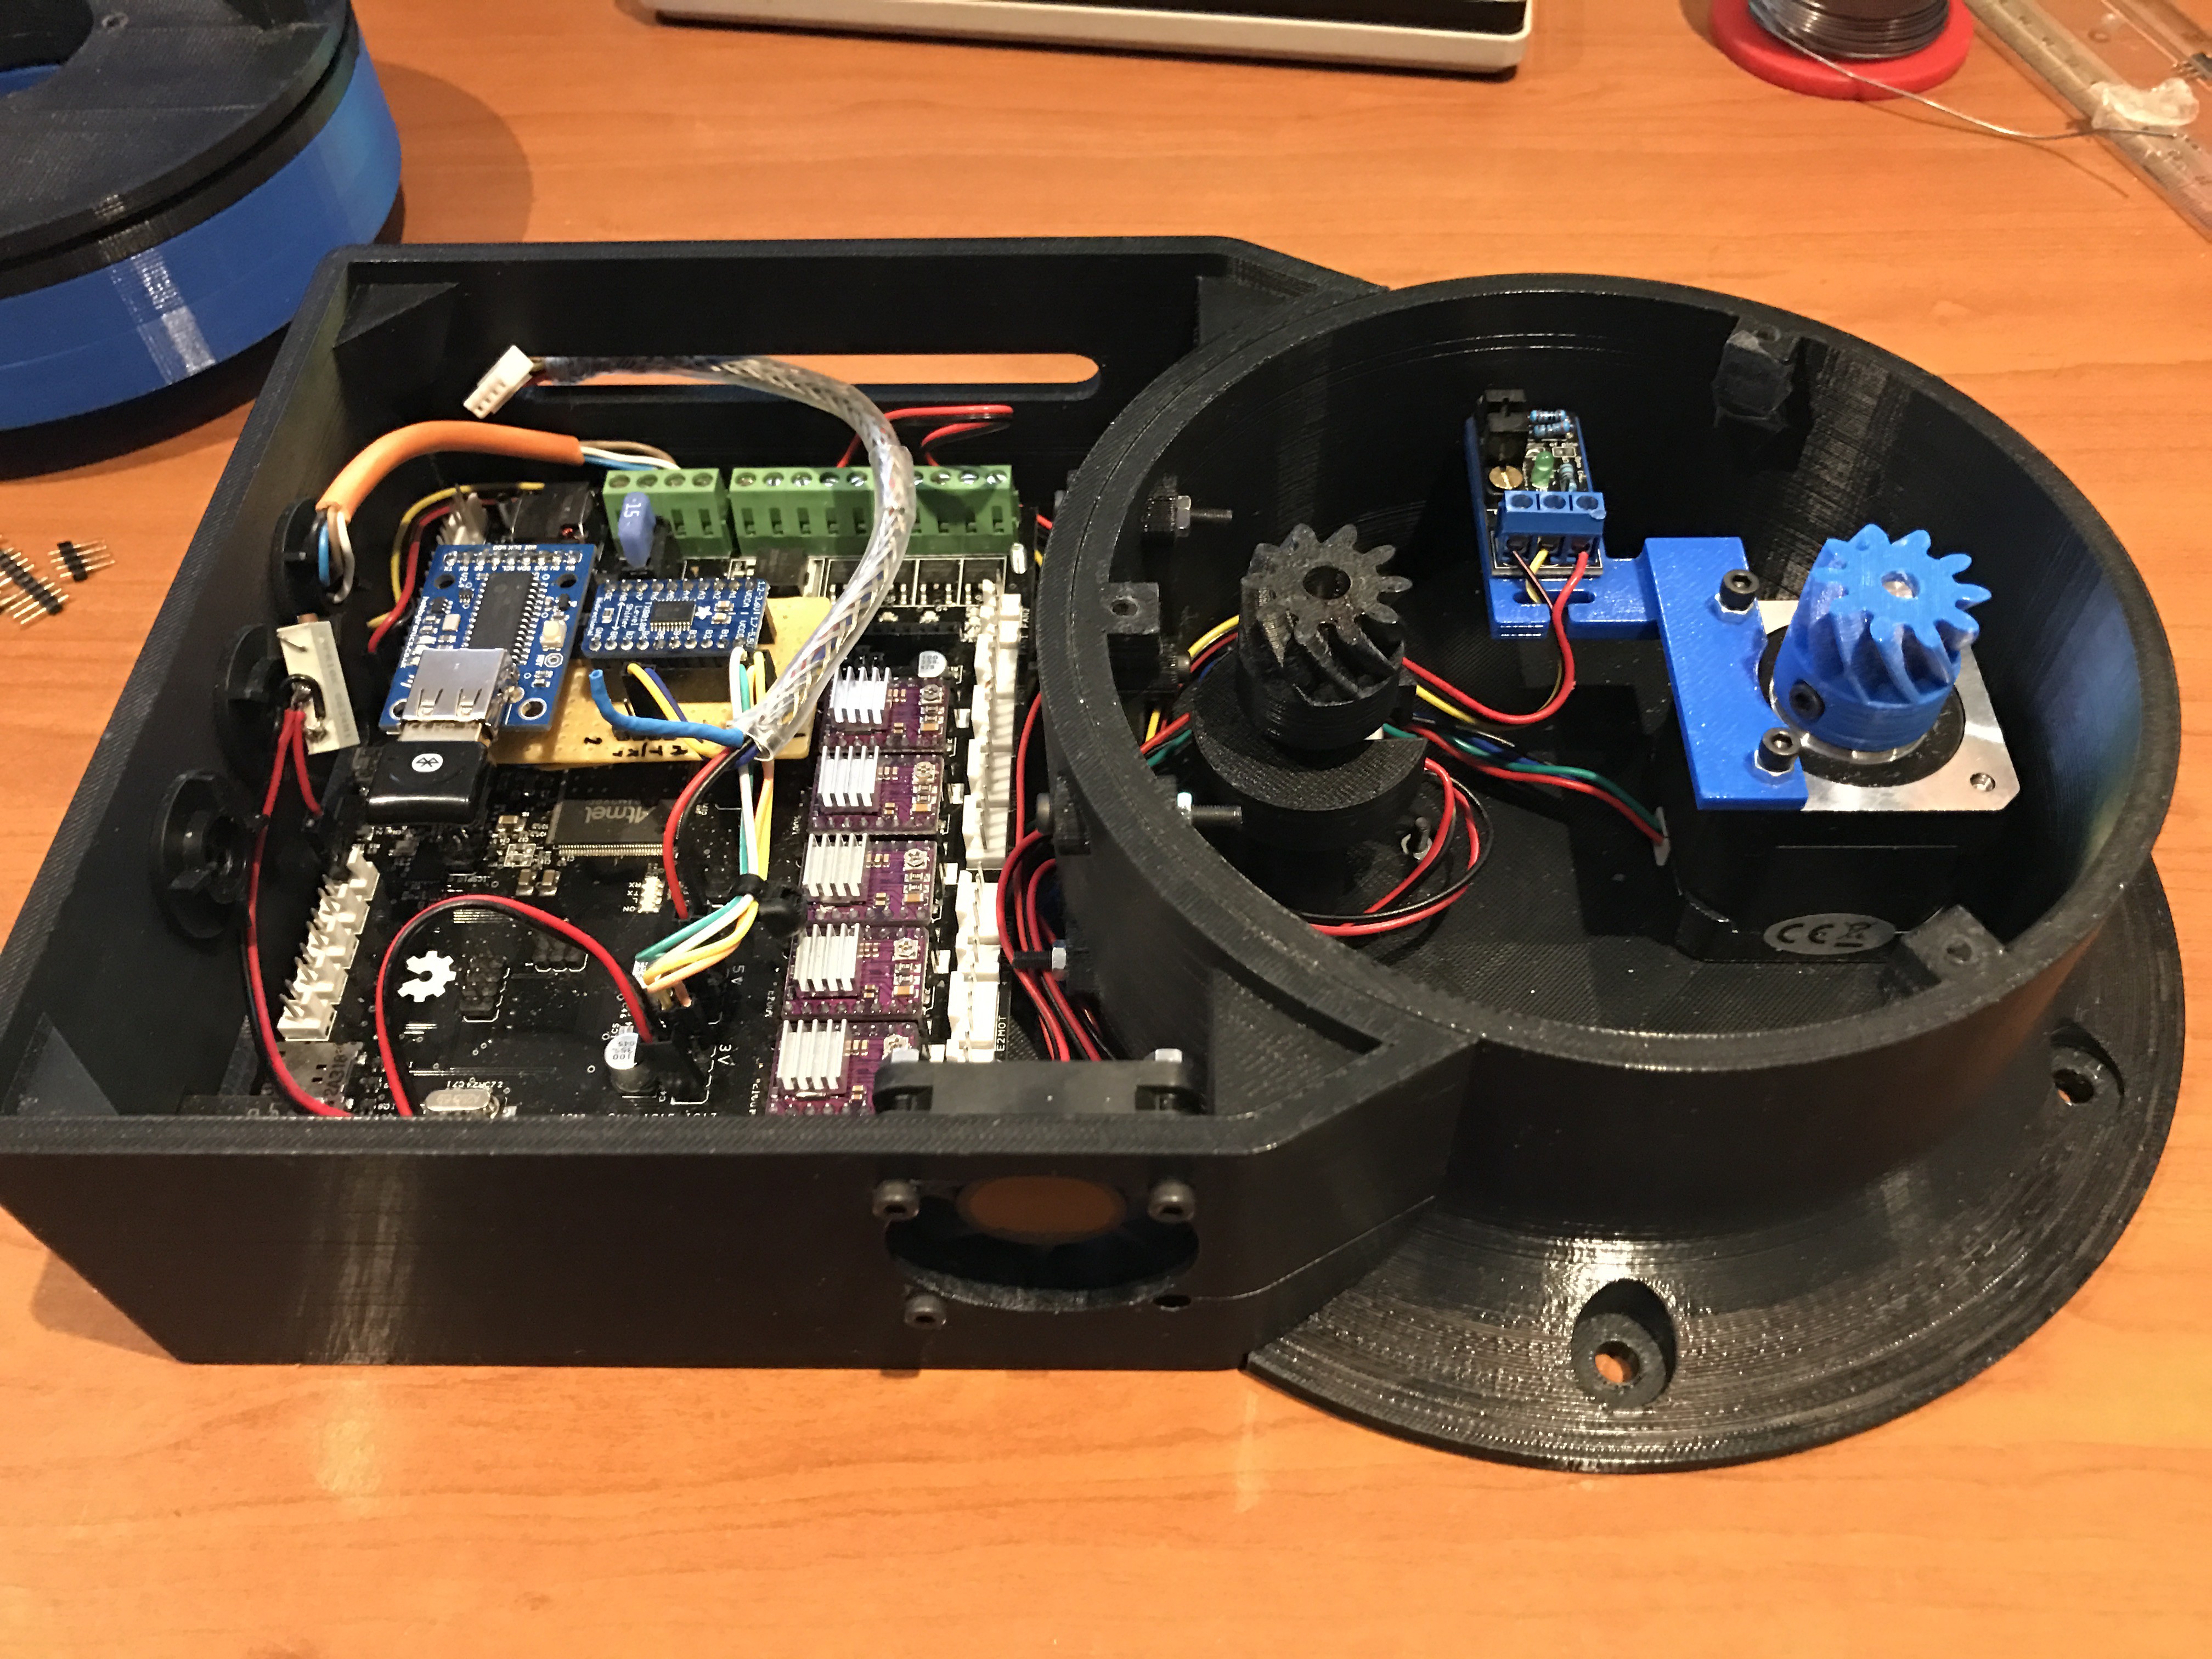
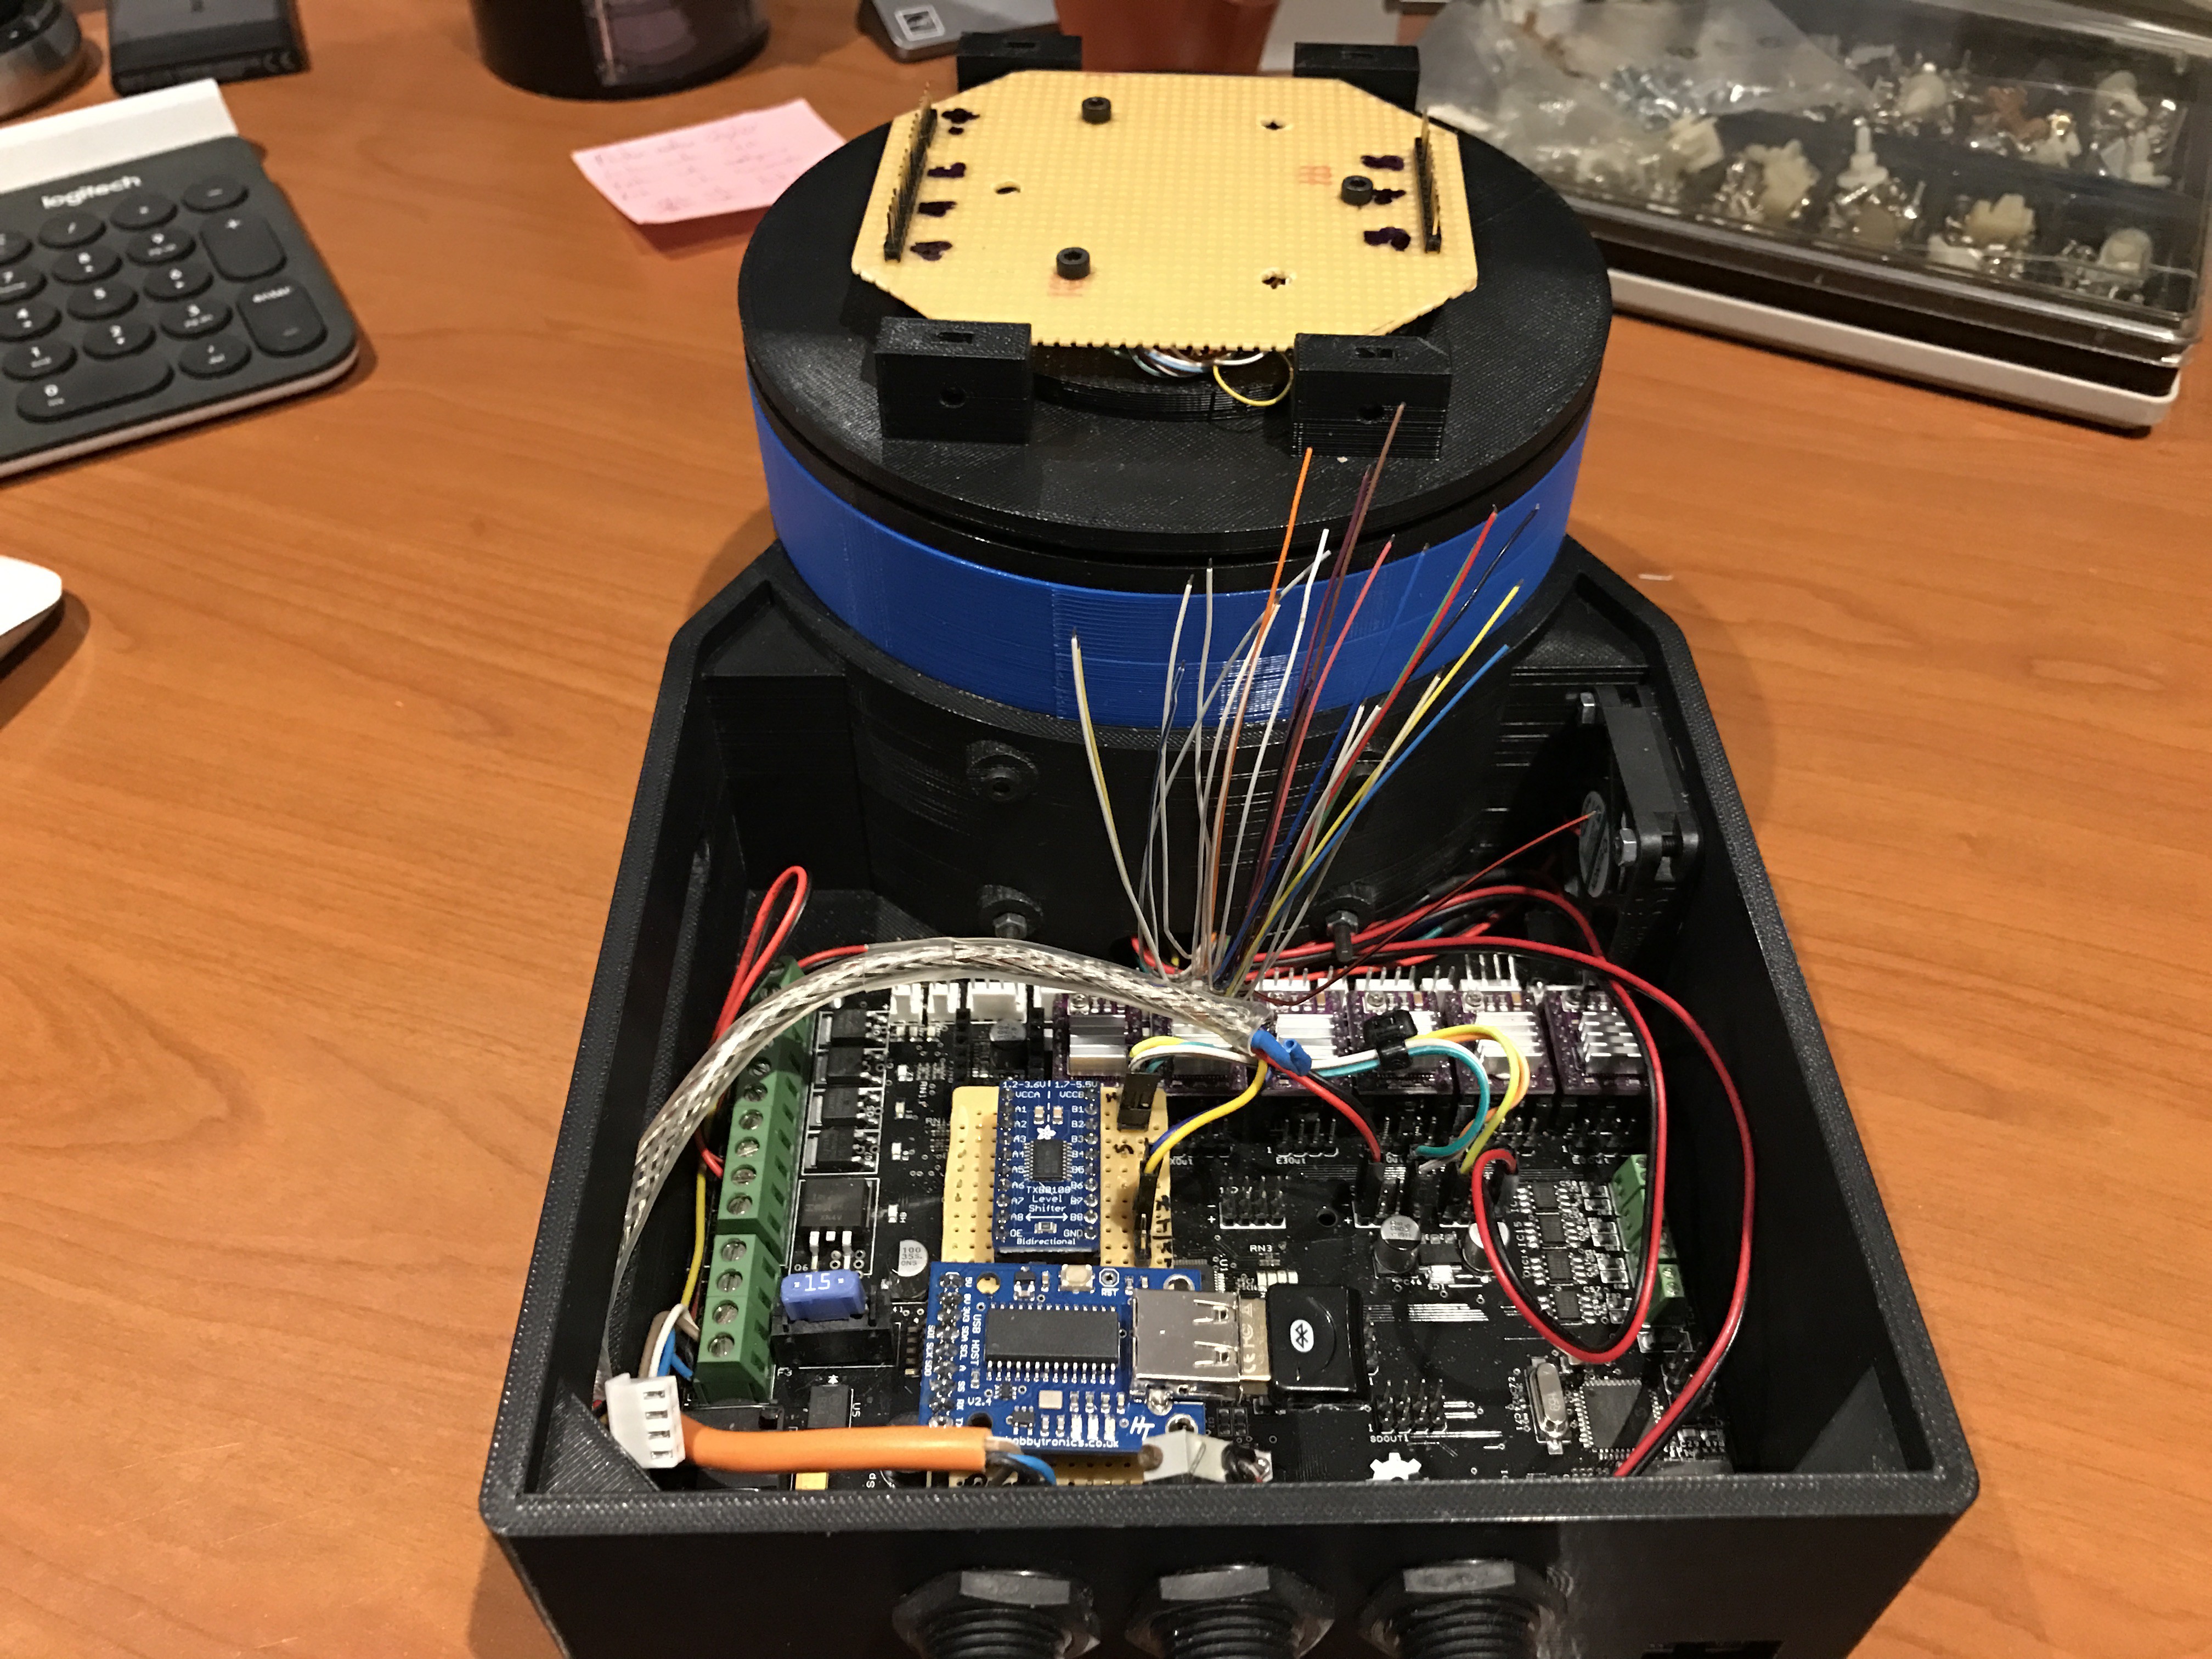
    Making room in the base, I have a motor with position sensor and feedback potentiometer wired, now it's time to add the slipring to it : -)

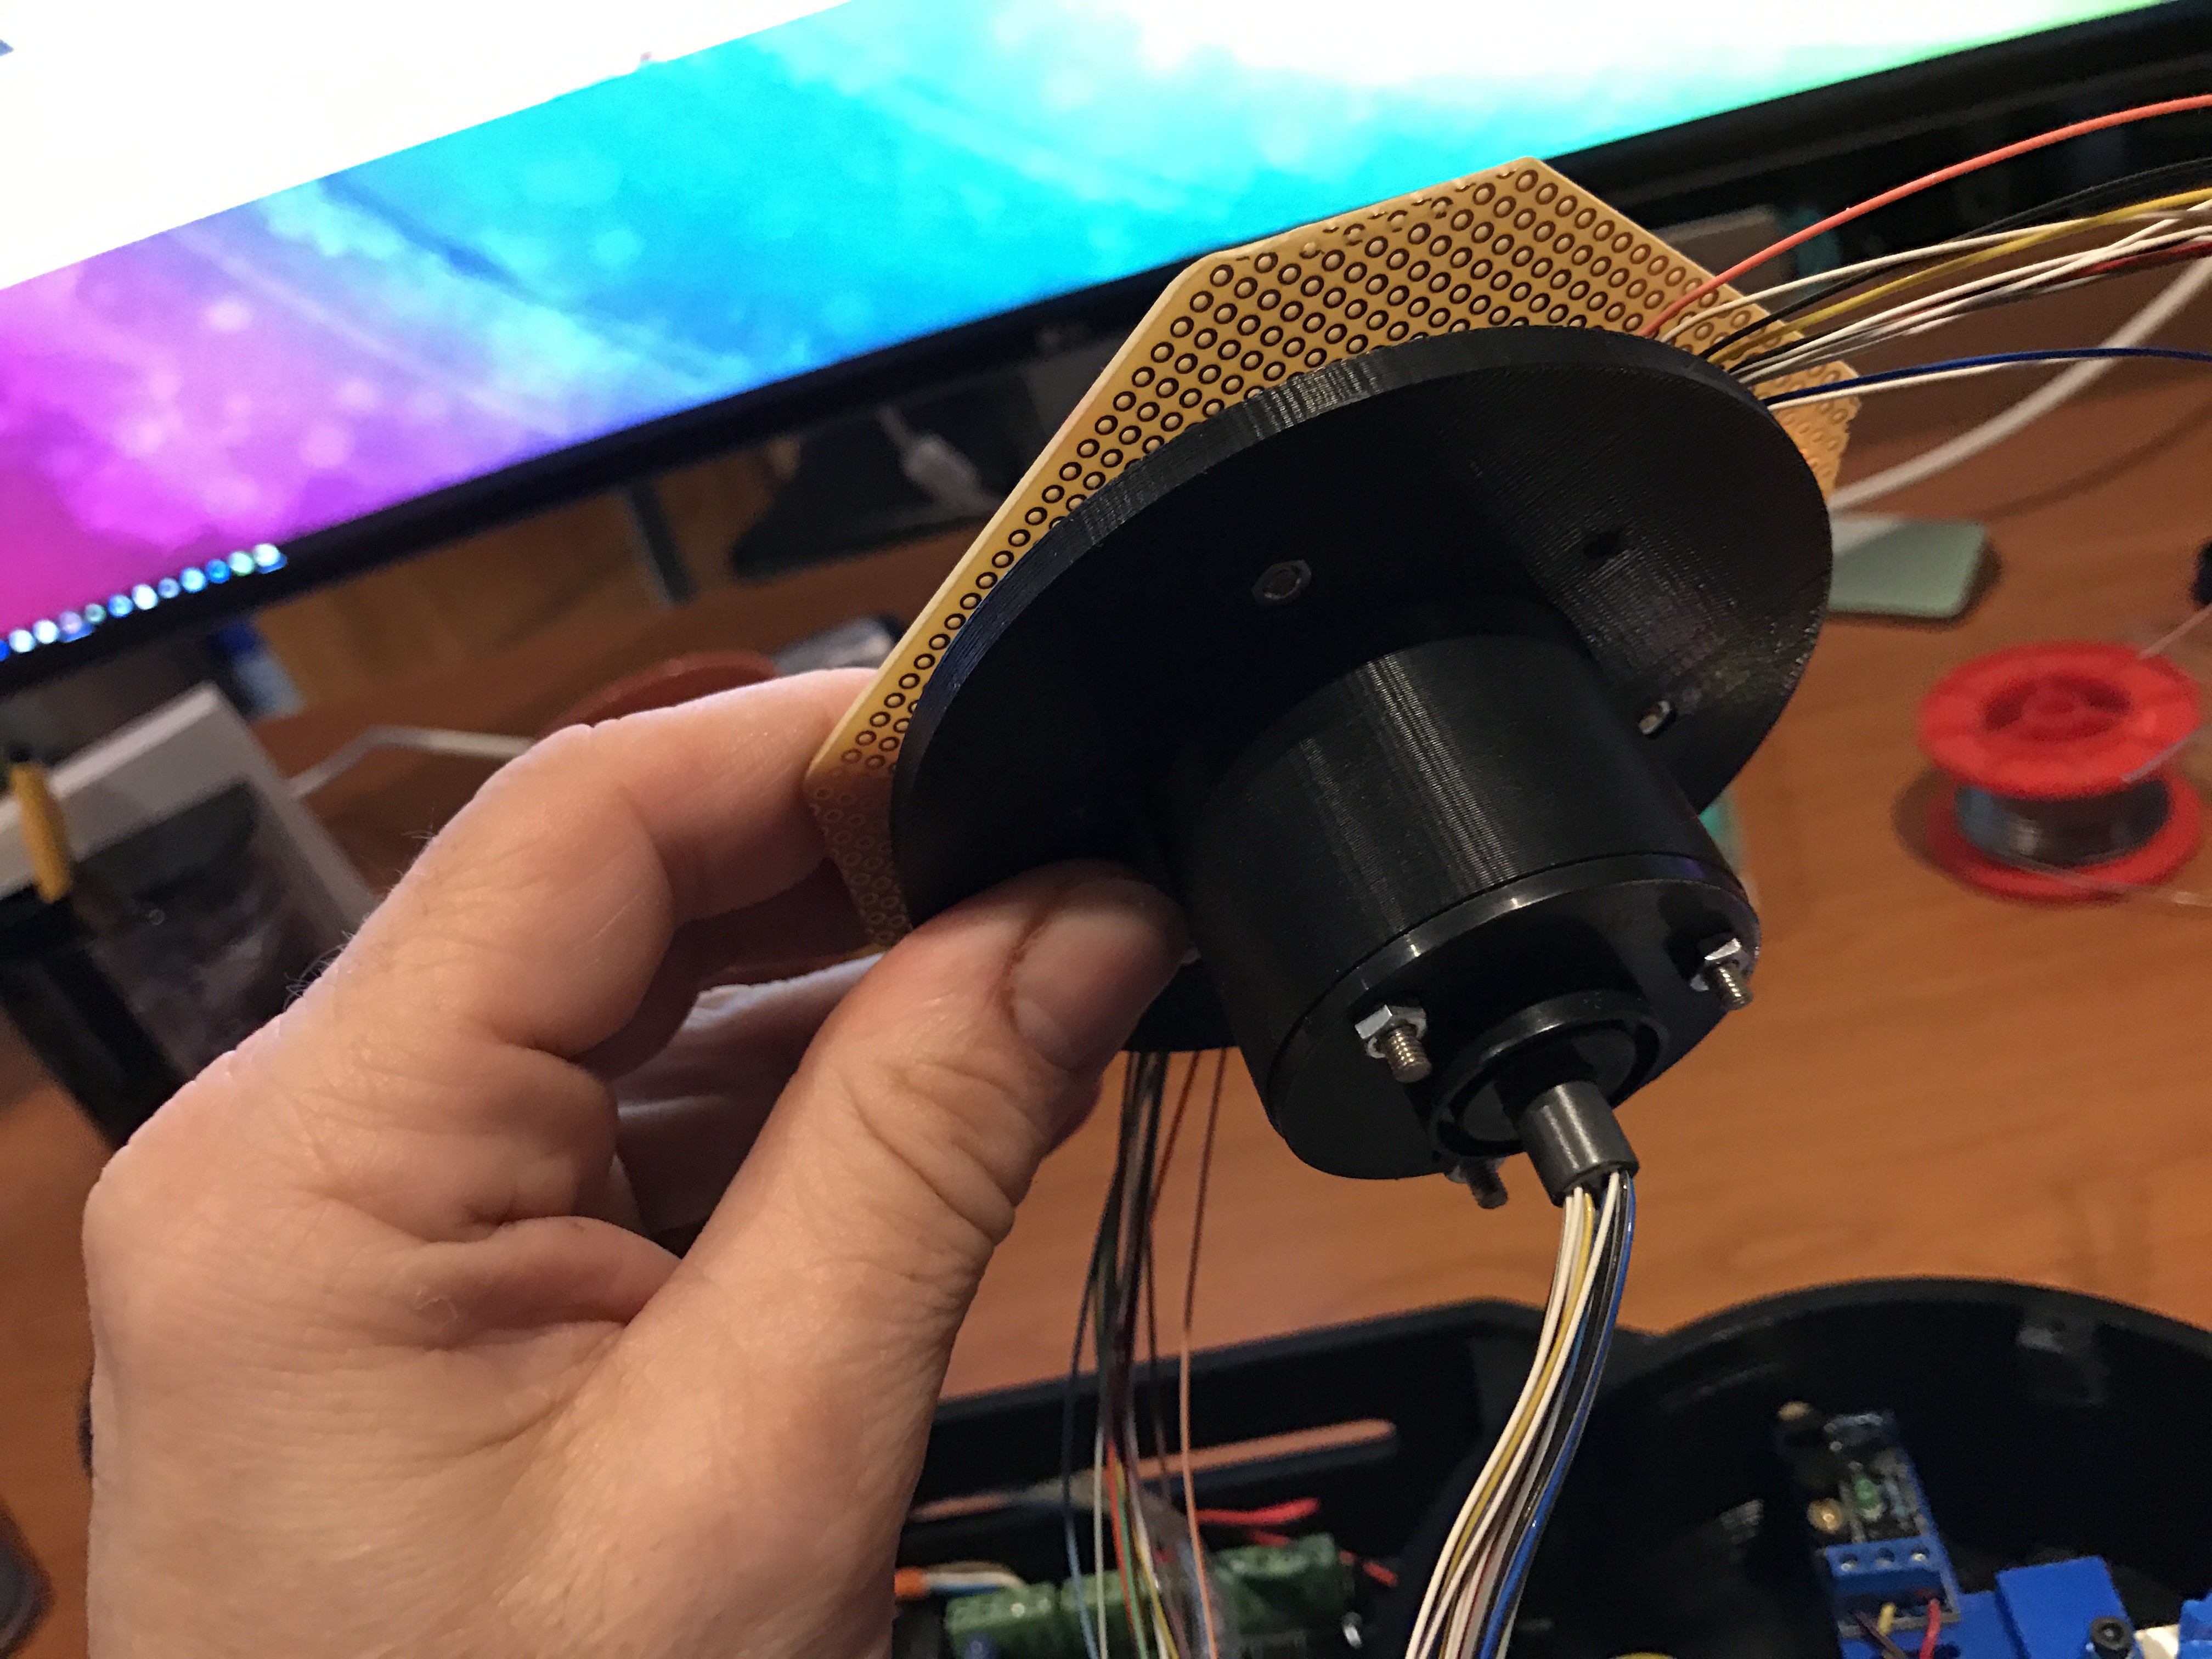
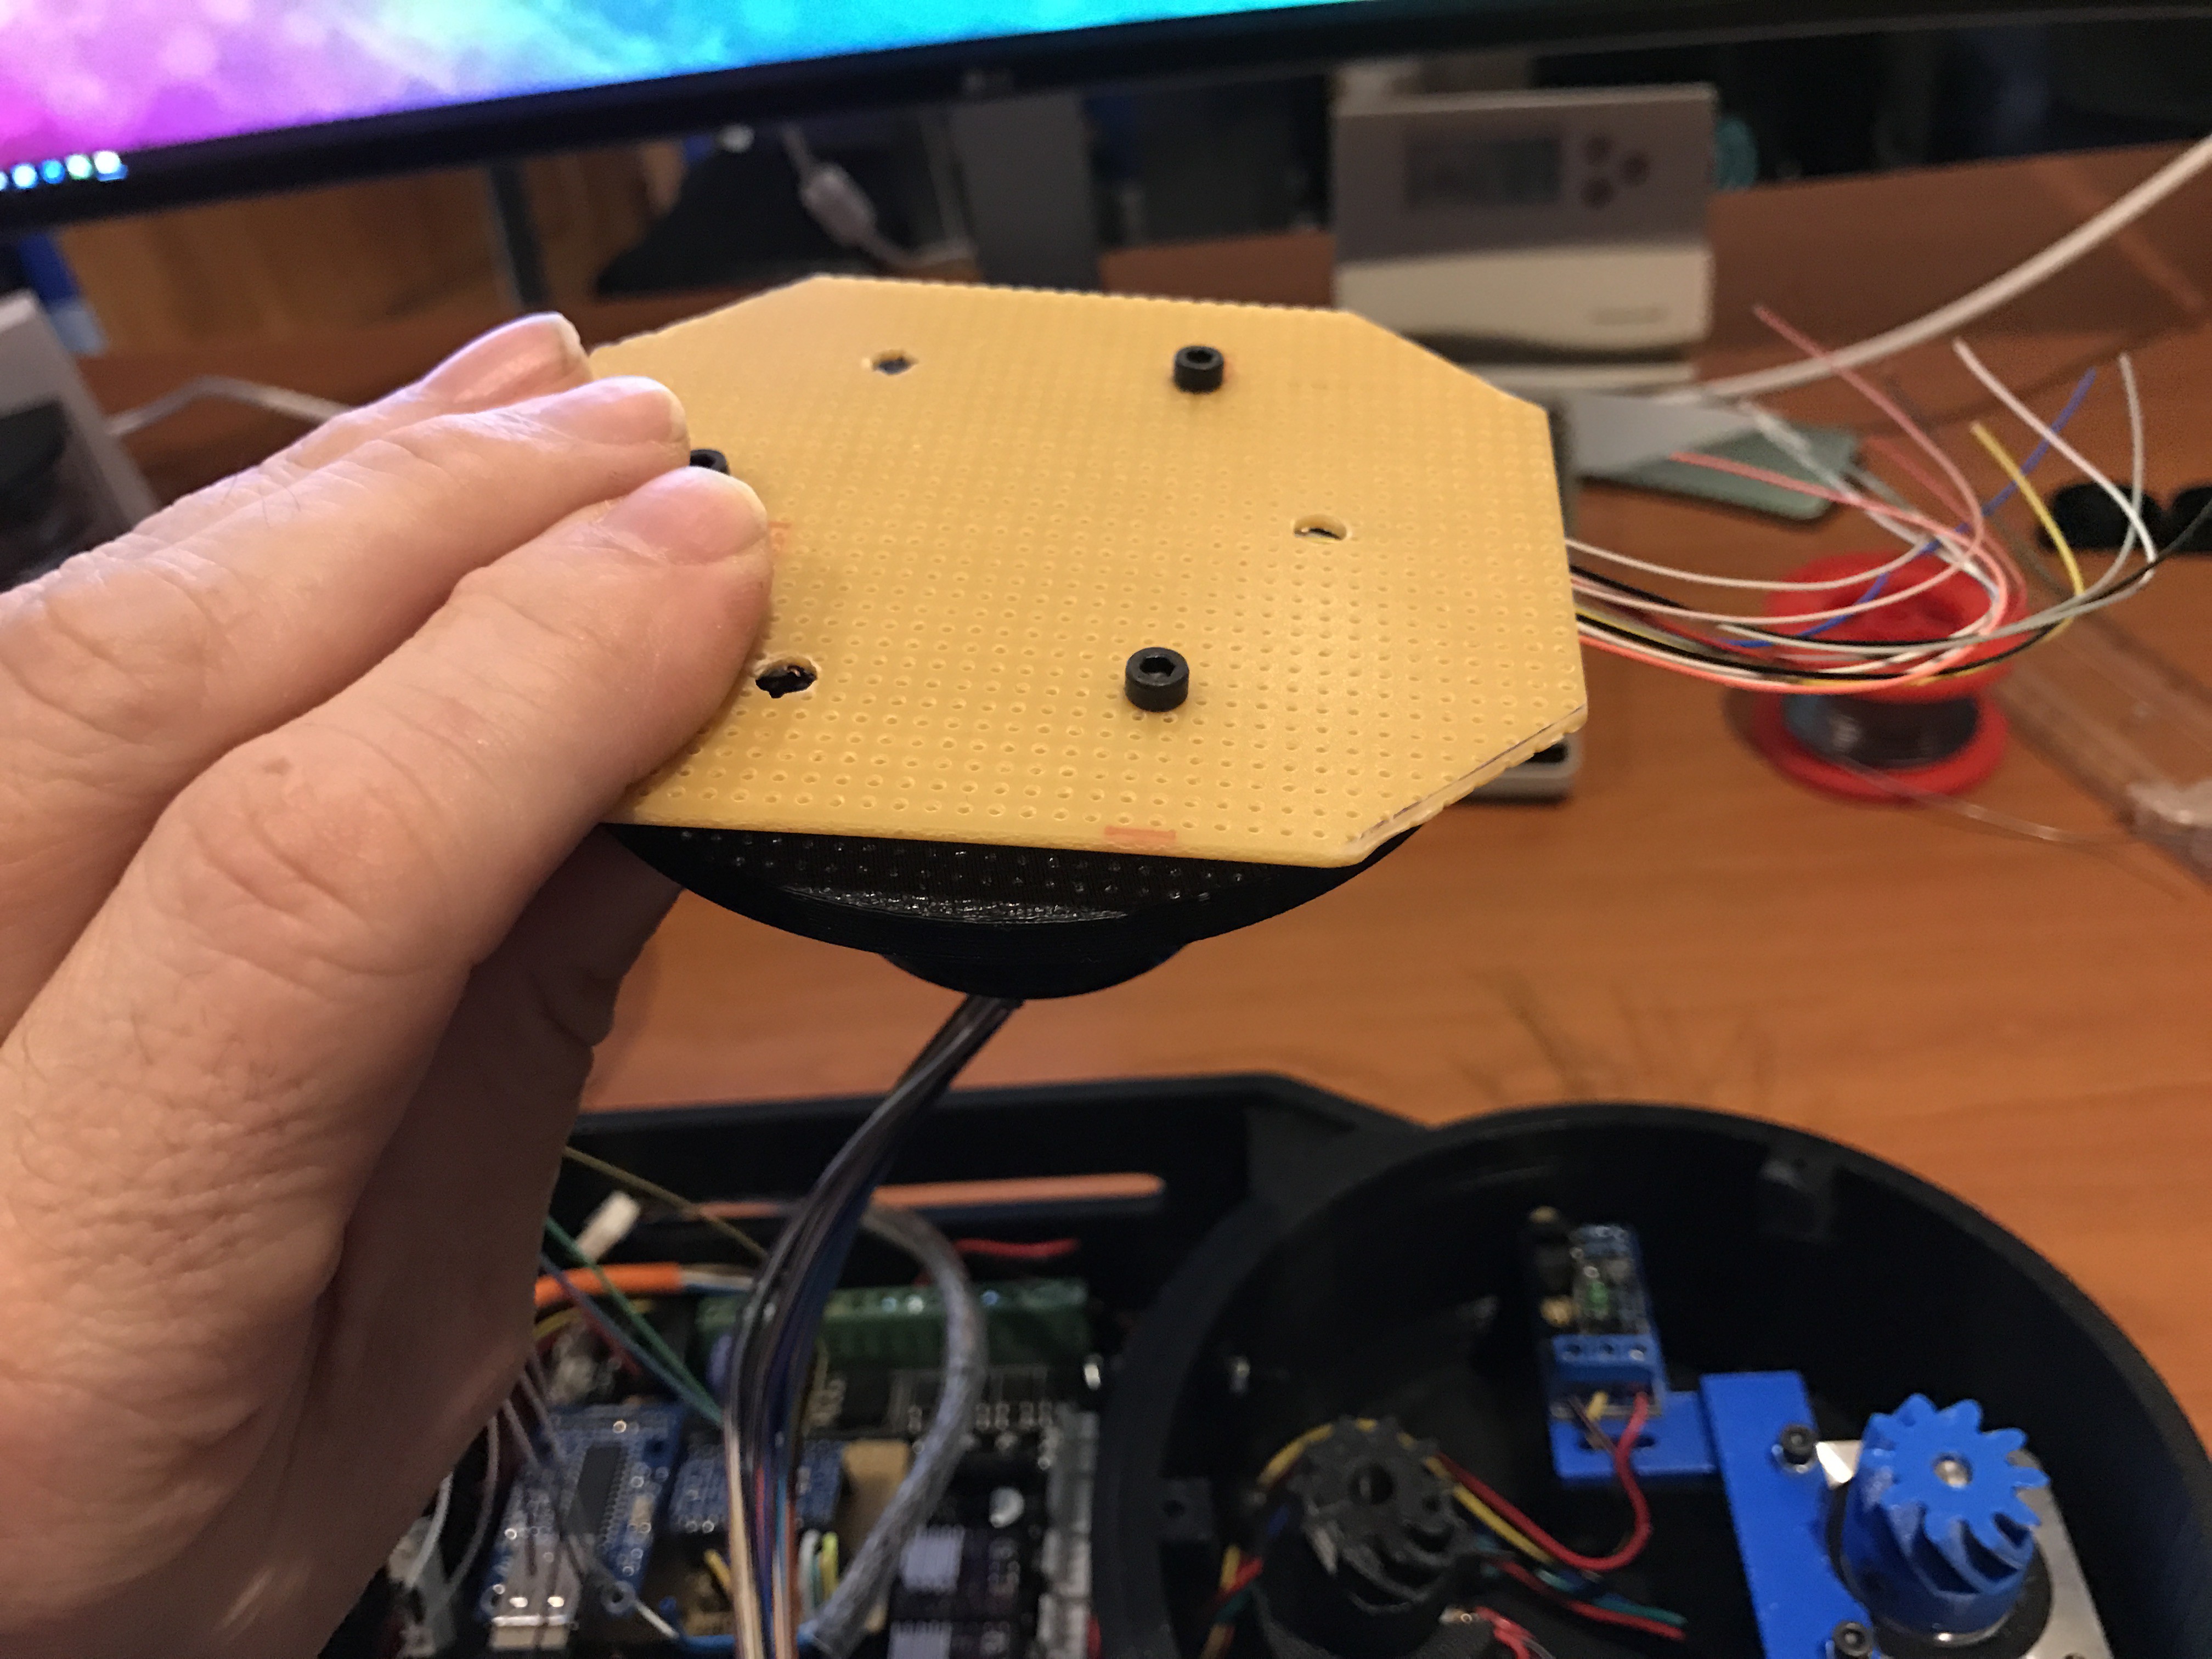
    Build my slipring into a ring that can be attached on the turning base.

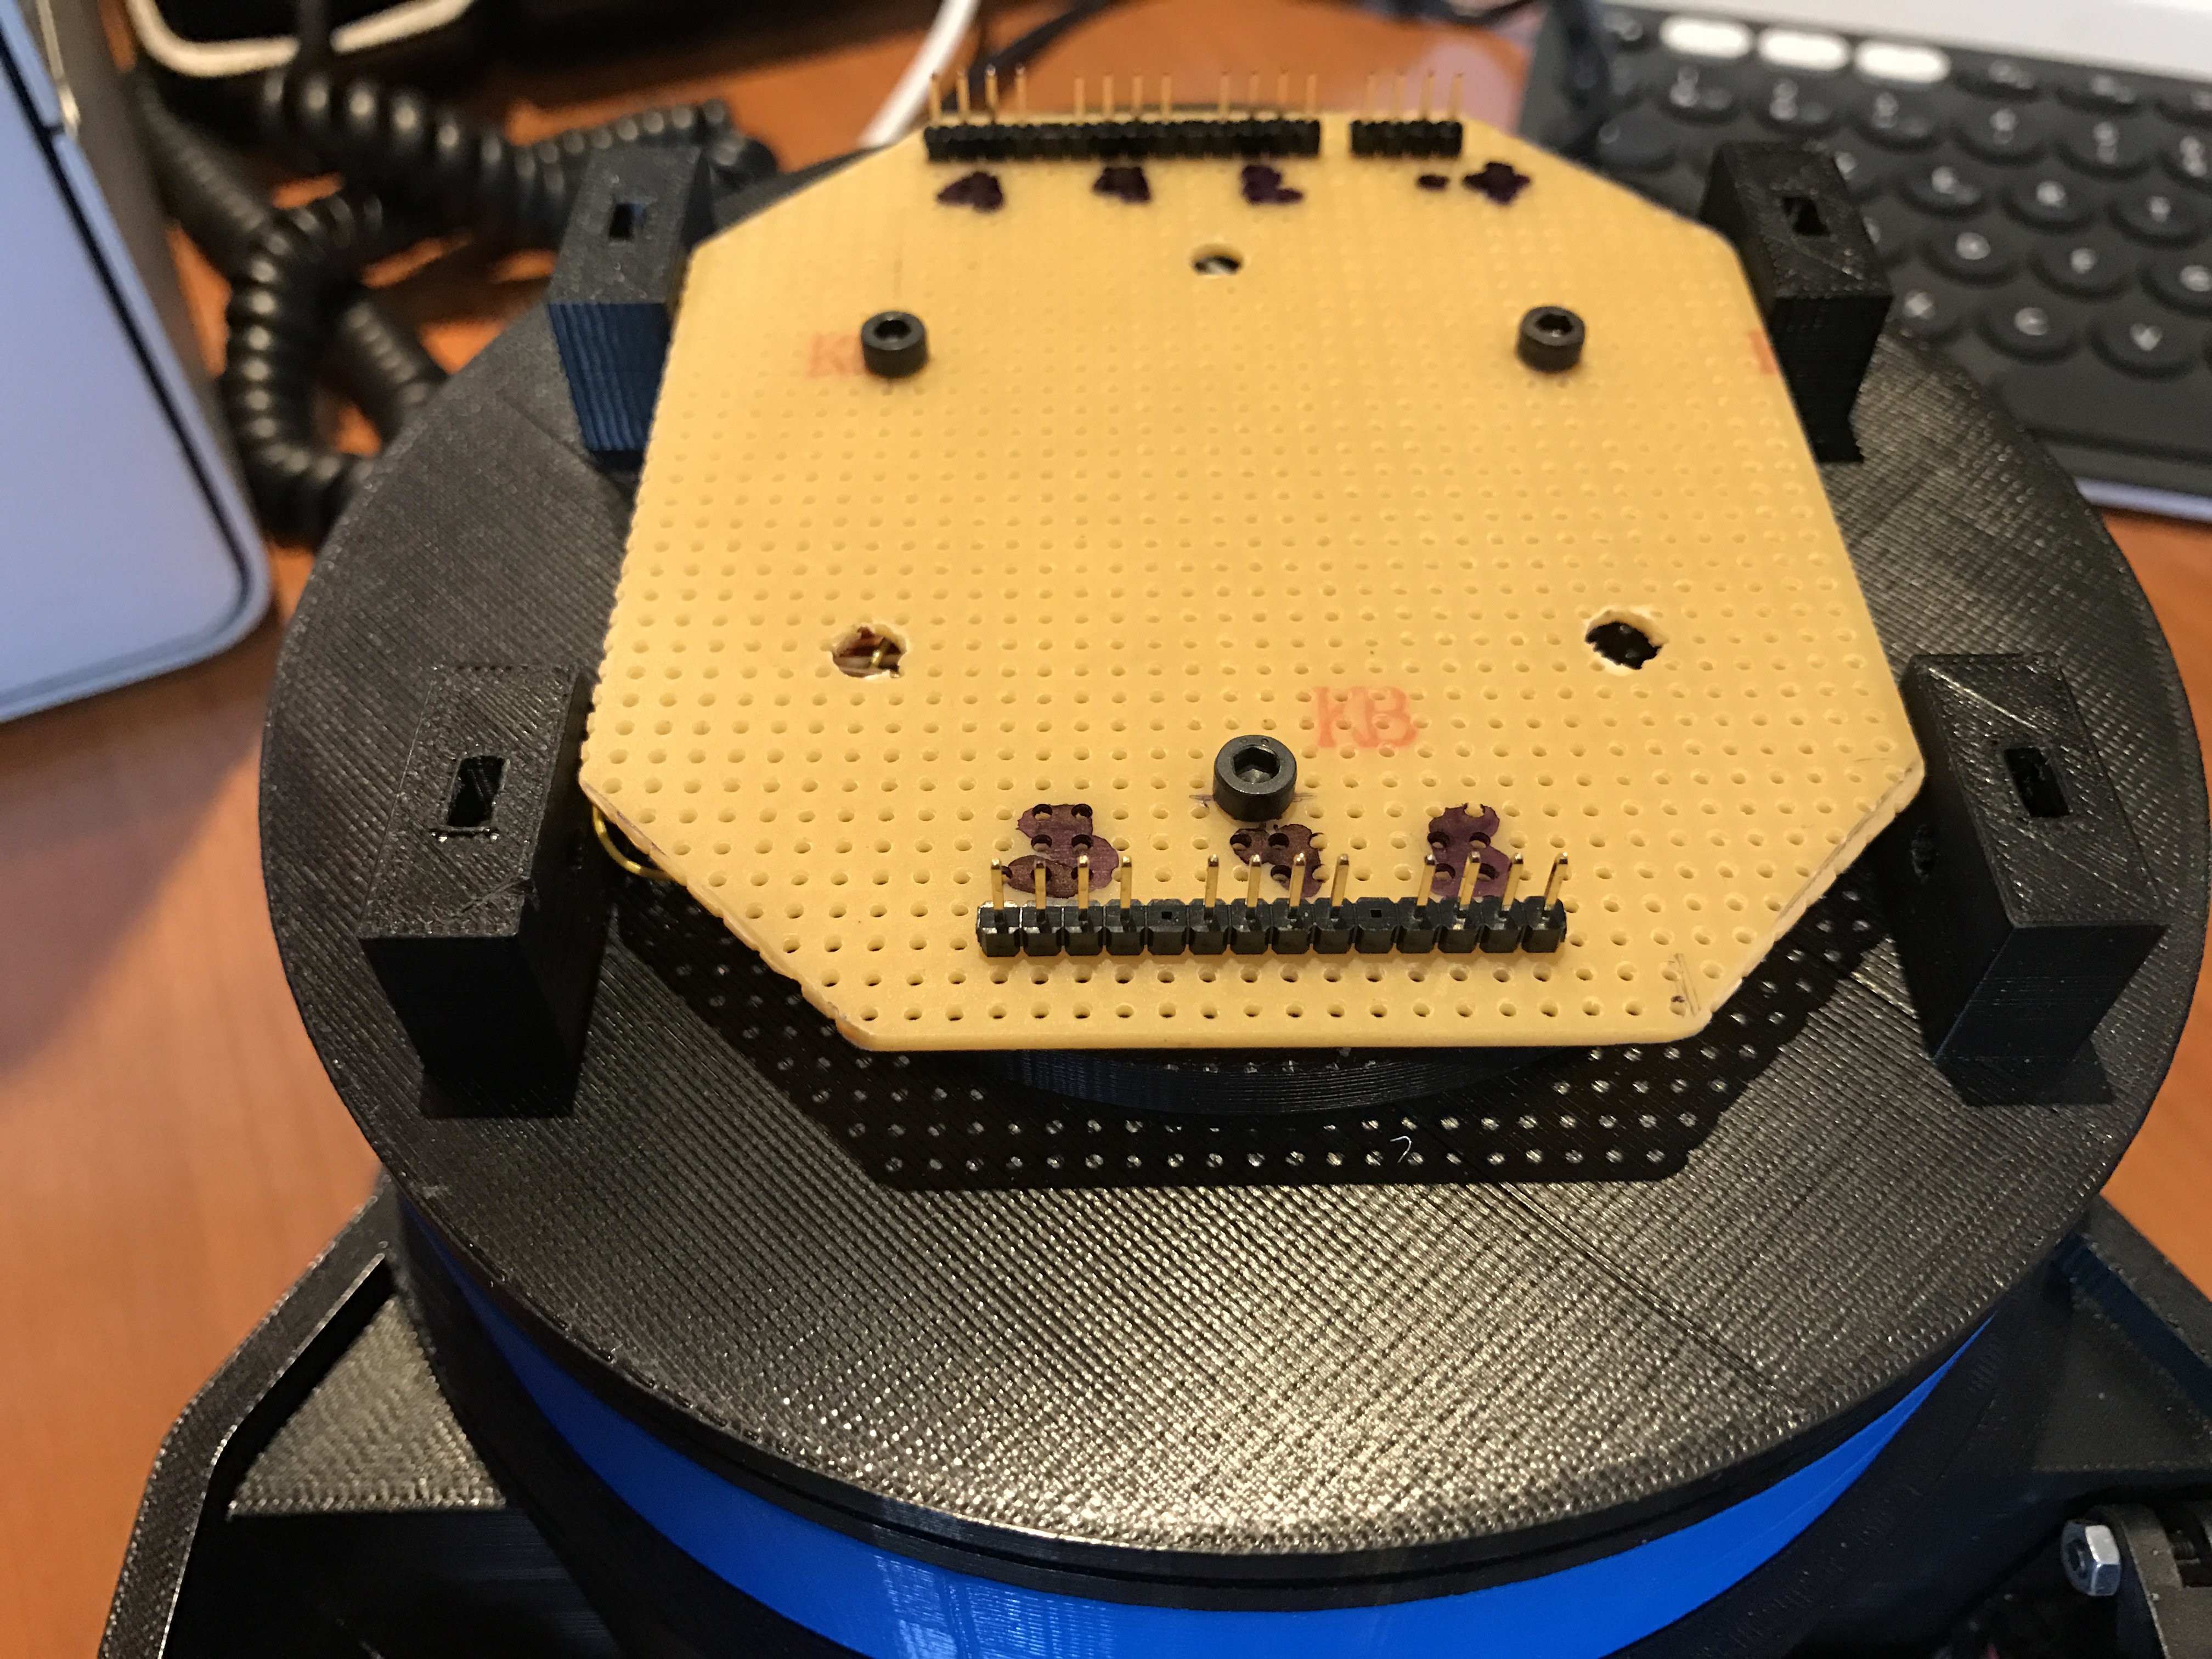
    Attached pcb and connectors on it

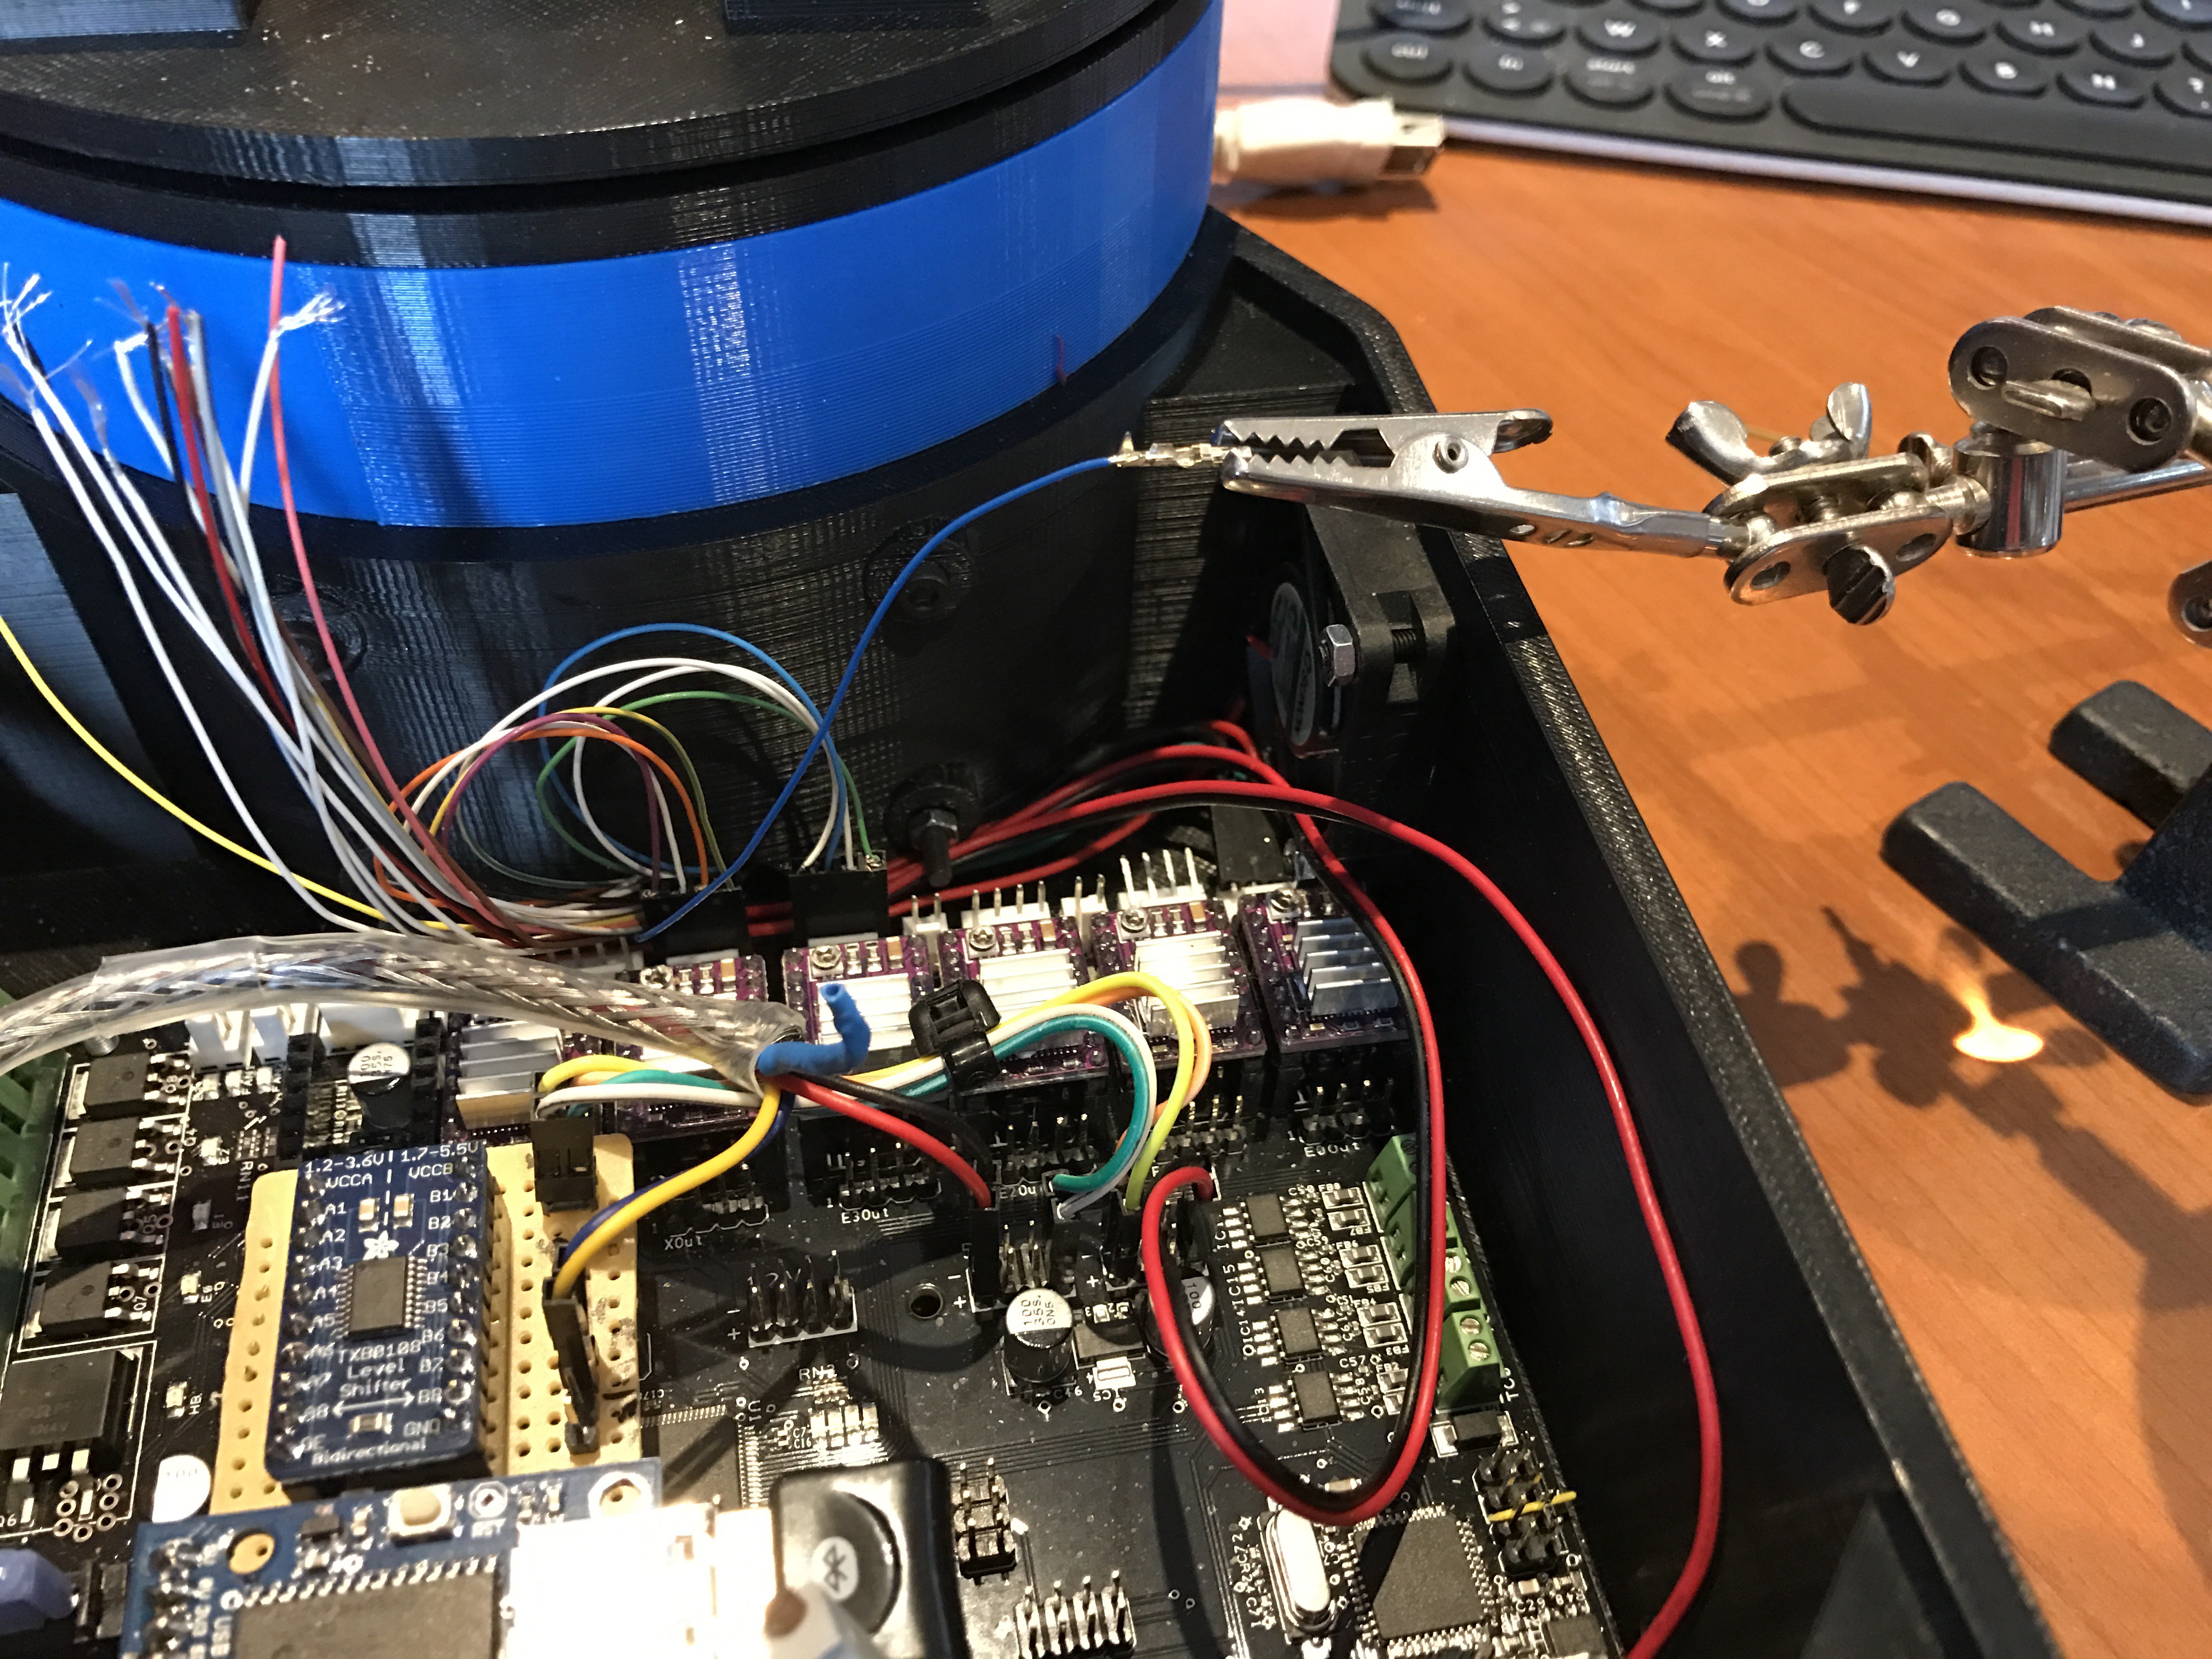
    6 steppers and 0V,5V,TX,RX for my arduino mini connectors, just to add all connectors in the controller box, very secure work adding all these small pins.

    My helping tool :-)

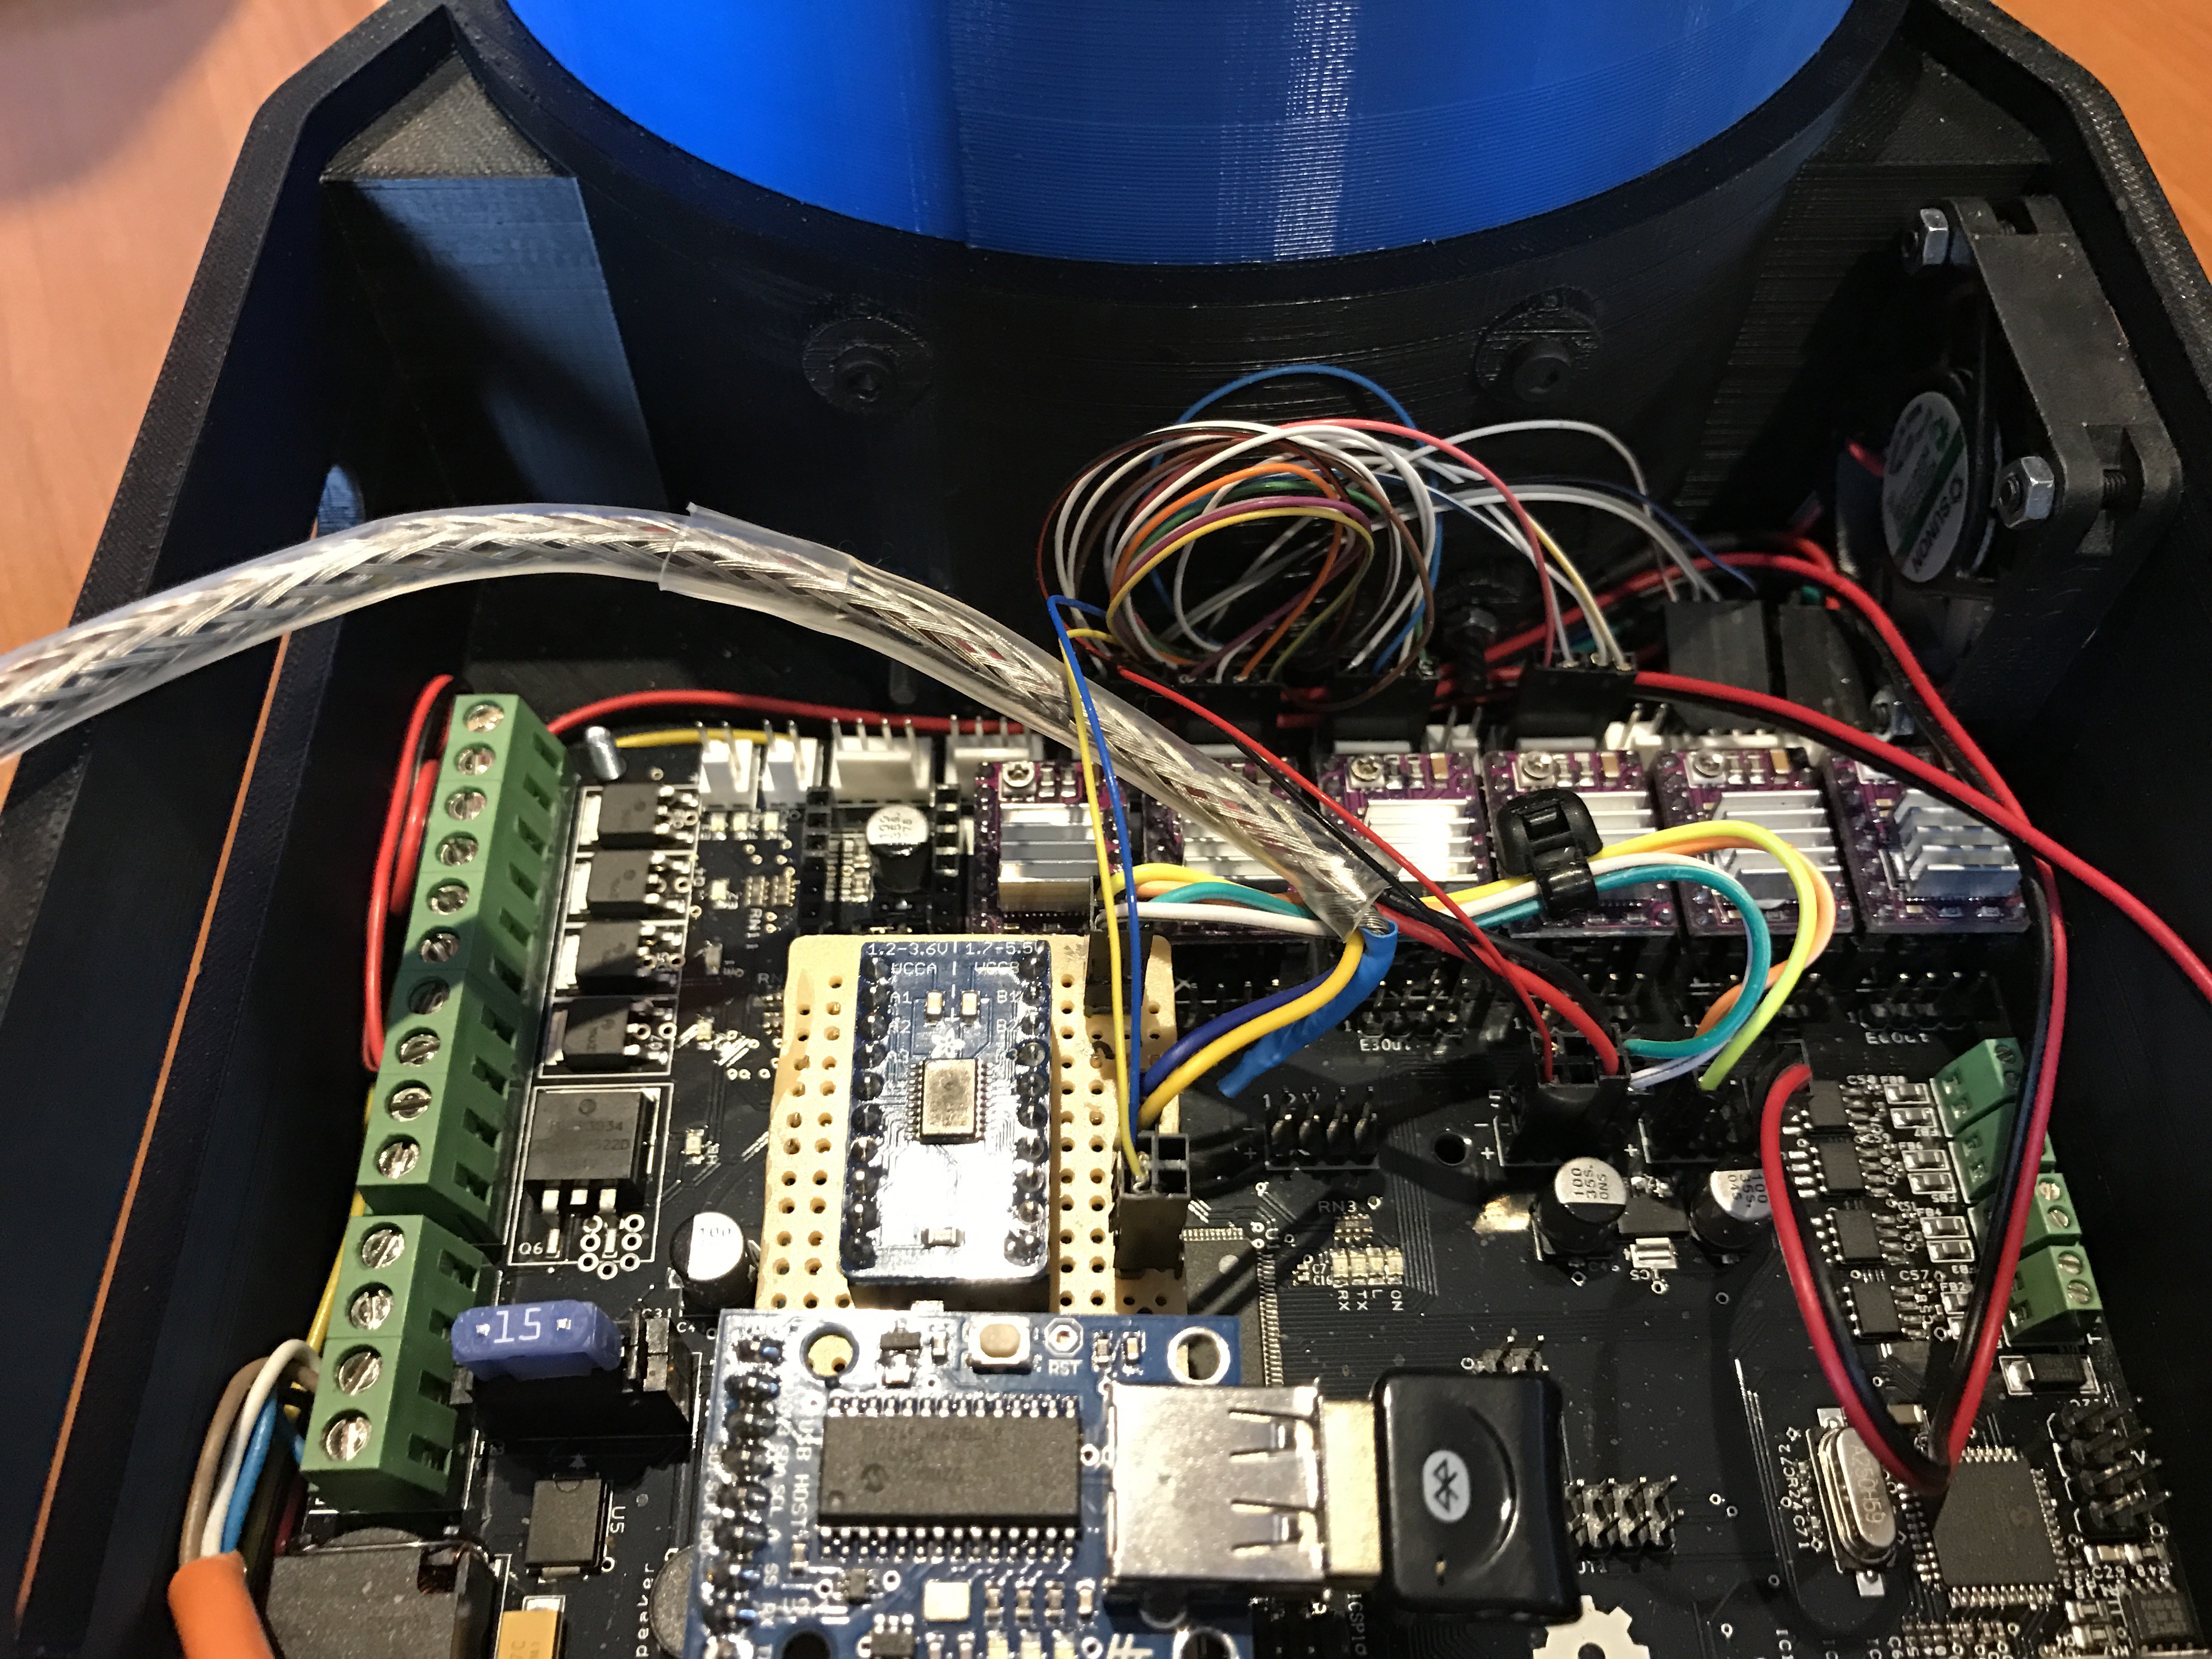
    Finnished! every wire has his connection, hoooraaayyy.

    No wire to find! That's what I wanted!

    Up to the next part, see ya!

  • 'ELECTRONIC SHEET THOR+'

    dannyvandenheuvel02/11/2017 at 16:49 2 comments

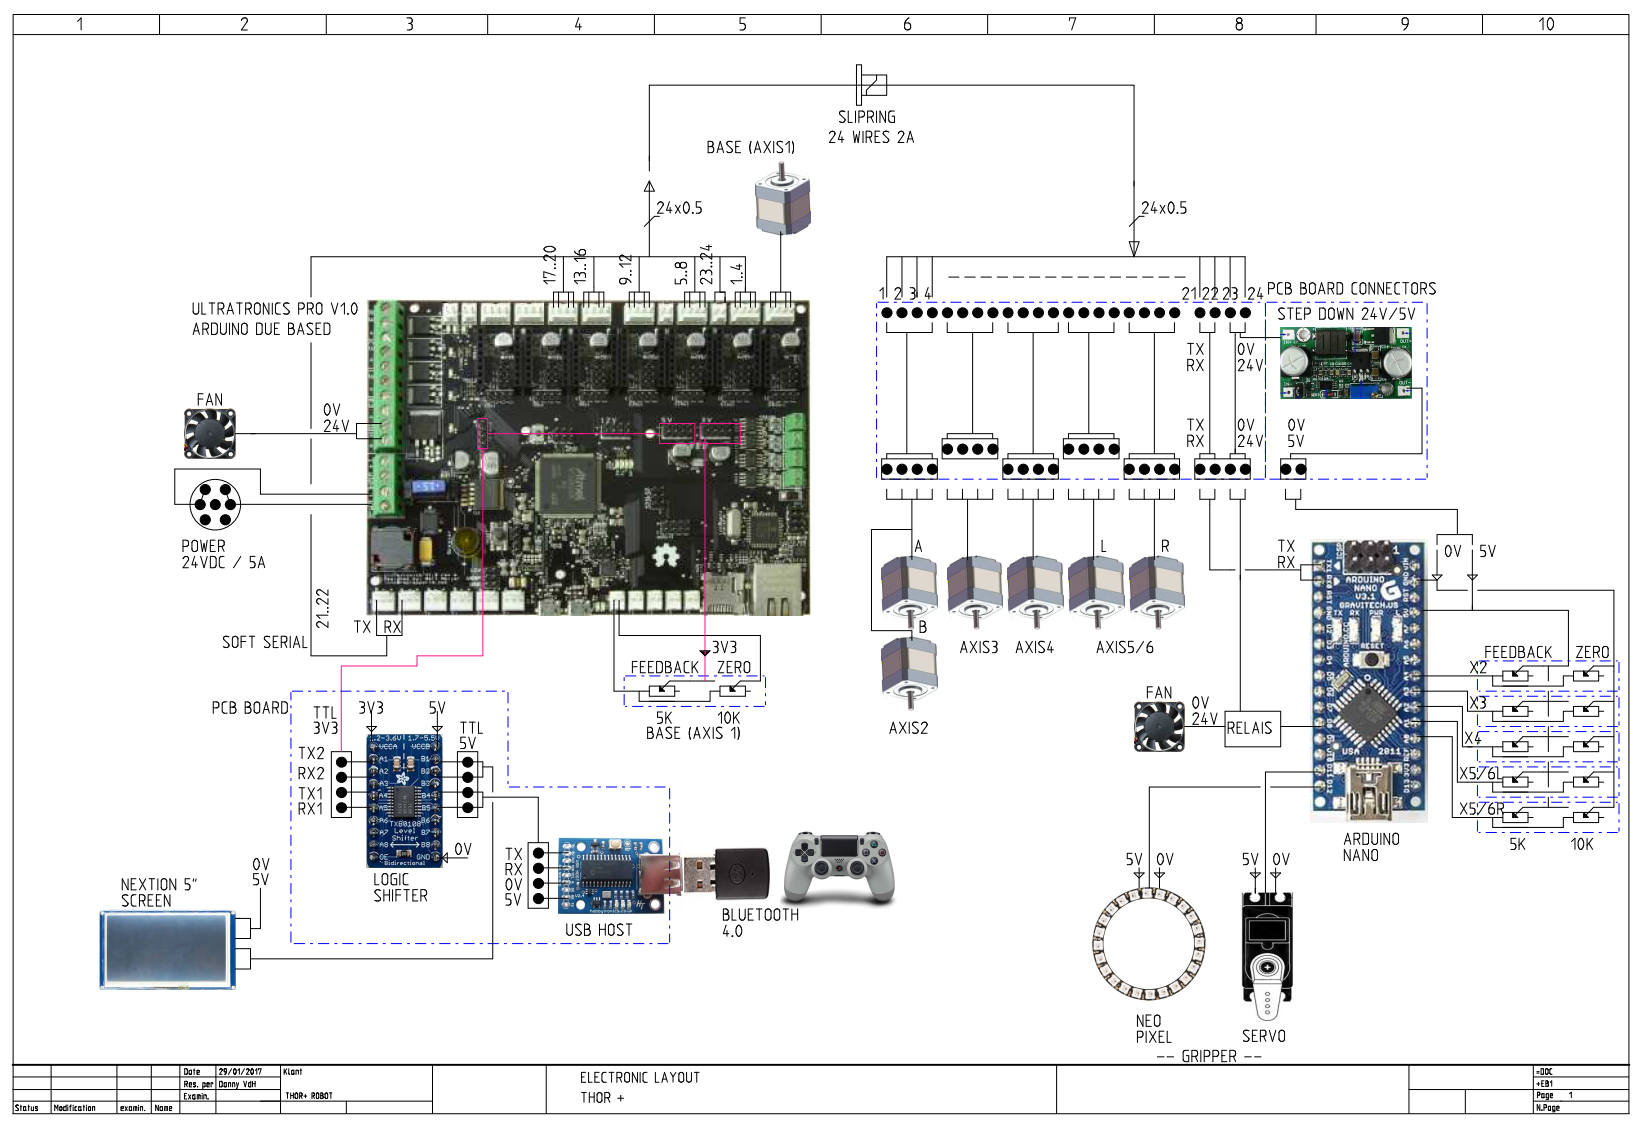
    I made a complete electronic sheet of my THOR+ robotic arm
    Components used:
    1x Main controller board Ultratronics Pro V1.0 based on arduino due
    6x Polulu stepper driver 8825 cooled max 2A - 24V
    1x Logic shifter 3V3 <> 5V 8 channels
    1x USB Host PCB with flashed software PS4 controller to TTL serial connection
    1x Bluetooth dongle 4.0
    1x Slipring 24 wires max.2A for each wire
    1x Arduino Nano
    1x Neo pixel ring (gripper)
    1x Servo motor (gripper)
    1x Stepper motor (base) 17HS16-2004S1 (2A) 24V
    3x Stepper motor geared 17HS13-0404S-PG5 (400mA) 24V
    3x Stepper motor 17HS13-0404S (400mA) 24V
    2x Fan 24V 40x40x10mm

    It becomes time to assemble it! So next week I'll try to put it all togetter.
    In the meanwhile I'm gone put all drawings and stl files online this weekend.
    And after all these works I finnaly can program back on my GUI controller software :-)
    In the next comming weeks I will have a real moving robotic arm, Yeah...

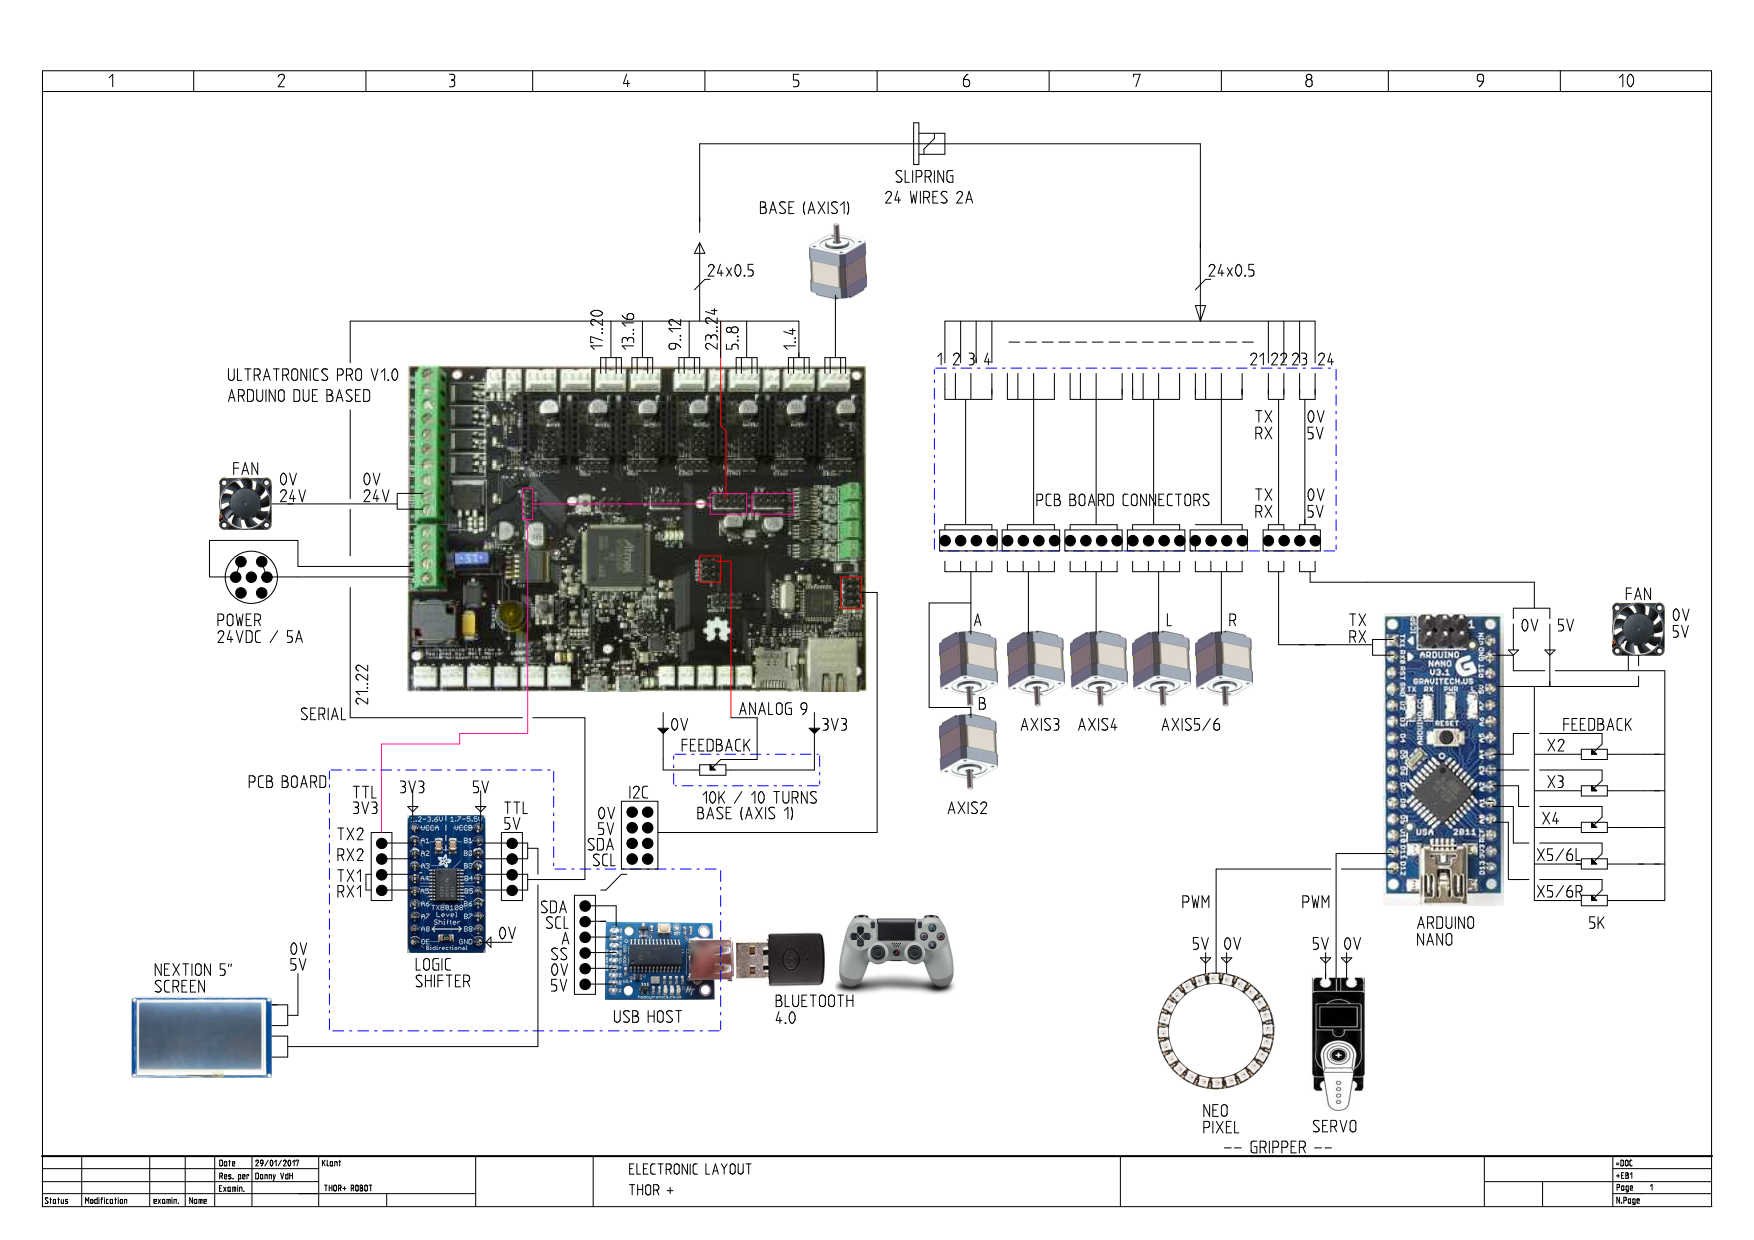
    UPDATE!!!

    Drawing has been changed, I had problems to connect to the mini arduino so had to change the communication to a real serial port. I did move my usb host to I2C.

    The base potentiometer has been moved to another analog point, don't need the extra zero potentiometer anymore.

    Removed the stepdown pcb and feed arduino mini directly with 5V and used a fan at 5V.

    Don't use de extra zero potentiometers at the other axis on arduino mini anymore.

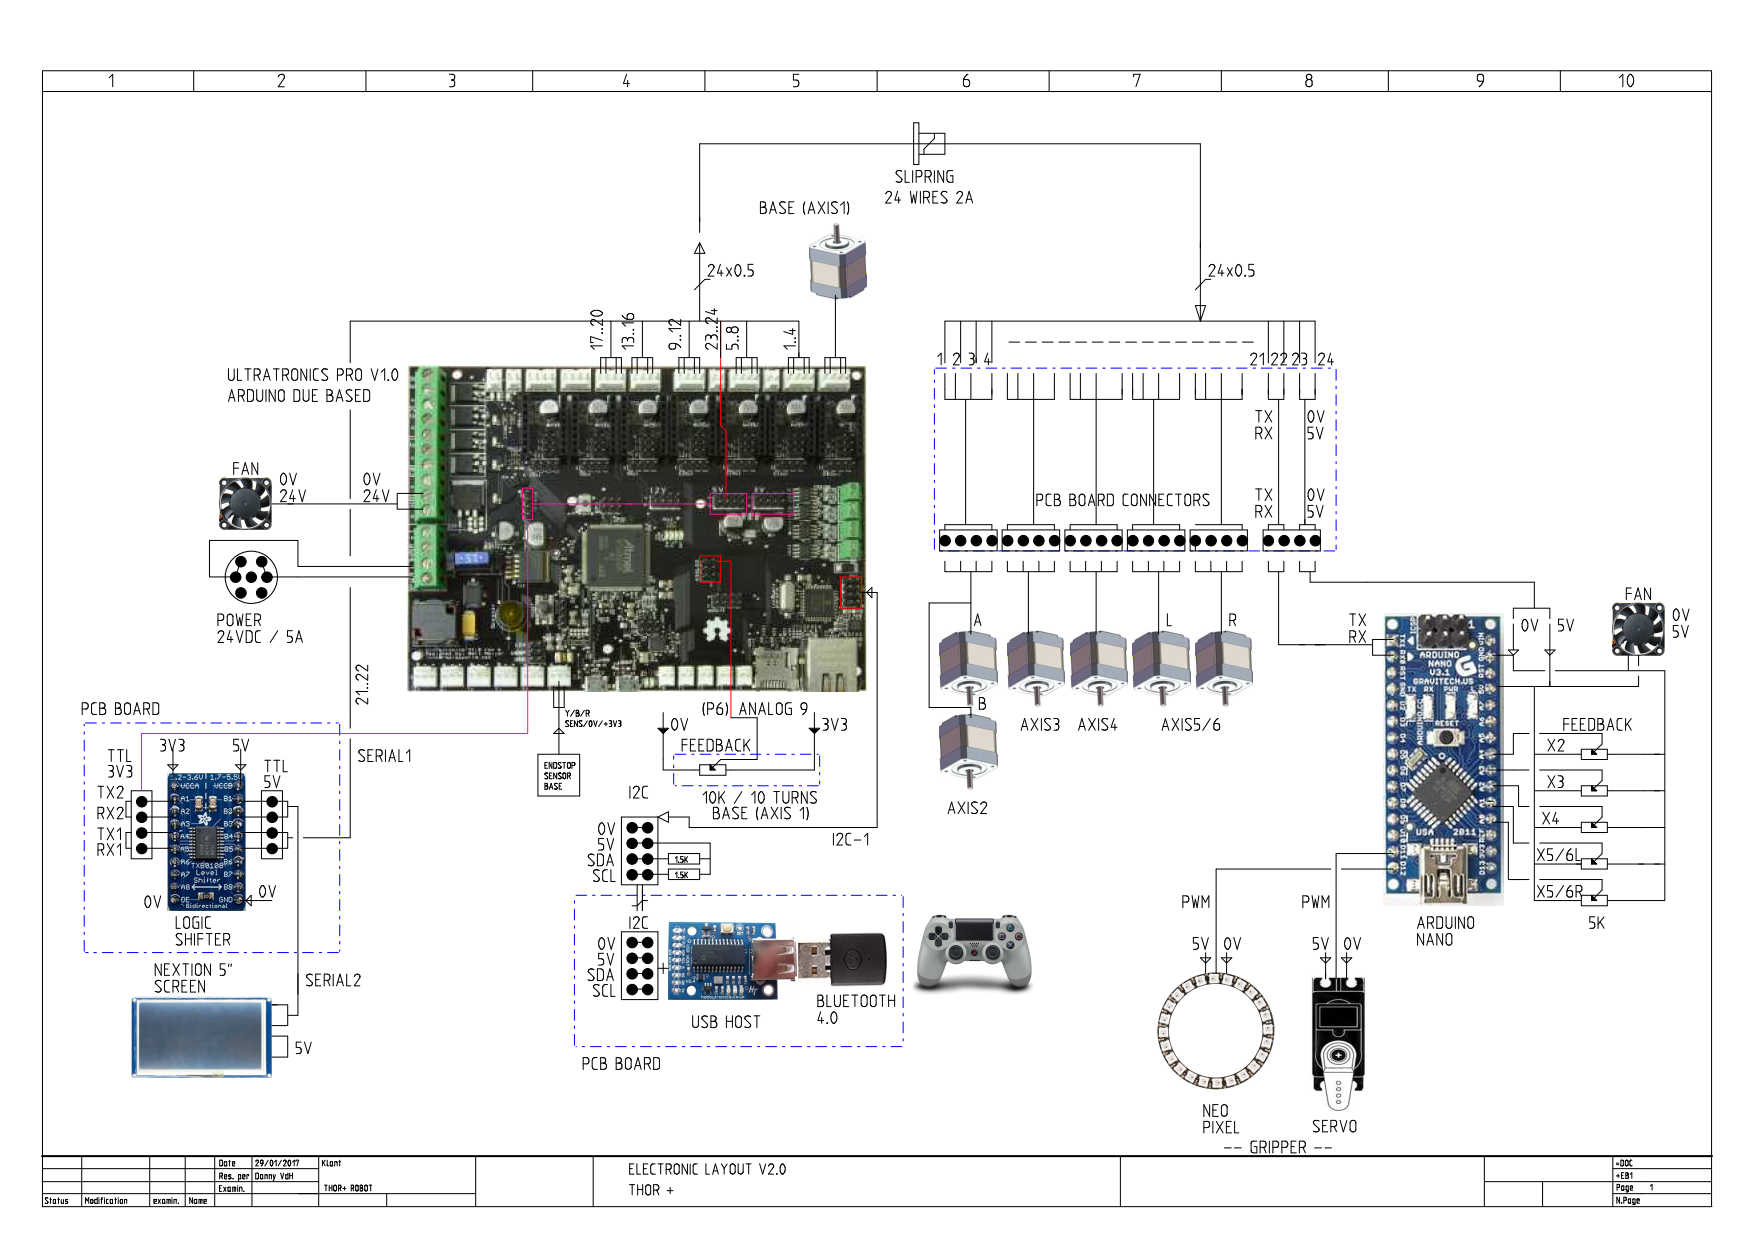
    UPDATE LIST

    1x Fan 24V 40x40x10mm
    1x Fan 5V 40x40x10mm
    1x Potentiometer 10 Turns 10Kohm
    1x Opto board (init base) https://reprapworld.com/products/electronics/endstops/opto_endstop/

    5x Makeblock angular sensor V1 http://www.makeblock.com/me-angular-sensor

    Did some testing to use the SDA SCL at the right side on the unitronics board, a little bit tricky but it works now for 100%.
    Needed pullup resistors 1.5Kohm between SDA,SLC lines to VCC. Edit the 'ps4_i2c.h' source and changed all the words 'Wire' into 'Wire1'. Added Wire1.begin() in setup function.
    Now everything is working like I wanted it! Got a spare serial port for connection on my arduino nano.
    Don't forget to attach the usb host module on TTL/USB module and set 'SERIAL OFF' to avoid latency problems. Read the documentation very carefully from the vendor.

  • 'STANDING CONTROLLER BOX FOR THOR ROBOT ARM'

    dannyvandenheuvel02/04/2017 at 19:00 11 comments

    For all those wanted a seperate controller box, there's room enough for the ultratronics pro V1.0 board, if you want a empty holes box, just ask!
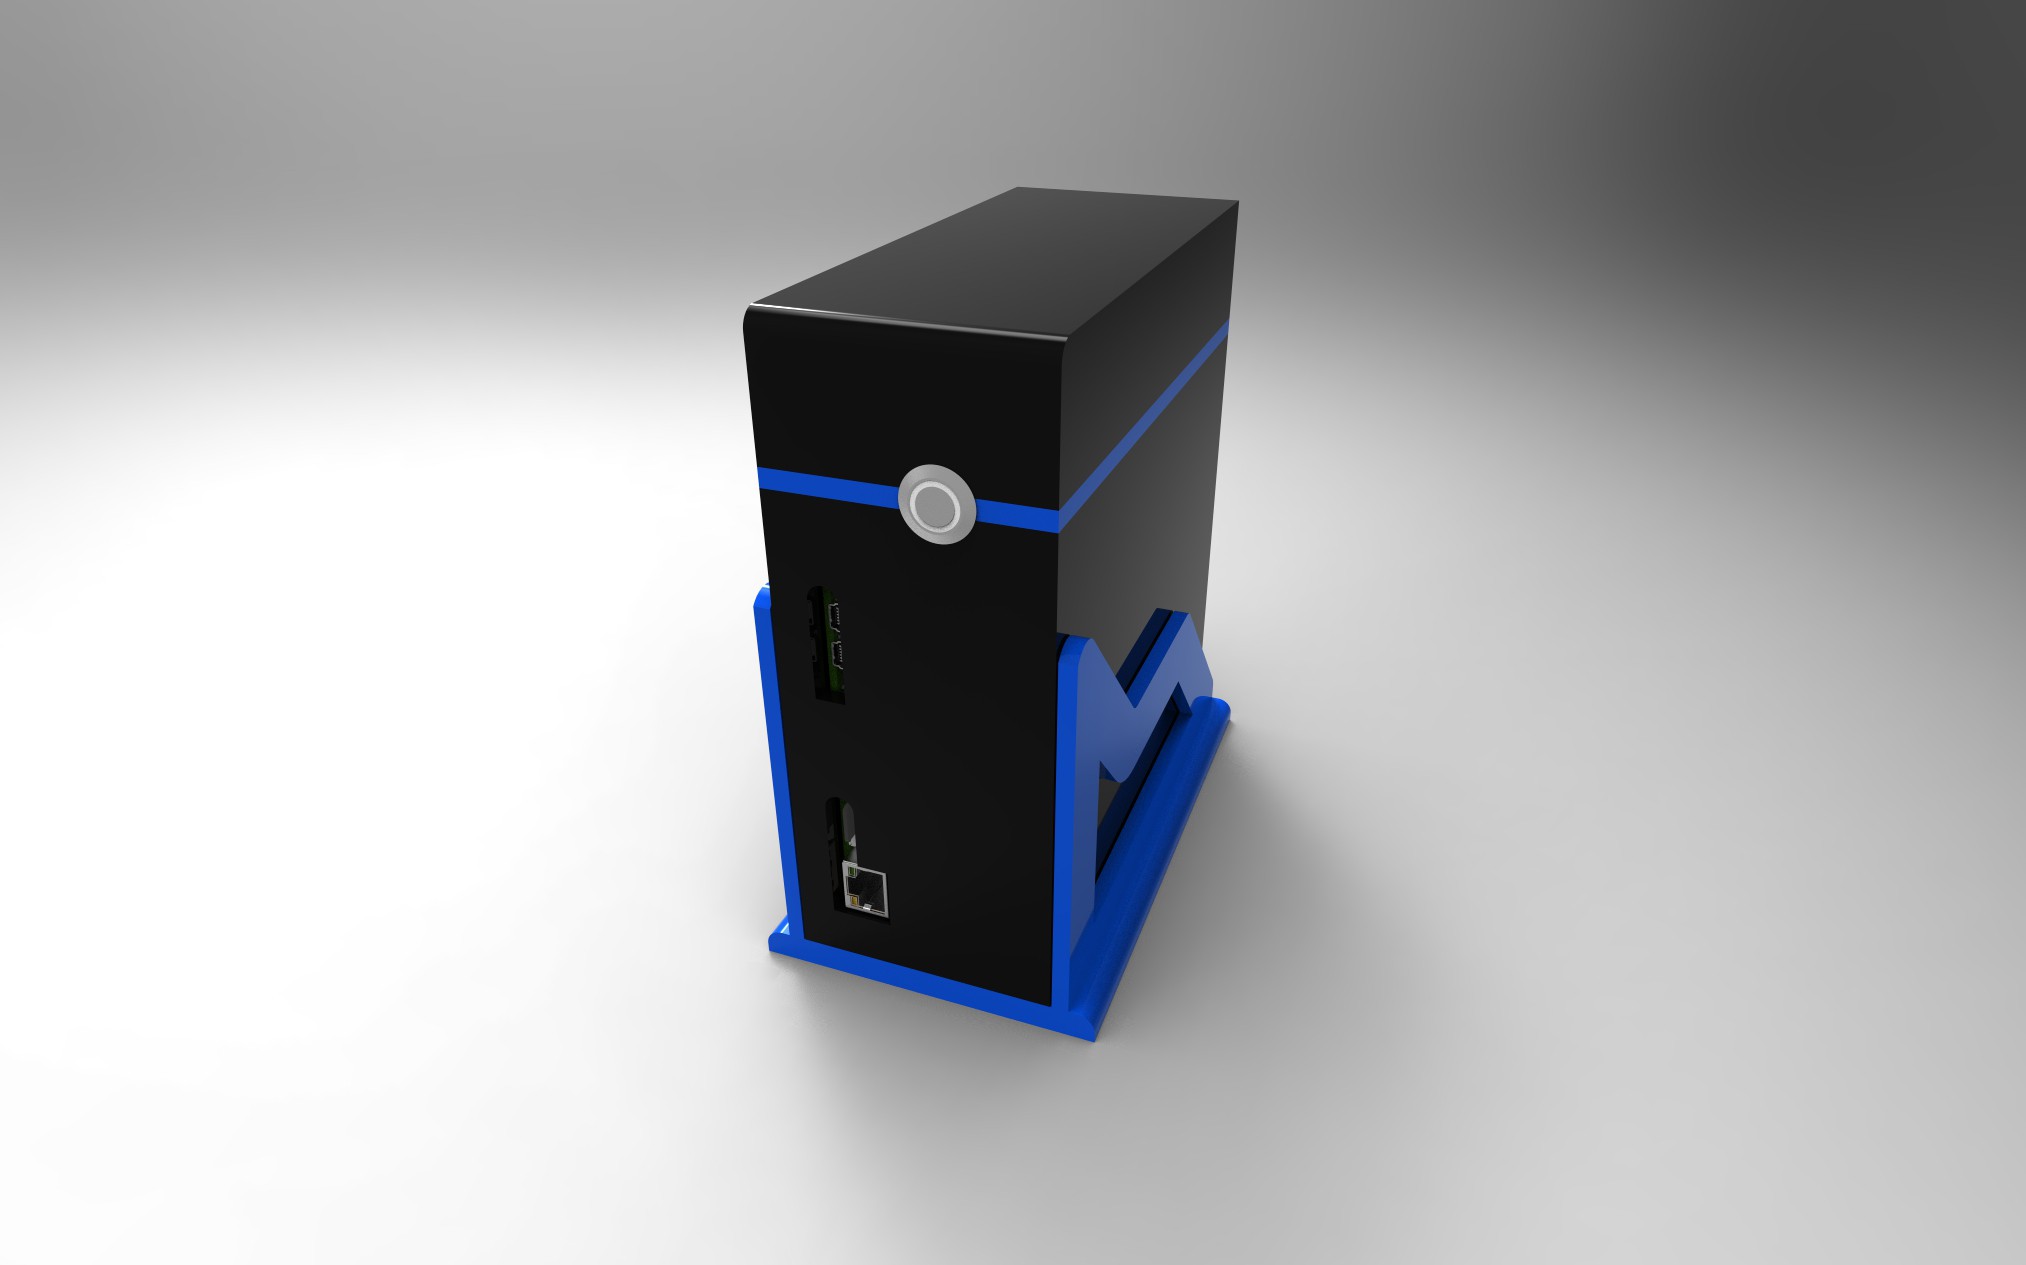
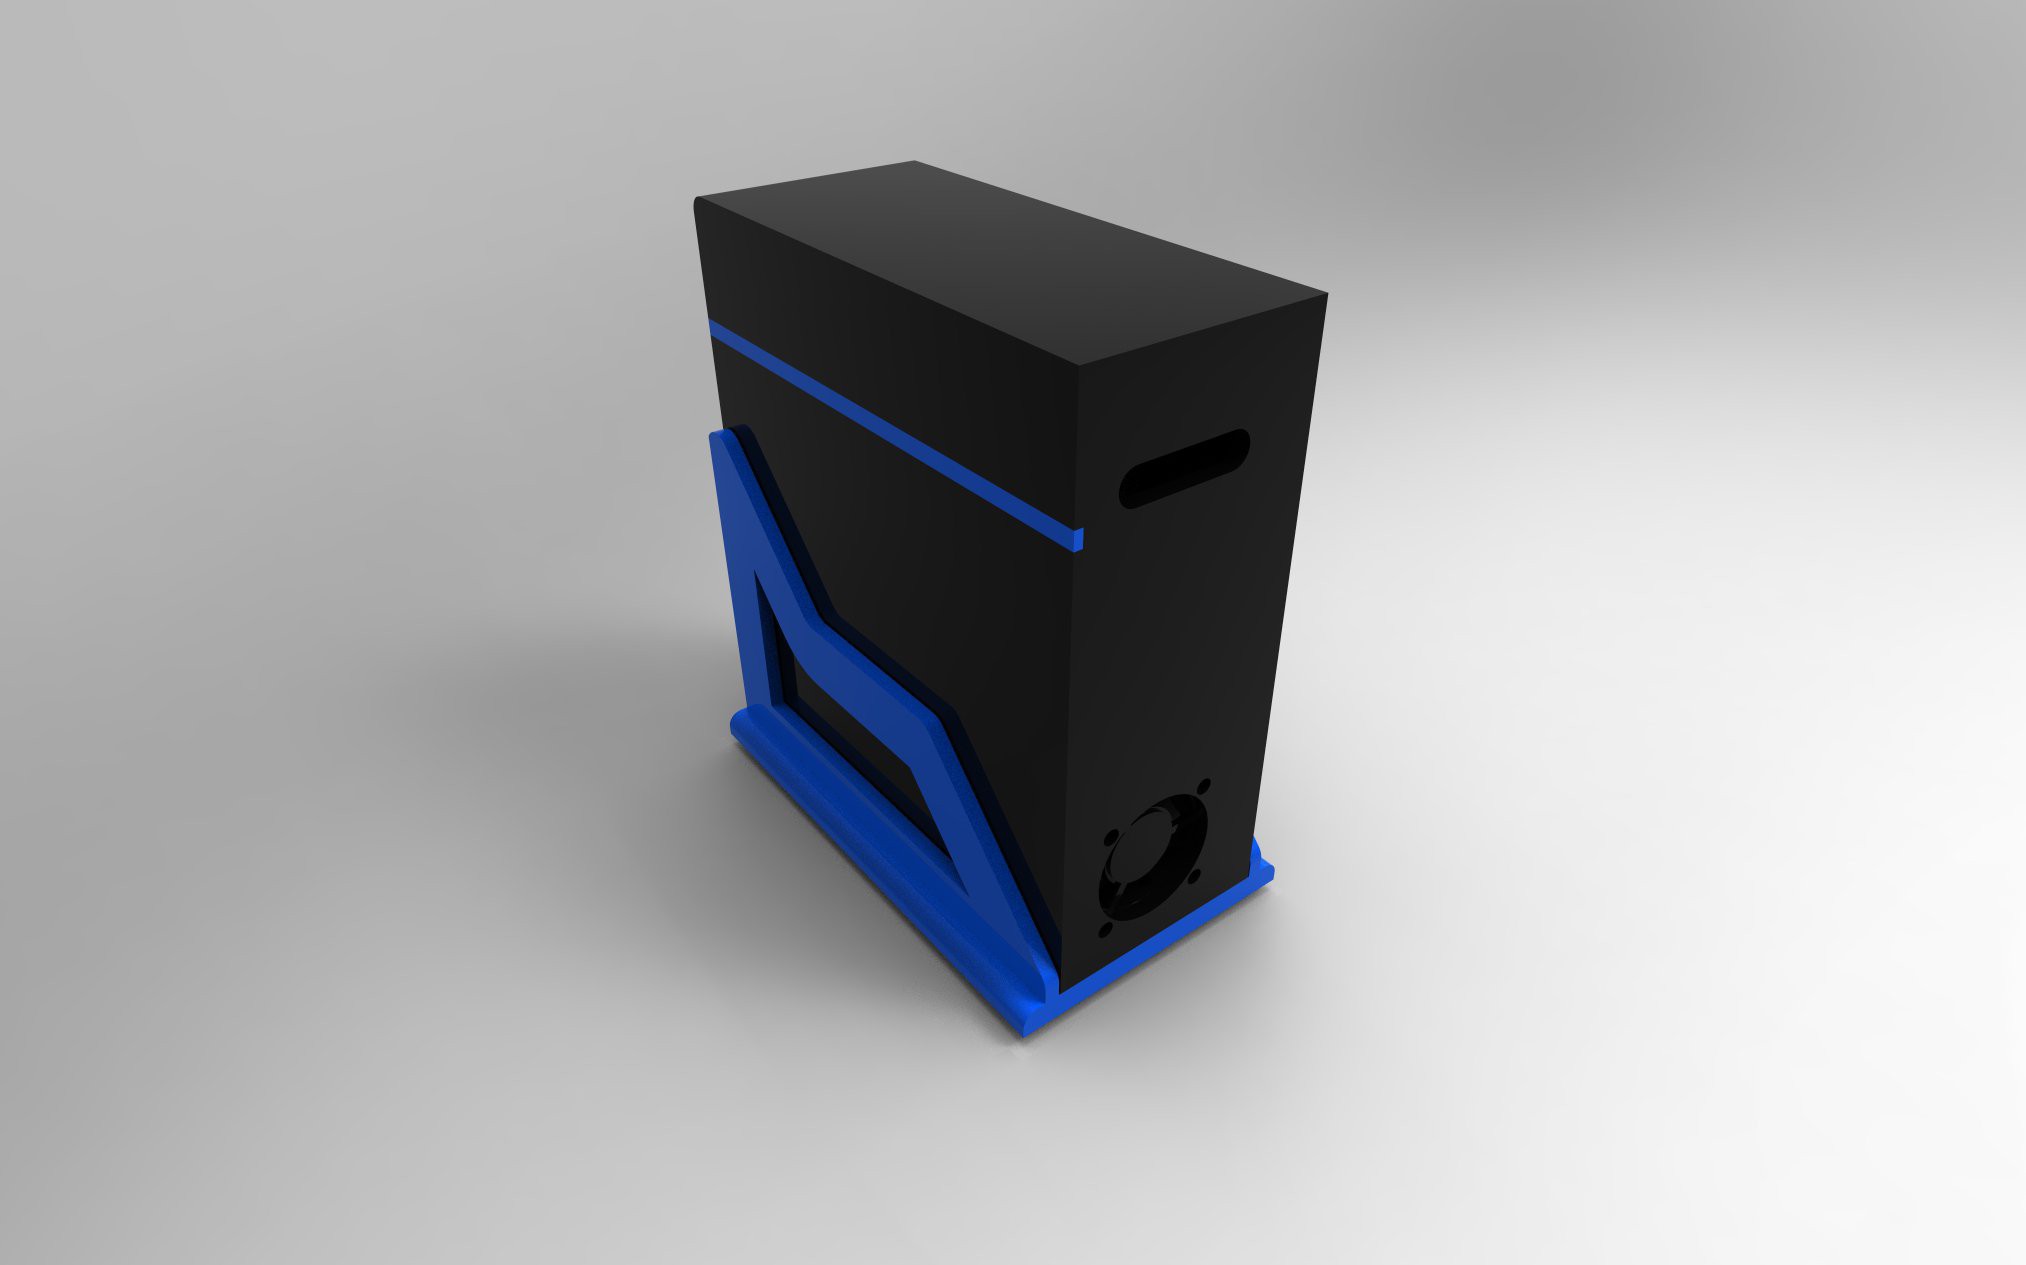
    If you want some dimensions, no problem :-)
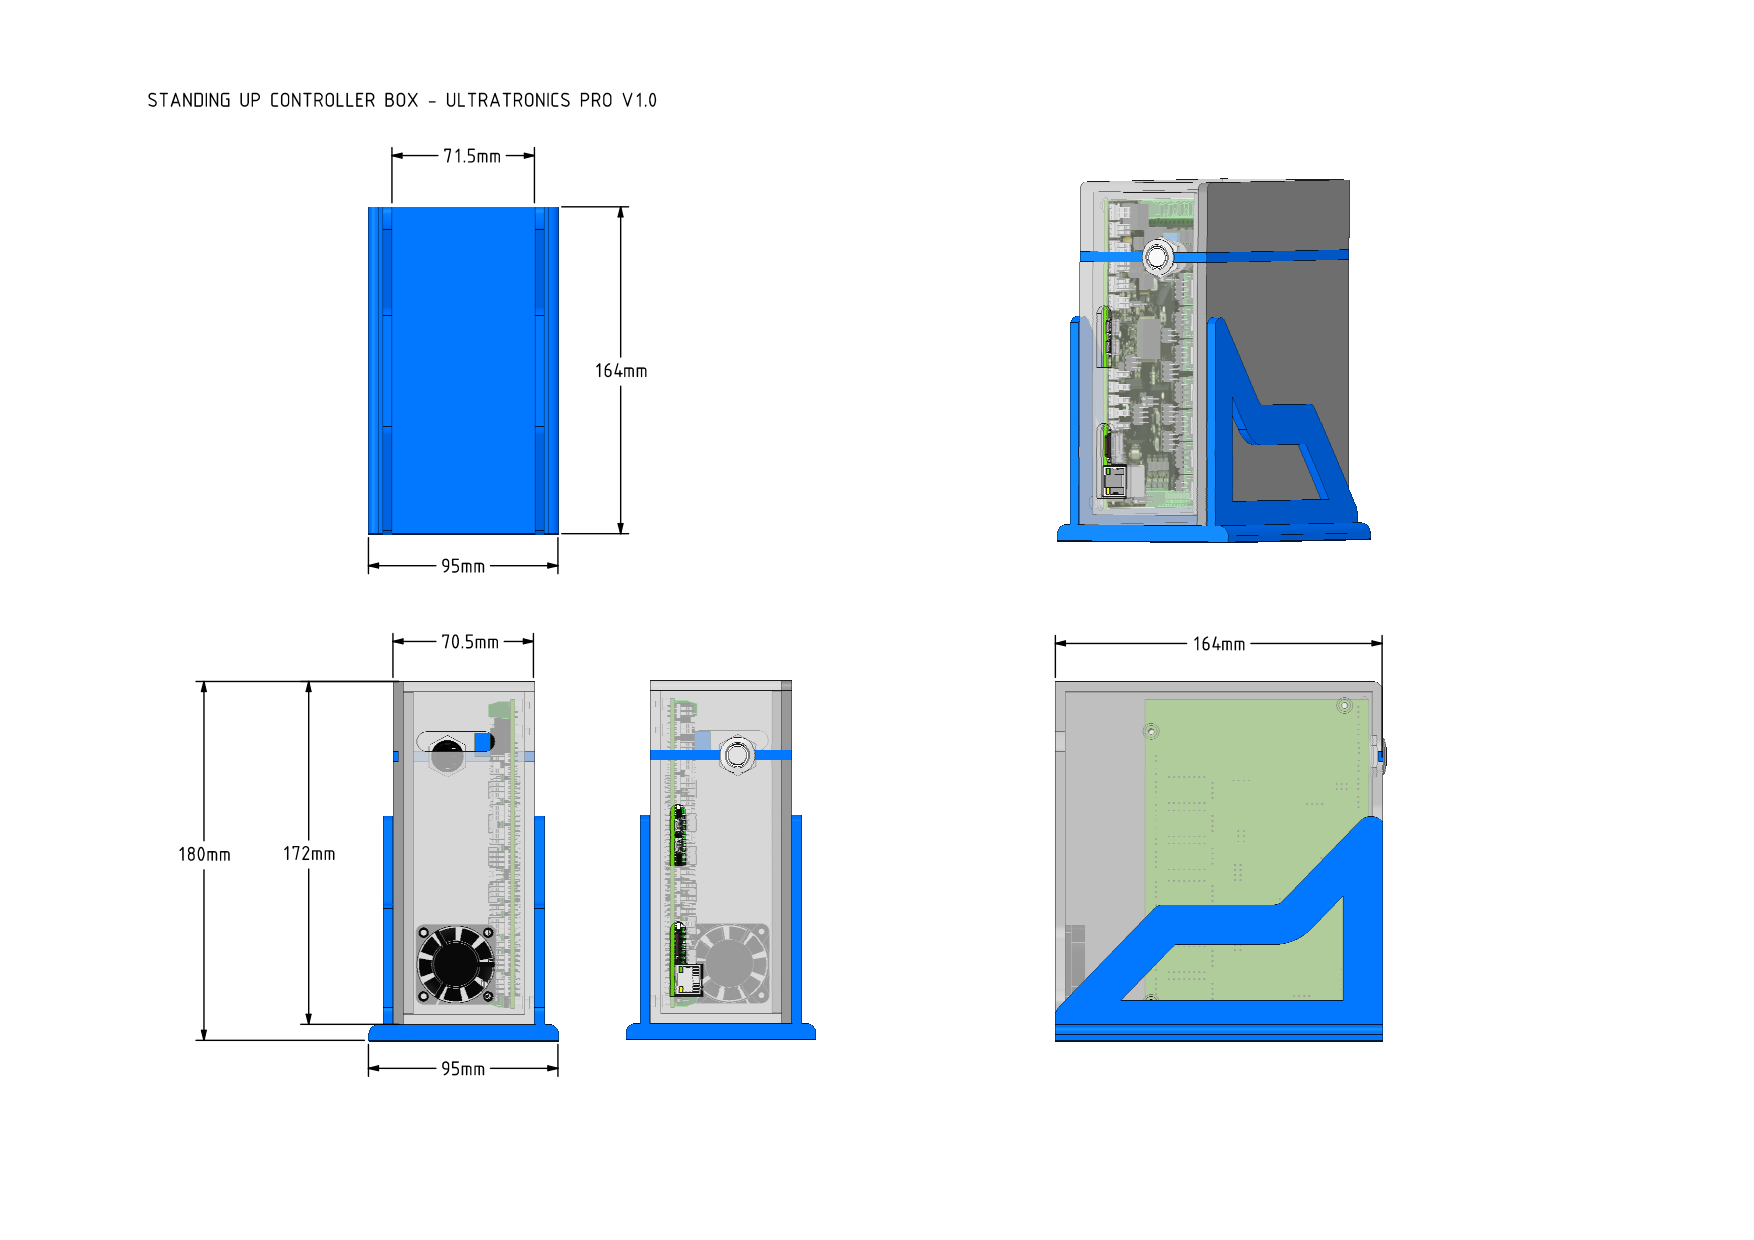
    Hope you like it! (for some personal modifications just sent me a comment!)

View all 36 project logs

  • 1
    Step 1

    Everything has been printer with stratasys Uprint SE, because some pieces where to big I changed some 3D parts, you can find them on my Github page if you have the same problem. I made them to be as strong as the originals. Feel free to ask me if you get in trouble printing it. :)

  • 2
    Step 2

    All parts has been printed, in a couple of days I will assemble THOR and make a movie and instruction list of the build!

  • 3
    Step 3

    I'am working on a graphical controle with Unity, more will be updated in the coming weeks!

View all 4 instructions

Enjoy this project?

Share

Discussions

Alex Martin wrote 11/19/2016 at 21:43 point

Really nice design! It feels good just looking at the robot. The print quality is very high as well, I gotta step my game up ;)

  Are you sure? yes | no

dannyvandenheuvel wrote 11/19/2016 at 00:35 point

Hi all! on my page the first glimps of the graphical controller! Basics has been fullfilled! Now the big works arrives making the simulator and after that the real TCP socket connection between this piece of software and the real robo arm!!!!

Take a look and give any comments as you like, all feedback is welcome!

  Are you sure? yes | no

French Makers wrote 11/18/2016 at 14:12 point

Hi Everybody,

Congratulations for all work !

We're ready to assembly the arm ;-)
All parts have been printed:


  Are you sure? yes | no

dannyvandenheuvel wrote 11/19/2016 at 00:30 point

Howly sh... very well done! another thor will wake up these days!

  Are you sure? yes | no

AngelLM wrote 11/22/2016 at 15:24 point

<3

  Are you sure? yes | no

Olaf Baeyens wrote 11/15/2016 at 22:14 point

Something else. You live in my country. I have been search like hell to find metal rods that have a diameter of 5 millimeters. I find 4 mm and I find 6 mm but not 5 mm. 

Any idea where I can find these parts?

  Are you sure? yes | no

Olaf Baeyens wrote 11/16/2016 at 18:45 point

Cool!

  Are you sure? yes | no

Olaf Baeyens wrote 11/15/2016 at 22:08 point

Some feedback I had an issue with your ART2BODYA_1.stl when printing it.  I tried it a few times with similar issues. Maybe it is possible to modify the model a bit so that this does not occur. I am thinking about slopes that avoids needs of support structures.

https://hackaday.io/project/16483-building-the-thor-robot/log/48925-art2bodya1stl

I am not up to speed enough to modify stuff with FreeCad. Still a nOOb

  Are you sure? yes | no

dannyvandenheuvel wrote 11/15/2016 at 23:42 point

Can you sent a picture with marks on where I have to change it? 

  Are you sure? yes | no

Olaf Baeyens wrote 11/16/2016 at 21:02 point

I have no time today to take more pictures:

But if you scroll down on this link, then look at the arrows

https://hackaday.io/project/16483-building-the-thor-robot/log/48925-art2bodya1stl

It is always at the corners of the side that needs support structures. And it always pulls the support structures from my 3D printer bed the very moment you start to print the real layer onto of these support structures. I assume that the new top layer (ABS) starts to curl upwards as it cool and pulls the support structure upward.

If you have this happening the first time then it could be bad luck, but if it happens 3 times in a row and at both corners then it becomes a pattern and other may also encounter this issue.

I wonder if we can improve this design by not making it a hoovering pretty big flat surface that needs a support structure but maybe curved or triangle cut that avoids a need of wasting plastic on support structure.

There are more issues to it, but I will put that in one of my blog posts the next few days.

I managed to print them, and then glued together. It is not a waste of plastic, just 3 hours of printing time.

I really love your changes :-)

  Are you sure? yes | no

Olaf Baeyens wrote 11/18/2016 at 09:40 point

Hello Danny

I created a blog post, with more pictures to show the issue.

https://hackaday.io/project/16483-building-the-thor-robot/log/49188-art2bodya1stl-update

  Are you sure? yes | no

dannyvandenheuvel wrote 11/15/2016 at 21:13 point

Some more updates!
Progress on graphical GUI robot application. 

Ported to linux, have some little issues to fix but it's looking good, so now 3 platforms has been made. I will have a moment of silence for a few days, lots of programming for my usual work :( but after that I will be back :) as never before!
BTW next week I will make a movie of assembling my personal 'Thor' robot. Every part has been arrived and I am trilled to make and become a owner off a great piece of toy, happy like a kid!

See ya!

  Are you sure? yes | no

AngelLM wrote 11/16/2016 at 15:20 point

Yay! Happy to read that! :)

  Are you sure? yes | no

dannyvandenheuvel wrote 11/08/2016 at 21:26 point

Hi all! Update!
I've been working hard on the graphical GUI
controller at the moment and must say it's moving fast! Inverse
kinimatics is working great! There will be Joint jogging and Cartesian
Jog with translation along or rotation about X,Y and Z axis. Camera
views has a lot of improvements. Watch out these comming days for the
first real release! :)

There will be a PC and MAC version!

  Are you sure? yes | no

AngelLM wrote 11/08/2016 at 21:32 point

Can't wait to see it! :)

As Mac is based on Unix, it could be easy to port it to Linux too? (I don't really know about OS compatibilities, but as Ubuntu user had to ask it hehehe)

  Are you sure? yes | no

dannyvandenheuvel wrote 10/28/2016 at 20:12 point

You will find the list of materials on my page with some links added to it

  Are you sure? yes | no

AnykeyNL wrote 10/28/2016 at 19:45 point

Is there a bill of materials for all the non-plastic parts?

  Are you sure? yes | no

dannyvandenheuvel wrote 10/28/2016 at 19:27 point

All STL files online! If you have a smaller area 3D printer this is your best choice to print a THOR robotic arm for yourself! Use ABS over PLA.

  Are you sure? yes | no

dannyvandenheuvel wrote 10/28/2016 at 10:37 point

Thanks for the comment, I appreciate this very much!

I am now working to bring the graphic simulator to a first beta version. It can store a full simulation of a movement pattern to replay afterwards. Everything has been built in 'unity personal' and is free to download. The program is built in C # and runs primarily on a PC or Mac computer.
The intention is that the generated simulation code to the real robot can be sended to the arduino board and can be replayed autonomously.

  Are you sure? yes | no

ottoragam wrote 10/28/2016 at 10:12 point

Good work! This version of the Thor arm looks gorgeous, including the rendered images. I'm thinking of printing a baby sized one when I have time :)

  Are you sure? yes | no

dannyvandenheuvel wrote 10/25/2016 at 23:01 point

I build a lot in arduino yet to communicate between two sets, also communicating with pc over modbus. A lot of tools and equipments are allready taken care of. Just need some spare time to build it togetter. For my professional work I have been involved with lots of plc programming, thats the reason why I wanted to take a protocol who is widely used.

One of the difficult things of this project will be the kinimatics, I want it to behave like a real robot.
There will be a graphical programming language in the (any platform) GUI application to move the robot to a whole serie of gcode to do some navigation. You also will have some I/O to start and or stop some of the sequences. One off the topics is recording the movement of the motors by hand and reading the info out of the potmeters to emulate that moving afterwards. So a lot off stuff to keep me going for now! :) From the moment when everything will have shape things will be thrown on github. This project will be open source from A to Z.

All modified 3D pieces are on a final stage and will be on github very soon. Some of the modified pieces are allready there.

  Are you sure? yes | no

dannyvandenheuvel wrote 10/25/2016 at 22:41 point

I have already had this covered, you have to press one of the buttons for 2 seconds before any action will be started :) One for on (start) / off and the other to initialise the robot. BTW you need to put the power on it to, haha (but you never know, kids these days are very clever with this kind of things) 

  Are you sure? yes | no

Olaf Baeyens wrote 10/25/2016 at 20:15 point

I am impressed by your complete package and color scheme.   The only thing that I see lacking is a panic button. The robot is maybe not that strong, but you never know that a child may want to play with it.

  Are you sure? yes | no

Similar Projects

Does this project spark your interest?

Become a member to follow this project and never miss any updates