 Ben Brooks
-
1Order and Print Components
The first thing you’ll want to do is order and print all of the necessary components. The printed components are all available on Thingiverse here.
-
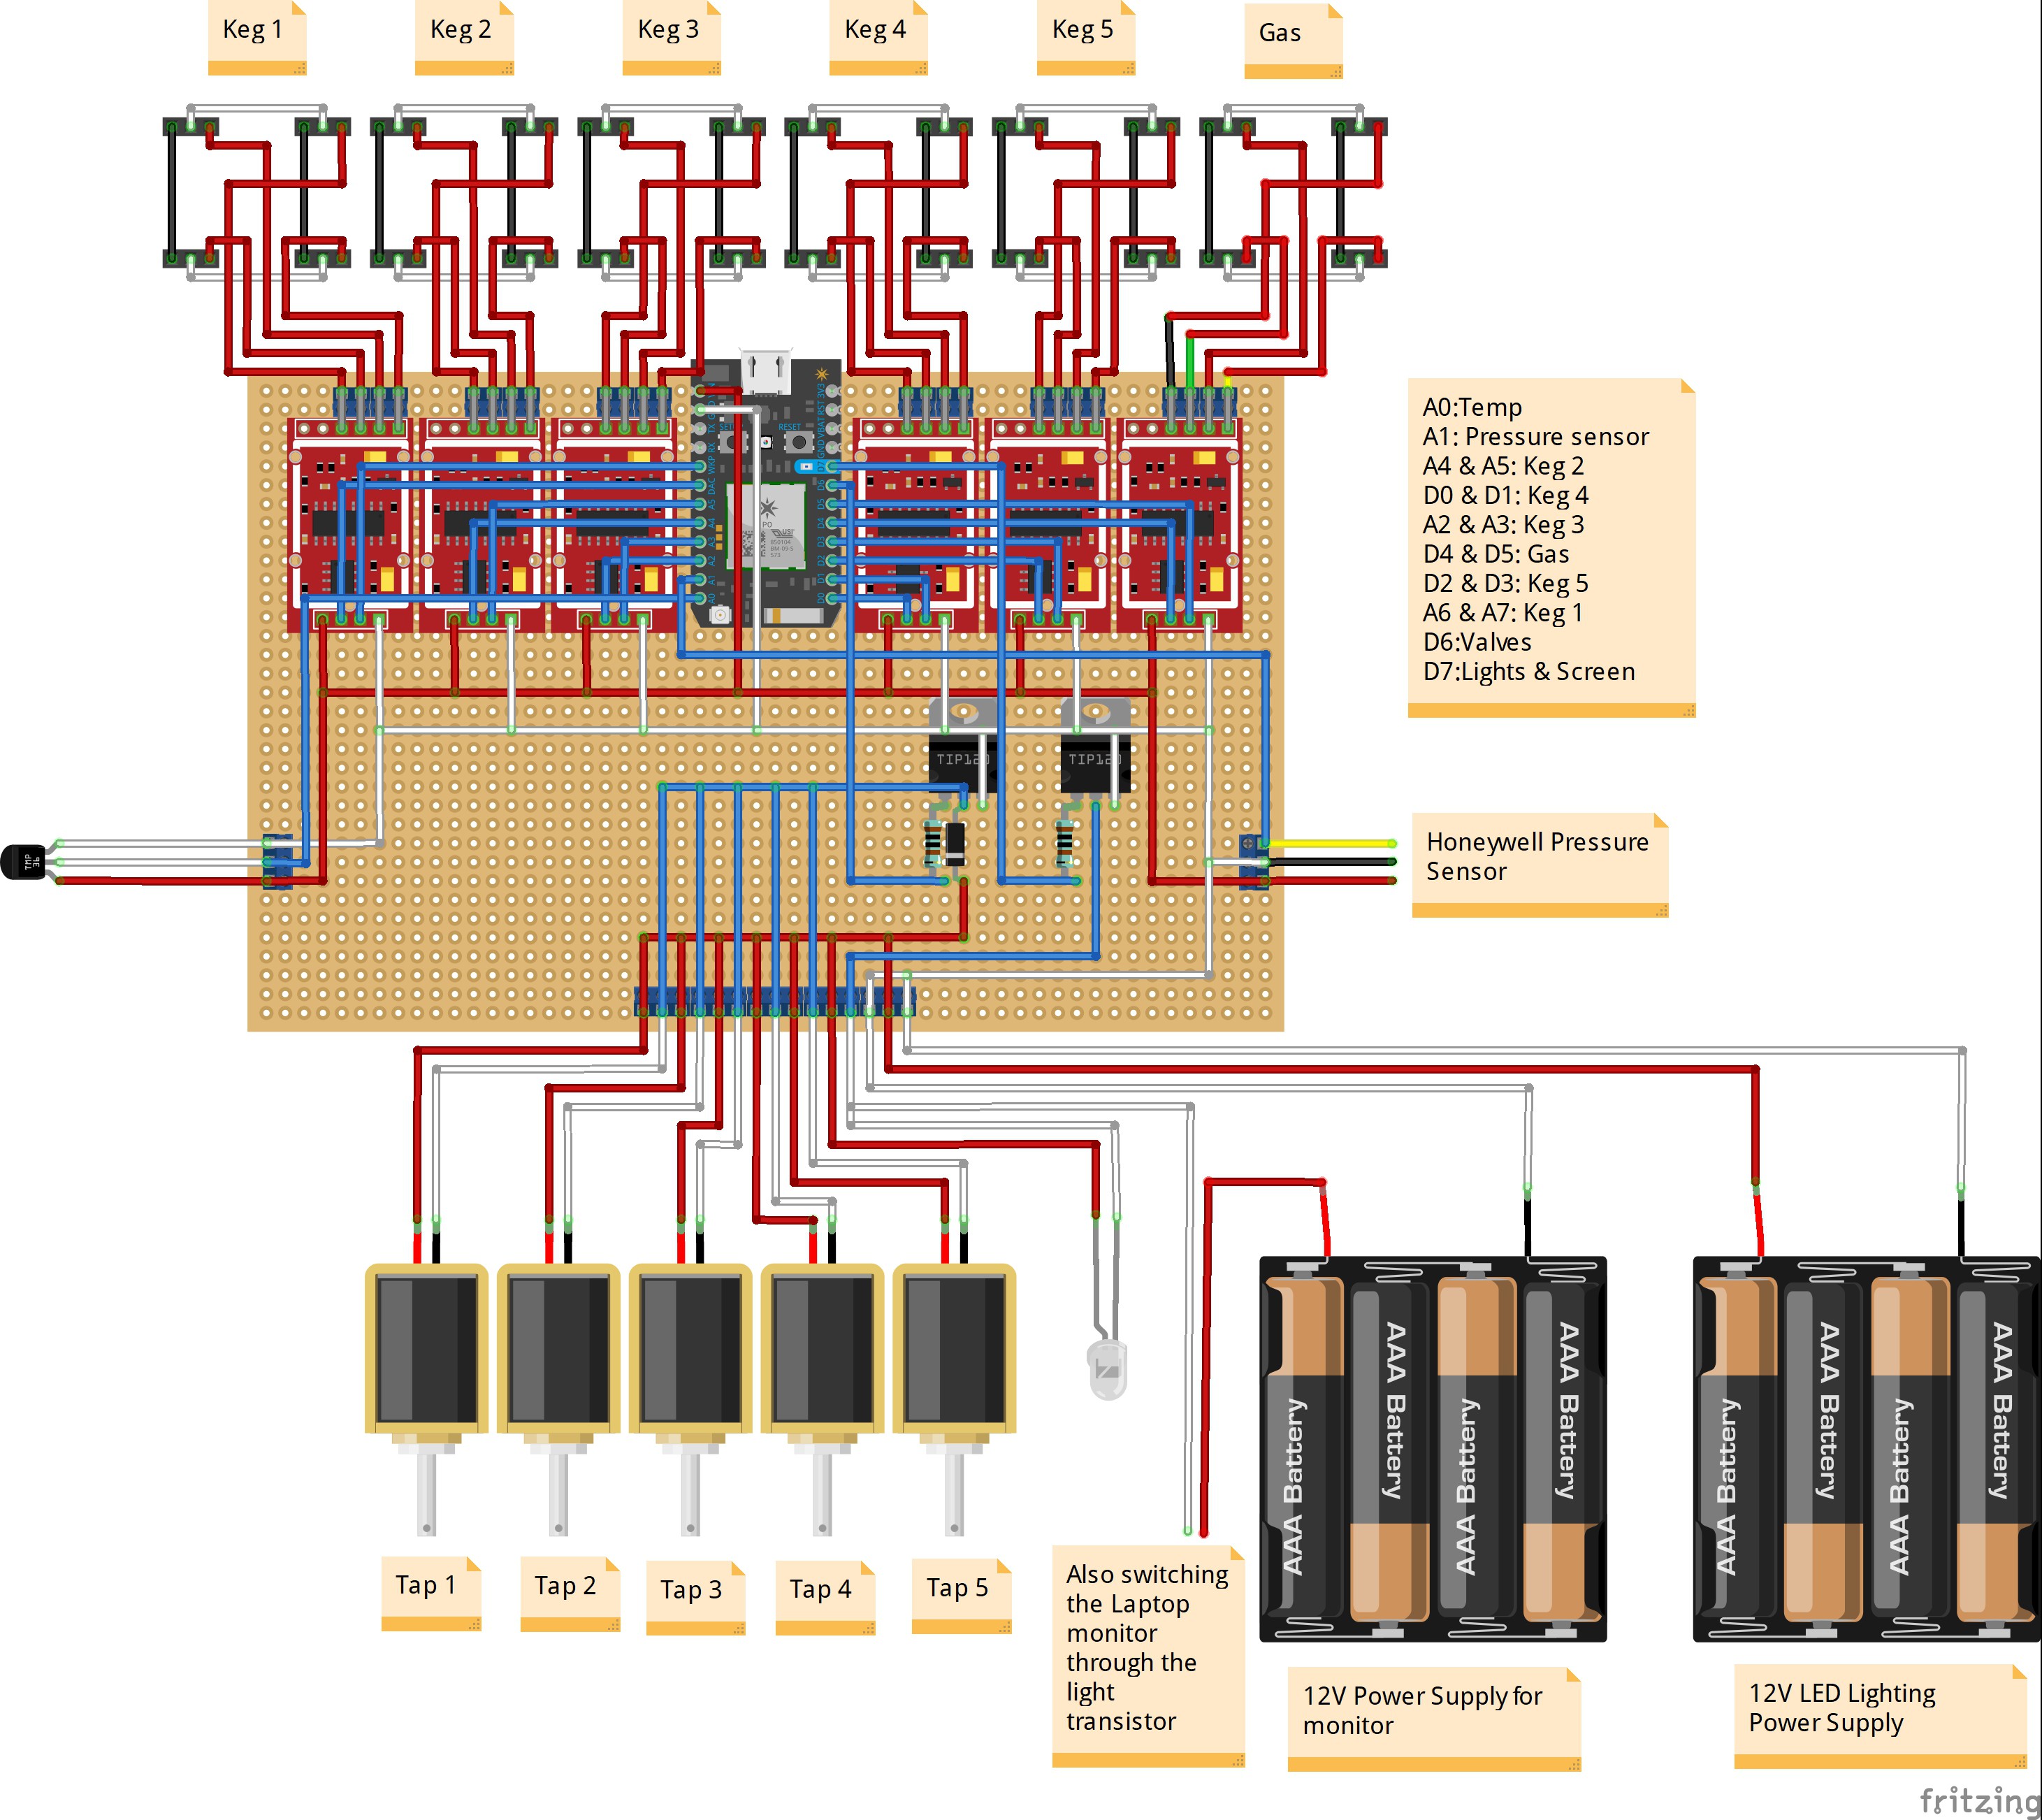
2Solder up the boards
By far the most time-consuming part of the build is simply soldering up the large PCB proto board in addition to the small remote board for the pressure sensor. Carefully follow the schematic below and you shouldn’t have any issues.
![]()
-
3Assemble/wire the Scales
Wire up the scales using the above wiring schematic as a reference. Fairly straightforward, if it doesn’t make sense to you just Google ‘Wheatstone Bridge Circuit’ as it’s a common circuit configuration.
-
4Make the connections
I’m going to assume that you’ve already plumbed up the solenoid valves and pressure sensor on your own. Once all of that is done, all that’s left is to mount the boards in their enclosures and wire everything up per the above schematic and the labels on the enclosures.
-
5Power It All Up and Edit the Code As Needed
The code is located on Github here. It’s written for a Particle Photon but should be easily edited to work on a similar Arduino. I’ve also included an example of the HTML file I made (all of the unique identifiers for my particular device have been replaced with ‘xxx’ so it won’t actually work as-is. I should also mention that coding in general is not my forte and I have no real experience with HTML so it’s likely a total mess. I’d love to see something better that someone else could come up with!
-
6RDWHAHB
Relax, Don’t Worry, Have a Homebrew!
Keezer (Keg/Tap/Beer) Controller
Add some smarts to your beer: see how much is left and turn off the taps when you’re not around.
Discussions
Become a Hackaday.io Member
Create an account to leave a comment. Already have an account? Log In.