Close
0%
0%

KZ80

A Z80 laptop

Similar projects worth following
I'm trying to build a Z80-based laptop.

I've long wanted to build my own laptop. I have a project to create a custom laptop, which is currently stalled due to trying to figure out some hardware questions. However, I was recently watching Halt and Catch Fire, and it really just made me want to build my own 8-bit computer and write some assembly. My first thought was doing something with the 6502s I have sitting at home, but as I poked around, I figured I'd start with the Z80. The experience building this will definitely be useful later on.

A while ago I built part of a CPU from transistors, but that became tedious, so I decided to build them out of 7400s. The upside is now I have a ton of 7400s (and others in the series), and there's this awesome company called OSHPark that manufactures perfect purple PCBs for you. I guess the question is, why not build a computer?

Tbe goal for this project is to build a computer that I can completely understand with hardware that's easily replaceable. As such, the logic boards will have all through-hole components and use IC sockets for all logic chips.

Eventually, I'd like it to be solar charged with both WiFi and LoRa modems; the first step is getting a working basic machine first.

  • The future of the KZ80

    Kyle Isom02/04/2020 at 05:44 0 comments

    News on the KZ80 front has been quiet, and for good reason: the new job hasn't given me the time I need to focus on it. Additionally, the cost of developing hard is pretty high so I need to find a way to do it more cheaply. I think the way I'm going to do this is by verifying designs as RC2014 subsystems. Those subsystems are going to be, in order of precedence,

    1. the mainboard (CPU + ROM + RAM)
    2. the LCD dev board (basically, PIO + headers)
    3. the keyboard... board (PIO or two + headers)
    4. CF/SD module - I'd like this to be an IDE interface, like the CF drive I have now.

    I don't have Eagle on OpenBSD, so I'm going to have to learn Kicad, and to be honest, I really don't want to do that. This might take a while. I have to not only learn a new UI (and one I've struggled so so much with in the past) but also learn how to build library parts and then rebuild my collection of library parts. I'm sure it's for the best, but it's going to take a long while.

  • Hardware debugging progress

    Kyle Isom10/23/2019 at 04:22 0 comments

    So I figured out that the reset button circuit (R5 and the 2-pin header in the previous posts' schematic) were causing RST to short ground. So, I figured I'd build out another board and see if not populating those parts would get me anywhere. So I did, plugged it in and hit the power switch and... nothing. Not even any lights on the digital I/O board.

    So I checked the voltages and it turns out the batteries had dropped just a tad too low for the L7805. I charged them up, made dinner, did some other stuff, and then tried again.

    Still nothing, not even LEDs.

    Meter was reading abnormally low voltages, and I touched the L7805 and wow, that sucker was H O T. So I've got a short somewhere. I figured it was just a defect in the board, and sort of resigned myself to really needing a new board. While I was here, I figured I could pull the parts from my parts bin for a new board, even though I'd still have to wait. Then I realised something.

    One of the 74HCT545's was backwards. That'd sure cause some problems, wouldn't it?

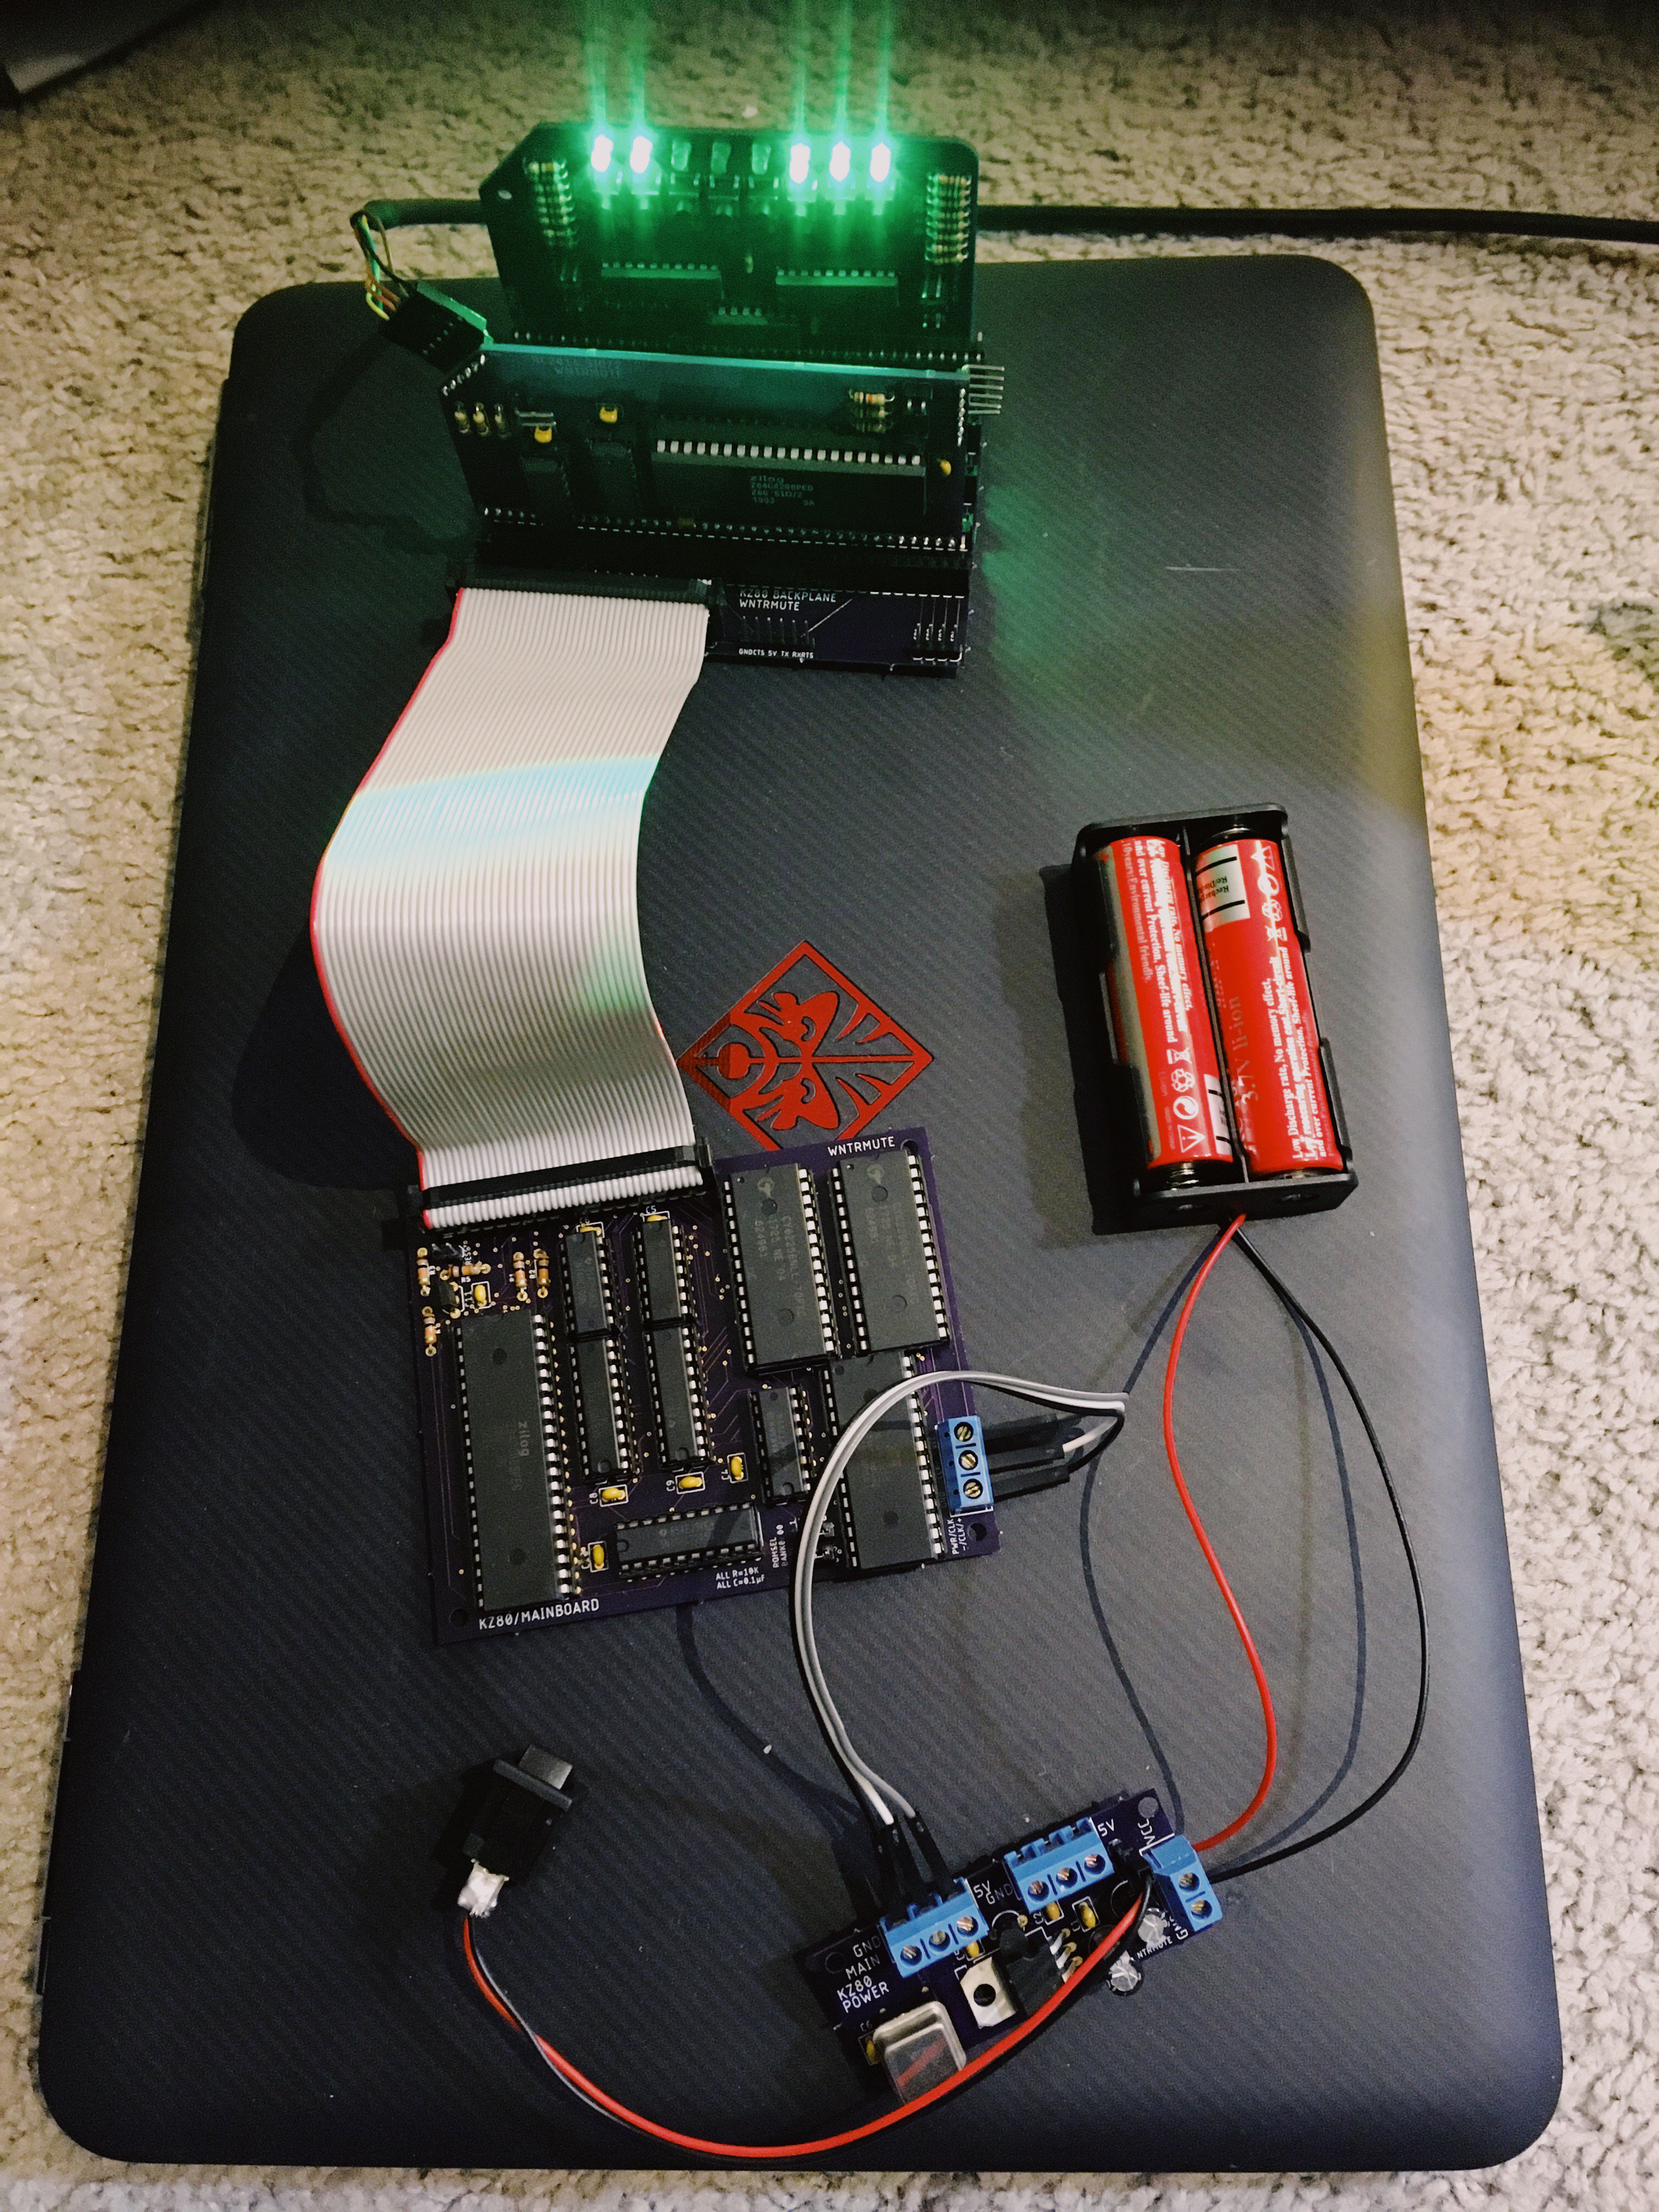
    So I fixed that and power on and all eight LEDs on the digital I/O board are now lit, but I still don't get anything on the serial. So there's that to debug, but I think this is in a place where I might actually be able to continue making progress. I still don't like how thin the PCBs and I'd like more room to make it easier to replace the EEPROM, but this works for now (I think).

  • Debugging the mainboard

    Kyle Isom10/21/2019 at 18:32 0 comments

    I had a hunch, not sure where it came from, that the MCP120 reset controller was to blame. I set up my probes and then did a quick continuity test to make sure they weren't touching each other... BEEEEEP.

    Okay, so I connected the ground to the serial card (which had an easy to connect pin) and BEEEEEEP.

    Some more debugging, including grabbing an unpopulated board, and it it looks like RESET is somehow tied to GND. That's a problem, because it means the board will never let the CPU start. I haven't figured out how this is happening yet.

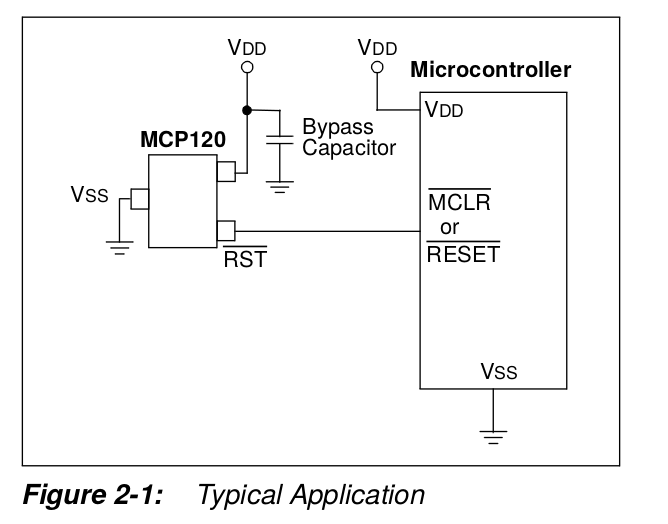
    For reference, here's the typical applications section of the MCP120 datasheet (I have the MCP120-485HI/TO):

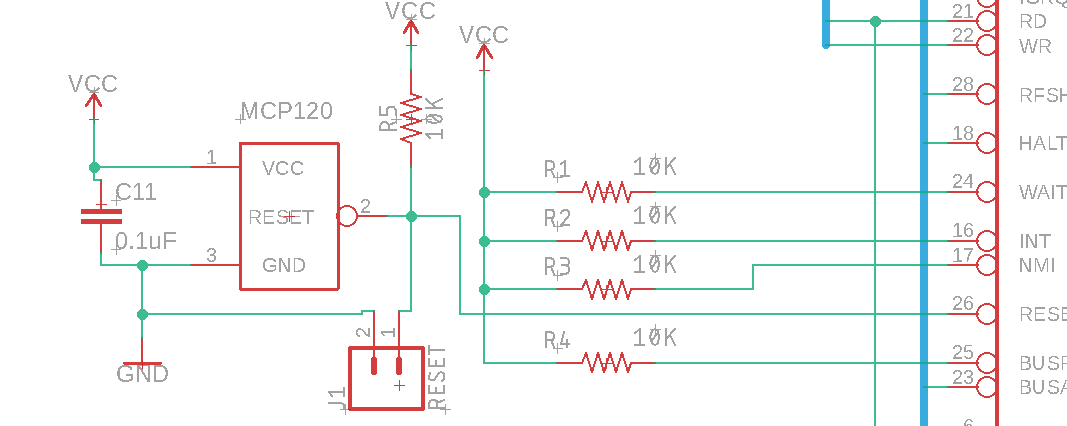
    And here's the relevant part of the schematic:

    J1 is a reset button connector so I could break it out to the case. On the board, it's an unjumpered header.

    I still need to figure out why this is happening and how to fix it; I don't have money to buy a new board until December, probably.

  • The first mainboard test

    Kyle Isom10/19/2019 at 19:06 0 comments

    So I got a TL866II+, and was able to program an AT28C256 ROM with the SCM; it's set up with an SIO/2 card and digital I/O module on the RC2014->KZ80 backplane. I used Alan Cox's RC2014 emulator as a framework for a basic serial-only KZ80 mainboard, so I'm relatively confident that the software works.

    And... I get nothing. Time to debug. Note that on a healthy RC2014 in the default boot state, all 8 LEDs are lit up on the digital I/O board. That three are not lit might be indicative of something, I just don't know what.

  • Hardware update

    Kyle Isom10/11/2019 at 04:42 0 comments

    I've been unemployed since late last month (intentionally so), and I don't start working again until the 4th. That means my funds are limited to order PCBs, so I won't be ordering new boards until the middle of November, most likely. I've got the latest revision of AEPROs incoming, so given that I have an RC2014 backplane for the KZ80 and a serial I/O card, I can at least start working on a serial interface and initial monitor.


    On the plus side, this gives me time to think through the interface parts, and work towards a design that will fit in the case.

    I'd also like to sort out the power board, and perhaps add some LiPo charging to it. That's sort of a passive, background task for now.

  • On I/O

    Kyle Isom10/09/2019 at 20:41 0 comments

    The biggest challenge right now is I/O into the system. I'd eventually like to support

    • Keyboard
    • LCD
    • Serial / UART for attaching modems and other such things
    • Compact flash drive
    • A Counter/Timer Circuit (CTC)

    Last night, I realised I could use a handful of PIO chips to do the bulk of the work. The LCD, which is 8 data pins and 4 control pins, could be controlled by a single PIO; the keyboard probably needs to be connected to a small microcontroller to handle strobing the entire keyboard (which is necessary to pick up modifier keys). Serial I/O is done with a separate chip, the SIO/2 that provides a pair of ports. I think the compact flash could be done with a pair of PIO chips, maybe connected to a microcontroller but maybe not. My compact flash is an IDE <-> dual CF interface with an ATA-44 connector, so that'll need some thinking. The CTC would be used for threading as well as a general counter and timer. Tentatively, I'm designing around the following addressing scheme:

     DEVICE ID   CONTROL
    D0 D1 D2 D3   A  B  C  D
    A7 A6 A5 A4  A3 A2 A1 A0
     1  0  0  0              | SIO/2 (BASE $80)
     0  1  0  0              | DIRECT INTERFACE (KBD+LCD) (BASE $40)
     0  0  1  0              | CTC (BASE $20)
     0  0  0  1              | ATA (BASE $10)
    
    SIO/2
    -----
    A: ENABLE ON 0
    B: 0
    C: C/D (CONTROL=0, DATA=1)
    D: A/B (PORT A=0, B=1)
    
    SIO A/C: $80
    SIO A/D: $81
    SIO B/C: $82
    SIO B/D: $83
    
     
    DIRECT INTERFACE
    ----------------
    A: ENABLE ON 0
    B: KBD/LCD SELECT (KBD=0, LCD=1)
    C: C/D (CONTROL=0, DATA=1)
    D: A/B (PORT A=0, B=1)
    
    KBD A/C: $40
    KBD A/D: $41
    KBD B/C: ---
    KBD B/D: ---
    LCD A/C: $44
    LCD A/D: $45
    LCD B/C: $46
    LCD B/D: $47
    
    CTC
    ---
    A: 0
    B: ENABLE
    C: CS0
    D: CS1
    
    CTC0: $20
    CTC1: $21
    CTC2: $22
    CTC3: $23

    I still need to figure out the addressing and interfacing for the IDE/CF drives (as well as figure out what the file system is going to be).

    I think the interrupt priority is going to be:

    • keyboard (always give the user priority control)
    • CTC
    • SIO/2
    • IDE
    • LCD (I don't actually anticipate any LCD interrupts, but I'm building this in case it becomes useful later)

  • ALMO: an Arduino LoRa modem

    Kyle Isom10/09/2019 at 02:07 0 comments

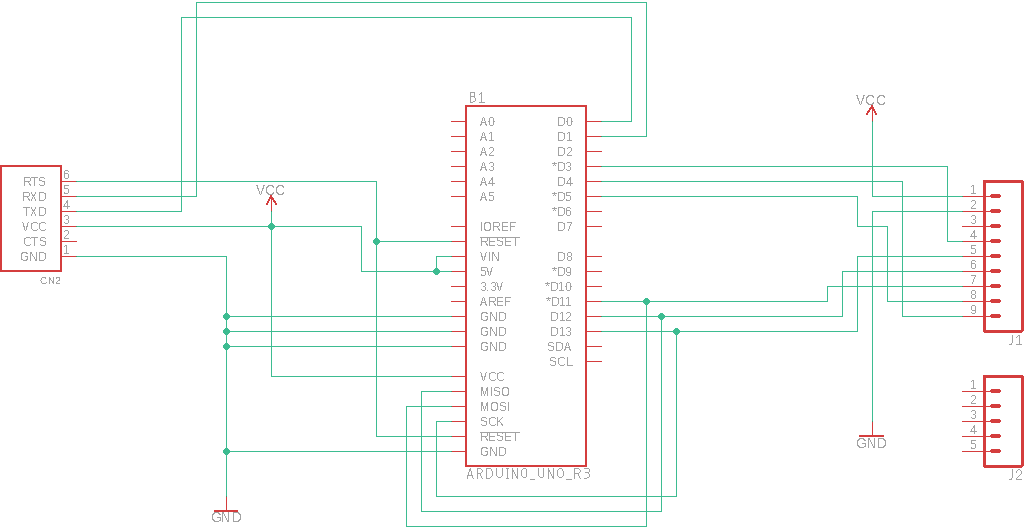
    I wanted a LoRa modem to go along with my computer, so I've created a shield for the Arduino. The thought is that Arduinos are pretty easy to come by, and the RFM95 breakouts also seem to be easy to come by. I've got a set of boards on order from OSHPark, so in about a week, I'll find out.

  • Status update

    Kyle Isom10/09/2019 at 00:22 0 comments

    Though quiet, I've been plugging away.

    I'm currently working on a serial I/O board that can be used for some of the initial work; it's based on the RC2014's dual SIO/2 card with modifications and adaptations for my purposes.


    The real bugger right now is the display and keyboard. I'm thinking of using PIO chips for this, though I was previously considering an atmega1284-controlled I/O board.


    I also got a compact flash to IDE adapter, so I think I' going to use that for a disk drive.

    Importantly, I'm also waiting on the EEPROM program (hey, revision 7 now) to show up. I can't do much until it gets here, as the Z80 doesn't know what to do.

  • Schematics and boards → GitHub

    Kyle Isom09/19/2019 at 16:40 0 comments

    I've put the schematics and PCB layouts on GitHub. There's the boards I've built so far and a few tooling boards I'm still waiting to get back from OSHPark. Almost none of it has been tested, though. Note that all of these are Eagle files, and you probably need the Adafruit and Sprakfun libraries too.

  • RC2014 board

    Kyle Isom09/19/2019 at 14:54 0 comments

    I've gotten an (really, another) RC2014 [1], and it's up and running. While I didn't design the hardware, it's nice to have a test platform for Z80 development. I'm using a Raspberry Pi as the serial terminal, which isn't so great (that's another project for another day), and it all works together nicely. I've got mine set up with the RomWBW and a Compact Flash card (that isn't working yet), so it should be a nice little dev platform.

    [1] I have an RC2014 Pro, but it spews garbage on the console. All signs point to an issue with the serial board; while I have a replacement on order, I wanted something that works now.

View all 11 project logs

Enjoy this project?

Share

Discussions

Ale o co chodzi wrote 11/23/2023 at 19:29 point

very nice

  Are you sure? yes | no

Peabody1929 wrote 02/05/2020 at 17:57 point

I would like to suggest a short cut to "breadboard" a Z80 laptop.  The Pinebook is a low cost laptop.  Inside the case is a large area where another board would fit.  "What If" you put a Z80 SBC in this space and used the Pinebook for the "terminal" to the board.  It would be the same as connecting the Z80 SBC to a desktop PC using a STL connection.

  Are you sure? yes | no

mel wrote 10/22/2019 at 08:01 point

Hi Why use a chip for reset? a 10uF cap and 10K resistor usually do the job on my Z80 stuff. Are you going to be baattery powered? A cmos Z80 will help.  take a look here, https://hackaday.io/project/168104-interak-z80-computer

  Are you sure? yes | no

Kyle Isom wrote 10/23/2019 at 06:36 point

They're pretty standard for POR but I've had enough headaches here that I'll probably go the standard 10K resistor + pushbutton reset.

  Are you sure? yes | no

Kyle Isom wrote 10/09/2019 at 01:44 point

An old IBM 5140 keyboard - you can find them on eBay for about $50, but you also need switches for them (~$50 for 200 from Matias).

  Are you sure? yes | no

Starhawk wrote 10/11/2019 at 08:00 point

Pardon my asking, but why does one need switches for what amounts to a box of switches atop an 8042 and some cabling?

  Are you sure? yes | no

Kyle Isom wrote 10/11/2019 at 16:25 point

Sorry, I mean you can get the switchless keyboard case and PCB for $50.

  Are you sure? yes | no

Starhawk wrote 10/09/2019 at 01:18 point

Just curious, what is the keyboard shown in the most prominent Gallery image there...?

  Are you sure? yes | no

Similar Projects

Does this project spark your interest?

Become a member to follow this project and never miss any updates