 Hazel Mitchell
-
1For full instructions, please visit: https://s-u-pm-sensor.gitbook.io/pyonair/
To avoid confusion, the following instructions will only cover the steps for making a PyonAir monitor using the PCBA approach. If you'd like to hand-solder the PCB or use breadboard, please visit: https://s-u-pm-sensor.gitbook.io/pyonair/tutorial/wiring/
The GitBook guide also includes additional information and resources not covered here.
-
2PCBA ordering
- Login or create an account at https://www.seeedstudio.com/fusion.html
- Click on 'Order Now'.
- Upload Gerber Files.
- Adjust settings:
- PCB quantity
- Surface finish: HASL Lead Free
- Add assembly drawing & pick and place file. (Same as Gerber files)
- Type in PCBA quantity.
- Add to cart and order!
-
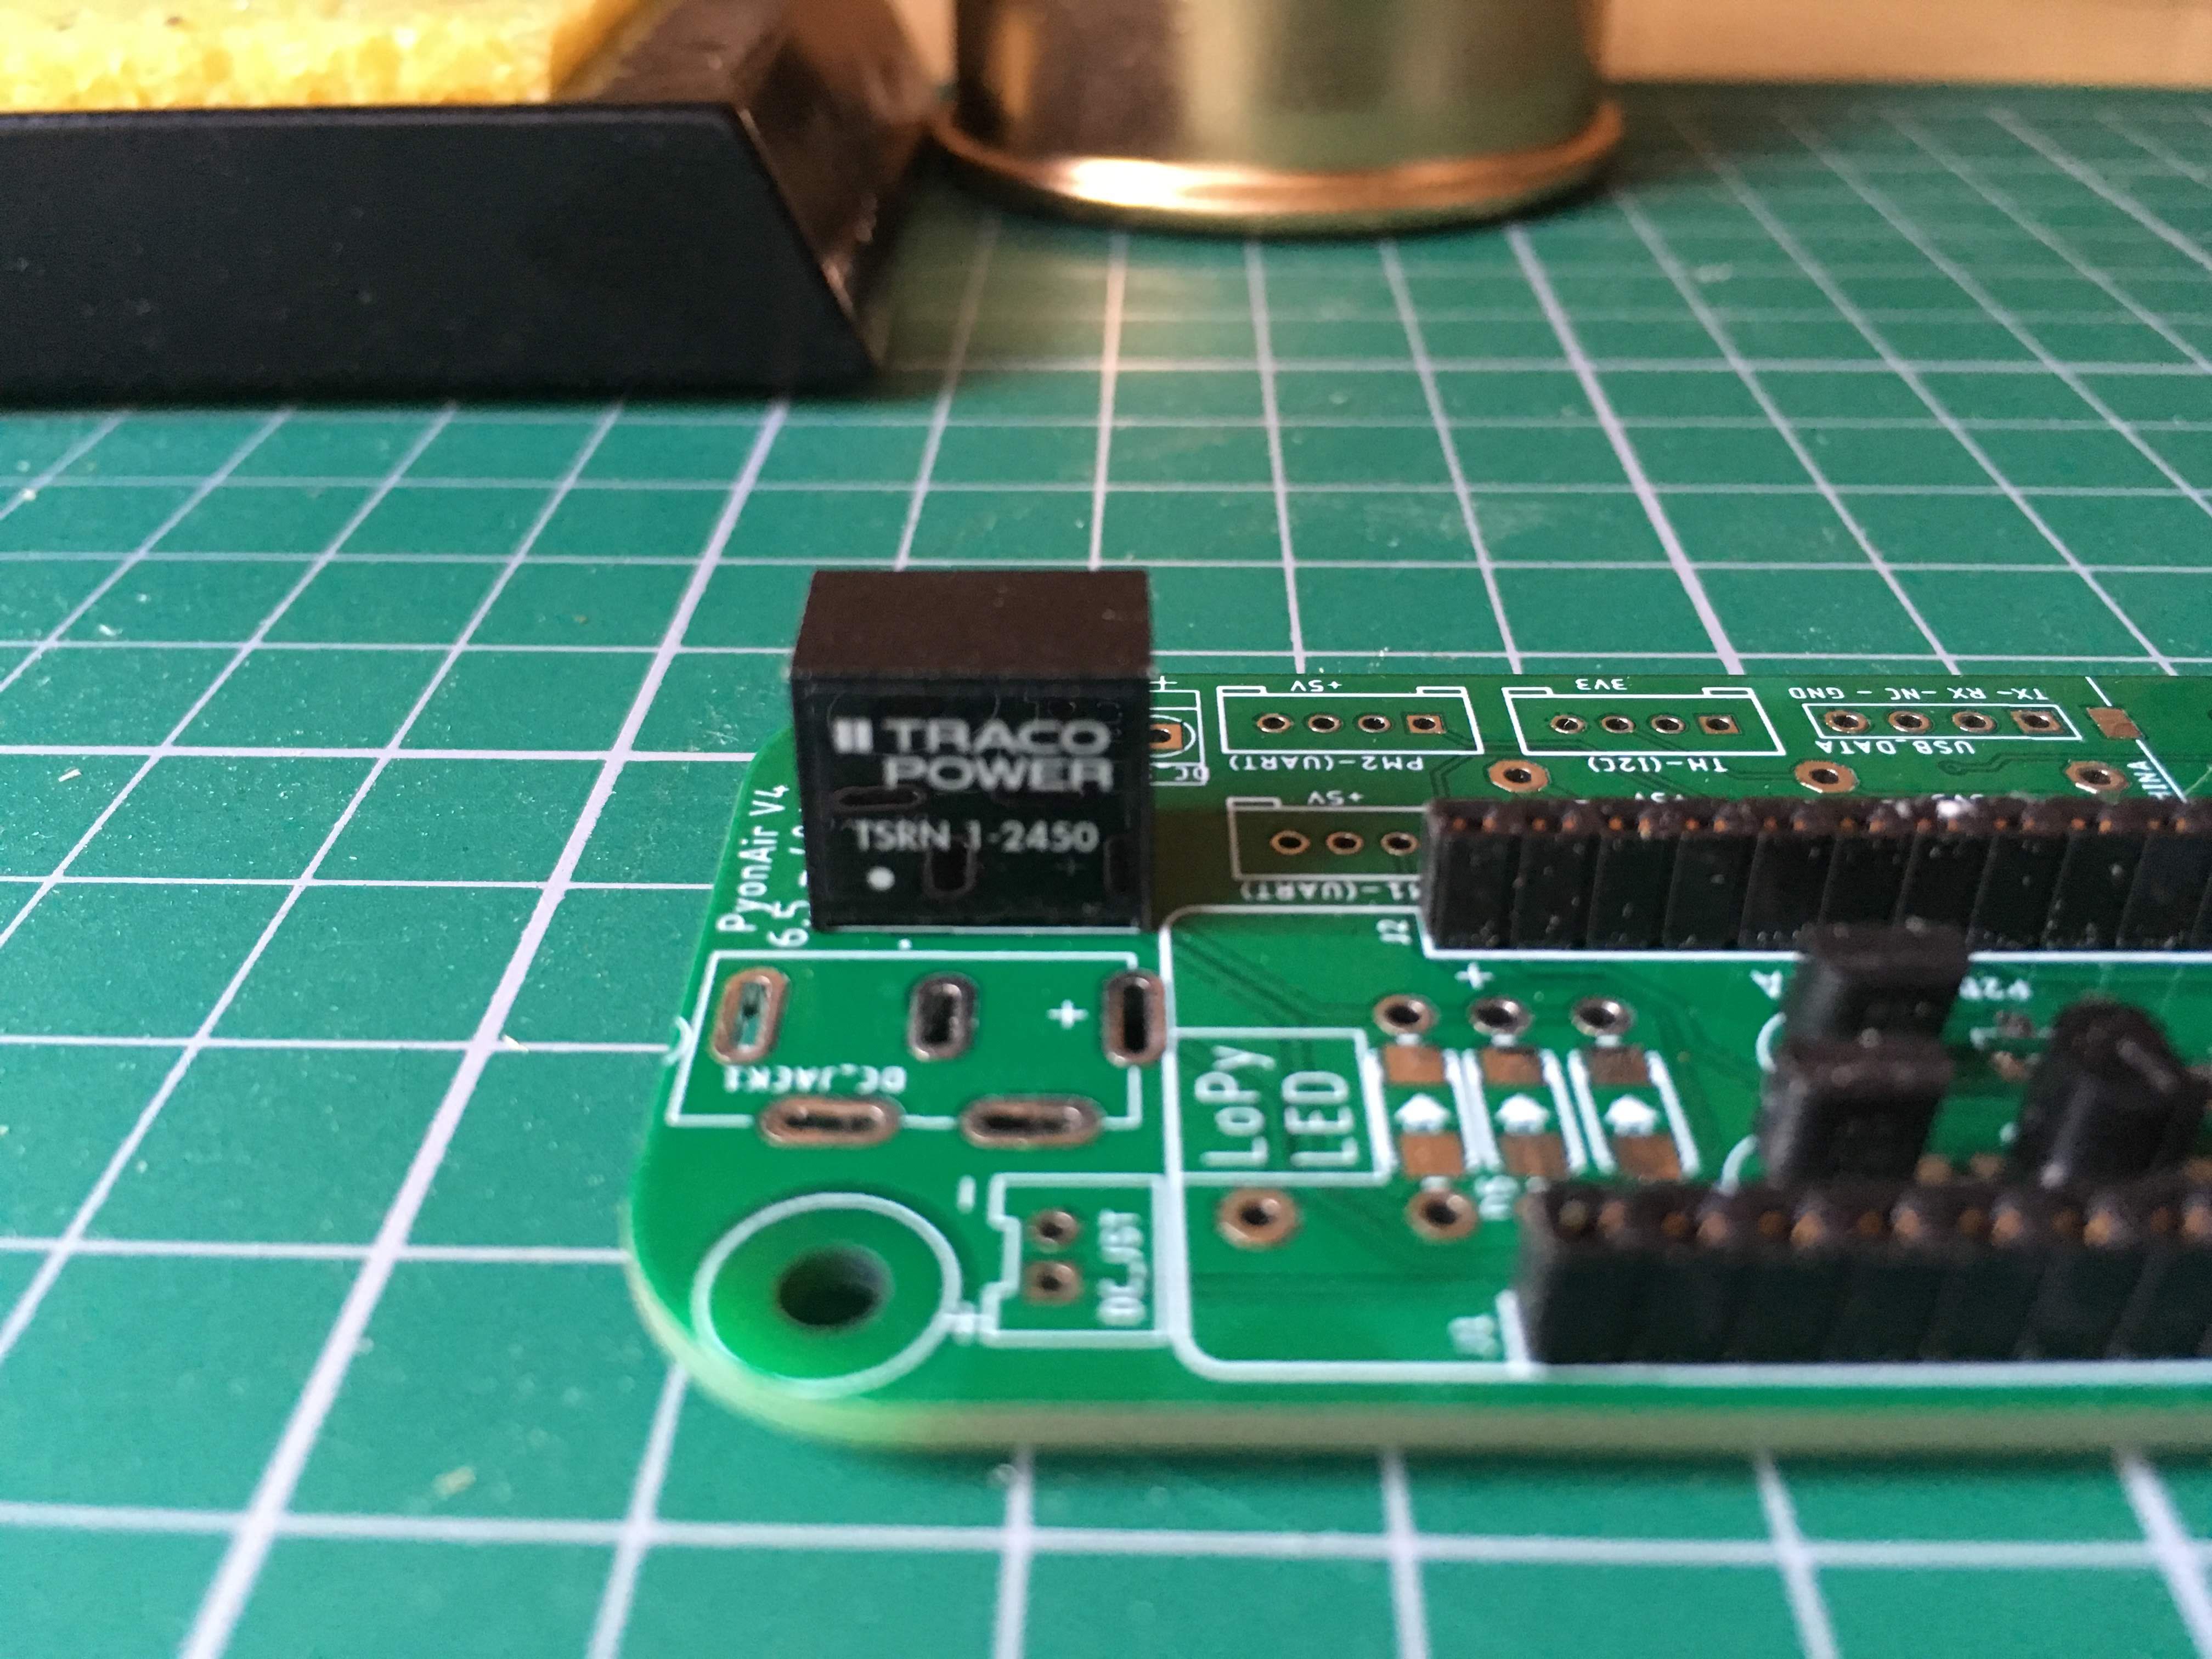
3Soldering the voltage regulator
The only part that requires soldering when using Seeed's PCBA service is the TSRN 1-2450 voltage regulator. You can include this in the assembly BOM instead but it may add a lot more time to the order.
If you're happy to solder it by hand, simply add the regulator to the place indicated by the silkscreen, making sure the orientation is correct. The white dot on the silkscreen should line up with the white dot on the regulator.
![]()
-
4Assembly
- Choose which one of the power inputs you wish to use (barrel jack / JST / screw terminal) and connect the appropriate supply.
- Use a multimeter to check the V_IN and 5V test pads on the back of the PCB.
- When you're happy that the board is correctly powered, remove the power supply.
- Plug the LoPy4 into the 16-pin headers, ensuring the LED is at the top (as shown on the silkscreen). The bottom 4 holes in the headers are unused.
- Connect each of the Grove devices into the matching sockets on the PCB.
- Plug in the micro SD card.
- Reconnect the power supply. The LEDs on the LoPy4 and GPS should both turn on.
- Use a multimeter to check the remaining test pads on the back of the PCB.
- Your PyonAir should now be ready to program!
-
5Software installation
For our software development, we used Atom and pymakr. Both of these are open-source and should work on most computers. We recommend installing these before downloading the code for the LoPy4 board.
Download zip folder from Github
To get your PM sensor device up and running, download the latest version of our code from GitHub: https://github.com/pyonair/PyonAir-pycom
Make sure you extract all of the files to a convenient location on your PC or laptop and avoid renaming any of the files.
Open folder in Atom
Open Atom and close any current files by right-clicking the top level folder and clicking "Remove Project Folder" in the menu that appears.
Go to File > Open Folder and select the "lopy" folder. All of the contained files and folders should appear in the "Project" pane on the left in Atom.
Connect LoPy to PC
Plug the Pycom expansion board into your PC or laptop using an FTDI-USB cable. You can use the RX, TX and GND wires with the header to the right of the PyonAir PCB to program the board.
Don't forget to plug in the micro SD card and power the board!
The board should show up in Atom and connect automatically. The bottom pane will look something like this, with the name of the board you are using:
![]()
Upload to LoPy
To upload the code, simply click the "Upload" button in the bottom pane. The process may take a few minutes, depending on how many files need to be removed and installed.
Once the upload has succeeded, press Ctrl + c on your keyboard to stop the code, then unplug the USB cable.
-
6Device configuration
When you set up a new device for the first time or if you want to change any settings, you will need to configure it over WiFi.
- Remove your air pollution monitor from any cases such that you can access the user button.
- Prepare a phone or computer that is able to connect to local WiFi networks.
- Power the PyonAir device.
- When setting up the device for the first time, it should automatically switch itself into configuration mode after a short initialisation period, indicated by blue LED flashing. Otherwise, press and hold the user button on the Grove socket PCB (labelled CONFIG) for 3 seconds.
The RGB LED should turn solid blue.
Connect to the PyonAir device's WiFi. (This will be named 'NewPyonAir' or whatever you previously named the device.) The password is 'newpyonair'.
Enter http://192.168.4.10/ into your web browser. The configuration page should appear.
- Fill all required fields on the page and click 'Save' when finished. (You will need to provide connection details to LoRa and WiFi, assign a unique ID to each sensor, and specify your preferences regarding data acquisition.)
- The PyonAir device should now reboot and will use the settings you provided.
LoRa & TTN
To connect your device to LoRa, register it via The Things Network. Create a new device with the Device EUI shown in the configuration page, and copy the Application EUI and App Key from TTN to the configurations.
-
7Deployment
Now that your air pollution monitor is fully configured, you should be ready to deploy the device!
Case advice
The case we selected for our devices is a 115 x 90 x 68 mm waterproof enclosure from eBay.
However, feel free to purchase a different case or design your own. SolidWorks files for most of the hardware we used can be found on GrabCAD, to help with designing custom cases.
Just remember that your case should:
- Protect the electronics from water and dust
- Hold the electronics securely inside the case
- Prevent the electronics from overheating
- Allow air to reach the PM sensor(s)
- Allow mounting of the device on-site
Location selection
An ideal deployment location will fulfill the following criteria:
- In a region of interest for air pollution
- Out of direct sunlight
- Within range of a LoRa gateway
- Within range of WiFi
- Close to a power source
- Secure mounting points
- Able to receive GPS signals
PyonAir - IoT air pollution monitor
An open-source, low-cost device for monitoring and transmitting local air pollution levels.

Discussions
Become a Hackaday.io Member
Create an account to leave a comment. Already have an account? Log In.