Chitu 3D Printer Mainboard Hacking
Studying the encryption on Chitu's 3D Print controllers
Studying the encryption on Chitu's 3D Print controllers
To make the experience fit your profile, pick a username and tell us what interests you.
We found and based on your interests.
chitucrypt.pyNow with decrypt and encrypt functionality.x-python-script - 3.77 kB - 09/22/2019 at 18:29 |
|
|
chitutronxybootloader.binThis is the bootloader which decrypts the update files.macbinary - 34.00 kB - 09/21/2019 at 04:24 |
|
Everything is merged. Marlin auto-builds for the Tronxy (chitu) boards. And this log concludes this project. Happy hacking, everyone.
A flurry of activity over the last few days has brought us to the end of the road with this project. Marlin 2.0 now has support for the chitu boards in bugfix-2.0.x, and I opened a PR that will enable disk based updates that should be done soon. THe disk based updates required a bit more reverse engineering, because the bootloader leaves hardware in a half-initialized state. Since DMA drops receive buffers straight at the beginning of RAM, I had to write some custom initialization code to turn off interrupts, clear devices and reset the system. Soon, building Marlin will be as simple as "pio run -e chitu_f103" and copying over the update.cbd to an SD card.
It's been fun...
I discovered problems in my chitucypt script, and figured out why encrypted firmware didn't load more than once. It turns out, the firmware stores the file key in the I2C EEPROM, which is why if you attempt to flash the same data over and over, it won't. I've also found some truly odd behavior that I can work around by padding the EEPROM, but I can't explain. My suspicion is that the file key is not entirely random - it indicates something about the size of the file or the blocks. The problem with this theory is that i can roundtrip a Chitu firmware, flashing it with a truly random key, and it works.
I simply don't know, yet. I can't debug the board, but I binary patched the bootloader to replace error messages with some values, and I suspect something is going wrong with the CRC...I just don't know what yet.
Also, someone has successfully ported Marlin, using LCD and touch screen -
https://github.com/MrPoke21/Marlin-Chitu-board-support
This is not my code, but I built it and flashed it using he STM32Cube programmer to 0x8000000 and it works. It's not the new Canvas based LCD code there's a PR out for, but it's Marlin, and it works.
I don't actually own an X5S or any variant thereof - I just have a disembodied mainboard and screen I've been using to do my projects. With the last bit of code from my previous log, I was able to build a script to allow generation of encrypted binaries for Chitu firmware while building in platformio.
I've now submitted a pull request to Marlin to enable this. After it's done, it will add an environment. It is *not* a complete Marlin build, but if you read the linked items in that PR, there are people who claim to to have working builds with all but the touch screen, so the key here is to get my bit in and let other people do theres. We'll need some pin updates by someone who has the printer.
With that there's really only a few more things left to do.
I would like to get a dump of the default firmware and rip the bootloader off - then I'll re-encrypt it so people can restore their printers.
And that will be the last of it.
Here we have proof that the custom code does in fact work. Marlin with no SD/LCD boots just fine, and at least the Y pins are correct.
What does this mean? This project is near to completion, I think. I'll try to verify the other pins, find the LEDs, fans, and runout sensors, but the goal here was to break the encryption and let us load whatever we want. I don't own an X5S, so it's not like I can do the iterative testing that is needed to develop a configuration.h for the printer. So...we near the end. Just a few pins to run down and so on.
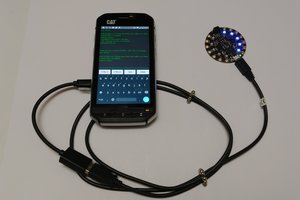
The picture is not all that awesome. It's the obligatory "hello" program.
What's cool is that it's running on a Tronxy/Chitu main board with a stock bootloader, meaning that you don't need ST-links, the STM32CubeProgrammer, or anything else to flash it. And if you don't like it, you can always go back.
Since my last update, I successfully added support for encrypting data such that round-trip produces identical files. Once I did this, I proceeded to make a minimal build of Marlin, figuring I could jump straight into working.
No dice. I can get the existing bootloader to flash data on. It turns out that it's storing data in the I2C eeprom regarding what's flashed, and won't re-flash the exact same firmware. You have to swap revisions to flash from one to the next, and I think the file key is what is used to figure out if it's the same thing. Since I use a known good file key right now, that doesn't work.
The resulting Marlin build flashes but never starts, and that lead me to notice a few details I hadn't seen before.
1. The Marlin build using STM32DUINO produces an NVIC with no reserved entries. I do not know why.
2. A super short firmware does NOT flash correctly. I don't know how many blocks are required, but an arduino sketch compiled for a generic F103 (which according to ST is bit-compatible) will not flash - it hits the error handler almost immediately.
3. There's a debug flag stored in ram at 0x2000000. If it's true, the bootloader traces operations. I have no way to enable it. I know the bootloader goes looking for a file that ends in .GCX but I don't know what it actually does.
4. Timer8 appears to be used to drive the speaker/buzzer.
The ST Arduino core doesn't have a variant for 103Z, so I have nothing to compare it to, yet, but I do see there's a feature request for a 103Z variant that's waiting.
So...right now, I need to do some round-trip tests I didn't think of before. I'll decrypt a known good firmware and re-encrypt it with a different file key. If this flashes on and boots up correctly, my encryption script is doing the right thing.
Now...if that's the case, what do we think is happening?
Well, with the M200 and Lerdge, I learned that the bootloader often interferes with the process of overwriting *everything* and re-initializing. I'll have to test a custom version which disables all interrupts (not needed in any normal boot up) and re-initializes, then turns on something like the onboard LED.
After quite a bit of creating and re-creating python functions to XOR the data together, I finally switched disassemblers and got a mildly different output - different enough that it showed me r12 being used in a way that I hadn't grasped before. With some work, I was able to decrypt Chitu/Tronxy firmware of several flavors, at least enough that Binary Ninja shows me complete functions, literal pools line up, and so on.
I'll add the script to the files section of this project. Next up will be to encrypt the same way and do a few end-to-end conversions and diff the resulting files. When those come back identical, it's time to try some custom firmware, probably starting with the classic "Make an LED blink."
Tonight, I'm just happy to be able to decrypt the firmware and confirm I understand how the bootloader works with it.
With some work, I've figured out how the Firmware CRC works.
The first 3 DWORDS of the file are, in order:
A signature - must be
0x443D2D3F
The XOR CRC of all DWORDS after the header
An encryption seed
To calcuate the CRC, begin with a seed of 0xef3d4323. XOR each subsequent byte with this.
In production, it's highly likely that the way this works is that they write the header first, calculate the XOR value of the firmware, and the final XOR is with the seed, resulting in what's written to the header.
Now, moving on to the XOR encryption.
Here's the code that does it, taken from Binary Ninja
Here's the call:
The operation pretty much only operates in blocks of 0x800.
The first two parameters appear to be the data from the encrypted file and a working buffer which is where the data is written to.
The third parameter is the block counter, which goes up as blocks are decrypted.
The file size is fixed, and I believe the last parameter is the encryption seed.
The problem is, my python implementation of this never seems to actually use different values, so I'm missing something obvious.
So, I may have noted that the Chitu board exposes Boot0. It's also a much later variant of the STM32F103, with FSMC support. I posted in one of the Tronxy facebook groups looking for dead boards to desolder so I could trace down SWD and see if there was an easier way to get at the flash.
But....
It turns out, there's no need to do this. As someone pointed out, all you have to do is pull the BOOT jumper, restart the board, and it comes up in DFU mode.
And read protection is NOT set.
Suffice it to say I extracted the Chitu bootloader. The encryption is complex (it is some sort of rolling encryption), but the firmware loads at 0x800880 (at least, that's where the bootloader tries to start it). There's a couple of things about this:
1. I've heard there's no firmware image from the Tronxy. There could be relatively easily.
2. We can get Marlin up and running just using DFU. I would still like to reverse engineer the bootloader to allow people to update without using the STM32CUBE programmer, but in essence, any DFU update will work.
So...I sort of spent a lot of time looking at hex dumps for nothing.
I mean, looking at hex dumps is always amusing, but I could have taken the fast train to getting the bootloader to disassemble. Sigh.
Create an account to leave a comment. Already have an account? Log In.
J.C. Thank's for the solid contribution to get Marlin ported to the CHitu I have the definite pleasure of using it and it's a wast improvement over the stock firmware.
I was wondering if during your mapping of the pins have discovered if any other pins than STEP, DIR and ENABLE are connected from the drivers? It would be of particular interest if pin 19 SPREAD was connected or otherwise to know that it's not connected to anything and could be jumpered and pulled high.
I've tried the linked github project:
https://github.com/MrPoke21/Marlin-Chitu-board-support
and on my Tronxy X5SA it just stays dead. The bootloader beeps a few times and then nothing.
I've also compiled my own marlin2.0 with only the serial connection changed. Nothing. FYI you need to disable the SPI library in the platformio to make it work.
I suspect that the image is not packages correctly. My firmware.bin is
207K, while the update.cbd is 209K.
I've used the script version from Marlin, but with python3. For that I had to adapt one print statement with (...) braces.
Do you have any idea what I'm doing wrong?
The current head should work and produce an update.cbd that "just works." :)
Hi, i'm trying to find all GCODE available for my ELEGOO MARS which using a CHITU board.. I was happy to find your project. Unfortunatly the firmware in CBD format can't be decrypted with your program.. Am i doing something wrong ? Thanks
What does it output? You really dont' want to dig into that massive switch statement. You can compile Marlin for it now, and that's what I would do.
Hello. Congratulations for your project!
I'm trying to load Marlin on a Stm32f4 based 3D printer board. Bootloader and firm are not protected, so I've the stripped .bin.
I can disassembly the binary with ghidra, but I'm really interested on get the current GPIO wiring, I mean, which GPIO controls servos, end switches and so on, in order to make the board marlin compatible (generate the pins.h file) . I'm interested on the way you have accomplished this task. I've been thinking about, and may be with keil or iar ew (using emulation with dumped firmware or debugging on the board itself) or may be using a logic analyzer and visual inspection...
Any help is appreciated!
I just saw this. The key I use for doing this is to get a simple arduino sketch running, and once I do that, I start probing for pins. If you can get any sketch running, a minimal Marlin will give you pins debugging, but finding the steppers is usually a lot more complex - I write sketches that turn on pins until I find ones that enable (disable) the steppers, or repeatedly step a pin to find the one that drives, etc. Endstops are easiest found with pins debugging.
Become a member to follow this project and never miss any updates

 J.C. Nelson
 ziggurat29
 foamyguy
 Alex Brown
Following this— I tried the github links but they’re all dead. Is there and update to the repository location?
I have a Chitu board on a QidiTech X-one and I’m kinda fed up with dealing with the proprietary Sailfish firmware and it’s lack of support for calibrating e-steps or PID adjustment. If I can find a way to get Marlin on it, I’d be thrilled! Any assistance would be appreciated— I really want to find this info on github but the links are dead. Any ideas?