Close
0%
0%

F450 Drone Kit with ESP

This is an esp-idf project in progress with an ESP32 flight controller/receiver and esp8266 D1 mini transmitter

Similar projects worth following
This is an esp-idf project with an ESP32 acting as a flight controller and receiver for F450 quadcopter drone and an esp8266 D1 mini as radio control transmitter.

Feb-25, 2020 - Got printed circuit boards for transmitter (and li-ion battery charger) from jlcpcb today. Soldered it up and got it running - picture in gallery.

-----------------------------------------------------------------------------------------------------------

It has been a couple months since I have done much direct work on this project but am starting to get back into it a little now. In that time I have been looking into some background projects to help support me in this project. In addition to spending a few day familiarizing myself (and writing libraries) for the NRF24L01+LNA with antenna, I have made project posts on this site on several topics related to this project -

  • BMP280 Data Collection With ESP
  • A Li-Ion battery (1S - 6S) charger and tester 
  • Drone Kit Development - Thrust Measurements 
  • Magnetometer Demonstration

As result of this aside I have decided to try to have my main thrust loop closing in on bmp280 altitude measurements, to build my own battery charger and to try to avoid using a magnetometer. The range of the esp's espnow radio is somewhat of a limitation so I have included an option to use a nrf24l01+ on both the flight controller and the transmitter. 

Given that I was closing in on a version of this project that I wanted to build and the breadboard was getting a little crowded (especially after adding the bmp280, the nrf24l01+ and a gps receiver to the flight controller board), I looked into building a printed circuit board. I haven't built a pcb for a home project (well since the old FeCl days as a kid) before, I have done it at work (where I didn't even have the cad tools on my computer) and had techs or vendors do the supervised capture, layout and ordering (did a couple 2 layer test jigs a few times but as I recall those were still in the $200+ range and the software was not very good).  This time I tried EasyEDA and was surprised at how easy, fast and cheap pcb design is these days, I had the pcb for the li-ion battery charger done the same day - 5 2-layer 100x100mm boards are $2 with $6.33 3 week shipping - wow! You can install the router easily on windows or linux systems and it will route the board in about a second - very intuitive interface with a schematic capture comparable to industry leaders, extensive component libraries (beware some contributed by individuals and not verified), hurry and download and maybe you can be the one millionth easyeda user!

I have submitted orders for both the flight controller board and the transmitter PCB  boards for this project - the boards have completed manufacture and been shipped. Pictures of the boards are included in the gallery.

What is demonstrated working so far as test and co-functional software libraries -

Flight Controller

  • ESP32 module with C program written using only software cloned from https://github.com/espressif/esp-idf 
  • SPI DMA interface to MPU9250 reading gyro data at 8K samples/sec, accelerometer data at 1K samples/sec (spiclk = 5MHz)
  • Low pass filter on accelerometer data, and xyz to spherical trig conversion to calculate accelerometer based pitch and roll at 100Hertz (will try to go higher)
  • Complementary filter fusion - preserving high speed component of gyroscope data and and low speed component of accelerometer data
  • PID control inner control loop (attitude measurement) integrals at 8K update rate, external PID (attitude control) updates at 100+Hz 
  • PWM generated servo outputs from outer control loop PIDs to four ESCs updated at 480Hz
  • MPU9250, BMP280 and ESC calibration functions
  • BMP280 pressure data used in altitude control PID

 Receiver/Transmitter Radio Set (one for esp8266 transmitter and one for esp32 flight controller)

  • Have had receiver working in both TCP/IP and ESPNOW modes, recently added NRF24L01 on flight controller and transmitter 
  • In TCP/IP mode have hosted remote webpage with a couple virtual joysticks, unfortunately limited to ~5 packets/sec, maybe useful for some...
Read more »

VID_20191024_093831851.mp4

2 axis testbed hover with push

MPEG-4 Video - 26.47 MB - 10/24/2019 at 14:01

Download

  • Submitted 2/7/2020

    markwarren.ee02/07/2020 at 17:06 0 comments

    Discussion

    On my two axis testbed with two motors spun up to average throttle of 1450 (close to what it would hover at with 4 motors) seem to be enjoying a 1 sigma attitude control of better than 0.1 degrees after a half hour of playing with tuning. It is impressive how hard you have to push these things to get them to move. Also included a graph of what the recovery looks like in time with the contributions from the proportional, integral and derivative components of the PID control loop. In attached files have included a video of recovery from a pretty good push on my two axis test setup. 

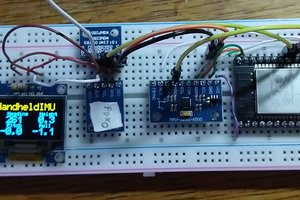
    In gallery have included a closeup picture of flight controller board. The two other modules on the breadboard are the MPU9250 with SPI interface wiring back to the ESP. The ESCs required a 5 volt servo input and are being routed through a 4 port 3 to 5 volt level converter, with wires heading off to the four ESCs. The usb plug heads back to my desktop monitor where I can modify parameters (PID gains, throttle speed, etc) and monitor state. 

    So far I have learned a bit from this project, it's my first exposure to drones, but I do have other relevant experience and think this procedure an informative introduction to the subject. I feel pretty good about being able to make a flight controller at least as good as the CC3D that came with my drone kit. I have gathered info from the web but the code is 100% mine except for the device drivers contained in the esp-idf framework.

    Next Steps

    Think up tethering scheme for 'safety conscious' indoor hover testing
    Free up other drone axis for actual flight (no more metal rod or testbed)
    Modify testing software for other 2 motors, yaw and altitude PID loops
    Integrate 4 inner PID loops (currently just using 1) into ESC servo commands
    Hover!
    UPDATE -- Received my much nicer joysticks Saturday morning and mounted them in cigar box. I was expecting the process of getting these working to go smoother than it ended up being. Turns out the ESP8266 briefly uses more than an amp of  current when transmitting wifi packets. This resulted in bad adc readings (~5% worst case) during wifi transmits. At first I tried to clean up the power supply going to a battery and further power filtering for the adc and joystick and managed to cut the errors only by less than half - I feel I could have done better with some good 1mF low esr caps which I don't have. Decided to try synchronize adc data acquisition to when wifi transmit is quiet and get rid of the wiring complexity of the filtering effort. The espnow example that I used to start my code with uses an event queue to schedule both espnow transmits and receives, I couldn't find a way to predict when the scheduled transmit would be unspooled from the event queue (even after waiting 100msec). Ended up pulling the transmit out of the event handler and issuing it directly with a 40msec vTaskDelay prior to starting the next adc reads. The 40msec delay seems to have eliminated (none in an hour) the adc interference (a 20msec delay gave me a little noise on one or two of the adc readings every minute or so).

    Tethering drone by hanging it from ceiling for the time being cradling two arms - need to get to single point (and to a point further from my desk). The metal rod is gone, other two motors incorporated into software. Currently have yaw, pitch and roll inner control loop PIDs tested and tuned for just hanging there at a relatively low throttle, but disturbances to yaw, pitch and roll do correct nicely.

    Next going to integrate transmitter commands into flight control PIDs by summing transmitter commands with error input to PIDs (already have communication between boards setup and working on 40msec loop).

    Update - Drone hanging from much nicer cradle about 15 feet from desk. Made changes to flight controller to receive flight controller data. In progress of doing some tethered maneuvers. When processing the espnow packets the mpu9250 fifo would overrun (only takes...

    Read more »

  • Log prior to 10-24-19

    markwarren.ee10/24/2019 at 13:54 0 comments

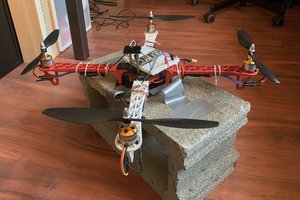
    I recently started a project with a kit containing f450 frame, brushless motors, electronic speed controllers and props for a little over $50. They even threw in a CC3D flight controller module, which while not part of the original plan helped firm up a development strategy. My plan is to develop stable platform that will hover (and return) to one spot before trying to focus on 'flight' concerns. The logs contain a story of several implementation attempts that did not pan out. This description is of the current status and direction.

    Components :

    F450 frame, motors and ESCs
    ESP8266 with resistive joysticks and analog to digital converter
    ESP32 with MPU9250

    Transmitter :
    The transmitter gathers voltage reading from the joysticks every 10 msec, they are encoded into a string as throttle, yaw, pitch and roll state. This string is transmitted as an ESPNOW packet. For ease of use, the espnow link between transmitter and receiver are hard-coded with each-other's  MAC address, discovery and turn on sequence are not an issue. The espnow between the two devices works reliably up to maybe 200 feet with the two devices tested - planning to probably replace these with a couple nrf24l01 (pa+lna) recently ordered. The joysticks that I currently have are barely usable  - plan to replace these with a couple jh-d202x recently ordered. A display was originally included bit interrupted some of the espnow packets being sent at 10 msec intervals (access later). Blackbox logging will be looked into later.

    Receiver :
    Hardware development is  proceeding  using a CC3D flight controller contained in the f450 kit, my daughter has taken lead on mechanical/soldering and test flights (pic included). Currently, the ESP32 on the quadcopter is receiving espnow packets from the transmitter and converting these to SBUS format to communicate with the CC3D flight controller. We used cleanflight to setup the CC3D and then to program the ESC's and make sure the motors were turning the correct direction, allowing us to proceed with mechanical build and soldering. We have armed the quadcopter and had several test flights out in the yard and everything is working pretty well.

    note : Getting ESP32 to SBUS communications up to the CC3D was not trivial - couldn't really find any starting point except SBUS specs and CC3D/cleanflight does not really support diagnostics. A linux program was written that writes and also monitors SBUS traffic that helped a lot in the development of this code.

    ESP32 Flight Controller and Receiver :

    The real goal of this project is to write the flight control software from scratch and host it one the ESP32 with a view toward maybe adding a barometer, gps, magnetometer, tof altitude monitor or camera to the platform to keep me busy this winter (and keeping to $100 budget). Progress on the IMU software has been good so far and I'm hoping the high resolution led timers will handle the ESC servo commands at a 10 msec update rate.

    Status of IMU software :
    - MPU9250 (not using magnetometer)
    - ESP32 module SPI interface 
    - reading 8K gyroscope samples per second
    - reading 1K accelerometer samples per second
    - simple one-pole low pass on accelerometer x, y and z axes
    - simple one-pole high pass filter on gyroscope z axis (yaw)
    - trig functions to convert accelerometer data into pitch
      and roll data in degrees
    - Complementary filter fusion of gyroscope and accelerometer
      x and y axes (pitch and roll) (output is angle in degrees)
    - start-up calibration
    - Inner control loop error estimaters and PID controllers
      (pitch, roll and yaw)
    Currently the program is working to the point where it outputs to the console the speed commands to each of the four motors as a result of changing the attitude of the board or commands from the transmitter joysticks.

    Plans :
    - more test flights with CC3D
    - finding out what can be found out about PID gains prior to first flight, a basic simulation?
    - replace those damn joysticks and build a nice transmitter...

    Read more »

  • Original project description

    markwarren.ee10/16/2019 at 16:31 0 comments

    This is the original project description that was posted when the project was first started a couple weeks ago. I want to rework the description but figured to keep the original as a log entry.

    ---------------- log entry 09/27/2019------------------

    This is an esp-idf project with an ESP32 acting as a flight controller and receiver for F450 quadcoptor drone and an esp8266 D1 mini as radio control transmitter.

    I did a project recently with an mcp6050 gyroscope and accelerometer, impressed with the capabilities and ability to keep a reasonable integral of inexpensive mems sensors I decided to find something to control. Some ebay searches pretty quickly lead me to consider building a quad coptor. I soon found a kit containing f450 frame, brushless motors, electronic speed controllers and props for a little over $50. They even threw in a CC3D flight controller module, which while not part of the original plan helped firm up a development strategy. My plan is to develop stable platform that will hover (and return) to one spot before trying to focus on 'flight' concerns.

    I've been hobbying around with esp devices for a few months now and have decided to use an esp8266 D1 mini as my transmitter base station and an esp32 as my receiver and flight controller. At first the flight controller aspects will be shared with the CC3D flight controller that I got with my kit package. I hope to integrate the CC3D  functionality into the esp32 as we go along, but there is a lot of learning to do here that I can reverse engineer with the CC3D and cleanflight.
          Transmitter requirements : 
              Two way comms to at least 200 feet
               be able to sustain packet rate of at least 10/sec (hopefully 50/sec)
               collect data from a couple joysticks, switches and a display
               return blackbox data from flight controller at packet rate to serial port

    Using a webpage as input and a TCP connection between transmitter did not work out, I have familiarity with the IP and was able to test it out in a few hours. Packets started getting backed up at a 300msec launch rate, maybe this could be improved but probably not by a order of magnitude. A couple of browser joysticks on a cell phone might have been nice. The project is now heading in a transmitter to flight controller receiver interface using espnow framed wi-fi station/access point connectivity and i2c interface to ground station hardware (physical joysticks, switches and display). Tests showed a 3x range improvement over my router without the connection and  tethering hassles, and much much better packet rates. The espnow protocol is directly between the esp devices to their mac addresses with crc checks and limited handshaking.

    The joysticks being, temporarily, used are pretty horrible. They have a huge dead spot at the center where the output resistance doesn't change for about 15 degrees each side of center and the rest of the range is used up well before coming  to limit of travel, so the whole usable range is about 15-40 degrees each side of center. The joysticks center position resistance varies considerably and needs to be calibrated and they return to center.

    A data acquire task loop is run in the transmitter to read voltage values from an ads1015 every 20msec. The readings are used to update local values for throttle, yaw, pitch and roll. The yaw, pitch and roll are 10bit values coming from the adc, the center rest position value is subtracted, the result adjusted by a chosen gain and added or subtracted (depending on orientation of joystick) to 1500. The throttle does not return to center so its reading (after calibration offset) is accumulated  (and multiplied by chosen gain) and added to 1000.

    Events are scheduled to run espnow_send every 20msec and a callback for espnow packets received. The espnow_send transmits a...

    Read more »

  • First Quick Flight

    markwarren.ee10/10/2019 at 21:45 0 comments

    ---------------Log 10-10-19------------------

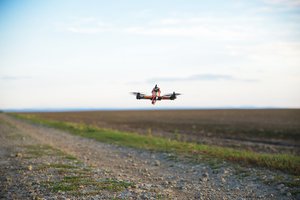
    Had a nice hover for a little while outside today. Daughter finished up soldering last night. During some preliminary tests we discovered that out propellers were all on the wrong shafts - who would have figured the 'R' numbered propellers would be on the clockwise rotation motors? We did the esc calibration on the cleanflight motors tab and then spun up the motors with the props a bit to see what would happen - we had the unit pretty well tied down but it was obvious that any sort of controlled flight would not be possible in that mode.

    Today it took us a while a while to figure out how to arm the quadcopter, partly because we didn't know it had to be done. We tried some initial lift offs and it was worse than direct motor control! Shortly figured out that we hadn't thought about orientation of flight controller board mounting relative to front. After we got this taken care of next test flight had it jump up and hover pretty well.

  • Pulling data from MPU6050

    markwarren.ee10/04/2019 at 21:59 0 comments

    ----------- Log Entry (10-04-19) -------------

    Got done building and testing a 50msec loop in the esp32 flight controller that reads three axes of acceleration data, from a mpu6050, and filters it through a 4 pole butterworth. Also wrote an acceleration calibration subroutine. Tried several different cut-off frequencies, 0.25, 1, 4 and 10 Hz. The output displays roll and pitch in degrees and the z-axis gravity. Just sitting on my desk running the 1Hz filter pitch and roll outputs were always within +/-0.2degrees and z-axis from 0.9994-1.005g. Tilting board 45 degrees gave me 45 degrees roll or pitch and .707g z-axis. 1Hz filter was steadier than the 4 or 10Hz filters and the 0.25Hz just felt a little too slow.

    Started work on 20msec loop that will read 1KHz gyroscope outputs and process that data trough the integrators and PID that will eventually supply the motor outputs, the ESCs that came with my kit only take servo inputs so I will eventually have to deal with that. 

    My daughter and I have kit mostly all built up to the point where we need to start doing some soldering. Added a DC-DC converter to supply esp32 and CC3D.

  • Planning Next Steps

    markwarren.ee10/03/2019 at 16:48 0 comments

    ----------- Log Entry (10-03-19) -------------

    Its time to outline data aquisition, filtering and control goals and implementation stages. As a first guess this is what is being experimented with first.

    Acquisition : Gyroscope data will be stored in fifo at 1KHz rate, accelerometer data gathered at 20msec interval at which time data is processed through filtering, control loop and downloaded. Other data such as magnetometer, barometer, laser range finder, gps, etc. may also be collected if new hardware is added.

    Filtering : The MPU6050 accelerometer data I am familiar with has a large high frequency component that we do not want getting into our feedback control loop, we should be designing toward a two pole low-pass filter with a cutoff frequency somewhere in the range of .5-2Hz. The gyroscope data will be used for the higher frequency flight adjustments, the lower frequency drift component may need to be filtered out. It may turn out to be useful to notch filter the servo motor control outputs for any observed system sympathetic resonance.

    Feedback Control : Three 1KHz PID loops are necessary to control the yaw, pitch and roll axis which will use the gyroscope data. The inputs for each of these loops will be the result that we desire on each on each the integrated gyroscope axis - which can be imagined as something like the angle that we would like. The output of these loops will be combined up to generate servo commands to each of the four motors. Suppose for example we would like to move forward - the transmitter sends a servo pitch value that specifies a desired forward tilt to the craft. The control loop will speed up the back rotors, lifting the back of the drone (and creating force in x axis) until the gyroscope catches up to the forward tilt command, the speed and stability of this transaction is determined by the P, I and D loop multipliers. Gyroscope data is useful to keep the craft in a desired attitude (not rotating on x (yaw), y (roll) or z (pitch) axes). 
    The accelerometer data provides information to the control loop that helps to imply an xyz point that we wish to maintain. For example, if the wind is blowing the gyroscope would not notice it (unless the drone was being twisted) but the accelerometer would notice an x or y acceleration. This can be somewhat controlled out with accelerometer data PID loops whose output is feed into the gyroscope PID loops just like transmitter pitch or roll inputs (ie I'm getting pushed to the right by a force so lean into it - P gain is how much to lean, I gain is how much to recover from a previous uncorrected push and D gain tells to loop closure to slow down once you start getting close). In software, PID loops are very simple - an error signal is generated at the input which is the difference between the angle that you want the quadcopter to be in and the angle that the gyroscope measures that it is in. The error then follows three paths. The P(roportional) path is simply multiplied by the P gain. The I path has an accumulator which is the sum of all previous error inputs which is multiplied by I(ntegral) gain. The D(erivative) path is the difference between the current error signal and the previous one which is then multiplies by the D gain. The output of the loop is the sum of these three, PID, paths which are combined with the other gyroscope PID loops outputs to generate motor speed commands. Tuning the loop gain parameters can either be done by simulation or tuning the actual system flight response.

    BlackBox Telemetry : A data packet will be sent to the ground station for collection every 20ms (50 times per second). The payload frame will contain the filtered acceleration 3 axis data, slots for future use (magnetometer, status, estimated altitude, etc) within the first 50 bytes. Initially, 150 bytes will be reserved for the raw gyroscope datar, eventually we will use bits in a configuration word to determine the configuration of the payload (if for example we...

    Read more »

  • Further testing/add display/eliminated sbus inverter

    markwarren.ee10/02/2019 at 15:47 0 comments

    ----------- Log Entry (10-02-19) -------------

    Managed to get rid of the SBUS inverter by switching to the second uart port (uart3 in cleanflight) on the CC3D (labelled flexiport instead of main port). Also have uart1 configured as configuration/msp port at 115,200 buad which I hope to use to send telemetry/blackbox data down to ground station transmitter. In cleanflight it looks like only one serial port can be configured serial rx at a time, when a configured both uart1 and uart3 to serial rx only uart1 was active. When uart1 was configured configuration/msp uart3 started working as serial rx which I configured to sbus.

    Further communications testing looking very promising two way espnow between rx and tx and sbus to flight controller.

    Added ssd1305 display to ground station transmitter for real time display of throttle, yaw, pitch and roll. I really dislike the cheap joysticks and am looking for replacement - I added the display to help me get used to the play on these controls, they have to be moved a lot off center before value changes at all and then it maxes out with very little further travel.

  • Cleaned up power supplies

    markwarren.ee09/29/2019 at 16:56 0 comments

    I was getting a little bit of noise in the cleanflight transmitter tab - every few seconds my throttle, yaw, pitch and roll values would jump around a bit even though the controls on the ground station were not touched. For the sbus signal  inverter I was using the 3.3v from the esp32 module. To add a 5 volt level to my system had to go external because there appears to be no way to get the esp32 module or the cc3d flight controller board to source +5volts.  I added the +5v from a usb to serial dongle and now the sbus interface has had no errors in the half hour I observed. I include a link to video of the setup as it current is controlling a drone simulator on the cleanflight transmitter tab page.

    https://drive.google.com/open?id=16zrWSgeVZqAOGRBdouZs-SjIfwVNKjcI

    One nasty that did occur as I was writing the sbus code for the esp32 module. I had the code ported from the esp8266 to the esp32 and it looked to be just about running, I was testing it with my desktop linux sbus_monitor program and noticed that about 5% of packets were showing up bad. The esp8255 D1mini did not show any packet loss. When I plugged the sbus into the cc3d there were no received packets (and no way to find out why apparently). Went back to the sbus_monitor program to debug packet loss and discovered the following in the table shown below the text.

    The esp32 module programmed with a sbus baud rate of 102,000 does not show any packet loss as far as I can see. Interestingly the cc3d sbus connection does show sbus packet confusion at 101,000 and 103,000, the port does not register any activity at 100,000 or 104,000 baud. Which is to say that the cc3d is much more sensitive to baud rate than my desktop. This problem would have been VERY complicated to debug without the linux sbus_monitor program. cleanflight doesn't seem to have much in the line of port packet monitoring or diagnostics (except for the usb port).

    As was mentioned earlier the esp8266 modules appeared to have no problem with the 100,000 non-standard baud rate generation and I don't know if other esp32 modules are off by the same amount.

    SBUS Serial Port Buad Rate ESP32 PortPacket Loss Percentage to sbus_monitor programPacket Loss to CC3D SBUS port
    95,000100%100%
    98,000~10%100%
    100,000~5%
    100%
    101,000~1%~~20%
    102,000~0%~0%
    103,000~1%~~20%
    104,000~5%100%
    105,000~10%100%
    110,000100%100%

View all 8 project logs

Enjoy this project?

Share

Discussions

Similar Projects

Does this project spark your interest?

Become a member to follow this project and never miss any updates