jasper cusiel
-
Parts List ( so far )
11/10/2019 at 22:45 • 0 commentsElectronics
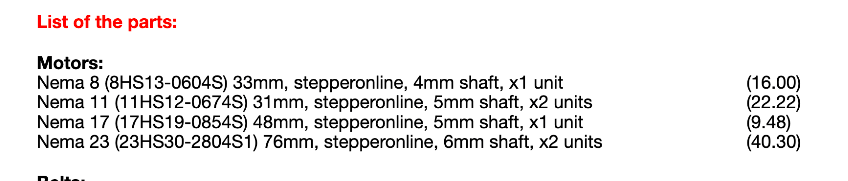
Name Part Number Qty. Nema 8 Bipolar 1.8deg 4Ncm (5.7oz.in) 0.6A 6V 20x20x38mm 8HS15-0604S 1 Nema 11 Bipolar 1.8deg 7Ncm (9.91oz.in) 0.67A 3.8V 28x28x31mm 11HS12-0674S 2 Nema 17 Bipolar 1.8deg 44Ncm (62.3oz.in) 0.85A 5.3V 42x42x48mm 17HS19-0854S 2 Nema 17 Bipolar 1.8deg 60Ncm (85oz.in) 0.64A 10V 42x42x60mm 17HS24-0644S 1 Geekcreit® RAMPS 1.4 Control Board + MEGA2560 R3 + A4988 Driver With Heat Sink 3D Printer Mainboard Kit 1 3D Printer 42 Stepper Motor Drive Expansion Board 8825 / A4988 1 40pcs 20cm Female to Female Jumper Cable Dupont Wire For Arduino 1 Geekcreit® 3D Printer Stepstick DRV8825 Stepper Motor Driver Reprap 4 Layer PCB 1 PSU ~200W, I am using a Liteon ps-5221-06 PC power supply 1 Emergency Stop Switch LAY37 1 Hardware
Name Part number Qty. Flanged Rigid Coupling (for 5mm shaft) 1 GT2 x 6mm pulleys, 5mm Bore 5 Open belt GT2 x 6mm, neoprene, fibreglass cord (per meter) 1 Plain – ID 8mm OD 14mm Width 4mm MR148ZZ 2 Plain – ID 5mm OD 14mm Width 5mm 605ZZ 2 Flanged – ID 5mm OD 14mm Width 5mm F605ZZ 2 Plain – ID 8mm OD 19mm Width 6mm 698ZZ 2 Plain – ID 8mm OD 22mm Width 7mm 608ZZ 3 Flanged – ID 8mm OD 22mm Width 7mm F608ZZ 1 -
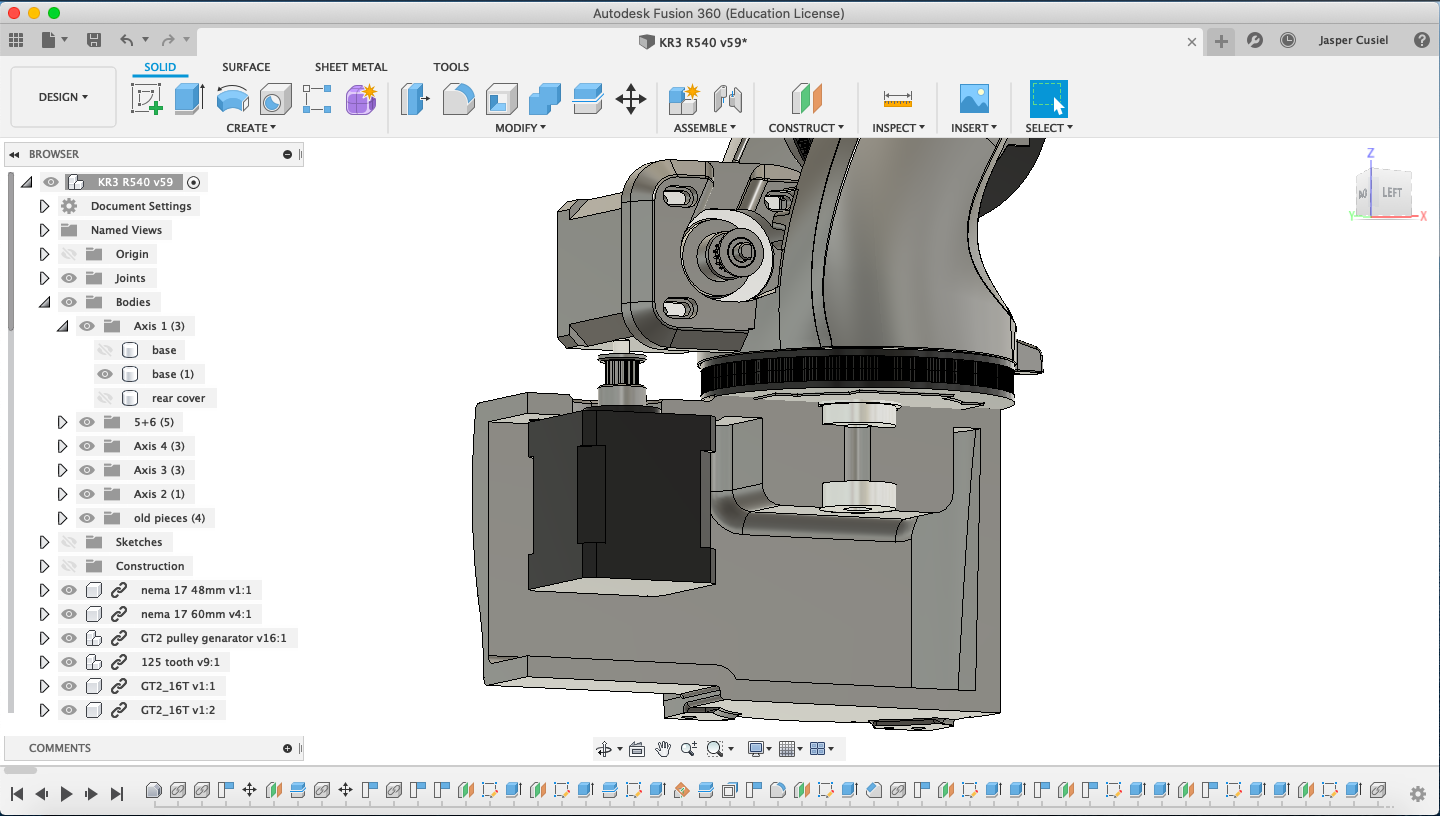
Bearing and bolt provisions are now in place
11/10/2019 at 21:45 • 0 commentsAfter spending the whole weekend (9-5) using my mums more powerful imac, I have managed to add holes for appropriate sized bearing which I will purchase from https://mecha4makers.co.nz/ as the price is very competitive
![]()
Just a few more bolts for covers to add then will be ready for 3d Printing!
-
Close to printing
11/09/2019 at 06:24 • 0 commentsAxis 6,5 and 4 almost done with bolts and bearings to be added. Going to use a flange that is attached to the nema 8 stepper for adding tools to the end of the arm. Also added cooling holes for axis 5 and 6 as they are more inside the arm compared to others.

steppers inside arm

Motor ventilation and belt provisions.

-
Change Of Plans
11/07/2019 at 08:18 • 0 commentsChange of plans, I'm running out of time so went on Kuka's website and found a 3d model of the robot arm I wanted. I have started on integrating the steppers motor and necessary hardware.

-
GT2 Pulley generator
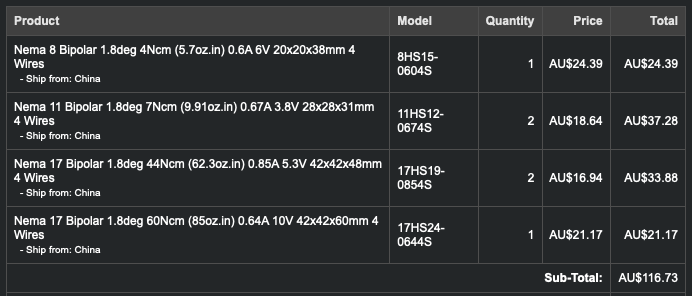
10/31/2019 at 21:37 • 0 commentsI have ordered the following stepper motors and will arrive soon thanks to the fast shipping from stepper online.
![]()
I was struggling to find GT2 pulleys in the size I was after so turned to Youtube and came across this video which I followed in order to create a file that could generate appropriate size pulleys. Thus allowing me to make the pulley to the size I need rather than having to model from scratch a pulley every time I need one.
-
Getting sketchy
10/28/2019 at 07:06 • 0 commentsI have begun designing how the base attaches to the shoulder on paper, it is easier than on the computer and I waste less time messing about in Fusion 360.

-
Modeling begins
10/27/2019 at 04:11 • 0 commentsSo it begins...
Have begun work on the base with provisions for a NEMA 17 that is 60mm tall. Have shifted motor to outside to keep robot more compact as well as allowing for a larger pulley to be fitted. Also motor is upside down to not make whole robot sit not so high off ground to reduce leverage of the arm causing it to fall over.
![]()
Me trying to figure out how its going to fit together (pencil and paper is the way to go)
![]()
-
Decided on stepper motors
10/24/2019 at 00:48 • 0 commentsStepper motors I have decided on using, below is what Skyentific is using
![]()
Update - I have bee back and forth with the customer support at stepper online and I have decided that I will be going with 2x NEMA 17 steppers in stead of the NEMA 23 for the shoulder and 1x NEMA 17 for the base rotation, rest as per list.
-
NEMA 23 steppers
10/22/2019 at 22:45 • 0 commentsSkyentific is using NEMA 23 steppers steppers that are rated to have a holding torque of around 200 newton cm.
![]()
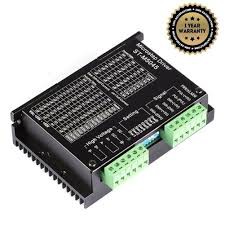
But is geared down heavily. The problem I'm facing is that in the size he has linked for the NEMA 23 requires a stepper drive that can produce 2 - 3 amps of current and require a large stepper motor driver. These drivers need to be wired from the RAMPS board to the driver then to the stepper rather than plugging in the stepper driver onto the RAMPS board which is connected to the stepper. Also these bigger drivers can be around 4 times as much to buy compared to the small drivers. Below is a large stepper driver that can supply 4 amps.
![]()
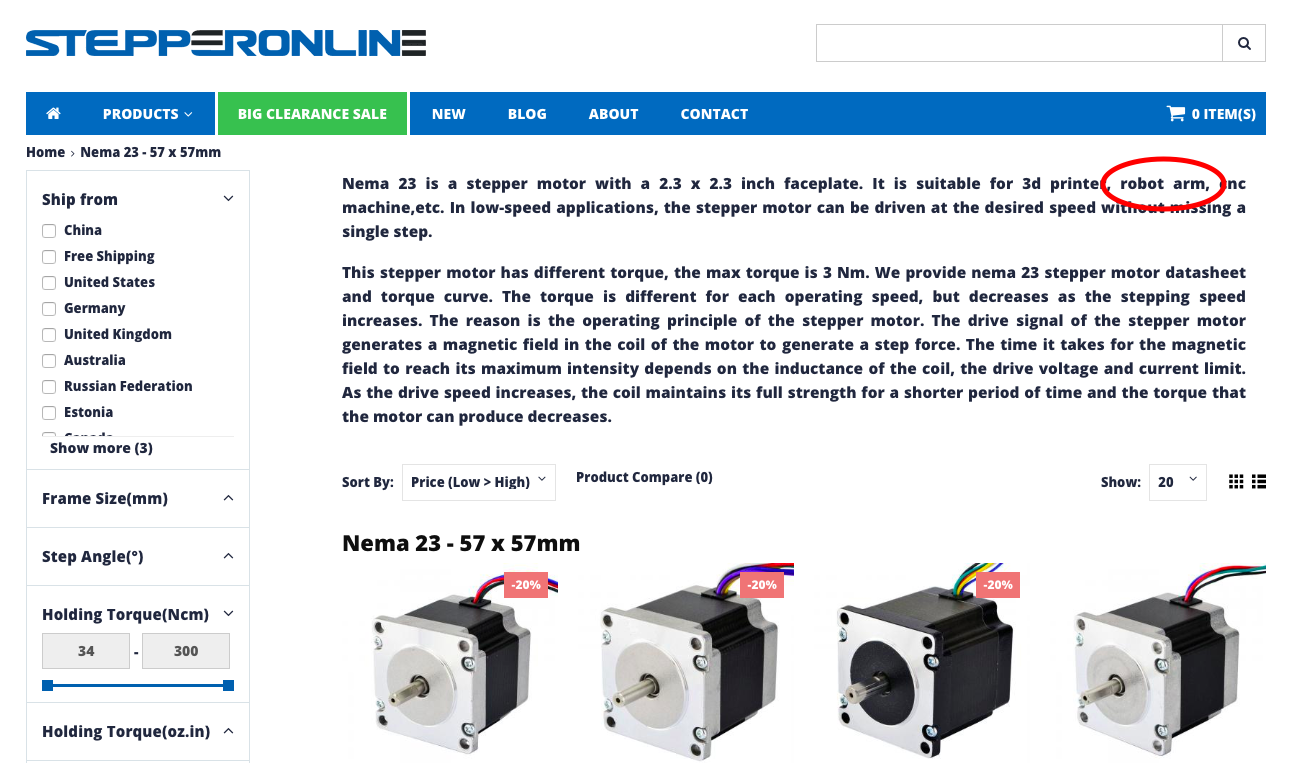
Below Is stepper online and it mentions that these motors are suitable for robotic arms!
![]()
It also mentions that each stepper motor comes with a data sheet and torque curve. This will be helpful for calculating if my steppers will be powerful enough. Thats when I came across a very informative video series which explains how to choose stepper motors.
-
Stepper motor research
10/22/2019 at 22:28 • 2 commentsLooking into stepper motors on Stepperonline and am following Skyentifics parts list. Find him on Github here.
![]()
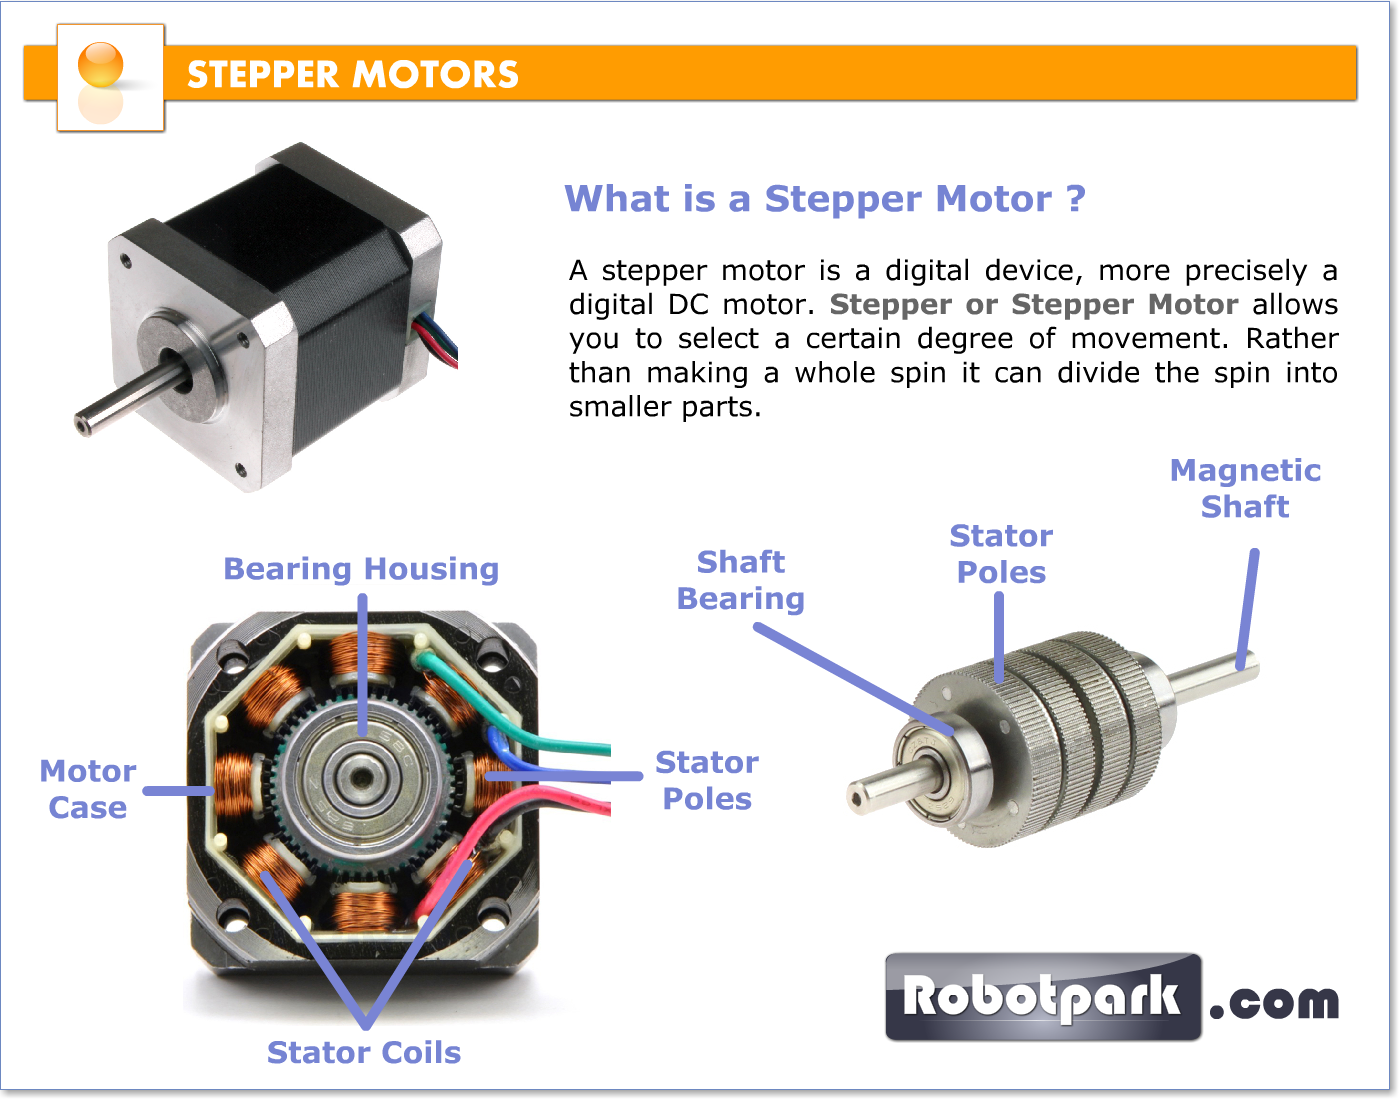
Here he is using low amperage steppers which have high holding torques. At first I was confused as when looking on stepper online I came across stepper motors rated at 2 Amps where as he was using steppers with in the range of 0.5 amps to 1 amp with the same holding torque. So I contacted the customer support and the friendly guy explained that inside the stepper motor with the lower amperage had bigger stator coils that required less amperage to produce the same holding torque. He also mentioned the lower amp stepper would run cooler which would be better for my application as PLA ( 3d printer filament ) starts to soften at around 60 degrees celsius. Below is a picture of a stepper motor internals to help you understand where the stator coils are.
![]()
3D Printed 6DOF Robotic Arm
Robotic Arm with the look of a small Industrial KUKA KR Agilus robot but on a hobby scale and tight budget.