-
Heat Generation + Sensing
02/12/2020 at 12:17 • 0 commentsHeat Generation
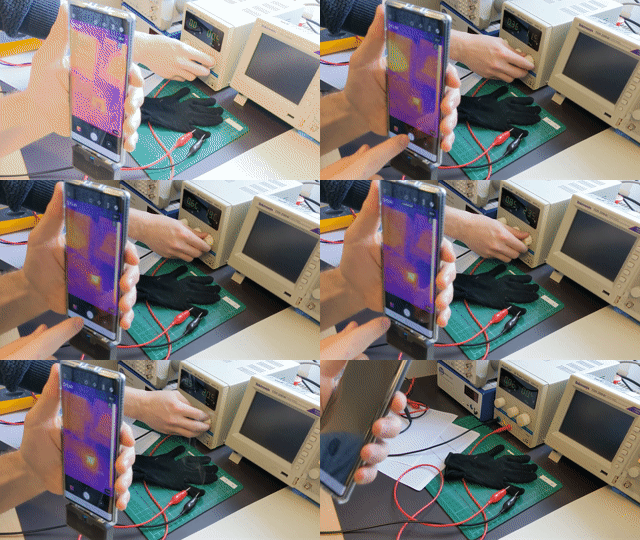
We polymerized a glove, and looked if we could warm it with a bit of power, it's quite nice in winter!
![]()
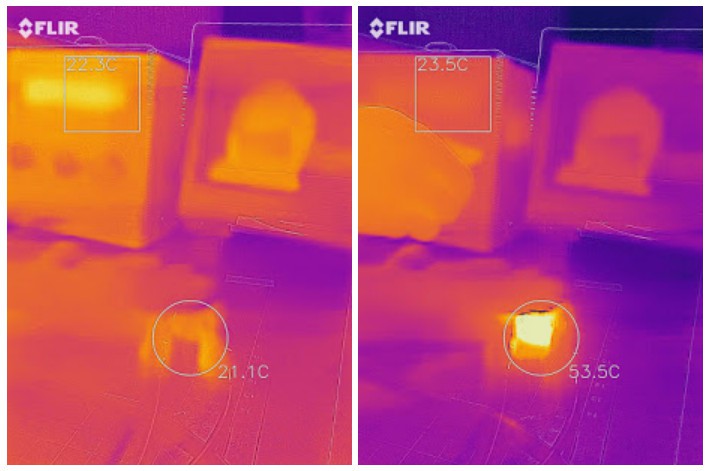
With about 0.6A x 20V = 12W (yeah, not exactly low-power), the glove went from 20°C to 53°C (= from 68°F to 127°F) in about 9 seconds (it's not very comfortable above that temperature).
For scientific reasons, we waited until the magic blue smoke came, and it was 130°C (266°F), wait for it:
![]()
Heat Sensing
Of course, we don't want to burn people so we looked if we could measure the resistance variation with heat.
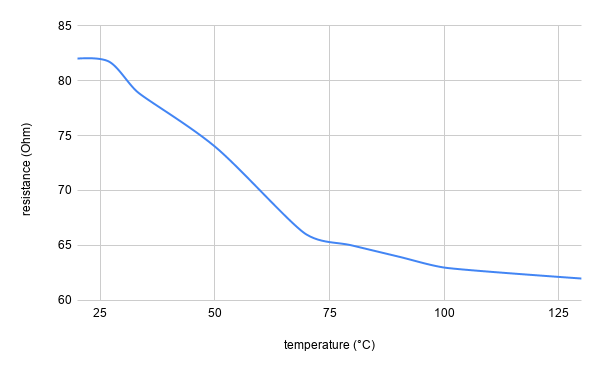
The measures are fairly inaccurate as we used a thermal camera, but the graph below gives an idea of how this Resistance VS Temperature behaves:
![]()
If we can ensure that there is no humidity (sweat, rain, etc), it seems realistic to use the resistance measures to estimate the temperature and stop heating above a threshold (ex: 74 ohms <=> 50°C / 122°F).
-
Artistic applications
02/12/2020 at 00:54 • 0 commentsA couple of artistic projects were already born out of the PolySense technique:
- - -
Stymphalian Birds
http://AudreyBriot.fr/stymphalian-birds/
Stymphalian Birds is an art installation exploring the aesthetics of a hybrid textile at the crossroads of electronics and haute couture. The textile combines traditional hand-crafted elements with digital technology, biological artefacts, and chemistry.
Stymphalian Birds are situated at the intersection between traditional featherwork and material science, the resulting textile offers complex haptic interactions with feathers.- - -
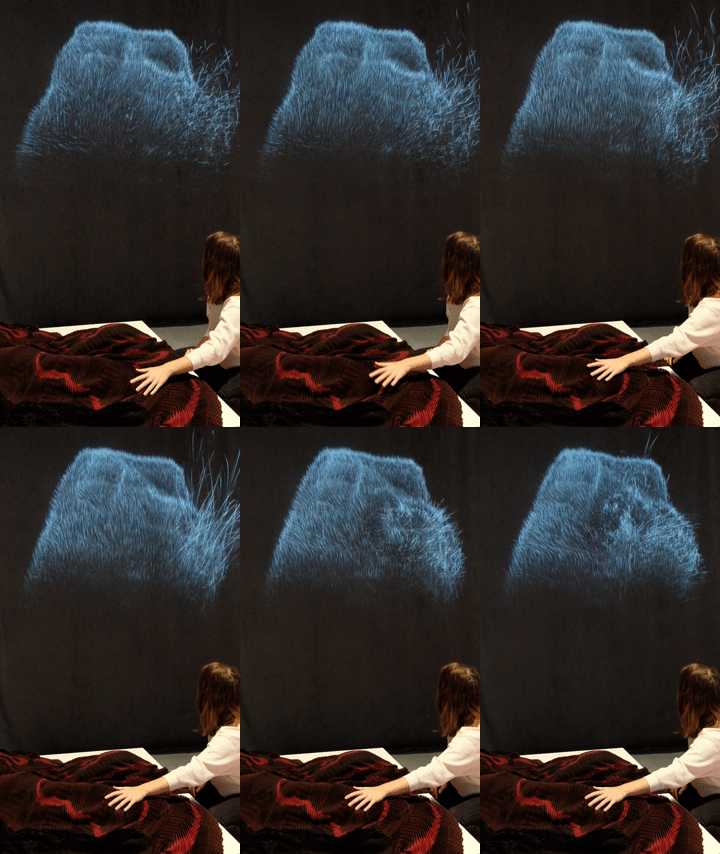
Digital Topography
This work is already exhibited in a french museum, but the video is still in progress.
This gif illustrates the interaction:
![]()
...and in this video made in our hackerspace (datapaulette.org), we show the 1st test with capacitive sensing on our own polymerized pleated fabric:
-
Explorations
02/11/2020 at 03:13 • 0 commentsMachines
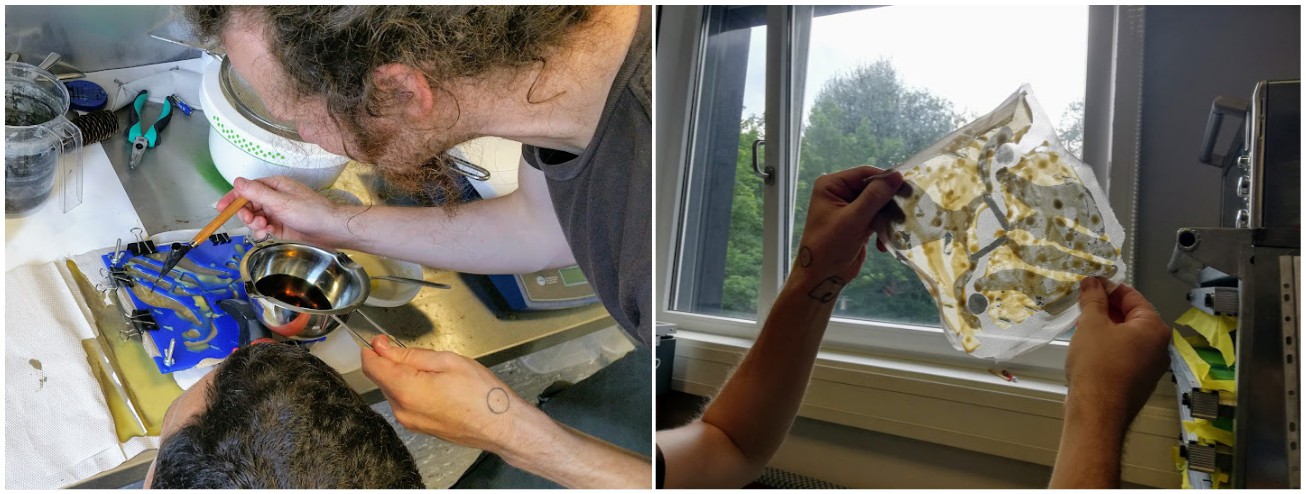
We started with chemistry magnetic stirrers, but we needed bigger, so we built our own gig with a drill (left). We then tried polymerizing a pre-stretched material to see if it would help (right), but the results were not particularly convincing...
![]()
Augmenting existing materials
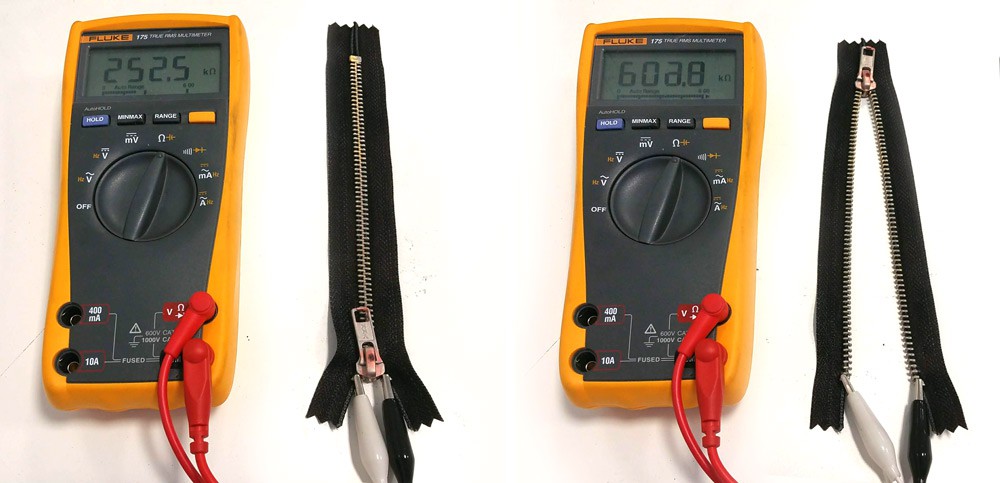
Zipper
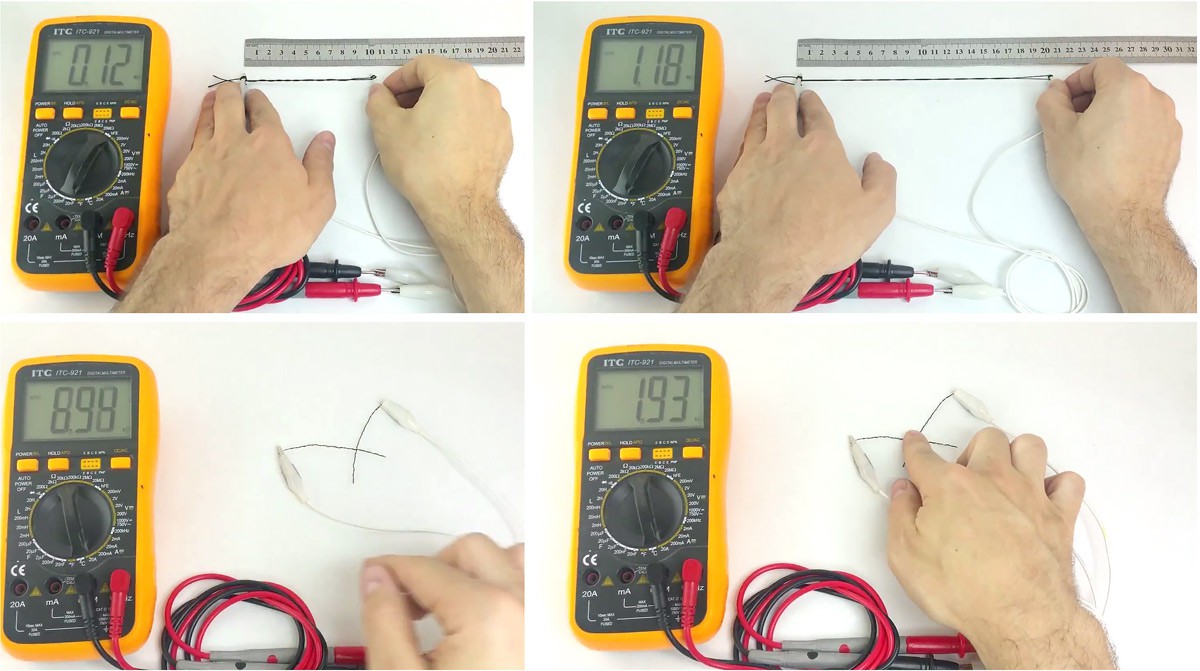
This is probably the simplest, but most unique to this process, we don't modify materials mechanically. This zipper used to be white, but the polymerization made it black. Here we use the constant resistance of the augmented material to measure how much the electricity has to travel depending on the closed / open state (250k => 600k). Obviously, it's a continuous measure, so this is a bit like a flexible potentiometer:
![]()
- - -
Kinesio tape
This is a sticky tape that can be purchased in most pharmacies for sprain or dislocation, it's made of cotton and glue to stick to the skin. As illustrated below, it can be used as linear slider (a), pressure sensor (b), xyz touch pad (c) and stretch/flex sensor (d).
![]() Note: an academic paper about it was published at the Augmented Humans Conference.
Note: an academic paper about it was published at the Augmented Humans Conference.- - -
Yarns
As seen in the demo video, we can functionalize stretchable materials, the top pictures show the range for a simple textile elastic: from 120 Kohms to 1.2 Mohms when stretched twice.
![]()
In the bottom picures, we can see a special thread that we polymerized: it has a copper core and a textile shield, which became piezoresistive. We can thus measure the pressure at the intersection: the resistance goes from 8 Kohms to 2 Kohms with maximum pressure.
Masking
We tried various ways to create controlled patterns.
Batik, a traditional technique from Indonesia, uses war to block dyeing process, and it works well for our polymerization too (see bottom right pictures + next section). The only trick is that wax needs a bit of fat to make it crack less.
We also used quick prototyping approaches, such as 3d printing (top pics) or hot glue (bottom) on textiles, and they both work but sometimes involve boiling to remove the mask.
Finally, we made stencils with laser cut acrylic (top pics) and the result were fairly impressive. Depending on the textile we could make 1mm traces (with 0.1mm cut in the stencil).
![]()
Hybrids:
That's where it gets exciting. If you take a "classic" conductive textile made out of silver or copper (cheaper), you can etch it with vinegar (or with the iron chloride of our process).
You can mask it with all the techniques mentioned above, then you get a flexible PCB!
![]()
The good news here is that you can also polymerize some parts of this flexible PCB, and get pressure sensors for example - see 'c' below. By folding it, you can measure the variable resistance between 'a' and 'b':
![]()
Bonus
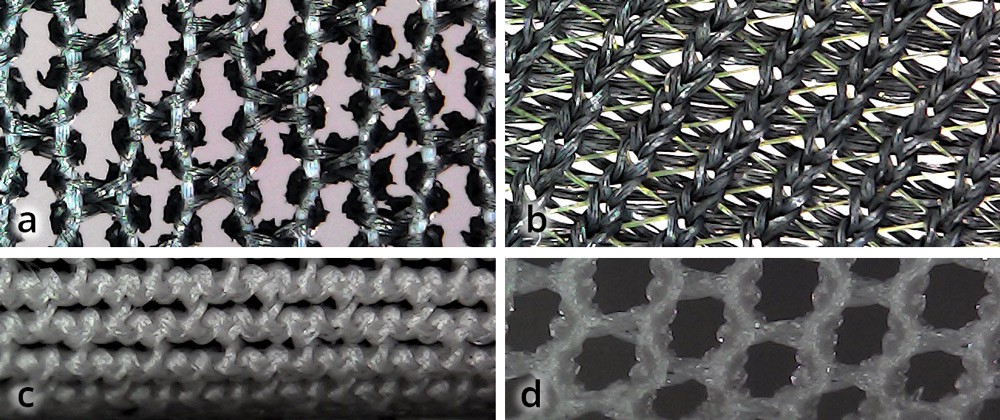
Cheap USB microscope give pretty good images now, so we looked at what polymerized, and what didn't. In picture 'a' we can see vertical thread that stayed white, probably because it's synthetic, but also possibly because it's "masked" when this textile is not stretched.
![]()
-
Reverse Engineering
02/10/2020 at 22:59 • 0 commentsOrigin
While exploring musical textile interfaces, we used the piezo-resistive material below (dark grey):
It was expensive and became hard to get because of a new exclusive contract with another company, so with material scientists, we reverse-engineered it.
Analysis
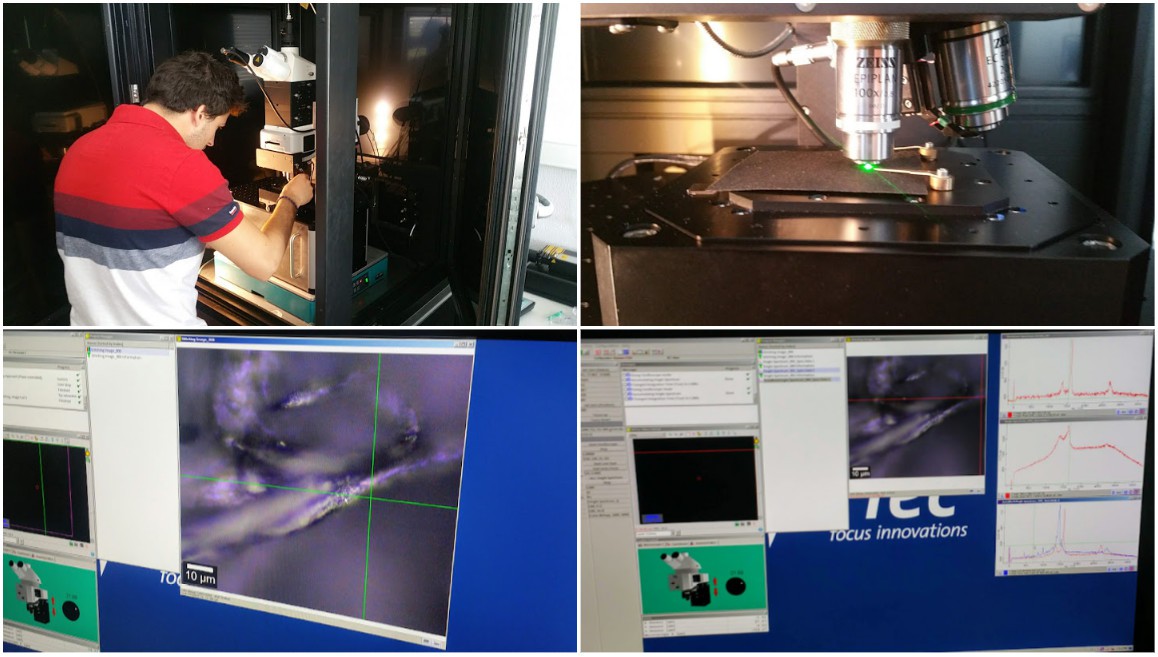
First, we observed a reference sample with a classic microscope:
💡Trick: to check if it is a classic coating (thick paint) or a more sophisticated approach (like our polymerization), the best technique is to use liquid nitrogen to freeze and break the textile. Using a knife / scissors would potentially spread the eventual coating so it would not allow seeing the real inside.
Raman Spectroscopy
After checking the process type, Raman Spectroscopy is quite practical to try identifying materials. Here we compared our sample with similar ones from our database.
This magic tool shoots a laser pulsed at various frequencies and it measures the energy bounced, which allows creating a spectrogram (see bottom right).
![]()
Note: a possibly more intuitive illustration is the acoustic property of objects around us, a phone and a mug would resonate at very different frequencies...
Solution
It was fortunate, but this material science team happened to know several similar processes that could do this functionalization, so after trying several we worked on simplifying the simplest:
![]()
Bonus
One of the tools they use looks like a nuclear weapon, it took years to build it, and it definitely does't fit in our hackerspace kitchen, but next time we have to play with it!
 Cedric Honnet

 Note: an academic paper about it was published at the