Close
0%
0%

Bluetooth Arcade Controller

DIY bluetooth fightstick for PC / PS3

Similar projects worth following
After having a play around with MAME I decided that my keyboard / PS3 controls just weren't cutting it. Instead of going out and purchasing a fightstick, DIY seemed the more interesting option.

After deciding to go DIY, I started looking around online at what other people had done.  Slagcoin is where it's at as far as info goes, and http://www.slagcoin.com/joystick/pcb_wiring.html#SOLDERLESS_EXTRACTED_PCBS shows pretty much dead on what I wanted to do.  Except for jamming 20 wires in a socket and gluing it all up, that's not pretty.

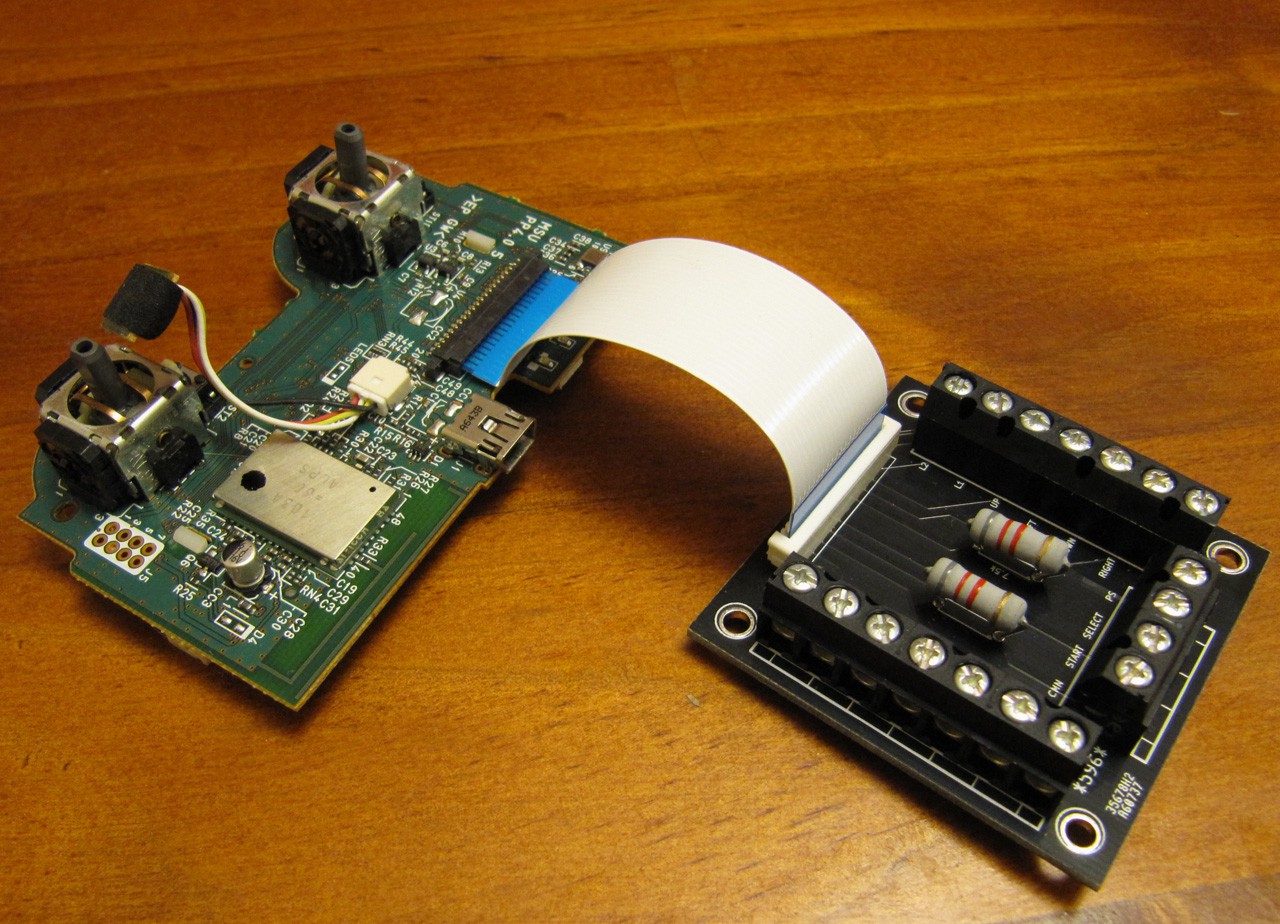
Next I came across http://forums.shoryuken.com/discussion/62104/diy-sixaxis-adapter-full-guide and we really started cooking.  A lot of the photos on there are dead now but it's easy enough to get the idea of what others have been doing.  Still no way was I going to solder wires straight to a FFC socket and the protoboard method looked OK, I figured custom PCB would be worth a crack.

Luckily, I'd just read about http://dirtypcbs.com/ and was keen to give my first PCB design a crack, so away we went and I downloaded KiCAD.

Long story short (and I mean long, KiCAD sure takes some time to get used to), PCBs drawn up, ordered and soldered, wiring hooked up, testing on the PC all looks good.  All that's left is to build a decent wooden case for the thing so it can be used in anger.  I'm considering also building a full size arcade cabinet that 2 of these can drop into so they can be swapped for couch / cabinet play and save me doubling up on controls.

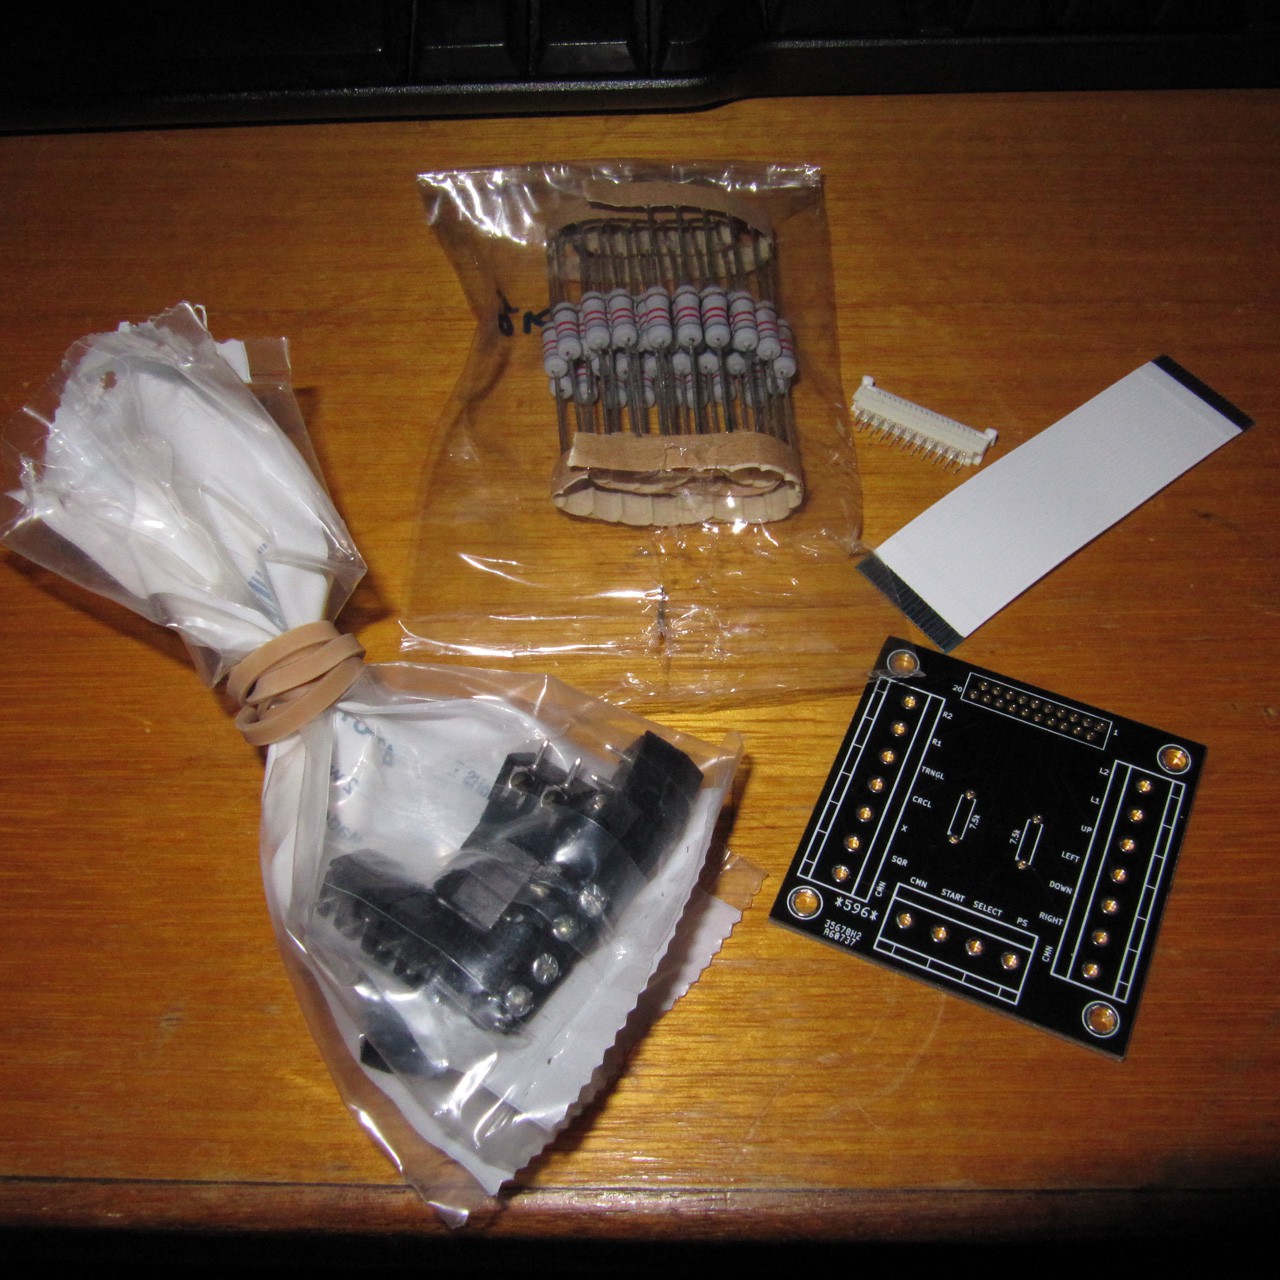
  • 1 × PCB 50mm x 50mm from http://dirtypcbs.com/
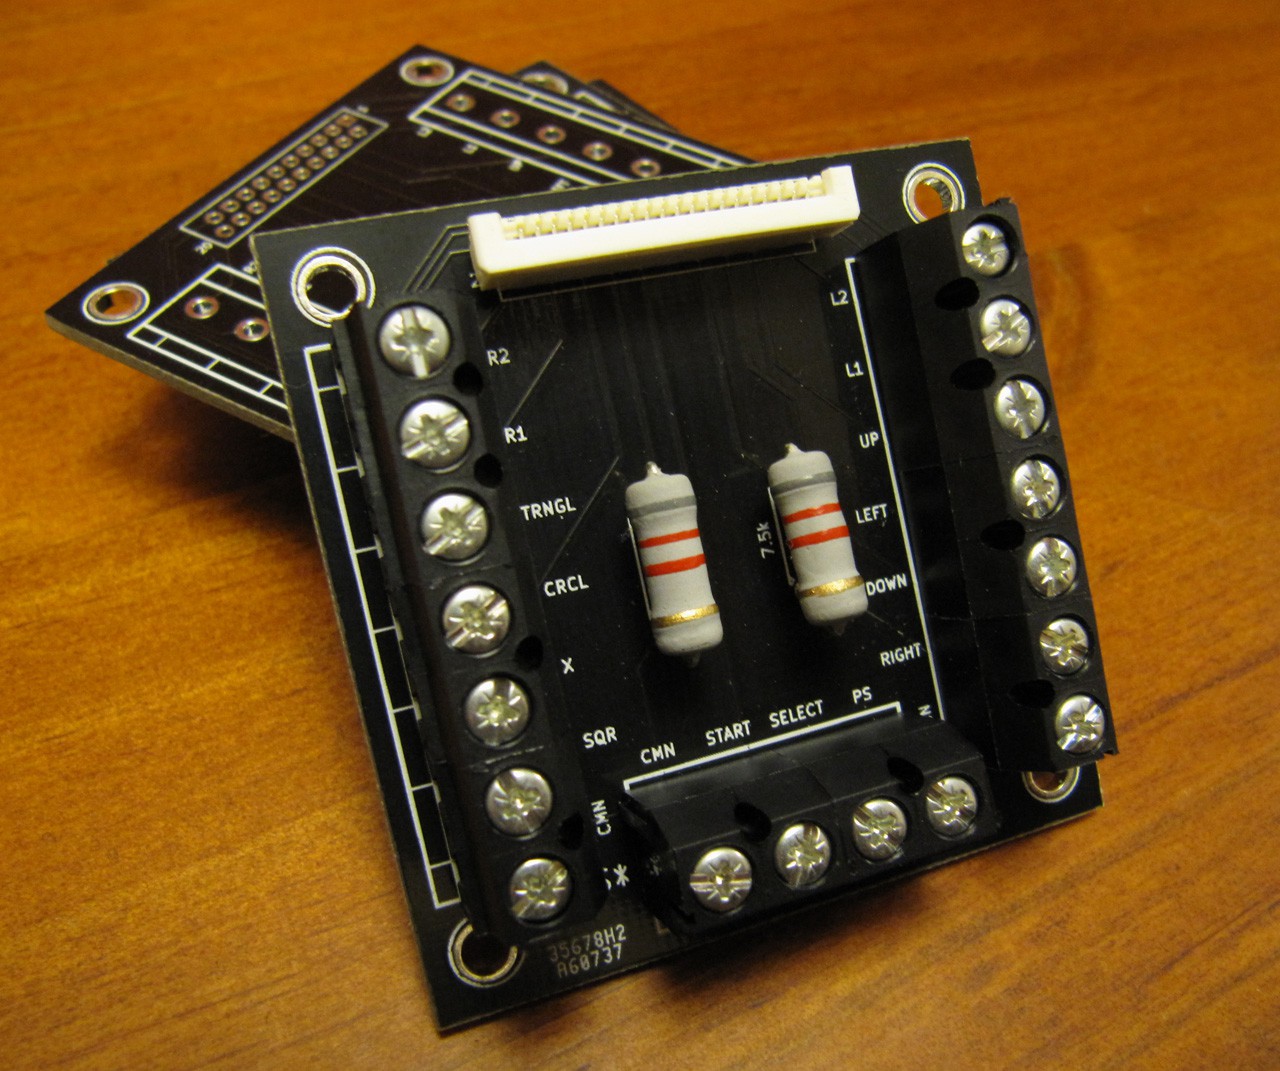
  • 2 × 8.2 kΩ resistors Anything around that mark (7.5 - 9.5k) should be fine
  • 6 × 2 pin screw terminals
  • 2 × 3 pin screw terminals
  • 1 × 20 pin FFC connector

View all 12 components

  • Analog Controls

    Robbo07/19/2014 at 01:56 0 comments

    Adam asked in the comments about retaining the force sensitivity functionality that comes with the original Sixaxis.  I hadn't really thought about this as I don't have the need for it myself but it was an interesting point and should be easy though to check out.  If possible then you could wire up other types controls to use in applications that require variable input such as flight / driving sim throttle control or even a steering wheel.

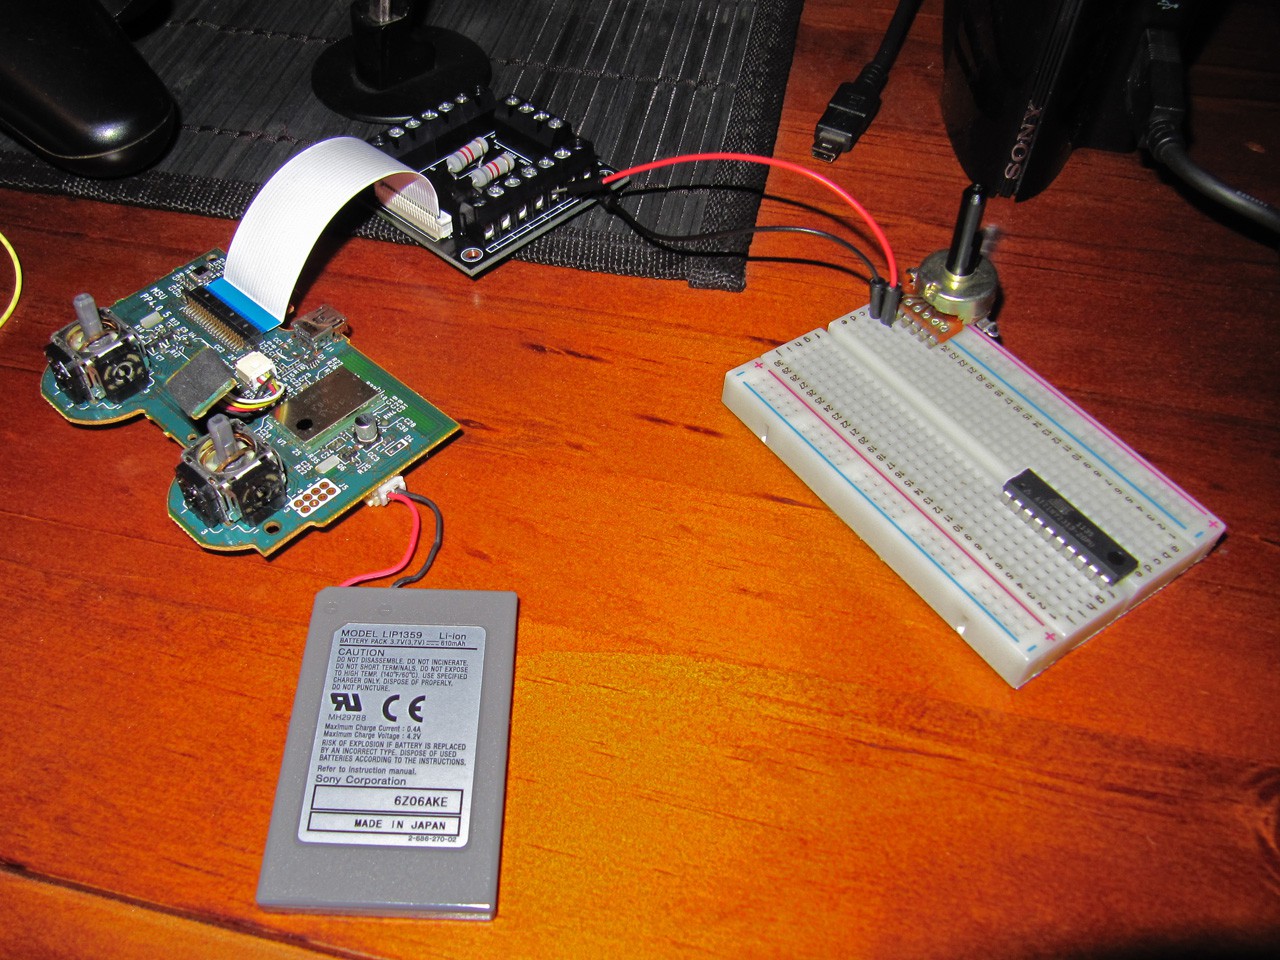
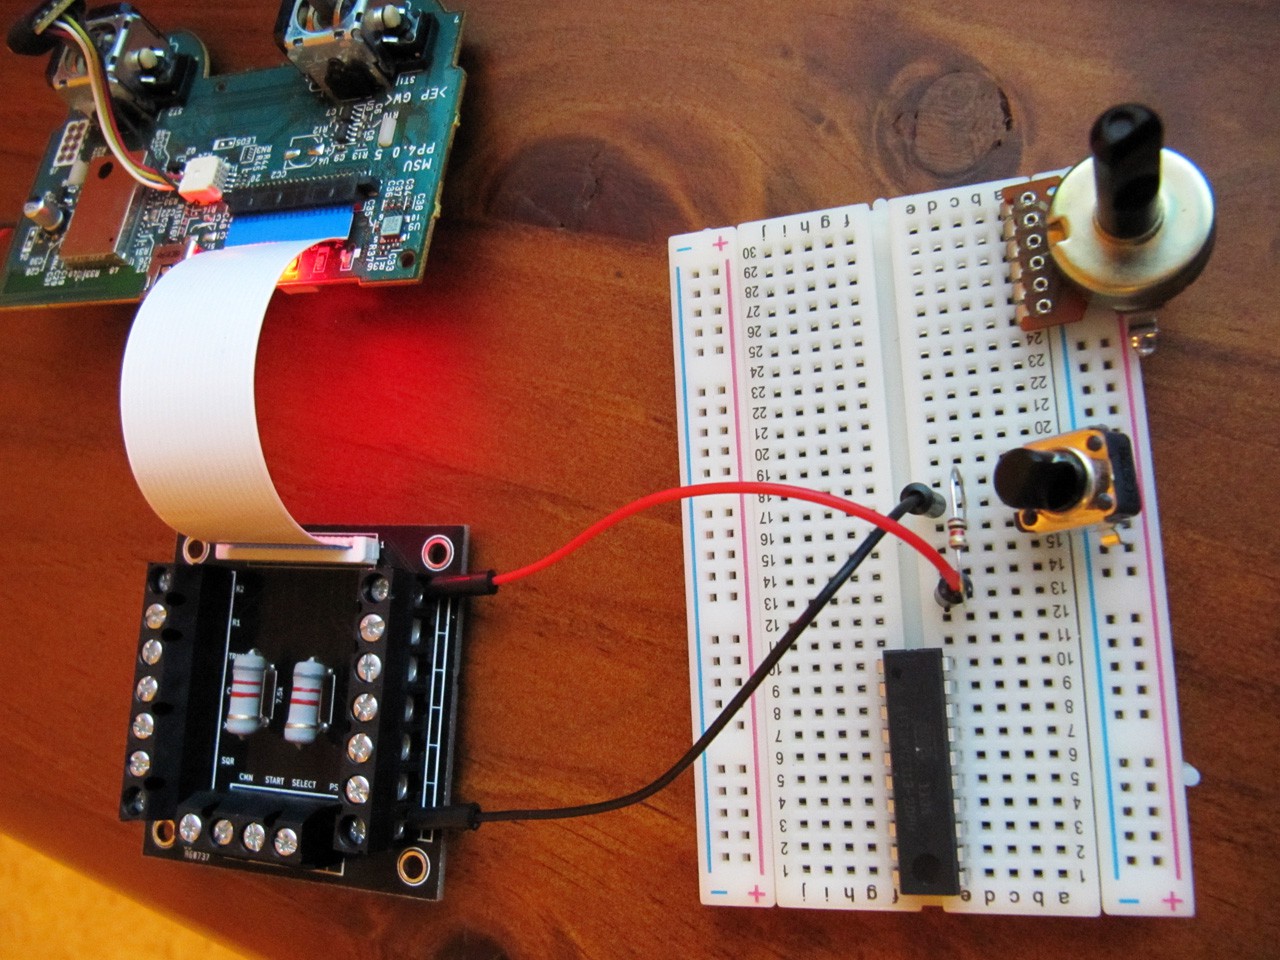
    The original controller uses membrane buttons which vary the resistance with pressure.  I don't have any such arcade buttons handy (in fact I haven't even been able to track any down while looking into this) but a potentiometer should give the same result.

    My spare parts list is very much a work in progress but I do have an old unused 'portable' CD player laying around that happens to have a couple of pots on it so I figured they'd do for a proof of concept.  These are both 100kΩ, log tapered, not ideal but they work in a pinch.

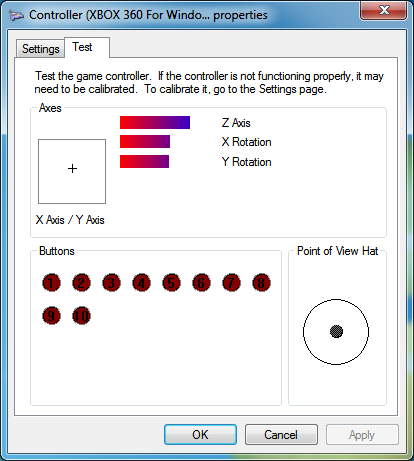
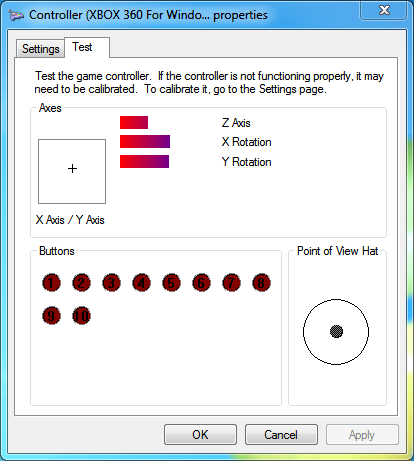
    I'd noticed before that windows treats the L2/R2 inputs as the Z-Axis in the config dialog so that was the first place I wanted to check.  I wired up the 100kΩ pot to the L2 and go to twiddling.

    It was possible to hold the Z Axis value at points in between the extremes easy enough, L2 takes the Z Axis up to max, R2 drops it down to min.  Windows treats all other buttons as digital on/off, but different drivers may solve this.  As shown, the drivers I am using use make the PS3 controller show up as an XBOX 360 controller.

    The pot was obviously way over specced as I would only get a reaction from a small fraction of the turn before effectively being seen as off. A rough measurement suggested that something around the 5kΩ mark would be more appropriate.

    I was still interested to see if the other buttons could be used with analog control but PS3 controllers on Windows via Bluetooth is temperamental enough so I wasn't going to go mucking about with my drivers right now.  I do know that GT5 uses pressure sensitivity on the the X button to vary throttle control though, so it was time to fire up the PS3.

    That's the big pot wired up to the X button.

    And that's the throttle being held half open via the pot, yes if you wanted to you could drive around using a big knob for the throttle.
    So there's that, but as I said earlier the 100kΩ pot isn't great for this as there's a lot of dead space and the log taper, while good for audio, isn't very useful in this application.  So... I ordered some new pots (I was planning on using them in my arcade machine restores anyhow).

    After a bit of trial and error, it appears that a 5kΩ still has a bit of dead space (is that even the correct term?) in it but wiring up a 1kΩ resistor in series with a 5kΩ linear pot gives pretty good response.

    So there you go, while I didn't originally have any plans for analog controls, it is possible.  Something to keep in mind if I want to implement an arcade wheel for something or twiddle with some knobs and sliders I could also use this interface.

  • It's alive

    Robbo07/12/2014 at 01:38 0 comments

    The controller works (albeit in a cardboard form) and I've managed to get a couple of games of Wizard Of Wor in.  Now seems like as good a time as any to publish some build details I guess...

    Next step, break out the power tools and knock up a real box with some real cable management.

View all 2 project logs

  • 1
    Step 1

    Get all your bits and pieces together.

    The gerber files I used are in github (

    https://github.com/wannabeerased/arcadeadapter). I used http://dirtypcbs.com/ to have them made up, at the time it cost me $14 for 10 PCBs delivered.

    Try to get a right angle FFC connector if possible.  I was only able to get a hold of a straight one and I expect it will lead to layout problems later when I go to box it all up.

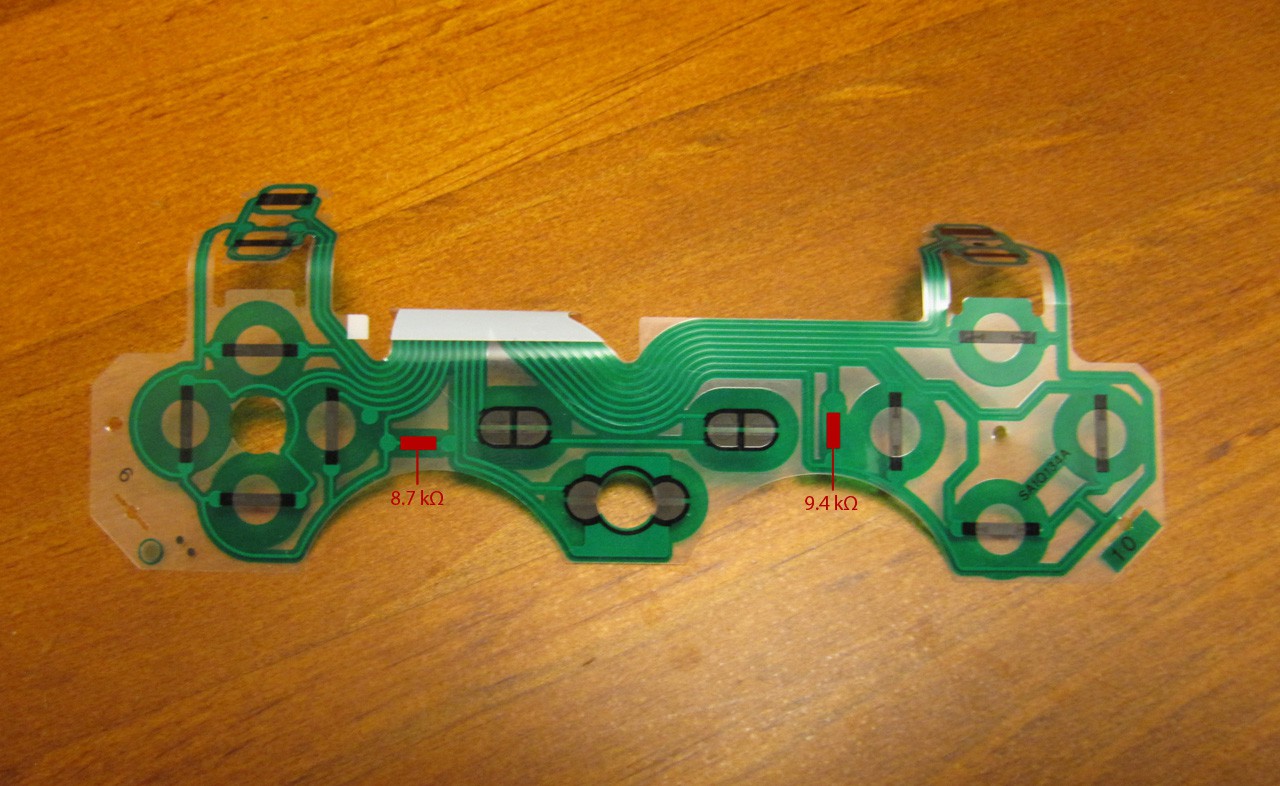
    The resisters I used are 8.2KΩ but this seems to be flexible.  Other sources seem to suggest anything around 7.5KΩ is fine.  I measured the resistors on the original controller to be 8.7KΩ and 9.4KΩ.

  • 2
    Step 2

    Solder that bad boy up, this isn't the most complicated PCB in the world so this step should be pretty straight forward.

  • 3
    Step 3

    Crack open the old PS3 controller and hook it up via your FFC.  I'm using an old Sixaxis that the analog sticks had gone on.  I'll probably de-solder them later and replace them with the appropriate fixed resistors so they always read dead centre.

View all 5 instructions

Enjoy this project?

Share

Discussions

AXELXu7 wrote 09/21/2020 at 02:39 point

Do you think this would work with the Hori Fighting Commander PS4? I'm not a fan of huge fight-sticks, but the ability to make the pad of my dreams wireless is something I've been losing sleep over for a long time. 

If you think it'll work, I'd like to buy some of those PCBs of yours and any insight you have on how the Hori works. I have images of the Hori without the shell if you need them...

  Are you sure? yes | no

Gray wrote 07/17/2014 at 21:38 point
Good times!!!!! Captain Morgan would be proud!!!!
Love the Aus Post box!!!!

  Are you sure? yes | no

Adam Fabio wrote 07/14/2014 at 02:57 point
Great work Robbo, and thanks for entering The Hackaday Prize! If I recall correctly, the buttons on the sixaxis were force sensitive. Is there any way (software or hardware) to add that functionality to your control?
Either way, you're doing great, and I can't wait to see the final case. Don't forget to keep the updates coming!

  Are you sure? yes | no

Robbo wrote 07/19/2014 at 02:00 point
Hi Adam, cheers for the question. It's not really something I'd thought about as it wasn't really required for the application I had in mind but it's definitely worth checking out. Short answer: Yes with the right hardware AND software, it can be used. Long answer: I've added a new log entry.

  Are you sure? yes | no

Similar Projects

Does this project spark your interest?

Become a member to follow this project and never miss any updates