 J_Ray
J_Ray-
1Step 1
As we always do, we will start this project off by ordering all our components so that we will need. While waiting on these to arrive we have a perfect amount of time to search for libraries we can add to the standard Arduino libraries to make coding this project achievable in a short period of time. The libraries chosen for this project are Keypad, and Servo.
-
2Step 2
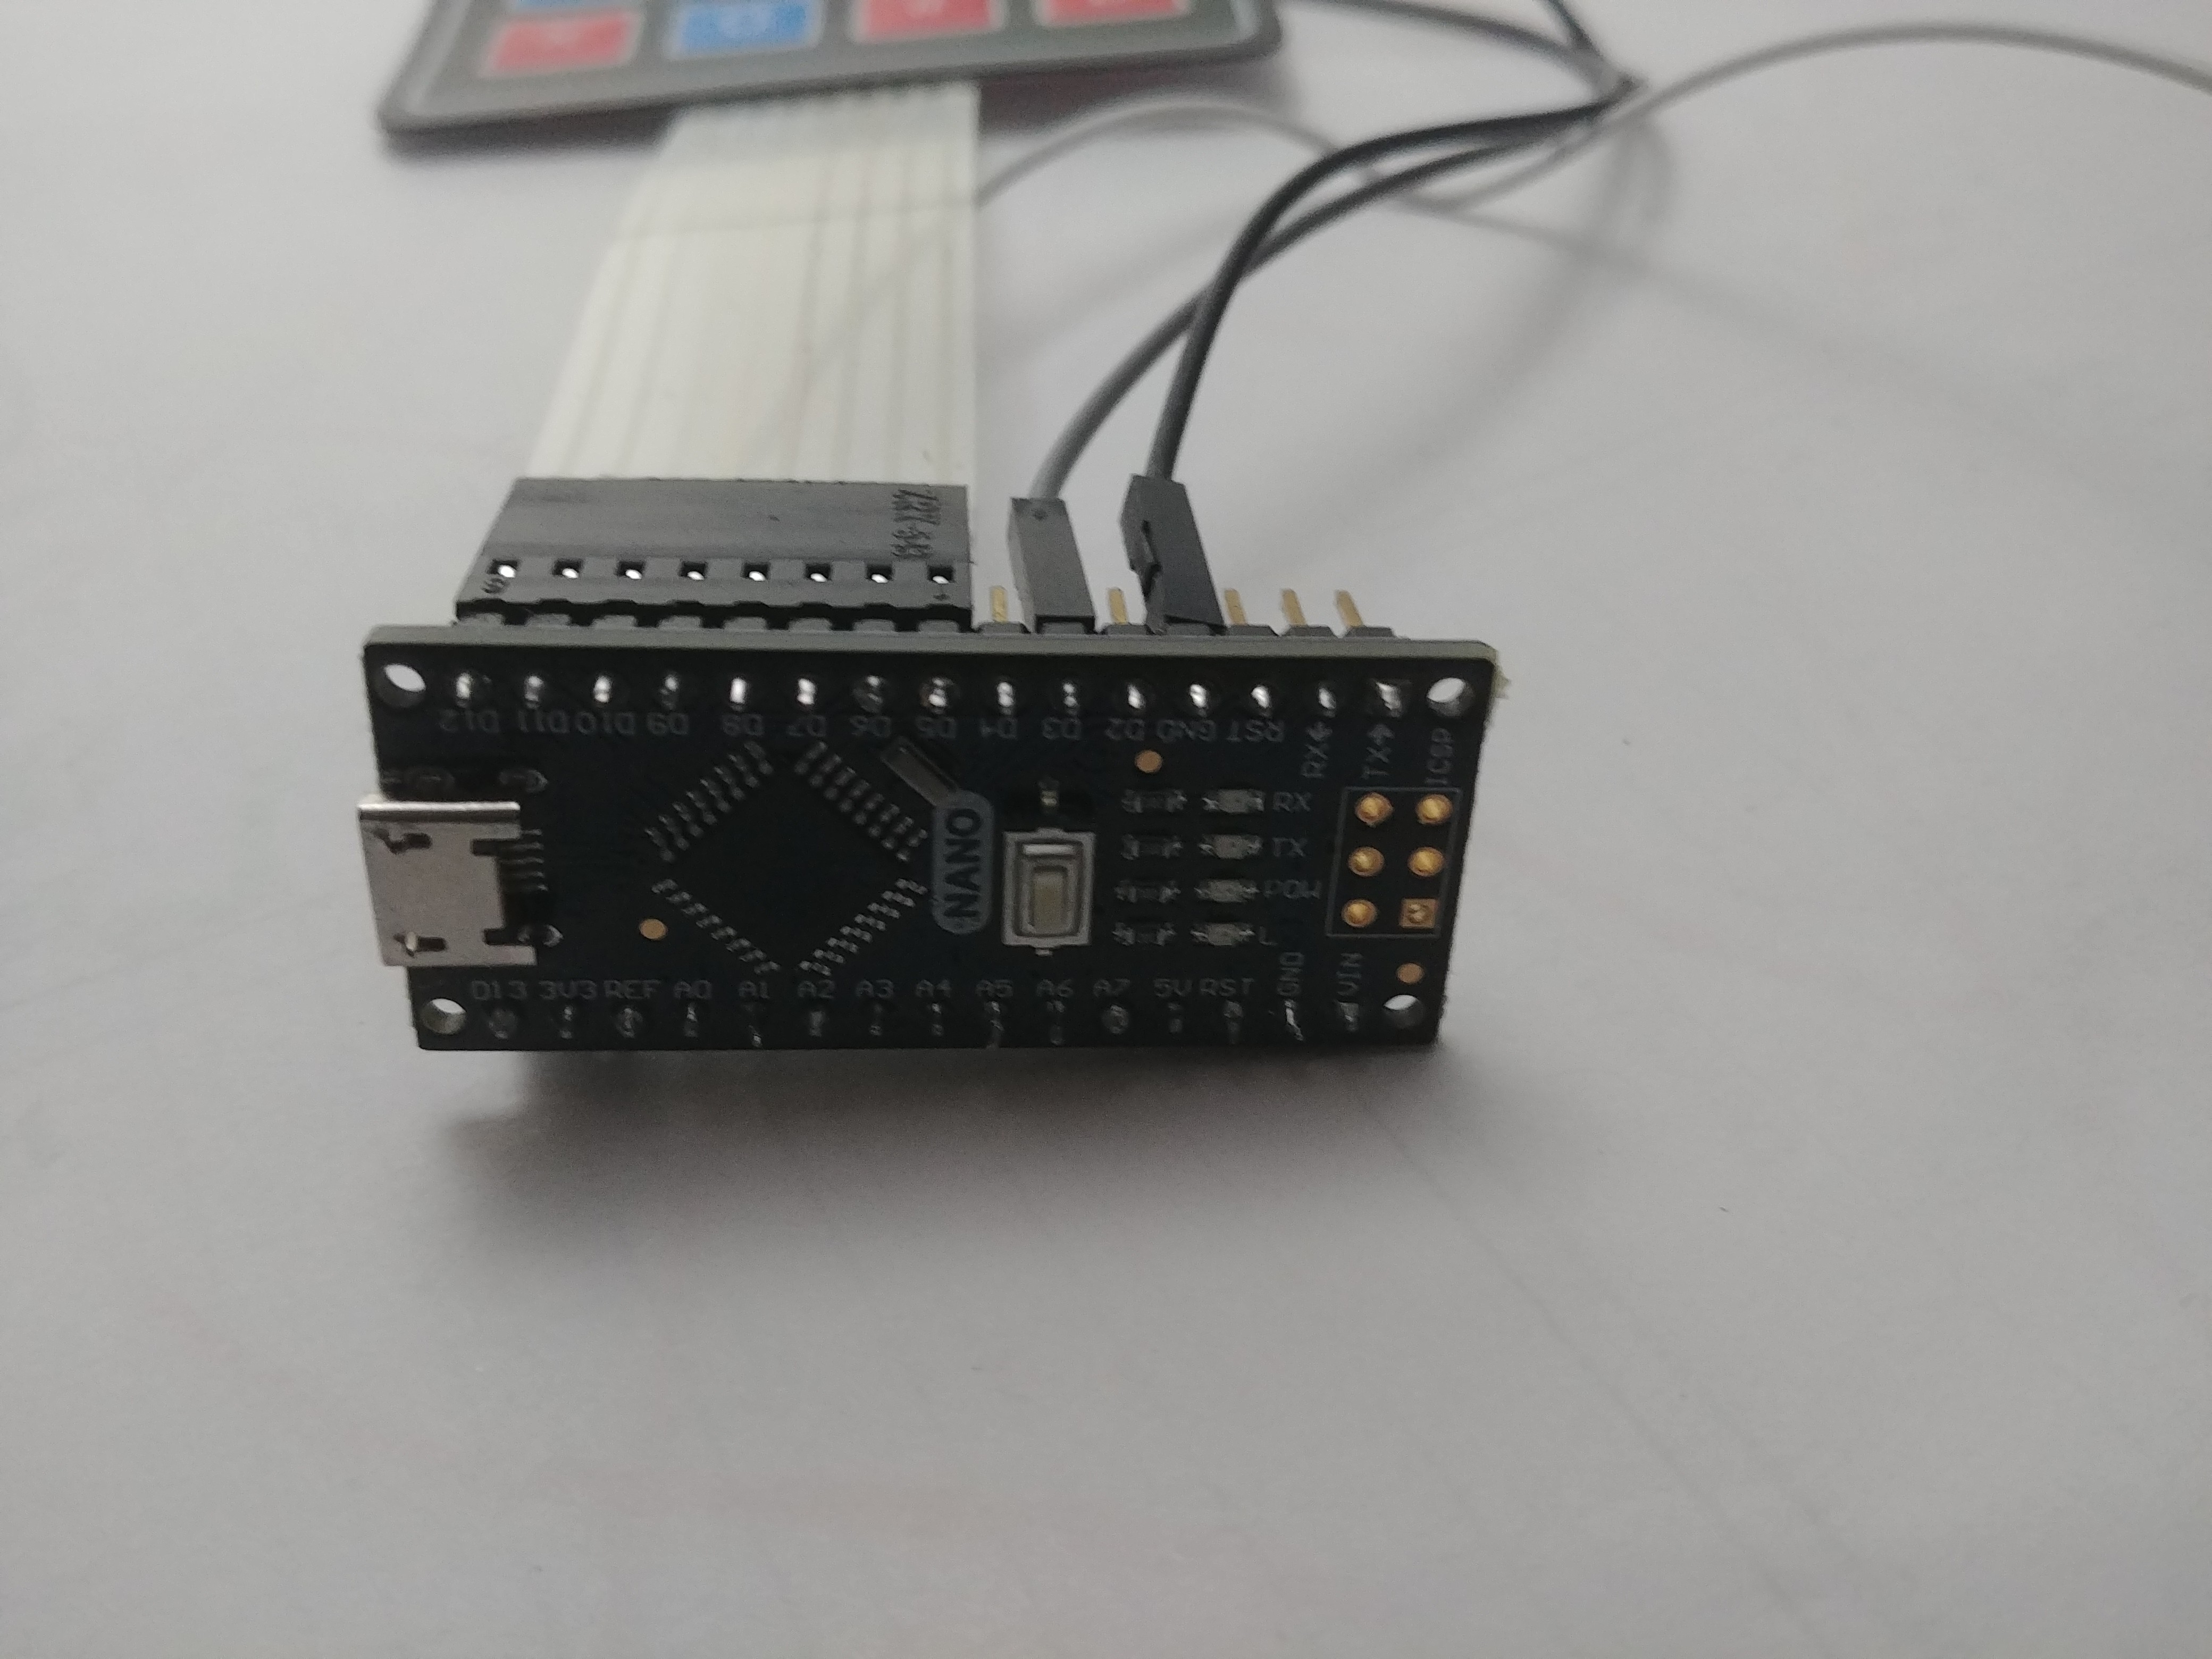
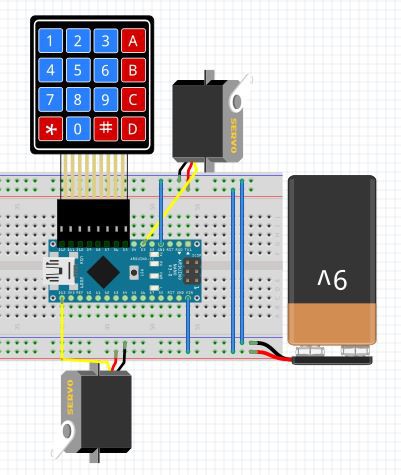
As the components arrive, we can begin to figure out how to power each and what pins need to be connected the Arduino and which need to be connected to the power and ground bus. While doing this we can begin to define which pins on the Arduino will be used for each component.
One pin on the other side for D13 as well:
![]()
-
3Step 3 (Not required to build but a requirement to learn)
This step may seem simple, but many people skip it and end up with code that needs hours and hours of debugging because they were just too lazy to download a sample code. It is not fun to write the “perfect code” for an hour and run it only to figure out you have no idea what most of the code you just wrote means, let alone know how to debug it. To avoid this just play around with sample code for each library maybe even write some small code to make sure you really get it, then you can begin to put the code together. In this project the best uses of your time would be to make sure that if you tell a servo to do turn and then return without having to copy paste code. If it will do what you expect and when reading a keypad, it can always read and display the correct value then you should be good to continue.
-
4Step 4 (Not required to build but a requirement to learn)
We now need to start meshing these two new libraries we have learned into one. Best way I have found is to write independent functions for each to start and then stitch the different functions together in the main program. This can be especially useful considering you are normally calling these functions multiple times and it is easiest and best practice to put something you are reusing into a function. Secondly, make sure you define all the values you will be using for functions and globally. Getting this done now will keep you from forgetting to add them later and then having to type a value into an equation directly or just completely forgetting to put them in at all.
-
5Step 5
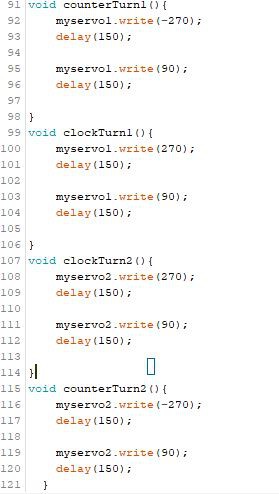
Once we are here, we need to think about the layout of the case because the layout will determine the direction and how much the servos must turn. In the code you can see that I have chosen to make a clockwise turn on servo1 a quarter and a counterclockwise turn on servo1 a dime. This choice is mostly arbitrary, but I liked the idea of the enclosure being somewhat symmetrical. Therefore, I chose to put a larger coin on each side.
-
6Step 6
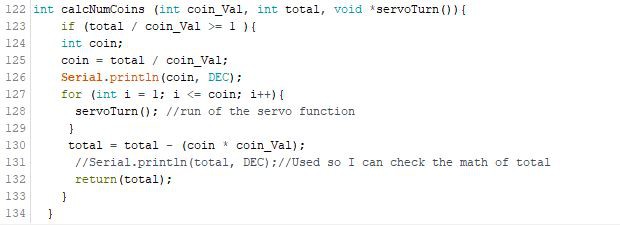
The functions for the servos will be very easy if you learned how to properly use them from step 3 so I will not spend much time on them. I will say however you will probably have to adjust the delay time and the angles they are turning. Do not forget one or more of them should be negative. Now the minimum coins counter function is not bad, but you must understand what each variable beingpassed into it means. The first value is just the value of the coin and it is dividing whatever the value plugged in was by that and rounding down to the nearest whole number. This is its basic functionality the only read addition I made to it is passing the correct servo function all to the function using a pointer variable.
Coin Counter Function:
![]()
Servo Functions:
![]()
-
7Step 7
Only things left to do with the code and circuit is to test it and make sure to hammer out any minor bugs as the main code should work. My code could be cleaned up but has been left with extra lines commented out to make it easy for me to debug in the future if any problems come up.
-
8Step 8 If you want to add a feature to the project
Build in a low power mode as currently the Arduino is either on and listening for a key press or completely off. This may be as good as it will get for me. I am not really concerned with the amount of power it draws while waiting for a press, but it is something that I will be researching at the very least to use on future projects.
-
9Step 9
Build an enclosure. It is all mapped out now just pull out Fusion 360 and model it to be printed.
-
10For a fast build were you do not learn much but the project works fast
Arduino Coin Dispenser
Arduino coin dispenser with 2 servos and a membrane keypad for input
Discussions
Become a Hackaday.io Member
Create an account to leave a comment. Already have an account? Log In.