Close
0%
0%

SlimPi

SlimPi is an e-paper display for Logitech Media Servers

Public Chat
Similar projects worth following
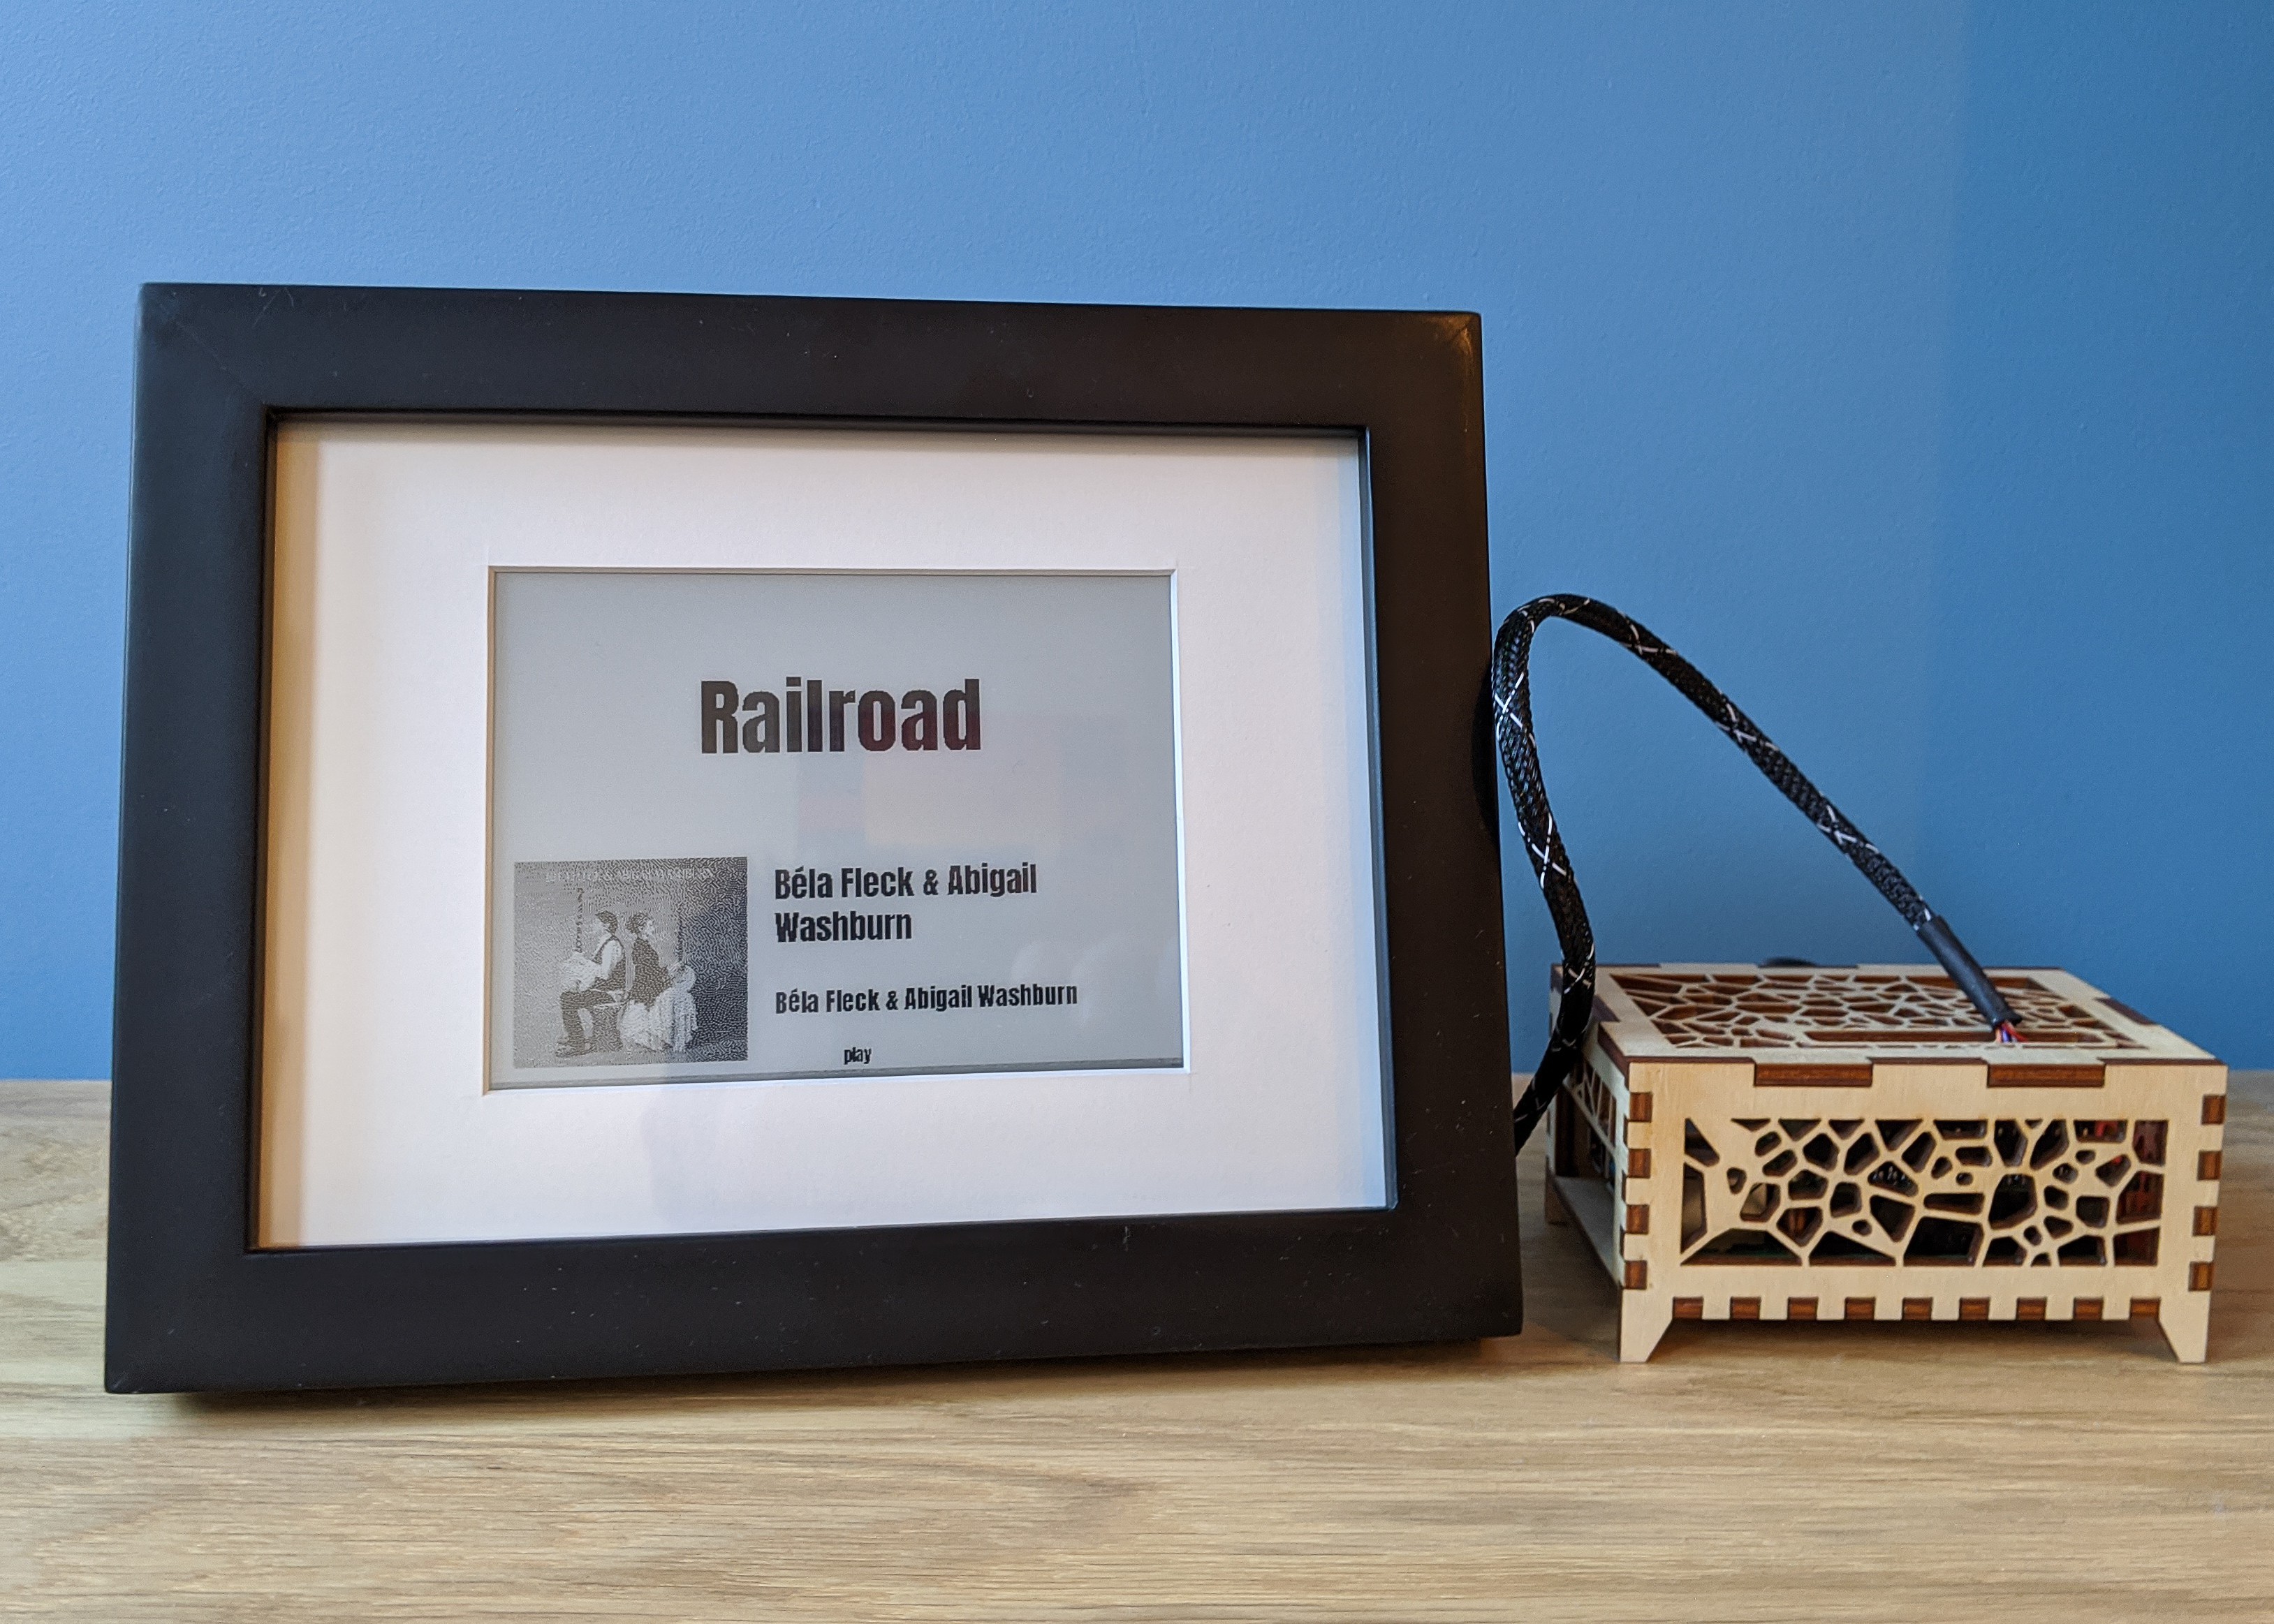
SlimPi provides an e-paper display for Logitech Media Servers using a Raspberry Pi and e-paper display.

My Logitech SqueezeBox has been doing it's job since 2006 when I bought it second hand from e-bay. Come to think of it, I think it might have been the first thing I ever bought from e-bay.

In the intervening fourteen years, it has yet to let me down. Unfortunately, the monochrome matrix LED display is getting a bit dim and hard to read. Considering it's been displaying music or the time for over 120,000 hours, I have absolutely nothing to complain about.

I'm not ready to cast it to the curb quite yet, but I'd like to have a replacement ready when it finally gives up. To that end I wanted to build a replacement that did the following:

  1. Worked with the Logitech Media Server
  2. Had a high-contrast and low power display 
  3. Played music over RCA cables
  4. Looked reasonably nice in our living room

From this SlimPi was born! 

SlimPi requires only a few minimal parts to get a display up and running:

SlimPi has been tested and runs great on a Pi 4, but a Pi 3 should work just fine. Any WaveShare e-Paper HAT based display should work with SlimPi in monochrome mode. Color is not supported at this time. The WaveShare python libraries are full of surprises and some features between each module are not entirely compatible. 

The HiFiBerry components are not necessary for SlimPi to work as a display, but add music playback functionality. 

Build and install instructions for SlimPi can be found over at Git Hub.

Check the instructions here for help and troubleshooting.

  • 1 × JST PHR-8 Female Housing (DigiKey 455-1189-ND) Female JST Connector
  • 8 × SPH-002T-P0.5L JST PH Female Crimp Terminal Contact (DigiKey 455-2148-2-ND) JST Female crimp connector
  • 1 × HiFiBerry DAC+ Pro Optional - audio output HAT
  • 1 × Picture Frame or other Housing Optional
  • 1 × Case Optional

View all 12 components

  • EPDLib - EPaper Display Library

    Aaron Ciuffo02/22/2020 at 15:05 0 comments

    As part of creating this project, I also created a python library for creating module flexible, but consistent layouts for frame-buffered screens. It was specifically developed for WaveShare e-Paper HAT compatible displays, but should work for any device where a composite image can be buffered and sent to the screen.

    EPDLib allows you to create layouts that will work with any resolution screen. The layouts are defined as blocks that are scaled to fit whatever display resolution is in use. The two examples below show the same layout on a 500x500 display and a 300x200 display. 

    The library currently only supports grayscale and 1 bit images and does not support the colored ink in WaveShare displays.

View project log

  • 1
    Physical Build

    The build is pretty straightforward:

    • Attach the e-Paper display to the HAT using the supplied ribbon cables
    • Attach the e-Paper HAT to the GPIO headers
    • Attach the e-Paper ribbon cable to the e-Paper display
    • Follow the SlimPi install instructions over at Git Hub (don't forget to enable SPI and setup the configuration files)
    • Run SlimPi and rejoice 

    It's a good idea to mount the e-Papper display on a stiff backing board as it is quite fragile. From there, find a picture frame with adequate space inside and mount the display inside.

    NOTES:

    I ran into a ton of problem using the included ribbon cable and found that the female GPIO header on the HAT had some faulty connections leading to all kinds of streaking and ghosting issues. 

    If your display has streaks, poor black quality, or is generally not functioning properly, see the Trouble Shooting instructions for help.

  • 2
    Trouble Shooting

    Lousy Image Quality

    You may find that your display may not display blacks correctly, or regions that should be black appear white or streaked with white. See the images below.

    Text should be entirely black

    Background should be entirely black

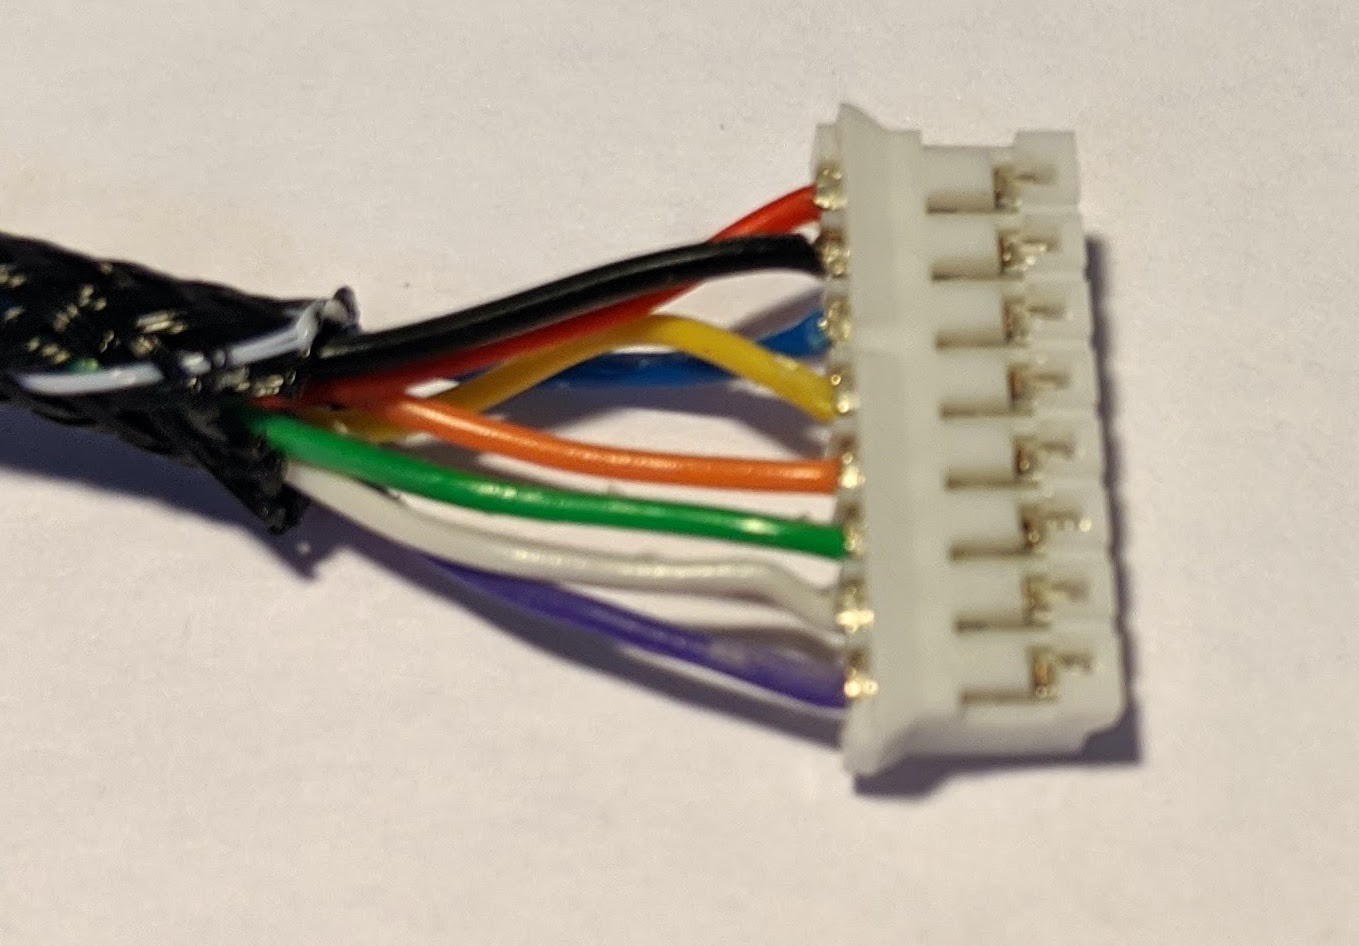
    After hours of trouble shooting, swapping out panels and HATs, I eventually determined that some of pins in the female GPIO header were not fully making contact with the Pi GPIO Male headers. Switching to the JST connector (white connector with 8 wires) included with the board resolved these issues. The JST connector appears to be a better choice all around.

    I ended up building my own JST connector to give myself a bit more length.  Check the parts list for all the connectors required and the Cable Build instructions for help in making the cable.

    Permission Errors

    If you receive "PermissionErrors" when starting up SlimPi, check the log output. It's likely the Pi user does not have access to the SPI and GPIO block devices or the SPI devices are not setup.

    Check the System Setup instructions over at git hub.

  • 3
    Cable Build

    Tools

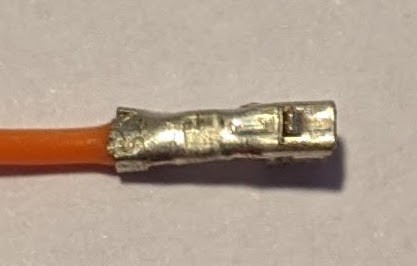
    If you choose to build your own cable for connecting the pi to the display, I suggest purchasing a quality pair of crimpers. There's no hope of properly crimping the ends using pliers. Crimpers are absolutely required.

    That being said, there's a lot of variety in the quality of the crimpers. The ratcheting type featured on AdaFruit are GARBAGE. This style of crimper works by crimping all portions of the crimp in one go.

    The die crimps both the wire crimp and the wings that fold over the wire insulation. This seems great, but unfortunately it is nearly impossible to see what you are doing. If the crimp-end is not placed exactly in the right spot on the die, it will be horribly ruined. 

    Instead, I suggest the Engineer PA-09 or the PA-21.  These crimpers are much simpler and more elegant. It takes twice as many motions to crimp each wire, but you can see exactly what you're doing and it is much less likely that you will ruin your crimp end.

    Crimping

    If you've never crimped JST or Dupont style ends, I suggest buying a lot of extra as you will likely waste a few. Check out this short video for quality instructions.

    Materials

    See the Bill of Materials attached above

    Construction

    1. Measure 8x 22-26AWG wires preferably of different colors 
    2. Cut a piece of braided wire sleeve approximately 15-20mm shorter than the desired length of wires.
    3. Add heat-shrink tube to the sleeve
      1. Cut two pieces of heat-shrink tubing about 10-15mm long
      2. Thread the heat-shrink on now so you don't forget it later!
    4. Thread the measured lengths of wire through the braided wire sleeve. 
      1. Thread a stiff wire such as a solid-core wire or coat hanger through the sleeve first. 
      2. Fasten the 8-wire bundle to the wire using masking tape
      3. Pull the bundle through the sleeve
    5. Add 8x JST crimp ends to one end of the cable
      1. Check this video for excellent instructions
    6. Add 8x Dupont crimp ends to the other end of the cable
      1. Use the same method as above for the Dupont connectors
    7. Install the JST crimp ends into the JST connector
      1. the flat side of the crimp end faces toward the open side of the JST connector (shown below) 
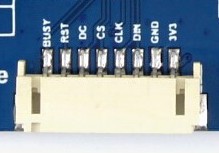
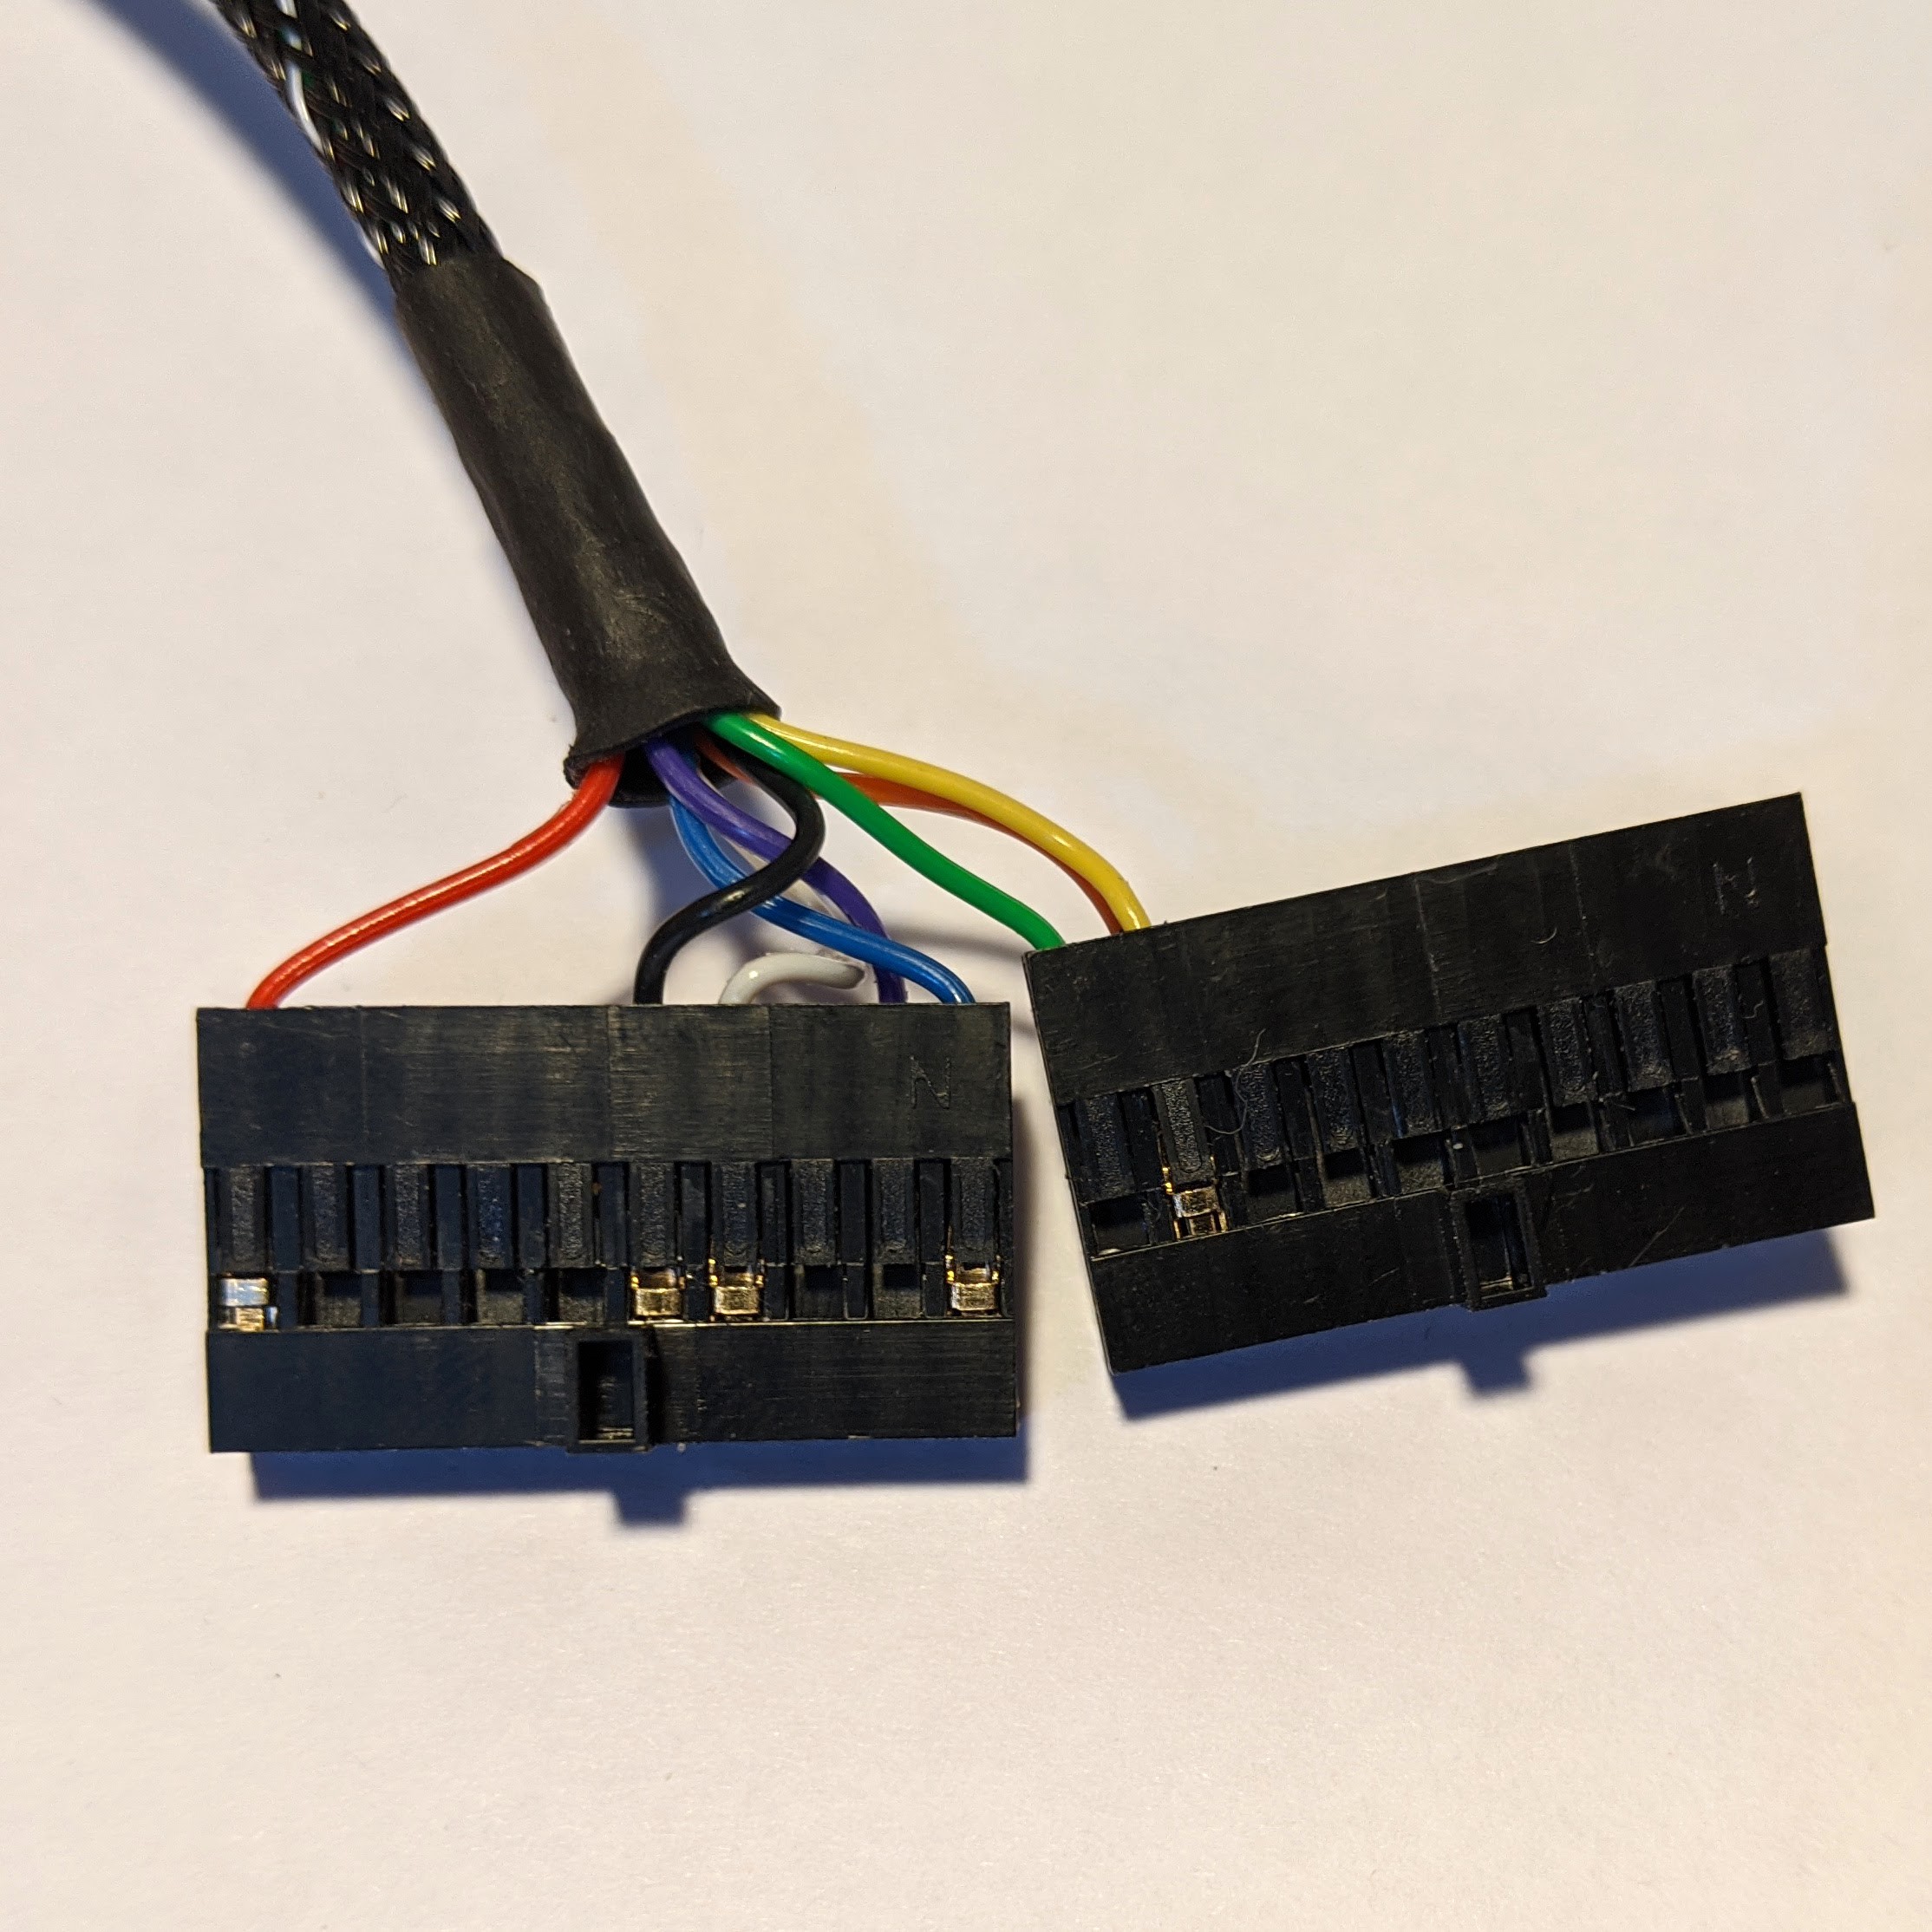
    8. Insert the Dupont crimp ends into the 40 pin Dupont Connector  - see the pinout in the documentation
      1. Use care and match the appropriate wires to the appropriate position in the connector 
      2. NOTE: the BOM specifies 2x10 pin connectors - use two, side-by side to make a 2x20 connector
    9. Shrink the tubing on at the ends where the sleeve meets the wire. 
      1. If the sleeve is too long, this is a good time to trim it.
    10. Gently snap the JST connector into place (it is indexed and can only fit in one direction)
    11. DOUBLE Check your connections. Swapping 3.3V and Ground is a GREAT way to let the magic blue smoke out of your display driver. 
    12. I mean it. DOUBLE CHECK your connections.
    13. Push the Dupont connectors onto the (powered down Pi) - pin 40 is is closest to the USB ports.
    14. Power on and start testing!

View all 4 instructions

Enjoy this project?

Share

Discussions

Similar Projects

Does this project spark your interest?

Become a member to follow this project and never miss any updates