Val
Val-
Installing hubs
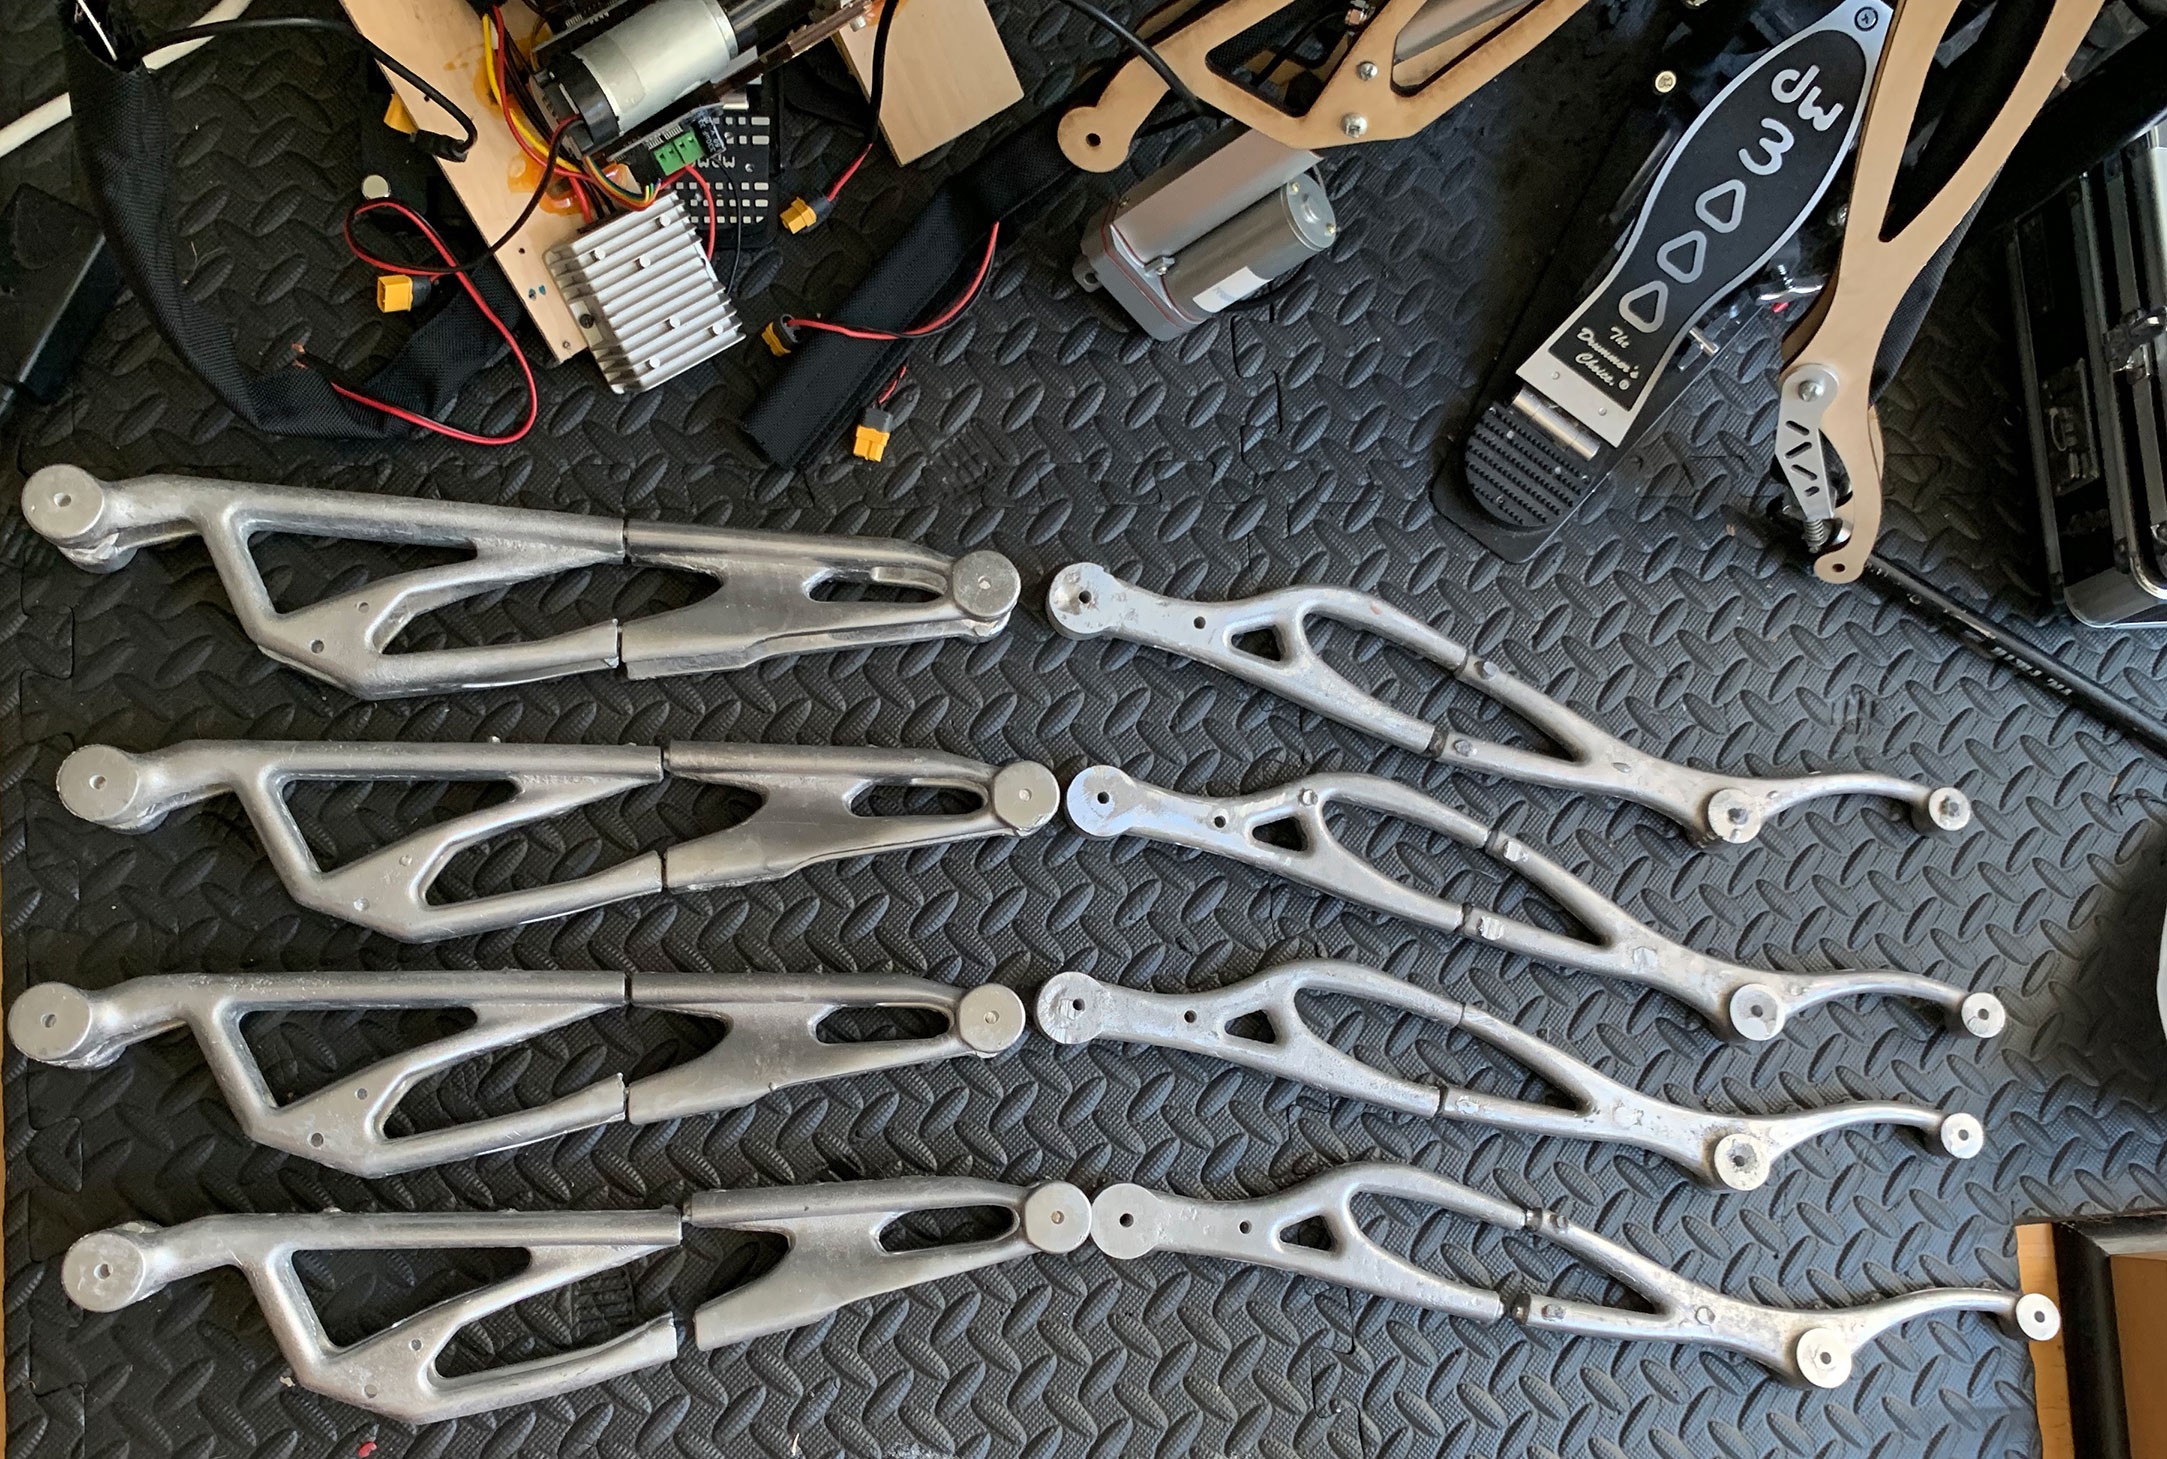
10/10/2021 at 03:52 • 0 commentsThis week I focused on installing all three potentiometers into one arm and testing that they work as expected, and then getting the other arms ready for pot installation next (see last log for the final pot choice).
![]()
![]()
When I designed the arms last year, there were a lot of unknowns, not the least of which determining how to track the arm positions and how to install the pots. As a result, even though I did leave spaces for the hollow shaft pots in the arm joints, I didn't know if I would be using 6mm round shafts, 6mm D-shafts, 6-32 screws, or even bearings. I ended up modeling a 6mm hole in the forearms (since metal casting the arms had a 7-month lead time) in hopes that I can always expand the hole if needed.
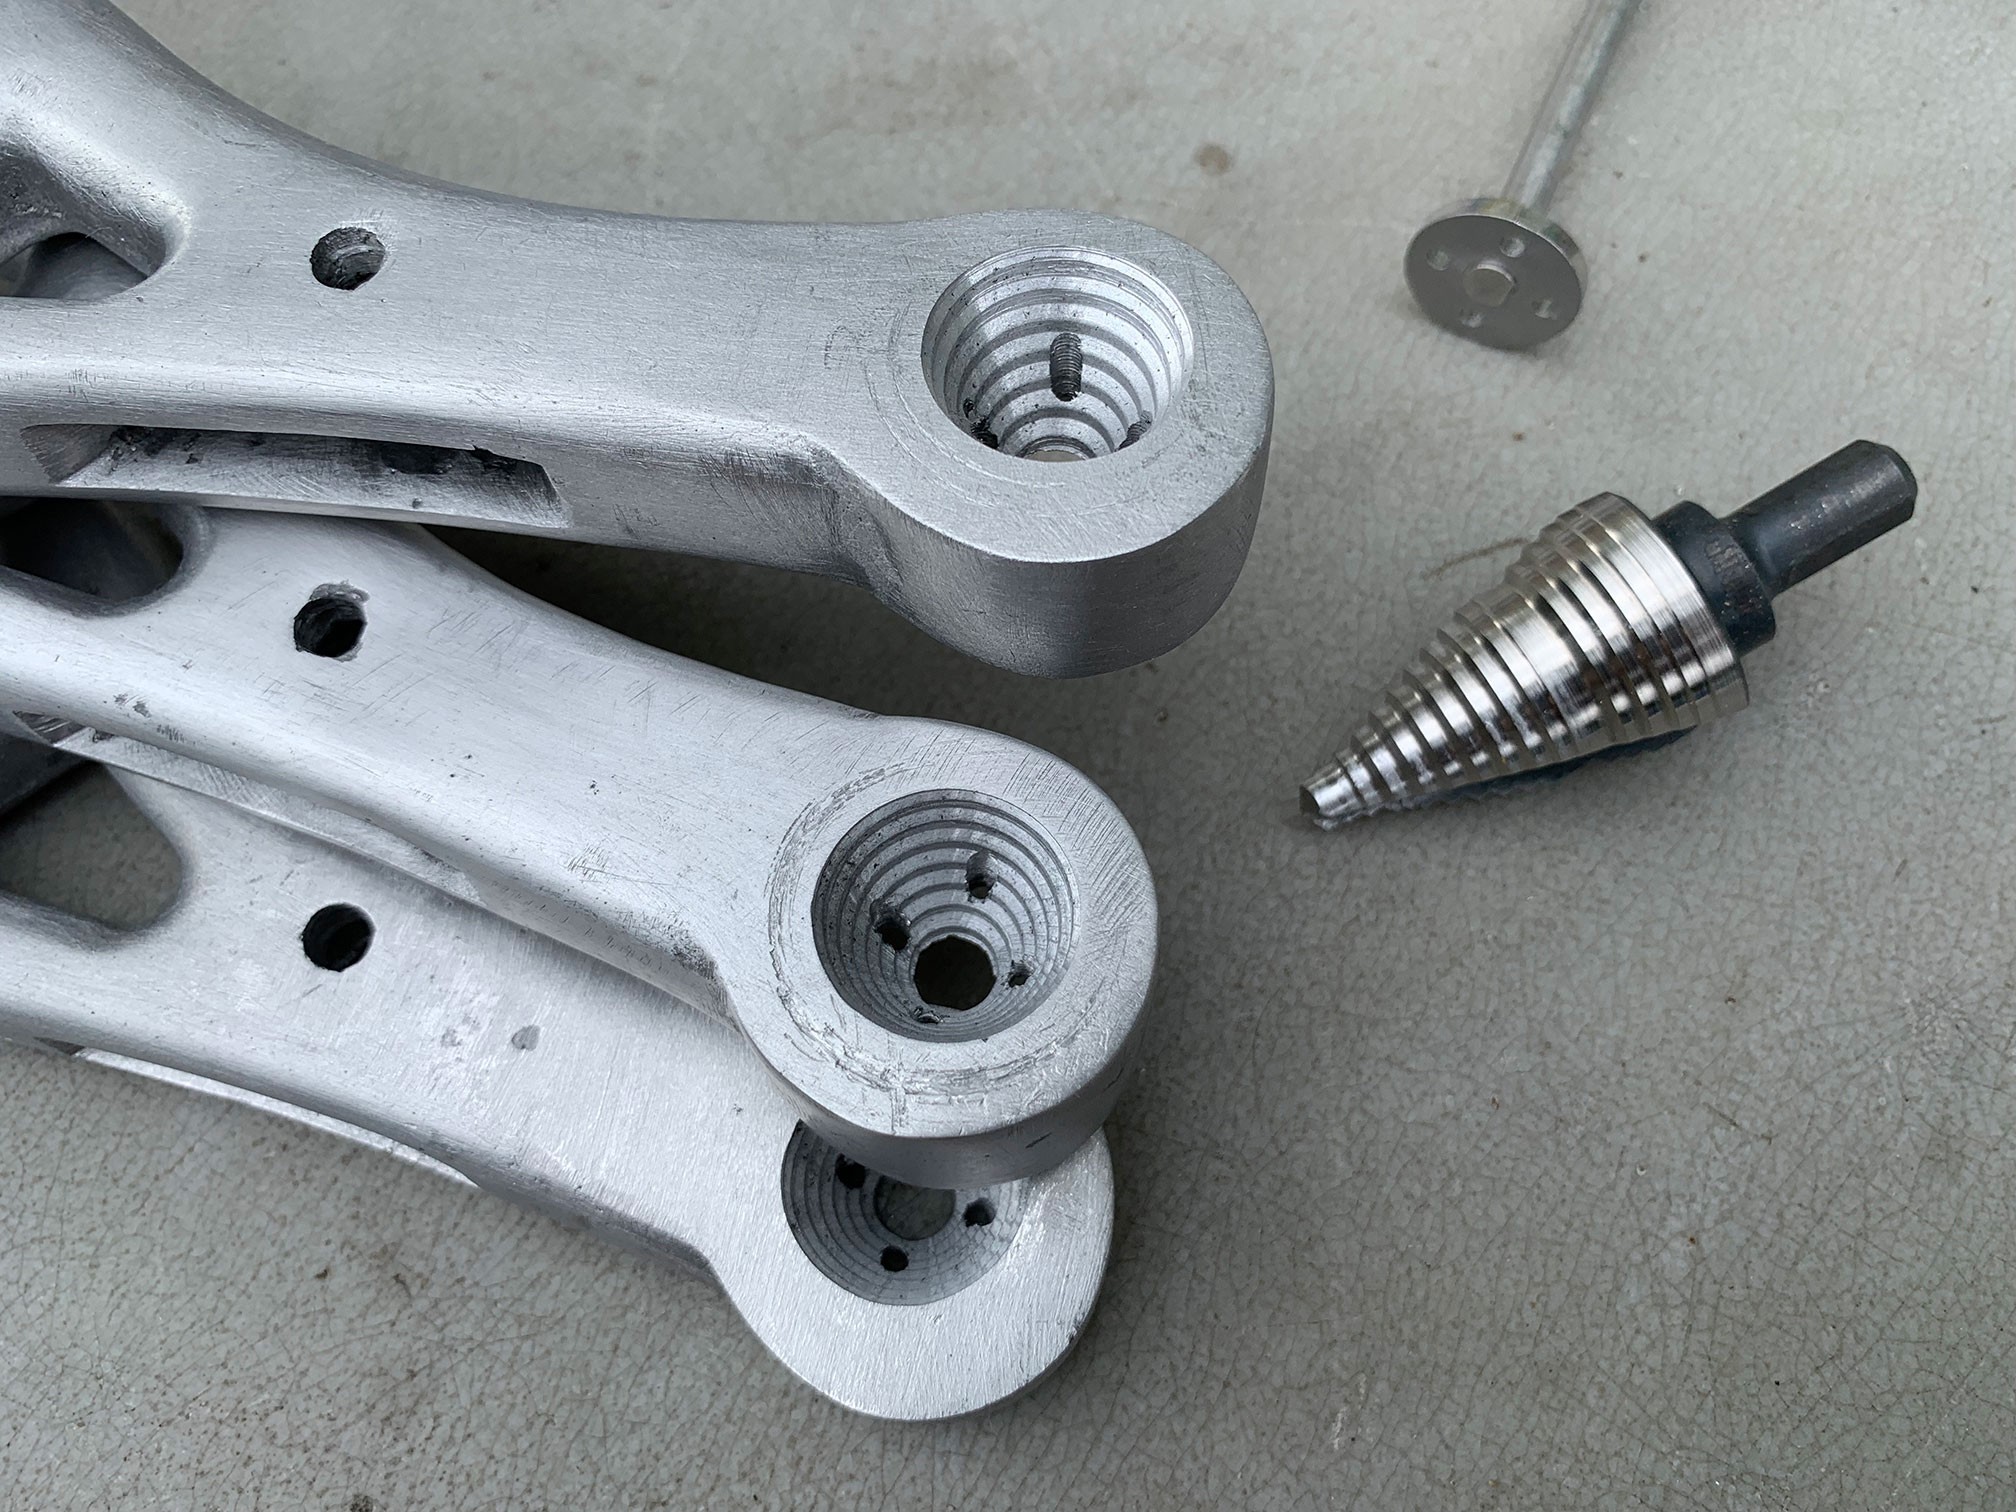
So, now I know I need 6mm D-shafts, and to lock a D-shaft into a round hole basically you have to counter-sink the hole and mount a hub with a D-opening. Shown here is the Irwin #9 counter-sink.
![]() The easiest way to do this would have been to design these parts with counter-sinks baked into the 3D model, as drilling them with this monster bit was really nerve-racking (is there a word for a phobia of drilling counter-sinks?)
The easiest way to do this would have been to design these parts with counter-sinks baked into the 3D model, as drilling them with this monster bit was really nerve-racking (is there a word for a phobia of drilling counter-sinks?)![]() First I tried these miniature robotics hubs, but even these were too big, more fit for projects where you have a lot of extra space:
First I tried these miniature robotics hubs, but even these were too big, more fit for projects where you have a lot of extra space:https://www.robotshop.com/en/lynxmotion-hub-02-universal-hub.html
https://www.pololu.com/product/1994
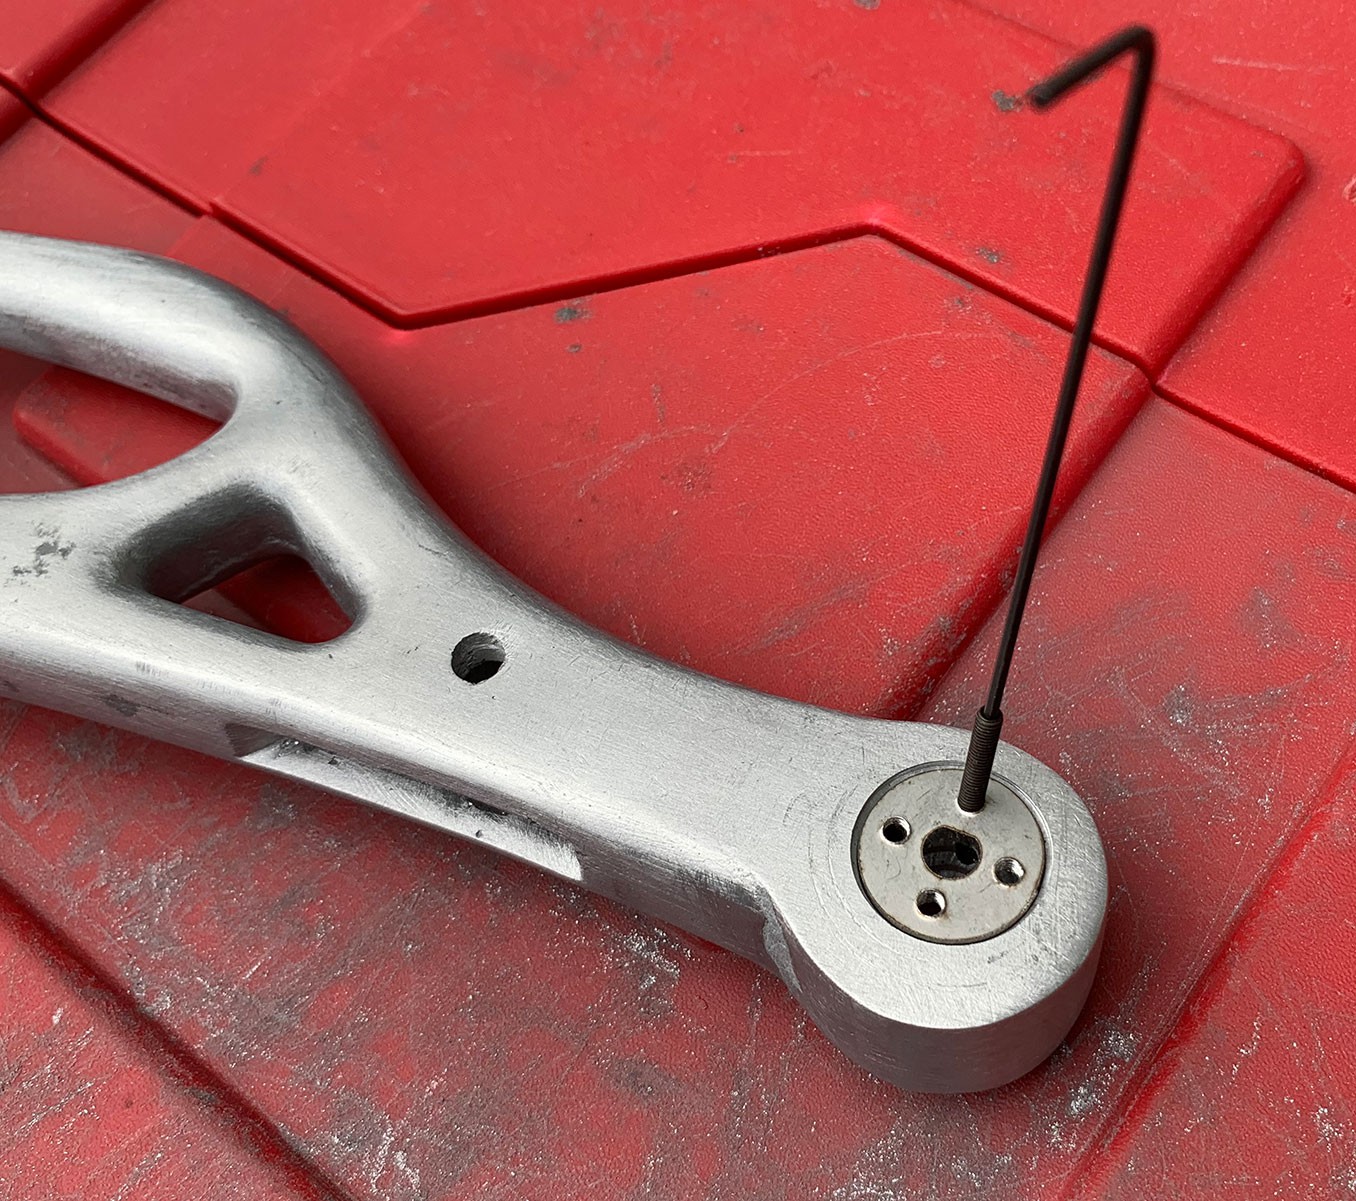
I ended up submitting a laser-cutting order to OSHCut to make flat circle pieces out of stainless steel, each with a 6mm D-shaft hole in the middle and four 3mm holes. Then I spent about 10 hours tapping the holes and breaking 7 taps.
![]()
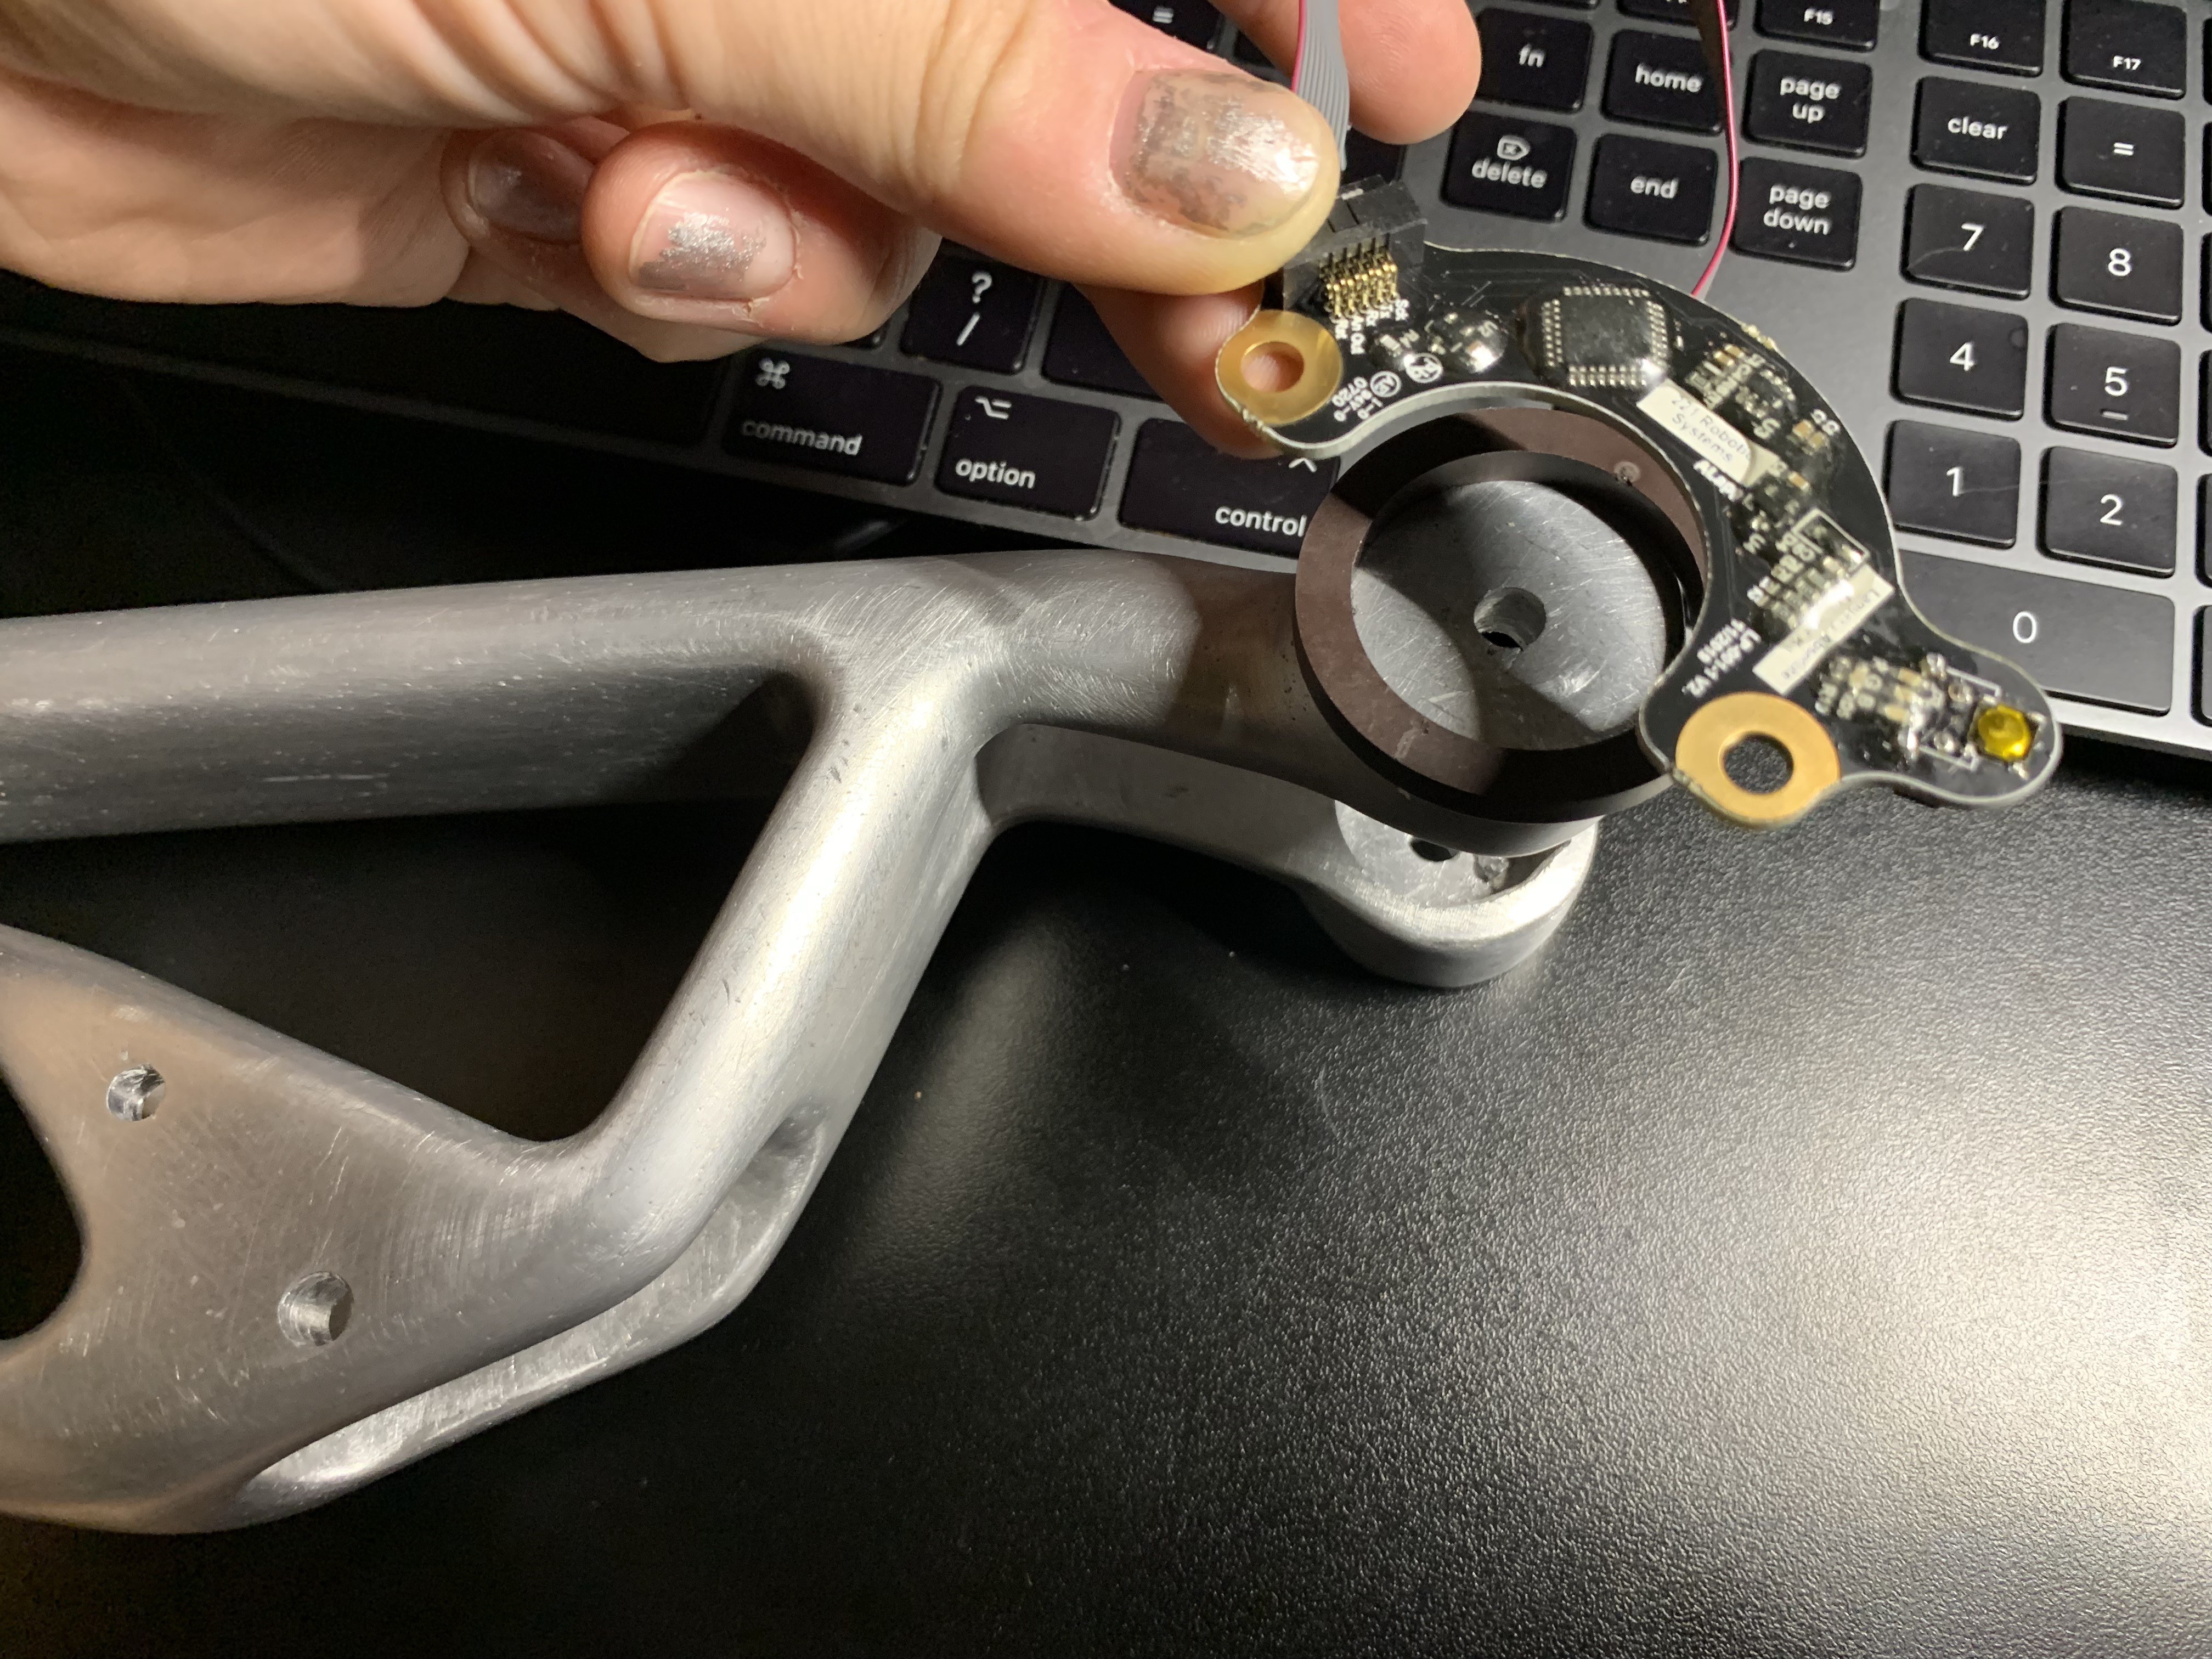
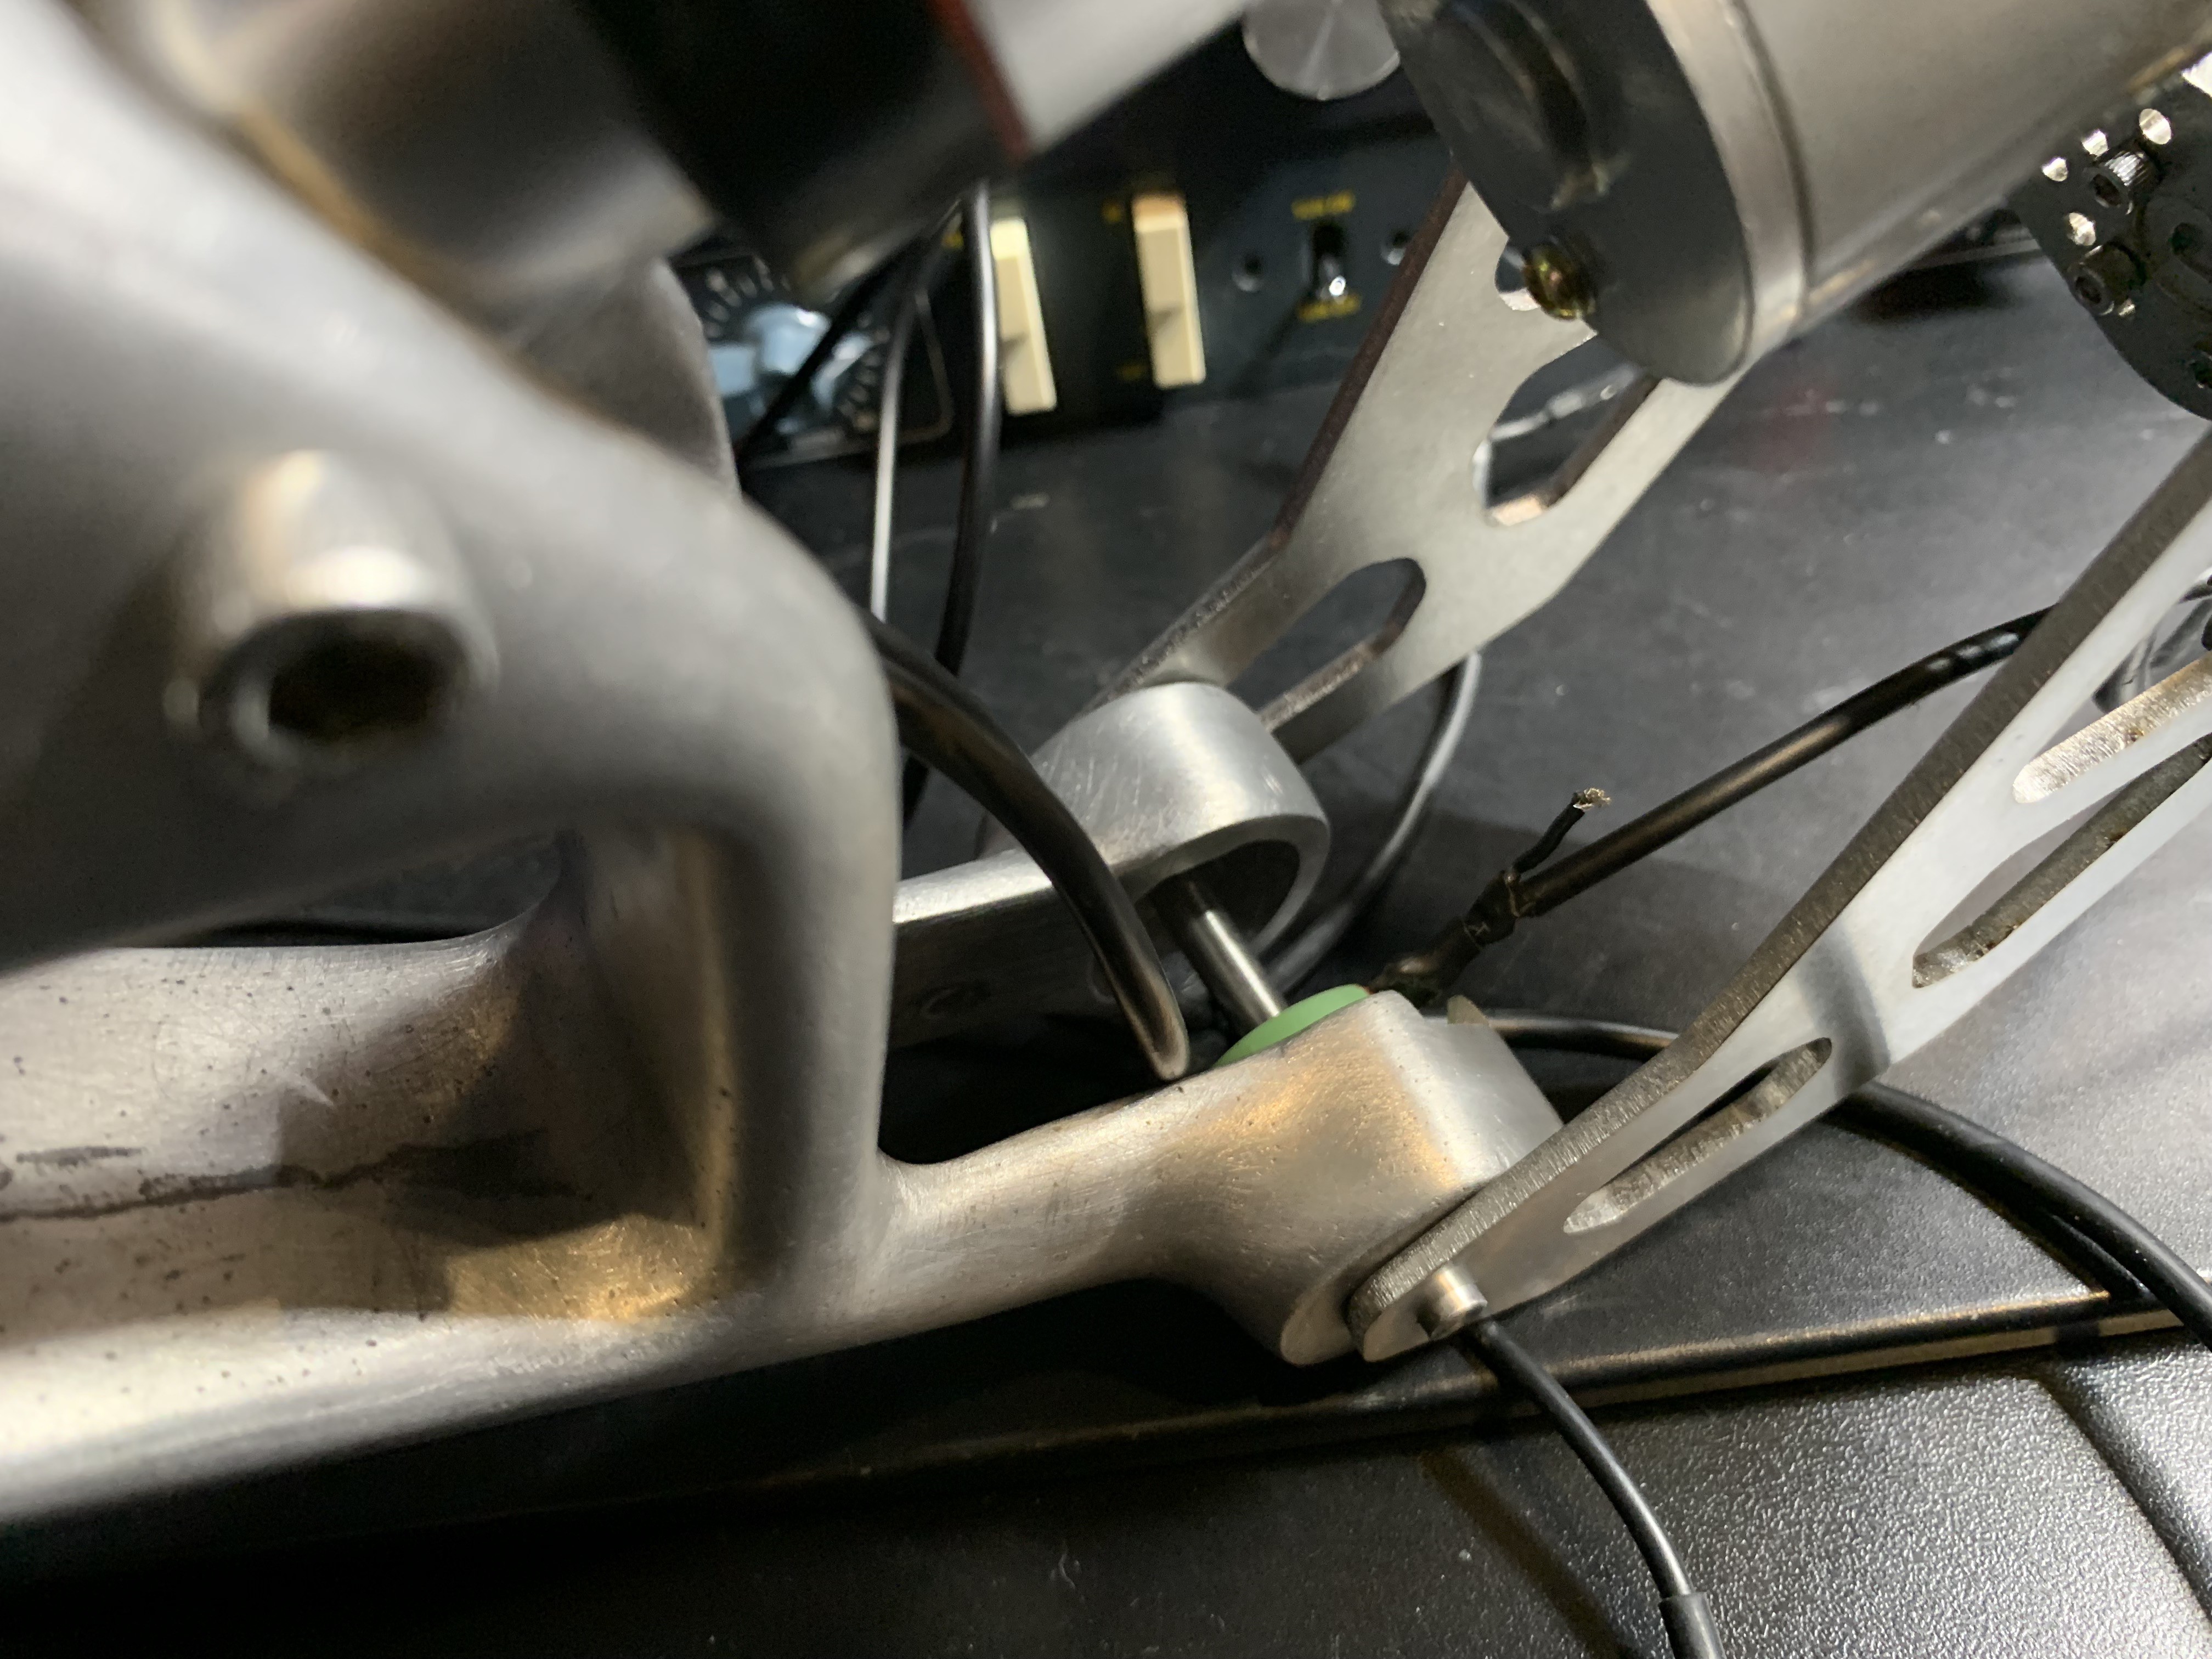
Finally, I screwed in the custom hubs, so now it's possible to lock the D-shaft in one piece of the arm joint while it rotates through the other piece, and since it's inserted into a hollow D-shaft potentiometer it will spin the potentiometer to keep advertising the arm joint position.
![]()
I think most people install potentiometers into their robot arms in a few hours, but I guess it took me a few months to get here because all the parts are custom, I wanted everything to be hidden, an in addition I made a very bizarre choice of actuator (the slow linear actuators) because sci-fi robots always have linear actuators in concept art.
![]()
-
Absolute encoder shootout
09/24/2021 at 05:50 • 0 commentsThe winner for this specific application (measuring angles on robot arms for inverse kinematics) is the 6mm hollow D-shaft potentiometer from P3 America:
![]()
![]()
https://p3america.com/np24hs-r10k-l2-d5/
https://p3america.com/rh24pc-e-r10k-l2-d5/
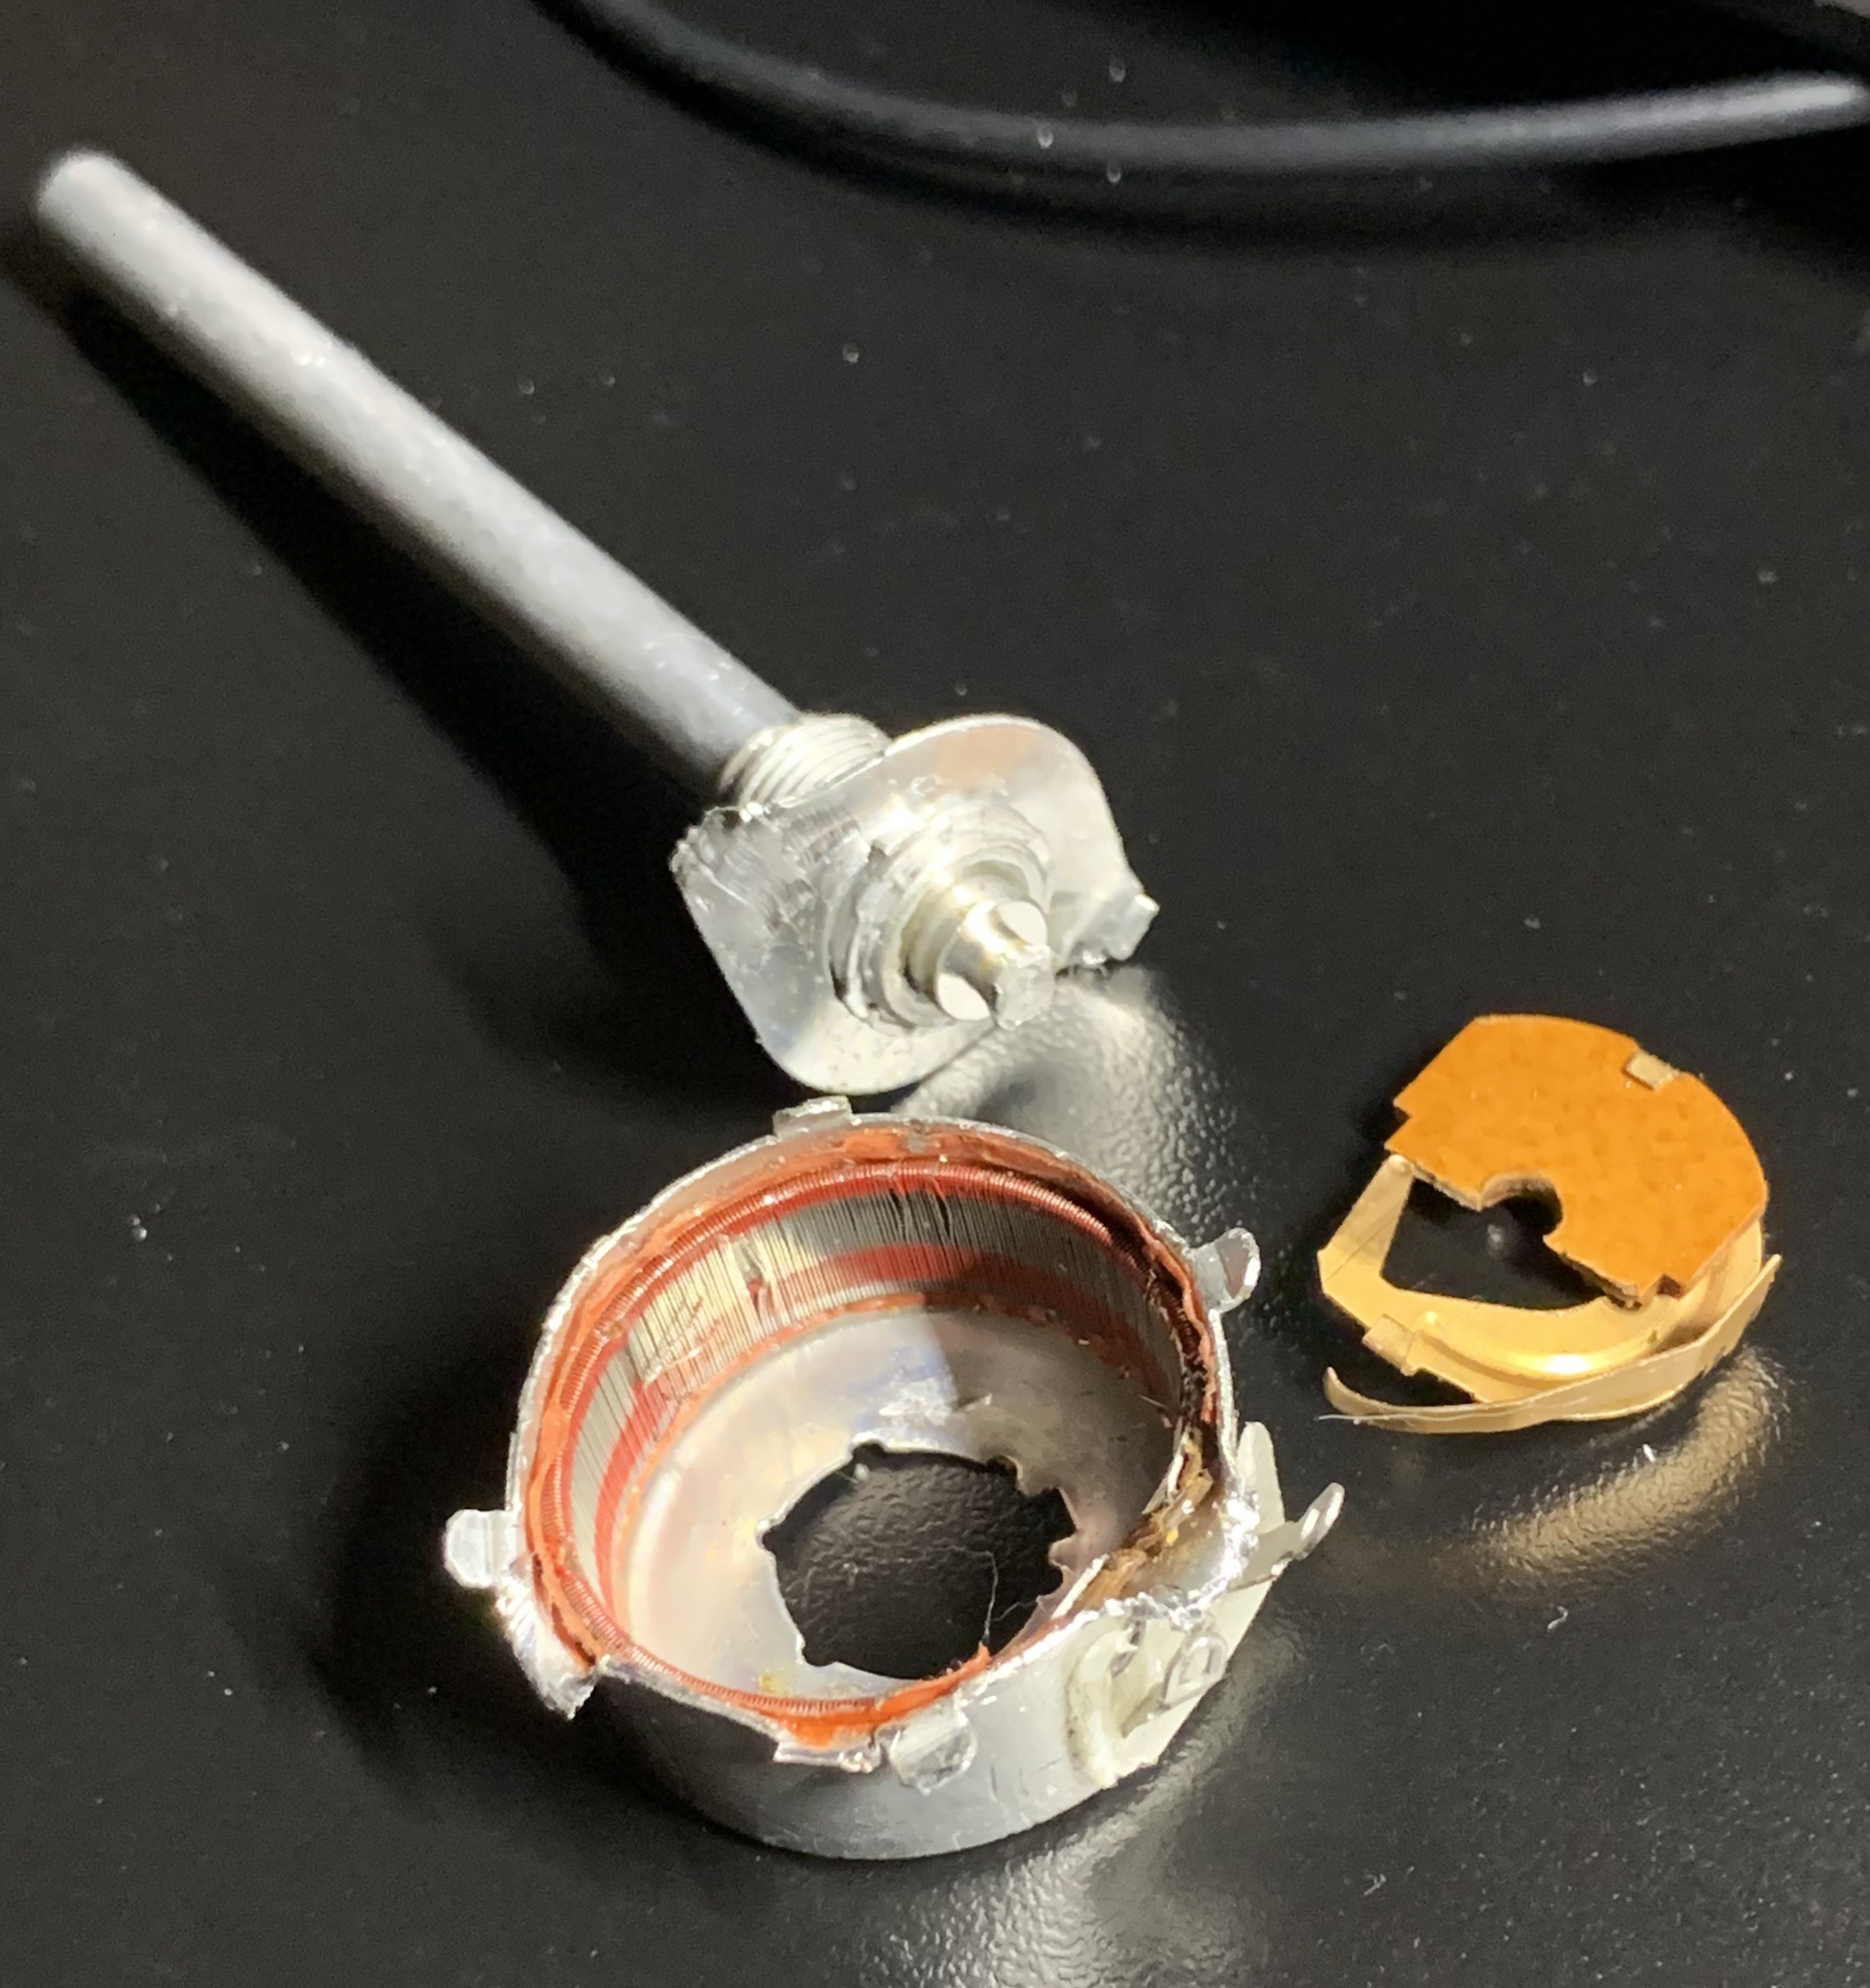
Despite the simple and unassuming construction this family of pots gives pretty detailed absolute angle readings rivaling those of a hall-effect sensor at really wide 340 degree angles, while fitting inside a robot arm in their entirety, without being seen. Also they are $15 each.
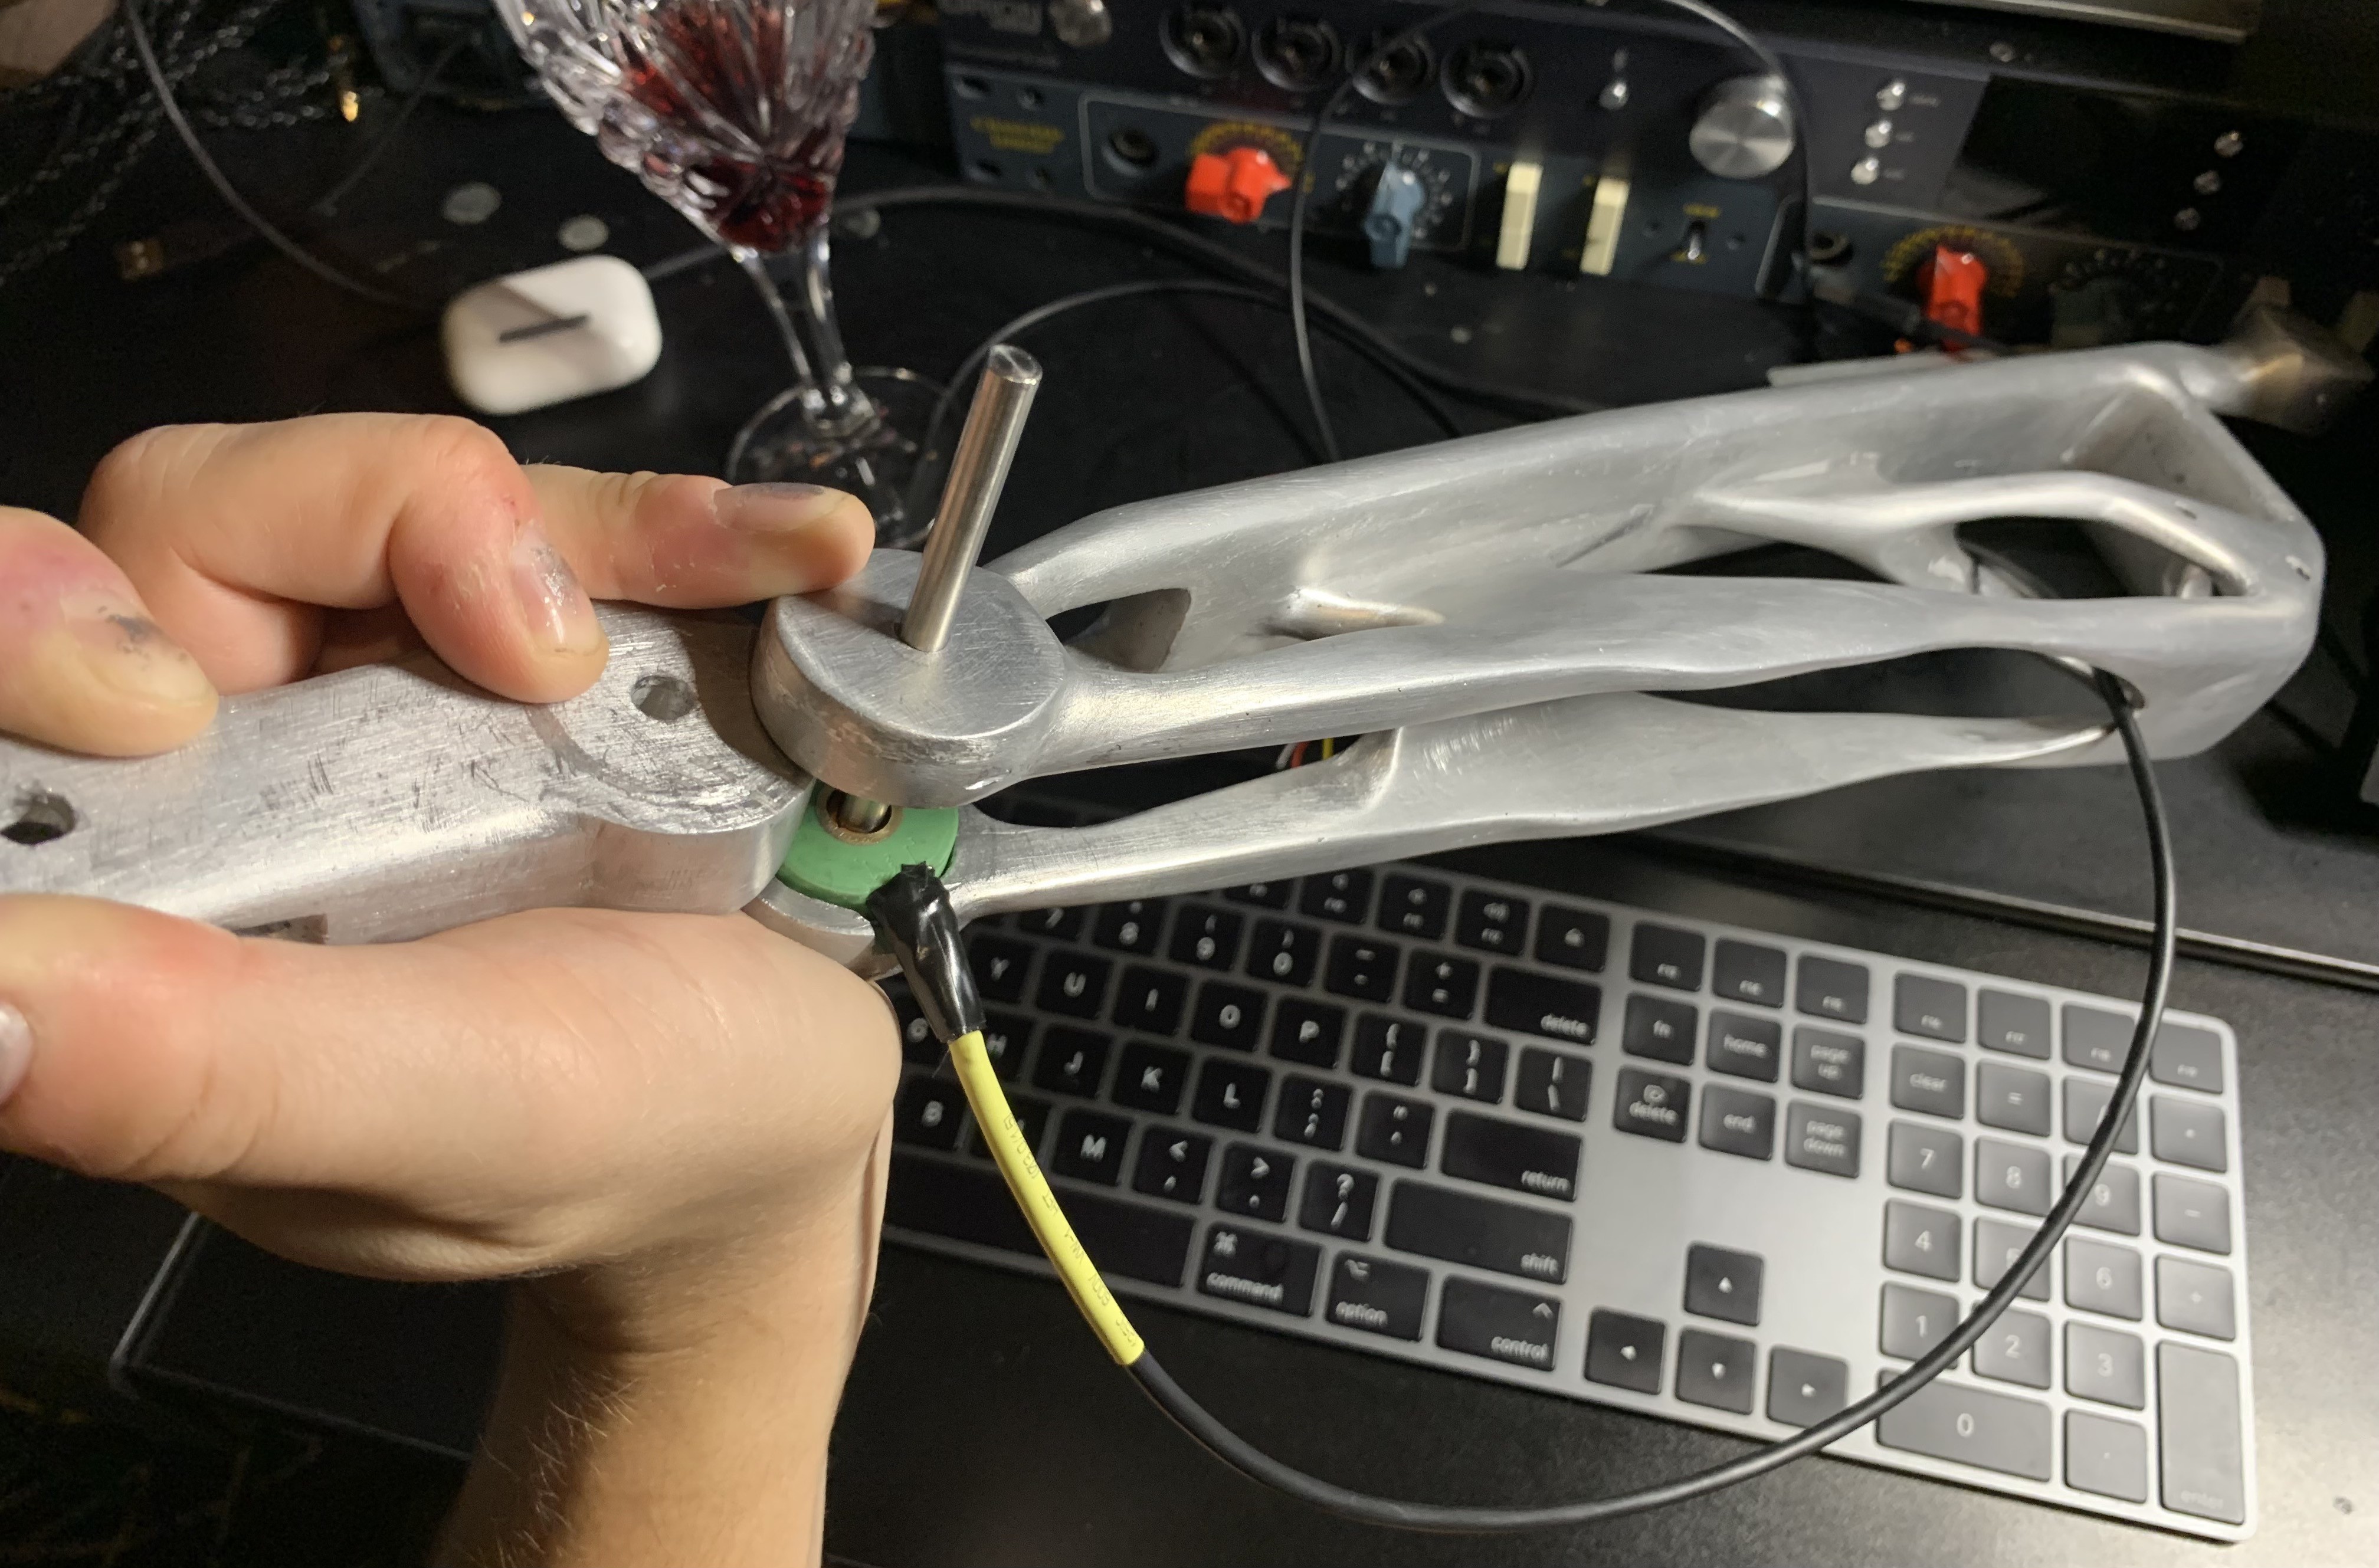
I had to file a square opening in the arm bones for the cable to pass through, but it doesn't seem like a big deal because it modified wall geometry in just one small spot rather than having me drill a big hole right through the rotation center of each joint (you can always make holes bigger, but not the other way around).
This was the only potentiometer I found that was big enough to accept a 6mm shaft, yet small enough to fit inside of something else without being seen. Note that the D-shaft is not 5.4mm on the "flatted" portion like standard robot parts (from GoBilda, RobotShop, or ServoCity), it's actually smaller, so I had to file the opening to fit in a 6mm D-shaft, but oh well.
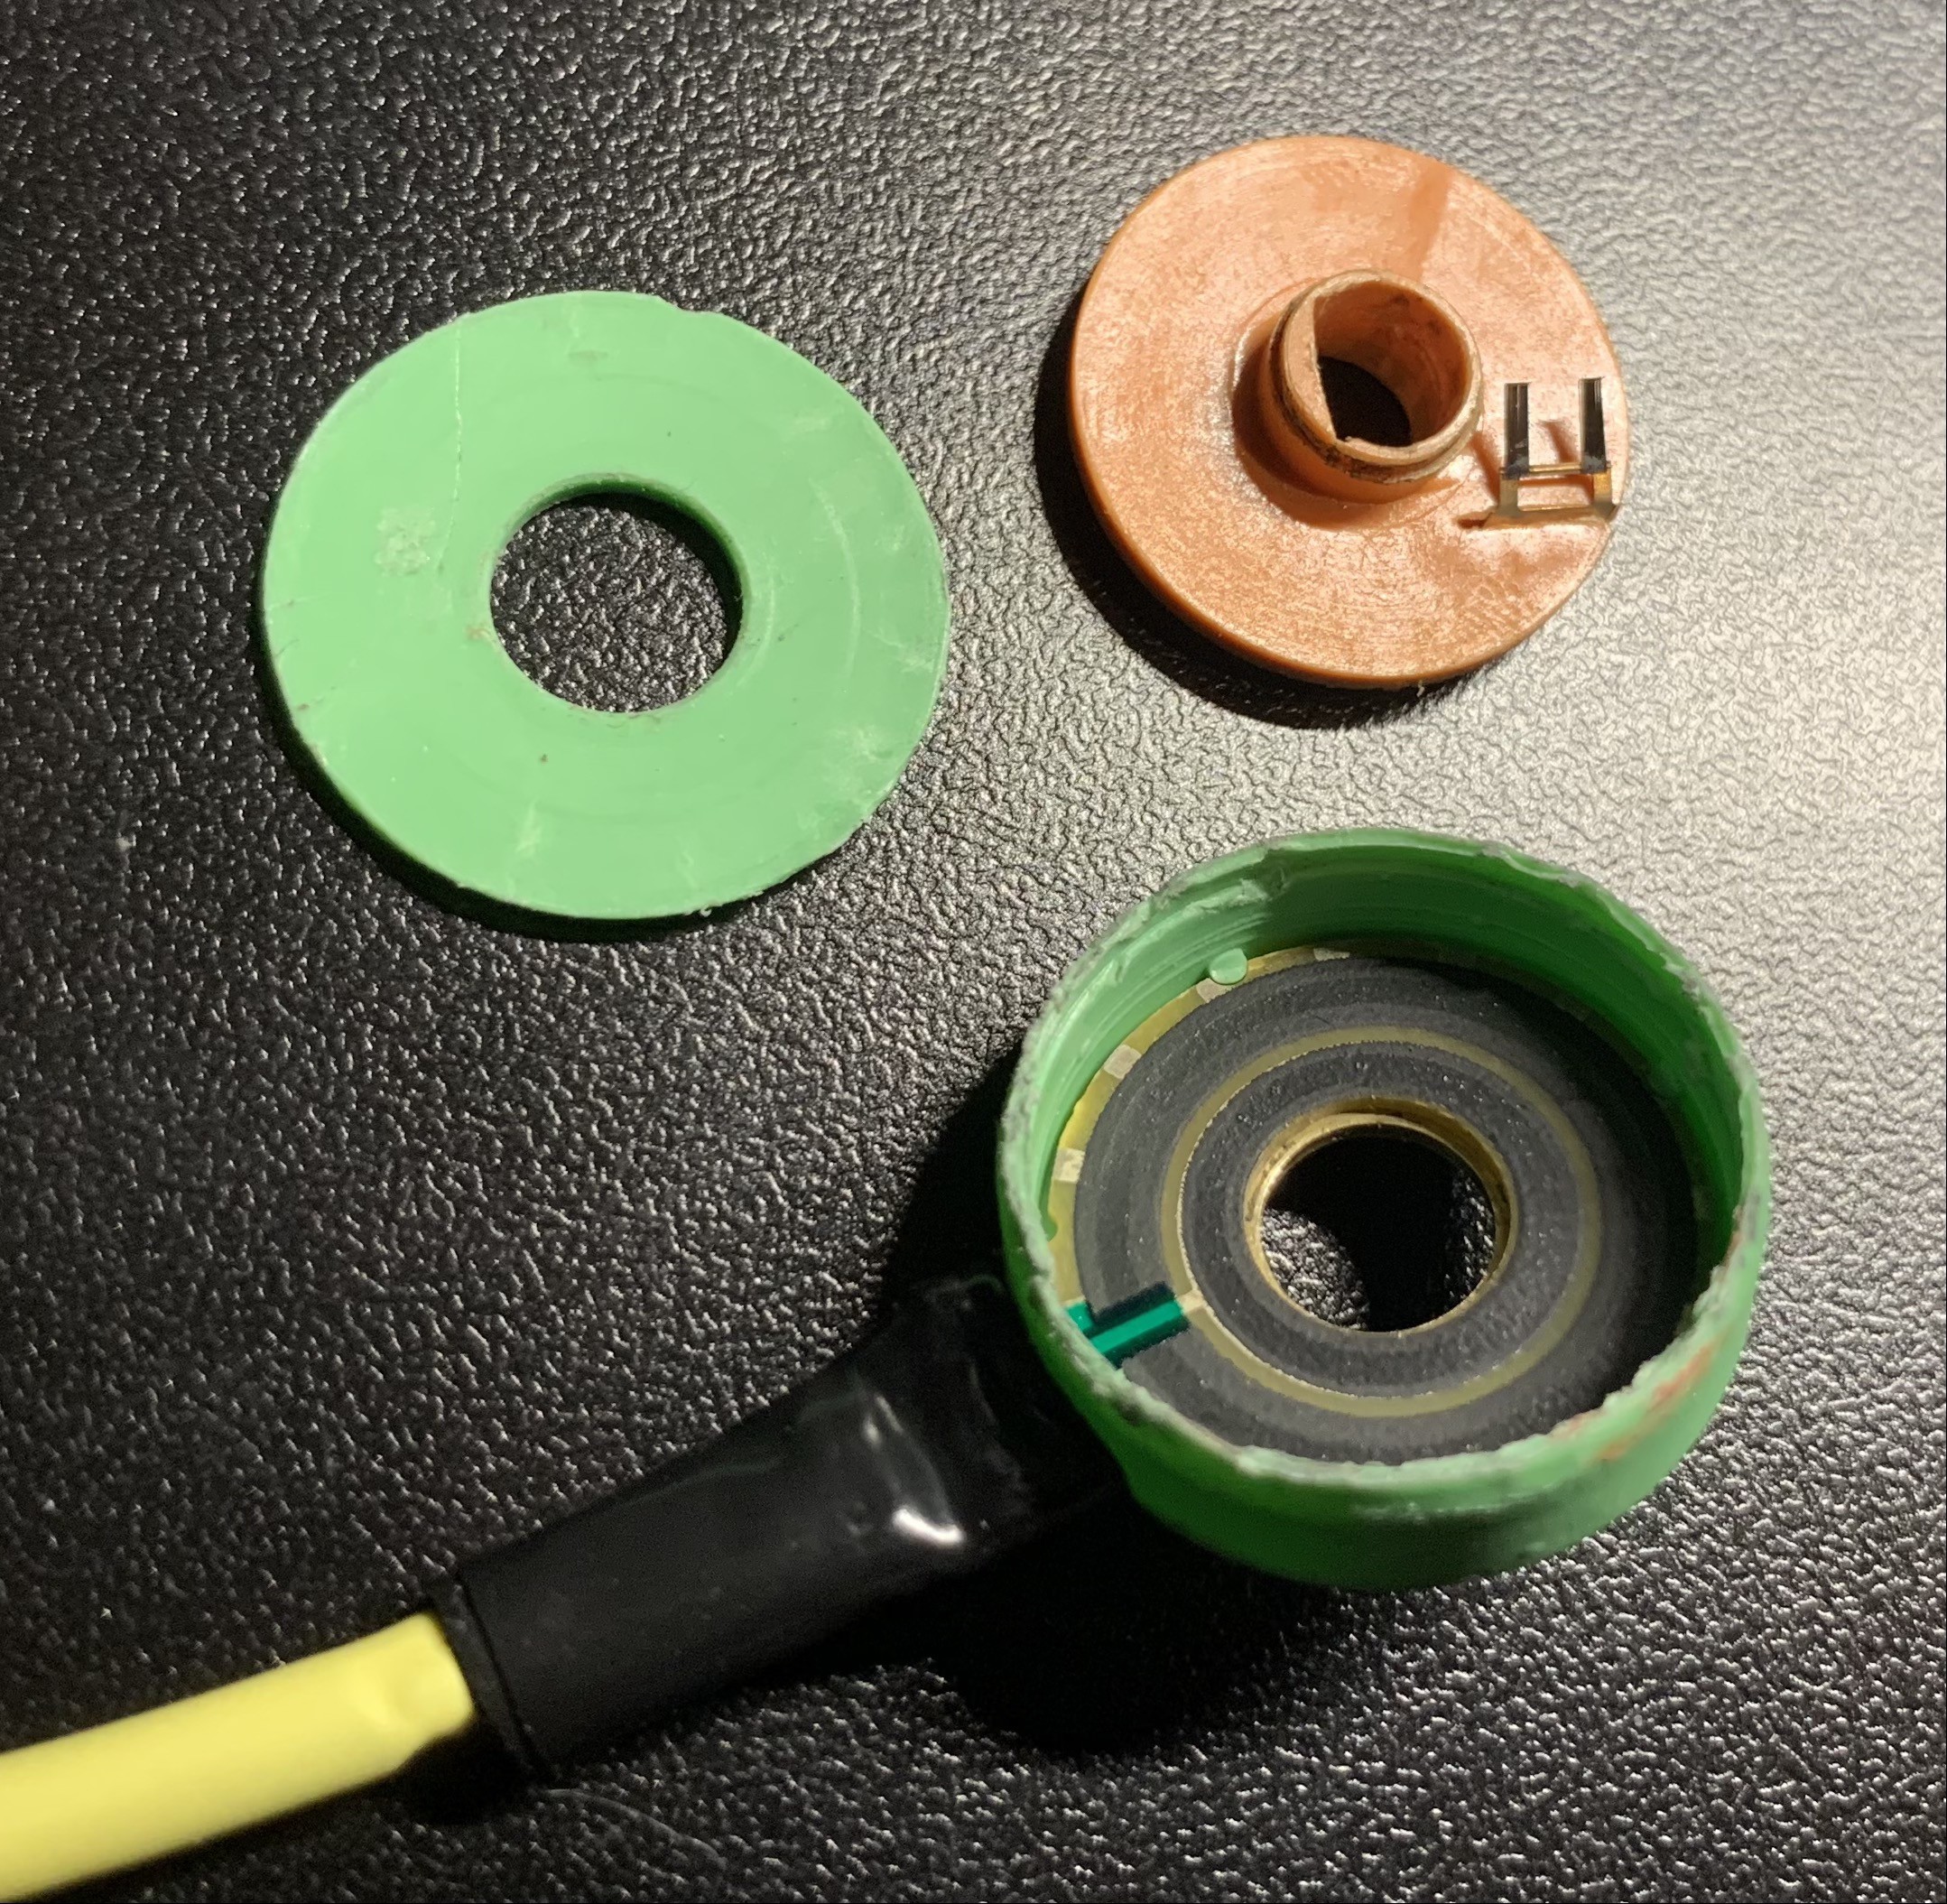
Also note that it doesn't have physical contact "leads", rather they are just simple PCB traces. Any wires you solder to the traces get fatigued very fast and break off easily, so I am using a shrinkwrap cover here combined with electrical tape to create a make-shift wire protector. The shitty leads along with flimsy plastic construction are the only thumbs-down issues with this pot. It would be incredibly cool if P3 America made one like this, but without ears, all-metal, with super nice pre-soldered leads that have a rubber wire protector built in.
Lastly, it is pictured here with the mounting "ears" forcibly removed by using pliers, which did not affect its function. So I suppose this product makes up for its weak construction by having the capability to be "re-skinned" by stripping away pieces and replacing them with other cooler-looking pieces while it still works.
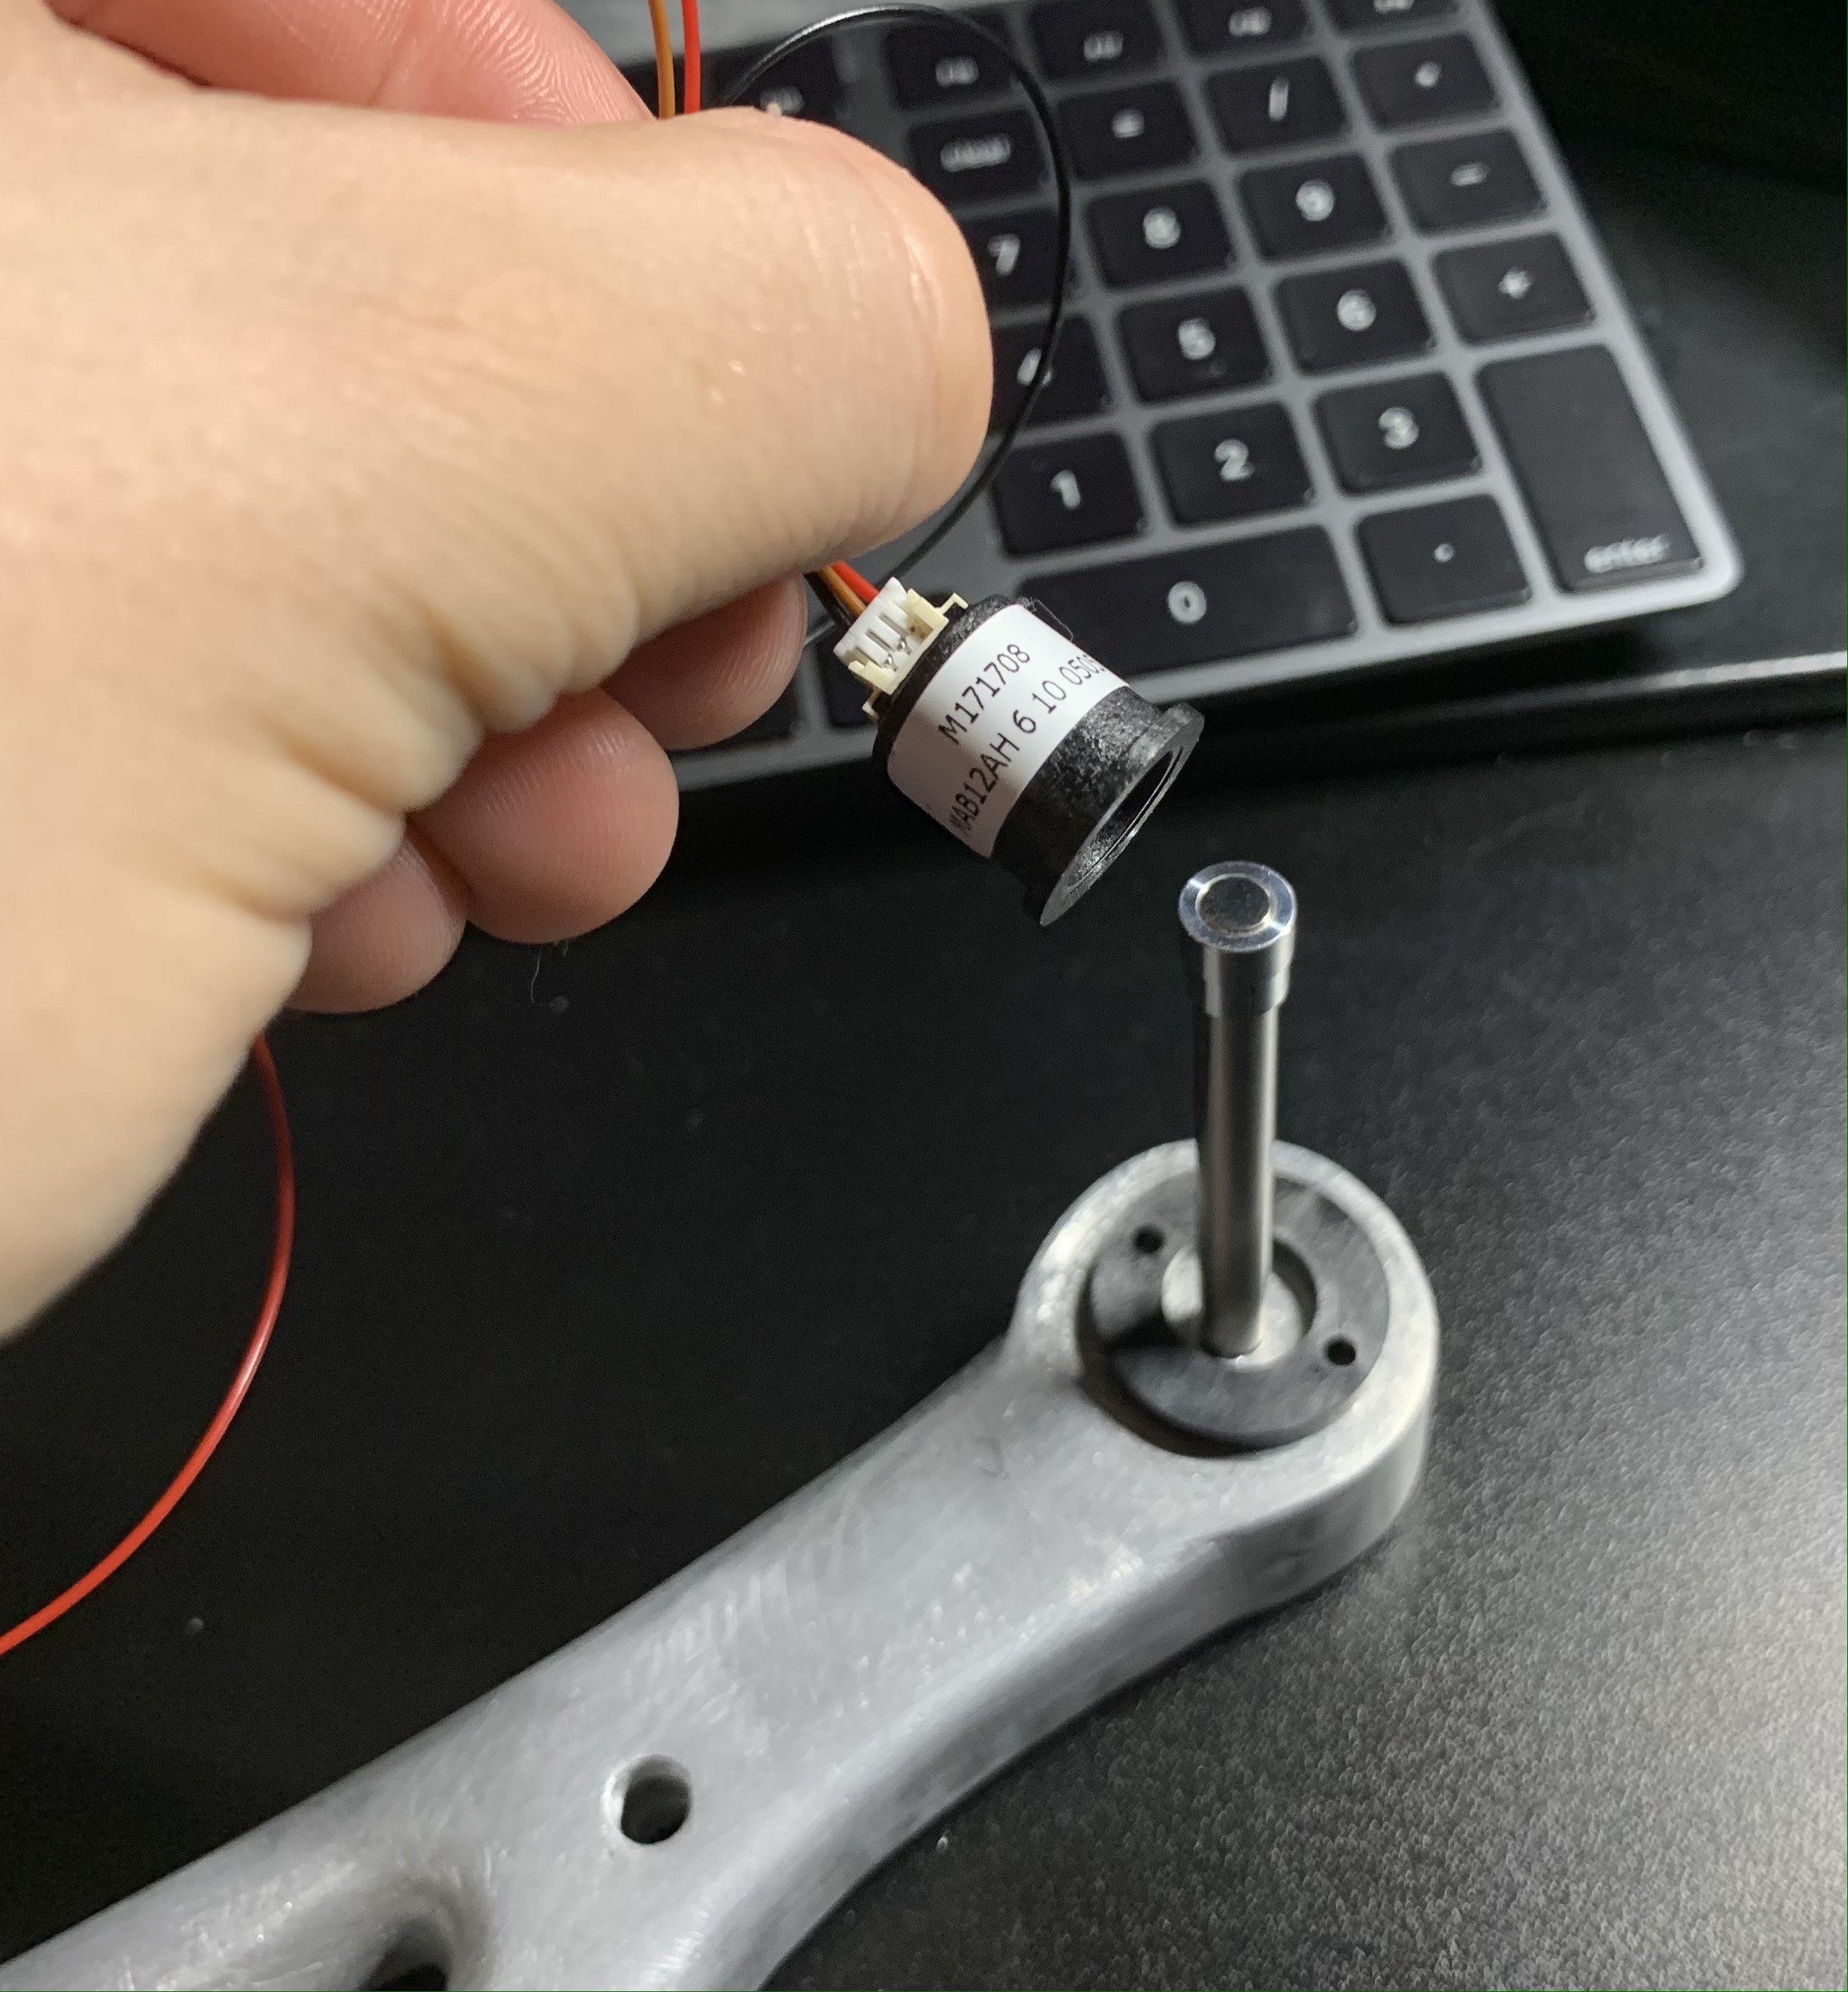
Now for the other contenders, most of which are way more expensive and hard to fit anywhere, while producing readings with a very similar precision. Runner up - the hall-effect potentiometer with analog output, also from P3 America:
https://p3america.com/mab12ah-6-10-0505/
![]()
Very accurate readings, especially with regard to linearity, but not that different than the cheap and simple pot reviewed above. The magnet fits perfectly on a 6mm round shaft or D-shaft, but I would have to drill a counter-sink into one of the arm bones to accept a part of the magnet (the one pictured here), while drilling the outer joint of the other arm bone straight through (with a pretty huge drill bit) to fit the body. Once I did all that, I would still have to fixate the joint with a hub on one end, and the joint would only be secured from one side with the rotating shaft (the other side would have the magnet). On the plus side, the leads are not only strong, but also are a micro-JST connector that can be disconnected. Overall strong construction even though it's plastic, and part of the "barrel" could be sawed off to fit into a tighter space, thus there is still capacity for "re-skinning". Small enough to fit into most designs without being seen.
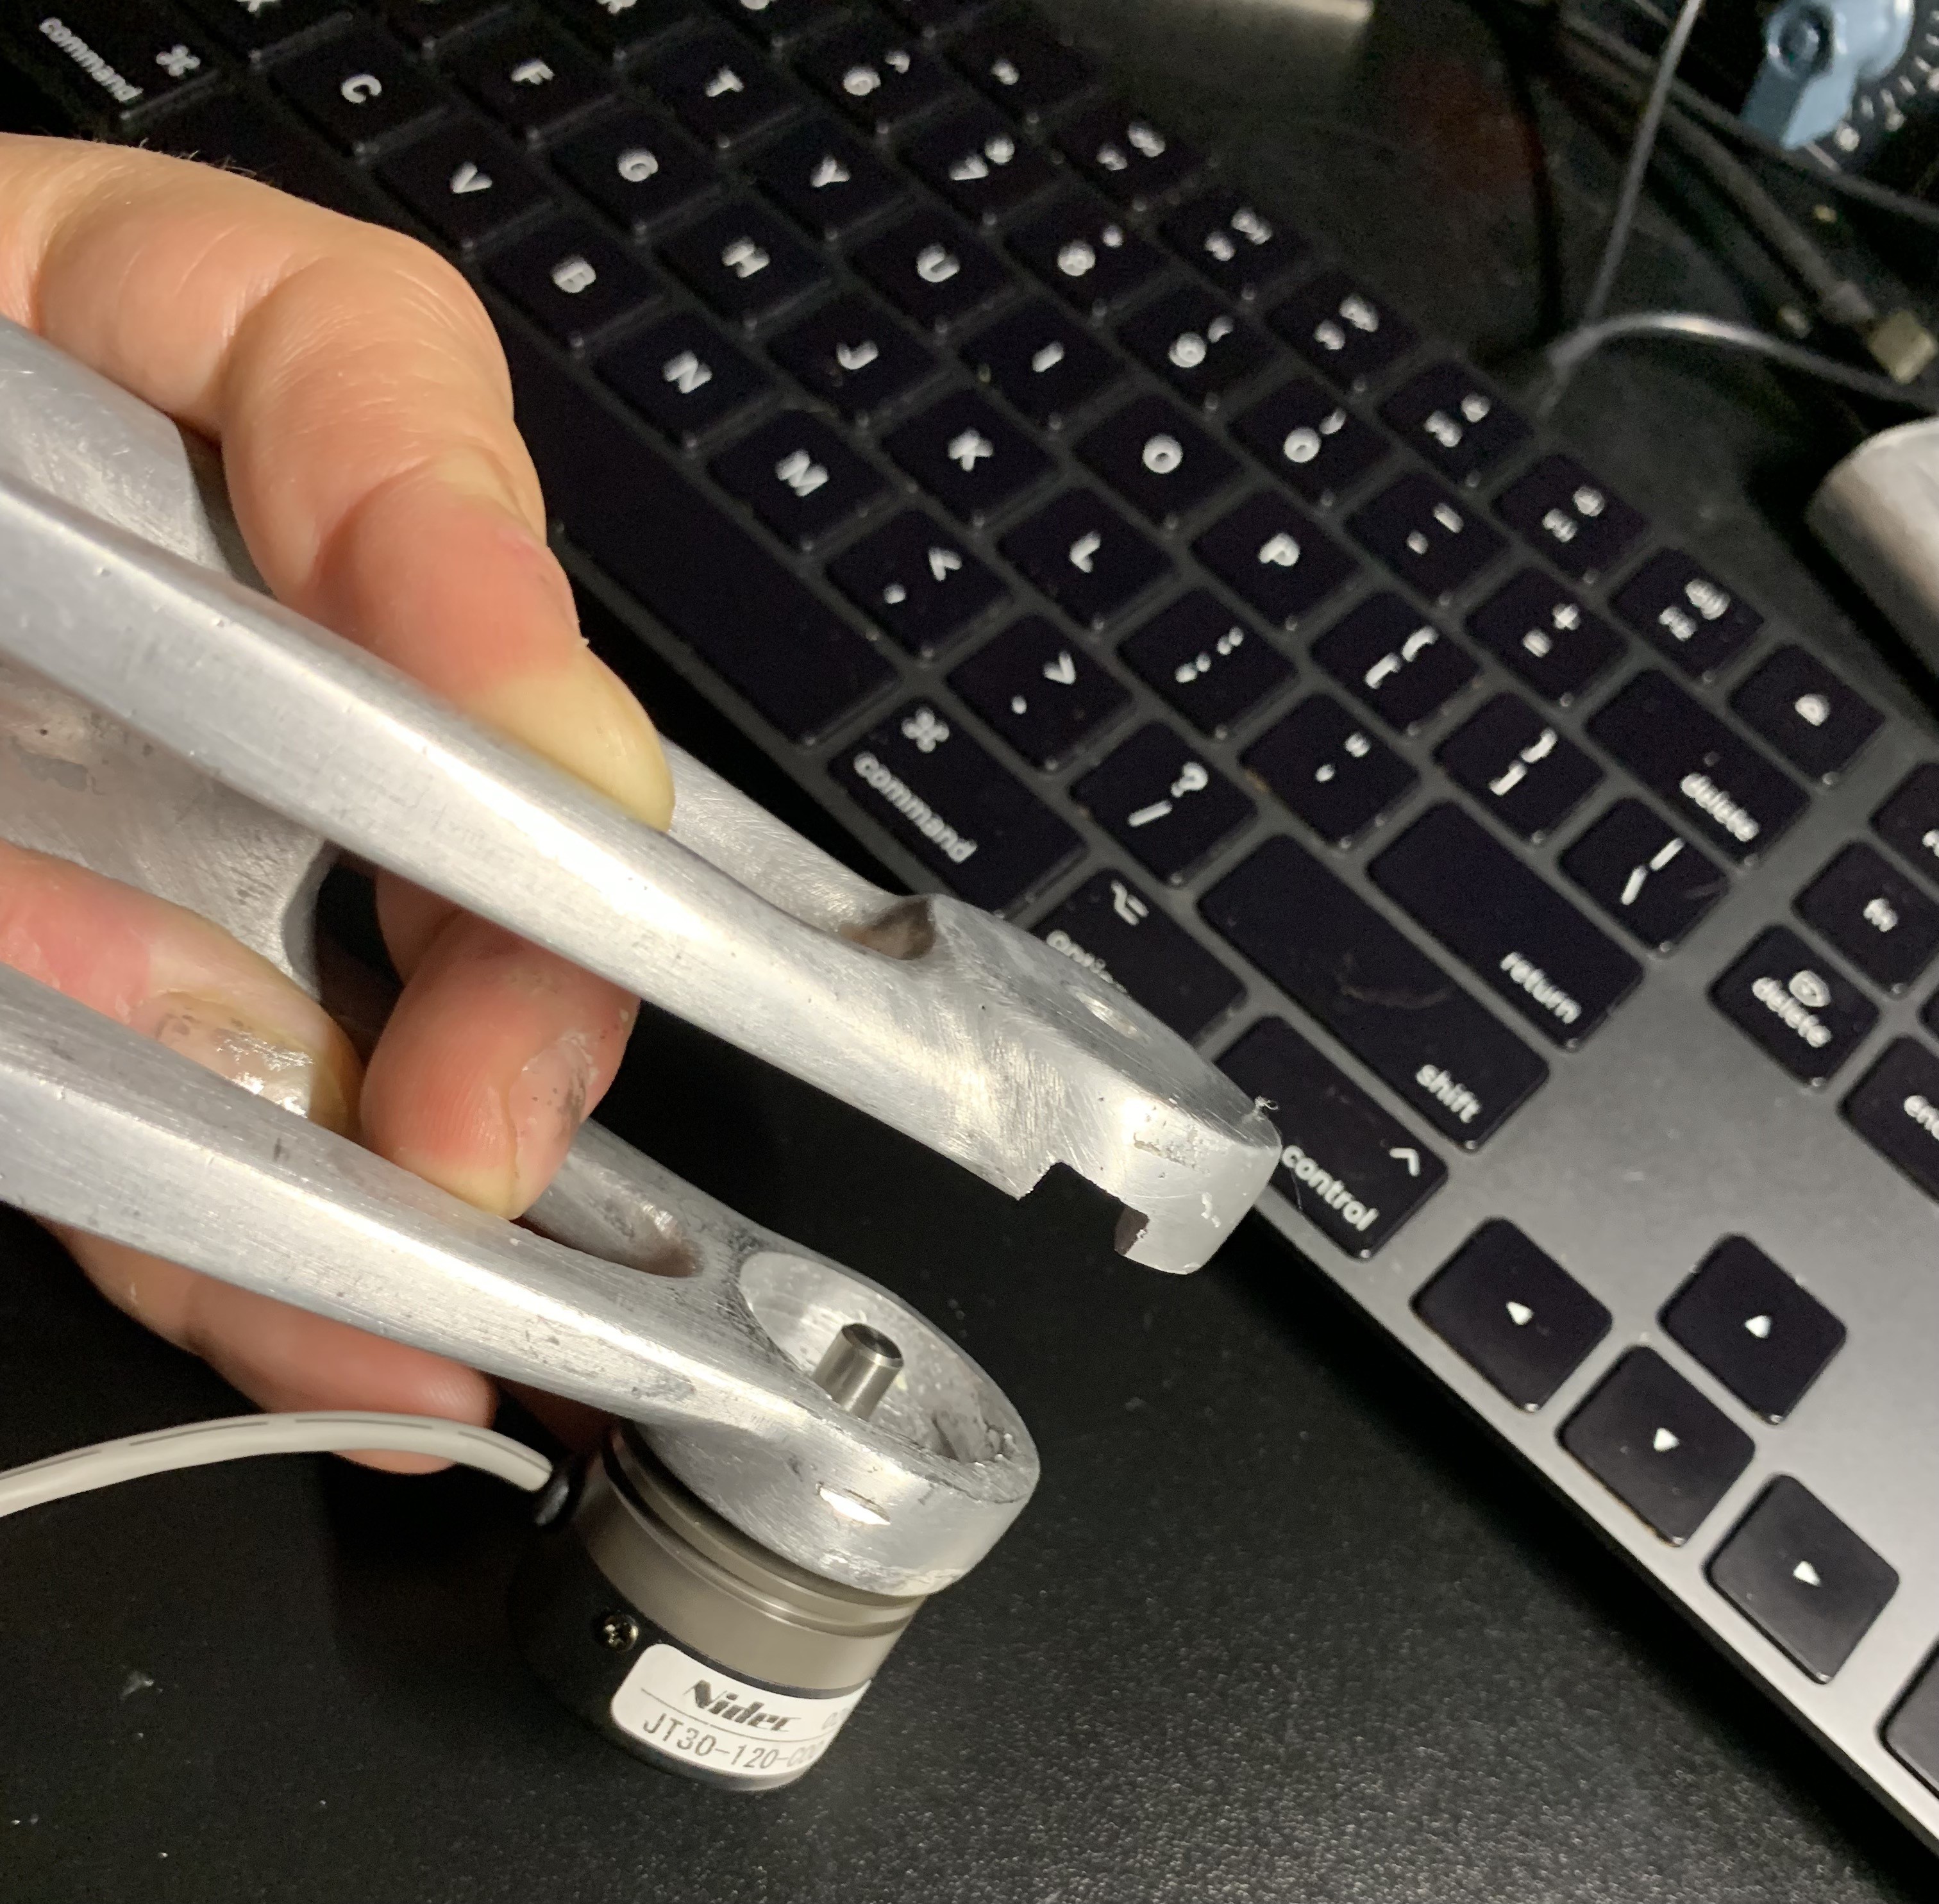
Next up is JT-30 absolute encoder from DigiKey (5V and 12V logic available):
https://www.digikey.com/en/products/detail/nidec-copal-electronics/JT30-120-C00/6469478
Incredibly smooth motion, very light despite sweet all-metal construction, perfectly standard 6mm D-shaft that fits all robot parts. Not only does it have strong, protected leads, but actually ships with shielded audio-grade cable built-in. The same cable I bought separately to use specifically for potentiometers so that my readings don't jump around too much. The downside is that the body is still pretty big so it cannot be concealed, and the shaft cannot be removed to be replaced with a longer shaft. That severely restricts where you can place them, since somehow you need to connect this shaft to the shaft that the robot arm rotates on.
![]()
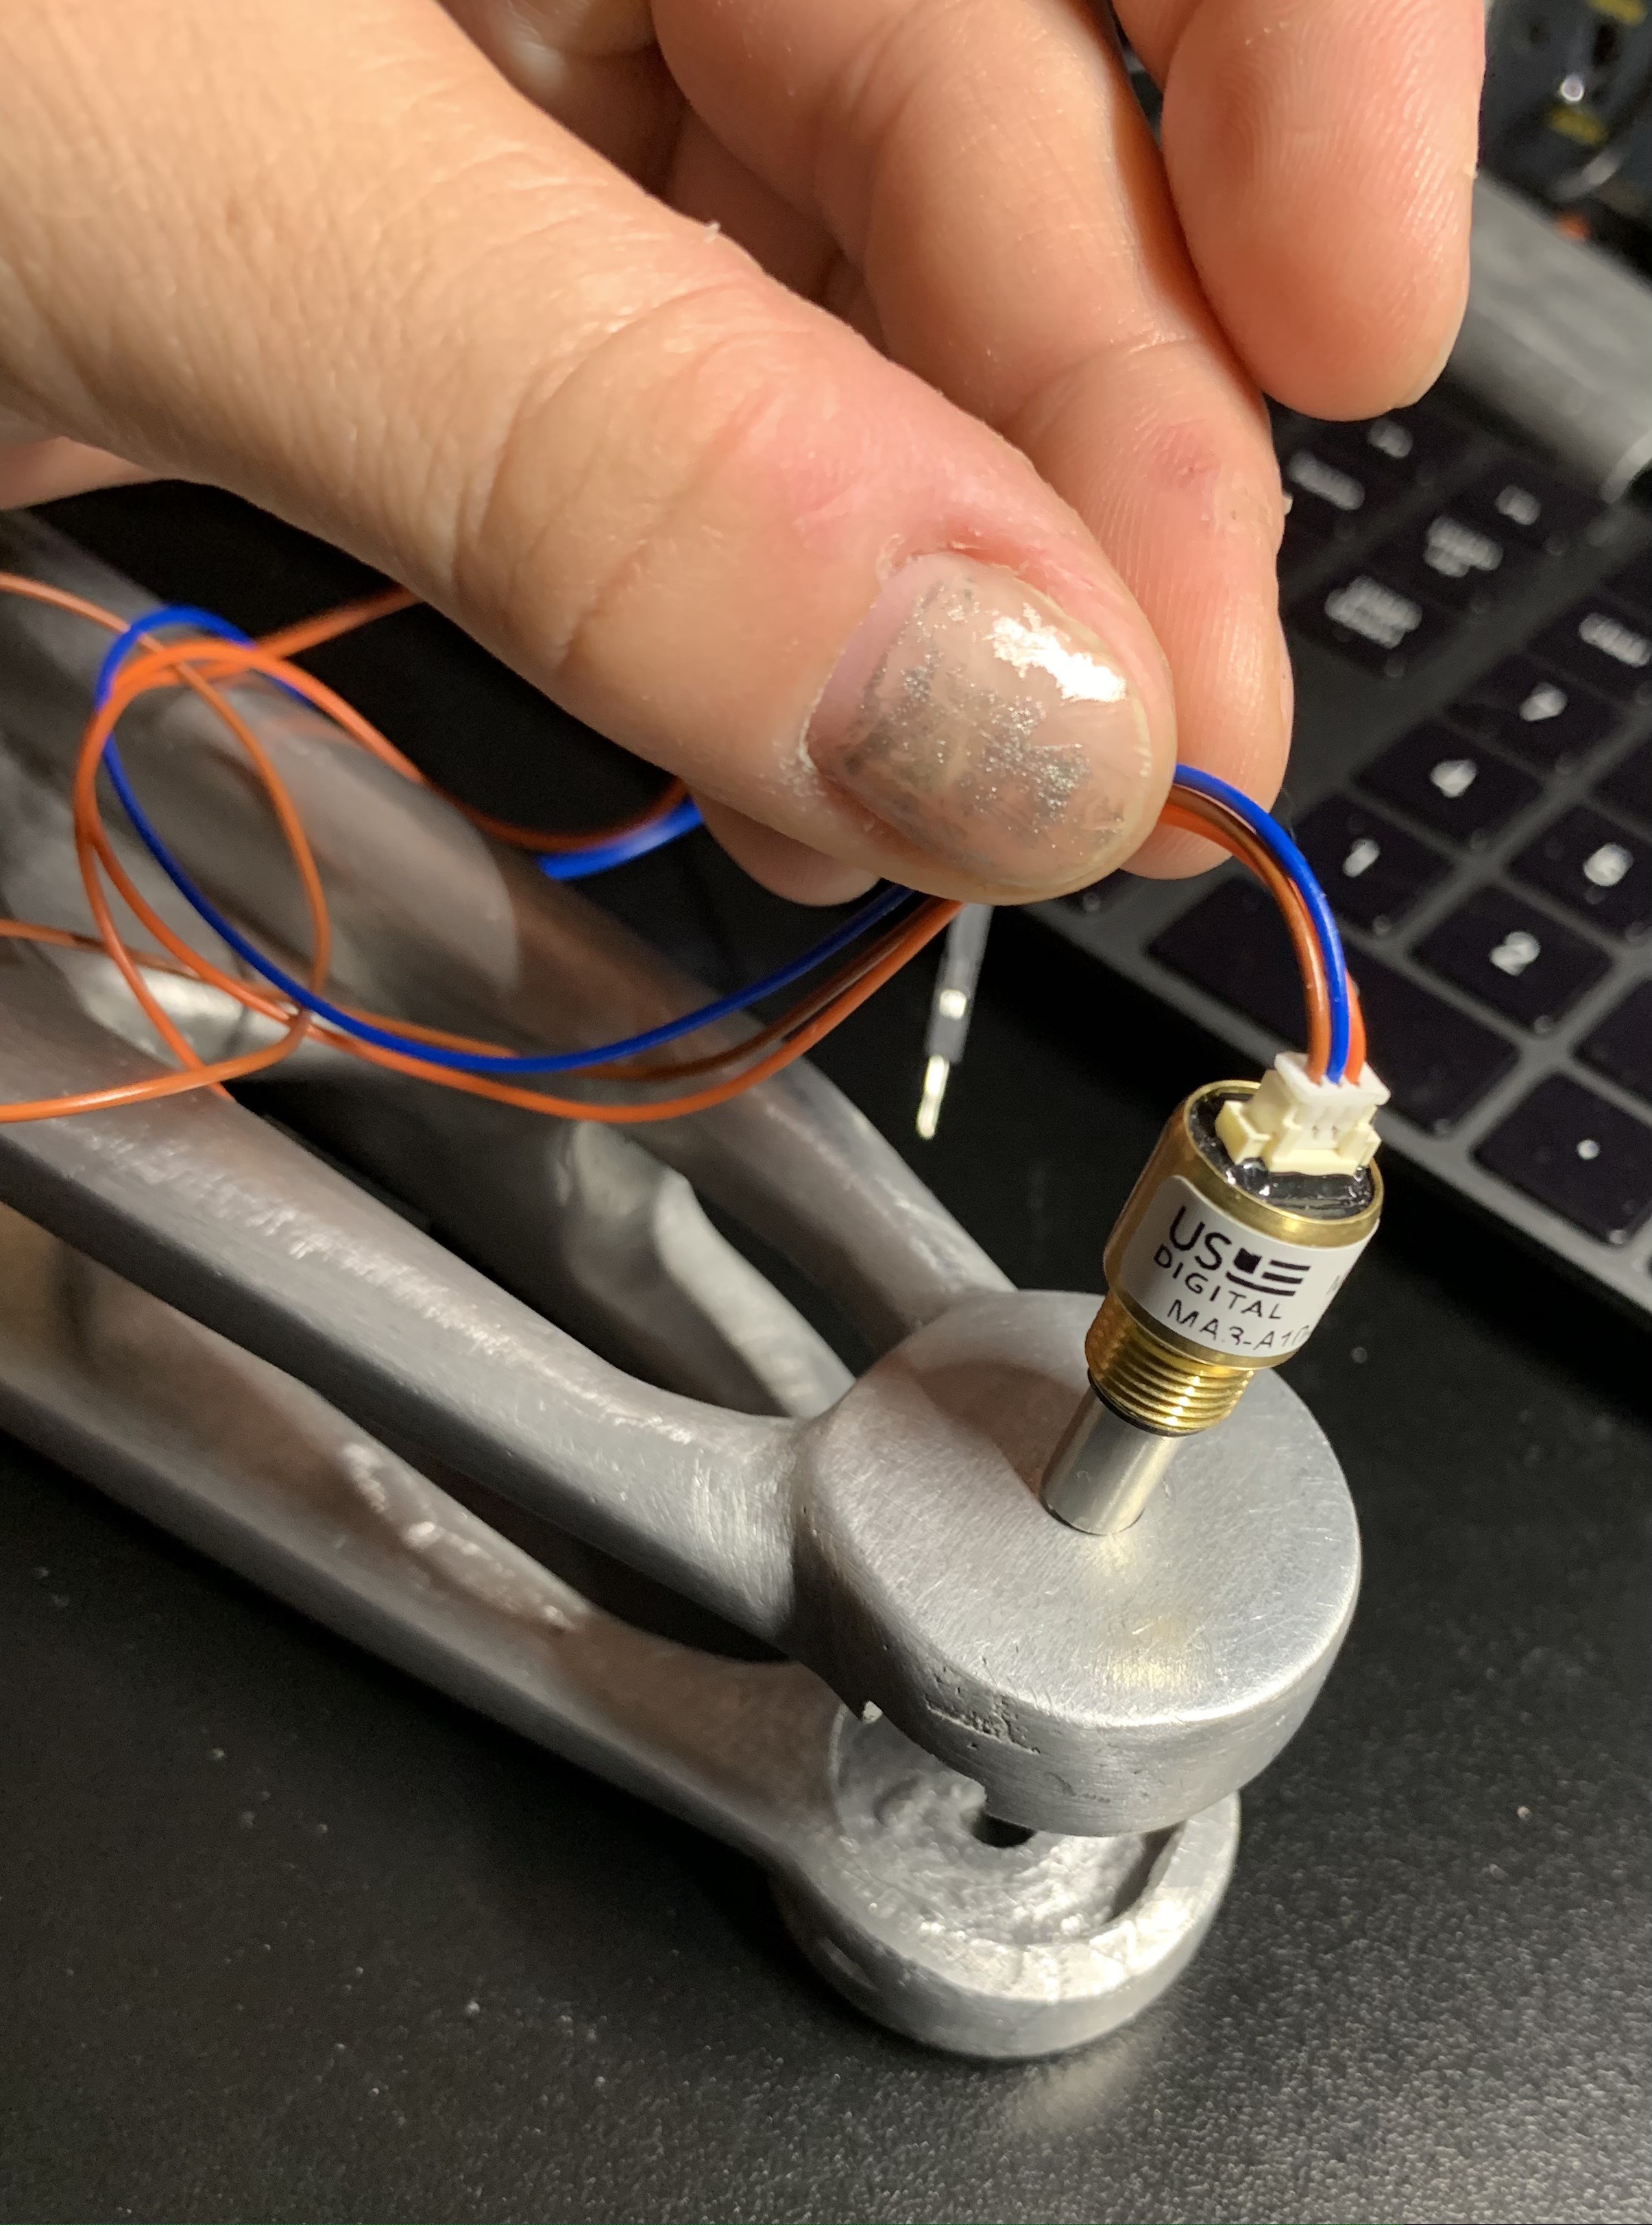
Next we have MA-3 from US Digital:
https://www.usdigital.com/products/ma3
![]()
Very nice all-metal construction, silky-smooth motion, and disconnect-able JST leads, easy to place by screwing it in, but the body is too long to be concealed. It would be better if it was a larger diameter and shorter. The shaft is 1/8" (no 6mm option unless you order custom) and can not be replaced with a longer shaft, which means you have to find a way to connect it to the rotation shaft of the arm bone. Too bad! I hear they can be custom-ordered with shafts of different diameters and lengths, but it would require a huge order quantity.
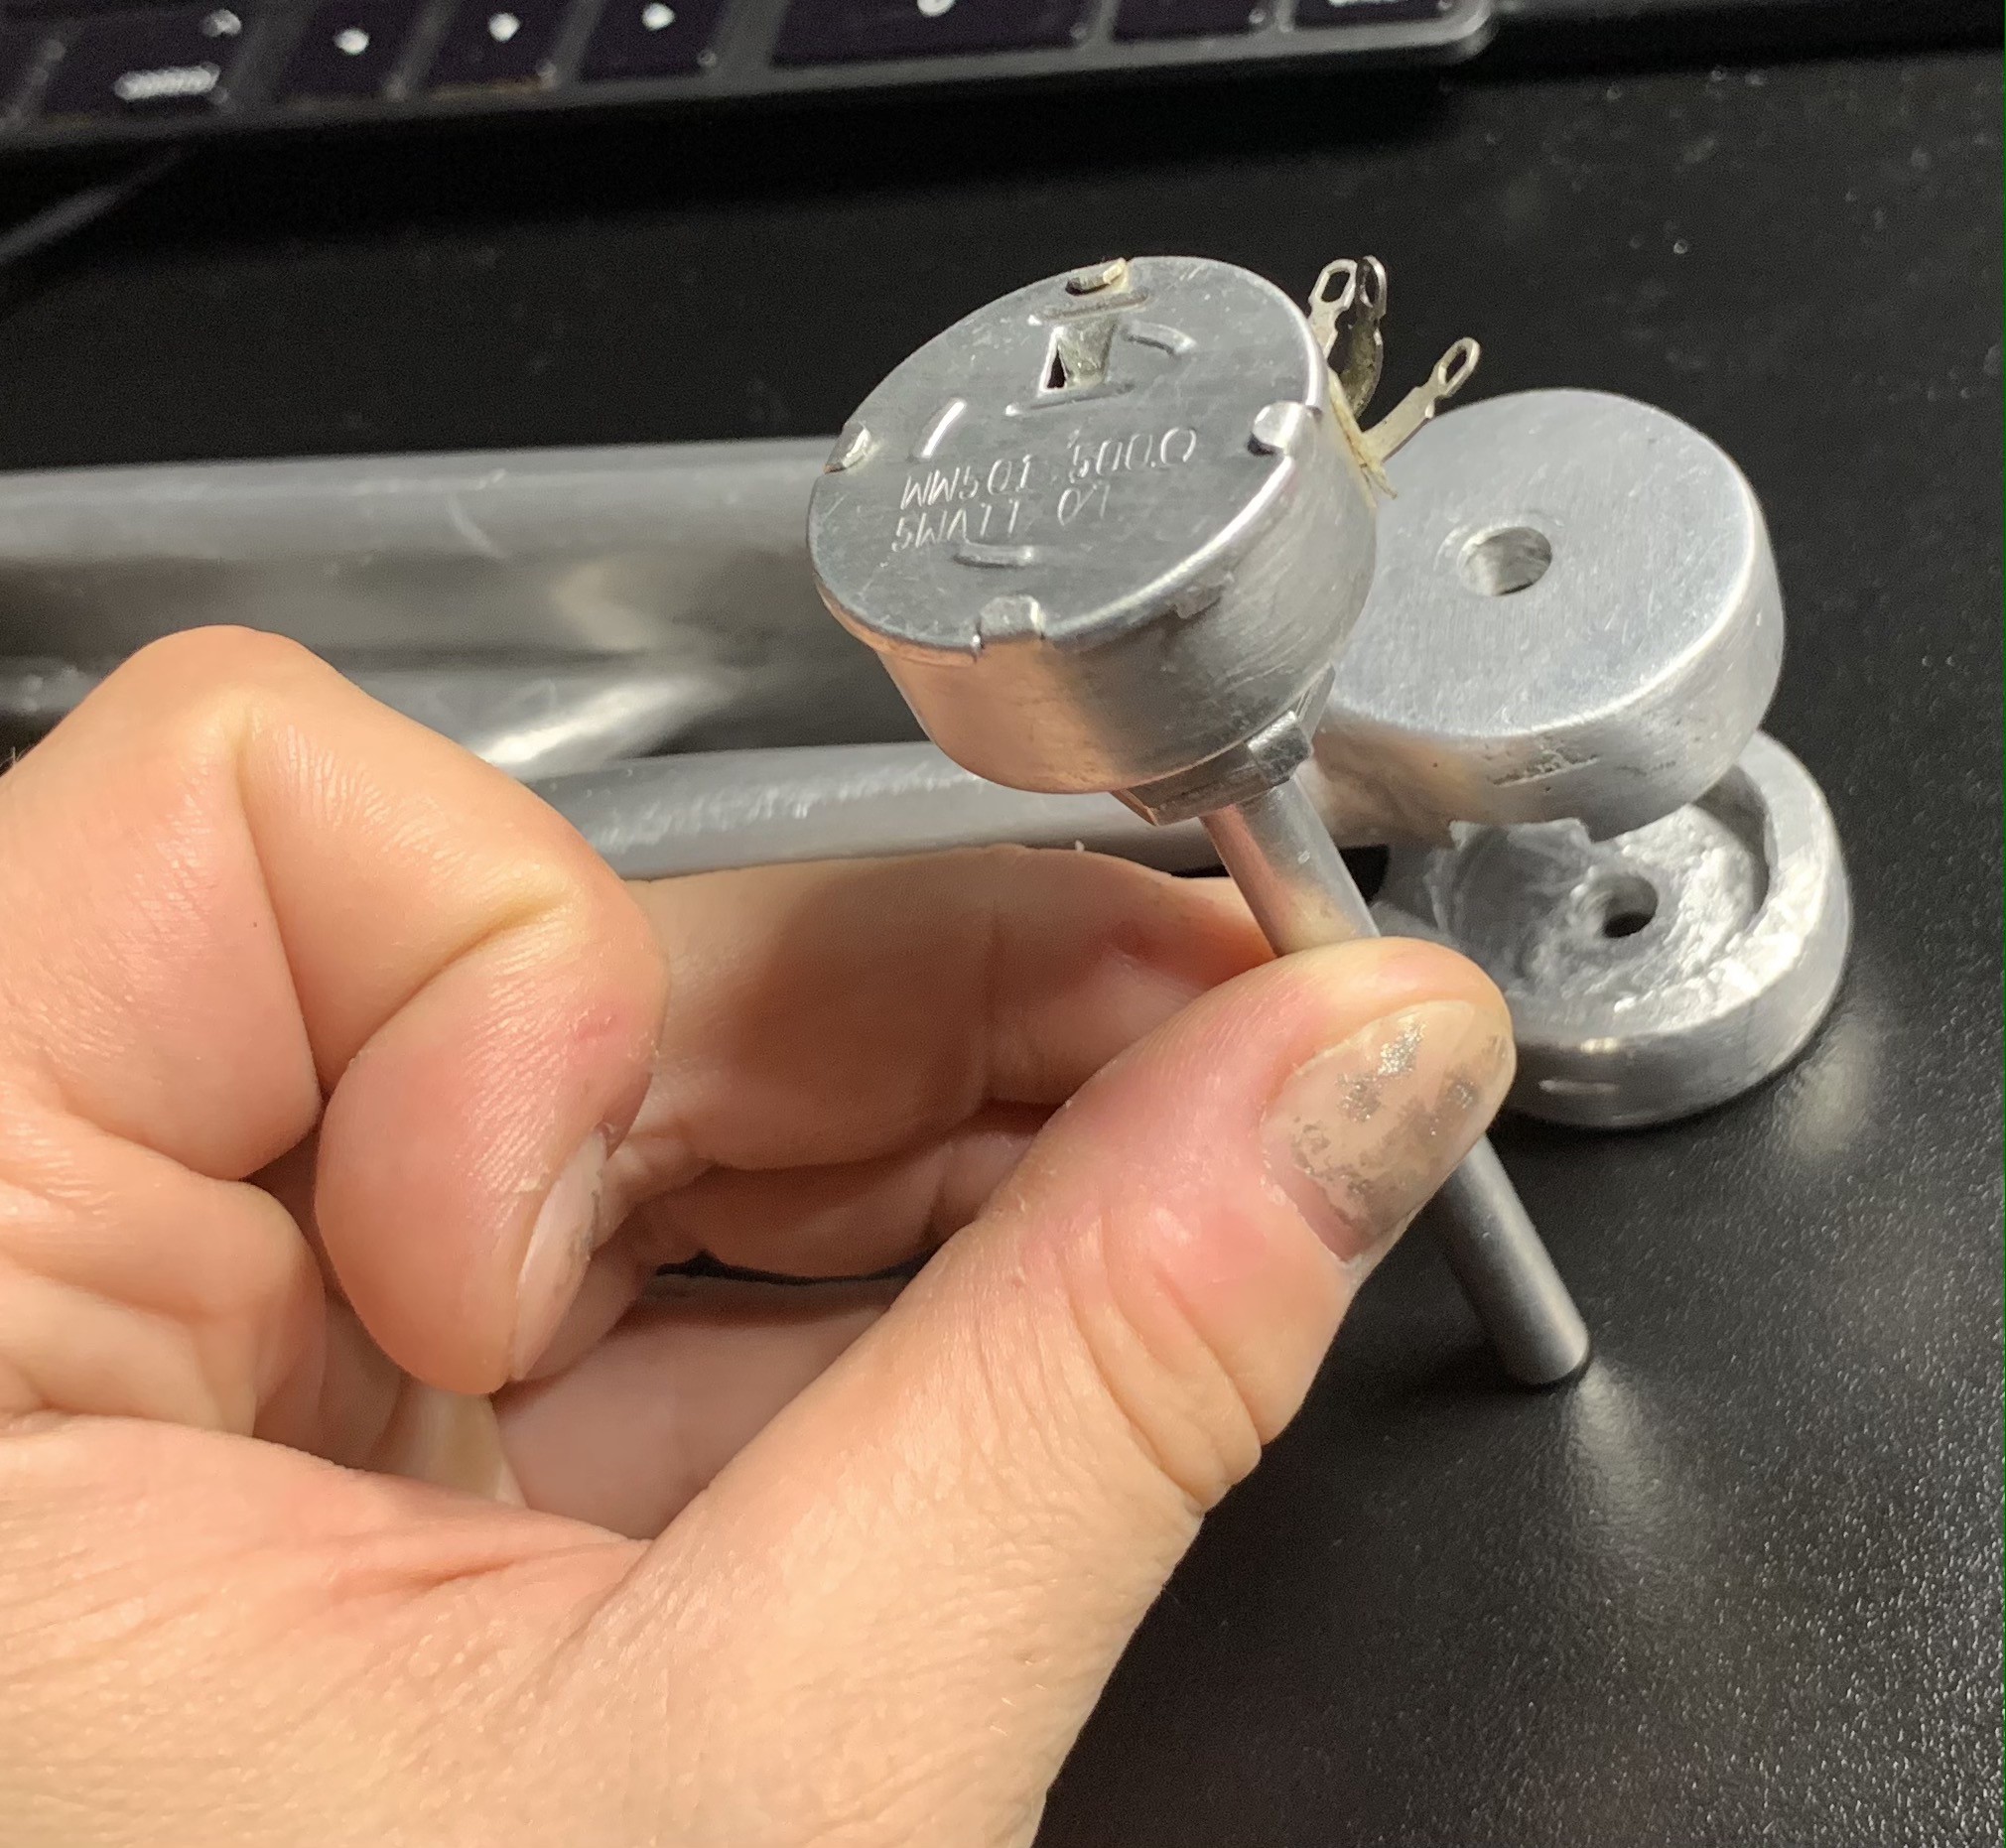
Then we have this $5 long-shaft linear potentiometer from eBay, likely made in India (Vishay, etc):
https://www.ebay.com/itm/265292080191
![]()
The body is large enough that it cannot be concealed, and strong enough construction that it cannot be re-skinned (any attempts at modification would just destroy it, believe me, I tried). The shaft is 1/8" which would require re-drilling a 6mm shaft to 1/8 (again, hard to make a hole smaller if I decided to undo). On the positive, the construction is very strong, the long shaft can be sawed off if needed and function as the actual rotation shaft of the robot arm. The contacts are fairly nice and won't be fatigued easily.
If you were wondering what's inside of these, here you go :)
![]()
Last one that's worth mentioning is AndyMark AM-4179:
https://www.andymark.com/products/lamprey-absolute-encoder
![]()
This is another luxury hall-effect absolute encoder (about $40 each) but too big for many human or animal-sized robot limbs. I will try it out on the robot torso since I still need a way to track the rotation of the entire upper body.
It's a little flimsy but easy to mount if you have the space and very easy to conceal, again, if the joint has a large enough diameter because it's so low-profile. There are complaints in the comments that the magnet can break easily but it is available for purchase separately so if you're serious about these maybe order an extra magnet.
-
Trying out more encoders
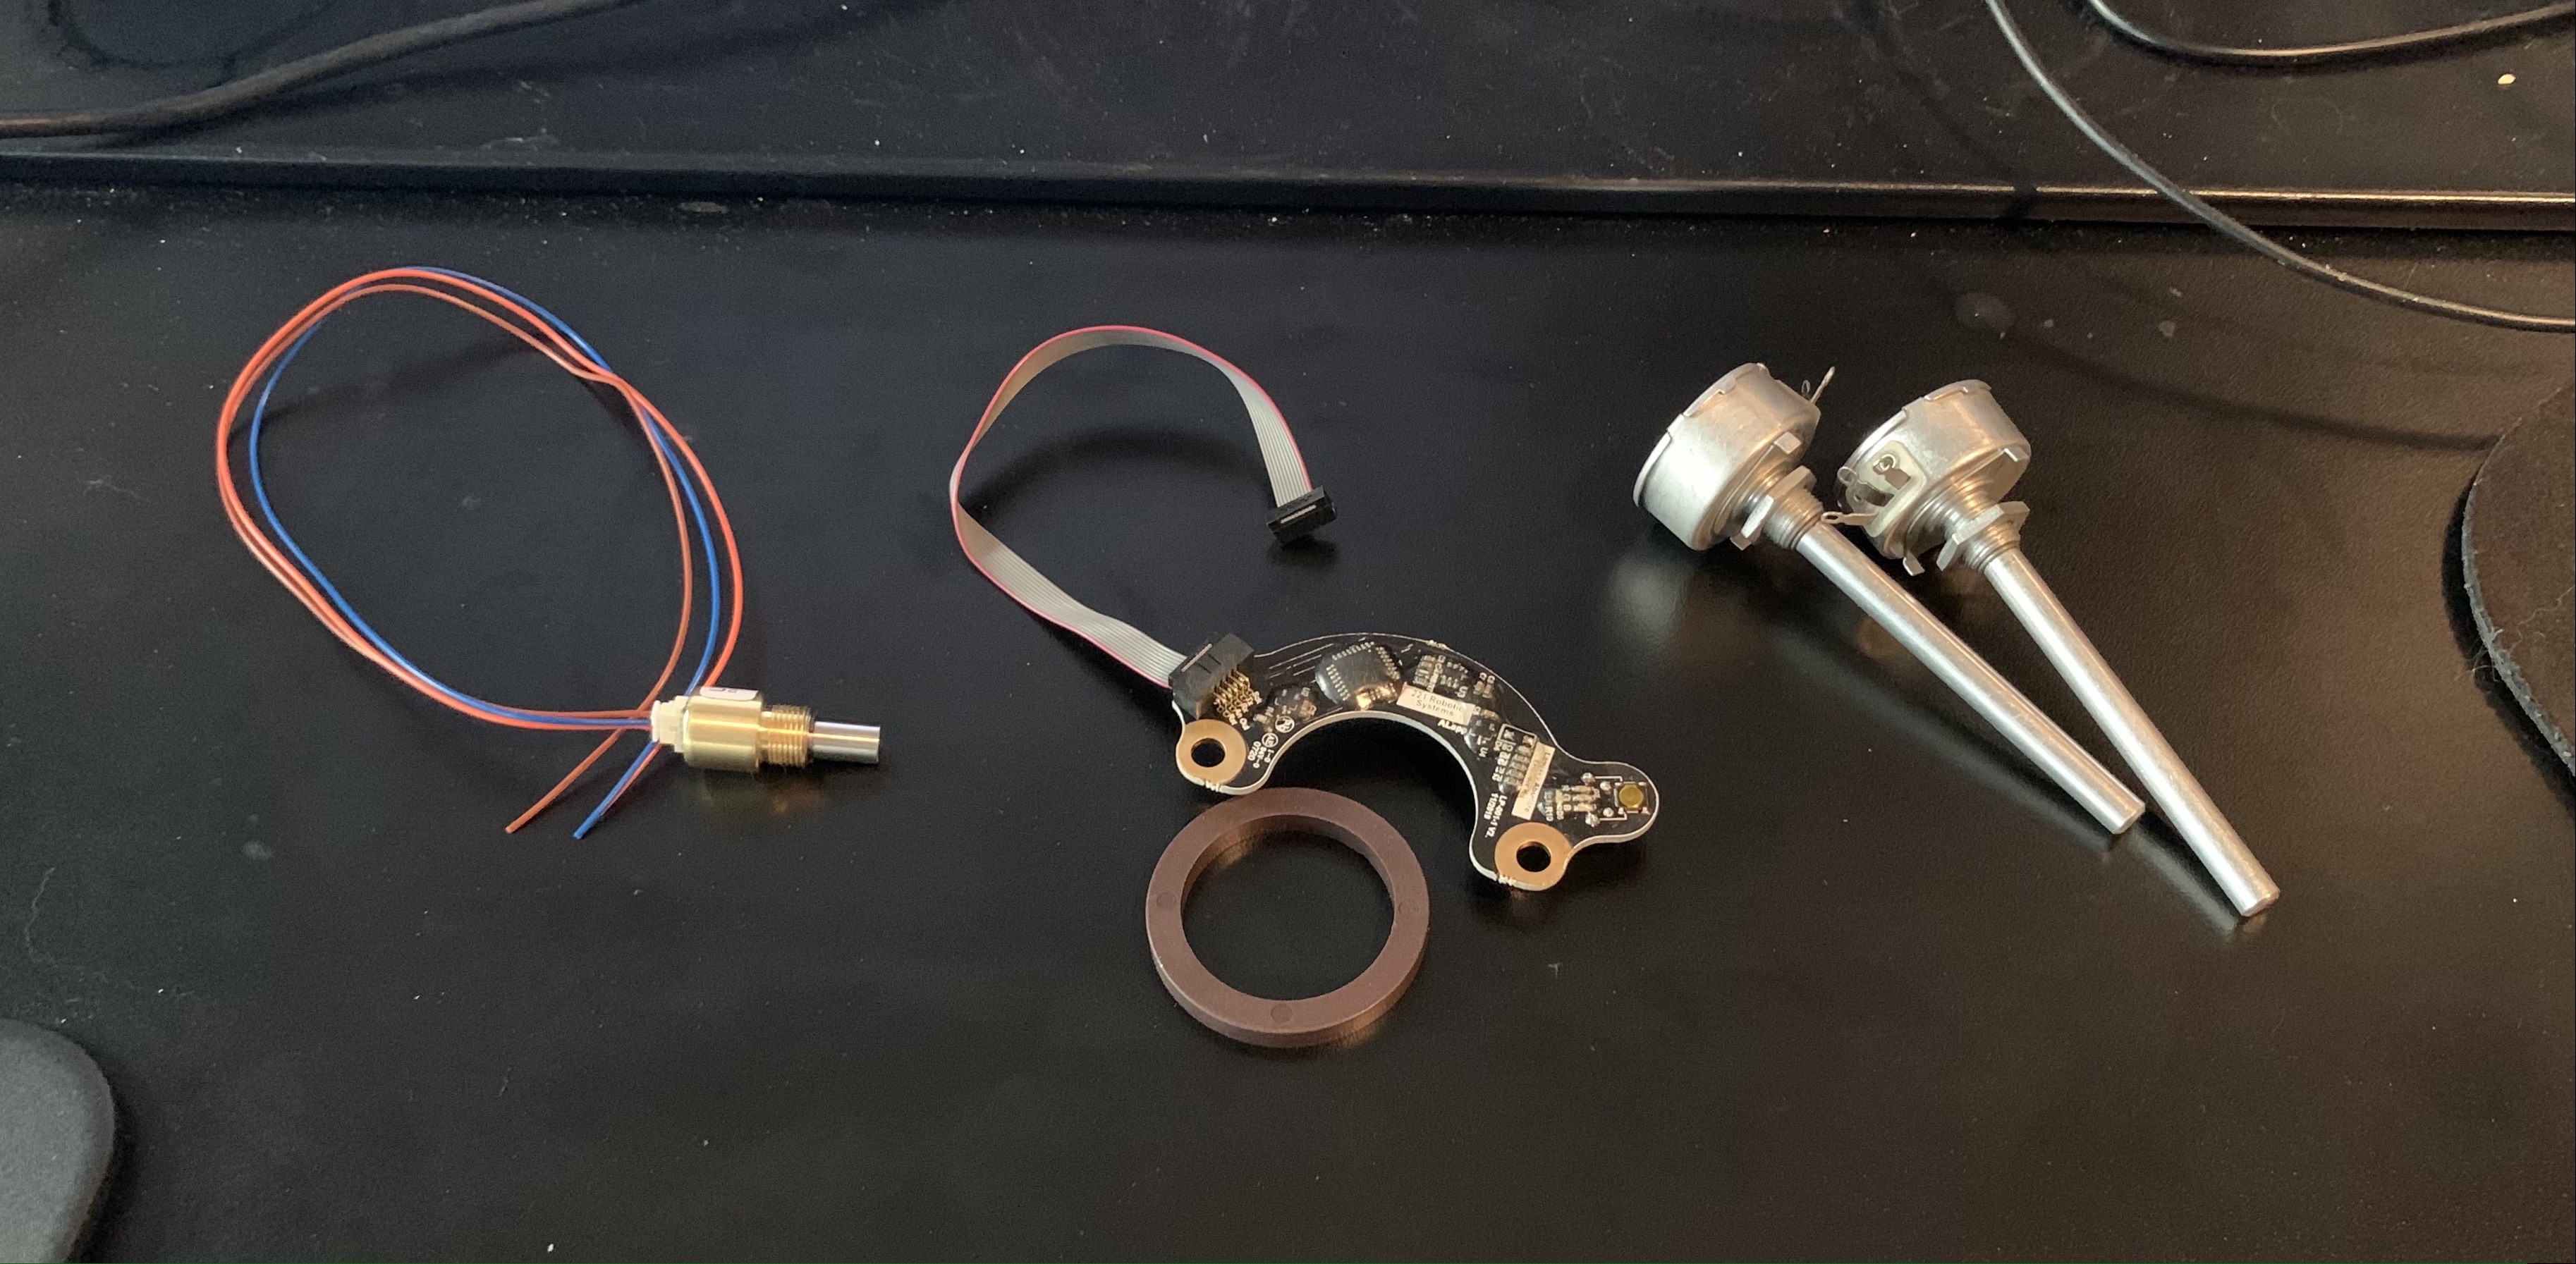
08/31/2021 at 15:23 • 0 commentsOrdered more encoders to test them with the arms. So far I like the little gold one. It's low profile, doesn't look too difficult to integrate if I can replace the 1/4" shaft with a longer one.
![]()
-
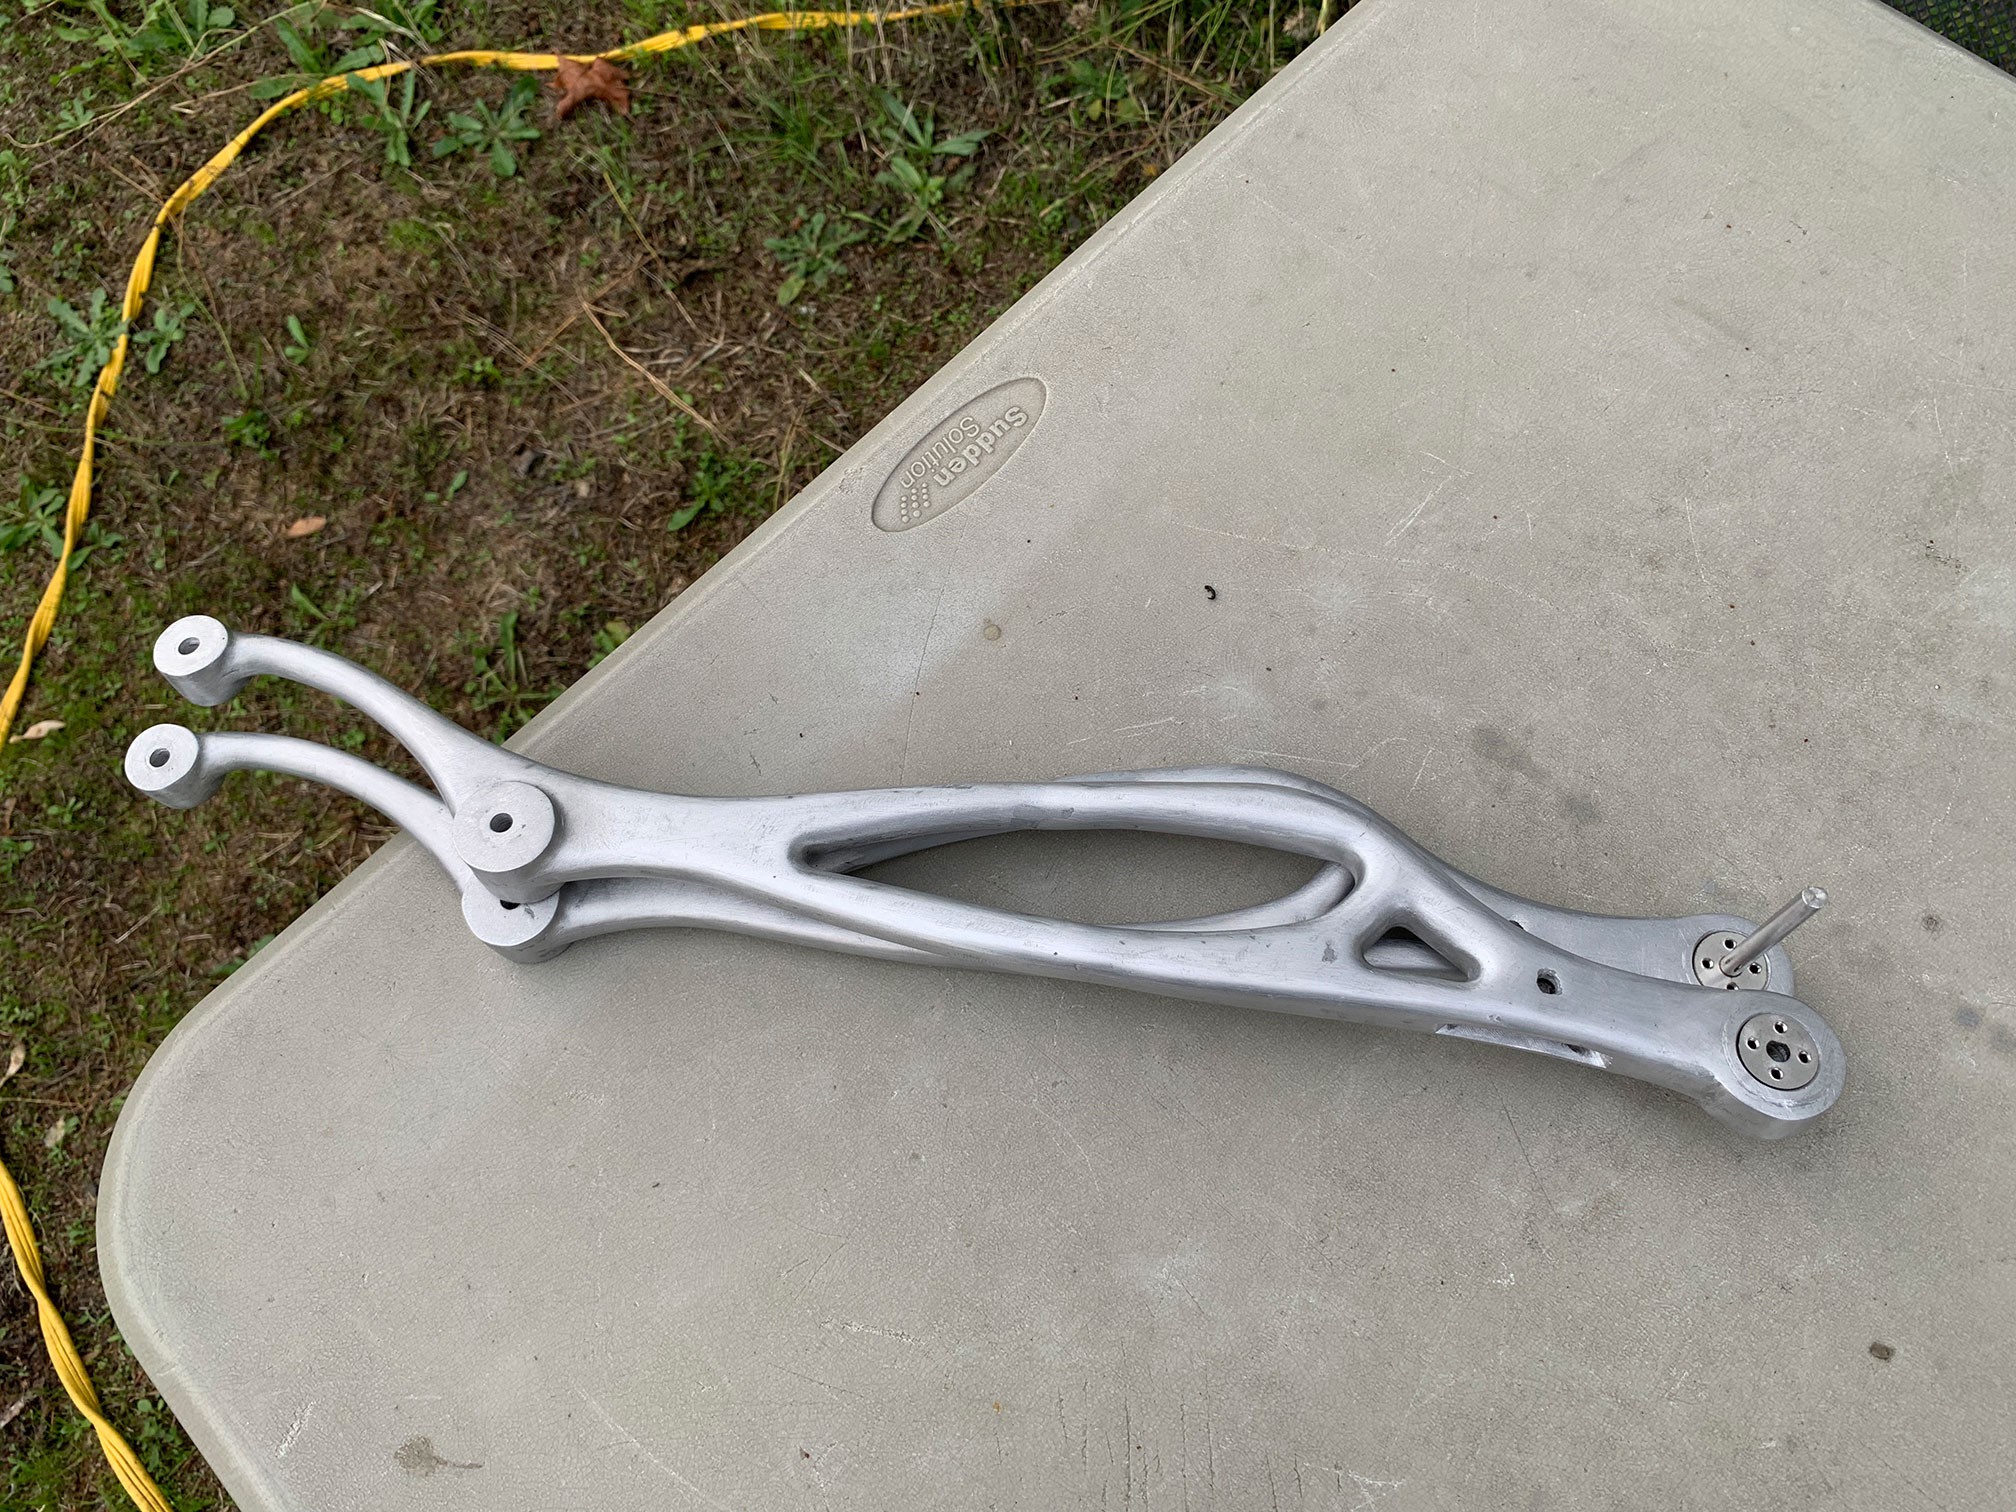
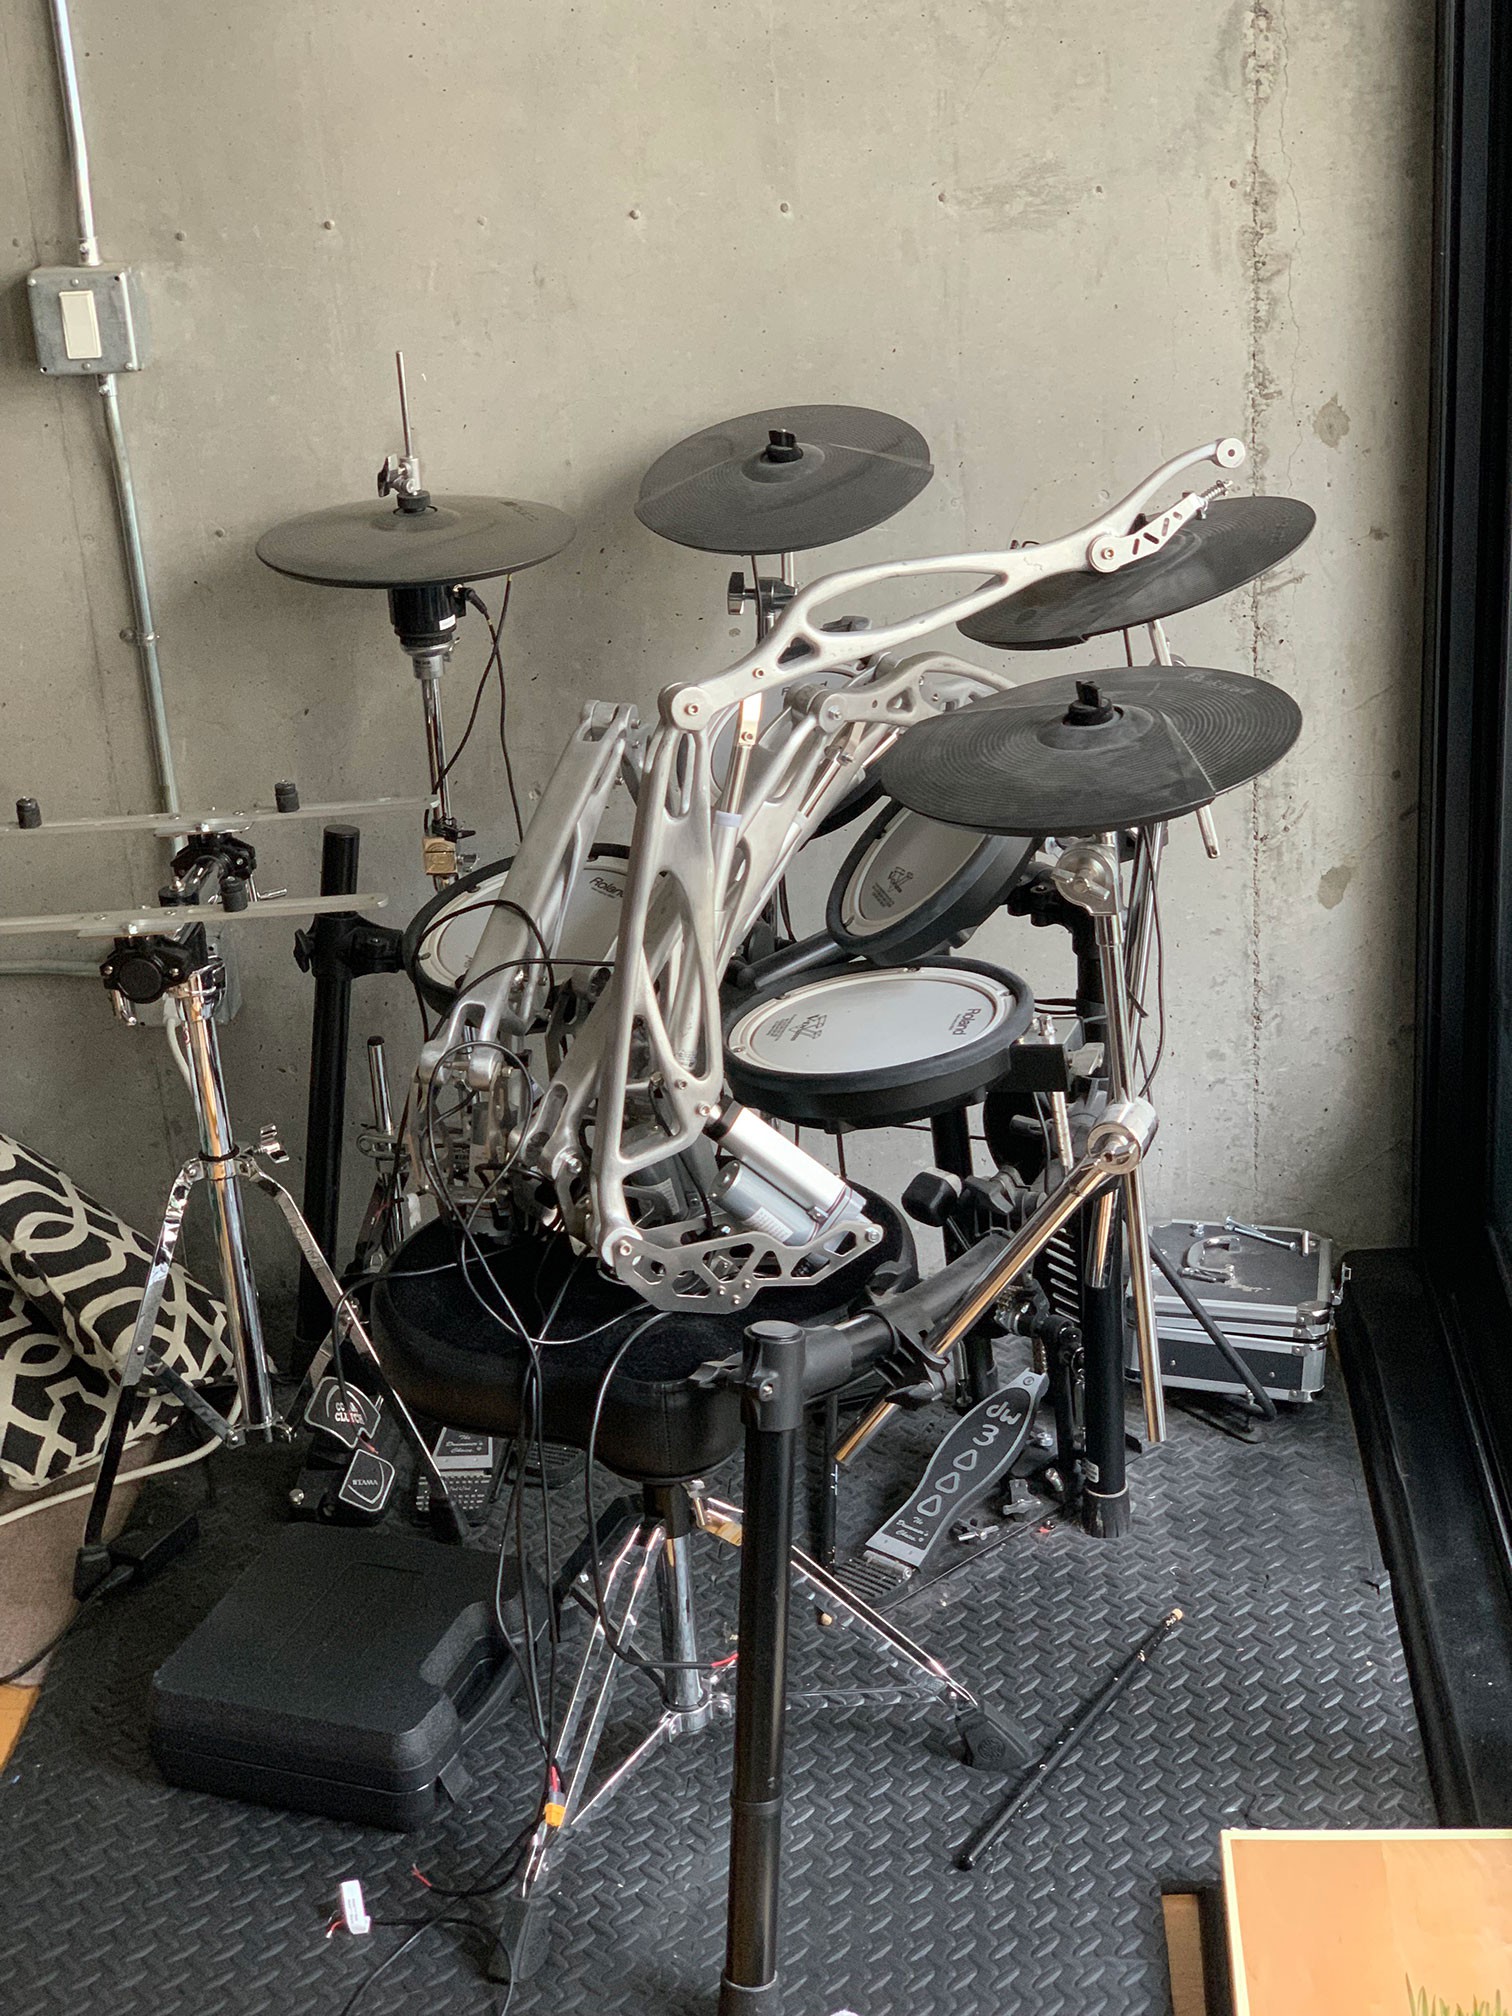
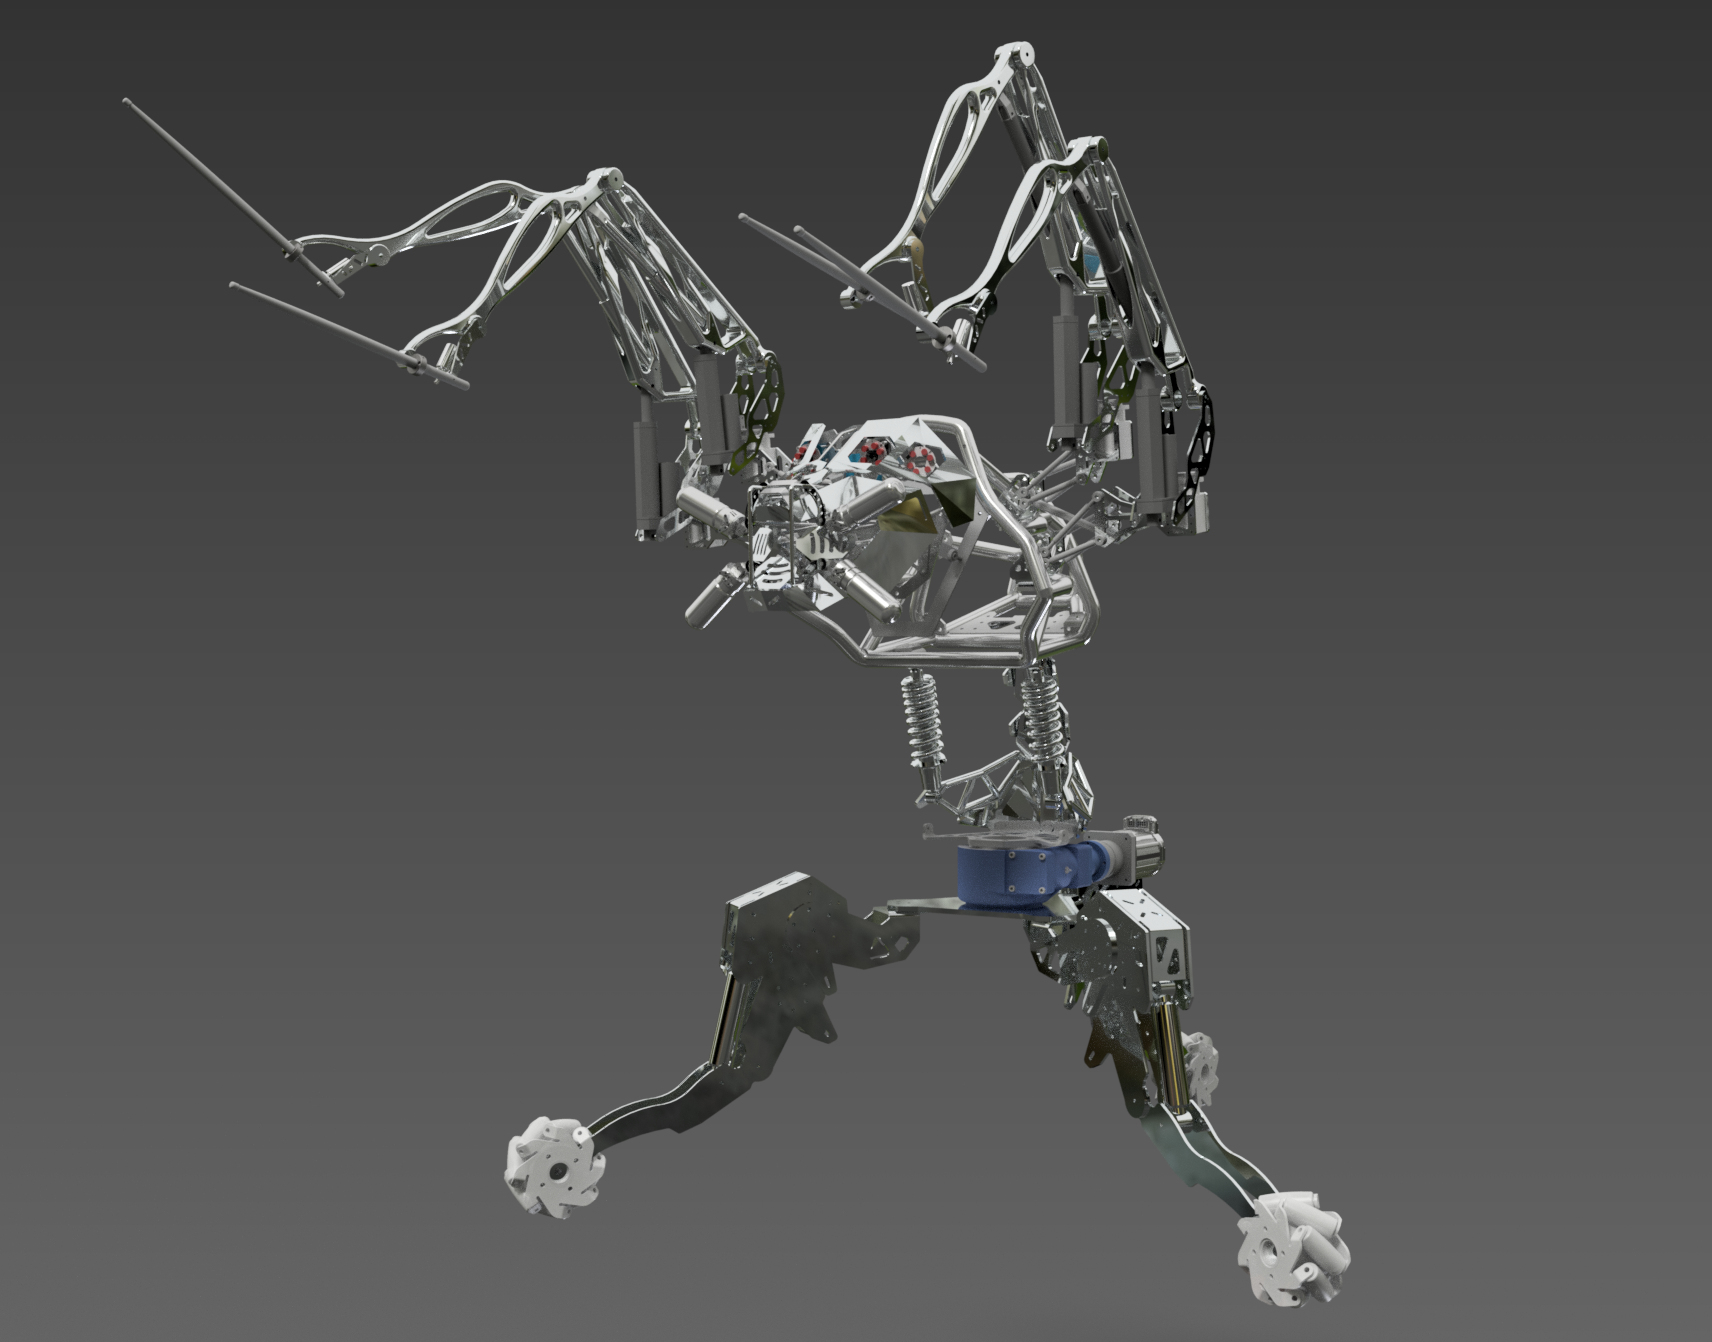
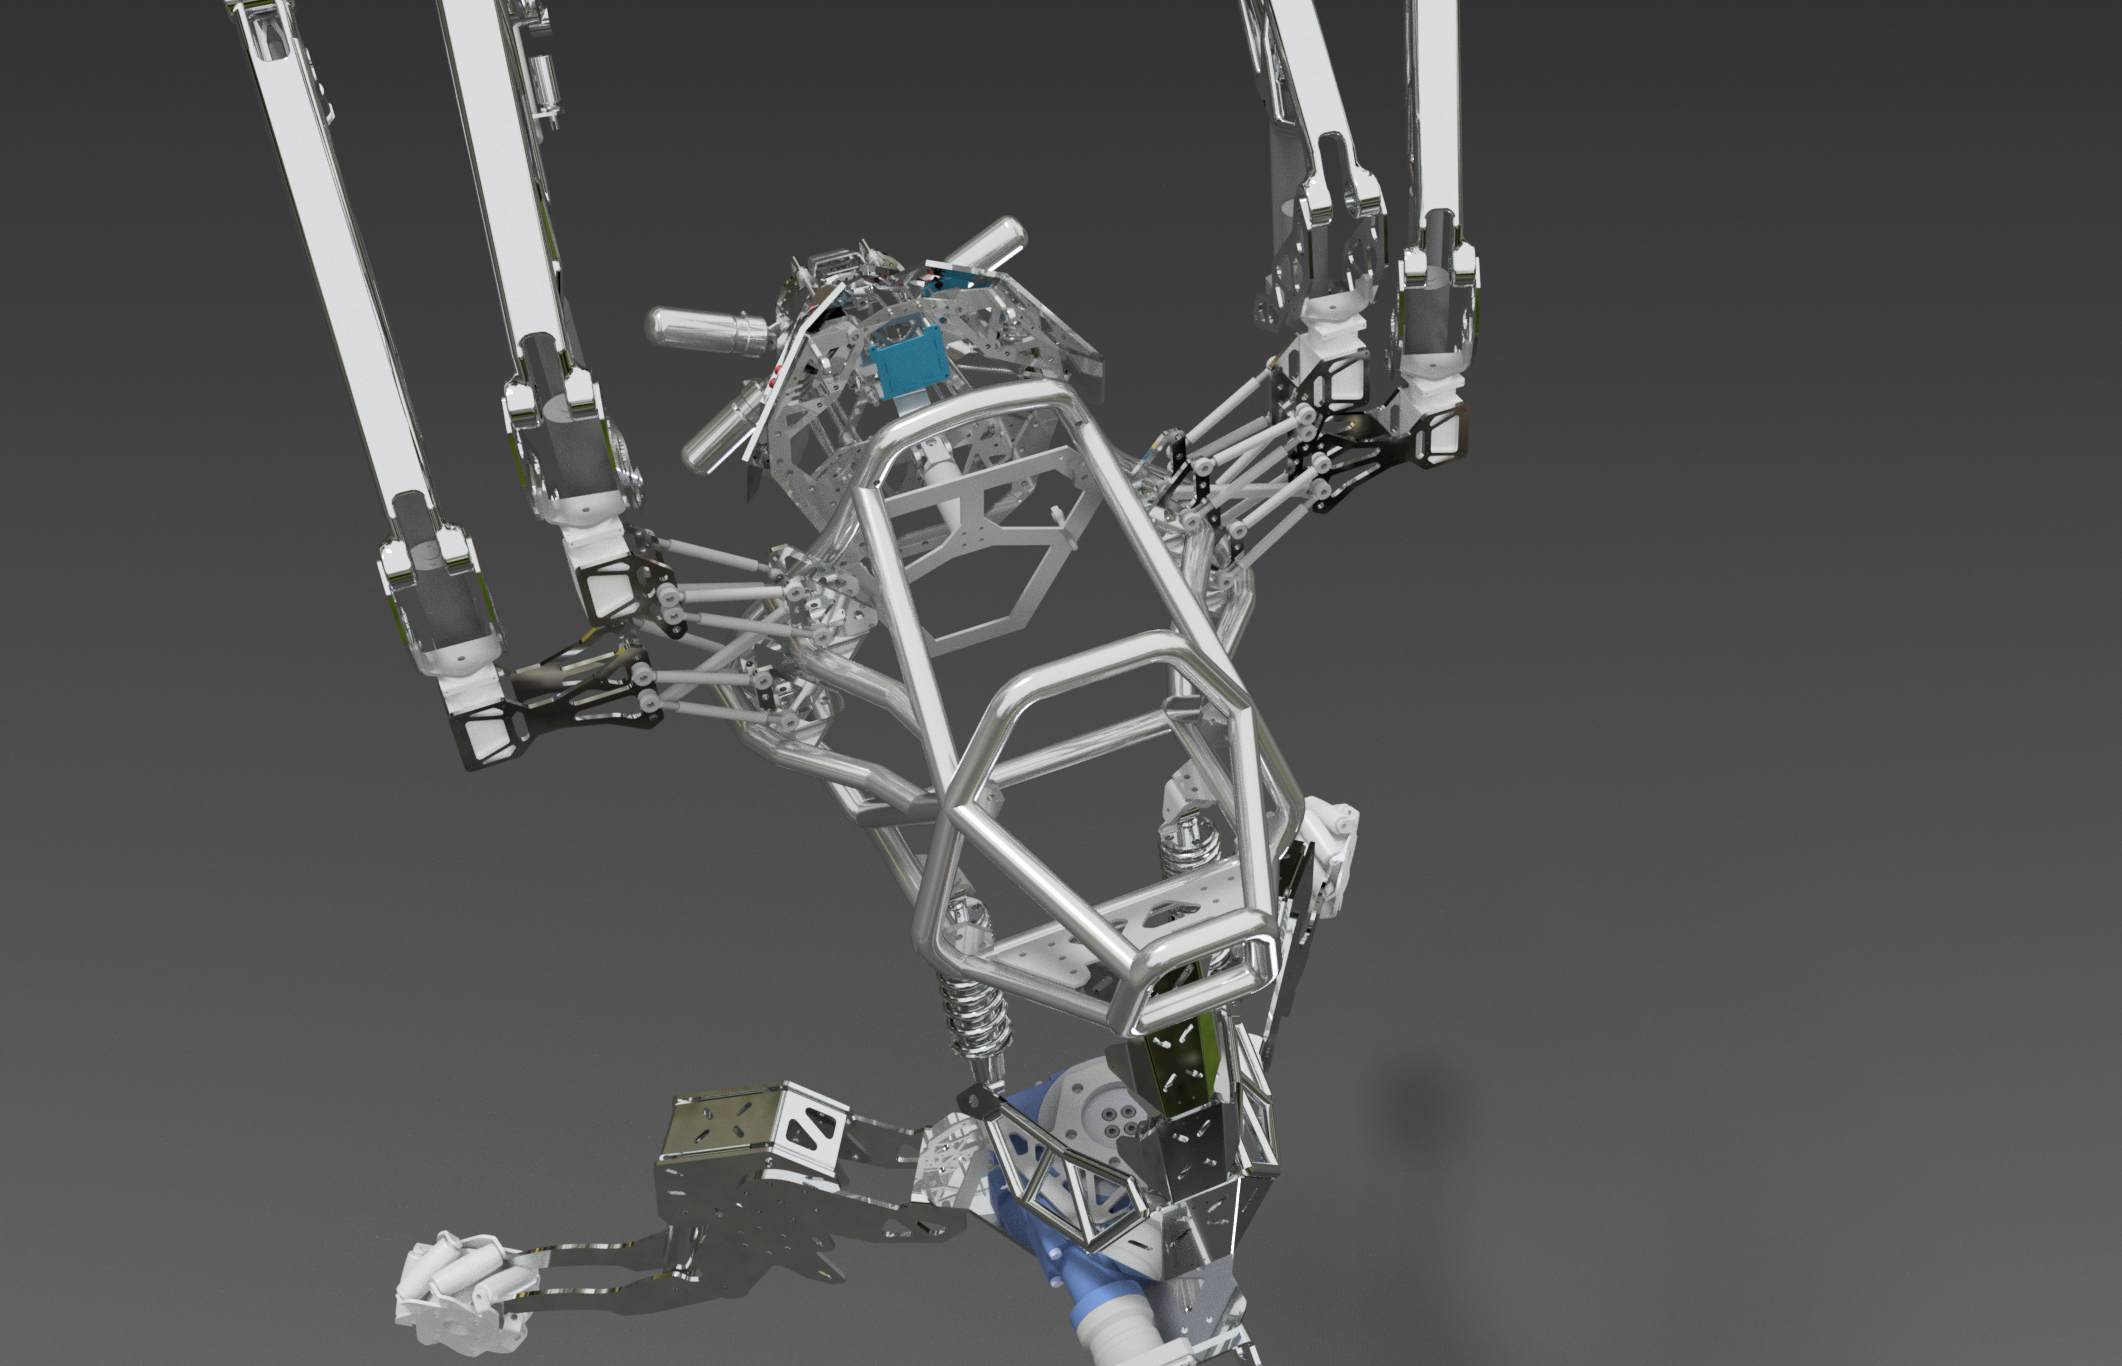
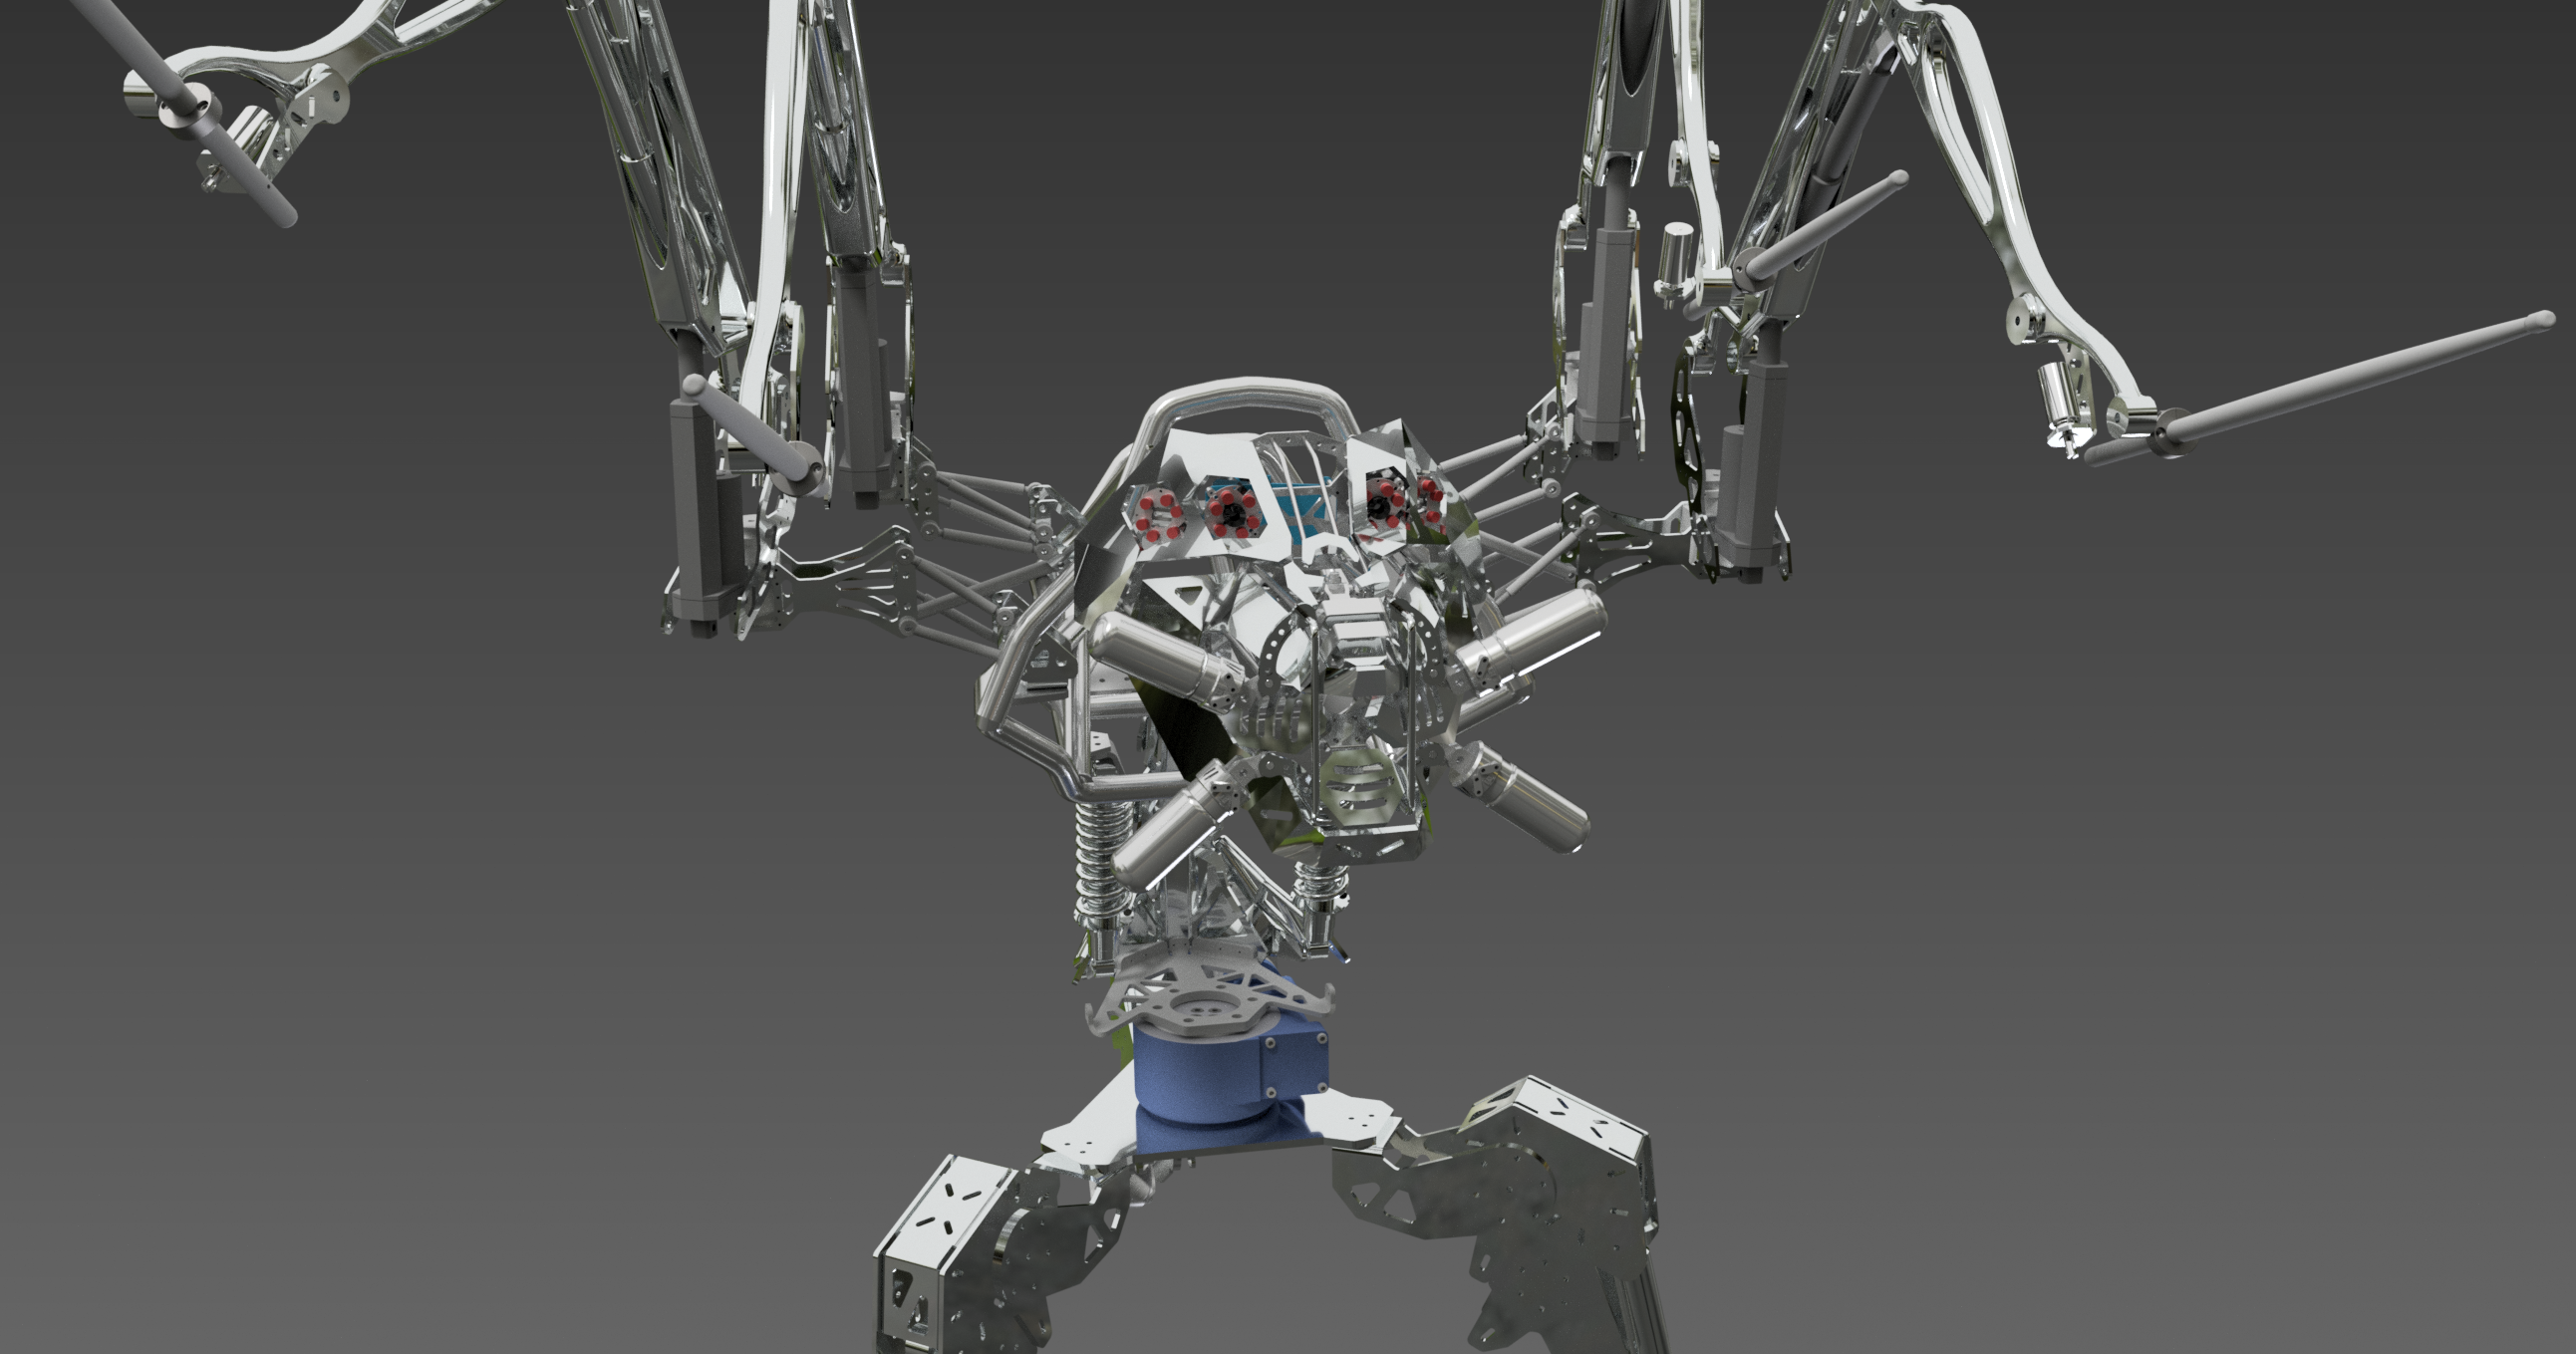
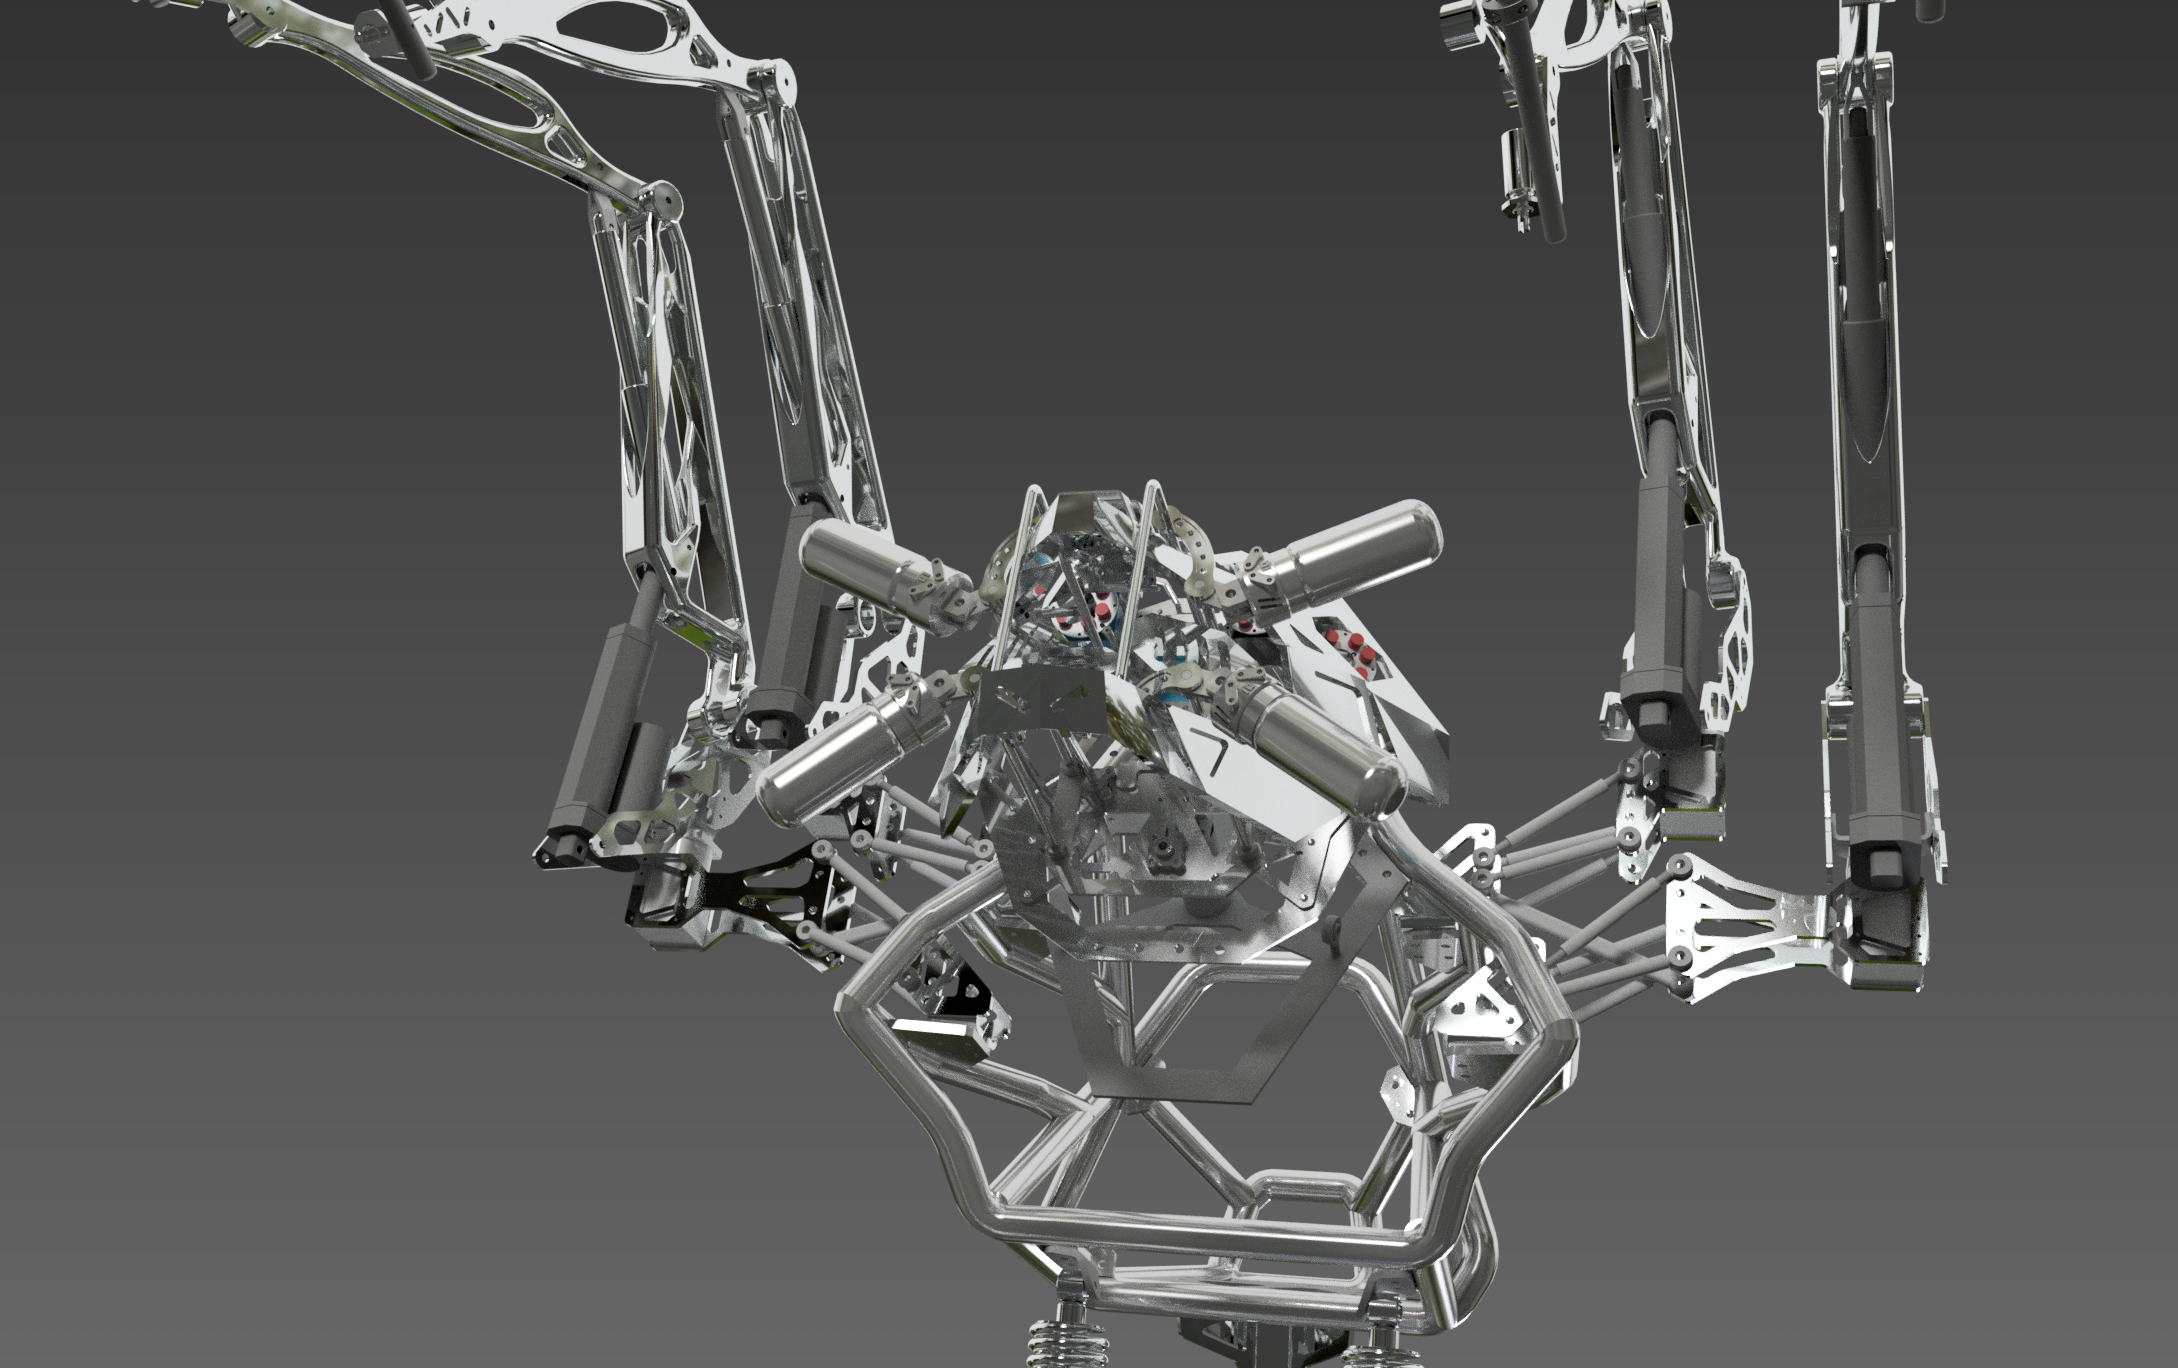
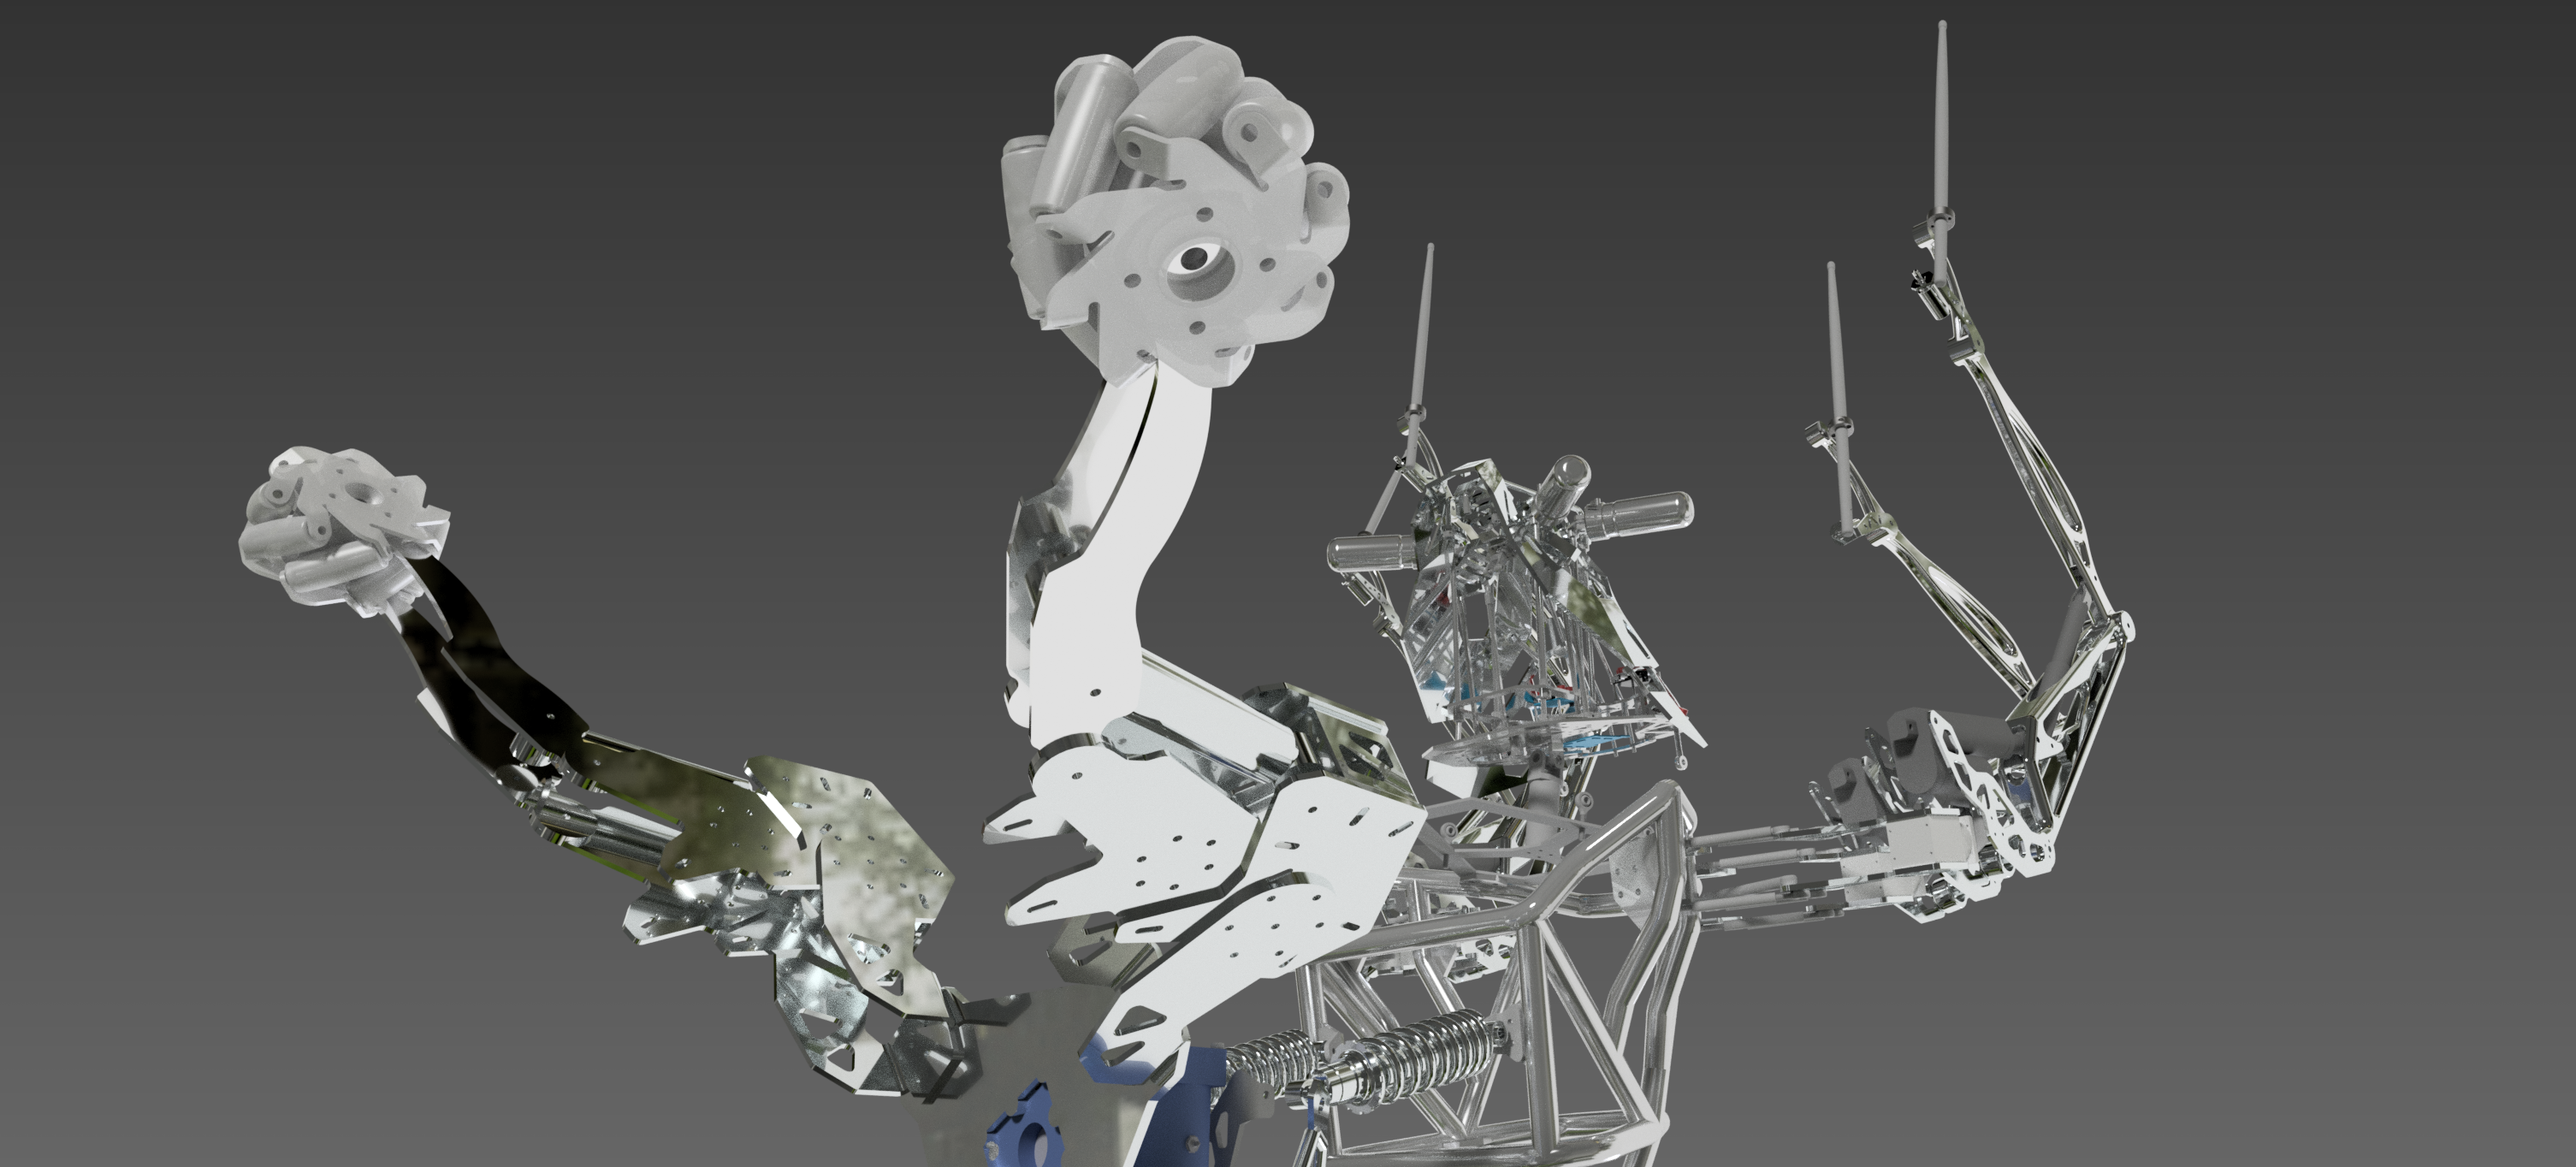
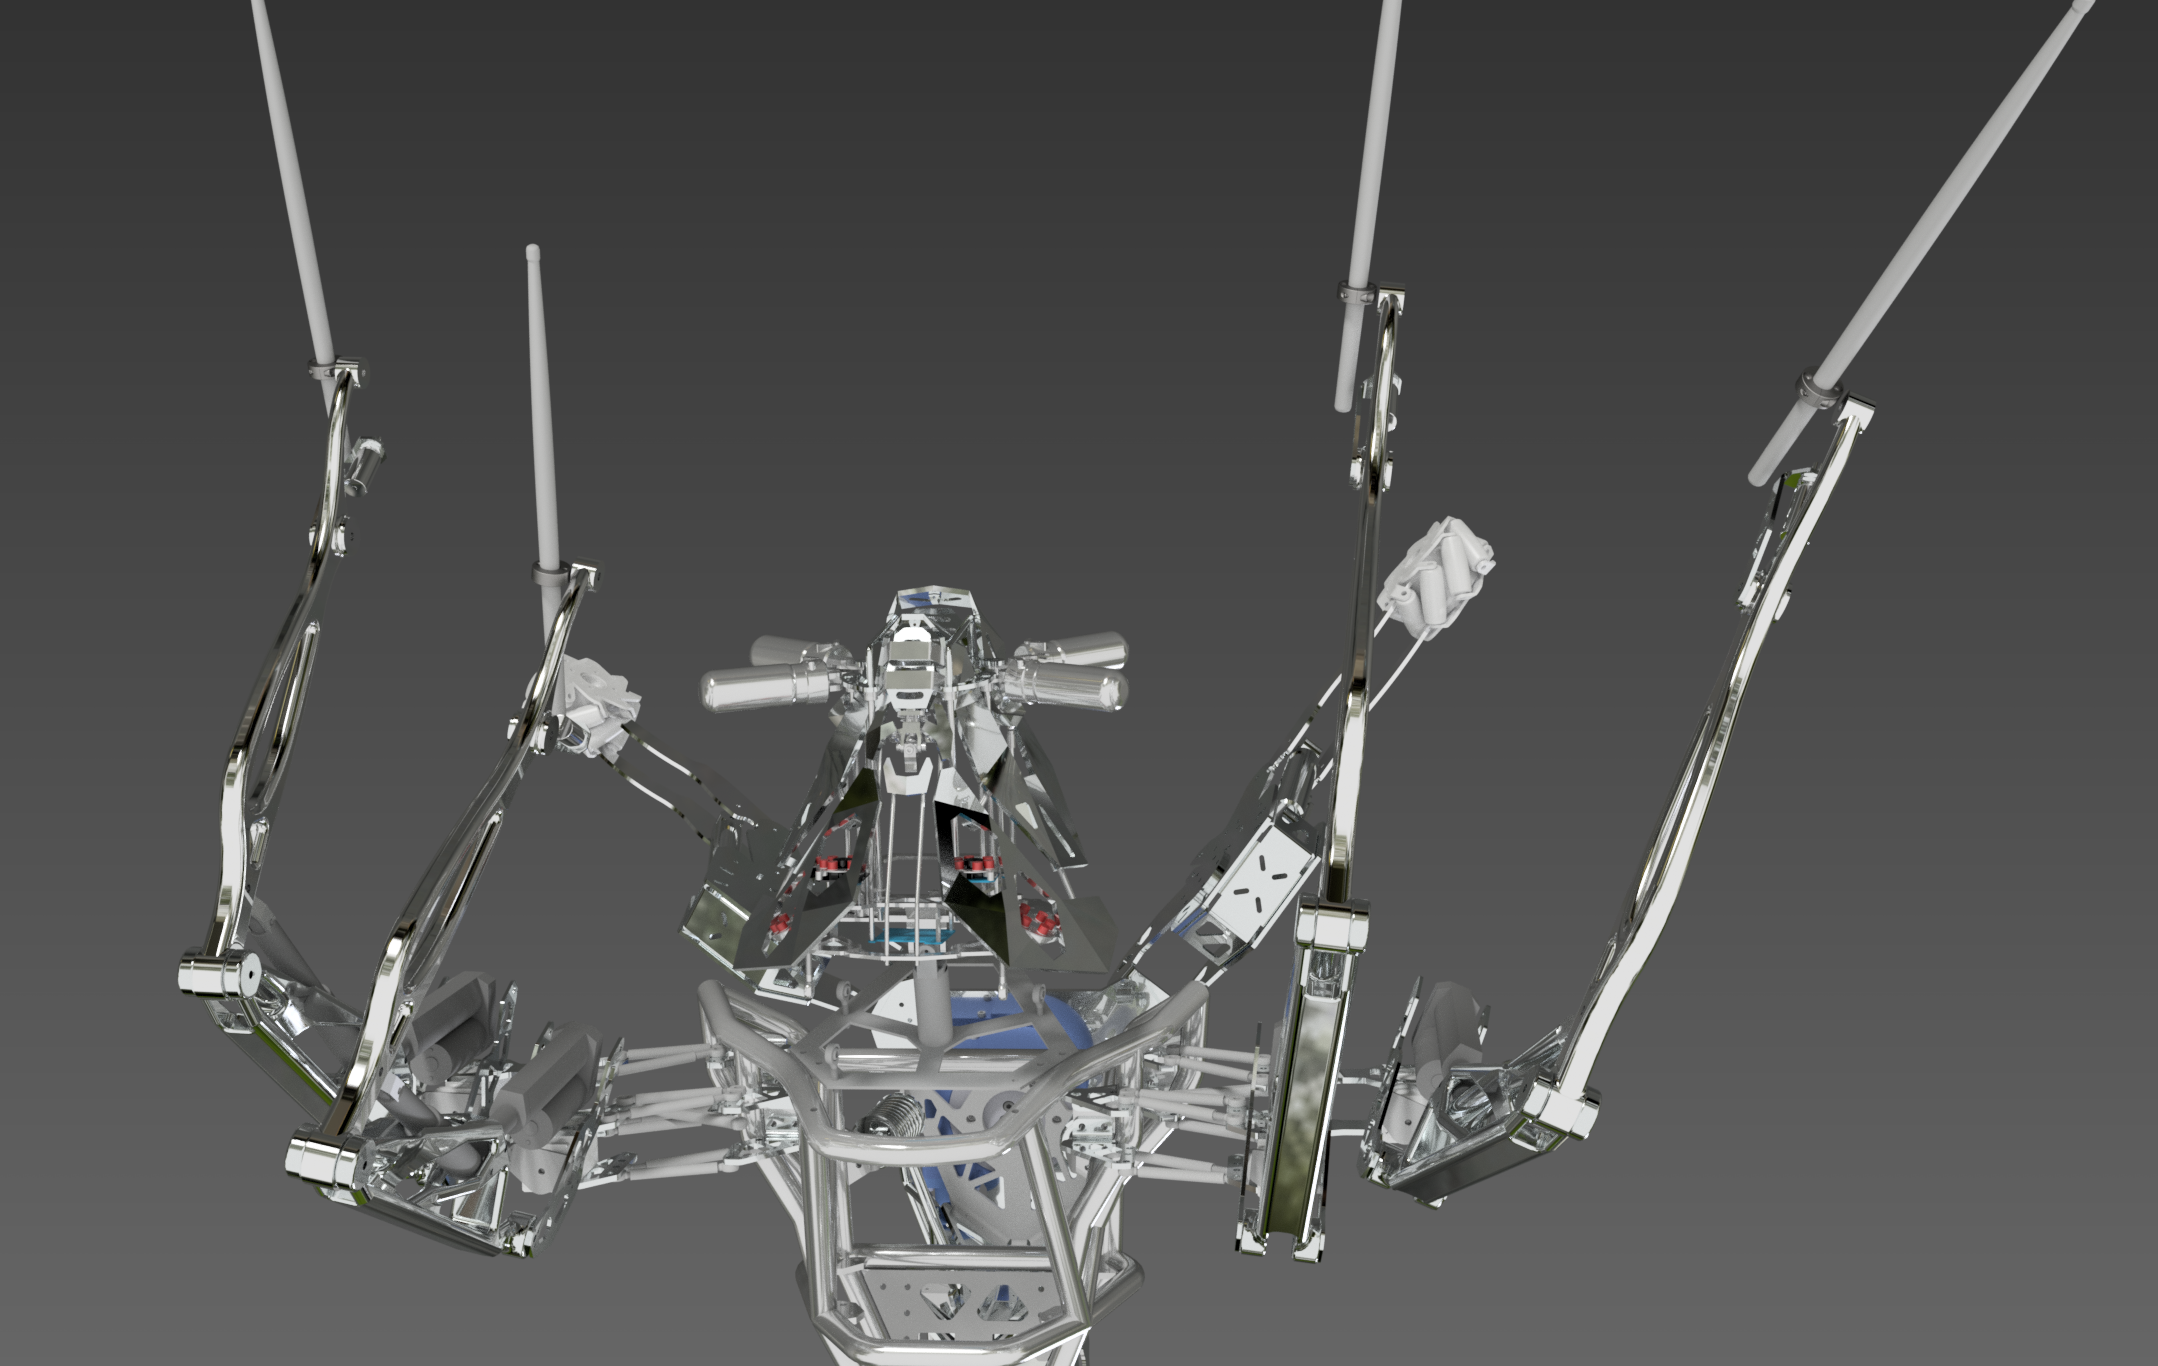
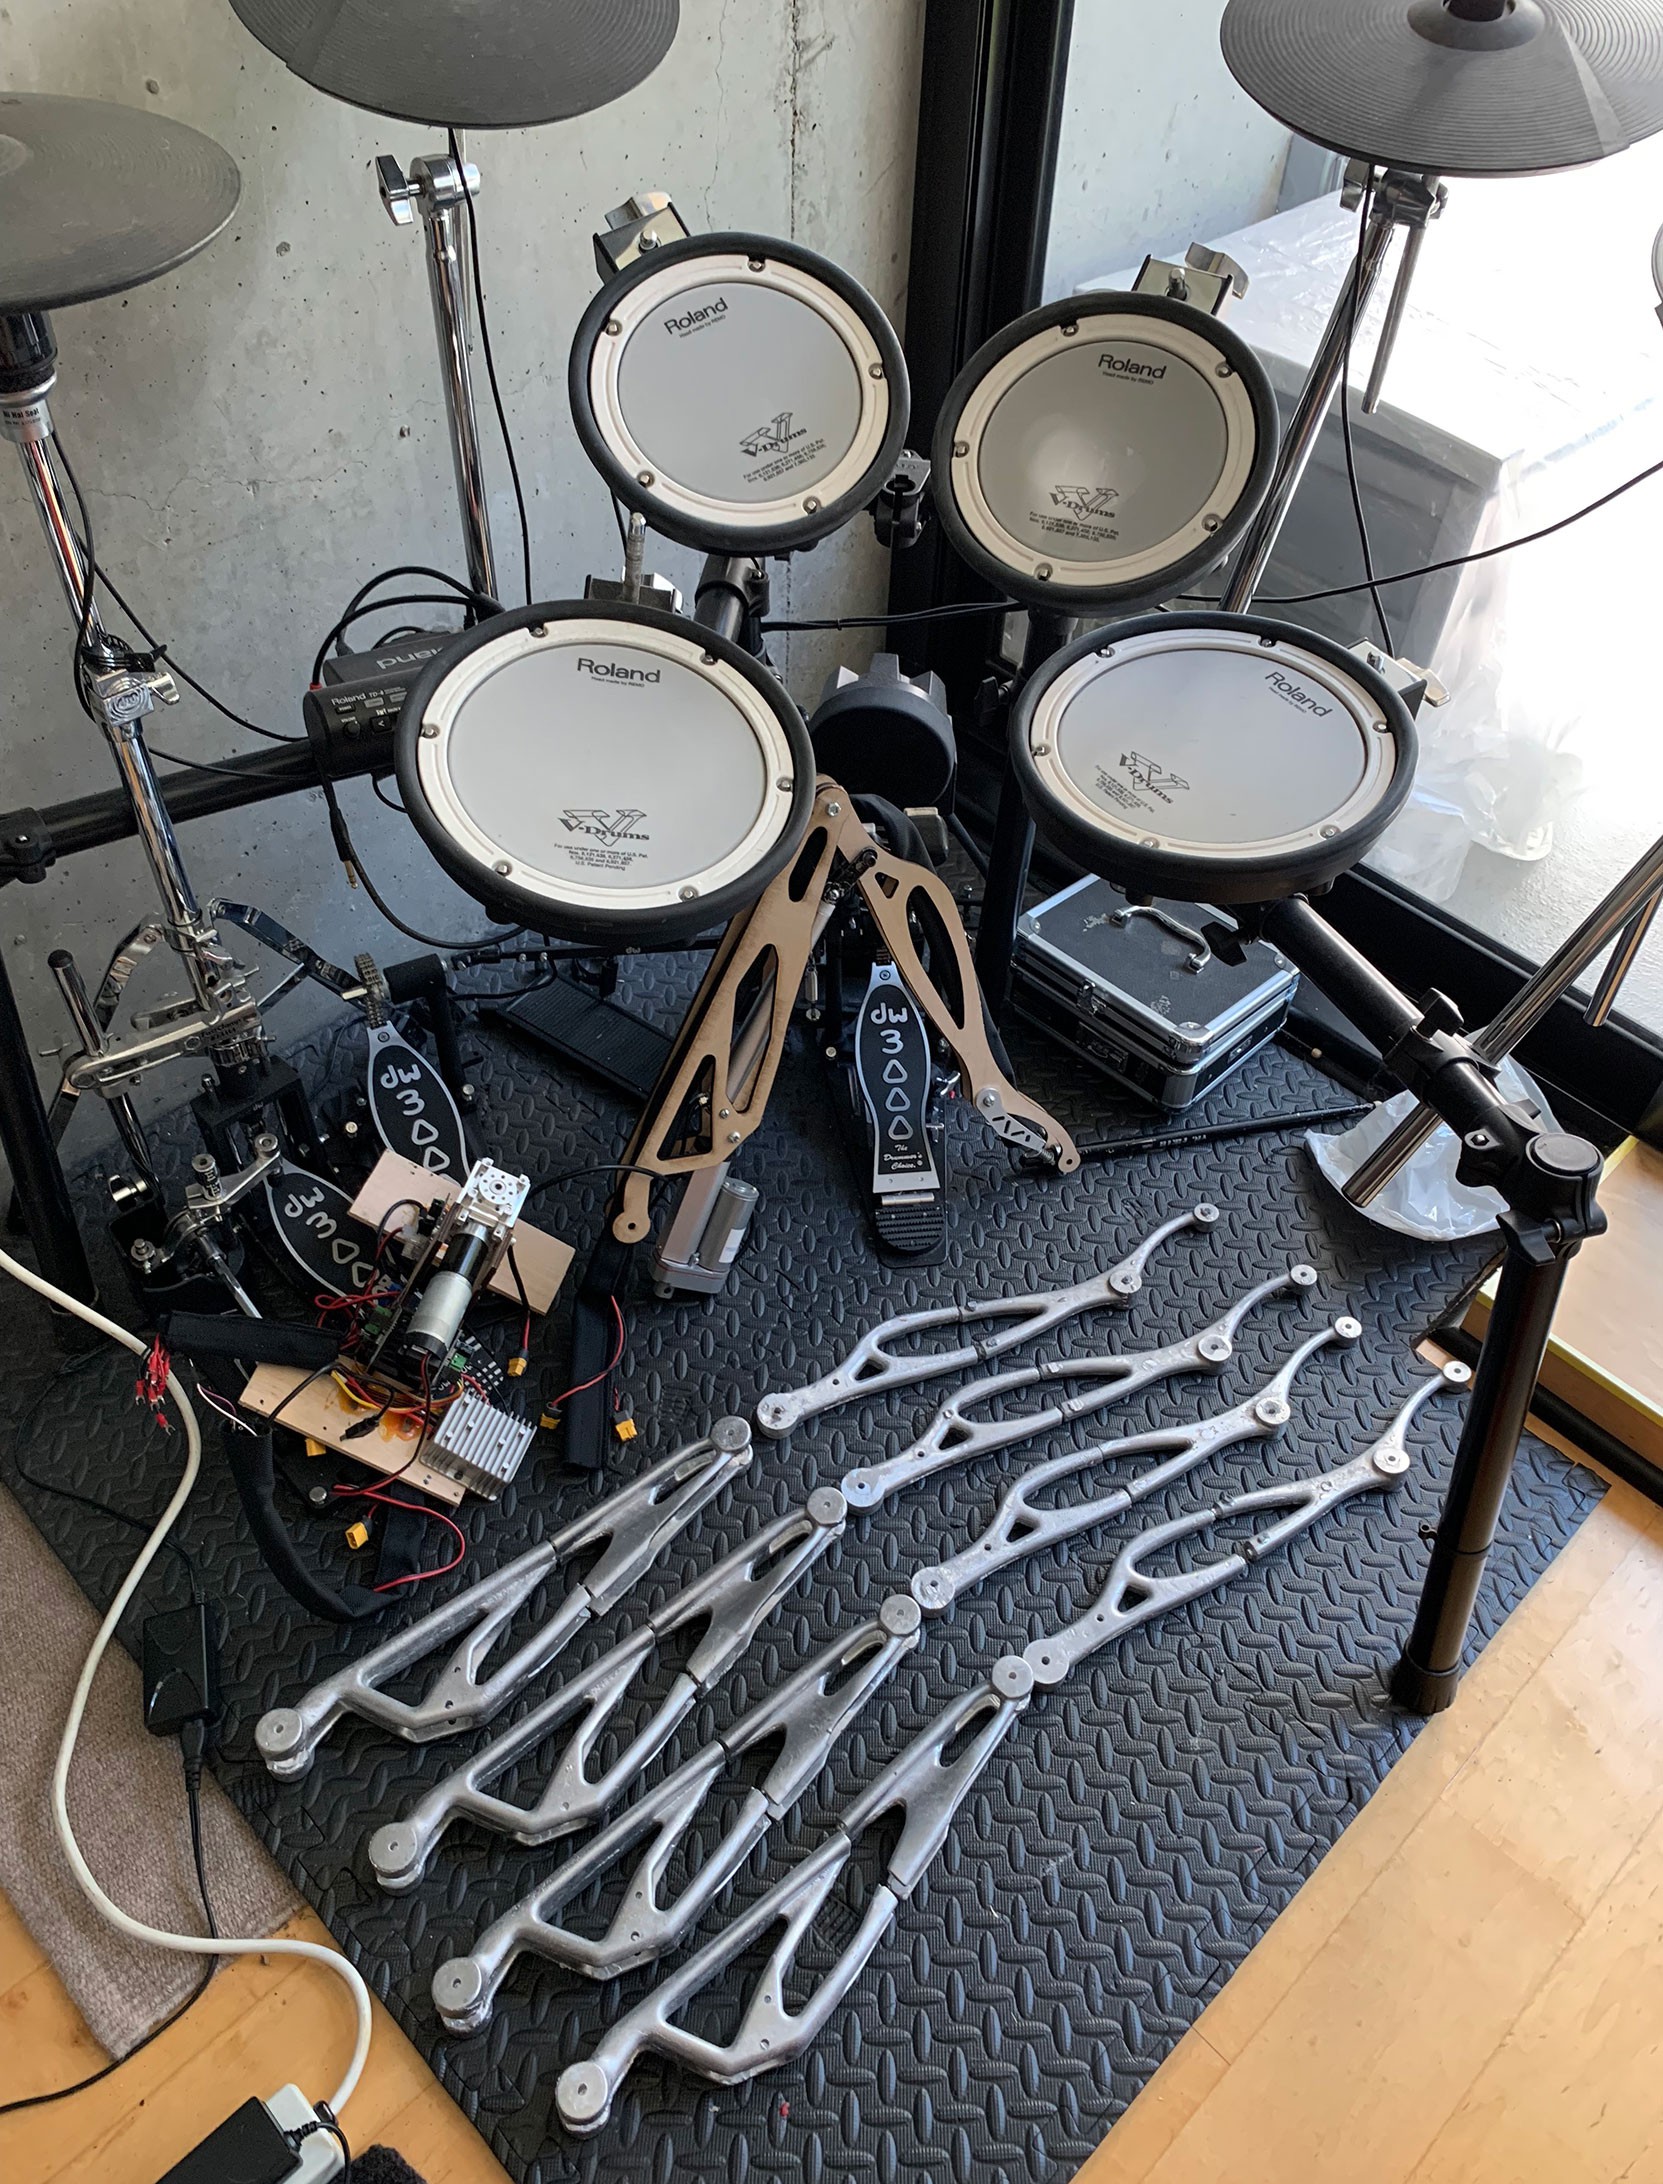
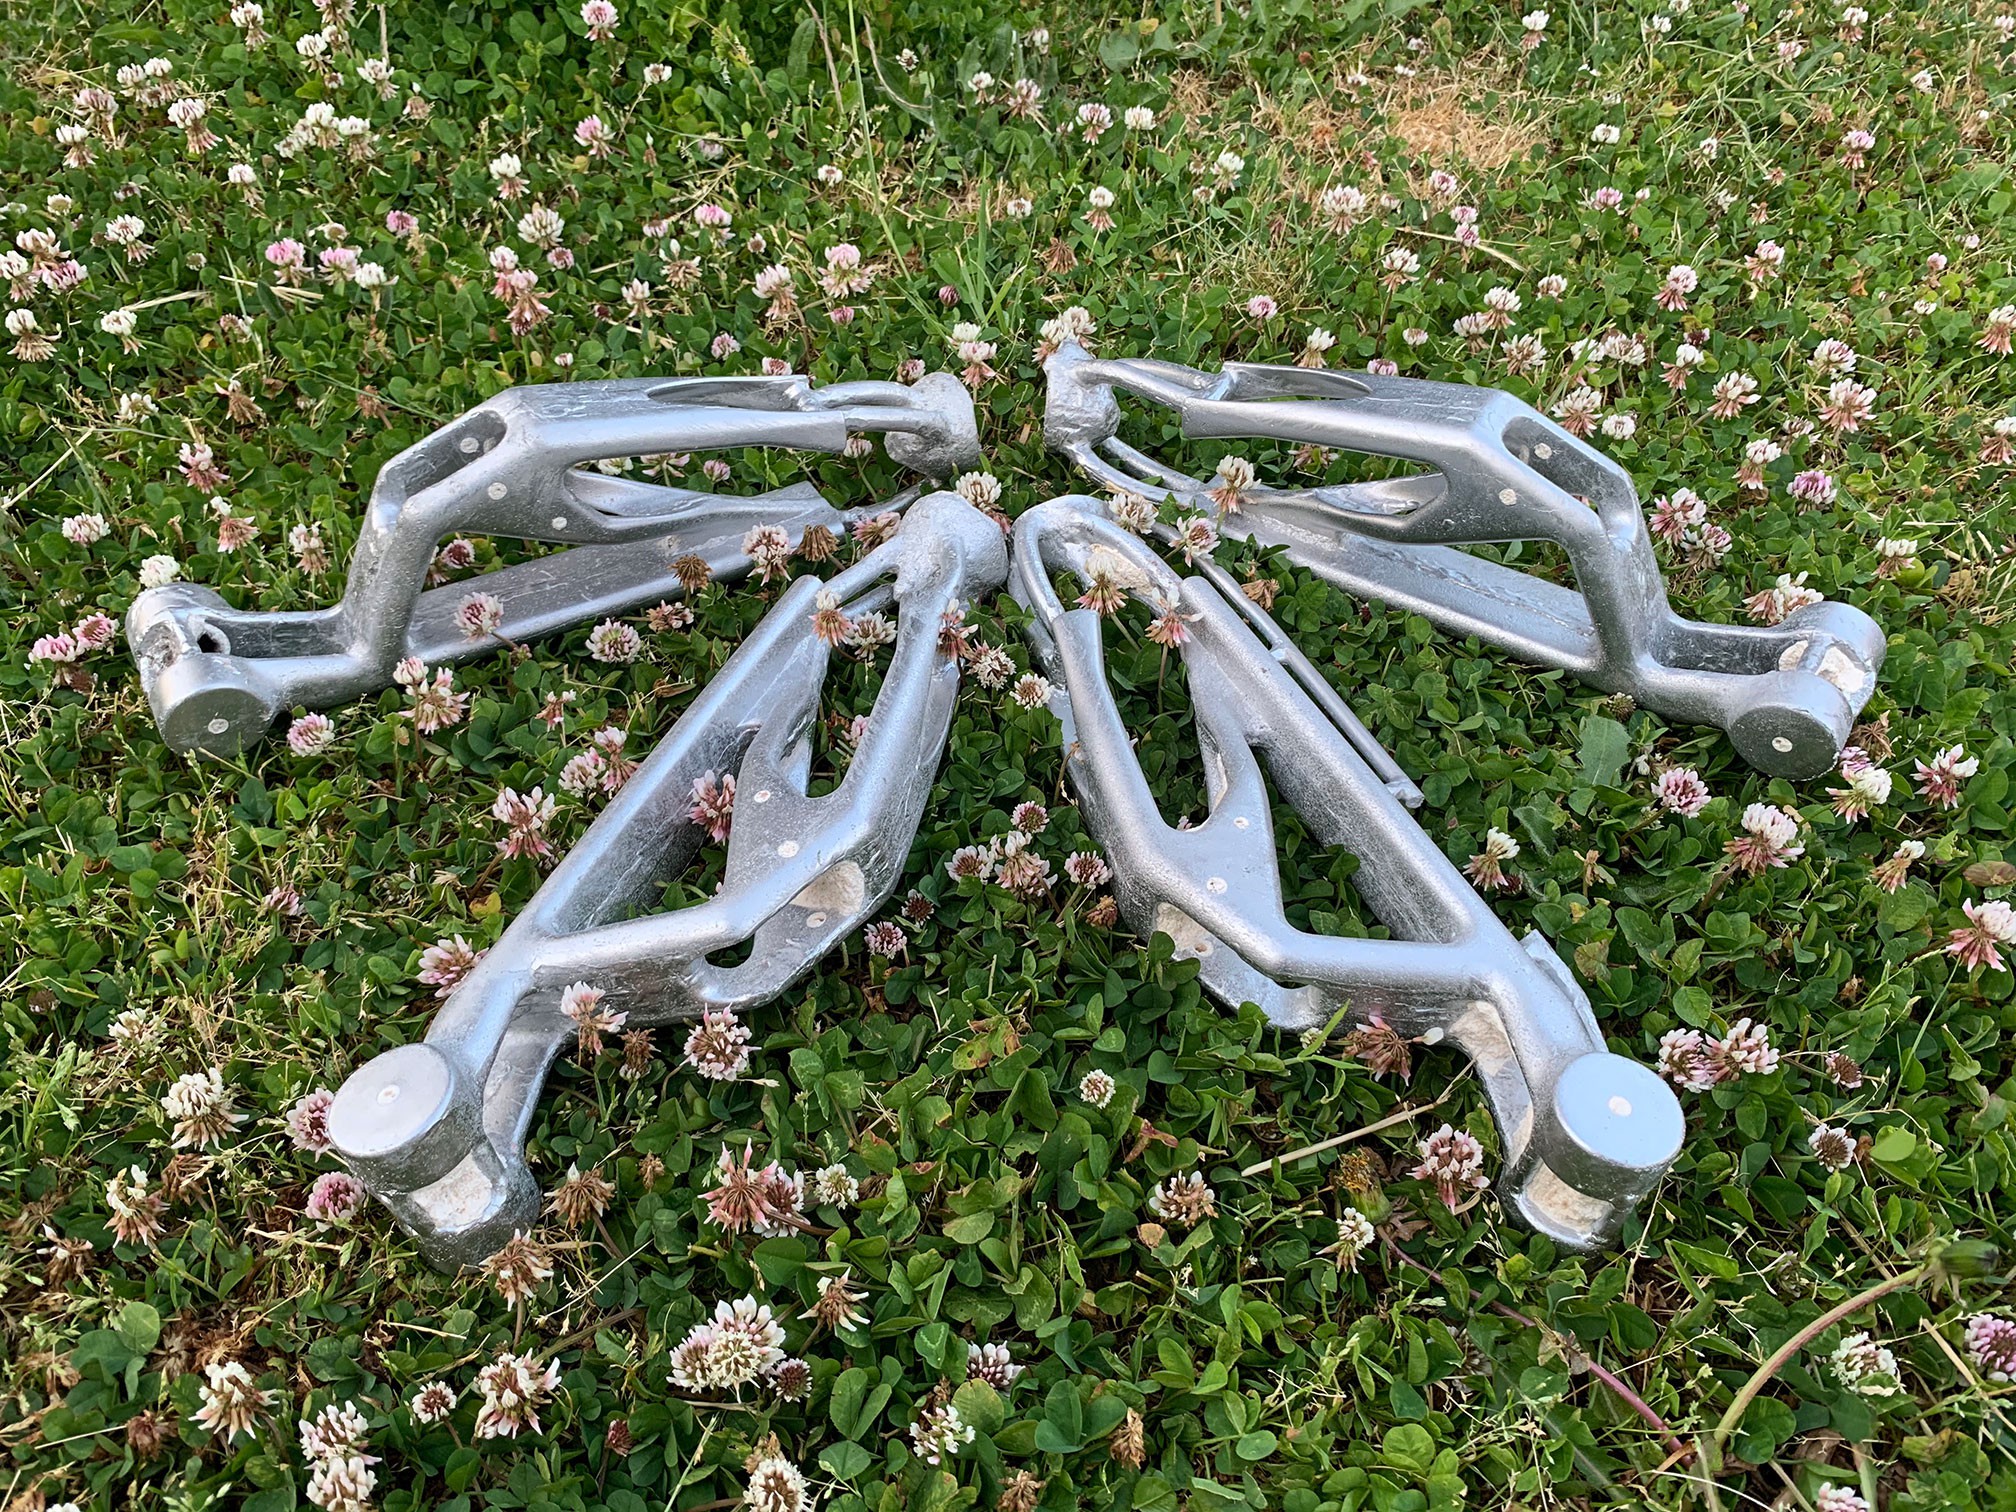
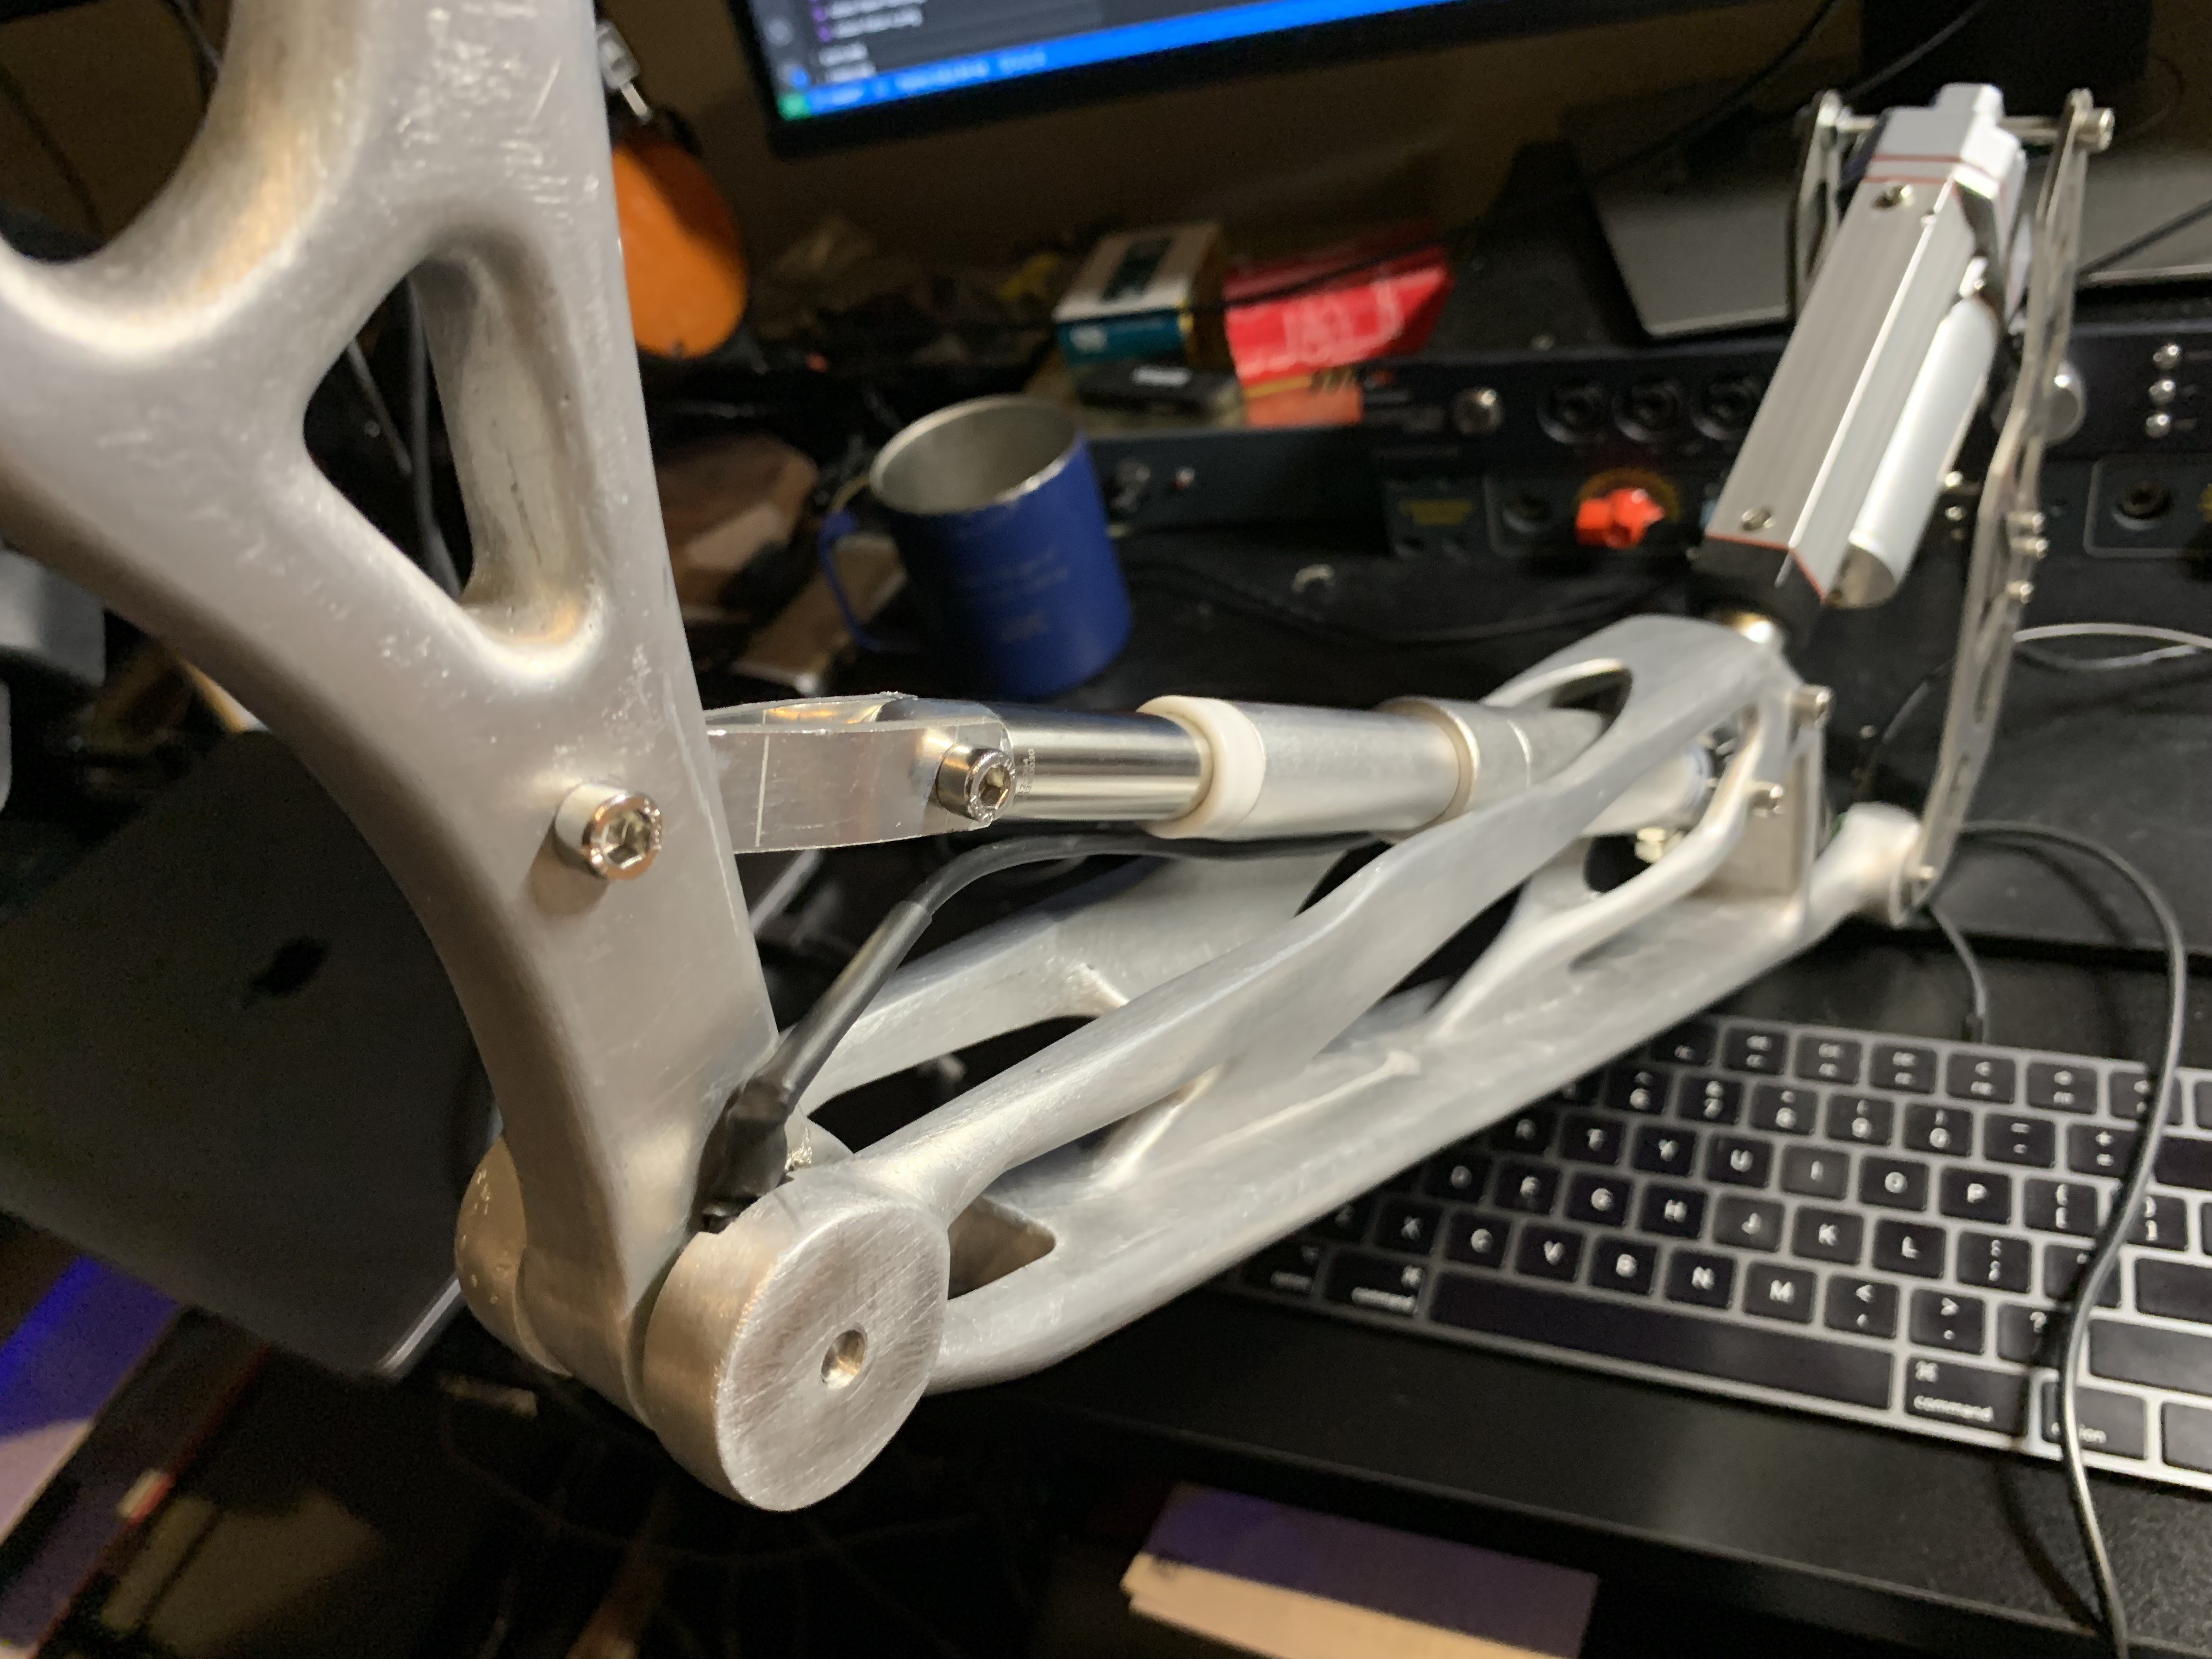
Robot arms assembled
08/23/2021 at 15:29 • 0 commentsThis weekend I assembled the robot arms after custom actuator brackets came in from OSH Cut, and fasteners from Grainger.
![]()
![]()
![]()
![]()
This is kind of a major milestone on this project - casting these parts took a year. I did a photoshoot with a flower bouquet to mark the occasion:
![]()
(Str1ker is the name of this robot)
The next tasks will be:
- More research on tracking arm positions. Found and ordered a few more potentiometers designed to be used with servos. Still not happy with the best I found last year, and not sure if I need to build them myself.
- Continue finishing the arm parts. They still need more polishing and grinding for best fit, and then sent for chrome plating.
- Finish the head and neck design, figure out what actuators are needed, and order them along with the head parts.
- Prototype robot vision. I got this started already, but my Arducam board misbehaved again so I need to order another one.
-
Head re-design
08/18/2021 at 02:27 • 0 commentsThe head re-design that I started last year is close to being done, just need a little more problem-solving to connect all facial parts to servos, and of course connecting the head to the body with rotate/tilt system used in animatronics.
![]()
![]()
![]()
![]()
![]()
![]()
-
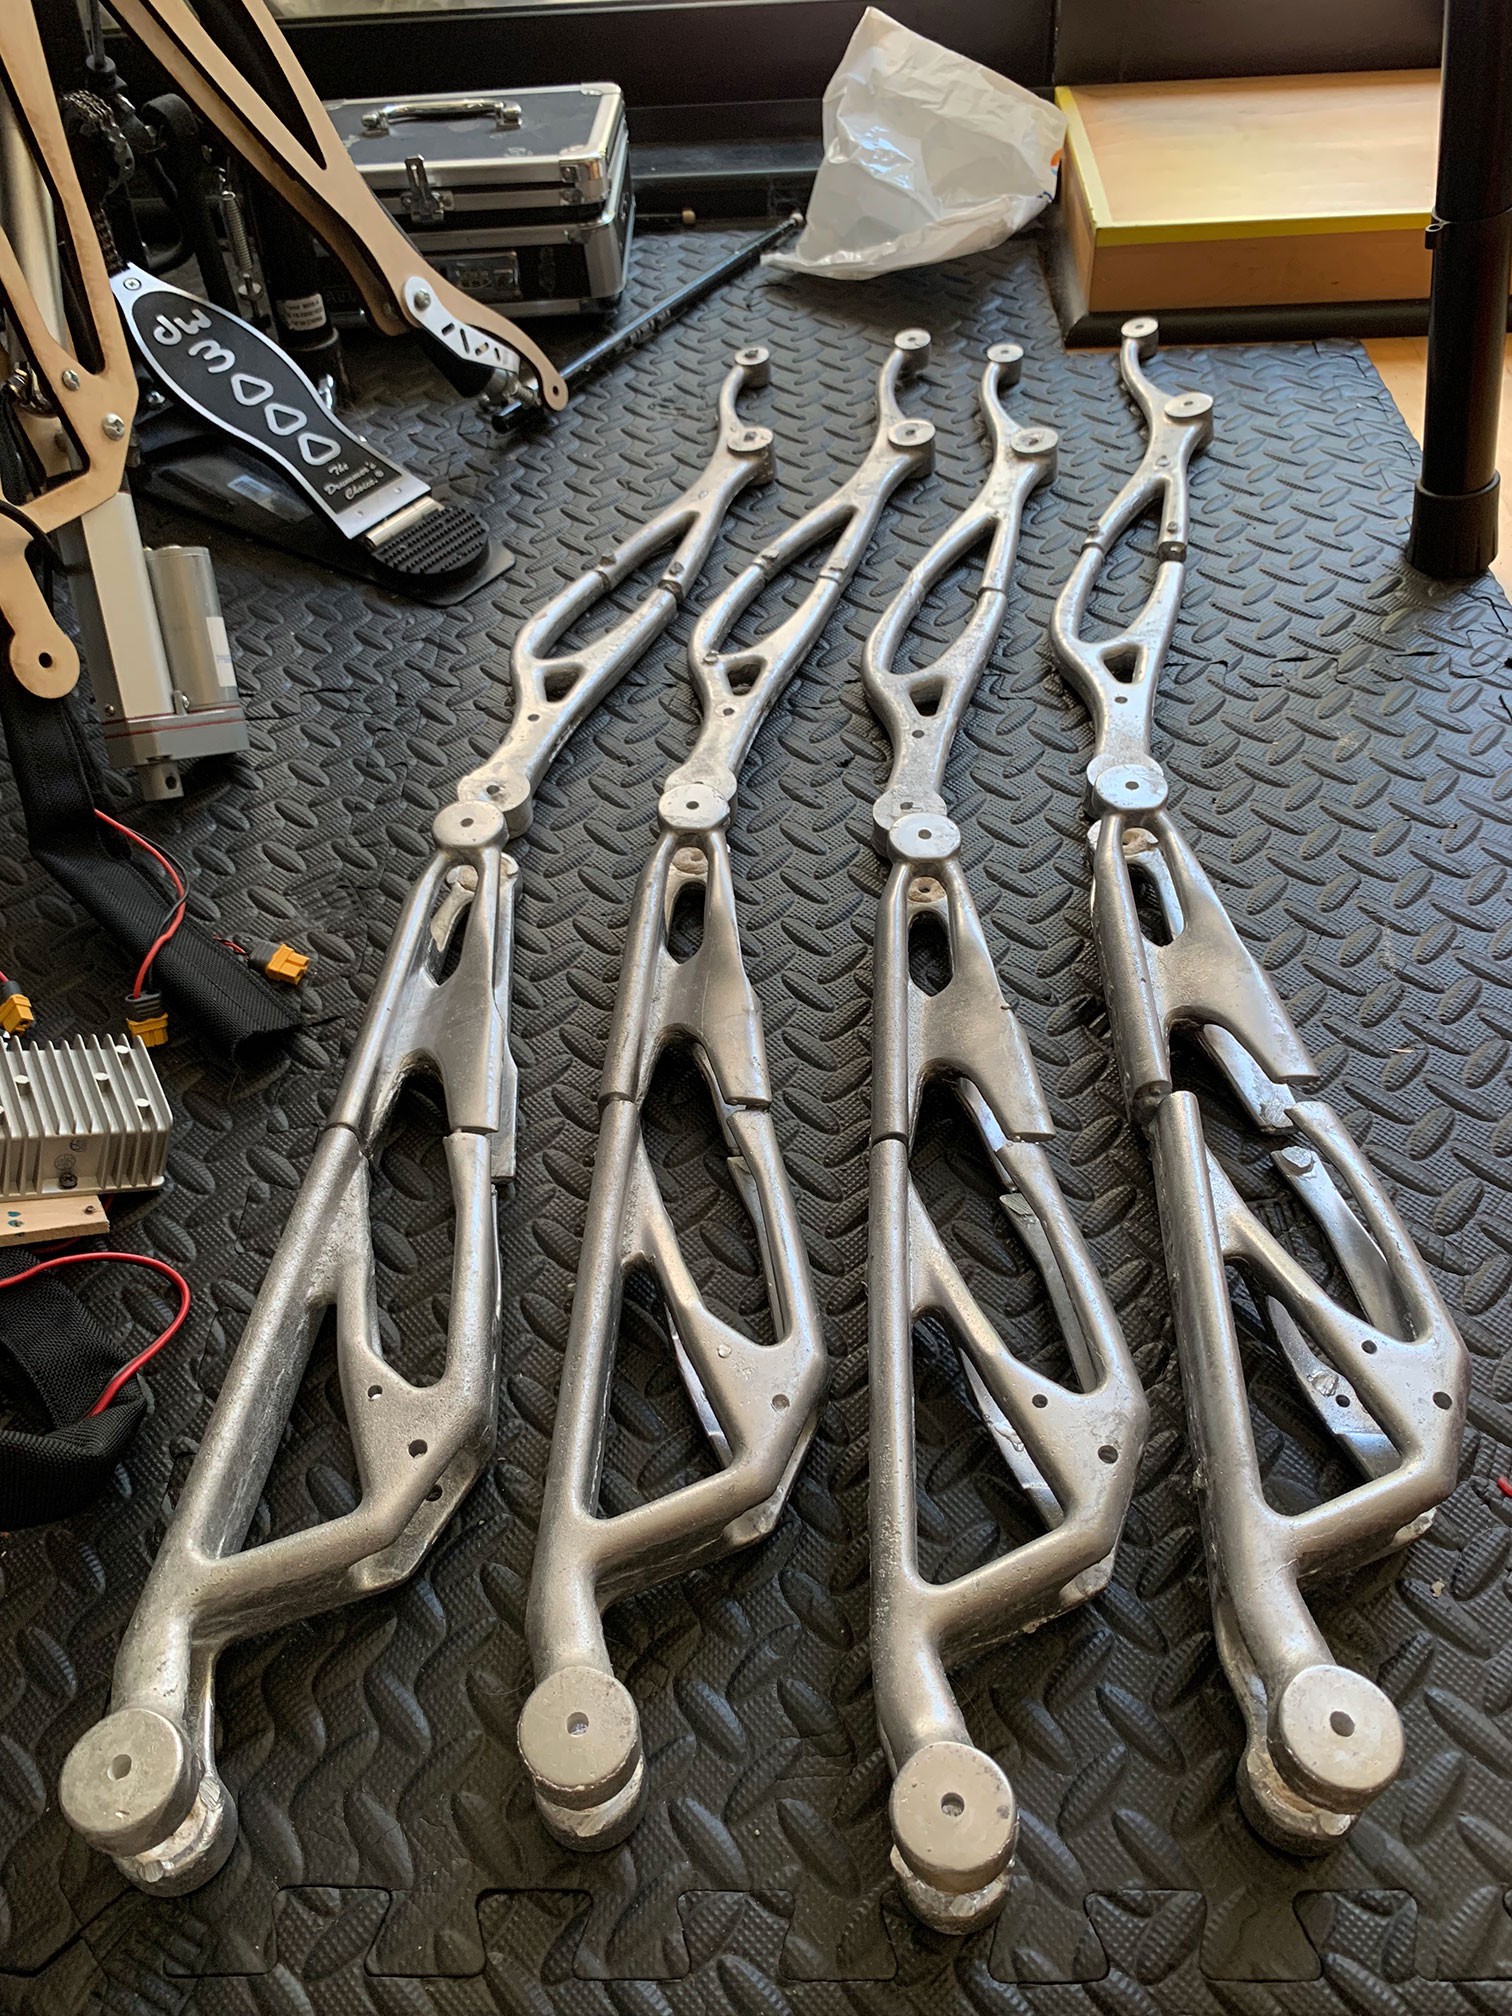
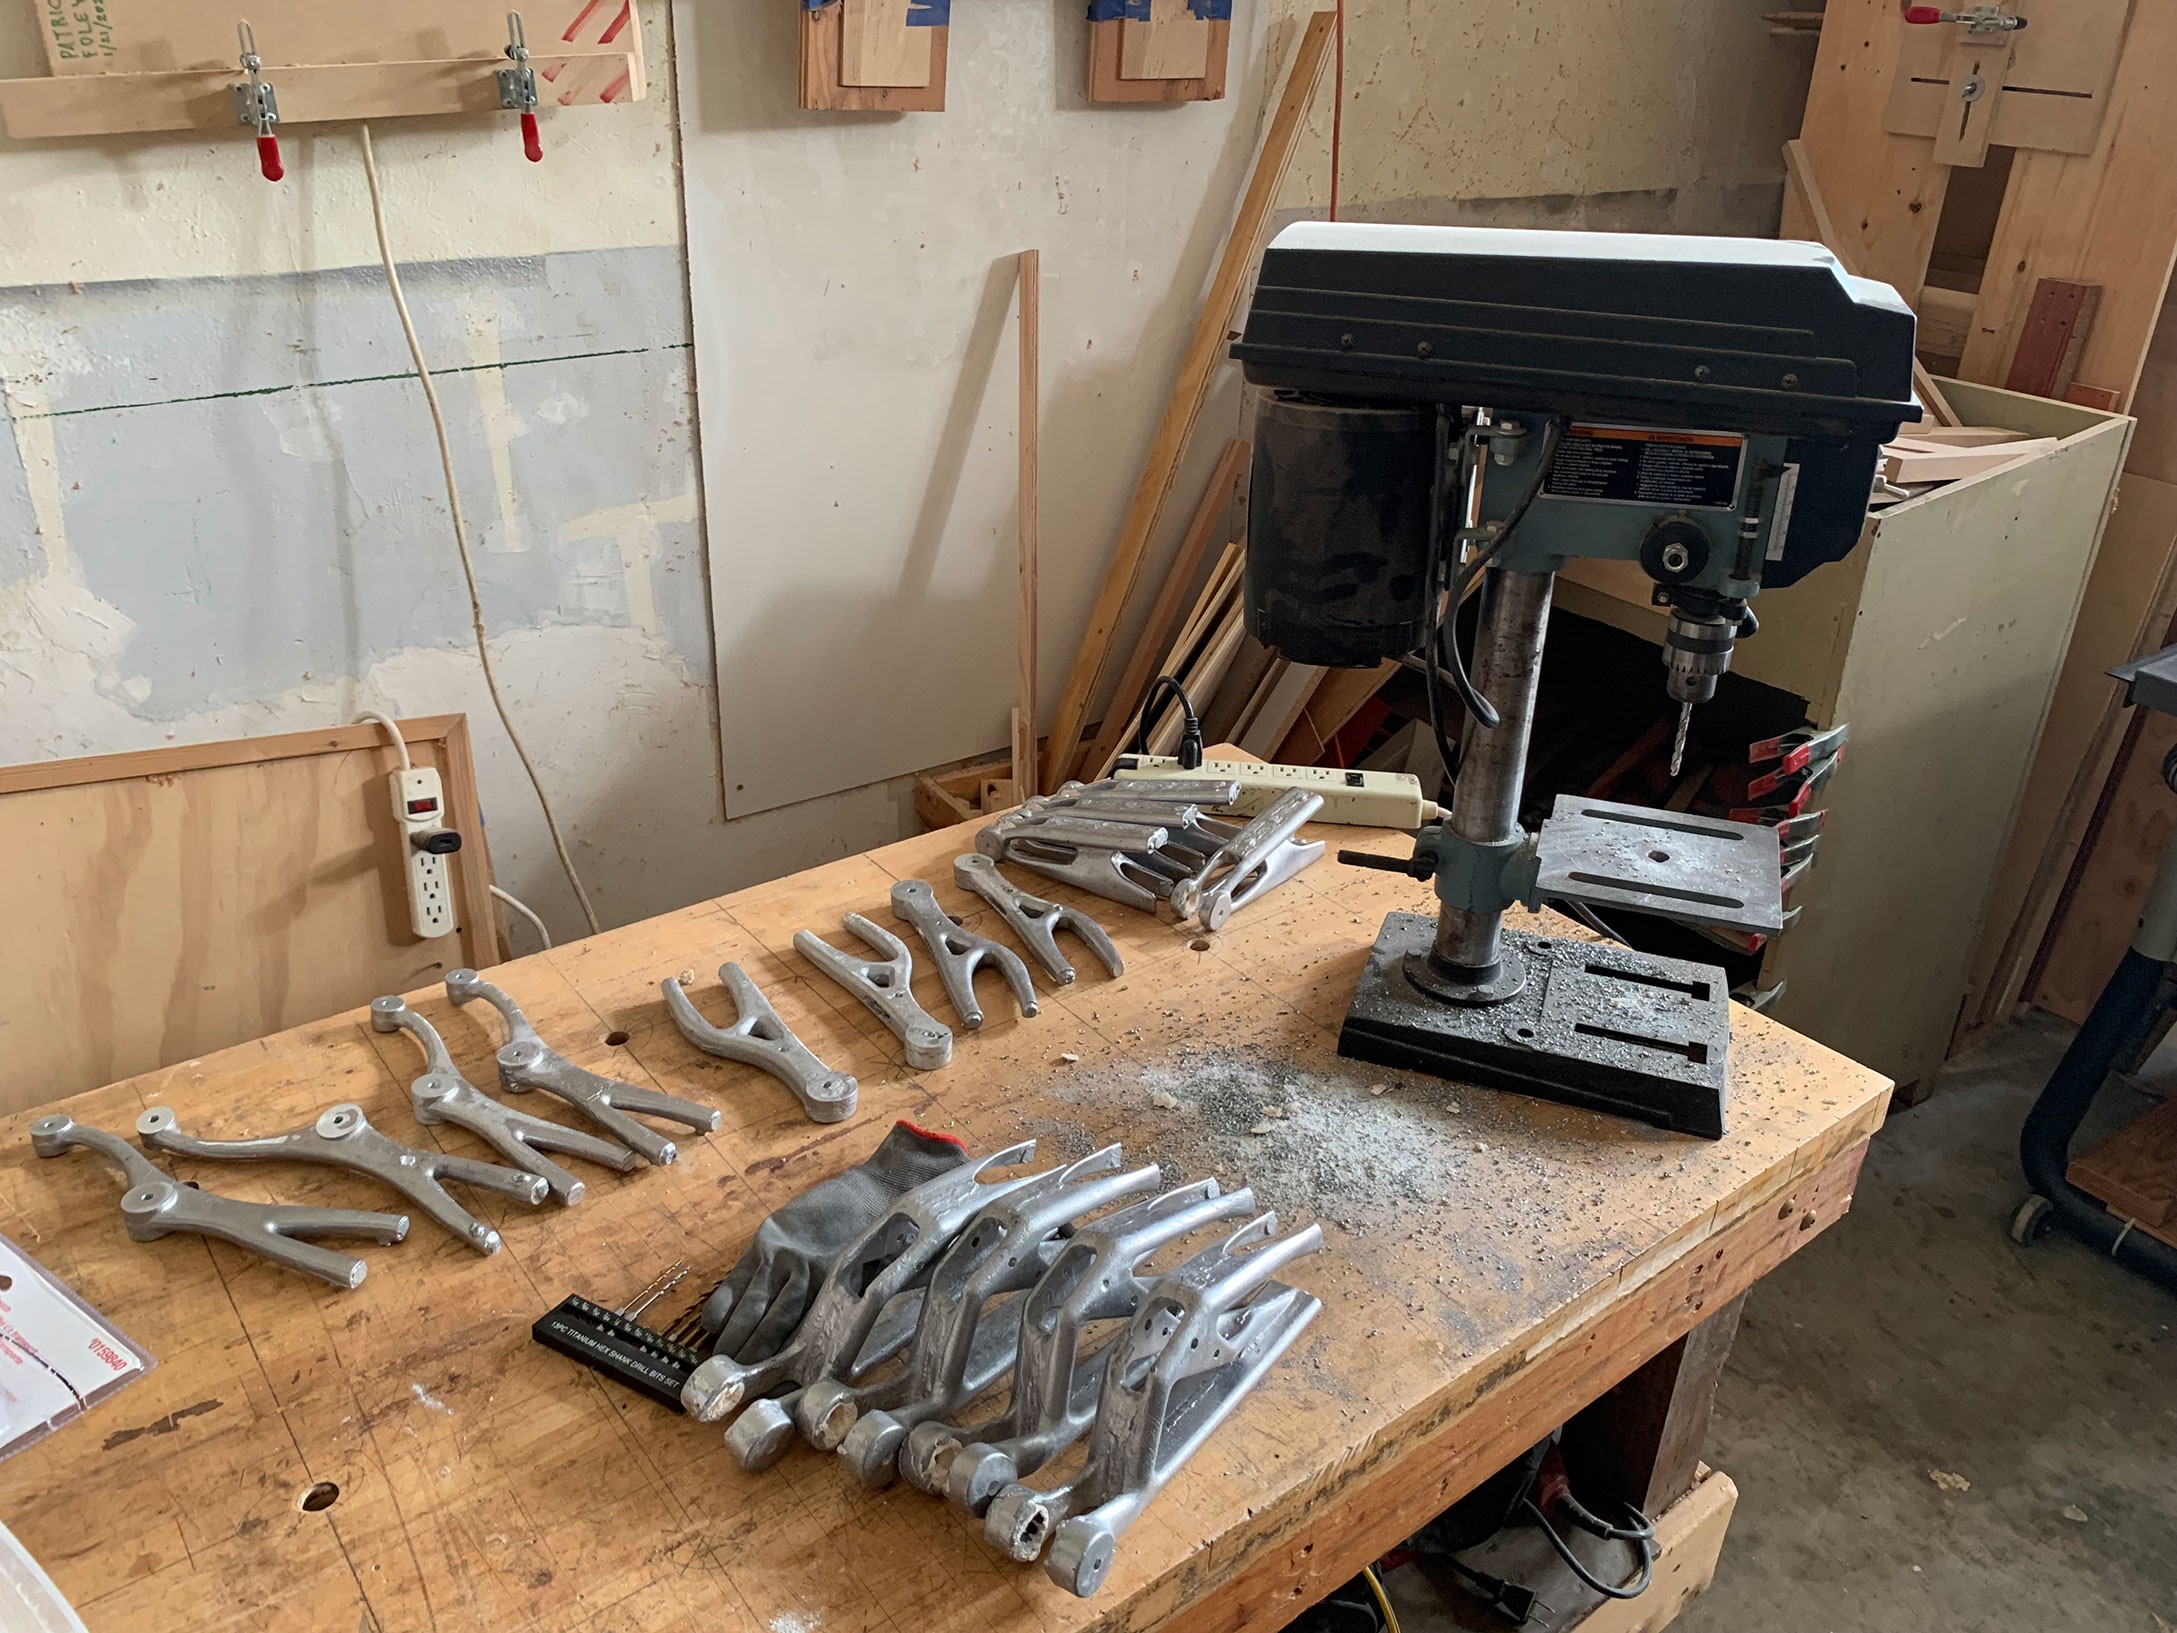
Preparing arms for welding
06/26/2021 at 01:51 • 0 commentsI did most of the cleanup on the robot arm parts and drilled 6mm holes. Dropping them of at a weld shop next week, and then it will probably take a month to apply metal filler, sand all the imperfections, and finally send to a finishing plant to get chrome-plated.
![]()
![]()
![]()
![]()
-
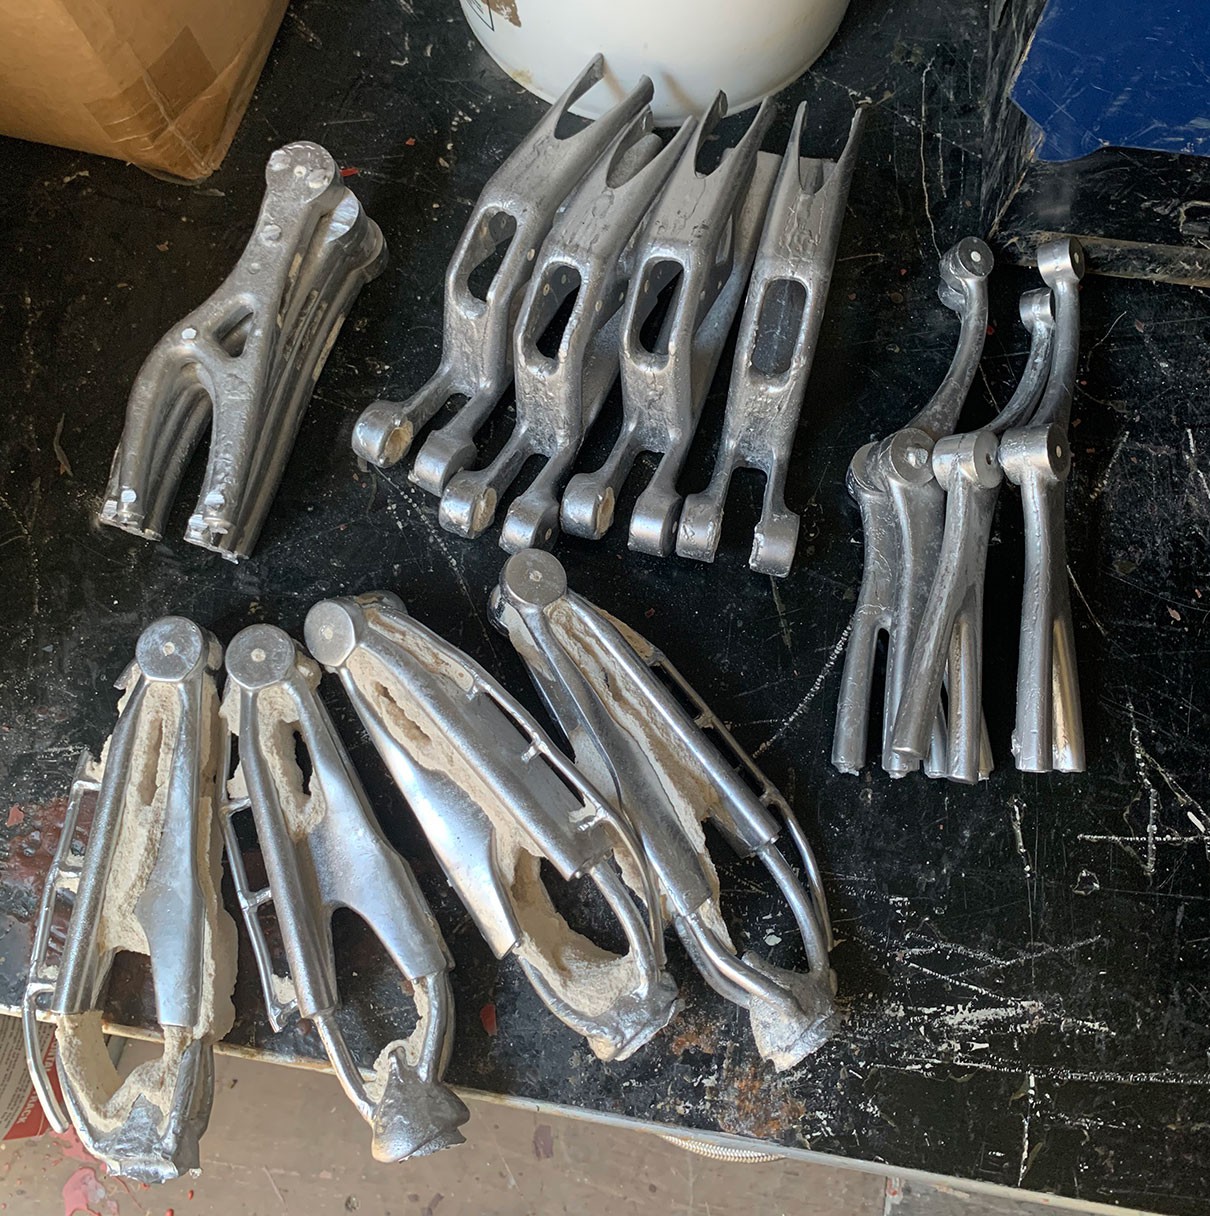
Finished casting, head re-design
06/18/2021 at 20:28 • 0 commentsAll of the arm parts have been cast, now I need to clean them up/polish them, weld, and send to get them chrome plated.
![]()
![]()
![]()
After more than a year of struggling to re-create the feeling of my original head concept art, I finally got something I am happy with using a combination of Blender and Inventor. I did the wireframe in Blender starting from the modeling clay sculpt I did in my last update, and adjusting slightly for the concept art and various references from different angles. Then I made it into a solid in Inventor.
![]()
-
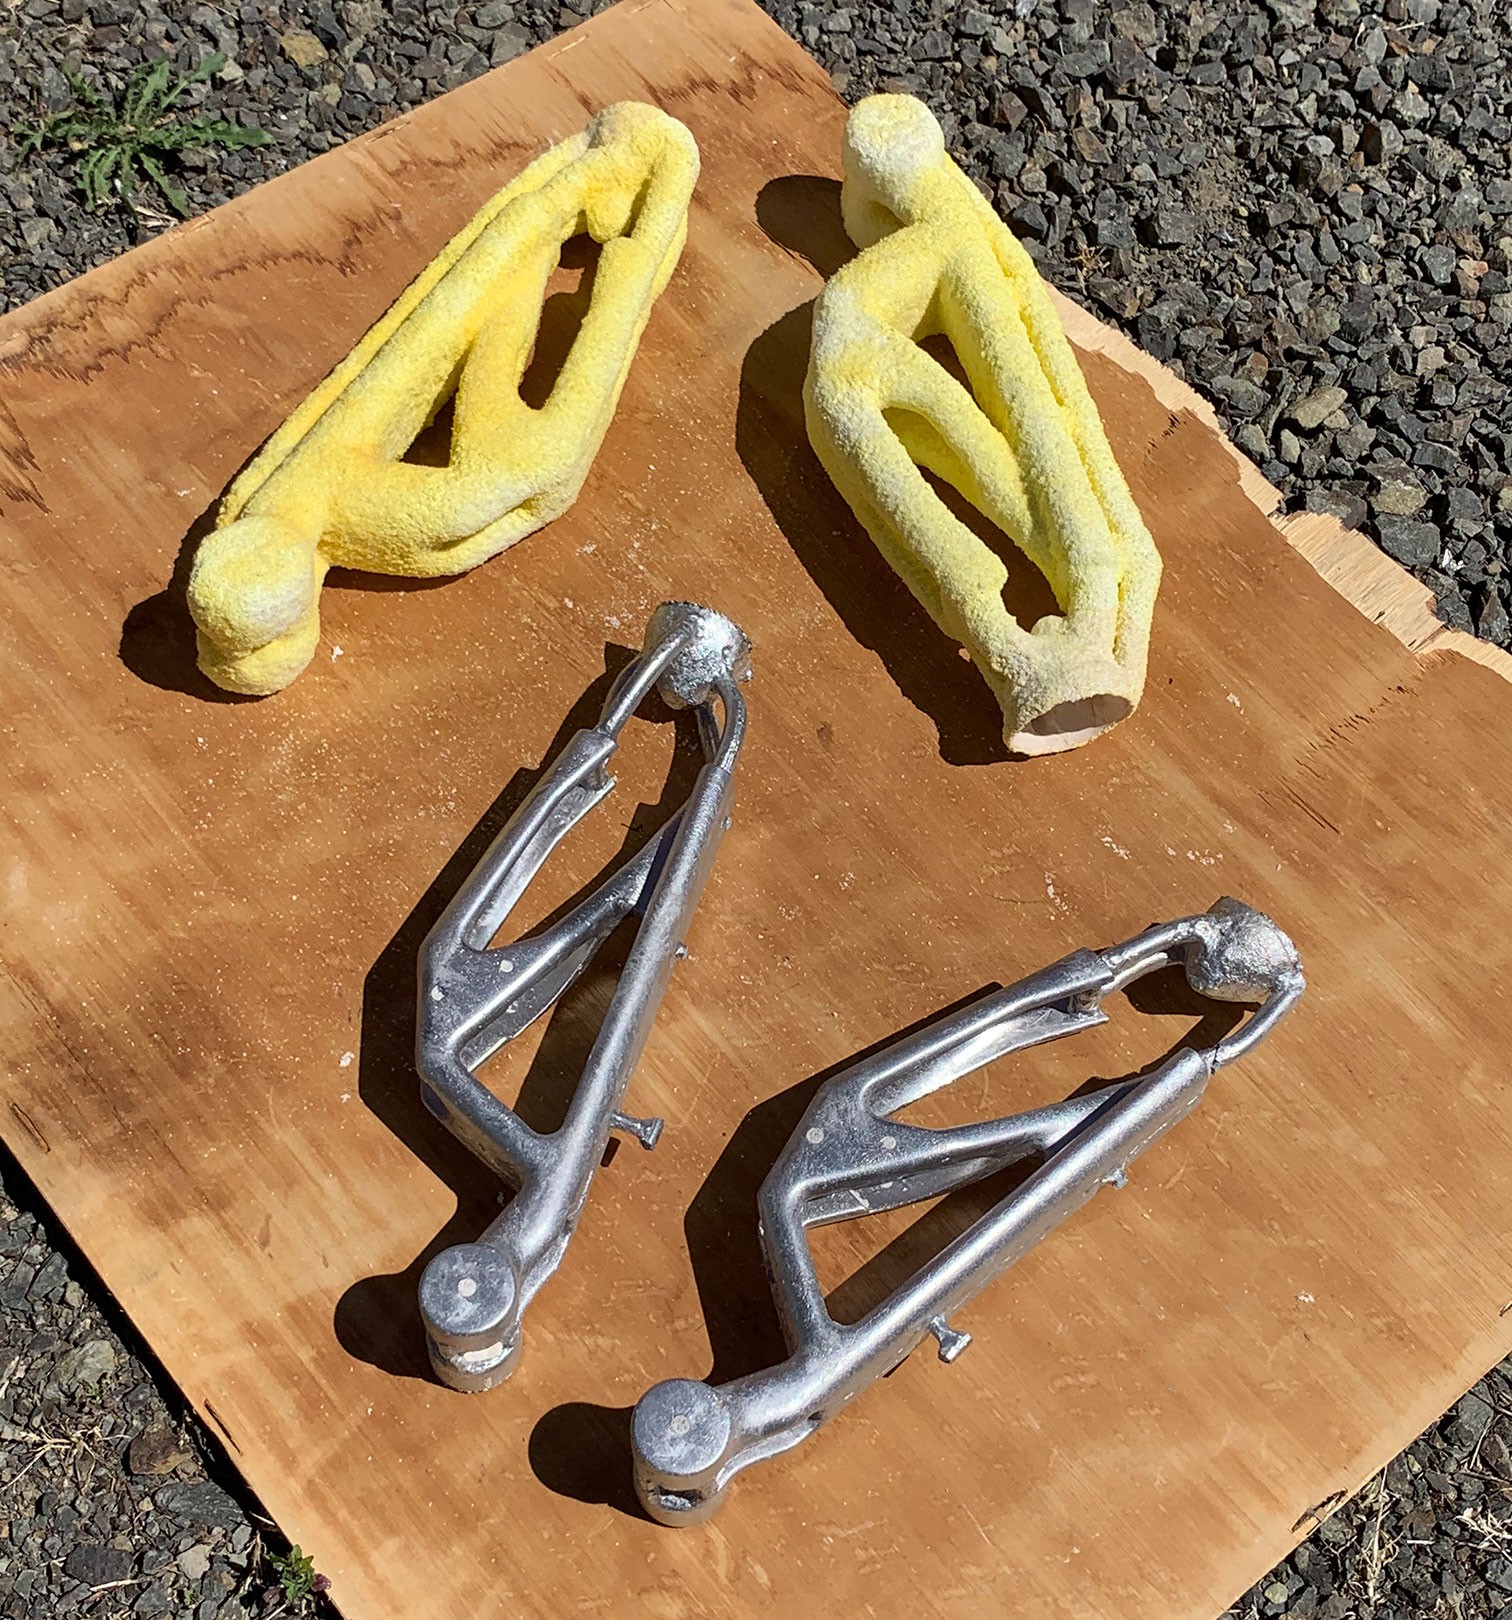
First half of upper arms cast
06/08/2021 at 05:43 • 0 commentsLast week I finished casting the first half of upper arm bones, and this week I am starting on second half. I might be done by the end of June with any luck, assuming I have to re-cast some parts a few times due to mistakes.
![]()
Picture half-way through, with two empty ceramic shells that weren't cast yet, and two metal parts that were cast the day before from identical shells.
![]()
-
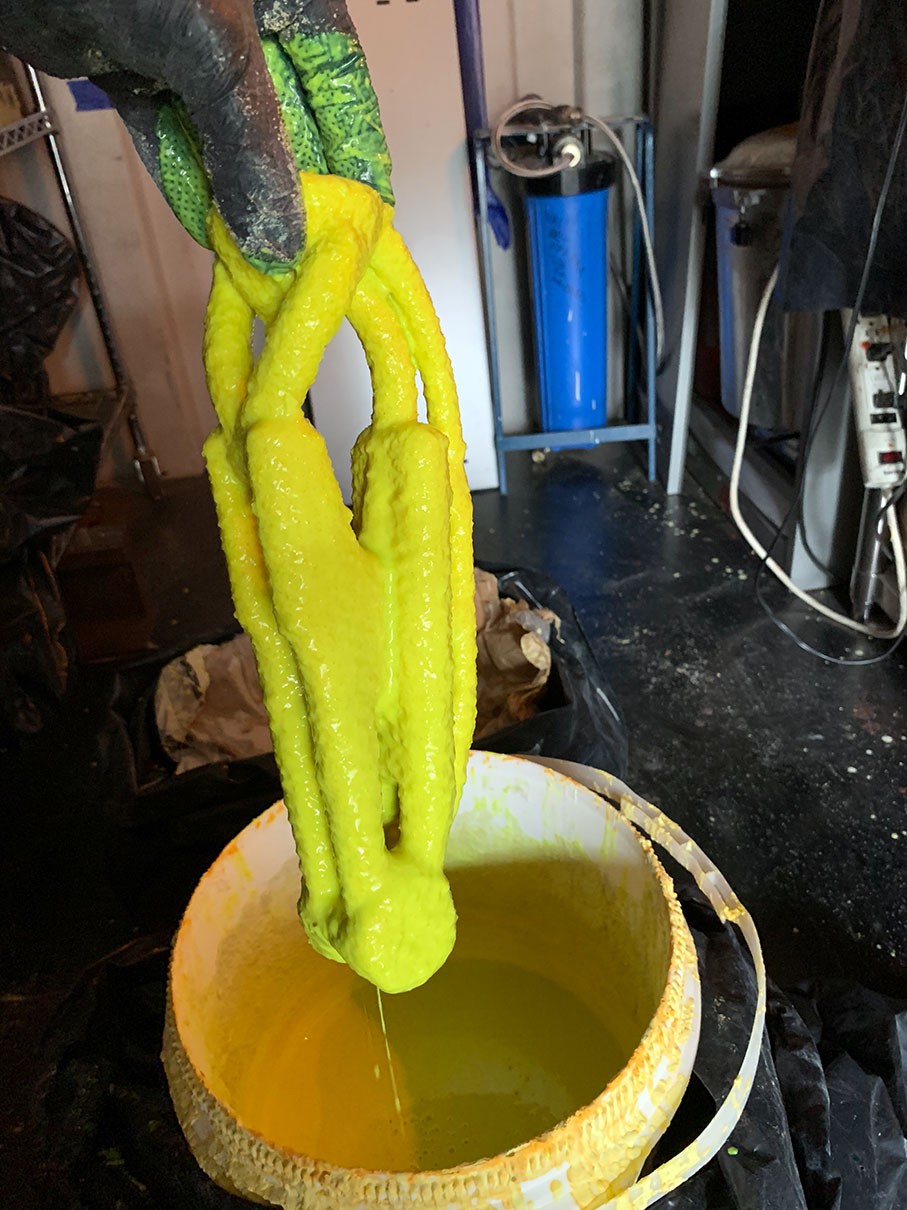
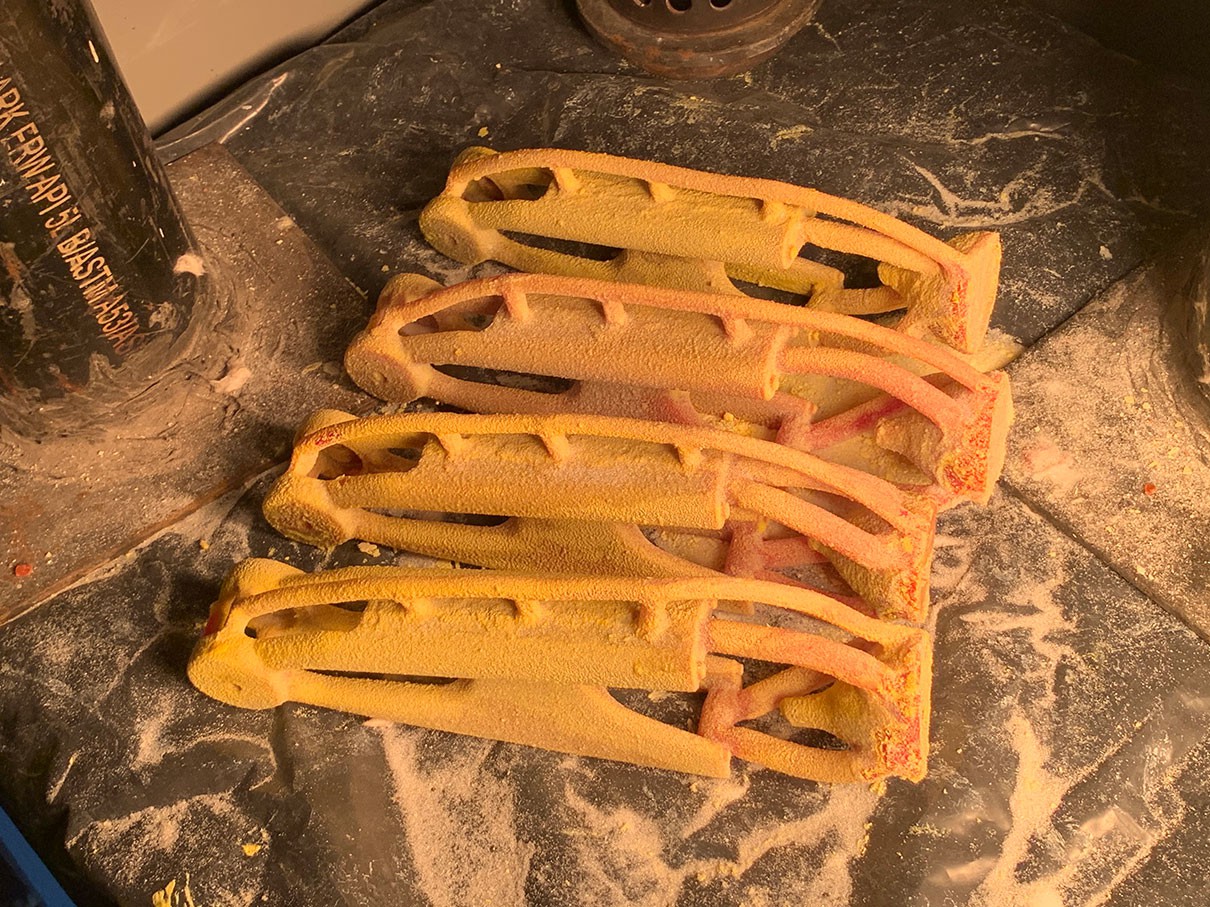
Casting upper arms
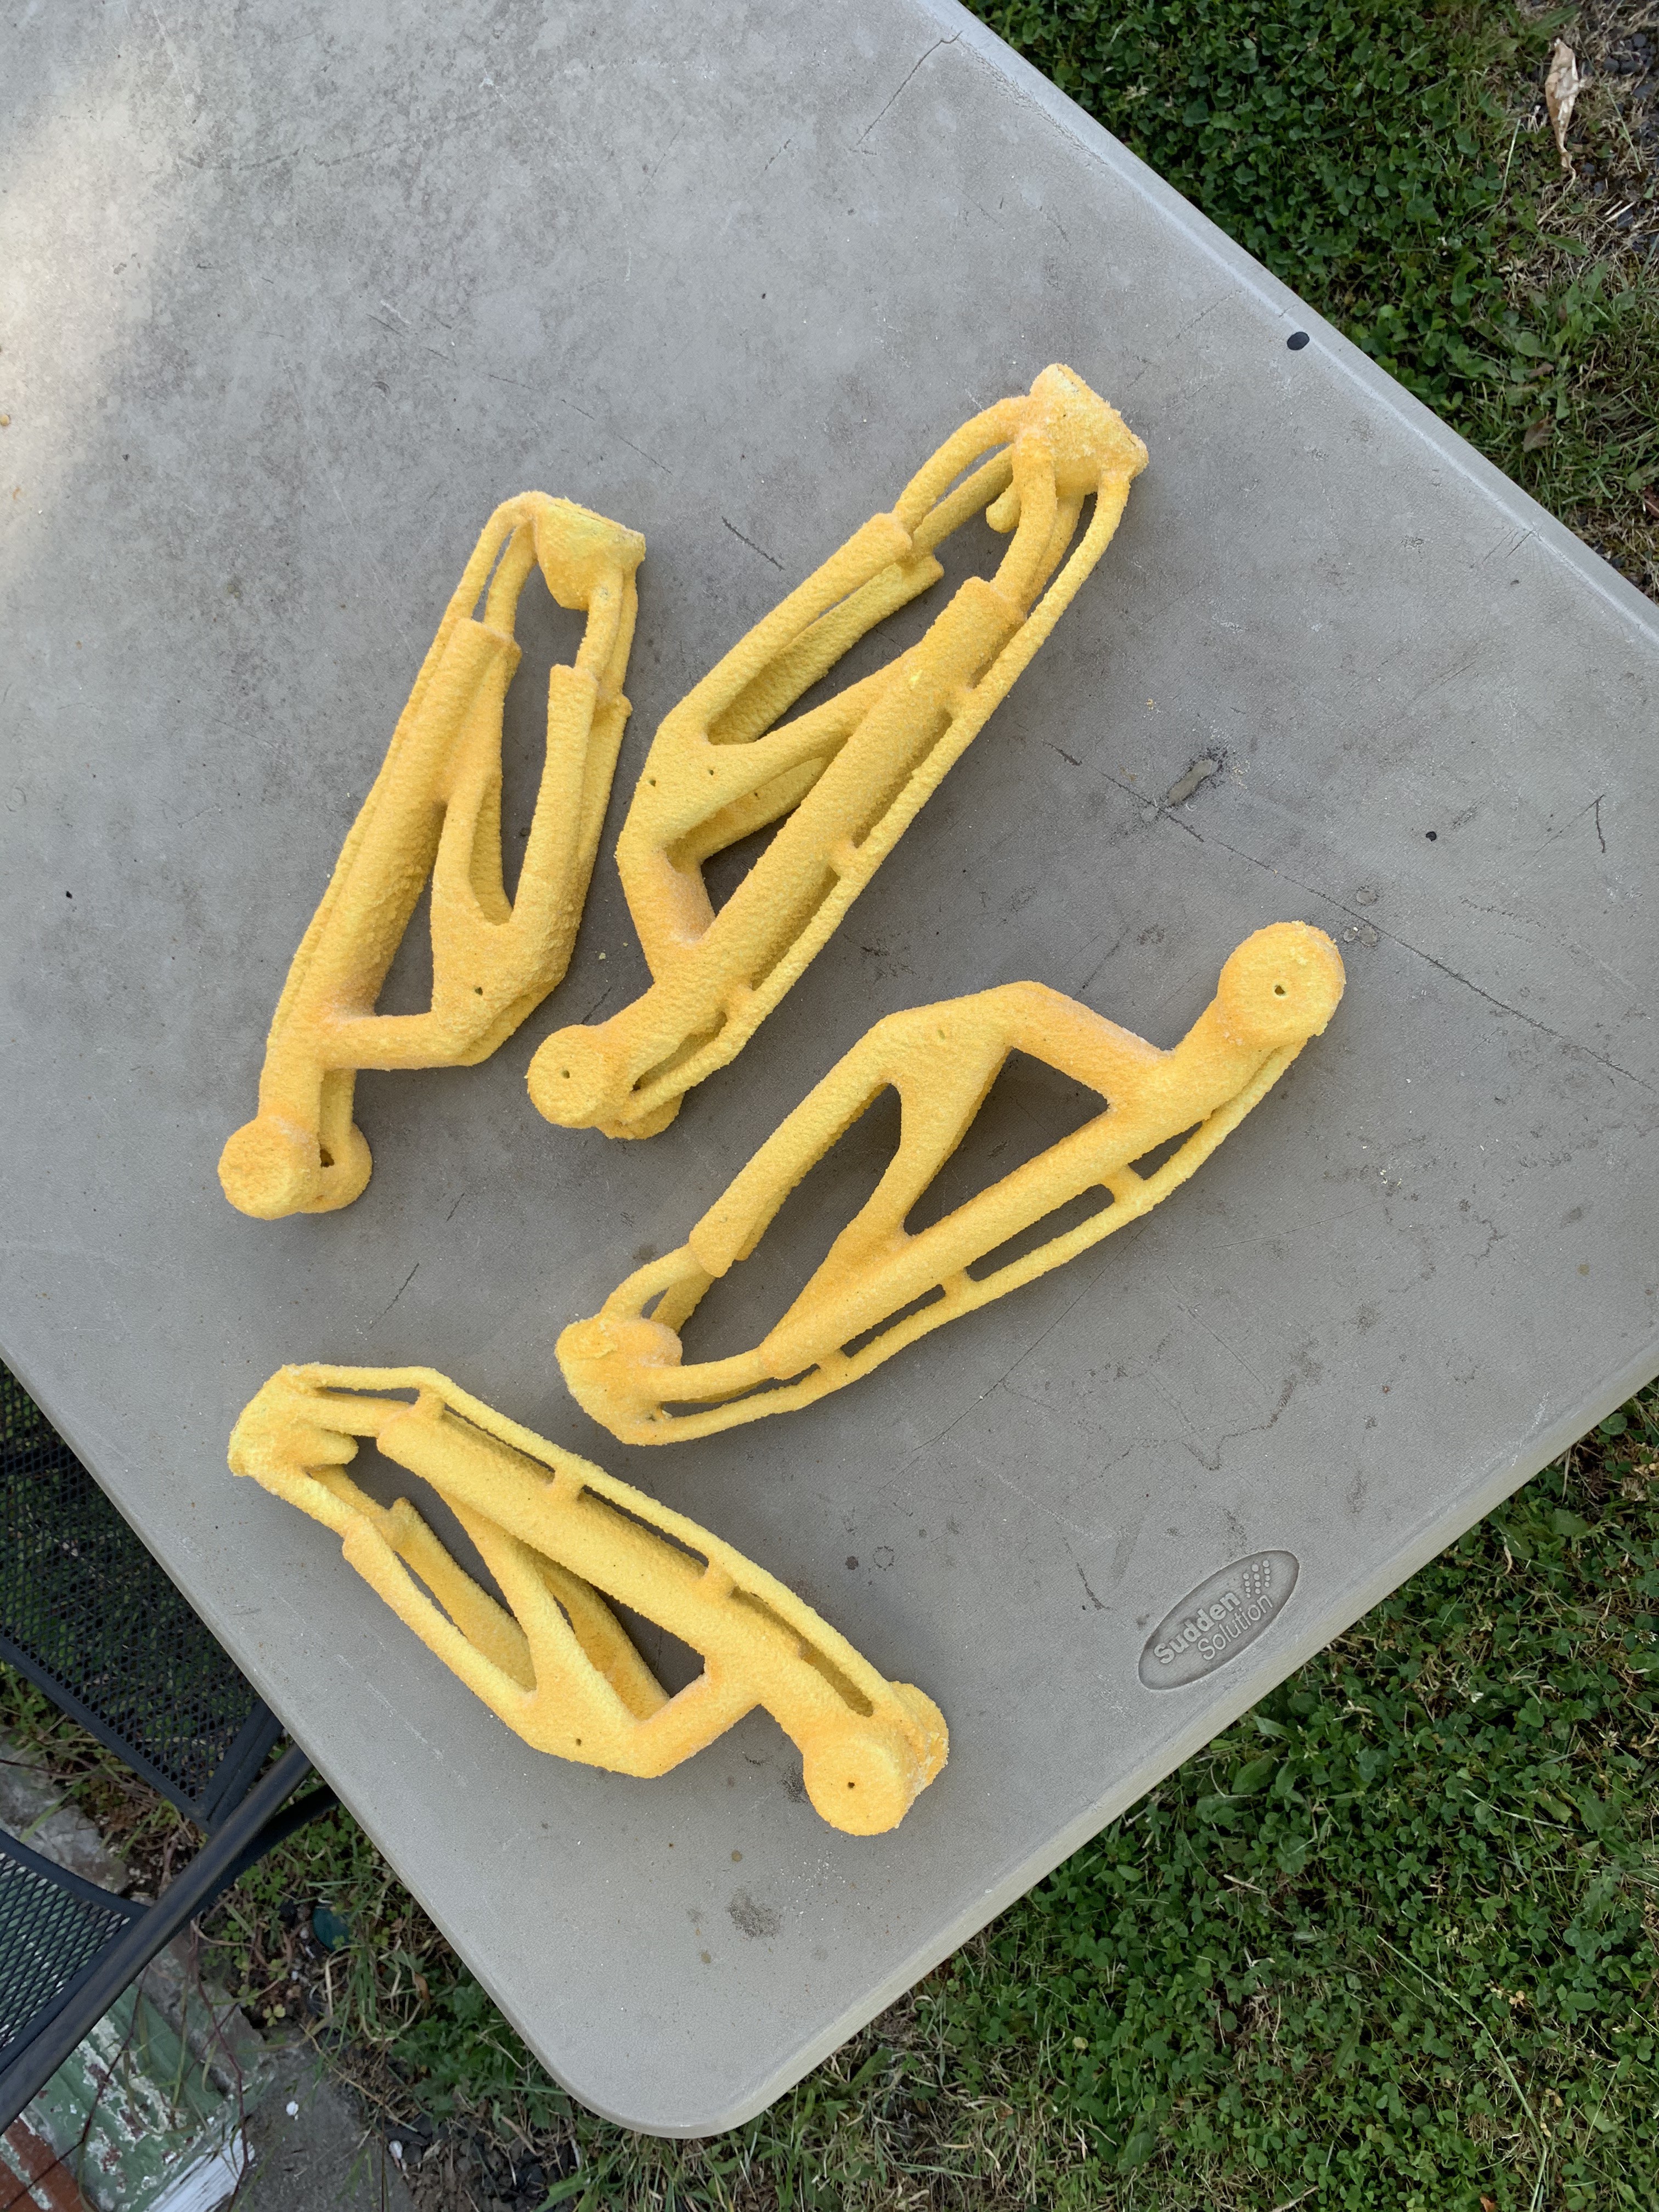
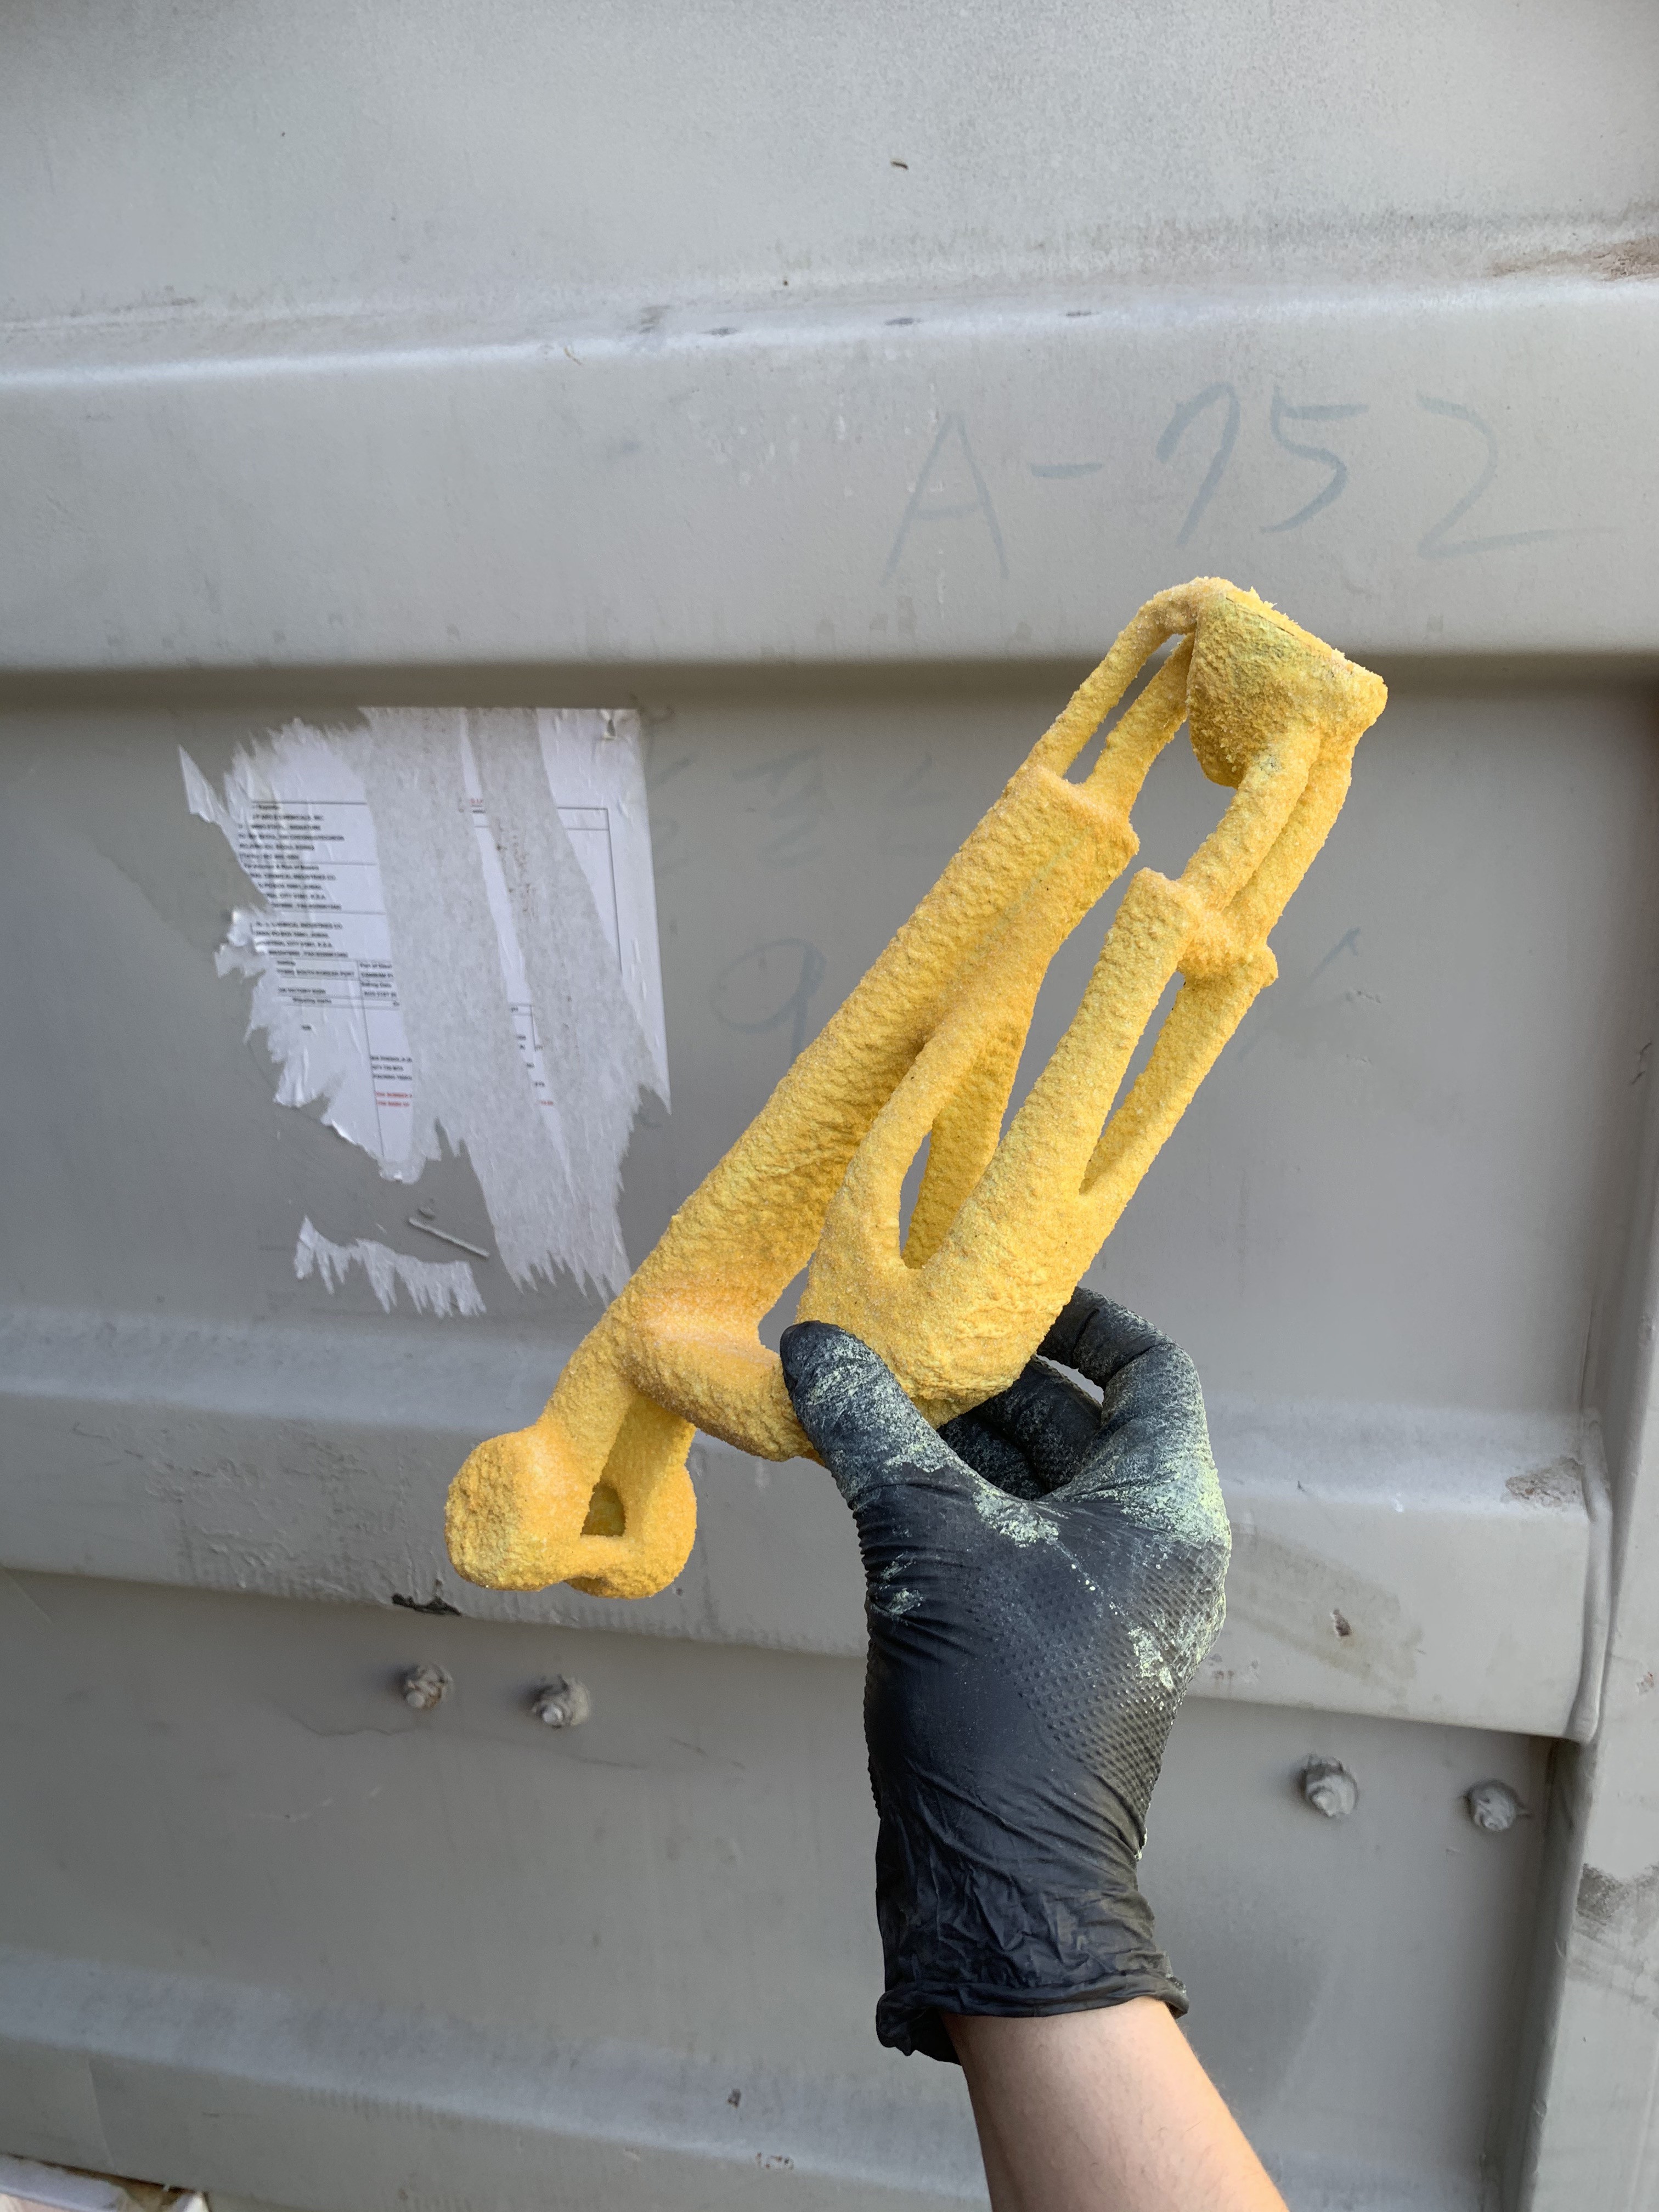
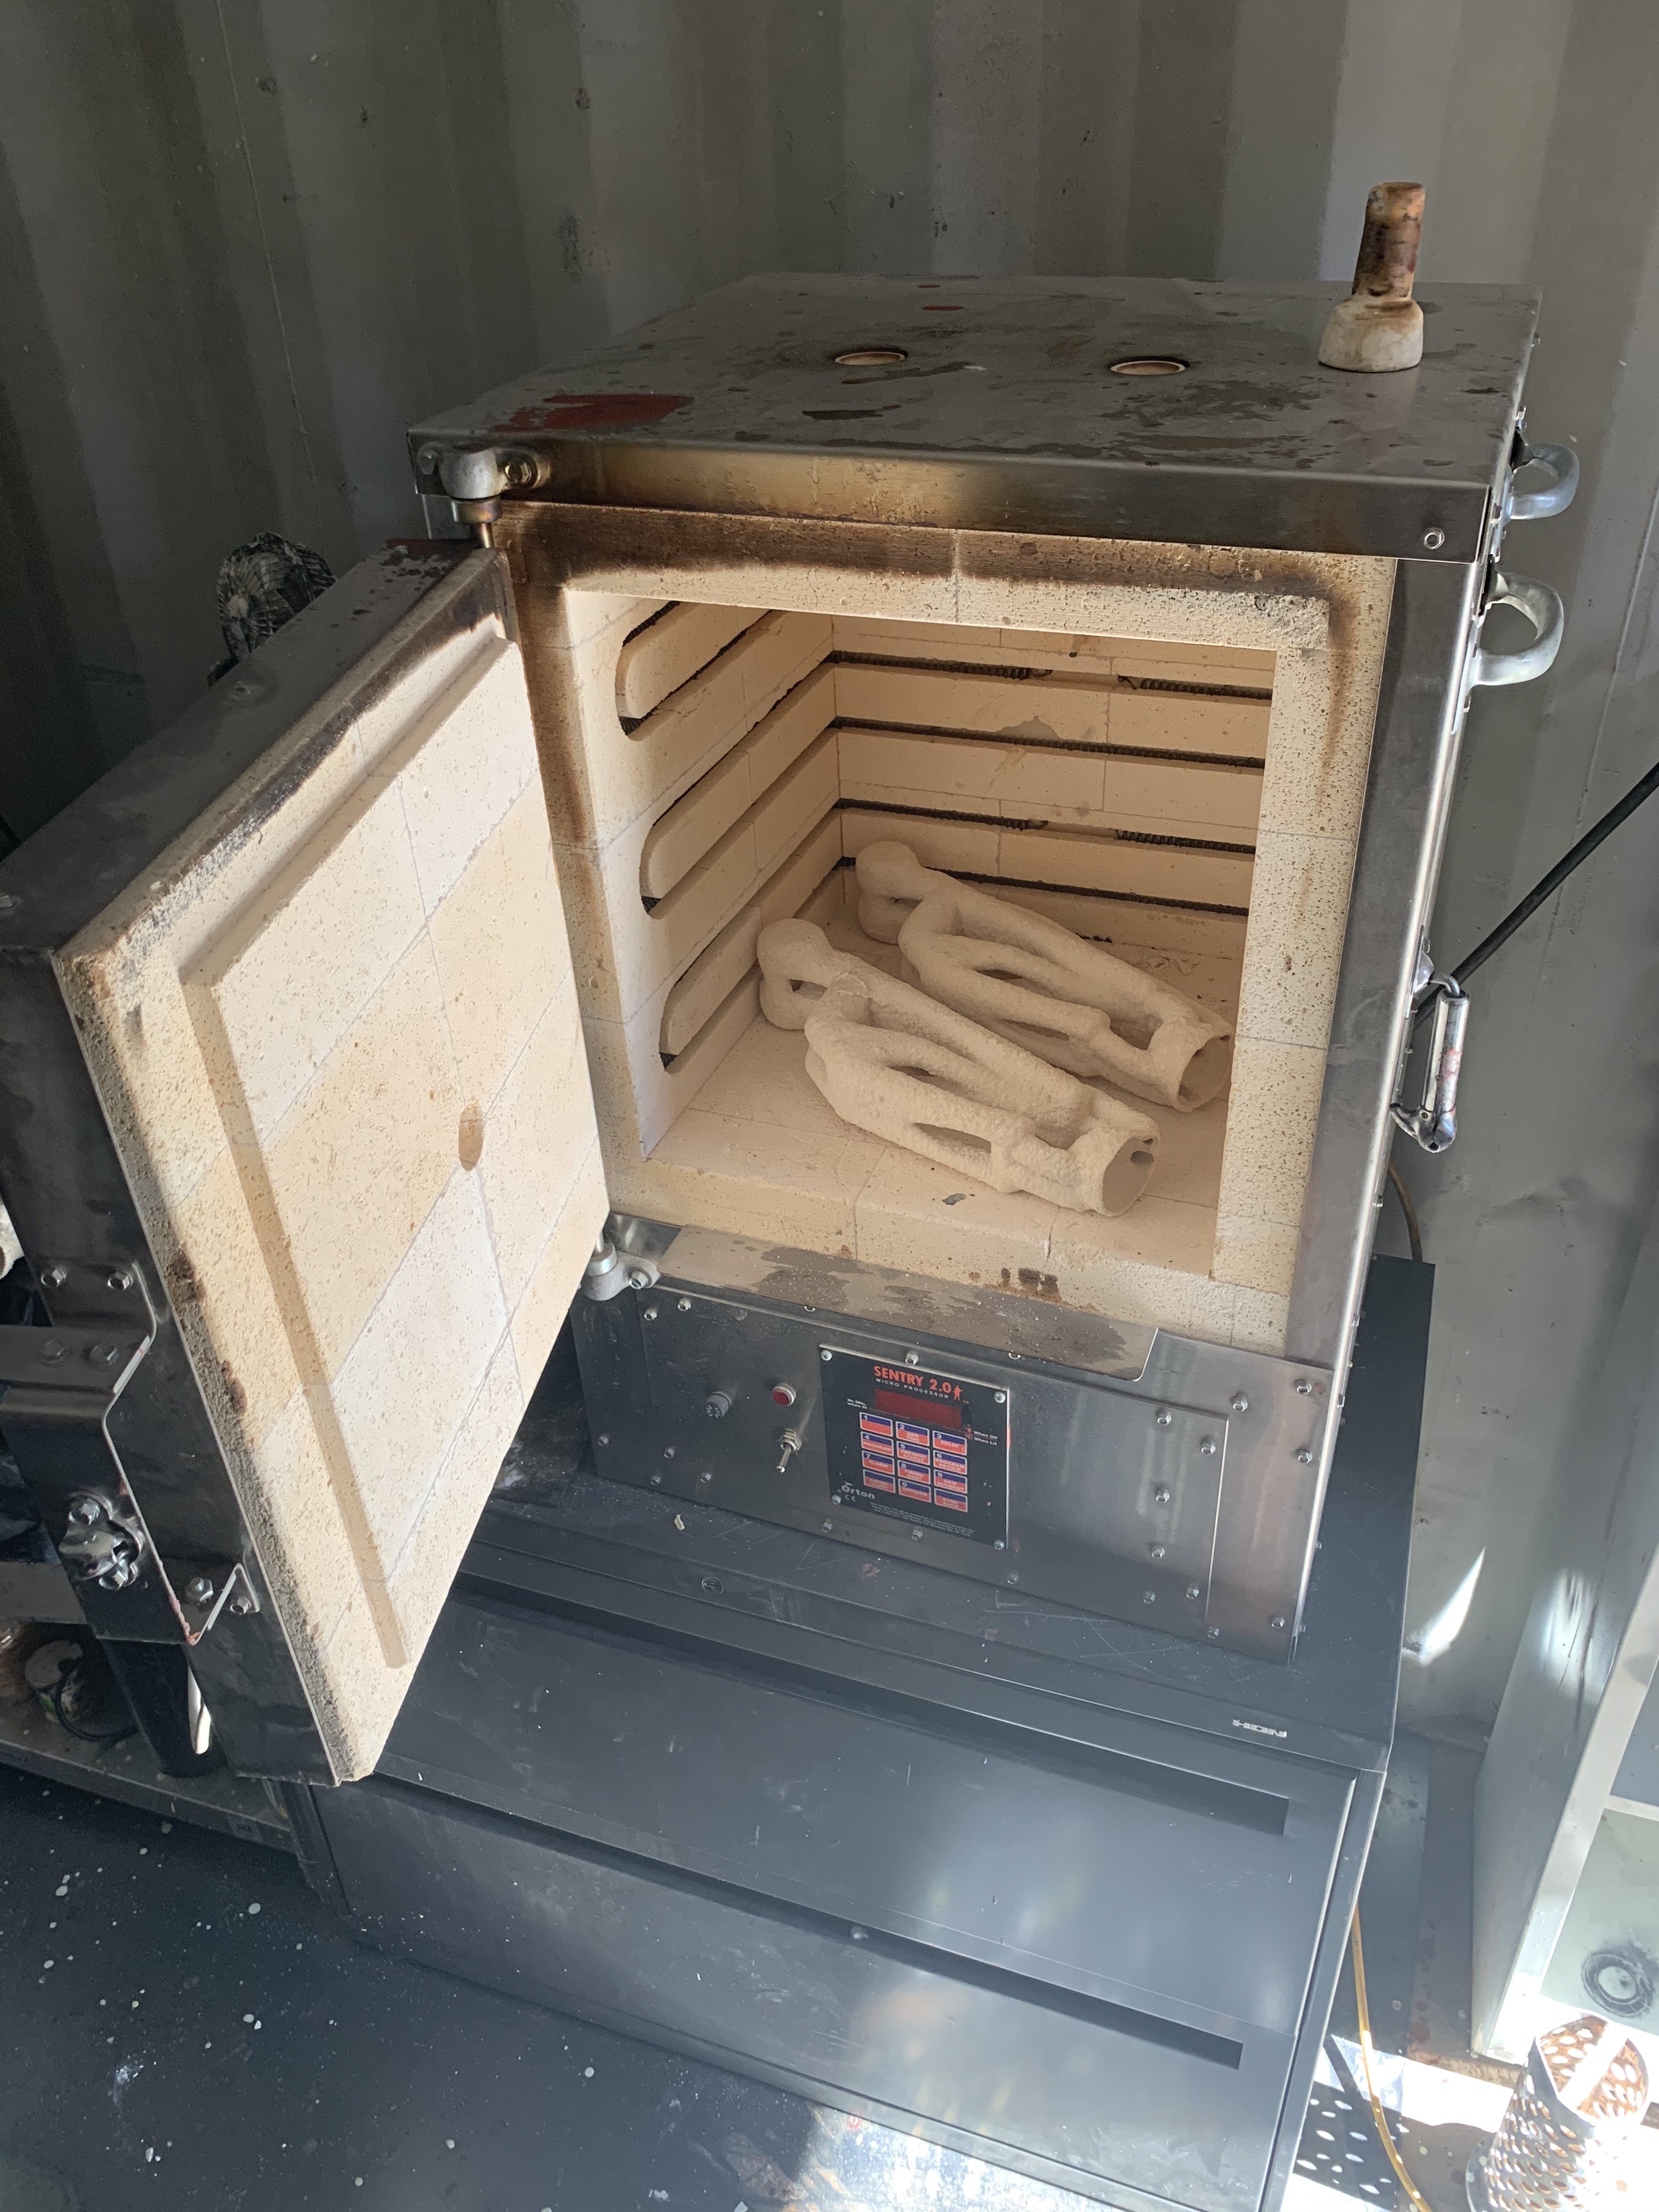
06/03/2021 at 05:25 • 0 commentsThis week I am casting the first half of upper arm bones. These are split in quarters due to very complex organic geometry (basically they have a hole through them where the pistons go), so that they could be removed from a rubber mold without breaking them. Here are some pictures after first two quarters of wax casts were welded together last November to create a complete half (still in wax, with a wax pen), dipped in slurry and coated in sand. After drying, they were bunt out in a kiln overnight.
![]()
![]()
![]()
![]()
-
Face re-design
05/26/2021 at 01:24 • 0 commentsWorking on face re-design to match my early concept art more closely. Doing it directly in CAD turned out to be too challenging because I would need to have advanced drafting skills to draw the model correctly from multiple views before even starting the CAD program, so I will try sculpting and 3D scanning this time.
 The easiest way to do this would have been to design these parts with counter-sinks baked into the 3D model, as drilling them with this monster bit was really nerve-racking (is there a word for a phobia of drilling counter-sinks?)
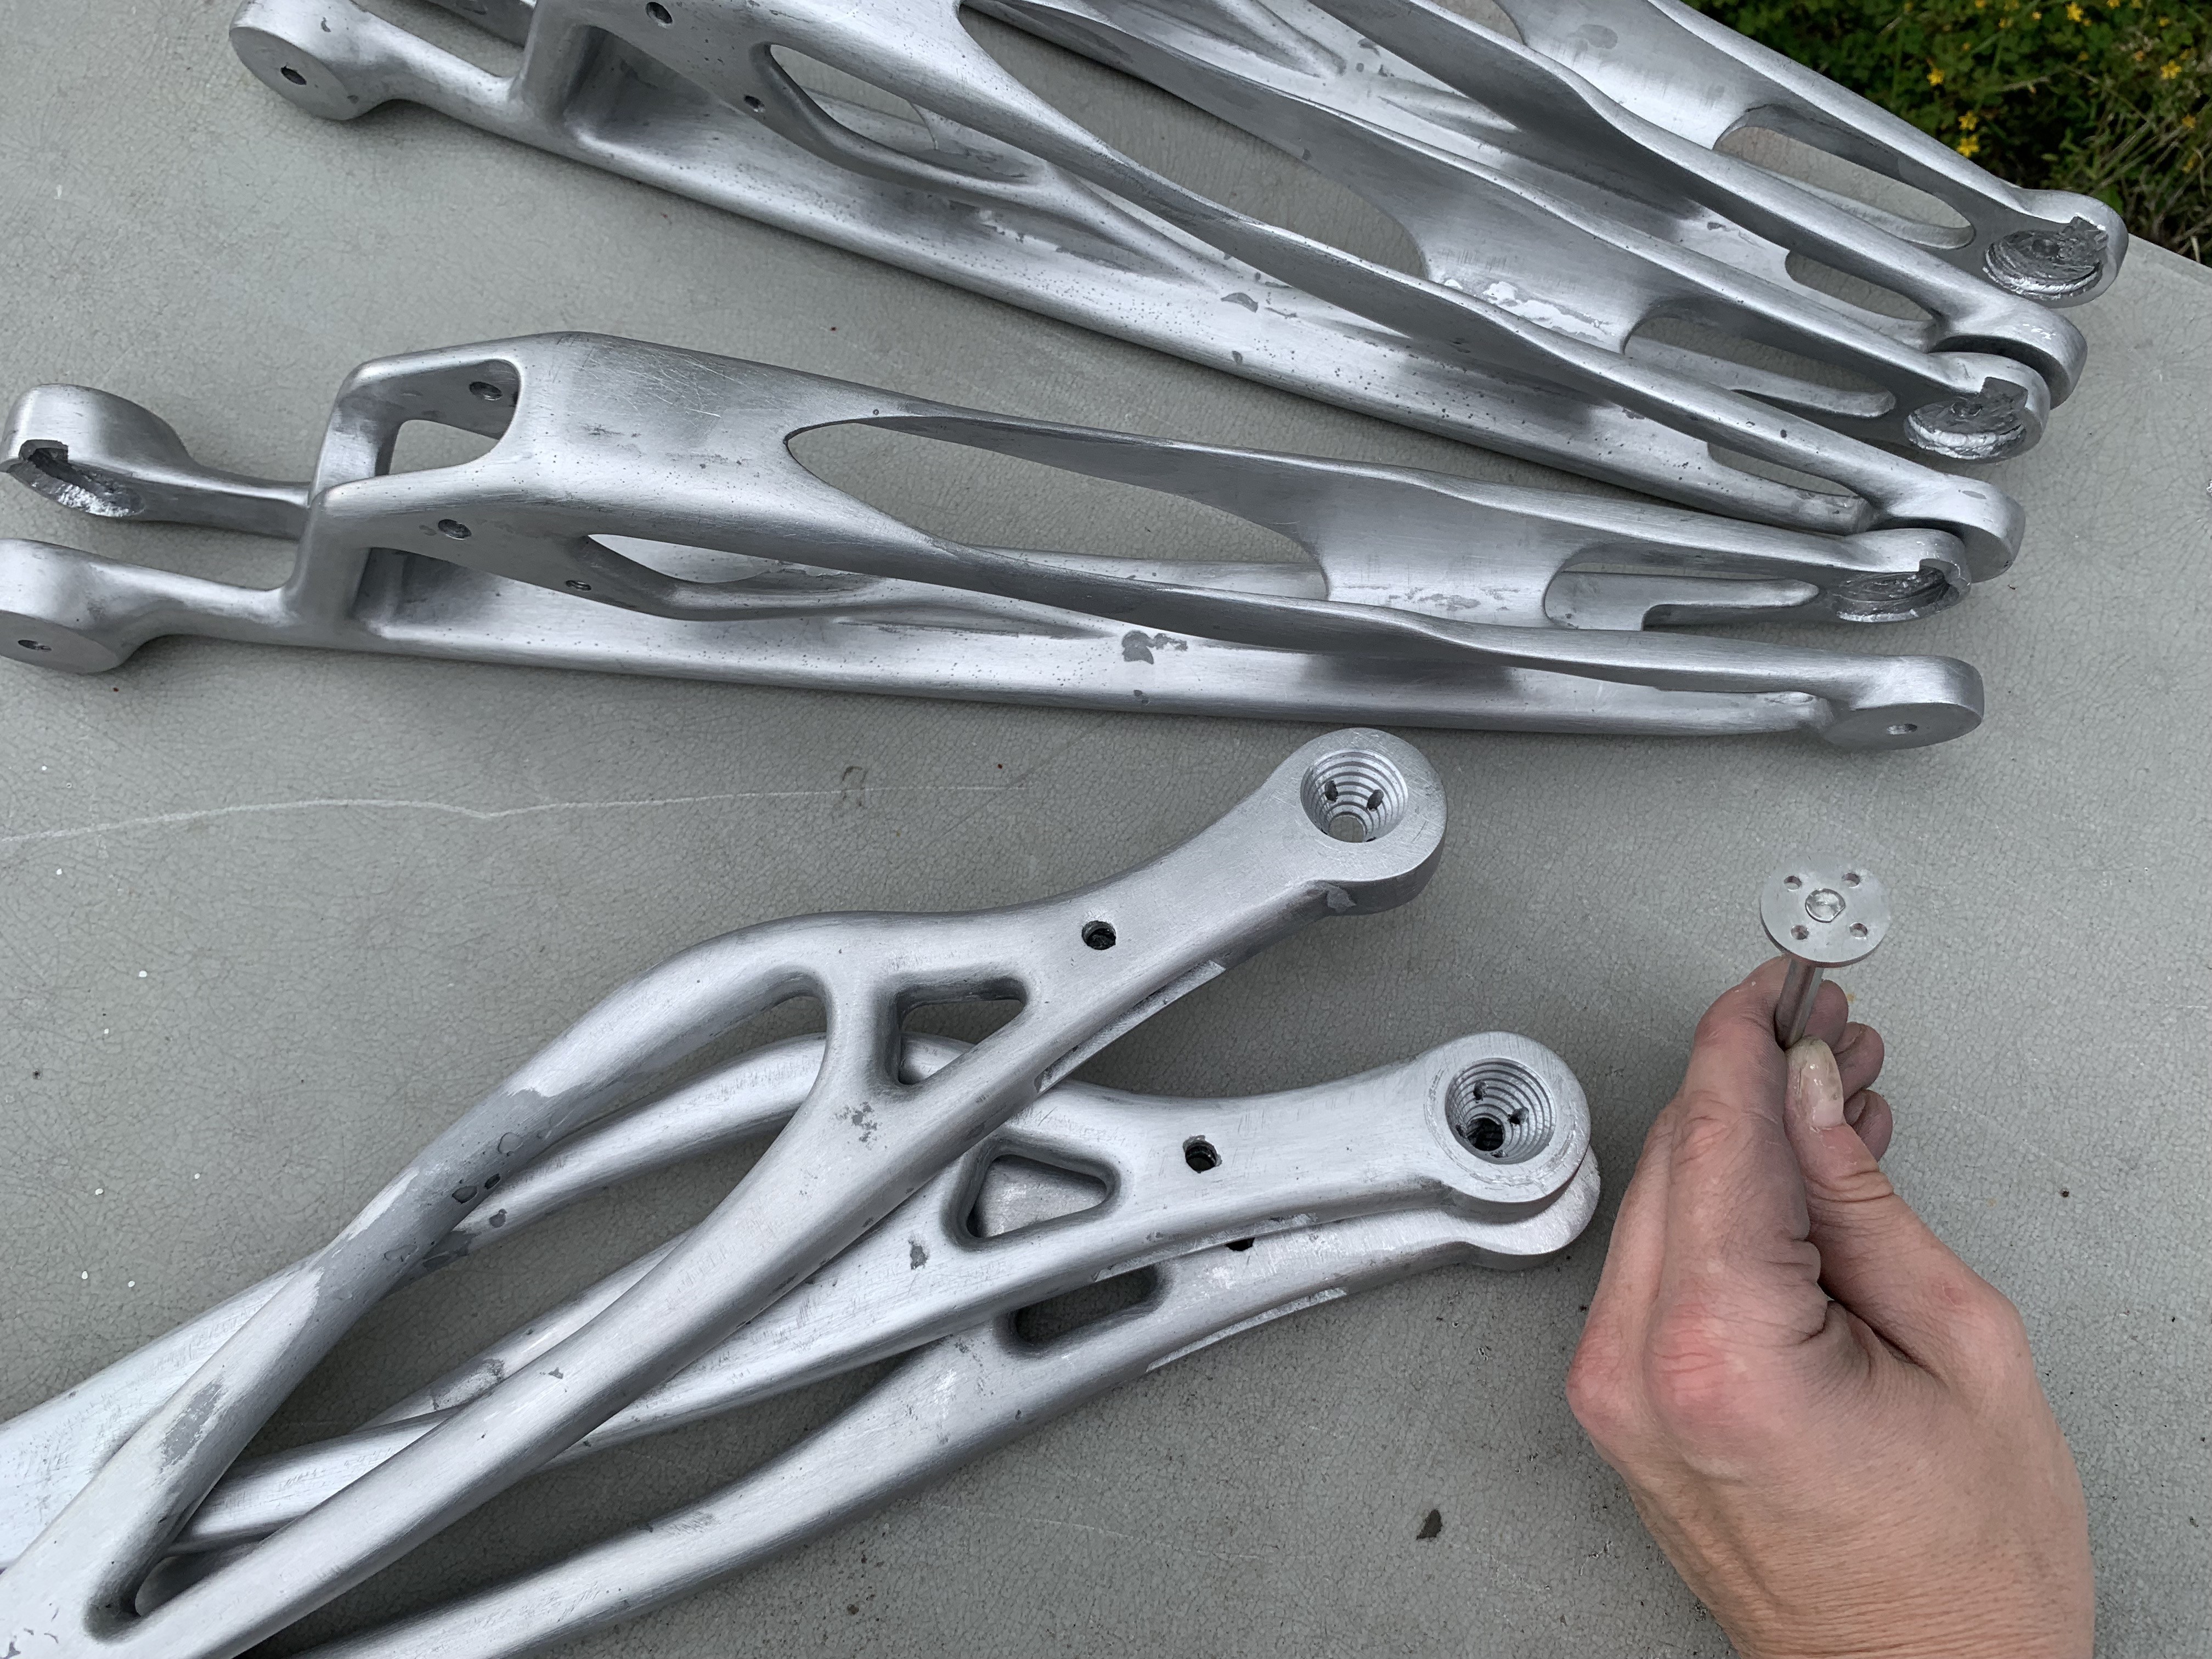 First I tried these miniature robotics hubs, but even these were too big, more fit for projects where you have a lot of extra space: