Either solder a board manually or buy an assembled board.
Also make sure to buy an Adafruit 2223 Raspberry Pi stacking header, or a similar header from another manufacturer. Otherwise you cannot connect the board to the Raspberry Pi!
2
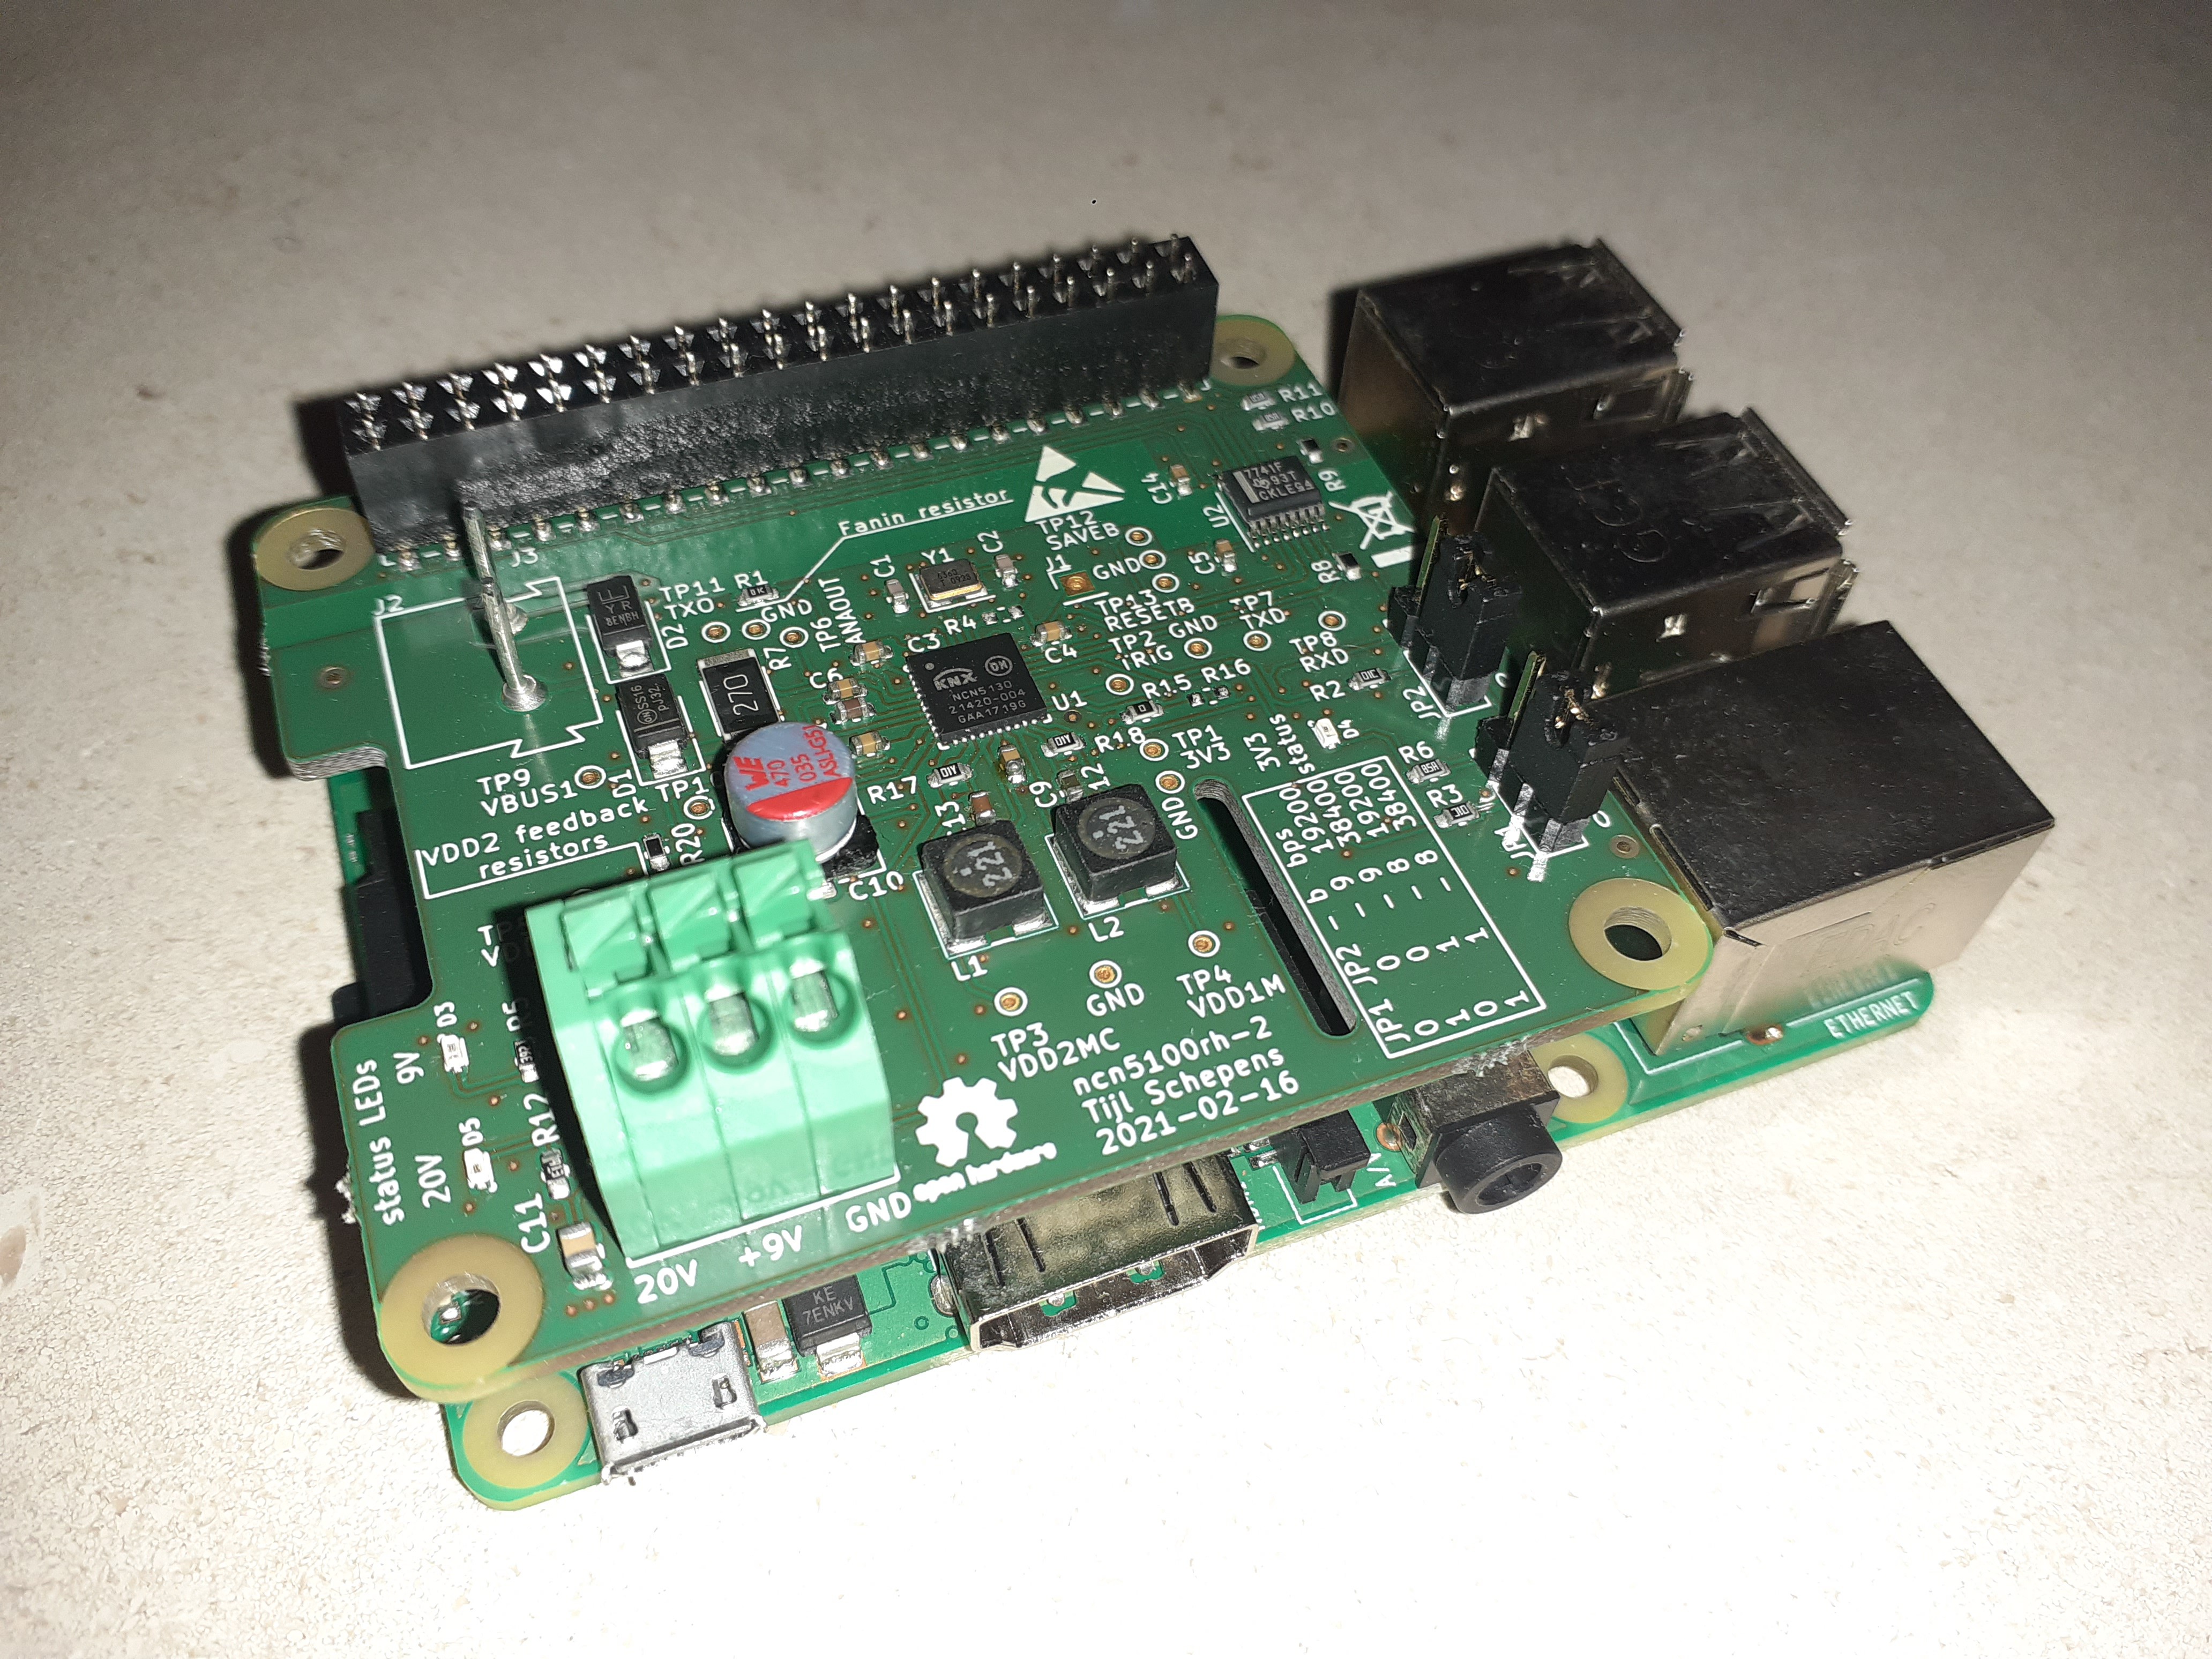
Stack the board on the Raspberry Pi.
Now shove the Raspberry Pi stacking header on the GPIO pins header of the Raspberry Pi.
Now shove the KNX Raspberry Pi HAT onto the long header pins as shown in the picture above. Make sure that the mounting holes on the HAT align with the ones on the Raspberry Pi. Connecting it in any other direction, will damage the HAT or even the Raspberry Pi!
3
Connecting the Power Supplies.
The KNX Raspberry Pi HAT and the Raspberry Pi itself need to be supplied separately. Both are functionally isolated from each other by the ISO7741.
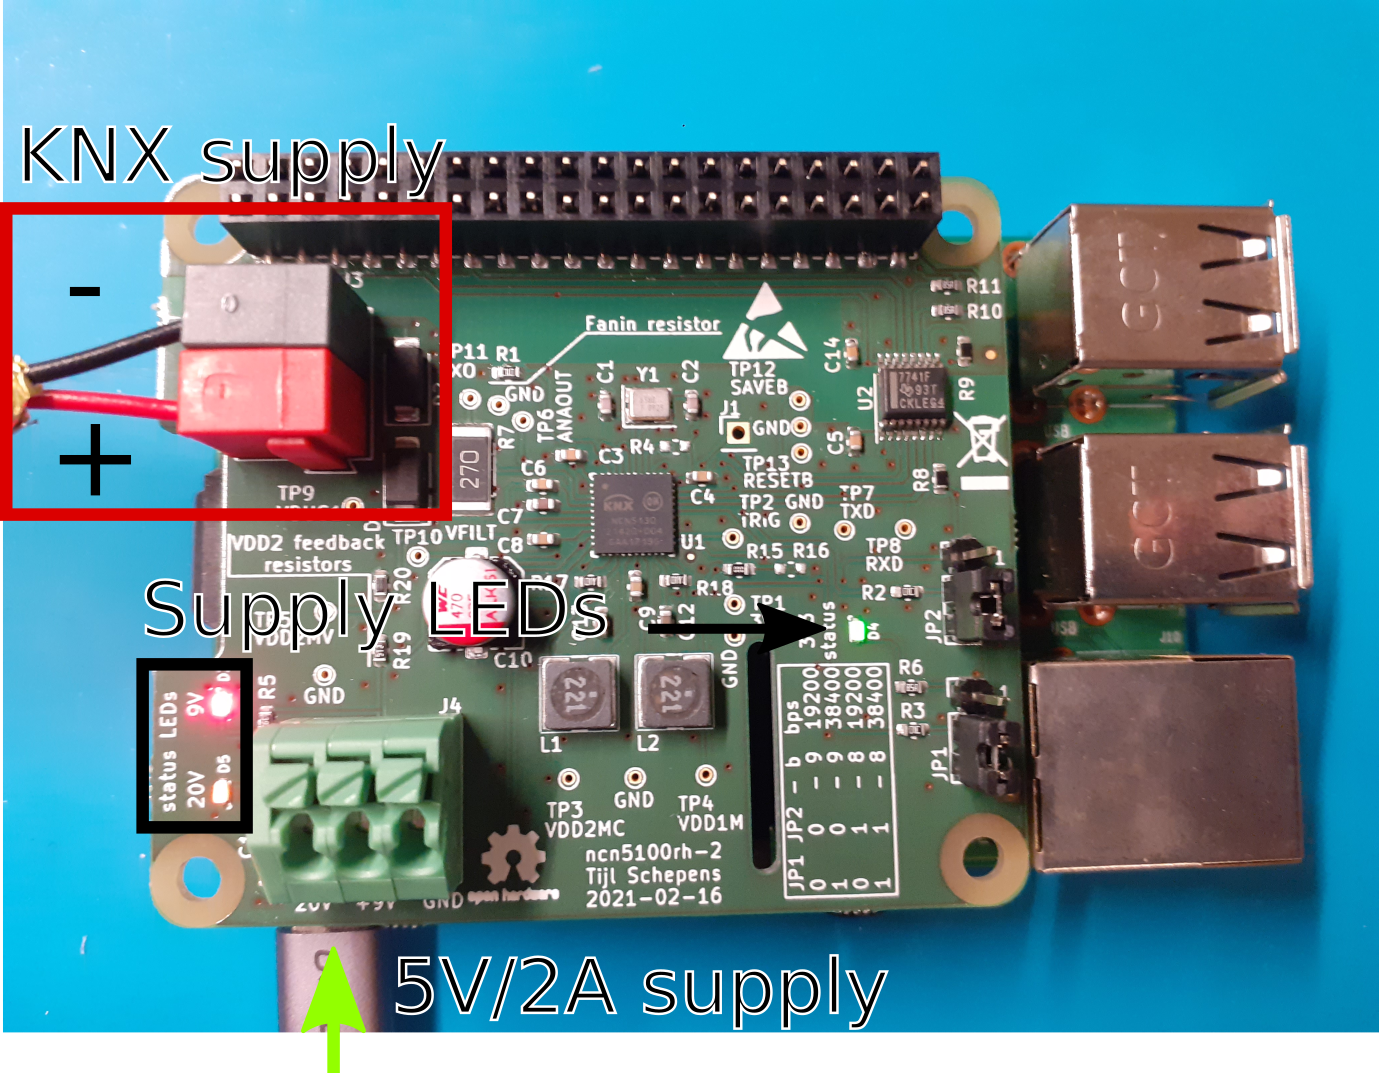
The HAT is supplied through the KNX bus. On the top left of the shield, there are two 1 mm terminal pins to connect the bus. Normally a red/grey Wago connector is used to plug onto these pins. Make sure to respect the RIGHT POLARITY when connecting the KNX bus!
The above image shows how to connect the bus properly. Note that it is possible to supply the HAT through a lab power supply, but communication will then NOT be possible. To communicate on the bus a special KNX choke is needed in series with the power supply. Normally every KNX supply sold these days contains this by default.
Supply the Raspberry Pi with a 5 V USB power supply through its micro USB or USB-C connector.
4
Select the communication speed.
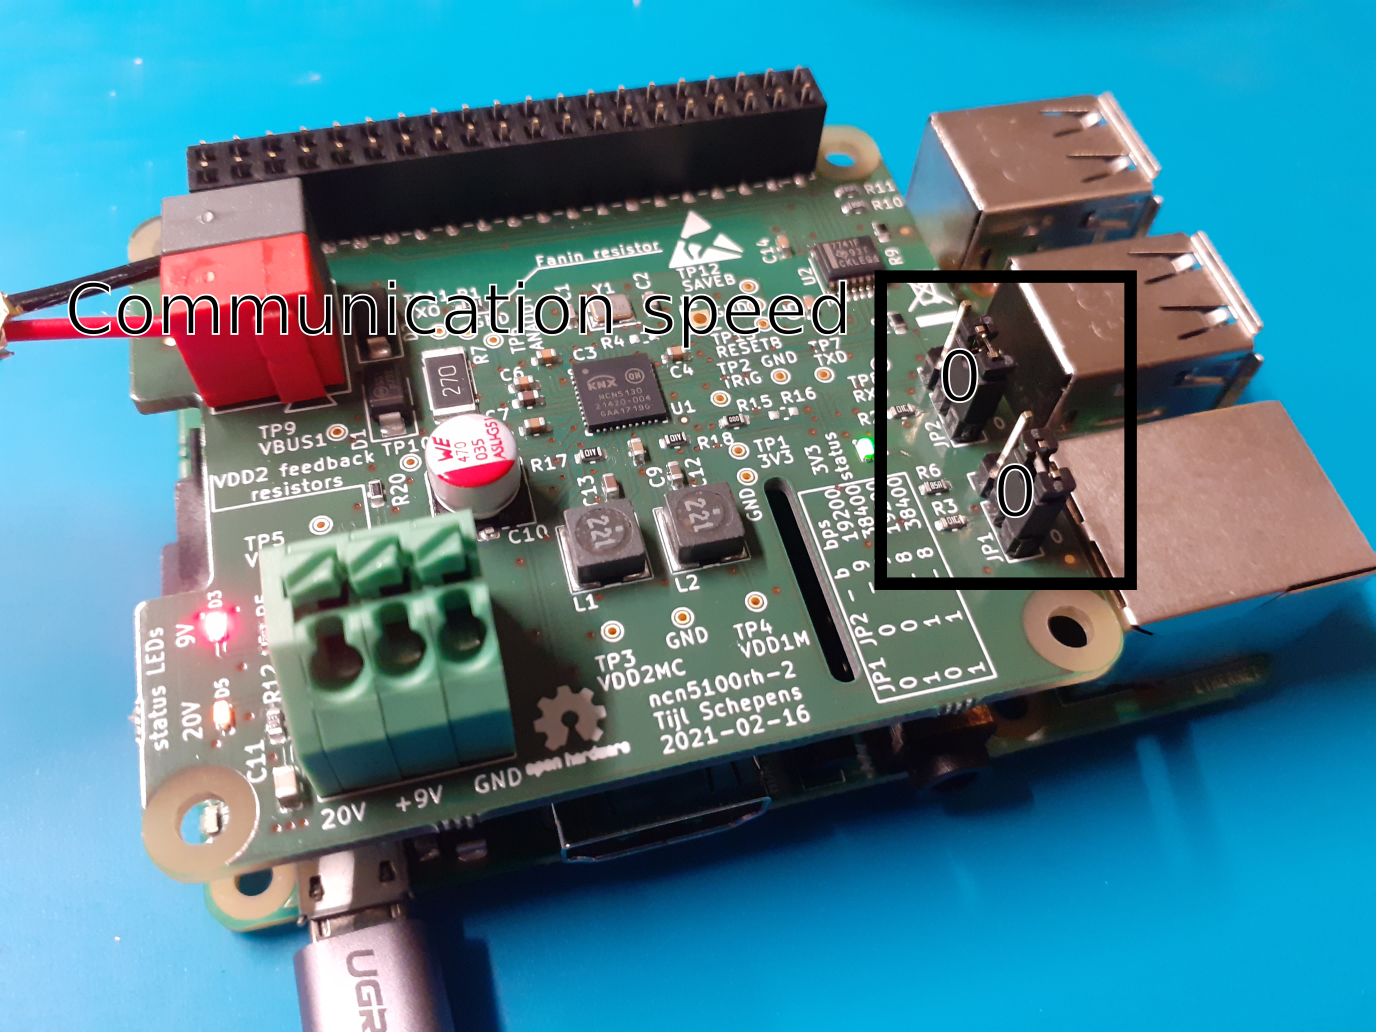
Now it's time to select the communication speed. The NCN5130 KNX transceiver supports two different UART communication speed. It can communicate either at 19200bps or 38400bps. Also it is possible to select to either use an even parity bit or not.
The KNXD software that we will install, uses 19200bps with an even parity bit to communicate with the transceiver by default. So we set both jumpers to 0 to select this speed.
5
Install the software.
Once the hardware is up and running the software can be installed. Both KNXD and OpenHAB need to be installed on the Raspberry Pi.
Installing OpenHAB is straight forward on Raspbian.:
First the openhab repository needs to be added to the apt sources lists. Do this by executing the following command:
Now update the apt packages list and install the latest version of OpenHAB:
sudo apt update
sudo apt install openhab
Once the software is installed, you can let the Raspberry Pi start OpenHAB automatically on boot:
sudosystemctldaemon-reloadsudosystemctlenableopenhab.service
# Start the service and check if it started successfully
sudosystemctlstartopenhab.servicesudosystemctlstatusopenhab.service
Have some patience as it can take some time for the service to start. You can see if everything went will using the 'status' command. For more information on install OpenHAB on Linux, refer to: https://next.openhab.org/docs/installation/linux.html
To install KNXD, use the Debian branch of the repository:
sudo apt install git
# get the source code
git clone -b debian https://github.com/knxd/knxd.git
# nowbuild+install knxd
sh knxd/install-debian.sh
# … andif you'd like to update knxd:
rm knxd*.deb
sh knxd/install-debian.sh
Once the installation is finished, restart the Raspberry Pi.
Now on your PC browse to the IP address of your Raspberry Pi using your favorite browser. If you don't know the IP address of your RPi, execute "ip addr" on the command line. So go to: http://my.rpi.ip:8080 Don't forget to add port 8080 to the IP address.
You will be greeted with a setup screen to create an admin account. Select an administrator username and password.
6
Configuring KNXD
Before we can start configuring OpenHAB and create our KNX network, we need to set up KNXD. It has to be configured to start automatically at boot as a service and it needs to be given the right arguments to communicate with the Raspberry Pi HAT.
Before anything else disable the login shell which is by default present on the UART. If this is not disabled, the UART peripheral is not available for anything else and we cannot use it to talk to the HAT. If you are getting "Permission Denied" for the /dev/ttyKNX1 interface a bit later on, this is the reason.
To do this, run
sudo raspi-config
and go to "5 Interfacing Options":
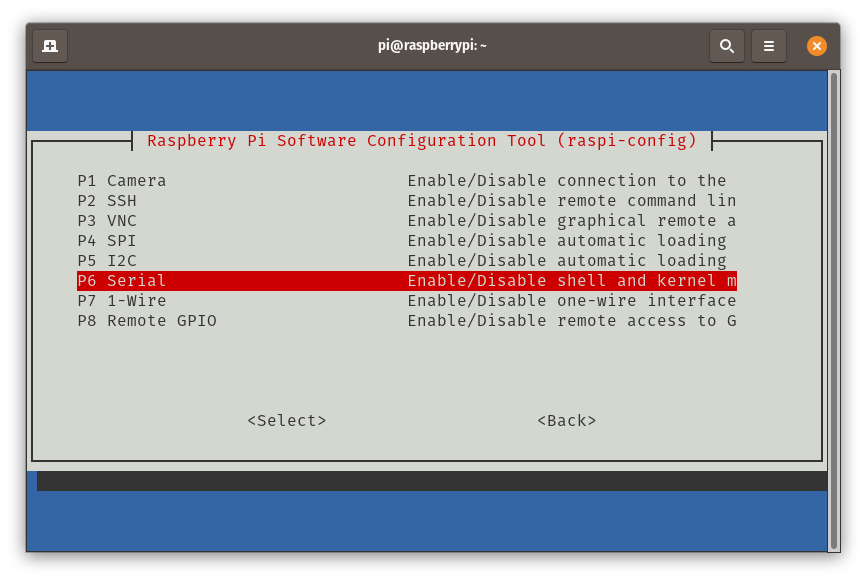
Now choose "P6 Serial":
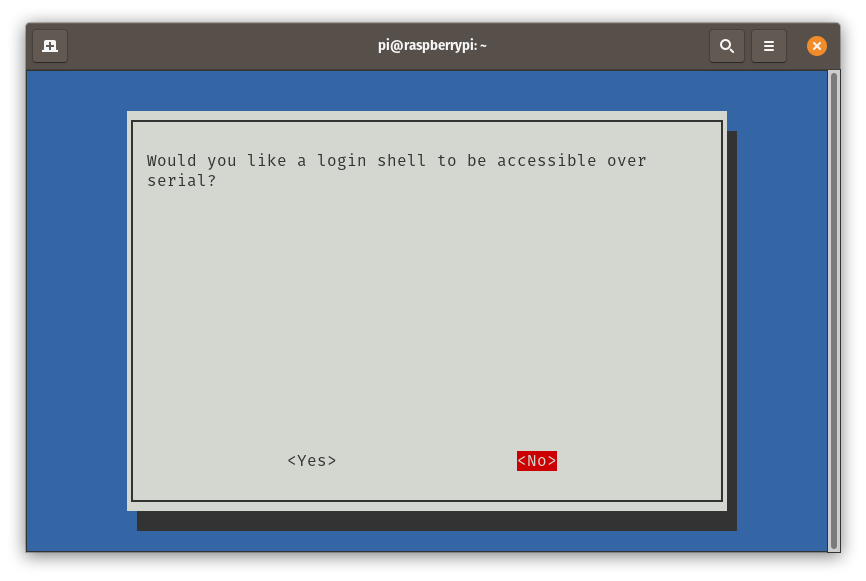
The first question is if you want to enable the login shell. Answer no to this question:
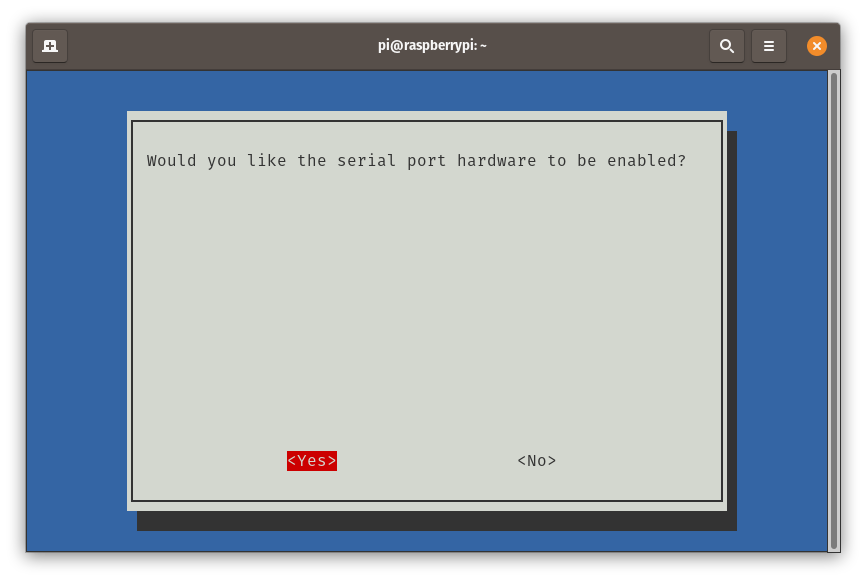
Next is if we want to enable the UART peripheral. Answer Yes to this question.After that choose "Finish" and restart your Raspberry Pi.
The transceiver on the Raspberry Pi HAT is and NCN5130 which communicates over UART to the Raspberry Pi. In order for KNXD to talk with the transceiver over UART we need an UDEV rule. Otherwise KNXD will not have permission to use the UART interface.
Add the following rule to a new specific rules file for KNXD:
sudo nano /etc/udev/rules.d/80-knxd.rules
# Add the following line to this file
ACTION=="add", SUBSYSTEM=="tty", ATTRS{id}=="your-attrs-id", KERNELS=="your-kernel-id", SYMLINK+="ttyKNX1", OWNER="knxd"
In this line, replace 'your-attrs-id' and 'your-kernel-id' with the outputs of the following commands:
# For kernel id:
sudo udevadm info -a /dev/ttyAMA0 | grep KERNELS.*serial
# For attrs id:
sudo udevadm info -a /dev/ttyAMA0 | grep \{id\}
Only copy the part between quotation marks "". The finished udev rule should look like this:
On the Raspberry Pi 3 and onward the UART interface is used for Bluetooth communication. To repurpose it for KNXD, disable bluetooth in the boot options by adding the following two lines in '/boot/config.txt':
When starting the KNXD service from the command line, there are several arguments that need to be provided to tell KNXD what to do. For example tell KNXD to listen on a socket file or TCP port for commands, what UART interface to use to communicate with the HAT and so on. All the command line arguments can be found here: https://github.com/knxd/knxd/wiki/Command-line-parameters
To play with these arguments and to find the right arguments for your application, I recommend starting KNXD from the command line and constantly change the arguments till they work alright. Constantly starting and stopping the systemd service is cumbersome. To do this, first stop the systemd service if it is running:
The argument '-t1023' enables maximum debug output. So if something goes wrong you will know why. Argument --eibaddr selects the individual address KNXD will occupy in the KNX network. This address is fixed and cannot be changed through software tools such as ETS. With -E a range of addresses is reserved that can be given to clients connecting to KNXD. -n gives a name to the service that is running. This is useful for clients which are able to discover KNXD as they will display this name. For example when connecting with ETS to KNXD through tunneling, ETS will display this name. With --layer2 you define what physical KNX interface KNXD is connecting to, in order to communicate on the KNX bus. There are several options, but for the Raspberry Pi HAT, tpuarts must be used. The tpuarts driver, communicates over UART, so we must specify a UART interface. Here we specify the UART interface that we created earlier through a UDEV rule. The other options are used for networking, create a server, listen on a socket, etc...
Once you are happy with your command line arguments, store them in the knxd config file. This file is located in "/etc/" and is called "knxd.conf". When editing this file you will see that at the top of the file there is a line that says:
Check if the service is running and does not report any errors:
sudo systemctl status knxd.service
Once the service is running well, we can start looking into setting up OpenHAB!
7
Configuring OpenHAB
Once the basic configuration for OpenHAB is done, navigate to the IP Address of your Raspberry Pi on port 8443. You will be greeted by the following screen:
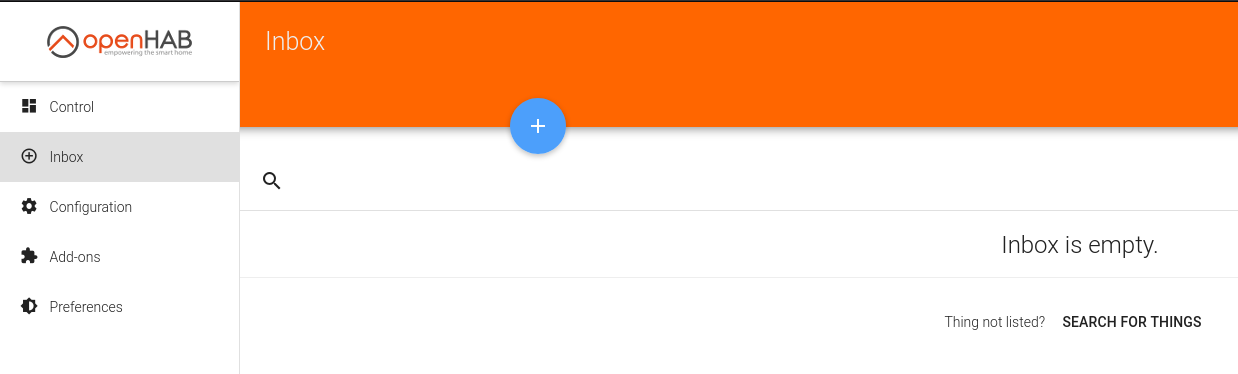
The Paper UI is used to configure OpenHAB and its bindings. After opening Paper UI you end up in the Inbox.
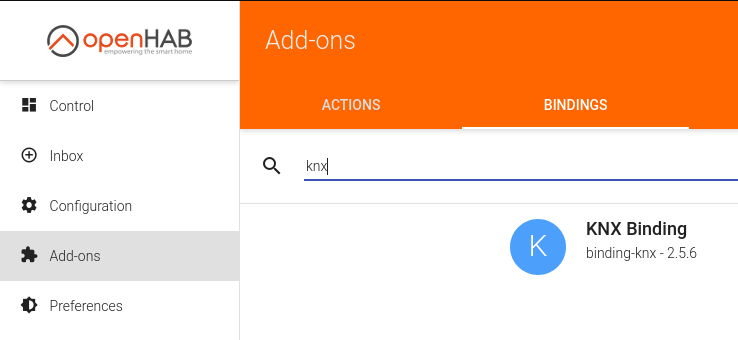
Before we can start configuring the KNX interface and start adding KNX device, we first have to install the KNX binding addon. Do this by first going to the Add-ons tab and under Bindings search for KNX.
It should find the KNX binding. Install it and wait for the installation is finished. After finishing the installation, go back to the Inbox and click on the + in the big blue circle. This will give us the option to add a new binding.
Here select to add a new KNX binding.
And select KNX/IP Gateway as the KNXD server we've set up earlier will act as a KNX/IP Gateway.
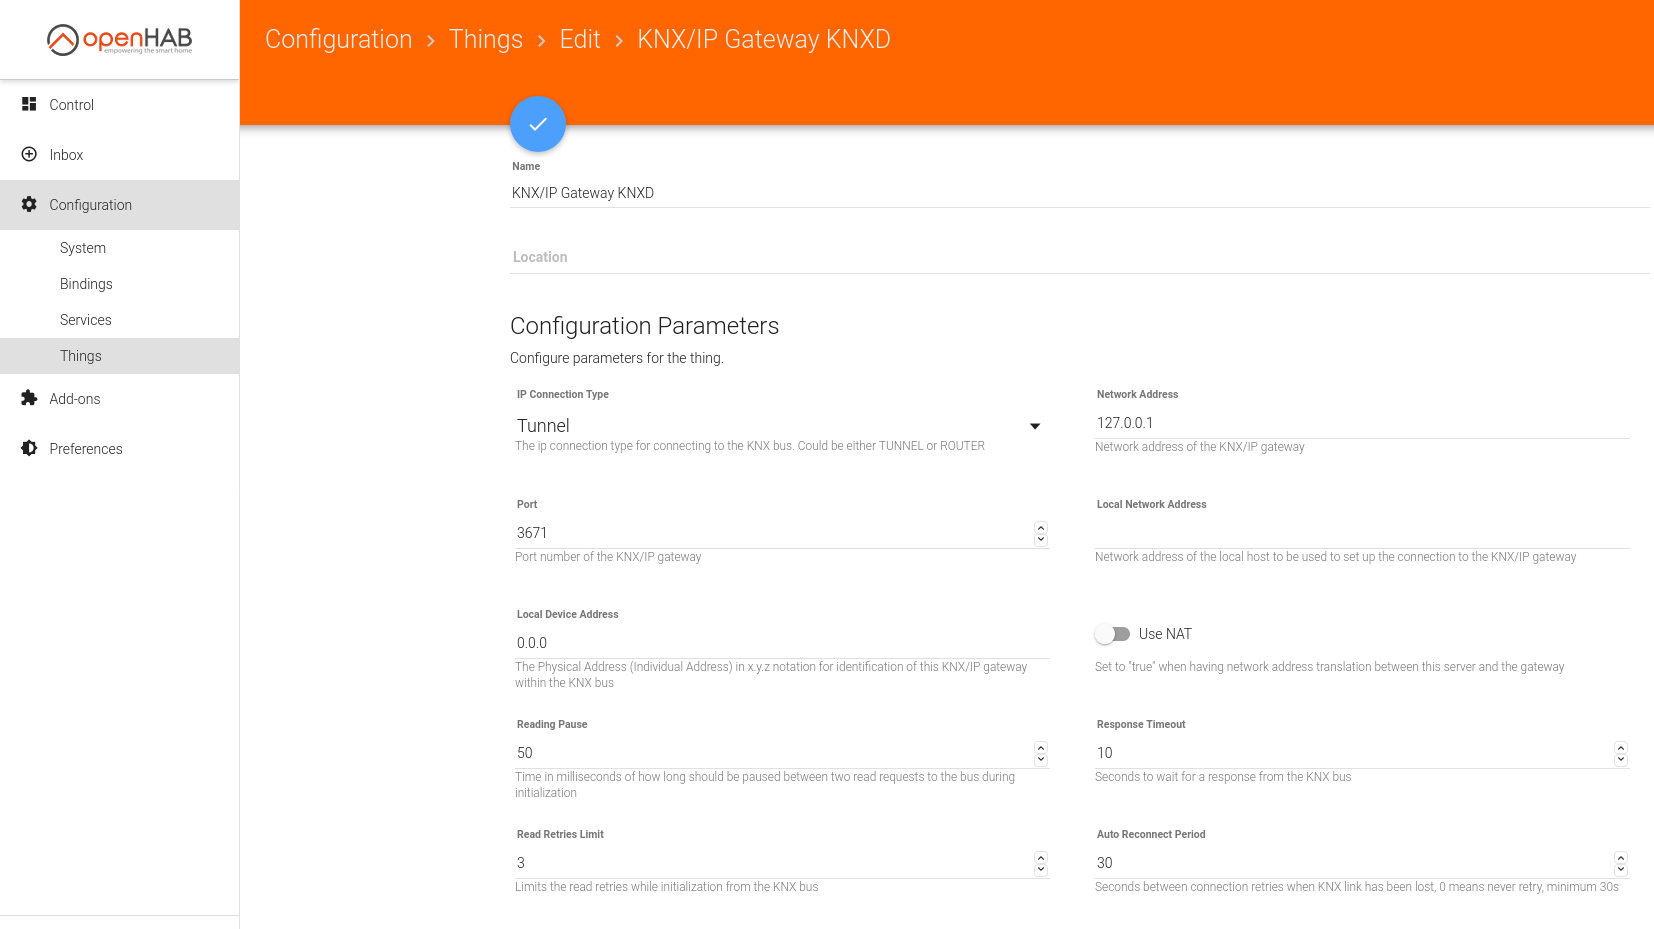
Most options can be left at their default values. Copy the settings in the image below to connect to the KNXD server:
The network address is 127.0.0.1 as the server is running locally. If you run KNXD on a Raspberry Pi and the OpenHAB server somewhere else on another server, fill in the IP of the Raspberry Pi running KNXD instead.
The port 3671 is the default tunneling port used by KNXD.
For the Local Device Address fill in an Individual Address that fits your KNX network. I've used 0.0.0 here for testing purposes, but normally you would match this address with the line your Raspberry Pi is connected to. Make sure that the address is free and not in use by another device in your network!
Once you are save the configuration and navigate to Configuration > Things in the right hand panel. Here you should see an overview of all your things in OpenHAB.
The KNX/IP gateway that we just added should also be listed. It should show that it is Online. If not then either your KNXD server is not running/configured correctly or your OpenHAB configuration is wrong. Please revise all the above steps to make sure everything is right. If you cannot get it to work, just drop me a message and we can start debugging :-)
8
Adding a KNX device in OpenHAB
Now that the KNX/IP gateway is configured in OpenHAB it is time to add some KNX devices. These are the devices connected in your KNX network such as light switches, PIR sensors, HVAC controllers,...
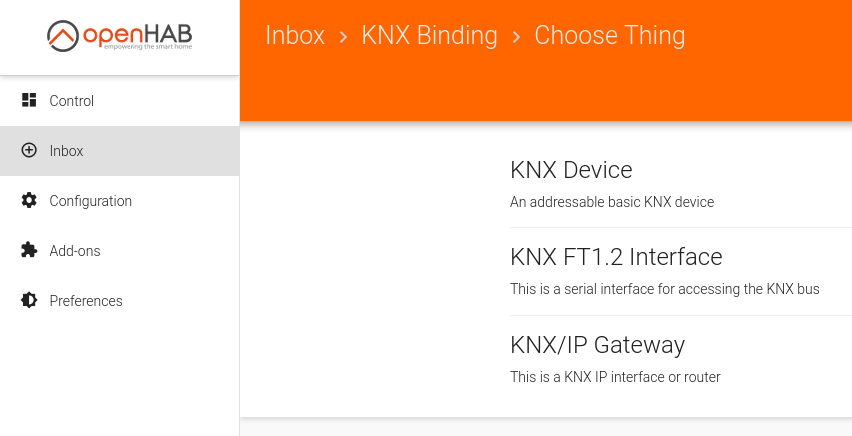
To do this we need to add another binding. In the Inbox in Paper UI click again on the big blue +. And choose KNX Binding.
Now click on KNX Device to add a new device.
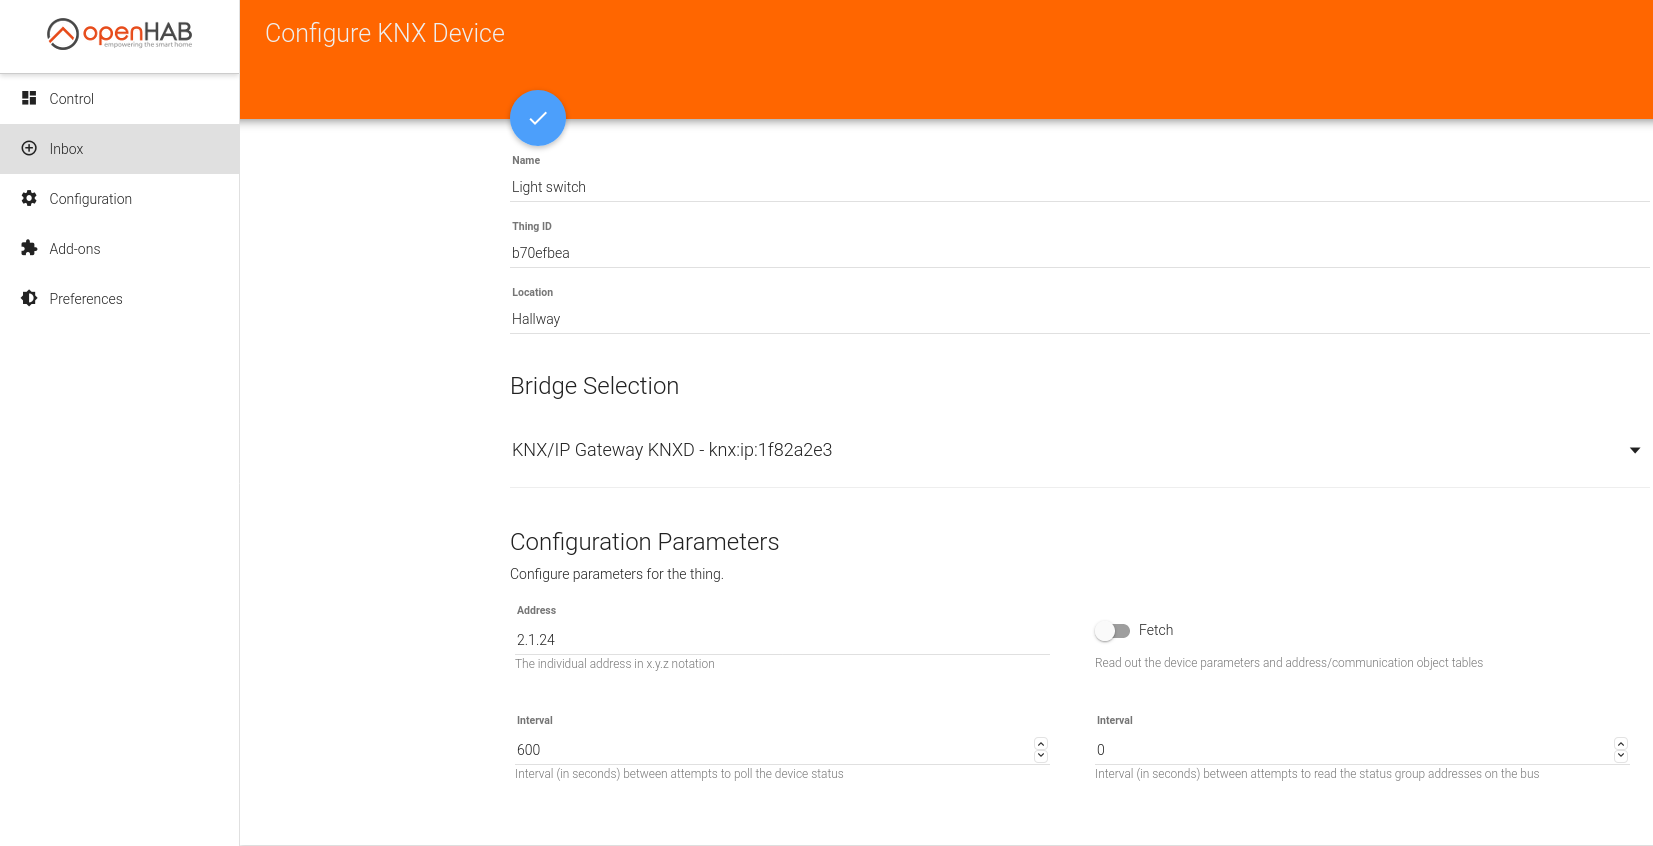
In the new window a new KNX device can be configured. Note that this window is just used to instantiate a new generic KNX device which is connected to the bus. OpenHAB does not yet care about the type of device you are adding. This could be anything.
Give the device and appropriate name and specify where it is located. This will make it easier later on to construct your GUI. Under "Bridge Selection" choose the KNX/IP gateway that we added earlier. The "Address" must be the individual address of the KNX device in your network. OpenHAB will use this address to read out the status of the device (if it is online or not). You can also specify an "Interval" at which OpenHAB will poll if the device is still active.
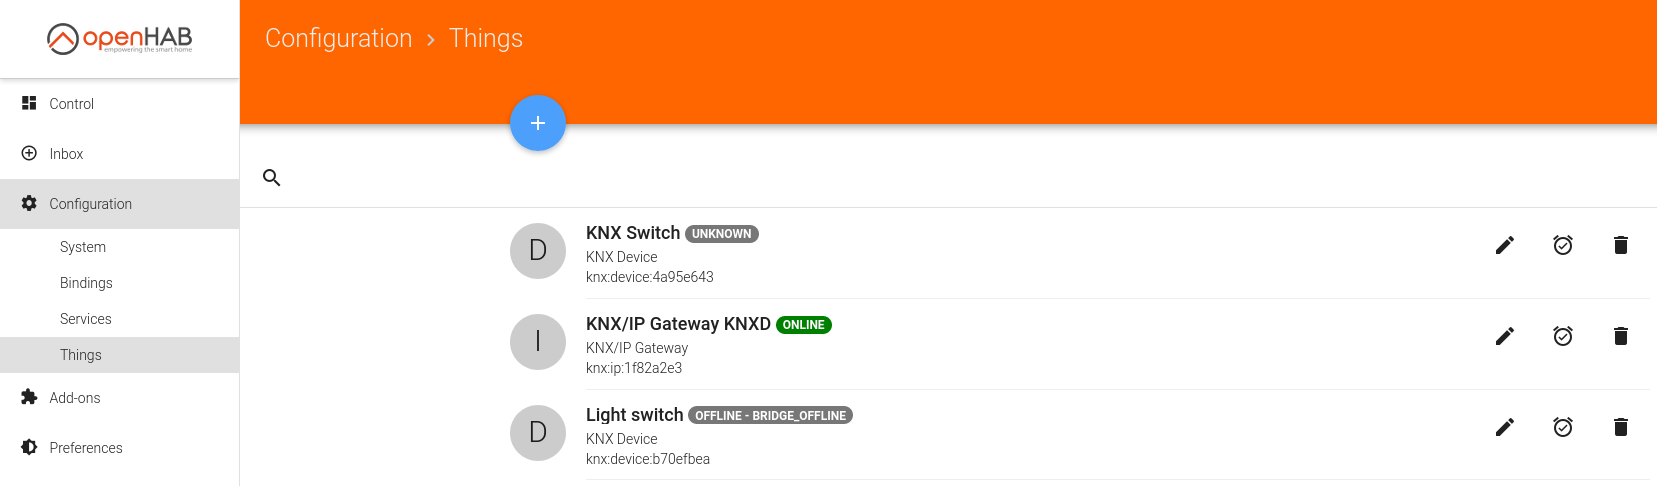
Under Configuration > Things in the right hand panel you should now see your newly added KNX device. OpenHAB will also show if the device is online or not. If OpenHAB can for some reason cannot communicate with the device, it will show that it is offline.
Now in order to control the device, we need to specify what functions are embedded into it. Do this by clicking on the device.
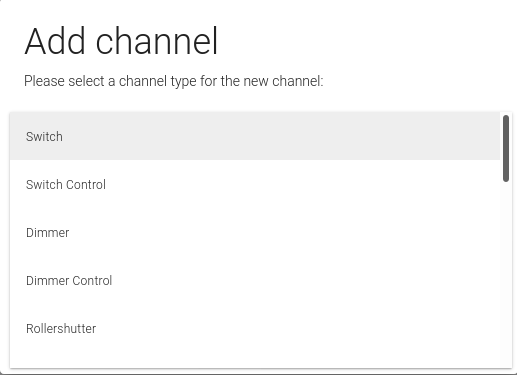
Under "Channels" it will list all the functions your device has such as switching or dimming. Obviously this list is empty as we need to configure it. Start adding group addresses by clicking on the blue +.
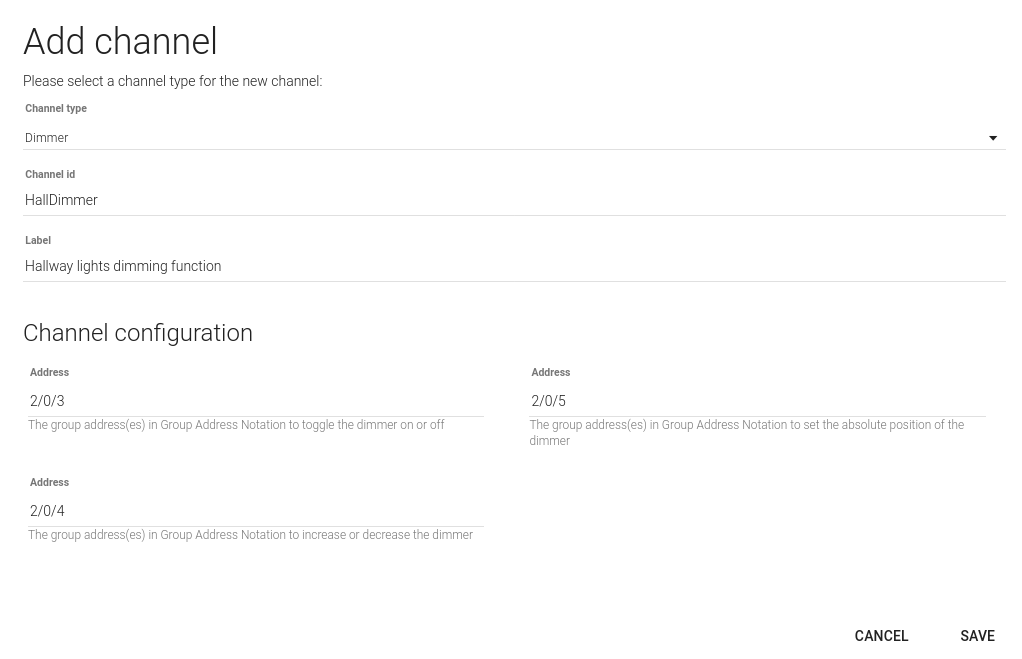
This will open a new window to add a channel. The first thing you need to select is the "Channel Type". This is what functionality your actuator actually implements. Does it switch a light on and off? Is it a Dimmer?
If you are looking to make a switch in OpenHAB to switch lights on and off without having a physical switch, look at the next step in this tutorial.
From the drop down menu you can select many different functions. For now do not select the "Control" variant. I will explain what they do in a later stage.
For example when you select dimming you will see the following window:
It will ask you what Group Addresses your Dimmer uses to toggle the light on/off, dim up and down and to set an absolute dimming value. The "Channel id" is a unique identifier for this function, while the label is more of a description of what it does. After hitting "Save" your settings will be saved and you will now be able to control your actuator through OpenHAB.
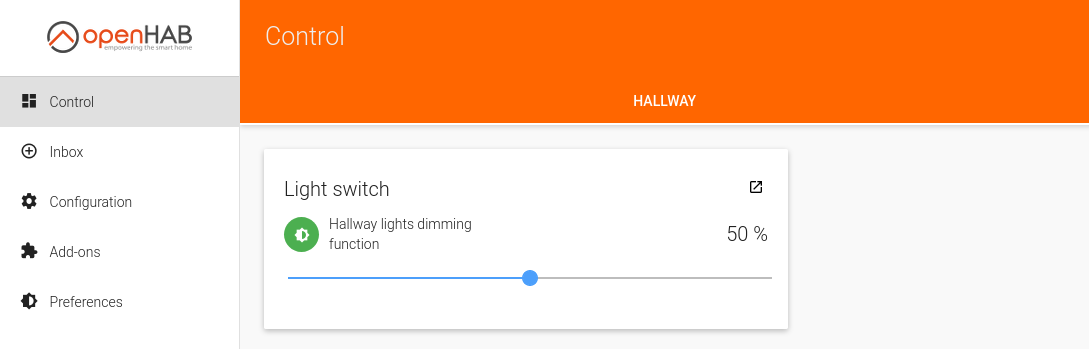
You can test if this now works without building a complete gui. To do this go to the "Control" tab in the right hand panel.
Here you should see your actuator you just configured and now you can easily control it. Play a bit with it and see if the actuator in your network actually responds. If so, enjoy your first success in your KNX adventure!
 Tijl Schepens
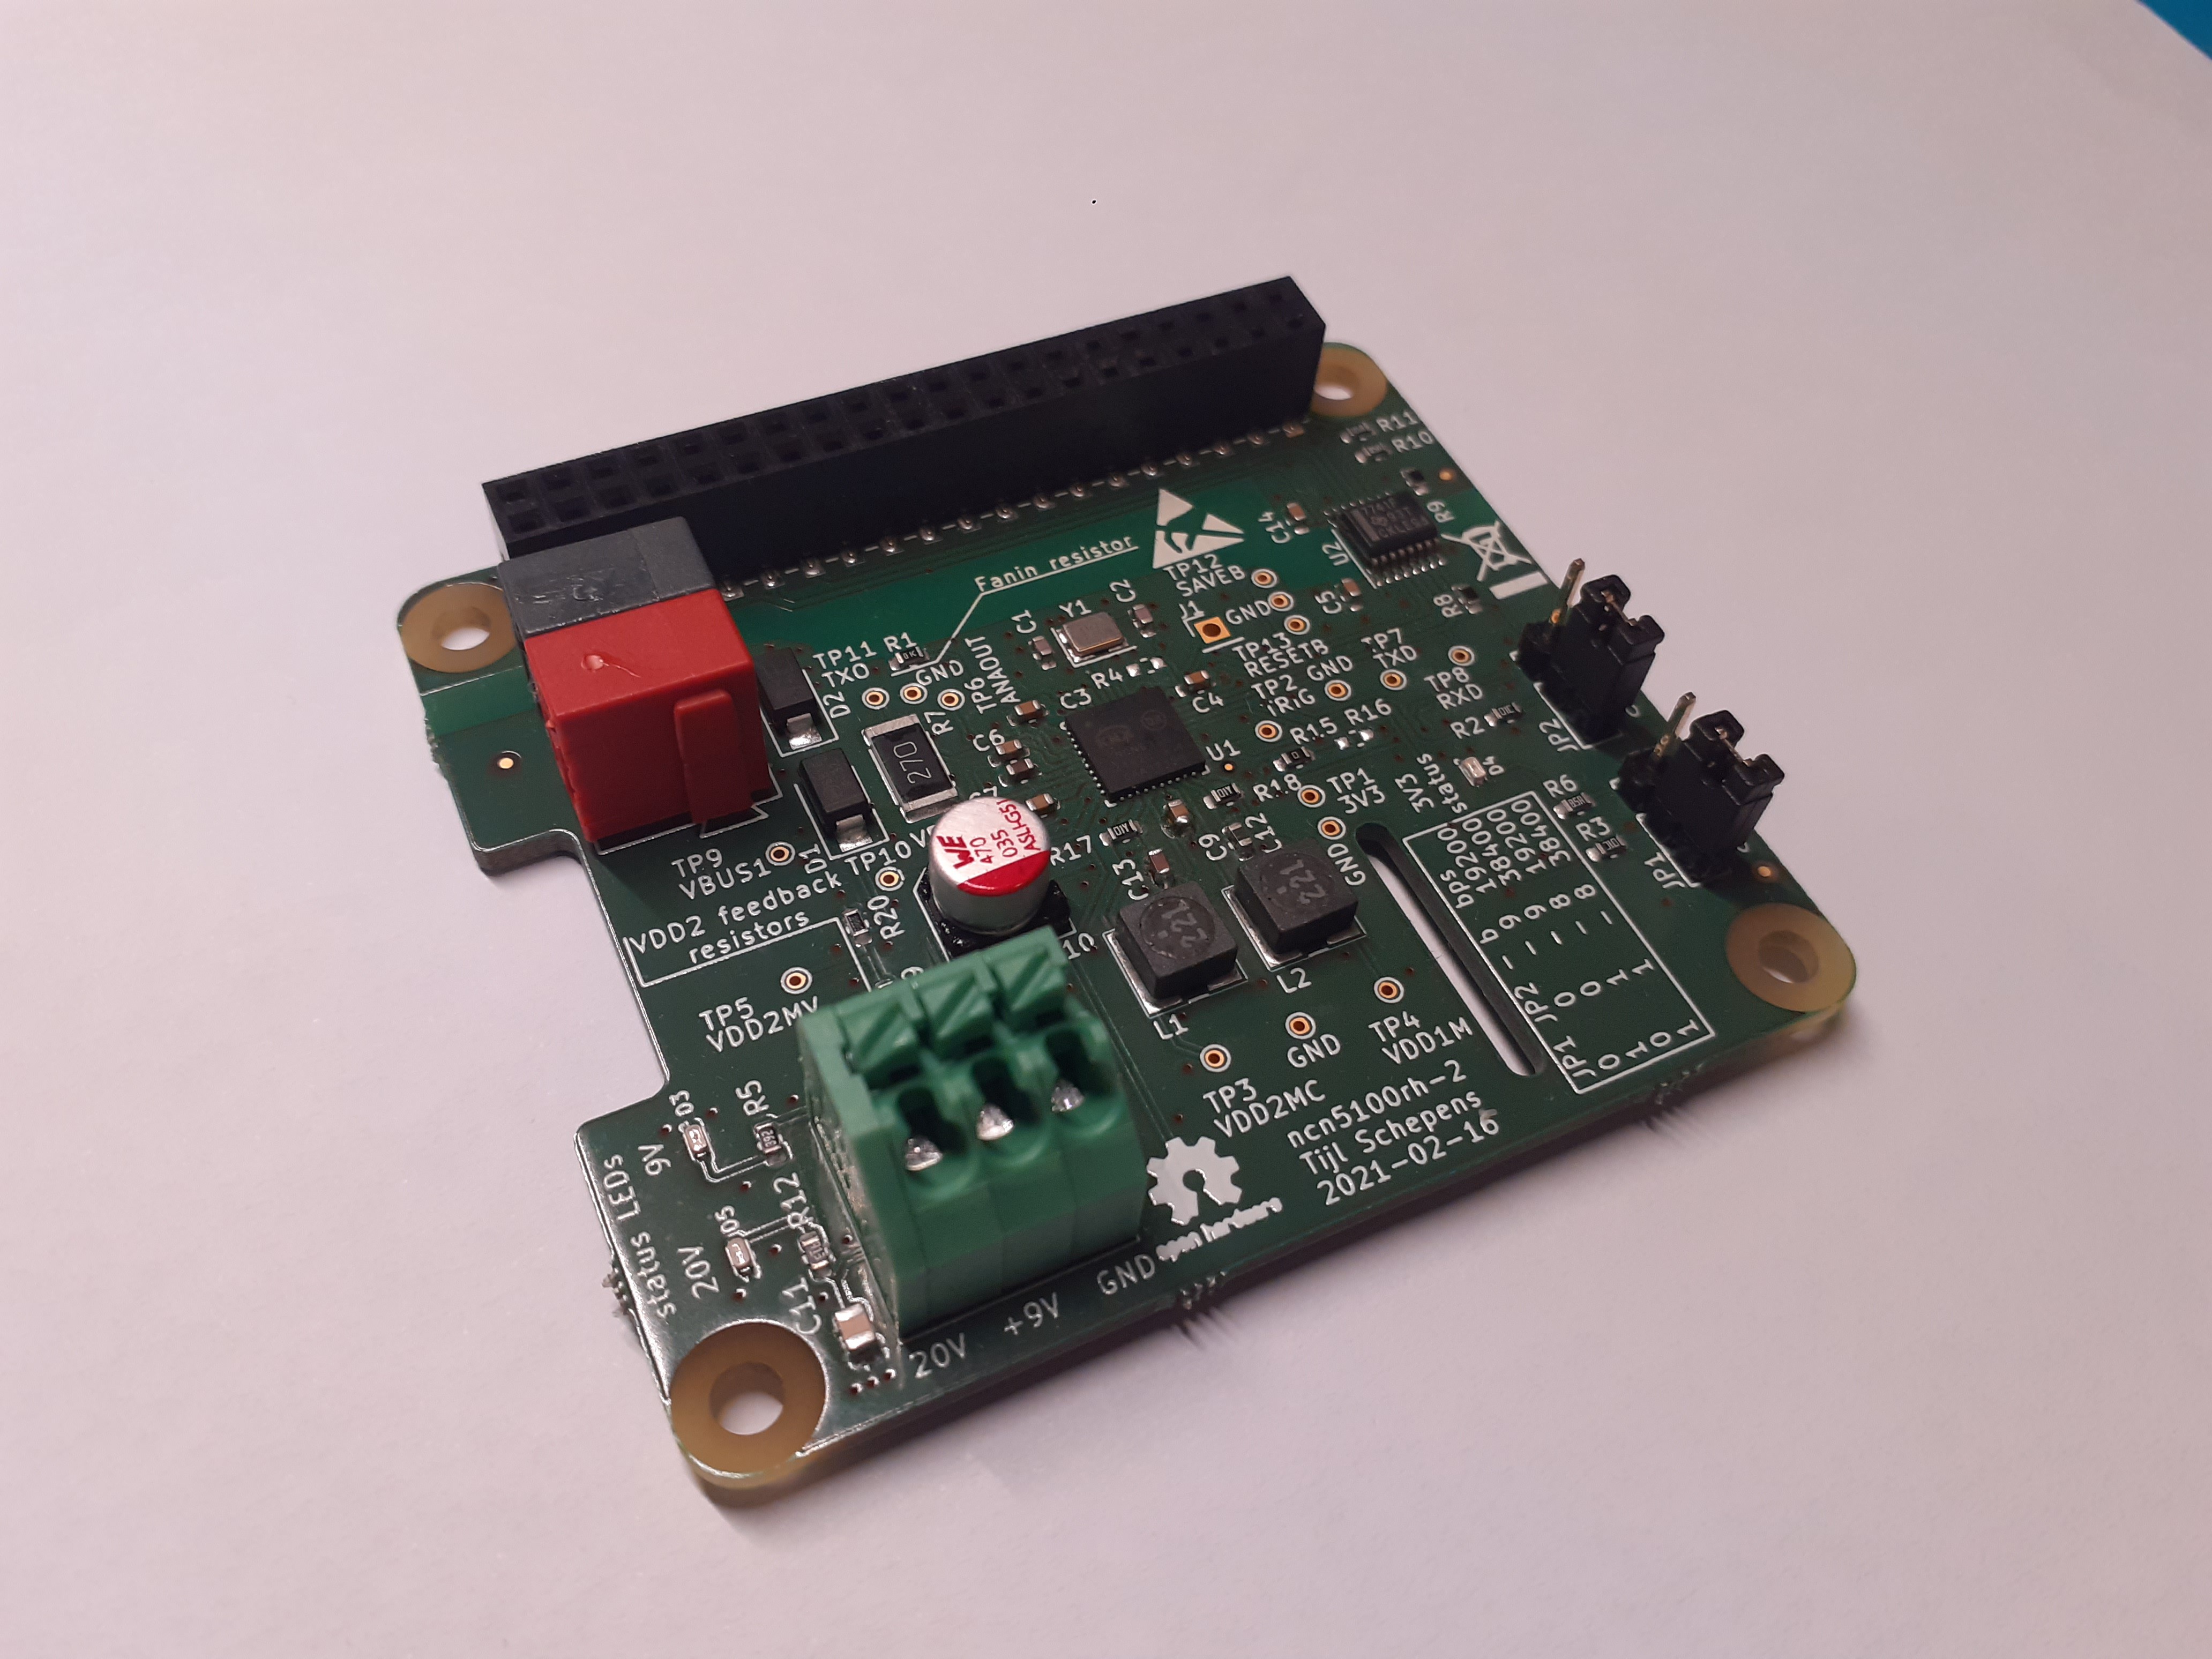
 The KNXD software that we will install, uses 19200bps with an even parity bit to communicate with the transceiver by default. So we set both jumpers to 0 to select this speed.
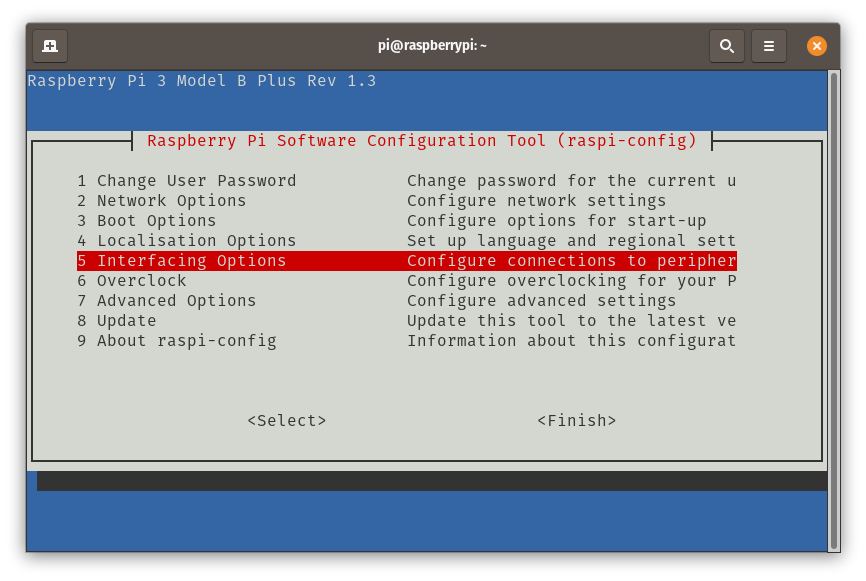
 After that choose "Finish" and restart your Raspberry Pi.
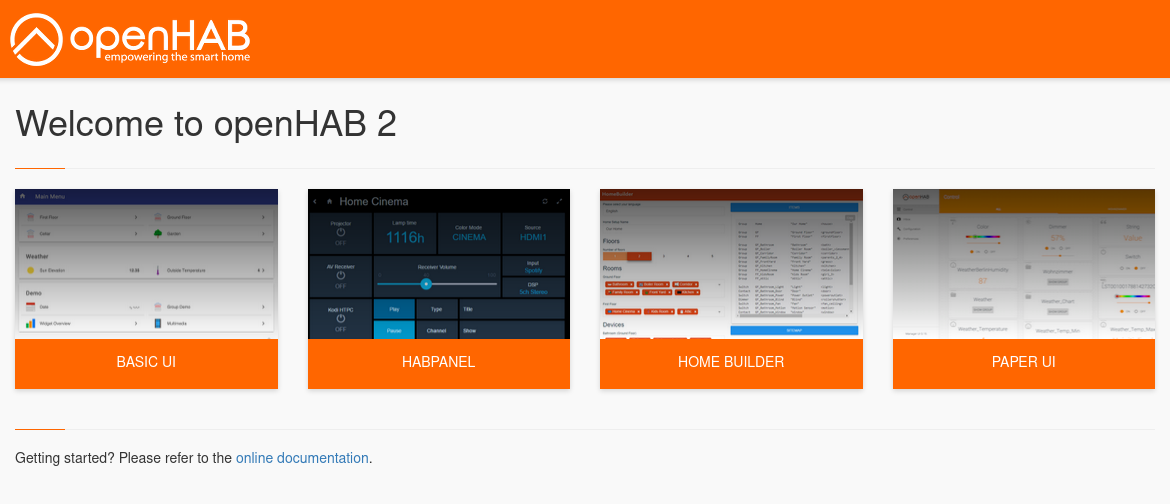


Discussions
Become a Hackaday.io Member
Create an account to leave a comment. Already have an account? Log In.
Where do you get a ready assembled hat from?
How does it perform?
Can it replace the costy visu servers and take the grid online?
Thanks!
Are you sure? yes | no