Close
0%
0%

Face-mask disinfection Device

UV-C / Heat, Arduino controlled, face-mask disinfecting device for Coronavirus (SARS-CoV-2)

Similar projects worth following
FFP1 and FFP2 masks are indispensable protective elements during epidemics. They are intended for single-use, but during a crisis the re-usage is inevitable and disinfection mechanisms are required (1)⁠. During the ongoing SARS-CoV-2 pandemics, hospitals, healthcare centres, and research facilities have implemented different mechanisms of disinfection for these masks, usually involving ultraviolet germicidal irradiation (UVGI) and/or heat of some sort. Nonetheless, these methods are not available to many vulnerable parts of the population, where nonetheless, due to shortage, the re-usage of these masks has become the only option. The need for a viable method of disinfection of face masks is further increased by evidence of SARS-CoV-2 being extremely stable on the surface of surgical masks even after 7 days⁠.

This project intends to create a low budget and portable device that can effectively use UVGI and dry heat to disinfect face masks from SARS-CoV virions and that

Face Mask Disinfection Device

UV-C / Heat, Arduino controlled, face-mask disinfecting device for Coronavirus (SARS-CoV-2)

This is an open source project shared under Creative Commons
“Attribution-NonCommercial-ShareAlike” CC BY-NC-SA

Disclaimer: This document falls under the "Good Samaritan Law".

Problem Statement 
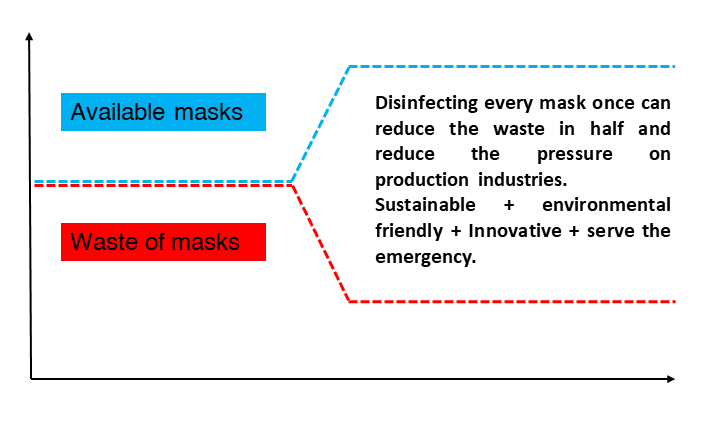
This device is a low budget and portable solution- that effectively uses UVGI and dry heat to disinfect face masks from SARS-CoV virions. The make of the device is simplified to enable easy production by people who have access to a maker space.

Version 1 

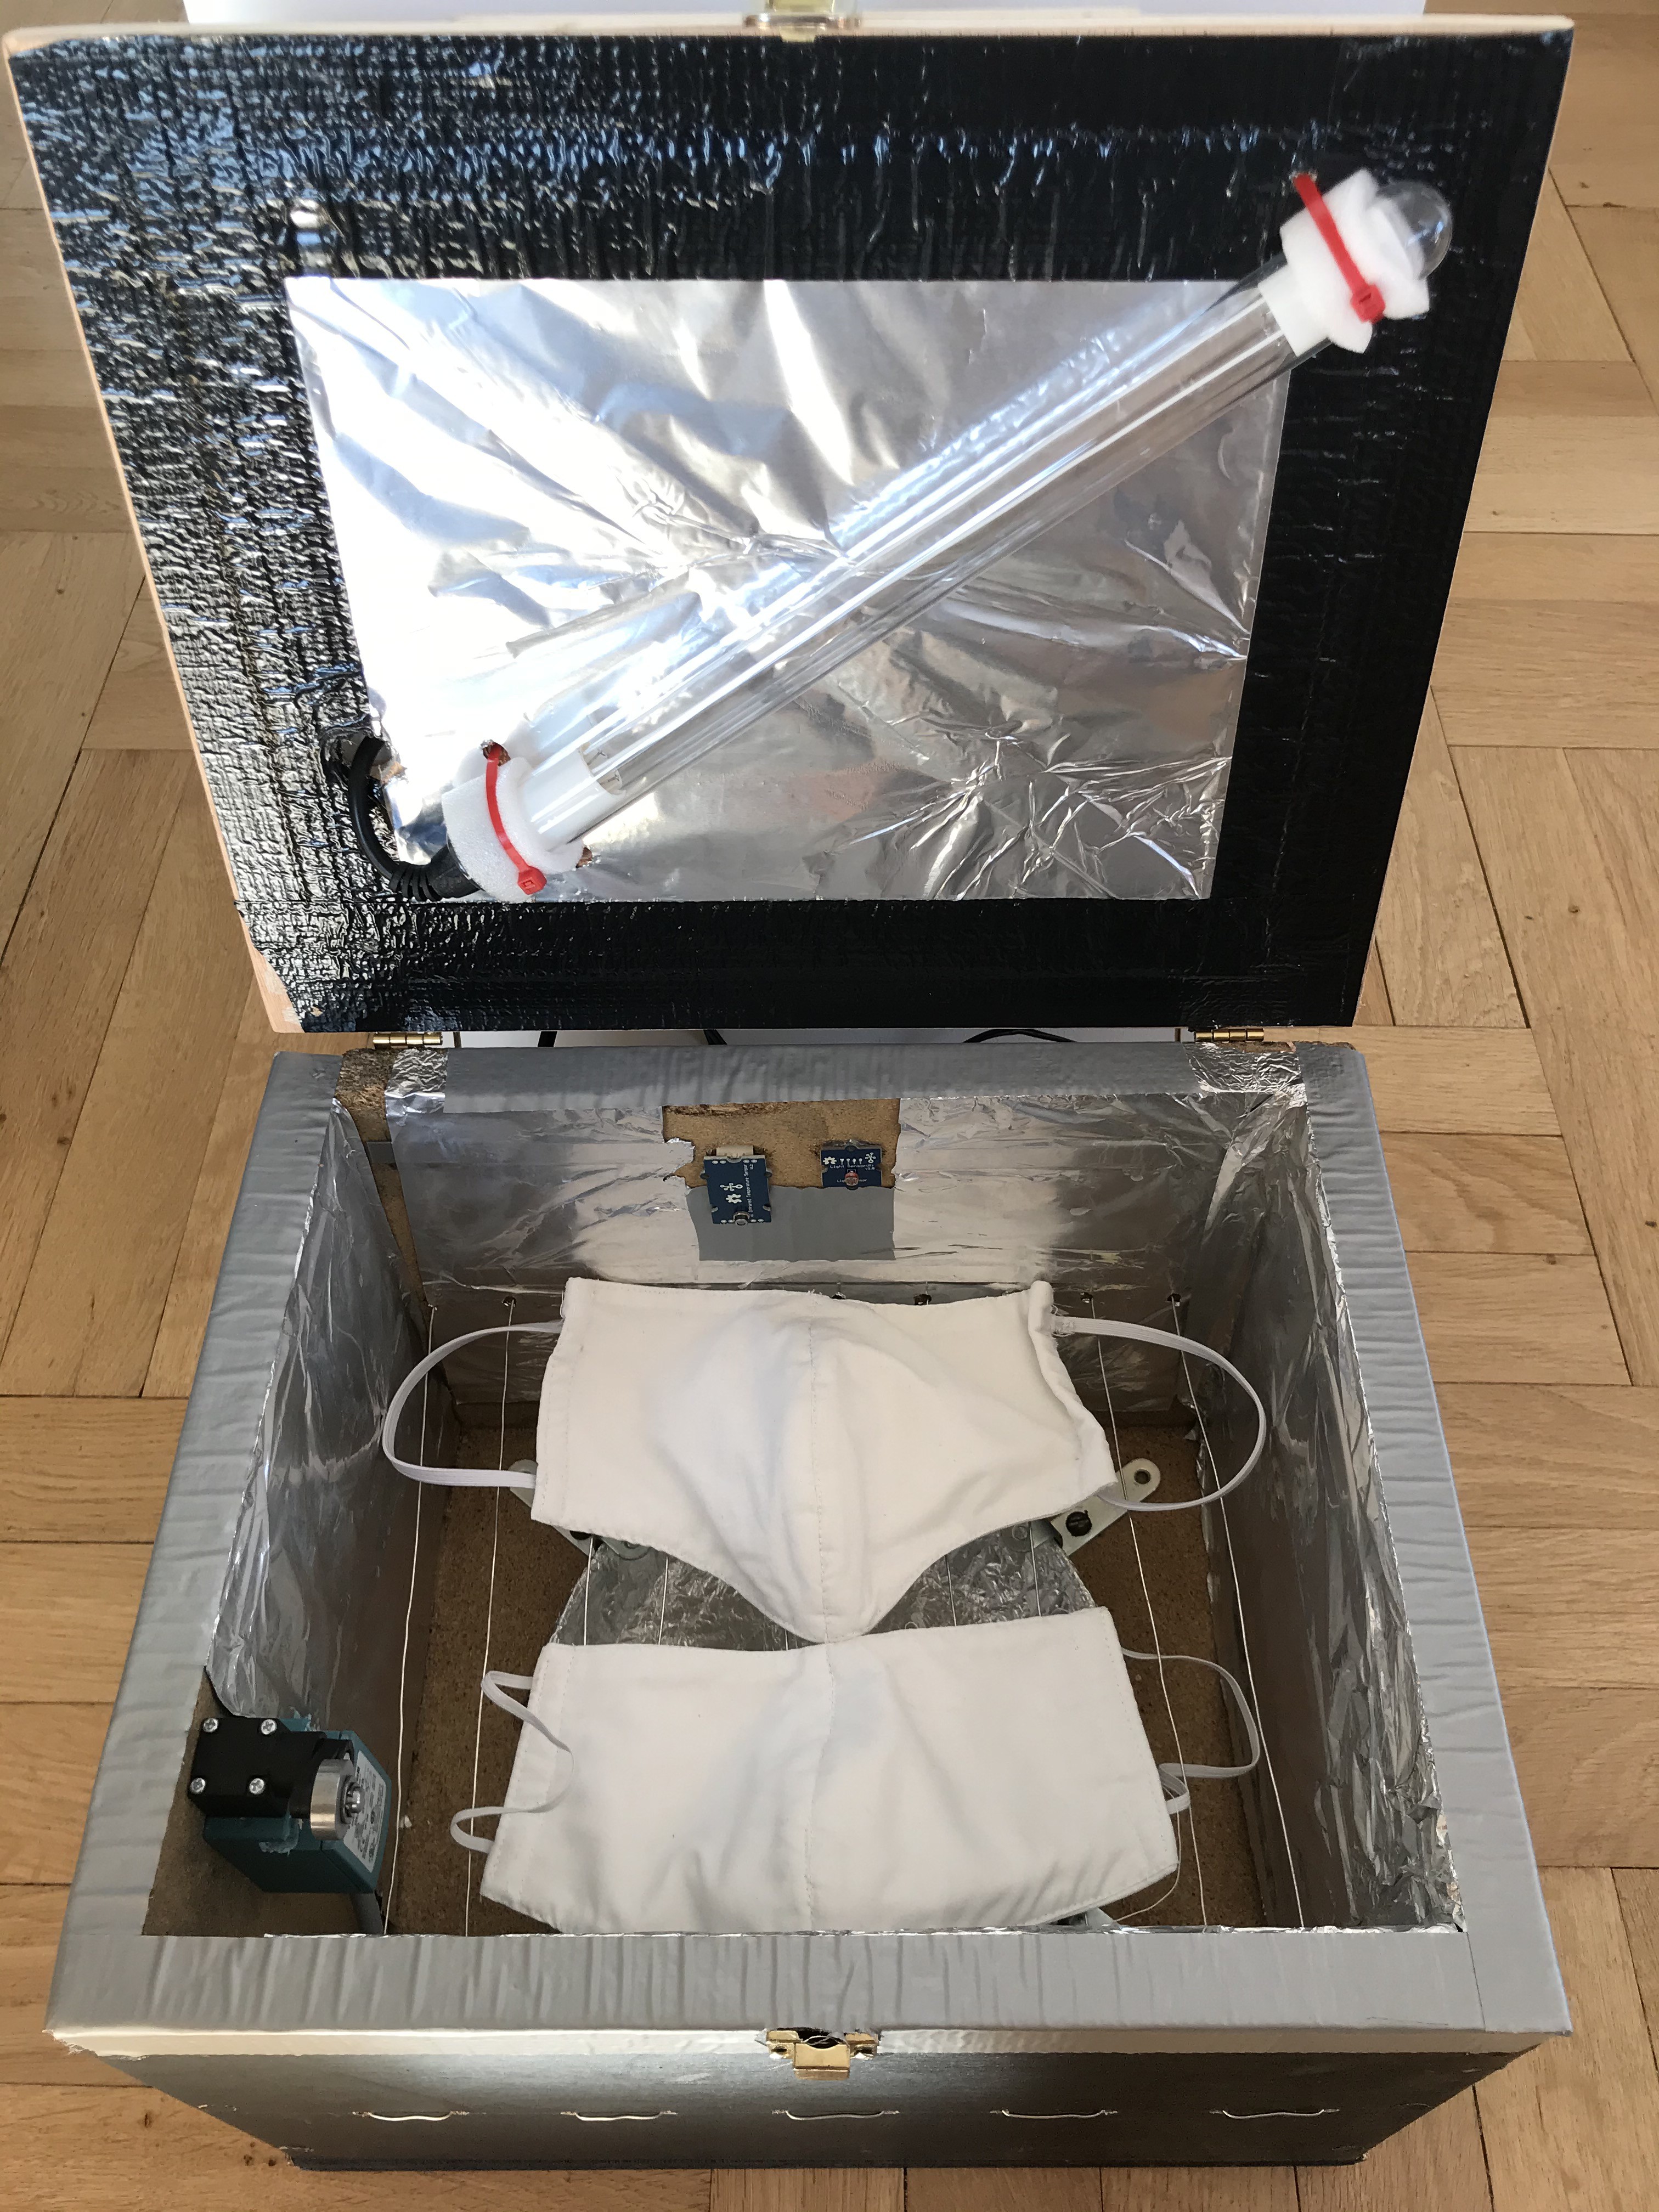
•Dual protection: UV-C + dry heat
•Alarm: indicator for temperature differences.
•Affordable and easy to make.
Version 2

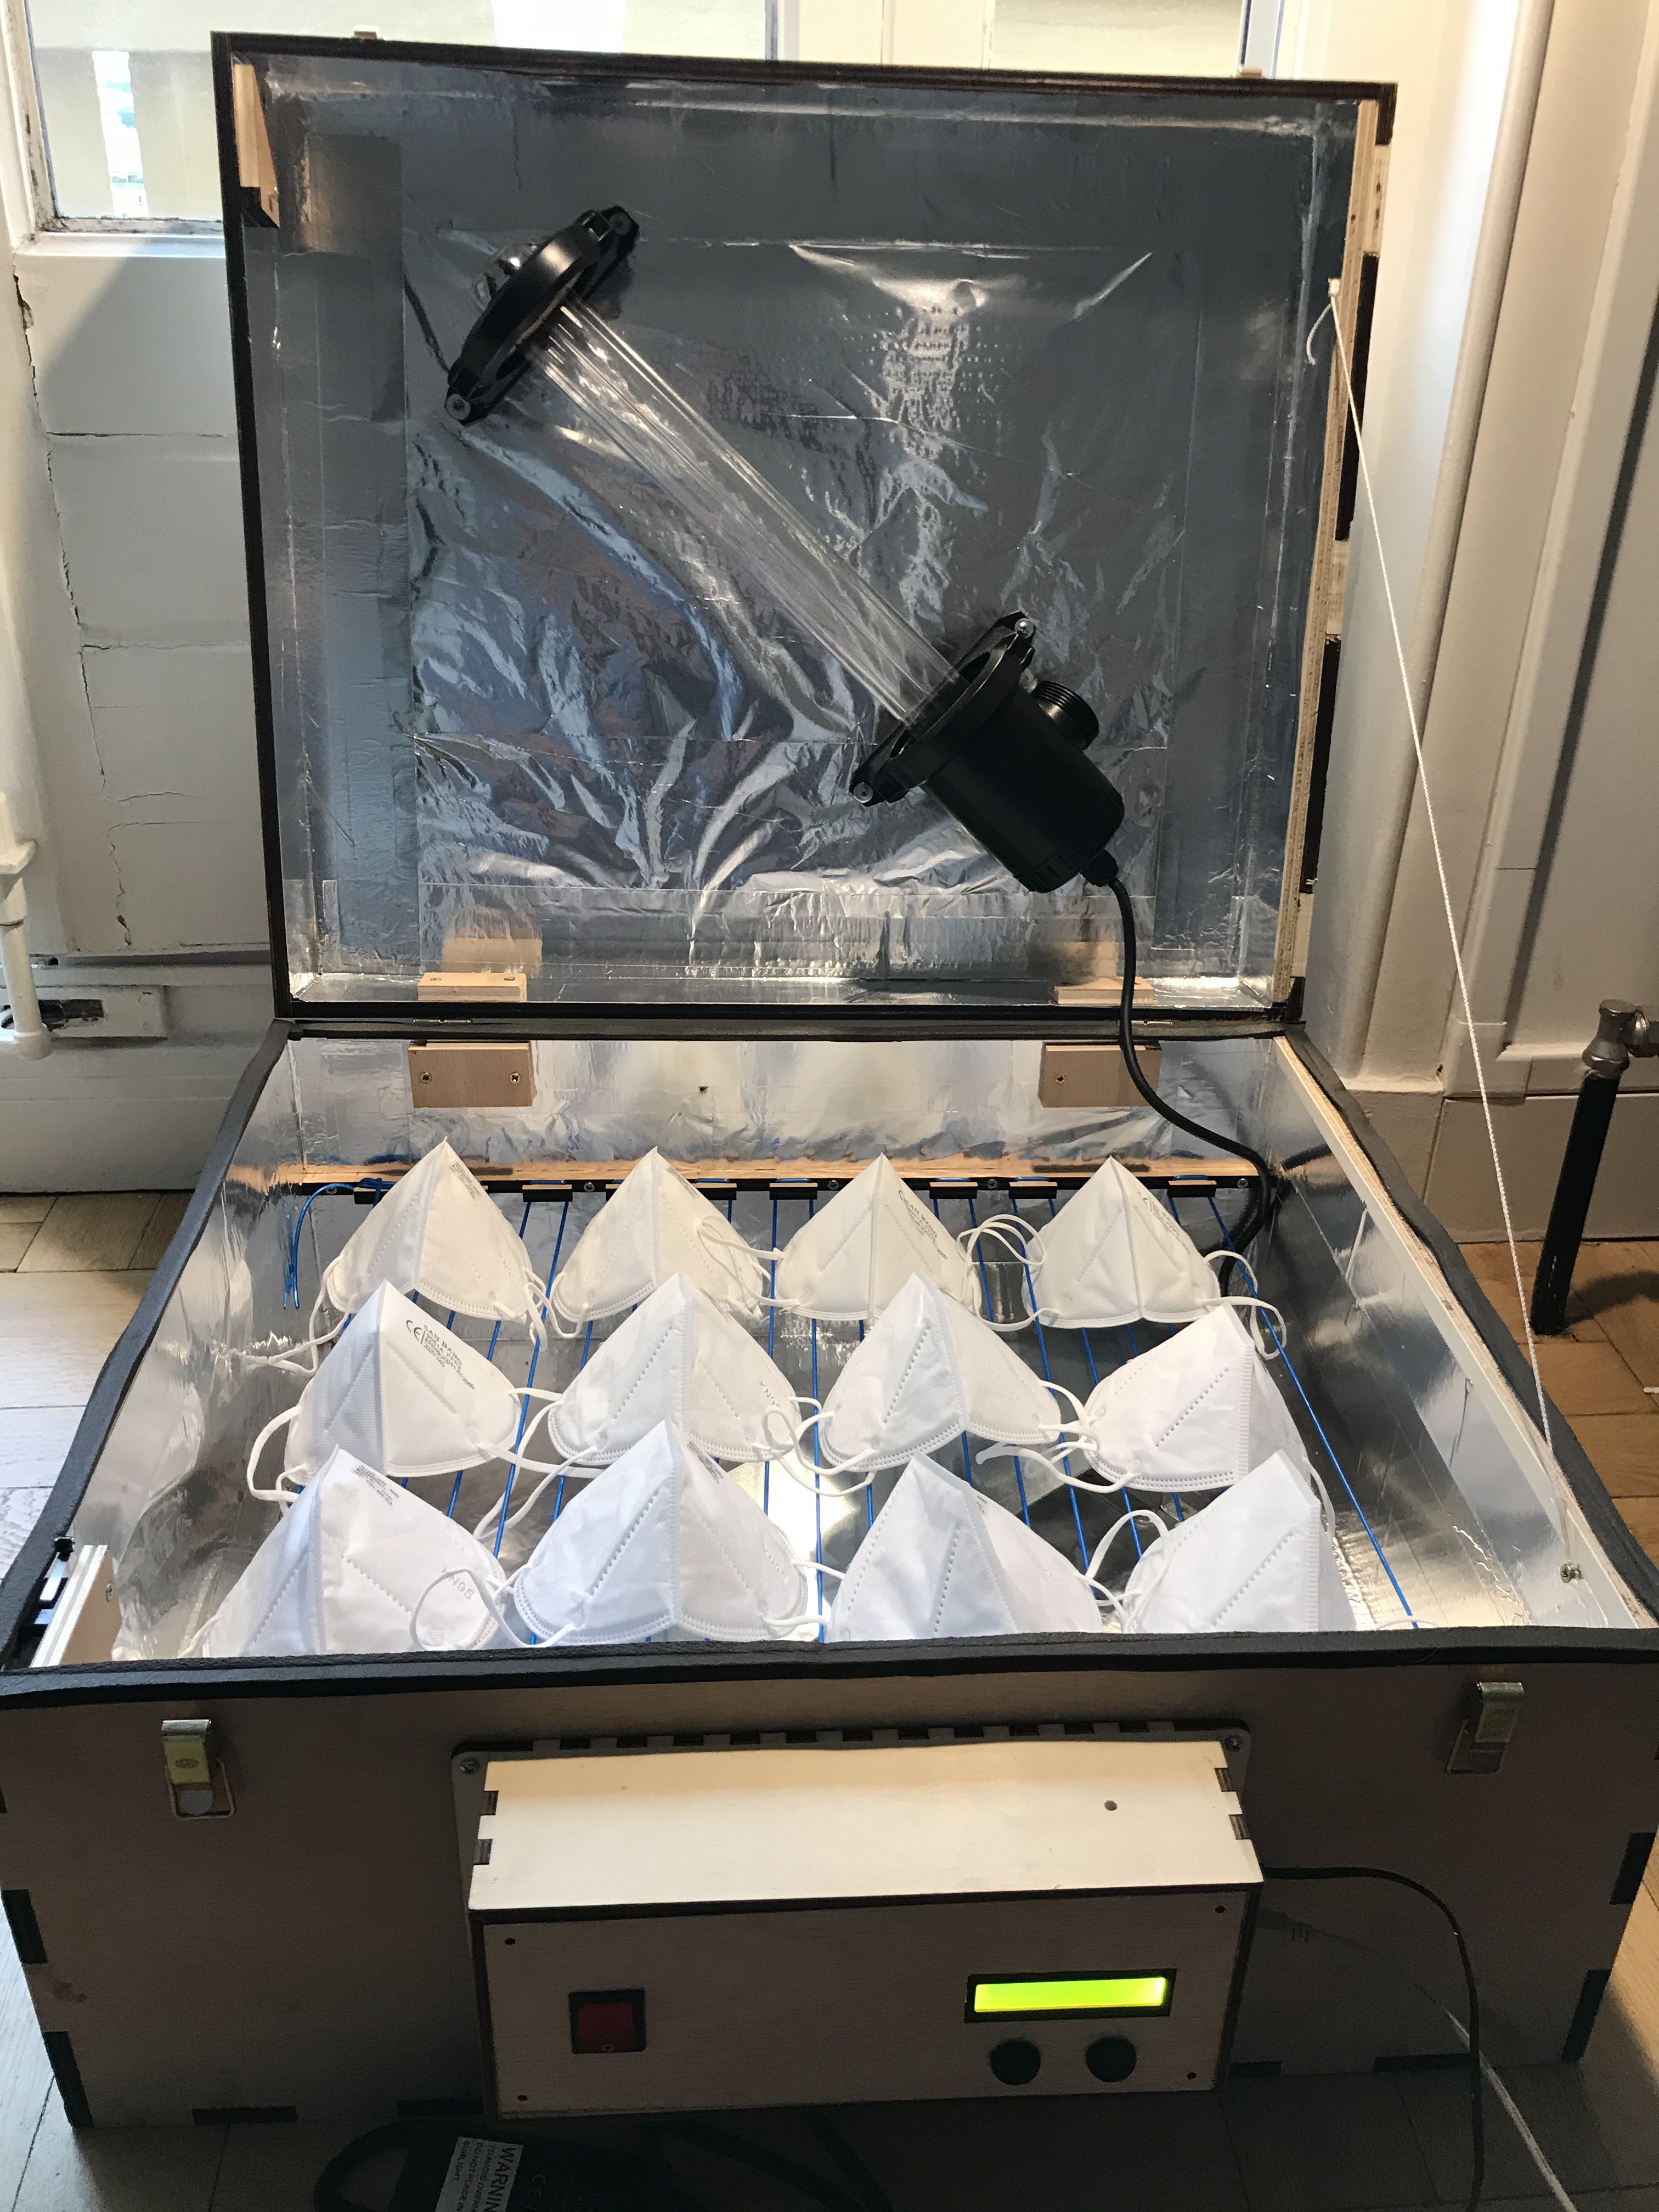
•Dry heat from infrared – cost effective and accessible to all.
•Can disinfected face shields as well.
•Can choose the combinations b/w UVC and Dry heat – or just one of them.
•Can accommodate more masks.
•Opensource – downloadable CNC, laser design files.
Published on: 

Github: Files to make the V2 of the Face mask disinfection device.
https://github.com/NeedLab/face-mask-disinfection-device

This publication explains in detail the method to build both V1 and V2 of the Face Mask disinfection device.

Face Mask Disinfection Device V2 BOM.xlsx

sheet - 12.45 kB - 09/02/2020 at 13:14

Download

Face mask disinfection device V1 BOM.xlsx

sheet - 12.73 kB - 08/28/2020 at 15:46

Download

  • Version 2, Face mask disinfection device

    Sameera Chukkapalli08/31/2020 at 21:16 1 comment

    Building the device is divided into different parts. 

    • Enclosure 
    • Electronics
    • Electricals
    • Arduino code
    • UVC - light
    • Infrared Heater
    • Fixtures

    - Enclosure 

    The device enclosure is divided into 3 parts

    • The main box, 
    • The electronics box &The electricals box

    Instructions: 

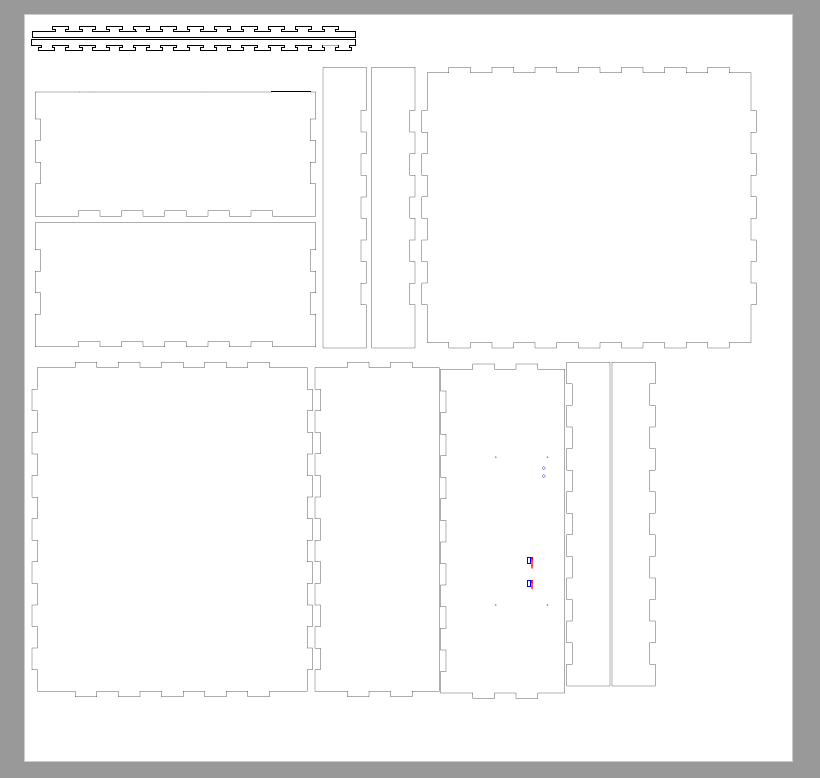
    1. Use 8mm or 10mm wood to laser cut the 2 files of the main box and the electrical and electronics box. The laser cut file is available on GitHub.

    This file is for the main box. Refer to the files on GIThub for 8mm or 10mm.

    This file is for the electronics & electrical box. Refer to the files GIThub for 8mm or 10mm.

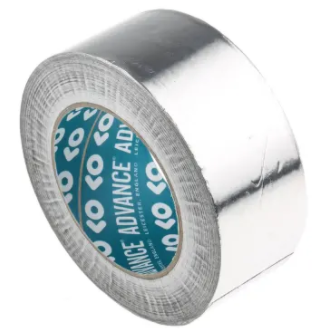
    Aluminium tape

    Use a generous amount of aluminium foil tape to cover the inside of the box, both the top enclosure and the bottom. The aluminum foil tape with adhesive on one side is recommended over the aluminium foil from the kitchen in order to avoid tearing of the foil.

    The reference we used, for example: https://fr.rs-online.com/web/p/rubans-aluminium/0176573/

    Electronics

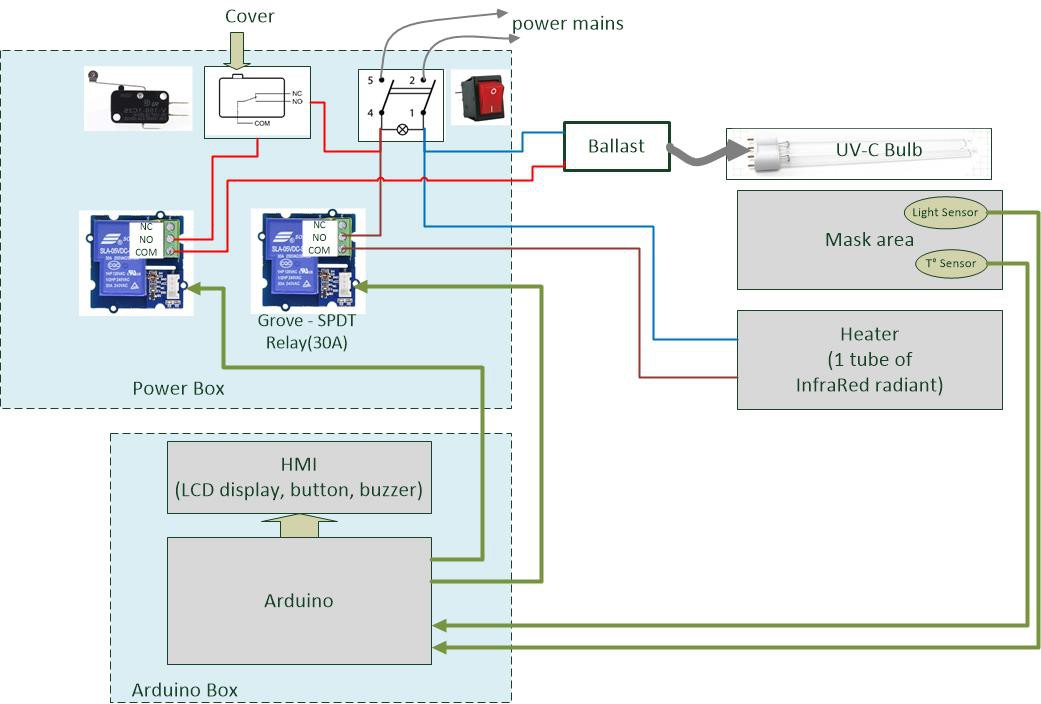
    1) Circuit connection diagram, For detailed list of components please refer to the BOM.

    2) Arduino pin mapping.  

    3) Schematics of the electrical and Electronics of the Face mask disinfection device (FMDD)

    Remark:

    If your Infrared heater has two bulbs, you should wire only one of them

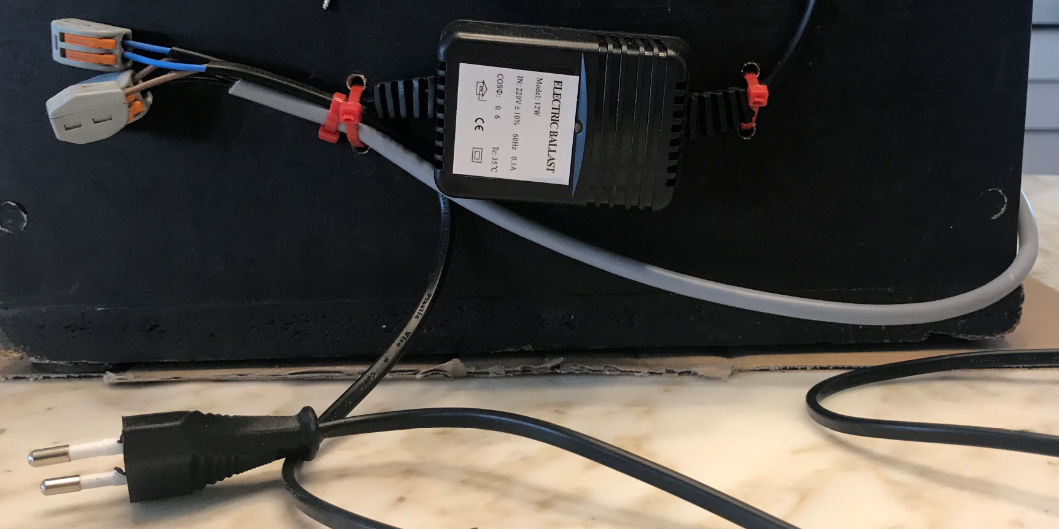
    Internal view of the electronics and electricals fit into the wooden box. On the right side compartment is the electronics and on the left side compartment is the electricals of the device.

    Back of the control board, Use Hot glue to keep the board in place.

    Front view of the electronics box - which displays the temperature and humidity.

    Arduino code

    1) Source code is available here:

    https://github.com/NeedLab/face-mask-disinfection-device/blob/master/arduino/face-mask-disinfection-device/face-mask-disinfection-device.ino

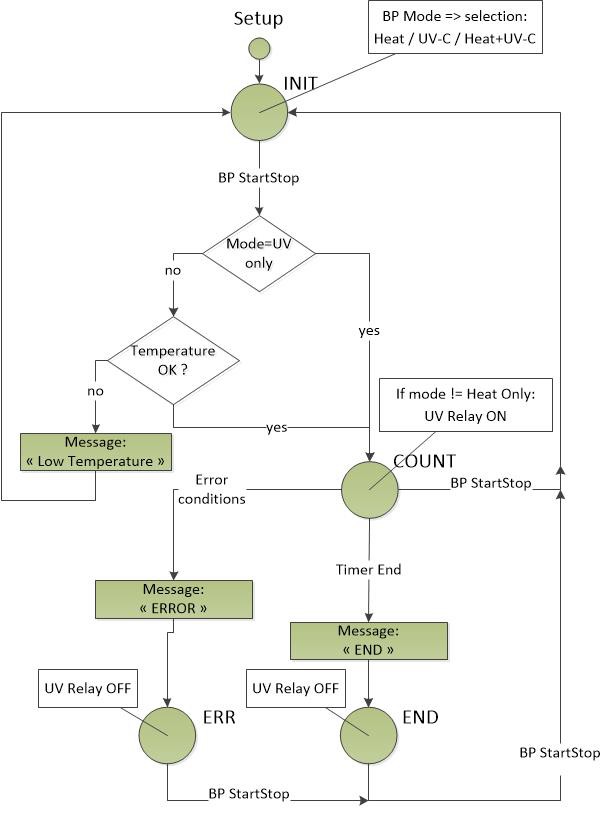
    2) Finite state Diagram

    3) Link to the user manual:
    https://hackaday.io/project/172189/instructions

    Fixing details

    Infrared heater fixing details 

    Use of standard brackets to keep the infrared in place. 

    Placement and positioning of the infrared heater. 

    Use of the metal plate on top of the infrared heater in order to radiate heat into the air

    not with direct infrared radiations. 

    Top view of the infrared heater with the metal plate and the insulated cables.

    The cables are used to make a rack where the masks will be placed in order for them to get exposed to the heat. 

    Weaving of the cables. Equidistant and uniform with the help of the Laser cut holders on both sides of the box.

    Fix the UV-C light on the other side of the box.

    Place the masks in the rack.

    Light leak test. 

    It is very important to make a dark room light leak test. => use a battery powered visible light source. Put it inside the box closed and check the leaks cover all the holes/ leaks if found, using some foam gasket and / or some borders

    This will give clear indication if any UV-C light is leaking from the box in order to avoid any damage to your eyes.

    WARNING:

    You must be aware that UV-C radiation is very dangerous for your eyes and skin. The UV-C light must be switched ON only when the top cover of the device is closed and switched off when the device is open.

    Due to the unseen danger of UV-C, one must check that the device is light proof. Remember, that the visible radiation of germicide tube is just a by product and it's only 3/4% of total emission, there's a big risk of emission leak and one doesn’t perceive it. One has to conduct a light test by checking for light leaks around the device/enclosure in a completely dark environment. One has to cover all the holes/ leaks if found, using some foam gasket and / or some borders to avoid this risk of UV-C leaks outside of the device.

  • Version 1, Face mask disinfection device

    Sameera Chukkapalli08/28/2020 at 16:16 0 comments

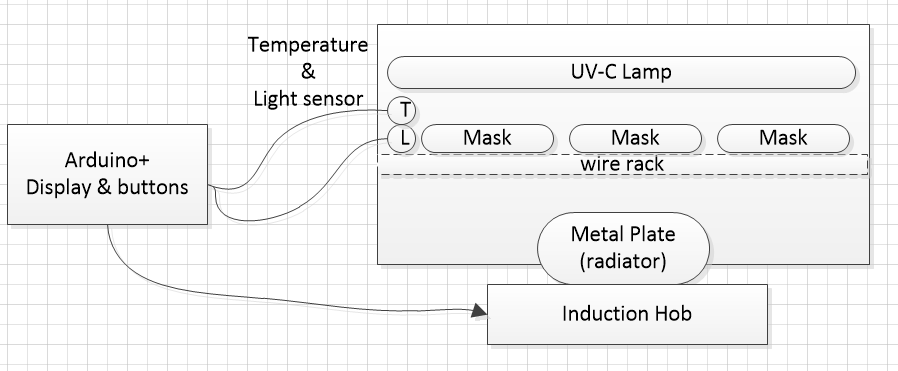
    V1 - Device set up diagram

    ●      Temperature must be maintained in the range 65+/-5°C

    ●      The lamp must provide UV-C wavelength.

    ●      The disinfection cycle duration is minimum of 30 minutes. (recommendation: Not more than 30 min in order to have a safer range to avoid potential face-mask degradation and loss of functionality.)

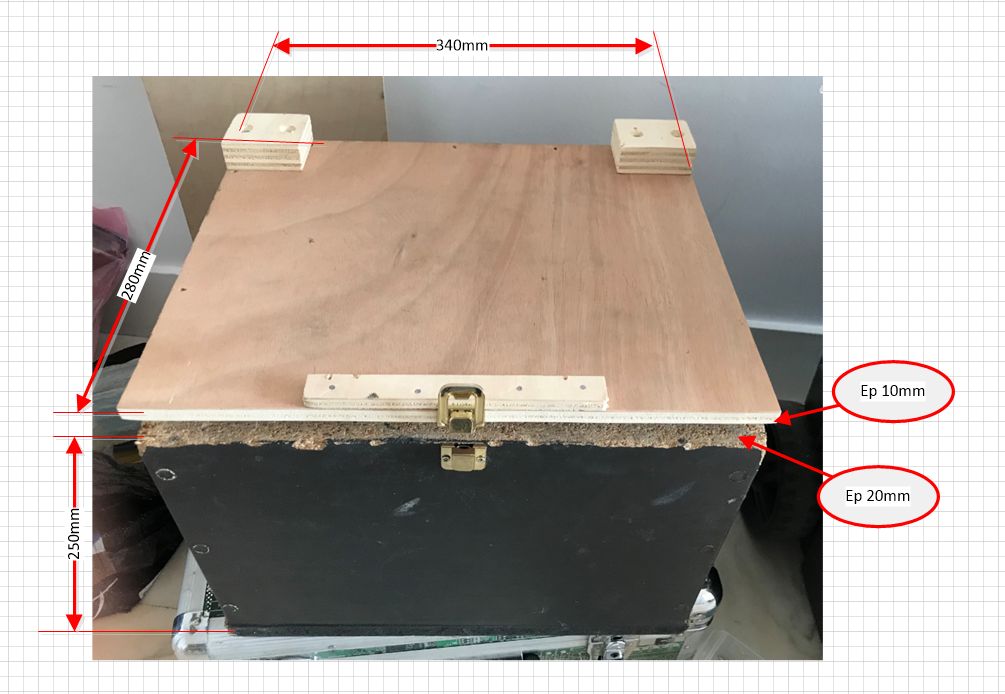
    Device Dimensions

    First Heat testing

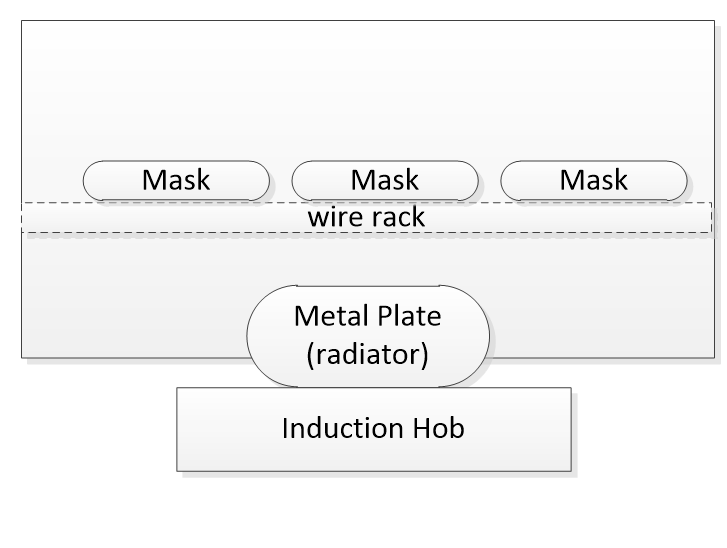
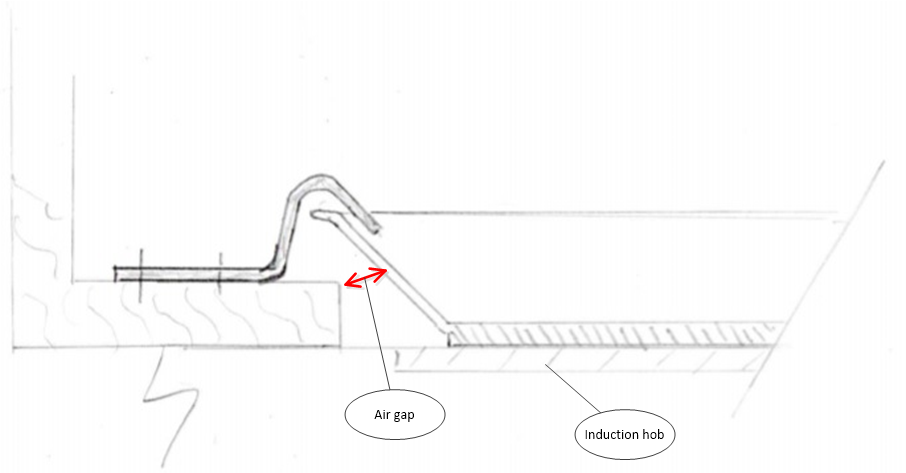
    Cross sectional diagram of the device.

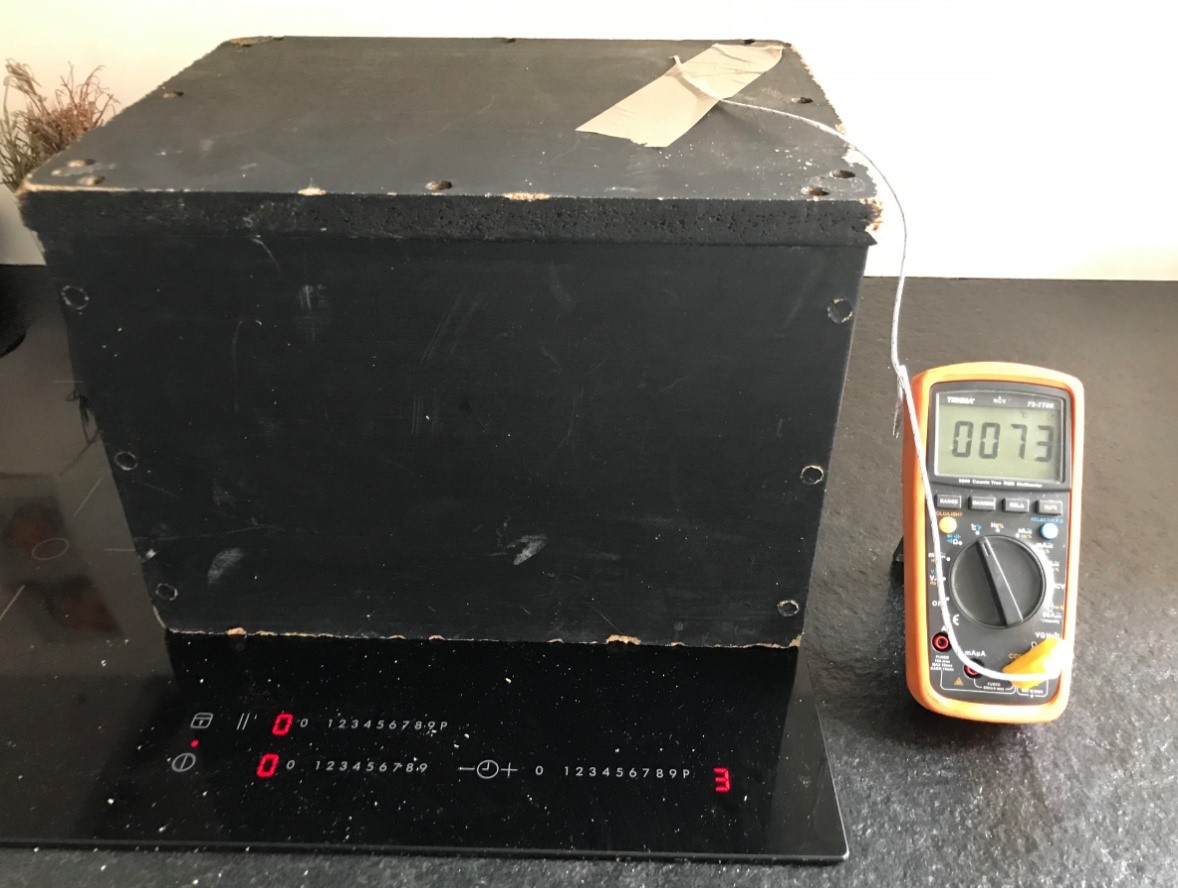
    Remark: Induction hob was used to prove the concept. Dry heat of 65+/- 5 °c can be produced using several other methods. But, induction hob can be used in actual device as well.

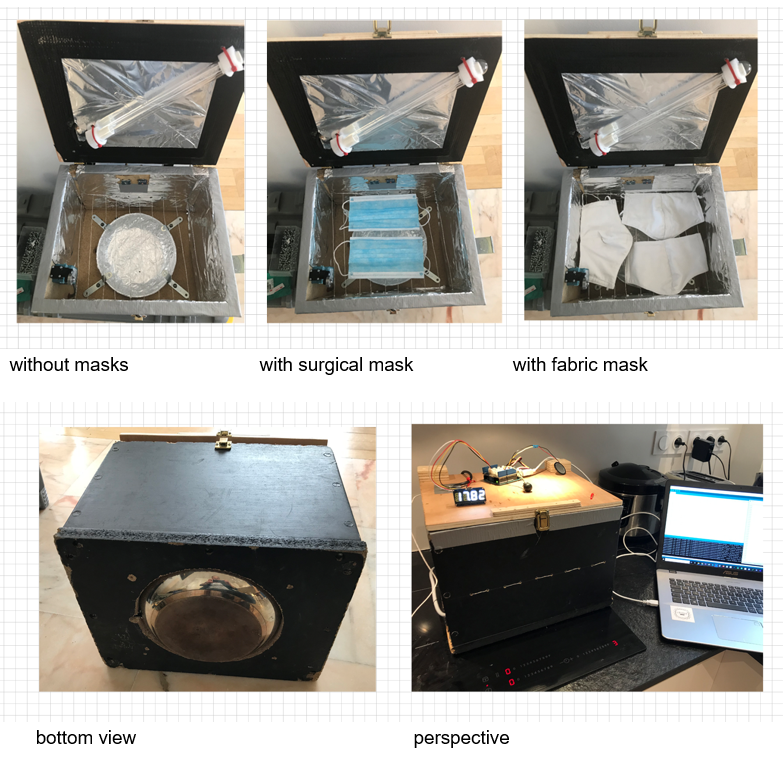
    Prototype heat testing using tabletop induction hob. The heating element is made of a frying pan (induction compatible) with the handle removed. The diameter is around 22 centimetres.

    In 15 minutes required temperature of 70°C is attended. The temperature can be maintained constant by adjusting the power of the induction hob.

    Making of the heating system

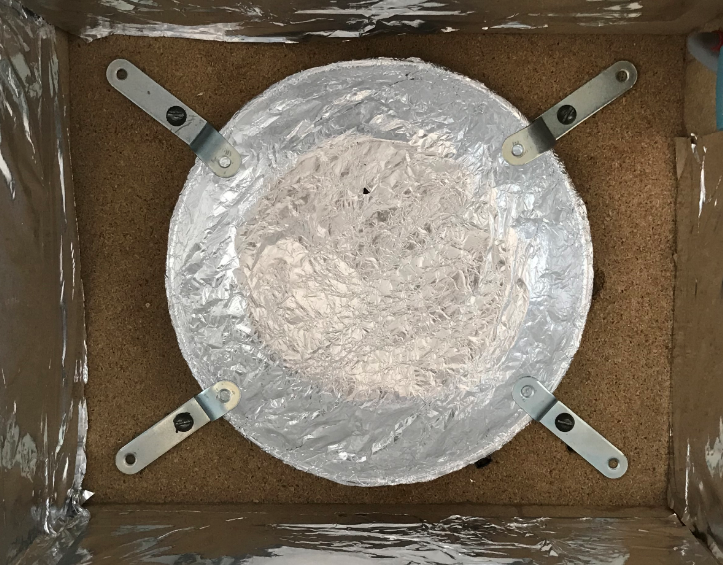
    A frying pan of 22 centimetres diameter (induction compatible) with the handle removed.

    Cover the frying pan with aluminum foil for UV-C light reflection.

    Make a hole of 20 centimetres at the center of the box/ bottom surface of the device.

    In order to maintain the position of the frying pan use four metal holders as shown in the image.

    Heating element detail.

    When the box is handled "in the air".

    When the box is put on the table-top induction hob.

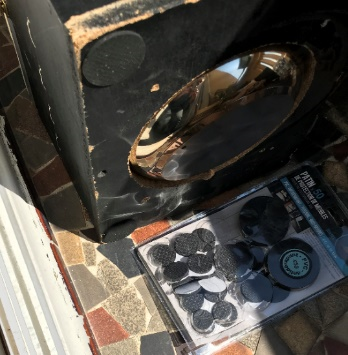
    In order to maintain smooth contact with the table top induction hob- use 4 rubber patches at the bottom of the box.

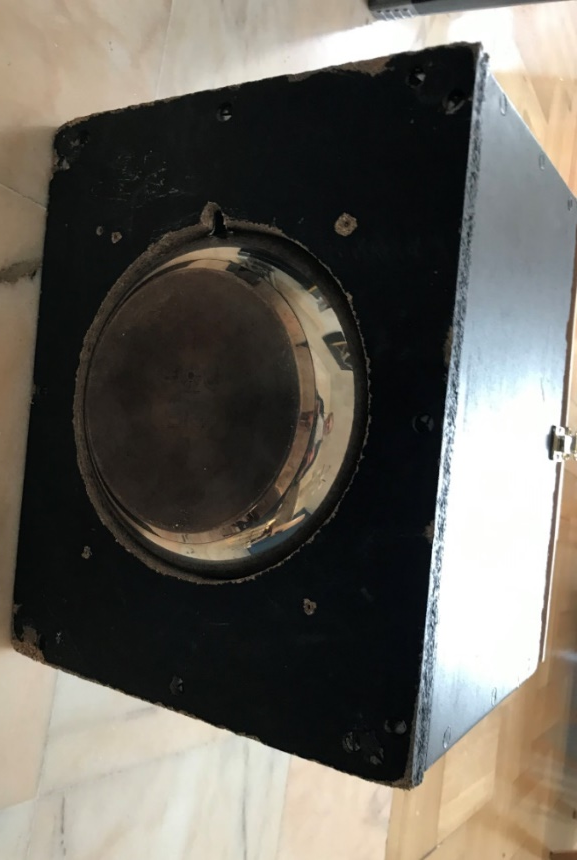
    Bottom view- showing the detail of the metal pan.

    Making of the top cover

    A small lock was used to ensure the closer of the cover.
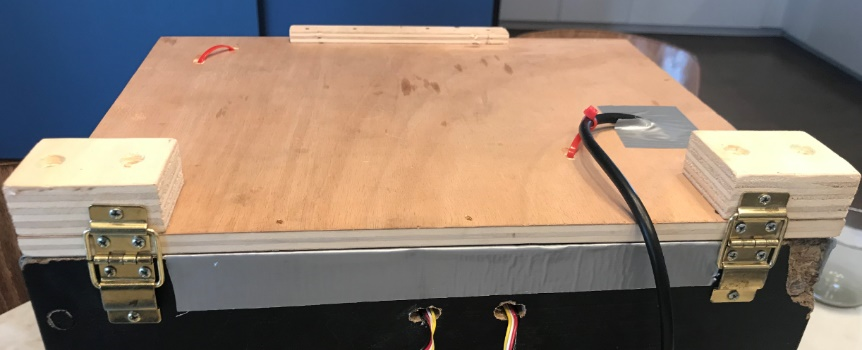
    Two hinges are used in the back to enable smooth movement of the top cover.

    UV-C System

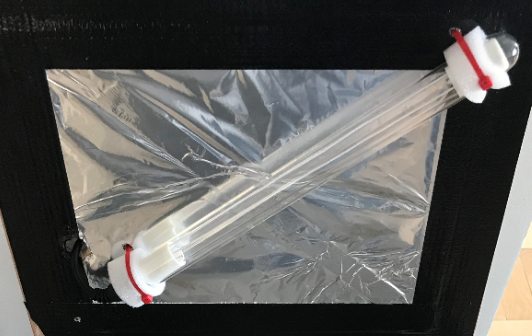
    For the UV-C source in this device, an 11 W lamp bulb from a “Sterilizer for Aquarium” kit was used. The UV-C bulb was extracted and mounted to the top cover at the two ends of the bulb as shown in the image. The bulb is mounted by creating 4 holes in the top cover and using a zip tie/cable tie and soft padding to securely fasten the bulb. The top surface is covered in aluminium to reflect the UV radiation.

    Feel free to use UV-C lamp from other sources. If you do not have access to the crystal tube (used in this project) do not use glass as a replacement as glass blocks the UV radiation.

    WARNING:

    You must be aware that UV-C radiation is very dangerous for your eyes and skin. The UV-C light must be switched ON only when the top cover of the device is closed and switched off when the device is open.

    Due to the unseen danger of UV-C, one must check that the device is light proof. Remember, that the visible radiation of germicide tube is just a by product and it's only 3/4% of total emission, there's a big risk of emission leak and one doesn’t perceive it. One has to conduct a light test by checking for light leaks around the device/enclosure in a completely dark environment. One has to cover all the holes/ leaks if found, using some foam gasket and / or some borders to avoid this risk of UV-C leaks outside of the device.

    In order to turn off the light when the device cover is opened a switch was installed. Diagram representation of the switch.

    View of the power switch.

    Covering the surfaces with Aluminum foil

    Before installing the UV-C tube and the wire rack, cover sides and top surface of the box with aluminum foil, as shown in the image.The goal is to reflect the UV-C light on the side faces, thus augmenting the efficacy.

    Tips: Double sided tape can be used to maintain the aluminium foil in place for the surfaces and the edges can be duct taped.

    Making of the Wire rack - Placement for the Face-mask

    The face-masks will be placed on top of...

    Read more »

  • ​ Detrimental effects of physical disinfection on face masks

    Sameera Chukkapalli08/14/2020 at 14:36 0 comments

    The possible loss of functionality of the face masks after physical disinfection is a crucial consideration in order to evaluate the viability of such practice. Radiation and heat could definitely affect the materials of the mask, rendering it unsafe for further usage. We considered this when establishing the energies and time of exposure to safely operate the device. 

    Regarding UVGI effects on face masks, we found studies showing that it can be safely used without altering aerosol penetration and filter airflow resistances. One study reported no significant alteration of these filtration properties after using UVGI with dosages as high as ~1000 J/cm2 (1)⁠, which are several orders higher than our proposed dosage. Another study reported that no detrimental effect was observed when using dosages of 176-181 mJ/cm2 (2)⁠. Further studies of the same research group found that this results could be extended at least to a 3X cycle using a total dosage of 1,62 J/cm2 (3)⁠—which is within the same order of our intended dosage—. According to this evidence, we consider that our intended dosage will probably not affect the filtration capacity of the masks for at least three cycles of disinfection. 

    In terms of the effect of heat, the reports are much more scarce. There are no assays are using dry heat, as we intend. The last study that we referenced for the UVGI used moist heat at 60°C and 80% RH for 30 min and observed no significant decrease in filtration capacities of the masks (3)⁠. This is the closest report we could find to our intended disinfection method, and so we chose the same temperature range, which we consider to be enough to remove almost all viral infectivity and also takes into account the functionality of the mask after the disinfection. 

    Bibliography

    1. Lindsley WG, Martin SB, Thewlis RE, Sarkisian K, Nwoko JO, Mead KR, et al. Effects of Ultraviolet Germicidal Irradiation (UVGI) on N95 Respirator Filtration Performance and Structural Integrity. J Occup Environ Hyg [Internet]. 2015 Aug 3 [cited 2020 Apr 2];12(8):509–17. Available from: http://www.tandfonline.com/doi/full/10.1080/15459624.2015.1018518
    2. Viscusi DJ, Bergman MS, Eimer BC, Shaffer RE. Evaluation of Five Decontamination Methods for Filtering Facepiece Respirators. Ann Occup Hyg [Internet]. 2009 [cited 2020 Apr 2];53(8):815–27. Available from: https://academic.oup.com/annweh/article-abstract/53/8/815/154763
    3. Bergman MS, Viscusi DJ, Heimbuch BK, Wander JD, Sambol AR, Shaffer RE. Evaluation of Multiple (3-Cycle) Decontamination Processing for Filtering Facepiece Respirators. J Eng Fiber Fabr [Internet]. 2010 Dec 15 [cited 2020 Apr 2];5(4):155892501000500. Available from: http://journals.sagepub.com/doi/10.1177/155892501000500405

  • UVGI. Germicidal effect of UVC light

    Sameera Chukkapalli08/14/2020 at 14:34 0 comments

    The germicidal capacity of UVC light has been known and exploited in industry and research for a long time. UVC light (with a wavelength between 200 nm and 300 nm) is strongly absorbed by nucleic acids, causing photochemical alterations of the genetic material of microbes —such as pyrimidine dimers—.These alterations hinder the replication of the genetic material and/or the expression of vital proteins, killing or inactivating the germs. 

    Single-stranded RNA (ssRNA) viruses, such as SARS-CoV-2, are particularly vulnerable to UVC irradiation, requiring a dosage of ~2-5 mJ/cm2 (3)⁠. Most commercially available UVC light-bulbs are capable of providing the necessary dosage in relatively short times. However, some important technical considerations must be taken into account during the design of a UV germicidal device.

    The UV dosage is the product between the intensity (mW/cm2) and the exposure time (s). Hence, it depends on the power of the light-bulb, the surface of exposure, and the time. The exposure surface itself depends on the shape of the light-bulb and the distance from the sample to the emission source. 

    We used a cylindrical light-bulb ~27 cm long, with a power of 11 W in UVC, placed at a distance of ~11 cm from the target samples. This gives a theoretical intensity of ~5,9 mW/cm2, rendering a needed exposure time of ~0,85 s to deliver the required energy to inactivate the virus (~5 mJ/cm2). However, some details must be considered when establishing a safe time of exposure. First, the light intensity is not homogeneous across the whole light-bulb; near the ends, it decreases down to a value of ~1/3 of the intensity in the center (4)⁠. This would increase the needed time at least three times, up to ~2,5 s. Moreover and more importantly, other factors —such as interactions between the light and the materials of the masks, absorption of some of the light by the coating of the light-bulb, end of lamp life, and loss of line-of-sight exposure of the sample—could alter the actual dosage that the sample is receiving. These factors are usually hard to calculate and would definitely entail a higher exposure time for safe disinfection protocols. 

    Due to the novelty of SARS-CoV-2, there are no specific studies about UV germicidal action on this strain since we reviewed it. However, literature reports regarding UV disinfection of SARS-CoV—the strain that caused the 2002-2004 outbreak—are a good guide in this matter, given the closeness between these two strains and confirmed reports of similar stability (5)⁠. The four most relevant studies that we considered report complete inactivation (or close to complete inactivation) of the virus after exposure times as short as 2 min using high intensities, and as long as 60 min using low intensities. These studies report that dosages proven to work against the virus are ~120 mJ/cm2 (6)⁠, ~324 mJ/cm2 (7)⁠, ~613 mJ/cm2 (8)⁠ and ~4800 mJ/cm2 (9)⁠. After calculating for the specifications of our device we obtain needed exposure times of ~20 s, ~55 s, ~2 min, and ~14 min—respectively—.It can be noticed that the exposure times of these studies are as much as two orders higher than our initial theoretical calculations, and it is also noteworthy that these studies had trustable ways of measuring intensities and usually worked with liquid samples—which are better media for UV disinfection than the materials of the face mask—For all of the above and the fact that one of the studies reported that SARS-CoV exhibits a relative tolerance to UV light, we decided to use an exposure time of 30 min for the disinfection protocol associated with our device. This time of exposure will deliver an energy about three orders higher than our theoretical needed value (~3,6 J/cm2), most likely eliminating all or almost all infectivity. 

    Bibliography

    1. Centers for Disease Control and Prevention. Atlanta, GA: U.S. Department of Health and Human Services C for DC and P. CDC - Recommended Guidance...
    Read more »

View all 4 project logs

  • 1
    V2 Face mask disinfection device (FMDD): User Manual

    General view of the control panel:

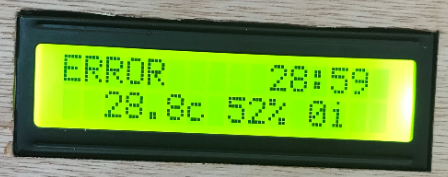
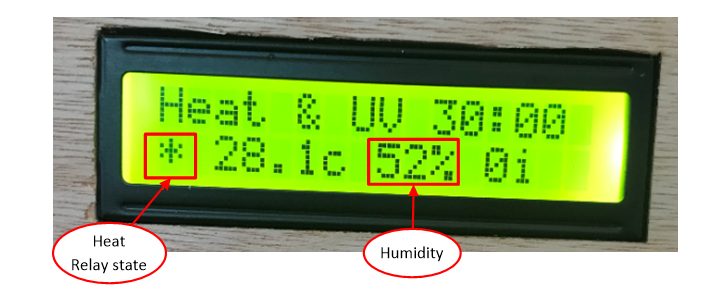
    Information on the display:

    Steps to follow for disinfection cycle:

    1. Plug on the Arduino's power supply => the LCD display should light on
    2. Plug on the power mains of to the electrical parts (UV-C ballast and Heater)
    3. Close the box 
    4.  Select the disinfection mode you want to use by pressing the "Mode" push button. The mode selection will change at each press:

     5) If the selected mode is “UV-C only”, go to step 11 (CYCLE “UV-C ONLY”)

    CYCLES WITH HEAT:

    6) Turn the power switch to “ON” (it should light in red)

    7) Wait for the temperature to reach 70°C.

    8) When the temperature is near 70°C, turn the power switch to “OFF”, open the box and place the masks to be disinfected inside. Then close the cover and turn the power switch to “ON” again.

    9) If the temperature is still above 65°C, you can start the cycle directly by pushing the Start/stop button. If the temperature is too low, there is a message "Low Temperature" on the display: just wait for it to reach 65°c and do it again.

    10) From that point the cycle is on the run for 30 minutes, there will be a sound signal and the message "END" at the elapsing time. Press the start/stop button to be ready for a new cycle. Remark: if you press the start/stop button during the cycle, it will be reinitialized.

    CYCLE “UV-C ONLY”:

    11) Open the box and place the masks to be disinfected inside. Then close the cover and turn the power switch to “ON”.

    12) Start the cycle directly by pushing the Start/stop button.

    13) From that point the cycle is on the run for 30 minutes, there will be a sound signal and the message "END" at the elapsing time. Press the start/stop button to be ready for a new cycle. Remark: if you press the start/stop button during the cycle, it will be reinitialized.

    Alarms and Error message:

    During all the process, the system will check error conditions, in the case of error condition it will make a sound signal and display "ERROR" which means the error state.

    ERROR conditions:

    • Low light intensity during  “UV-C only” or “Heat + UV-C” cycle
    • Temperature too low or too high when the selected mode is “Heat only” or “Heat + UV-C”

    Other indications:

    • Heat Relay State: displays ‘*’ when the relay is turned ON (power to the heater)
    • Humidity: the system doesn't actively command the humidity level, but this information can be relevant to check, according to some studies about the masks disinfection using heat.

View all instructions

Enjoy this project?

Share

Discussions

Similar Projects

Does this project spark your interest?

Become a member to follow this project and never miss any updates