Fabian
-
Turret build instructions
10/05/2020 at 11:34 • 0 commentsThe instructions for assembling the turret are online. I hope I haven't forgotten anything and everything is easy to understand. I look forward to any constructive criticism. 😊
Here are the instructions
Hackaday.io: https://hackaday.io/project/172328/instructions
Nerdiy.de: https://nerdiy.de/en/howto-windiy-drehturm-aufbauen/
![]()
![]()
![]()
![]()
![]()
![]()
-
Pitch actuator instructions
10/05/2020 at 11:32 • 0 commentsThe instructions for setting up the pitch actuator are online. I hope I haven't forgotten anything and everything is easy to understand. I look forward to constructive criticism. 😊
Here are the instructions
Hackaday.io: https://hackaday.io/project/172328/instructions
Nerdiy.de: https://nerdiy.de/en/howto-windiy-pitch-aktor-zusammenbauen/
![]()
![]()
![]()
![]()
![]()
![]()
-
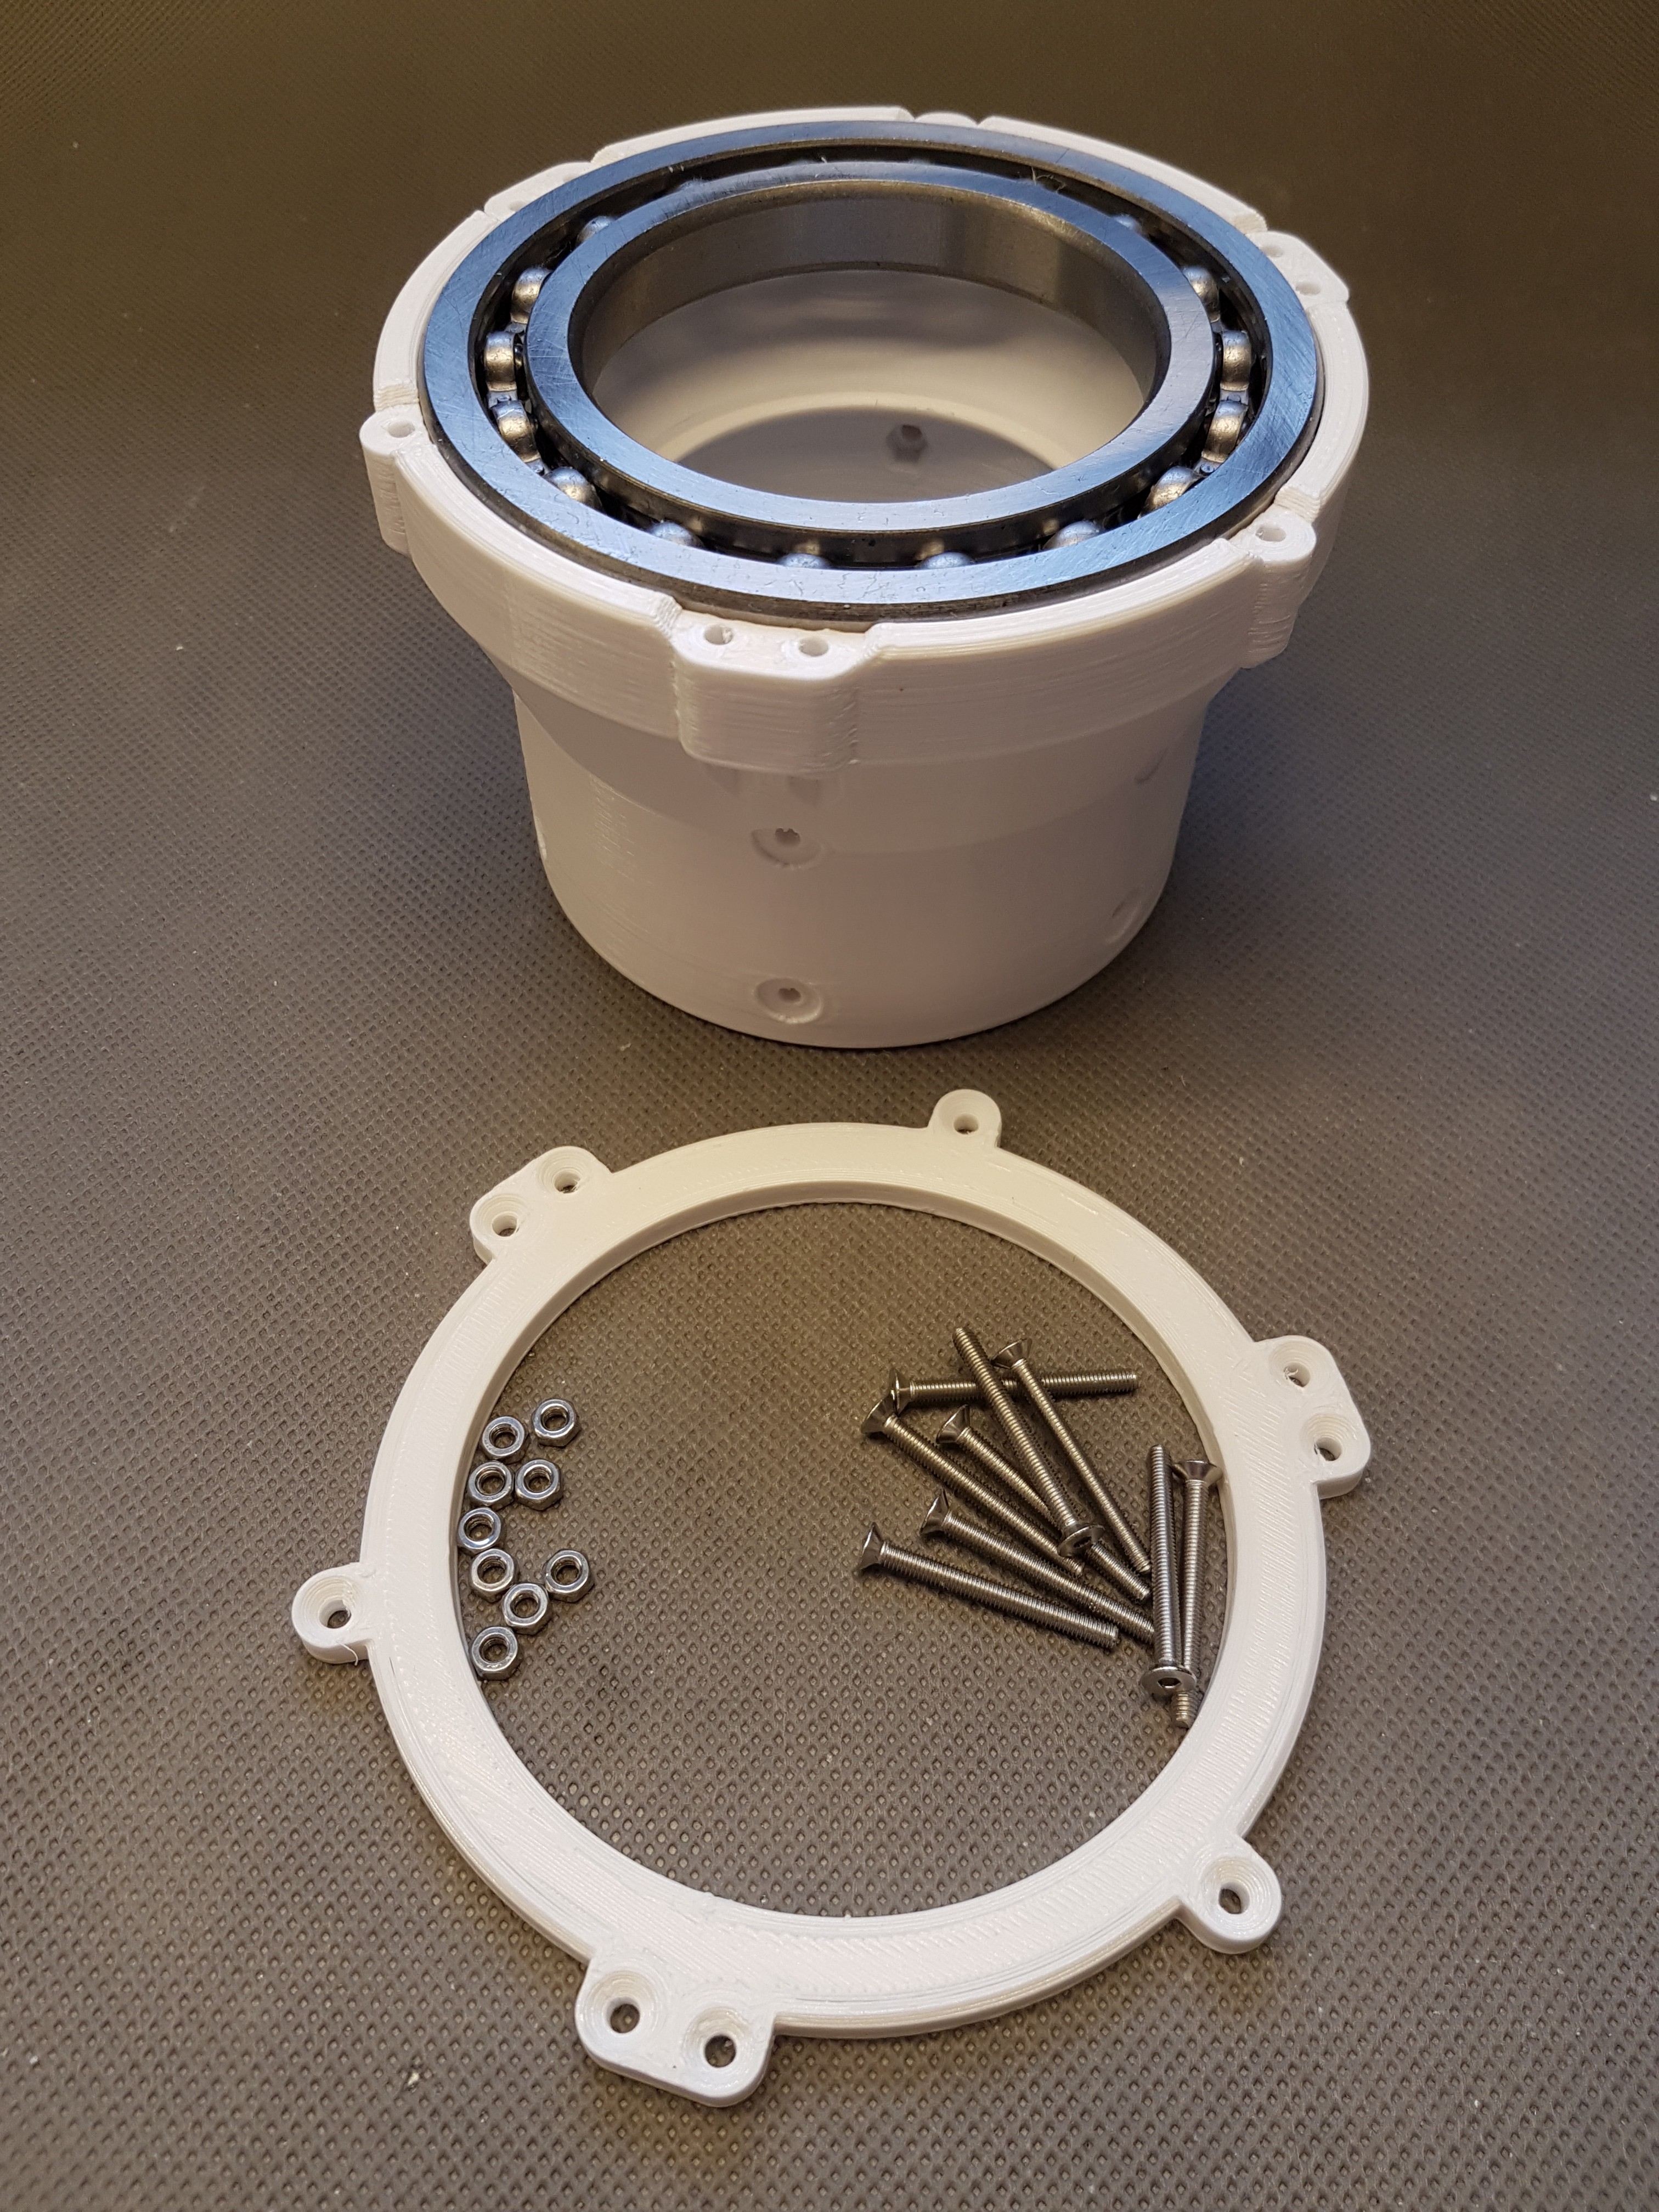
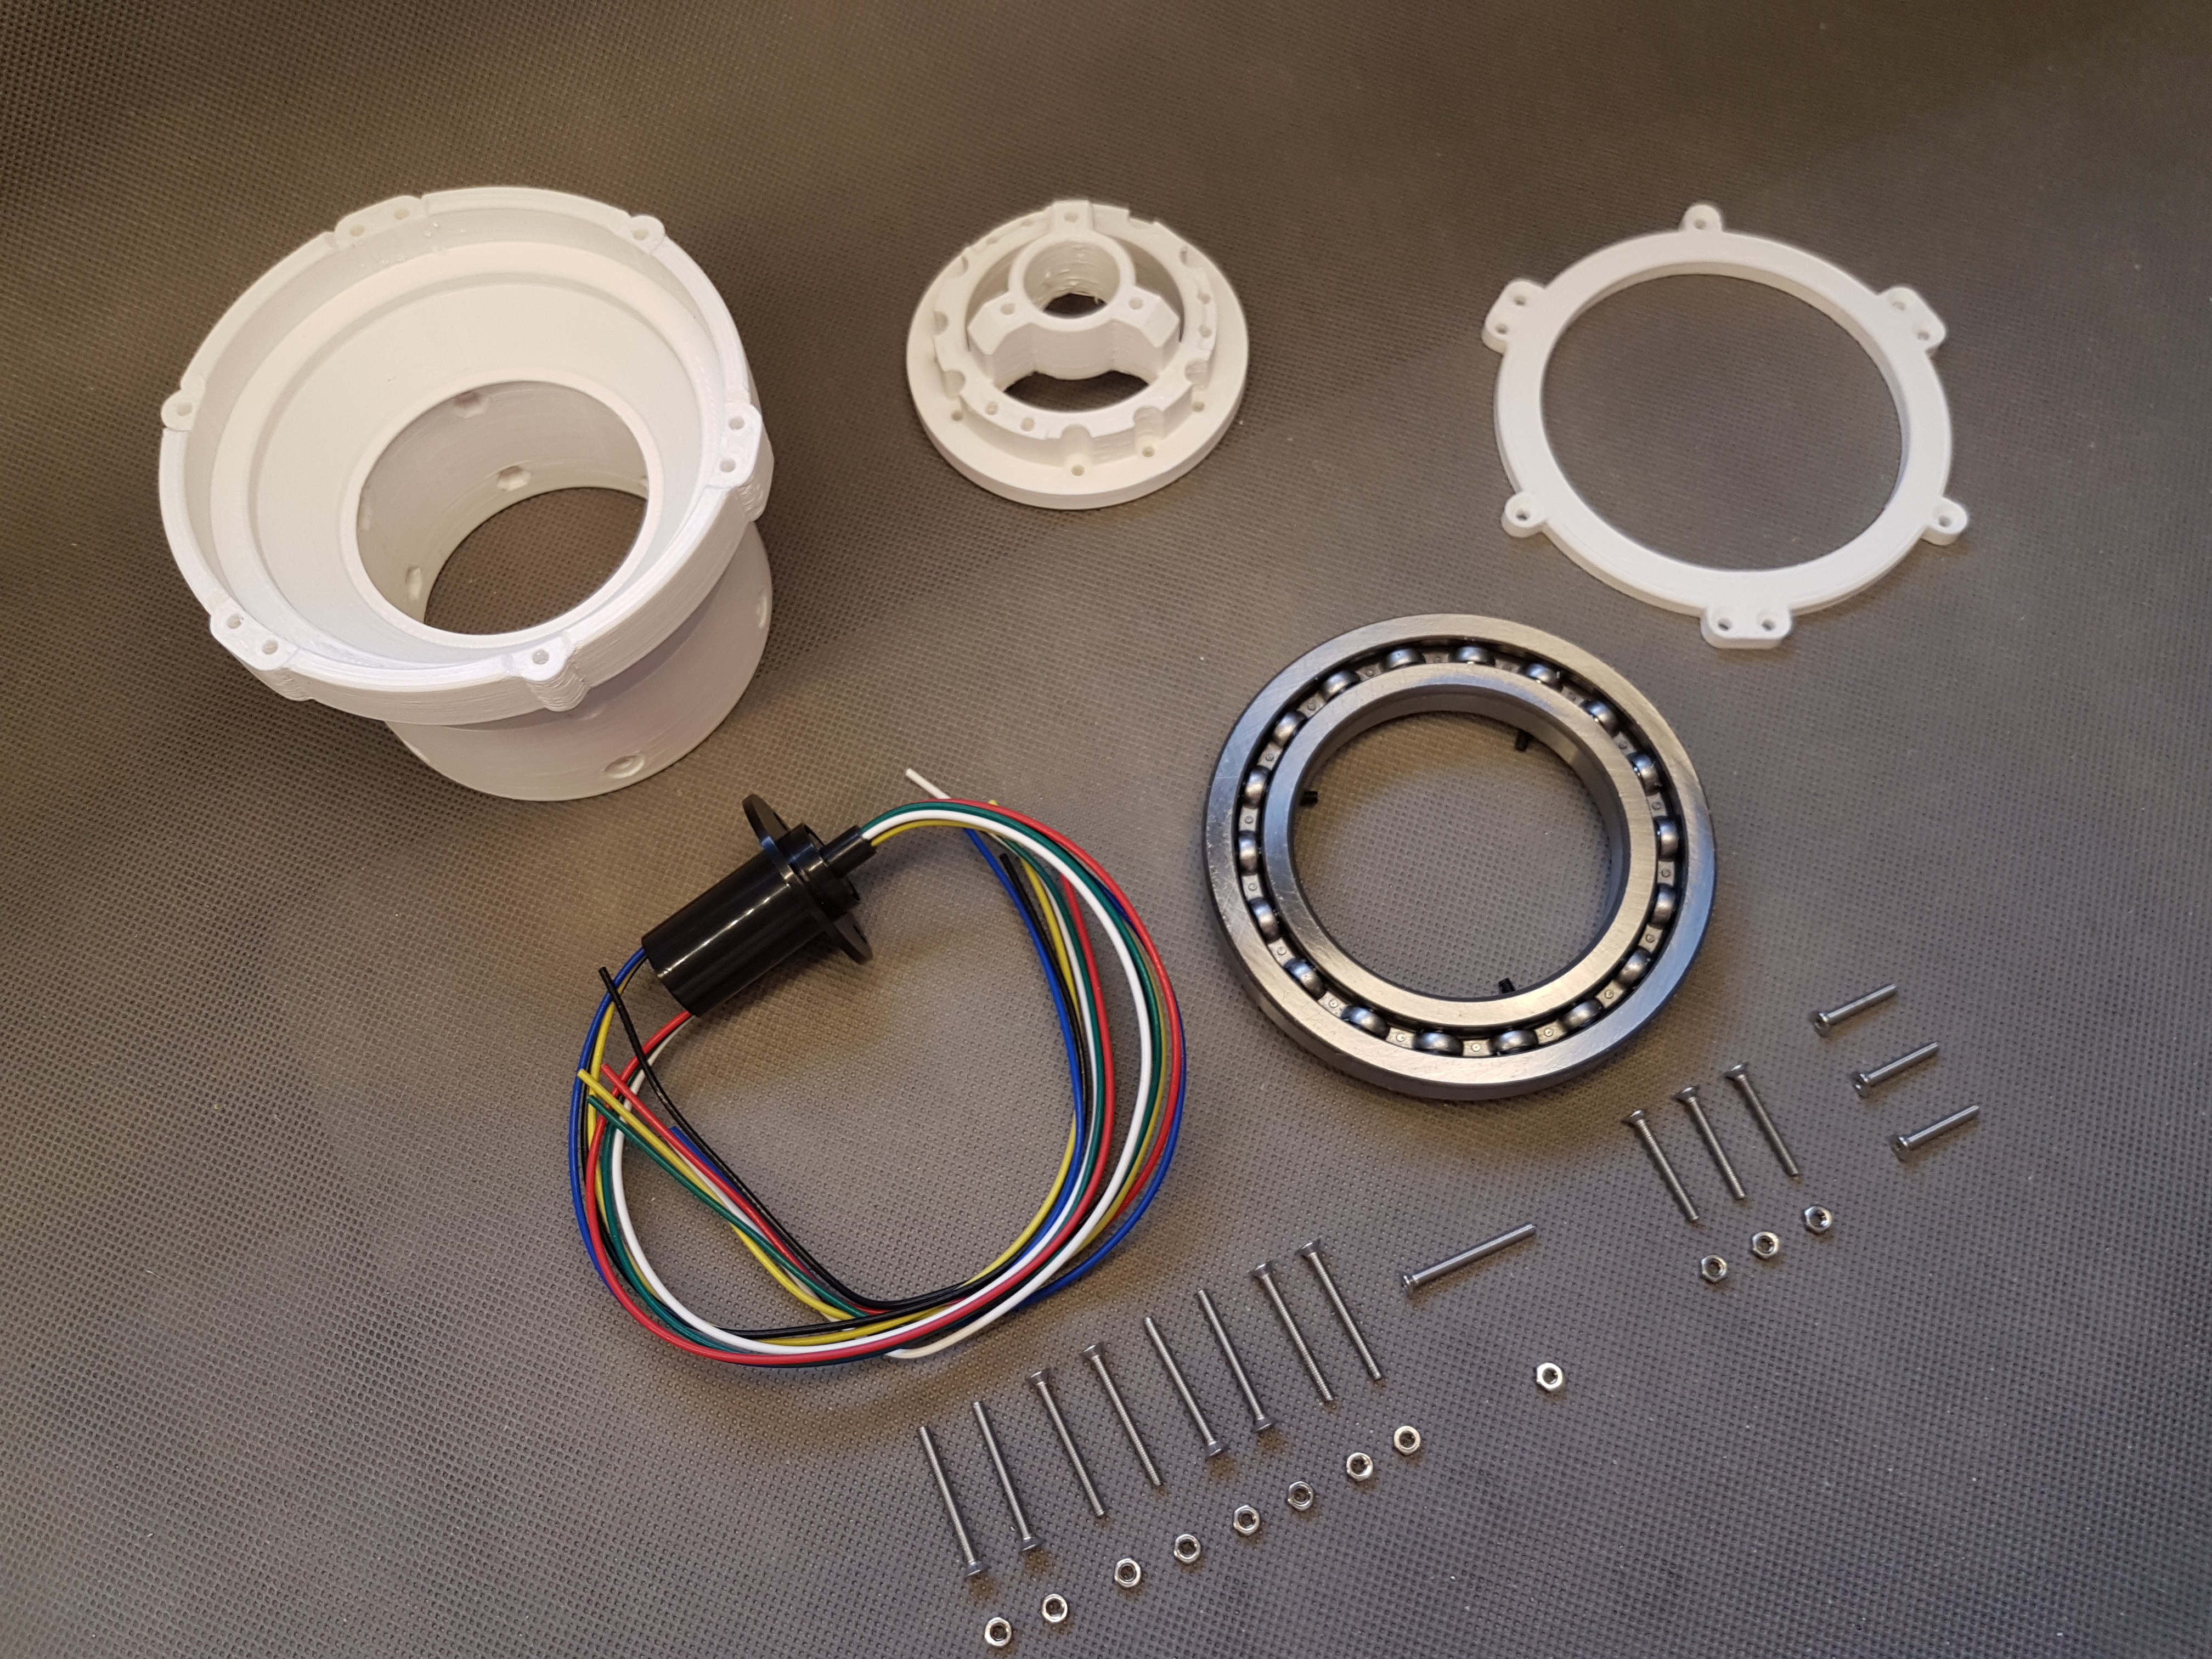
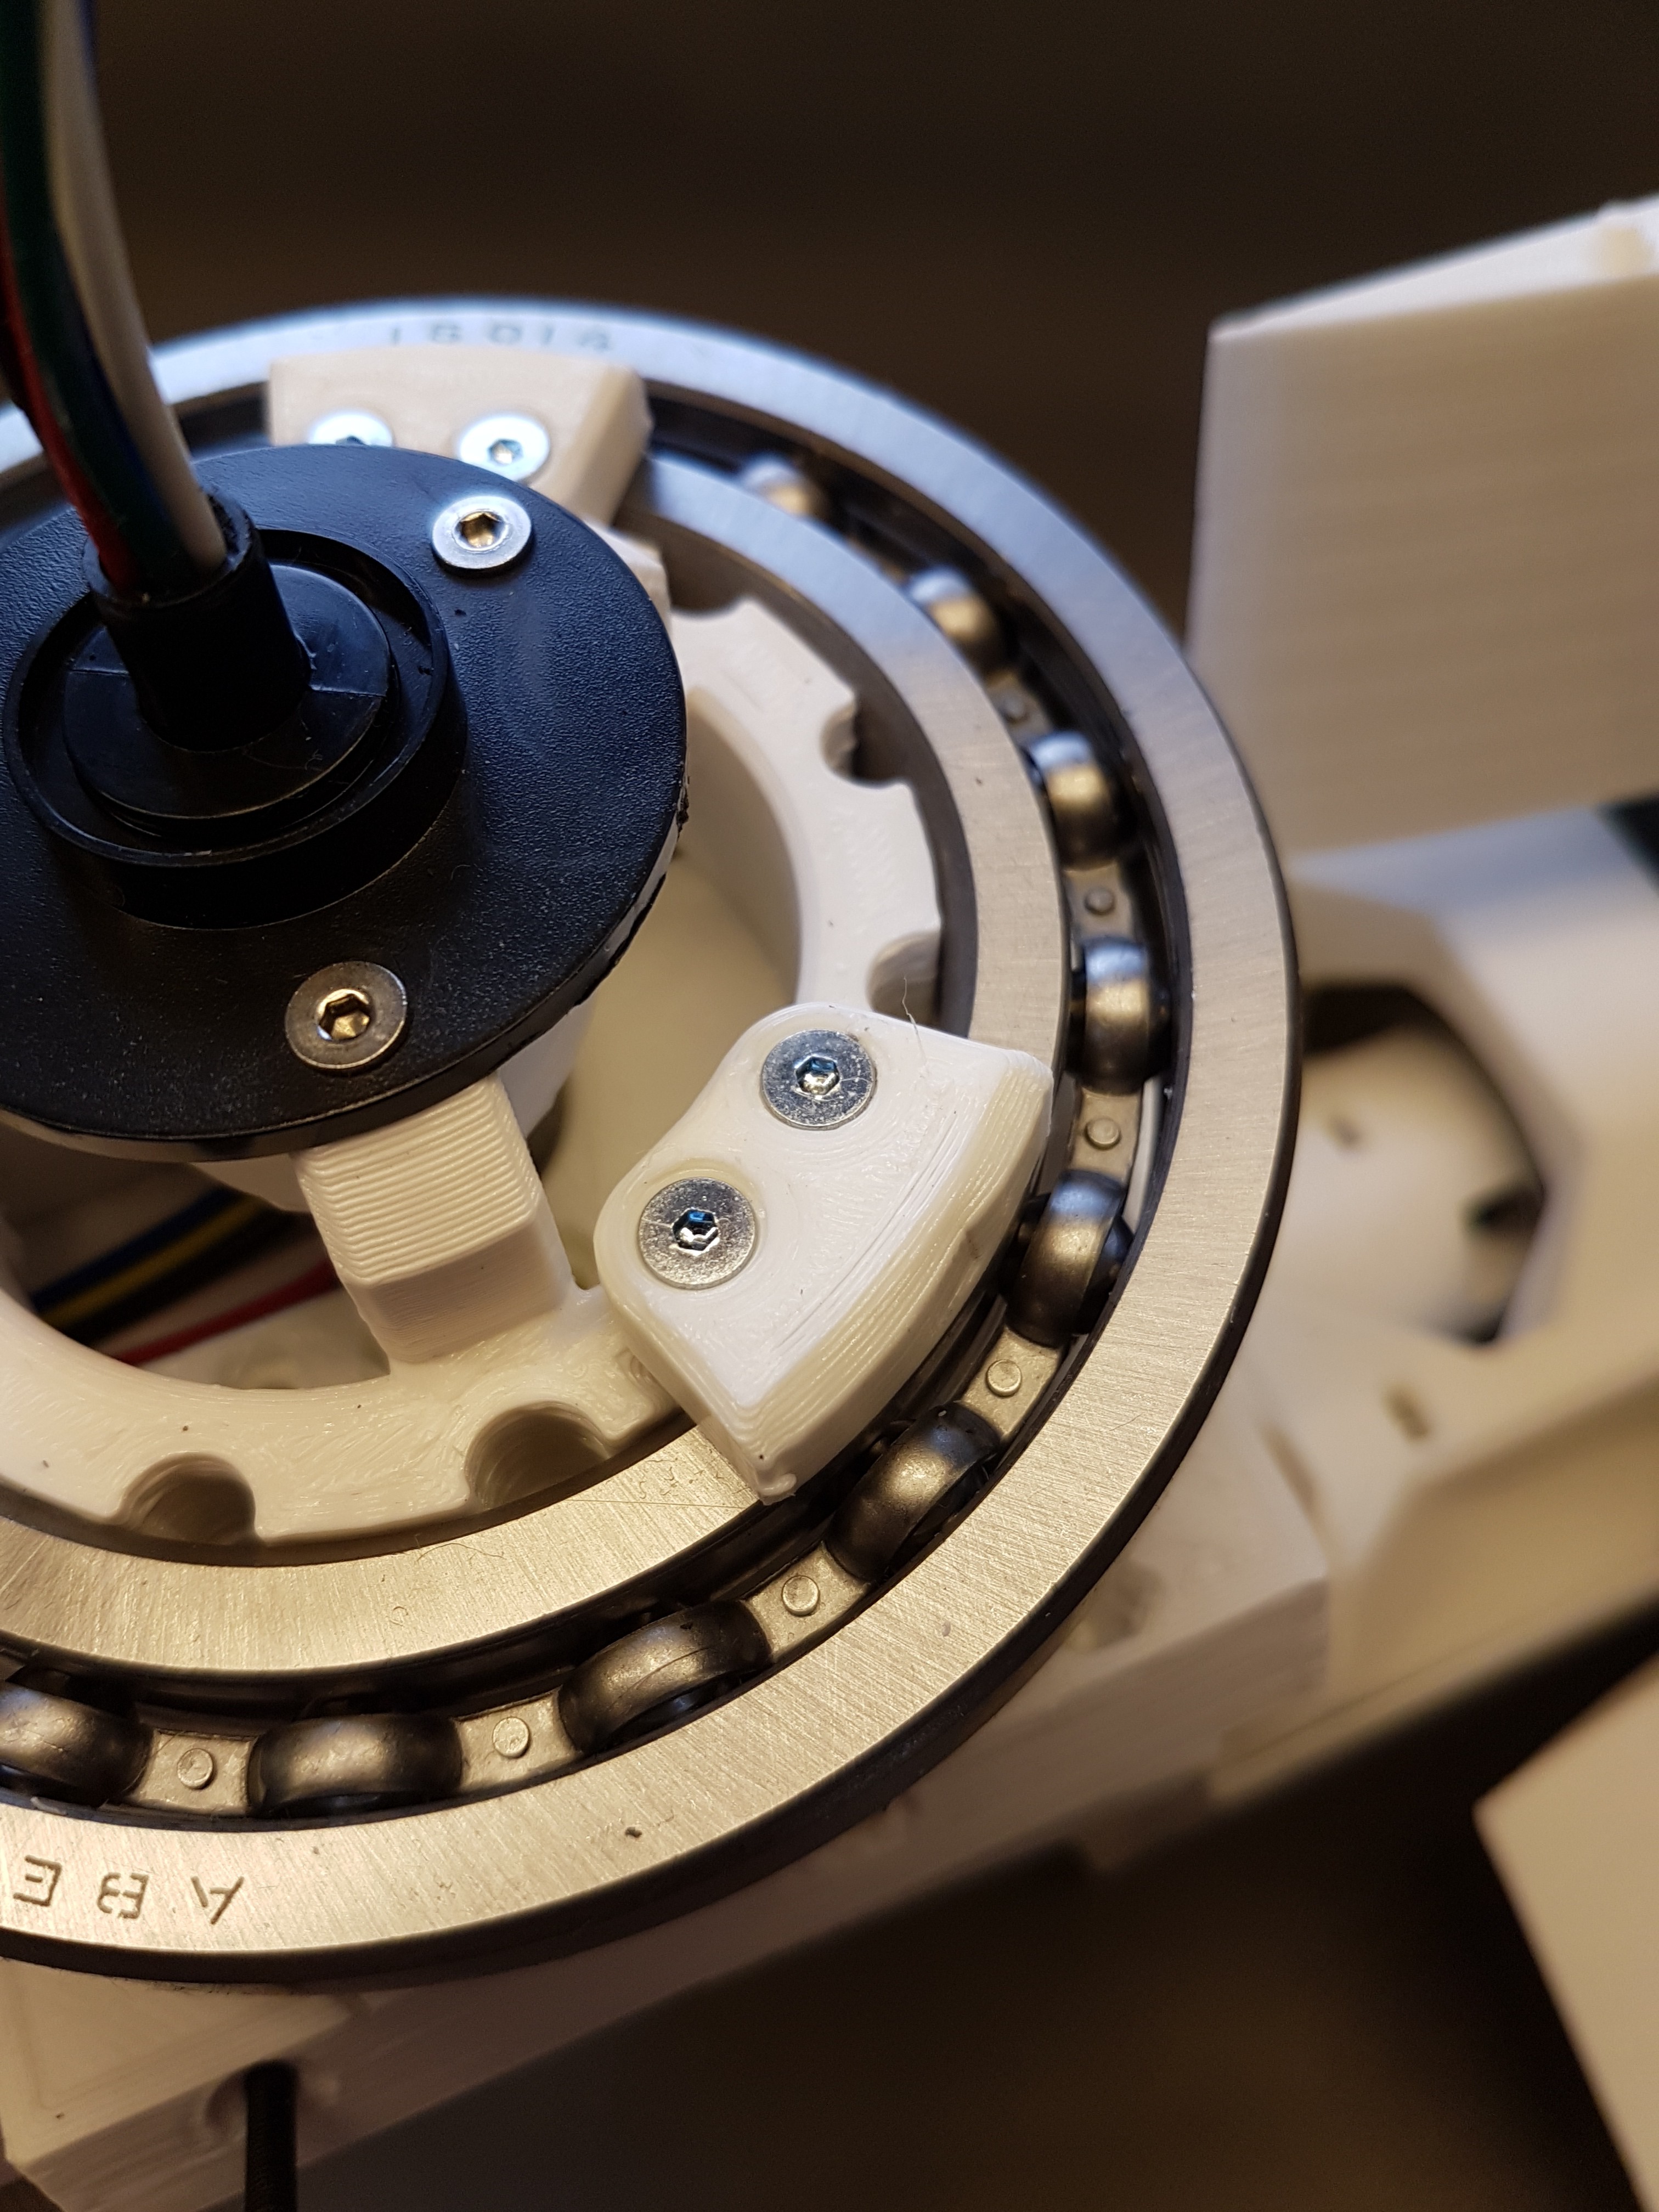
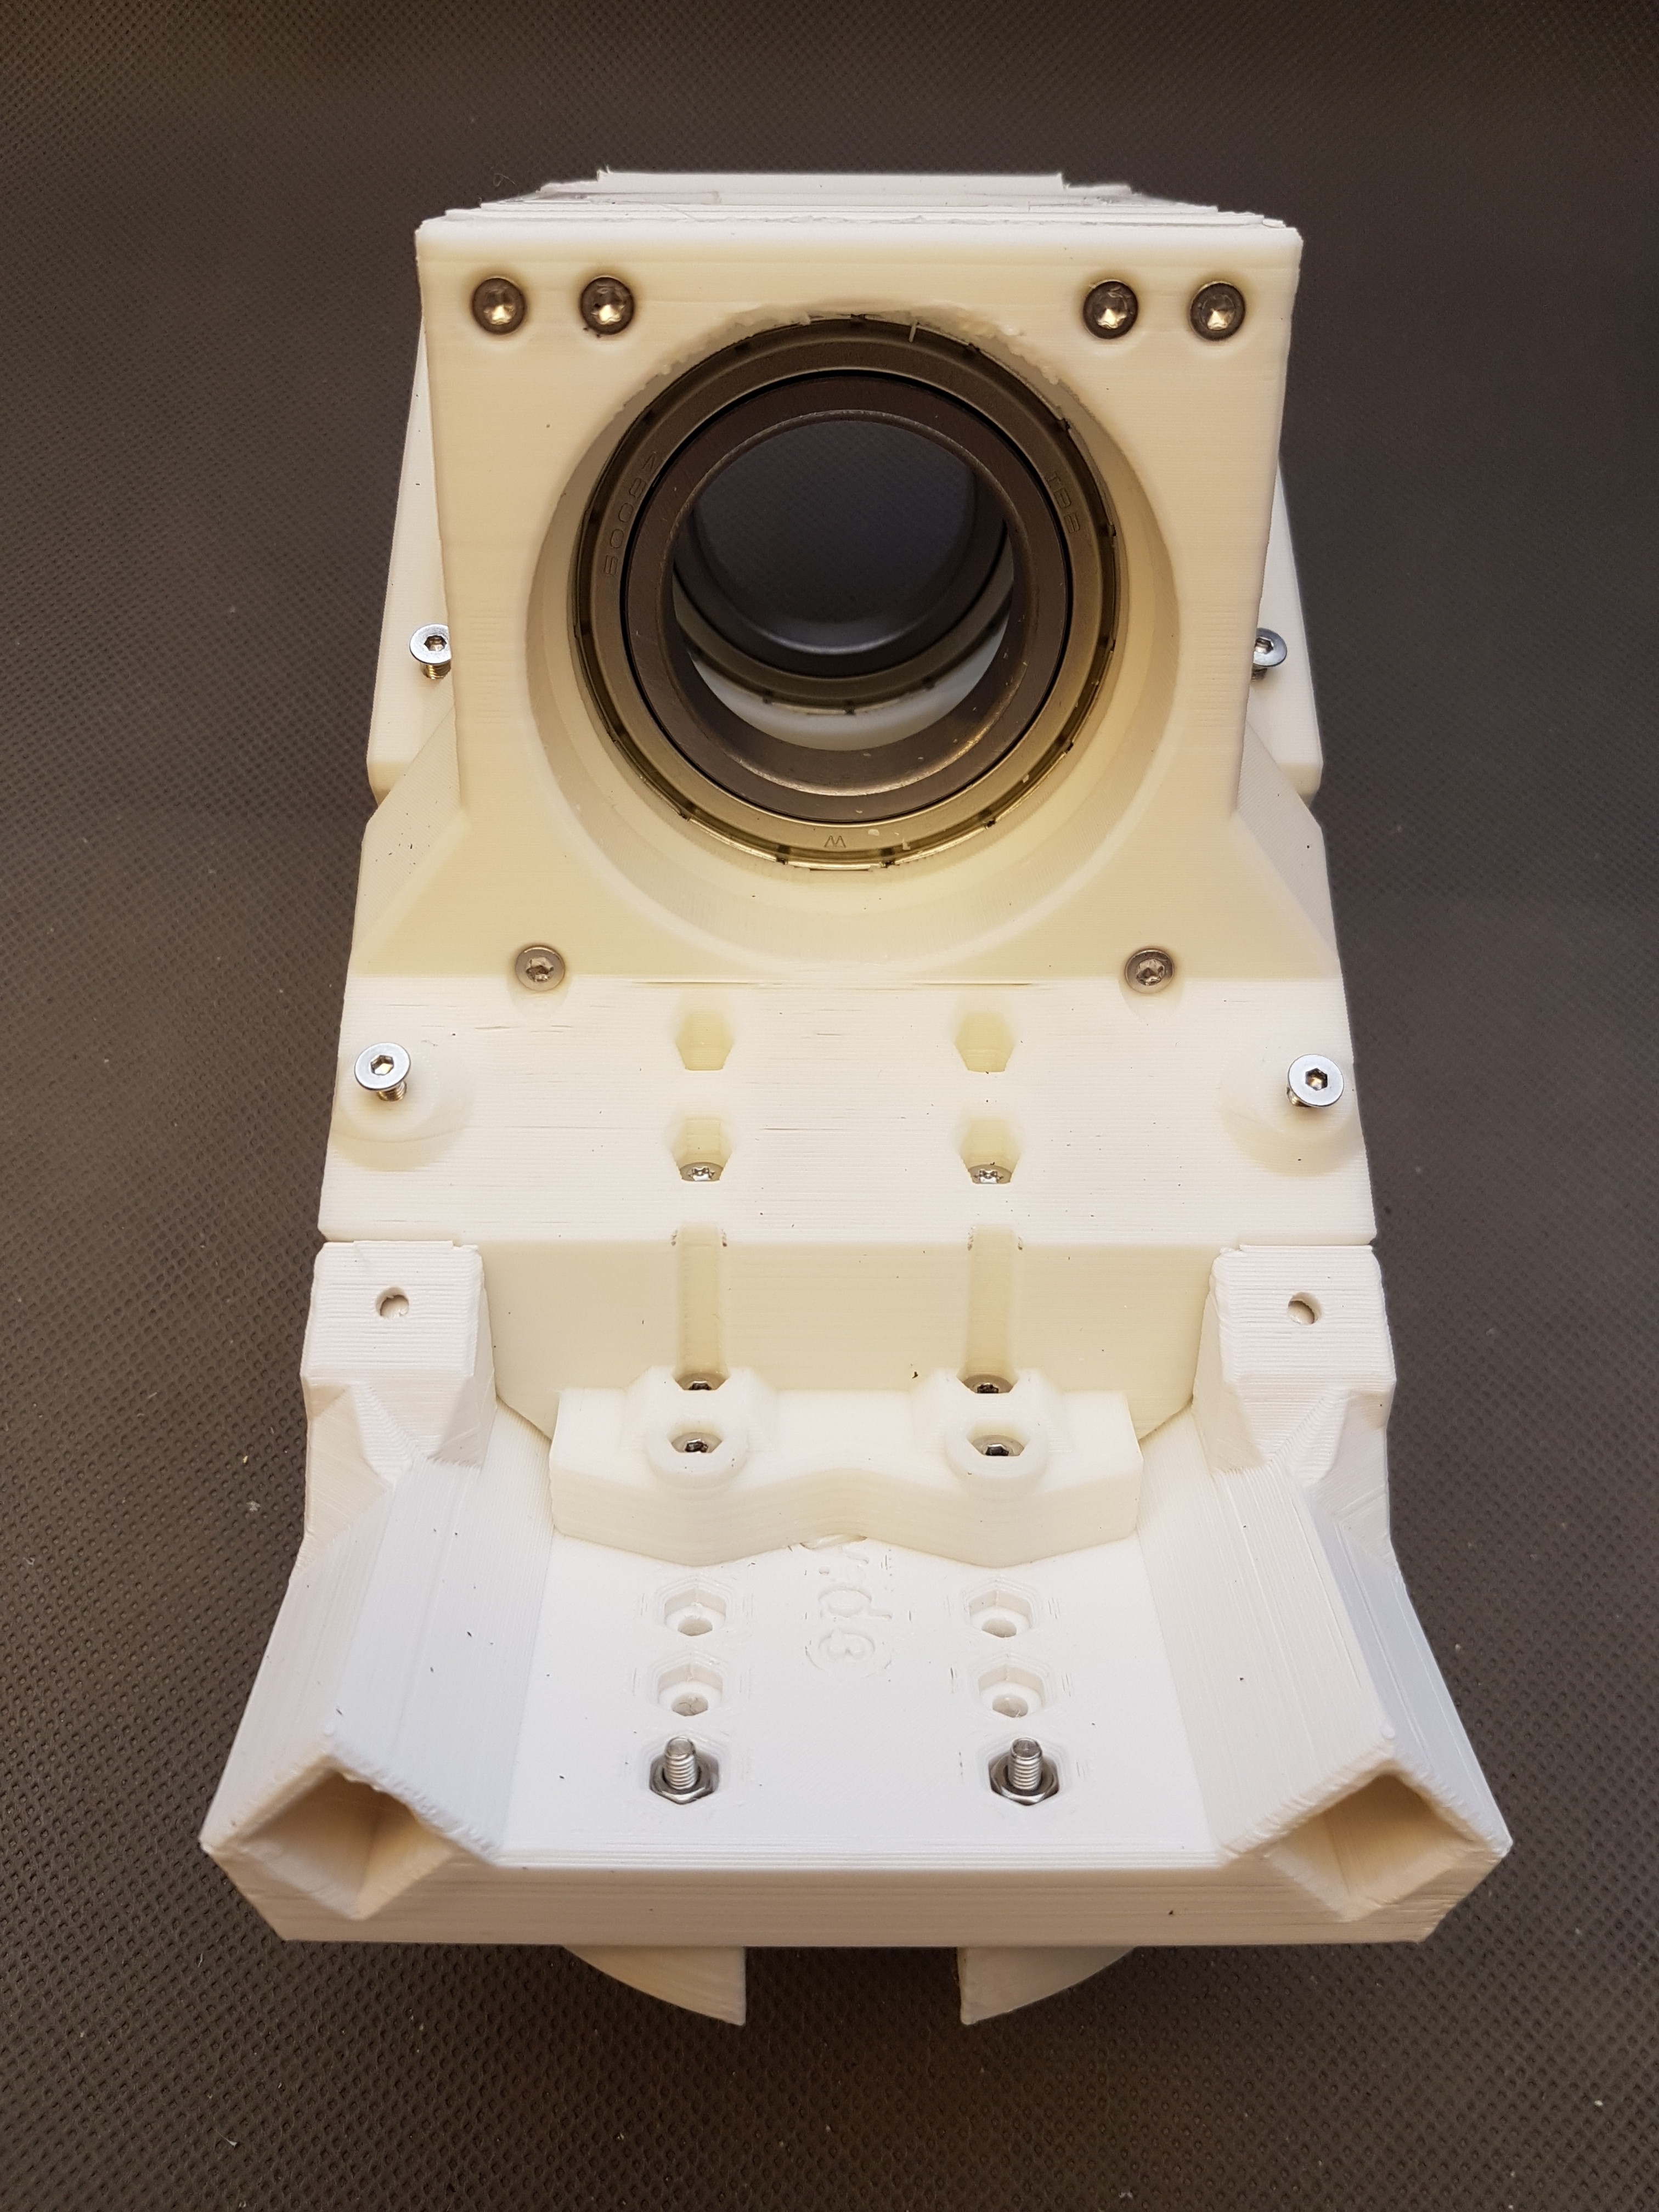
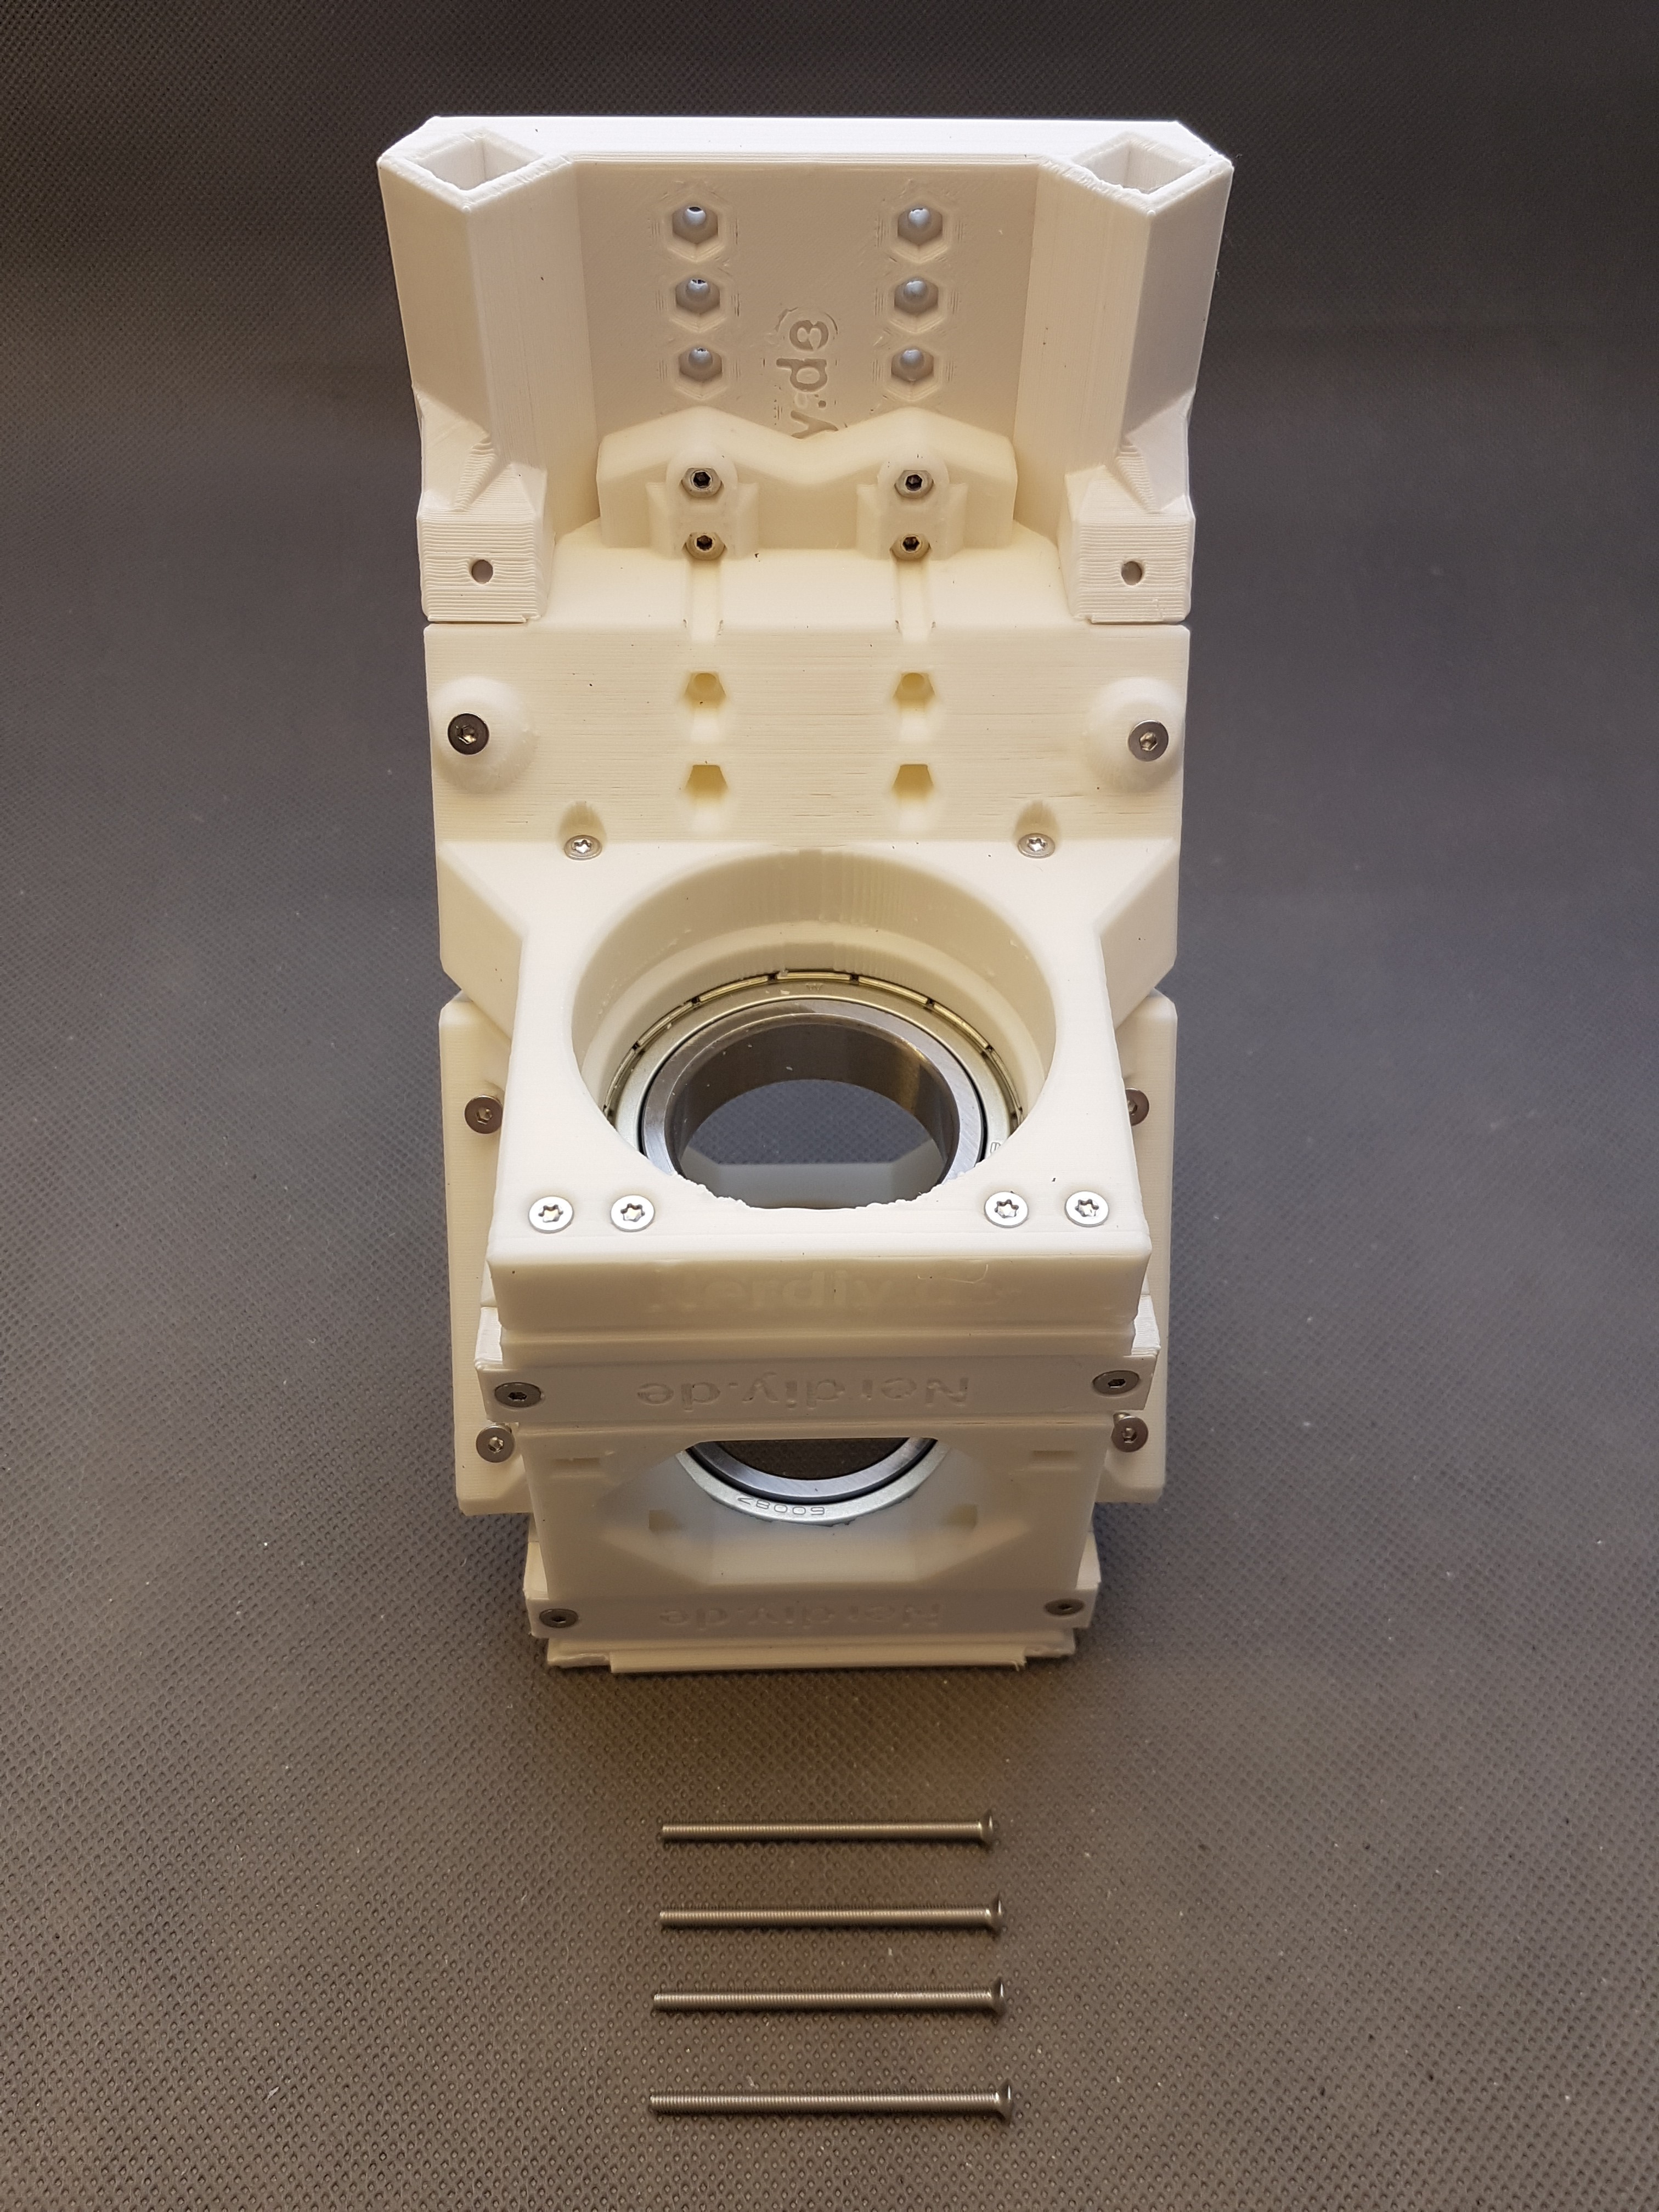
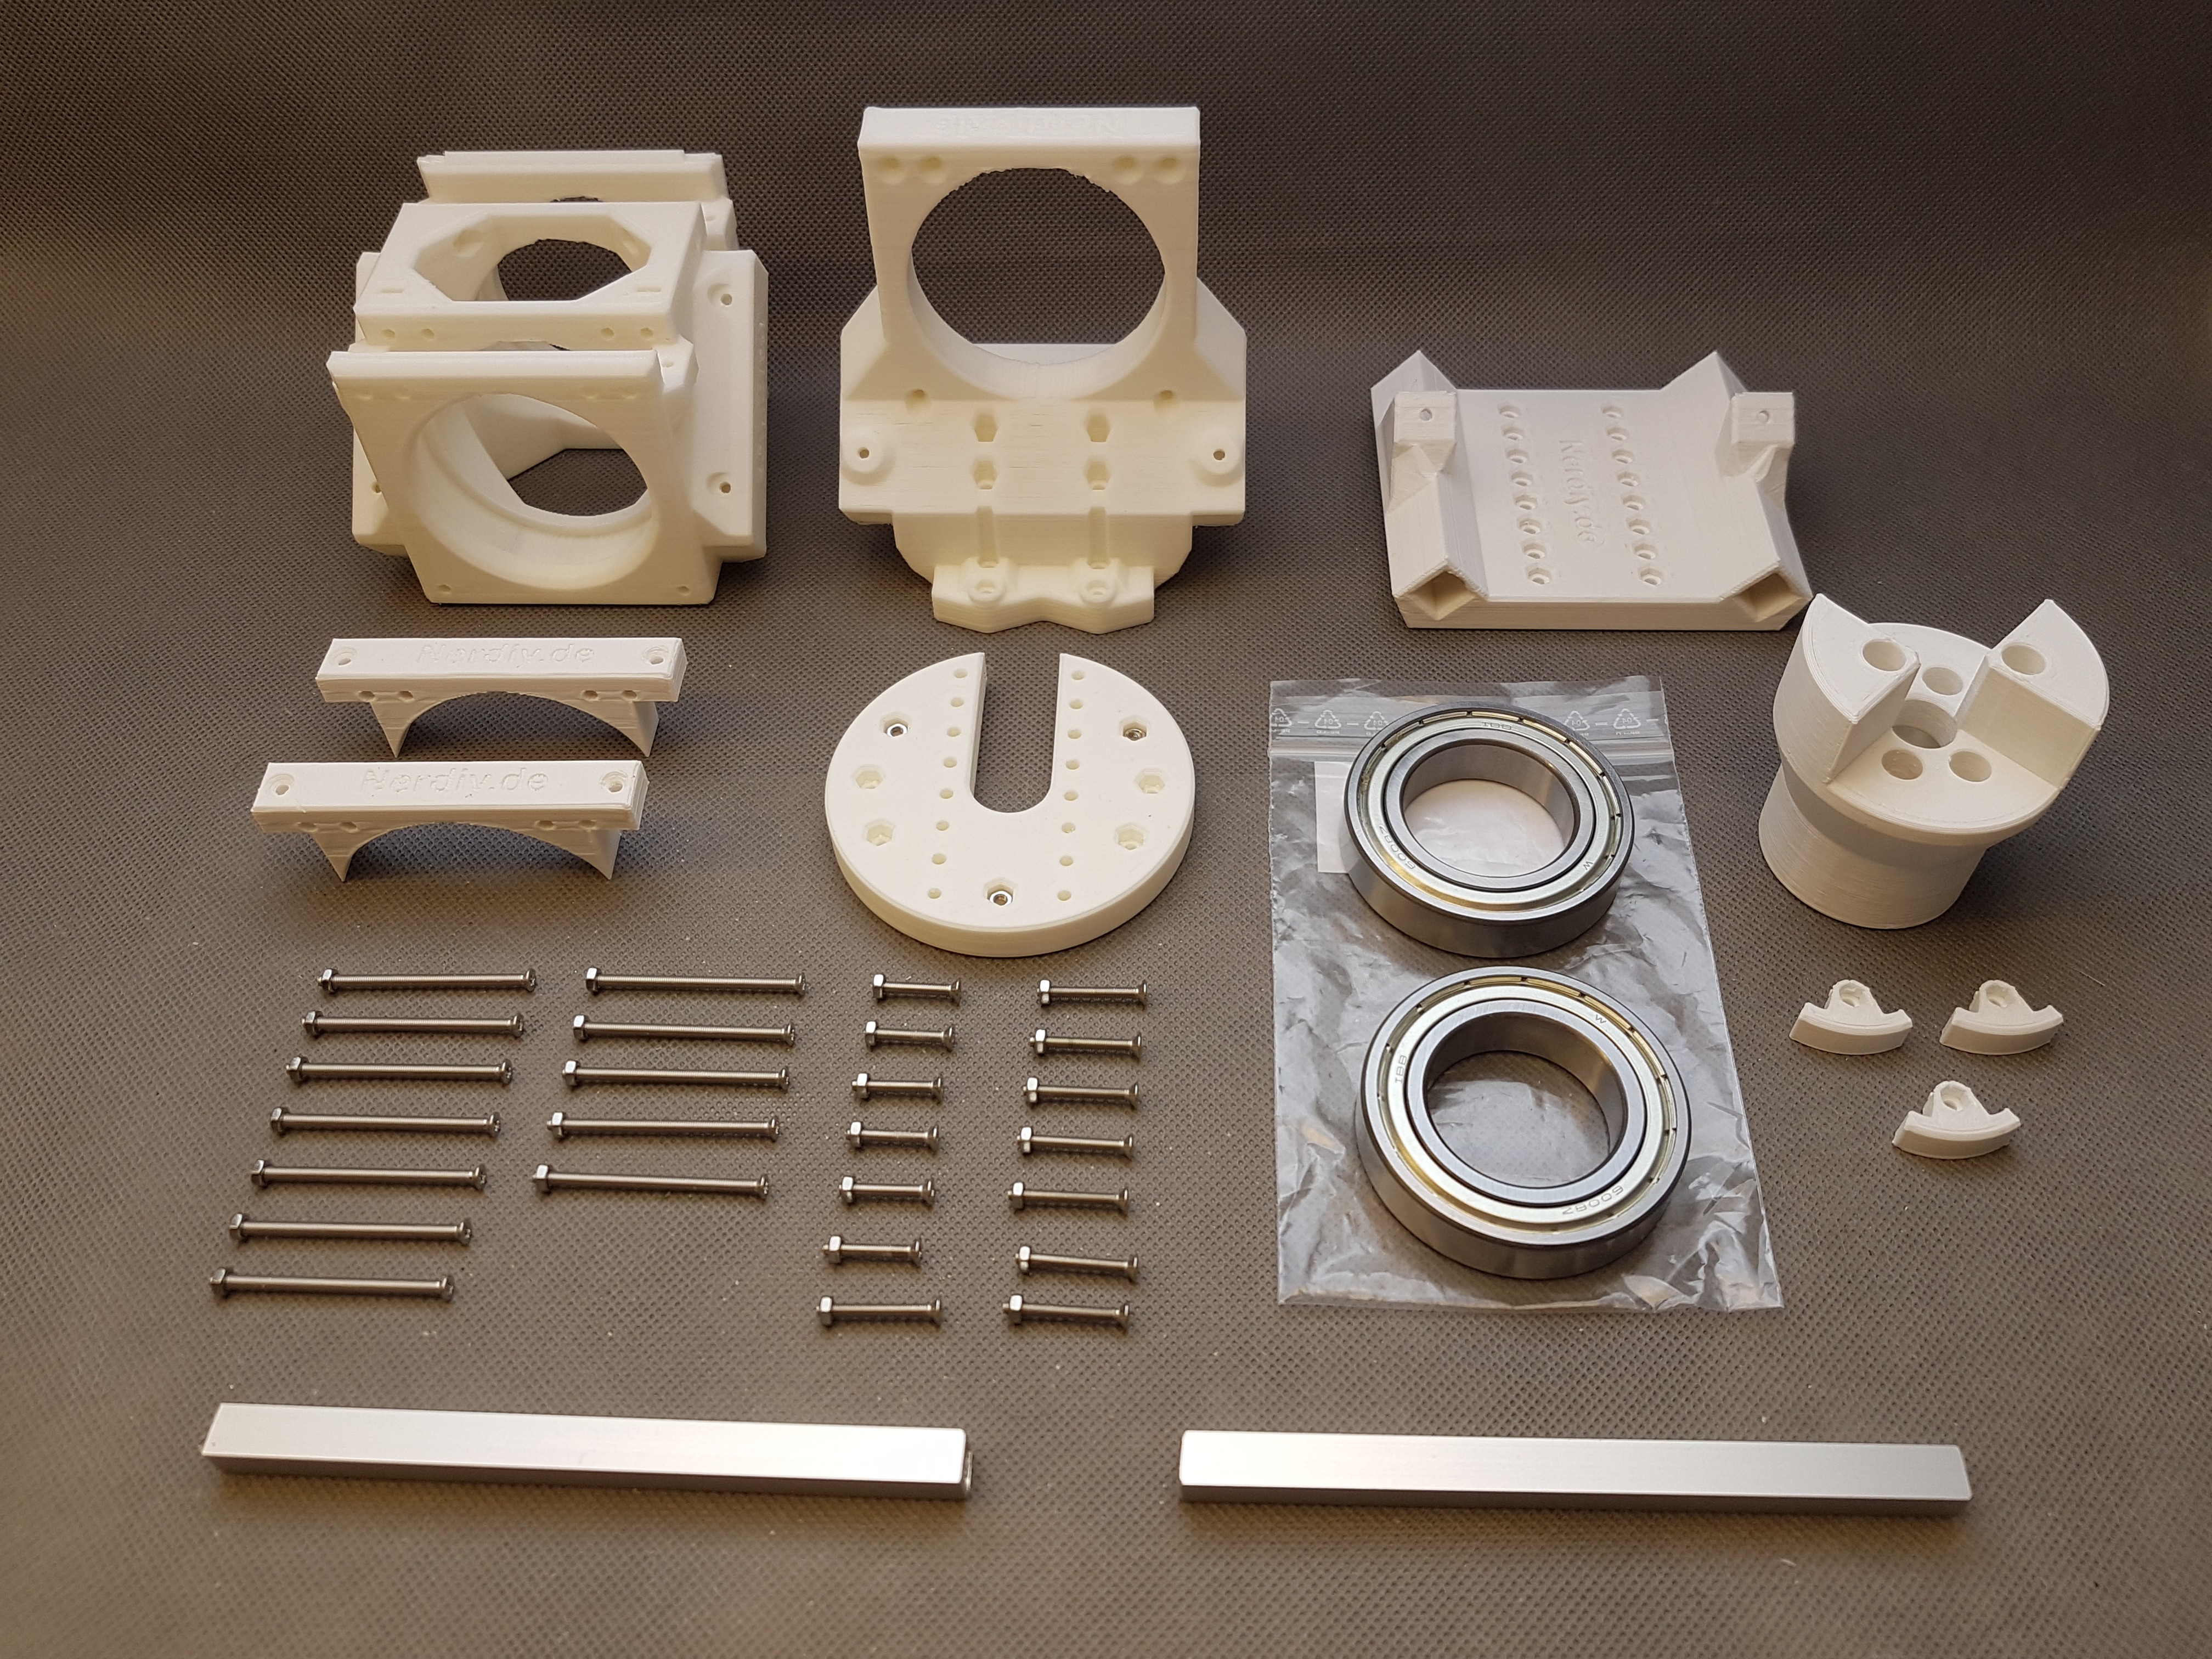
Main axis build instructions
10/05/2020 at 11:31 • 0 commentsThe instructions for setting up the main axis are online. I hope I haven't forgotten anything and everything is easy to understand. I look forward to any constructive criticism. 😊
Here are the instructions
Hackaday.io: https://hackaday.io/project/172328/instructions
Nerdiy.de: https://nerdiy.de/en/howto-windiy-montage-der-hauptachse/
![]()
![]()
![]()
![]()
-
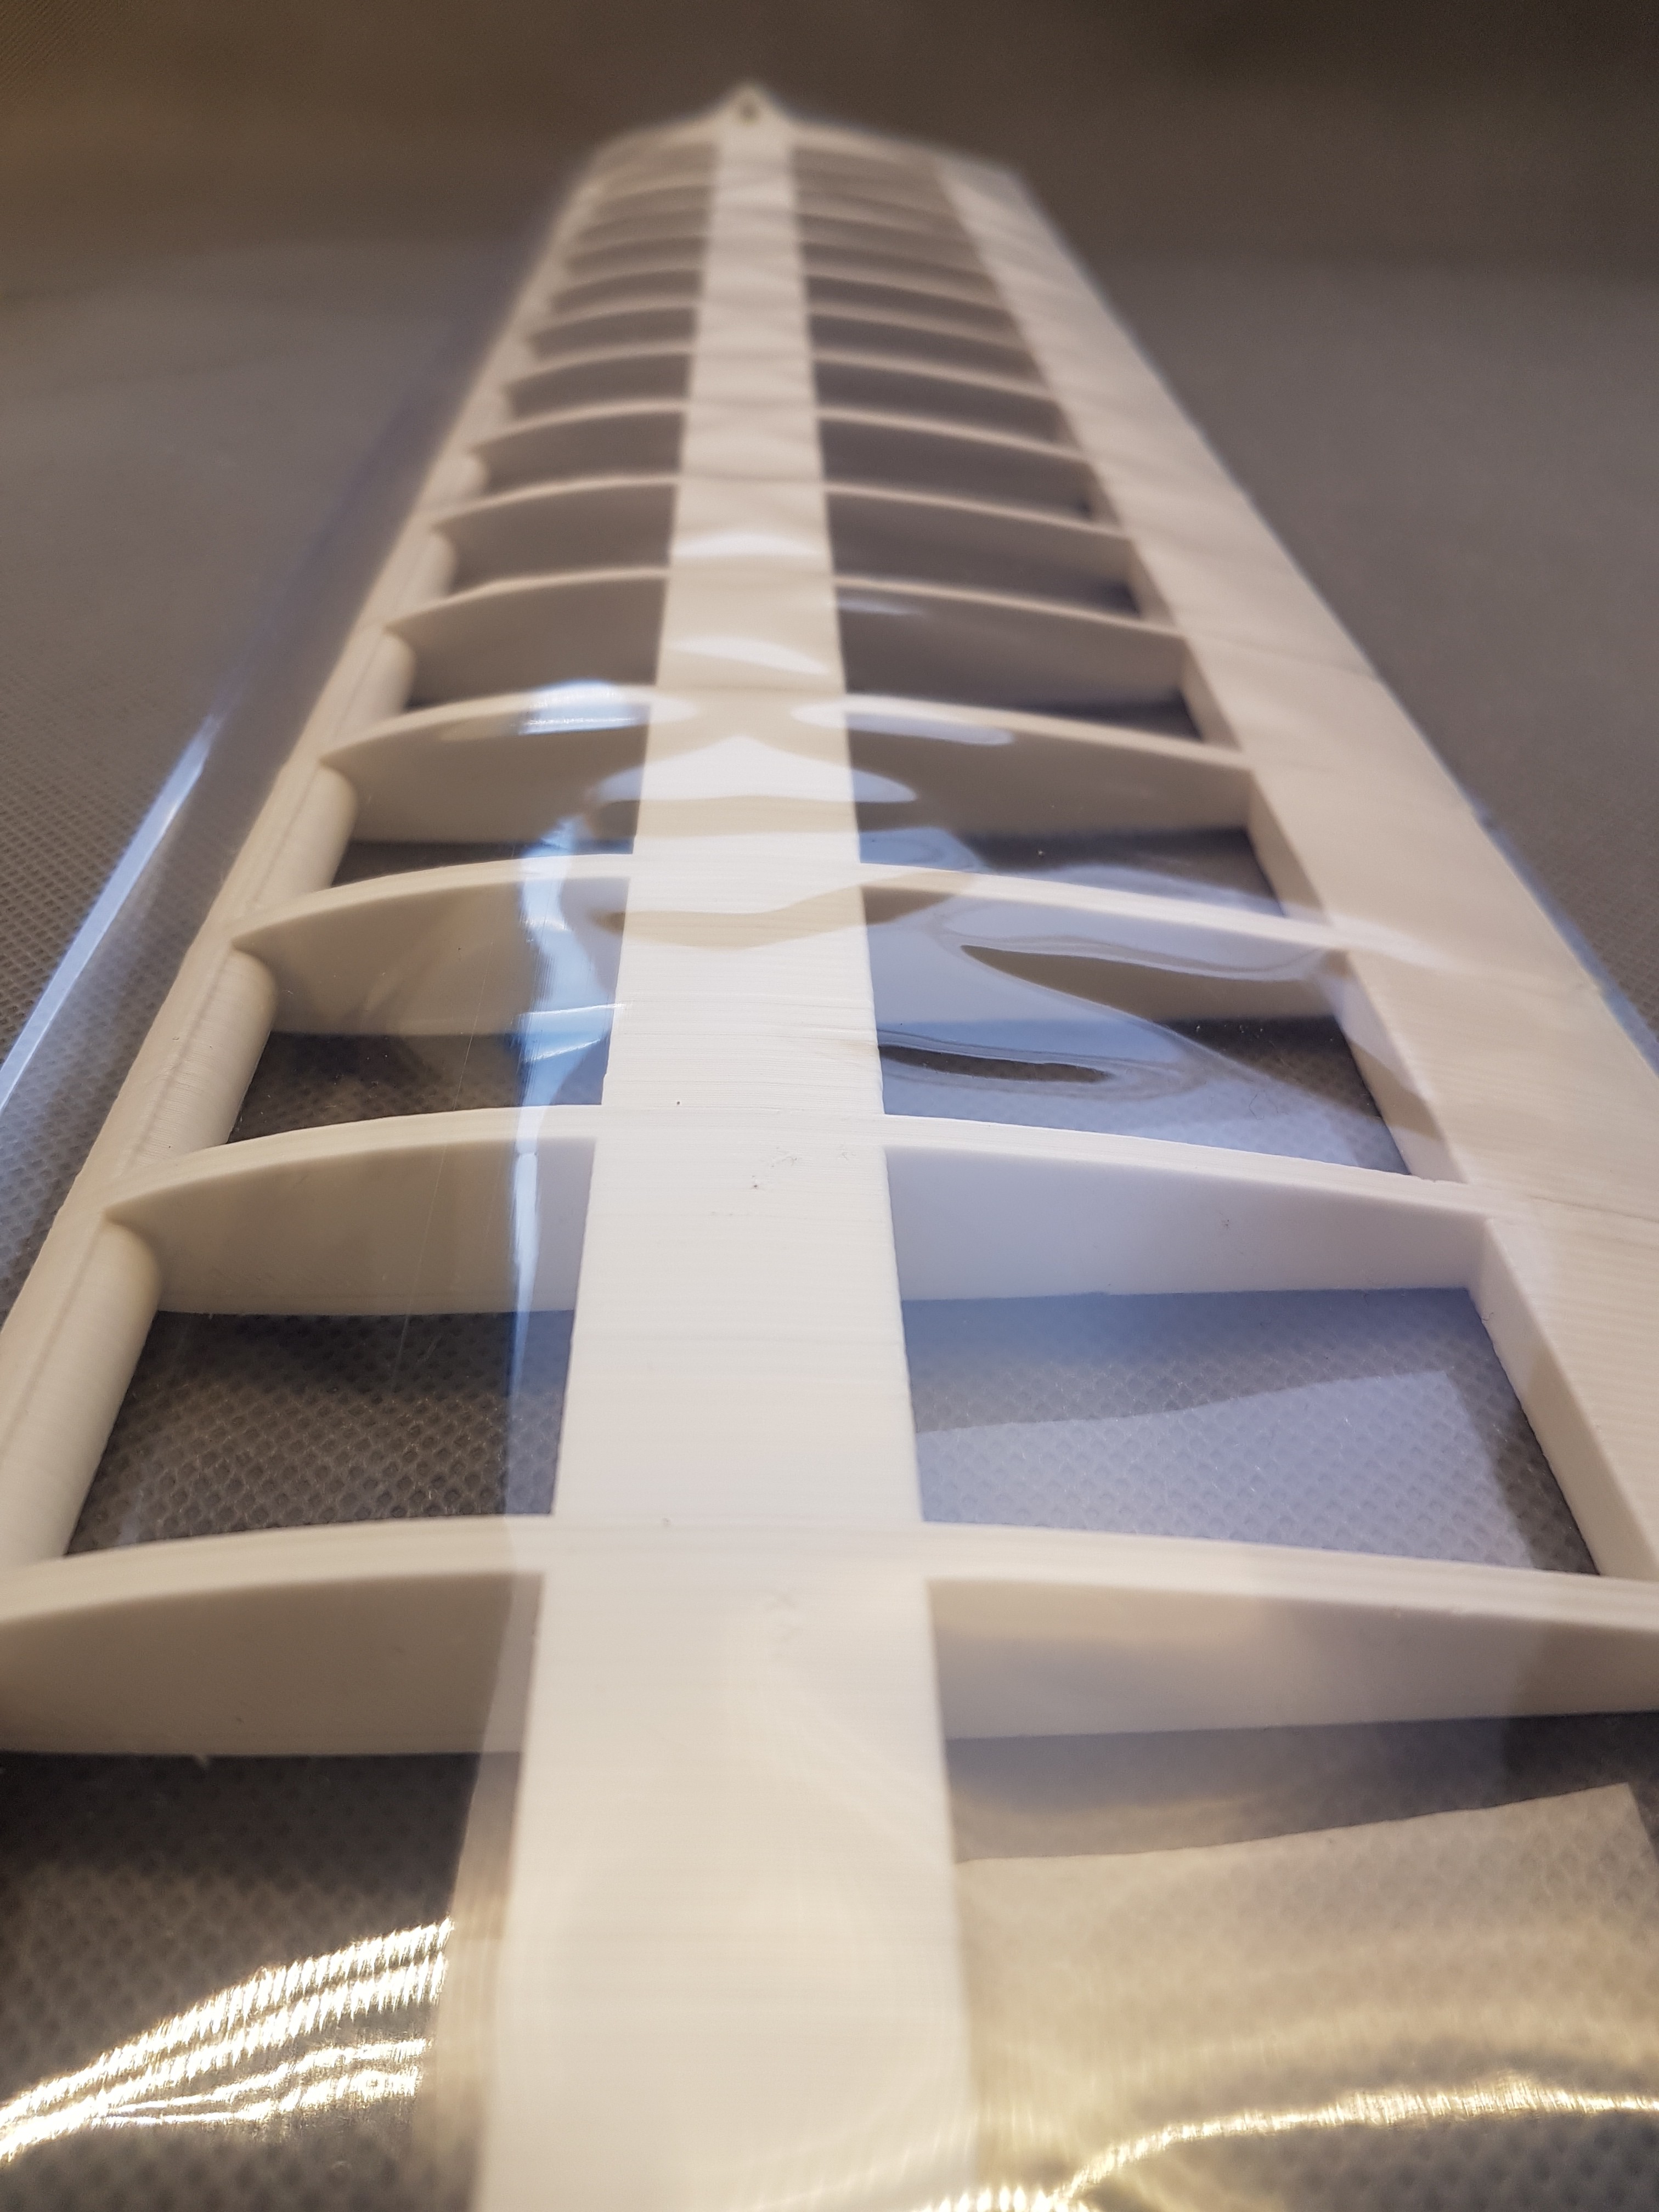
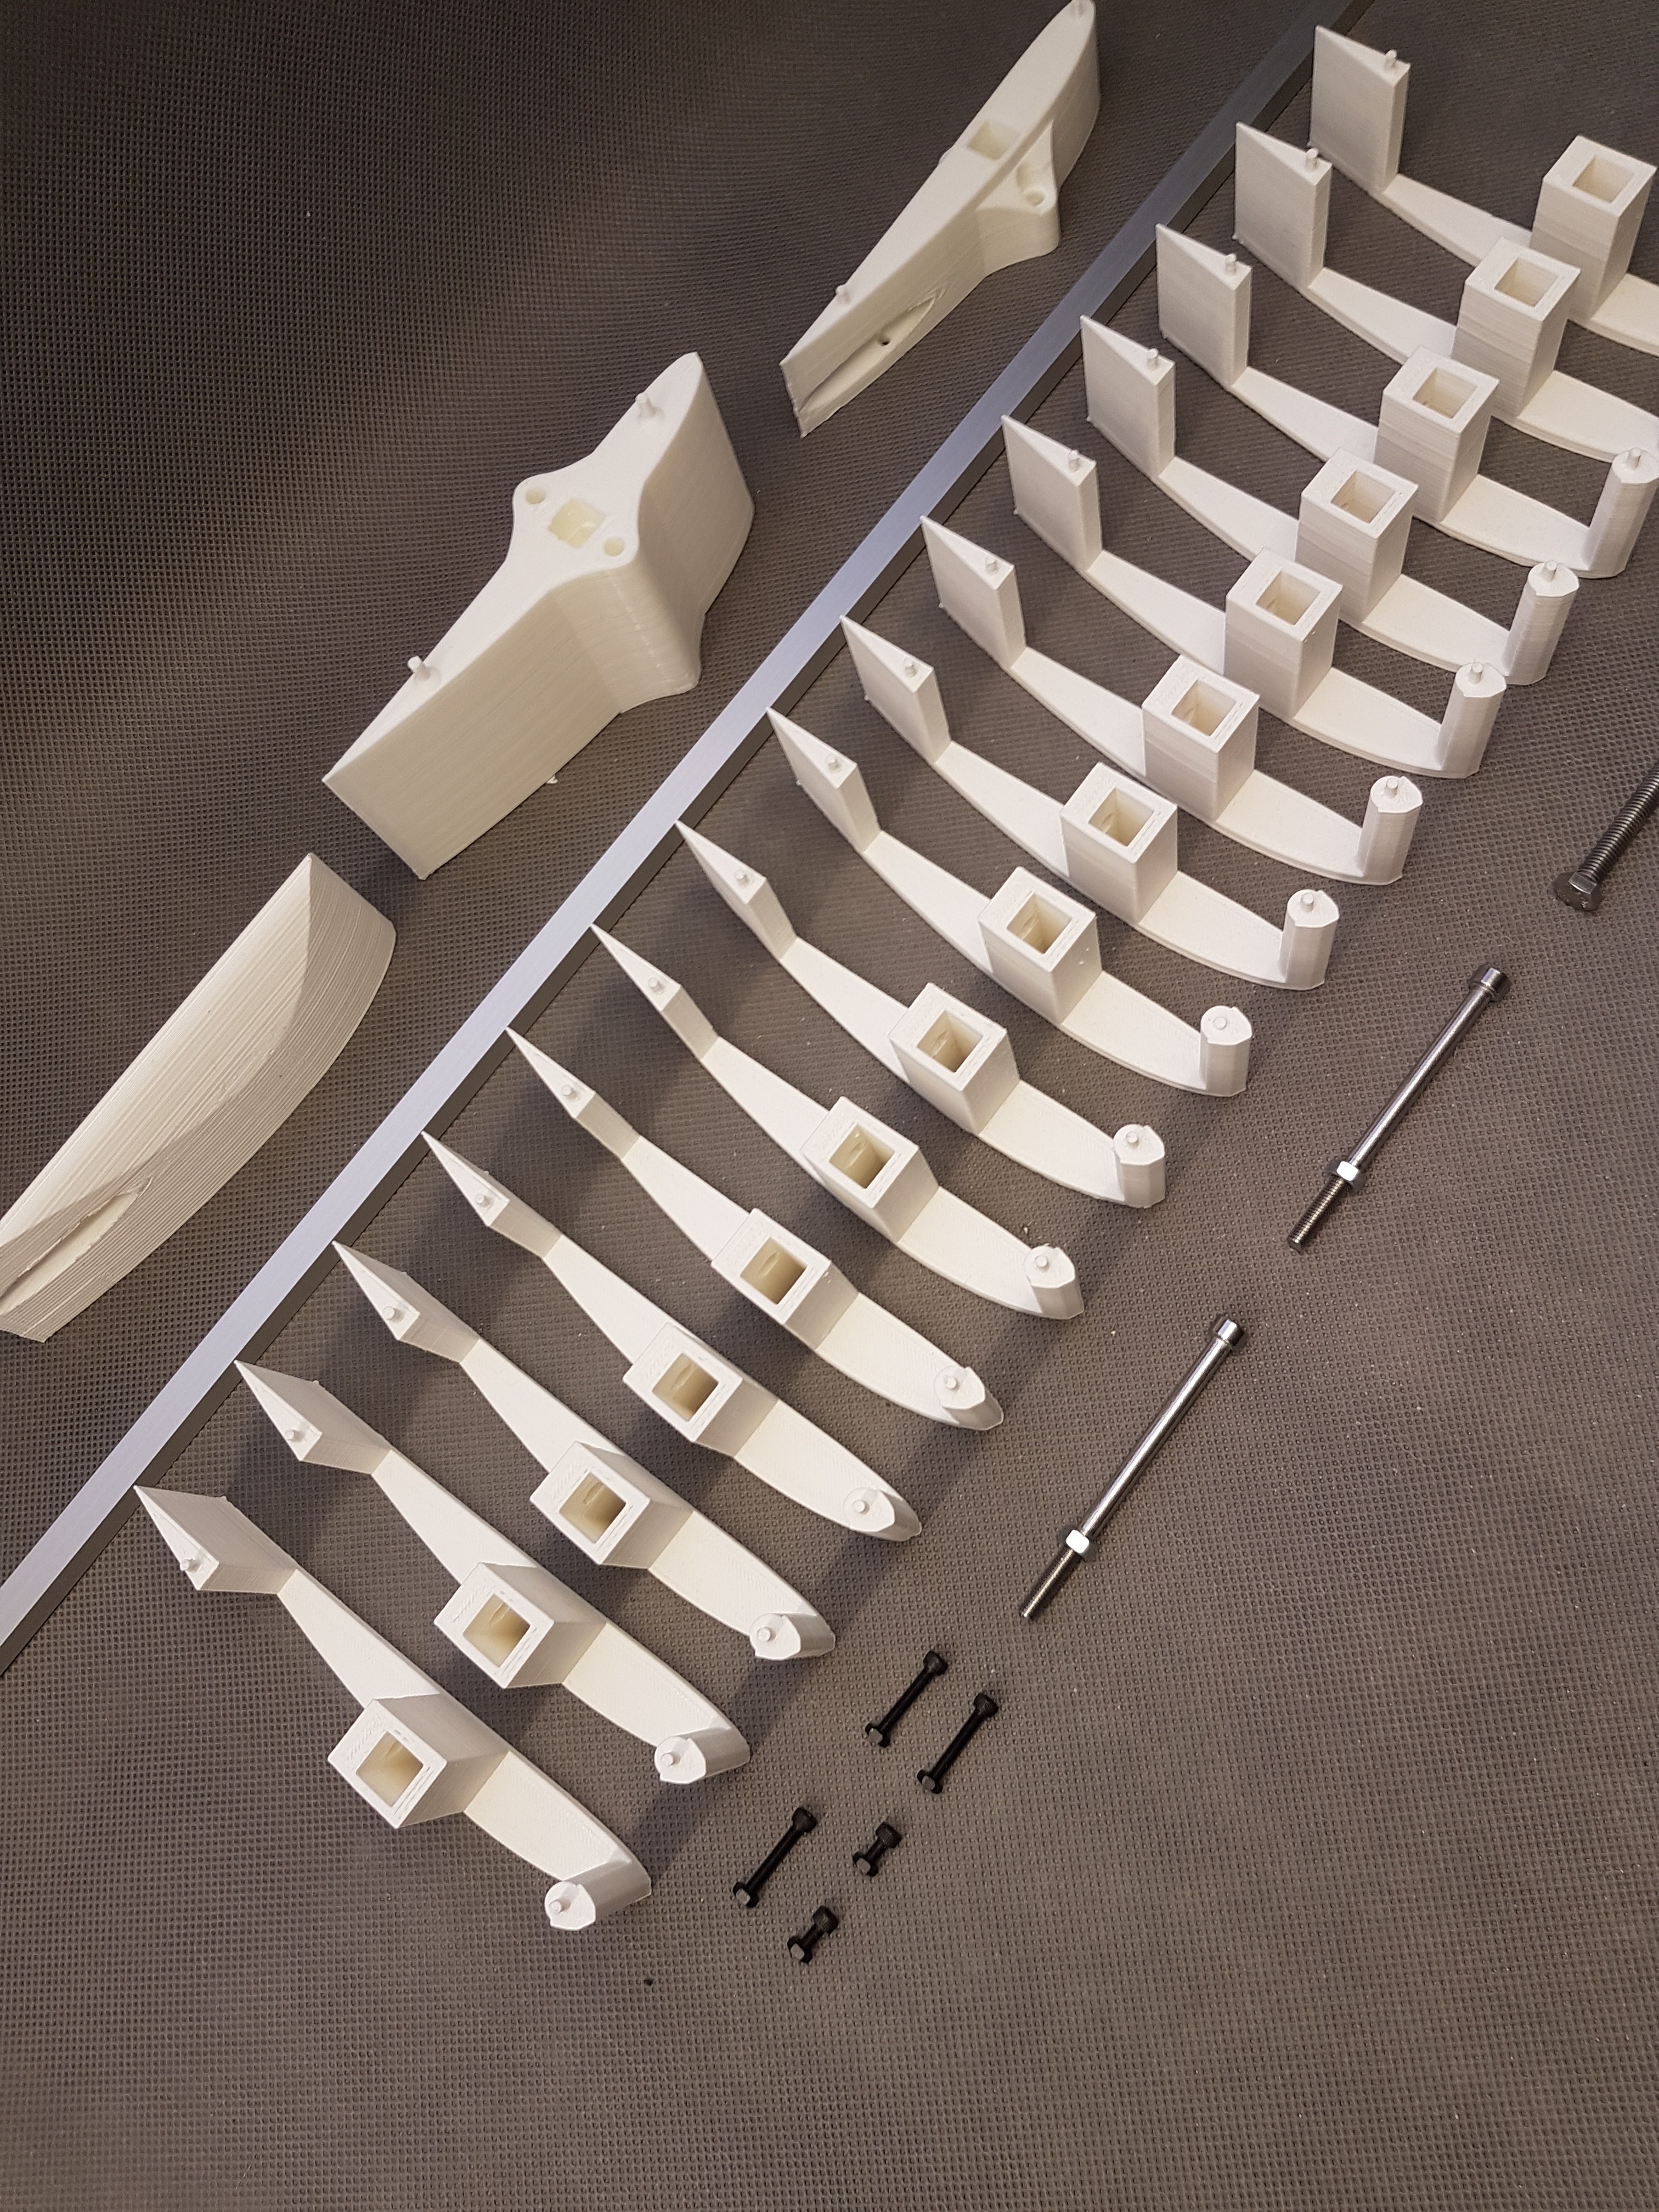
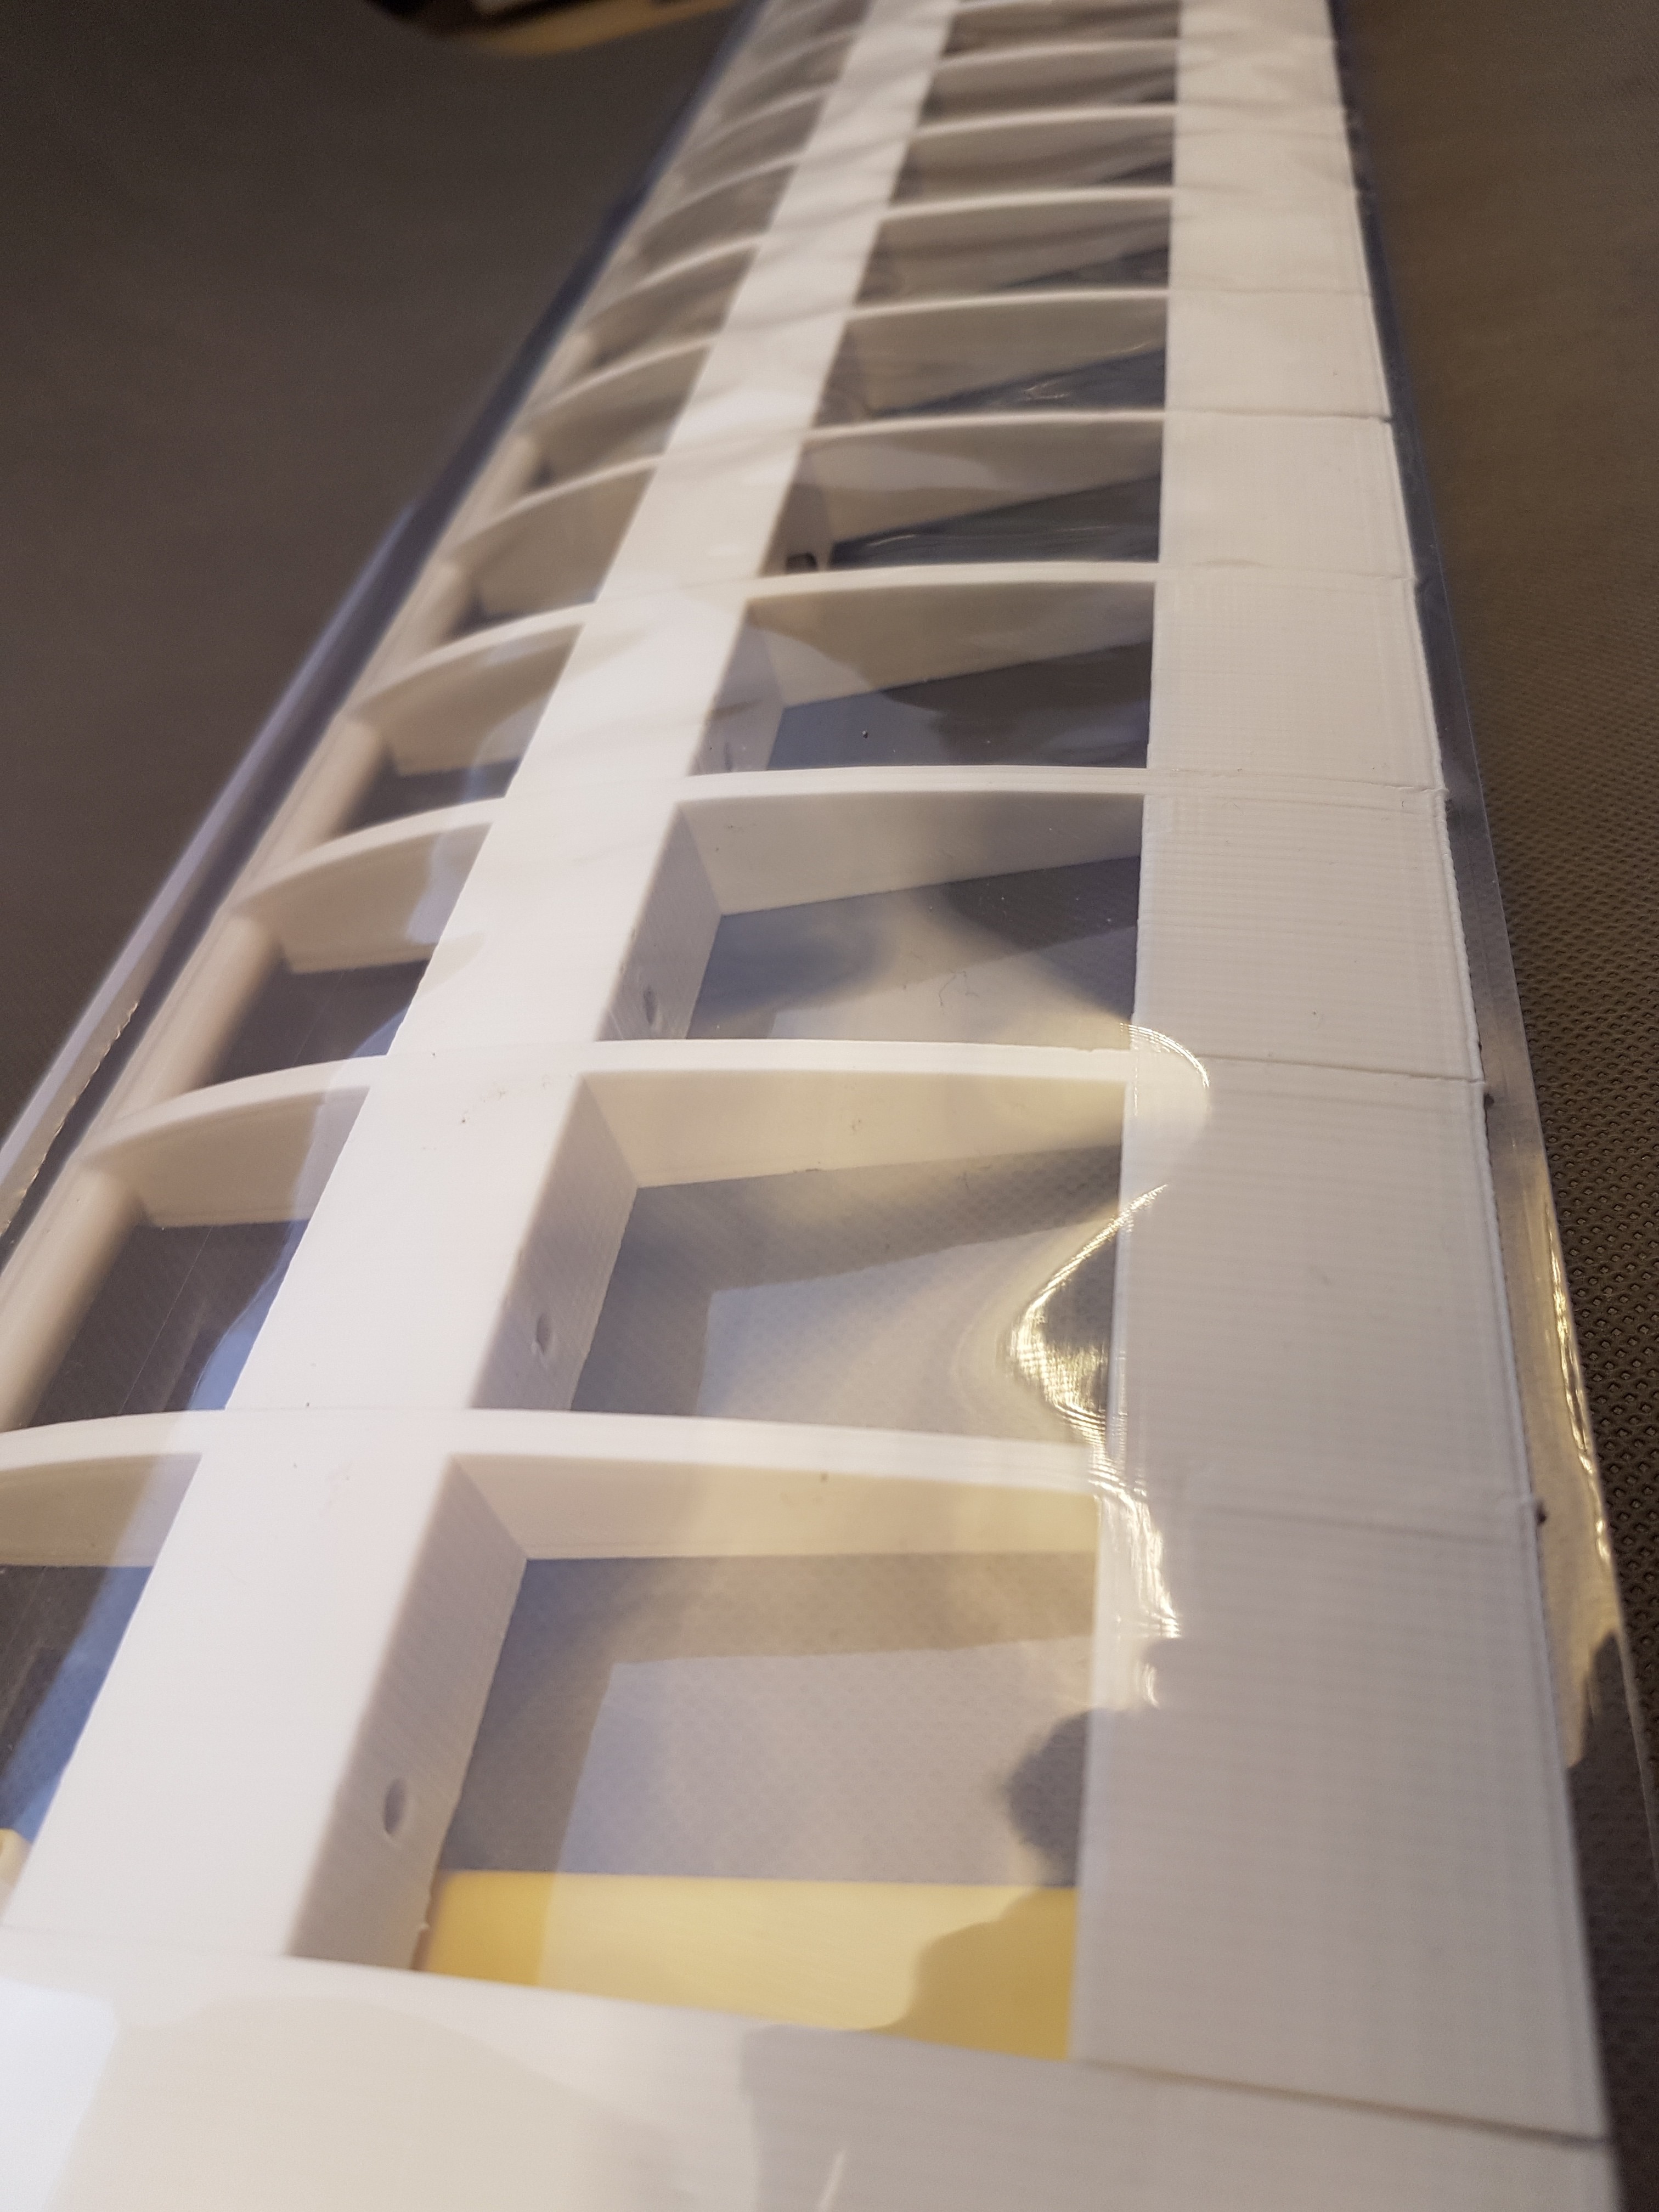
Wing build instructions posted
10/05/2020 at 11:29 • 0 commentsThe instructions for the wings are online. I hope I haven't forgotten anything and everything is easy to understand. I look forward to any constructive criticism. 😊
Here are the instructions
Hackaday.io: https://hackaday.io/project/172328/instructions
Nerdiy.de: https://nerdiy.de/en/howto-windiy-fluegel-der-windturbine-aufbauen/
![]()
![]()
![]()
![]()
-
I think the controller needs to be renamed
10/05/2020 at 11:26 • 0 commentsNow that I have worked on the “NerdiskeratorController”, I have decided that I don't necessarily want to restrict the board and software to use with WinDIY and the Nerdiskerator. That is why I will continue to develop the “Nerdiskerato Controller” under the name “ genCtrlr” in the future. If you have additional ideas, please leave me a message or comment. 😊
Here some pictures of the more and more frankensteind state of the controller.
Link to the actual software state is here: https://github.com/Nerdiyde/genCon
![]()
![]()
-
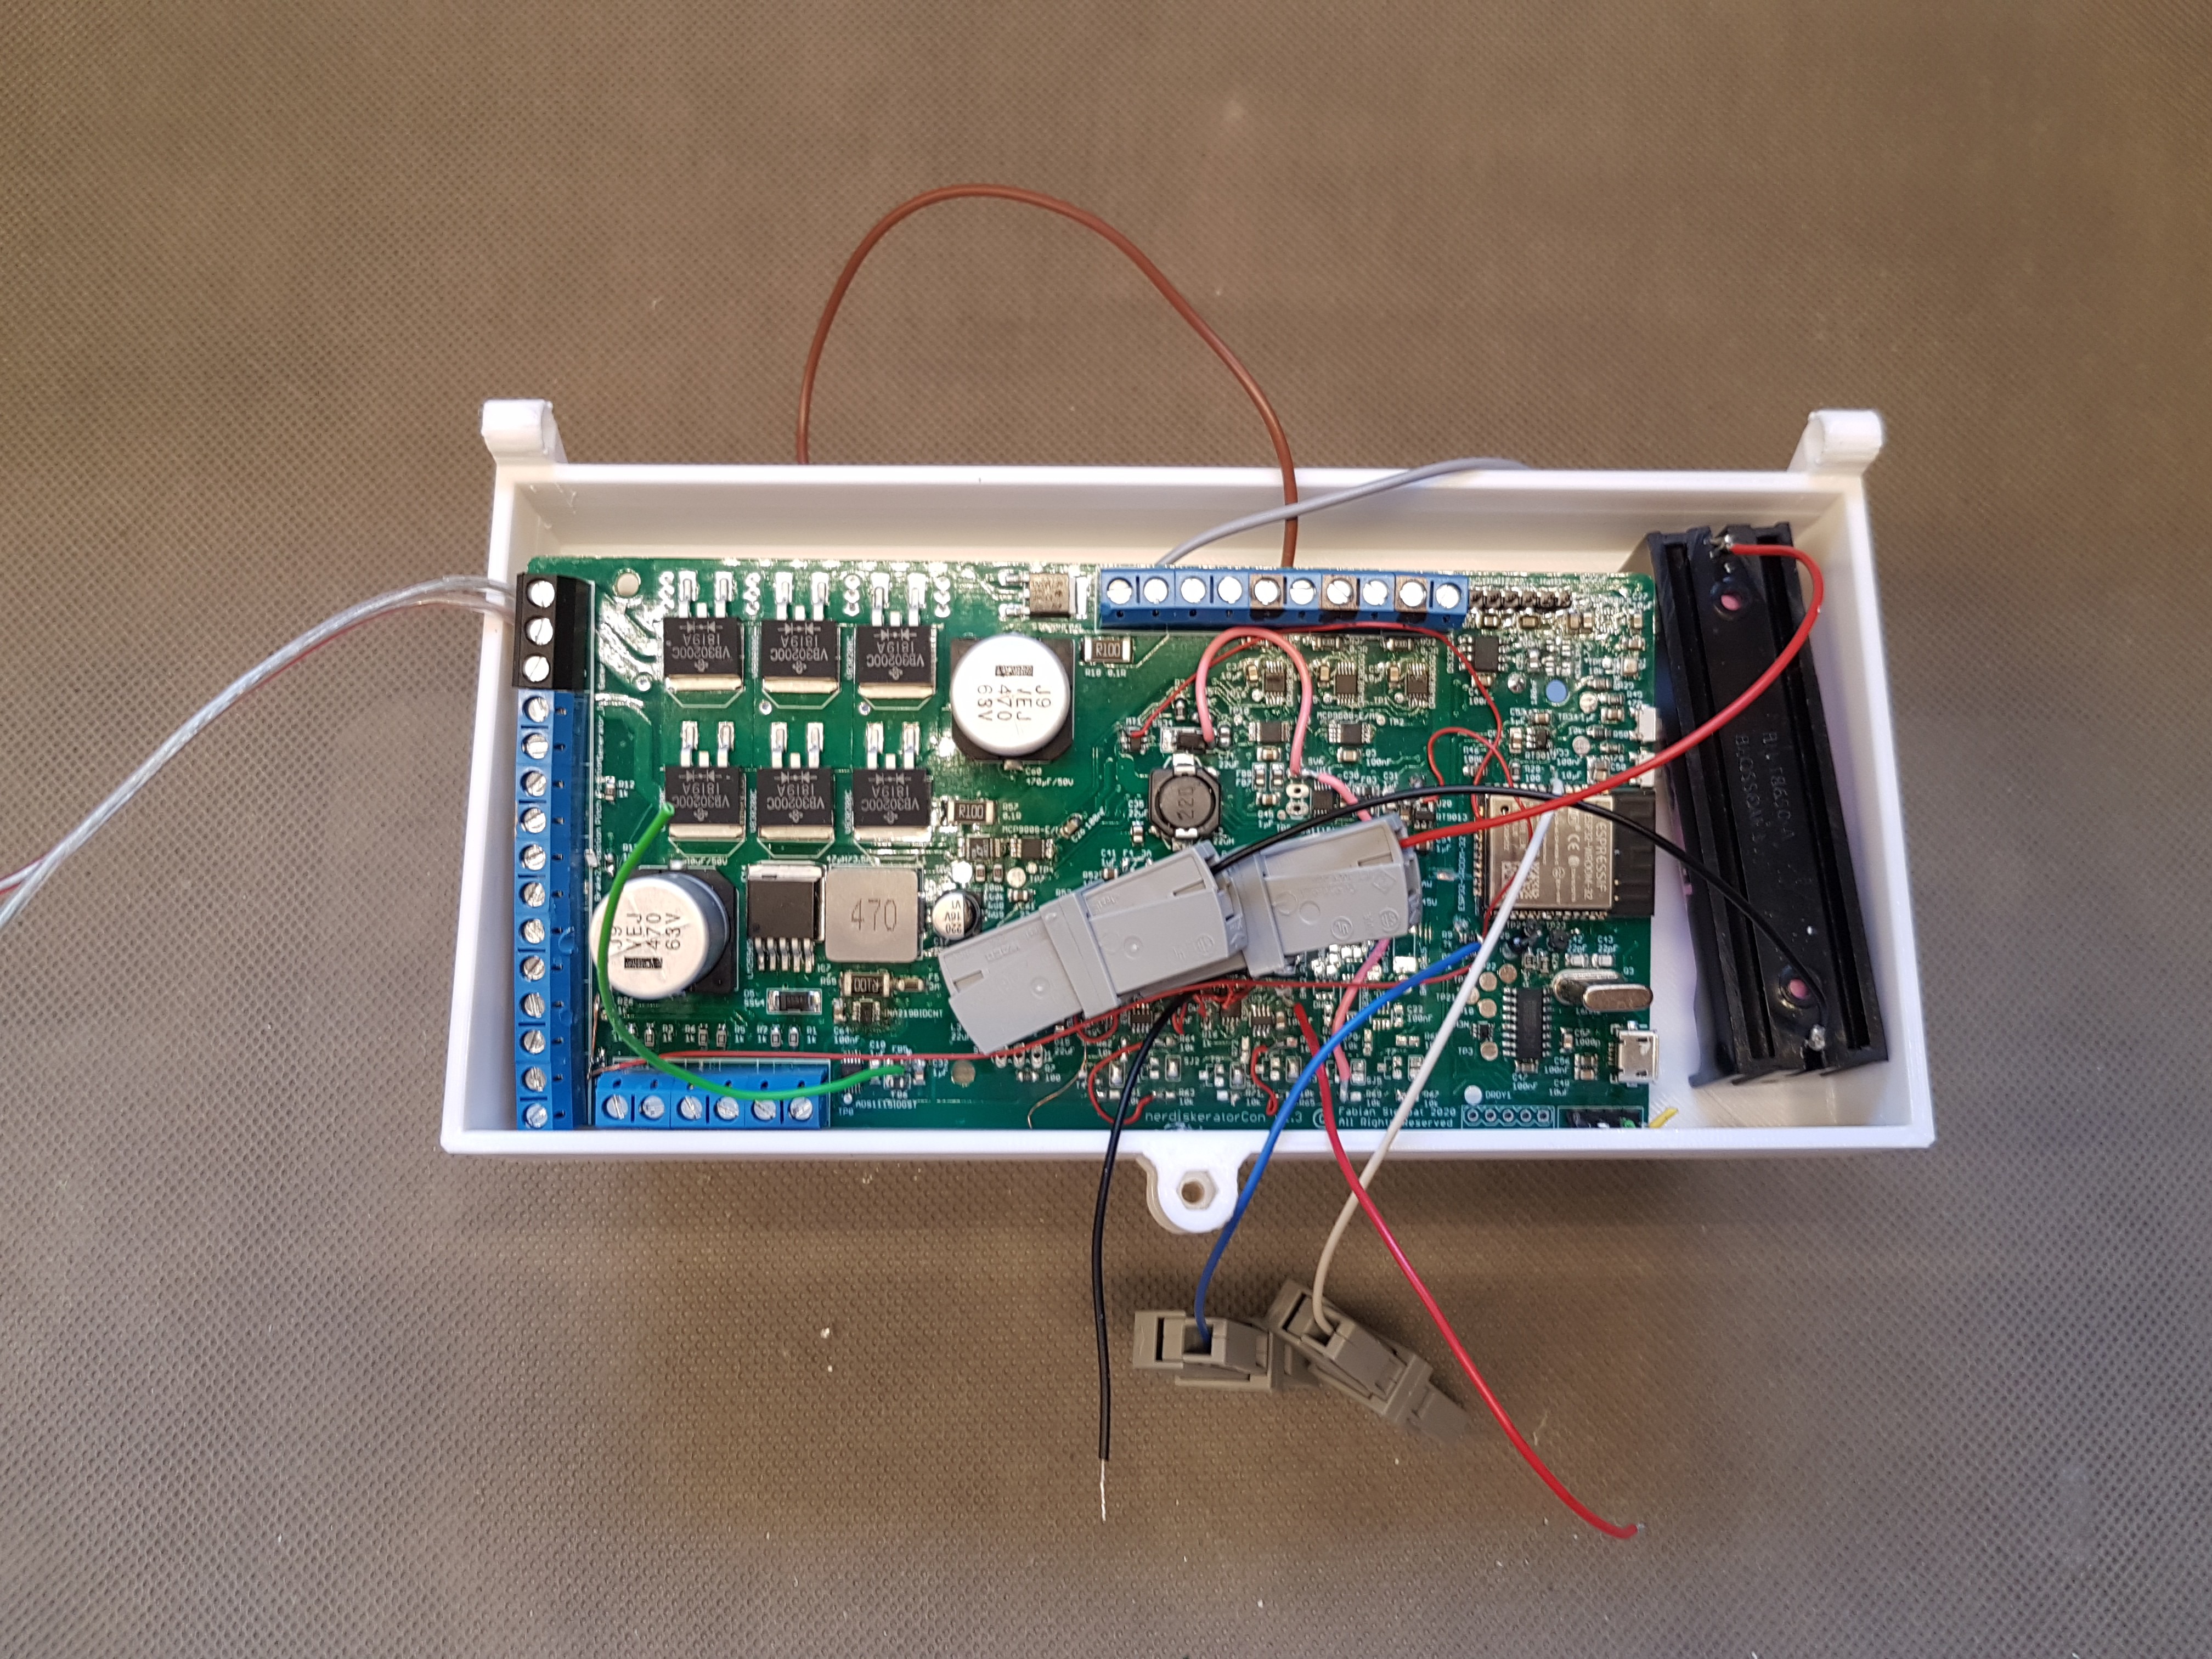
Nerdikserator controller
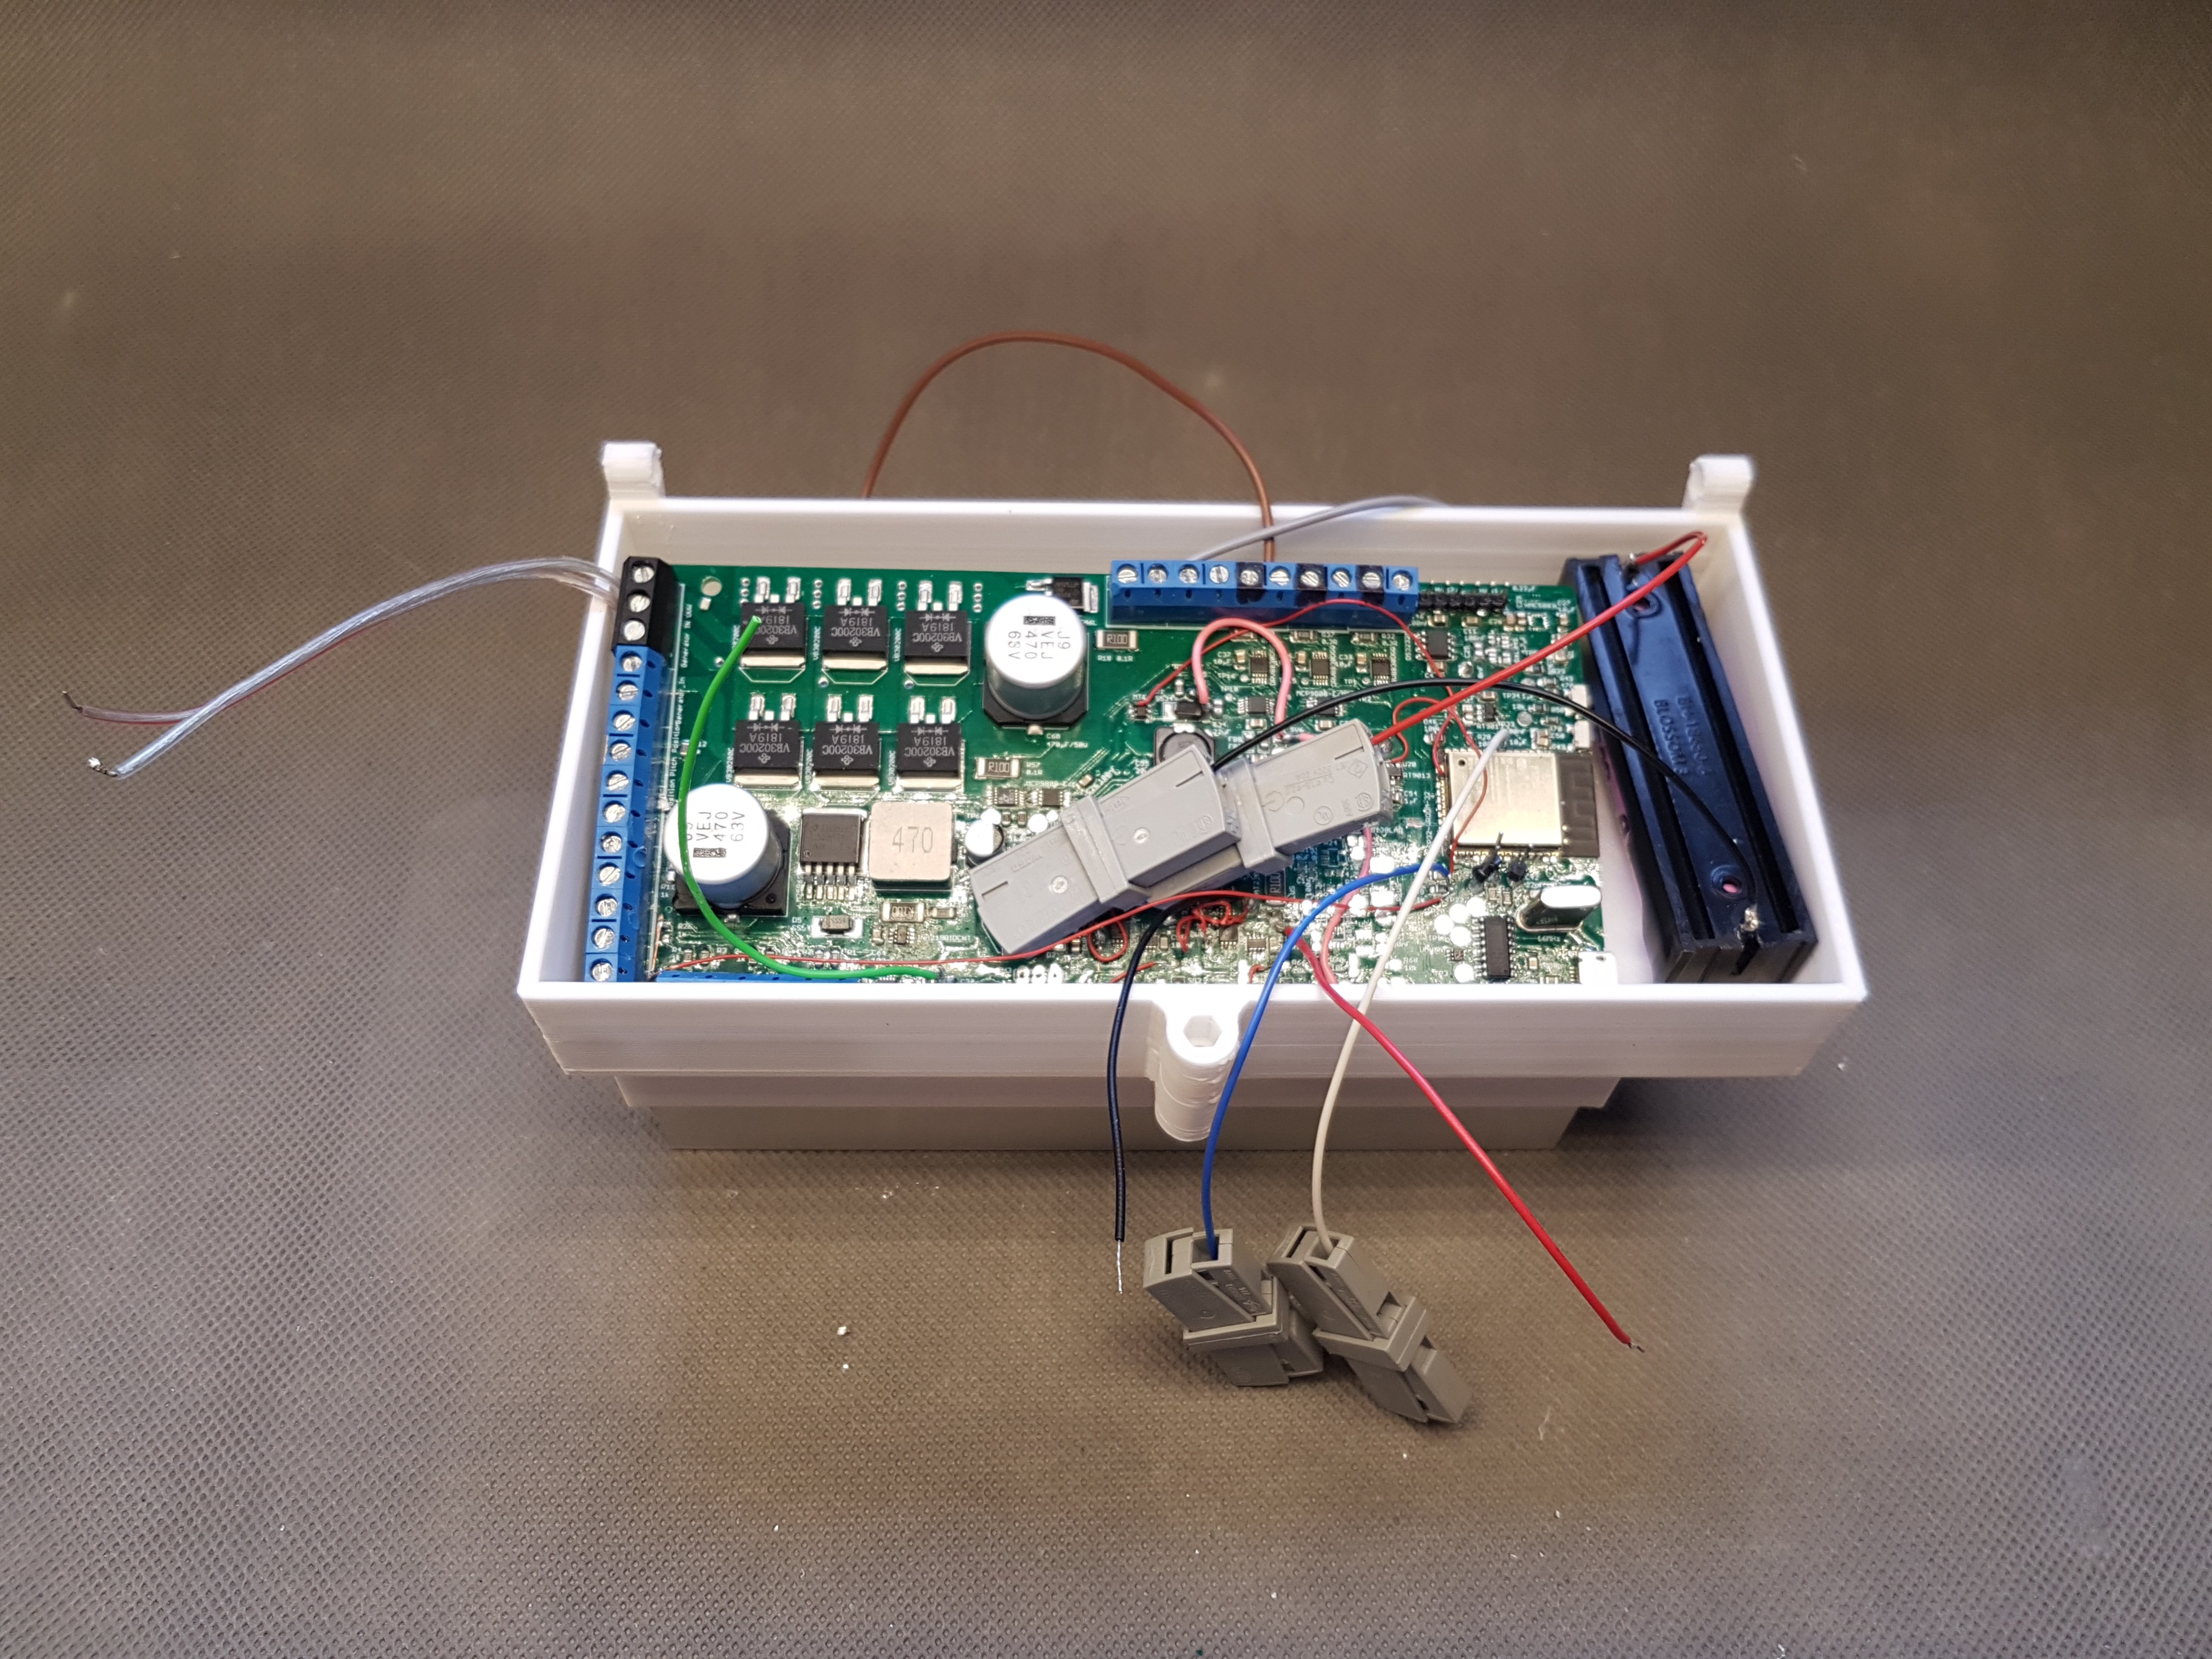
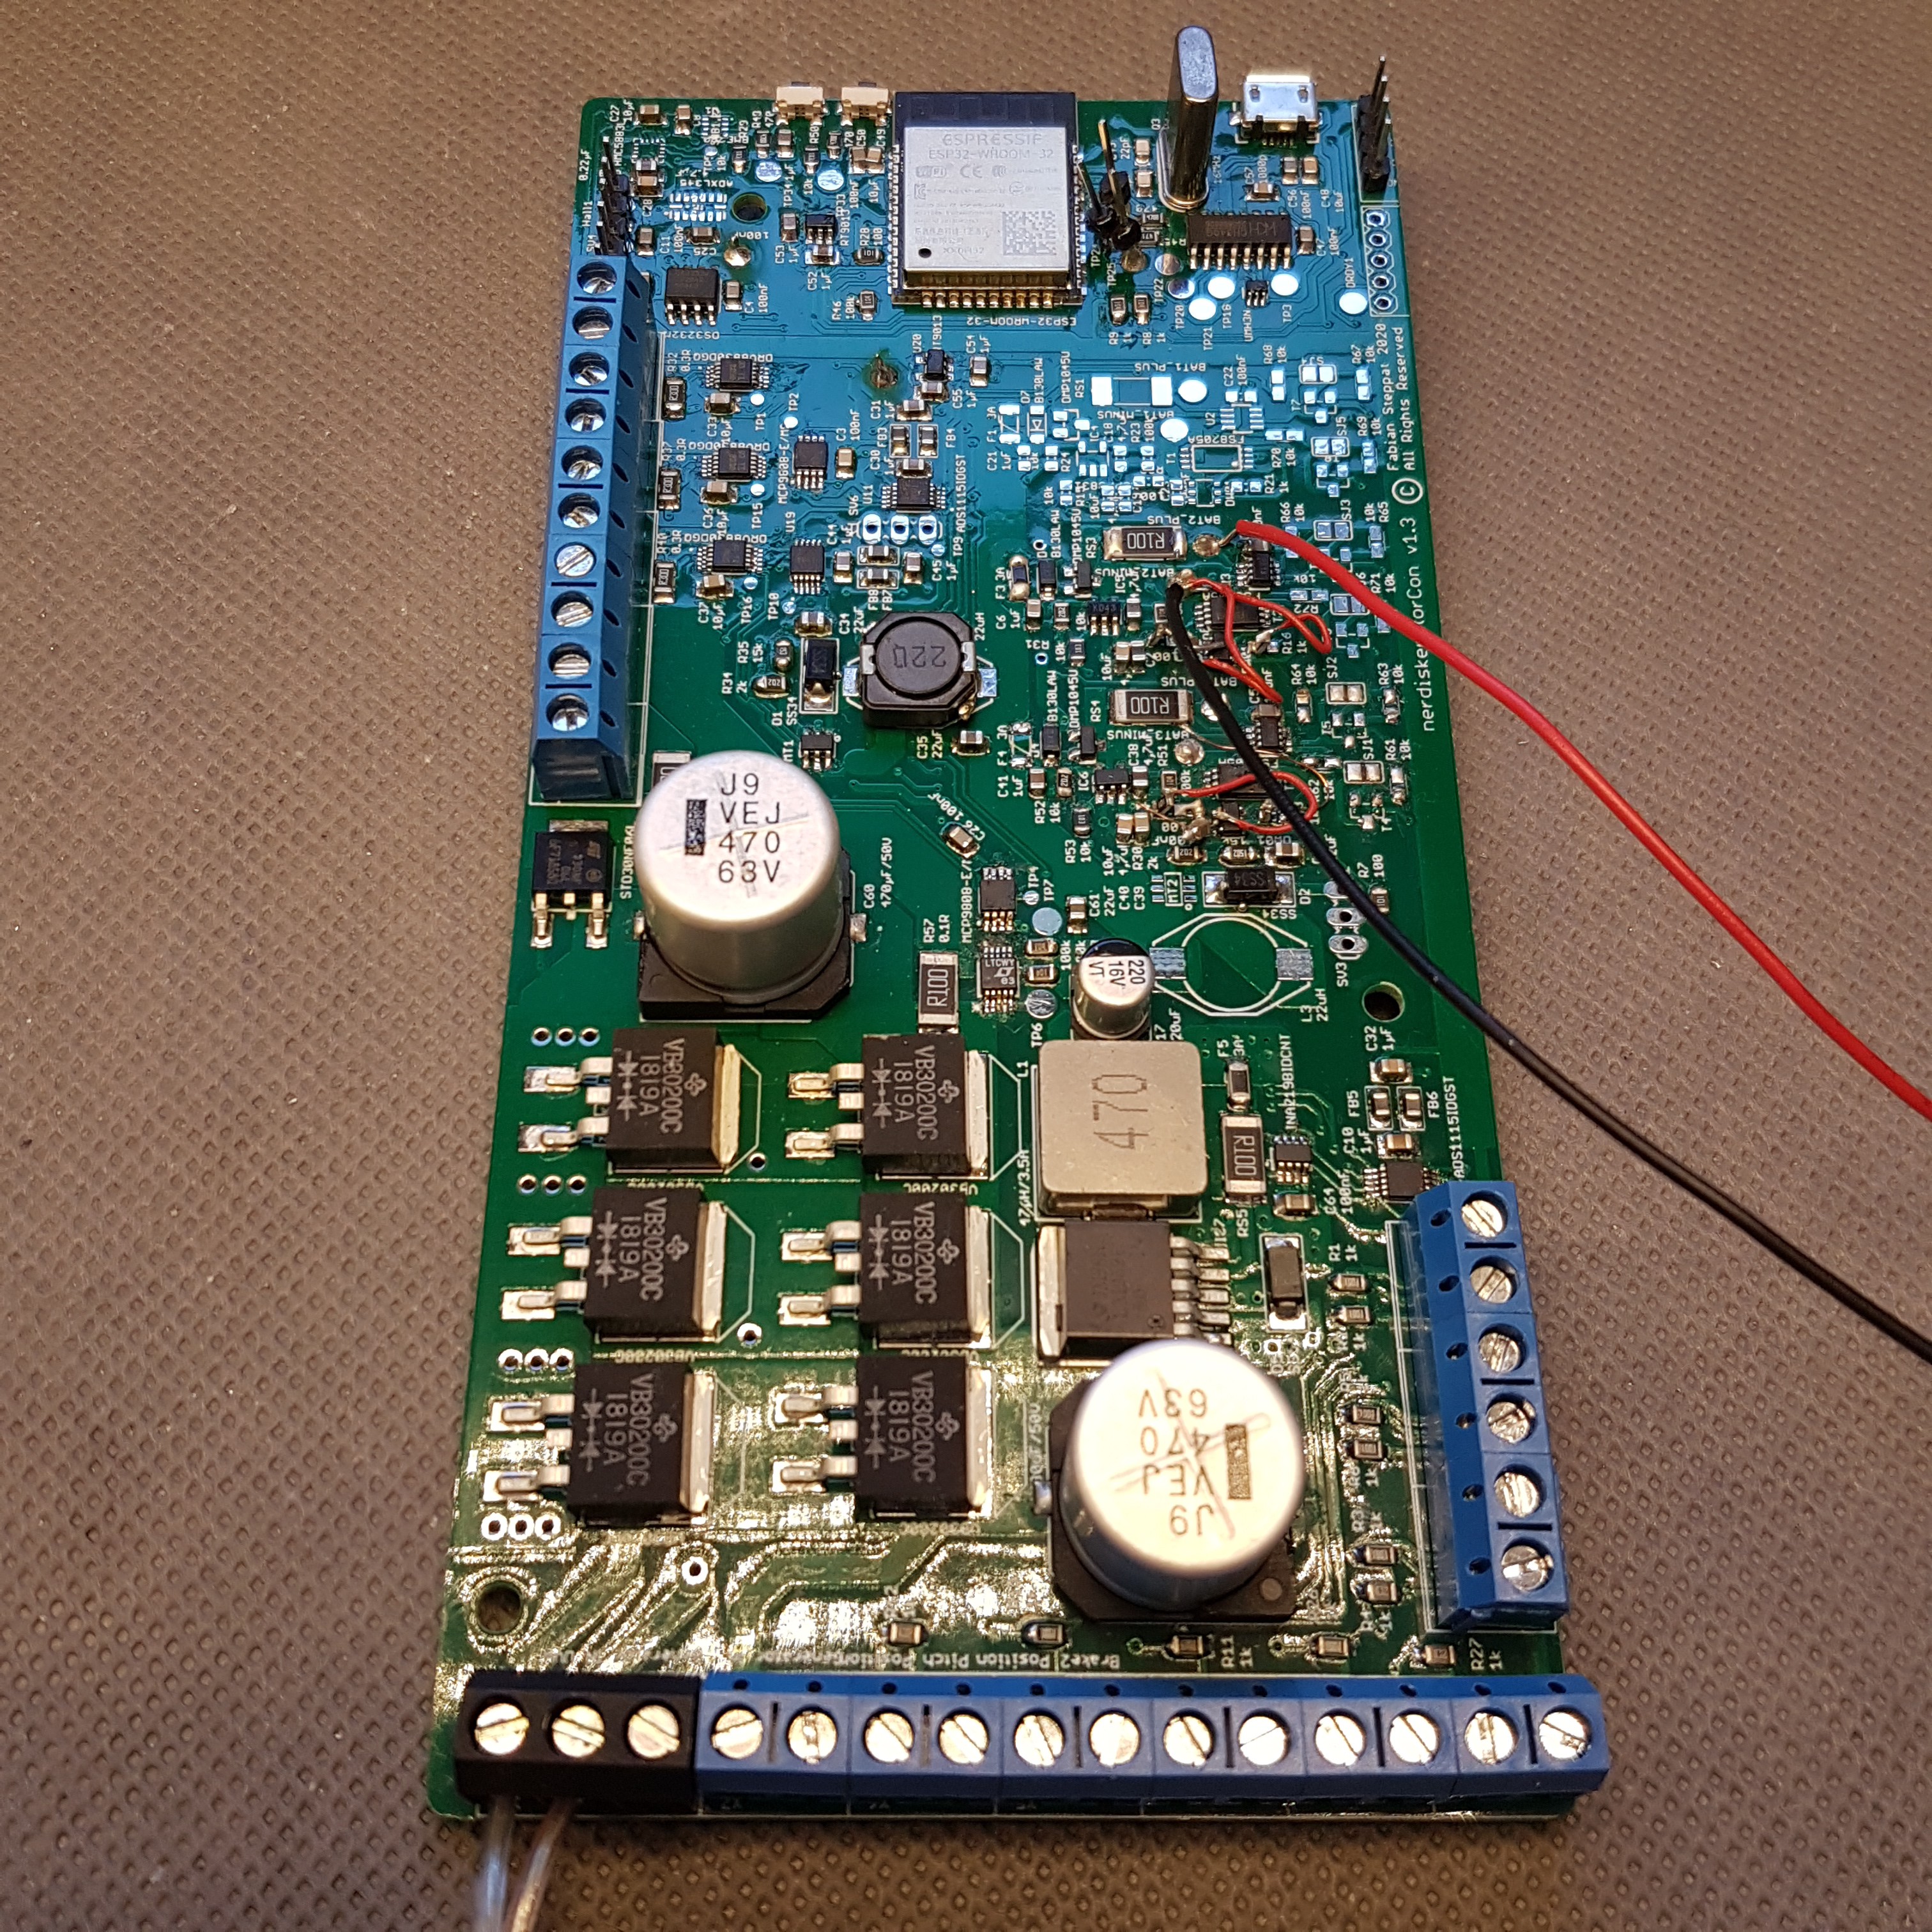
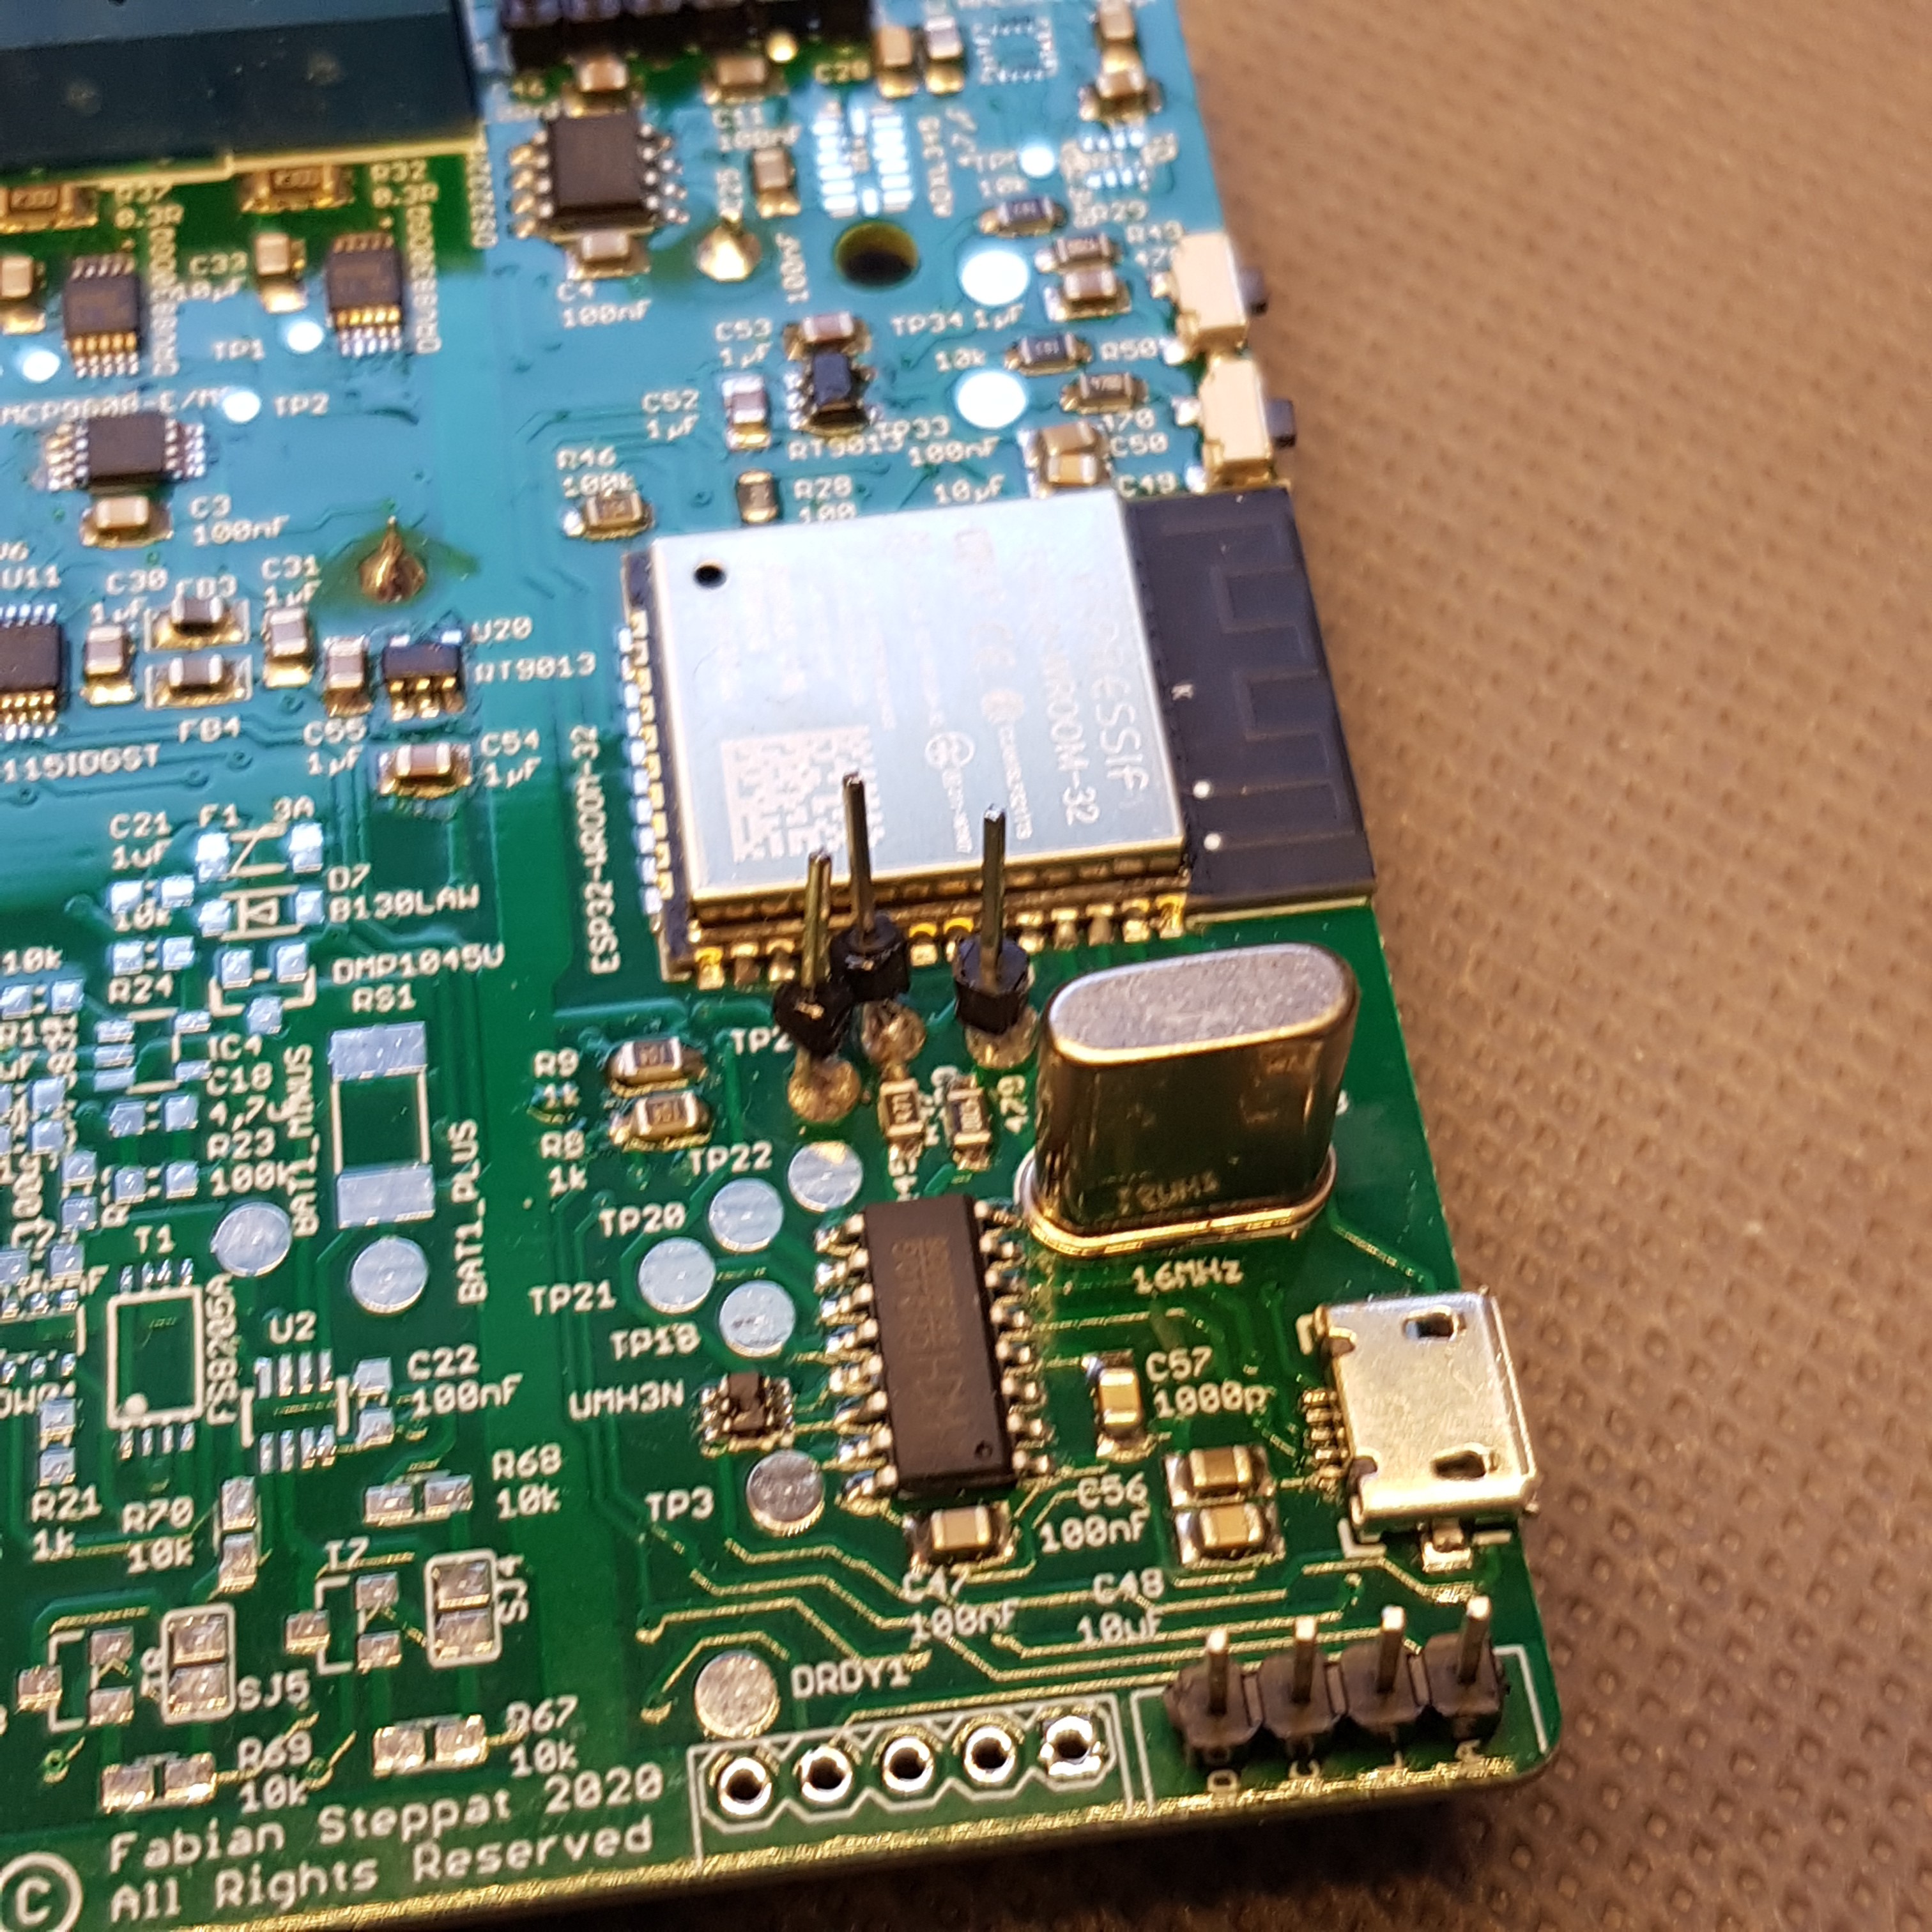
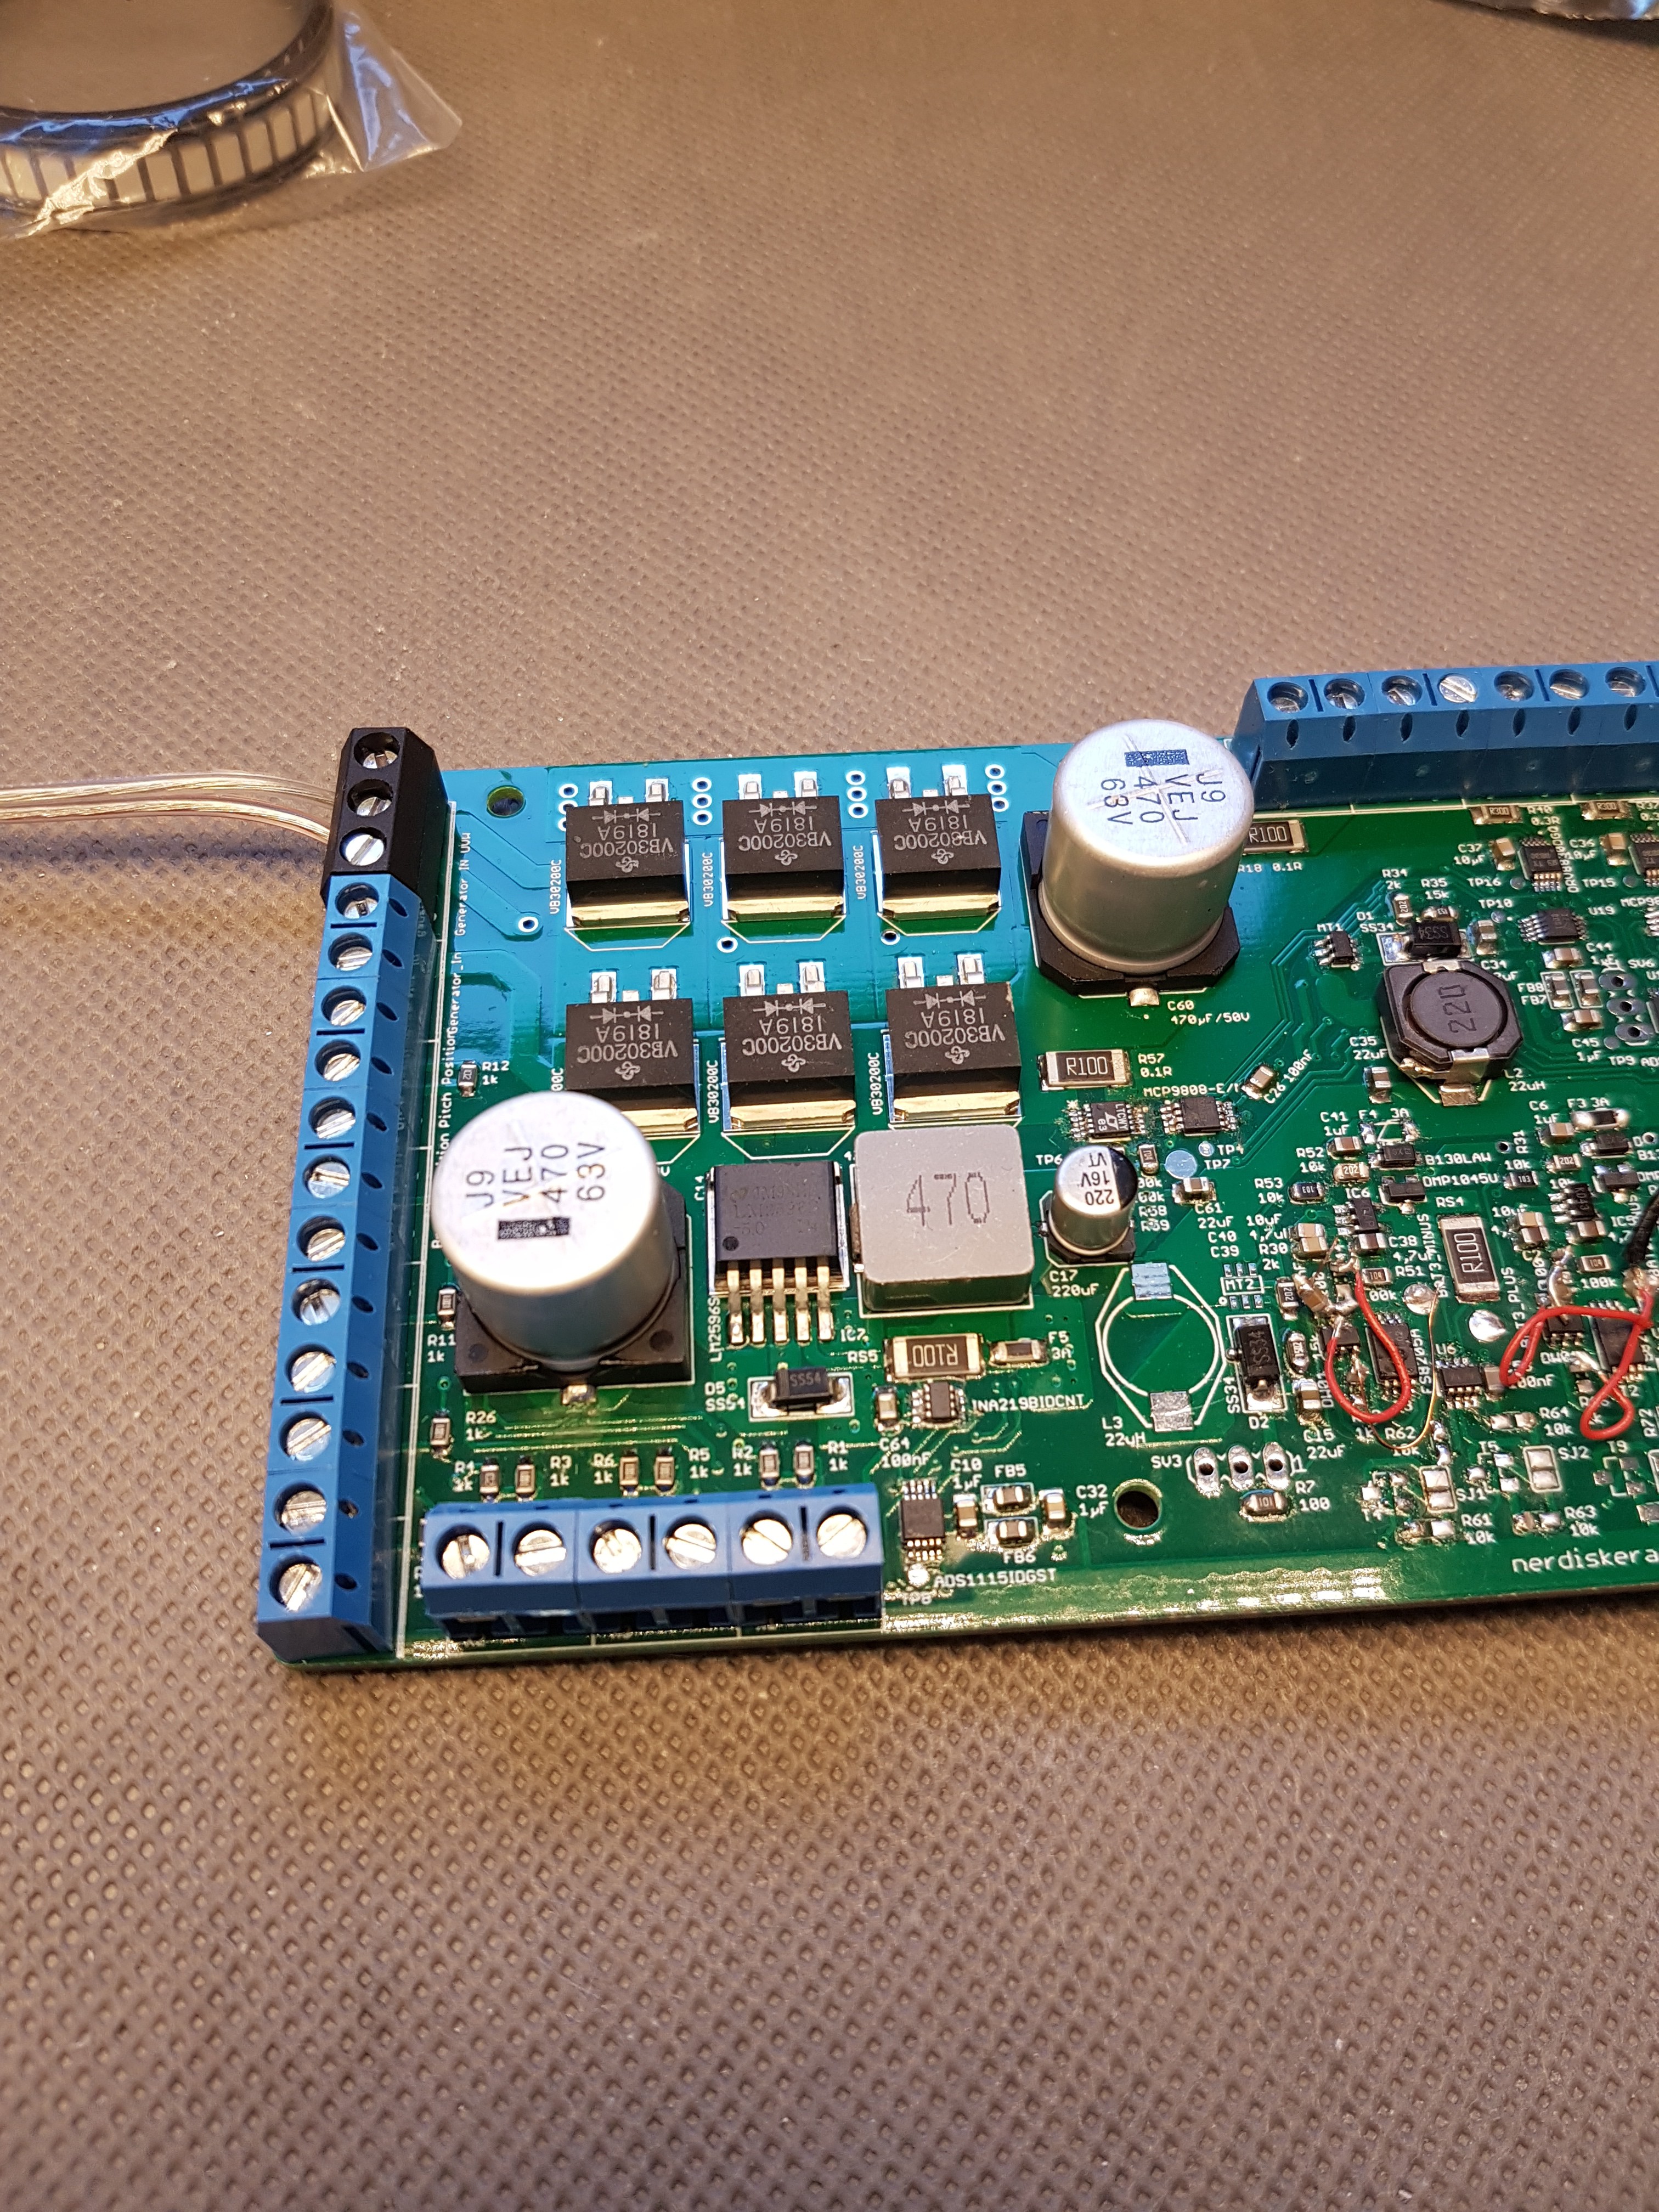
10/05/2020 at 11:23 • 0 commentsOf course, I needed some electronics to check the individual sensors and actuators from windiy. For this purpose I made a PCB design on which there should be space for all necessary components.
This PCb was made by PCBWay.com
In addition to the rectifier, the following functions are built into it:
Features:
• ESP32 powered
• Three-way bridge rectifier
• Step-down regulator
• Three independent charging circuits for one LiPo cell each
• Three I2C motor drivers to control the motors of the brake actuator and the pitch actuator
• various current and voltage sensors to measure the energy generated and consumed
• Connections for two Hall sensors for measuring the generator speed
• Connections for three sliding resistors to measure the positions of the pitch actuator and the brake cylinder
• Connections for two force sensors to measure the contact pressure of the brake cylinder
• Connections for four NTCs to measure the temperatures of the generator windings and the load resistance.
• Connection to be able to discharge the rectified voltage to a consumer
• Connection and electronics to be able to connect a load resistor PWM-controlled.
• Vibration sensor to detect abnormal vibrations
• two temperature sensors to monitor the temperatures on the PCB
• an electronic compass
• a micro-SD card slot
• A climate sensor for measuring the ambient temperature, humidity and air pressure
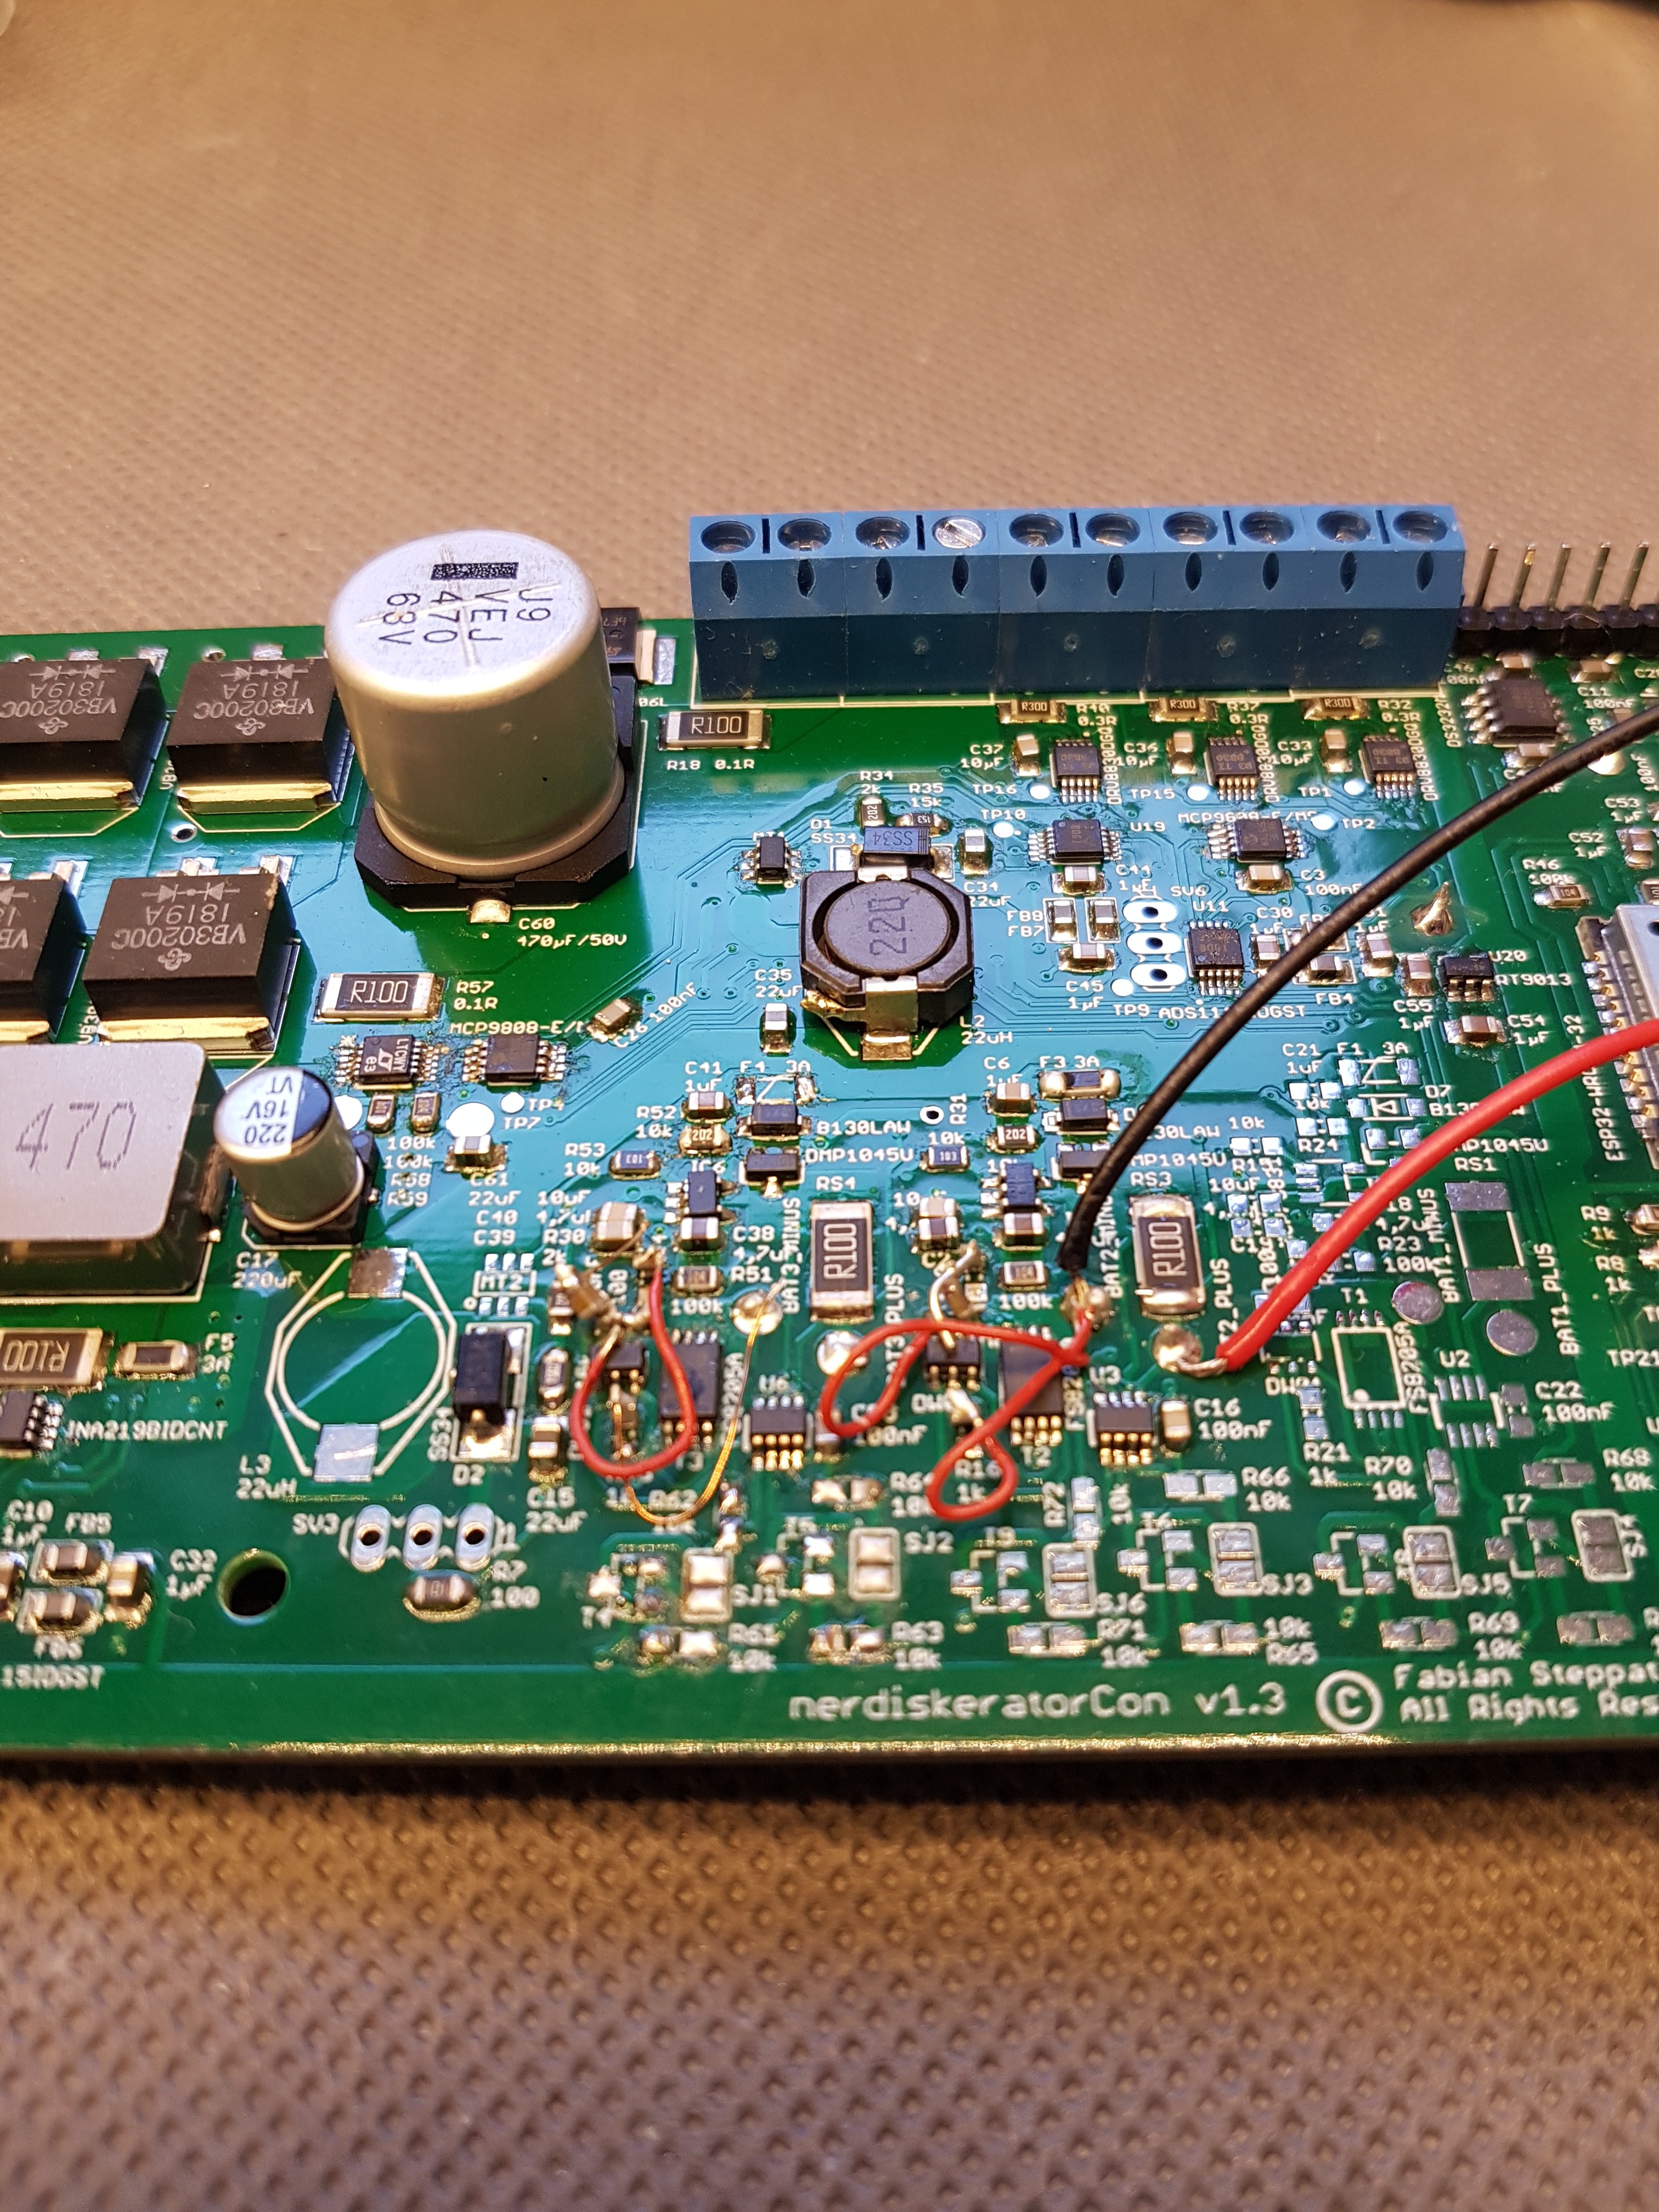
The board is of course still in prototype status. So it's no wonder that the circuit board didn't look the same after about a week
The board is of course still in prototype status. So it's no wonder that the circuit board didn't look the same after about a week
![]()
![]()
![]()
![]()
![]()
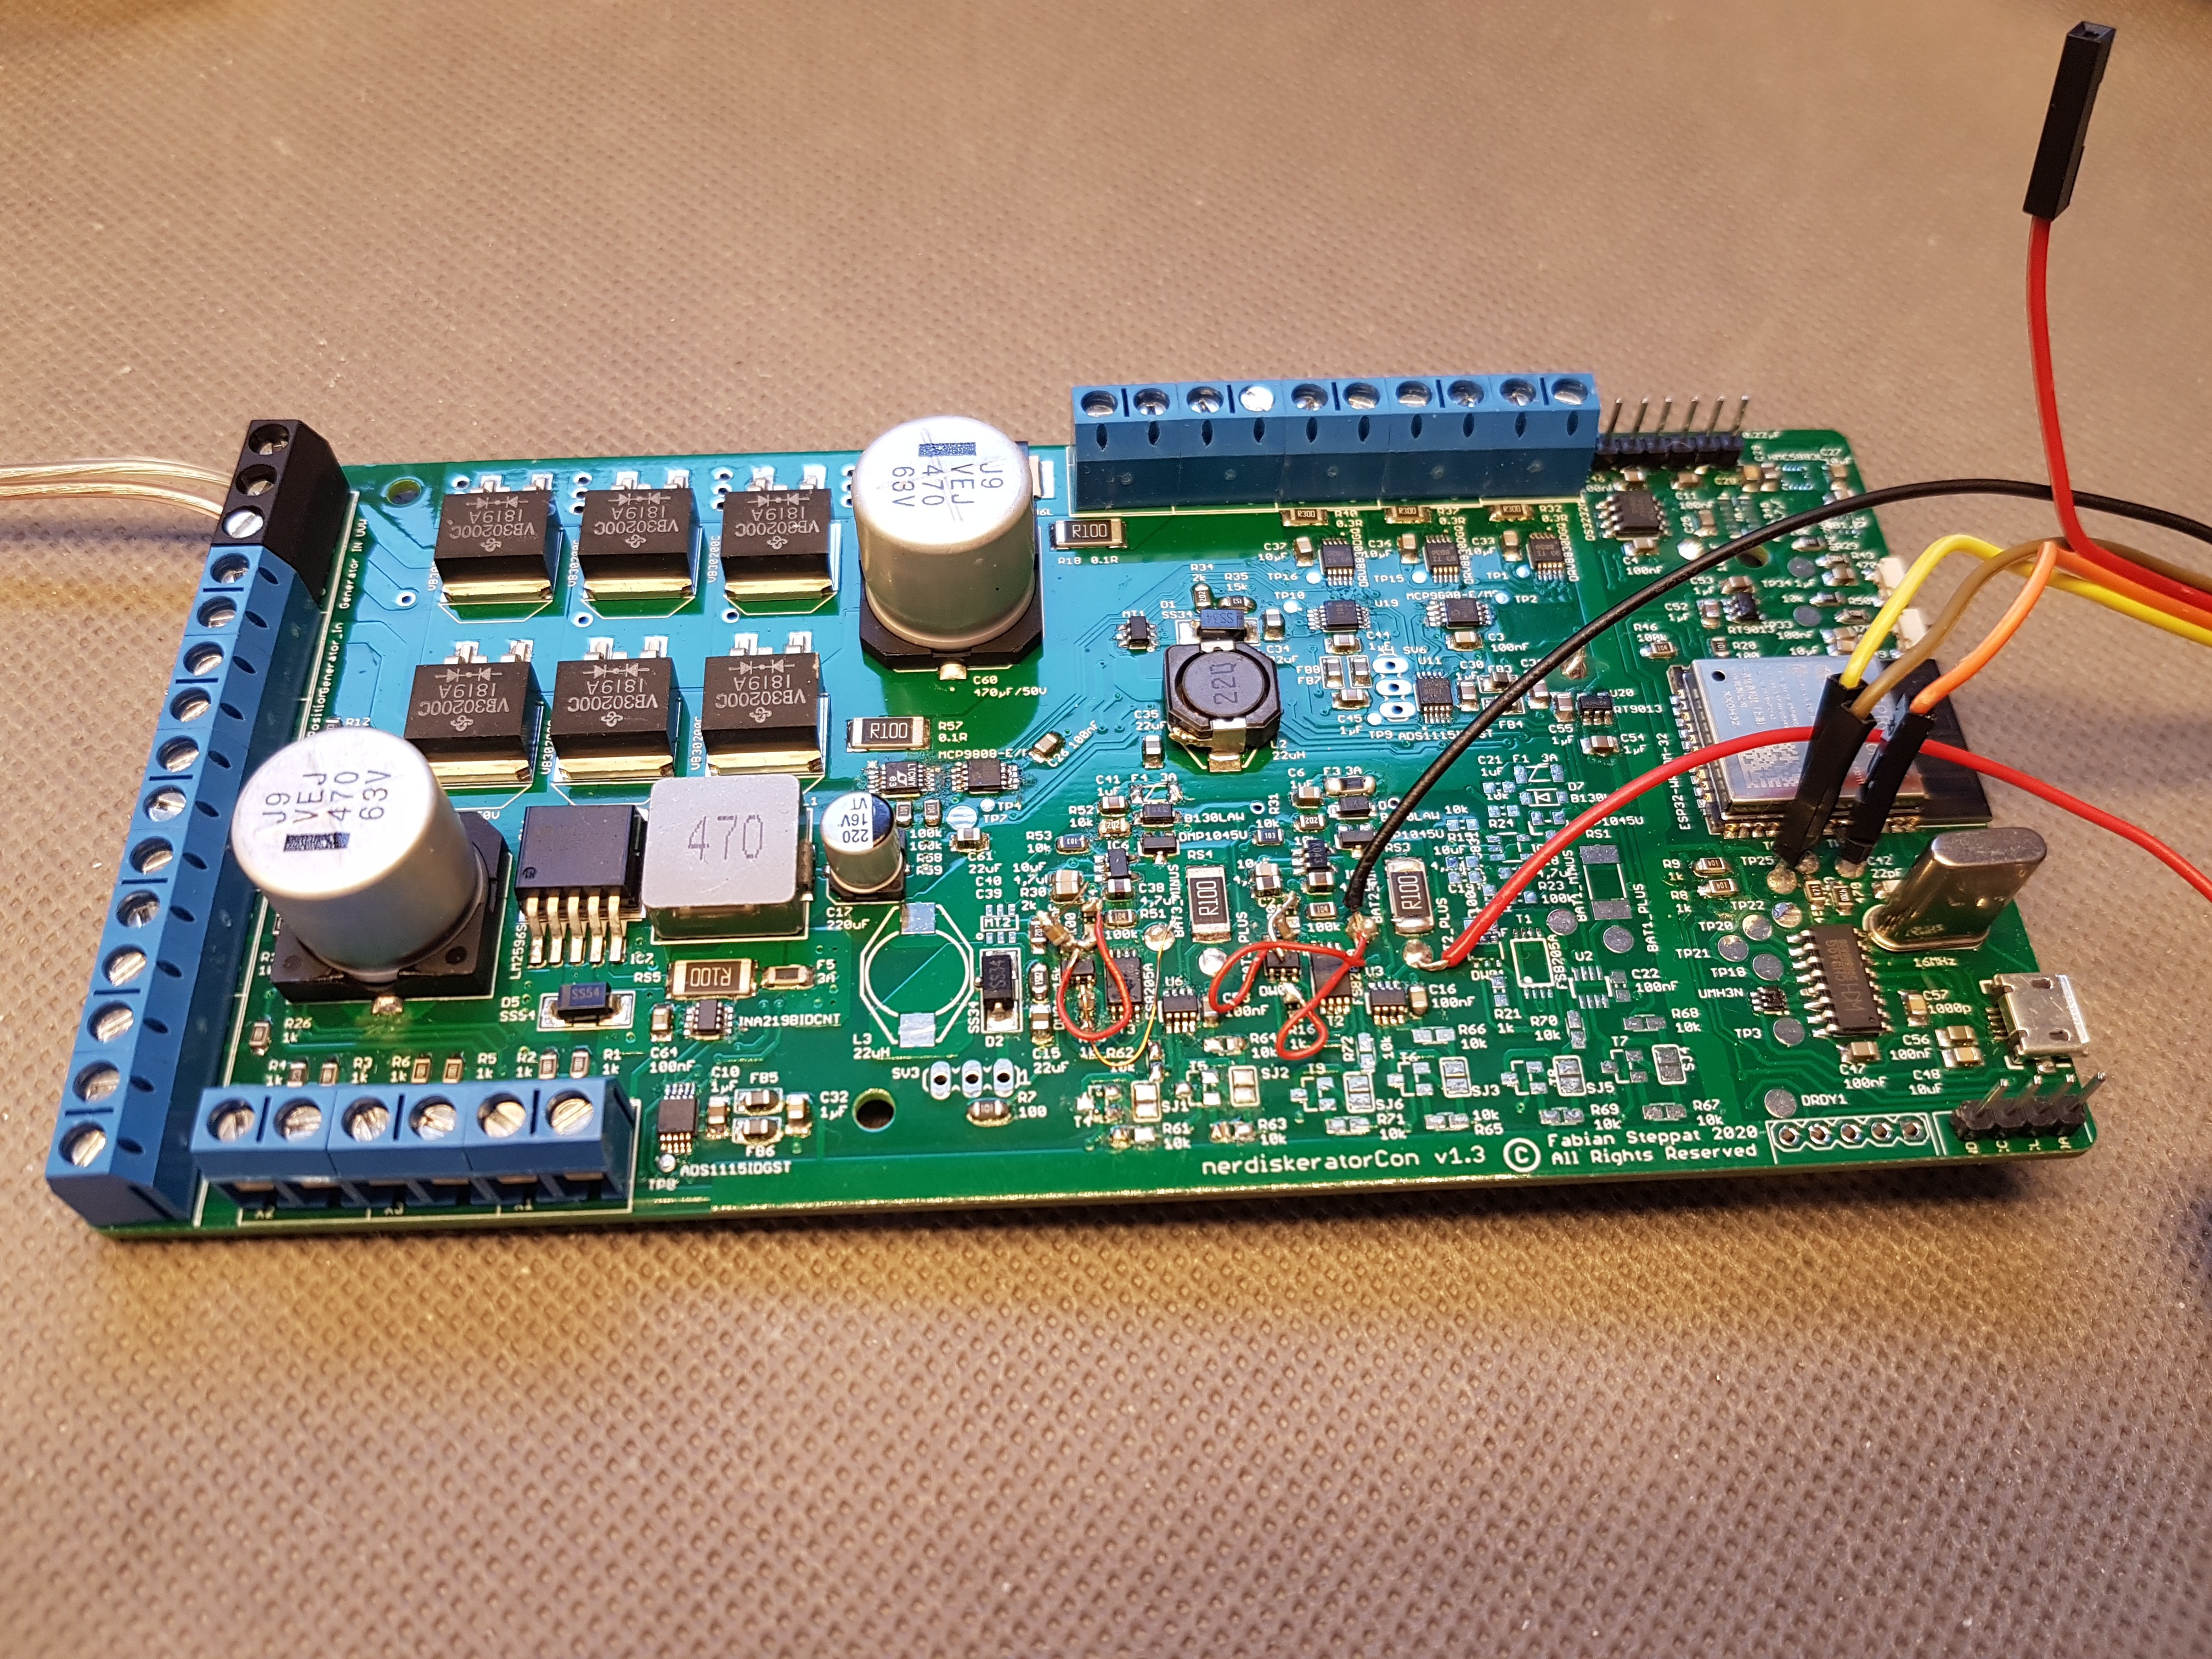
But like this:
![]()
![]()
I uploaded a first version of the software here on GitHub: https://github.com/Nerdiyde/genCon
-
Long time no see
10/05/2020 at 11:05 • 0 commentsSo guys,
it's been a while since i posted something new here. Not because I was inactive, but rather because in between I had the feeling that I was running out of time. In addition to the last hardware activities, the development of the software for the Nerdiskerator controller was also on the agenda.
Now that I've finished everything so far, I want to add the notes that i made about the stuff thats worth mentioning. Sorry for this somewhat delayed update. 😊
-
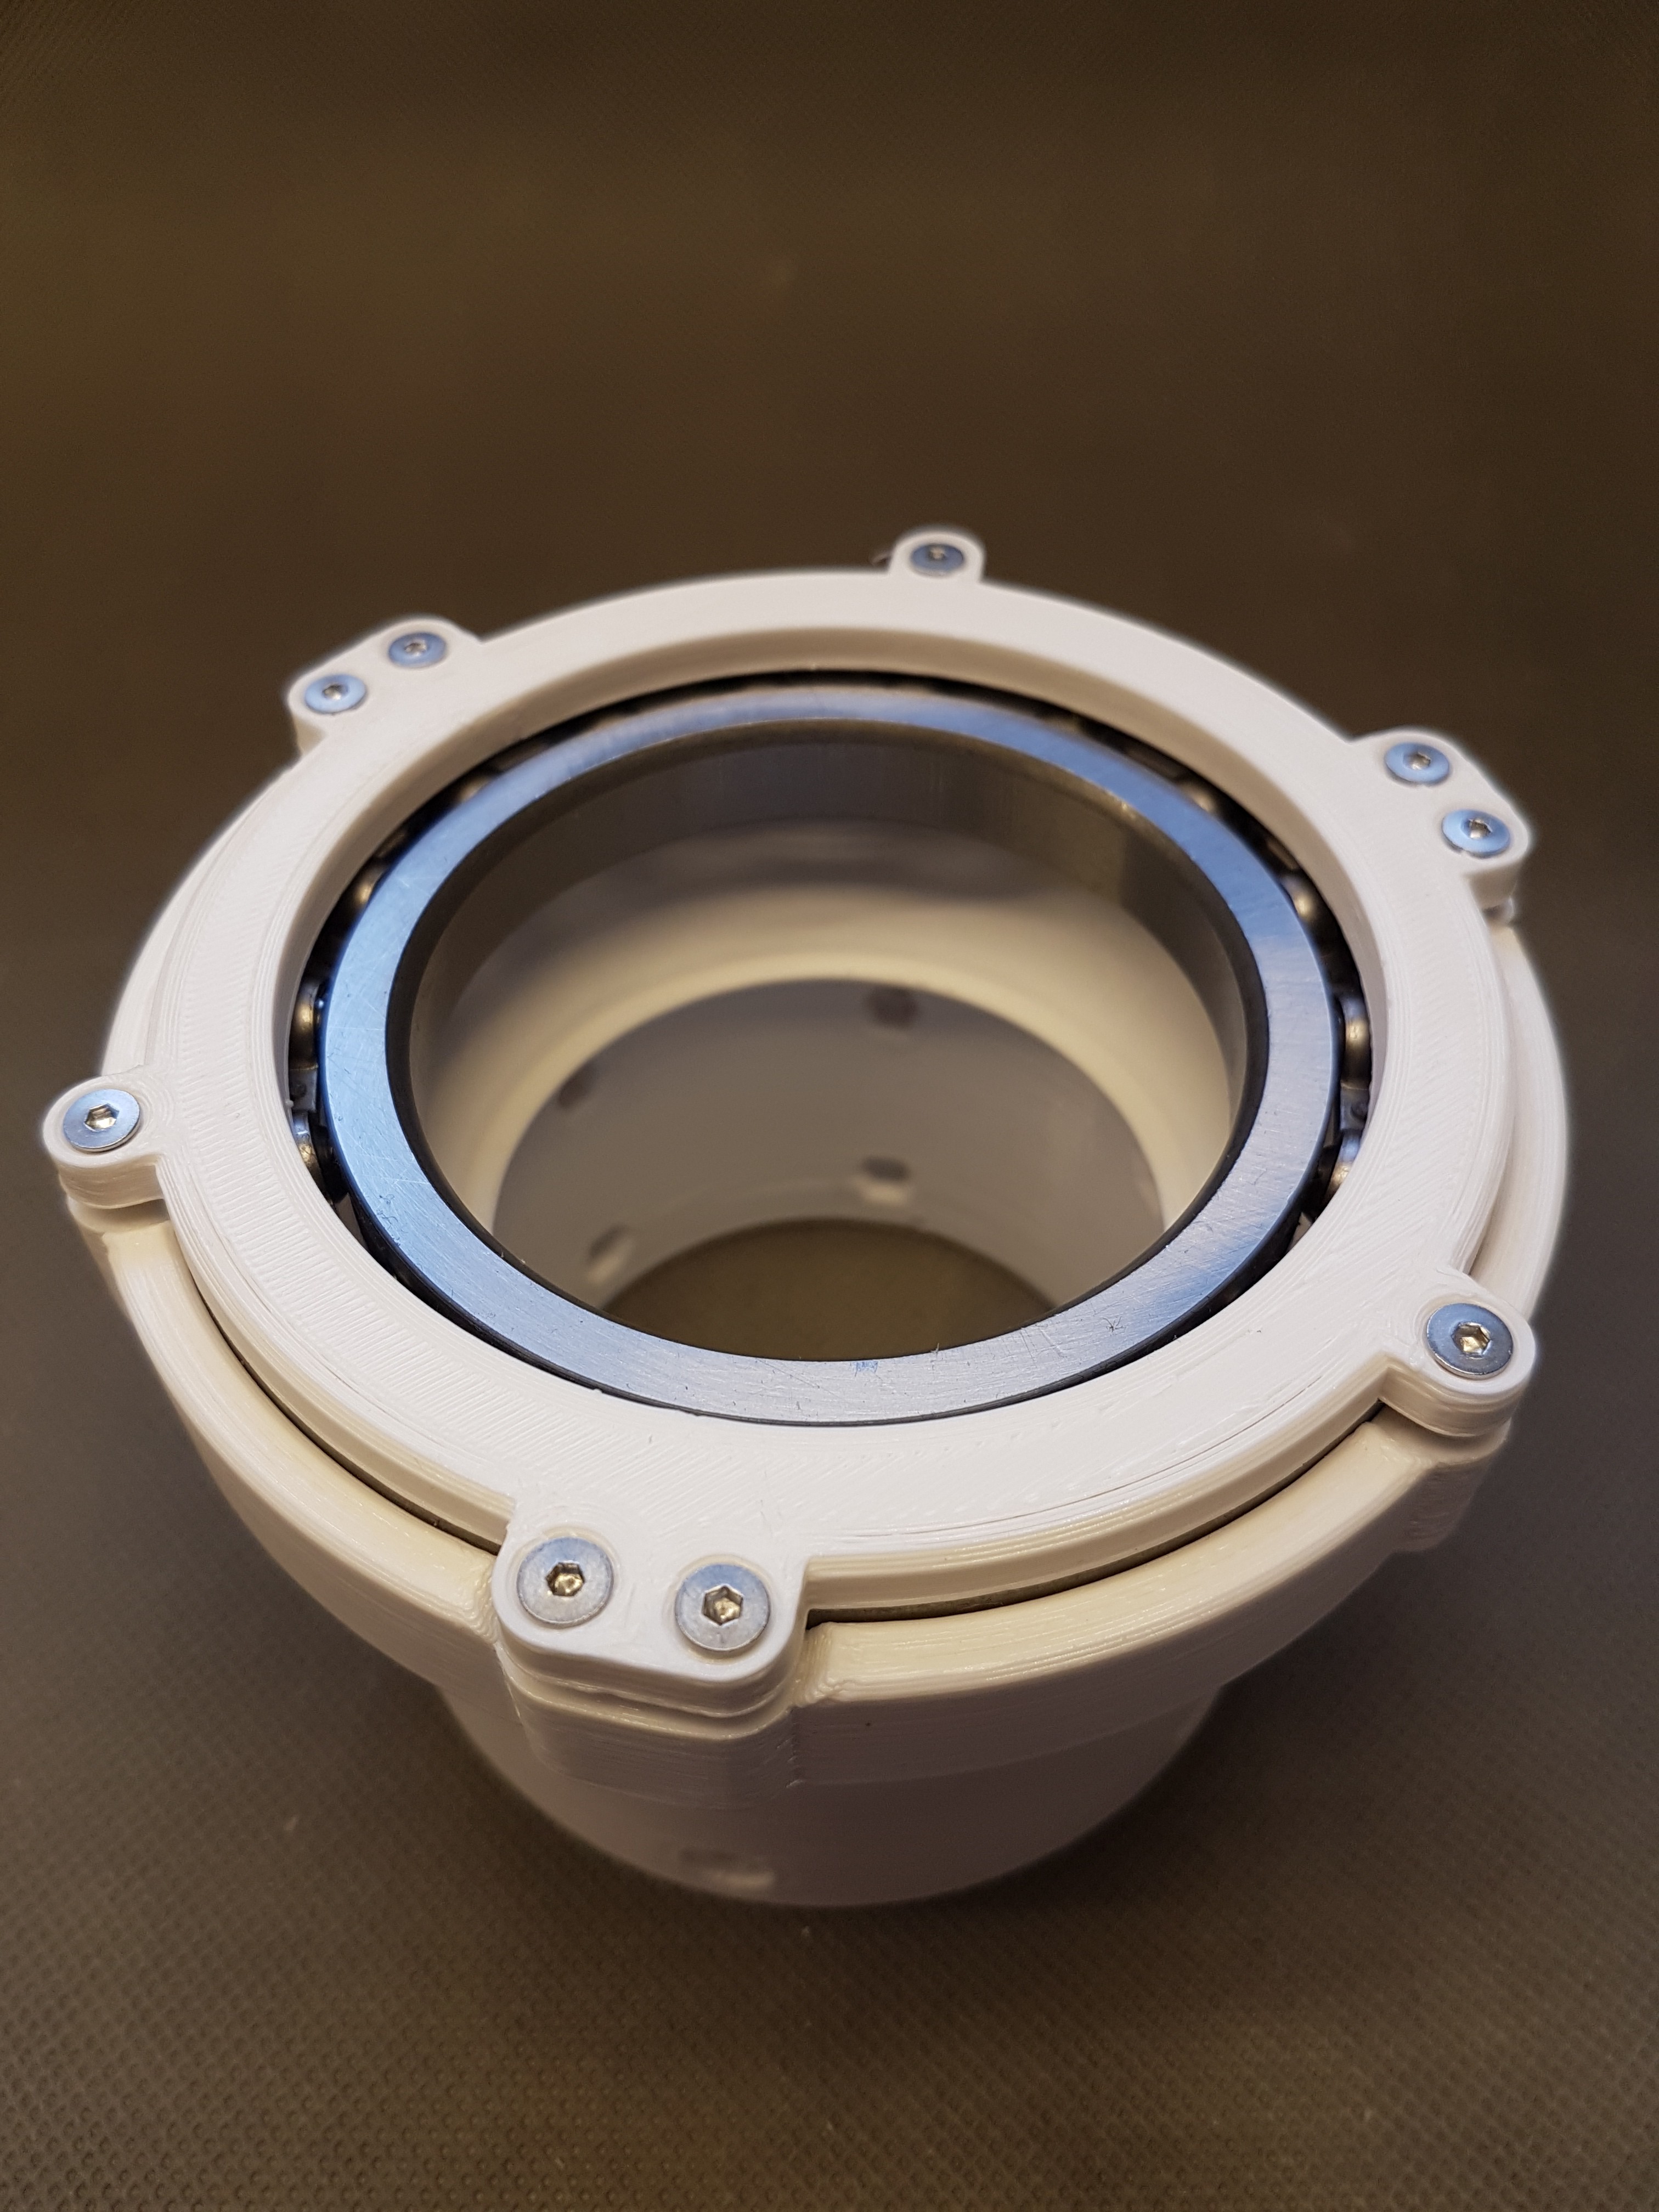
Brake actuator for the mechanical brake
08/10/2020 at 15:12 • 0 commentsI posted some information about the development and the build of the mechanical brake in the project log of the Nerdiskerator. Because it's also one of the main security features of winDIY i think its worth mentioning here. (I do not want to post the same content in two project logs) You can find the full log here: https://hackaday.io/project/172445/log/182044-brake-actuator-next-try
Here is some (teaser) content: :)
![]()
-
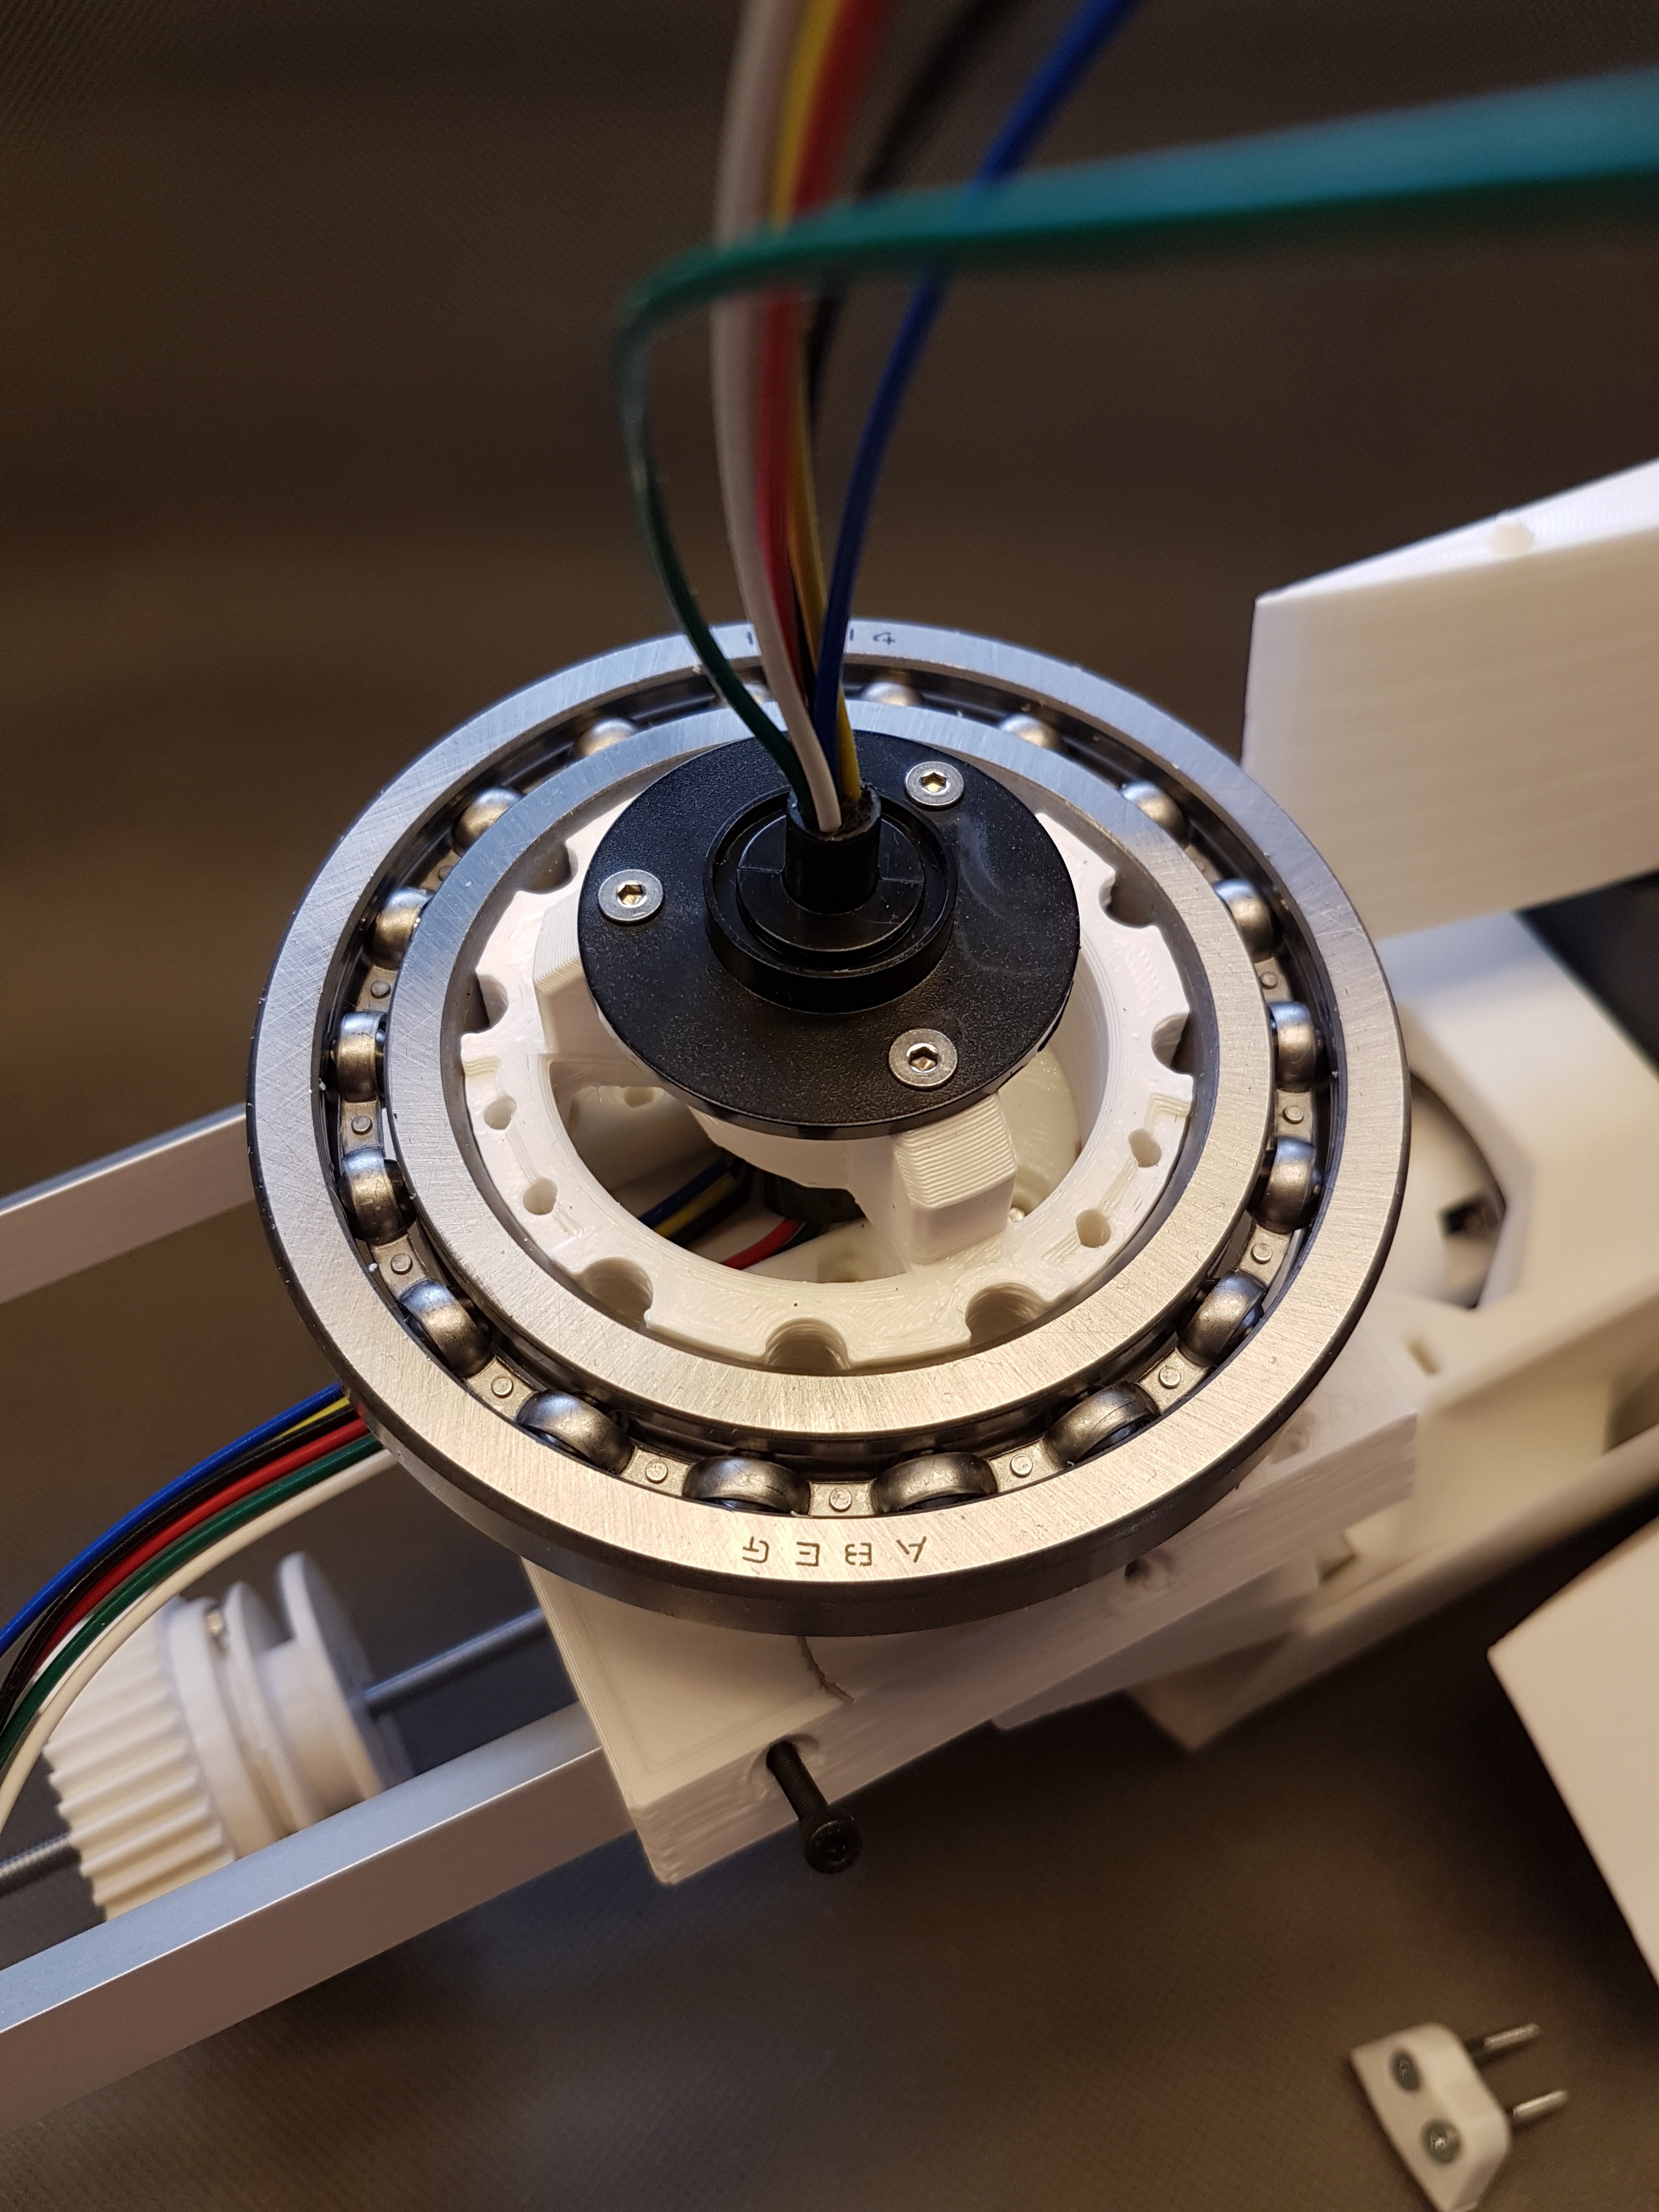
PitchAktor Mark2, Mark3 and Mark4
08/06/2020 at 17:54 • 0 commentsIt has been a little quieter here lately. But that wasn't because I was idling. :D In the meantime, the pitch actuator has gone through three iterations. But more on that later.
The last few weeks I've mainly worked on the pitch actuator but also on the wind vane. I have finished a draft for the wind vane and have already partially assembled it. More about this in a separate log. :)
In addition to the (hopefully final) design for the pitch actuator, I also worked on the brake actuator for the Nerdiskerator. I will post more on the nerdiskerator's project log soon. (Link: https://hackaday.io/project/172445-nerdiskerator-a-3d-printed-disk-generator)
The first design for the Pitch Actuator worked, but it took far too long to adjust the blades. The stepper motor needed almost ten minutes for a complete journey from end position to end position.
Clearly too slow to be able to react quickly to a rotation-speed change.
Pitch actuator Mark 2
So I thought I would just replace the stepper motor with a small DC motor. On the search for a motor I oriented myself more towards what I had available at home than what was needed for this purpose. Spoiler: I should have looked at the data sheet.![]()
![]()
As you can see, the motor has enough speed for a quick adjustment. Unfortunately, a lot of torque was sacrificed to reach more speed. In addition, the motor draws almost 5A when it is blocked. Clearly too much. I have to admit that I chose the engine somewhat naively according to the motto "it will fit".
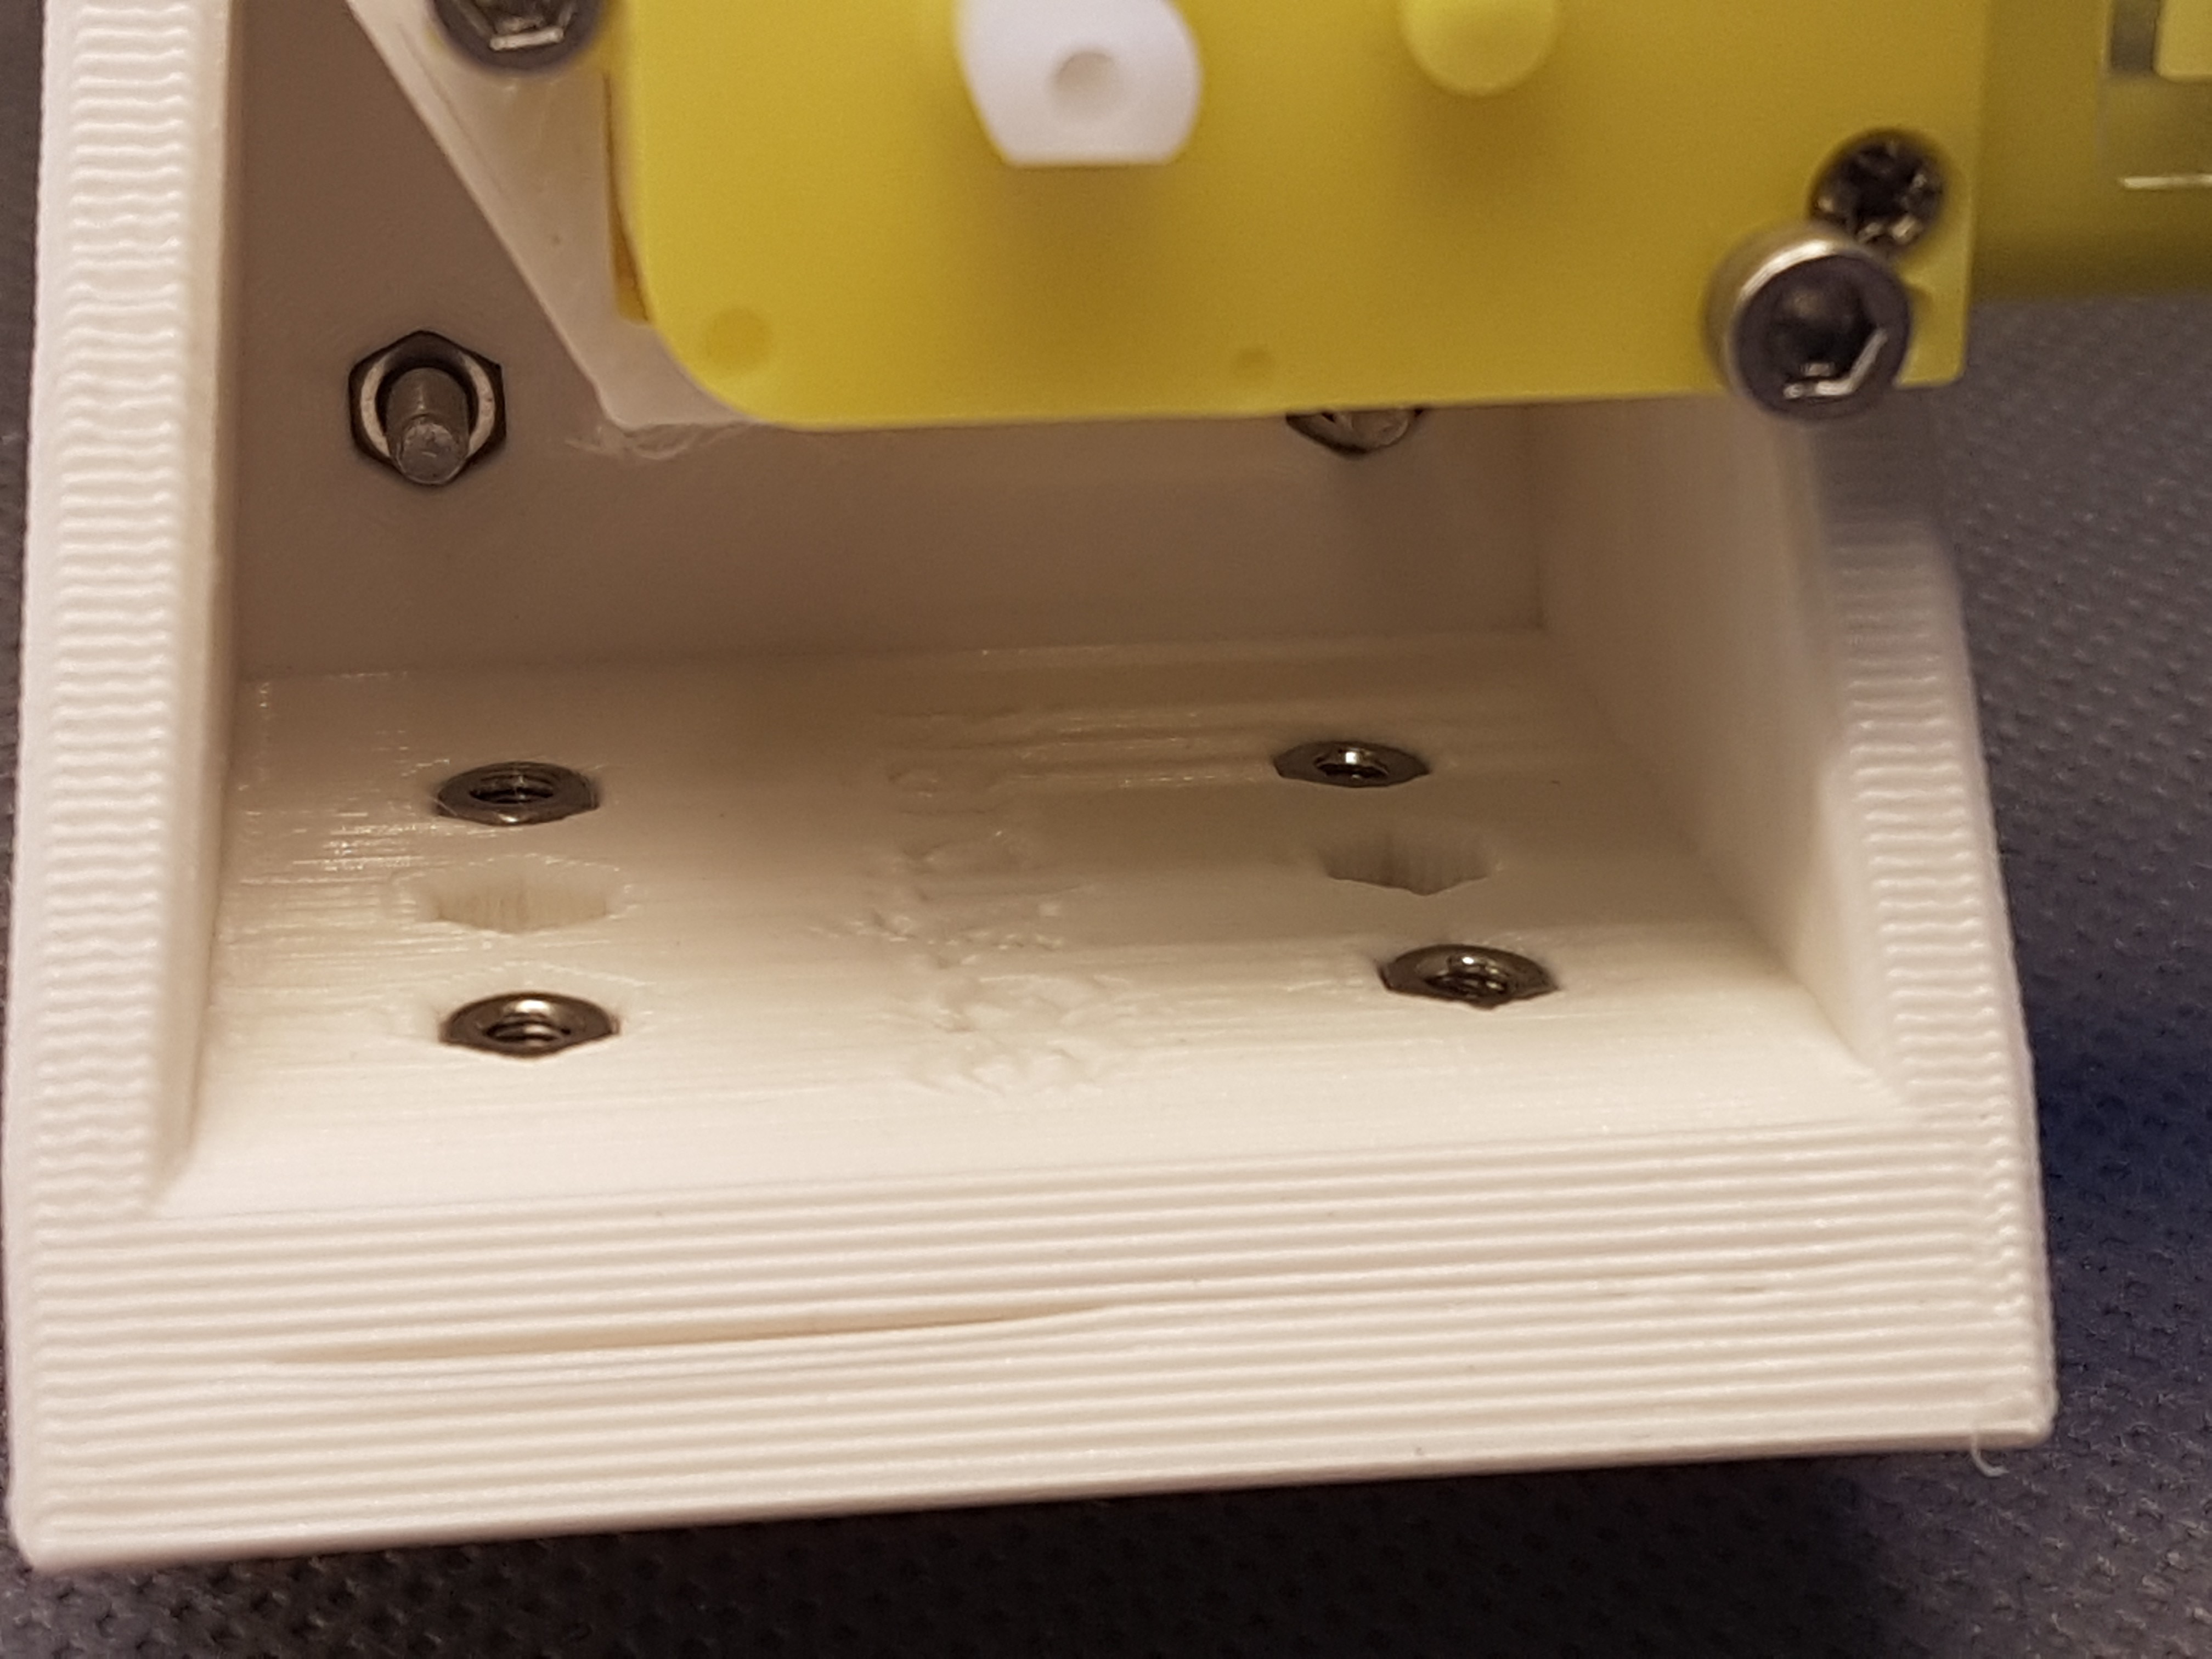
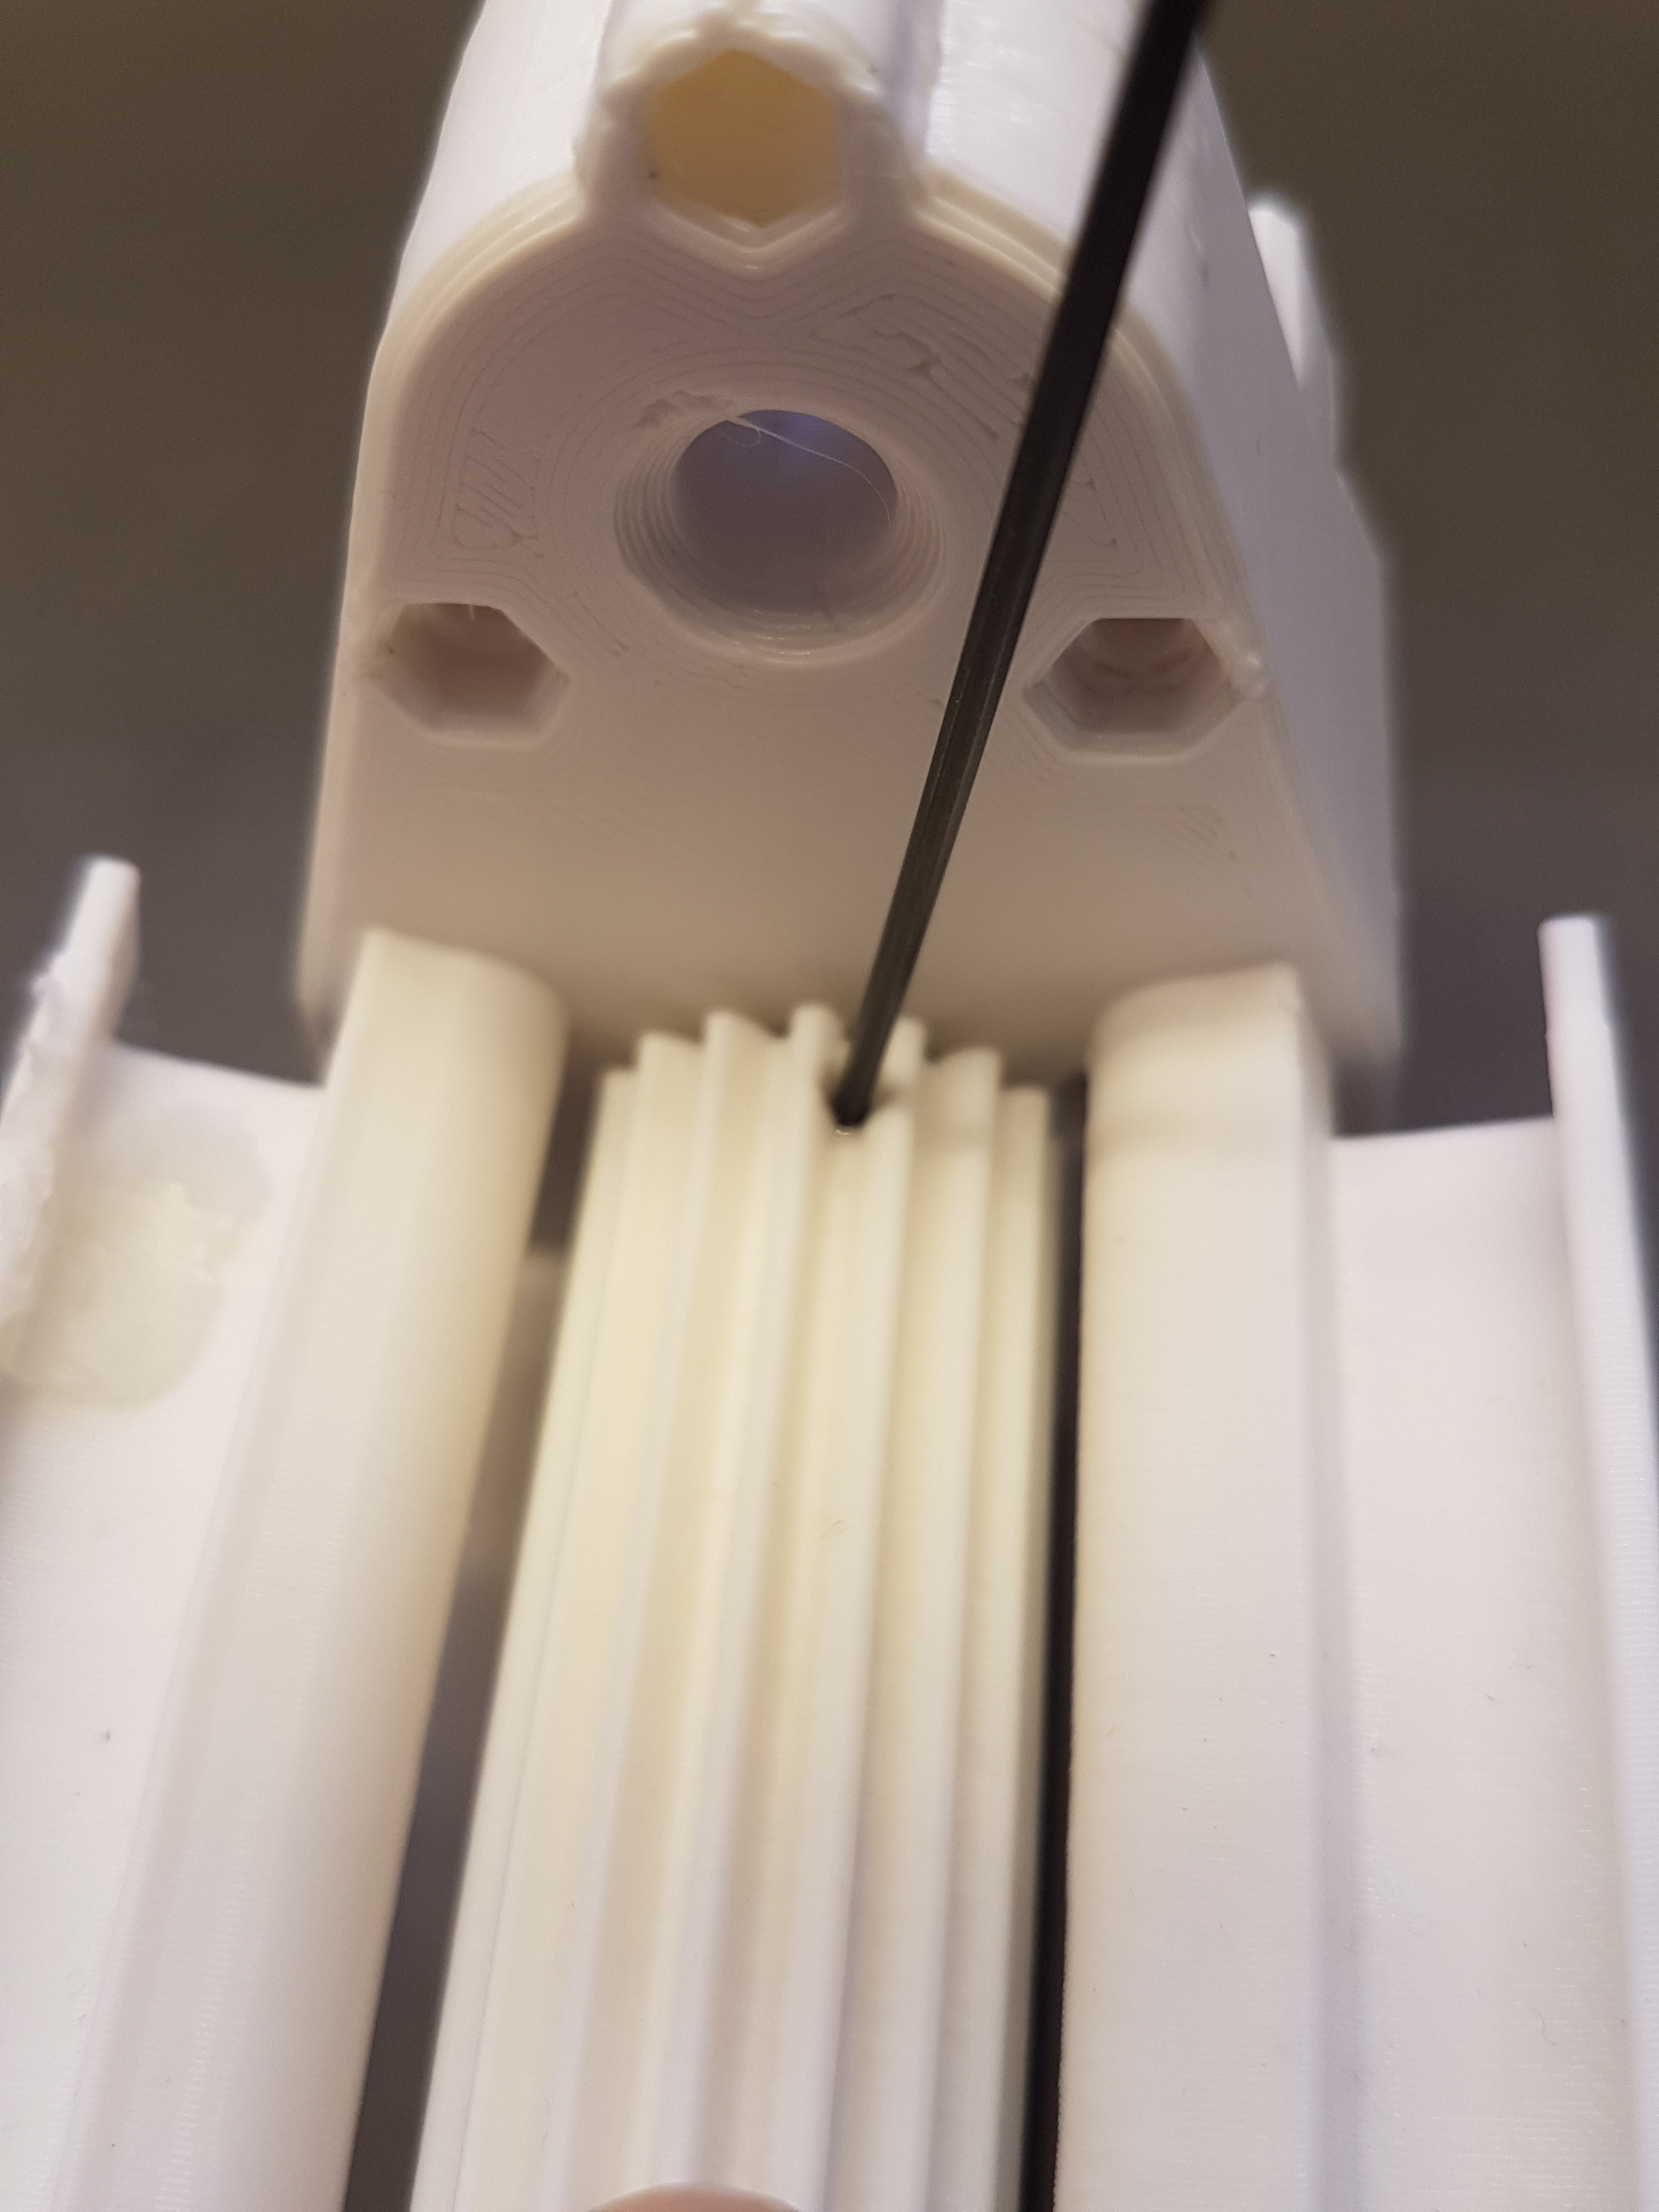
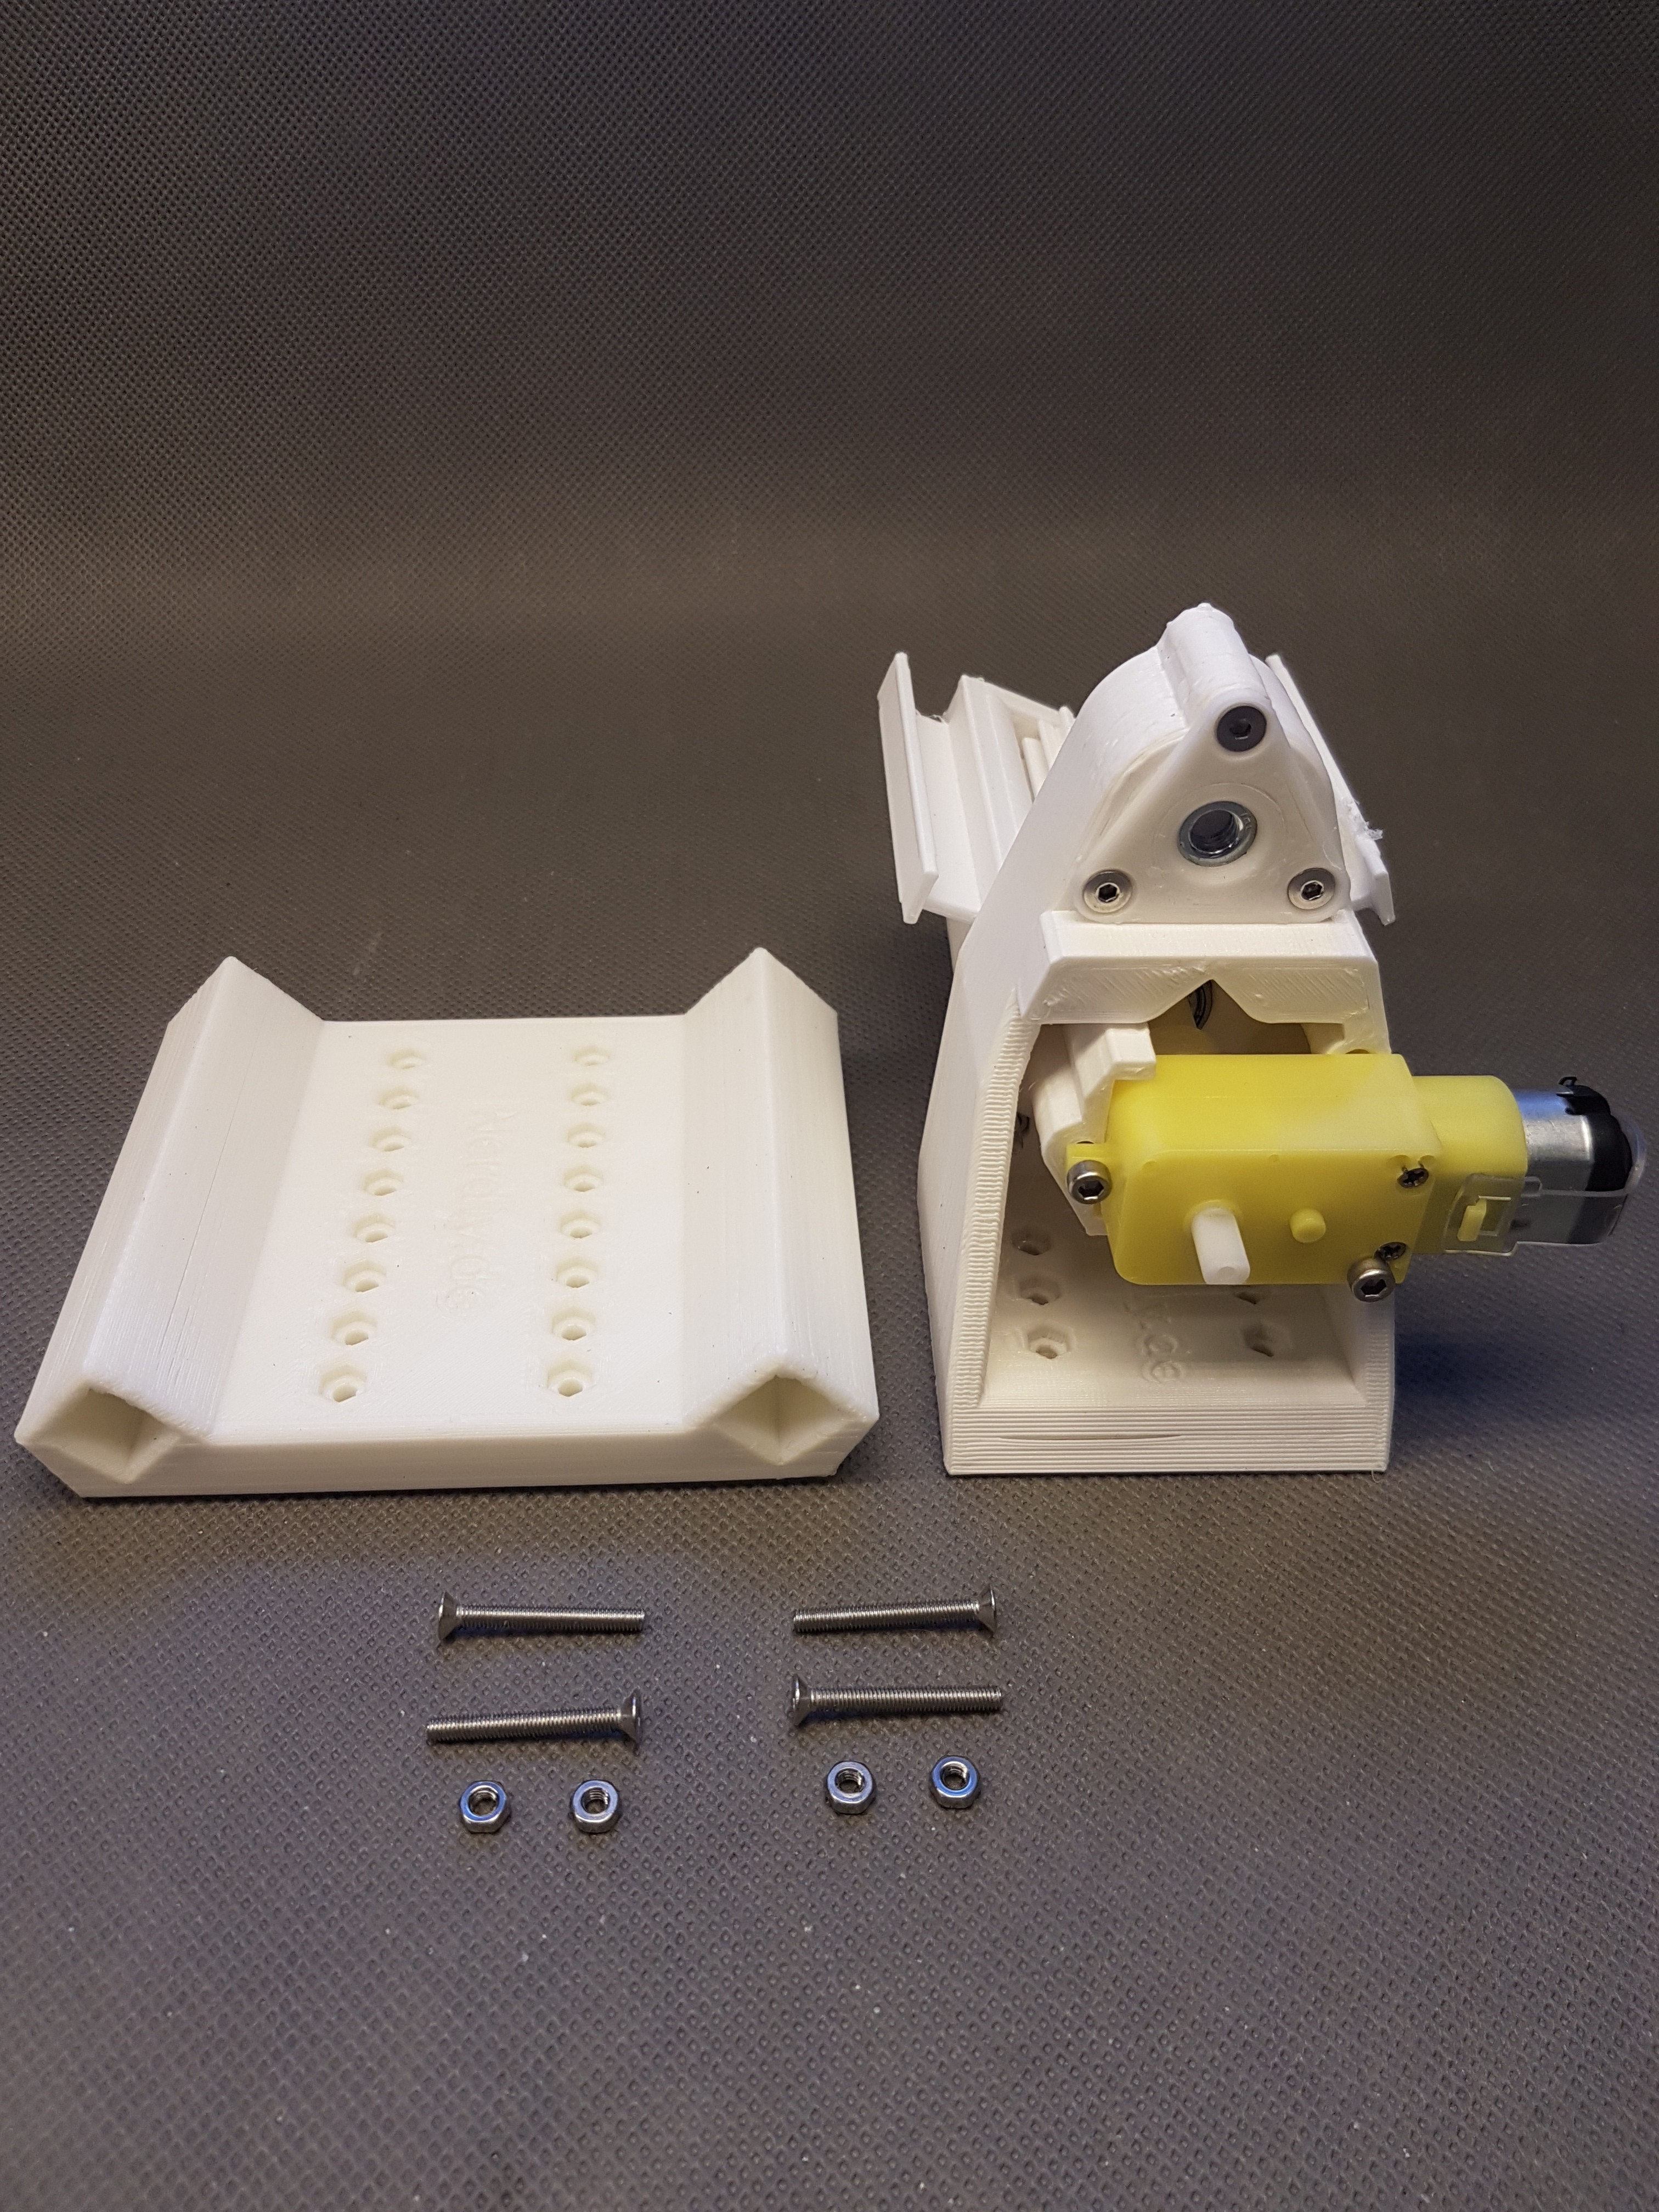
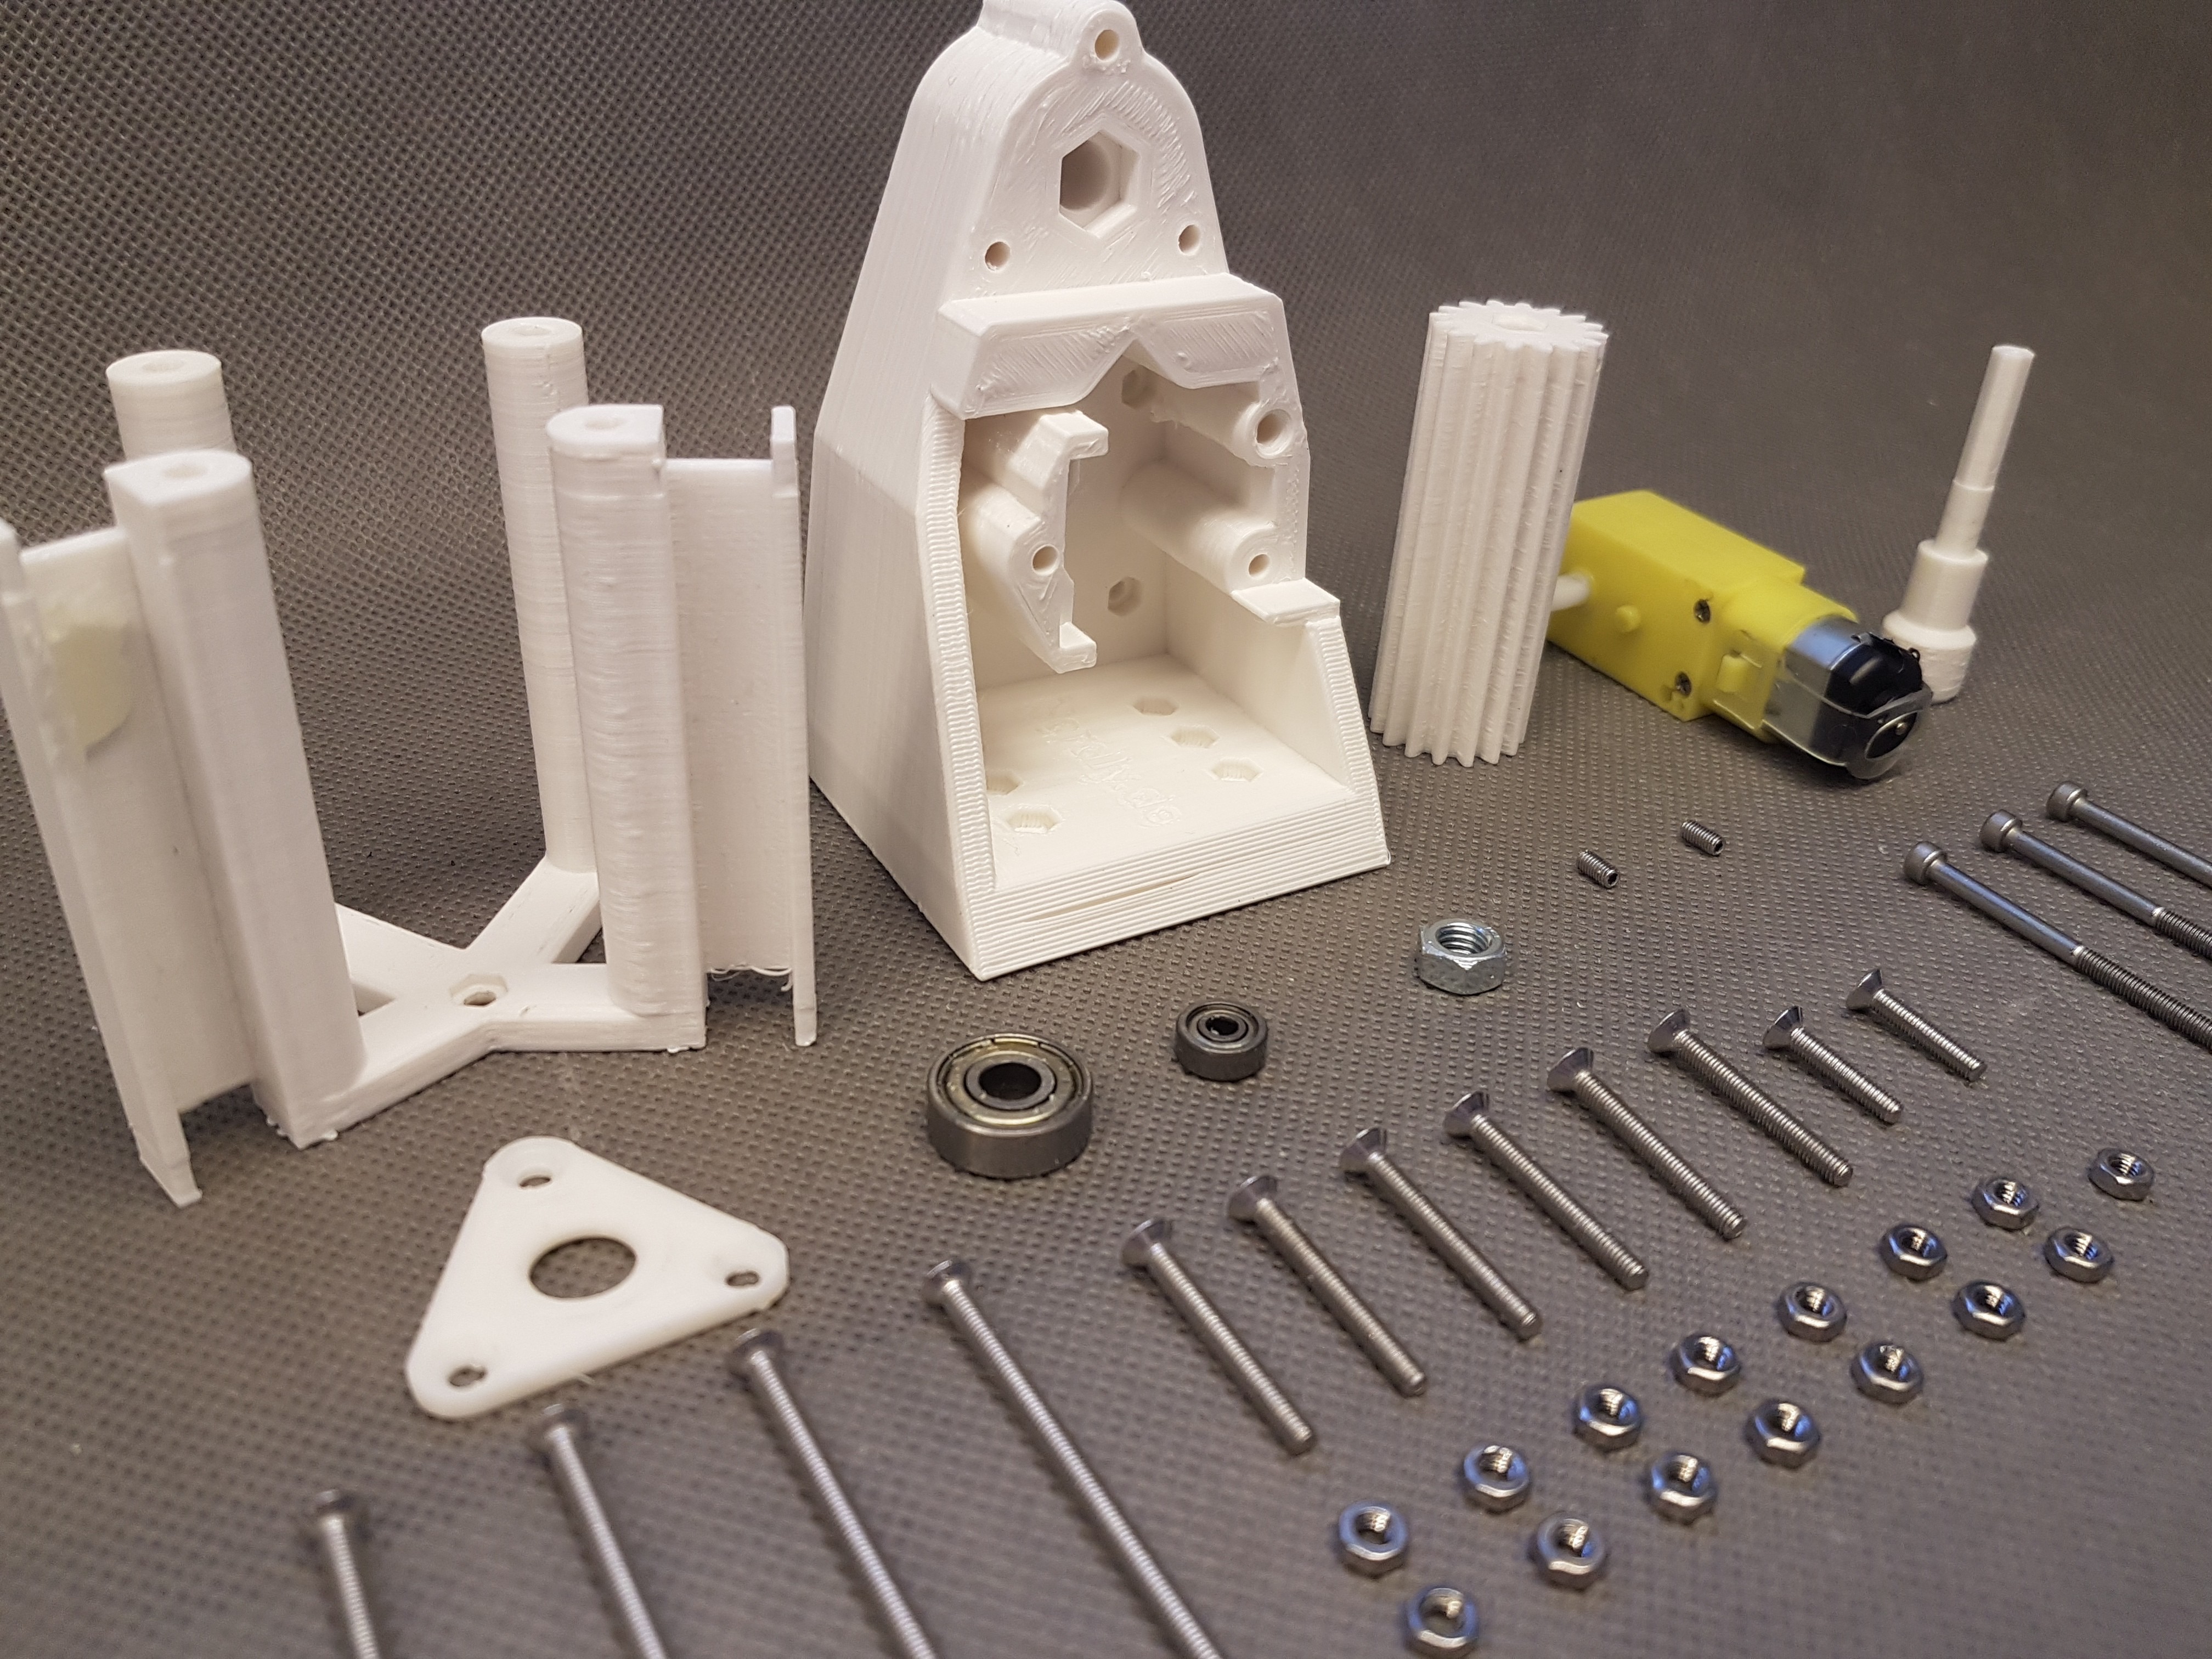
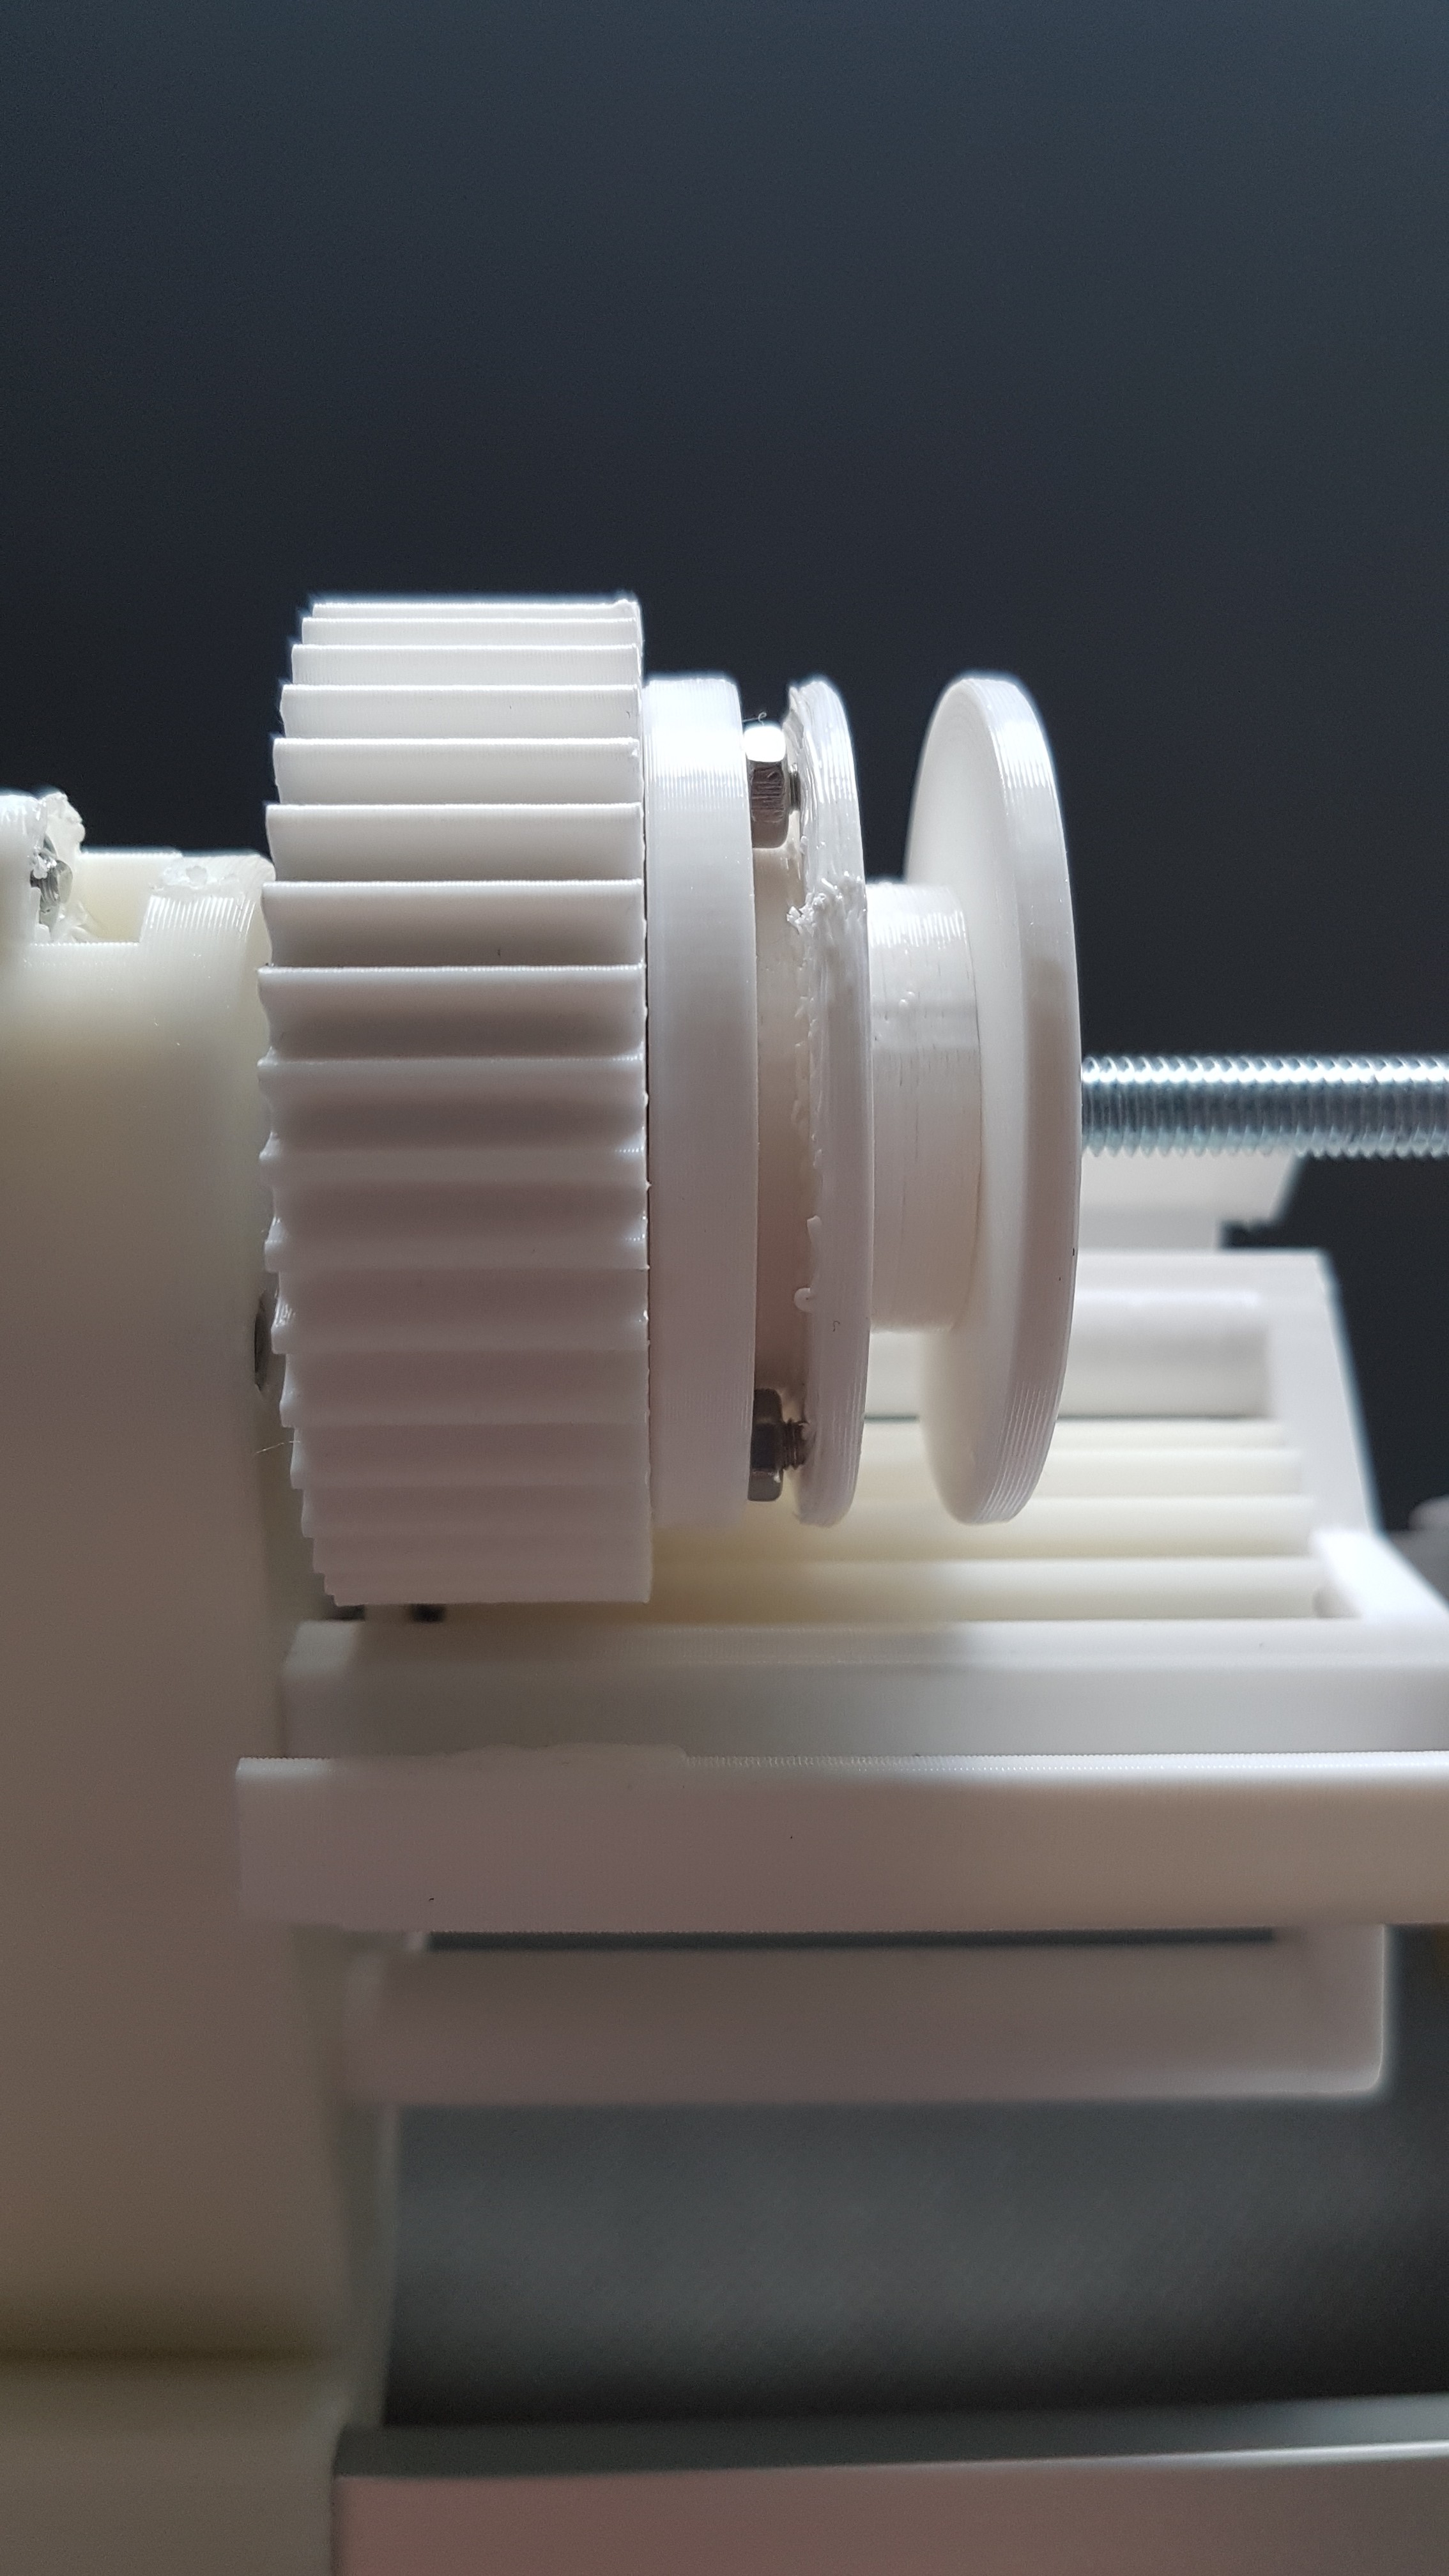
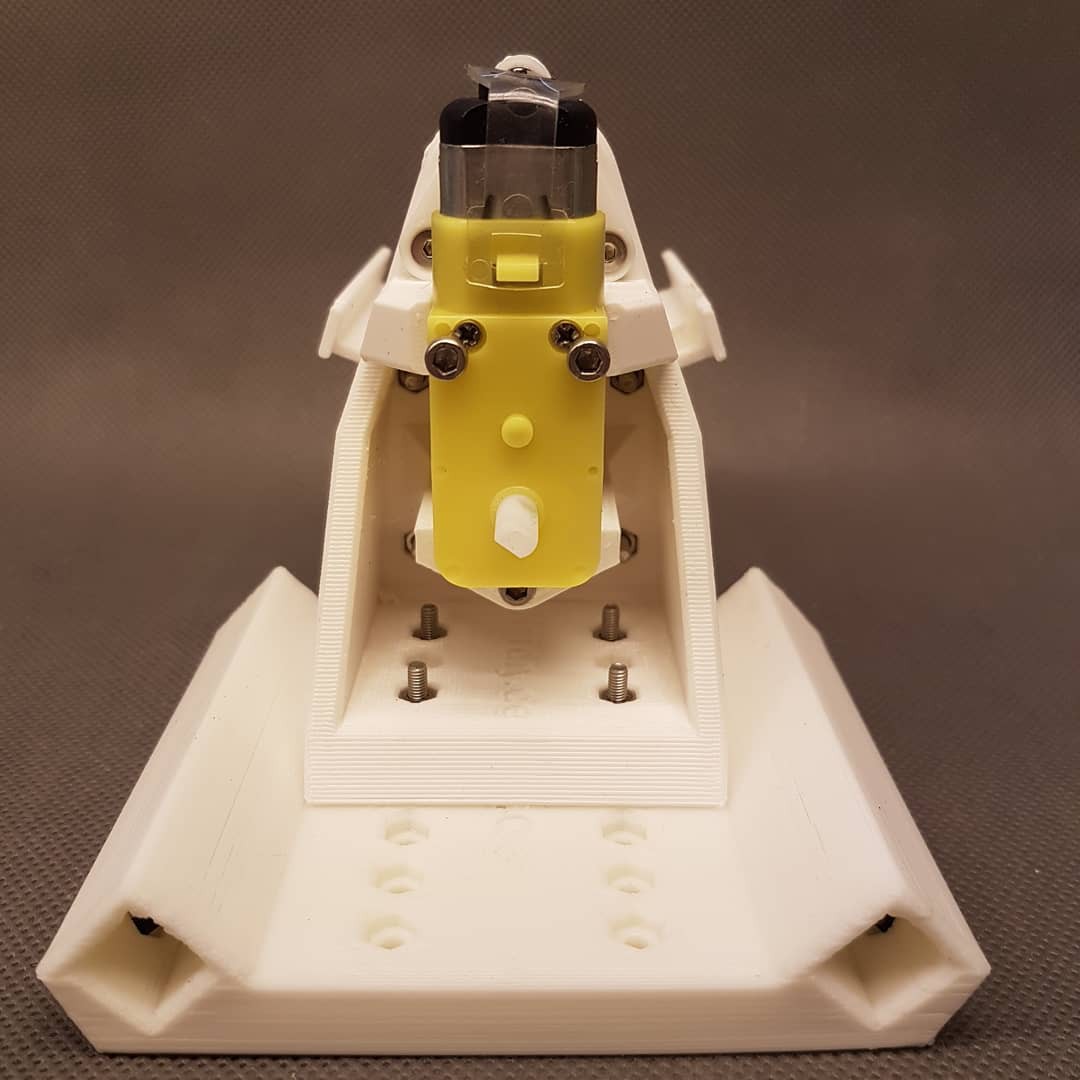
Pitch actuator Mark 3
So I went to the next draft. And with it to the next proof that before I start an additional printing process I should really check first that everything will fit. :D
In this design I used the same gear motor that I use for the brake actuator of the Nerdiskerator. This already has a reduction of 1:48 integrated into the housing. The motor pulls 500mA when blocked. That fits perfectly with the I2C motor driver DRV8830 that I want to use for control.
![]()
![]()
![]()
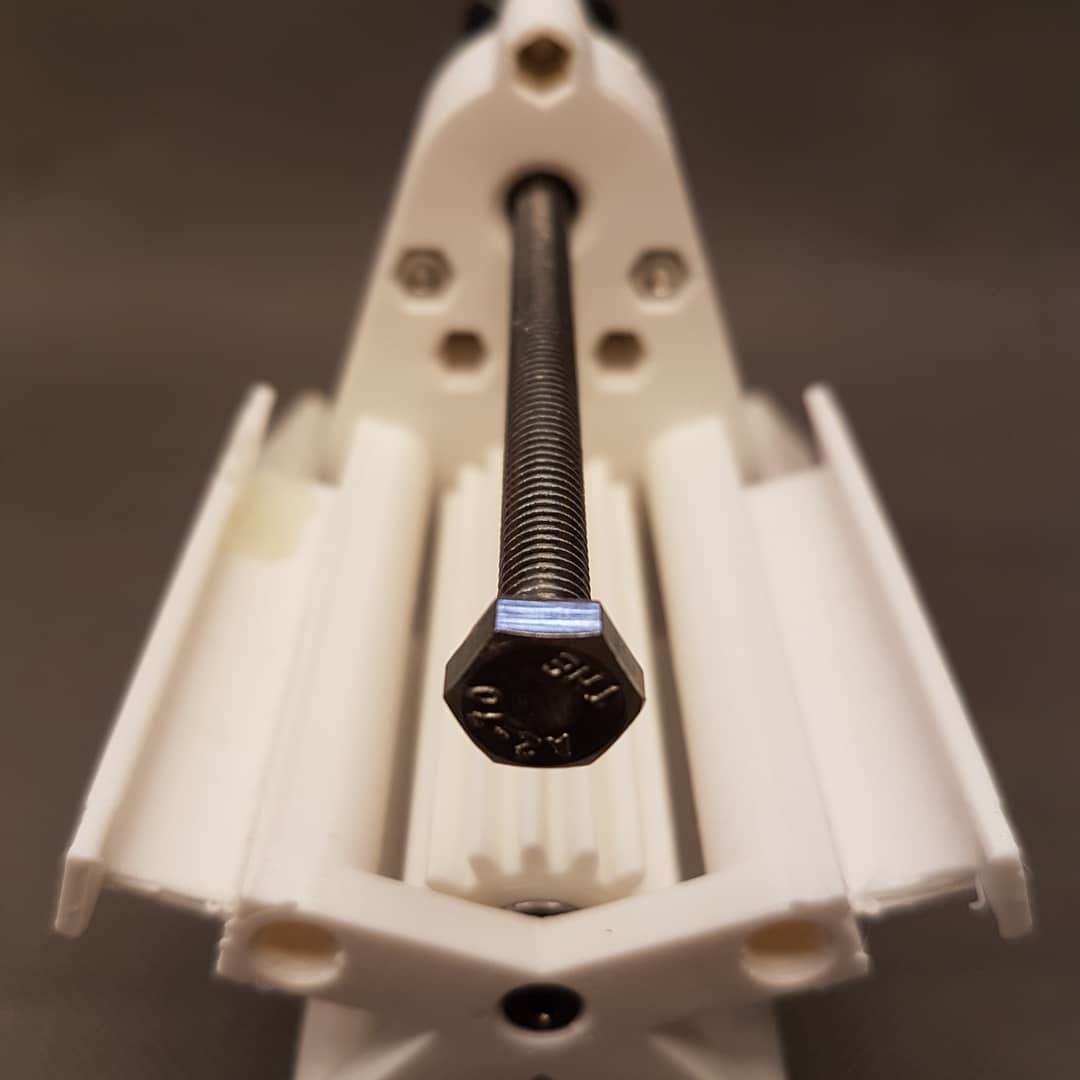
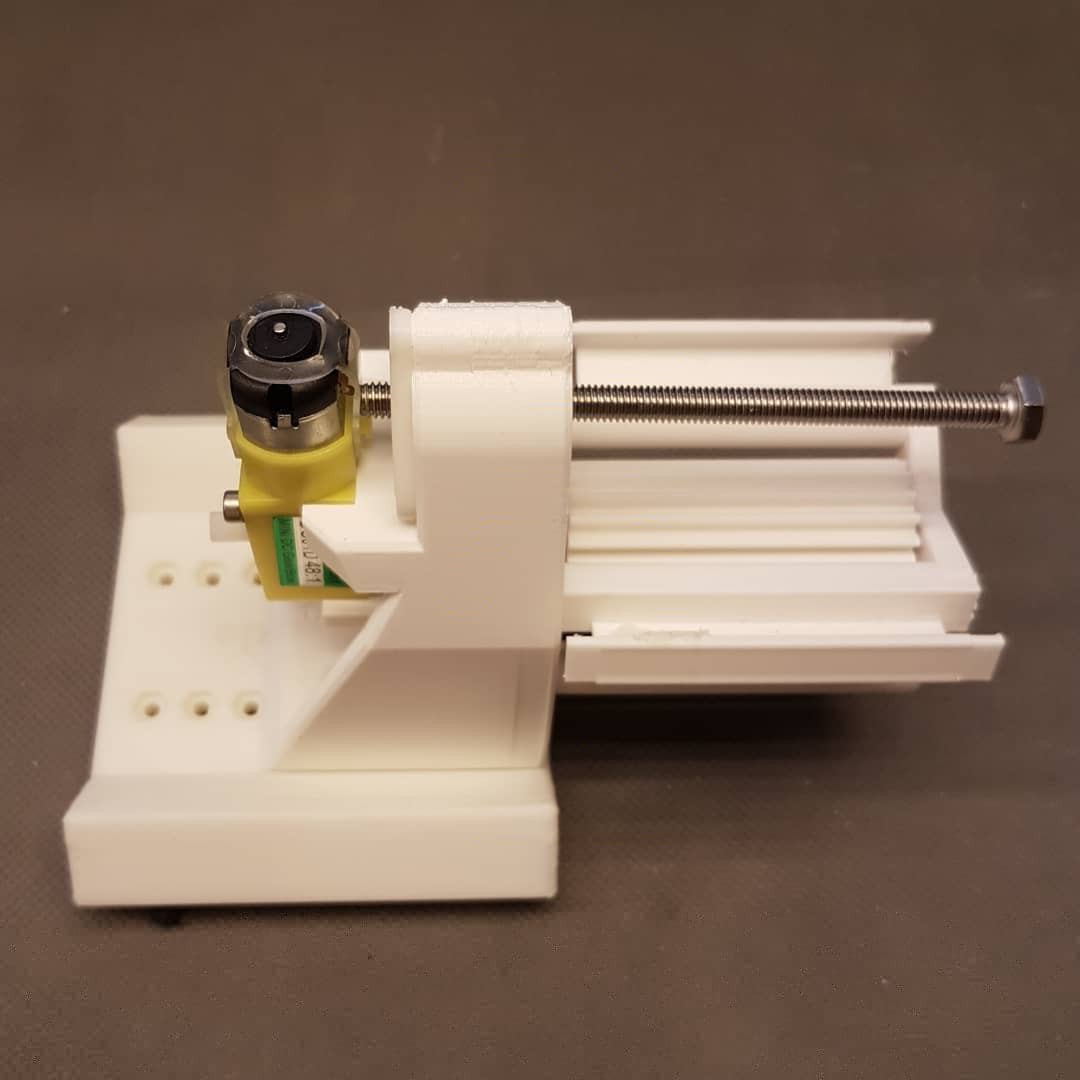
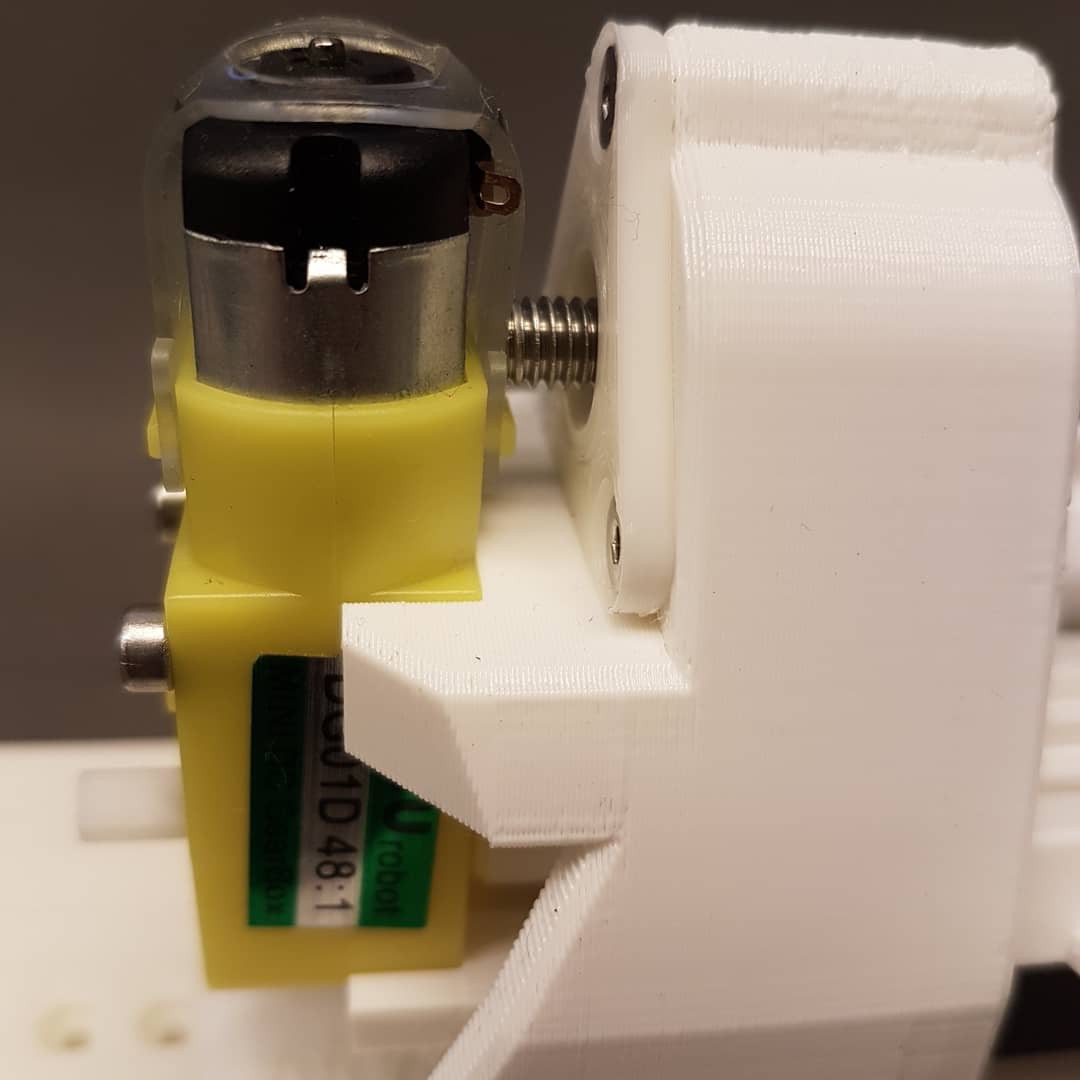
![]()
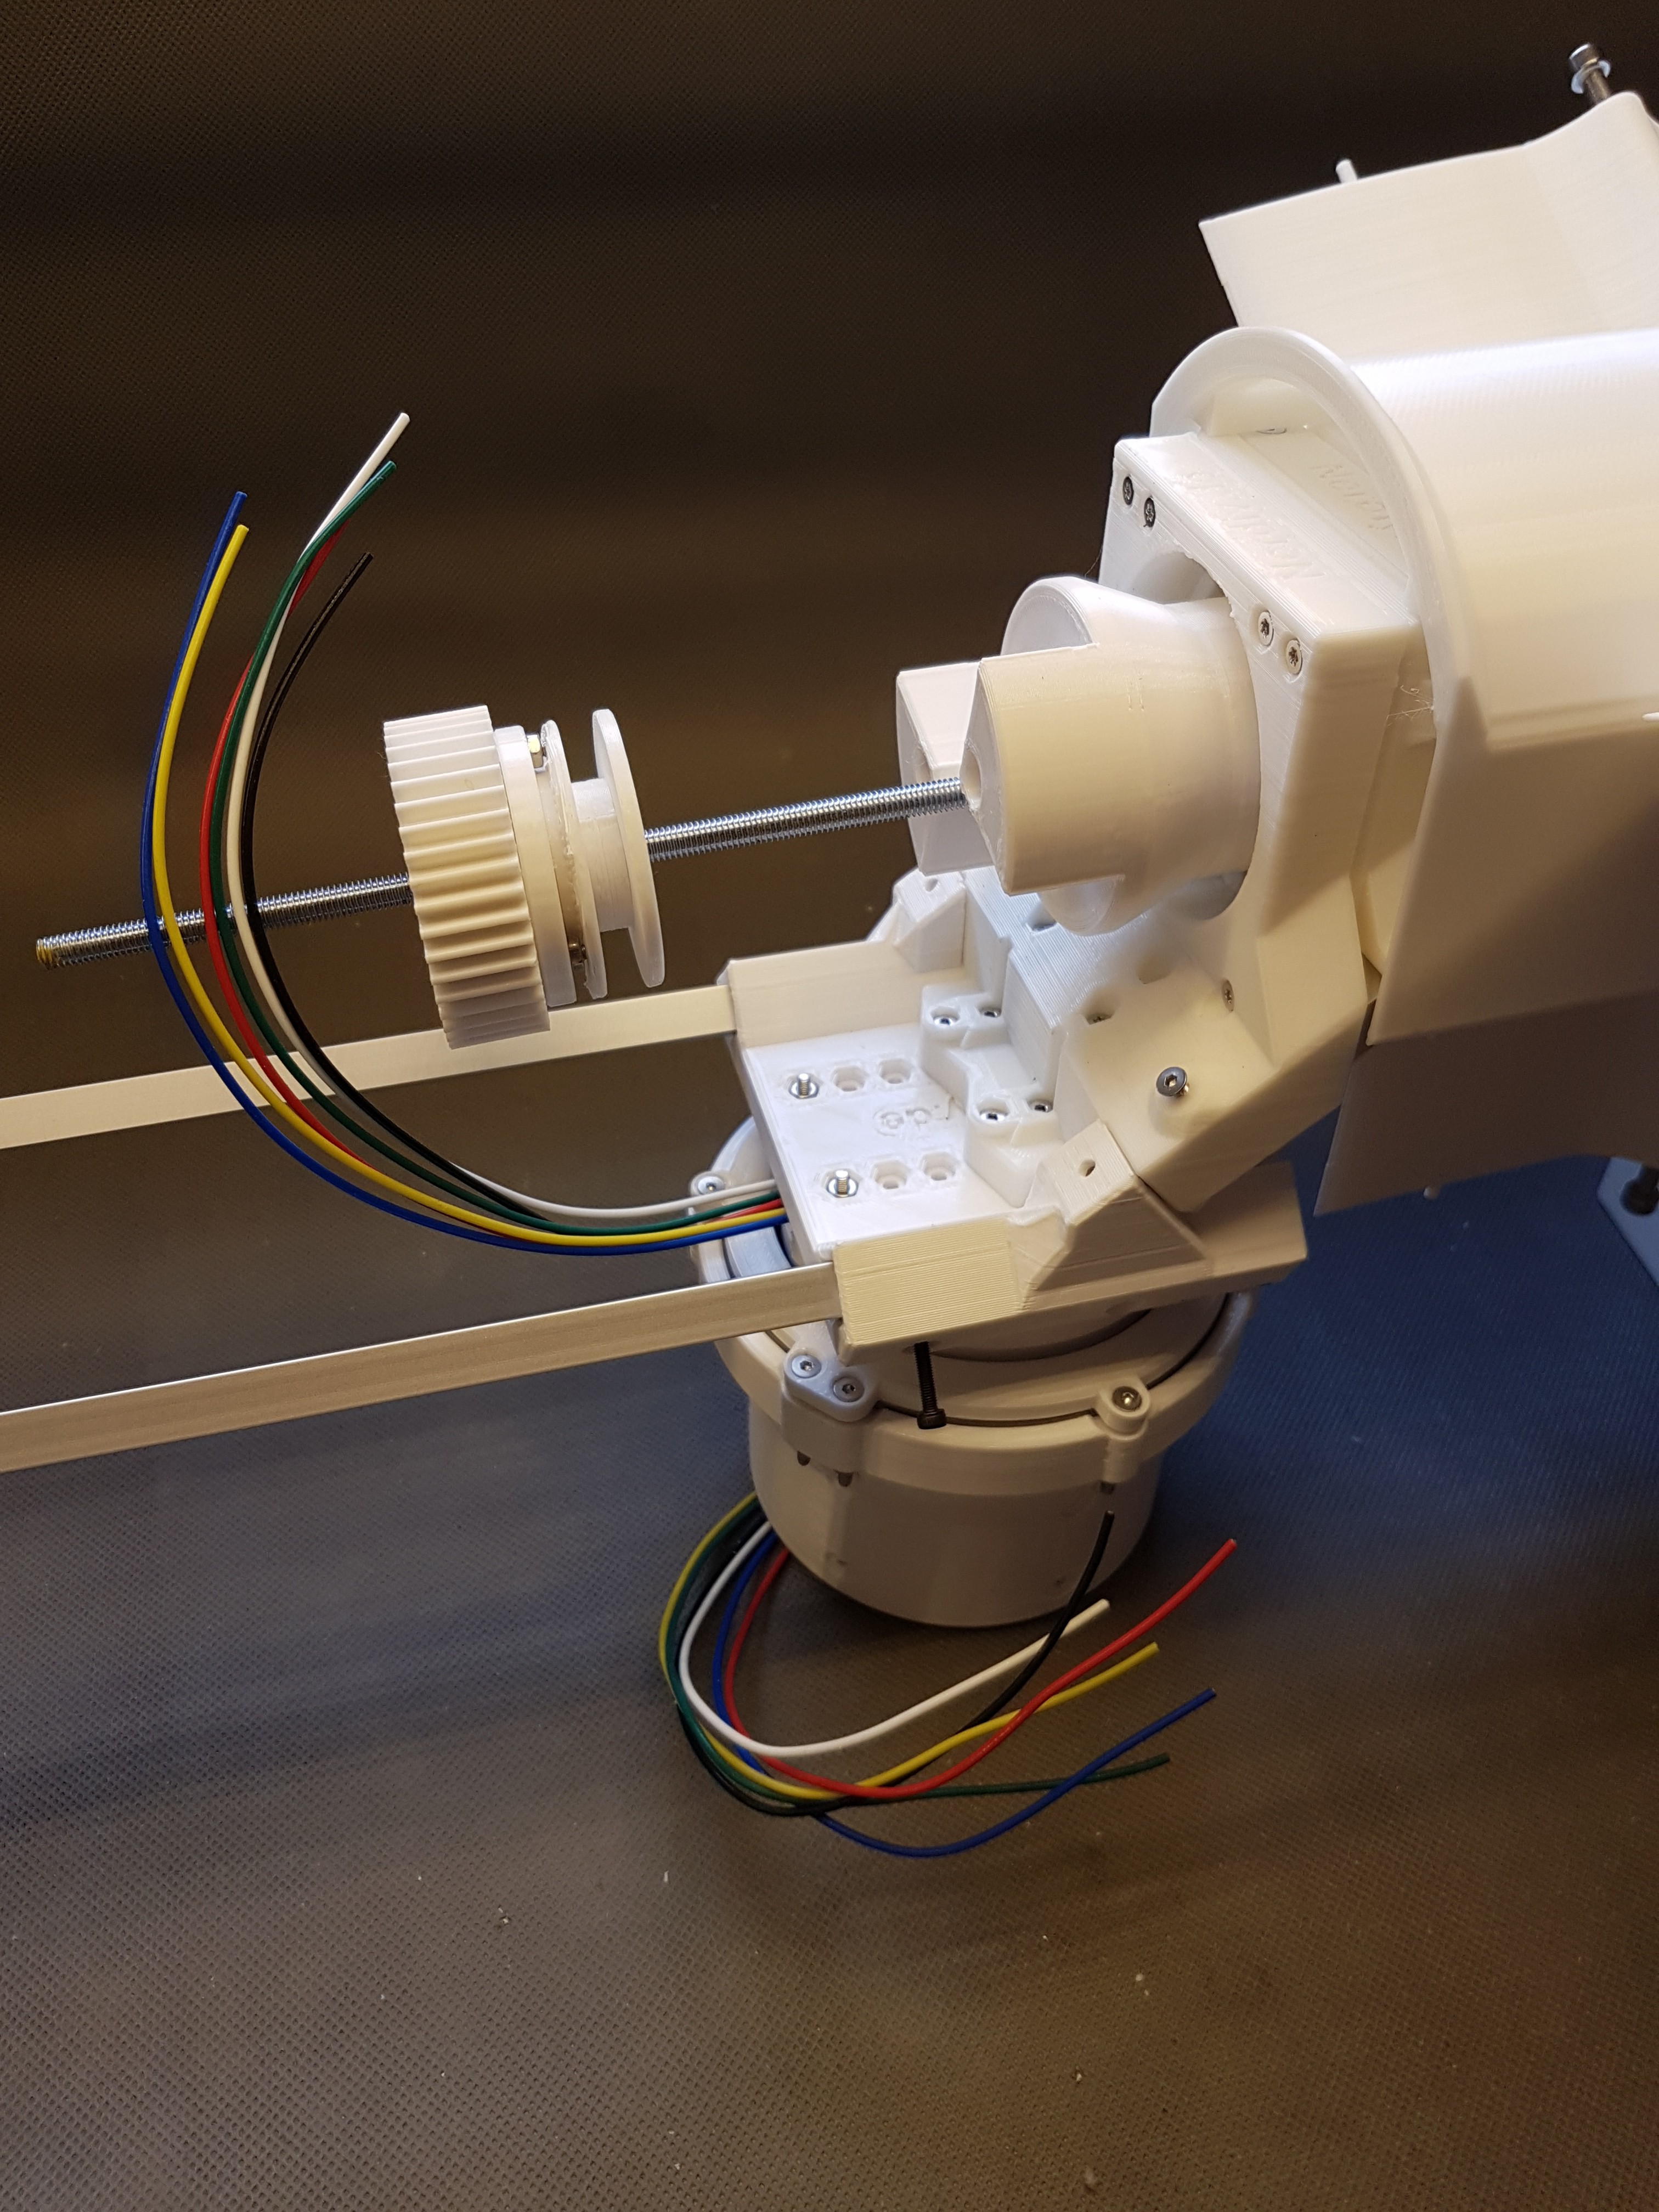
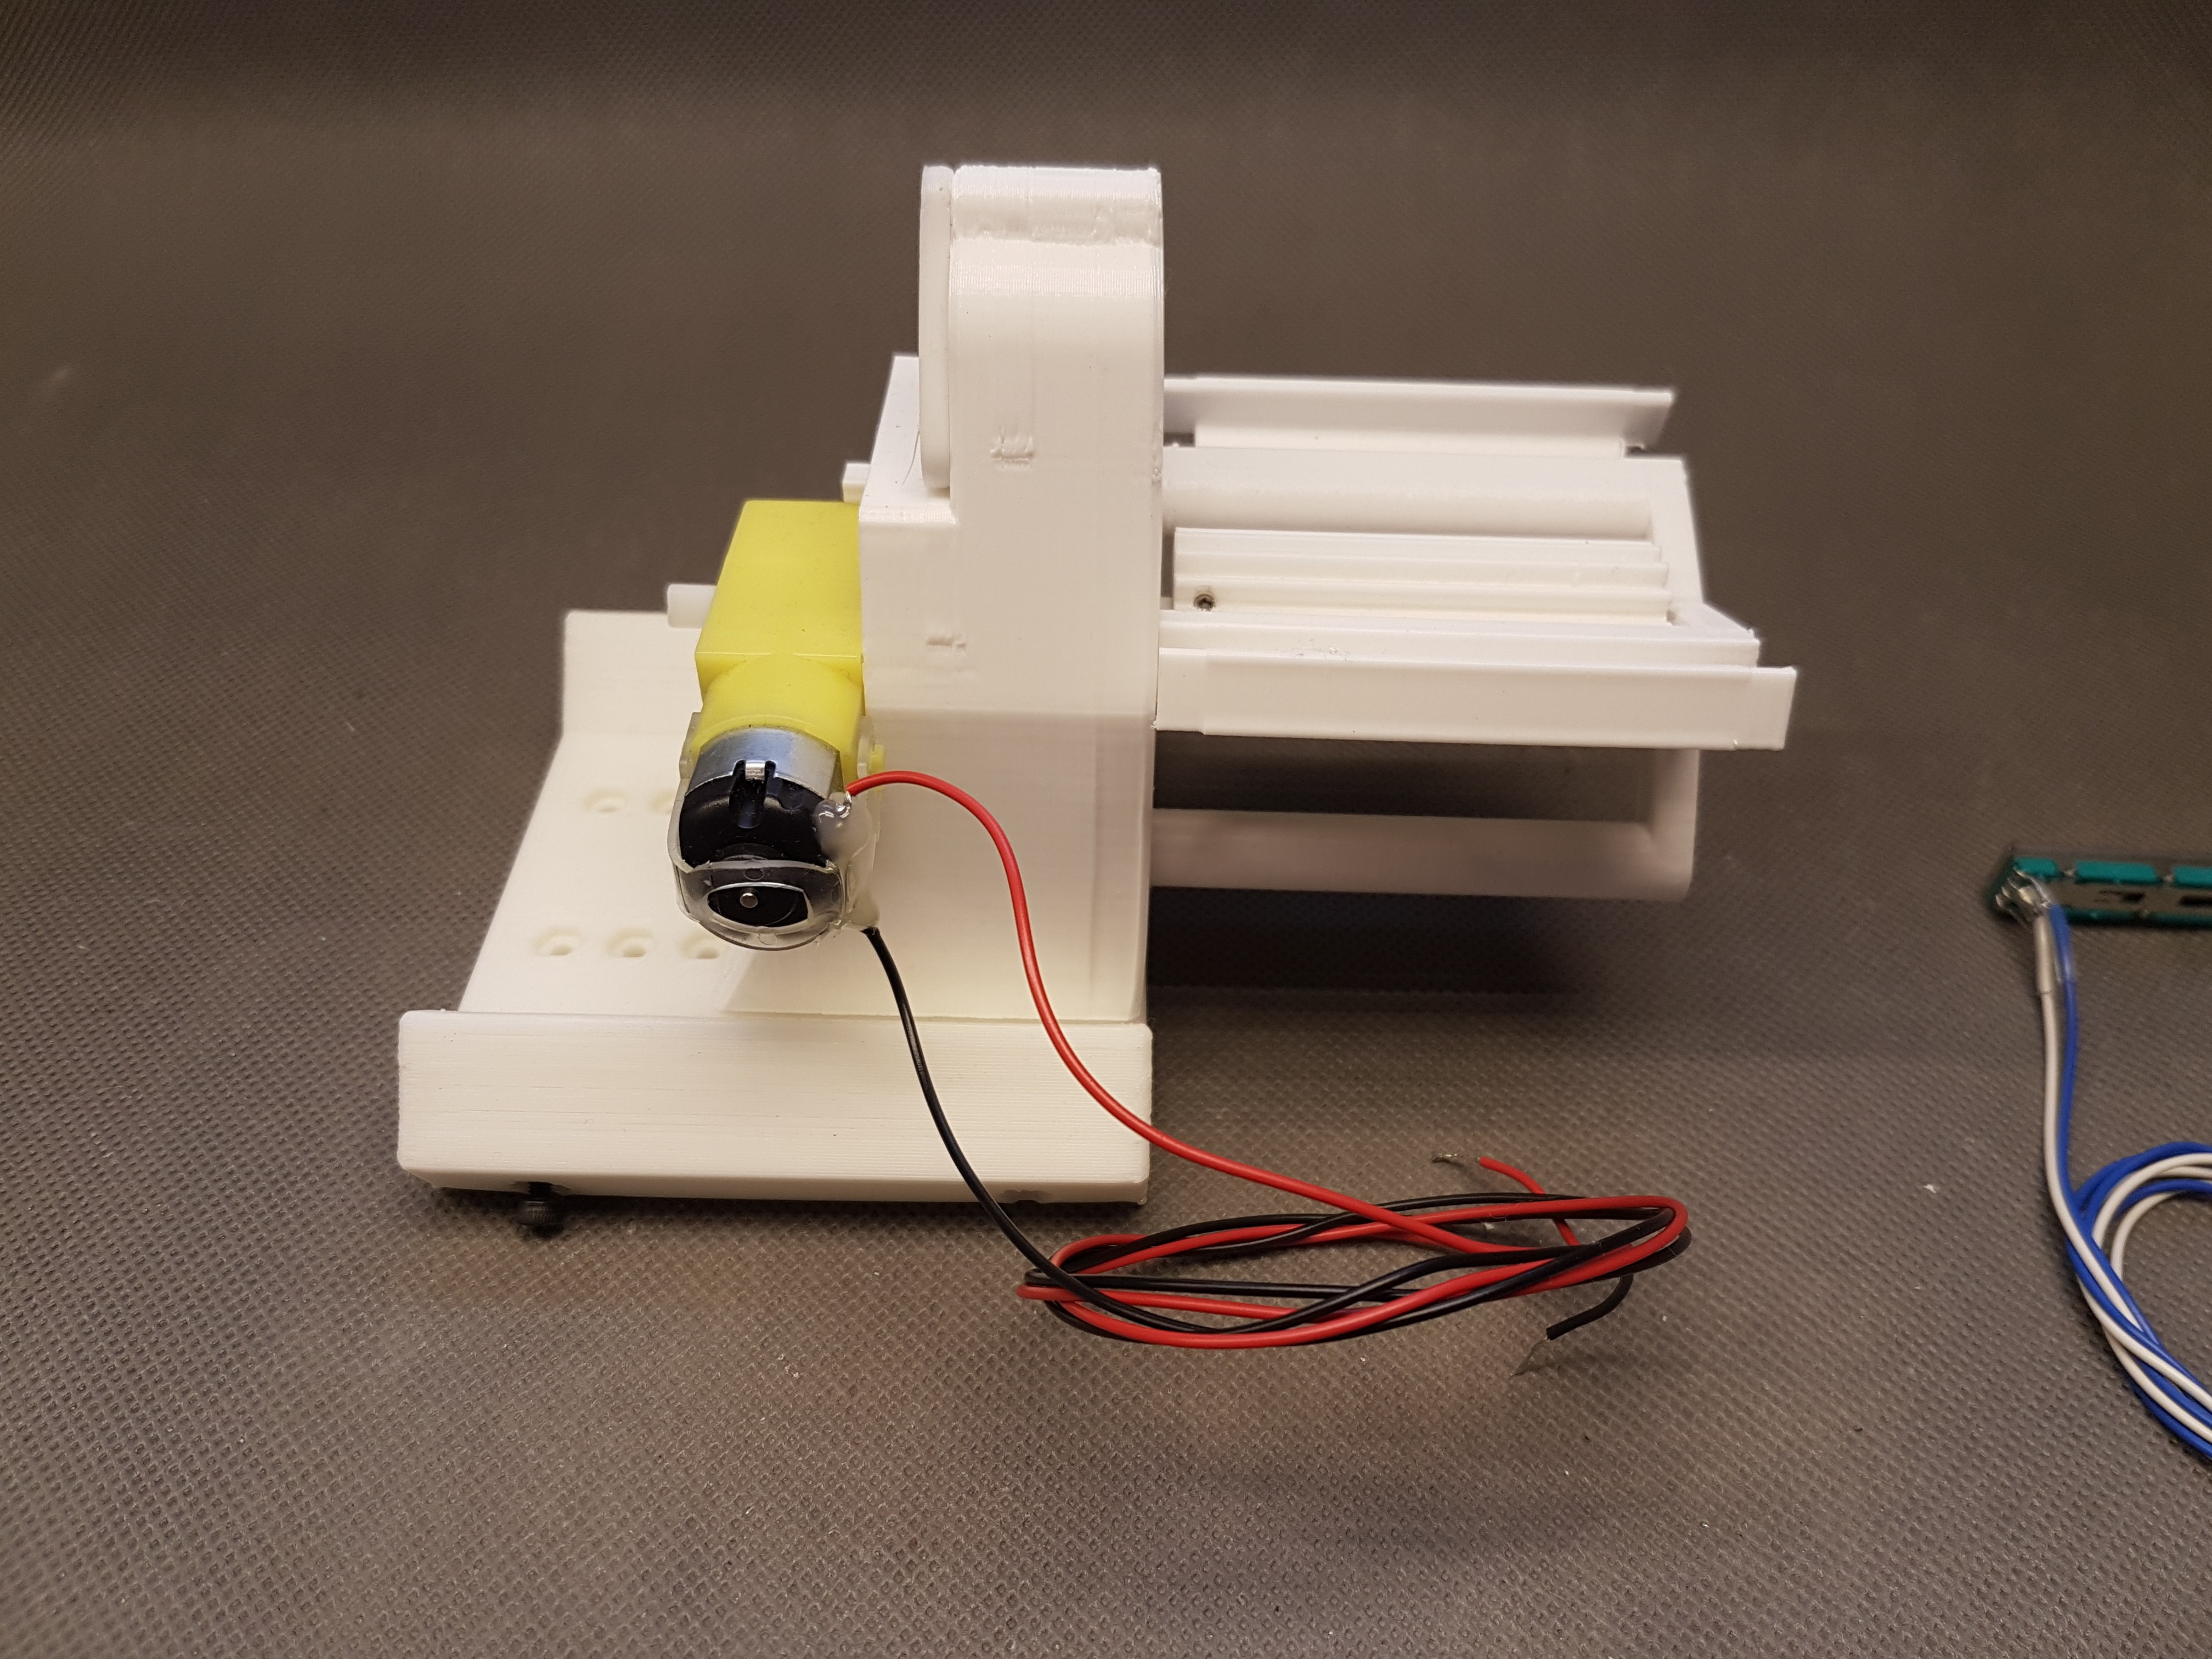
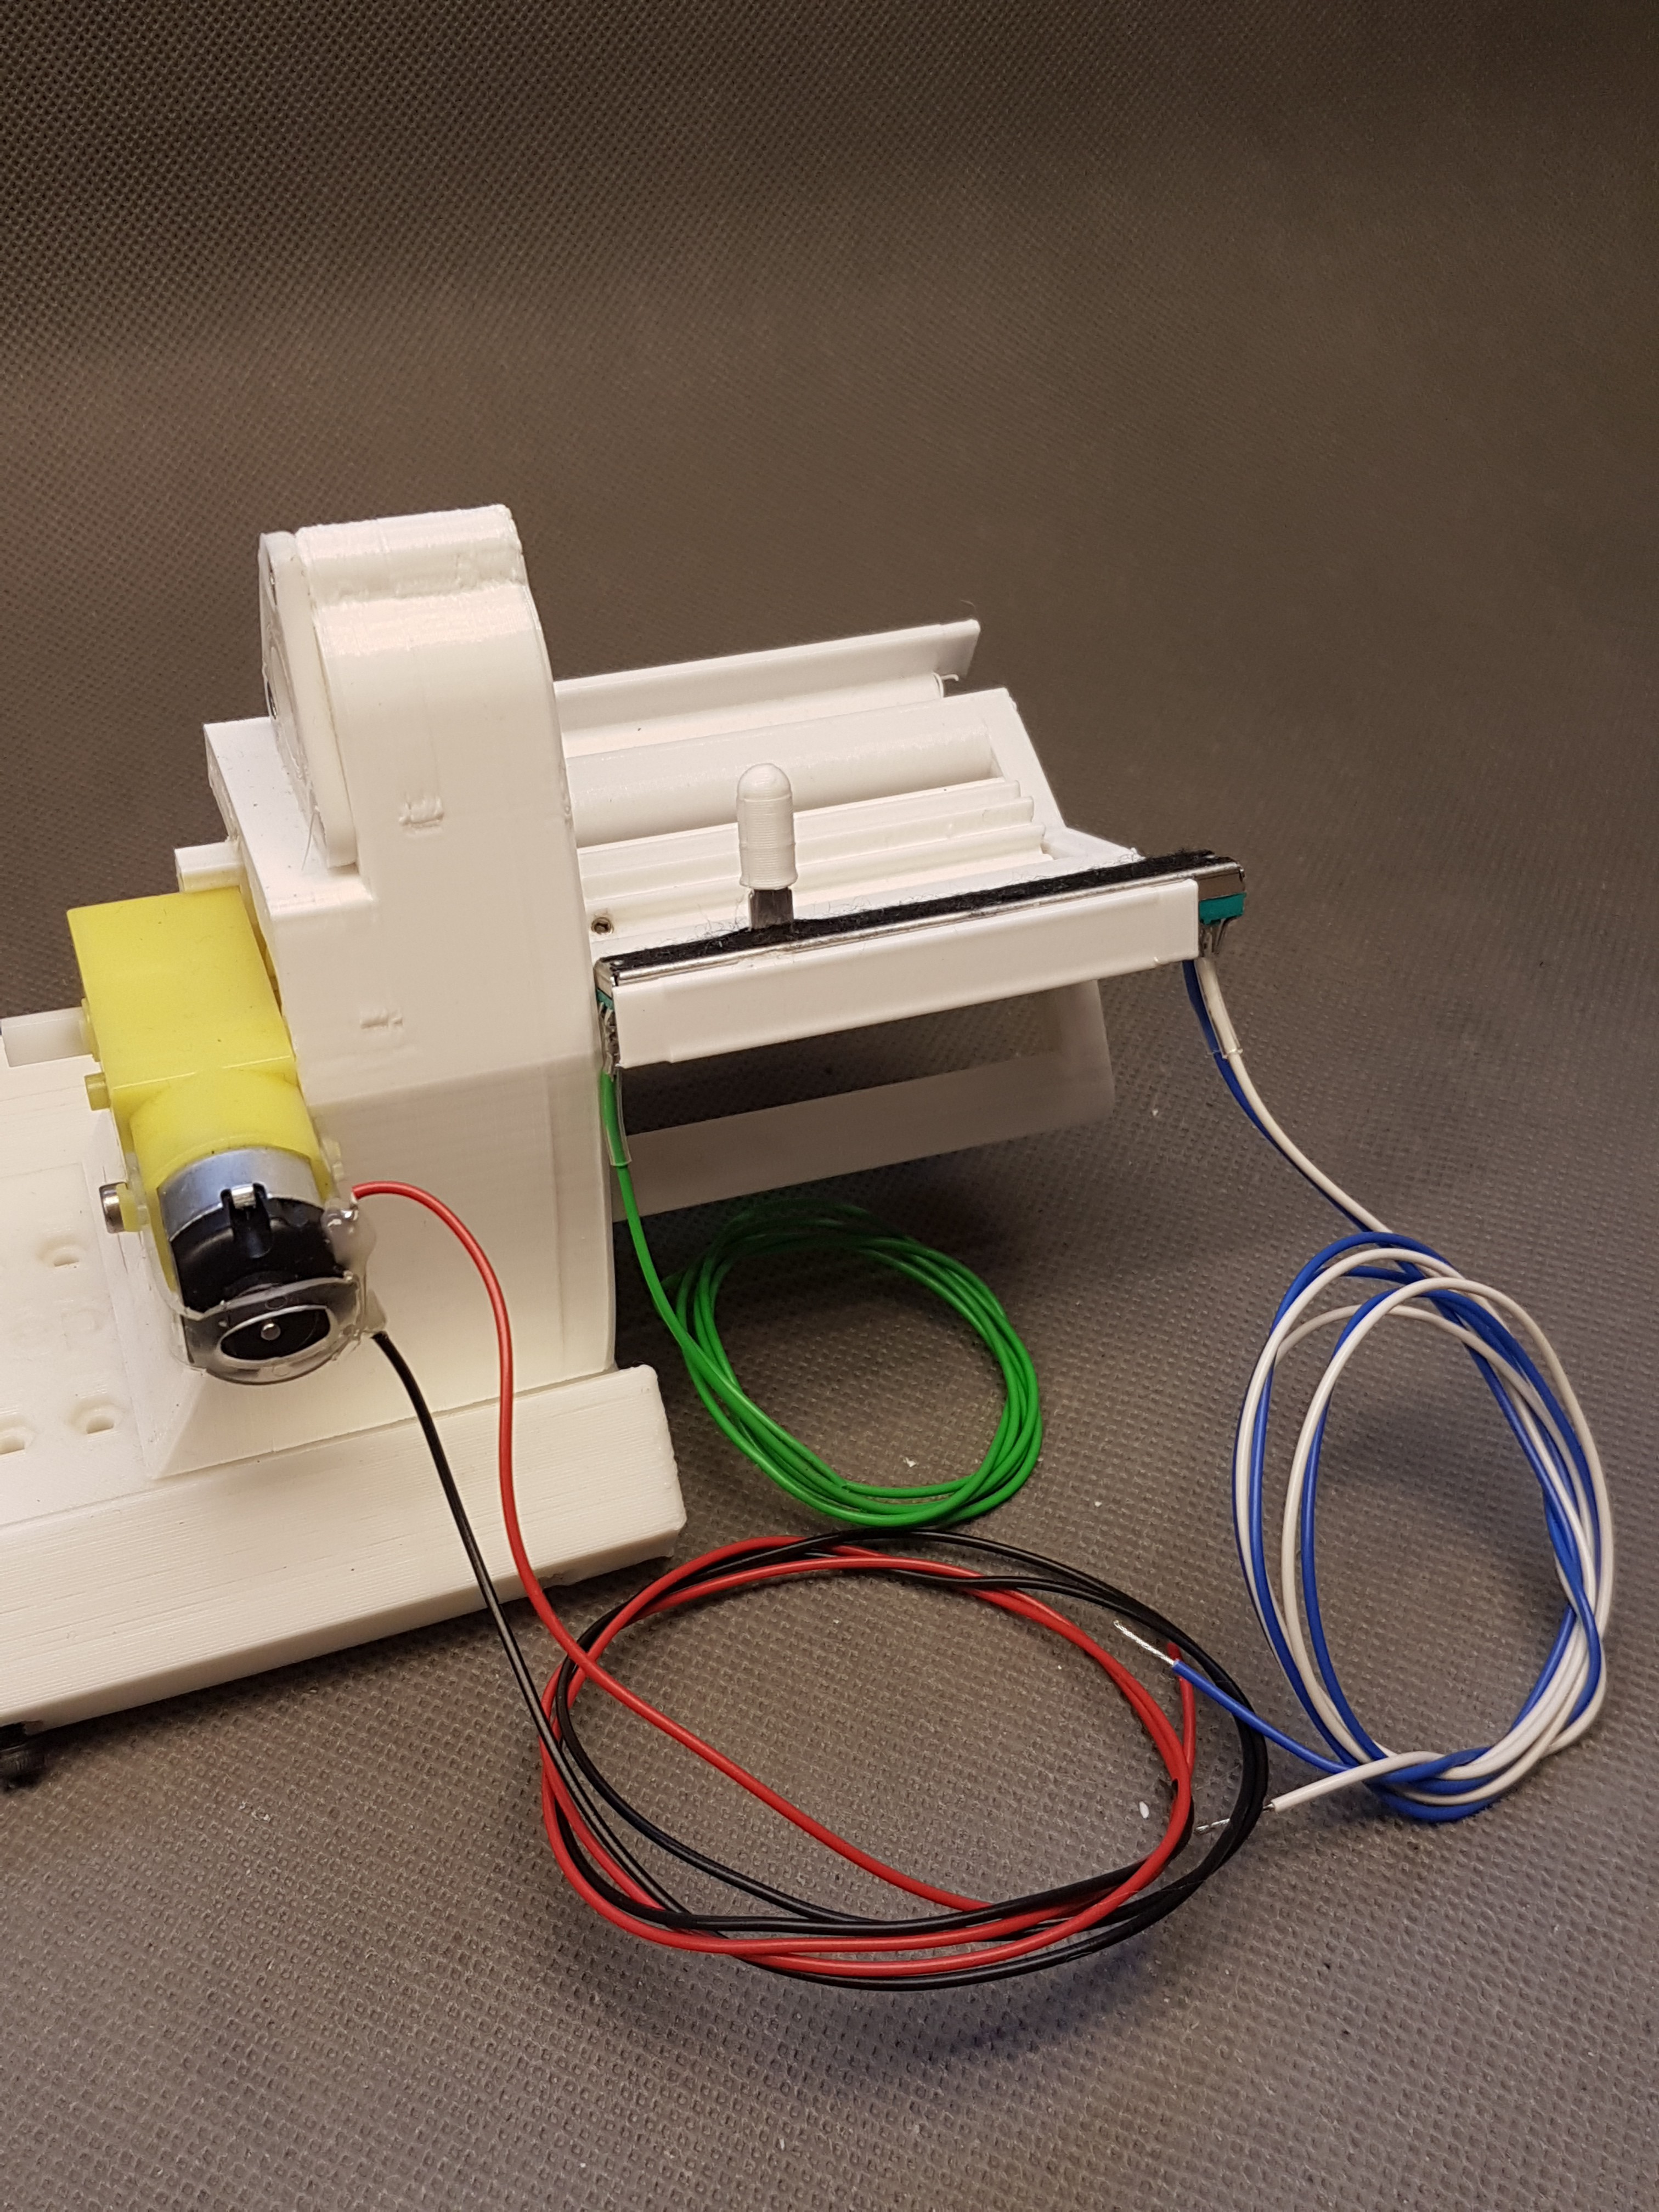
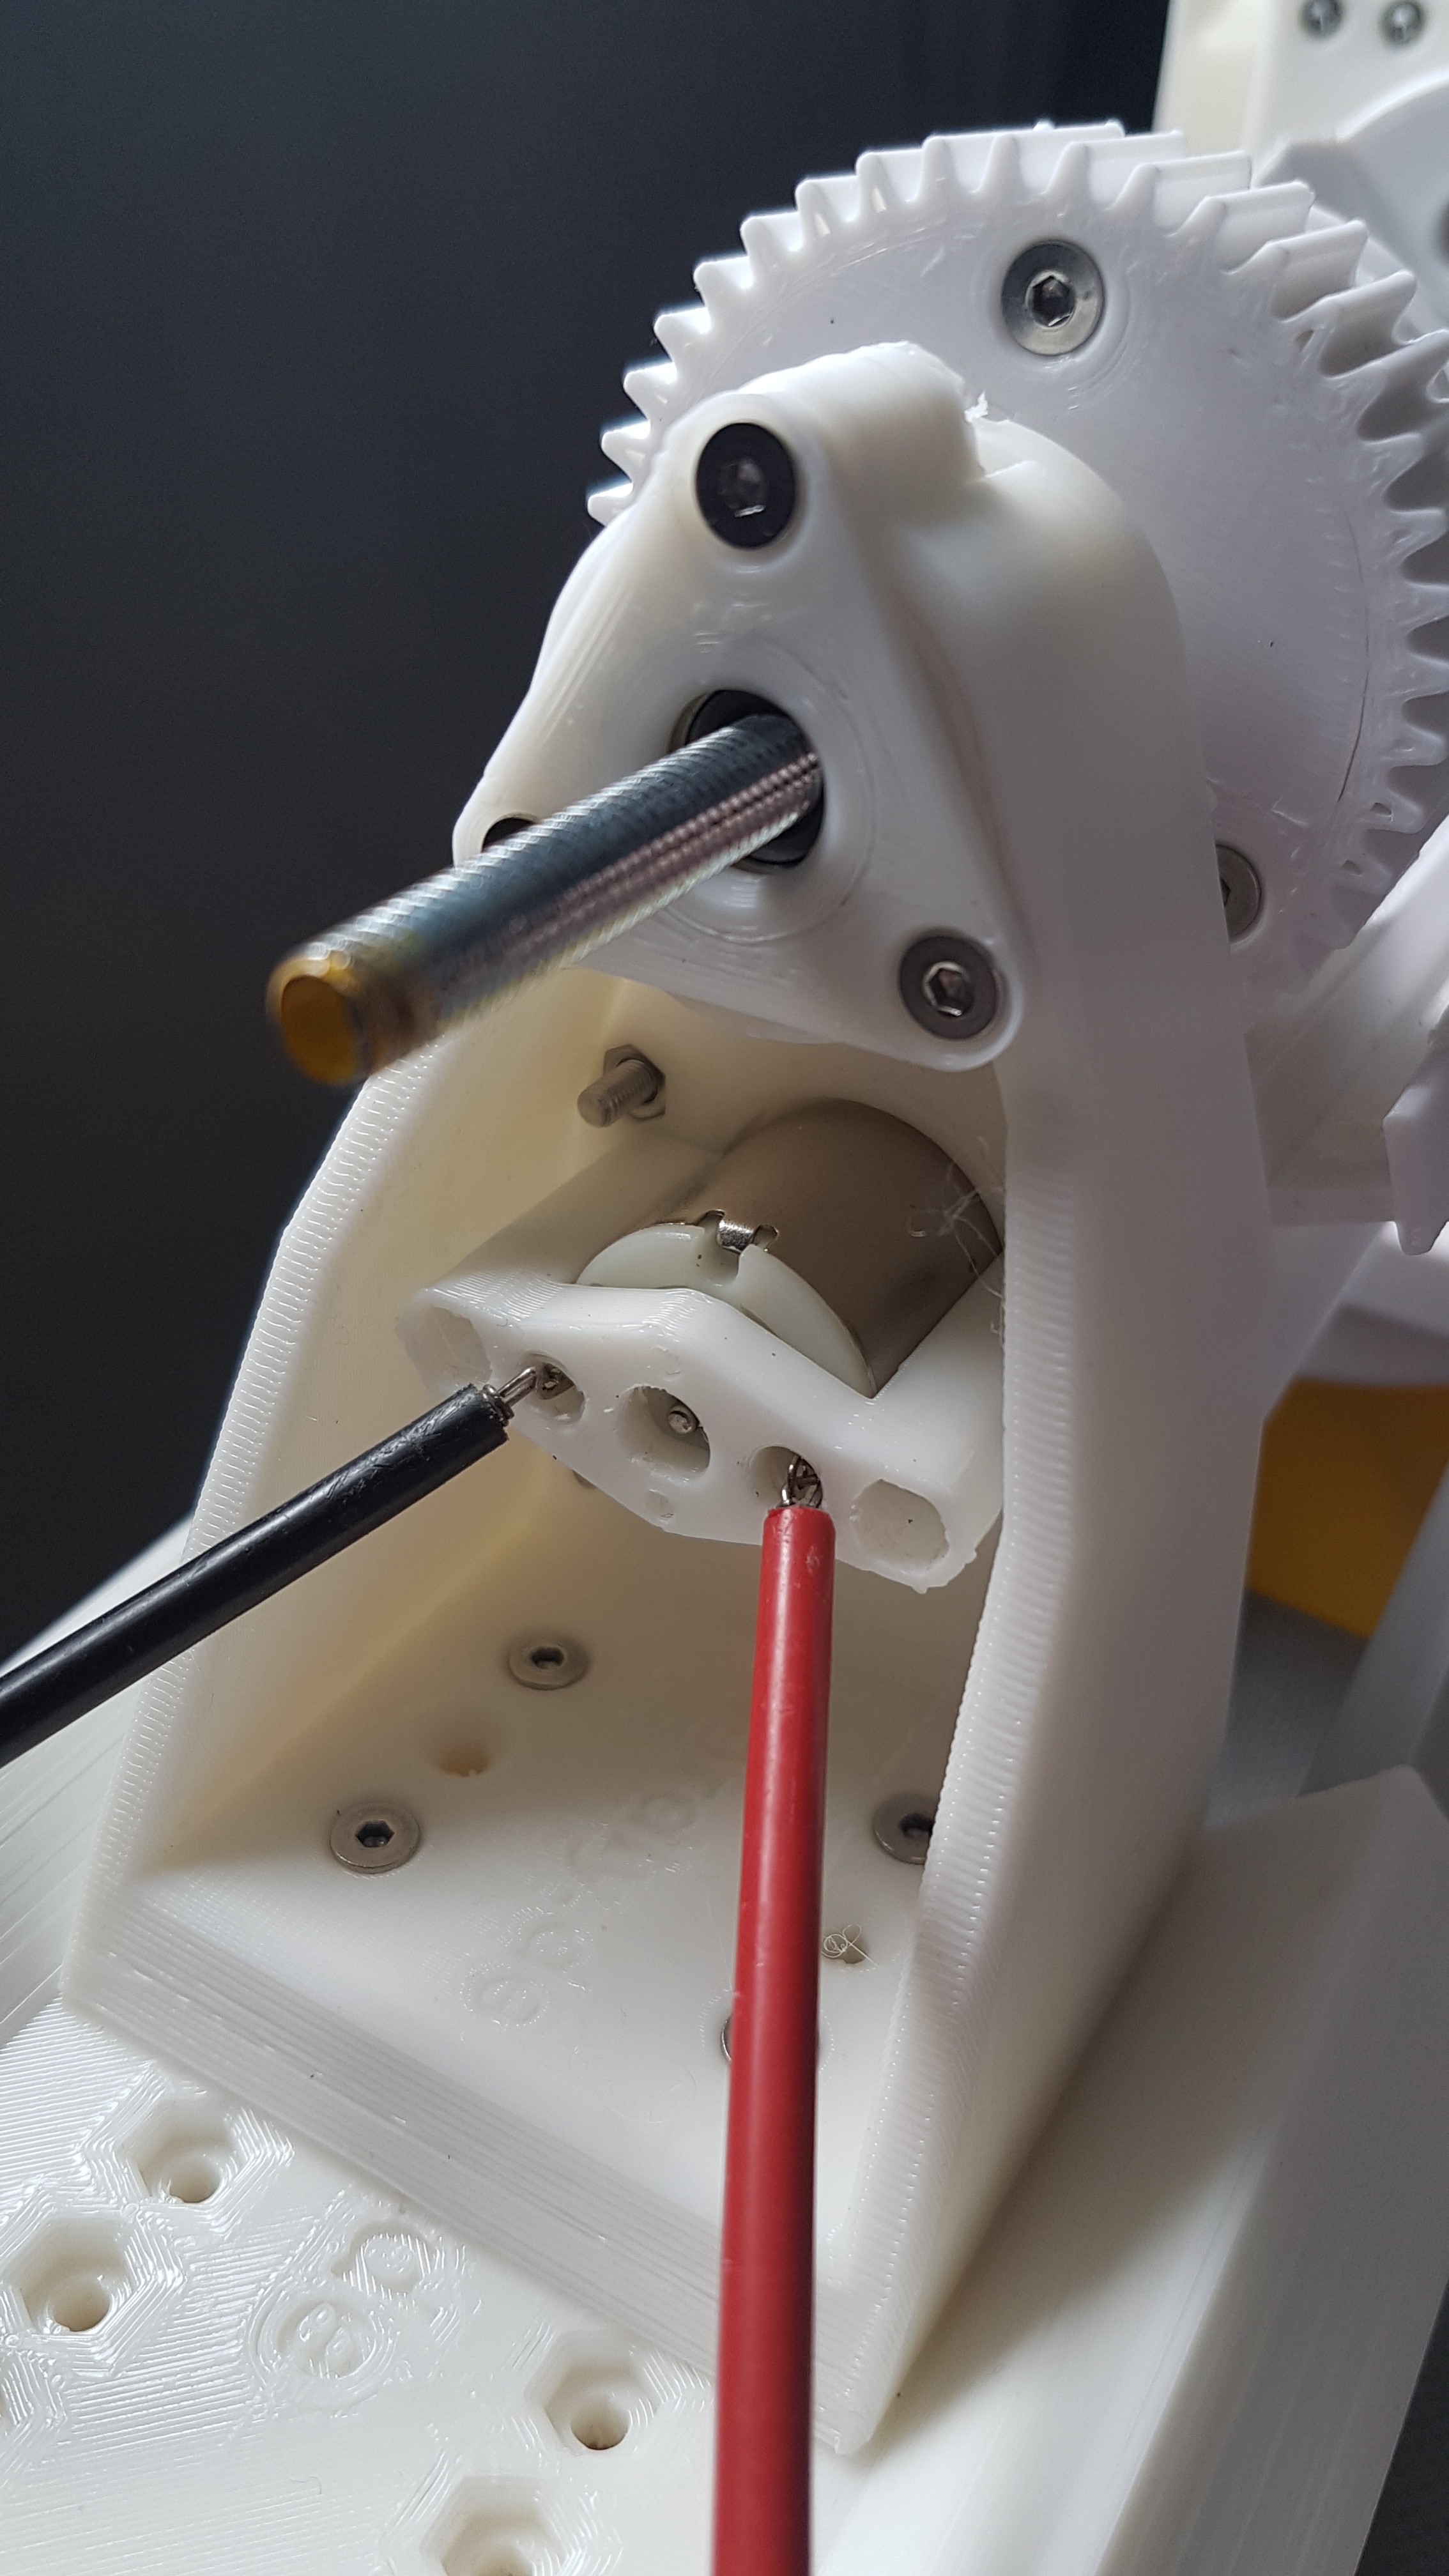
In the picture you can see that I did not notice that the vertically aligned motor would collide with the threaded rod when it was moved.
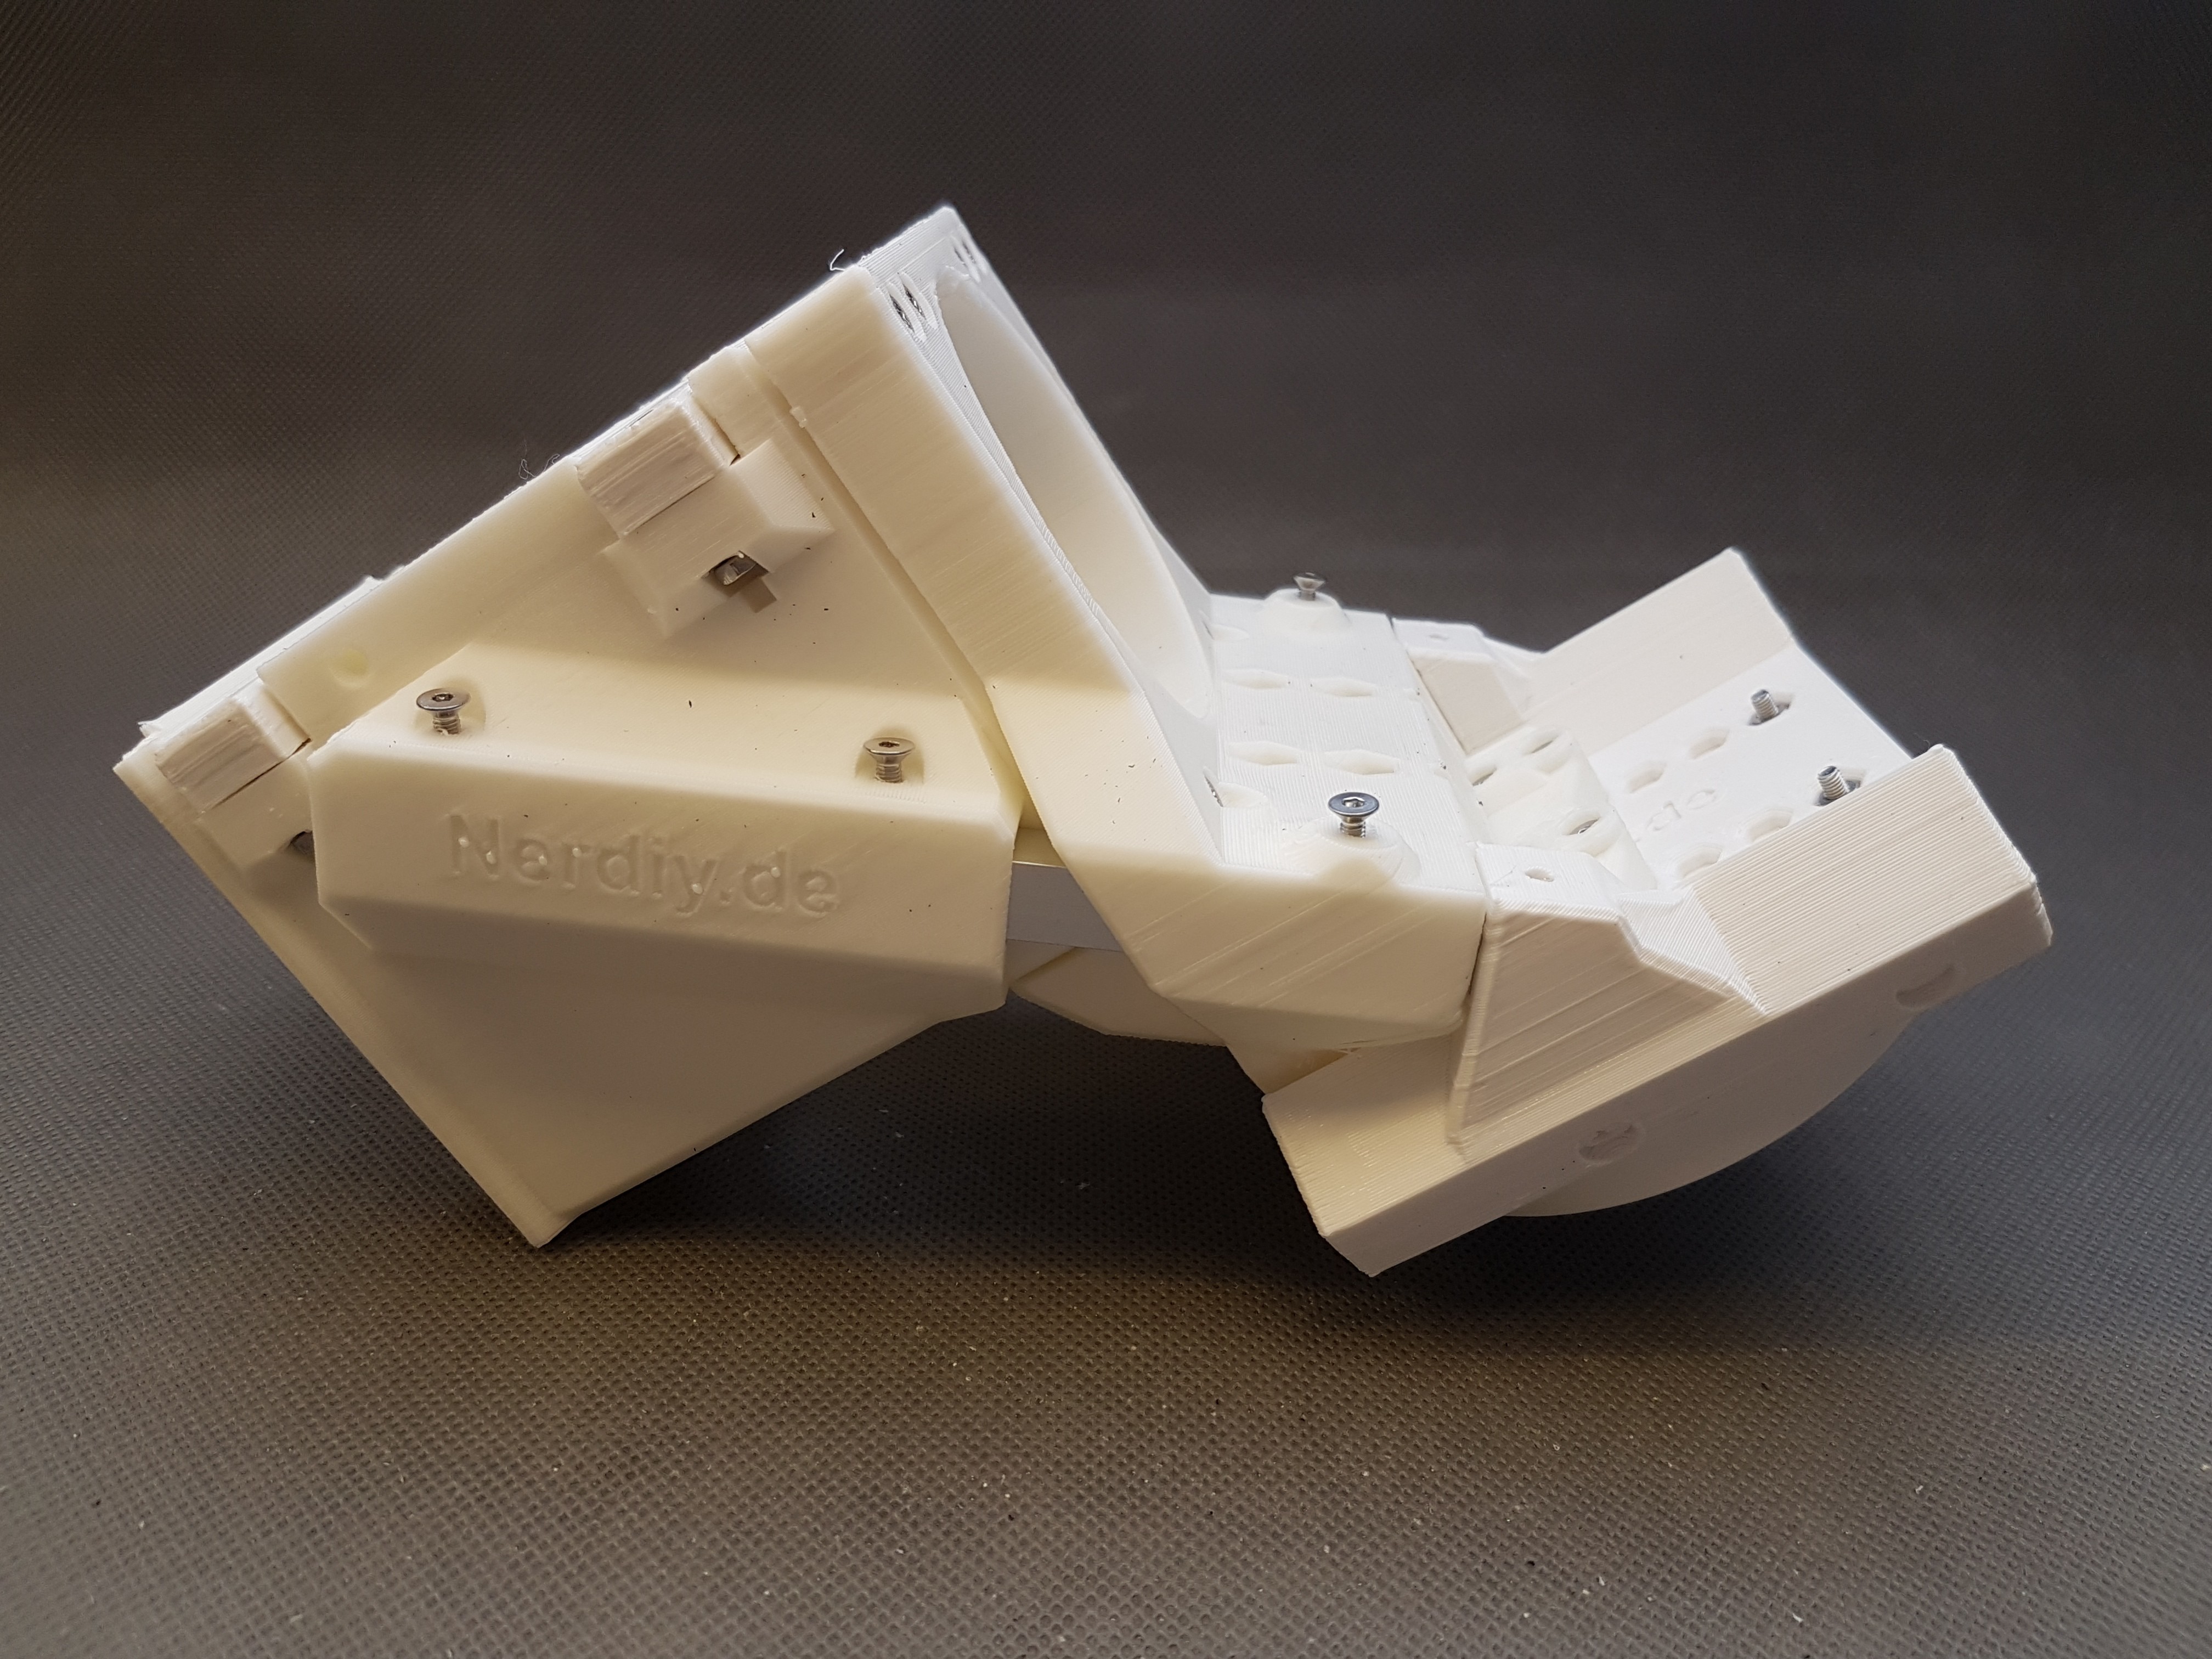
So...Pitch actuator Mark 4
For the Pitch Actuator Mark 4, I basically just turned the gear motor by 90 degrees. Photos and videos will follow. :)
-
A couple of mind games: What could you do with a "WinDIY hotspot"?
07/20/2020 at 13:48 • 0 commentsYesterday I started designing the board for the Nerdiskerator-controller (See my thoughts about that here: https://hackaday.io/project/172445/log/181068-start-of-development-of-the-nerdiskerator-controller).
During this I also provided a slot for a micro SD card, for example to be able to save log files on it. It occurred to me that it is somehow a shame to use this SD card only to stuff it with .csv files. Especially if the development of WinDIY is largely completed, this SD card slot would be largely useless.
So I got the idea that WinDIY could not only be used to provide energy.
With the help of the SD card slot, WinDIY could also be used to provide information locally and independently of other infrastructure.
Since I plan to use an ESP32 as the heart of the controller, WiFi functionality is already available anyway.
It would therefore be easy to install a web portal in the controller firmware that enables information to be uploaded and downloaded to the built-in SD card via WiFi.
Because the wind turbine should be installed at a high location/pile, WiFi reception would be good.
A couple of usecases I have in mind are the following:- If WinDIY is used in disaster regions where communication has broken down, information could be disseminated in this way. For example, rules of conduct, survival tips, repair instructions and more.
- In isolated regions, information could be provided in this way that enables orientation. A WinDIY in Alaska could, for example, supply hikers who have strayed from the path with maps. Plus electricity for the possibly empty GPS or cell phone batteries. The information on the WinDIY hotspot could also include building instructions for a shelter or instructions for obtaining/treating drinking water. Also an overview of which local plants are edible (or not edible) would be helpful. Possibilities for making an emergency call could also be saved on it. If available, an emergency call via a Lora (relay) network could also be made in this way.
- In developing countries, the "WinDIY hotspot" (this could be the name of the function) could contain teaching materials that make teaching possible/easier for the people living around it. In this way information could be distributed free of charge (and internet connection).
- Of course, all information such as instructions, material lists and STL files would be included on the SD card in order to repair/maintain WinDIY or clone it.
In order to make it easier to read all this information, a manual consisting of pictograms and / or QR codes would be included at the base of WinDIY, which uses pictures to explain which information can be found here and, above all, how to get there.
What do you think about that? :)
WinDIY - HAWT Wind turbine
Mostly 3D printed HAWT windturbine incl. 3D printed disk-generator and brake system.