-
1Step 1
Modifying existing doorbell
As shown below, we took an existing Bell Push Transmitter; opened it up and removed all the internal electronics and the battery. We also cut out the interiors to free up the interior space. Then we connected Cricket Wi-Fi module to a battery and the tactile button. The button we glued on one side of the battery in the position that it can be pressed from the casing button. Then we wrapped it up and put into the casing. As the battery fit tightly we didn't have to glue anything more. This is it!
NOTE: do not close the casing yet. You will need to press the built-in button on the Cricket to configure it.
![]()
Now let's configure it.
IFTTT setup with a "VoIP Calls" service
Steps to follow:
- Go to: https://ifttt.com/
- Login or register
- Click Create from User / Account menu (top right corner)
- Click + to create new source event
- Select Webhooks service
- Click Continue
- Click Receive a web request (on the left hand side)
- Create event name e.g. ring_my_phone
- The source event should be set-up now, click + after Then event
- Search VoIP Calls service
- Change Event Name to ring_my_phone
- Change Title accordingly e.g. Doorbell (the title is shown when a phone rings)
- Change Voice message to whatever you like e.g. Hey! Someone is at your doorstep!
- Click Finish
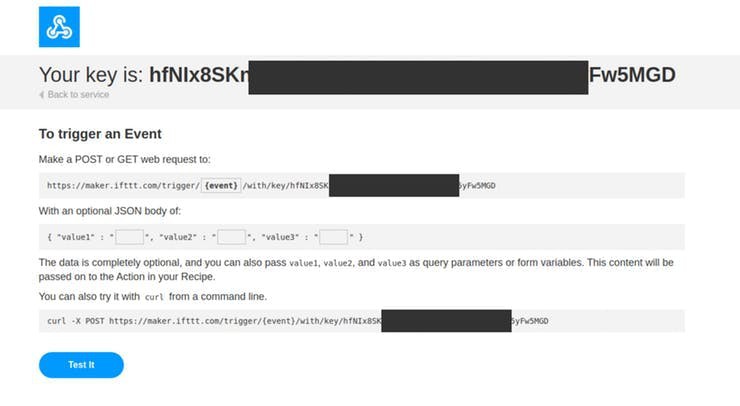
Almost there, now you need to get a HTTP address to which we can post events from the IoT module. Search for Webhooks service and click on the document in the right up corner.
![]()
Next copy web links under"Make a POST or GET web request to:" you will need it later.
![]()
Before we start using the device it needs to be configured in Developer Portal.
Please go to the next section.
Configure your device in Developer Portal
Open TOE Developer Portal from any browser either from PC or mobile. You must register/login to Developer Portal to configure the device in your account. Click "Add new" device to activate your device in the system. You need to use the unique serial number printed on a label stick on the back of Cricket.
Set the following configuration:
RTC: OFF
IO2: OFF
Battery monitor: OFF
Temperature Sensor: OFF
Force updates on - IO1 Wake Up: Yes
Force updates on - RTC Wake Up: No
Post Events: see below
Copy / paste the link we copied from Webhooks in io1_wakeup:
URL:
- replace https to http
- replace event to ring_my_phone
the link should look like this below:
http://maker.ifttt.com/trigger/ring_my_phone/with/key/{key}Do not forget to press the Save button.
We are almost there! We just need to connect our device to the internet over the Wi-Fi network.
Connect to Wi-Fi network (internet)
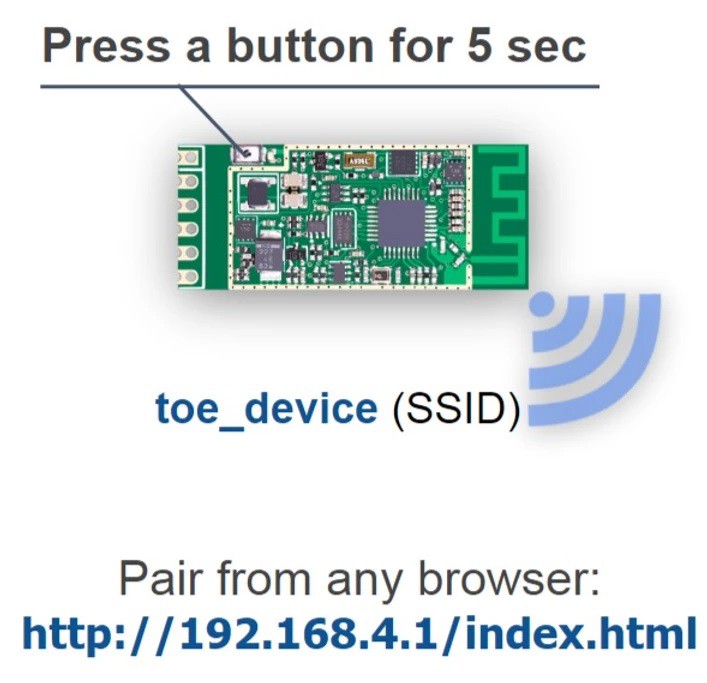
Press the button on the Cricket for 5 seconds until the LED is constantly lit. Then connect from any device with web browser capabilities (smartphone, laptop, ...) to toe_device Circket's private Wi-Fi network. Open http://192.168.4.1/index.html page and pass your Wi-Fi credentials. That's it.
![]()
More information how to provision Cricket with your Wi-Fi can be found in Cricket's IOT Developer Guide documentation.
Now your device is live and connected to the internet!
Fetch the configuration from Developer Portal
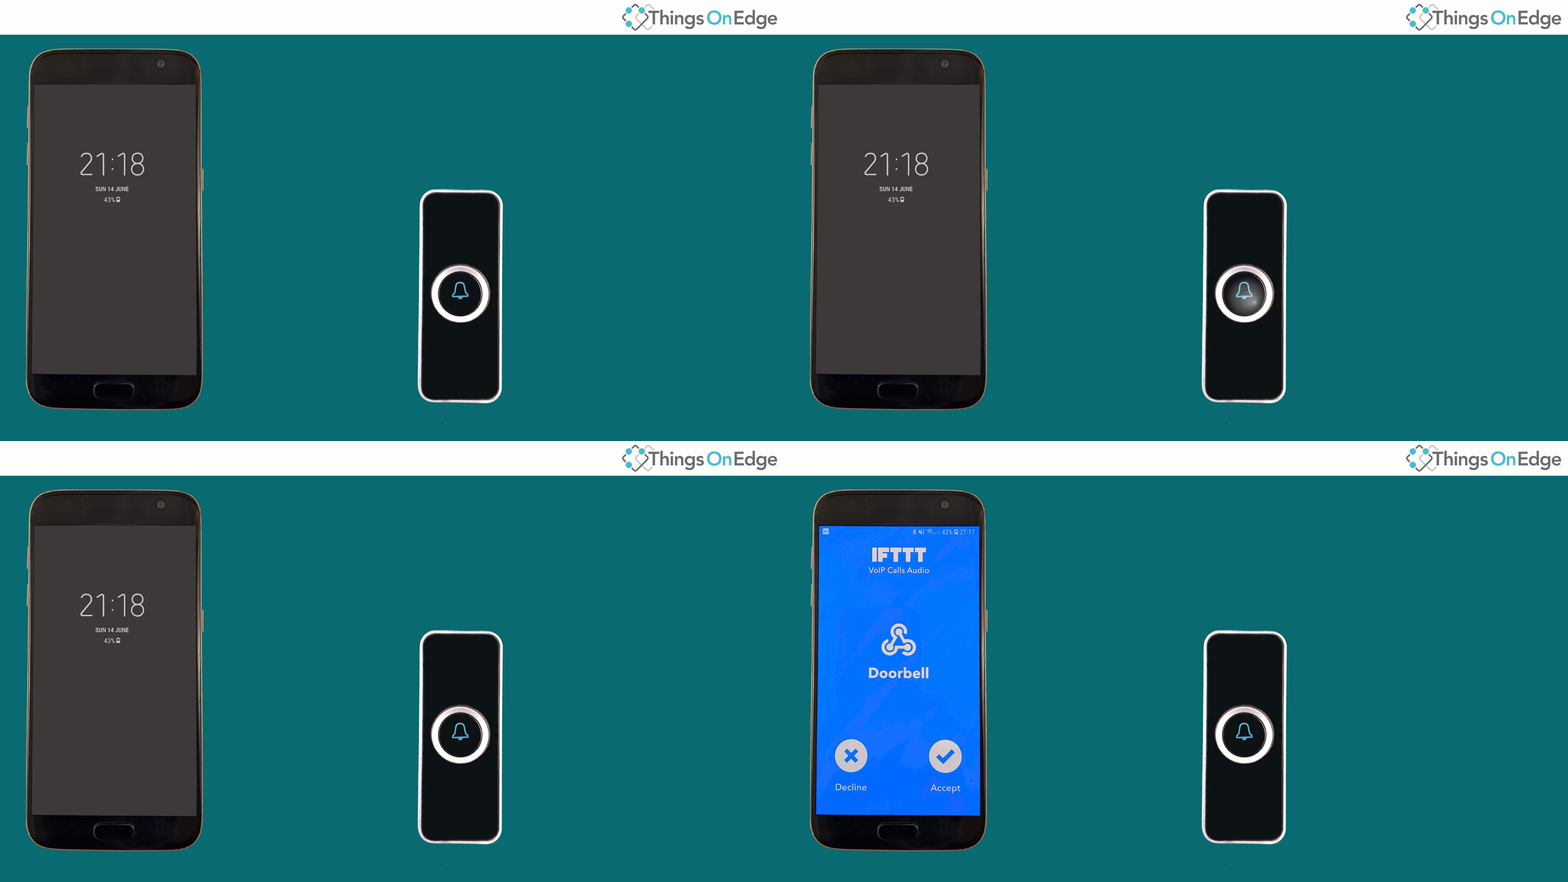
Just one more step. Press the built-in button on the Cricket for 1 second to fetch the configuration from Developer Portal. Now you are all set and you should keep calls on your phone when you press the doorbell button.
![]()
IOT Doorbell with a custom voice message
Convert a doorbell into IOT / WiFi. Get a call with custom voice messages instead of a chime. Stick it anywhere as it is battery powered.
 Sylwester


Discussions
Become a Hackaday.io Member
Create an account to leave a comment. Already have an account? Log In.
Feedback
We hope it was an enjoyable experience for you! If you have any feedback or suggestions, feel free to get in touch and help us improve the technology. If you like the project, please spread the word.
Thank you!
Are you sure? yes | no