-
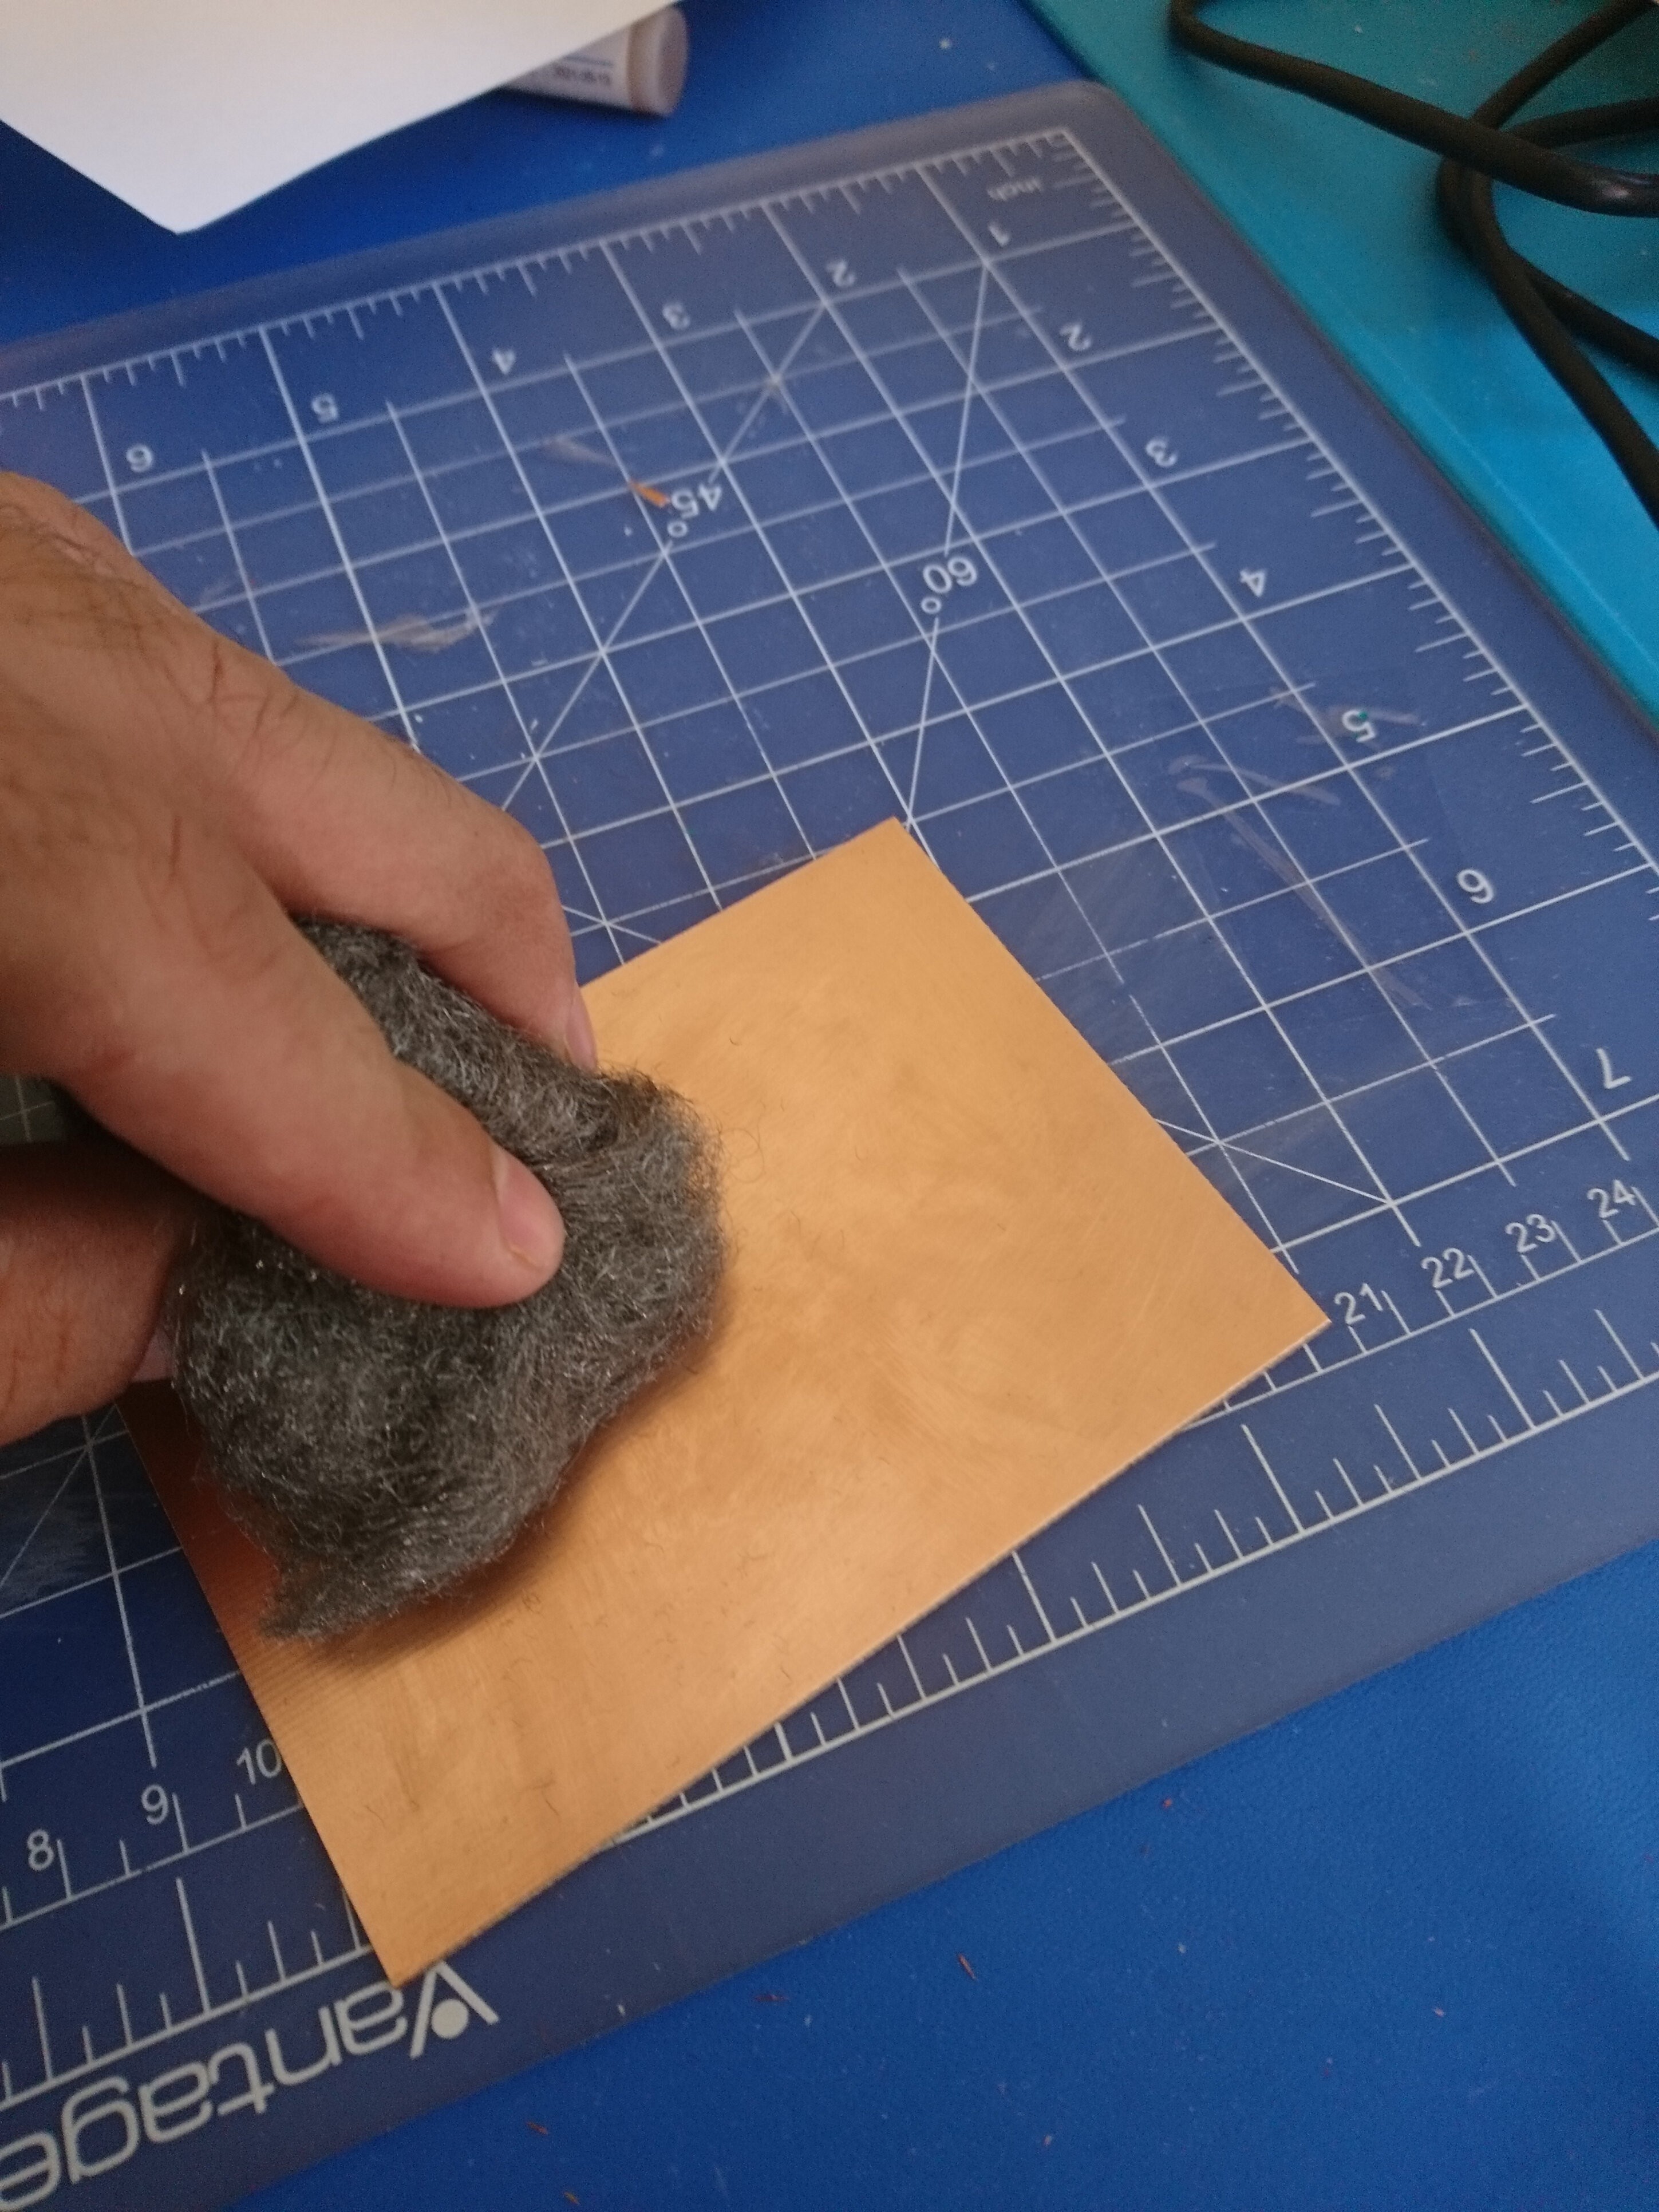
1Rub the copper clad with the steel wool very good
![]()
Rub the copper clad with the steel wool very good to help the toner ink stick to it.
-
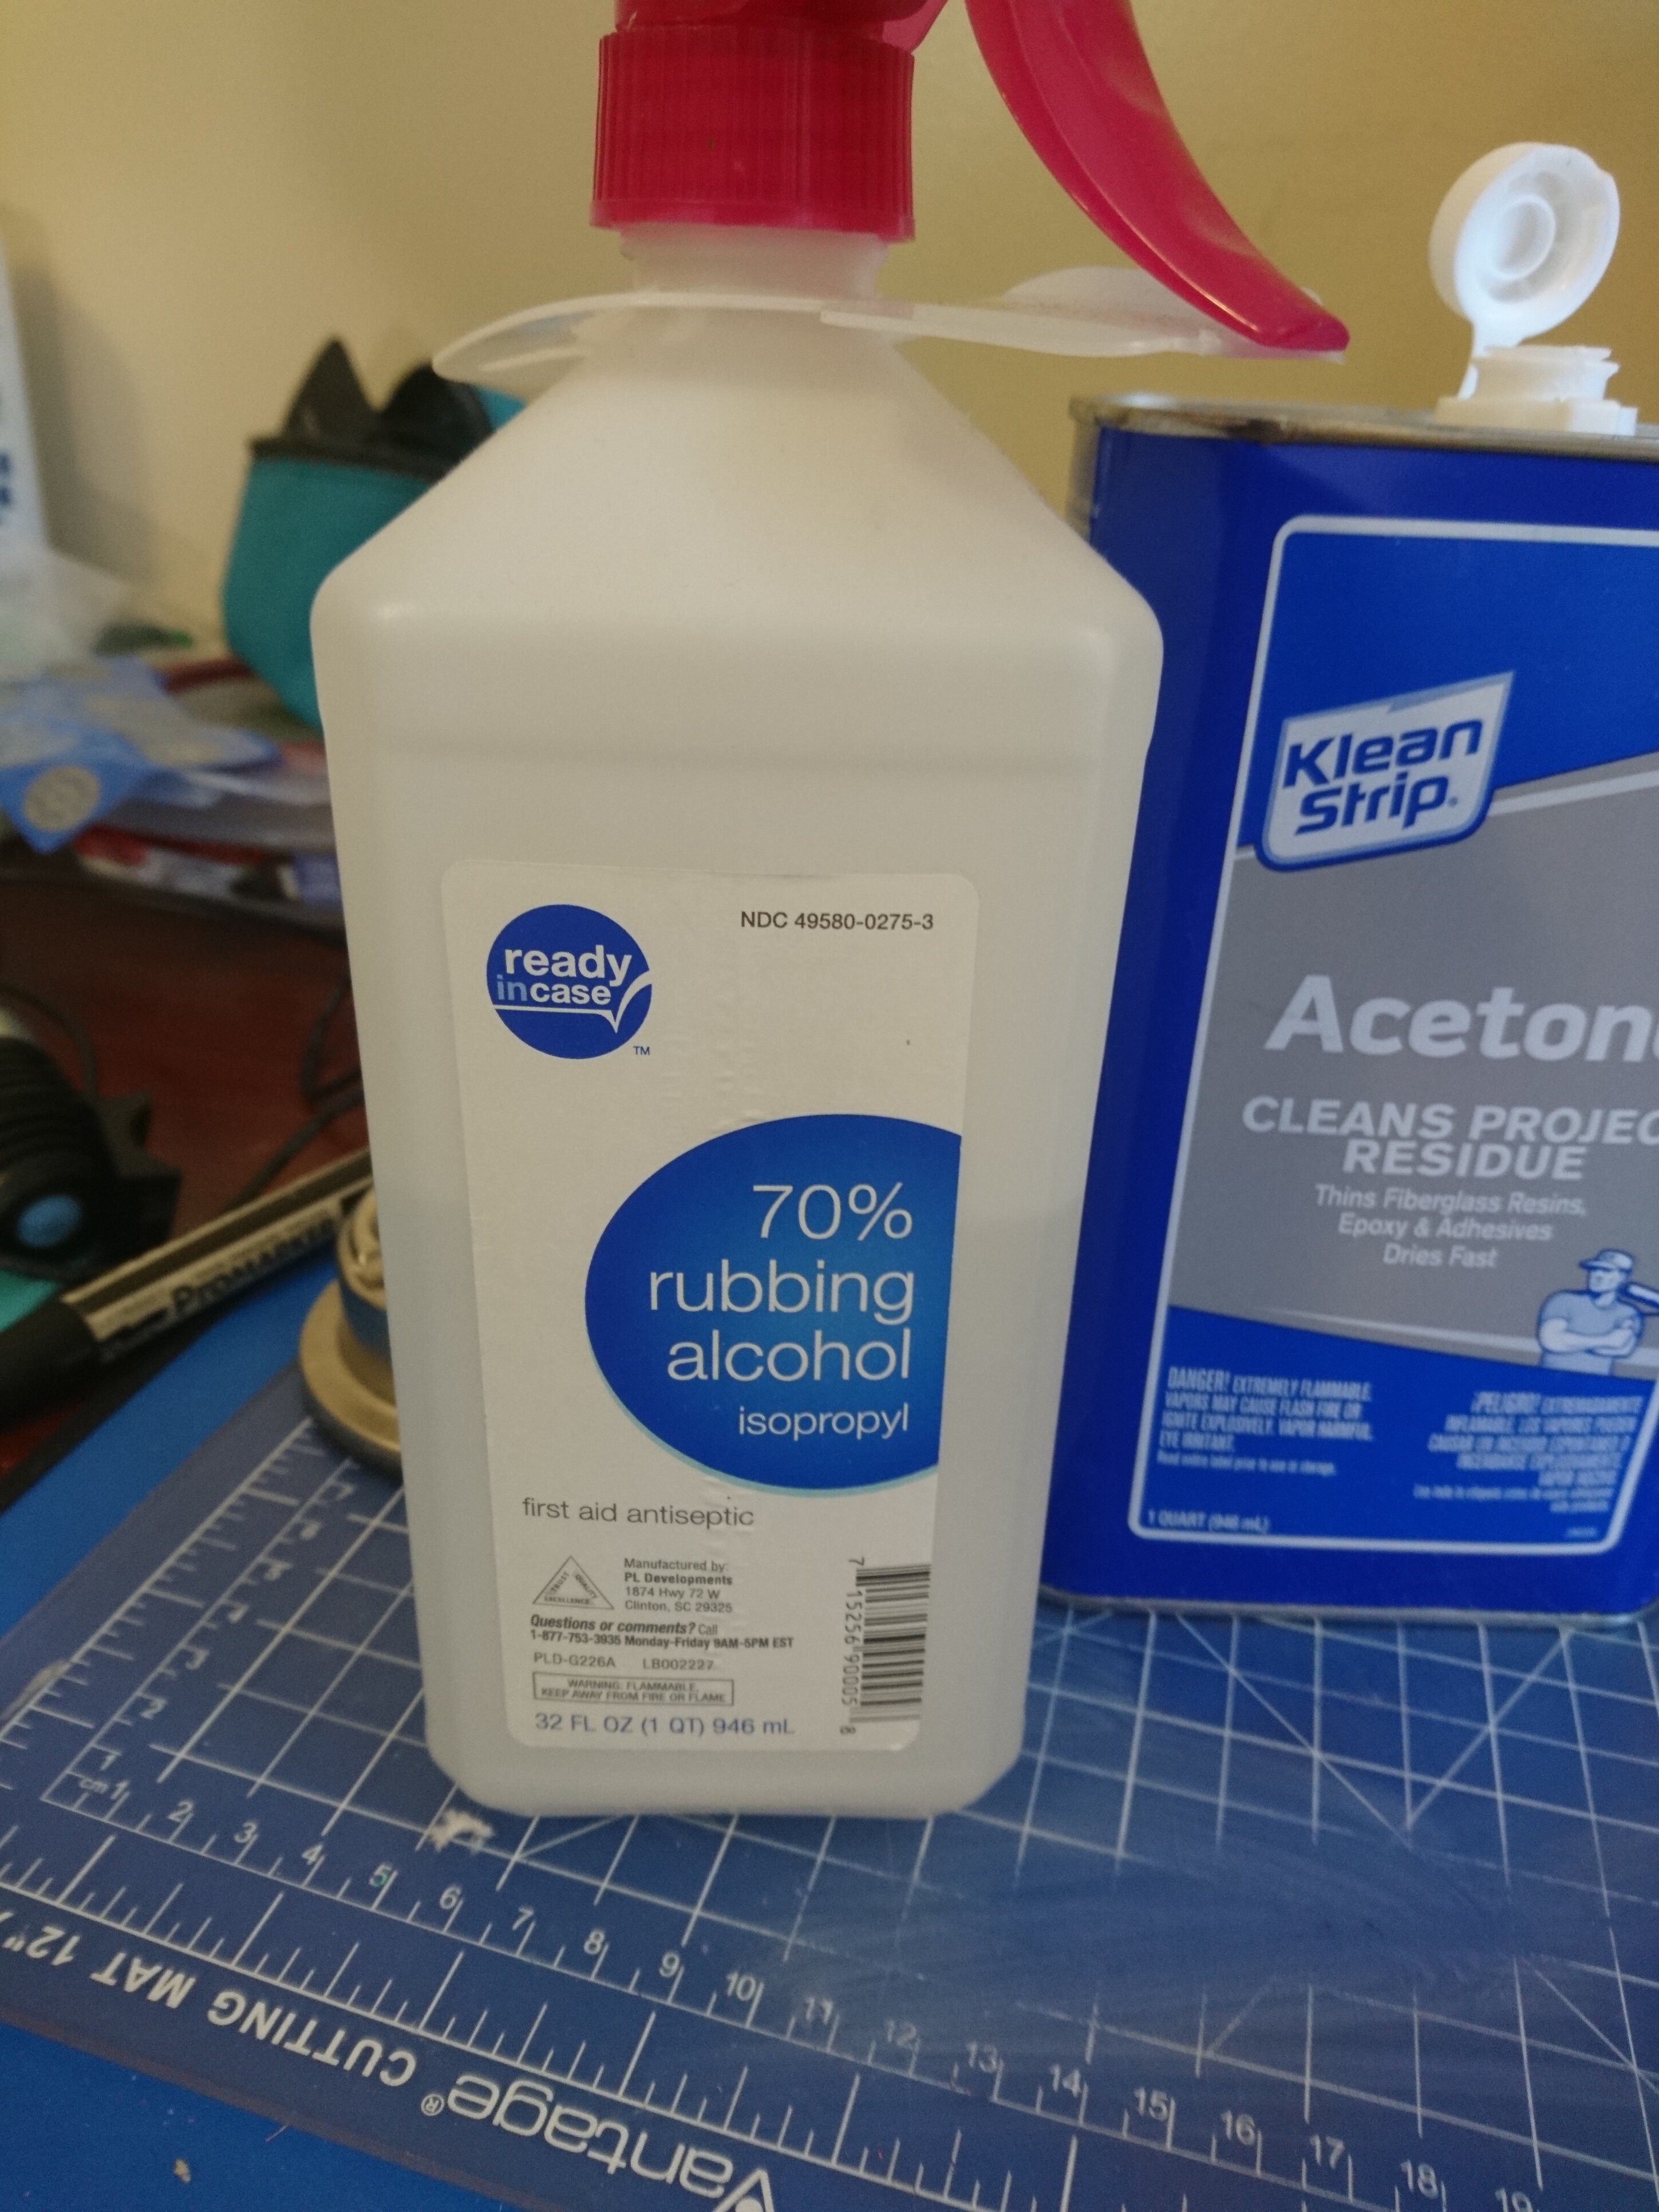
2Clean the copper clad from the dust, grease and oils
![]()
Clean the copper clad from the dust, grease and fats from your hands using acetone or alcohol and try not to touch it after you clean it.
-
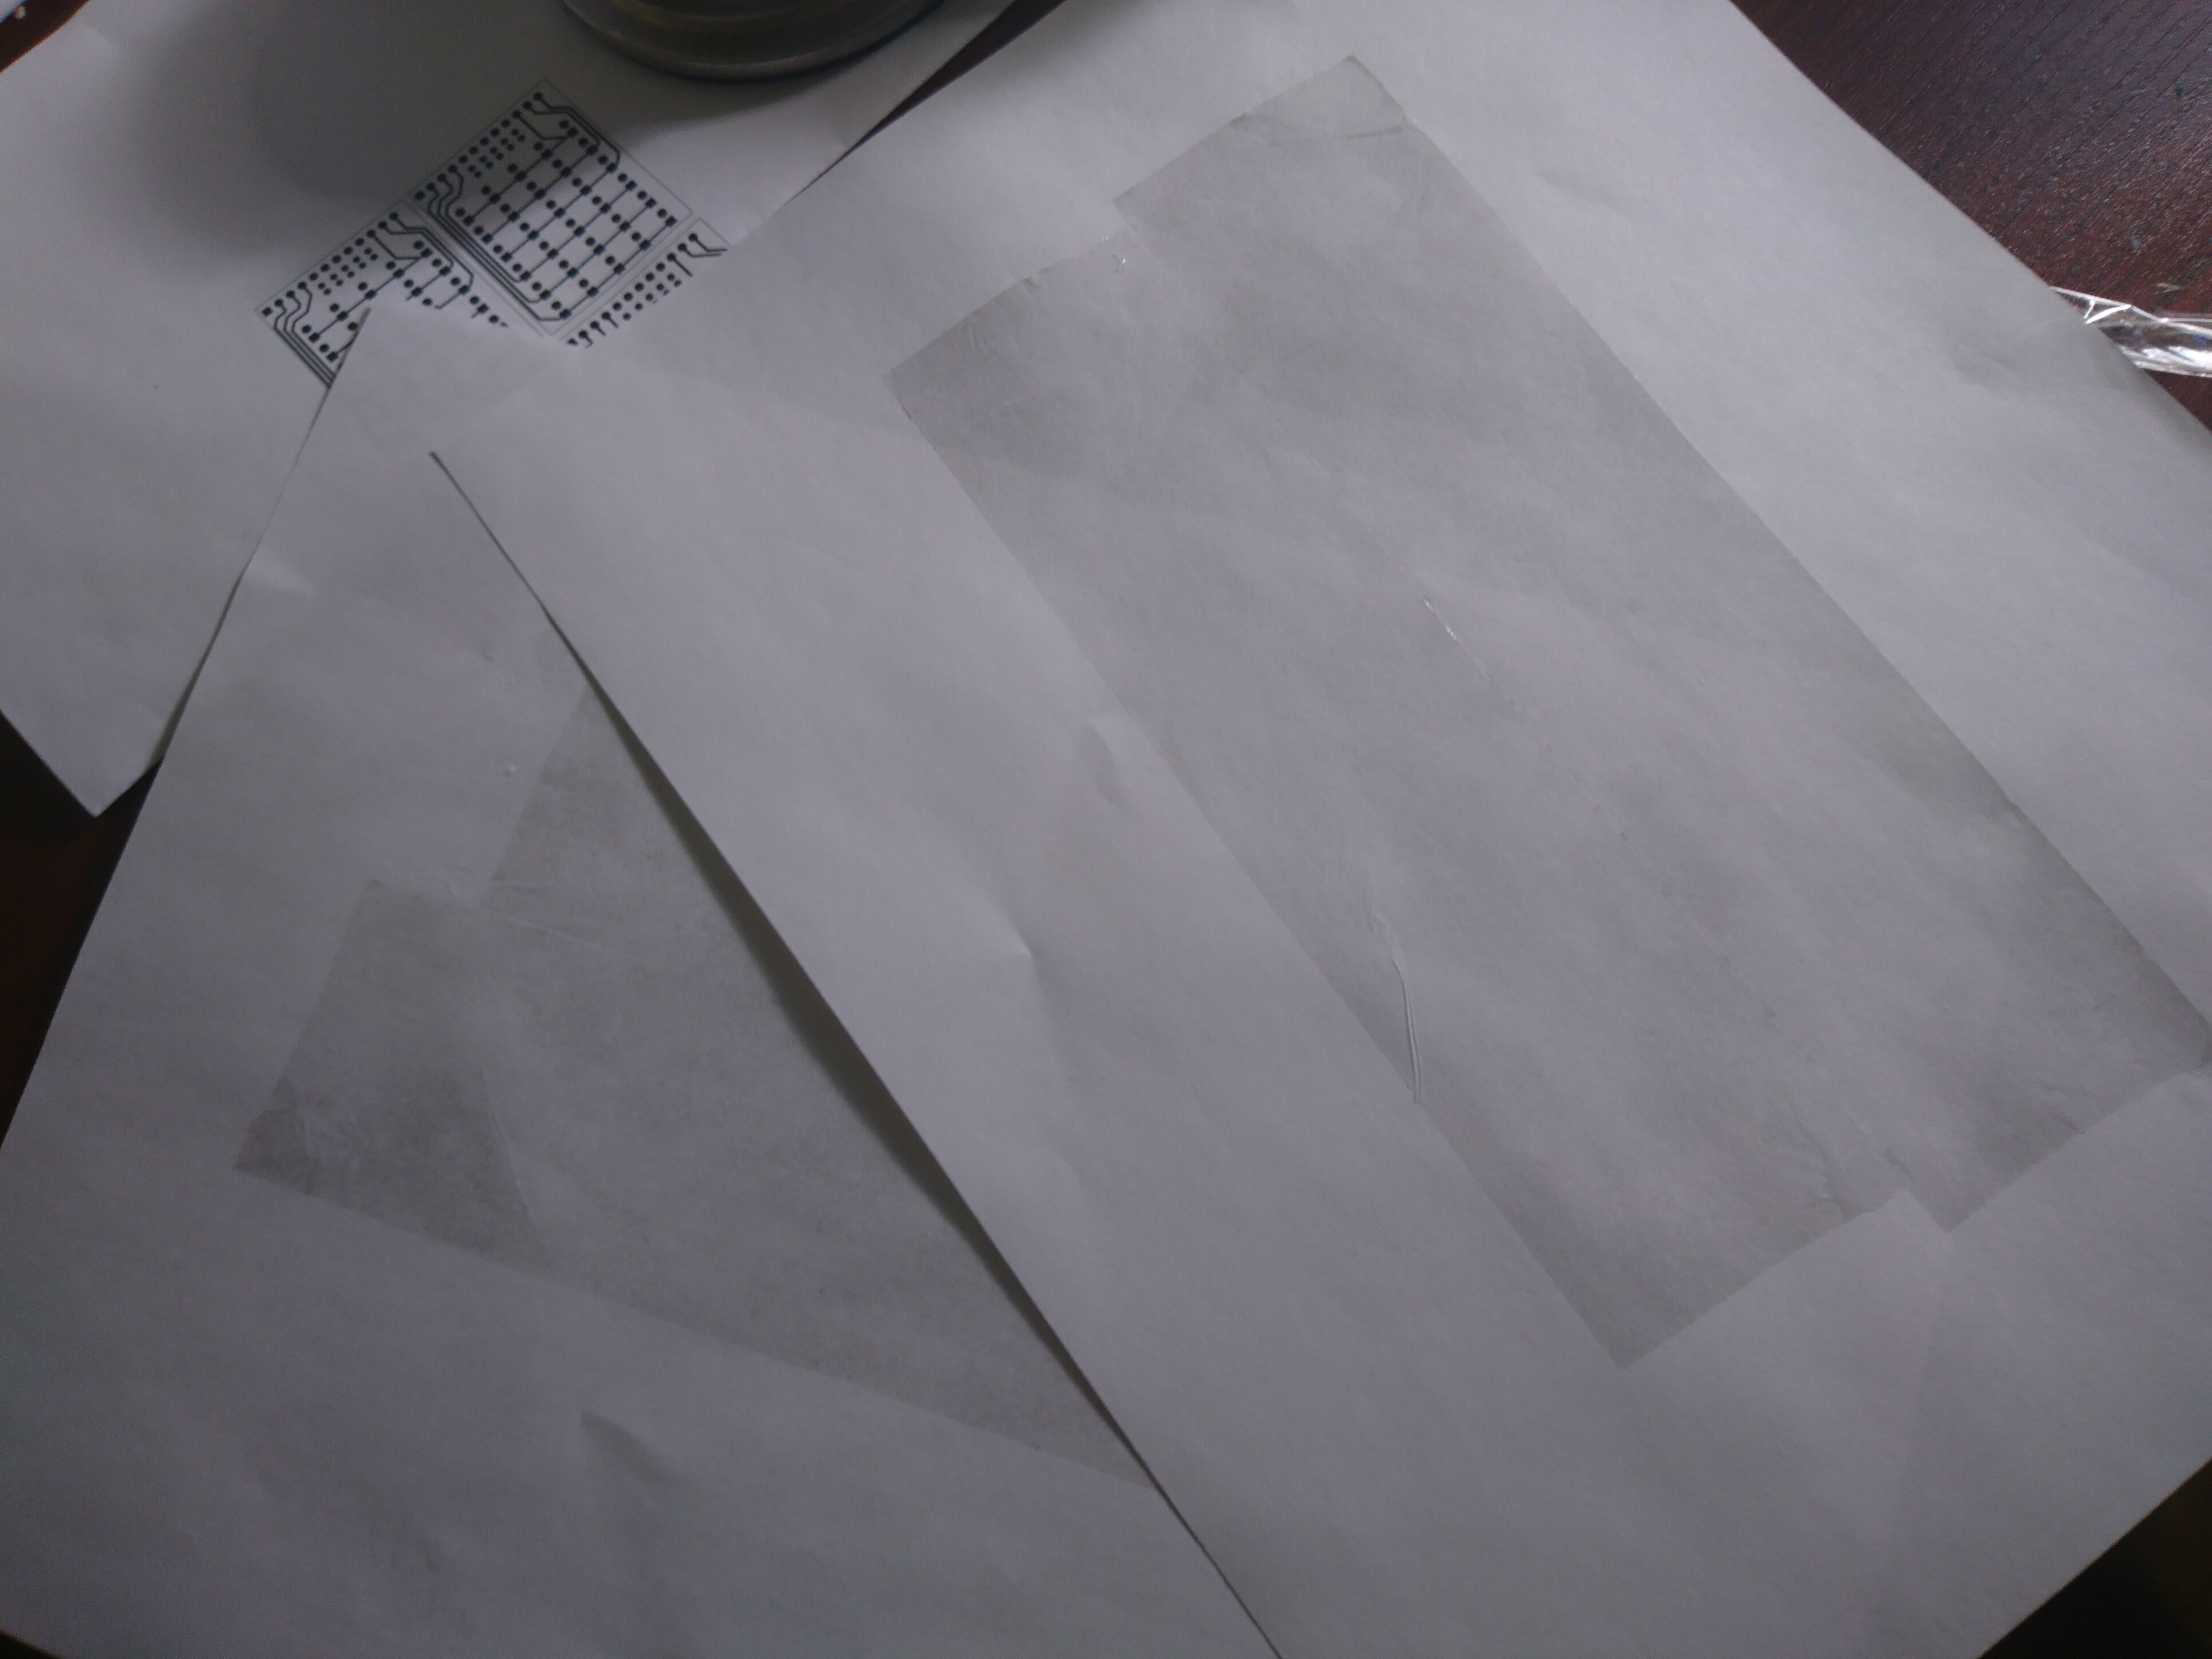
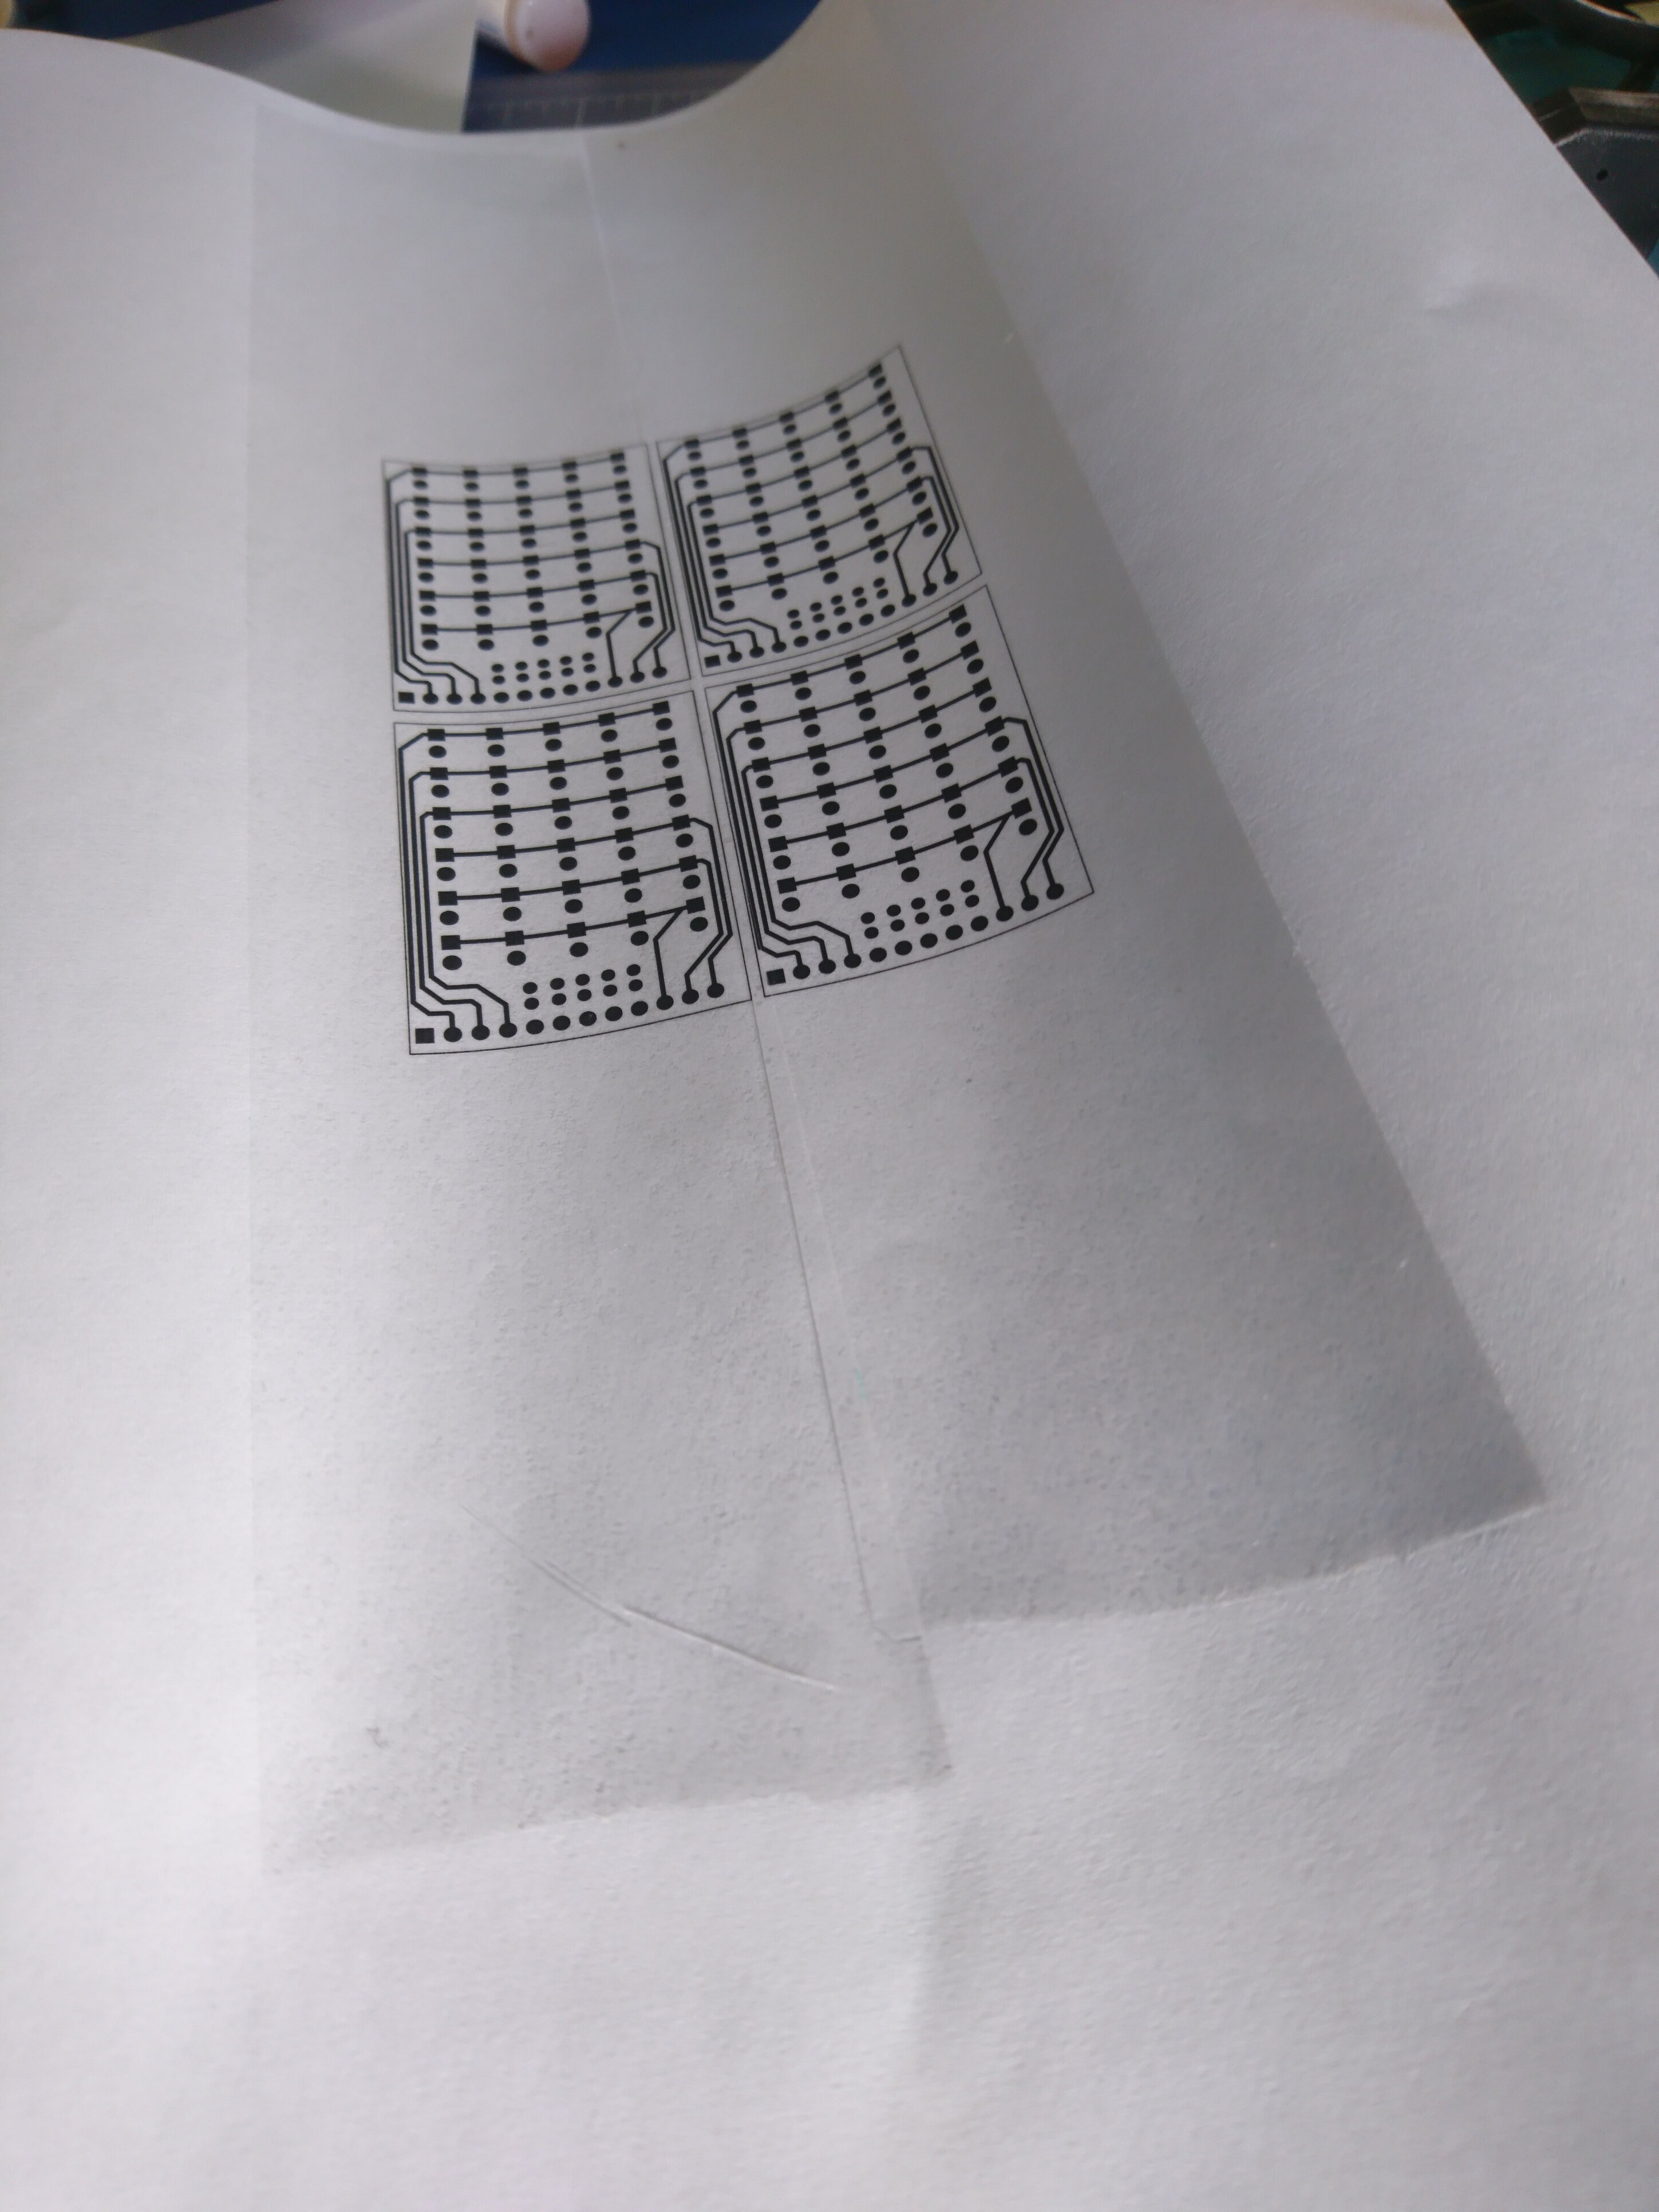
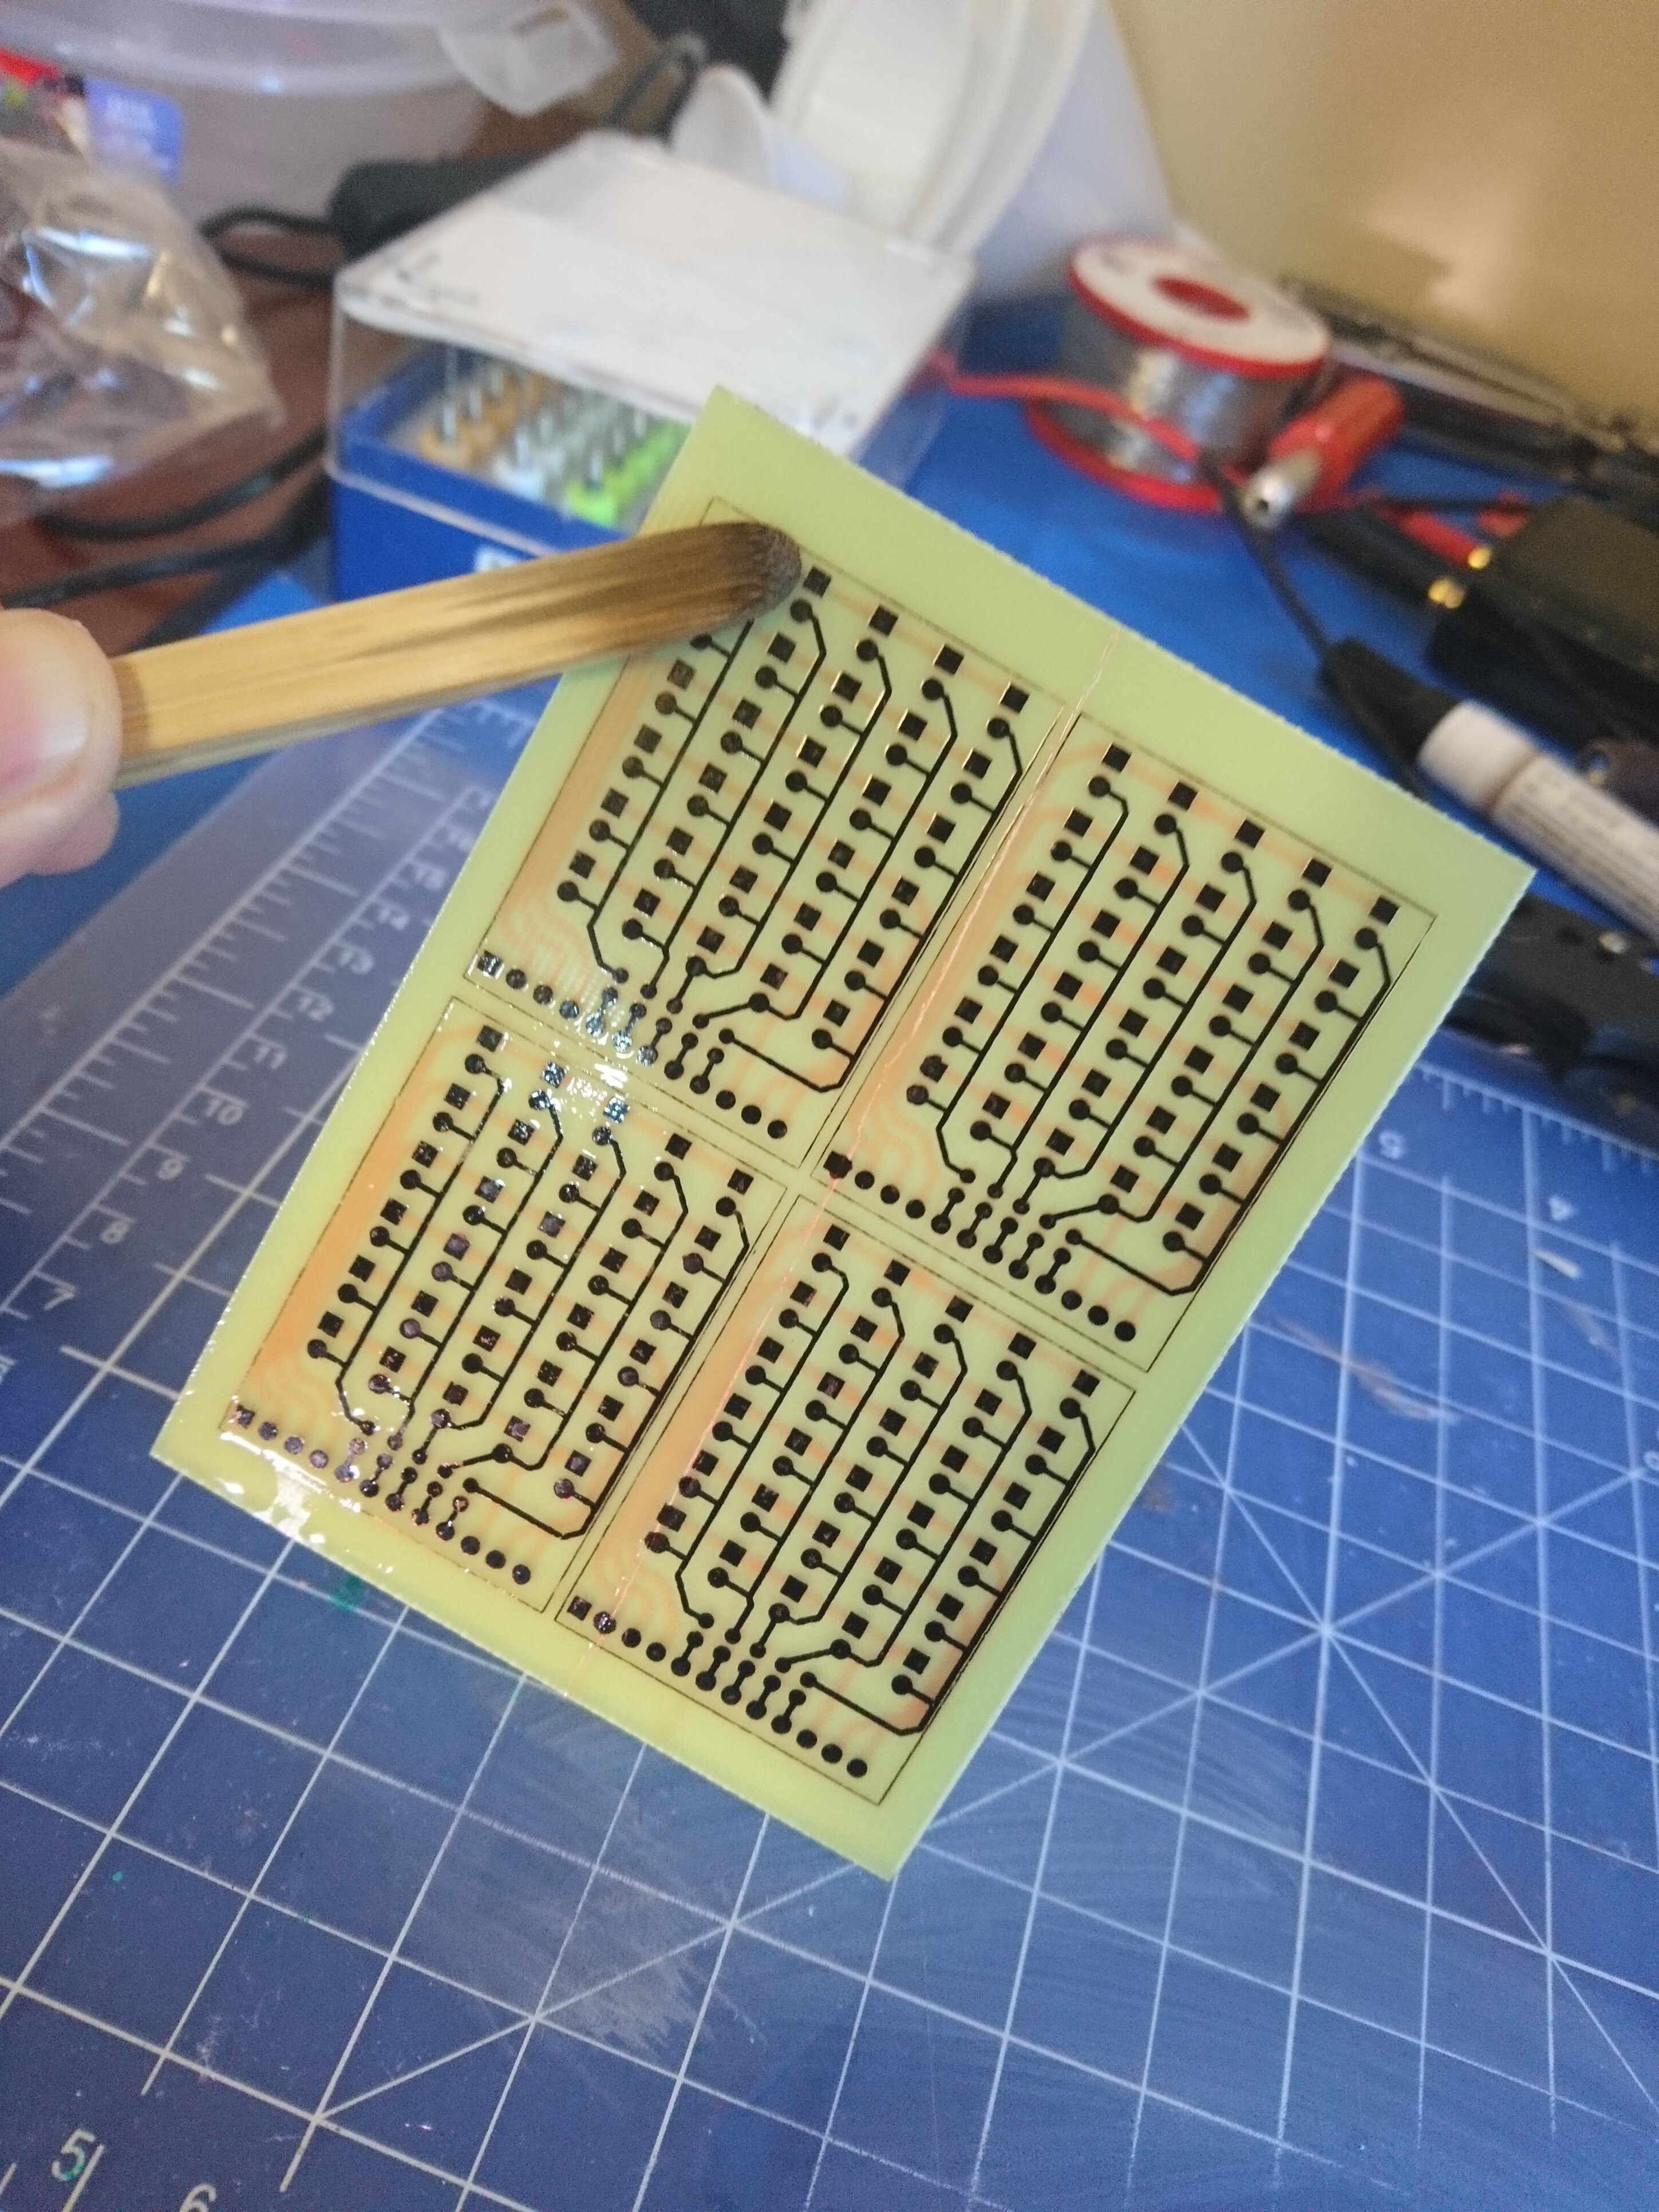
3Print the traces on a blank paper then use it to align the packaging tape on another blank paper.
![]()
![]()
Print the traces on a piece of paper using your favorite CAD program.
Then use it to align the packaging tape on another blank paper.
This is step is important and should be perfect. -
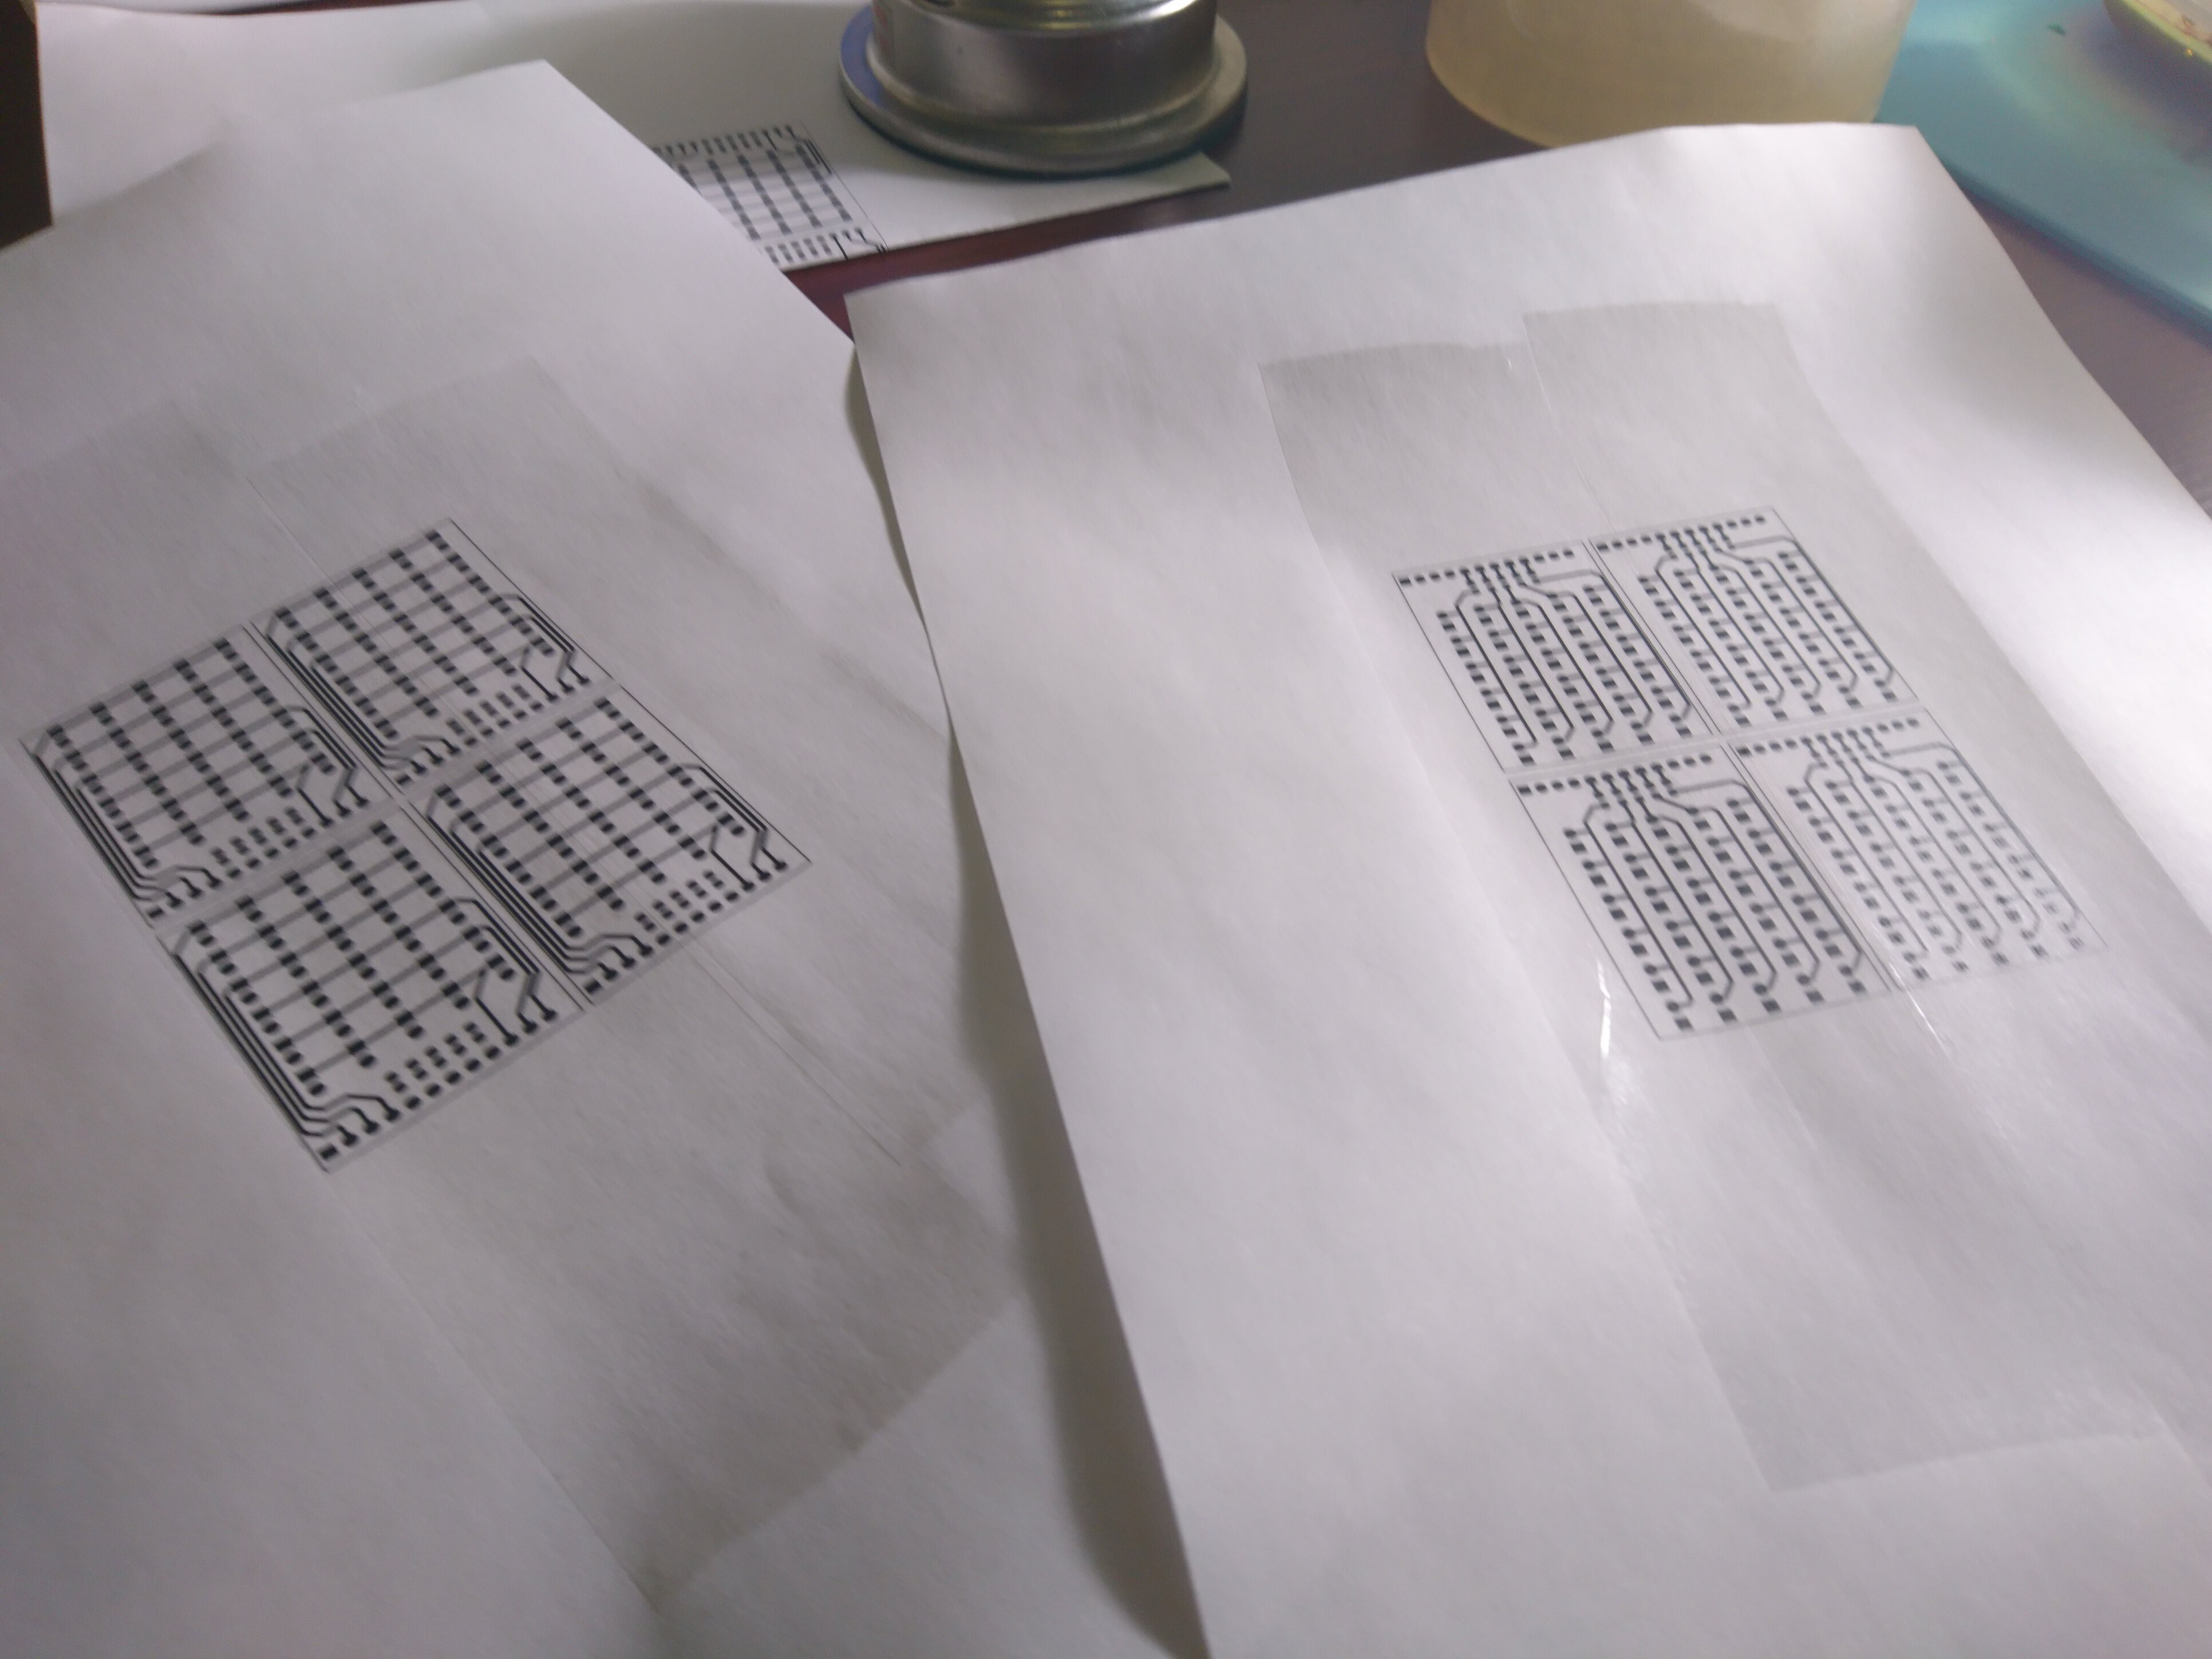
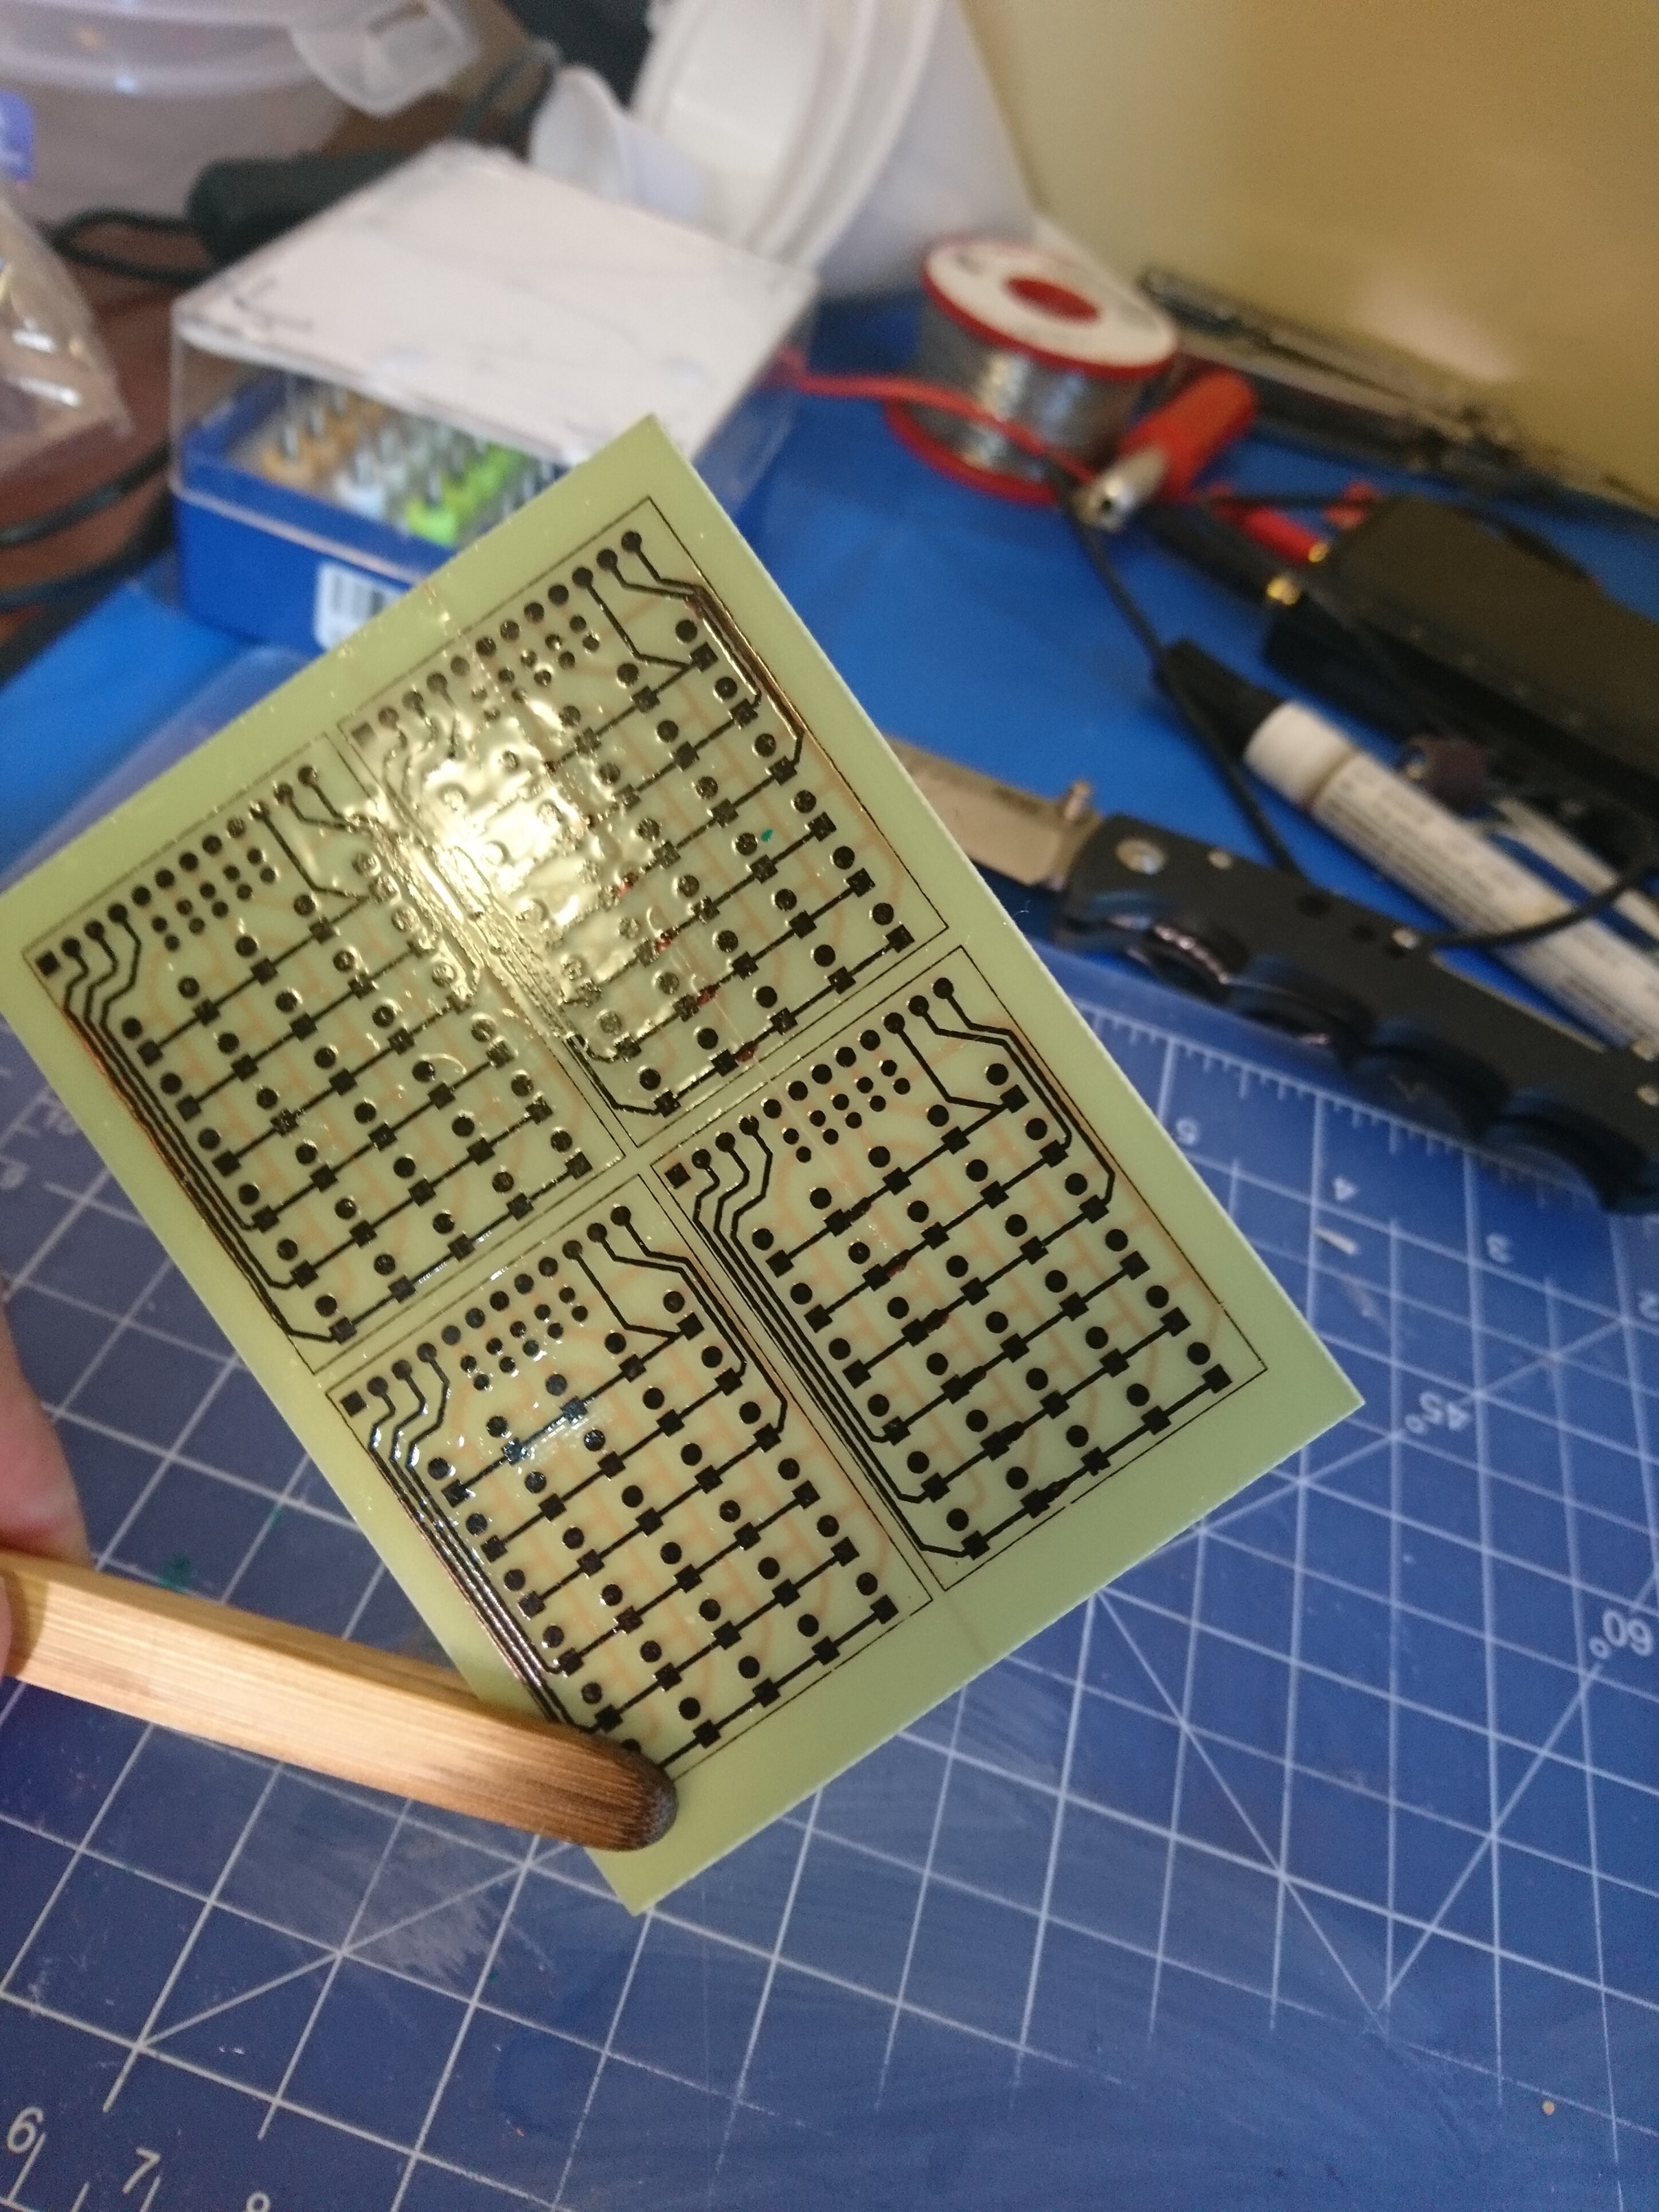
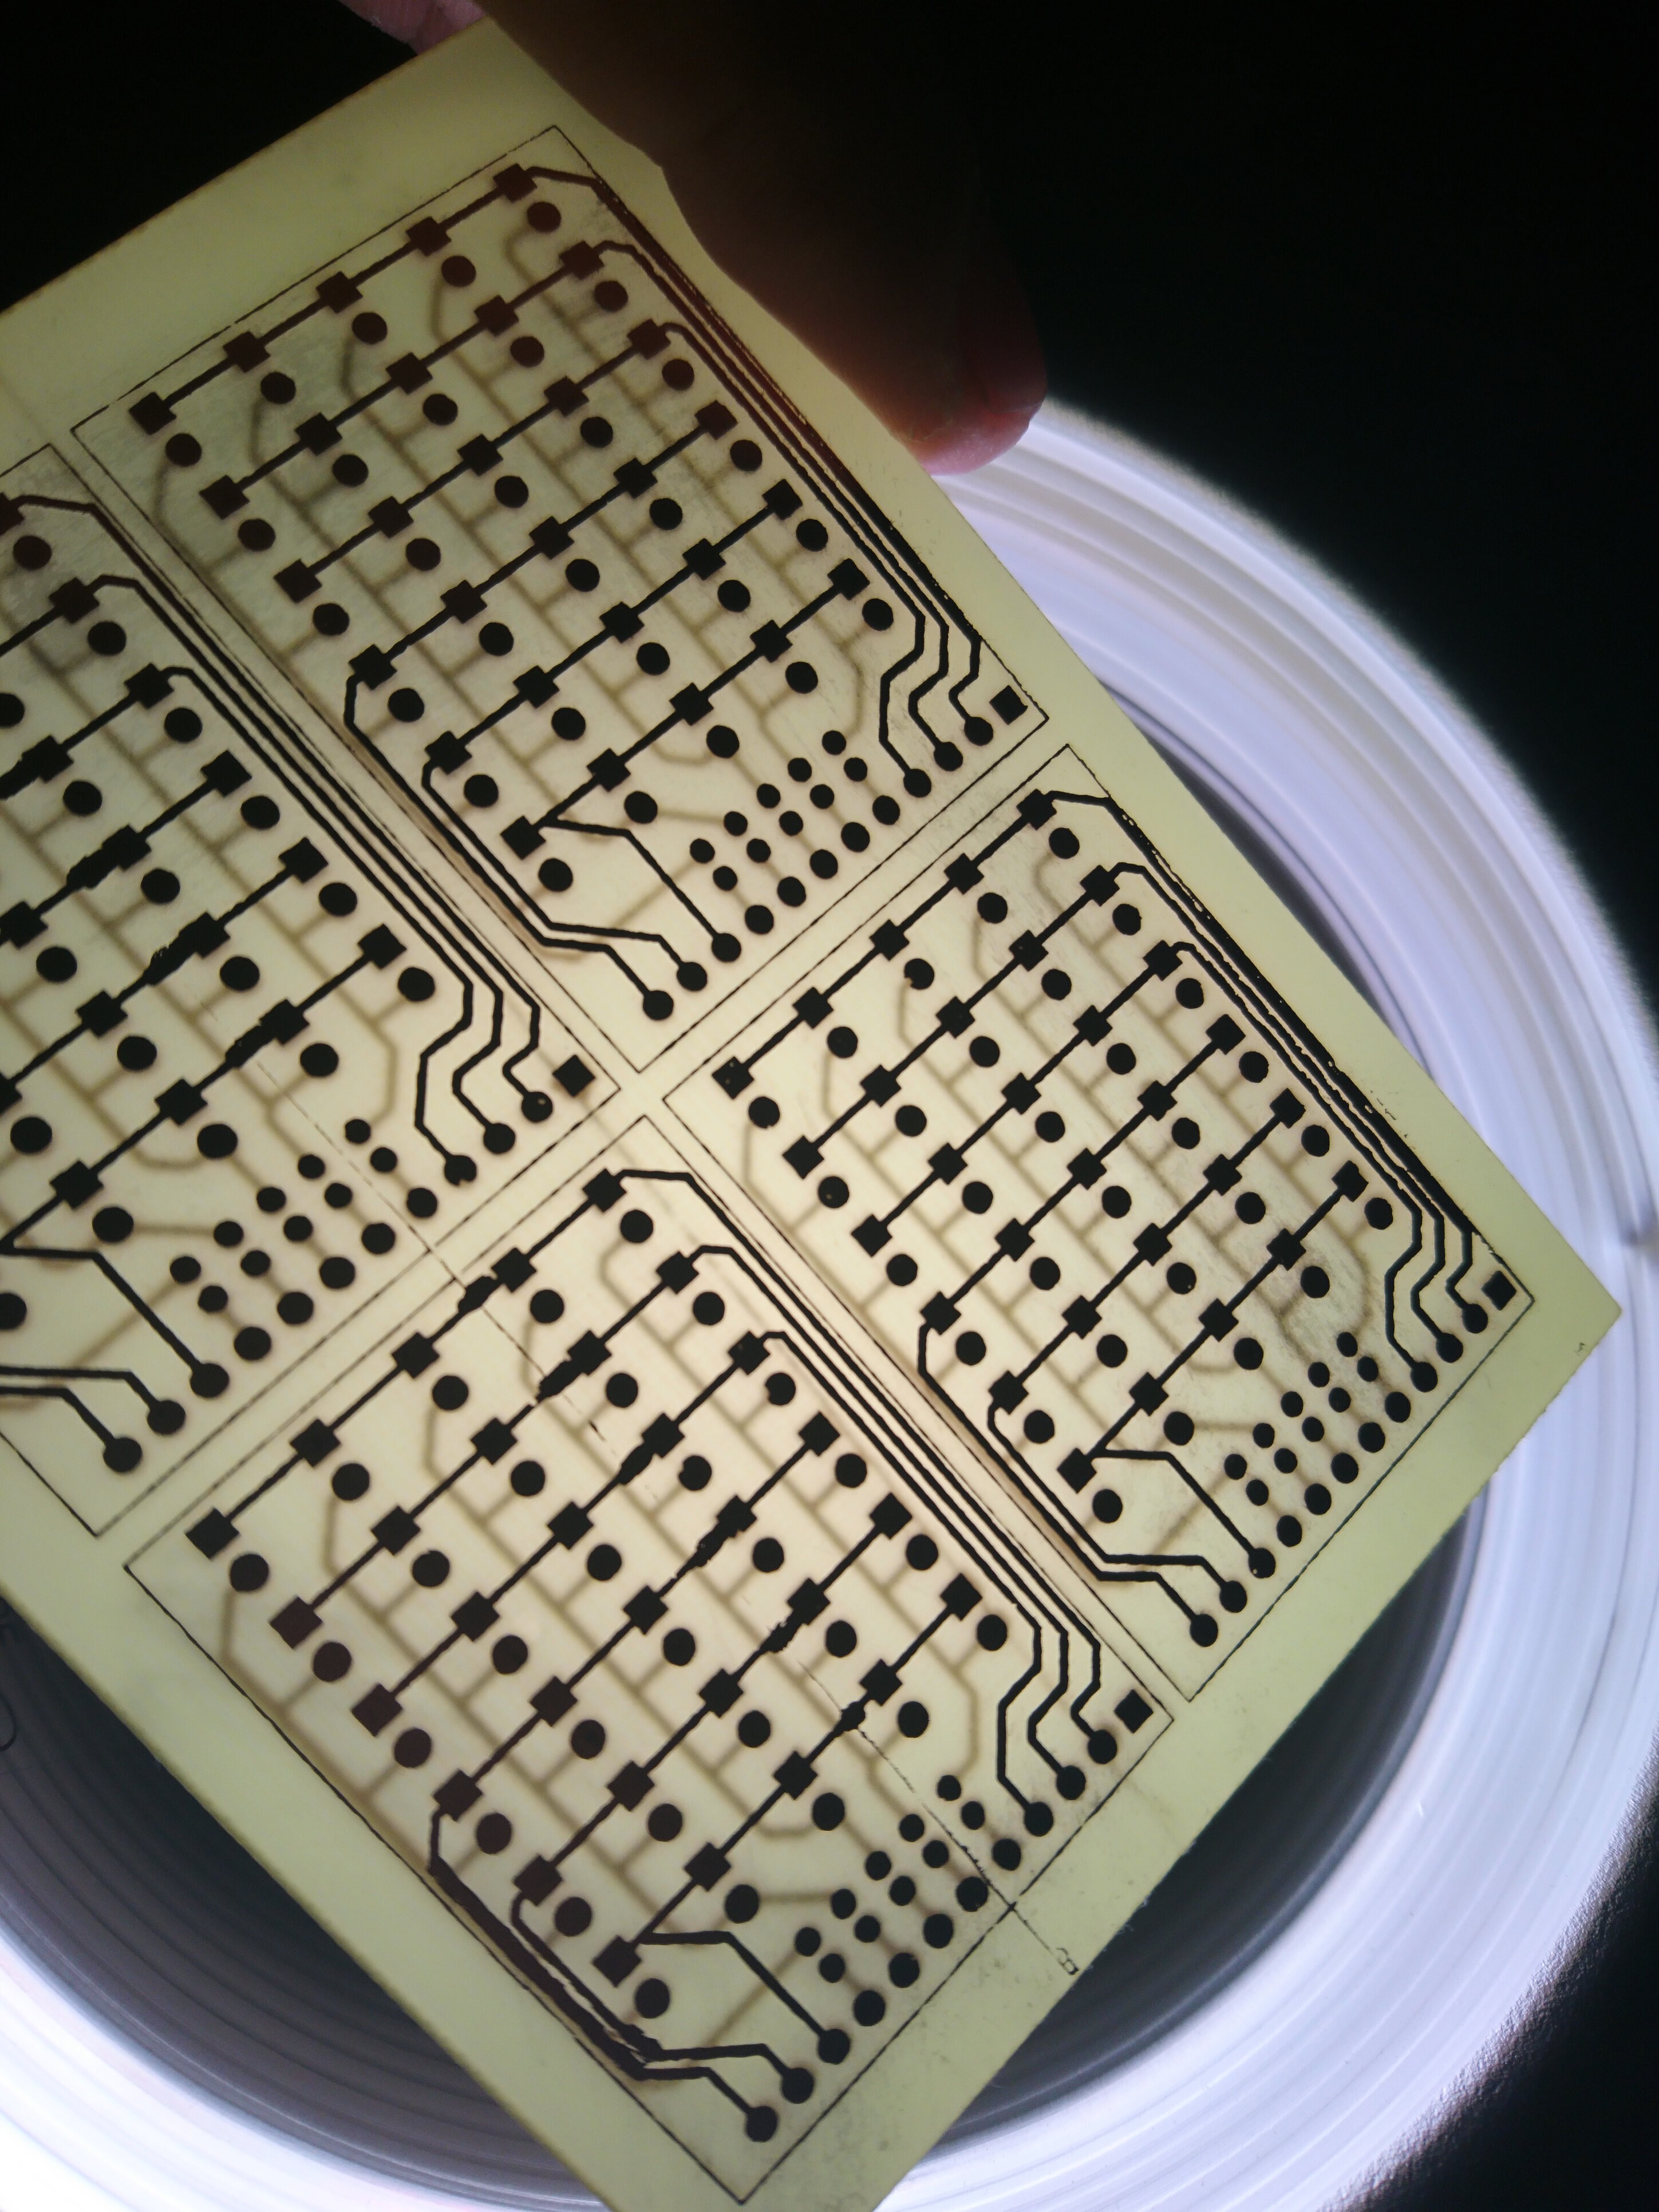
4Now print the same traces on the taped paper
![]()
![]() Now print the same traces on the taped paper and make sure you put the taped paper in the printer drawer facing the right orientation were the printer prints. The new traces Must be printer on the tape.
Now print the same traces on the taped paper and make sure you put the taped paper in the printer drawer facing the right orientation were the printer prints. The new traces Must be printer on the tape.
Note, if you are making a double sided pcb like in this tutorial make sure one of the sides is printed mirrored. -
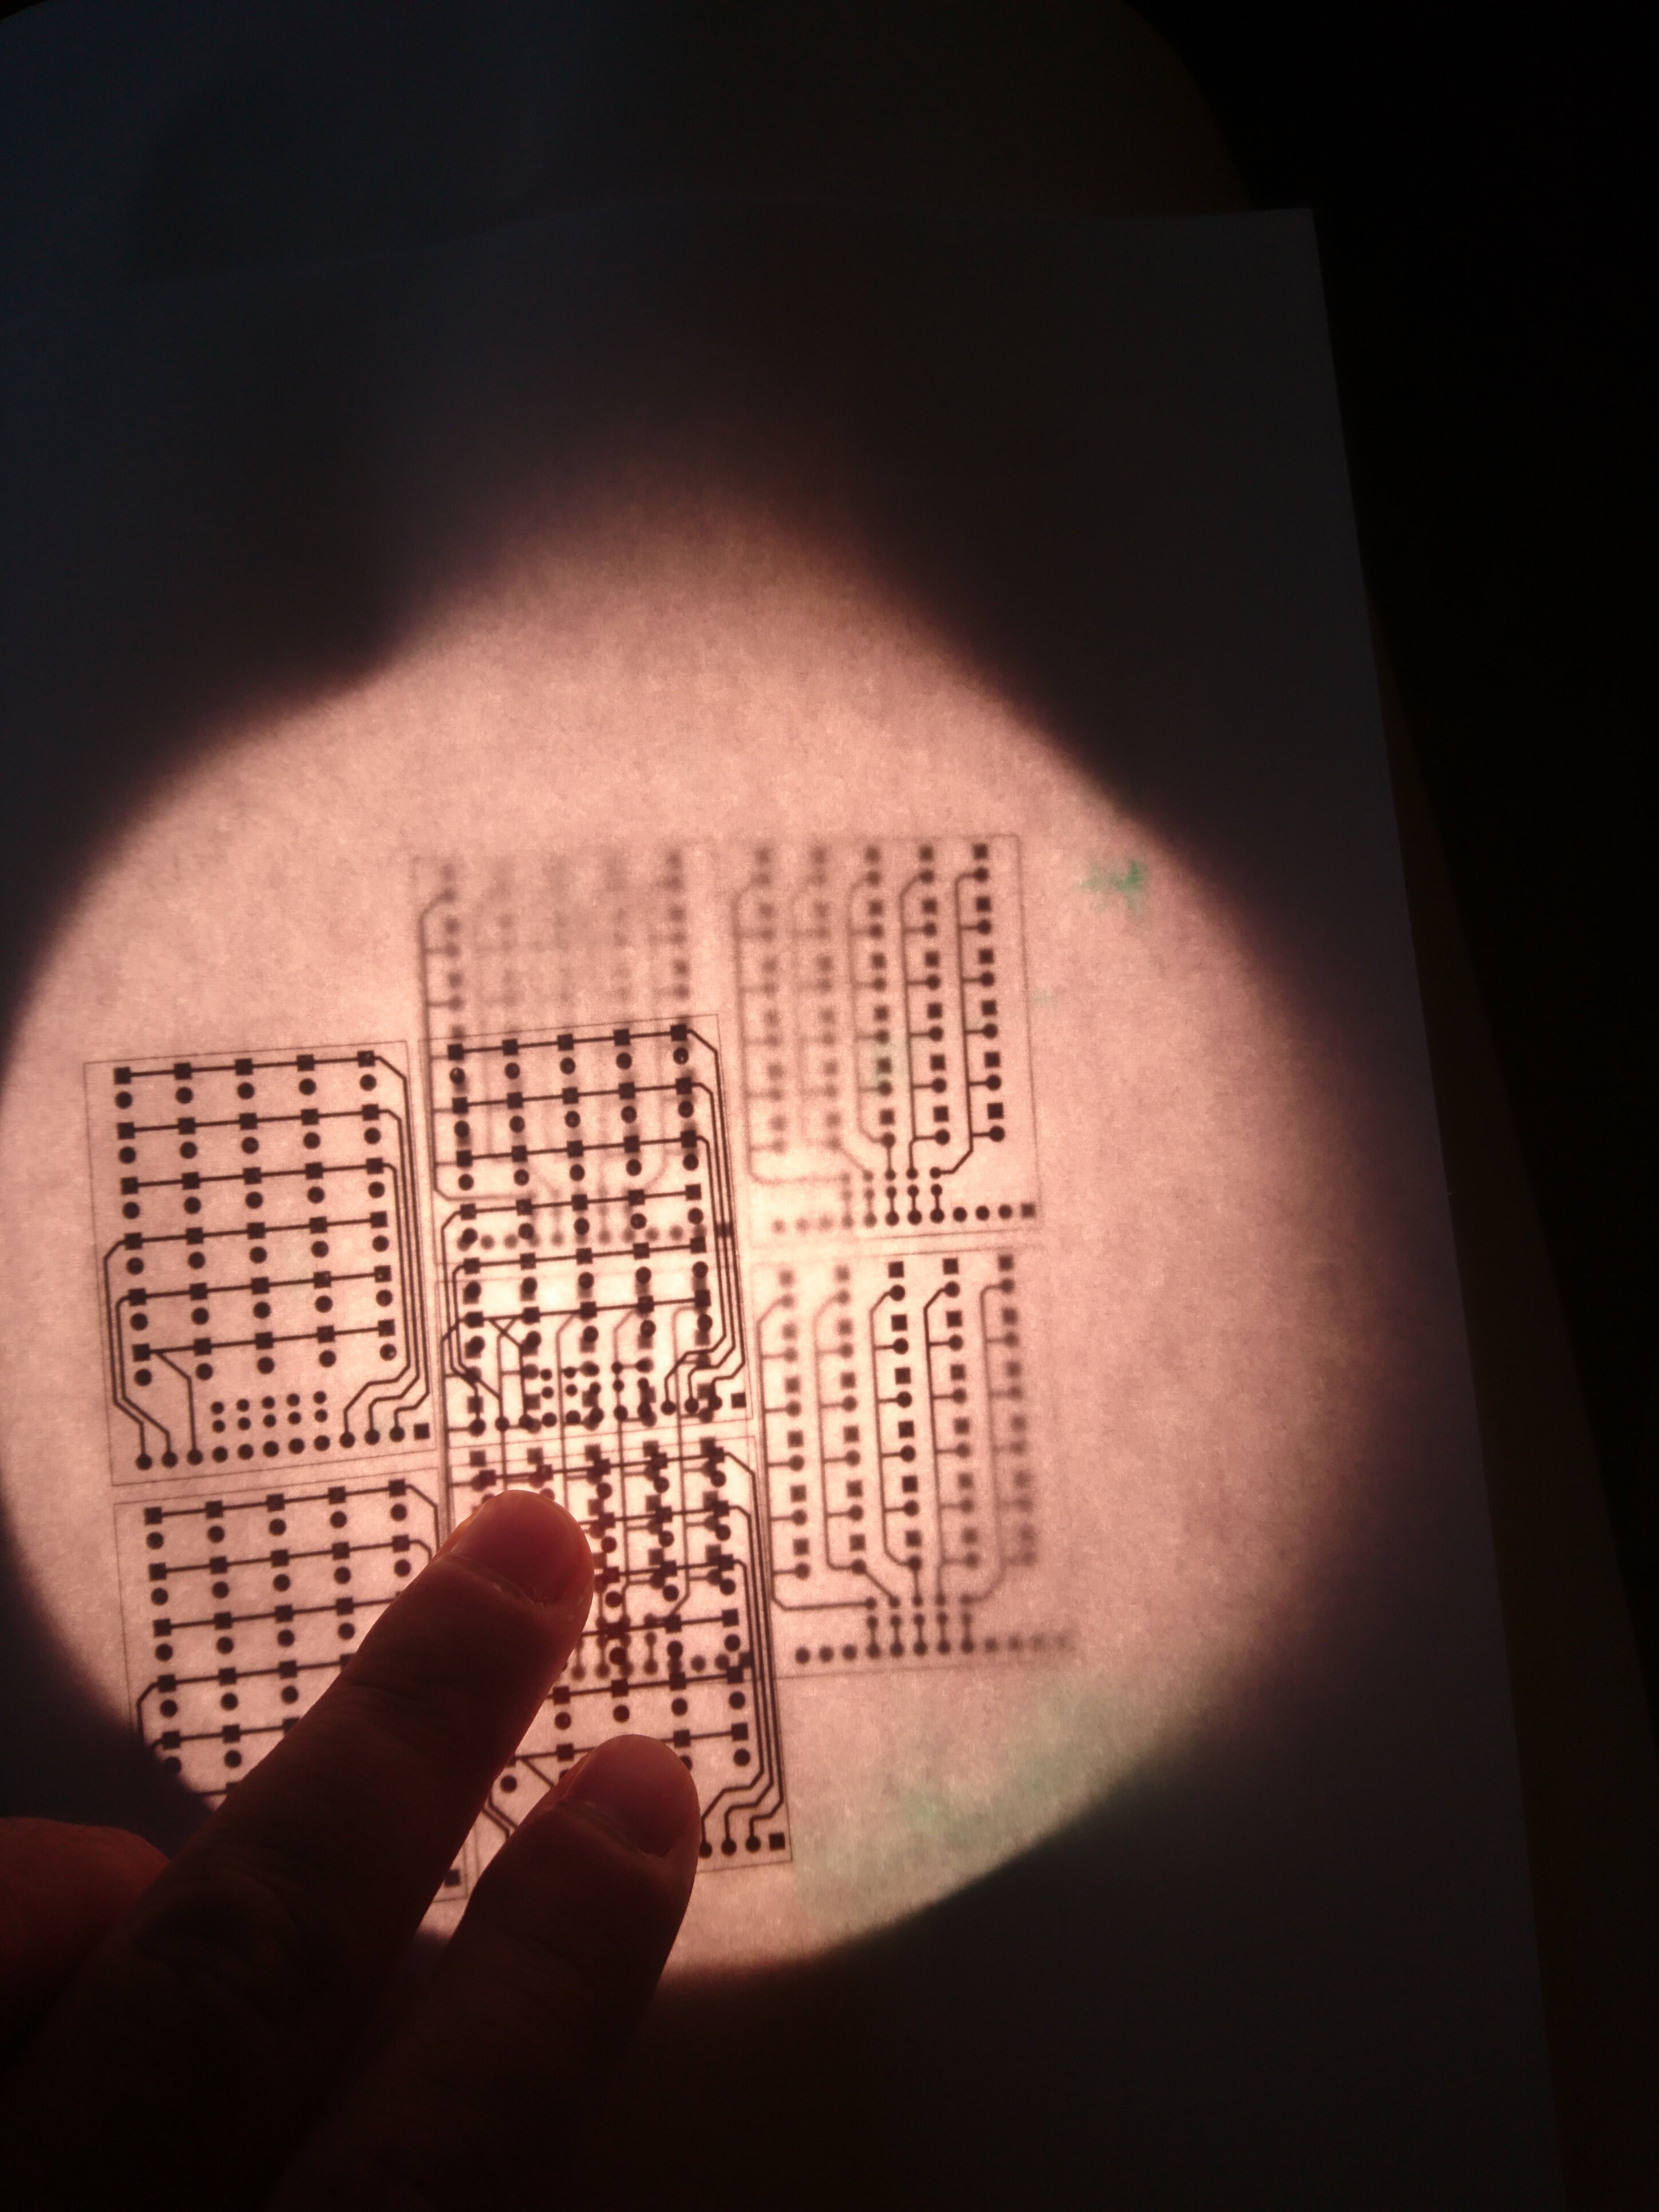
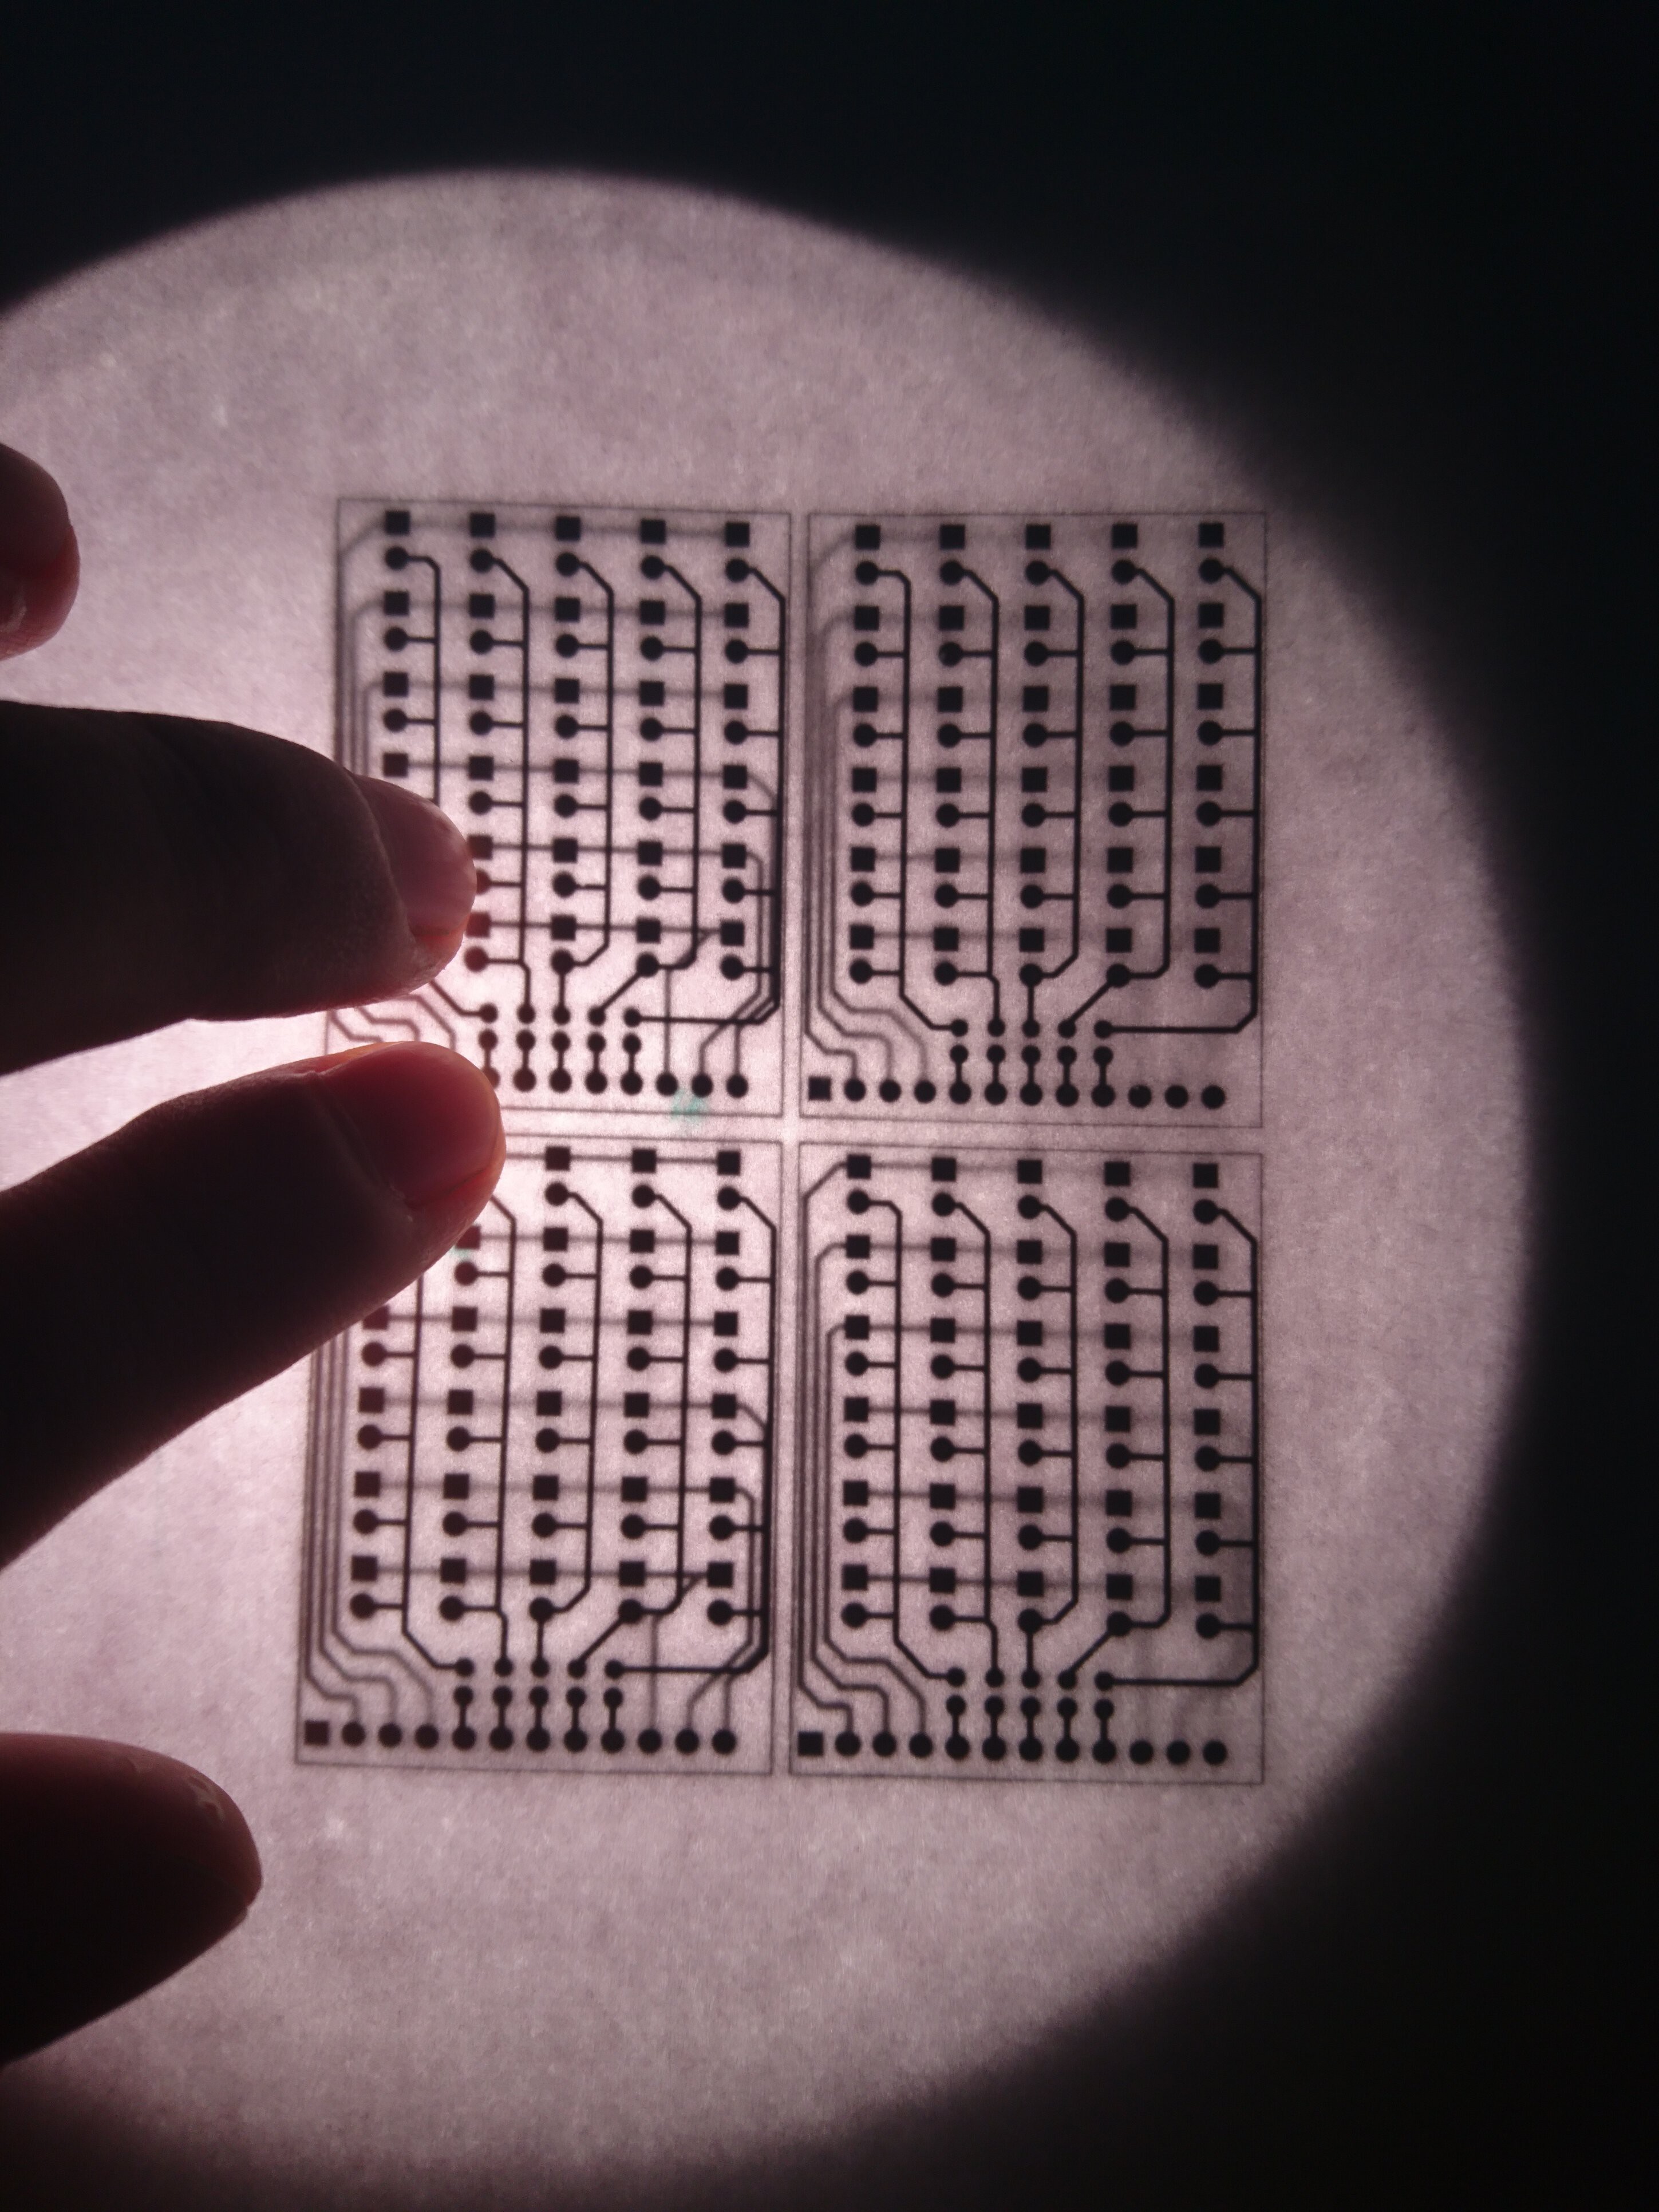
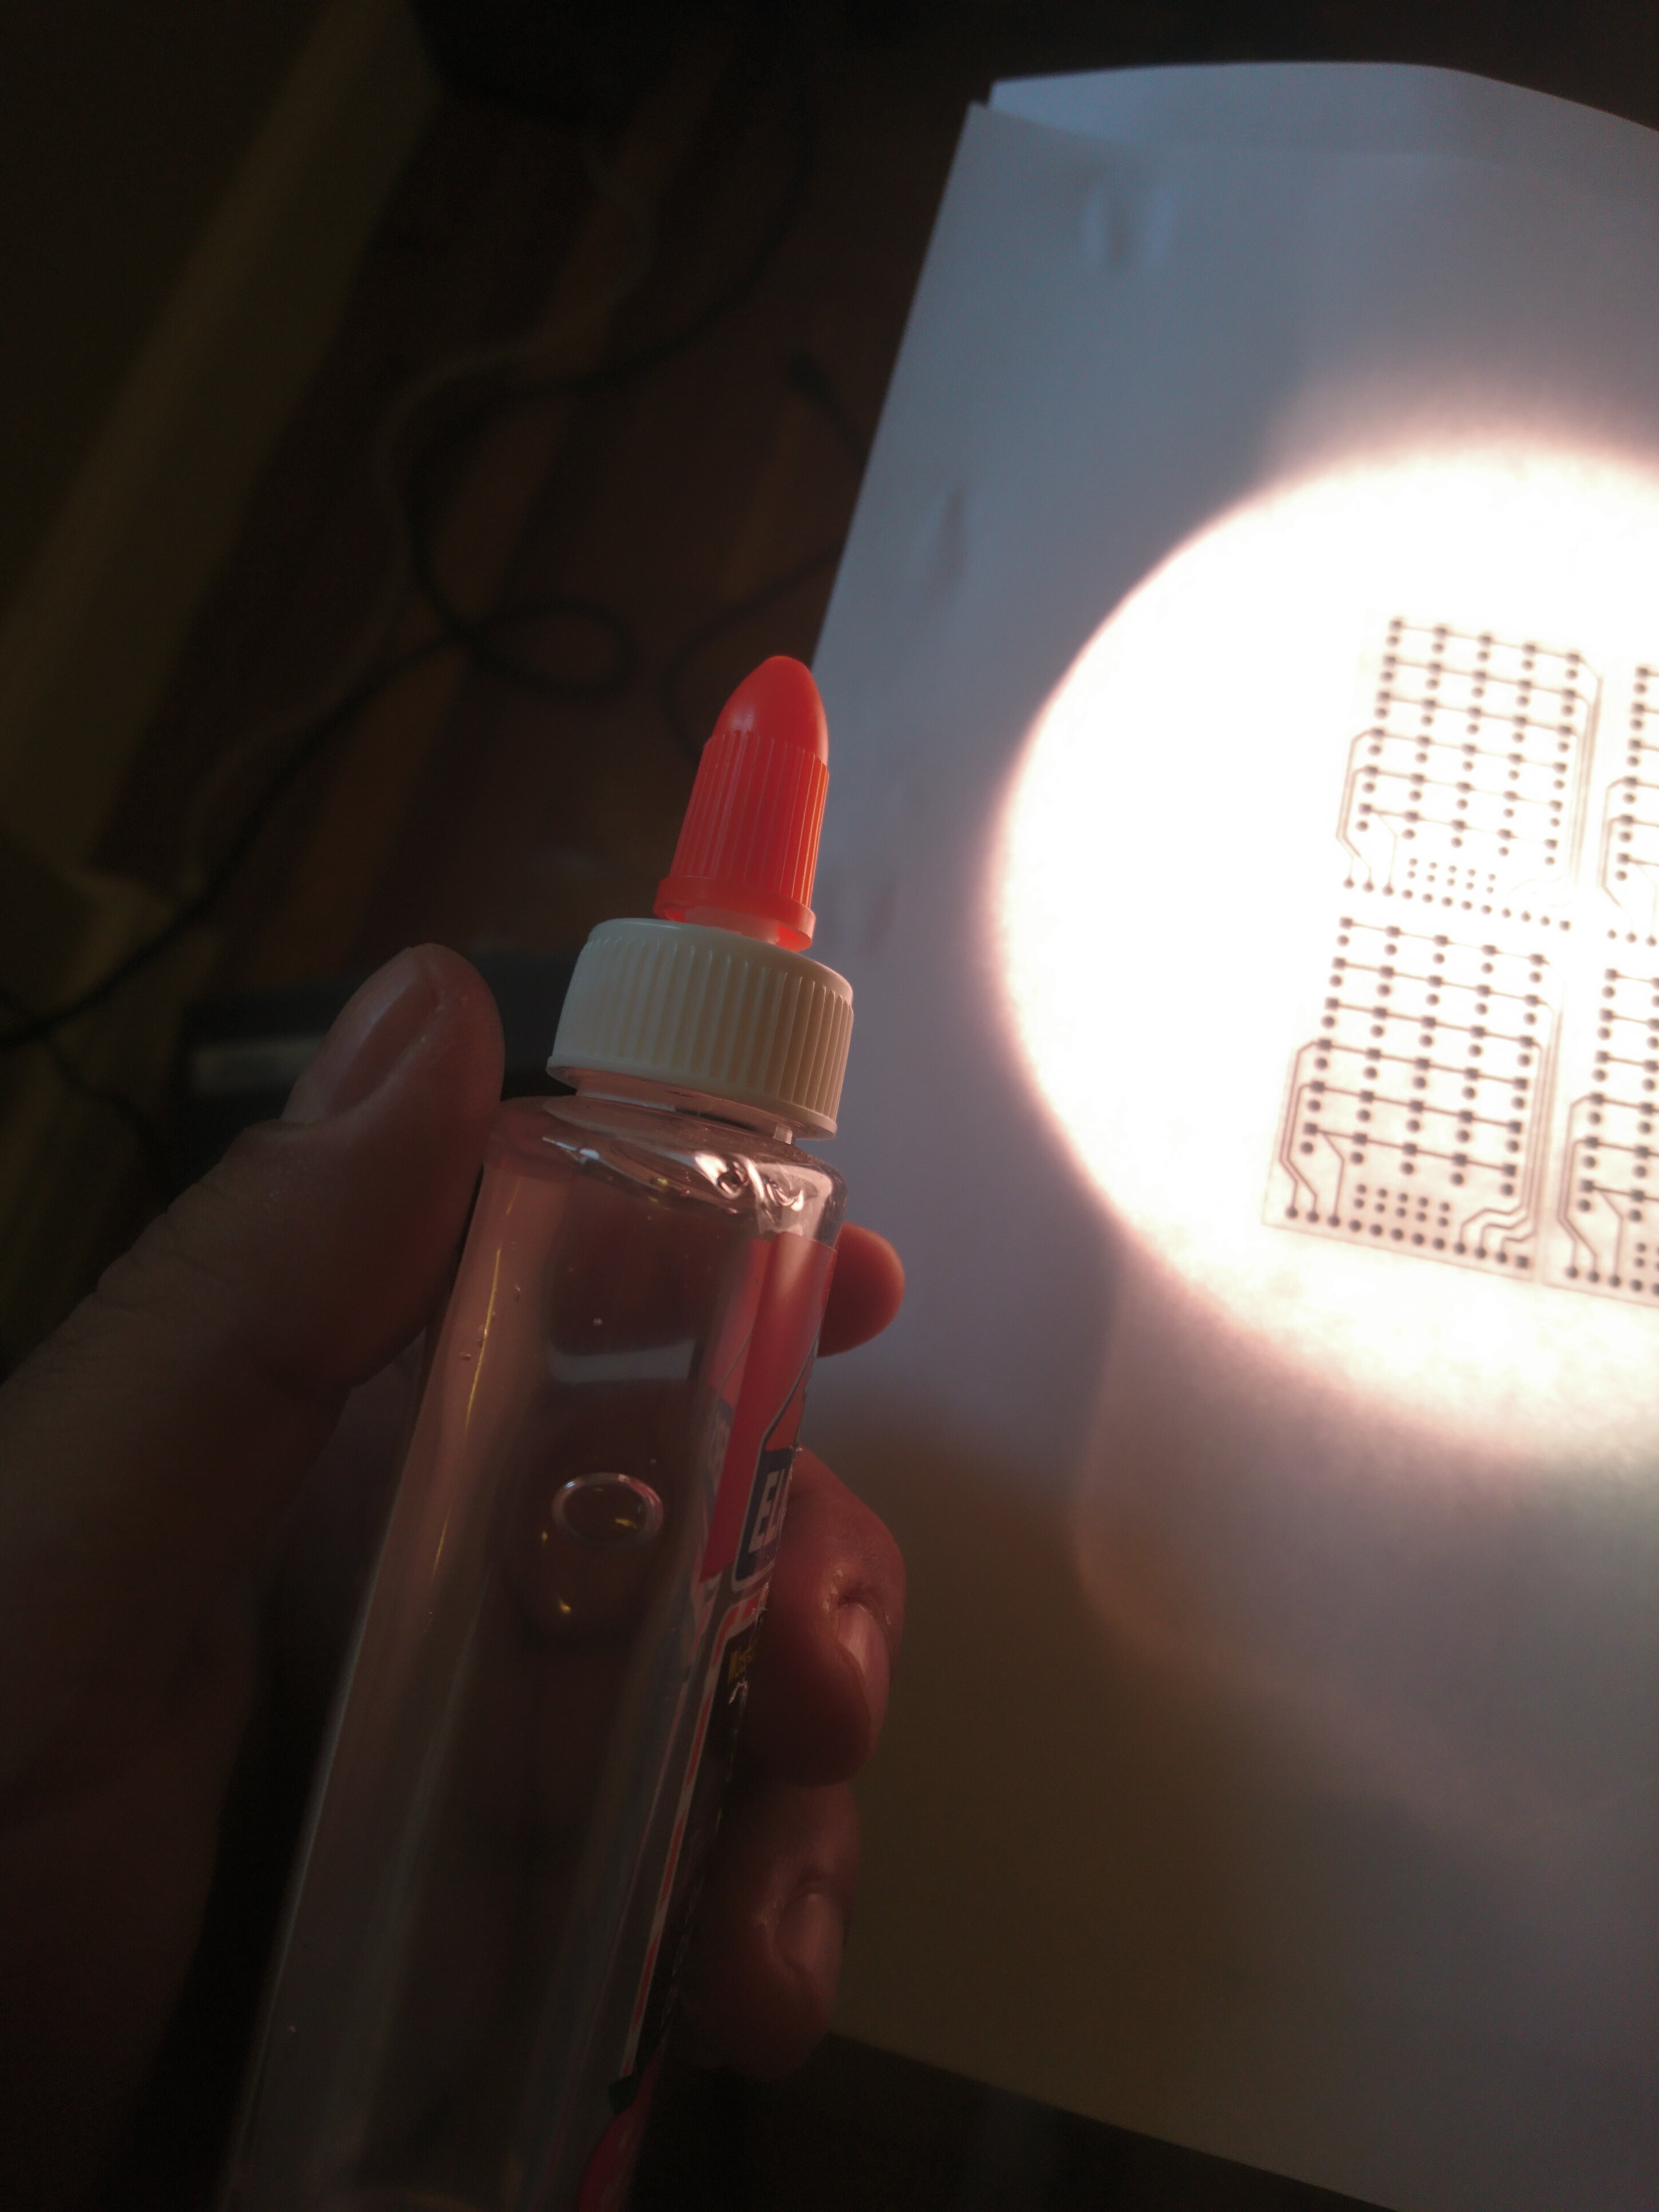
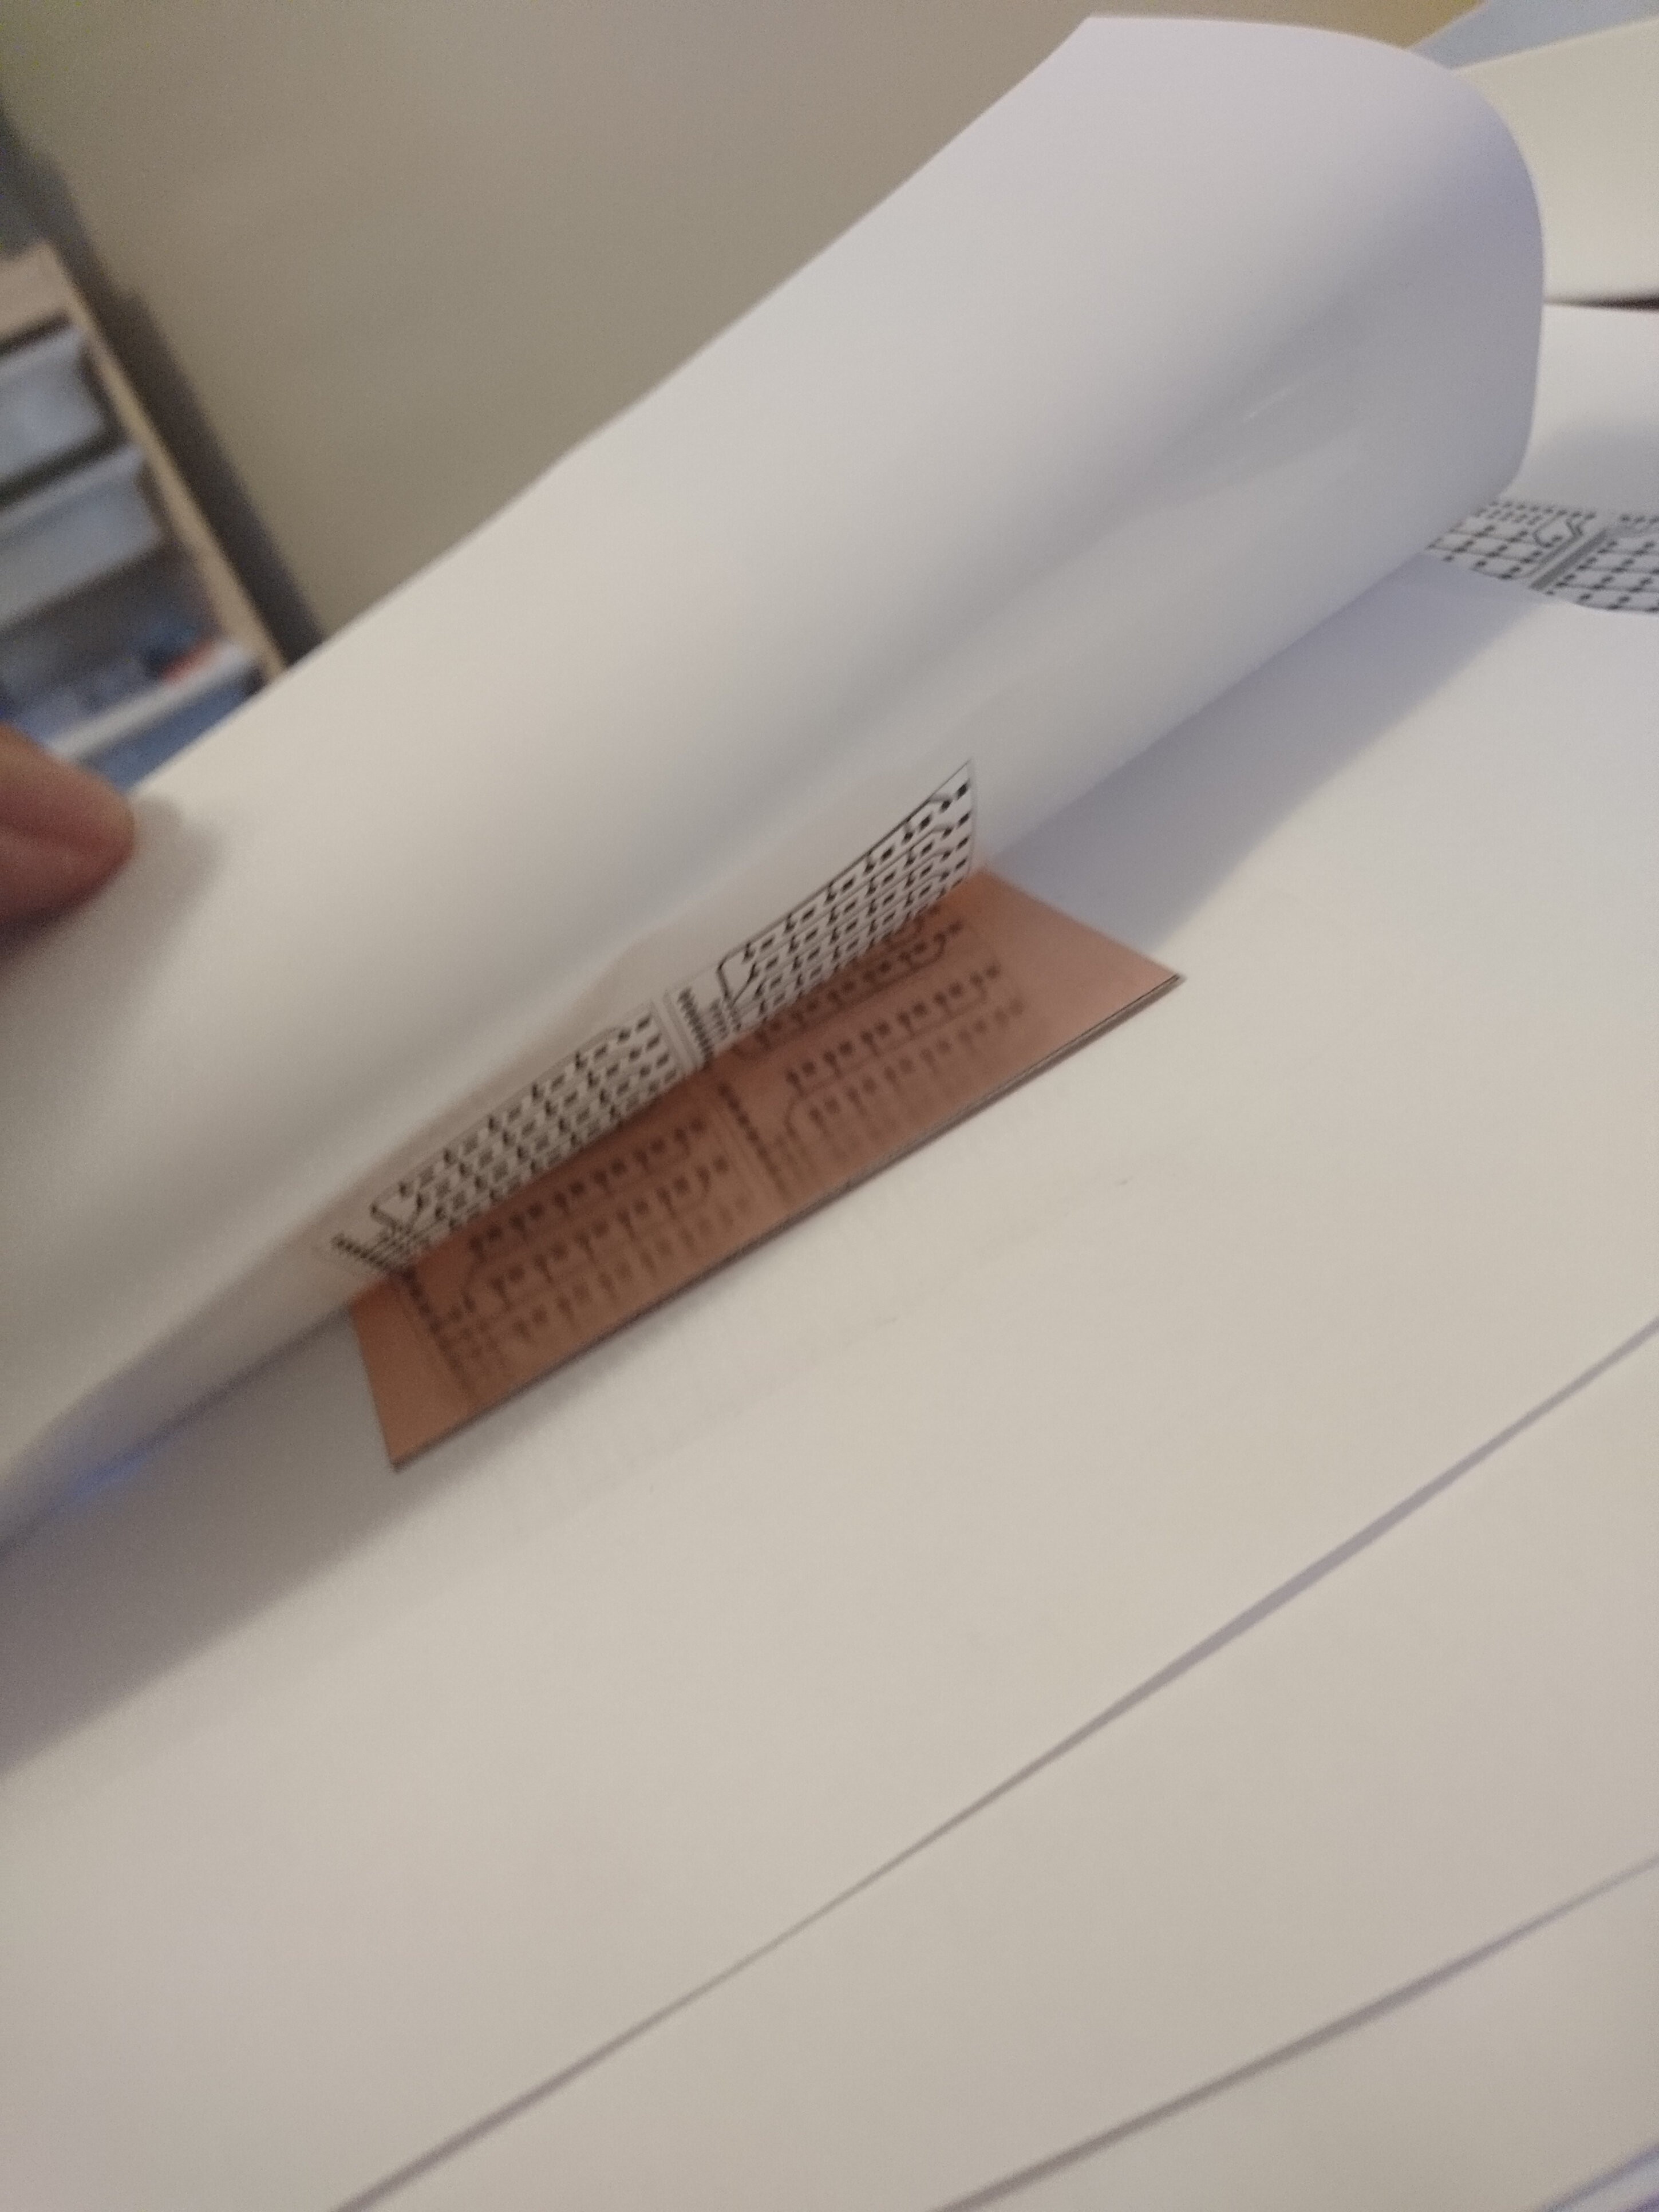
5Using a light source to align and glue the two sides face to face. (The perfect sandwich)
![]()
![]()
![]()
![]()
![]()
Using a light source to align and glue the two sides face to face and use paper glue to glue the two sides together and make sure you leave one side open to put the pcb inside the sandwich. -
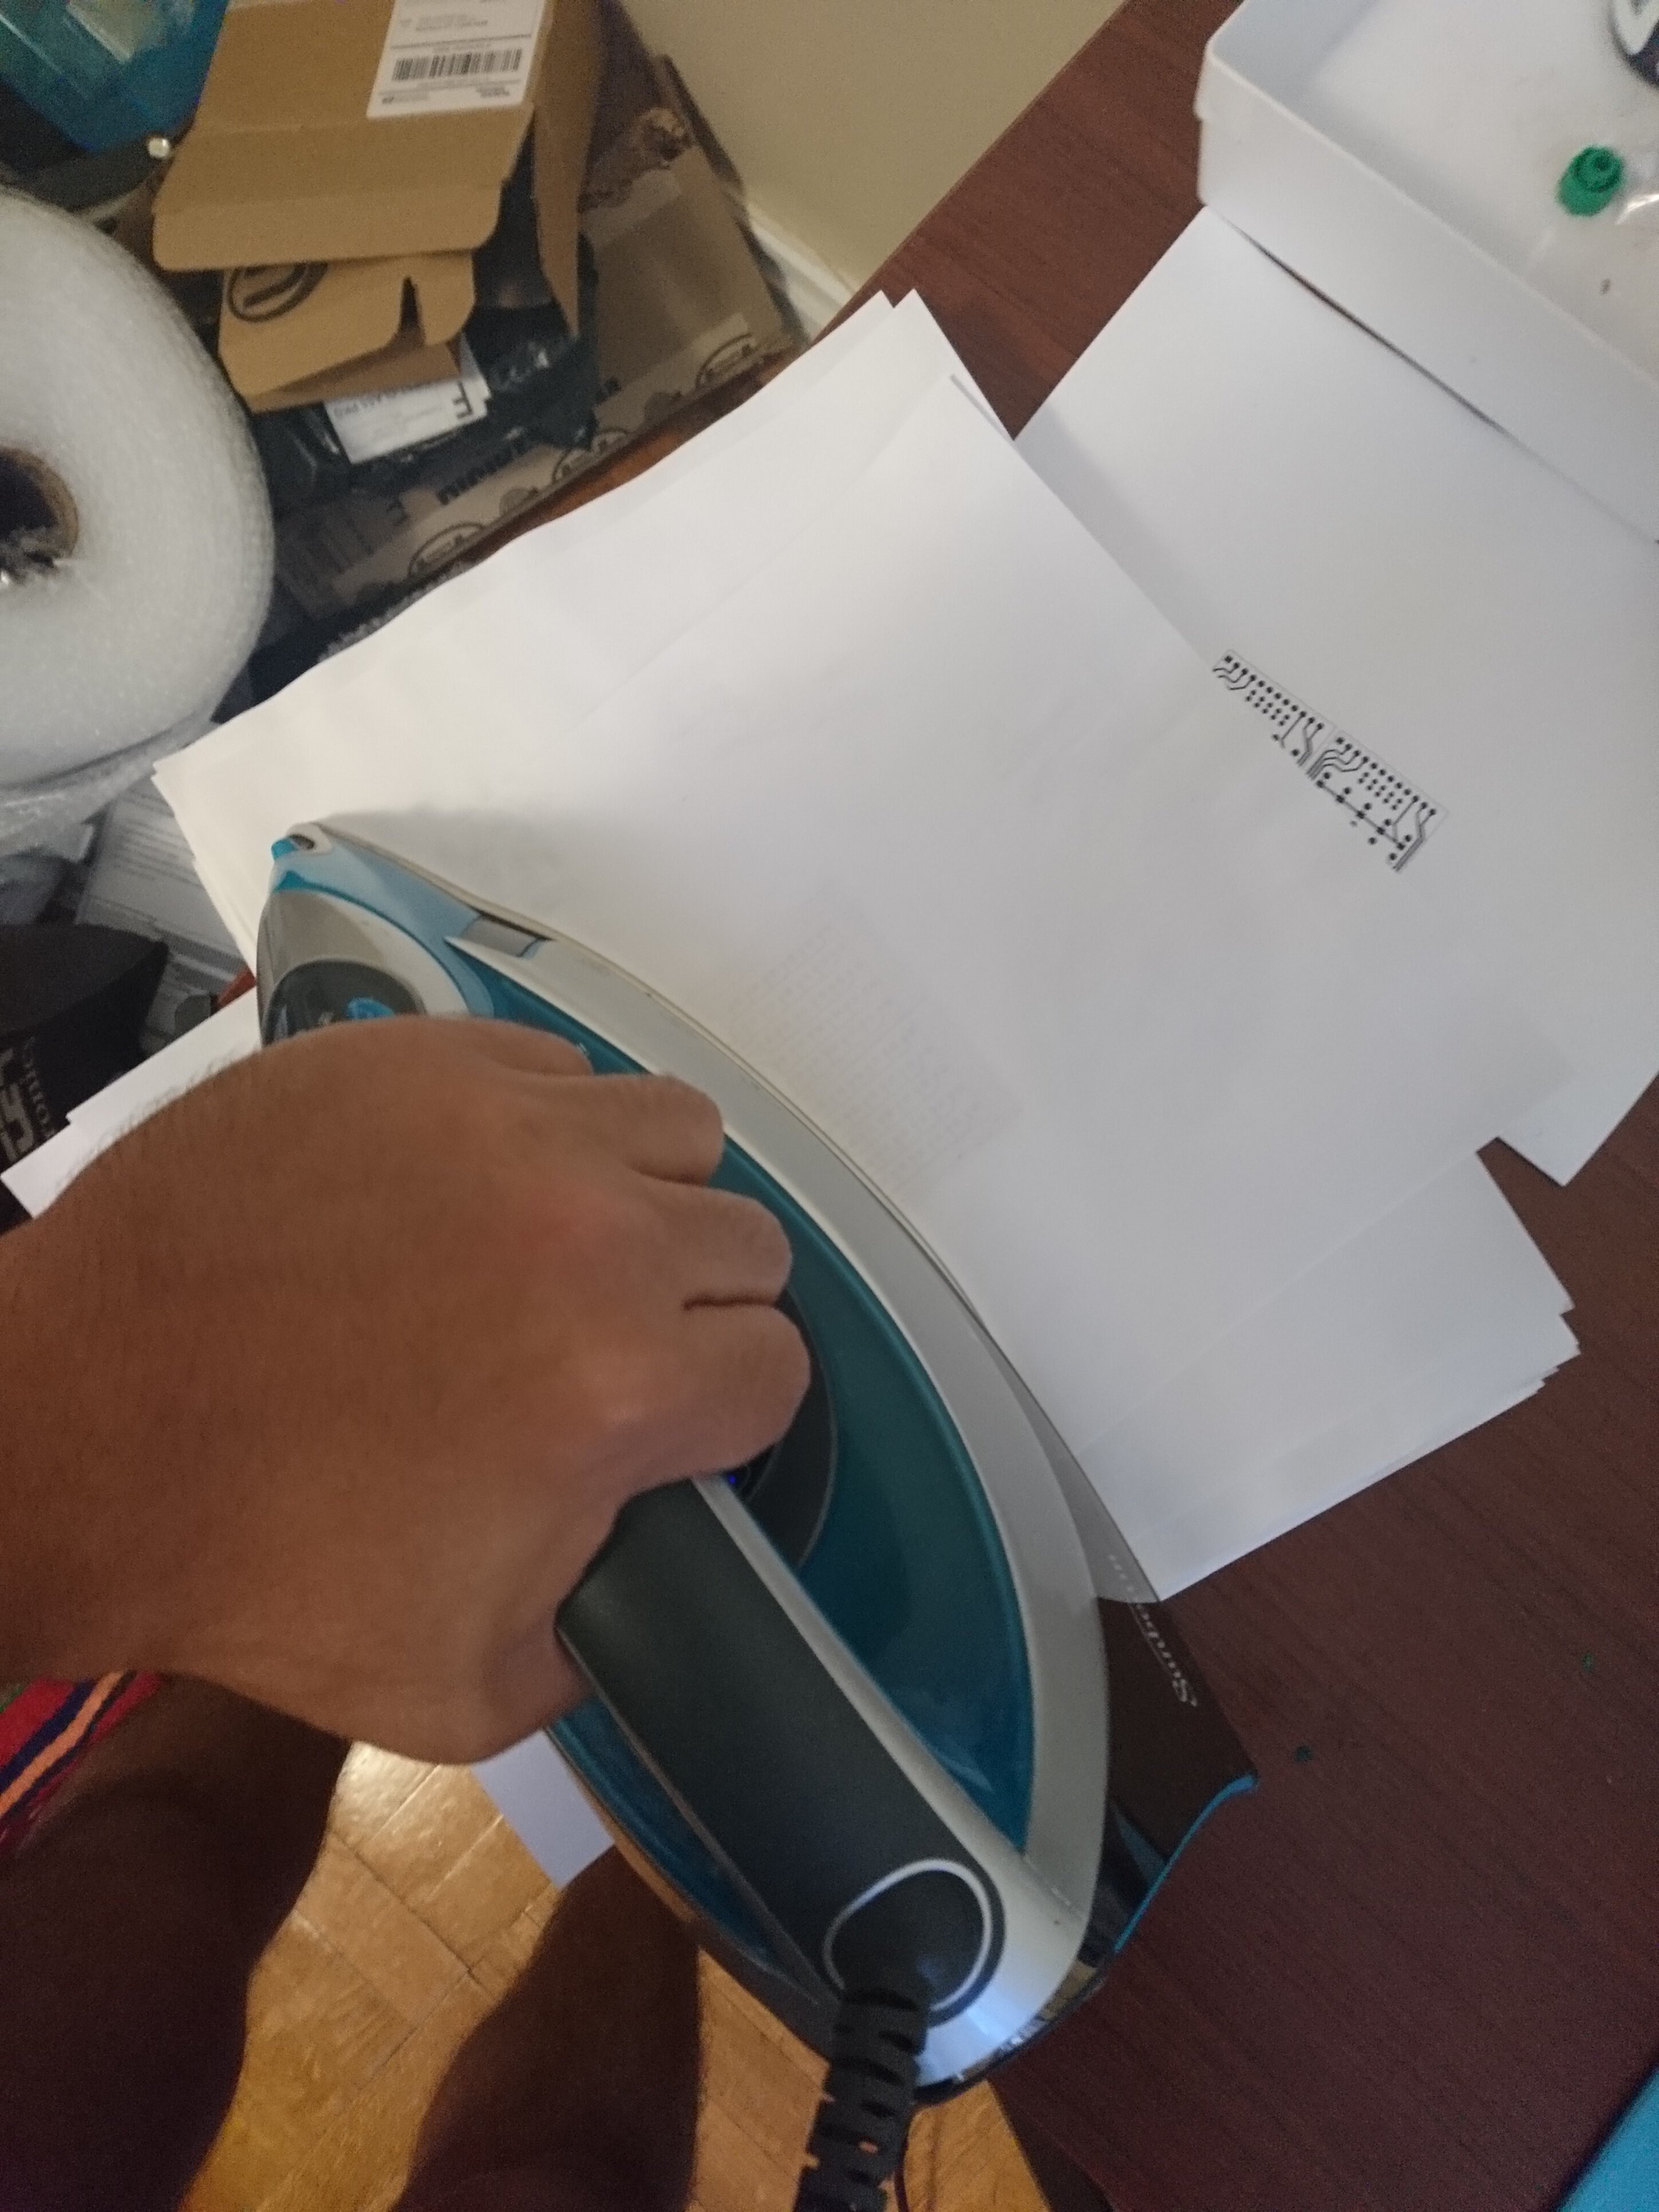
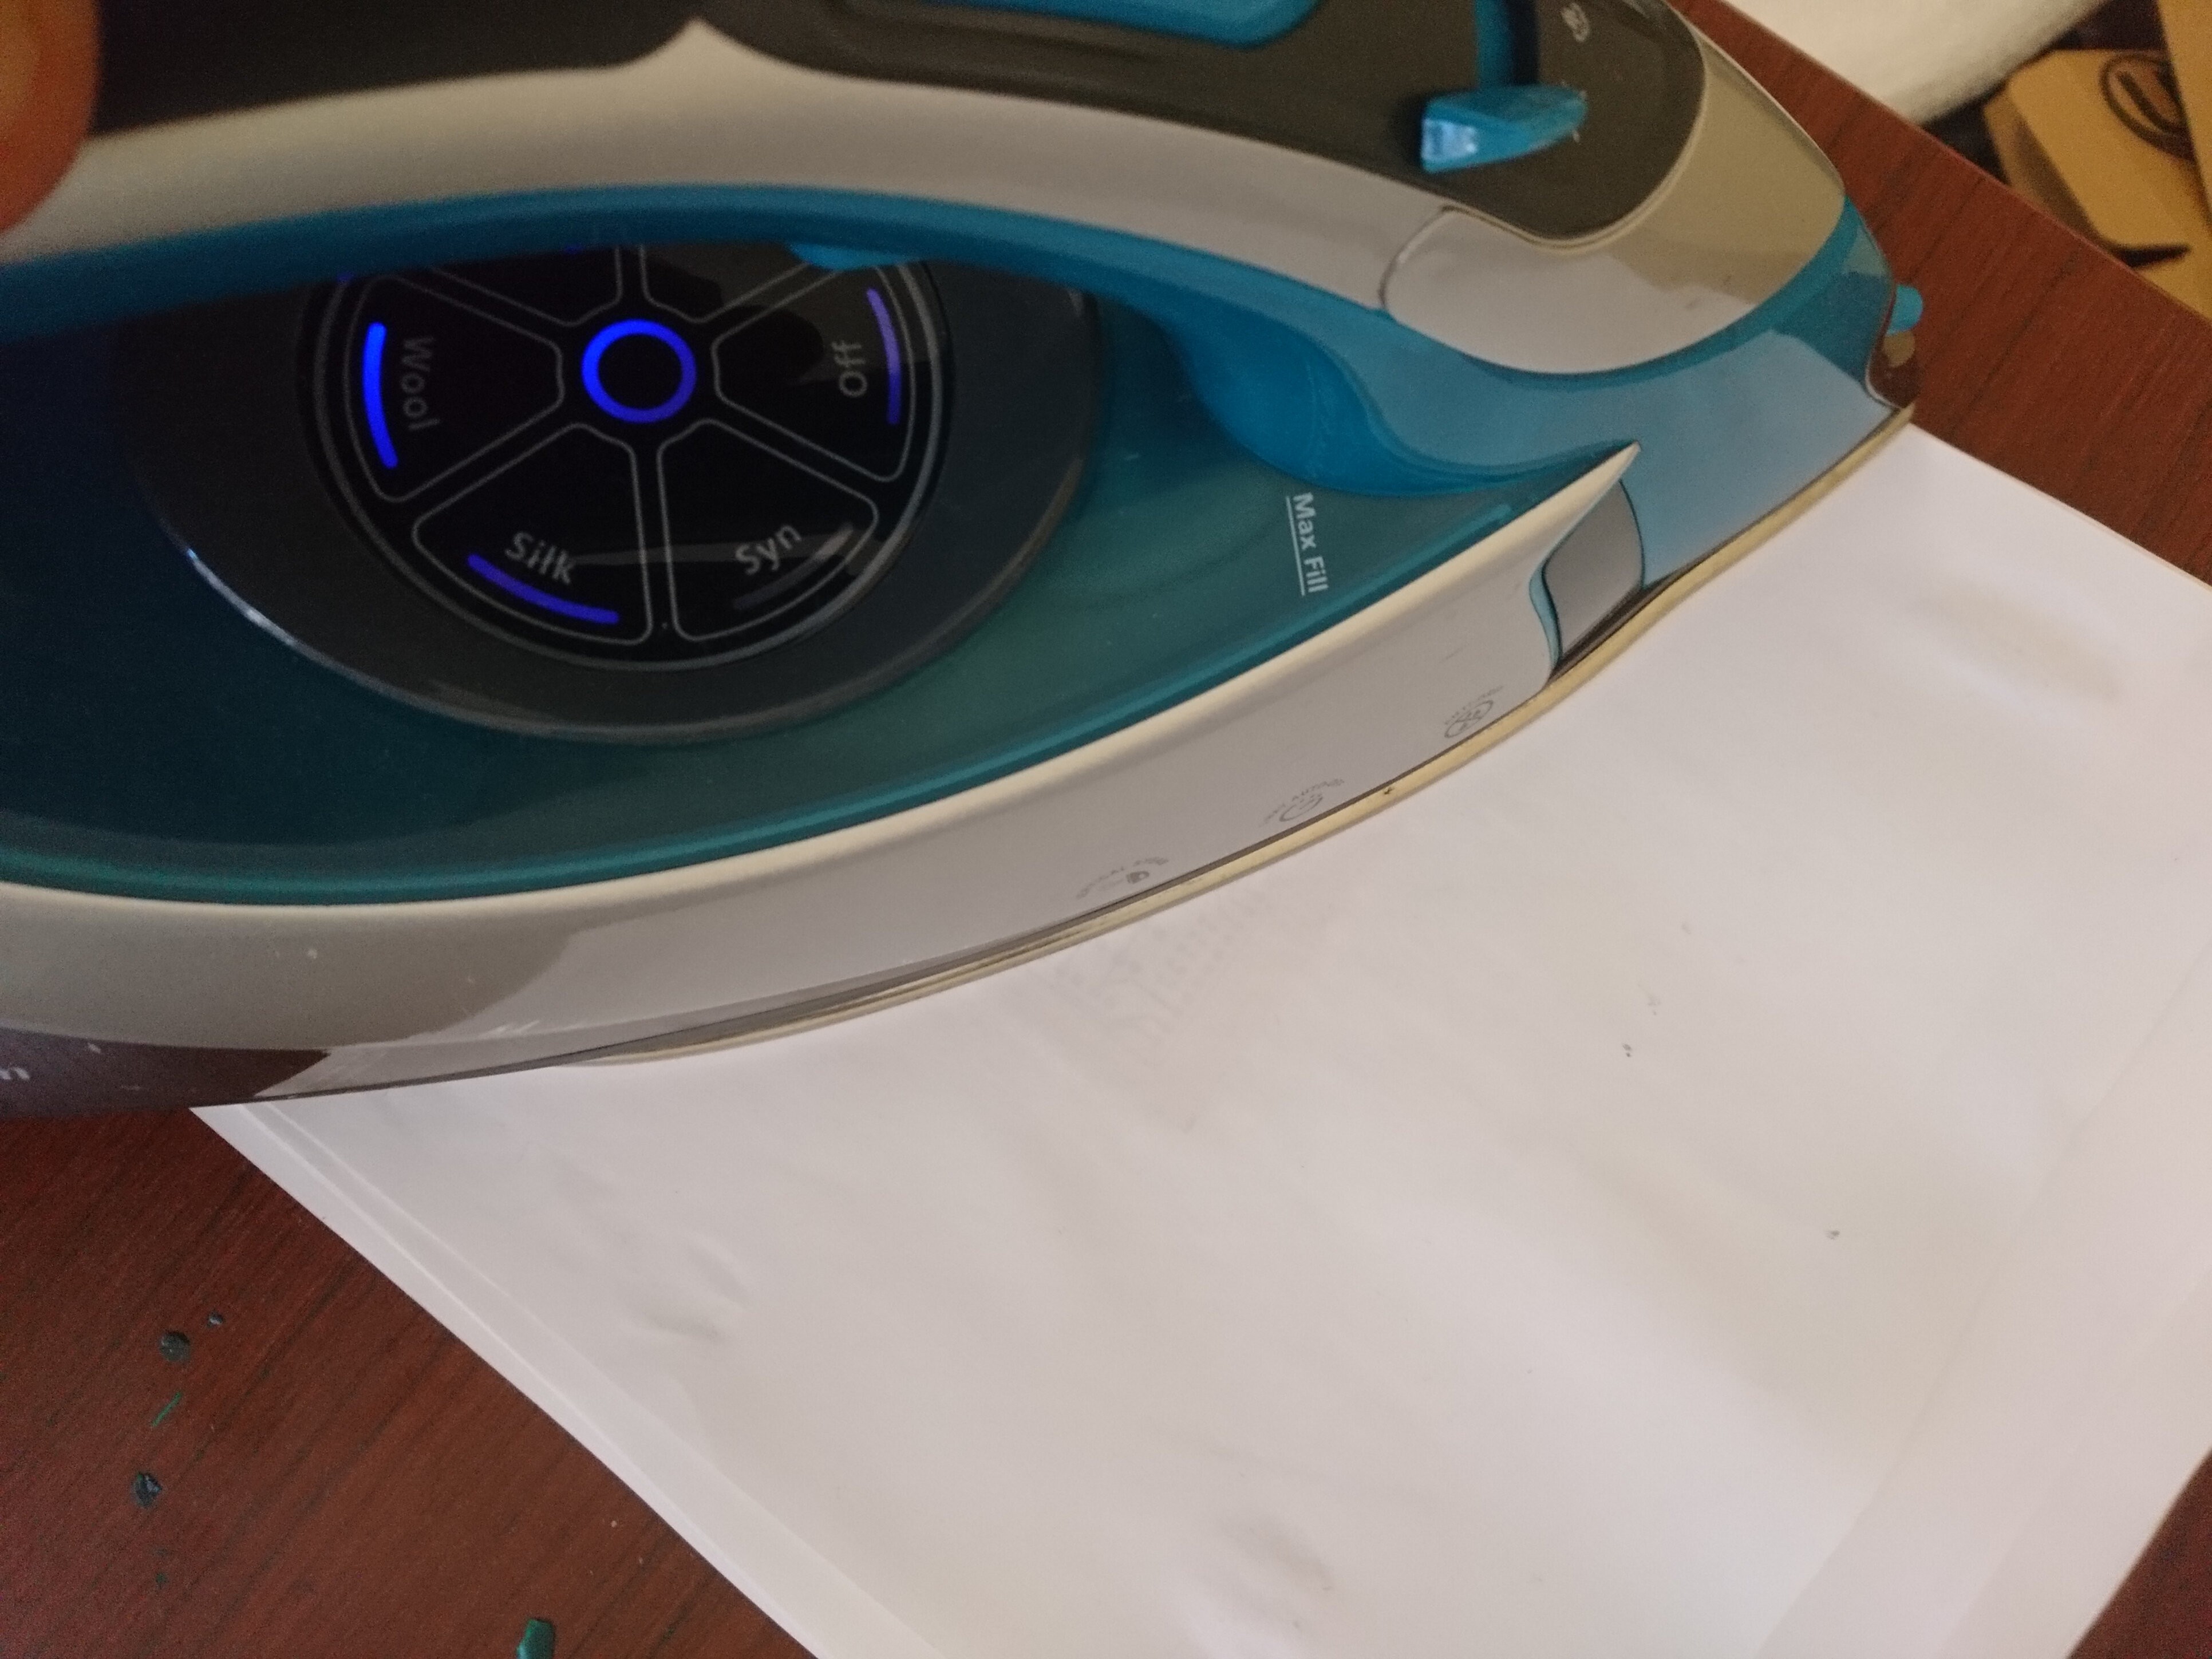
6Toner transfer using any home iron
![]()
![]()
![]()
![]()
![]() Toner transfer using any home iron.
Toner transfer using any home iron.
After you put the copper clad in the sandwich make sure it is aligned from all sides.
Use the iron with light pressure on both sides and be careful while flipping the sandwich.
Using the packaging tape is very good with home irons than using glossy paper and I ended up ironing for only 20 seconds on each sides.
Make sure you don't leave the iron for too long or the packaging tape will shrink and will ruin the transfer process. -
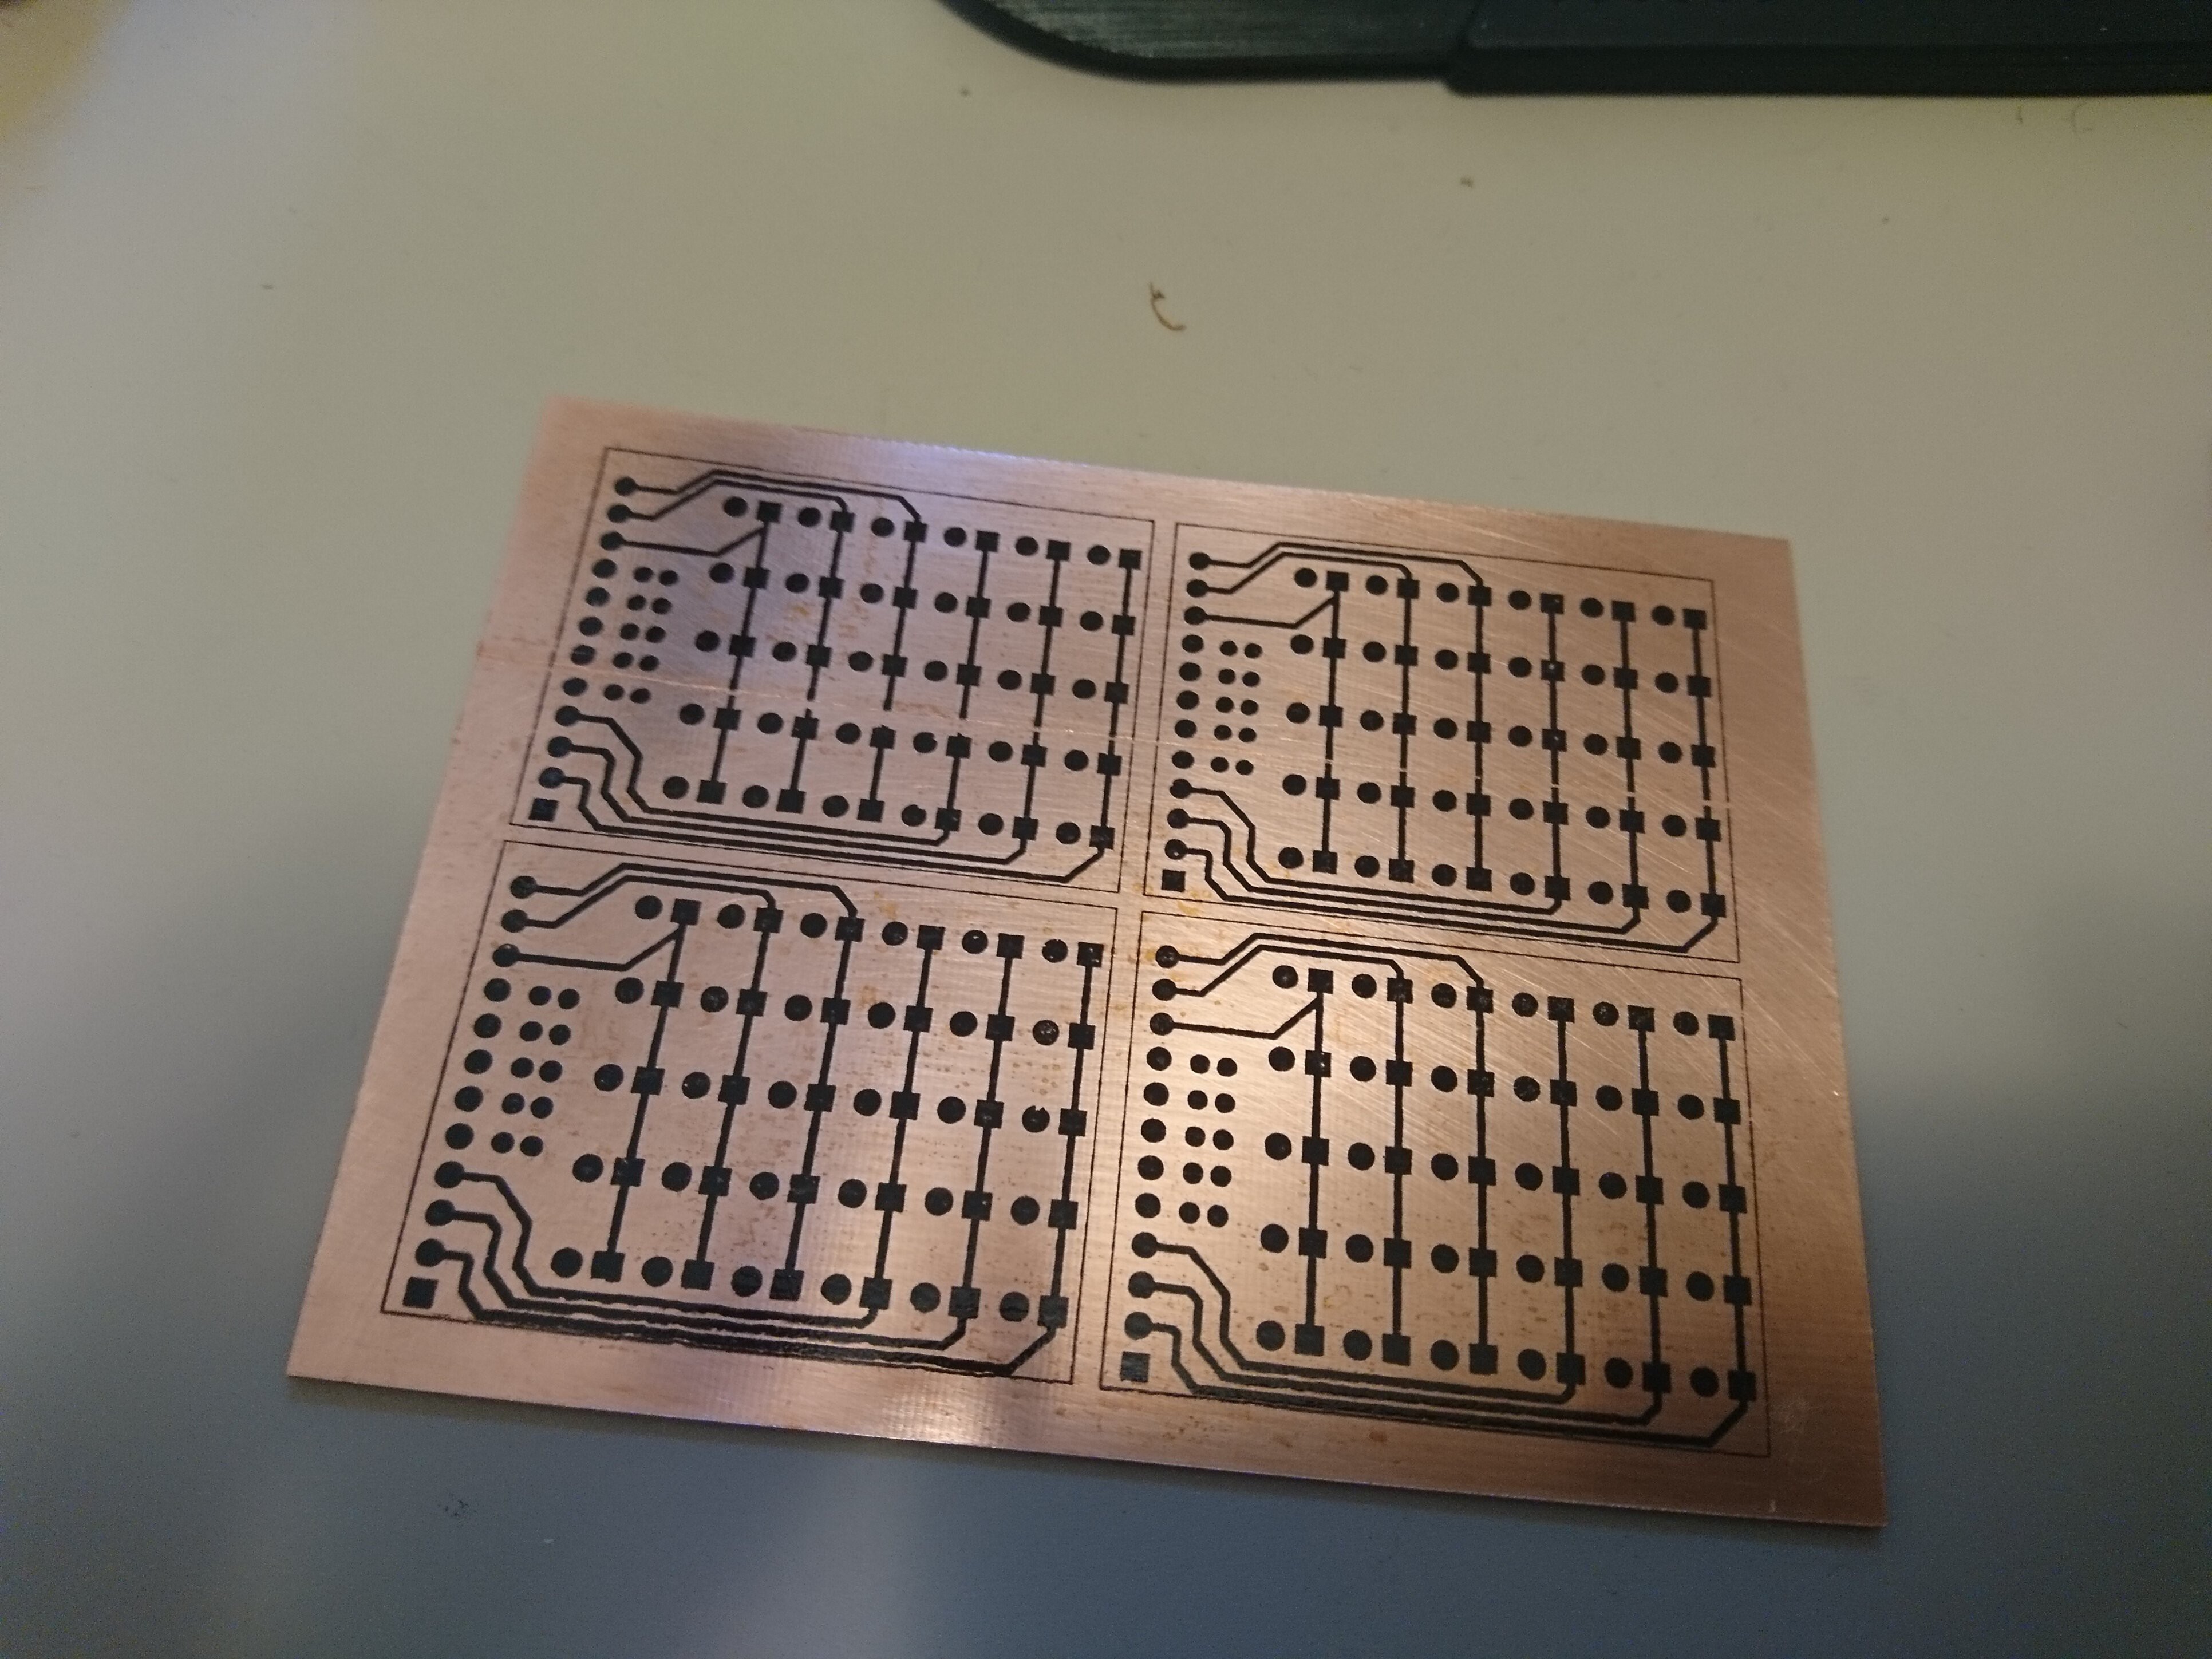
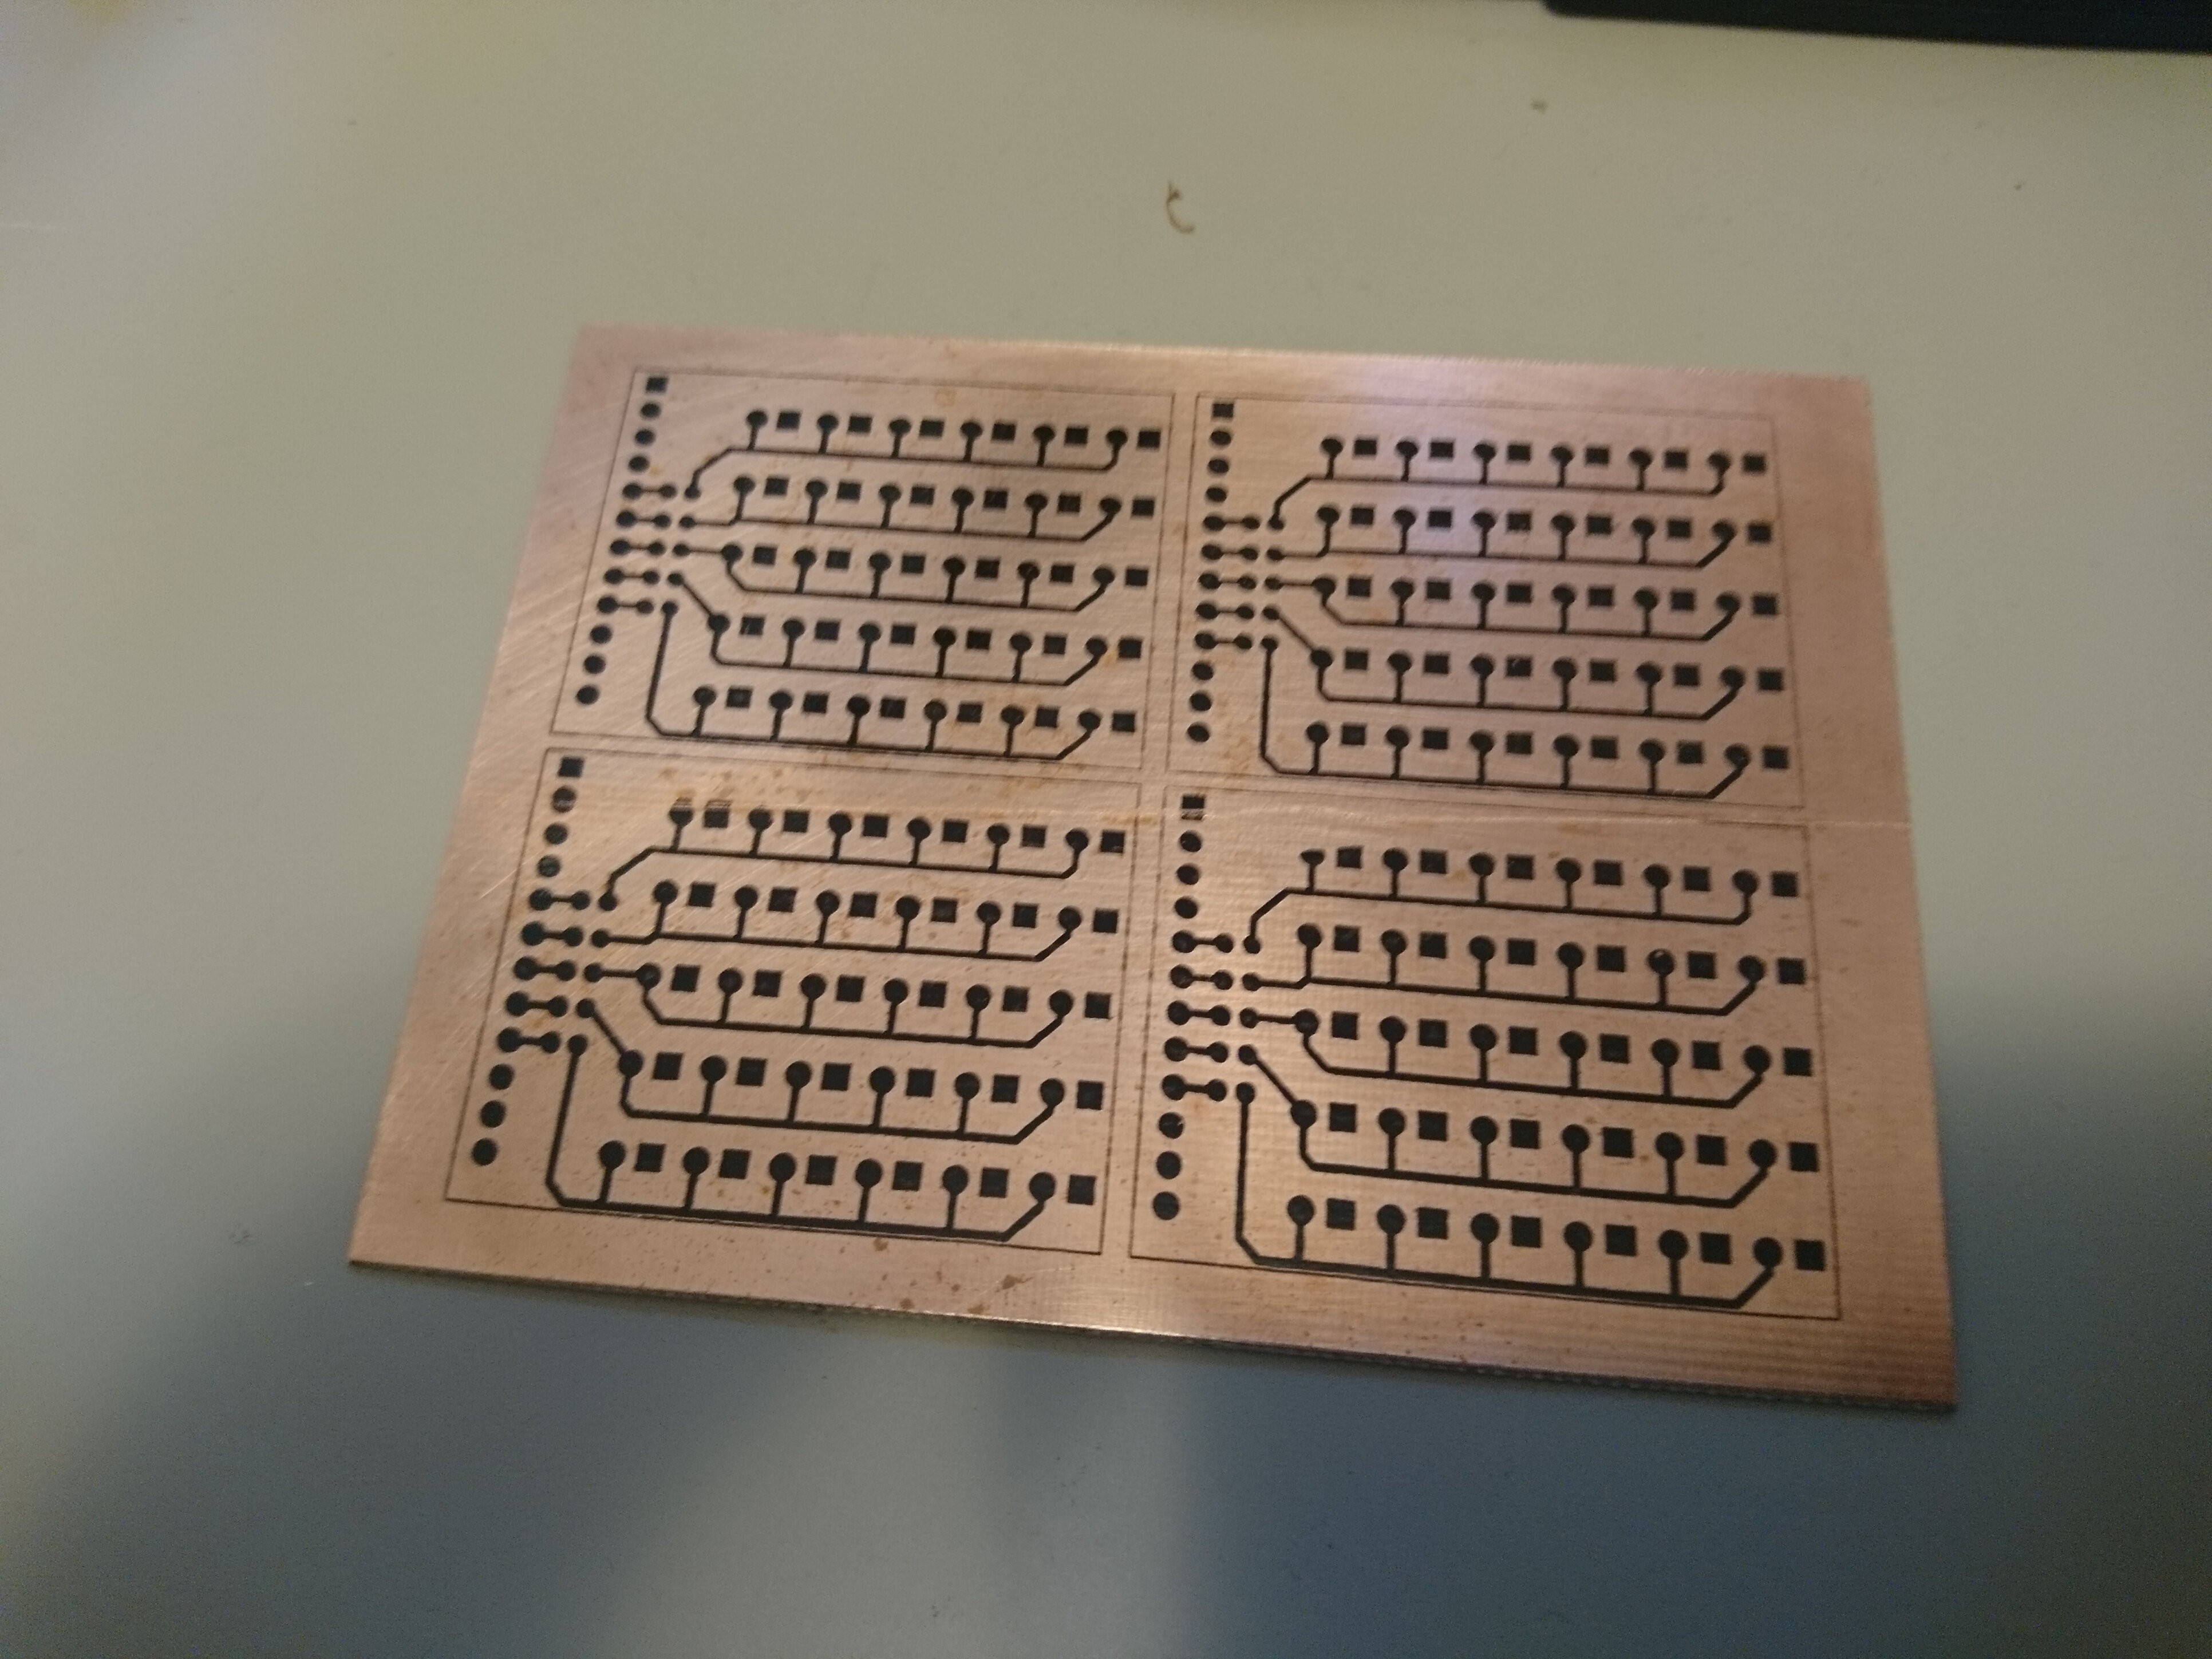
7Opening the Oreo
![]()
![]()
![]()
![]()
As you can see the outcome is very good. You might also notice that I didn't align the packaging tape very well and I will have to use a sharpie to fix some of the spots that are not transferred well.
Also as you may have noticed, I just peel off the papers without water or even waiting for it to cool down. Its perfect :) -
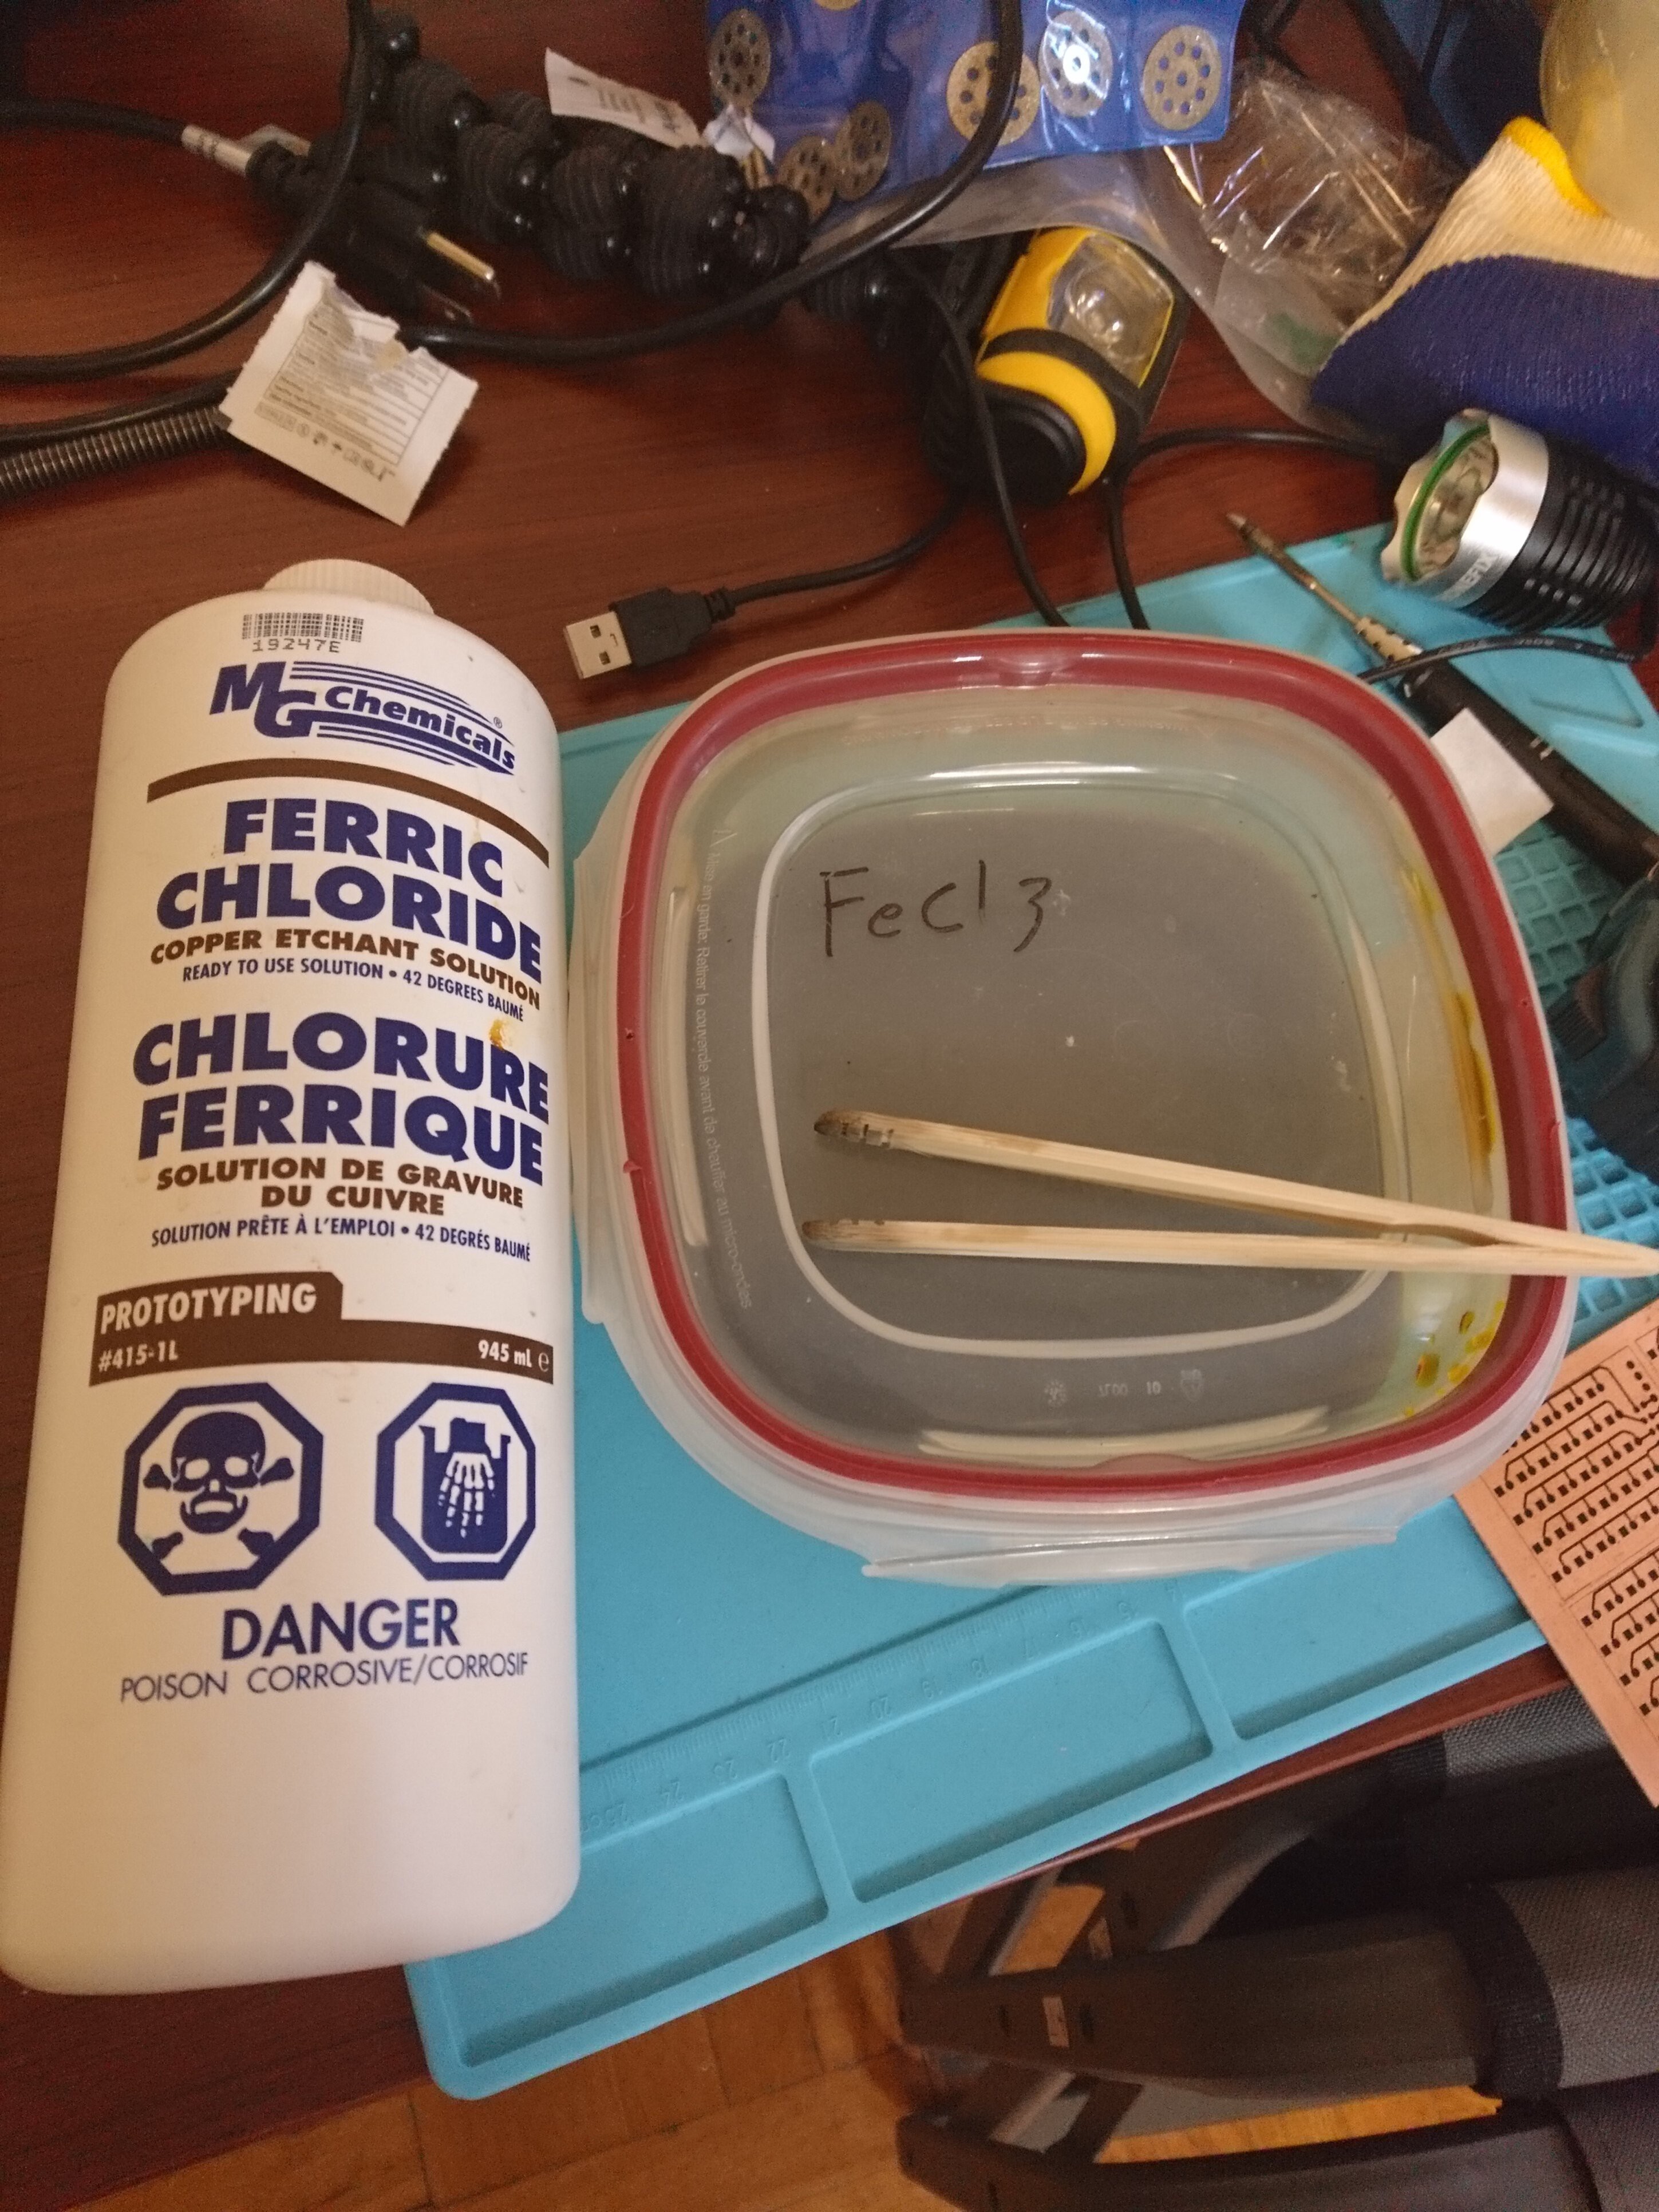
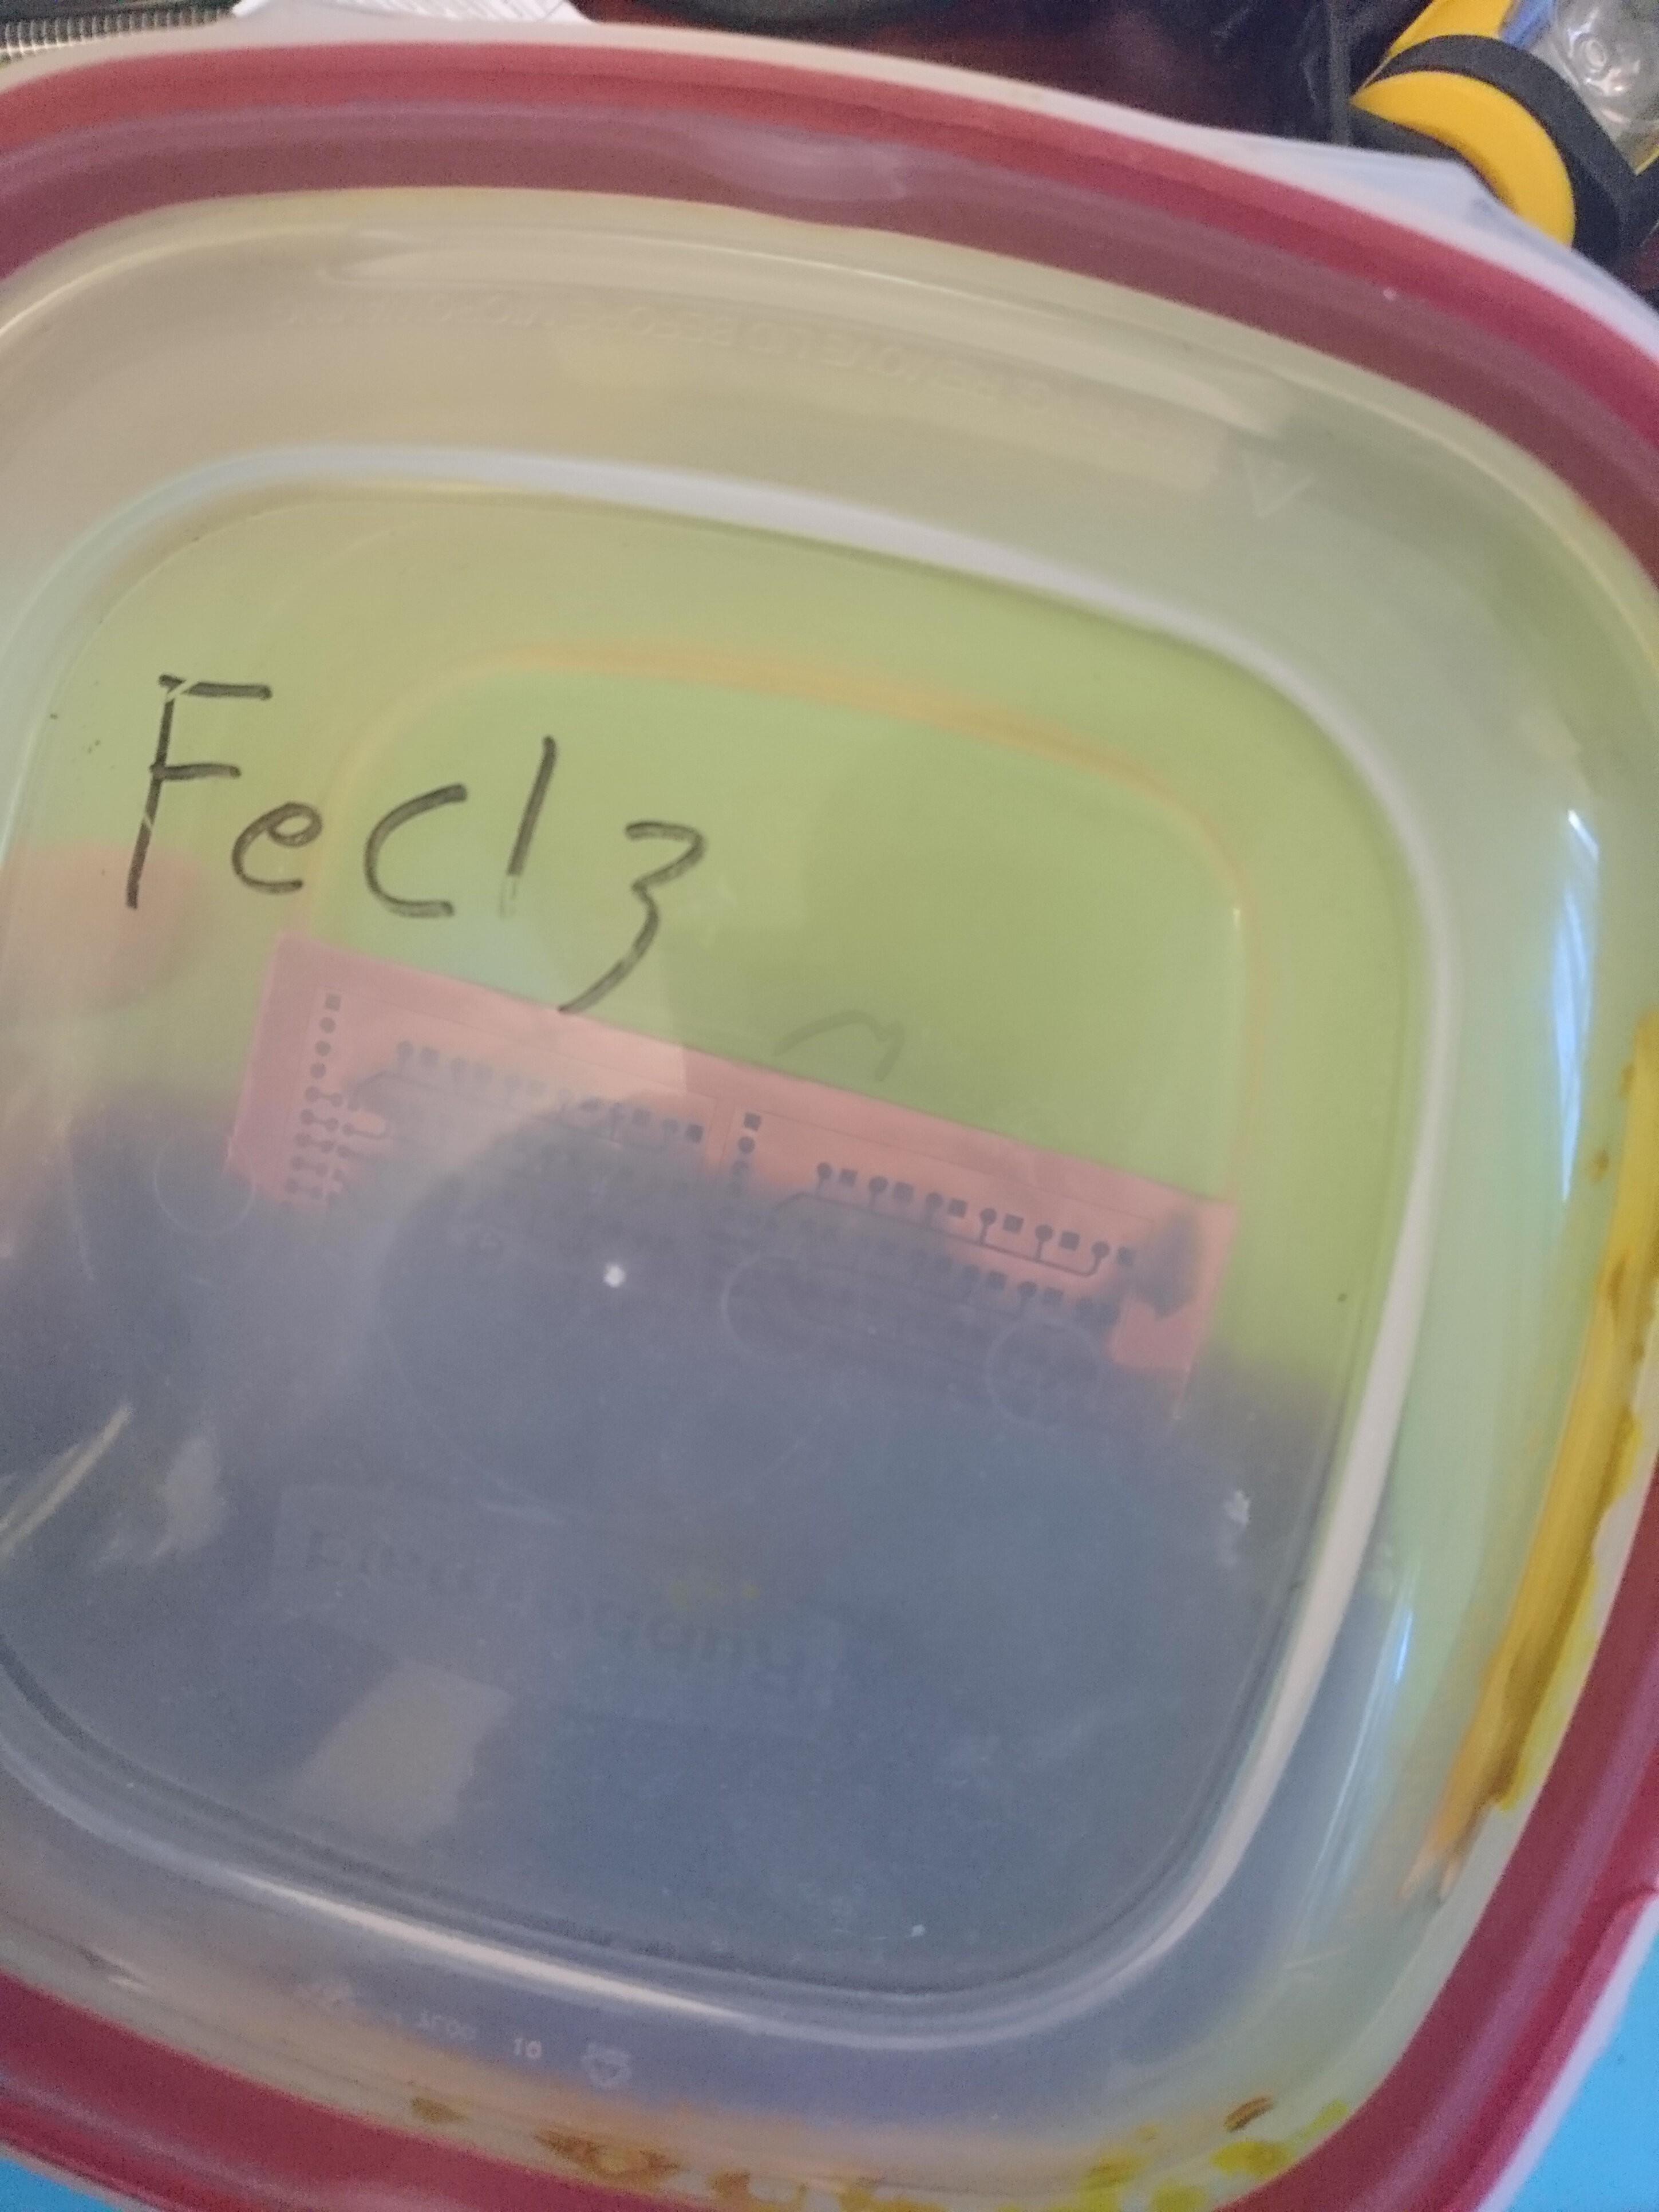
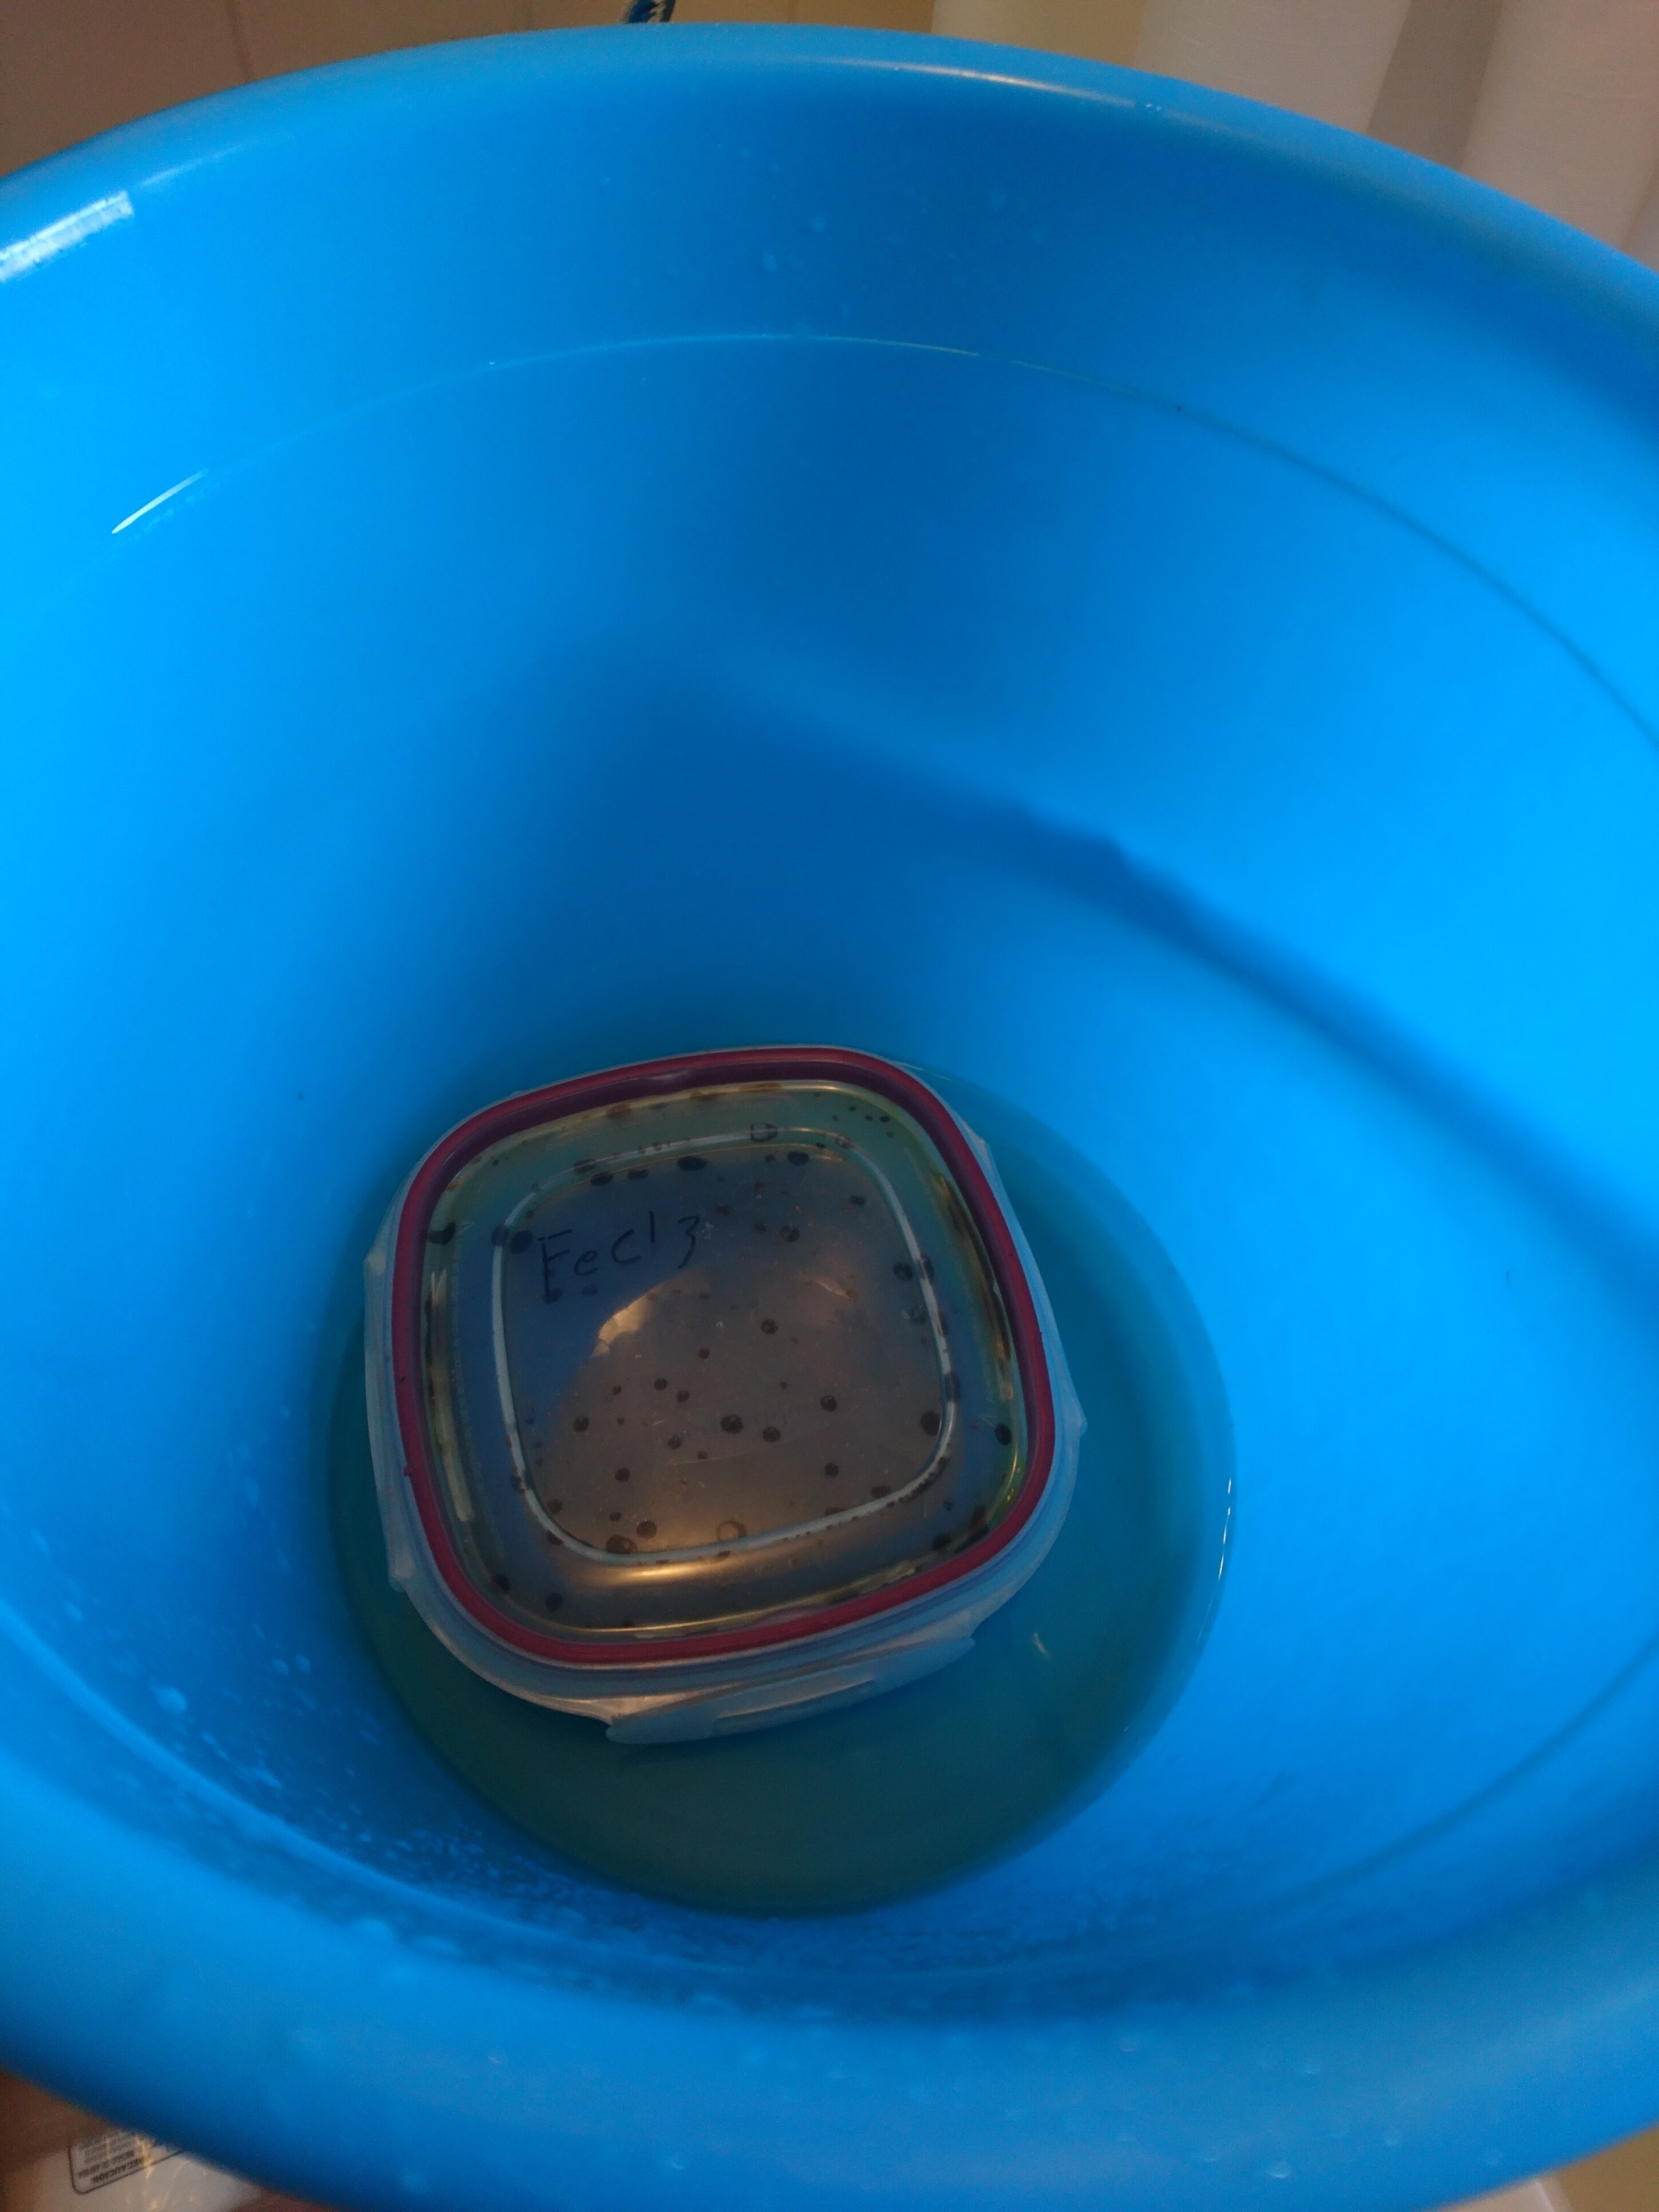
8Etching!
![]()
![]()
![]()
I use a ready mixed Ferric Chloride but you can use any.
I use an airtight container to shake the solution without having to worry about accidents.
Also I used a hot water bucket to speed the etching process.
-
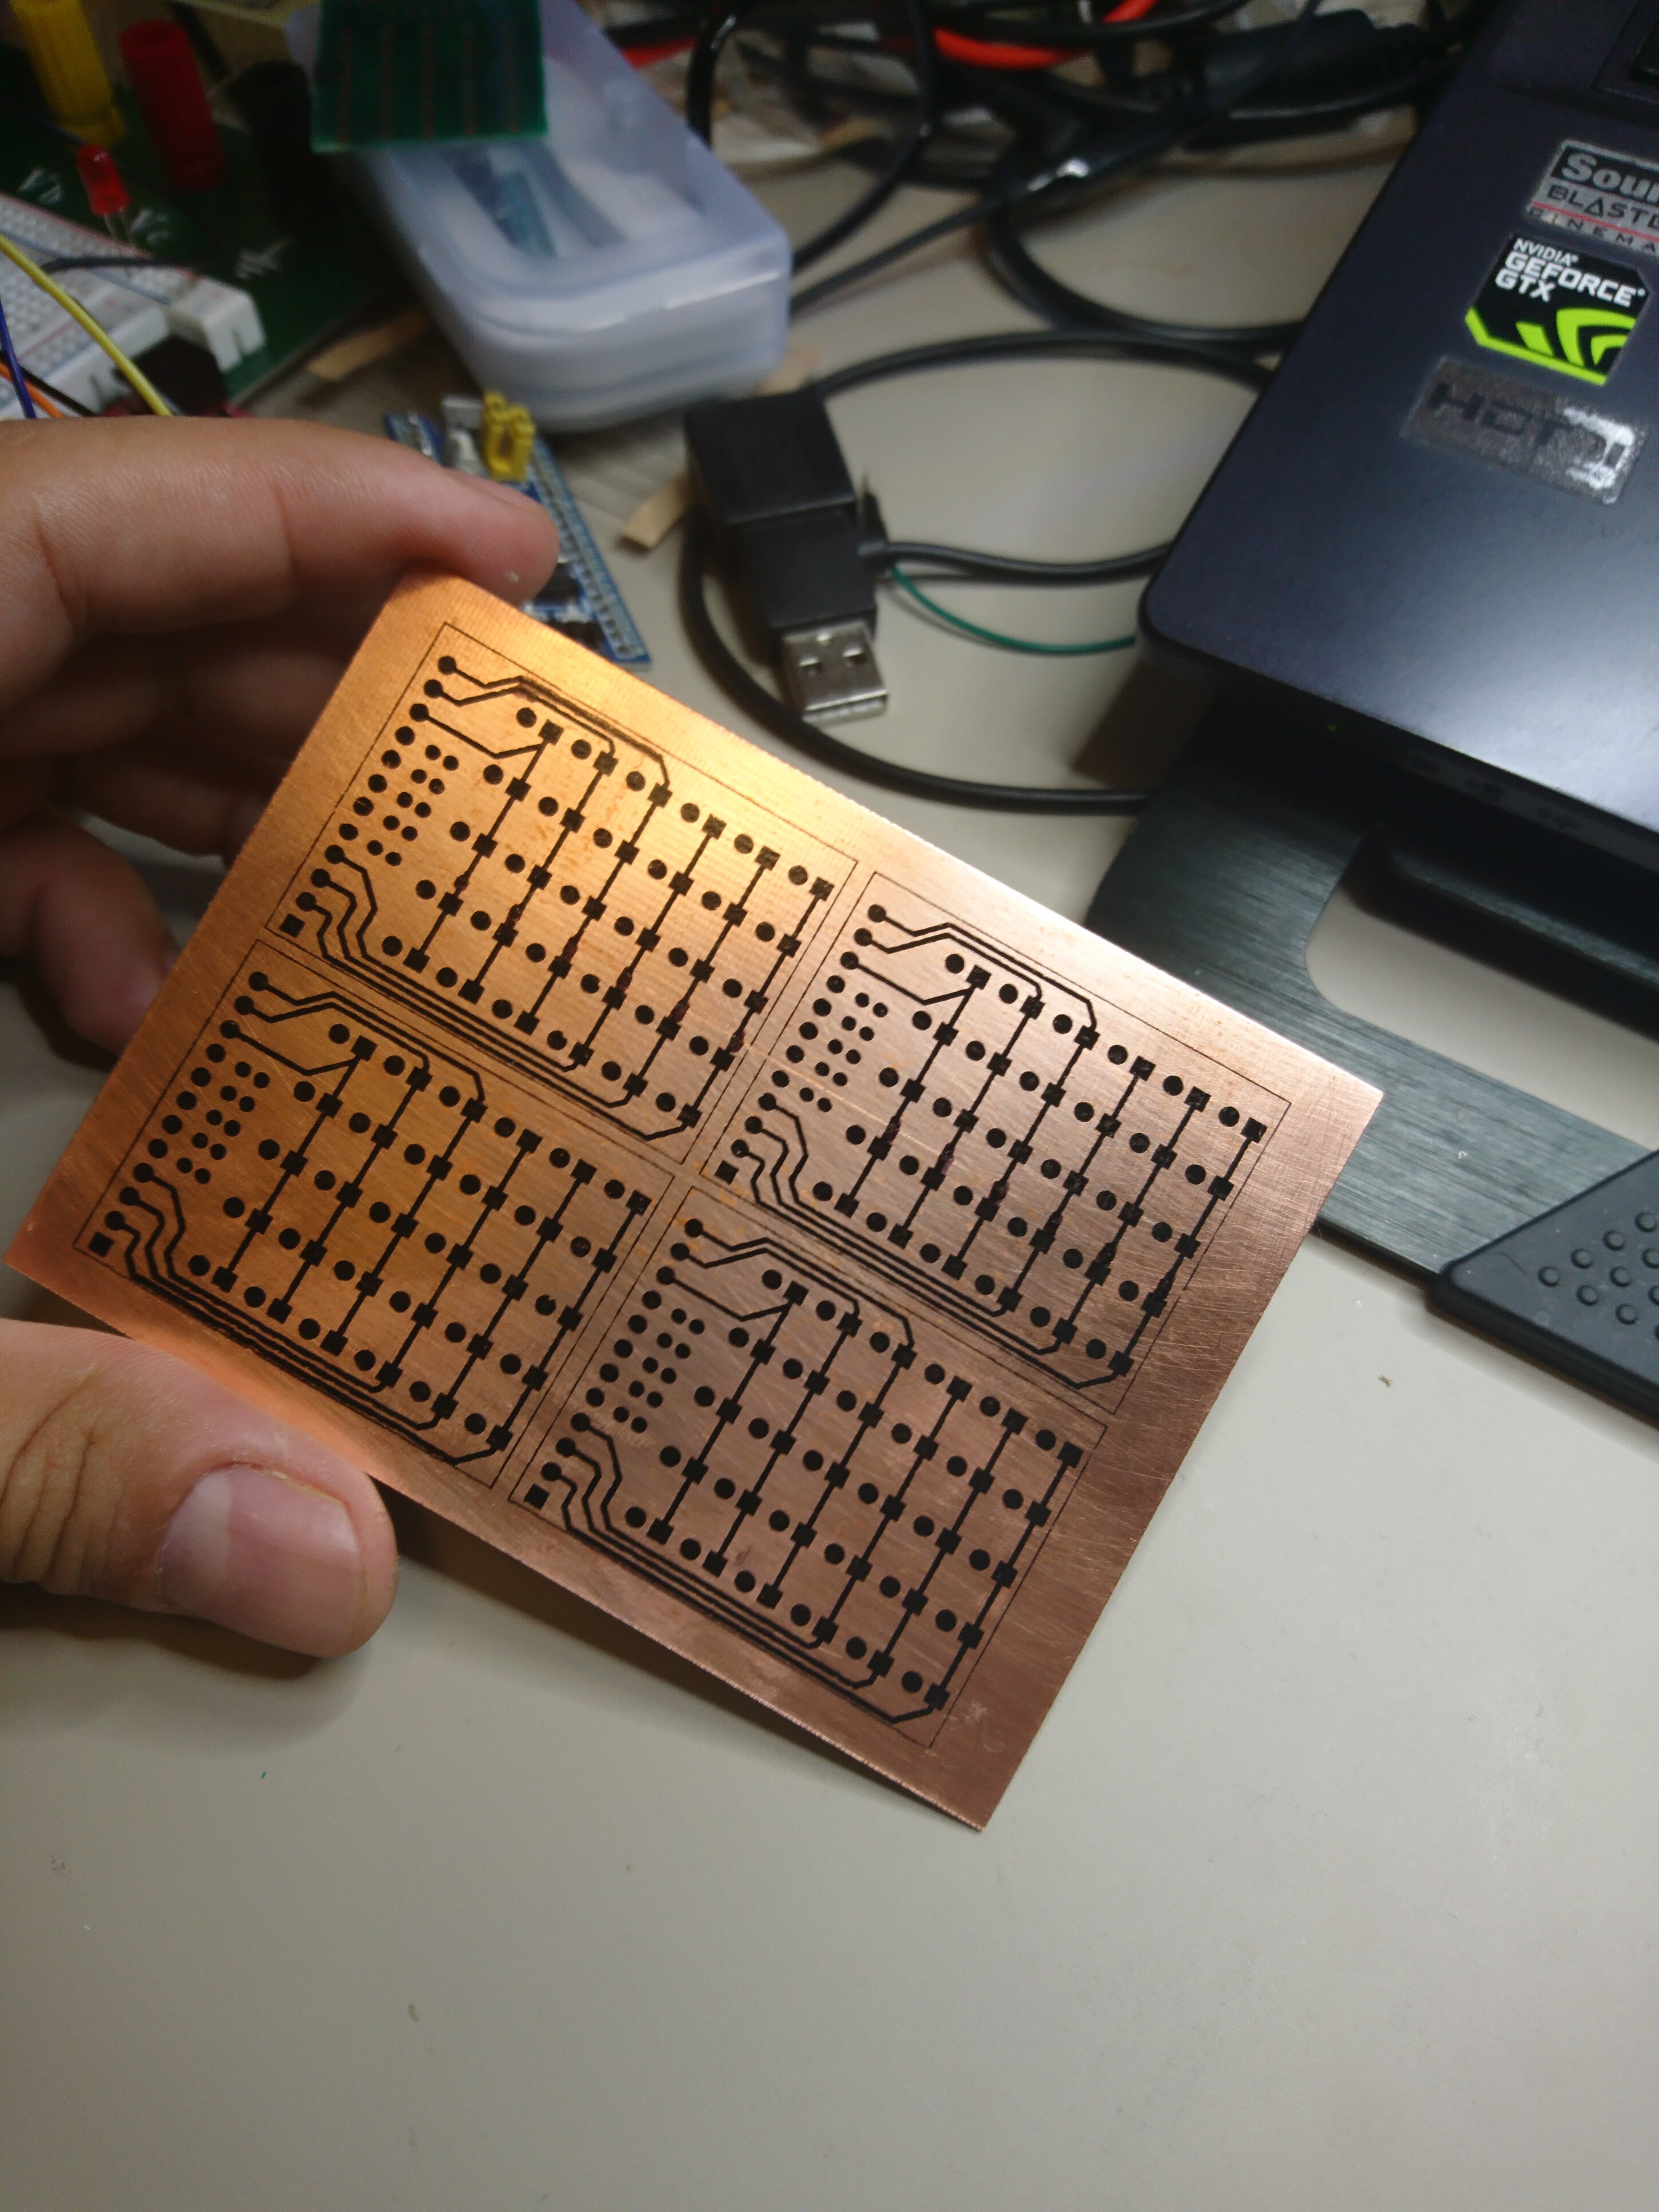
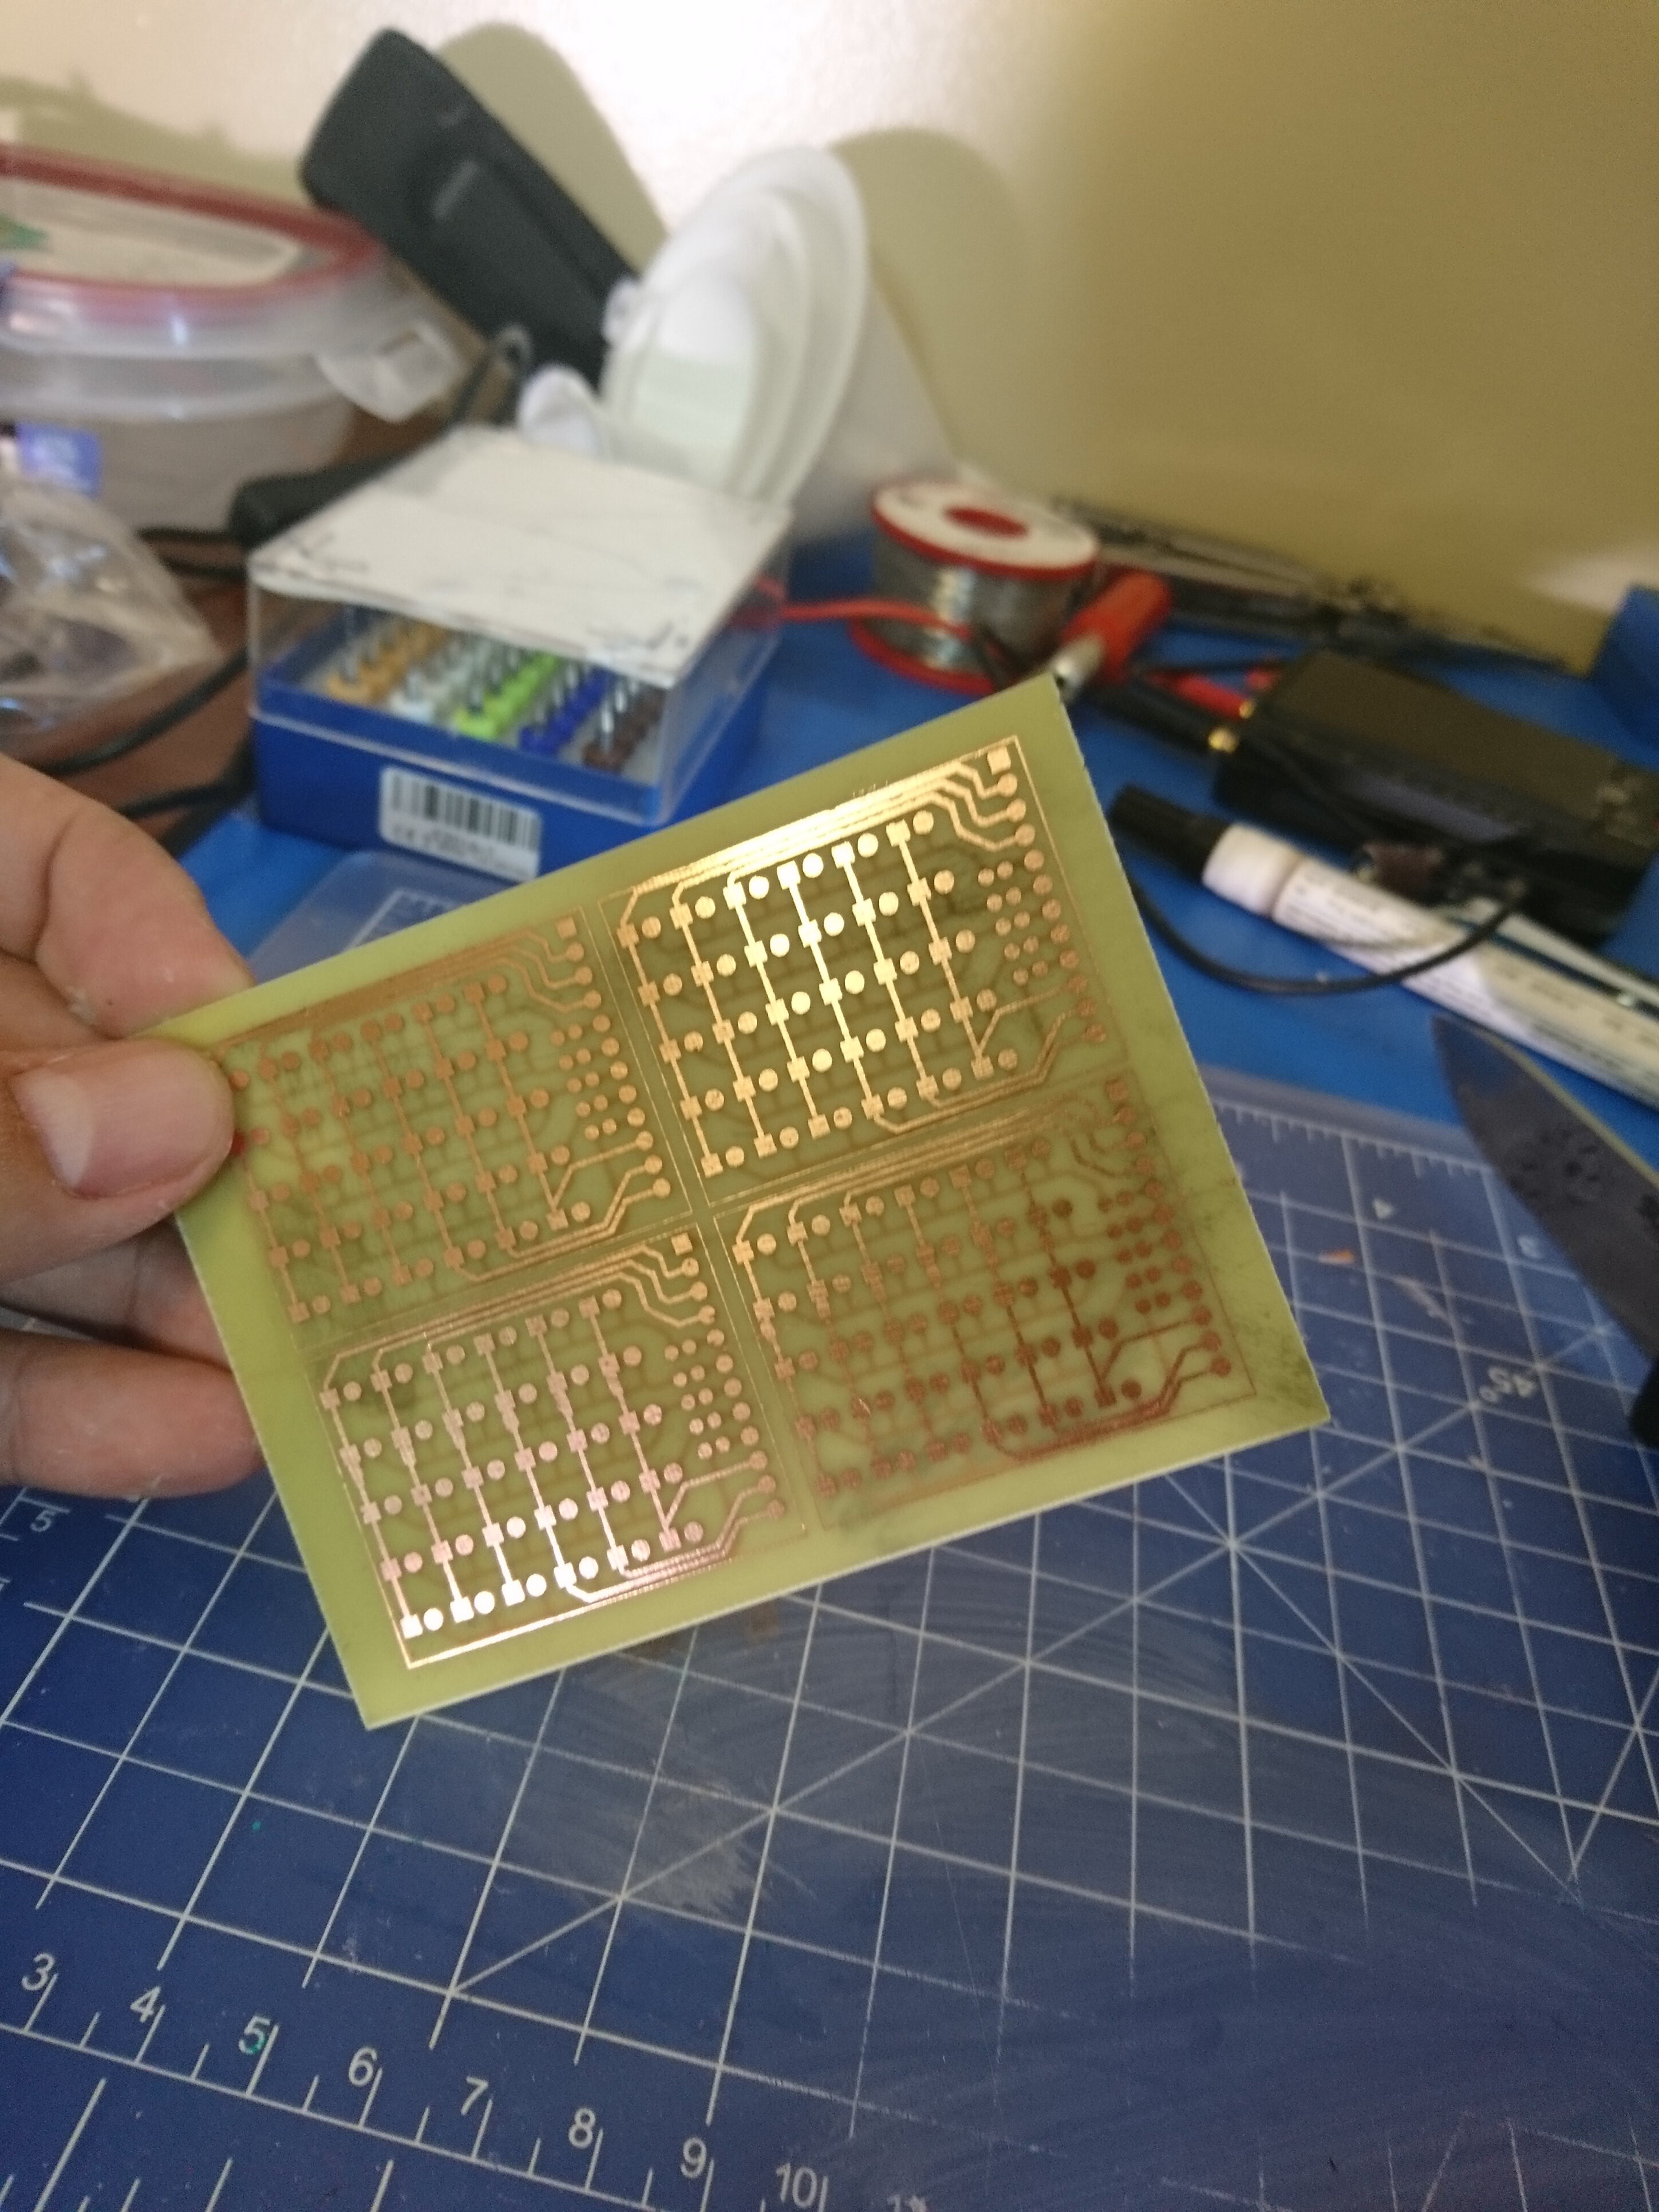
9Its perfect! Maybe!
![]()
![]()
![]()
-
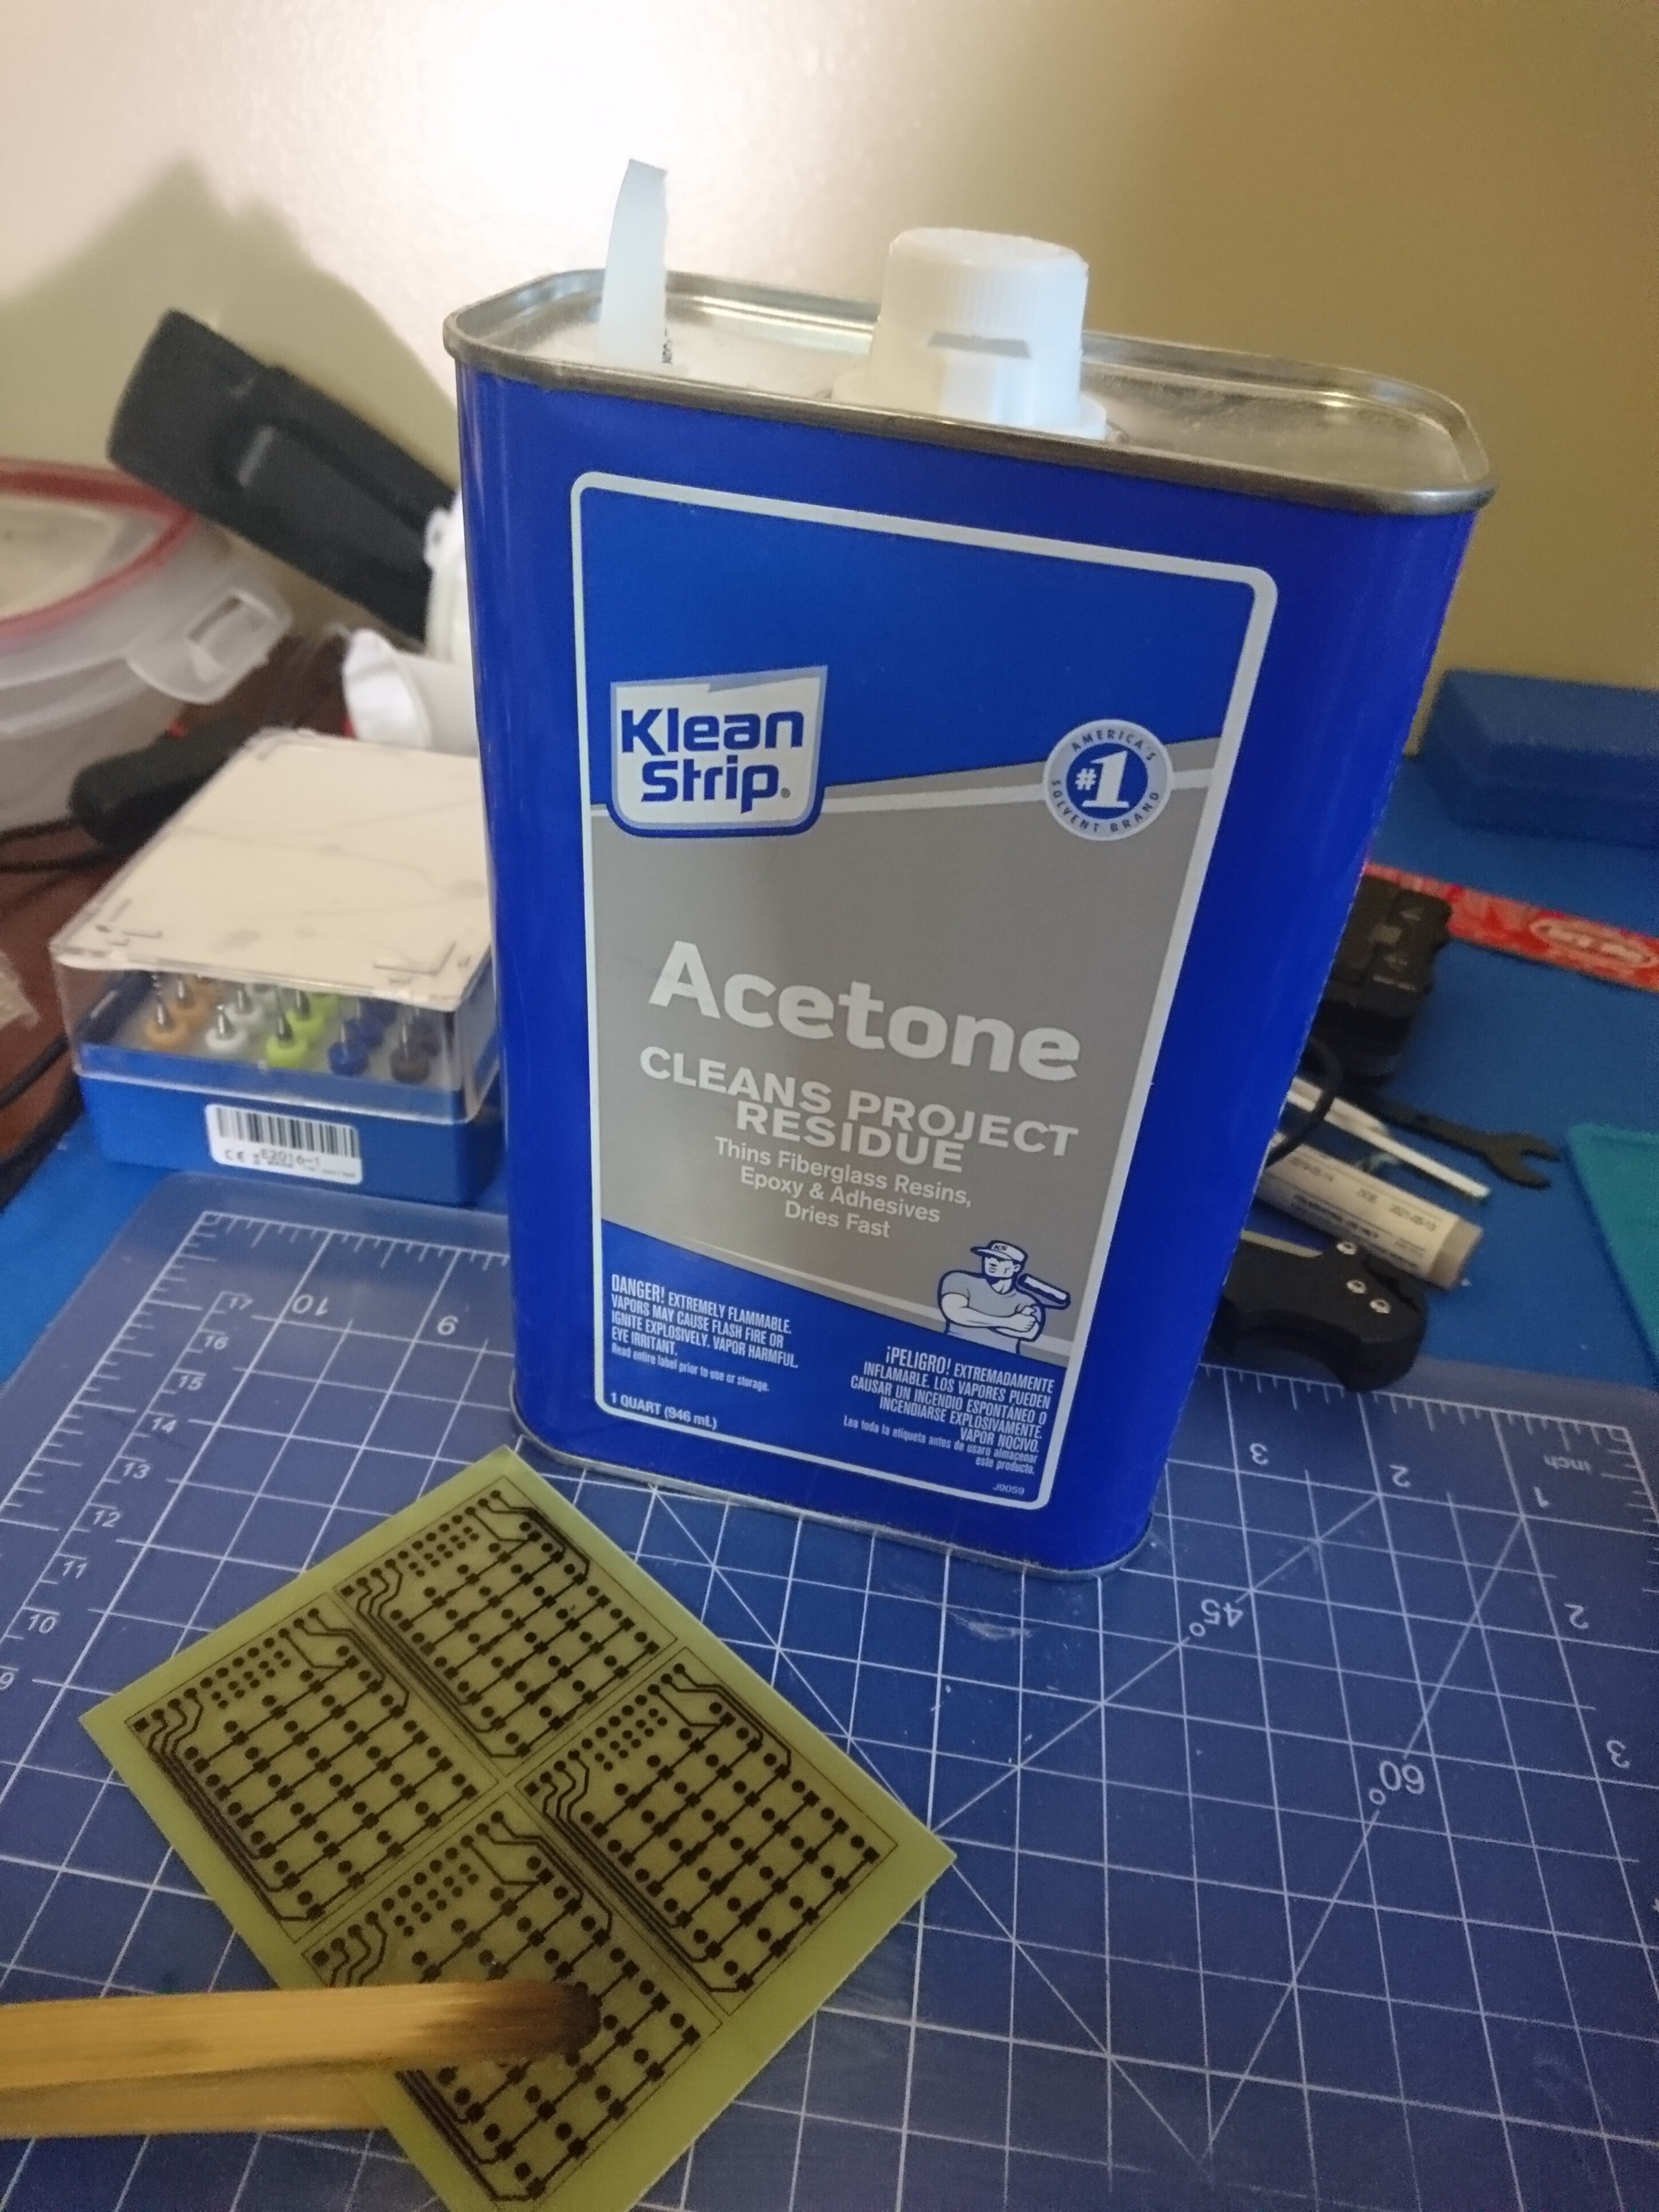
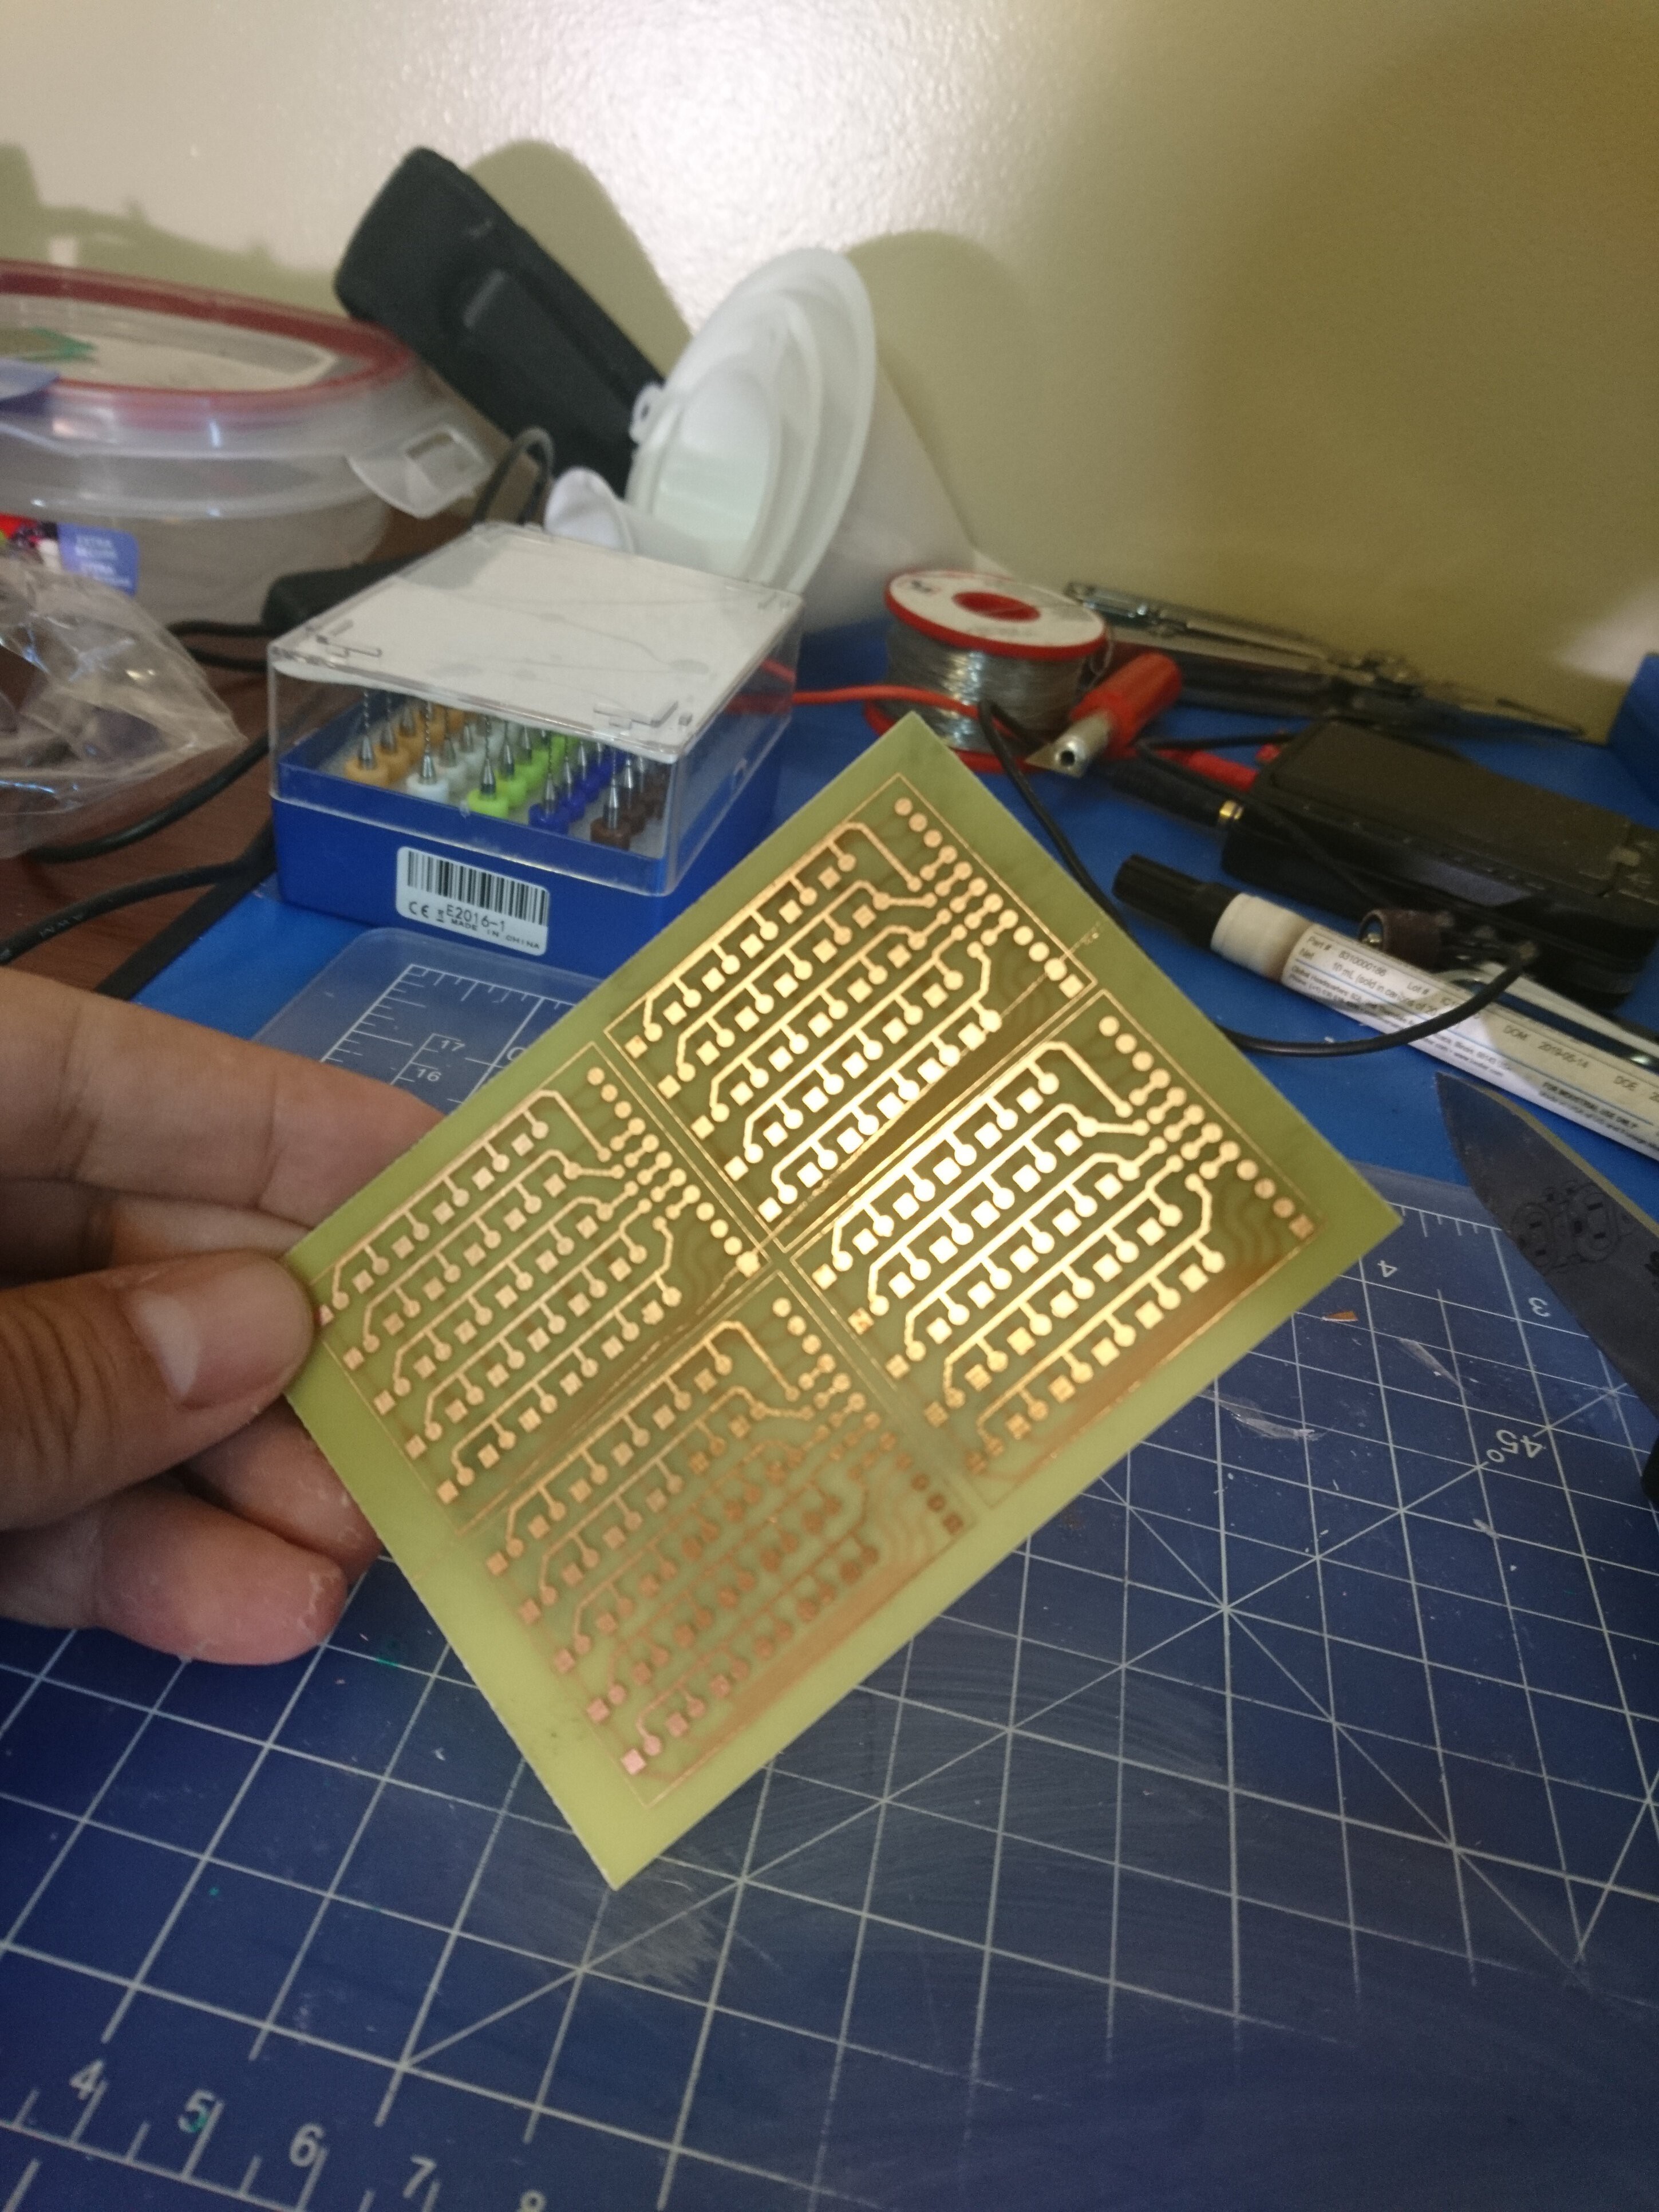
10Clean the ink with acetone
![]()
![]()
![]()
You can use a piece of cotton or tissue and put little acetone on it. You don't need the industrial acetone I am using, Any acetone nail polish remover will work.
After cleaning, I had to scratch some extra copper that didn't etch because of the misalignment of the packaging tape but not too bad. I am happy with the results.
Also make sure to do a continuity test using a multi-meter to make sure there is no shorts or cut in traces.

 Now print the same traces on the taped paper and make sure you put the taped paper in the printer drawer facing the right orientation were the printer prints. The new traces Must be printer on the tape.

 Toner transfer using any home iron.
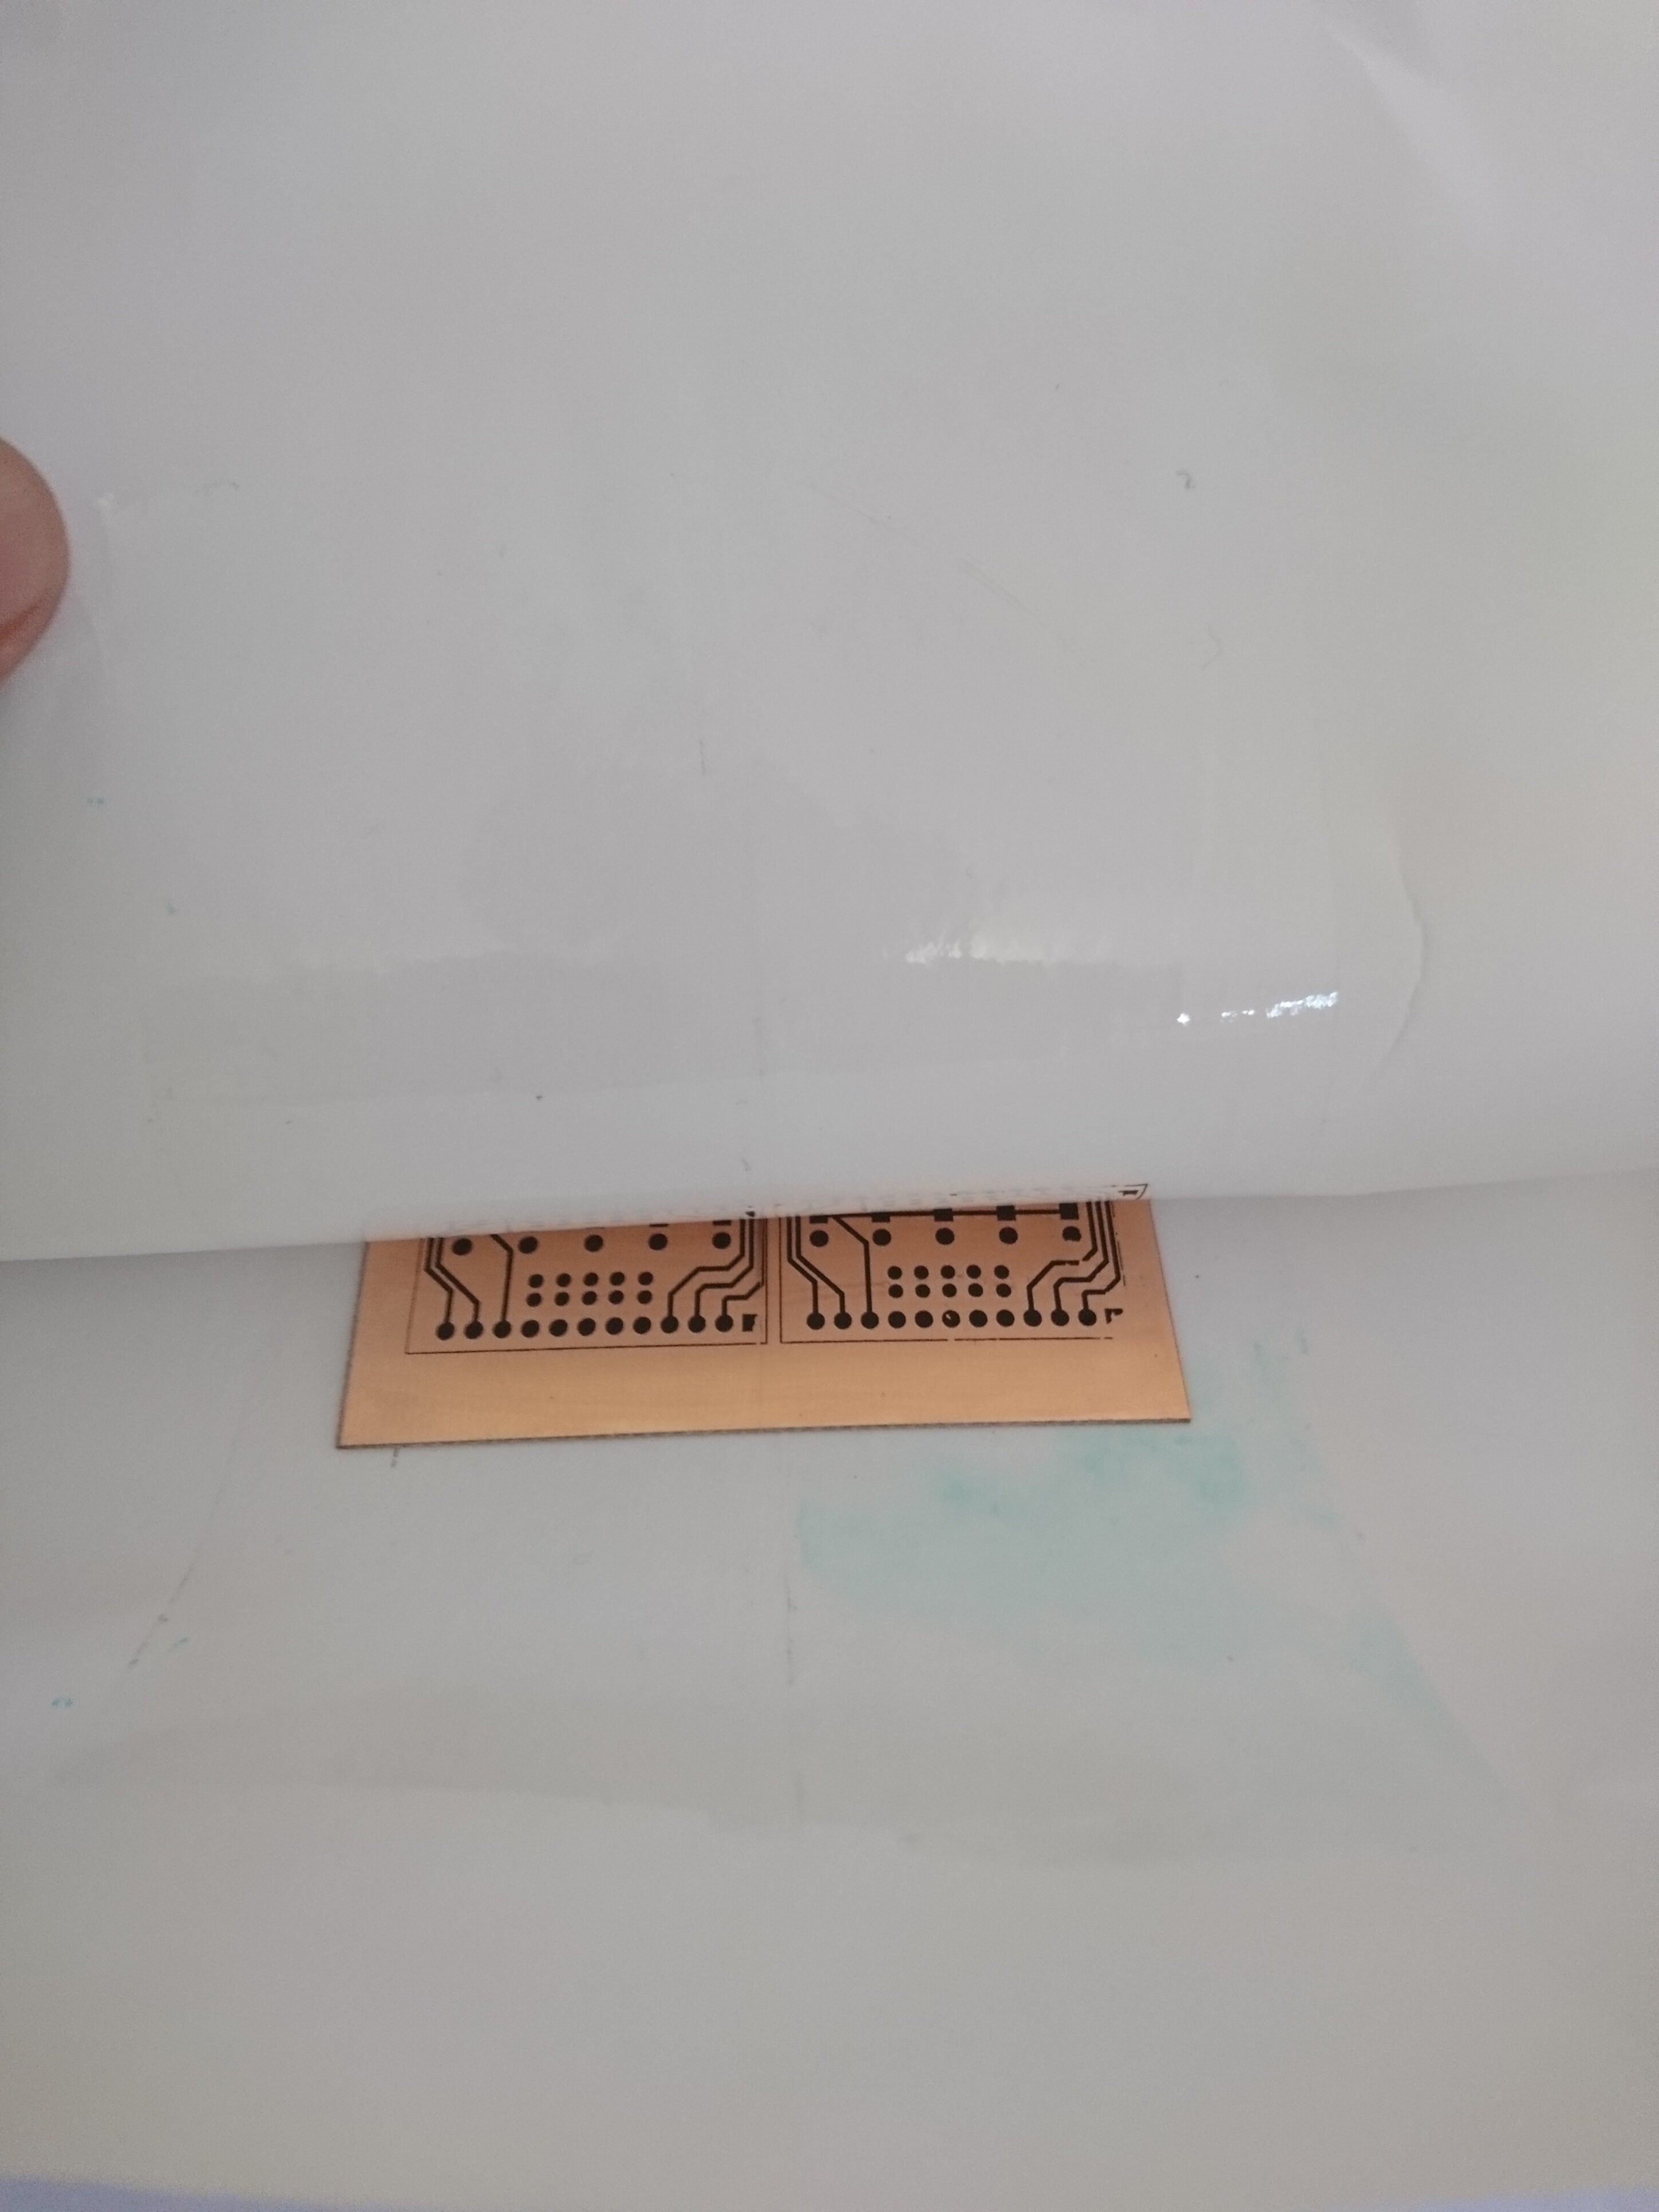
Discussions
Become a Hackaday.io Member
Create an account to leave a comment. Already have an account? Log In.
Hey,
I just finished a project where I describe my method of making 2 layer PCBs at home :)
https://hackaday.io/project/173323-yet-another-guide-on-how-to-make-pcbs-at-home
Good work !
Are you sure? yes | no
Thank you.
I like you project too. Good Job ;)
Are you sure? yes | no