Turning your Raspberry Pi into a camera
The idea is to make the Raspberry Pi High Quality Camera look like a Camera using a 3D printer.
The idea is to make the Raspberry Pi High Quality Camera look like a Camera using a 3D printer.
To make the experience fit your profile, pick a username and tell us what interests you.
We found and based on your interests.
Camera.zipUpdate Ver(STL)x-zip-compressed - 26.06 MB - 07/21/2020 at 23:34 |
|
|
camera.stpUpdate Ver(STEP)stp - 26.85 MB - 07/21/2020 at 23:33 |
|
|
Instruction manual.pdfInstruction manualAdobe Portable Document Format - 1.14 MB - 07/19/2020 at 10:33 |
|
|
We are currently looking at simplifying and downsizing the camera.
We also made the shutter button a little larger in response to feedback.
Below is a comparison of the dimensions and internal structure.
I even bought a 3D printer! But I'm a little overwhelmed with school assignments at the moment, so prototyping is slowing me down.
Also, since I'm here, I'd like to pay a little more attention to the design. More product-like.
That's the status report.
Use DeepL for translation.
It's very trivial, but it's still not a pretty sight with the power feed cables exposed, so I edited the model a bit to make a removable storage box.
The cable will be wrapped around the inside.

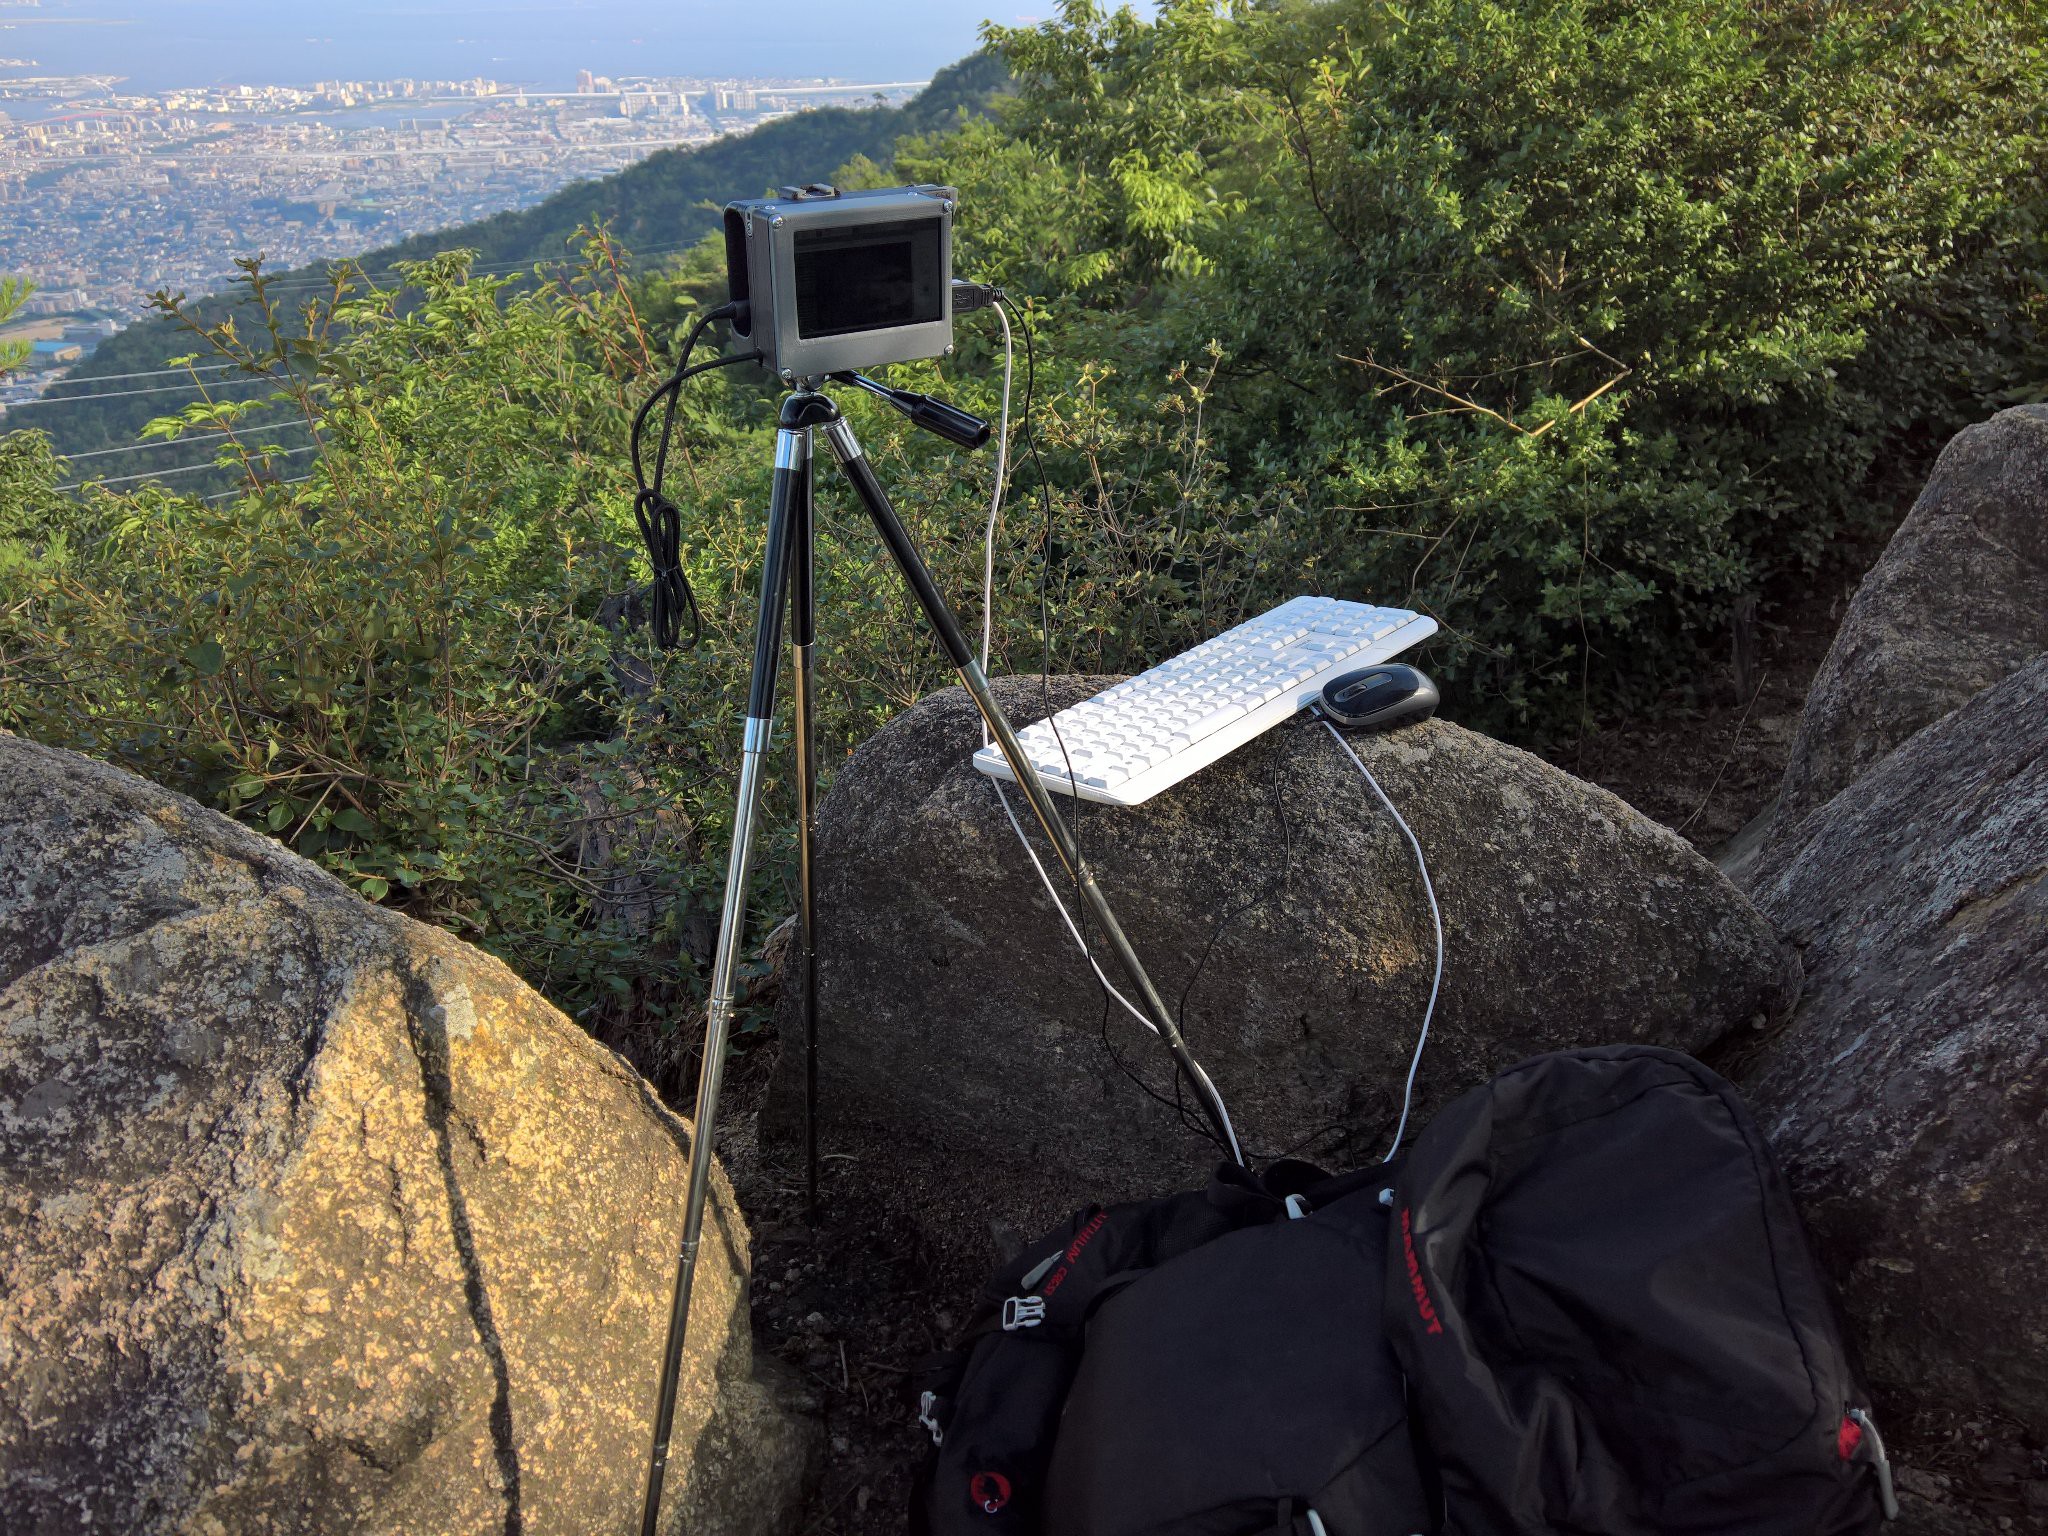
I recently took it to a nearby mountain to test it out for shooting.
However, the shutter button doesn't work, so you need a mouse and keyboard.
Create an account to leave a comment. Already have an account? Log In.
Use PLA, ABS, or nylon as the filament material.
If you are going to paint it, you will need a finishing treatment. Polish the surface with sandpaper and spray.
As mentioned in the project log, we do not have a program for the shutter button, so it is not currently functional.
We use DeepL for translation.
I am currently playing with a Raspberry HQ camera microscope (https://www.instructables.com/Raspberry-Pi-HQ-Camera-Microscope-a-Minimalist-LEG/) and I am currently using a Pimoroni Touchpad for evoking preview (total area, central ROI) and taking of images of the total area or ROI while applying different image effects. Works well. For the program I use the Python picamera module. The zoom function is very helpful, allowing to restrict the displayed image size to or below your displays resolution and either show the total view or just a selected area. I will add my script to the instructable in the coming days, so you may have a look.
Awesome! It's amazing! I will definitely take a look at it.
By the way... I'm using a pimoroni hyperpixel 4.0 as my camera viewfinder, and I was wondering if you could give me some hints on how to program the Raspberry Pi 4B to take pictures with the tact switch connected to the Hyperpixel.
such a beautiful design!
I am make a similar pi-camera too.
I think replace that little button with a 8mm or 12 mm push button will improve touch experience.
or use a capacitor touch button to avoid screen vibrate while take a snap.
I might be able to help you make the shutter button work. What software are you running on the pi, and how are you currently activating the shutter?
日本語でもいいよ。
コメントありがとうございます。
現在入れているソフトウェアというのはOSのことでしょうか?Raspberry Pi OSを入れています
シャッターボタンについては全く仕組みがわからないので接続していない状態になっています。
GPIOは全てHyperPixel 4.0の接続で埋まっているのですが、Pin No.17(3.3V)とPin No.19(GPIO10)は使用していないようなので、そこにタクトスイッチを接続したらシャッターボタンができるのかな?と考えているのですが、やり方がわからない状態になっています。
もう一つ、HyperPixel 4.0のディスプレイ裏にはI2Cと呼ばれる5個のピンがあるのですが、そこがシャッターボタンの接続に使えるのかもわからない所です。
Looks amazing, am working on a similar setup, with an adjustable screen angle. So fun to cobble together a pretty okay but super super modular (flexible) camera!
Become a member to follow this project and never miss any updates
A great and interesting project. But I have no 3D printer so i must use a Company that can make the case for me. But if I do that what information do I need to geive the company. Obviously which material - but what about finishing /polishing etc. I am afraid I have no idea abut 3D printer processing.