-
Buying a donor camera
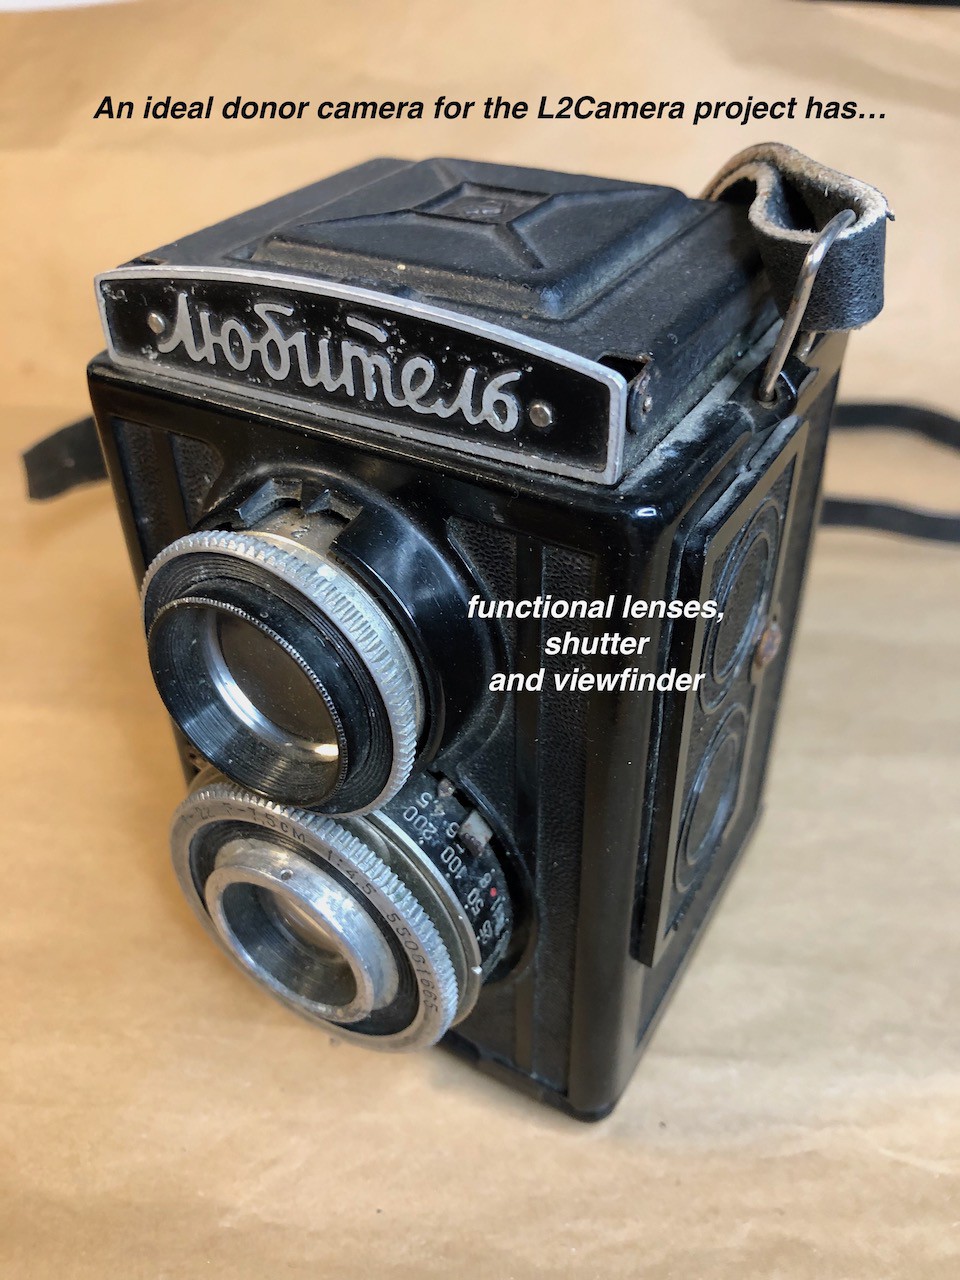
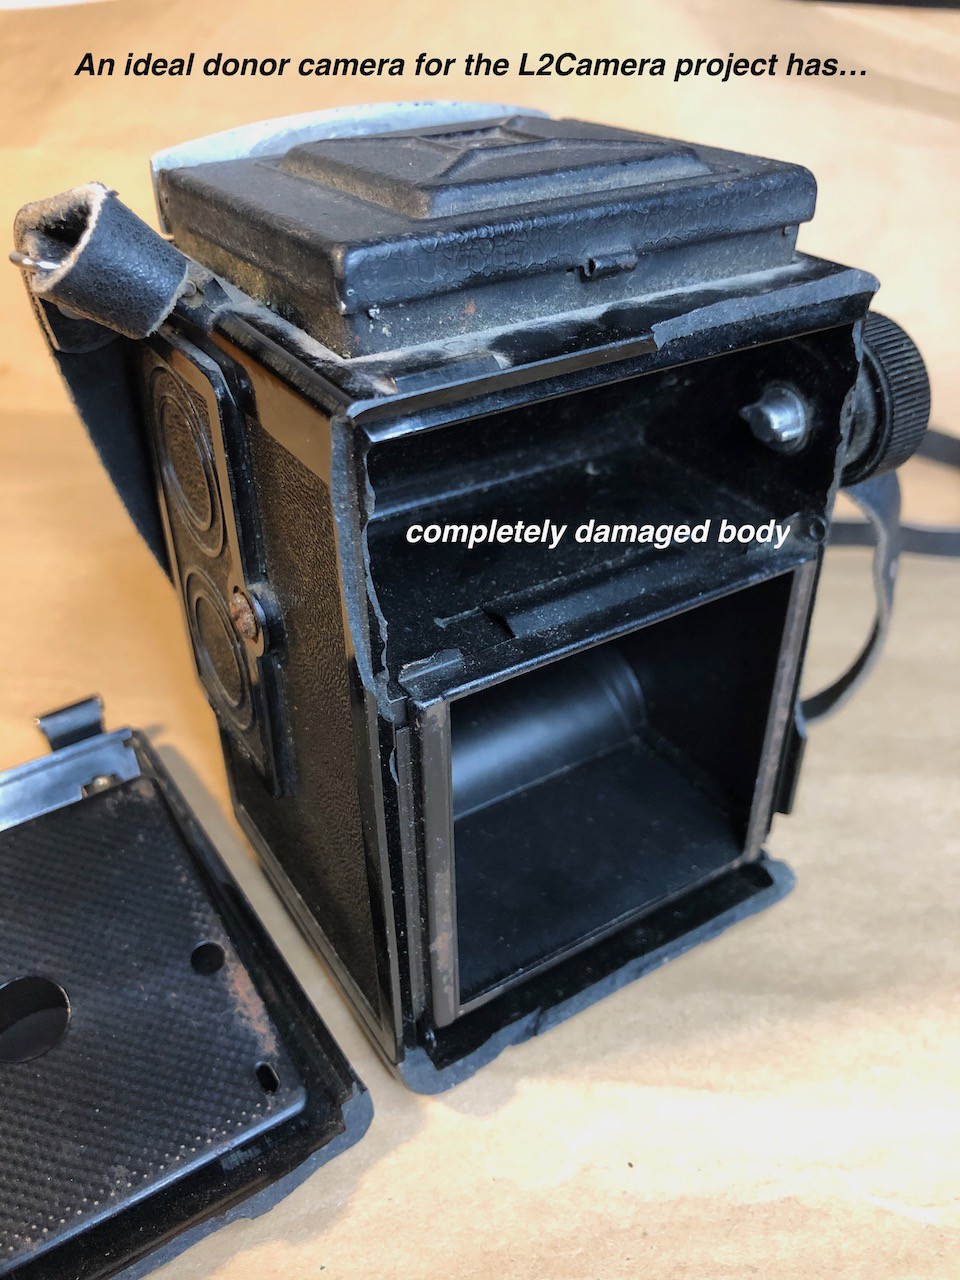
11/24/2020 at 10:10 • 0 commentsAn ideal donor camera for the project has irrecoverably damaged body, but a functional shutter, lenses and a viewfinder. Do such exemplars exist? They do and I found at least two among ten Lubitel cameras I bought within the project.
![]()
![]()
I bought all of the cameras on the Internet, except one which I found in a photo shop. My recipe for searching and buying a Lubitel camera is as follows:- Monitor eBay and local East European web sites (listed below)
- Search for a Lubitel-2 model using the following keywords: Lubitel, Ljubitel, Любитель
- A decent camera should cost between ten and fifteen dollars without shipping
Several notes on the recipe. Currently the project works with the Lubitel-2 model only. I'm planning to adjust the design to support other models, Lubitel and Lubitel-166, later. Questions about price are always tricky. The lowest price I paid for a Lubitel camera was $2 (the one I bought in the photo shop, which sold it for spares). The highest price I encountered was around $100. From my perspective, it makes sense to pay these money only for a serviced camera with some kind of warranty offered by the seller or, at least, with sample shots provided. From my experience, even if the Lubitel camera looks like a brand new one, it requires re-hauling for sure. This project uses only components of a Lubitet camera, therefore, my suggestion is a $10 tag. That's the price which I paid for the most of the camera.
Working on this project I developed a way to revive used Lubitel cameras and bring them second life. Therefore, if you find a piece that doesn't match the image of the ideal candidate for project, please firstly consider repairing it. I believe, bringing to life a used Lubitel camera is better for our planet than producing a new plastic camera like the Lomography society does.
Soviet photo industry produced more than one million Lubitel camaras. Most of them settled down in East Europe. Here is the list of local classified ads web sites.
- Czech Republic: bazos.cz, sbazar.cz, aukro.cz
- Slovakia: bazos.sk
- Poland: allegro.pl
- Ukraine: olx.ua
- Belarus: gde.by, sum.by
- Bulgaria: olx.bg
- Estonia: osta.ee, soov.ee
- Russia: avito.ru, ula.ru, meshok.ru
Use these web sites responsibly and on your own risk, beware of fraud.
-
Selecting a 3D printer
11/19/2020 at 12:23 • 0 commentsI have access to a pair of shared Prusa printers: an i3 MK2 and an i3 MK3 models. I've been using these printers for two years and not only learned how to print, but also how to calibrate the printers, do troubleshooting, maintenance and repair (shared hardware is severely abused). I printed with PLA, ABS, PETG, PET, TPE from variety of manufacturers. During all of that I was puzzled: why many 3D printing forums are full of questions describing issues? The description of my experience was "I just printed".
That was true until I decided to validate my design against another printer. I borrowed an Ender-3 printer with a glass bed from a colleague of mine. This is rather popular and common model of 3D printers.
Ender-3 turned out to be a crush-test to my design.
I note the following differences between the Prusa printers and the Ender-3:
- no auto bed leveling
- glass bed instead of PEI
- bowden extruder instead of direct one
The first two are, probably, the most crucial. I had to learn how to make bed leveling manually and how to make it properly. It took me two days. Filament has lower adhesion to glass, compared to PEI surface. In some cases it's an advantage. For example, when you remove prints after printing - you just pick the prints from the bed. In my case that was an disadvantage, because even PLA prints suffered warping. To mitigate it, I had to print with brims and remove them at post-printing.
But I was really surprised with another issue - so-called elephant foot effect. It's when the bottom layers of the print got shrunk. In this case it made harder two pieces of the camera body pieces to mesh properly. I encountered this issue for the first time in my experience and in happened with the Ender-3 printer. I had no such issue with Prusa printers. 3D printing forums suggest many reasons for that effect: high bed temperature, insufficient cooling, mechanical issues with the Z-axis, etc. In my case, I believe, it was a mixture of reasons.
I don't expect all of 3D printing enthusiasts interested in my project to switch to PEI-auto-bed-leveling printers in an instant. Therefore, I reworked my design and formed a set of recommendations for printing with the common goal to eliminate the aforementioned issues. All of these will be included into the release.
-
Selecting filament for the camera
10/15/2020 at 14:04 • 0 commentsI printed first prototypes with what I had on hand - white PLA Pro filament. The prints were not opaque enough and I had to blacken their inside surface with black acrylic paint. As the project progressed towards a more mature design, I started looking for a better filament option.
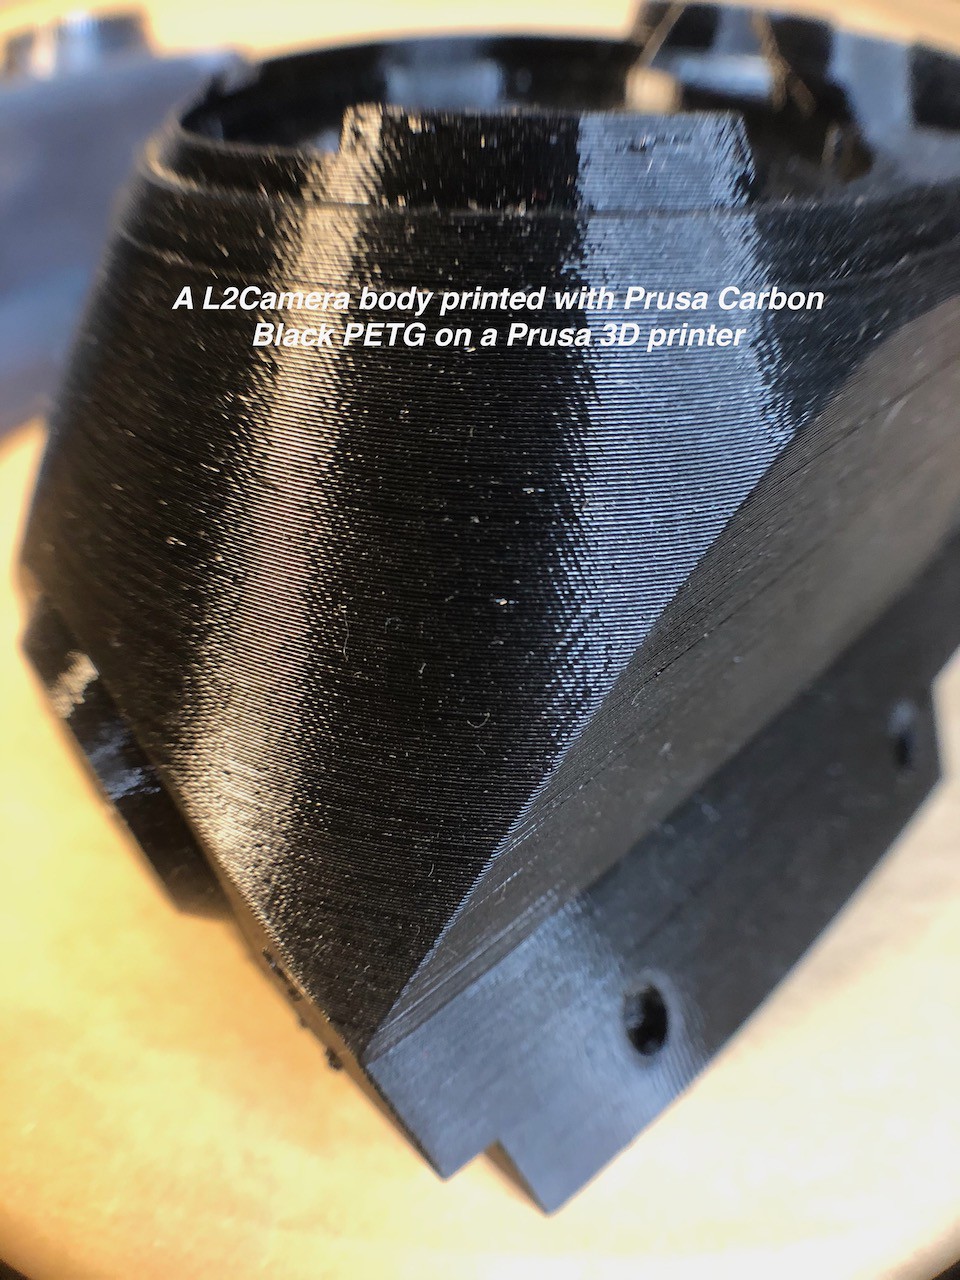
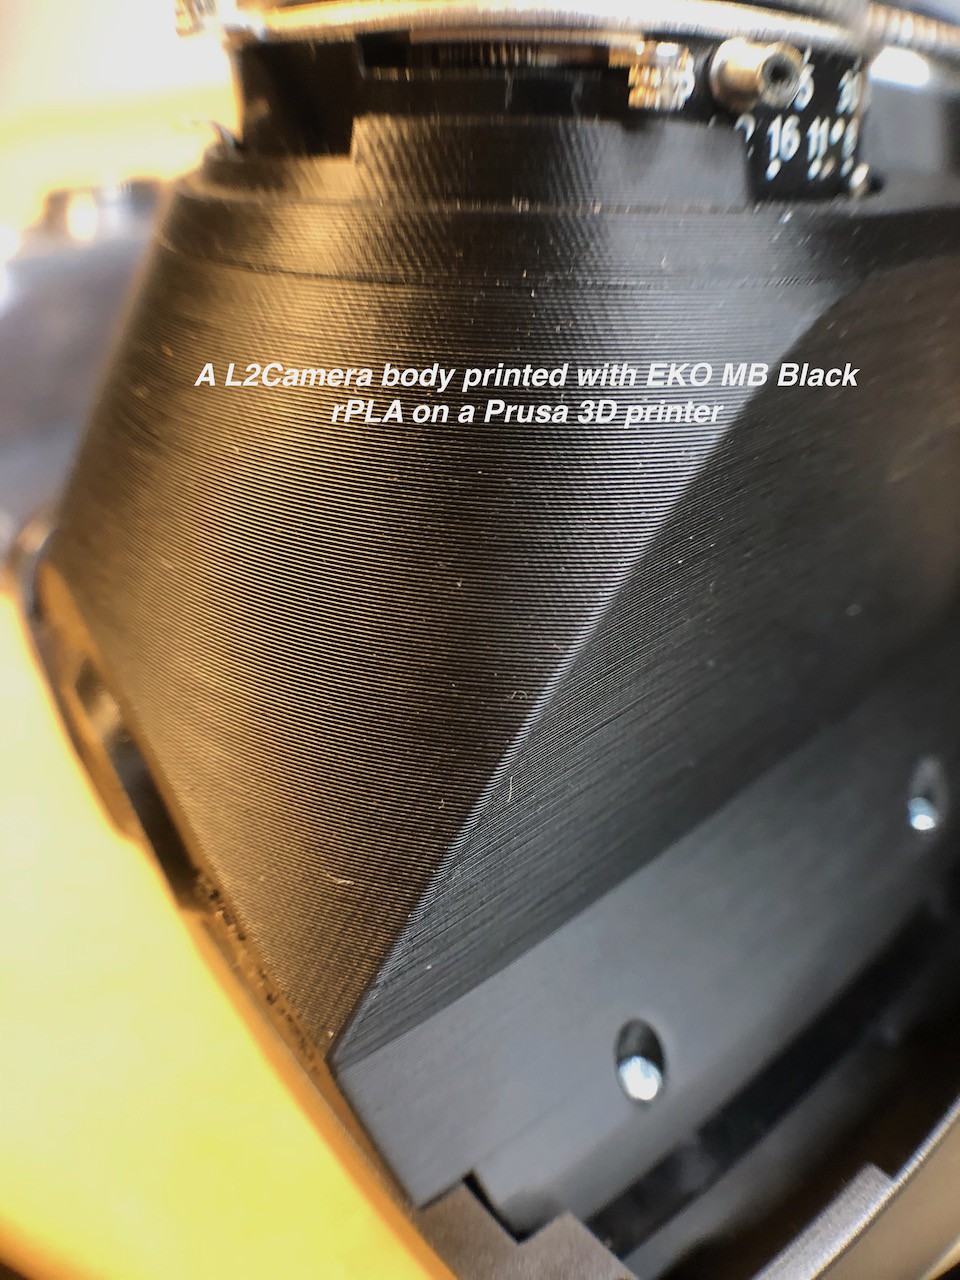
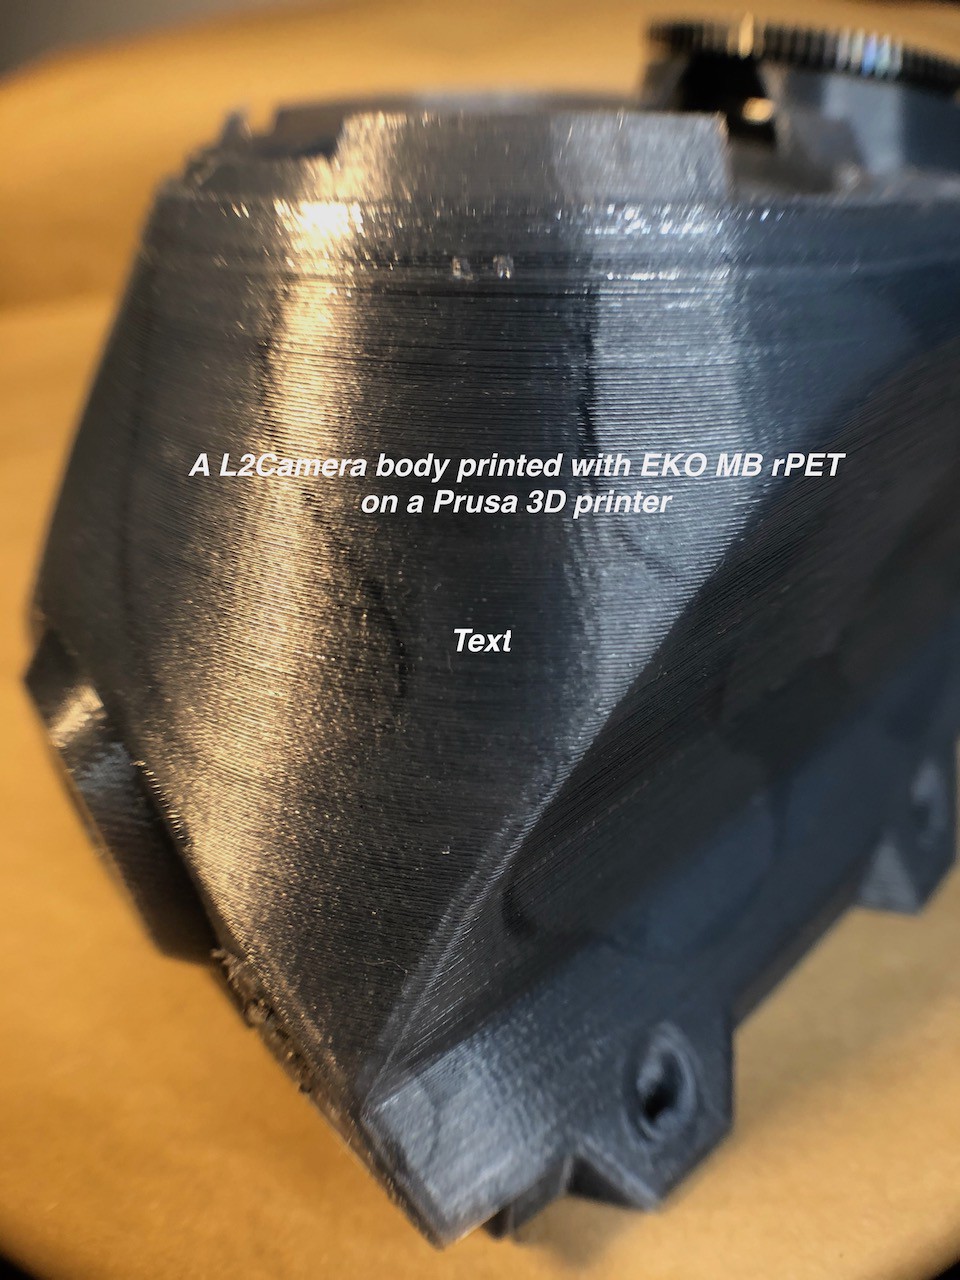
A friend of mine recommended Prusa Carbon Black PETG, which I tried the first. Unlike the other PETG filaments I dealt with, this one is really opaque! I needed no additional work on the prints made with Prusa PETG - they all were light-leaking-proof. Later, I discovered a Czech company called EKO MB, their website is in Czech only. They produce r-PLA, r-PETG and r-PET filament from recycled plastic. Despite the fact that their price tag is slightly higher than the average, I decided to give it a try because recycled filament nicely fits into the concept of my project.
![]()
China filament is cheap, however I don't like the idea of shipping it over the half of the world. It is not eco-friendly in my opinion. Low price just removes the burden of making a choice, but what are real priorities and criteria?
EKO MB filament astonished me! For example, printing with their r-PLA or r-PETG, I had no stringing at all. That happened for the very first time in my two-year 3D-printing experience. I believe, the filament works well because it is fresh, i.e. the way from the filament producing machine to my printer was short. This fact encouraged me even to try pure PET filament. I consider this material to be the most "recyclable" filament nowadays, because most of the recycling infrastructure already processes it. This project creates an utility tool, not a toy, therefore properties such as temperature stability and structural strength are crucial. This fact prioritizes PET over PLA. I modified the printer with 0.6 mm nozzle to eliminate clogging of PET, which happens sometimes with the most common 0.4 mm nozzle diameter. I got excellent prints with EKO MB rPET as well.
![]()
My ultimate choice of filament for this project is r-PET. But it's not opaque enough and it requires a non-standard nozzle and a special two-component glue for assembling the parts of the printed camera body. Therefore, for the very first release of the project I decided to resort to good old PLA, preferably recycled one.![]()
Also, I appreciated an EKO MB initiative to re-use filament spools. I sent them a dozen of empty filament spools, which piled up in a corner.
-
Troubleshooting
10/15/2020 at 13:44 • 0 commentsAfter the fiasco with the first working prototype, I started troubleshooting. First of all, I checked the 3D model and found no issue with it. After that I examined the printed camera body. Everything was OK there, except the distance between the hole for the main lens and the rear panel - it was half millimeter (!) longer than I had designed. I suspected two reasons for this: either the plastic absorbed water and became elongated, or the 3D printer was not calibrated precisely enough.
Water absorption was not the reason, because two other dimensions of the camera were not elongated. I did several test prints with the printer and none of them had an issue with dimensions. I became puzzled.
I gave myself a one day break and came back to the puzzle. Luckily enough, having a fresh view of the situation, I spotted the issue. I printed the lens hole edges on top of the support layers, and for that reason the edges sagged 0.5 mm below the expected height. What a tricky case!
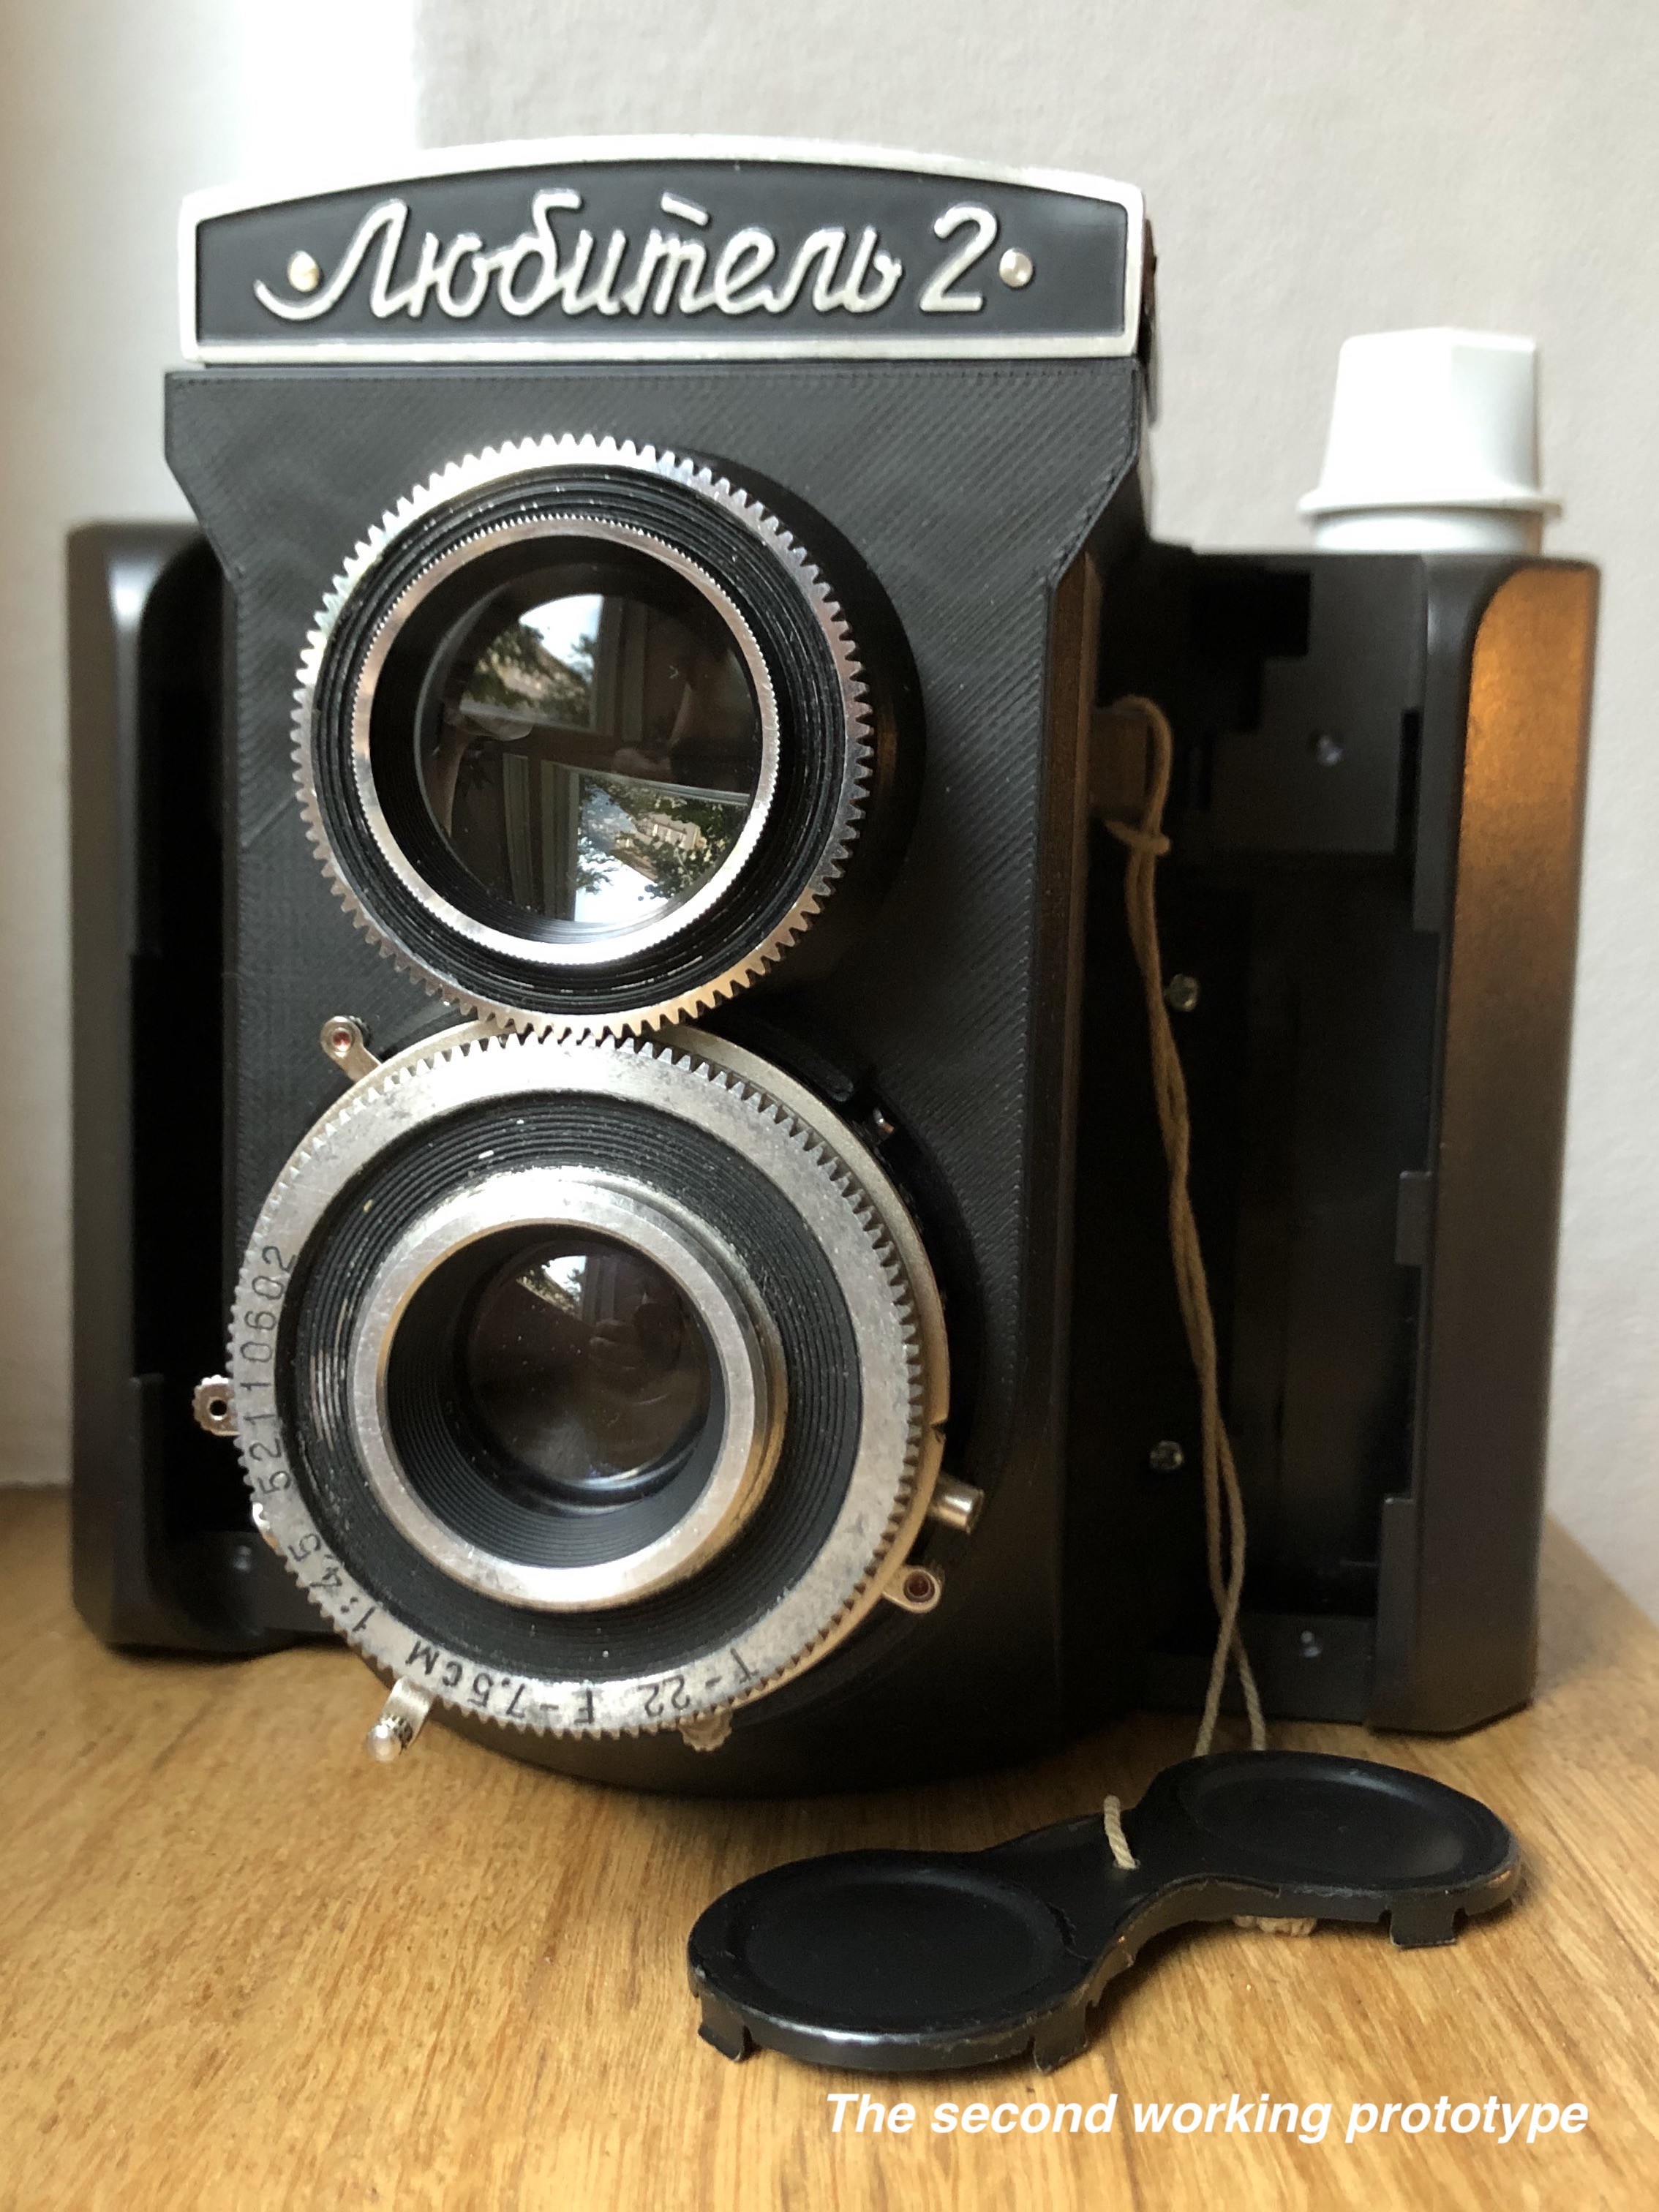
I considered several options to solve the issue and selected the following one. I split the camera body into two parts - the body itself and the front face panel - to print them separately and later join them together.
In this way I printed the second working prototype, and since then I have had no issue with focusing. Now the focusing mechanism behaves as it should.
![]()
-
The first working prototype
09/26/2020 at 10:41 • 0 commentsHaving reverse engineered both the Lubitel camera and studied Instax cartridges, I had got all the necessary information to start designing my camera. I set a couple of guiding principles for myself. Firstly, the design should be comprised of as little newly introduced plastic as possible. Secondly, it should made up of as many donor components as possible. Thirdly, it should look nice and be handy.
I used OpenSCAD for modeling, Prusa Slicer for slicing and two Prusas for proof printing. I chose OpenSCAD because I needed the model to be parametric, i.e. it freely adjusts to given parameters like thread diameter, inter-lens distance, mirror position, etc. In doing so, I sacrificed some artistic possibilities with the camera design.
The goal for the first stage was to develop a camera body that incorporates all the components, and then check the viability of the whole construction. My main concern was that the components may hamper each other. The initial body design was simple: the front panels carried two lenses; the top panel carried the grounding glass, the viewing shaft, and the mirror; and the back panel had holes to screw on the developer unit. It took me some time to prepare a proper 3D model. The main issue of the delay was the viewing lens thread. I measured its diameter and pitch, but for some reason the lens didn’t match any of the proof prints I made. The main thing I missed was the simple fact that the lens had a quadruple thread. Once I had figured that out, I quickly finished the model and printed it with a white PLA filament I had on hand. I used black acrylic paint to blacken the internal surfaces of the camera body.

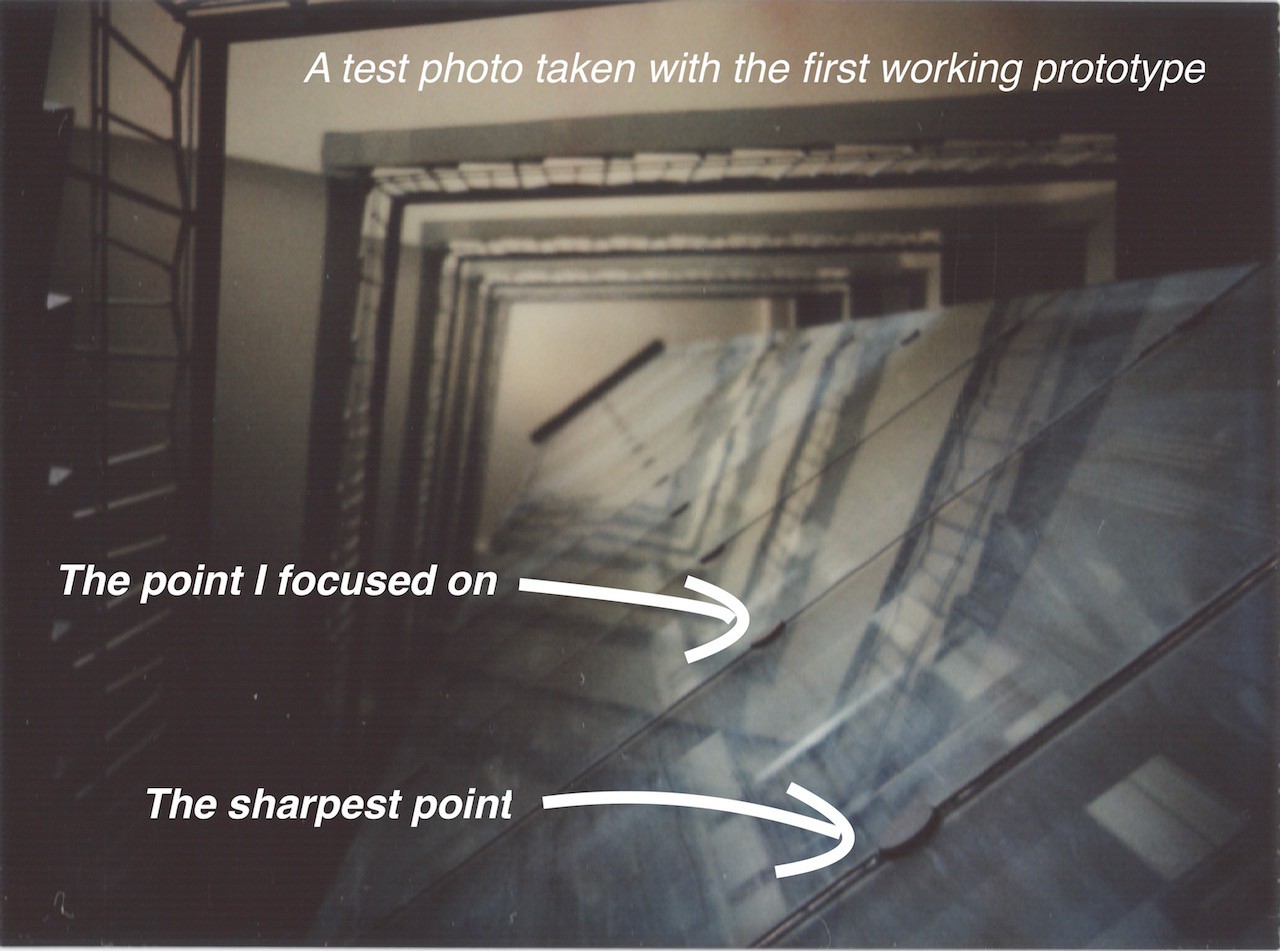
I put together the body and the components, re-hauled the shutter, aligned the lenses according to the instructions, and loaded a cartridge with colour film. I took several photos. Colours and exposure were fine; however, the images didn’t look as sharp as I expected after my experience with the simple frame prototype. I decided to check the accuracy of focusing mechanism with some sort of a testing rig. The appropriate rig should have distinctive features (like contrast lines or edges) and be rather long to cover different focusing distances. The elevator shaft in our house was well-suited to this task. I took two more photos with the elevator as a test rig. I got sharp details on the photos, but I was not satisfied. Curiously, the sharp details I obtained were not those which I intended to focus on. What a fiasco!![]()
-
A sneaky secret about Instax film
09/17/2020 at 20:55 • 5 commentsAfter my proof-of-concept prototype gave reassuring results, I started a full-scale project. The very first step I took was reverse engineering of the Lubitel camera I had. I measured main optical parameters: distance between optical axes of the lenses, position of the mirror and the ground glass, and the lens-to-film distance.
Then I switched to the Kiipix developing unit and became surprised with two things. First, I realised that we load cartridges and not films into Instax cameras. Second, there is no information on how film sheets are aligned inside the cartridge. I have to admit, that Fuji release few specifications on their Instax film: ISO speed, image size, and number of exposures per pack - only superficial data. In order to estimate cartridge-to-Instax-film distance I did the following. I reloaded an empty cartridge with ten developed exposures and put the cartridge back into the Kiipix unit. I put eight marks on the unit’s flange around the film window, then I measured flange-to-film distance using a vernier caliper. I measured the distance from the frame edge to where the caliper just touches the film. In order to reduce measurement error I repeated measurements for each film sheet and averaged the results. I pulled each sheet in a standard way by operating the unit knob. I did so in order to produce film movement inside the cartridge to replicate actual use.

Sheets of instax film take unpredictable position inside cartridge The results of my measurements are nearly shocking. Among eight marks where I measured the distance, calculated averaged values ranged from 5.515 mm to 6.2125 mm (0.70 mm interval), and standard deviation varied from 0.277 mm to 0.400 mm (0.55 - 0.80 mm interval). It might not be a big deal, but from a book on 35-mm cameras I learned that the film always bends 0.03-0.05 mm towards the lens and that fact is accounted in the designs. It turns out that Instax film bends ten to twenty times more than expected by industry standards. What is the practical significance? I consider it to be enormous. For example, the main lens moves slightly more that one millimetre while changing focusing distance from infinity to minimal (1.3 metres). Instax film sheets placed inside the cartridge remind me of quantum mechanics particles - you expect them to be discreet and tangible things, but you can describe their physical position only through the probability of being in certain place. In other words, we can only guess how the sheets are aligned. For that reason I just averaged my measurements and used the derived distance in my design.
That finding helped me explain the following feature of Instax cameras: they have automatic exposure control, but a small fixed f/12.7 aperture. Why don’t they use other apertures like f/5.6 or f/8, and why don’t they change the aperture? My assumption now is that Fuji engineered the cameras with small aperture to compensate for both fixed focus and film random alignment in the cartridge. From my perspective, that decision leads to dull images - photos have no distinguishable fore- and background planes. Frankly speaking, the photos look flat.
What is the main take-away? Instax stock lenses made of plastic are apparently bad, and do not utilise the full potential of Instax film. But how much improvement can be achieved by switching to better lenses? I’m confident that certain improvements can be achieved, but at some point cartridges become blockers. Therefore I’m not a fan of transplanting top-end lenses to Instax cameras. I find Lubitel lenses to be the best match for Instax film. Firstly, they are good enough to tap into the potential of Instax film, at least as fat as the design of the cartridges allows. Secondly, the first point still applies even to worn lenses with noticeable backlash in the thread. And last but not least, they are very affordable.
This conclusion fortified my willingness to invest effort into the project.
-
Selecting a film developing unit
09/02/2020 at 12:26 • 0 commentsAfter my proof-of-concept prototype gave reassuring results, I decided to start a full-scale project. At that moment I had a Lubitel camera with well-worn body and a Jollylook camera. These two cameras were supposed to provide all necessary components to make my hybrid: lenses, shutter, viewfinder and developing unit. And my goal was to design a functional camera body that incorporates all of the above components.
Firstly, I disassembled and examined both cameras. Lubitel cameras are of solid design: it is easy to overhaul it and then to re-align lenses. There are only few components that can fail and It seems that these cameras can work forever provided regular maintenance. This is a probable reason for the low quality of the cameras--they were supposed to be fixed by the buyers themselves. Jollylook is a controversial photographic device. On the one hand, the manufacturer marketed it as an "easily recyclable cardboard camera". On the other hand, the biggest part of the camera - the film developing unit - is made of plastic not cardboard and therefore may be not recyclable (at least it has no recycle symbol). However, this is the part of the camera that I like the most.
Secondly, I realized that the Jollylook film developing unit is not a good fit for my design. The cons are:
- the unit has an irregular wedge-like shape, which perplexes designing any attachments for it
- there are no thread holes for screwing on any other components to the unit
- there is no back lid that covers the Instax film cartridge in the unit
- the film pulling mechanism seems to be too harsh on the film resulting in black tree-like traces in the upper-left corner of photos.
Having only two pros (compact size and a crank handle that allows more even dragging out of film) against many cons, I decided to look for an alternative. Eventually I found one - a Kiipix "printer" that I bought used on Amazon for experimentation.
As I started my disassembly, the Kiipix appeared to me suspect as well: I questioned its practicality, but its design and quality remained attractive. I found the following pros:
- Kiipix provides a back lid and an exposure counter
- there are plenty of thread holes for screw assembly
- the retail price is lower: $30 for a Kiipix against $35 for a Jollylook developing unit
Cons:
- it is bulky compared with the Jollylook developing unit
- it uses a hand-turned knob to advance the film and this intermittent dragging of the film leaves temporary traces on the image
After pondering Kiipix and Jollylook options, I chose the Kiipix film developing unit. I tried a couple of ways of combining the developing unit with the camera, and finally chose horizontal alignment which makes the assembled camera look neat and balanced.
-
Proof of Concept
08/26/2020 at 18:53 • 0 commentsAt the very end of the last year I bought a used Jollylook instant camera, which is the product of a bizarre Kickstarter project. Surprisingly enough, I got the camera even before some of the Kickstarter backers who invested into the project. My experience with the camera was disappointing and I was considering getting rid of it. Luckily, at nearly the same time I bought a used Lubitel camera, because I was interested in middle-format photography. Having these two cameras, I came up with the idea of combining the subtle beauty of instant photography with solid design and decent quality of Lubitel cameras.
I started small with a proof-of-concept prototype. The prototype was simply a 3D-printed frame that held a sheet of Instax Mini film securely inside the Lubitel camera in place of roll film. I loaded and unloaded each sheet of film manually using a dark box. After I removed the exposure from the camera I processed it also in darkroom environment using the Jollylook camera as a developer unit. Despite the awkwardness of the whole process, it brought encouraging results. The photos were sharp and created perceivable impression of depth with distinguishable fore- and background planes.
At that moment I realised that I could do better than Jollylook, but what about widely used Instax cameras? I had not found where to rent or from whom to borrow an Instax camera, therefore I bought a used Instax Mini Neo 90 from Amazon.
I provide photos which I took with the Neo 90 camera and my frame prototype. I used both color and monochrome film. I expected the latter to give sharper images, but that seems not to be the case, probably because it’s not a true black and white film.
- a monochrome photo taken with Neo 90
- a monochrome photo taken with the prototype
- a color photo taken with Neo 90
- a color photo taken with the prototype
I scanned the photos with a conventional flatbed scanner at 1200 DPI (I assume the value reflects real optical resolution) and down-scaled to 600 DPI. No other processing was applied. Apparently, the prototype produced better images than the Neo 90. That result encouraged me to start a full-scale project implementing my idea of combining Instax film with Lubitel camera.
-
Why I started the project
08/20/2020 at 05:59 • 0 commentsI tried instant film photography for the first time at the beginning of the year. I used Instax Mini films and Instax Neo 90 camera and was disappointed with the results I got - all of my test photos were blurry. I examined both the camera and the film packages that were used and concluded that the camera was the weakest part.
Although most Instax cameras have a contemporary look, they all are fixed-focus, fixed-aperture cameras with automatic shutter speed. Moreover, they are equipped with only the simplest plastic lenses. That fact, combined with the amount of Instax film sales (in 2016 Fuji sold five million Instax cameras), made me conclude sadly: Why do people spend so much money (one Euro per exposure) for photos which are fated to go to the trash the instant they were taken and processed? I can't even imagine the amount of non-recyclable plastic waste these films introduce to the environment.
Also, I found another source of photo waste - old middle-format cameras like Russian Lubitel (which stands for amateur). Nowadays, if you shoot with middle-format then you can afford a used Hasselblad or Kiev camera, or a Czech Flexaret, and these have either a better design or higher quality. Lubitel was meant to be a mass-market model which, in my experience, resulted in low quality.
Among four Lubitel cameras I obtained for examination and experiments, two had the same problem with their focusing (viewing) lens. The lenses had enormous backlash in their screw threads. The threads are quadruple 0.75 mm pitch and had up to 0.24 mm axial backlash, which resulted in nearly a 30-degree (!) angle backlash. This makes sharp focusing practically impossible.
Despite the shortcomings, I can't deny that there is definitely something special about instant photography. And so I decided, even if I can't completely solve the issue with photo waste pollution, I can improve the experience for people engaged in instant photography by providing them some direction to take technically better photos.