-
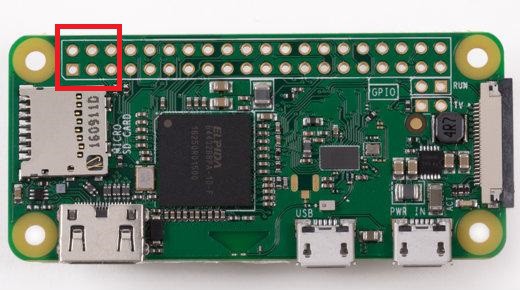
1Identify the pins on the RPi
Identify on your RPi the six pins (1 to 6 according to RPi documentation) illustrated on the following picture (pins are the same on RPi ZW, RPi 2, 3 & 4):
![]()
-
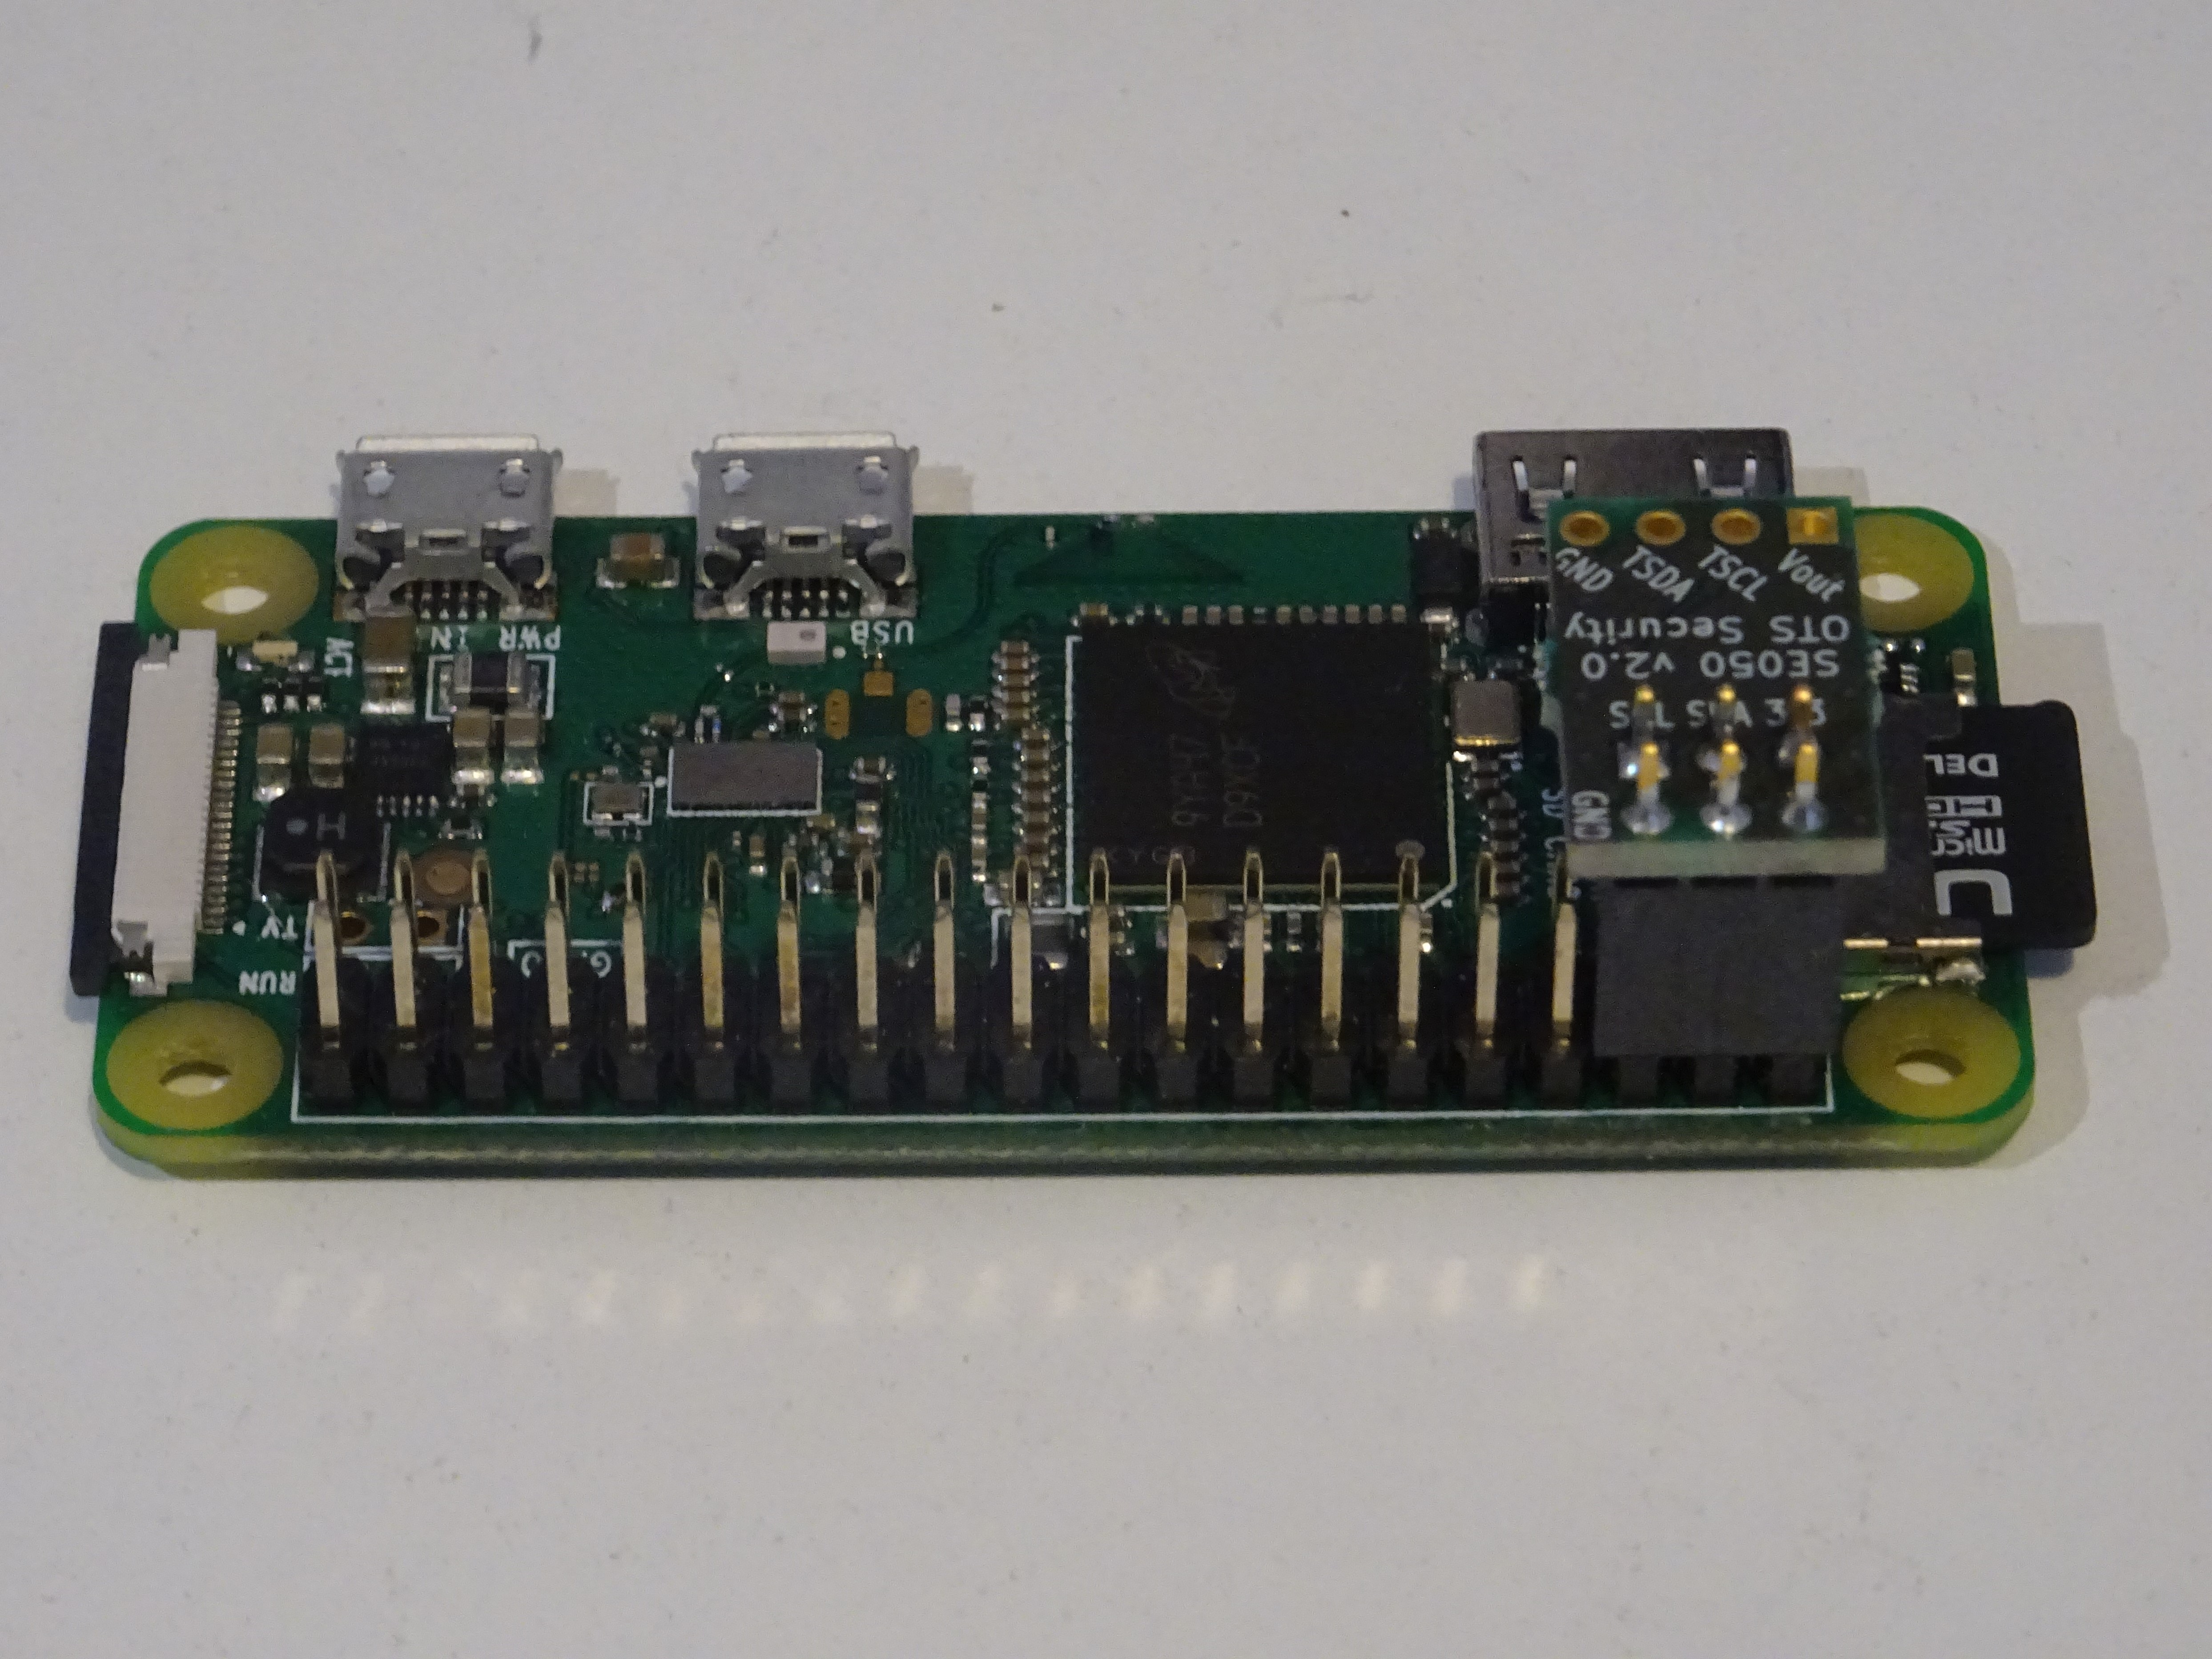
2Connect your breakout board
Connect your breakout board on these pins according to the following picture (breakout board should be ABOVE the Raspberry Pi board). !!!Beware connecting the breakout board incorrectly WILL BREAK your board!!!
-
3Installing Raspbery PI OS and enable I2C port
If you don't have an already ready to use Raspberry PI, you can follow the installation instructions from the official website. Once installed, you have to enable I2C port in Linux kernel using the raspi-config command (5 Interfacing Options -> P5 I2C):
sudo raspi-config sudo reboot -
4Download and install required tools
Use apt to install the packages required to compile the NXP Plug & Trust Middleware
sudo apt update
sudo apt-get install python cmake cmake-curses-gui cmake-qt-gui libssl-dev
Download the NXP's Plug & Trust MW from SE050 web page. You will need a user account. If you don't want download a proprietary piece of code, you can also base your developments on the open source library published by NXP on its Github page. Place the downloaded zip package in "/home/pi" folder for example and type:
cd /home/pi unzip SE050-PLUG-TRUST-MW.zip -d se050_mw -
5Compile and Install the NXP's Plug & Trust middleware
Enter the following command lines:
cd /home/pi/se050_mw/simw-top/scripts/ sudo python create_cmake_projects.py cd /home/pi/se050_mw/simw-top_build/raspbian_native_se050_t1oi2c/ cmake --build . sudo make install sudo ldconfig /usr/local/lib -
6To finish, launch the Minimal SE050 example program
Type the two following commands:
cd /home/pi/se050_mw/simw-top_build/raspbian_native_se050_t1oi2c/
./se05x_Minimal
If everything is OK, you should see an output which looks like :
Congratulations ;-)
SE050 Security Breakout Board
Breakout board intended to secure Raspberry PI or others IoT products thanks to SE050 secure element from NXP


Discussions
Become a Hackaday.io Member
Create an account to leave a comment. Already have an account? Log In.