 Nick Rehm
-
1Building the Starhopper
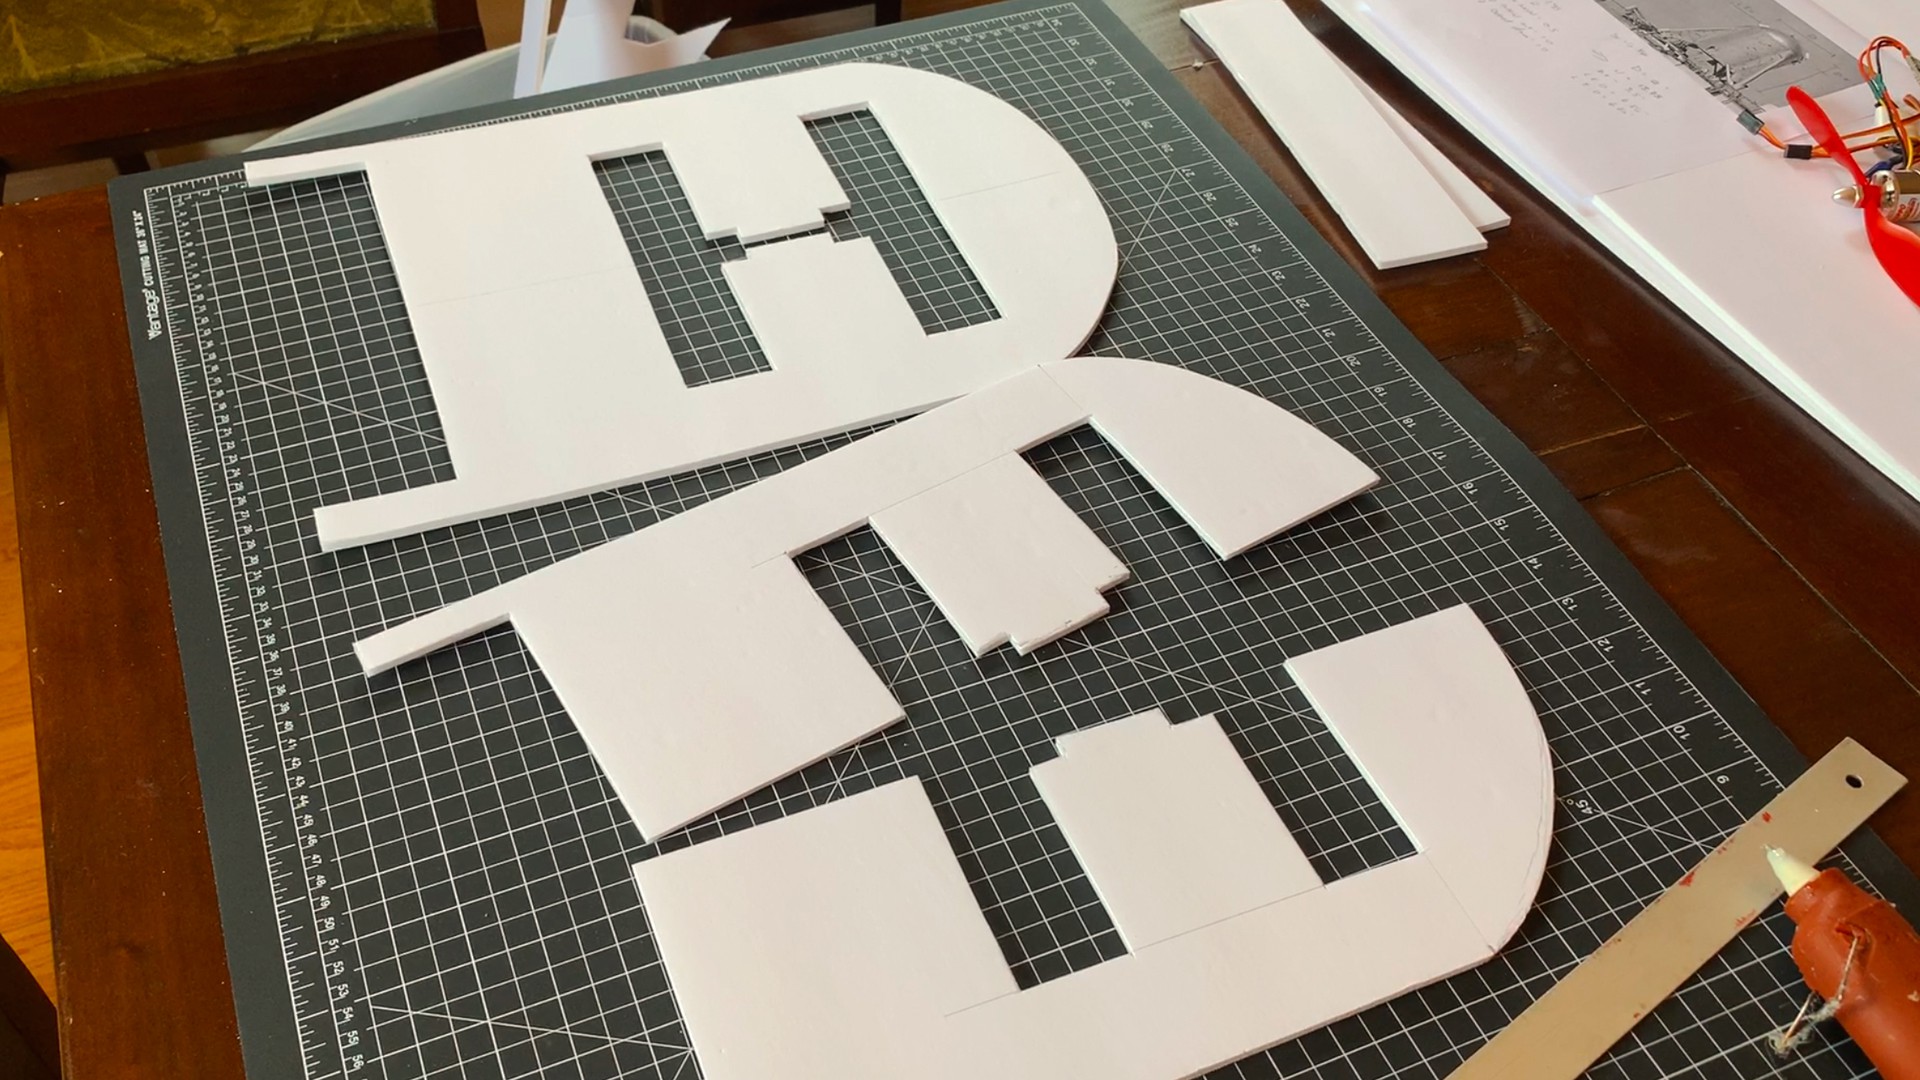
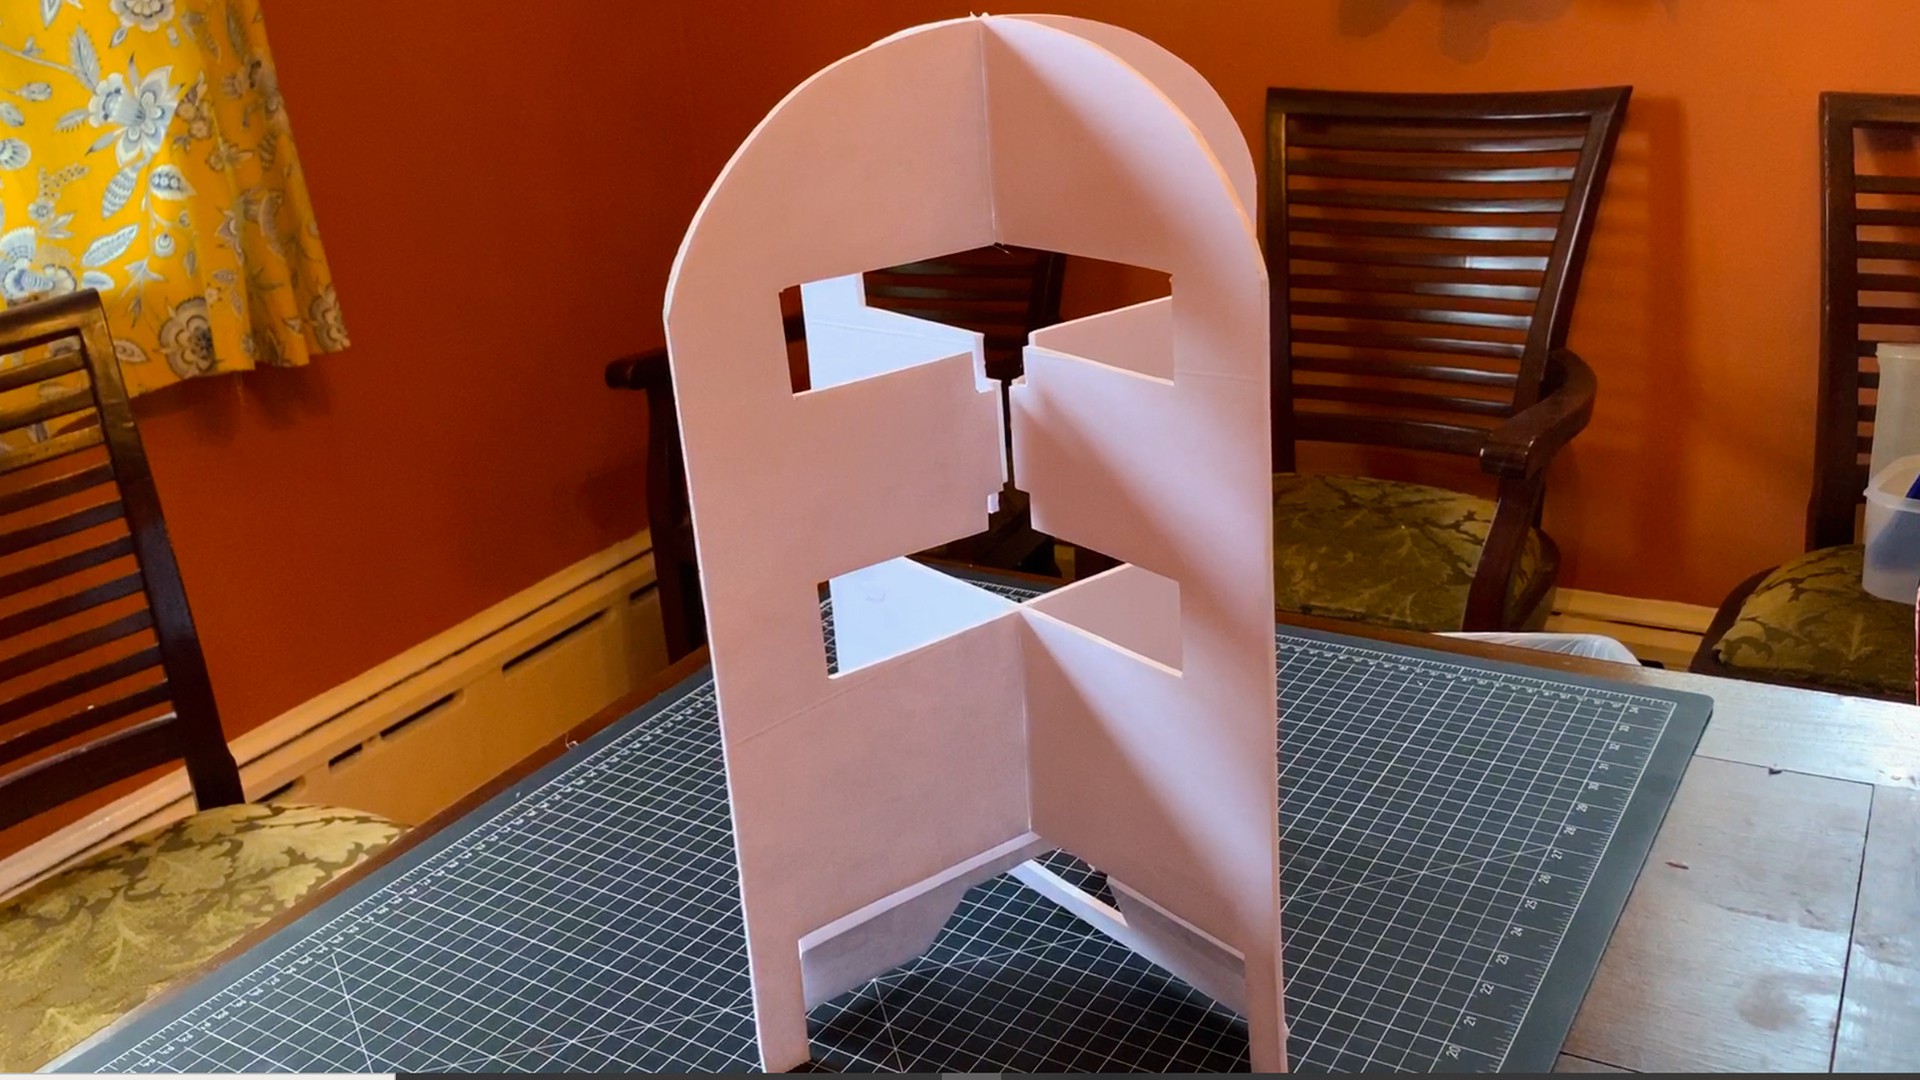
Cutting out and gluing together the internal structure from foamboard:
![]()
![]()
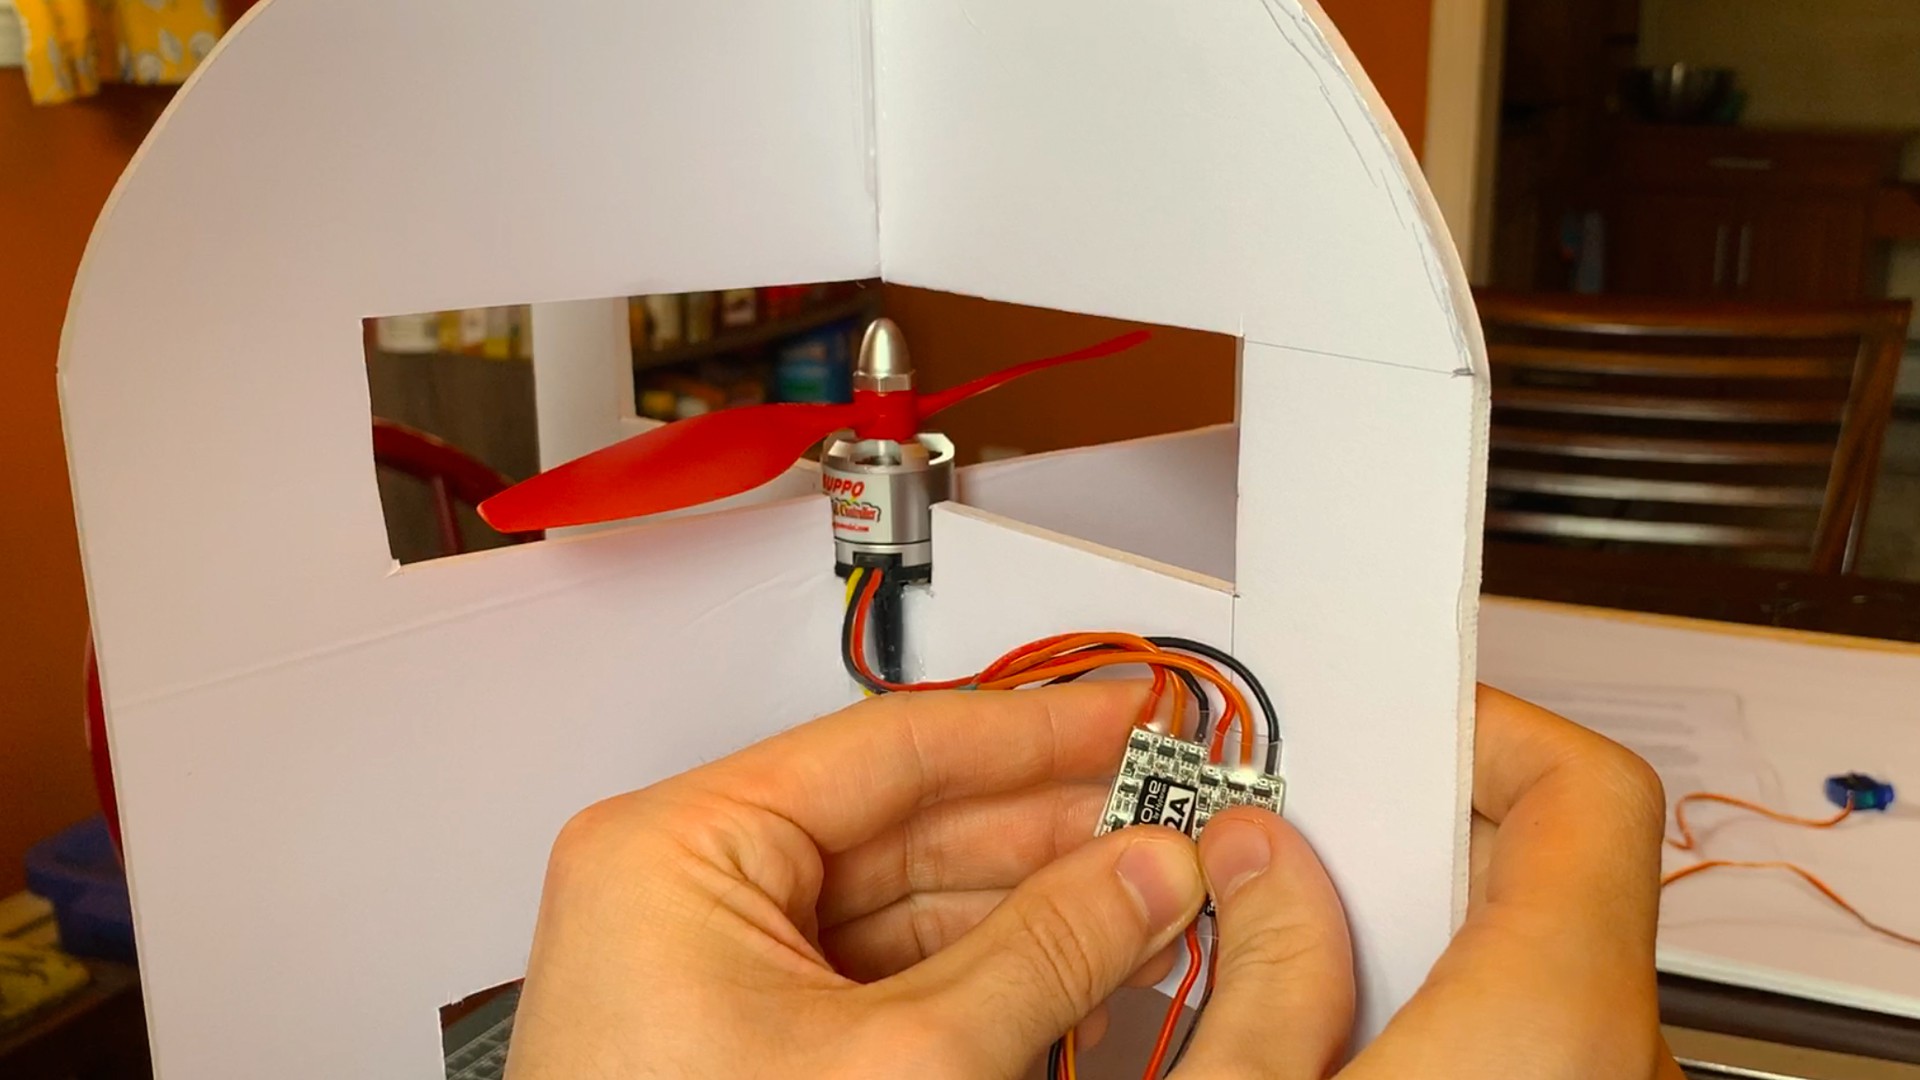
Motors attached to 3D printed motor mount and hot glued to the structure. ESCs attached with double sided tape:
![]()
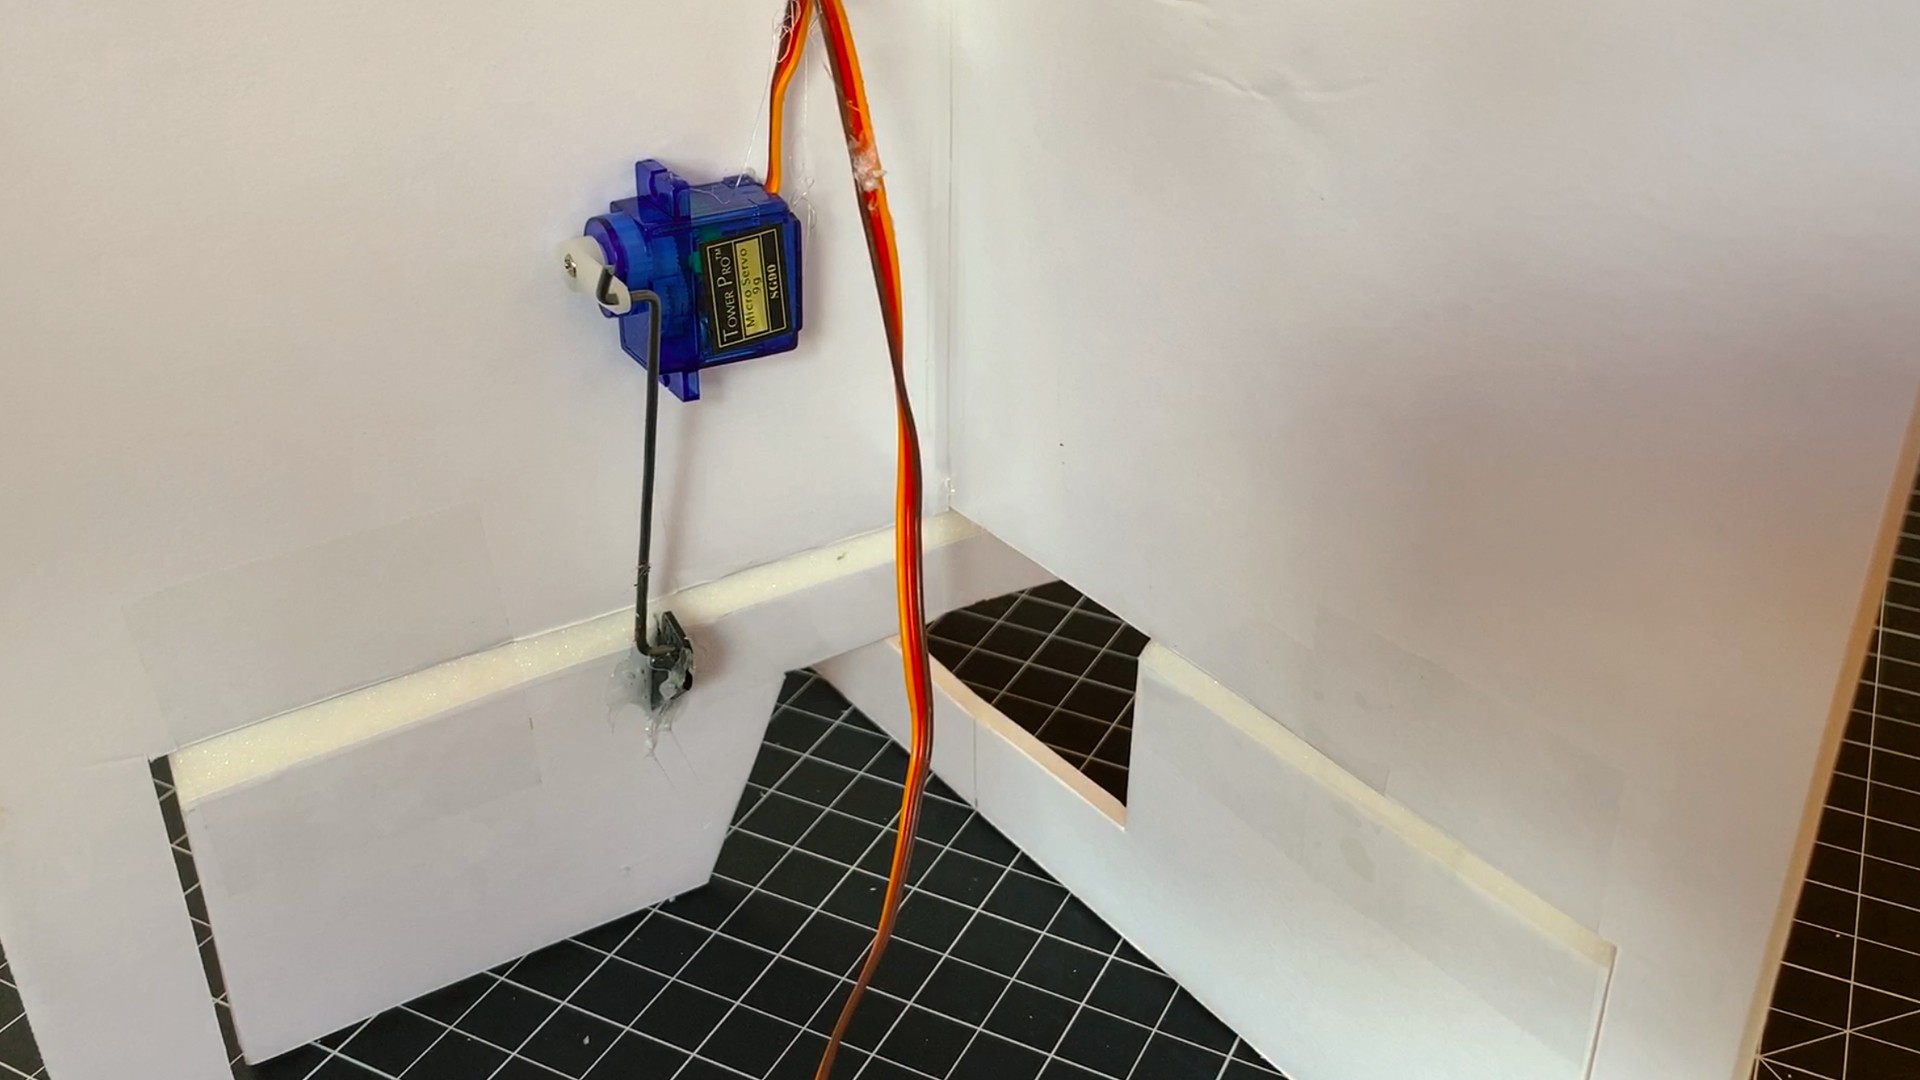
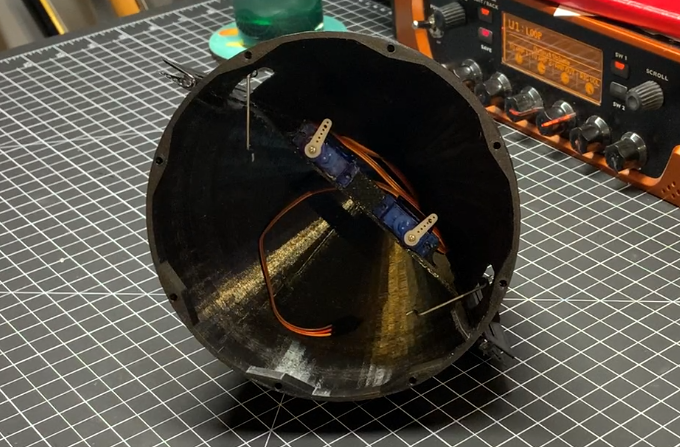
Connecting the servo linkage for the control surfaces:
![]()
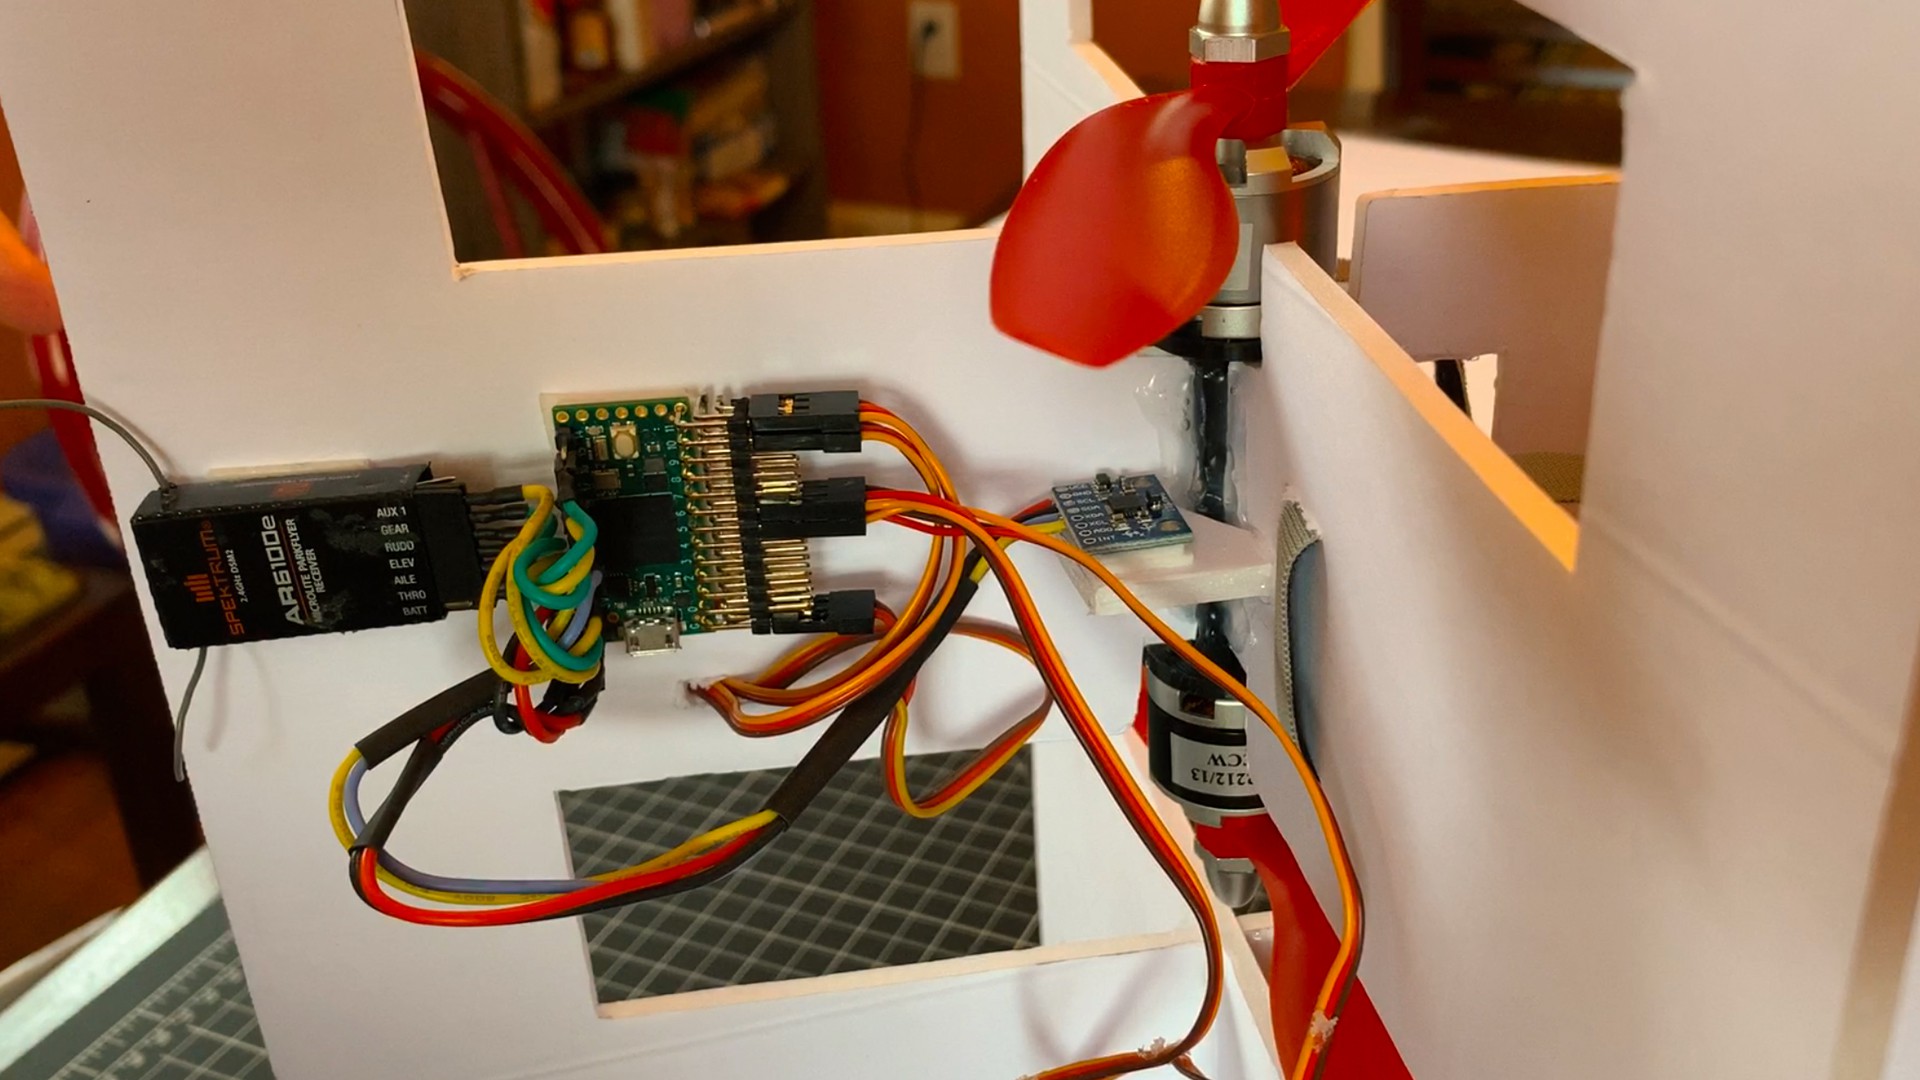
Installing receiver and Teensy 4.0-based flight controller:
![]()
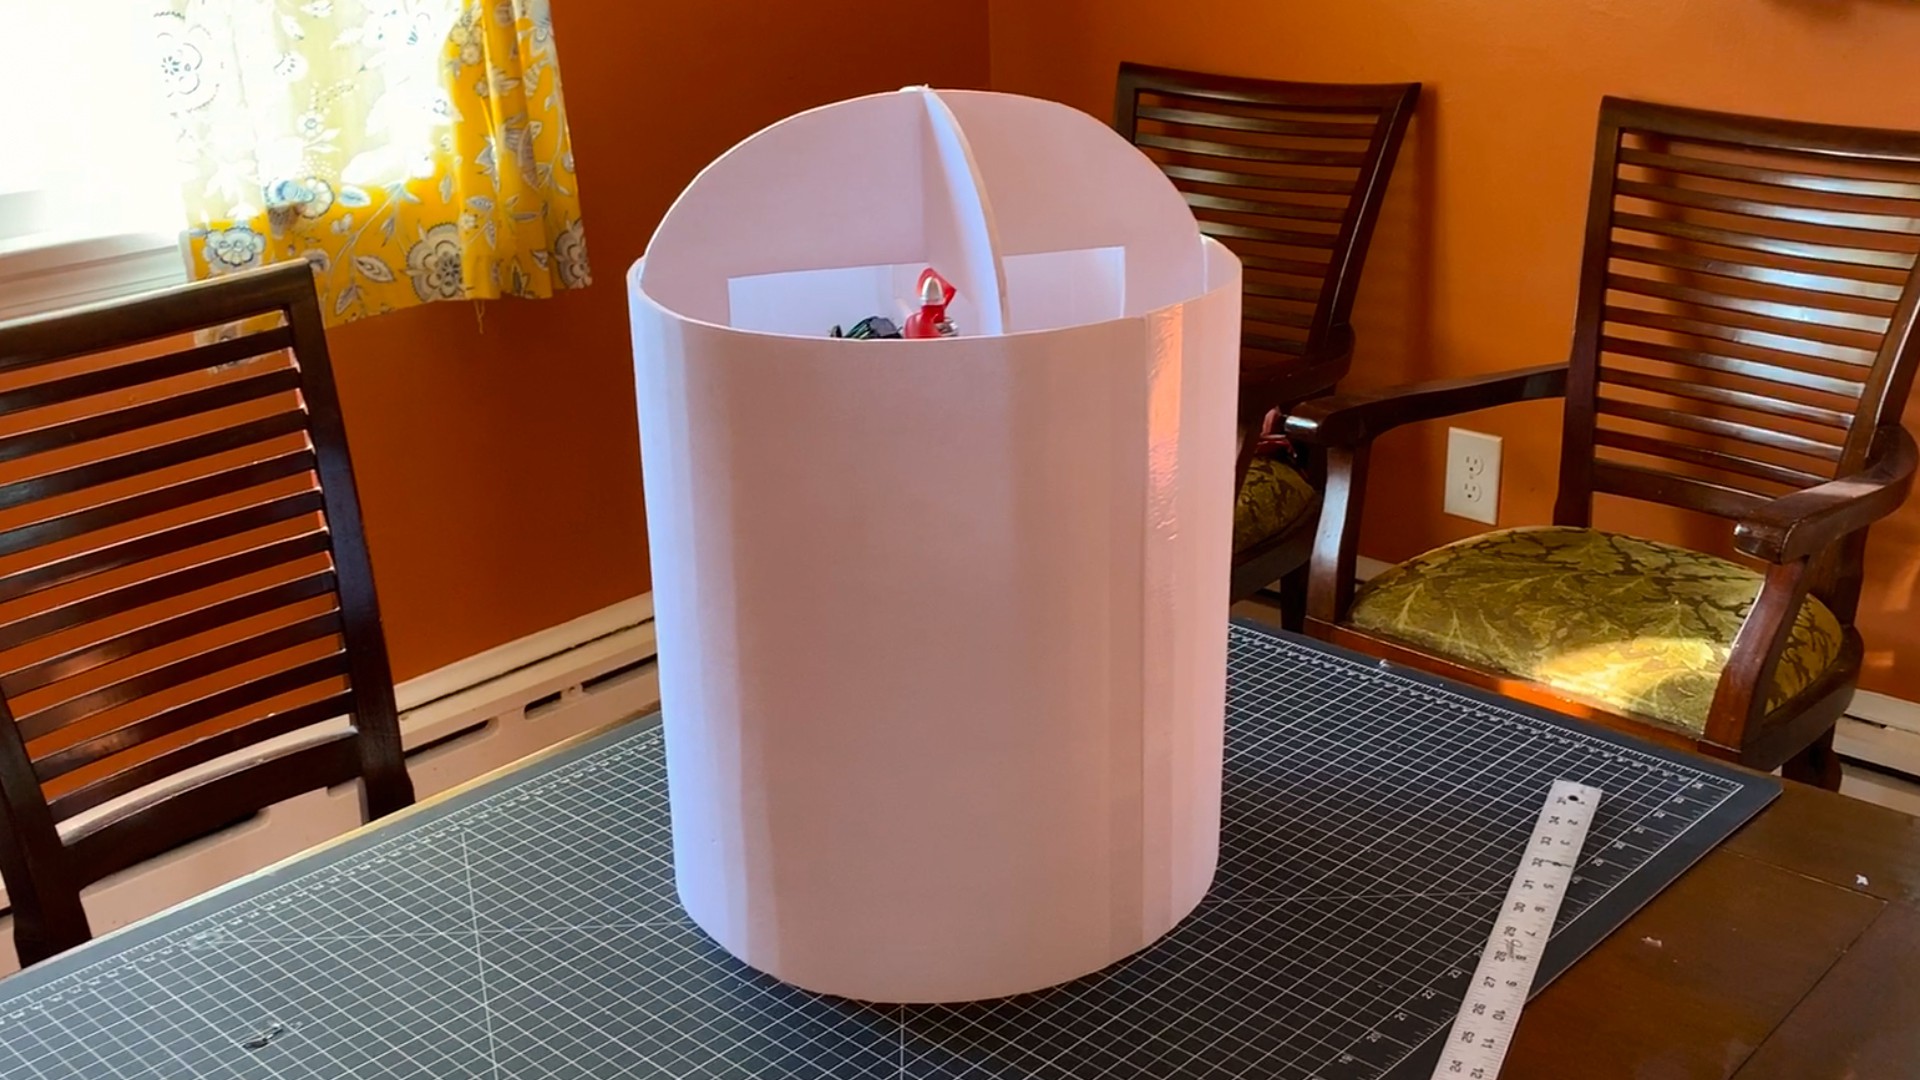
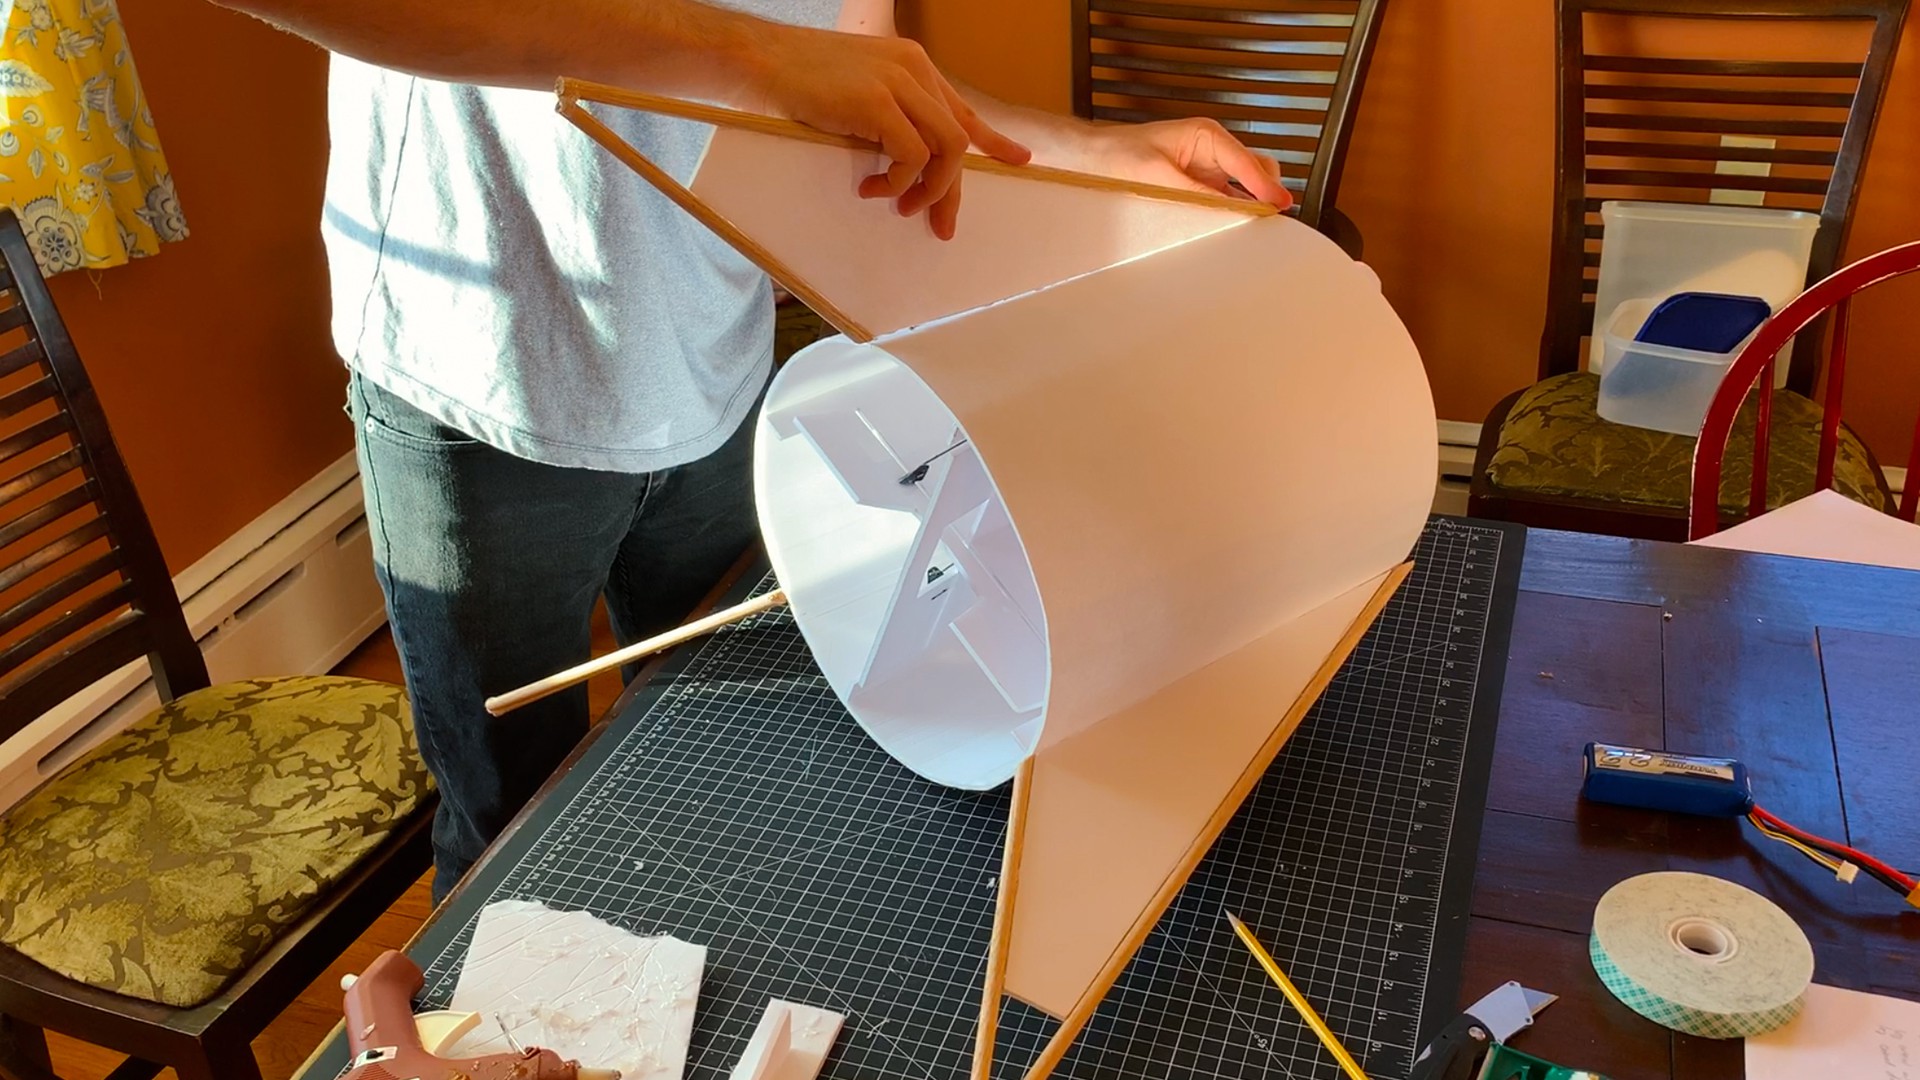
Internals wrapped in cylindrical foam and landing legs glued on:
![]()
![]()
-
2Building the StarShip
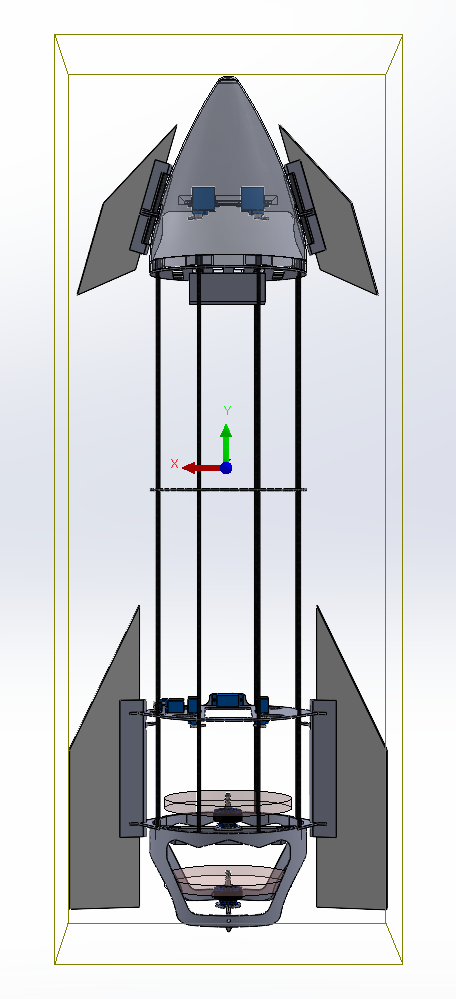
Parts all designed in Solidworks 2020 and masses used to estimate vehicle center of gravity:
![]()
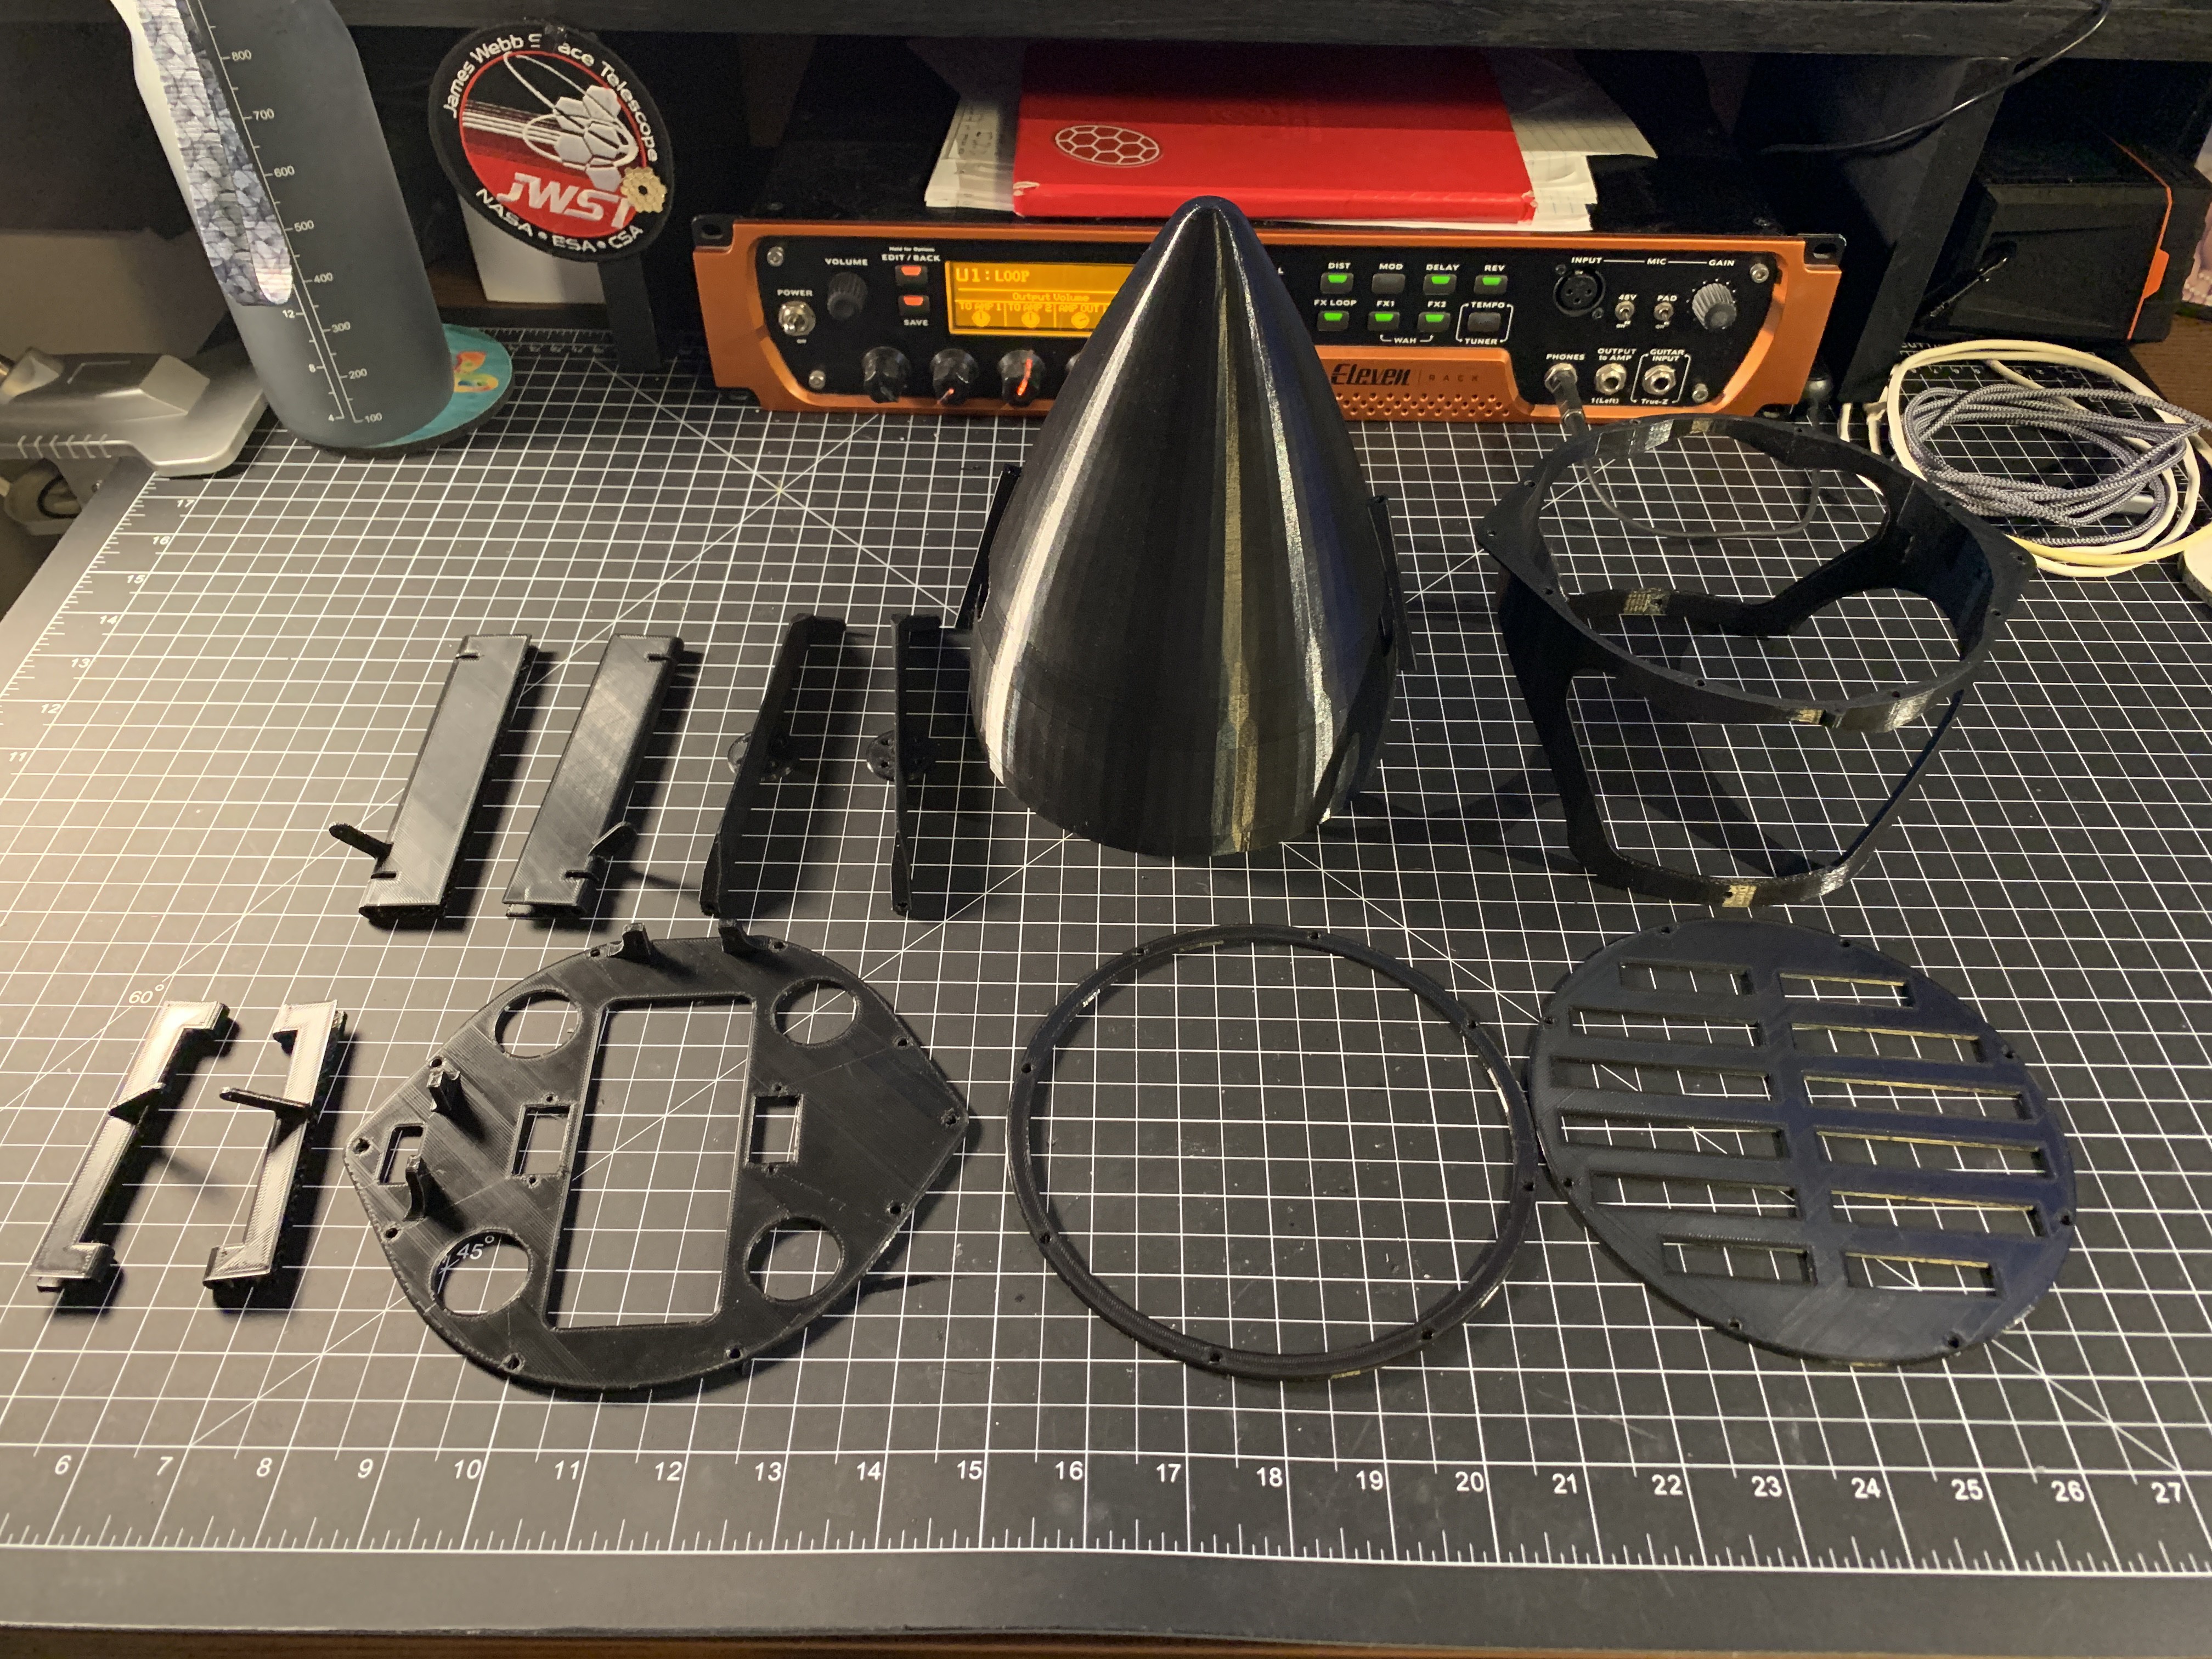
Print all the parts in PLA or ABS (quantities of each part listed in part name):
![]()
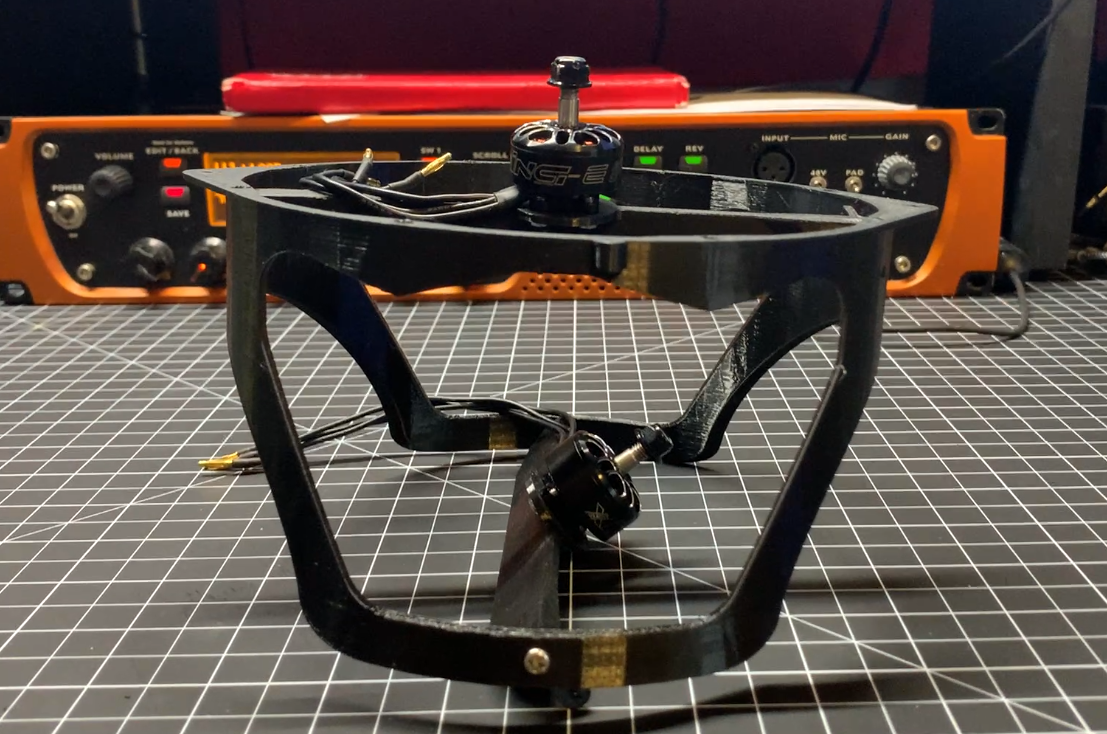
Install motor mounts to motor bulkhead with m3 hardware:
![]()
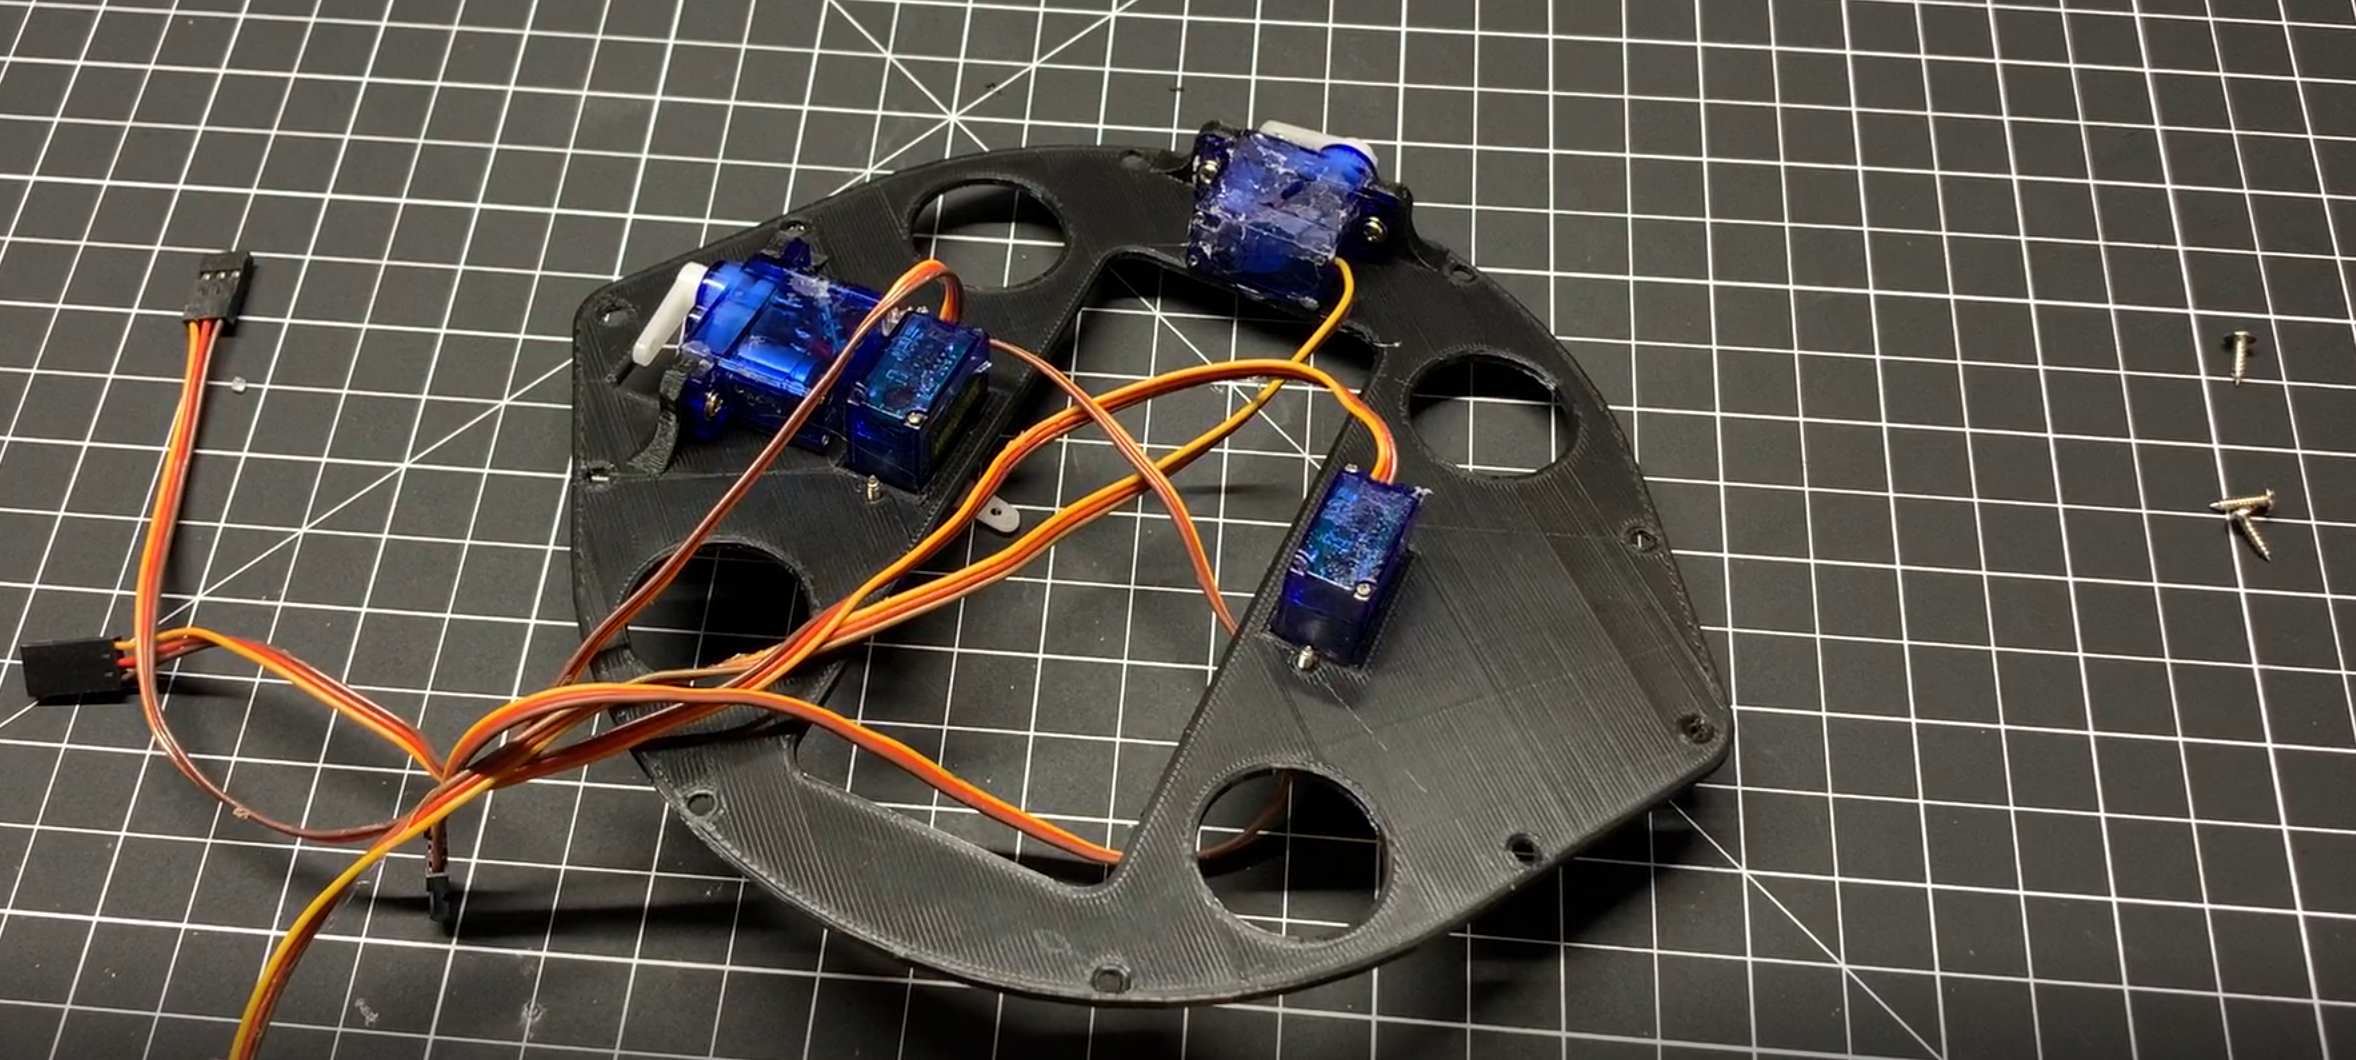
Install 4 SG-90 servos to servo bulkhead with hot glue and servo hardware:
![]()
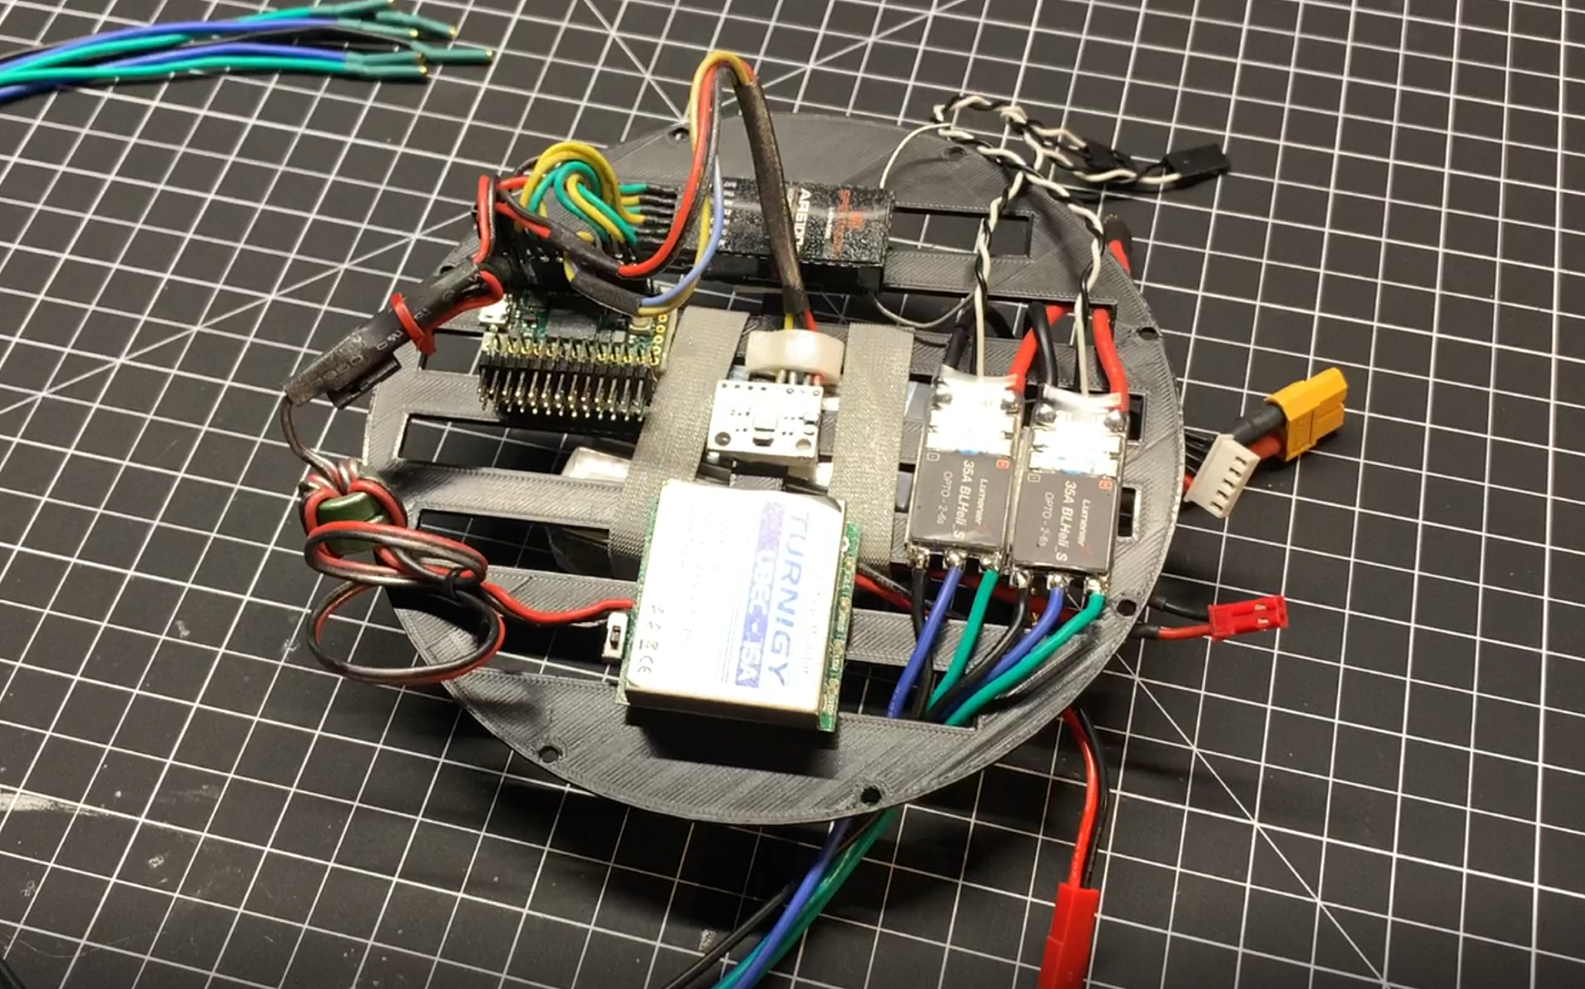
Install electronics on electronics bulkhead with double sided tape:
![]()
Install servos in the nosecose and assemble canard hinge:
![]()
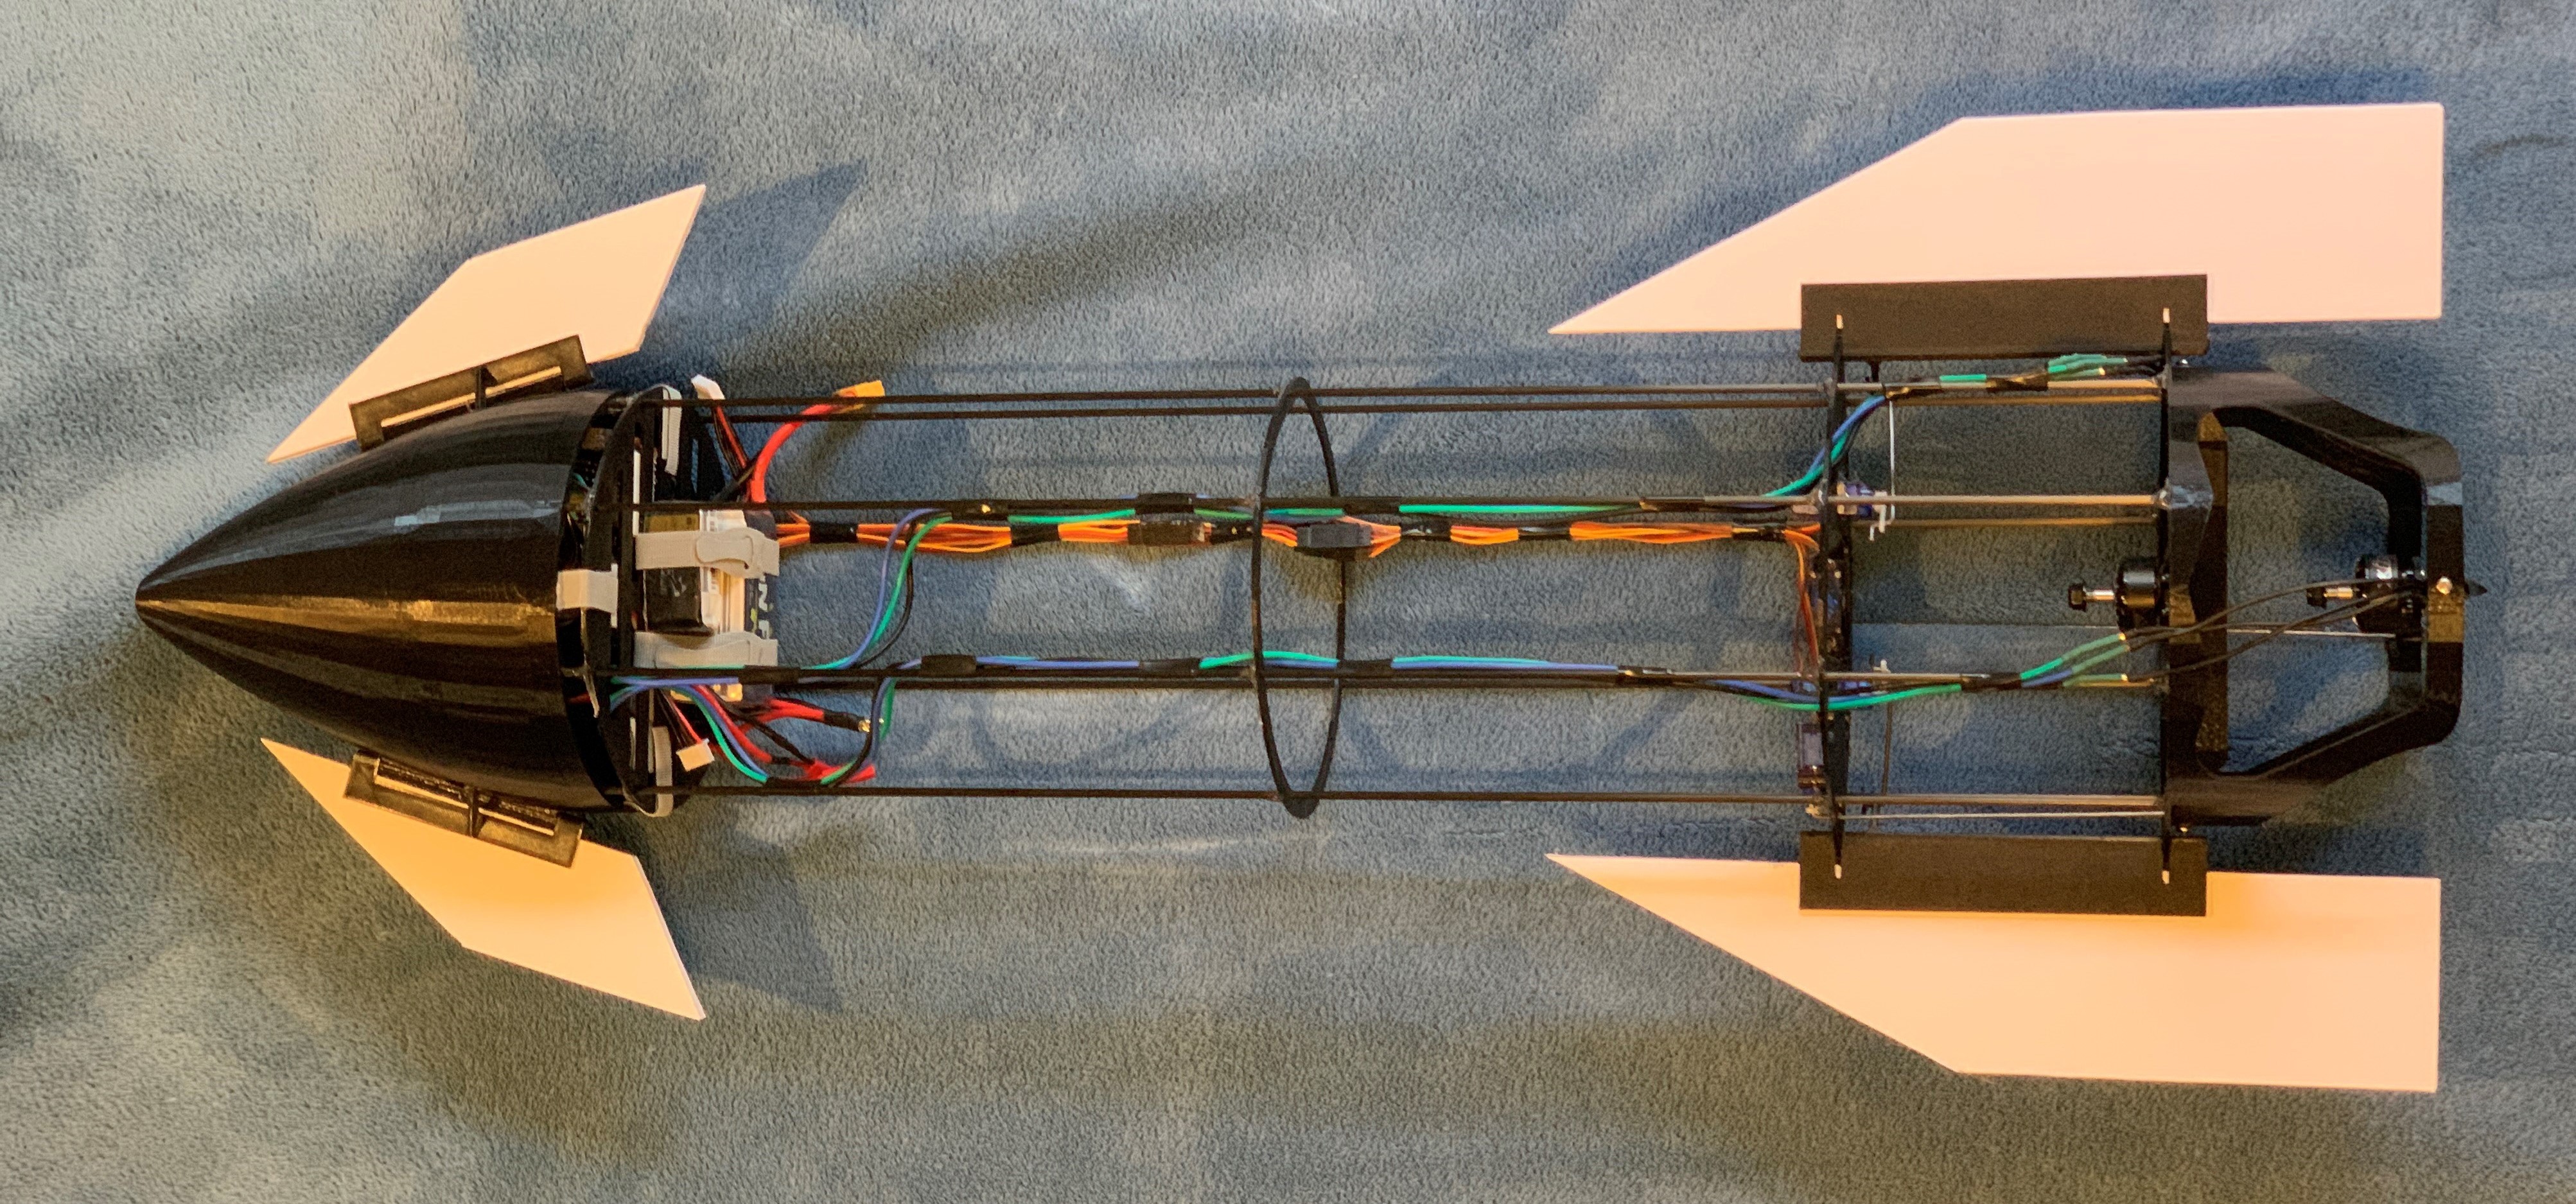
Slide all subassemblies over carbon spars of ~400mm length. Servo bulkhead placement is dictated by rear flap hinge. Pin all parts in place with hot glue. Cut out aerodynamic surfaces from foamboard and slide into hinge pieces:
![]()
Cut out foamboard to snugly wrap around outside and pin in place with tape so that it can be taken off later to access electronics:
![]()
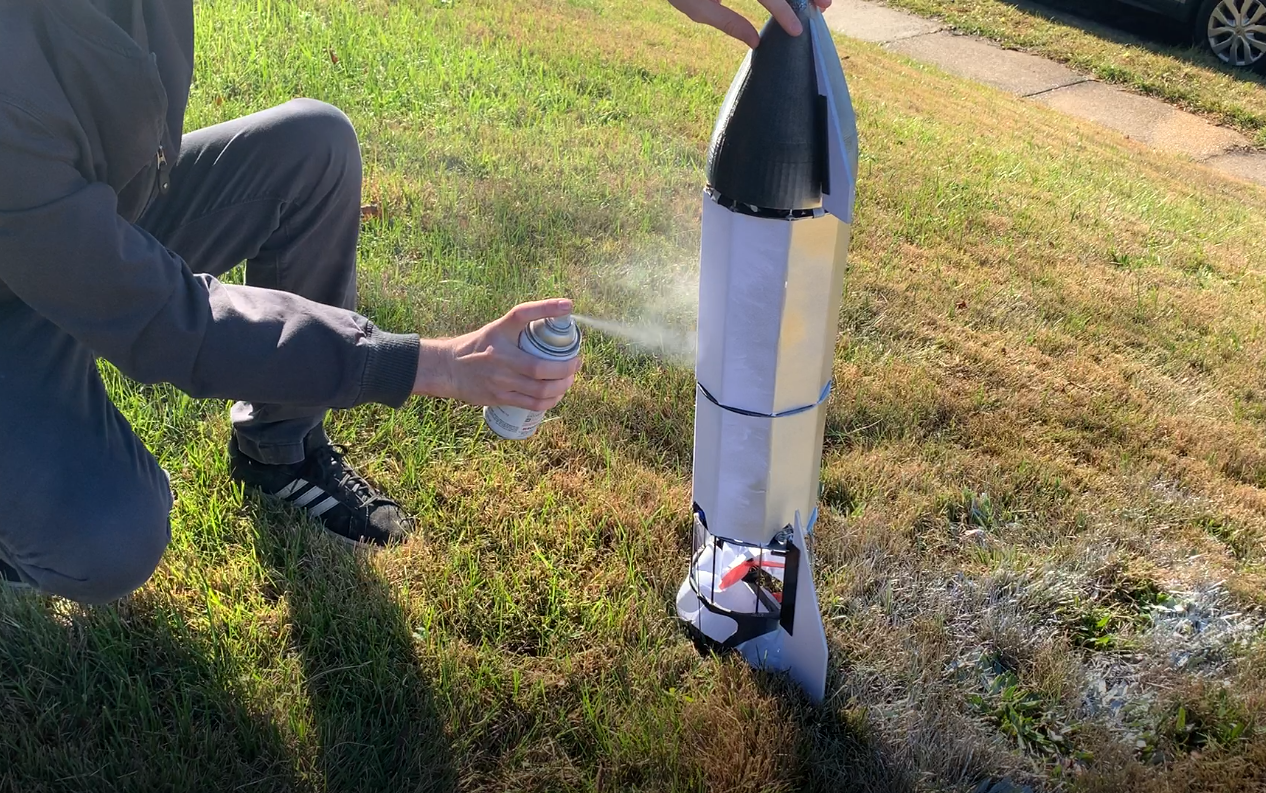
Give it some paint:
![]()
Radio Controlled Starship Program
Trying to catch up to SpaceX's Starship program with my own radio controlled, electric version.

Discussions
Become a Hackaday.io Member
Create an account to leave a comment. Already have an account? Log In.