-
1Watch the video
Before you start this project it might be a good idea to watch the video I made. The video in itself isn't a how-to, but more of an introduction to what FreeTouchDeck is and what it can do for you!
Watched the video? Let's get the parts you'll need!
-
2Get the Parts You'll Need
If you do not already have an ESP32 and an ILI9488 TFT + Touchscreen lying around. You can find them pretty cheap on AliExpress. I used these parts:
- A 38-pin ESP32-WROOM-32D Development Board from AliExpress*
- An ILI9488 TFT screen with XPT2046 touch controller from AliExpress*Not all ILI9488 TFT screens are created equally. It is important to make sure you have selected a screen with touch!
Download the FreeTouchDeck repository from Github: (https://github.com/DustinWatts/FreeTouchDeck)*Full disclosure: these are affiliate links
-
3Hardware: Connect the TFT Screen to the ESP32
![]()
![]()
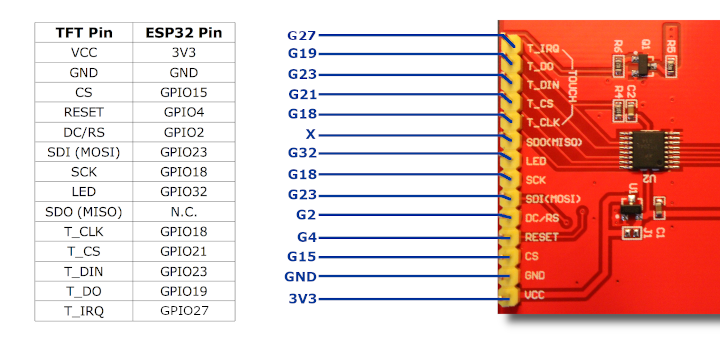
The wiring may seem a bit daunting at first. But don't let all the wires scare you. It is pretty straight forward. The images above will help you when you wire your TFT + Touchscreen to your ESP32. This is also decision making time. There are few options when it comes to connecting the two together. You can use a breadboard, you can use prototyping board or you can order a PCB specifically to connect the ILI9488 + touch to the 38-pin ESP32 DevKitC. I'd like to point out that the breadboard option is only an option for testing your connections and screen. It is not very practical to have on your desk and loose connections can cause problems.
It is important to know that these screens run at 3.3V. Connecting them to 5V can cause damage!
These are the connections you need to make from the ESP32 -> ILI9488:
3.3V -> VCC
GND -> GND
GPIO15 -> CS
GPIO4 -> RESET
GPIO2 - > DC/RS
GPIO23 -> SDI(MOSI) and T_DIN
GPIO18 -> SCK and T_CLK
GPIO32 -> LED
GPIO21 -> T_CS
GPIO19 -> T_DO
GPIO27 -> T_IRQ
SDO(MOSI) is not used for the TFT screen, so you are left with one unconnected pin on the TFT module. That's ok!
If you like to order a PCB designed to make it easy to connect the ESP32 and the TFT screen together, you can download the gerber files here: https://github.com/DustinWatts/ESP32_TFT_CombinerYou can also order them directly from PCBWay where I had mine made: https://www.pcbway.com/project/shareproject/ESP32_TFT_Combiner_V1.html
-
4Using the Web Installer to Install the Firmware. (Recommended)
Next there are two options. You can install all the software manually (Step 5 through 8). Or use the new (as per April the 18th 2022) FreeTouchDeck Web Installer. I recommend the Web Installer as it will save you time and there a less chances you will make a mistake.
For the Web Installer to work, you will need to use Chrome, Opera or Edge as your browser!
- Select the "ESP32 DevKitC" option
- Click “Connect”
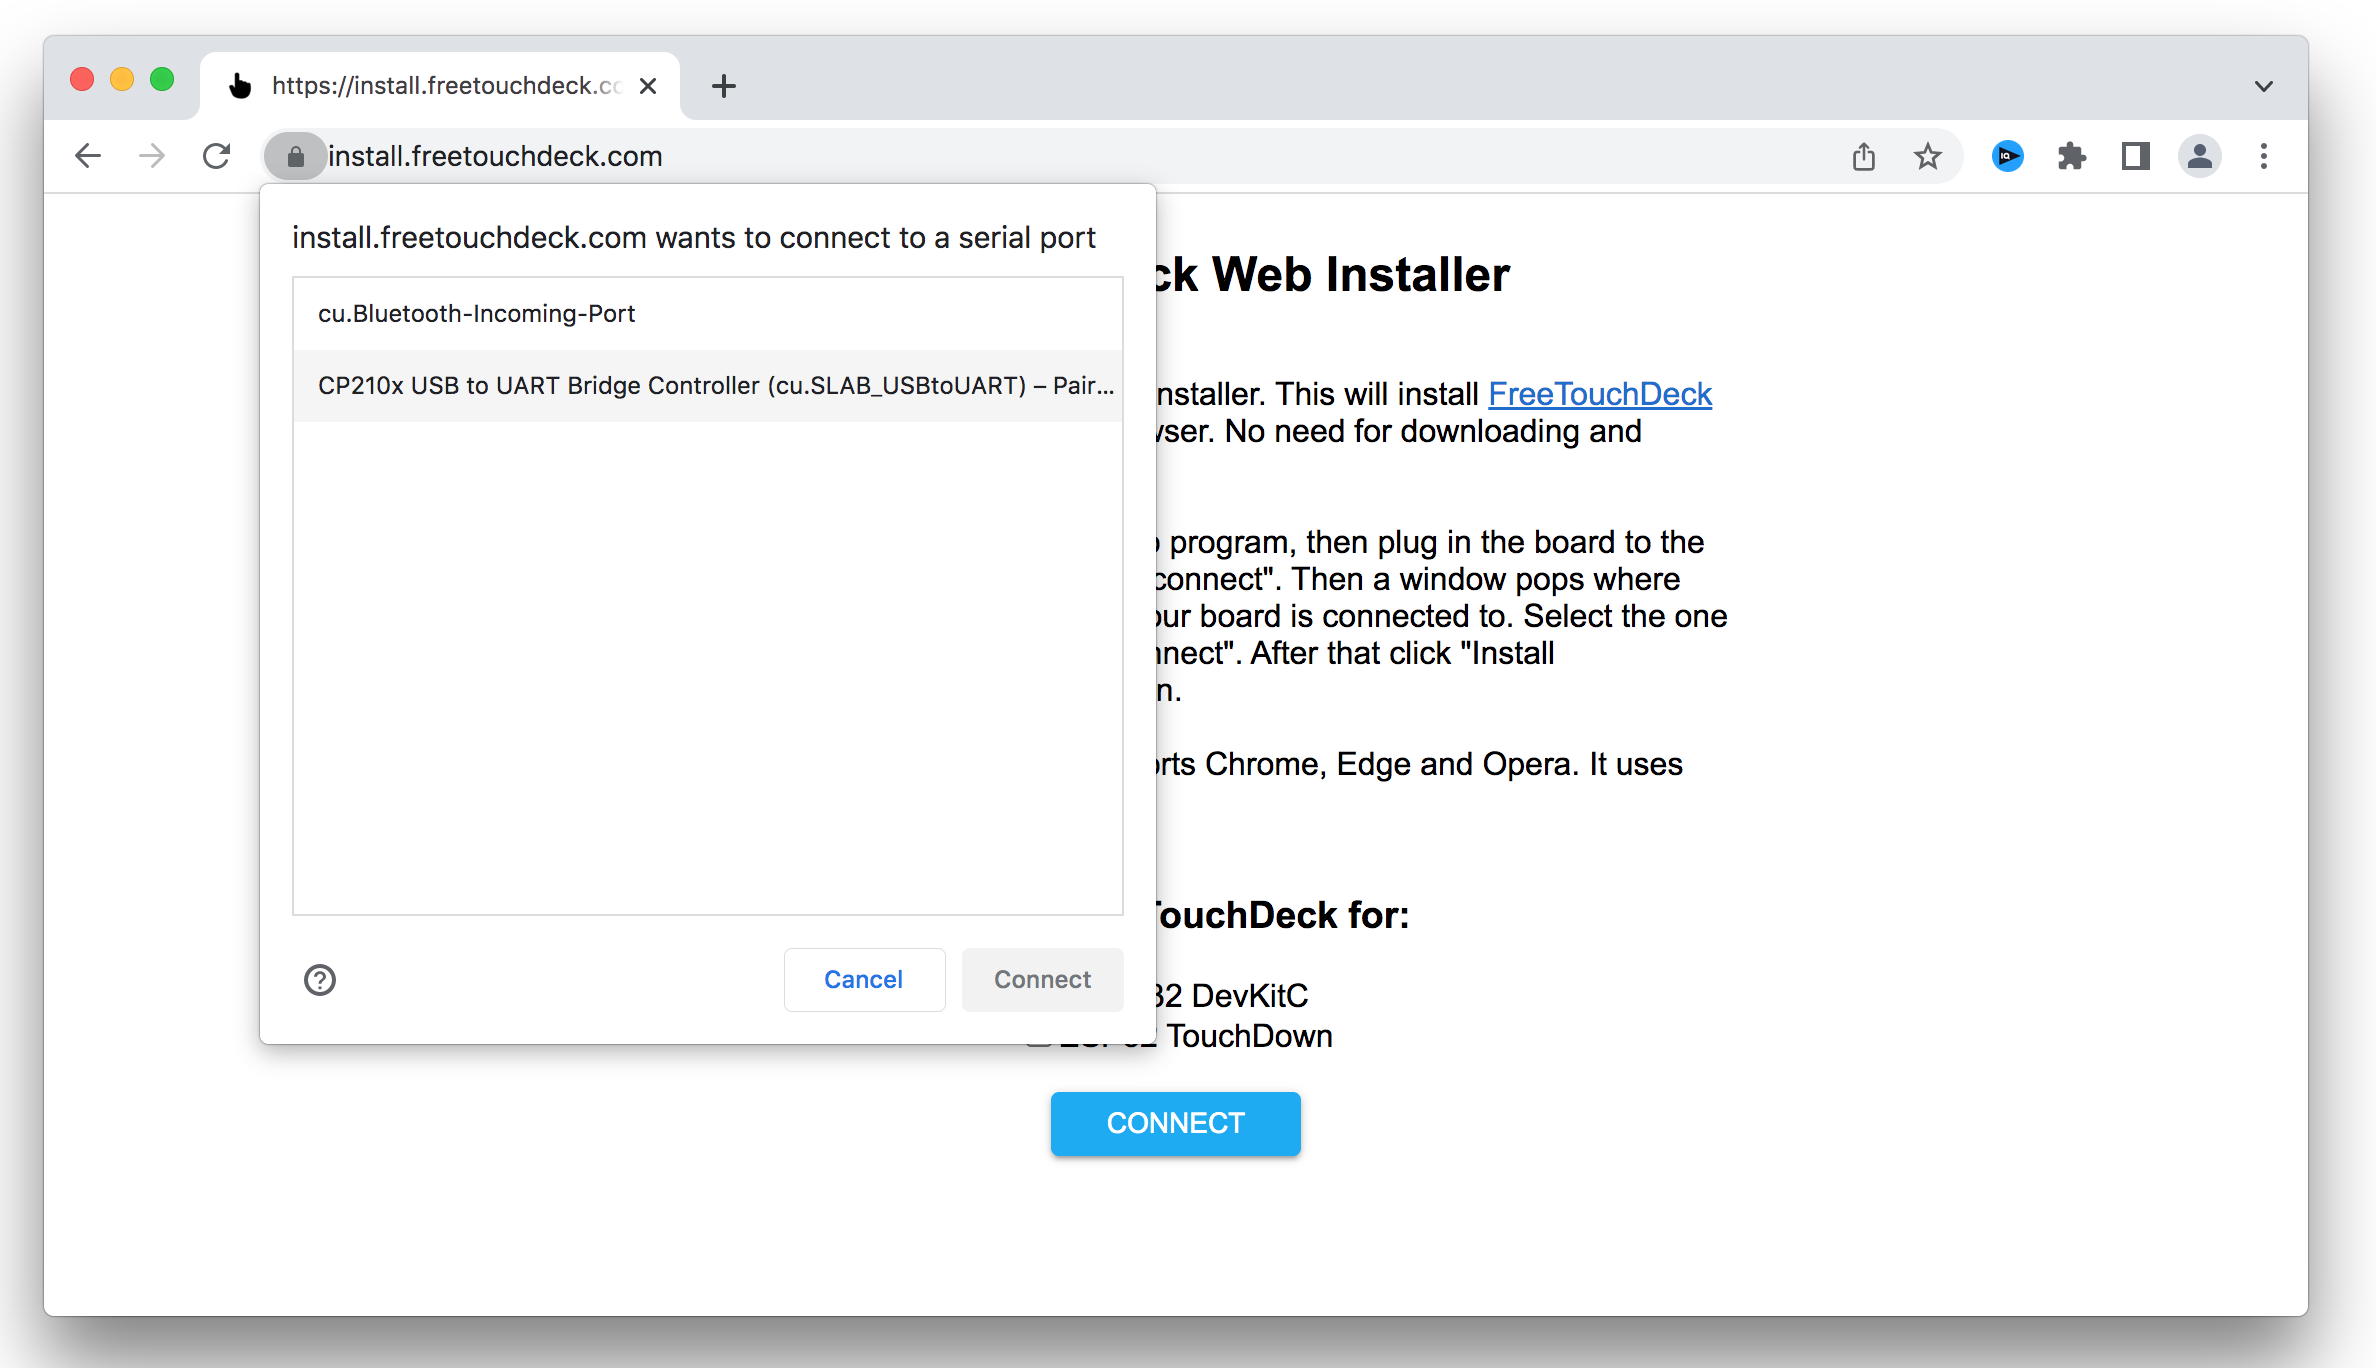
A pop-up window telling you that install.freetouchdeck.com wants to connect to a serial port pops up. Plug in your newly made FreetouchDeck. A new port now shows up in the list.- Select this port and click “Connect”
![]()
- After it connects, click “Install FreeTouchDeck”.
A message prompts you with the version that is about to be installed and that all data will be erased before the new installation begins. This is fine, there is nothing important on our device anyway.
- Click “Install”.
Note that at some point the installation might seem to “hang”. It I actually not, the percentage will not update, but the device is really being programmed. So nothing to worry about!
After some time the installation will be done. And on your FreeTouchDeck you are greeted with a calibration screen. This is the time to skip to Step 8!
-
5Software: Installing Arduino IDE Libraries
Installing the Arduino IDE ESP32 core.
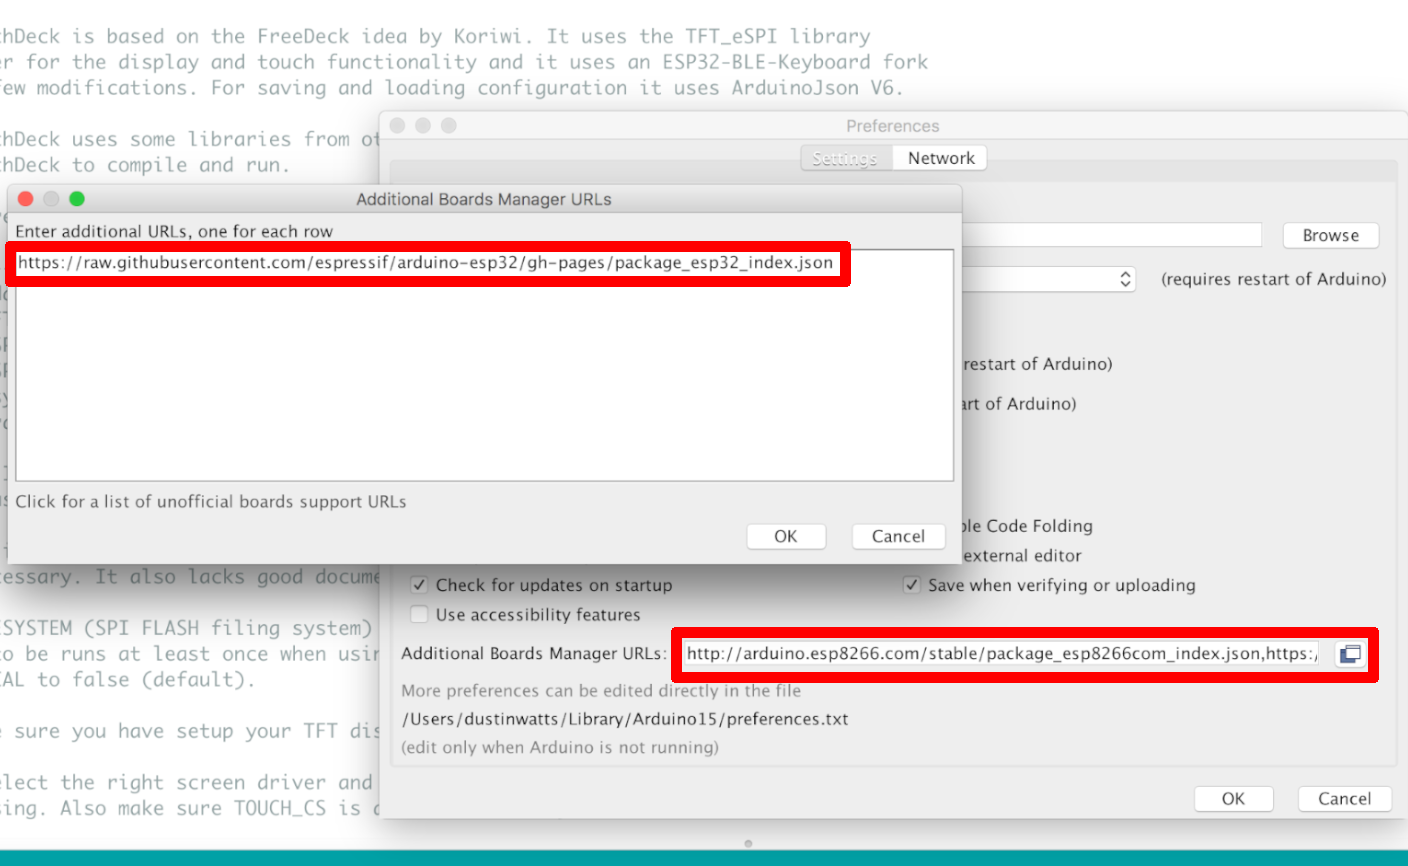
Go to Arduino -> Preferences and click on the icon behind the input field for Additional Board Managers URLs.
![]()
Next, copy and paste the following link (without quotes) in the popup box:
"https://raw.githubusercontent.com/espressif/arduino-esp32/gh-pages/package_esp32_index.json"
Click OK and OK.
Next, go to Tools -> Board: -> Board Manager and search for "ESP32". Install the latest version and click "Close".
Installing the necessary libraries.
![]()
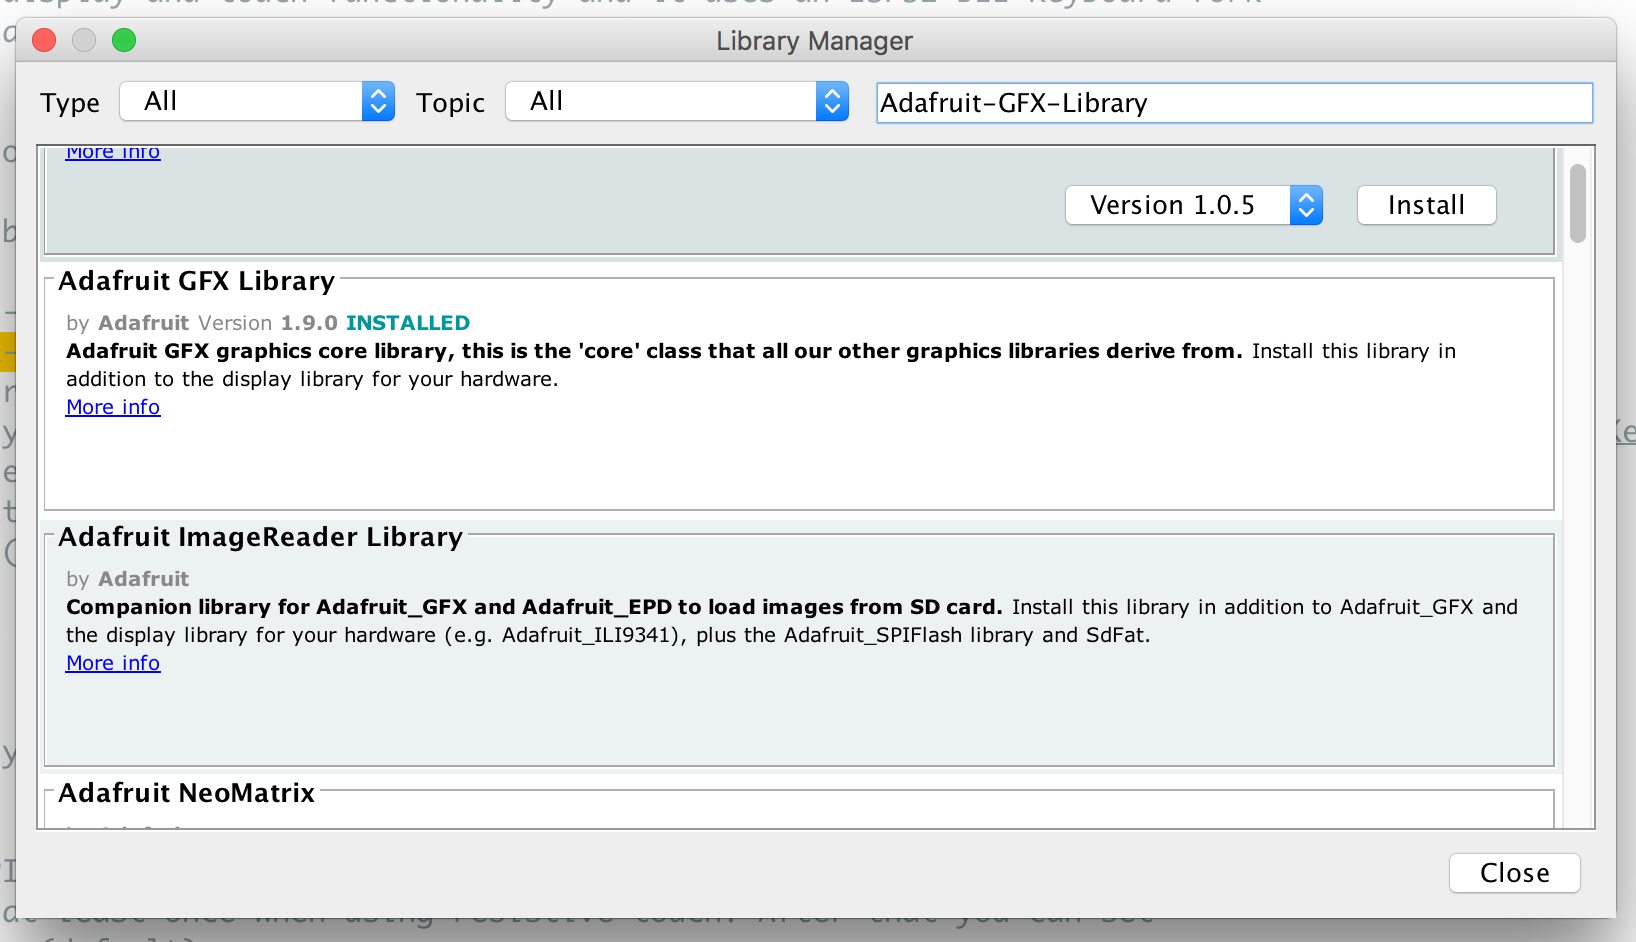
FreeTouchDeckuses a few (some might call 6 more than a few) libraries. Three of these libraries can be installed though the the Library Manager. Go to Sketch -> Include Library -> Manage Libraries and search for, and install the following libraries:
-
Adafruit-GFX-Library
-
TFT_eSPI
-
ArduinoJson
The other three libraries need to be downloaded manually. For each of them the process is the same so I'll describe just one of them.
Go to "https://github.com/T-vK/ESP32-BLE-Keyboard", click on "Releases" and under the latest release, click on "Assests" and "Download _libraryname_.ZIP". In the Arduino IDE, go to Sketch -> Include Library -> Add .ZIP library. You can also directly unpack the folder in the .zip in to your libraries folder (usually "Documents/Arduino/libraries."
Repeat for the following libraries:
- "https://github.com/me-no-dev/ESPAsyncWebServer"
- "https://github.com/me-no-dev/AsyncTCP"
If there is no release, then on the main page click "Code", and then "Download ZIP"
-
-
6TFT Screen Configuration
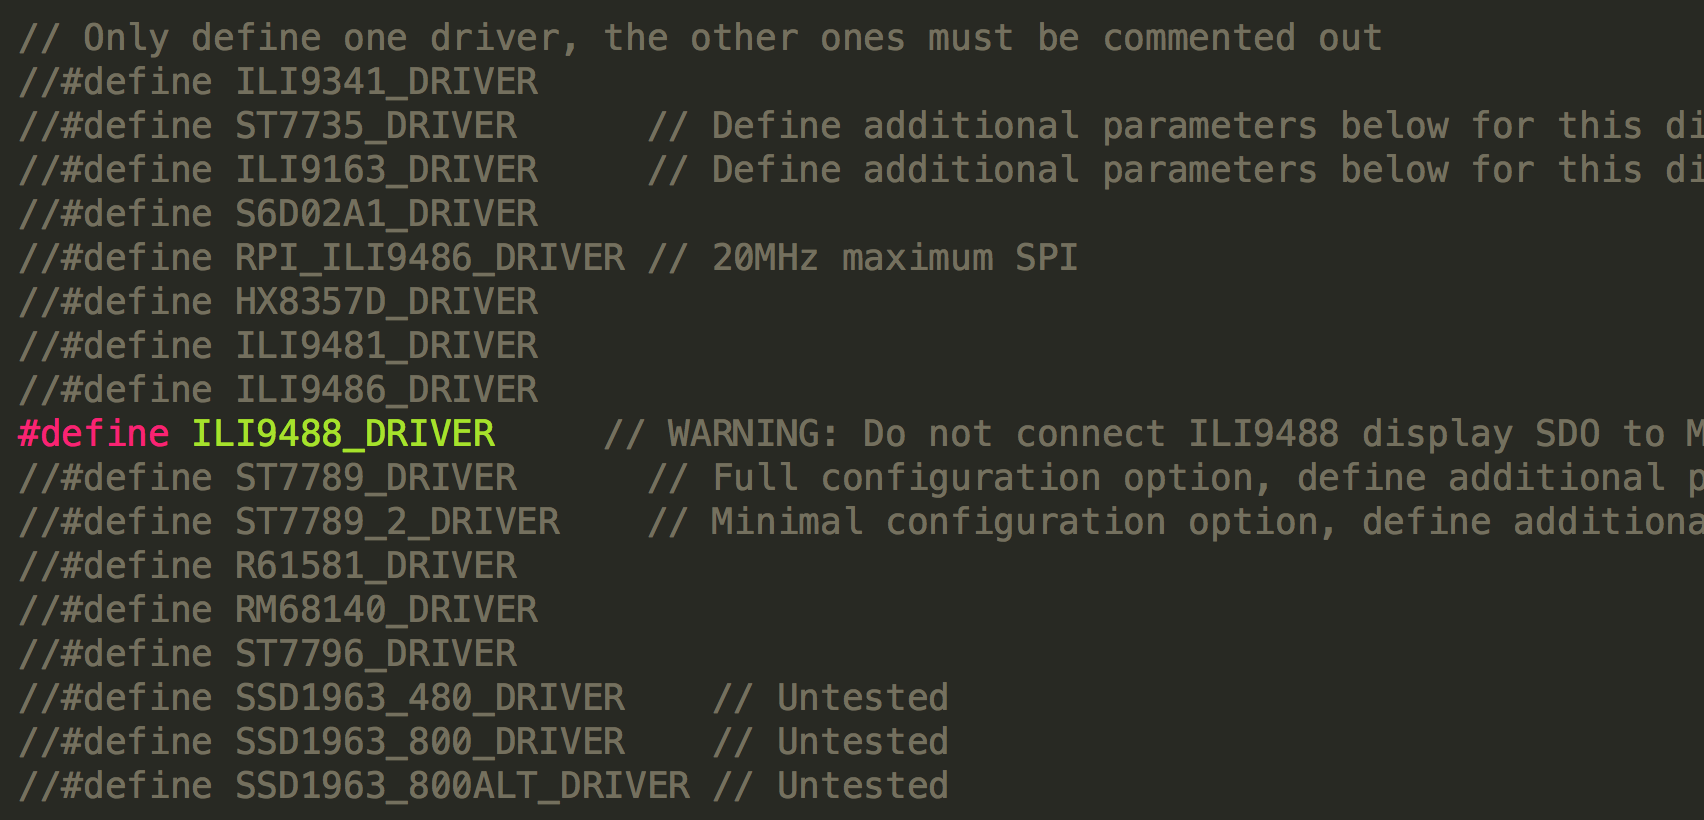
Before compiling and uploading the FreeTouchDeck.ino sketch, you will have to edit the user_setup.h file included with the TFT_eSPI library. This can be found in your Arduino sketchbook folder under "libraries". If you have not renamed the TFT_eSPI library folder, the file user_setup.h can be found in TFT_eSPI-master. Here you will have to uncomment the lines that apply to your hardware configuration.
![]()
![]()
![]()
To make things easier, you can find the user_setup.h file you will need for this project in the FreeTouchDeck repository (https://github.com/DustinWatts/FreeTouchDeck) in the "user_setup.h Examples" folder. Copy the file "ESP32_Dev_Kit_V1_ILI9488_Resistive.h" to "/TFT_eSPI-master/". Rename the "User_Setup.h" that is already there to "User_Setup.old" (this way you keep the original in case something goes wrong). Now rename "ESP32_Dev_Kit_V1_ILI9488_Resistive.h" to "User_Setup.h". (<- CASE sensitive!) Save and close the file. -
7Download FreeTouchDeck.ino and Upload to the ESP32
ESP Sketch Data Upload Tool
FreeTouchDeck uses the SPIFFS (ESP32 flash memory) to store configuration and images that are used. You'll need to upload these to the ESP32 before you upload the sketch to the ESP32. For this you'll need the ESP32 Sketch Data Upload tool. You can download this from Github: "https://github.com/me-no-dev/arduino-esp32fs-plugin". Follow the instructions on the Github to install the tool:
- Download the tool archive from releases page.
- In your Arduino sketchbook directory, create tools directory if it doesn't exist yet.
- Unpack the tool into tools directory (the path will look like /Arduino/tools/ESP32FS/tool/esp32fs.jar).
- Restart Arduino IDE.
(On MacOS create the tools directory in ~/Documents/Arduino/ and unpack the files there).
On Github you can find the full source code for FreeTouchDeck. If you haven't already, ro to the FreeTouchDeck Github repository (https://github.com/DustinWatts/FreeTouchDeck) and click "Code" and "Download .ZIP"
Extract and rename the extracted folder to "FreeTouchDeck". Open the FreeTouchDeck.ino sketch in the Arduino IDE. This will also open a few other header (.h) files. You do not need to touch (pun intended) these.
**Since version 0.9.11 the next step is no longer necessary! You can still edit this if you want but if you do not edit the config before uploading, if you start the configurator and it can't connect to an Access Point it will start one. You can then enter the configurator and edit you wifi settings in there.**
Set your WiFi Settings
Once you have the FreeTouchDeck.ino sketch open go to the folder you have the FreeTouchDeck.ino sketch in, open "/data/config/wificonfig.json". This is where you can enter you're WiFi SSID and Password so you can connect to your FreeTouchDeck to configure it
- change "YOUR_WIFI_SSID" to the WiFi SSID you want FreeTouchDeck to connect to.
- change "YOUR_WIFI_PASSWORD" to the Password that WiFi network uses.
- if you want FreeTouchDeck to start the configurator in STA mode leave wifimode as "WIFI_STA". If you want the configurator to be started as an Access Point. Change to "WIFI_AP"
Upload the data folder
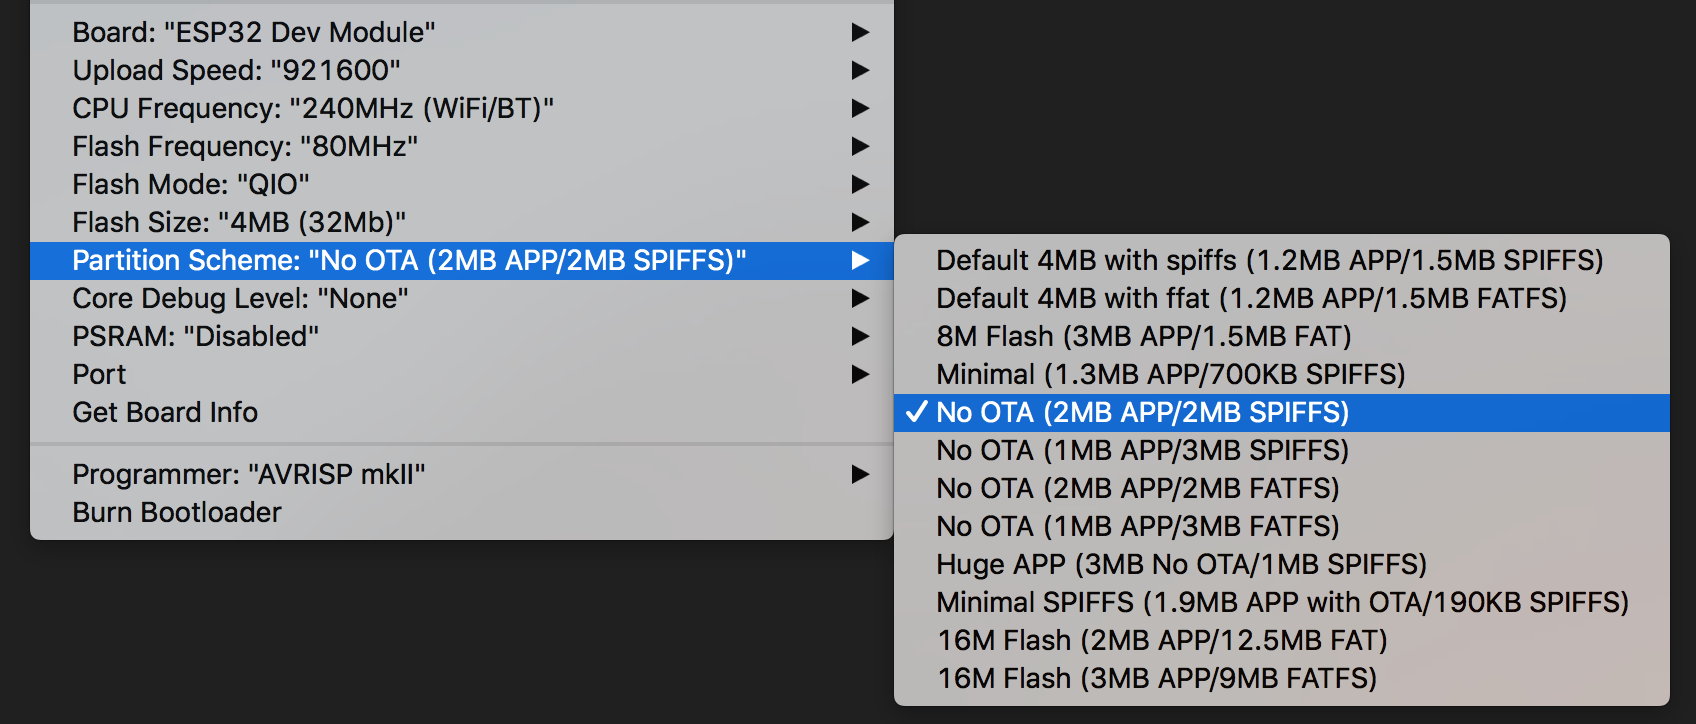
Before you upload the data folder to the ESP32, you'll first have to select the right partitioning scheme.
![]()
- Go to Tools -> Board and select ESP32 Dev Module.
- Still under Tools, select Partition Scheme. -> "No OTA (2MB APP/ 2MB SPIFFS)".
- Plug in the ESP32.
- Click on Tools and select "ESP Sketch Data Upload".
Tip!: If the data upload fails, chances are you have the serial monitor open. If this happens, close the serial monitor and try again.
Upload the sketch to the ESP32
After the data folder is successfully uploaded, you can go ahead and upload the FreeTouchDeck.ino sketch to the ESP32. The settings under tools besides the Partition Scheme can be left to the default.
Go to "Sketch" and select "Upload". This may take a while because it is a large sketch.
-
8FIrst Boot
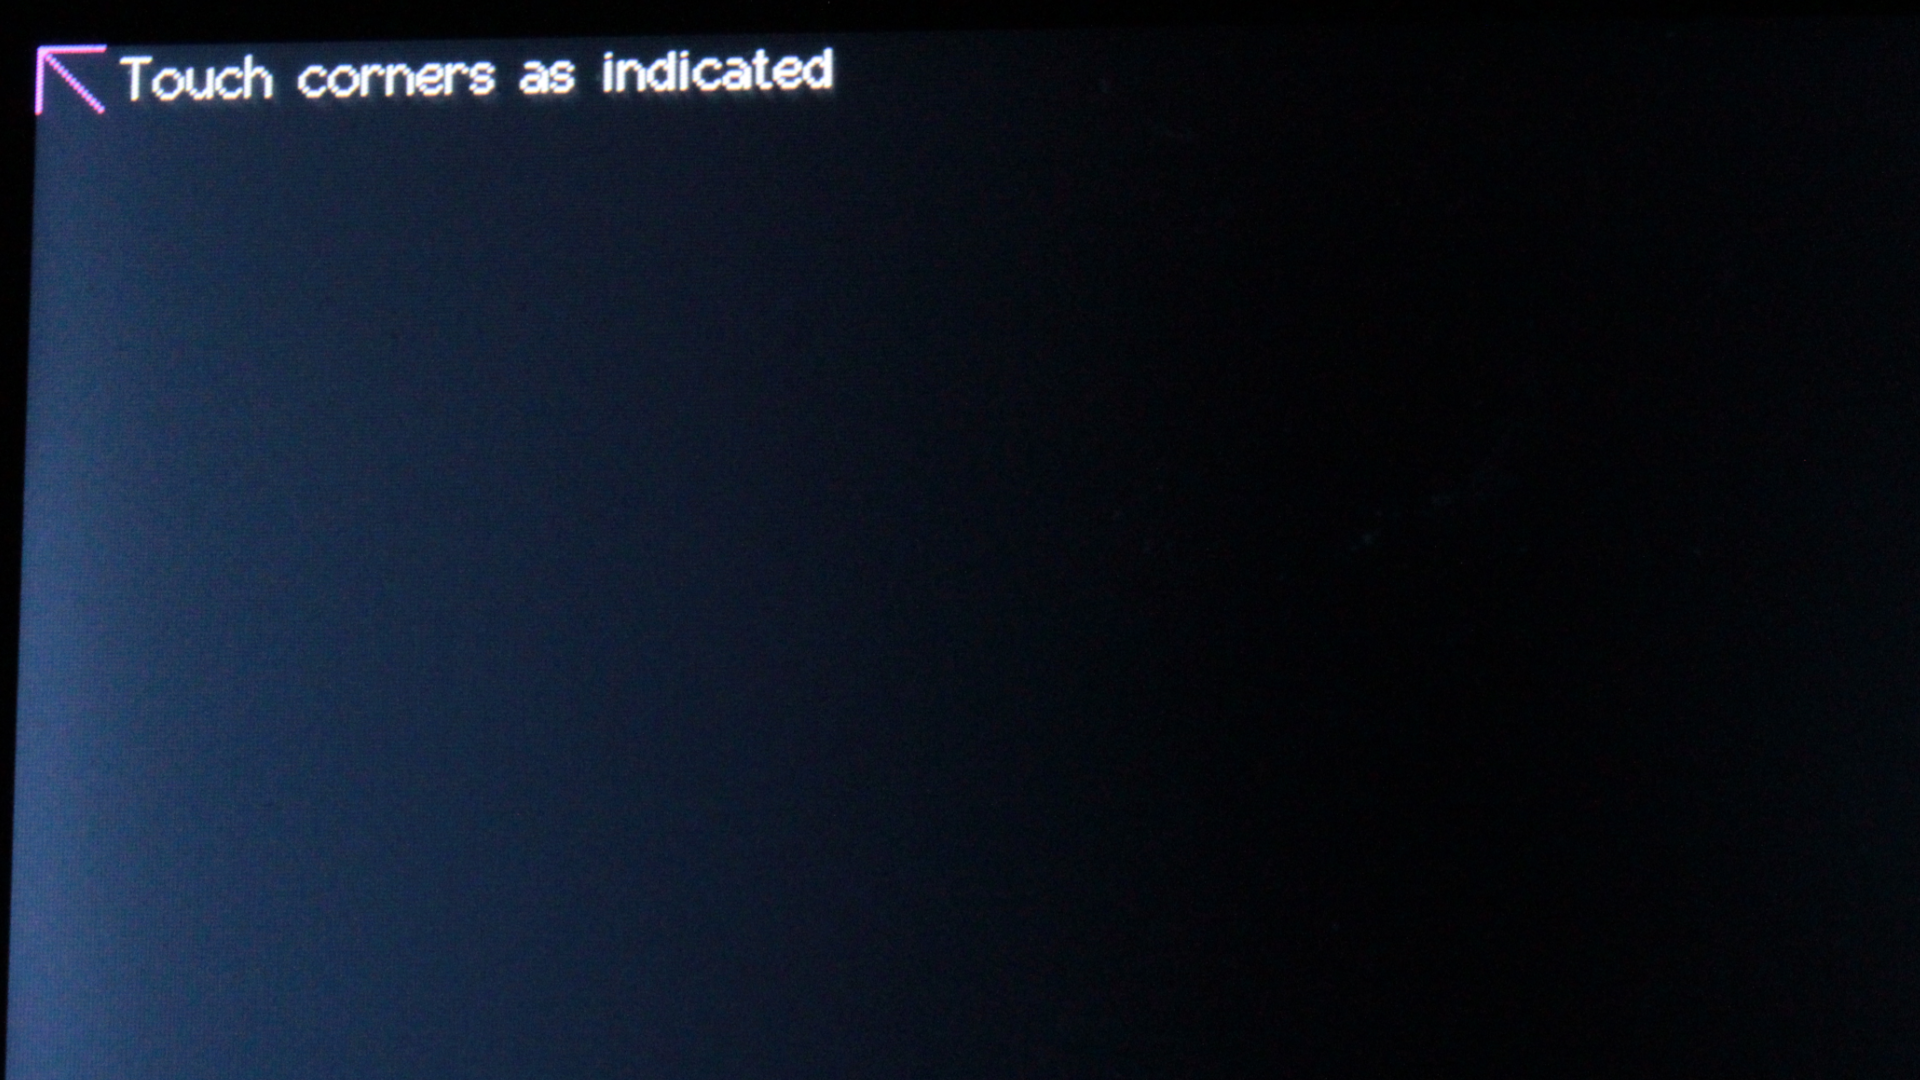
After uploading the sketch and all the files to the ESP, at first boot a touch calibration screen is displayed. This is so that FreeTouchDeck knows where all the corners are and can determine if a touch falls within the boundaries of a button.
![]()
A calibration file is saved on the ESP filesystem. So, if you re-upload files to the ESP using "ESP32 Sketch Data Upload", the calibration file is deleted and you will be presented with the calibration screen again.![]()
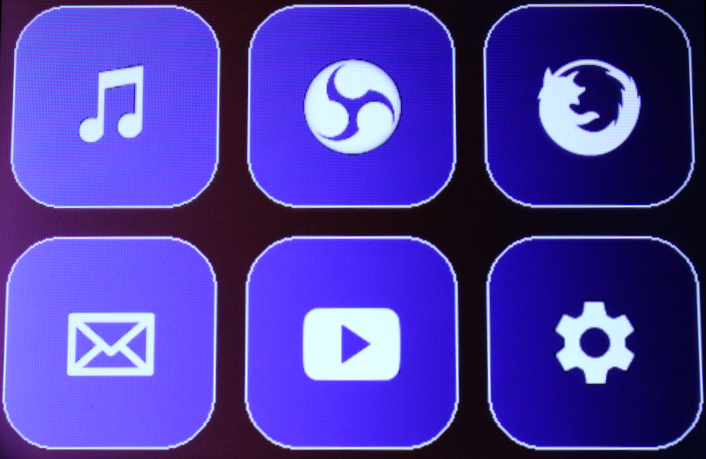
Once the home screen is loaded, BLE is also started. You can now connect with your computer to the FreeTouchDeck. You might have to refresh your Bluetooth device list on your computer. After you see "FreeTouchDeck", you can connect to it. To test if Bluetooth works properly you can go in to the "Music" menu. And press "Mute" to see if a BLE connection is established. -
9Configure Your FreeTouchDeck
You can now customize your FreeTouchDeck. FreeTouchDeck hosts a website on the ESP32 itself where you can configure the menu's and the button's each menu has. You can also customize the colors and upload your own logo's.
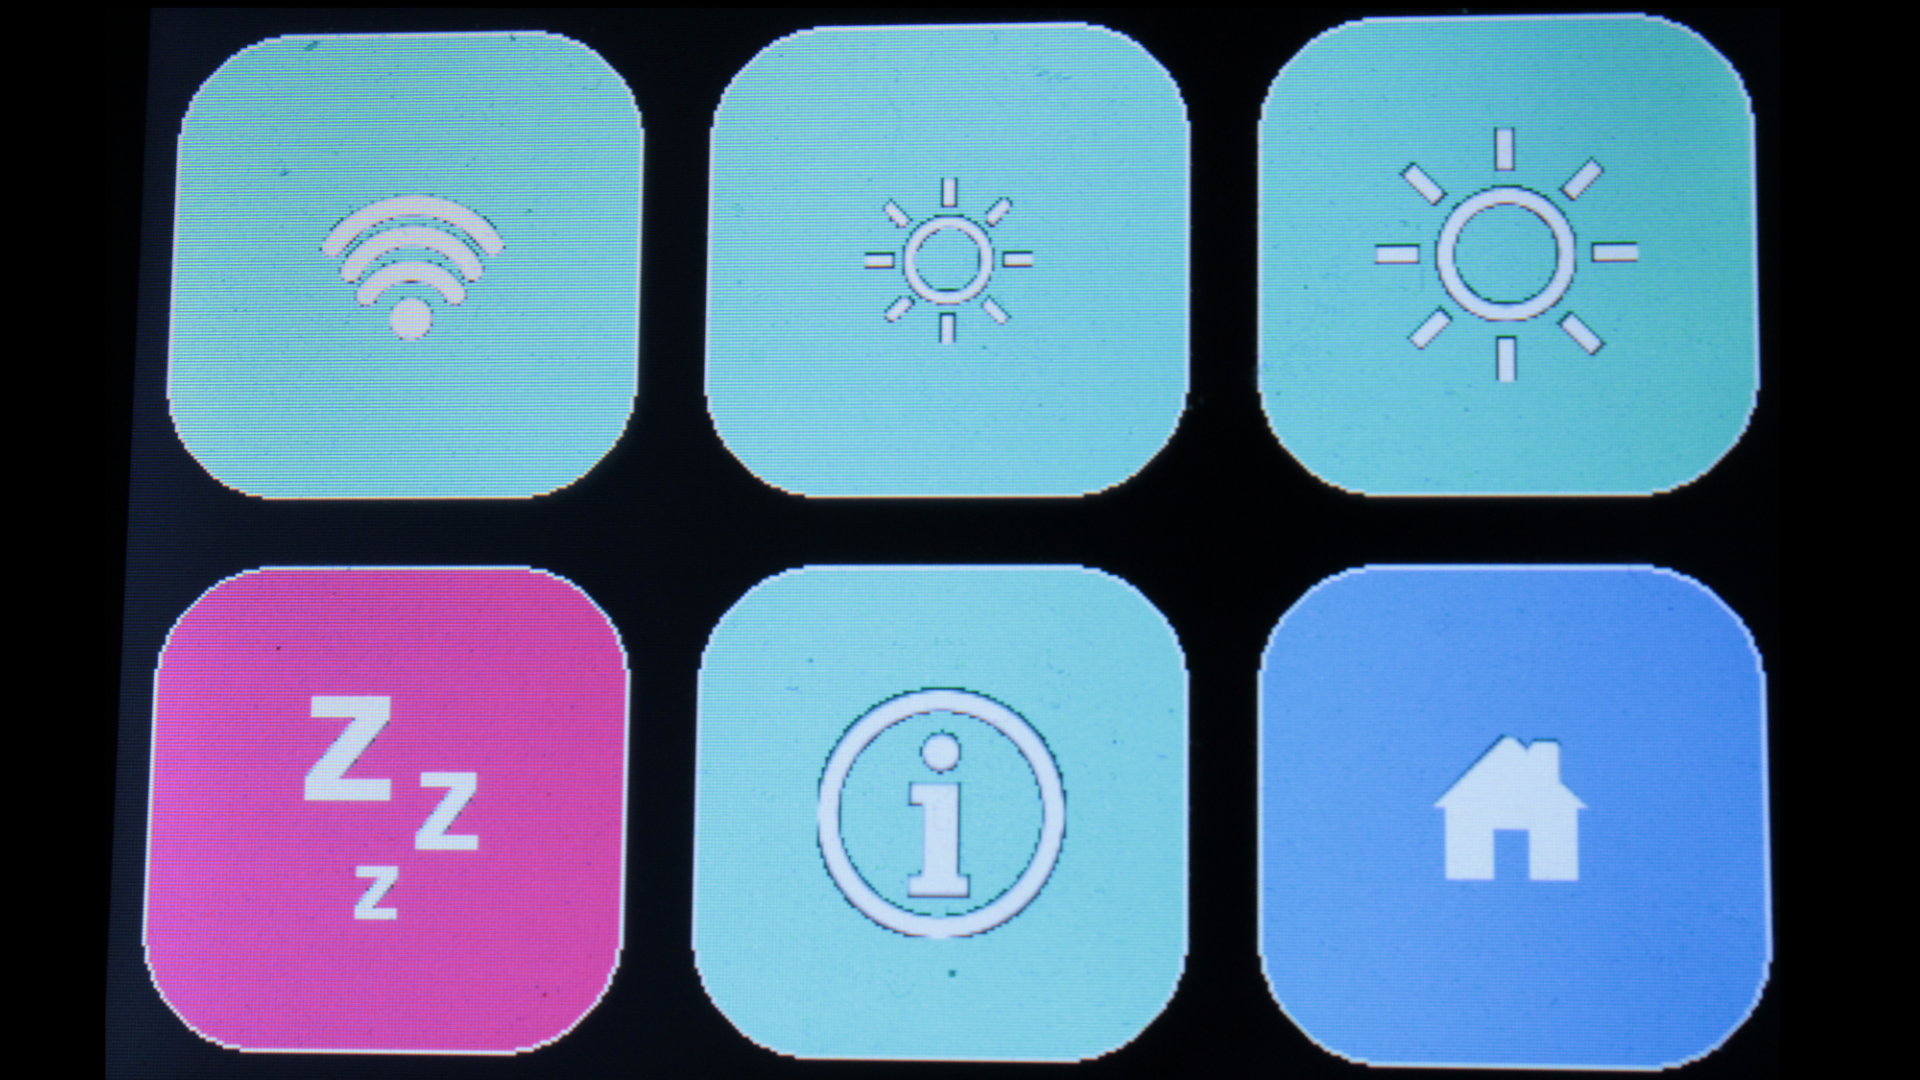
To start the configurator. Touch the bottom right button so go to the "Settings" page and then touch the "WiFi" button on the top left.![]()
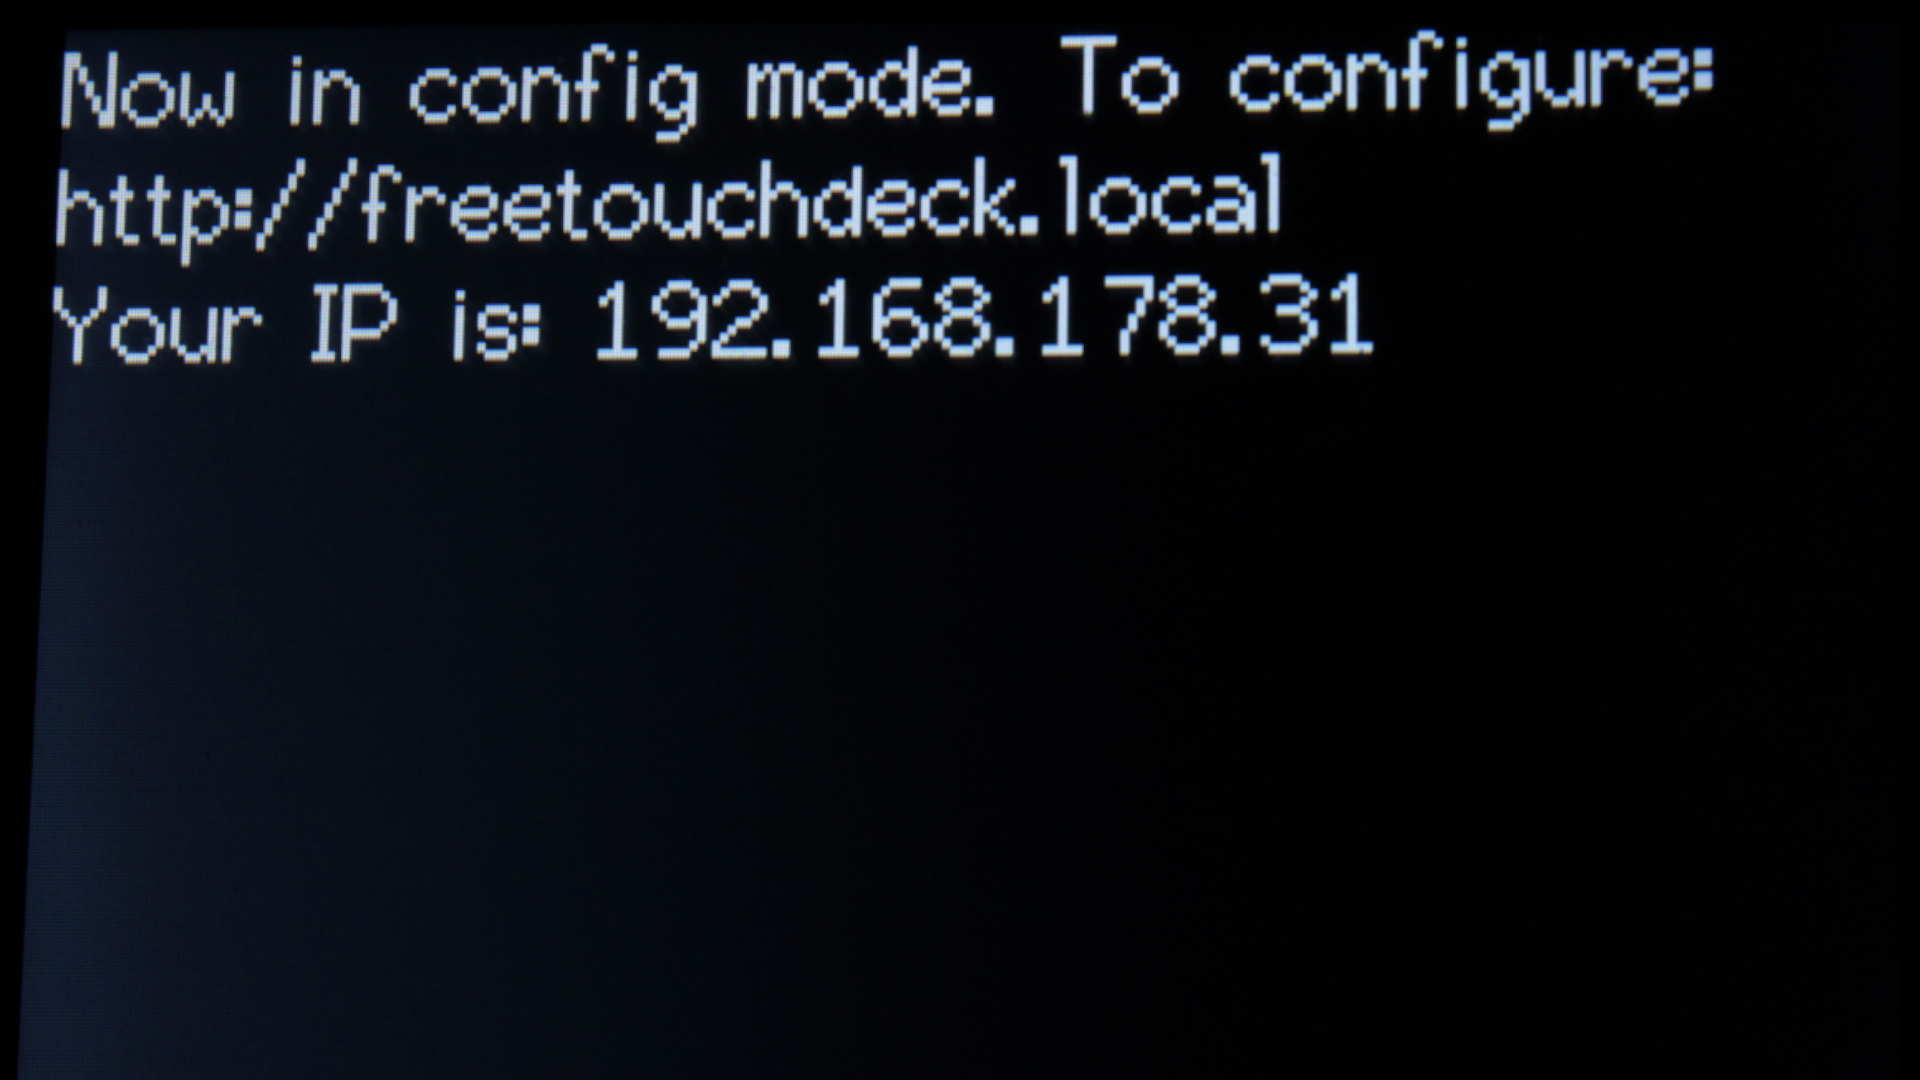
Once the configurator has started you can open a web browser and go to freetouchdeck.local.![]()
To learn more about how to use the configurator check out the Wiki on Github.
-
10Printing a case
![]()
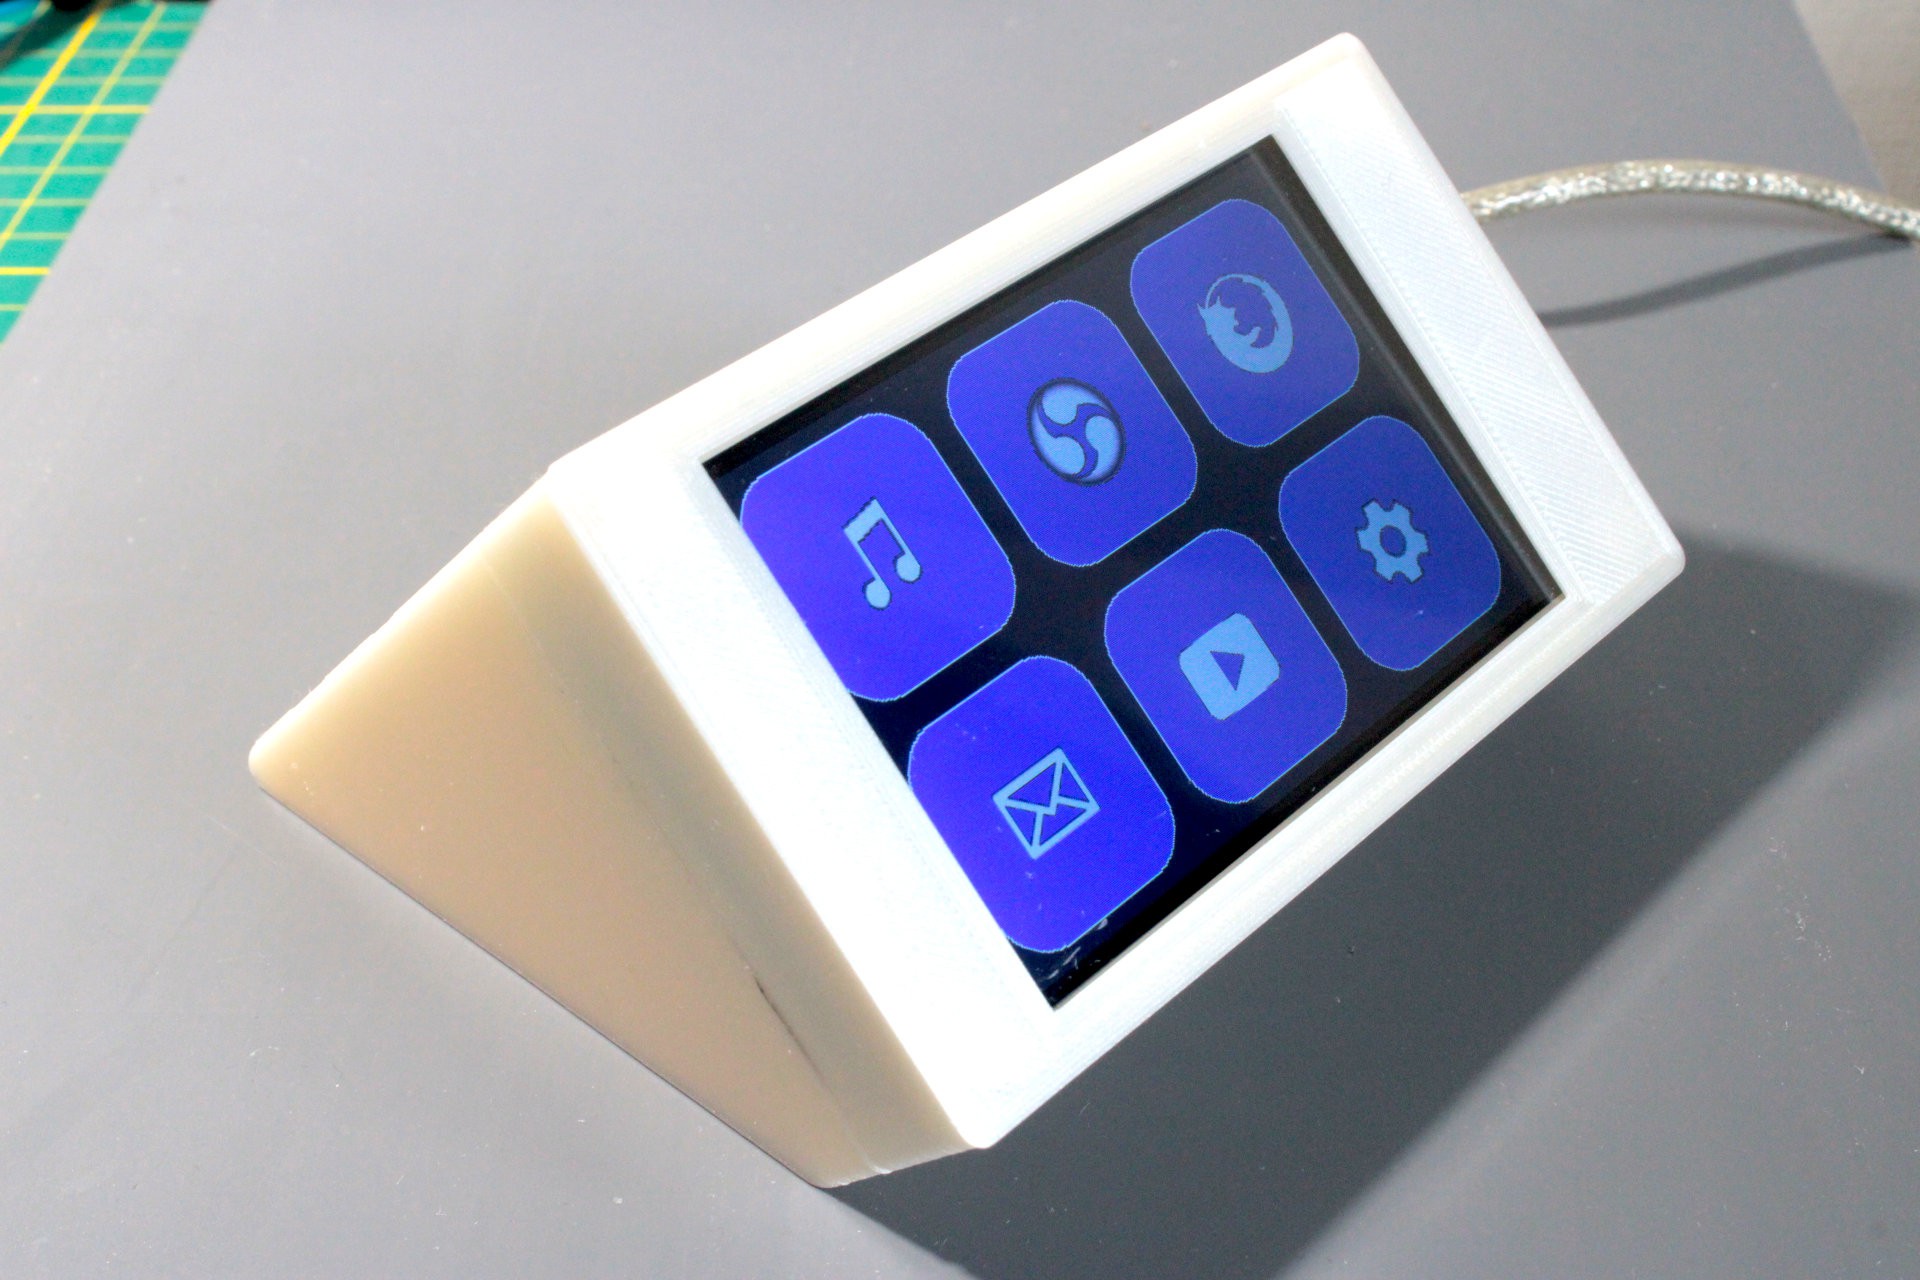
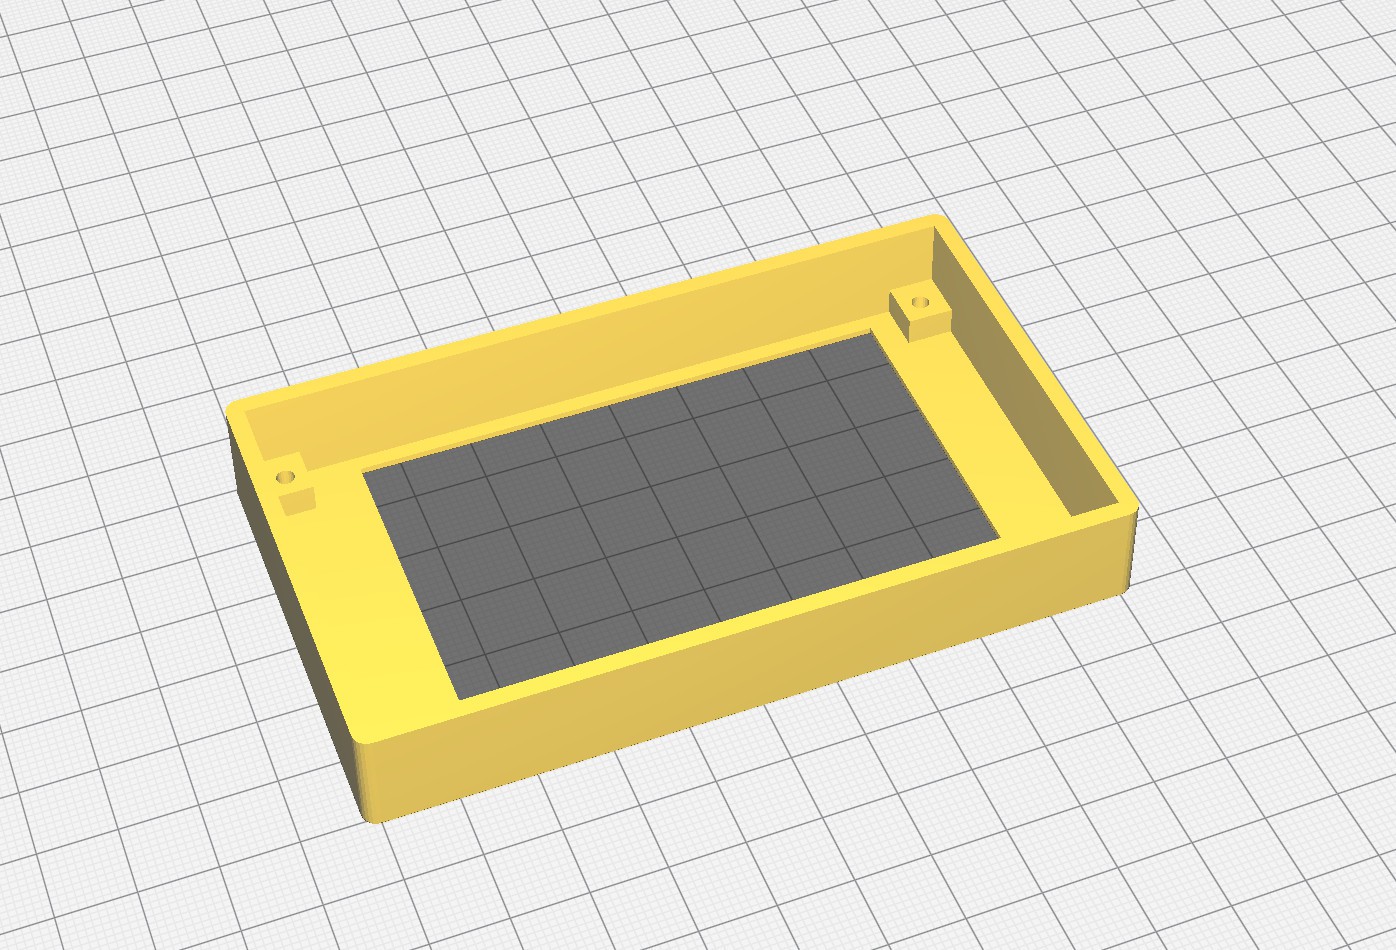
Off course not necessary, but when you have built your FreeTouchDeck you can print a case for you FreeTouchDeck. This design will fit the screen and ESP32 with or without the combiner PCB.
![]()
The case is designed to be a press-fit. You could however add a touch of CA glue (crazy glue) to keep the top firmly attached to the bottom.
You can find the case on Thingiverse: https://www.thingiverse.com/thing:4661069
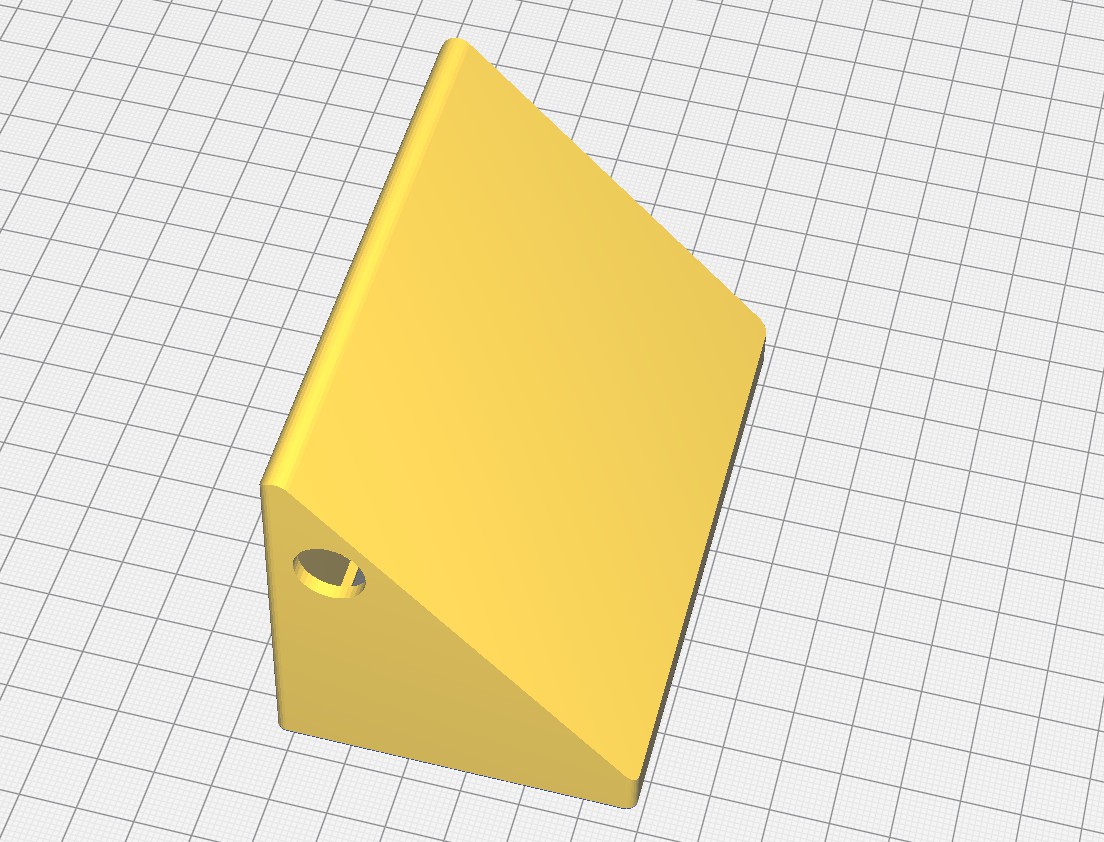
I printed it in PLA with a 0.2 mm layer height. The top doesn't need support if you print it face down. The bottom needs some minimal support if you print it with the opening down.
If you like to modify the case to your liking, you can find the Fusion 360 files on Github: https://github.com/DustinWatts/FreeTouchDeck/tree/master/case/ESP32_TFT_Combiner_Case
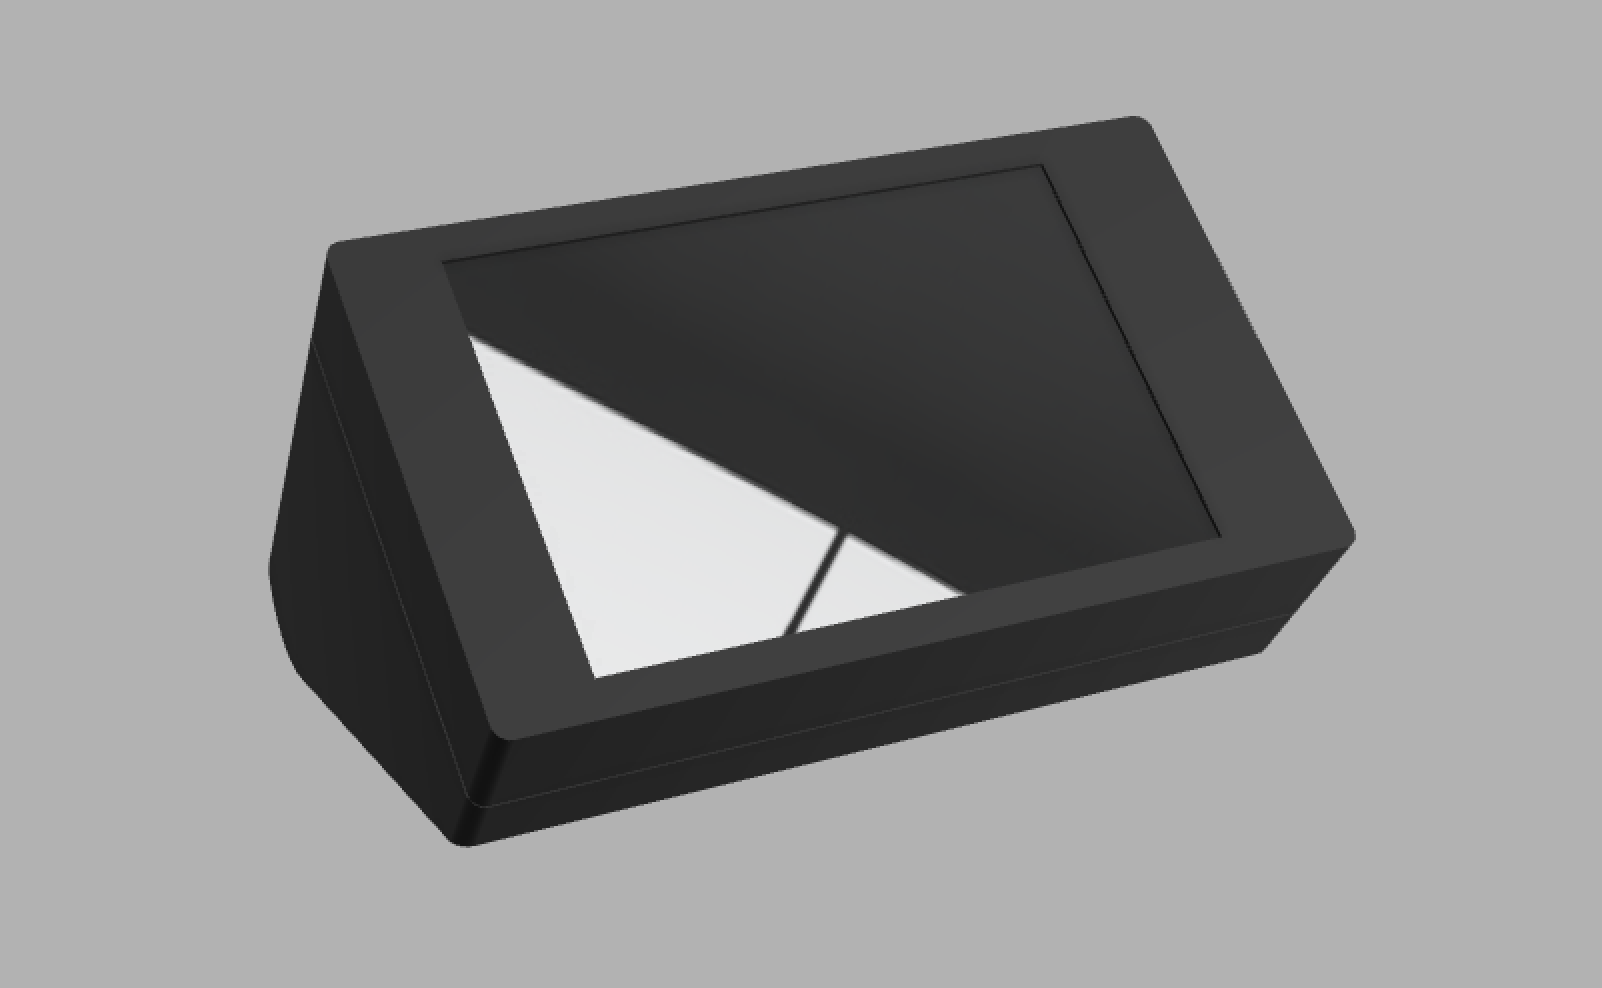
I've included some images of my slicer.
![]()
![]()
 Dustin Watts


Discussions
Become a Hackaday.io Member
Create an account to leave a comment. Already have an account? Log In.
I made all the connections on a breadboard.
I downloaded the product firmware and it worked perfectly.
Very happy, it's beautiful and everything works!!
Are you sure? yes | no
I keep getting a white screen with the TFT. I have bought the correct screen and changed the user_setup.h file.
Are you sure? yes | no
The white screen is because the pin to turn on the bottom LED has been turned on, it is HIGH.
You need to check all SPI connections and try to run at least some example of the ILI9488 on the ESP32.
And see if it works....
Are you sure? yes | no